
1. Introduction
Images account for more than 60% of the bytes on average needed to load a web page. Using AVIF you can make your images smaller and make your website load faster.
What is AVIF?
AVIF is a new image format derived from the AV1 video bitream. AVIF was built for compression efficiency.
Why AVIF?
AVIF images are much smaller than JPEG, PNG, GIF, or WebP images with the same or better quality.
What you will learn
- How to create AVIF images from your images
- How to render AVIF images in a web page
What you'll need
2. Creating AVIF images with Squoosh
Squoosh is an image compression web app. With squoosh you can easily compress your images into AVIF images.
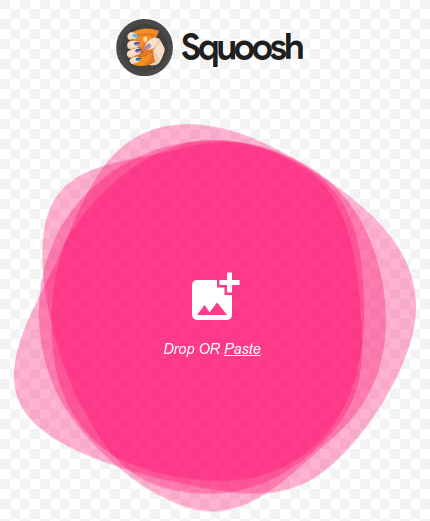
- Open https://squoosh.app
- Drop a local image onto Squoosh.
- Choose AVIF from the Compress drop-down box.
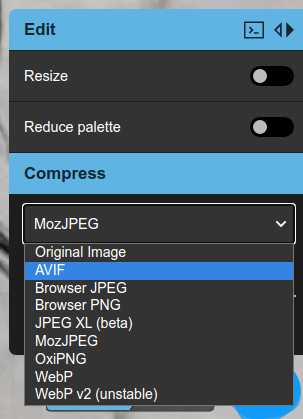
Squoosh will then compress your image to an AVIF image. Once Squoosh is done it will show a download button with some statistics on the AVIF image in the bottom right corner.

The original sample image was 3340 kB and the compressed image is 378 kB. The sample image was compressed almost 10x smaller than the original image!
- Download the AVIF image
Click the download button and the AVIF image will be saved to your local drive.
You now have your very own AVIF image!
3. Building command line encoder avifenc
avifenc is a command line application that can convert PNG and JPEG images to AVIF images. avifenc uses libavif, which is a library that can decode and encode AVIF images. If you have a lot of images you want to convert to AVIF then using the command line encoder, avifenc, is probably a good choice.
- Get the code.
git clone https://github.com/AOMediaCodec/libavif.git
- Change directory to libavif.
cd libavif/
There are many different ways you can configure avifenc and libavif to build. You can find more information at libavif. We are going to build avifenc so that it is statically linked to the av1 encoder and decoder library, libaom.
- Get and build libaom.
Change to the libavif extensions directory.
cd ext
The next command will pull the libaom source code and build libaom staticly.
./aom.cmd
Change directory to libavif.
cd ../
- Build the command line encoding tool, avifenc.
It is a good idea to create a build directory for avifenc.
mkdir build
Change to the build directory.
cd build
Create the build files for avifenc.
cmake -DCMAKE_BUILD_TYPE=Release -DAVIF_LOCAL_AOM=1 -DAVIF_CODEC_AOM=1 -DBUILD_SHARED_LIBS=0 -DAVIF_BUILD_APPS=1 ../
Build avifenc.
make
You have successfully built avifenc!
4. Creating AVIF images with avifenc
- Create an AVIF image with default settings.
The most basic parameters for avifenc to run, are setting the input and output files.
./avifenc happy_dog.jpg example.avif --min 0 --max 63 -a end-usage=q -a cq-level=32 -a tune=ssim -a deltaq-mode=3 -a sharpness=3 -y 420
Avifenc has a lot of options that will affect both quality and speed. If you want to see the options and learn more about them just run ./avifenc
You now have your very own second AVIF image!
- Speeding up the encoder.
One parameter that may be good to change depending on how many cores you have on your machine is the --jobs parameter. This parameter sets how many threads avifenc will use to create AVIF images. Try running this command line.
./avifenc happy_dog.jpg example.avif --jobs 8
This tells avifenc to use 8 threads when creating the AVIF image. On my machine this speeds up the AVIF encoding by 5x.
5. Render AVIF images in a web page.
Now lets show the world all of your hard work.
- Create a web page to serve your AVIF image.
Create a file named avif_example.html.
Open avif_example.html in your text editor and type this code:
<html>
  <head>
    <title>AVIF Example</title>
  </head>
  <body>
    <picture>
      <source type="image/avif" srcset="example.avif" />
      <img src="happy_dog.jpg" />
    </picture>
  </body>
</html>
Copy your source file (in my case happy_dog.jpg) and your AVIF file (eaxmple.avif) into the same directory as avif_example.html.
We are using the
- Open web page in Chrome.
One way to open the html file is to drag avif_example.html into Chrome. Another option to open the html file is to serve avif_example.html from an HTTP server.
Now your AVIF image should be rendered in Chrome. You can test this by right clicking on the image and choosing Save image as..., which should open a dialog box with example.avif. Another option is to open Chrome Developer Tools and see that example.avif is downloaded.
6. Creating Animated AVIF images
- Convert your source media into y4m format.
avifenc supports y4m as the input to create animated AVIF images. A great option to create y4m files is to use FFmpeg.
ffmpeg -i input.gif -pix_fmt yuv420p -f yuv4mpegpipe output.y4m
- Create an animated AVIF image.
Run this command to create an animated AVIF image from a y4m file.
avifenc ice_qcif_15fps.y4m animated.avif
You now have your very own animated AVIF image!
- Render the animated AVIF image in a web page.
Create a file named avif_animated_example.html.
Open avif_animated_example.html in your text editor and type this code:
<html>
  <head>
    <title>Animated AVIF Example</title>
  </head>
  <body>
    <picture>
      <source type="image/avif" srcset="animated.avif" />
      <img src="ice_qcif_15fps.gif" />
    </picture>
  </body>
</html>
Copy your source file (in the case above ice_qcif_15fps.gif) and your AVIF file (animated.avif) into the same directory as avif_animated_example.html.
- Open web page in Chrome.
One way to open the html file is to drag avif_animated_example.html into Chrome. Another option to open the html file is to serve avif_animated_example.html from an HTTP server.
Now your animated AVIF image should be rendered in Chrome.
If using the sample media provided, it should look like this:
You can test this is an animated AVIF image by right clicking on the image and choosing Save image as..., which should open a dialog box with animated.avif. Another option is to open Chrome Developer Tools and see that animated.avif is downloaded.
7. Congratulations!
You have finished the serving AVIF images code lab!
Hopefully it's clear to you how AVIF can help make your images smaller and more efficient to transmit over the web. You can learn more about the features of AVIF in a great post by Jake Archibald.