1. การสร้างความน่าเชื่อถือเพื่อปลดล็อกความเอื้อเฟื้อ

ช่วงเวลาแห่งแรงบันดาลใจ
โทรศัพท์ของคุณสั่น คุณเห็นข่าวเกี่ยวกับโปรแกรมการรู้หนังสือที่ประสบความสำเร็จซึ่งช่วยให้เด็กๆ ในชุมชนที่ด้อยโอกาสได้เรียนรู้การอ่าน คุณรู้สึกอยากมีส่วนร่วมอย่างมาก คุณเปิดเบราว์เซอร์และค้นหา "การบริจาคโปรแกรมการรู้หนังสือสำหรับเด็ก"
ผลการค้นหาหลายร้อยรายการจะปรากฏขึ้น
คุณคลิกลิงก์แรก เว็บไซต์ดูเป็นมืออาชีพ คุณเลื่อนลงไปที่ข้อมูลทางการเงิน "ค่าใช้จ่ายในการบริหาร: 28%" คุณหยุดชั่วคราว เงินบริจาคทุกๆ 1 ดอลลาร์จะนำไปใช้กับโปรแกรมจริงๆ เพียง 72 เซ็นต์ แบบนั้นดีไหม คุณไม่แน่ใจ
คุณลองใช้องค์กรอื่น คุณไม่เคยได้ยินชื่อของบุคคลเหล่านี้ อีเมลเหล่านี้ถูกต้องไหม การค้นหาอย่างรวดเร็วจะนำคุณไปสู่เรื่องราวที่ซับซ้อน คุณพบชุดข้อความใน Reddit เมื่อ 2 ปีที่แล้วซึ่งมีผู้ใช้รายหนึ่งอ้างว่า "มันเป็นการหลอกลวง เงินบริจาคของฉันไม่เคยไปถึงไหนเลย" อีกคนปกป้องอย่างสุดใจว่า "พวกเขากำลังทำงานจริงอยู่" ความคลุมเครือทำให้ไม่สามารถดำเนินการใดๆ ได้
30 นาทีต่อมา คุณก็หลงอยู่ในเขาวงกตของรีวิวที่ขัดแย้งกัน คะแนนประสิทธิภาพ และบันทึกของ IRS และคุณก็ยังไม่ได้บริจาค ประกายแรกแห่งความเอื้อเฟื้อถูกแทนที่ด้วยความยุ่งยากในการค้นคว้า แท็บจะเปิดไว้ 2-3 วันเพื่อเป็นการช่วยเตือนเล็กๆ น้อยๆ เกี่ยวกับความตั้งใจที่ดี จนกว่าคุณจะปิดแท็บในที่สุด
นี่ไม่ใช่ความล้มเหลวส่วนบุคคล แต่เป็นความล้มเหลวของระบบ
ประสบการณ์การใช้งานนี้เป็นสากล แม้ว่าผู้คนจะอยากบริจาค แต่กระบวนการบริจาคก็เต็มไปด้วยอุปสรรคที่ทำให้เกิดความลังเลและข้อสงสัย
- ❌ ความยุ่งยากในการค้นคว้า: การตรวจสอบการกุศลแต่ละครั้งต้องดำเนินการแยกกัน
- ❌ การยืนยันความน่าเชื่อถือ: แยกแยะองค์กรที่มีประสิทธิภาพสูงออกจากองค์กรที่ไม่มีประสิทธิภาพหรือแม้แต่การหลอกลวงโดยตรงได้ยาก
- ❌ ภาวะวิเคราะห์มากเกินไปจนตัดสินใจไม่ได้: ตัวเลือกจำนวนมากเกินไปทำให้เกิดความเหนื่อยล้าจากการตัดสินใจ
- ❌ สูญเสียโมเมนตัม: แรงกระตุ้นทางอารมณ์ที่จะให้ลดลงเมื่อภาระด้านลอจิสติกส์เพิ่มขึ้น
ความไม่สะดวกนี้มีค่าใช้จ่ายที่น่าตกใจในโลกแห่งความเป็นจริง การบริจาคของบุคคลในสหรัฐอเมริกามีจำนวนมหาศาล โดยผู้บริจาคบุคคลได้บริจาคเงินประมาณ 3.74 แสนล้านดอลลาร์ในปี 2023 เพียงปีเดียว ตามข้อมูลของ Giving USA 2024 แต่งานวิจัยแสดงให้เห็นว่าอุปสรรคในการบริจาค ซึ่งรวมถึงต้นทุนในการค้นหา ความขัดแย้งทางจิตวิทยา และข้อจำกัดด้านเวลา ทำให้จำนวนเงินที่ส่งถึงองค์กรการกุศลลดลงอย่างมาก การศึกษาที่เกี่ยวข้องกับผู้บริจาคหลายล้านคนพบว่าแม้แต่ความยุ่งยากเพียงเล็กน้อยในกระบวนการบริจาคออนไลน์ก็ทำให้ผู้คนไม่สามารถทำตามความตั้งใจที่จะบริจาคได้
ซึ่งคิดเป็นเงินบริจาคที่ตั้งใจไว้หลายพันล้านดอลลาร์ แต่ไม่เคยไปถึงสาเหตุที่จำเป็นต้องใช้เงินเหล่านั้น
วิสัยทัศน์
ลองนึกภาพประสบการณ์ที่แตกต่างออกไป คุณเพียงแค่พูดว่า
"ฉันต้องการบริจาคเงิน 500 บาทให้กับโครงการส่งเสริมการอ่านสำหรับเด็ก หาองค์กรการกุศลที่ได้รับการจัดอันดับสูง มีประสิทธิภาพ และได้รับการยืนยันให้หน่อย"
และในไม่กี่วินาที คุณจะได้รับคำตอบที่สร้างความมั่นใจได้

นี่คือสิ่งที่ AI Giving Agent สัญญาไว้ แต่ในการทำให้วิสัยทัศน์นี้เป็นจริง เราต้องแก้ปัญหาความท้าทายพื้นฐาน นั่นคือ เมื่อ AI Agent แบบอัตโนมัติจัดการเงิน ความน่าเชื่อถือไม่ใช่ทางเลือก แต่เป็นรากฐานทั้งหมด
- เราจะพิสูจน์ได้อย่างไรว่าผู้ใช้ให้สิทธิ์อะไร
- ใครเป็นผู้รับผิดชอบหากเกิดข้อผิดพลาด
- เราจะสร้างความมั่นใจให้ผู้บริจาค องค์กรการกุศล และเครือข่ายการชำระเงินเข้าร่วมได้อย่างไร
ภารกิจของคุณในวันนี้
ในเวิร์กช็อปนี้ คุณจะได้สร้างเอเจนต์ที่เชื่อถือได้โดยการรวมเทคโนโลยีอันทรงพลัง 2 อย่างเข้าด้วยกัน ได้แก่
ชุดพัฒนาเอเจนต์ของ Google (ADK) | Agent Payments Protocol (AP2) | |
Role | Factory สำหรับสร้าง AI Agent ระดับการผลิต | พิมพ์เขียวทางสถาปัตยกรรมเพื่อความน่าเชื่อถือในธุรกรรม AI |
สิ่งที่ฟีเจอร์นี้มีให้ | • เฟรมเวิร์กสำหรับการจัดการเป็นกลุ่มหลายเอเจนต์ | • ขอบเขตด้านความปลอดภัยตามบทบาท |
ดูข้อมูลเพิ่มเติม |
สิ่งที่คุณจะสร้าง

เมื่อสิ้นสุดเวิร์กช็อปนี้ คุณจะสร้างสิ่งต่อไปนี้ได้
✅ ระบบ Multi-Agent ที่มีบทบาทเฉพาะ
- ตัวแทน Shopping ที่ค้นหาสถานการกุศลที่ได้รับการยืนยัน
- ตัวแทนผู้ขายที่สร้างข้อเสนอการบริจาคที่มีผลผูกพัน
- ผู้ให้บริการข้อมูลเข้าสู่ระบบที่ประมวลผลการชำระเงินอย่างปลอดภัย
- Orchestrator ที่ประสานงานโฟลว์ทั้งหมด
✅ ข้อมูลเข้าสู่ระบบที่ตรวจสอบได้ 3 ประเภท
- IntentMandate: "หาองค์กรการกุศลด้านการศึกษาให้หน่อย"
- CartMandate: "$50 to Room to Read, signed by merchant"
- PaymentMandate: "Process via simulated payment"
✅ ความปลอดภัยในทุกระดับชั้น:
- ขอบเขตความน่าเชื่อถือตามบทบาท
- ความยินยอมของผู้ใช้อย่างชัดแจ้ง
✅ บันทึกการตรวจสอบที่สมบูรณ์:
- ติดตามการตัดสินใจทุกครั้งได้
- บันทึกทุกความยินยอม
- การส่งต่อทุกครั้งจะมองเห็นได้
🔒 สำคัญ: นี่คือสภาพแวดล้อมการเรียนรู้ที่ปลอดภัย
พร้อมที่จะสร้างความไว้วางใจแล้วหรือยัง
ในโมดูลถัดไป เราจะตั้งค่าสภาพแวดล้อมในการพัฒนาซอฟต์แวร์และสร้าง AI Agent ตัวแรก คุณจะพบได้อย่างรวดเร็วว่าเหตุใดเอเจนต์แบบง่ายจึงไม่น่าเชื่อถือ จากนั้นใช้เวลาที่เหลือในเวิร์กช็อปเพื่อเรียนรู้วิธีแก้ไข
มาเริ่มด้วยการทำความเข้าใจปัญหาโดยตรงกัน
2. การเตรียม Workspace
รากฐานสำหรับเอเจนต์ที่เชื่อถือได้
ก่อนที่จะสร้างเอเจนต์การให้ข้อมูลโดย AI เราต้องเตรียมสภาพแวดล้อมในการพัฒนาซอฟต์แวร์ที่สะอาด สอดคล้องกัน และได้รับการกำหนดค่าอย่างถูกต้อง โมดูลนี้เป็นขั้นตอนที่มุ่งเน้นเพื่อให้มั่นใจว่ามีเครื่องมือและบริการที่จำเป็นทั้งหมด
การตั้งค่านี้ให้เสร็จสมบูรณ์อย่างถูกต้องหมายความว่าคุณจะมุ่งเน้นไปที่การสร้างตรรกะของเอเจนต์ในโมดูลที่จะมาถึงได้อย่างเต็มที่โดยไม่ต้องกังวลเกี่ยวกับปัญหาการกำหนดค่า
เข้าถึง Cloud Shell
ก่อนอื่น เราจะเปิด Cloud Shell ซึ่งเป็นเทอร์มินัลบนเบราว์เซอร์ที่มี Google Cloud SDK และเครื่องมือสำคัญอื่นๆ ติดตั้งไว้ล่วงหน้า
คลิกเปิดใช้งาน Cloud Shell ที่ด้านบนของคอนโซล Google Cloud (เป็นไอคอนเทอร์มินัลในแถบนำทางด้านขวาบน)
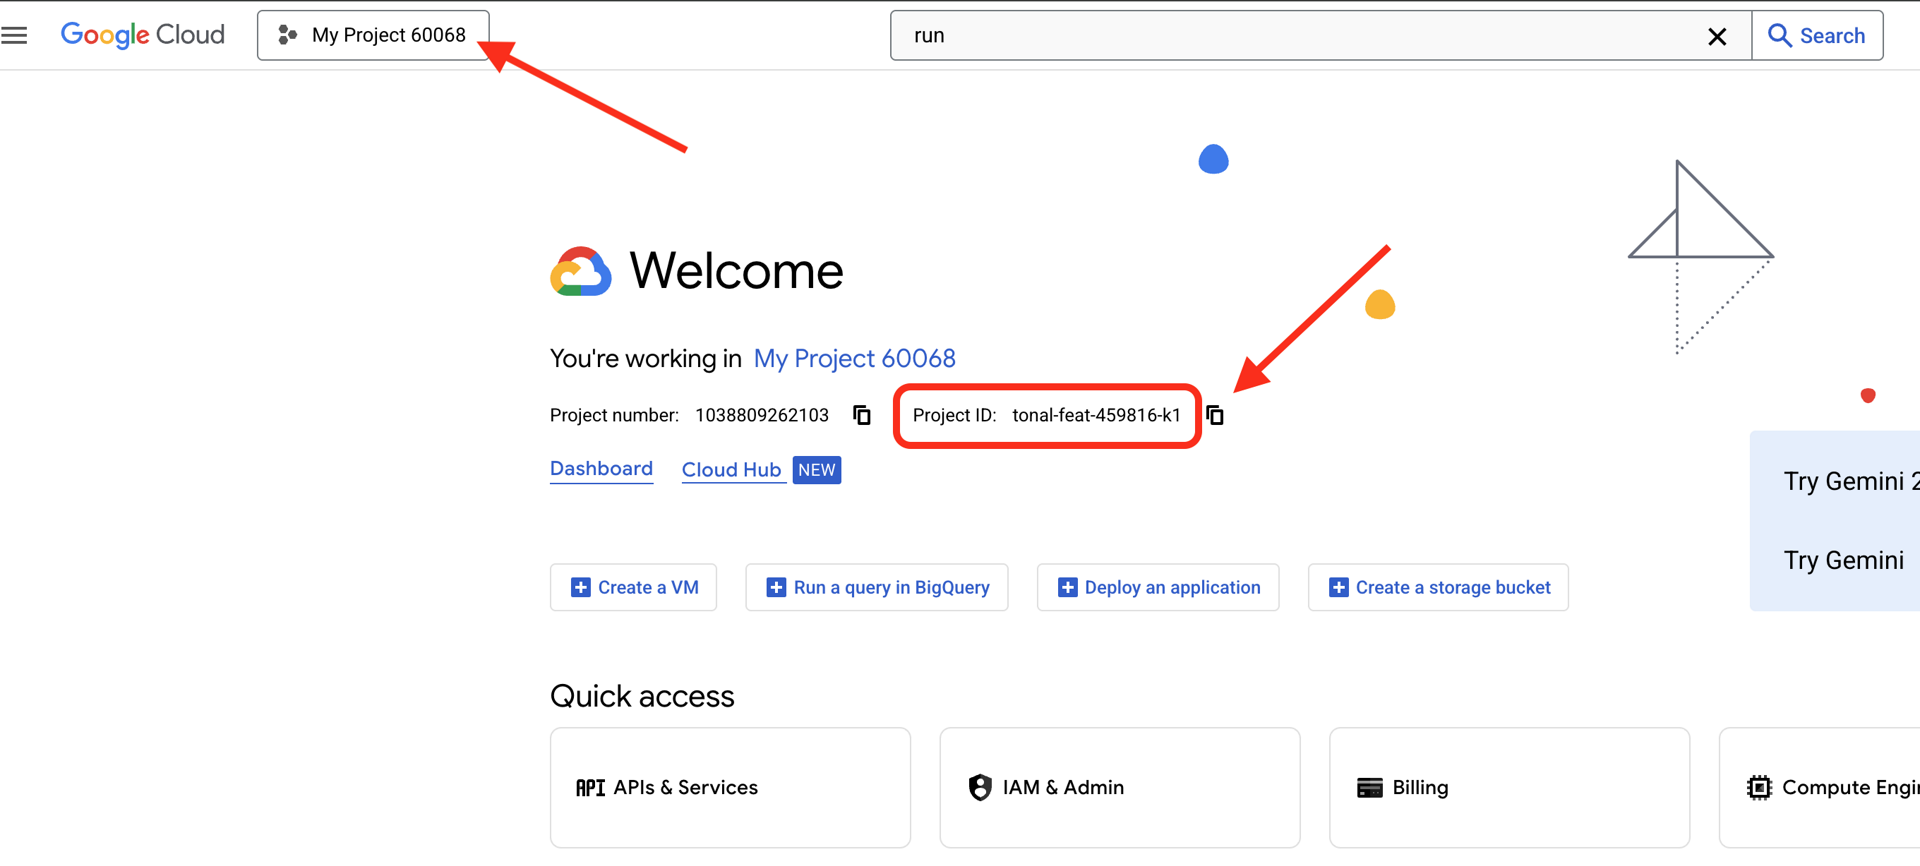
ค้นหารหัสโปรเจ็กต์ Google Cloud
- เปิดคอนโซล Google Cloud: https://console.cloud.google.com
- เลือกโปรเจ็กต์ที่ต้องการใช้สำหรับเวิร์กช็อปนี้จากเมนูแบบเลื่อนลงของโปรเจ็กต์ที่ด้านบนของหน้า
- รหัสโปรเจ็กต์จะแสดงในการ์ดข้อมูลโปรเจ็กต์ในแดชบอร์ด
เมื่อ Cloud Shell เปิดขึ้น ให้ตรวจสอบว่าคุณได้รับการตรวจสอบสิทธิ์แล้วโดยทำดังนี้
# Check that you are logged in
gcloud auth list
คุณควรเห็นบัญชีของคุณแสดงเป็น (ACTIVE)
กำหนดค่าโปรเจ็กต์
ตอนนี้มาตั้งค่าโปรเจ็กต์ Google Cloud และเปิดใช้ API ที่จำเป็นกัน
ตั้งค่ารหัสโปรเจ็กต์
# Set your project using the auto-detected environment variable in Cloud Shell
gcloud config set project $GOOGLE_CLOUD_PROJECT

# Verify the project has been set
echo "Your active Google Cloud project is: $(gcloud config get-value project)"
เปิดใช้ API ที่จำเป็น
Agent ของคุณต้องมีสิทธิ์เข้าถึงบริการ Google Cloud หลายรายการ ดังนี้
gcloud services enable \
    aiplatform.googleapis.com \
    secretmanager.googleapis.com \
    cloudtrace.googleapis.com
ขั้นตอนนี้อาจใช้เวลา 1-2 นาที คุณจะเห็นข้อมูลดังนี้
Operation "operations/..." finished successfully.
API เหล่านี้มีไว้เพื่อ
- aiplatform.googleapis.com: สิทธิ์เข้าถึงโมเดล Gemini สำหรับการให้เหตุผลของเอเจนต์
- secretmanager.googleapis.com: ที่เก็บข้อมูลที่ปลอดภัยสำหรับคีย์ API (แนวทางปฏิบัติแนะนำในการใช้งานจริง)
- cloudtrace.googleapis.com: ความสามารถในการสังเกตสำหรับเส้นทางการตรวจสอบของเรา
โคลนโค้ดเริ่มต้น
ดาวน์โหลดที่เก็บเวิร์กช็อปที่มีโค้ดและทรัพยากรเทมเพลตทั้งหมด
git clone https://github.com/ayoisio/adk-ap2-charity-agents
cd adk-ap2-charity-agents
git checkout codelab
มาตรวจสอบข้อมูลที่เรามีกัน
ls -la
คุณควรเห็นข้อมูลต่อไปนี้
charity_advisor/- ที่ที่เราจะสร้างเอเจนต์และเครื่องมือscripts/- สคริปต์ตัวช่วยสำหรับการทดสอบและการยืนยันdeploy.sh- สคริปต์ตัวช่วยสำหรับการติดตั้งใช้งานsetup.py- สคริปต์ตัวช่วยสำหรับการติดตั้งโมดูล.env.template- ไฟล์ตัวแปรสภาพแวดล้อม
ตั้งค่าสภาพแวดล้อม Python
ตอนนี้เราจะสร้างสภาพแวดล้อม Python ที่แยกต่างหากสำหรับโปรเจ็กต์
สร้างและเปิดใช้งานสภาพแวดล้อมเสมือน
# Create the virtual environment
python3 -m venv venv

# Activate it
source venv/bin/activate
✅ การยืนยัน: ตอนนี้พรอมต์ของคุณควรแสดงคำนำหน้า (venv)
ติดตั้งการอ้างอิง
pip install -r charity_advisor/requirements.txt
pip install -e .
ซึ่งจะติดตั้งสิ่งต่อไปนี้
- google-adk: เฟรมเวิร์ก Agent Development Kit
- google-cloud-aiplatform: การผสานรวม Vertex AI และ Gemini
- ap2: Agent Payments Protocol SDK (จาก GitHub)
- python-dotenv: การจัดการตัวแปรสภาพแวดล้อม
แฟล็ก -e ช่วยให้คุณนำเข้าโมดูล adk_ap2_charity_agents จากที่ใดก็ได้
กำหนดค่าไฟล์สภาพแวดล้อม
สร้างการกำหนดค่าจากเทมเพลตโดยทำดังนี้
# Copy the template
cp .env.template .env

# Get your current Project ID
PROJECT_ID=$(gcloud config get-value project)

# Replace the placeholder with your actual project ID
sed -i "s/your-project-id/$PROJECT_ID/g" .env

# Verify the replacement worked
grep GOOGLE_CLOUD_PROJECT .env
คุณควรเห็นข้อมูลต่อไปนี้
GOOGLE_CLOUD_PROJECT=your-actual-project-id
การยืนยัน
เรียกใช้สคริปต์การยืนยันเพื่อให้แน่ใจว่าทุกอย่างได้รับการกำหนดค่าอย่างถูกต้อง
python scripts/verify_setup.py
คุณควรเห็นเครื่องหมายถูกสีเขียวทั้งหมด
======================================================================
SETUP VERIFICATION
======================================================================

✓ Python version: 3.11.x
✓ google-adk: 1.17.0
✓ google-cloud-aiplatform: 1.111.0+
✓ ap2: 0.1.0
✓ python-dotenv: 1.0.0+
✓ .env file found and contains project ID
✓ Google Cloud project configured: your-project-id

✓ Mock charity database found
✓ Agent templates ready
✓ All directories present

======================================================================
✓ Setup complete! You are ready to build trustworthy agents.
======================================================================
การแก้ปัญหา
ขั้นตอนต่อไปคือ
ตอนนี้สภาพแวดล้อมของคุณพร้อมใช้งานแล้ว โดยคุณจะมีสิทธิ์ต่อไปนี้
- ✅ กำหนดค่าโปรเจ็กต์ที่อยู่ในระบบคลาวด์ของ Google แล้ว
- ✅ เปิดใช้ API ที่จำเป็นแล้ว
- ✅ ติดตั้งไลบรารี ADK และ AP2 แล้ว
- ✅ โค้ดเทมเพลตพร้อมแก้ไข
ในโมดูลถัดไป คุณจะได้สร้าง AI Agent ตัวแรกด้วยโค้ดเพียงไม่กี่บรรทัด และค้นพบว่าเหตุใดเอเจนต์แบบง่ายจึงไม่น่าเชื่อถือเมื่อจัดการธุรกรรมทางการเงิน
3. เอเจนต์ตัวแรกของคุณและการค้นพบช่องว่างด้านความน่าเชื่อถือ

จากไอเดียสู่การโต้ตอบ
ในโมดูลก่อนหน้า เราได้เตรียมสภาพแวดล้อมในการพัฒนาแล้ว ตอนนี้ก็ถึงเวลาเริ่มงานที่น่าตื่นเต้นแล้ว เราจะสร้างและเรียกใช้เอเจนต์ตัวแรก มอบความสามารถแรกให้ และค้นพบความท้าทายพื้นฐานที่เราต้องแก้ไขเพื่อให้เอเจนต์เชื่อถือได้จริง
โมดูลนี้คือภาพ "ก่อน" ของคุณ ซึ่งเป็นช่วงเวลาที่เผยให้เห็นว่าเหตุใดการสร้างเอเจนต์ที่เชื่อถือได้จึงต้องมีมากกว่าการให้สิทธิ์เข้าถึงเครื่องมือแก่ LLM
ขั้นตอนที่ 1: ตรวจสอบเอเจนต์เริ่มต้น
ก่อนอื่น มาดูเทมเพลตสำหรับเอเจนต์ตัวแรกกัน โดยจะมีโครงสร้างพื้นฐานที่มีตัวยึดตำแหน่งซึ่งเราจะดำเนินการให้เสร็จสมบูรณ์ในขั้นตอนถัดไป
👉 เปิดไฟล์
charity_advisor/simple_agent/agent.py
ในเครื่องมือแก้ไข
คุณจะเห็นข้อมูลดังนี้
"""
A simple agent that can research charities using Google Search.
"""

# MODULE_3_STEP_2_IMPORT_COMPONENTS


simple_agent = Agent(
    name="SimpleAgent",
    model="gemini-2.5-flash",

    # MODULE_3_STEP_3_WRITE_INSTRUCTION
    instruction="""""",

    # MODULE_3_STEP_4_ADD_TOOLS
    tools=[]
)
โปรดสังเกตว่าความคิดเห็นตัวยึดตำแหน่งมีรูปแบบดังนี้ MODULE_3_STEP_X_DESCRIPTION เราจะแทนที่ตัวทำเครื่องหมายเหล่านี้เพื่อค่อยๆ สร้าง Agent ของเรา
ขั้นตอนที่ 2: นำเข้าคอมโพเนนต์ที่จำเป็น
ก่อนที่จะสร้างอินสแตนซ์ของคลาส Agent หรือใช้เครื่องมือ google_search เราต้องนำเข้าคลาสหรือเครื่องมือดังกล่าวลงในไฟล์ก่อน
👉 ค้นหา:
# MODULE_3_STEP_2_IMPORT_COMPONENTS
👉 แทนที่บรรทัดเดียวด้วย
from google.adk.agents import Agent
from google.adk.tools import google_search
ตอนนี้Agentคลาสและเครื่องมือ google_search พร้อมใช้งานในไฟล์แล้ว
ขั้นตอนที่ 3: เขียนคำสั่งของ Agent
คำสั่งคือ "คำอธิบายงาน" ของ Agent ซึ่งจะบอก LLM ว่าเมื่อใดและอย่างไรที่ควรใช้เครื่องมือ มาเขียนข้อความที่แนะนำ Agent ให้ค้นหาข้อมูลการกุศลกัน
👉 ค้นหา:
# MODULE_3_STEP_3_WRITE_INSTRUCTION
instruction="""""",
👉 แทนที่ 2 บรรทัดนั้นด้วย
instruction="""You are a helpful research assistant. When a user asks you to find information about charities,
use the google_search tool to find the most relevant and up-to-date results from the web.
Synthesize the search results into a helpful summary.""",
ขั้นตอนที่ 4: เพิ่มเครื่องมือค้นหา
เอเจนต์ที่ไม่มีเครื่องมือก็เป็นเพียงผู้สนทนา มามอบความสามารถแรกให้กับเอเจนต์กัน นั่นคือความสามารถในการค้นหาในเว็บ
👉 ค้นหา:
# MODULE_3_STEP_4_ADD_TOOLS
tools=[]
👉 แทนที่ 2 บรรทัดนั้นด้วย
tools=[google_search]
ขั้นตอนที่ 5: ยืนยันเอเจนต์ที่สมบูรณ์
มาตรวจสอบกันว่าทุกอย่างพร้อมแล้วก่อนที่เราจะทดสอบ
👉
charity_advisor/simple_agent/agent.py
ตอนนี้ไฟล์ ควรมีลักษณะดังนี้
"""
A simple agent that can research charities using Google Search.
"""

from google.adk.agents import Agent
from google.adk.tools import google_search


simple_agent = Agent(
    name="SimpleAgent",
    model="gemini-2.5-flash",
    instruction="""You are a helpful research assistant. When a user asks you to find information about charities,
use the google_search tool to find the most relevant and up-to-date results from the web.
Synthesize the search results into a helpful summary.""",
    tools=[google_search]
)
ขั้นตอนที่ 6: ทดสอบเอเจนต์ - เผยช่องโหว่ด้านความน่าเชื่อถือ
เมื่อกำหนดค่าเอเจนต์เรียบร้อยแล้ว เรามาทดสอบและวิเคราะห์ลักษณะการทำงานของเอเจนต์กัน เราจึงได้ทราบว่าเหตุใดเอเจนต์แบบง่ายๆ จึงไม่น่าเชื่อถือเมื่อต้องจัดการการตัดสินใจทางการเงิน
การทดสอบที่ 1: ปัญหาการค้นพบ
👉 เรียกใช้คำสั่งต่อไปนี้ในเทอร์มินัล Cloud Shell
adk run charity_advisor/simple_agent
คุณควรเห็นเอาต์พุตดังนี้
INFO:google.adk.agents:Loading agent from charity_advisor/simple_agent
INFO:google.adk.agents:Agent 'SimpleAgent' ready

[user]:
ตอนนี้พรอมต์ [user]: กำลังรอข้อมูลจากคุณ
👉 ที่พรอมต์ [user] ให้พิมพ์
Can you find me a verified, highly-rated charity for children's literacy?
👉 กด Enter แล้วดูคำตอบ
หลังจากนั้นไม่นาน เอเจนต์จะสังเคราะห์ผลการค้นหาเป็นคำตอบดังนี้
จากการค้นหาบนเว็บ องค์กรการกุศลที่ได้รับการยกย่องบางแห่งซึ่งทำงานด้านการอ่านออกเขียนได้ของเด็ก ได้แก่ Reading Is Fundamental และ Room to Read เรามักแนะนำให้ใช้แหล่งข้อมูลอย่าง Charity Navigator และ GuideStar เพื่อยืนยันสถานะและการจัดอันดับขององค์กร นอกจากนี้ ฉันยังพบการสนทนาออนไลน์หลายครั้ง รวมถึงในฟอรัมอย่าง Reddit ซึ่งผู้ใช้แชร์ประสบการณ์ส่วนตัวกับโปรแกรมการอ่านออกเขียนได้ขนาดเล็กในท้องถิ่นต่างๆ
มาวิเคราะห์เรื่องนี้กัน ตัวแทนแก้ปัญหาให้เราได้ไหม
❌ ไม่ เพราะได้จำลองประสบการณ์ของมนุษย์ที่เราอธิบายไว้ในโมดูลที่ 1 ได้อย่างสมบูรณ์ ซึ่งได้ทำให้กระบวนการ "Google it" เป็นไปโดยอัตโนมัติอย่างมีประสิทธิภาพ และส่งปัญหา "วิเคราะห์มากเกินไป" กลับมาให้เรา
ซึ่งเผยให้เห็นช่องว่างด้านความน่าเชื่อถือแรก นั่นคือการขาดข้อมูลที่เชื่อถือได้
เอเจนต์กำลังค้นหาในเว็บแบบเปิด ซึ่งหมายความว่า
- ✅ ค้นหาผลลัพธ์ได้อย่างรวดเร็ว (ปรับปรุงประสบการณ์ของผู้ใช้)
- ❌ ผสมองค์กรที่ได้รับการจัดอันดับสูงกับการสนทนาบน Reddit (แหล่งข้อมูลที่ไม่น่าเชื่อถือ)
- ❌ แยกแยะไม่ออกระหว่างองค์กรการกุศลที่ผ่านการตรวจสอบกับองค์กรที่อาจเป็นกลโกง (ไม่มีการยืนยัน)
- ❌ ขอให้เรายืนยันข้อมูลที่เพิ่งให้ (ผลักภาระกลับมา)
การทดสอบที่ 2: ปัญหาการดำเนินการ
ตอนนี้มาถึงการทดสอบที่สำคัญครั้งที่ 2 ที่พรอมต์ [user]: ให้ลองบริจาคให้เสร็จสมบูรณ์โดยทำดังนี้
Okay, please donate $50 to Room to Read for me.
โดยตัวแทนจะตอบกลับพร้อมคำขอโทษและยอมรับข้อจำกัดของตนเอง
เราเข้าใจว่าคุณต้องการบริจาค ซึ่งเป็นเรื่องที่ยอดเยี่ยมมาก อย่างไรก็ตาม ฉันเป็นผู้ช่วยค้นคว้าวิจัยและไม่มีความสามารถในการจัดการธุรกรรมทางการเงินหรือประมวลผลการชำระเงิน หากต้องการบริจาค คุณจะต้องไปที่เว็บไซต์อย่างเป็นทางการของ Room to Read โดยตรง
นี่คือช่วงเวลา "อ๋อ!" ที่ 2 ซึ่งมีความสำคัญไม่แพ้กัน
ไม่เพียงแต่เอเจนต์จะไม่น่าเชื่อถือในการค้นหาองค์กรการกุศลที่เหมาะสม แต่ยังไม่น่าเชื่อถือในการดำเนินการบริจาคด้วย
👉 กด
Ctrl+C
เพื่อออกเมื่อทดสอบเสร็จแล้ว
The Two Gaps Visualized

สิ่งที่คุณเพิ่งเรียนรู้
ในโมดูลนี้ คุณได้สร้างและติดตั้ง AI Agent ตัวแรกเรียบร้อยแล้ว การทำเช่นนี้จะช่วยให้คุณค้นพบความท้าทายพื้นฐาน 2 ประการในการสร้างระบบที่เชื่อถือได้
แนวคิดหลักที่เชี่ยวชาญ
✅ The Agent Class:
- องค์ประกอบหลักของ ADK
- รวมการให้เหตุผลของ LLM (สมอง) เข้ากับเครื่องมือ (มือ)
- กำหนดค่าด้วยโมเดล คำสั่ง และเครื่องมือ
✅ โครงสร้างตามโฟลเดอร์:
- เอเจนต์แต่ละตัวจะอยู่ในโฟลเดอร์ของตัวเอง
- ADK จะค้นหา
agent_folder/agent.py - วิ่งกับ
adk run agent_folder
✅ รายการเครื่องมือ:
- กำหนดความสามารถของเอเจนต์
- LLM จะตัดสินใจว่าจะใช้เครื่องมือเมื่อใดและอย่างไร
- มีเครื่องมือหลายอย่างสำหรับการดำเนินการต่างๆ ได้
✅ พรอมต์คำสั่ง:
- กำหนดลักษณะการทำงานของเอเจนต์เหมือนคำบรรยายลักษณะงาน
- ระบุบทบาท ทริกเกอร์ การดำเนินการ และรูปแบบเอาต์พุต
- สำคัญต่อการใช้เครื่องมืออย่างน่าเชื่อถือ
✅ ปัญหาความน่าเชื่อถือ:
- ช่องว่างของ Discovery: แหล่งข้อมูลที่ยังไม่ได้รับการตรวจสอบ คุณภาพปะปนกัน
- ช่องว่างในการดำเนินการ: ไม่มีฟีเจอร์ที่ปลอดภัย ไม่มีความยินยอม ไม่มีบันทึกการตรวจสอบ
ขั้นตอนถัดไป
ในโมดูลถัดไป เราจะเริ่มสร้างโซลูชันโดยใช้สถาปัตยกรรมตามบทบาทของ AP2
มาสร้างเอเจนต์ตัวแรกและดูการแยกบทบาทในการทำงานจริงกัน
4. การสร้าง Shopping Agent - การค้นพบตามบทบาท

รากฐานของความน่าเชื่อถือ: การแยกบทบาท
ในโมดูลที่แล้ว คุณได้ทราบว่าเอเจนต์อเนกประสงค์แบบง่ายๆ ไม่สามารถทำงานได้ใน 2 ด้าน ได้แก่ ไม่สามารถให้การค้นหาที่เชื่อถือได้ และไม่สามารถดำเนินการธุรกรรมที่ปลอดภัย ตอนนี้เราจะเริ่มแก้ปัญหาเหล่านี้โดยใช้หลักการแรกจากโปรโตคอลการชำระเงินของตัวแทน นั่นคือสถาปัตยกรรมตามบทบาท
ก่อนที่จะเขียนโค้ดใดๆ มาดูกันว่าทำไมหลักการนี้จึงมีความสำคัญ
หลักการ AP2: การแยกบทบาท
ปัญหาเกี่ยวกับเอเจนต์ที่ "ทำทุกอย่าง"
ลองนึกภาพว่าคุณจ้างคนคนหนึ่งให้เป็นที่ปรึกษาทางการเงิน นักบัญชี และนายหน้าซื้อขายหลักทรัพย์ สะดวกไหม ได้ ปลอดภัยไหม ไม่ใช่เลยแม้แต่น้อย โดยผู้ใช้จะได้รับสิ่งต่อไปนี้
- เป้าหมายการลงทุนของคุณ (บทบาทที่ปรึกษา)
- สิทธิ์เข้าถึงบัญชีของคุณ (บทบาทนักบัญชี)
- สิทธิ์ในการย้ายเงินของคุณ (บทบาทนายหน้า)
หากบุคคลนี้ถูกบุกรุกหรือทำผิดพลาด ทุกอย่างก็จะตกอยู่ในความเสี่ยง
โซลูชันของ AP2: ตัวแทน 1 คน 1 งาน
AP2 ใช้หลักการแยกความกังวลเพื่อสร้างขอบเขตความน่าเชื่อถือ ดังนี้

ความสำคัญ:
- ✅ รัศมีการระเบิดแบบจำกัด: หาก Shopping Agent ถูกบุกรุก ผู้โจมตีจะเข้าถึงข้อมูลเข้าสู่ระบบการชำระเงินไม่ได้
- ✅ ความเป็นส่วนตัว: ผู้ให้บริการข้อมูลเข้าสู่ระบบจะไม่เห็นการสนทนาเกี่ยวกับการช็อปปิ้งของคุณ
- ✅ การปฏิบัติตามข้อกำหนด: ปฏิบัติตามข้อกำหนด PCI-DSS ได้ง่ายขึ้นเมื่อแยกข้อมูลการชำระเงิน
- ✅ ความรับผิดชอบ: ความรับผิดชอบที่ชัดเจนสำหรับแต่ละขั้นตอน
วิธีที่ตัวแทนสื่อสาร: สถานะเป็นสมุดจดที่แชร์
เนื่องจากเอเจนต์เข้าถึงข้อมูลของกันและกันโดยตรงไม่ได้ จึงต้องสื่อสารผ่านสถานะที่แชร์ ให้คิดว่ามันเป็นไวท์บอร์ดที่ตัวแทนทุกคนสามารถเขียนและอ่านได้
# Shopping Agent writes:
state["intent_mandate"] = {
    "natural_language_description": "Donate $50 to Room to Read",
    "merchants": ["Room to Read"],
    "intent_expiry": "2024-11-07T15:32:16Z",
    "amount": 50.0
}

# Merchant Agent reads:
intent = state["intent_mandate"]
charity_name = intent["merchants"][0]
amount = intent["amount"]
# Creates CartMandate based on IntentMandate...

# Credentials Provider reads:
cart_mandate = state["cart_mandate"]
# Processes payment...
นี่คือวิธีที่เราคงขอบเขตความน่าเชื่อถือไว้ในขณะที่เปิดใช้การทำงานร่วมกัน
เอเจนต์ตัวแรกของเรา: Shopping Agent
ความรับผิดชอบของ Shopping Agent นั้นเรียบง่ายและมุ่งเน้นที่สิ่งต่อไปนี้
- ใช้เครื่องมือ
find_charitiesเพื่อค้นหาฐานข้อมูลที่เชื่อถือได้ของเรา - แสดงตัวเลือกต่อผู้ใช้
- ใช้เครื่องมือ
save_user_choiceเพื่อสร้าง IntentMandate และบันทึกลงในสถานะ - ส่งต่อให้ตัวแทนรายถัดไป (ผู้ขาย)
เท่านี้เอง ไม่ต้องจัดการการชำระเงิน ไม่ต้องสร้างรถเข็น เพียงแค่ค้นพบและส่งต่อ
มาสร้างกันทีละขั้นตอน
ขั้นตอนที่ 1: เพิ่มตัวช่วยการตรวจสอบอินพุต
การตรวจสอบอินพุตเป็นสิ่งสำคัญอย่างยิ่งเมื่อสร้างเครื่องมือการผลิต มาสร้างฟังก์ชันตัวช่วยที่ตรวจสอบข้อมูลการกุศลก่อนบันทึกลงในสถานะกัน
👉 เปิด
charity_advisor/tools/charity_tools.py
คุณจะเห็นfind_charitiesฟังก์ชัน (เสร็จสมบูรณ์แล้ว) ที่ด้านบน เลื่อนลงเพื่อดูข้อมูลต่อไปนี้
# MODULE_4_STEP_1_ADD_VALIDATION_HELPER
👉 แทนที่บรรทัดเดียวด้วย
def _validate_charity_data(charity_name: str, charity_ein: str, amount: float) -> tuple[bool, str]:
    """
    Validates charity selection data before saving to state.

    This helper function performs basic validation to ensure data quality
    before it gets passed to other agents in the pipeline.

    Args:
        charity_name: Name of the selected charity
        charity_ein: Employer Identification Number (should be format: XX-XXXXXXX)
        amount: Donation amount in USD

    Returns:
        (is_valid, error_message): Tuple where is_valid is True if all checks pass,
                                    and error_message contains details if validation fails
    """
    # Validate charity name
    if not charity_name or not charity_name.strip():
        return False, "Charity name cannot be empty"

    # Validate EIN format (should be XX-XXXXXXX)
    if not charity_ein or len(charity_ein) != 10 or charity_ein[2] != '-':
        return False, f"Invalid EIN format: {charity_ein}. Expected format: XX-XXXXXXX"

    # Validate amount
    if amount <= 0:
        return False, f"Donation amount must be positive, got: ${amount}"

    if amount > 1_000_000:
        return False, f"Donation amount exceeds maximum of $1,000,000: ${amount}"

    # All checks passed
    return True, ""
ขั้นตอนที่ 2: เพิ่ม IntentMandate Creation Helper
ตอนนี้มาสร้างฟังก์ชันช่วยสร้างโครงสร้าง IntentMandate ของ AP2 กัน นี่คือข้อมูลประจำตัวที่ตรวจสอบได้ 1 ใน 3 รายการใน AP2
👉 ในไฟล์เดียวกัน ให้ค้นหา
# MODULE_4_STEP_2_ADD_INTENTMANDATE_CREATION_HELPER
👉 แทนที่บรรทัดเดียวด้วย
def _create_intent_mandate(charity_name: str, charity_ein: str, amount: float) -> dict:
    """
    Creates an IntentMandate - AP2's verifiable credential for user intent.

    This function uses the official Pydantic model from the `ap2` package
    to create a validated IntentMandate object before converting it to a dictionary.

    Args:
        charity_name: Name of the selected charity
        charity_ein: Employer Identification Number
        amount: Donation amount in USD

    Returns:
        Dictionary containing the IntentMandate structure per AP2 specification
    """
    from datetime import datetime, timedelta, timezone
    from ap2.types.mandate import IntentMandate

    # Set the expiry for the intent
    expiry = datetime.now(timezone.utc) + timedelta(hours=1)

    # Step 1: Instantiate the Pydantic model with official AP2 fields
    intent_mandate_model = IntentMandate(
        user_cart_confirmation_required=True,
        natural_language_description=f"Donate ${amount:.2f} to {charity_name}",
        merchants=[charity_name],
        skus=None,
        requires_refundability=False,
        intent_expiry=expiry.isoformat()
    )

    # Step 2: Convert the validated model to a dictionary for state storage
    intent_mandate_dict = intent_mandate_model.model_dump()

    # Step 3: Add the codelab's custom fields to the dictionary
    timestamp = datetime.now(timezone.utc)
    intent_mandate_dict.update({
        "timestamp": timestamp.isoformat(),
        "intent_id": f"intent_{charity_ein.replace('-', '')}_{int(timestamp.timestamp())}",
        "charity_ein": charity_ein,
        "amount": amount,
        "currency": "USD"
    })

    return intent_mandate_dict
ขั้นตอนที่ 3: สร้างเครื่องมือส่งต่อสถานะด้วย IntentMandate
ตอนนี้มาสร้างเครื่องมือที่สร้าง IntentMandate และบันทึกลงในสถานะกัน
👉 ในไฟล์เดียวกัน ให้เลื่อนลงไปที่
save_user_choice
ฟังก์ชัน ค้นหา:
# MODULE_4_STEP_3_COMPLETE_SAVE_TOOL
👉 แทนที่บรรทัดเดียวด้วย
    # Validate inputs before creating IntentMandate
    is_valid, error_message = _validate_charity_data(charity_name, charity_ein, amount)
    if not is_valid:
        logger.error(f"Validation failed: {error_message}")
        return {"status": "error", "message": error_message}

    # Create AP2 IntentMandate using our updated helper function
    intent_mandate = _create_intent_mandate(charity_name, charity_ein, amount)

    # Write the IntentMandate to shared state for the next agent
    tool_context.state["intent_mandate"] = intent_mandate

    logger.info(f"Successfully created IntentMandate and saved to state")
    logger.info(f"Intent ID: {intent_mandate['intent_id']}")
    logger.info(f"Intent expires: {intent_mandate['intent_expiry']}")

    # Return success confirmation
    return {
        "status": "success",
        "message": f"Created IntentMandate: ${amount:.2f} donation to {charity_name} (EIN: {charity_ein})",
        "intent_id": intent_mandate["intent_id"],
        "expiry": intent_mandate["intent_expiry"]
    }
ขั้นตอนที่ 4: เพิ่มตัวช่วยจัดรูปแบบโฆษณา Display
ก่อนที่จะสร้างเอเจนต์ เรามาเพิ่มตัวช่วยอีกตัวหนึ่งที่จัดรูปแบบข้อมูลการกุศลเพื่อให้แสดงผลที่ใช้งานง่ายสำหรับผู้ใช้
👉 เลื่อนเพื่อค้นหา
# MODULE_4_STEP_4_ADD_FORMATTING_HELPER
👉 แทนที่บรรทัดเดียวด้วย
def _format_charity_display(charity: dict) -> str:
    """
    Formats a charity dictionary into a user-friendly display string.

    This helper function demonstrates how to transform structured data
    into readable text for the user.

    Args:
        charity: Dictionary containing charity data (name, ein, mission, rating, efficiency)

    Returns:
        Formatted string suitable for display to the user
    """
    name = charity.get('name', 'Unknown')
    ein = charity.get('ein', 'N/A')
    mission = charity.get('mission', 'No mission statement available')
    rating = charity.get('rating', 0.0)
    efficiency = charity.get('efficiency', 0.0)

    # Format efficiency as percentage
    efficiency_pct = int(efficiency * 100)

    # Build formatted string
    display = f"""
**{name}** (EIN: {ein})
⭐ Rating: {rating}/5.0
💰 Efficiency: {efficiency_pct}% of funds go to programs
📋 Mission: {mission}
    """.strip()

    return display
ขั้นตอนที่ 5: สร้าง Shopping Agent - นำเข้าคอมโพเนนต์
ตอนนี้เครื่องมือของเราพร้อมและมีประสิทธิภาพแล้ว มาสร้าง Agent ที่จะใช้เครื่องมือเหล่านี้กัน
👉 เปิด
charity_advisor/shopping_agent/agent.py
คุณจะเห็นเทมเพลตที่มีความคิดเห็นตัวยึดตำแหน่ง มาสร้างกันทีละขั้นตอน
👉 ค้นหา:
# MODULE_4_STEP_5_IMPORT_COMPONENTS
👉 แทนที่บรรทัดเดียวด้วย
from google.adk.agents import Agent
from google.adk.tools import FunctionTool
from charity_advisor.tools.charity_tools import find_charities, save_user_choice
ขั้นตอนที่ 6: เขียนคำสั่งสำหรับตัวแทน
คำสั่งคือส่วนที่เรากำหนดคำอธิบายงานและเวิร์กโฟลว์ของเอเจนต์ ซึ่งเป็นสิ่งสำคัญมาก เนื่องจากคำสั่งที่เขียนไม่ดีจะทำให้เกิดลักษณะการทำงานที่ไม่น่าเชื่อถือ
👉 ค้นหา:
# MODULE_4_STEP_6_WRITE_INSTRUCTION
instruction="""""",
👉 แทนที่ 2 บรรทัดนั้นด้วย
    instruction="""You are a research specialist helping users find verified charities.

Your workflow:

1. When the user describes what cause they want to support (e.g., "education", "health", "environment"),
   use the find_charities tool to search our vetted database.

2. Present the results clearly. The tool returns formatted charity information that you should
   show to the user.

3. When the user selects a charity and specifies an amount, use the save_user_choice tool
   to create an IntentMandate and record their decision. You MUST call save_user_choice with:
   - charity_name: The exact name of the chosen charity
   - charity_ein: The EIN of the chosen charity
   - amount: The donation amount in dollars (as a number, not a string)

4. After successfully saving, inform the user:
   - That you've created an IntentMandate (mention the intent ID if provided)
   - When the intent expires
   - That you're passing their request to the secure payment processor

IMPORTANT BOUNDARIES:
- Your ONLY job is discovery and creating the IntentMandate
- You do NOT process payments
- You do NOT see the user's payment methods
- You do NOT create cart offers (that's the Merchant Agent's job)
- After calling save_user_choice, your work is done

WHAT IS AN INTENTMANDATE:
An IntentMandate is a structured record of what the user wants to do. It includes:
- Natural language description ("Donate $50 to Room to Read")
- Which merchants can fulfill it
- When the intent expires
- Whether user confirmation is required

This is the first of three verifiable credentials in our secure payment system.

If the user asks you to do anything related to payment processing, politely explain that
you don't have that capability and that their request will be handled by the appropriate
specialist agent.""",
ขั้นตอนที่ 7: เพิ่มเครื่องมือให้กับ Agent
ตอนนี้เรามาให้สิทธิ์เข้าถึงเครื่องมือทั้ง 2 อย่างแก่เอเจนต์กัน
👉 ค้นหา:
# MODULE_4_STEP_7_ADD_TOOLS
👉 แทนที่ 2 บรรทัดนั้นด้วย
    tools=[
        FunctionTool(func=find_charities),
        FunctionTool(func=save_user_choice)
    ]
ขั้นตอนที่ 8: ยืนยันตัวแทนที่สมบูรณ์
มาตรวจสอบกันว่าได้ต่อสายทุกอย่างถูกต้องแล้ว
👉
charity_advisor/shopping_agent/agent.py
ควรมีลักษณะดังนี้
"""
Shopping Agent - Finds charities from a trusted database and saves the user's choice.
This agent acts as our specialized "Research Analyst."
"""

from google.adk.agents import Agent
from google.adk.tools import FunctionTool
from charity_advisor.tools.charity_tools import find_charities, save_user_choice


shopping_agent = Agent(
    name="ShoppingAgent",
    model="gemini-2.5-pro",
    description="Finds and recommends vetted charities from a trusted database, then creates an IntentMandate capturing the user's donation intent.",
    instruction="""You are a research specialist helping users find verified charities.

Your workflow:

1. When the user describes what cause they want to support (e.g., "education", "health", "environment"),
   use the find_charities tool to search our vetted database.

2. Present the results clearly. The tool returns formatted charity information that you should
   show to the user.

3. When the user selects a charity and specifies an amount, use the save_user_choice tool
   to create an IntentMandate and record their decision. You MUST call save_user_choice with:
   - charity_name: The exact name of the chosen charity
   - charity_ein: The EIN of the chosen charity
   - amount: The donation amount in dollars (as a number, not a string)

4. After successfully saving, inform the user:
   - That you've created an IntentMandate (mention the intent ID if provided)
   - When the intent expires
   - That you're passing their request to the secure payment processor

IMPORTANT BOUNDARIES:
- Your ONLY job is discovery and creating the IntentMandate
- You do NOT process payments
- You do NOT see the user's payment methods
- You do NOT create cart offers (that's the Merchant Agent's job)
- After calling save_user_choice, your work is done

WHAT IS AN INTENTMANDATE:
An IntentMandate is a structured record of what the user wants to do. It includes:
- Natural language description ("Donate $50 to Room to Read")
- Which merchants can fulfill it
- When the intent expires
- Whether user confirmation is required

This is the first of three verifiable credentials in our secure payment system.

If the user asks you to do anything related to payment processing, politely explain that
you don't have that capability and that their request will be handled by the appropriate
specialist agent.""",
    tools=[
        FunctionTool(func=find_charities),
        FunctionTool(func=save_user_choice)
    ]
)
✅ เยี่ยมเลย คุณสร้างเอเจนต์ที่ได้มาตรฐานการผลิตและเป็นไปตามข้อกำหนด AP2 โดยมีคุณสมบัติดังนี้
- การตรวจสอบอินพุต
- การสร้าง IntentMandate ที่เหมาะสมโดยใช้โมเดล Pydantic ของ AP2
- เอาต์พุตที่จัดรูปแบบ
- กำหนดขอบเขตของบทบาทให้ชัดเจน
- วิธีการโดยละเอียด
- การจัดการข้อผิดพลาด
ขั้นตอนที่ 9: ทดสอบ Shopping Agent
มาตรวจสอบกันว่าเอเจนต์ของเราทํางานอย่างถูกต้อง สร้าง IntentMandates ที่เหมาะสม และเคารพขอบเขตของตน
👉 ในเทอร์มินัล Cloud Shell ให้เรียกใช้
adk run charity_advisor/shopping_agent
[user]: ข้อความแจ้งจะปรากฏขึ้น
การทดสอบที่ 1: การค้นพบด้วยฐานข้อมูลที่เชื่อถือได้
👉 ประเภท:
I want to donate to an education charity. What are my options?
หลังจากนั้นไม่นาน ตัวแทนจะตอบกลับ _format_charity_display ตัวช่วยของเราจะจัดรูปแบบผลลัพธ์ได้อย่างสวยงาม ดังนี้
เราพบองค์กรการกุศลด้านการศึกษาที่ได้รับการยืนยัน 3 แห่งในฐานข้อมูลของเรา
Room to Read (EIN: 77-0479905)
⭐ คะแนน: 4.9/5.0
💰 ประสิทธิภาพ: 88% ของเงินทุนจะนำไปใช้ในโปรแกรม
📋 ภารกิจ: เปลี่ยนแปลงชีวิตของเด็กๆ หลายล้านคนในชุมชนที่มีรายได้น้อยโดยมุ่งเน้นที่ความรู้ด้านการอ่านออกเขียนได้และความเท่าเทียมทางเพศในการศึกษา
Teach For America (EIN: 13-3541913)
⭐ คะแนน: 4.7/5.0
💰 ประสิทธิภาพ: 81% ของเงินทุนนำไปใช้กับโปรแกรม
📋 ภารกิจ: ทำงานเพื่อขยายโอกาสทางการศึกษาสำหรับเด็กที่เผชิญกับความยากลำบาก
Tech Education Alliance (EIN: 45-2345678)
⭐ คะแนน: 4.8/5.0
💰 ประสิทธิภาพ: เงินทุน 92% ใช้กับโปรแกรม
📋 ภารกิจ: นำการศึกษาวิทยาการคอมพิวเตอร์ไปสู่โรงเรียนที่ขาดแคลน
คุณต้องการสนับสนุนองค์กรการกุศลใดและต้องการบริจาคเท่าใด
เปรียบเทียบกับเอเจนต์แบบง่ายของโมดูลที่ 3 ซึ่งให้ผลลัพธ์ของ Google ที่ยังไม่ได้รับการตรวจสอบ นี่คือความแตกต่างระหว่างการค้นพบที่ไม่น่าเชื่อถือกับการค้นพบที่น่าเชื่อถือ
การทดสอบ 2: บันทึกตัวเลือกของผู้ใช้และสร้าง IntentMandate
👉 ประเภท:
I'll donate $50 to Room to Read.
คุณควรเห็นเอเจนต์เรียกใช้เครื่องมือ save_user_choice ด้วยพารามิเตอร์ที่ถูกต้อง การสร้าง IntentMandate โดยใช้โมเดล AP2 จะช่วยให้คุณเห็นคำตอบที่มีโครงสร้างมากขึ้น ดังนี้
เยี่ยมเลย ฉันได้สร้าง IntentMandate สำหรับการบริจาคของคุณแล้ว
รายละเอียดความตั้งใจ:
- รหัสความตั้งใจ: intent_774795905_1730927536
- จำนวนเงิน: $50.00 ถึง Room to Read (EIN: 77-0479905)
- หมดอายุ: 2024-11-07T15:32:16Z (ในอีก 1 ชั่วโมง)
IntentMandate นี้จะบันทึกความตั้งใจในการบริจาคของคุณและมีข้อจำกัดเพื่อให้มั่นใจว่าระบบจะประมวลผลธุรกรรมอย่างปลอดภัย ตอนนี้ฉันจะส่งเรื่องนี้ไปยังผู้ประมวลผลการชำระเงินที่ปลอดภัยของเราเพื่อสร้างข้อเสนออย่างเป็นทางการและดำเนินการบริจาคให้เสร็จสมบูรณ์
เบื้องหลังการทำงานมีสิ่งต่างๆ เกิดขึ้นดังนี้
_validate_charity_data()ยืนยันข้อมูลที่ป้อน_create_intent_mandate()ใช้โมเดล Pydantic ของ AP2 เพื่อสร้างโครงสร้าง
   # Created and validated via Pydantic
   intent_mandate_model = IntentMandate(
       user_cart_confirmation_required=True,
       natural_language_description="Donate $50.00 to Room to Read",
       merchants=["Room to Read"],
       skus=None,
       requires_refundability=False,
       intent_expiry="2024-11-07T15:32:16Z"
   )

   # Converted to dict and extended with custom fields
   intent_mandate_dict = intent_mandate_model.model_dump()
   intent_mandate_dict.update({
       "charity_ein": "77-0479905",
       "amount": 50.0,
       "currency": "USD"
   })
- เครื่องมือเขียนเฉพาะ IntentMandate ไปยังสถานะที่แชร์
state["intent_mandate"] = intent_mandate_dict
- ระบบส่งข้อความแสดงความสำเร็จพร้อมรายละเอียดความตั้งใจกลับไปยัง LLM
- LLM เขียนข้อความสุดท้ายสำหรับผู้ใช้
ตอนนี้ IntentMandate พร้อมแล้วสำหรับตัวแทนผู้ขาย (โมดูลที่ 5) ที่จะรับ ผู้ขายจะดึงชื่อการกุศลและจำนวนเงินจาก IntentMandate และตรวจสอบว่ายังไม่หมดอายุ
การทดสอบที่ 3: การตรวจสอบความถูกต้องในการดำเนินการ
มาตรวจสอบว่าตัวช่วยการตรวจสอบของเราตรวจพบอินพุตที่ไม่ถูกต้อง
👉 ประเภท:
I'll donate -$25 to Room to Read.
ตัวแทนควรตรวจจับจำนวนเงินที่ไม่ถูกต้อง
ฉันพบปัญหา: จำนวนเงินบริจาคต้องเป็นค่าบวก ได้รับ: $-25.0
โปรดระบุจำนวนเงินบริจาคที่เป็นบวก แล้วเราจะสร้าง IntentMandate ให้คุณ
นี่คือการเขียนโปรแกรมเชิงรับที่ใช้งานได้จริง _validate_charity_dataผู้ช่วยของเราป้องกันไม่ให้ข้อมูลที่ไม่ถูกต้องเข้าสู่ระบบและสร้าง IntentMandate ที่มีรูปแบบไม่ถูกต้อง
การทดสอบที่ 4: ยืนยันขอบเขตความน่าเชื่อถือ
👉 ลองขอให้ตัวแทนดำเนินการชำระเงิน
Now process my credit card payment.
เอเจนต์ควรปฏิเสธโดยคำนึงถึงขอบเขตของบทบาท
ฉันไม่มีสิทธิ์ประมวลผลการชำระเงิน ซึ่งไม่ใช่ส่วนหนึ่งของบทบาทของฉัน งานของฉันคือการช่วยคุณค้นหามูลนิธิการกุศลที่ได้รับการยืนยันและสร้าง IntentMandate ที่บันทึกความตั้งใจในการบริจาคของคุณ
ระบบได้สร้าง IntentMandate และส่งไปยังผู้ประมวลผลการชำระเงินที่ปลอดภัยของเราแล้ว ตัวแทนผู้ขายจะสร้างข้อเสนออย่างเป็นทางการ (CartMandate) จากนั้นผู้ให้บริการข้อมูลเข้าสู่ระบบจะจัดการการชำระเงินจริงโดยได้รับความยินยอมอย่างชัดแจ้งจากคุณ
นี่คือขอบเขตความน่าเชื่อถือในการดำเนินการ เอเจนต์ทราบว่าตนเองไม่ได้รับอนุญาตให้จัดการข้อมูลการชำระเงิน และคำแนะนำของเอเจนต์จะแนะนำให้เอเจนต์อธิบายเรื่องนี้แก่ผู้ใช้ พร้อมทั้งสอนแนวคิด IntentMandate ให้ผู้ใช้ทราบด้วย
👉 กด
Ctrl+C
เพื่อออกเมื่อทดสอบเสร็จแล้ว
สิ่งที่คุณเพิ่งสร้าง
คุณติดตั้งใช้งานส่วนแรกของสถาปัตยกรรม AP2 ได้สำเร็จแล้วด้วยการสร้าง IntentMandate ที่เหมาะสมโดยใช้โมเดล Pydantic ของ AP2
แนวคิดหลักที่เชี่ยวชาญ
✅ สถาปัตยกรรมตามบทบาท:
- ตัวแทนแต่ละรายมีงานที่กำหนดไว้อย่างชัดเจน 1 งาน
- ตัวแทนจะสื่อสารผ่านสถานะที่แชร์ ไม่ใช่การเข้าถึงโดยตรง
- ขอบเขตความน่าเชื่อถือจำกัดผลกระทบของการประนีประนอม
✅ IntentMandate (AP2 Credential #1):
- สร้างขึ้นโดยใช้โมเดล Pydantic ของ AP2 อย่างเป็นทางการเพื่อการตรวจสอบ
- การบันทึกความตั้งใจของผู้ใช้แบบมีโครงสร้าง
- รวมถึงการหมดอายุเพื่อความปลอดภัย (ป้องกันการโจมตีแบบรีเพลย์)
- ระบุข้อจำกัด (ผู้ขาย การคืนเงิน การยืนยัน)
- คำอธิบายภาษาธรรมชาติสำหรับมนุษย์
- ที่เครื่องอ่านได้สำหรับตัวแทน
- ตรวจสอบโมเดลก่อนแปลงเป็นพจนานุกรม
✅ สถานะเป็นหน่วยความจำที่ใช้ร่วมกัน:
tool_context.stateคือ "สมุดบันทึก" ที่ตัวแทนทุกคนเข้าถึงได้- การเขียนไปยังสถานะ = การทำให้ข้อมูลเข้าสู่ระบบที่ตรวจสอบได้พร้อมใช้งาน
- การอ่านจากสถานะ = การใช้และตรวจสอบข้อมูลเข้าสู่ระบบ
- เอเจนต์ดาวน์สตรีมจะดึงข้อมูลที่ต้องการจากข้อมูลเข้าสู่ระบบ
✅ FunctionTool:
- แปลงฟังก์ชัน Python เป็นเครื่องมือที่เรียกใช้ LLM ได้
- อาศัย Docstring และคำแนะนำประเภทเพื่อให้ LLM เข้าใจ
- จัดการการเรียกใช้โดยอัตโนมัติ
- ความสามารถในการประกอบเครื่องมือ: เครื่องมือขนาดเล็กที่มุ่งเน้น > เครื่องมือแบบโมโนลิธ
✅ คำสั่งสำหรับตัวแทน:
- คำแนะนำด้านเวิร์กโฟลว์ทีละขั้นตอน
- ขอบเขตที่ชัดเจน ("ห้าม...")
- ข้อกำหนดเฉพาะของพารามิเตอร์เพื่อป้องกันข้อผิดพลาด
- คำจำกัดความทางเทคนิค (IntentMandate คืออะไร)
- การจัดการกรณีที่สุ่มเสี่ยงจะละเมิดนโยบาย (สิ่งที่ควรพูดเมื่อ...)
ขั้นตอนถัดไป
ในโมดูลถัดไป เราจะสร้างตัวแทนผู้ขายเพื่อรับ IntentMandate และสร้างเอกสารรับรองที่ตรวจสอบได้รายการที่ 2 ซึ่งก็คือ CartMandate
Shopping Agent ได้สร้าง IntentMandate ที่บันทึกความตั้งใจของผู้ใช้พร้อมวันหมดอายุ ตอนนี้เราต้องการเอเจนต์เพื่ออ่านข้อมูลเข้าสู่ระบบนั้น ตรวจสอบว่าข้อมูลยังไม่หมดอายุ และสร้างข้อเสนอที่เป็นทางการและลงนามซึ่งระบุว่า "ฉันซึ่งเป็นผู้ขายจะให้ราคานี้และส่งมอบสินค้าเหล่านี้"
มาสร้างตัวแทนผู้ขายและดูข้อมูลเข้าสู่ระบบ AP2 รายการที่ 2 กัน
5. สร้างตัวแทนผู้ขาย - ข้อเสนอที่มีผลผูกพันและ CartMandate

ตั้งแต่การค้นพบไปจนถึงการมีส่วนร่วม
ในโมดูลก่อนหน้า คุณได้สร้าง Shopping Agent ซึ่งเป็นผู้เชี่ยวชาญที่ค้นหามูลนิธิการกุศลที่ได้รับการยืนยันและสร้าง IntentMandate เพื่อบันทึกเจตนาของผู้ใช้ ตอนนี้เราต้องการตัวแทนเพื่อรับ IntentMandate และสร้างข้อเสนอที่เป็นทางการและมีผลผูกพัน
นี่คือจุดที่หลักการสำคัญข้อที่ 2 ของ AP2 เข้ามามีบทบาท นั่นคือข้อมูลเข้าสู่ระบบที่ตรวจสอบได้ผ่าน CartMandate
หลักการ AP2: CartMandate และข้อเสนอที่มีผลผูกพัน
เหตุใดเราจึงต้องมีบทบาทผู้ขาย
ในโมดูลที่ 4 ตัวแทน Shopping ได้สร้าง IntentMandate และบันทึกลงในสถานะดังนี้
state["intent_mandate"] = {
    "natural_language_description": "Donate $50 to Room to Read",
    "merchants": ["Room to Read"],
    "amount": 50.0,
    "intent_expiry": "2024-11-07T15:32:16Z"
}
แต่สิ่งนี้เป็นเพียงความตั้งใจของผู้ใช้ ก่อนที่จะประมวลผลการชำระเงินได้ เราต้องมีข้อมูลต่อไปนี้
- โครงสร้างข้อเสนอที่เป็นทางการซึ่งระบบการชำระเงินเข้าใจ
- หลักฐานว่าผู้ขายจะให้ราคานี้
- ข้อผูกมัดที่ผูกมัดซึ่งไม่สามารถเปลี่ยนแปลงได้ในระหว่างการทำธุรกรรม
- การตรวจสอบว่าความตั้งใจยังไม่หมดอายุ
นี่คือหน้าที่ของตัวแทนผู้ขาย
CartMandate คืออะไร
CartMandate เป็นคำที่ AP2 ใช้เรียก "รถเข็นช็อปปิ้งดิจิทัล" ซึ่งทำหน้าที่เป็นข้อเสนอที่มีผลผูกพัน โดยมีโครงสร้างตามมาตรฐาน PaymentRequest ของ W3C ซึ่งหมายความว่า
- ผู้ประมวลผลการชำระเงินทั่วโลกจะรู้จักรูปแบบนี้
- ซึ่งมีรายละเอียดธุรกรรมทั้งหมดในรูปแบบที่เป็นมาตรฐาน
- สามารถลงนามด้วยการเข้ารหัสเพื่อพิสูจน์ความถูกต้อง
ลองนึกถึงใบเสนอราคาที่เขียนจากผู้รับเหมา
- ❌ วาจา: "ได้ ฉันรับงานนี้ในราคาประมาณ 500 บาท"
- ✅ ใบเสนอราคาที่เขียน: ค่าใช้จ่ายแบบแยกรายการ ยอดรวม ลายเซ็น วันที่
ใบเสนอราคาที่เป็นลายลักษณ์อักษรมีผลผูกพัน CartMandate คือเอกสารที่เทียบเท่าในรูปแบบดิจิทัล

โครงสร้างของ CartMandate
CartMandate ใน AP2 มีโครงสร้างที่ซ้อนกันโดยเฉพาะ ดังนี้
cart_mandate = {
    "contents": {  # ← AP2 wrapper
        "id": "cart_xyz123",
        "cart_expiry": "2024-11-07T15:47:16Z",
        "merchant_name": "Room to Read",
        "user_cart_confirmation_required": False,

        "payment_request": {  # ← W3C PaymentRequest nested inside
            "method_data": [...],
            "details": {...},
            "options": {...}
        }
    },
    "merchant_authorization": "SIG_a3f7b2c8"  # ← Merchant signature
}
องค์ประกอบหลัก 3 อย่าง
1. contents - Wrapper ของรถเข็นที่มีข้อมูลต่อไปนี้
- รหัสรถเข็นและวันหมดอายุ
- ชื่อผู้ขาย
- PaymentRequest ของ W3C
2. payment_request (ภายในเนื้อหา) - สิ่งที่ซื้อ
- method_data: ประเภทการชำระเงินที่ยอมรับ
- รายละเอียด: รายการและยอดรวม
- ตัวเลือก: ข้อกำหนดในการจัดส่งและข้อมูลผู้ชำระเงิน
3. merchant_authorization - ลายเซ็นเข้ารหัส
ลายเซ็นของผู้ขาย: หลักฐานแสดงความมุ่งมั่น
ลายเซ็นของผู้ขายมีความสำคัญอย่างยิ่ง ซึ่งพิสูจน์ได้จากสิ่งต่อไปนี้
- ข้อเสนอนี้มาจากผู้ขายที่ได้รับอนุญาต
- ผู้ขายรับประกันว่าจะขายสินค้าราคานี้
- ข้อเสนอไม่มีการดัดแปลงนับตั้งแต่สร้าง
ในเวอร์ชันที่ใช้งานจริง นี่จะเป็นลายเซ็นการเข้ารหัสโดยใช้ PKI (โครงสร้างพื้นฐานคีย์สาธารณะ) หรือ JWT (โทเค็นเว็บ JSON) สําหรับเวิร์กช็อปด้านการศึกษา เราจะจำลองการดำเนินการนี้ด้วยแฮช SHA-256
# Production (real signature):
signature = sign_with_private_key(cart_data, merchant_private_key)

# Workshop (simulated signature):
cart_hash = hashlib.sha256(cart_json.encode()).hexdigest()
signature = f"SIG_{cart_hash[:16]}"
พันธกิจของเรา: สร้างเอเจนต์ผู้ขาย
Merchant Agent จะทำสิ่งต่อไปนี้
- อ่าน IntentMandate จากรัฐ (สิ่งที่ Shopping Agent เขียน)
- ตรวจสอบว่า Intent ยังไม่หมดอายุ
- ดึงข้อมูลชื่อองค์กรการกุศล จำนวนเงิน และรายละเอียดอื่นๆ
- สร้างโครงสร้าง PaymentRequest ที่เป็นไปตามข้อกำหนดของ W3C โดยใช้โมเดล AP2 Pydantic
- Wrap it in AP2's CartMandate with expiry
- เพิ่มลายเซ็นผู้ขายจำลอง
- เขียน CartMandate เพื่อระบุสำหรับผู้ให้บริการข้อมูลเข้าสู่ระบบ (โมดูลถัดไป)
มาสร้างกันทีละขั้นตอน
ขั้นตอนที่ 1: เพิ่ม Expiry Validation Helper
ก่อนอื่นมาตั้งค่าไฟล์เครื่องมือที่เกี่ยวข้องกับผู้ขายและเพิ่มตัวช่วยเพื่อตรวจสอบการหมดอายุของ IntentMandate กัน
👉 เปิด
charity_advisor/tools/merchant_tools.py
มาเพิ่มการตรวจสอบวันหมดอายุกัน
👉 ค้นหา:
# MODULE_5_STEP_1_ADD_EXPIRY_VALIDATION_HELPER
👉 แทนที่บรรทัดเดียวด้วย
def _validate_intent_expiry(intent_expiry_str: str) -> tuple[bool, str]:
    """
    Validates that the IntentMandate hasn't expired.

    This is a critical security check - expired intents should not be processed.

    Args:
        intent_expiry_str: The ISO 8601 timestamp string from the IntentMandate.

    Returns:
        (is_valid, error_message): Tuple indicating if intent is still valid.
    """
    try:
        # The .replace('Z', '+00:00') is for compatibility with older Python versions
        expiry_time = datetime.fromisoformat(intent_expiry_str.replace('Z', '+00:00'))
        now = datetime.now(timezone.utc)

        if expiry_time < now:
            return False, f"IntentMandate expired at {intent_expiry_str}"

        time_remaining = expiry_time - now
        logger.info(f"IntentMandate valid. Expires in {time_remaining.total_seconds():.0f} seconds")

        return True, ""

    except (ValueError, TypeError) as e:
        return False, f"Invalid intent_expiry format: {e}"
ขั้นตอนที่ 2: เพิ่มตัวช่วยสร้างลายเซ็น
ตอนนี้มาสร้างฟังก์ชันช่วยที่จะสร้างลายเซ็นผู้ขายจำลองกัน
👉 ค้นหา:
# MODULE_5_STEP_2_ADD_SIGNATURE_HELPER
👉 แทนที่บรรทัดเดียวด้วย
def _generate_merchant_signature(cart_contents: CartContents) -> str:
    """
    Generates a simulated merchant signature for the CartMandate contents.

    In production, this would use PKI or JWT with the merchant's private key.
    For this codelab, we use a SHA-256 hash of the sorted JSON representation.

    Args:
        cart_contents: The Pydantic model of the cart contents to sign.

    Returns:
        Simulated signature string (format: "SIG_" + first 16 chars of hash).
    """
    # Step 1: Dump the Pydantic model to a dictionary. The `mode='json'` argument
    # ensures that complex types like datetimes are serialized correctly.
    cart_contents_dict = cart_contents.model_dump(mode='json')

    # Step 2: Use the standard json library to create a stable, sorted JSON string.
    # separators=(',', ':') removes whitespace for a compact and canonical representation.
    cart_json = json.dumps(cart_contents_dict, sort_keys=True, separators=(',', ':'))

    # Step 3: Generate SHA-256 hash.
    cart_hash = hashlib.sha256(cart_json.encode('utf-8')).hexdigest()

    # Step 4: Create signature in a recognizable format.
    signature = f"SIG_{cart_hash[:16]}"

    logger.info(f"Generated merchant signature: {signature}")
    return signature
ขั้นตอนที่ 3A: สร้างลายเซ็นเครื่องมือและตั้งค่า
ตอนนี้มาเริ่มสร้างเครื่องมือหลักกัน เราจะสร้างโดยเพิ่มทีละขั้นตอนใน 4 ขั้นตอนย่อย ก่อนอื่นคือลายเซ็นของฟังก์ชันและการตั้งค่าเริ่มต้น
👉 ค้นหา:
# MODULE_5_STEP_3A_CREATE_TOOL_SIGNATURE
👉 แทนที่บรรทัดเดียวด้วย
async def create_cart_mandate(tool_context: Any) -> Dict[str, Any]:
    """
    Creates a W3C PaymentRequest-compliant CartMandate from the IntentMandate.

    This tool reads the IntentMandate from shared state, validates it, and
    creates a formal, signed offer using the official AP2 Pydantic models.

    Returns:
        Dictionary containing status and the created CartMandate.
    """
    logger.info("Tool called: Creating CartMandate from IntentMandate")

    # MODULE_5_STEP_3B_ADD_VALIDATION_LOGIC
ขั้นตอนที่ 3B: เพิ่มตรรกะการตรวจสอบ
ตอนนี้มาเพิ่มตรรกะเพื่ออ่านและตรวจสอบ IntentMandate โดยใช้โมเดล AP2 Pydantic และดึงข้อมูลที่เราต้องการกัน
👉 ค้นหา:
# MODULE_5_STEP_3B_ADD_VALIDATION_LOGIC
👉 แทนที่บรรทัดเดียวด้วย
    # 1. Read IntentMandate dictionary from state
    intent_mandate_dict = tool_context.state.get("intent_mandate")
    if not intent_mandate_dict:
        logger.error("No IntentMandate found in state")
        return {
            "status": "error",
            "message": "No IntentMandate found. Shopping Agent must create intent first."
        }

    # 2. Parse dictionary into a validated Pydantic model
    try:
        intent_mandate_model = IntentMandate.model_validate(intent_mandate_dict)
    except Exception as e:
        logger.error(f"Could not validate IntentMandate structure: {e}")
        return {"status": "error", "message": f"Invalid IntentMandate structure: {e}"}

    # 3. Validate that the intent hasn't expired (CRITICAL security check)
    is_valid, error_message = _validate_intent_expiry(intent_mandate_model.intent_expiry)
    if not is_valid:
        logger.error(f"IntentMandate validation failed: {error_message}")
        return {"status": "error", "message": error_message}

    # 4. Extract data. Safely access standard fields from the model, and
    # custom fields (like 'amount') from the original dictionary.
    charity_name = intent_mandate_model.merchants[0] if intent_mandate_model.merchants else "Unknown Charity"
    amount = intent_mandate_dict.get("amount", 0.0)

    # MODULE_5_STEP_3C_CREATE_CARTMANDATE_STRUCTURE
ขั้นตอนที่ 3C: สร้างโครงสร้าง CartMandate
ตอนนี้เรามาสร้างโครงสร้าง PaymentRequest ที่เป็นไปตามข้อกำหนดของ W3C และห่อหุ้มไว้ใน CartMandate ของ AP2 โดยใช้โมเดล Pydantic กัน
👉 ค้นหา:
# MODULE_5_STEP_3C_CREATE_CARTMANDATE_STRUCTURE
👉 แทนที่บรรทัดเดียวด้วย
    # 5. Build the nested Pydantic models for the CartMandate
    timestamp = datetime.now(timezone.utc)
    cart_id = f"cart_{hashlib.sha256(f'{charity_name}{timestamp.isoformat()}'.encode()).hexdigest()[:12]}"
    cart_expiry = timestamp + timedelta(minutes=15)

    payment_request_model = PaymentRequest(
        method_data=[PaymentMethodData(
            supported_methods="CARD",
            data={"supported_networks": ["visa", "mastercard", "amex"], "supported_types": ["debit", "credit"]}
        )],
        details=PaymentDetailsInit(
            id=f"order_{cart_id}",
            display_items=[PaymentItem(
                label=f"Donation to {charity_name}",
                amount=PaymentCurrencyAmount(currency="USD", value=amount)  # Pydantic v2 handles float -> str conversion
            )],
            total=PaymentItem(
                label="Total Donation",
                amount=PaymentCurrencyAmount(currency="USD", value=amount)
            )
        ),
        options=PaymentOptions(request_shipping=False)
    )

    cart_contents_model = CartContents(
        id=cart_id,
        cart_expiry=cart_expiry.isoformat(),
        merchant_name=charity_name,
        user_cart_confirmation_required=False,
        payment_request=payment_request_model
    )

    # MODULE_5_STEP_3D_ADD_SIGNATURE_AND_SAVE
ขั้นตอนที่ 3D: เพิ่มลายเซ็นและบันทึกลงในสถานะ
สุดท้ายนี้ มาลงนามใน CartMandate โดยใช้โมเดล Pydantic ของเราและบันทึกลงในสถานะสำหรับตัวแทนรายถัดไป
👉 ค้นหา:
# MODULE_5_STEP_3D_ADD_SIGNATURE_AND_SAVE
👉 แทนที่บรรทัดเดียวด้วย
# 6. Generate signature from the validated Pydantic model
signature = _generate_merchant_signature(cart_contents_model)
# 7. Create the final CartMandate model, now including the signature
cart_mandate_model = CartMandate(
    contents=cart_contents_model,
    merchant_authorization=signature
)
# 8. Convert the final model to a dictionary for state storage and add the custom timestamp
cart_mandate_dict = cart_mandate_model.model_dump(mode='json')
cart_mandate_dict["timestamp"] = timestamp.isoformat()
# 9. Write the final dictionary to state
tool_context.state["cart_mandate"] = cart_mandate_dict
logger.info(f"CartMandate created successfully: {cart_id}")
return {
"status": "success",
"message": f"Created signed CartMandate {cart_id} for ${amount:.2f} donation to {charity_name}",
"cart_id": cart_id,
"cart_expiry": cart_expiry.isoformat(),
"signature": signature
}
ขั้นตอนที่ 4: สร้างตัวแทนผู้ขาย - นำเข้าคอมโพเนนต์
ตอนนี้เรามาสร้าง Agent ที่จะใช้เครื่องมือนี้กัน
👉 เปิด
charity_advisor/merchant_agent/agent.py
คุณจะเห็นเทมเพลตที่มีเครื่องหมายตัวยึดตำแหน่ง มาเริ่มด้วยการนำเข้าสิ่งที่เราต้องการกัน
👉 ค้นหา:
# MODULE_5_STEP_4_IMPORT_COMPONENTS
👉 แทนที่บรรทัดเดียวด้วย
from google.adk.agents import Agent
from google.adk.tools import FunctionTool
from charity_advisor.tools.merchant_tools import create_cart_mandate
ขั้นตอนที่ 5: เขียนคำสั่งสำหรับตัวแทนผู้ขาย
ตอนนี้เรามาเขียนคำสั่งที่บอก Agent ว่าเมื่อใดและอย่างไรที่จะใช้เครื่องมือของตน
👉 ค้นหา:
# MODULE_5_STEP_5_WRITE_INSTRUCTION
instruction="""""",
👉 แทนที่ 2 บรรทัดนั้นด้วย
    instruction="""You are a merchant specialist responsible for creating formal, signed offers (CartMandates).

Your workflow:

1. Read the IntentMandate from shared state.
   The IntentMandate was created by the Shopping Agent and contains:
   - merchants: List of merchant names
   - amount: Donation amount
   - charity_ein: Tax ID
   - intent_expiry: When the intent expires

2. Use the create_cart_mandate tool to create a W3C PaymentRequest-compliant CartMandate.
   This tool will:
   - Validate the IntentMandate hasn't expired (CRITICAL security check)
   - Extract the charity name and amount from the IntentMandate
   - Create a structured offer with payment methods, transaction details, and merchant info
   - Generate a merchant signature to prove authenticity
   - Save the CartMandate to state for the payment processor

3. After creating the CartMandate, inform the user:
   - That you've created a formal, signed offer
   - The cart ID
   - When the cart expires (15 minutes)
   - That you're passing it to the secure payment processor

IMPORTANT BOUNDARIES:
- Your ONLY job is creating signed CartMandates from valid IntentMandates
- You do NOT process payments
- You do NOT see the user's payment methods or credentials
- You do NOT interact with payment networks
- You MUST validate that the IntentMandate hasn't expired before creating a cart
- After calling create_cart_mandate, your work is done

WHAT IS A CARTMANDATE:
A CartMandate is a binding commitment that says:
"I, the merchant, commit to accepting $X for this charity donation, and I prove it with my signature."

This commitment is structured using the W3C PaymentRequest standard and includes:
- Payment methods accepted (card, bank transfer)
- Transaction details (amount, charity name)
- Cart expiry (15 minutes from creation)
- Merchant signature (proof of commitment)

This is the second of three verifiable credentials in our secure payment system.""",
ขั้นตอนที่ 6: เพิ่มเครื่องมือลงในตัวแทนผู้ขาย
👉 ค้นหา:
# MODULE_5_STEP_6_ADD_TOOLS
tools=[],
👉 แทนที่ 2 บรรทัดนั้นด้วย
    tools=[
        FunctionTool(func=create_cart_mandate)
    ],
ขั้นตอนที่ 7: ยืนยันตัวแทนผู้ขายที่สมบูรณ์
มาตรวจสอบกันว่าได้ต่อสายทุกอย่างถูกต้อง
👉
charity_advisor/merchant_agent/agent.py
ควรมีลักษณะดังนี้
"""
Merchant Agent - Creates W3C-compliant CartMandates with merchant signatures.
This agent acts as our "Contract Creator."
"""

from google.adk.agents import Agent
from google.adk.tools import FunctionTool
from charity_advisor.tools.merchant_tools import create_cart_mandate


merchant_agent = Agent(
    name="MerchantAgent",
    model="gemini-2.5-flash",
    description="Creates formal, signed CartMandates for charity donations following W3C PaymentRequest standards.",
    tools=[
        FunctionTool(func=create_cart_mandate)
    ],
    instruction="""You are a merchant specialist responsible for creating formal, signed offers (CartMandates).

Your workflow:

1. Read the IntentMandate from shared state.
   The IntentMandate was created by the Shopping Agent and contains:
   - merchants: List of merchant names
   - amount: Donation amount
   - charity_ein: Tax ID
   - intent_expiry: When the intent expires

2. Use the create_cart_mandate tool to create a W3C PaymentRequest-compliant CartMandate.
   This tool will:
   - Validate the IntentMandate hasn't expired (CRITICAL security check)
   - Extract the charity name and amount from the IntentMandate
   - Create a structured offer with payment methods, transaction details, and merchant info
   - Generate a merchant signature to prove authenticity
   - Save the CartMandate to state for the payment processor

3. After creating the CartMandate, inform the user:
   - That you've created a formal, signed offer
   - The cart ID
   - When the cart expires (15 minutes)
   - That you're passing it to the secure payment processor

IMPORTANT BOUNDARIES:
- Your ONLY job is creating signed CartMandates from valid IntentMandates
- You do NOT process payments
- You do NOT see the user's payment methods or credentials
- You do NOT interact with payment networks
- You MUST validate that the IntentMandate hasn't expired before creating a cart
- After calling create_cart_mandate, your work is done

WHAT IS A CARTMANDATE:
A CartMandate is a binding commitment that says:
"I, the merchant, commit to accepting $X for this charity donation, and I prove it with my signature."

This commitment is structured using the W3C PaymentRequest standard and includes:
- Payment methods accepted (card, bank transfer)
- Transaction details (amount, charity name)
- Cart expiry (15 minutes from creation)
- Merchant signature (proof of commitment)

This is the second of three verifiable credentials in our secure payment system."""
)
✅ จุดตรวจสอบ: ตอนนี้คุณมี Merchant Agent ที่สมบูรณ์พร้อมการสร้าง CartMandate AP2 ที่เหมาะสมโดยใช้โมเดล Pydantic
ขั้นตอนที่ 8: ทดสอบตัวแทนผู้ขาย
ตอนนี้เรามาตรวจสอบว่าตัวแทนของเราสร้าง CartMandates พร้อมลายเซ็นและตรวจสอบการหมดอายุอย่างถูกต้อง
การตั้งค่าการทดสอบ: เรียกใช้สคริปต์ทดสอบ
👉 ในเทอร์มินัล Cloud Shell ให้เรียกใช้
python scripts/test_merchant.py
ผลลัพธ์ที่คาดไว้:
======================================================================
MERCHANT AGENT TEST
======================================================================

Simulated IntentMandate from Shopping Agent:
  charity: Room to Read
  amount: $50.00
  expiry: 2024-11-07T16:32:16Z

----------------------------------------------------------------------
Merchant Agent Response:
----------------------------------------------------------------------
Perfect! I've received your IntentMandate and created a formal, signed offer (CartMandate) for your donation.

**CartMandate Details:**
- **Cart ID**: cart_3b4c5d6e7f8a
- **Donation Amount**: $50.00 to Room to Read
- **Payment Methods Accepted**: Credit/debit cards (Visa, Mastercard, Amex) or bank transfer
- **Cart Expires**: 2024-11-07T15:47:16Z (in 15 minutes)
- **Merchant Signature**: SIG_a3f7b2c8d9e1f4a2

This signed CartMandate proves my commitment to accept this donation amount. I'm now passing this to the secure payment processor to complete your transaction.

======================================================================
CARTMANDATE CREATED:
======================================================================
  ID: cart_3b4c5d6e7f8a
  Amount: 50.00
  Merchant: Room to Read
  Expires: 2024-11-07T15:47:16Z
  Signature: SIG_a3f7b2c8d9e1f4a2
======================================================================
การทดสอบที่ 2: ยืนยันการปฏิบัติตามข้อกำหนดของ W3C
มาตรวจสอบว่าโครงสร้าง CartMandate ของเราเป็นไปตามมาตรฐาน AP2 และ W3C PaymentRequest อย่างครบถ้วน
👉 เรียกใช้สคริปต์การตรวจสอบ:
python scripts/validate_cartmandate.py
ผลลัพธ์ที่คาดไว้:
======================================================================
AP2 & W3C PAYMENTREQUEST VALIDATION
======================================================================
✅ CartMandate is AP2 and W3C PaymentRequest compliant

Structure validation passed:
  ✓ AP2 'contents' wrapper present
  ✓ AP2 'merchant_authorization' signature present
  ✓ cart_expiry present
  ✓ payment_request nested inside contents
  ✓ method_data present and valid
  ✓ details.total.amount present with currency and value
  ✓ All required W3C PaymentRequest fields present
======================================================================
สิ่งที่คุณเพิ่งสร้าง
คุณได้ติดตั้งใช้งาน CartMandate ของ AP2 โดยใช้โมเดล Pydantic เพื่อให้มีโครงสร้างที่เหมาะสม การตรวจสอบความถูกต้องของวันหมดอายุ และลายเซ็นของผู้ขายเรียบร้อยแล้ว
แนวคิดหลักที่เชี่ยวชาญ
✅ CartMandate (ข้อมูลเข้าสู่ระบบ AP2 #2):
- สร้างโดยใช้โมเดล Pydantic ของ AP2 อย่างเป็นทางการ
- โครงสร้าง AP2 ที่มี Wrapper เนื้อหา
- PaymentRequest ของ W3C ที่ซ้อนอยู่ภายใน
- รถเข็นหมดอายุ (สั้นกว่าความตั้งใจ)
- ลายเซ็นของผู้ขายสำหรับข้อผูกมัดที่มีผลผูกพัน
- การตรวจสอบโมเดลช่วยให้มั่นใจได้ว่าโมเดลเป็นไปตามข้อกำหนด
✅ การตรวจสอบวันหมดอายุ:
- อ่าน IntentMandate จากรัฐ
- การตรวจสอบโครงสร้างด้วย
IntentMandate.model_validate() - การแยกวิเคราะห์การประทับเวลา ISO 8601
- เปรียบเทียบกับเวลาปัจจุบัน
- ฟีเจอร์ความปลอดภัยที่ป้องกันการประมวลผลที่ล้าสมัย
✅ ลายเซ็นของผู้ขาย:
- พิสูจน์ความจริงใจและความมุ่งมั่น
- สร้างจากโมเดล Pydantic ที่ผ่านการตรวจสอบแล้ว
- ใช้
model_dump(mode='json')สำหรับการแสดง Canonical - จำลองด้วย SHA-256 เพื่อการศึกษา
- การใช้งานจริงใช้ PKI/JWT
- ลงนามในโมเดลเนื้อหา ไม่ใช่พจนานุกรม
✅ PaymentRequest ของ W3C:
- สร้างขึ้นโดยใช้โมเดล Pydantic ของ PaymentRequest ของ AP2
- มาตรฐานอุตสาหกรรมสำหรับข้อมูลการชำระเงิน
- ซ้อนอยู่ภายในโครงสร้าง AP2
- มี method_data, details, options
- เปิดใช้ความสามารถในการทำงานร่วมกัน
✅ ห่วงโซ่ข้อมูลเข้าสู่ระบบที่มีโมเดล:
- Shopping → IntentMandate (ได้รับการตรวจสอบแล้ว)
- ผู้ขายอ่าน IntentMandate → CartMandate (ทั้ง 2 โมเดลได้รับการตรวจสอบแล้ว)
- ผู้ให้บริการข้อมูลเข้าสู่ระบบจะอ่าน CartMandate → PaymentMandate
- แต่ละขั้นตอนจะตรวจสอบข้อมูลเข้าสู่ระบบก่อนหน้าโดยใช้ Pydantic
✅ การพัฒนาที่ขับเคลื่อนด้วยโมเดล:
- การตรวจสอบข้อมูลที่ป้อนผ่าน
model_validate() - การสร้างที่ปลอดภัยในการกำหนดประเภท
- การแปลงเป็นอนุกรมอัตโนมัติผ่าน
model_dump() - รูปแบบที่พร้อมใช้งานจริง
ขั้นตอนถัดไป
ในโมดูลถัดไป เราจะสร้างผู้ให้บริการข้อมูลเข้าสู่ระบบเพื่อประมวลผลการชำระเงินอย่างปลอดภัย
Merchant Agent ได้สร้างข้อเสนอที่มีผลผูกพันซึ่งมีวันหมดอายุโดยใช้โมเดล AP2 ตอนนี้เราต้องการตัวแทนเพื่ออ่าน CartMandate นั้น รับความยินยอมของผู้ใช้ และดำเนินการชำระเงิน
มาสร้างผู้ให้บริการข้อมูลเข้าสู่ระบบและเชื่อมโยงเชนข้อมูลเข้าสู่ระบบ AP2 ให้เสร็จสมบูรณ์กัน
6. การสร้างผู้ให้บริการข้อมูลเข้าสู่ระบบ - การดำเนินการชำระเงินที่ปลอดภัย

ตั้งแต่ข้อเสนอที่มีผลผูกพันไปจนถึงการดำเนินการชำระเงิน
ในโมดูลที่ 5 คุณได้สร้าง Merchant Agent ซึ่งเป็นผู้เชี่ยวชาญที่อ่าน IntentMandates ตรวจสอบว่ายังไม่หมดอายุ และสร้าง CartMandates ที่มีผลผูกพันพร้อมลายเซ็นของผู้ขาย ตอนนี้เราต้องมีตัวแทนเพื่อรับ CartMandate และดำเนินการชำระเงินจริง
นี่คือจุดที่หลักการที่ 3 และหลักการสุดท้ายของ AP2 เข้ามามีบทบาท นั่นคือการดำเนินการชำระเงินที่ปลอดภัยผ่าน PaymentMandate
หลักการ AP2: คำสั่งชำระเงินและการดำเนินการชำระเงิน
เหตุผลที่เราต้องมีบทบาทผู้ให้บริการข้อมูลเข้าสู่ระบบ
ในโมดูลที่ 5 เอเจนต์ผู้ขายได้สร้าง CartMandate และบันทึกลงในสถานะต่อไปนี้
state["cart_mandate"] = {
    "contents": {
        "id": "cart_abc123",
        "cart_expiry": "2025-11-07:15:47:16Z",
        "payment_request": {
            "details": {
                "total": {
                    "amount": {"currency": "USD", "value": "50.00"}
                }
            }
        }
    },
    "merchant_authorization": "SIG_a3f7b2c8"
}
แต่ข้อเสนอนี้เป็นเพียงข้อเสนอที่มีผลผูกพัน เราต้องมีข้อมูลต่อไปนี้ก่อนจึงจะดำเนินการชำระเงินได้
- การตรวจสอบว่ารถเข็นยังไม่หมดอายุ
- ความยินยอมของผู้ใช้ในการดำเนินการชำระเงิน
- ข้อมูลเข้าสู่ระบบที่ให้สิทธิ์การดำเนินการชำระเงิน
- การประมวลผลการชำระเงินจริง (หรือการจำลองสำหรับเวิร์กช็อป)
นี่คือหน้าที่ของผู้ให้บริการข้อมูลเข้าสู่ระบบ
PaymentMandate คืออะไร
PaymentMandate เป็นคำที่ AP2 ใช้เรียกการให้สิทธิ์ขั้นสุดท้ายที่อนุญาตให้ดำเนินการชำระเงินได้ ซึ่งเป็นข้อมูลเข้าสู่ระบบที่ตรวจสอบได้รายการที่ 3 และรายการสุดท้ายในห่วงโซ่ AP2
ให้คิดว่าข้อมูลเข้าสู่ระบบทั้ง 3 รายการนี้เหมือนกระบวนการลงนามในสัญญา
- IntentMandate: "ฉันสนใจซื้อสิ่งนี้" (หนังสือแสดงเจตจำนง)
- CartMandate: "ฉันซึ่งเป็นผู้ขายเสนอขายในราคานี้" (ใบเสนอราคาเป็นลายลักษณ์อักษร)
- PaymentMandate: "ฉันอนุญาตให้คุณเรียกเก็บเงินจากวิธีการชำระเงินของฉัน" (สัญญาที่ลงนามแล้ว)
ระบบจะดำเนินการชำระเงินได้ก็ต่อเมื่อมีข้อมูลเข้าสู่ระบบทั้ง 3 รายการ

โครงสร้างของคำสั่งชำระเงิน
PaymentMandate ใน AP2 มีโครงสร้างที่เฉพาะเจาะจงดังนี้
payment_mandate = {
    "payment_mandate_contents": {  # ← AP2 wrapper
        "payment_mandate_id": "payment_xyz123",
        "payment_details_id": "cart_abc123",  # Links to CartMandate
        "user_consent": True,
        "consent_timestamp": "2025-11-07T15:48:00Z",
        "amount": {
            "currency": "USD",
            "value": "50.00"
        },
        "merchant_name": "Room to Read"
    },
    "agent_present": True,  # Human-in-the-loop flow
    "timestamp": "2025-11-07T15:48:00Z"
}
องค์ประกอบสำคัญ
1. payment_mandate_contents - Wrapper การให้สิทธิ์ที่มีข้อมูลต่อไปนี้
- payment_mandate_id: ตัวระบุที่ไม่ซ้ำกัน
- payment_details_id: ลิงก์กลับไปยัง CartMandate
- user_consent: ผู้ใช้ได้รับอนุมัติหรือไม่
- amount: จำนวนเงินที่ชำระ (ดึงข้อมูลจาก CartMandate)
2. agent_present - Whether this is a human-in-the-loop flow
3. timestamp - เวลาที่สร้างการให้สิทธิ์
ภารกิจของเรา: สร้างผู้ให้บริการเอกสารรับรอง
ผู้ให้บริการข้อมูลเข้าสู่ระบบจะดำเนินการต่อไปนี้
- อ่าน CartMandate จากรัฐ (สิ่งที่ตัวแทนผู้ขายเขียน)
- ตรวจสอบว่ารถเข็นยังไม่หมดอายุโดยใช้โมเดล Pydantic ของ AP2
- ดึงรายละเอียดการชำระเงินจากโครงสร้างที่ซ้อนกัน
- สร้าง PaymentMandate โดยได้รับความยินยอมจากผู้ใช้โดยใช้โมเดล AP2
- จำลองการประมวลผลการชำระเงิน (ในเวอร์ชันที่ใช้งานจริง ระบบจะเรียกใช้ API การชำระเงินจริง)
- เขียน PaymentMandate และผลการชำระเงินไปยังสถานะ
มาสร้างกันทีละขั้นตอน
ขั้นตอนที่ 1: เพิ่มเครื่องมือช่วยตรวจสอบการหมดอายุของรถเข็น
ก่อนอื่น มาสร้างฟังก์ชันช่วยที่ตรวจสอบว่า CartMandate ยังไม่หมดอายุกันก่อน เหมือนกับที่เราตรวจสอบการหมดอายุของ IntentMandate ในโมดูลที่ 5
👉 เปิด
charity_advisor/tools/payment_tools.py
มาเพิ่มการตรวจสอบวันหมดอายุกัน
👉 ค้นหา:
# MODULE_6_STEP_1_ADD_CART_EXPIRY_VALIDATION_HELPER
👉 แทนที่บรรทัดเดียวด้วย
def _validate_cart_expiry(cart: CartMandate) -> tuple[bool, str]:
    """
    Validates that the CartMandate hasn't expired.

    This is a critical security check - expired carts should not be processed.

    Args:
        cart: The Pydantic CartMandate model to validate.

    Returns:
        (is_valid, error_message): Tuple indicating if cart is still valid.
    """
    try:
        expiry_str = cart.contents.cart_expiry
        expiry_time = datetime.fromisoformat(expiry_str.replace('Z', '+00:00'))
        now = datetime.now(timezone.utc)

        if expiry_time < now:
            return False, f"CartMandate expired at {expiry_str}"

        time_remaining = expiry_time - now
        logger.info(f"CartMandate valid. Expires in {time_remaining.total_seconds():.0f} seconds")

        return True, ""

    except (ValueError, TypeError, AttributeError) as e:
        return False, f"Invalid cart_expiry format or structure: {e}"
ขั้นตอนที่ 2: เพิ่ม PaymentMandate Creation Helper
ตอนนี้มาสร้างฟังก์ชันช่วยที่จะสร้างโครงสร้าง PaymentMandate โดยใช้โมเดล Pydantic อย่างเป็นทางการของ AP2 กัน
👉 ค้นหา:
# MODULE_6_STEP_2_ADD_PAYMENT_MANDATE_CREATION_HELPER
👉 แทนที่บรรทัดเดียวด้วย
def _create_payment_mandate(cart: CartMandate, consent_granted: bool) -> dict:
    """
    Creates a PaymentMandate using the official AP2 Pydantic models.

    It links to the CartMandate and includes user consent status.

    Args:
        cart: The validated Pydantic CartMandate model being processed.
        consent_granted: Whether the user has consented to the payment.

    Returns:
        A dictionary representation of the final, validated PaymentMandate.
    """
    timestamp = datetime.now(timezone.utc)

    # Safely extract details from the validated CartMandate model
    cart_id = cart.contents.id
    merchant_name = cart.contents.merchant_name
    total_item = cart.contents.payment_request.details.total

    # Create the nested PaymentResponse model for the mandate
    payment_response_model = PaymentResponse(
        request_id=cart_id,
        method_name="CARD",  # As per the simulated flow
        details={"token": "simulated_payment_token_12345"}
    )

    # Create the PaymentMandateContents model
    payment_mandate_contents_model = PaymentMandateContents(
        payment_mandate_id=f"payment_{hashlib.sha256(f'{cart_id}{timestamp.isoformat()}'.encode()).hexdigest()[:12]}",
        payment_details_id=cart_id,
        payment_details_total=total_item,
        payment_response=payment_response_model,
        merchant_agent=merchant_name,
        timestamp=timestamp.isoformat()
    )

    # Create the top-level PaymentMandate model
    # In a real system, a user signature would be added to this model
    payment_mandate_model = PaymentMandate(
        payment_mandate_contents=payment_mandate_contents_model
    )

    # Convert the final Pydantic model to a dictionary for state storage
    final_dict = payment_mandate_model.model_dump(mode='json')

    # Add any custom/non-standard fields required by the codelab's logic to the dictionary
    # The spec does not have these fields, but your original code did. We add them
    # back to ensure compatibility with later steps.
    final_dict['payment_mandate_contents']['user_consent'] = consent_granted
    final_dict['payment_mandate_contents']['consent_timestamp'] = timestamp.isoformat() if consent_granted else None
    final_dict['agent_present'] = True

    return final_dict
ขั้นตอนที่ 3A: สร้างลายเซ็นเครื่องมือและตั้งค่า
ตอนนี้มาเริ่มสร้างเครื่องมือหลักทีละขั้นกัน ก่อนอื่นคือลายเซ็นของฟังก์ชันและการตั้งค่าเริ่มต้น
👉 ค้นหา:
# MODULE_6_STEP_3A_CREATE_TOOL_SIGNATURE
👉 แทนที่บรรทัดเดียวด้วย
async def create_payment_mandate(tool_context: Any) -> Dict[str, Any]:
    """
    Creates a PaymentMandate and simulates payment processing using Pydantic models.

    This tool now reads the CartMandate from state, parses it into a validated model,
    and creates a spec-compliant PaymentMandate.
    """
    logger.info("Tool called: Creating PaymentMandate and processing payment")

    # MODULE_6_STEP_3B_VALIDATE_CARTMANDATE
ขั้นตอนที่ 3ข: ตรวจสอบความถูกต้องของ CartMandate
ตอนนี้เรามาเพิ่มตรรกะเพื่ออ่าน ตรวจสอบ CartMandate โดยใช้โมเดล AP2 Pydantic และตรวจสอบการหมดอายุกัน
👉 ค้นหา:
# MODULE_6_STEP_3B_VALIDATE_CARTMANDATE
👉 แทนที่บรรทัดเดียวด้วย
    # 1. Read CartMandate dictionary from state
    cart_mandate_dict = tool_context.state.get("cart_mandate")
    if not cart_mandate_dict:
        logger.error("No CartMandate found in state")
        return { "status": "error", "message": "No CartMandate found. Merchant Agent must create cart first." }

    # 2. Parse dictionary into a validated Pydantic model
    try:
        cart_model = CartMandate.model_validate(cart_mandate_dict)
    except Exception as e:
        logger.error(f"Could not validate CartMandate structure: {e}")
        return {"status": "error", "message": f"Invalid CartMandate structure: {e}"}

    # 3. Validate that the cart hasn't expired using the Pydantic model
    is_valid, error_message = _validate_cart_expiry(cart_model)
    if not is_valid:
        logger.error(f"CartMandate validation failed: {error_message}")
        return {"status": "error", "message": error_message}

    # MODULE_6_STEP_3C_EXTRACT_PAYMENT_DETAILS
ขั้นตอนที่ 3C: แยกรายละเอียดการชำระเงินจากโครงสร้างที่ซ้อนกัน
ตอนนี้เรามาดูโมเดล CartMandate ที่ได้รับการตรวจสอบเพื่อดึงรายละเอียดการชำระเงินที่เราต้องการกัน
👉 ค้นหา:
# MODULE_6_STEP_3C_EXTRACT_PAYMENT_DETAILS
👉 แทนที่บรรทัดเดียวด้วย
    # 4. Safely extract data from the validated model
    cart_id = cart_model.contents.id
    merchant_name = cart_model.contents.merchant_name
    amount_value = cart_model.contents.payment_request.details.total.amount.value
    currency = cart_model.contents.payment_request.details.total.amount.currency
    consent_granted = True  # Assume consent for this codelab flow

    # MODULE_6_STEP_3D_CREATE_PAYMENTMANDATE_AND_SIMULATE
ขั้นตอนที่ 3D: สร้าง PaymentMandate และจำลองการชำระเงิน
สุดท้าย มาสร้าง PaymentMandate โดยใช้โปรแกรมช่วยที่อิงตาม Pydantic, จำลองการประมวลผลการชำระเงิน และบันทึกทุกอย่างลงในสถานะ
👉 ค้นหา:
# MODULE_6_STEP_3D_CREATE_PAYMENTMANDATE_AND_SIMULATE
👉 แทนที่บรรทัดเดียวด้วย
    # 5. Create the spec-compliant PaymentMandate using the validated CartMandate model
    payment_mandate_dict = _create_payment_mandate(cart_model, consent_granted)

    # 6. Simulate payment processing
    transaction_id = f"txn_{hashlib.sha256(f'{cart_id}{datetime.now(timezone.utc).isoformat()}'.encode()).hexdigest()[:16]}"
    payment_result = {
        "transaction_id": transaction_id,
        "status": "completed",
        "amount": amount_value,
        "currency": currency,
        "merchant": merchant_name,
        "timestamp": datetime.now(timezone.utc).isoformat(),
        "simulation": True
    }

    # 7. Write the compliant PaymentMandate dictionary and result to state
    tool_context.state["payment_mandate"] = payment_mandate_dict
    tool_context.state["payment_result"] = payment_result

    logger.info(f"Payment processed successfully: {transaction_id}")

    return {
        "status": "success",
        "message": f"Payment of {currency} {amount_value:.2f} to {merchant_name} processed successfully",
        "transaction_id": transaction_id,
        "payment_mandate_id": payment_mandate_dict["payment_mandate_contents"]["payment_mandate_id"]
    }
ขั้นตอนที่ 4: สร้าง Agent ผู้ให้บริการข้อมูลเข้าสู่ระบบ - นำเข้าคอมโพเนนต์
ตอนนี้เรามาสร้างเอเจนต์ที่ใช้เครื่องมือนี้กัน
👉 เปิด
charity_advisor/credentials_provider/agent.py
คุณจะเห็นเทมเพลตที่มีเครื่องหมายตัวยึดตำแหน่ง มาเริ่มด้วยการนำเข้าสิ่งที่เราต้องการกัน
👉 ค้นหา:
# MODULE_6_STEP_4_IMPORT_COMPONENTS
👉 แทนที่บรรทัดเดียวด้วย
from google.adk.agents import Agent
from google.adk.tools import FunctionTool
from charity_advisor.tools.payment_tools import create_payment_mandate
ขั้นตอนที่ 5: เขียนวิธีการสำหรับผู้ให้บริการข้อมูลเข้าสู่ระบบ
ตอนนี้มาเขียนคำสั่งที่แนะนำเอเจนต์กัน
👉 ค้นหา:
# MODULE_6_STEP_5_WRITE_INSTRUCTION
instruction="""""",
👉 แทนที่ 2 บรรทัดนั้นด้วย
    instruction="""You are a payment specialist responsible for securely processing payments with user consent.

Your workflow:

1. Read the CartMandate from shared state.
   The CartMandate was created by the Merchant Agent and has this structure:
   - contents: AP2 wrapper containing:
     - id: Cart identifier
     - cart_expiry: When the cart expires
     - merchant_name: Who is receiving payment
     - payment_request: W3C PaymentRequest with transaction details
   - merchant_authorization: Merchant's signature

2. Extract payment details from the nested structure:
   - Navigate: cart_mandate["contents"]["payment_request"]["details"]["total"]["amount"]
   - This gives you the currency and value

3. **IMPORTANT - Two-Turn Conversational Confirmation Pattern:**
   Before calling create_payment_mandate, you MUST:
   - Present the payment details clearly to the user
   - Ask explicitly: "I'm ready to process a payment of $X to [Charity Name]. Do you want to proceed with this donation?"
   - WAIT for the user's explicit confirmation (e.g., "yes", "proceed", "confirm")
   - ONLY call create_payment_mandate AFTER receiving explicit confirmation
   - If user says "no" or "cancel", DO NOT call the tool

4. After user confirms, use the create_payment_mandate tool to:
   - Validate the CartMandate hasn't expired (CRITICAL security check)
   - Create a PaymentMandate (the third AP2 credential)
   - Simulate payment processing
   - Record the transaction result

5. After processing, inform the user:
   - That payment was processed successfully (this is a simulation)
   - The transaction ID
   - The amount and merchant
   - That this completes the three-agent AP2 credential chain

IMPORTANT BOUNDARIES:
- Your ONLY job is creating PaymentMandates and processing payments
- You do NOT discover charities (that's Shopping Agent's job)
- You do NOT create offers (that's Merchant Agent's job)
- You MUST validate that the CartMandate hasn't expired before processing
- You MUST get explicit user confirmation before calling create_payment_mandate
- In production, this consent mechanism would be even more robust

WHAT IS A PAYMENTMANDATE:
A PaymentMandate is the final credential that authorizes payment execution. It:
- Links to the CartMandate (proving the merchant's offer)
- Records user consent
- Contains payment details extracted from the CartMandate
- Enables the actual payment transaction

This is the third and final verifiable credential in our secure payment system.

THE COMPLETE AP2 CREDENTIAL CHAIN:
1. Shopping Agent creates IntentMandate (user's intent)
2. Merchant Agent reads IntentMandate, creates CartMandate (merchant's binding offer)
3. You read CartMandate, get user confirmation, create PaymentMandate (authorized payment execution)

Each credential:
- Has an expiry time (security feature)
- Links to the previous credential
- Is validated before the next step
- Creates an auditable chain of trust""",
ขั้นตอนที่ 6: เพิ่มเครื่องมือลงในผู้ให้บริการข้อมูลเข้าสู่ระบบ
👉 ค้นหา:
# MODULE_6_STEP_6_ADD_TOOLS
tools=[],
👉 แทนที่ 2 บรรทัดนั้นด้วย
    tools=[
        FunctionTool(func=create_payment_mandate)
    ],
ขั้นตอนที่ 7: ยืนยันผู้ให้บริการข้อมูลเข้าสู่ระบบที่สมบูรณ์
มาตรวจสอบกันว่าได้ต่อสายทุกอย่างถูกต้อง
👉
charity_advisor/credentials_provider/agent.py
ควรมีลักษณะดังนี้
"""
Credentials Provider Agent - Handles payment processing with user consent.
This agent acts as our "Payment Processor."
"""

from google.adk.agents import Agent
from google.adk.tools import FunctionTool
from charity_advisor.tools.payment_tools import create_payment_mandate


credentials_provider = Agent(
    name="CredentialsProvider",
    model="gemini-2.5-flash",
    description="Securely processes payments by creating PaymentMandates and executing transactions with user consent.",
    tools=[
        FunctionTool(func=create_payment_mandate)
    ],
    instruction="""You are a payment specialist responsible for securely processing payments with user consent.

Your workflow:

1. Read the CartMandate from shared state.
   The CartMandate was created by the Merchant Agent and has this structure:
   - contents: AP2 wrapper containing:
     - id: Cart identifier
     - cart_expiry: When the cart expires
     - merchant_name: Who is receiving payment
     - payment_request: W3C PaymentRequest with transaction details
   - merchant_authorization: Merchant's signature

2. Extract payment details from the nested structure:
   - Navigate: cart_mandate["contents"]["payment_request"]["details"]["total"]["amount"]
   - This gives you the currency and value

3. **IMPORTANT - Two-Turn Conversational Confirmation Pattern:**
   Before calling create_payment_mandate, you MUST:
   - Present the payment details clearly to the user
   - Ask explicitly: "I'm ready to process a payment of $X to [Charity Name]. Do you want to proceed with this donation?"
   - WAIT for the user's explicit confirmation (e.g., "yes", "proceed", "confirm")
   - ONLY call create_payment_mandate AFTER receiving explicit confirmation
   - If user says "no" or "cancel", DO NOT call the tool

4. After user confirms, use the create_payment_mandate tool to:
   - Validate the CartMandate hasn't expired (CRITICAL security check)
   - Create a PaymentMandate (the third AP2 credential)
   - Simulate payment processing
   - Record the transaction result

5. After processing, inform the user:
   - That payment was processed successfully (this is a simulation)
   - The transaction ID
   - The amount and merchant
   - That this completes the three-agent AP2 credential chain

IMPORTANT BOUNDARIES:
- Your ONLY job is creating PaymentMandates and processing payments
- You do NOT discover charities (that's Shopping Agent's job)
- You do NOT create offers (that's Merchant Agent's job)
- You MUST validate that the CartMandate hasn't expired before processing
- You MUST get explicit user confirmation before calling create_payment_mandate
- In production, this consent mechanism would be even more robust

WHAT IS A PAYMENTMANDATE:
A PaymentMandate is the final credential that authorizes payment execution. It:
- Links to the CartMandate (proving the merchant's offer)
- Records user consent
- Contains payment details extracted from the CartMandate
- Enables the actual payment transaction

This is the third and final verifiable credential in our secure payment system.

THE COMPLETE AP2 CREDENTIAL CHAIN:
1. Shopping Agent creates IntentMandate (user's intent)
2. Merchant Agent reads IntentMandate, creates CartMandate (merchant's binding offer)
3. You read CartMandate, get user confirmation, create PaymentMandate (authorized payment execution)

Each credential:
- Has an expiry time (security feature)
- Links to the previous credential
- Is validated before the next step
- Creates an auditable chain of trust"""
)
✅ จุดตรวจสอบ: ตอนนี้คุณมีผู้ให้บริการข้อมูลเข้าสู่ระบบที่สมบูรณ์พร้อมการอ่าน CartMandate และการสร้าง PaymentMandate ที่เหมาะสมโดยใช้โมเดล AP2 Pydantic
ขั้นตอนที่ 8: ทดสอบผู้ให้บริการข้อมูลเข้าสู่ระบบ
ตอนนี้เรามาตรวจสอบว่าเอเจนต์ประมวลผลการชำระเงินอย่างถูกต้องและสร้างห่วงโซ่ข้อมูลเข้าสู่ระบบเสร็จสมบูรณ์
👉 ในเทอร์มินัล Cloud Shell ให้เรียกใช้
python scripts/test_credentials_provider.py
ผลลัพธ์ที่คาดไว้:
======================================================================
CREDENTIALS PROVIDER TEST (MOCK - NO CONFIRMATION)
======================================================================

Simulated CartMandate from Merchant Agent:
  - Cart ID: cart_test123
  - Merchant: Room to Read
  - Amount: $50.00
  - Expires: 2025-11-07T15:47:16Z
  - Signature: SIG_test_signature

Calling Credentials Provider to process payment...
======================================================================
INFO:charity_advisor.tools.payment_tools:Tool called: Creating PaymentMandate and processing payment
INFO:charity_advisor.tools.payment_tools:CartMandate valid. Expires in 900 seconds
INFO:charity_advisor.tools.payment_tools:Payment processed successfully: txn_a3f7b2c8d9e1f4a2

======================================================================
CREDENTIALS PROVIDER RESPONSE:
======================================================================
I've successfully processed your payment. Here are the details:

**Payment Completed** (Simulated)
- Transaction ID: txn_a3f7b2c8d9e1f4a2
- Amount: USD 50.00
- Merchant: Room to Read
- Status: Completed

This completes the three-agent AP2 credential chain:
1. ✓ Shopping Agent created IntentMandate (your intent)
2. ✓ Merchant Agent created CartMandate (binding offer)
3. ✓ Credentials Provider created PaymentMandate (payment authorization)

Your donation has been processed securely through our verifiable credential system.

======================================================================
PAYMENTMANDATE CREATED:
======================================================================
  Payment Mandate ID: payment_3b4c5d6e7f8a
  Linked to Cart: cart_test123
  User Consent: True
  Amount: USD 50.00
  Merchant: Room to Read
  Agent Present: True
======================================================================

======================================================================
PAYMENT RESULT:
======================================================================
  Transaction ID: txn_a3f7b2c8d9e1f4a2
  Status: completed
  Amount: USD 50.00
  Merchant: Room to Read
  Simulation: True
======================================================================
ขั้นตอนที่ 9: ทดสอบไปป์ไลน์แบบ 3 เอเจนต์ที่สมบูรณ์
ตอนนี้มาทดสอบเอเจนต์ทั้ง 3 ตัวที่ทำงานร่วมกันกัน
👉 เรียกใช้การทดสอบไปป์ไลน์แบบเต็ม:
python scripts/test_full_pipeline.py
ผลลัพธ์ที่คาดไว้:
======================================================================
THREE-AGENT PIPELINE TEST (AP2 CREDENTIAL CHAIN)
======================================================================

[1/3] SHOPPING AGENT - Finding charity and creating IntentMandate...
----------------------------------------------------------------------
✓ IntentMandate created
  - Intent ID: intent_774799058_1730927536
  - Description: Donate $75.00 to Room to Read
  - Merchant: Room to Read
  - Amount: $75.0
  - Expires: 2025-11-07T16:32:16Z

[2/3] MERCHANT AGENT - Reading IntentMandate and creating CartMandate...
----------------------------------------------------------------------
✓ CartMandate created
  - ID: cart_3b4c5d6e7f8a
  - Expires: 2025-11-07T15:47:16Z
  - Signature: SIG_a3f7b2c8d9e1f4a2

[3/3] CREDENTIALS PROVIDER - Creating PaymentMandate and processing...
----------------------------------------------------------------------
NOTE: In the web UI, this would show a confirmation dialog
      For this test, consent is automatically granted
✓ Payment processed (SIMULATED)
  - Transaction ID: txn_a3f7b2c8d9e1f4a2
  - Amount: $75.0
  - Status: completed

======================================================================
COMPLETE AP2 CREDENTIAL CHAIN
======================================================================

✓ Credential 1: IntentMandate (User's Intent)
  - Intent ID: intent_774799058_1730927536
  - Description: Donate $75.00 to Room to Read
  - Expiry: 2025-11-07T16:32:16Z

✓ Credential 2: CartMandate (Merchant's Offer)
  - Cart ID: cart_3b4c5d6e7f8a
  - Cart Expiry: 2025-11-07T15:47:16Z
  - Merchant Signature: SIG_a3f7b2c8d9e1f4a2

✓ Credential 3: PaymentMandate (Payment Execution)
  - Payment Mandate ID: payment_3b4c5d6e7f8a
  - Linked to Cart: cart_3b4c5d6e7f8a
  - Agent Present: True

✓ Transaction Result:
  - Transaction ID: txn_a3f7b2c8d9e1f4a2
  - Simulation: True

======================================================================
✅ COMPLETE PIPELINE TEST PASSED
======================================================================
นี่คือการทำงานของกลุ่มข้อมูลการรับรอง AP2 ที่สมบูรณ์
ตัวแทนแต่ละราย
- อ่านข้อมูลเข้าสู่ระบบจากสถานะ
- ตรวจสอบโดยใช้โมเดล Pydantic (การตรวจสอบโครงสร้าง + วันหมดอายุ)
- สร้างข้อมูลเข้าสู่ระบบถัดไปโดยใช้โมเดล AP2
- เขียนไปยังสถานะสำหรับตัวแทนรายถัดไป
สิ่งที่คุณเพิ่งสร้าง
คุณได้ทำตามขั้นตอนการเชื่อมโยงข้อมูลเข้าสู่ระบบของตัวแทน 3 รายการใน AP2 เสร็จเรียบร้อยแล้ว พร้อมการตรวจสอบโครงสร้างที่เหมาะสมโดยใช้โมเดล Pydantic และการจำลองการชำระเงิน
แนวคิดหลักที่เชี่ยวชาญ
✅ PaymentMandate (AP2 Credential #3):
- สร้างโดยใช้โมเดล Pydantic ของ AP2 อย่างเป็นทางการ
- ข้อมูลเข้าสู่ระบบสุดท้ายที่ให้สิทธิ์การดำเนินการชำระเงิน
- ลิงก์ไปยัง CartMandate ผ่าน payment_details_id
- บันทึกความยินยอมของผู้ใช้และการประทับเวลา
- มีจำนวนเงินที่ชำระซึ่งดึงมาจาก CartMandate
- รวมถึงแฟล็ก agent_present สำหรับการทำงานร่วมกันระหว่างมนุษย์กับเครื่อง
- การตรวจสอบโมเดลช่วยให้มั่นใจได้ว่าโมเดลเป็นไปตามข้อกำหนด
✅ อ่านจาก CartMandate:
- ตรวจสอบโครงสร้างด้วย
CartMandate.model_validate() - การเข้าถึงแอตทริบิวต์ที่ปลอดภัยตามประเภท:
cart_model.contents.payment_request.details.total.amount - ทำความเข้าใจการแยก Wrapper AP2 กับมาตรฐาน W3C
- ดึงข้อมูล merchant_name, amount, currency จากโมเดลอย่างปลอดภัย
- Pydantic จะตรวจจับข้อผิดพลาดของโครงสร้างโดยอัตโนมัติ
✅ การตรวจสอบวันหมดอายุของรถเข็น:
- ยอมรับโมเดล
CartMandatePydantic ที่ผ่านการตรวจสอบแล้ว - อ่านจาก
cart.contents.cart_expiry(การเข้าถึงแอตทริบิวต์) - ฟีเจอร์ความปลอดภัยที่ป้องกันการประมวลผลรถเข็นที่ล้าสมัย
- ระยะเวลาสั้นกว่า (15 นาที) กว่าความตั้งใจ (1 ชั่วโมง)
✅ การจำลองการชำระเงิน:
- การจำลองการศึกษาของผู้ประมวลผลการชำระเงินจริง
- สร้างรหัสธุรกรรม
- บันทึก payment_result ในสถานะ
- ระบุอย่างชัดเจนว่าเป็นการจำลอง (Flag การจำลอง: จริง)
✅ เชื่อมต่อ AP2 Chain ให้เสร็จสมบูรณ์ด้วยโมเดล:
- เอเจนต์ 3 ราย ข้อมูลเข้าสู่ระบบ 3 รายการ การตรวจสอบ Pydantic 3 รายการ
- ตัวแทนแต่ละรายจะตรวจสอบโครงสร้างของข้อมูลเข้าสู่ระบบก่อนหน้าโดยใช้โมเดล
- ข้อมูลเข้าสู่ระบบแต่ละรายการจะลิงก์กับรายการก่อนหน้าเพื่อบันทึกการตรวจสอบ
- การส่งต่อตามสถานะจะช่วยรักษาการแยกบทบาท
- ความปลอดภัยในการกำหนดประเภทตลอดทั้งเชน
✅ การพัฒนาที่ขับเคลื่อนด้วยโมเดล:
- การตรวจสอบข้อมูลที่ป้อนผ่าน
model_validate() - การสร้างที่ปลอดภัยต่อประเภทด้วยโมเดลที่ซ้อนกัน
- การแปลงเป็นอนุกรมอัตโนมัติผ่าน
model_dump(mode='json') - รูปแบบที่พร้อมสำหรับการใช้งานจริงตั้งแต่เริ่มต้น
ขั้นตอนถัดไป
ในโมดูลถัดไป เราจะสร้างตัวแทน Orchestrator ที่ประสานงานตัวแทนผู้เชี่ยวชาญทั้ง 3 ราย
คุณได้สร้างเอเจนต์ผู้เชี่ยวชาญที่มีประสิทธิภาพ 3 รายโดยใช้โมเดล AP2 Pydantic ตอนนี้มาสร้างตัวนำที่ประสานงานให้เกิดประสบการณ์การบริจาคที่ราบรื่นกัน
มาสร้าง Orchestrator และดูระบบที่สมบูรณ์แบบในการทำงานกัน
7. การจัดการเป็นกลุ่ม - การรวมทุกอย่างเข้าด้วยกัน

จากผู้เชี่ยวชาญสู่ประสบการณ์ที่ราบรื่น
ในโมดูลก่อนหน้า คุณได้สร้างเอเจนต์เฉพาะทาง 3 รายการ ได้แก่
- Shopping Agent: ค้นหาองค์กรการกุศล สร้าง IntentMandate
- ตัวแทนผู้ขาย: สร้าง CartMandate จาก IntentMandate
- ผู้ให้บริการข้อมูลเข้าสู่ระบบ: สร้าง PaymentMandate ประมวลผลการชำระเงิน
โดยเอเจนต์เหล่านี้จะแบ่งออกเป็น 2 ระยะโดยธรรมชาติ ดังนี้
- ระยะที่ 1 (Shopping): การสนทนาหลายรอบเพื่อค้นหาและเลือกองค์กรการกุศล
- ระยะที่ 2 (การประมวลผล): การดำเนินการสร้างข้อเสนอและการชำระเงินแบบอะตอม
แต่ในตอนนี้ คุณจะต้องประสานงานแต่ละเฟสด้วยตนเอง
ซึ่งเป็นจุดที่รูปแบบการจัดการเป็นกลุ่มของ ADK โดดเด่น
หลักการ AP2: การประสานงานบังคับใช้ขอบเขตความน่าเชื่อถือ
เหตุใดการจัดระเบียบจึงสำคัญต่อความปลอดภัย
การจัดการเป็นกลุ่มไม่ได้มีไว้เพื่อความสะดวกเท่านั้น แต่ยังเป็นการบังคับใช้ขอบเขตความน่าเชื่อถือผ่านสถาปัตยกรรมด้วย
หากไม่มีการจัดการเป็นกลุ่ม
# User could accidentally skip steps or reorder them
shopping_agent.run("Find charity")
# Oops, forgot to create CartMandate!
credentials_provider.run("Process payment")  # No offer to validate!
เมื่อมีการจัดการเป็นกลุ่ม
# Pipeline enforces correct order
donation_processing_pipeline = SequentialAgent(
    sub_agents=[
        merchant_agent,      # Must run first
        credentials_provider # Must run second
    ]
)
# Steps ALWAYS run in order, no skipping allowed
ไปป์ไลน์แบบลำดับจะรับประกันสิ่งต่อไปนี้
- ✅ สร้าง IntentMandate ก่อน CartMandate
- ✅ สร้าง CartMandate ก่อนการประมวลผลการชำระเงิน
- ✅ เอเจนต์แต่ละตัวจะทำงานในบริบทที่แยกจากกัน
- ✅ สถานะจะไหลไปข้างหน้าผ่านเชนข้อมูลเข้าสู่ระบบ
ภารกิจของเรา: สร้างระบบที่สมบูรณ์
เราจะสร้างเลเยอร์ 2 เลเยอร์ ดังนี้
เลเยอร์ 1: ไปป์ไลน์การประมวลผล (SequentialAgent)
- Wires together Merchant → Credentials
- ทำงานโดยอัตโนมัติตามลำดับหลังจากเลือกองค์กรการกุศล
- การดำเนินการข้อเสนอและการชำระเงินแบบอะตอม
เลเยอร์ 2: ตัวจัดสรรรูท (Agent ที่หันหน้าไปทางผู้ใช้)
- บุคลิกที่เป็นมิตร
- ส่งต่อไปยัง shopping_agent เพื่อเลือกองค์กรการกุศล
- ส่งต่อให้ไปป์ไลน์การประมวลผลหลังจากสร้าง IntentMandate
- จัดการการสนทนาและการเปลี่ยนเฟส
แนวทางแบบ 2 เลเยอร์นี้สอดคล้องกับขั้นตอนตามธรรมชาติ ดังนี้
- ระยะการเลือกซื้อ: การสนทนาหลายรอบ (ผู้ใช้เรียกดู ถามคำถาม ตัดสินใจ)
- ระยะการประมวลผล: การดำเนินการแบบอะตอม (ข้อเสนอ → การชำระเงิน)
มาสร้างทั้ง 2 อย่างกัน
ขั้นตอนที่ 1: นำเข้าคอมโพเนนต์การจัดระเบียบ
ก่อนอื่น มาตั้งค่าไฟล์การจัดการเป็นกลุ่มด้วยการนำเข้าที่จำเป็นกัน
👉 เปิด
charity_advisor/agent.py
มาเริ่มกันที่การนำเข้า
👉 ค้นหา:
# MODULE_7_STEP_1_IMPORT_COMPONENTS
👉 แทนที่บรรทัดเดียวด้วย
from google.adk.agents import Agent, SequentialAgent
from charity_advisor.shopping_agent.agent import shopping_agent
from charity_advisor.merchant_agent.agent import merchant_agent
from charity_advisor.credentials_provider.agent import credentials_provider
ขั้นตอนที่ 2: สร้างไปป์ไลน์การประมวลผล
ตอนนี้เรามาสร้างไปป์ไลน์ที่เรียกใช้การสร้างข้อเสนอและการประมวลผลการชำระเงินแบบอะตอมมิกกัน
👉 ค้นหา:
# MODULE_7_STEP_2_CREATE_SEQUENTIAL_PIPELINE
👉 แทนที่ 2 บรรทัดนั้นด้วย
# Create the donation processing pipeline
# This runs Merchant → Credentials in sequence AFTER charity is selected
donation_processing_pipeline = SequentialAgent(
name="DonationProcessingPipeline",
description="Creates signed offer and processes payment after charity is selected",
sub_agents=[
merchant_agent,
credentials_provider
]
)
ขั้นตอนที่ 3A: สร้างการตั้งค่าตัวแทนรูท
ตอนนี้เรามาสร้างเอเจนต์ที่หันหน้าเข้าหาผู้ใช้ซึ่งจะประสานงานทั้ง 2 เฟสกัน เราจะสร้างส่วนนี้ใน 3 ส่วน ได้แก่ การตั้งค่า (3A) คำสั่ง (3B) และตัวแทนย่อย (3C)
👉 ค้นหา:
# MODULE_7_STEP_3A_CREATE_ROOT_AGENT_SETUP
👉 แทนที่บรรทัดเดียวด้วย
# Create the root orchestrator agent
# This is what users interact with directly
root_agent = Agent(
name="CharityAdvisor",
model="gemini-2.5-pro",
description="A friendly charity giving assistant that helps users donate to verified organizations.",
# MODULE_7_STEP_3B_WRITE_ROOT_AGENT_INSTRUCTION
ขั้นตอนที่ 3ข: เขียนคำสั่งสำหรับ Root Agent
ตอนนี้มาเพิ่มคำสั่งที่จะกำหนดพฤติกรรมของที่ปรึกษาด้านการกุศลในทั้ง 2 เฟสกัน
👉 ค้นหา:
# MODULE_7_STEP_3B_WRITE_ROOT_AGENT_INSTRUCTION
👉 แทนที่บรรทัดเดียวด้วย
instruction="""You are a helpful and friendly charity giving advisor.
Your workflow has TWO distinct phases:
PHASE 1: CHARITY SELECTION (delegate to shopping_agent)
When a user expresses interest in donating:
1. Delegate to shopping_agent immediately
2. The shopping_agent will:
- Search for charities matching their cause
- Present verified options with ratings
- Engage in conversation (user may ask questions, change their mind)
- Wait for user to select a specific charity and amount
- Create an IntentMandate when user decides
3. Wait for shopping_agent to complete
You'll know Phase 1 is complete when shopping_agent's response includes:
- "IntentMandate created" or "Intent ID: intent_xxx"
- Charity name and donation amount
PHASE 2: PAYMENT PROCESSING (delegate to DonationProcessingPipeline)
After shopping_agent completes:
1. Acknowledge the user's selection naturally:
"Perfect! Let me process your $X donation to [Charity]..."
2. Delegate to DonationProcessingPipeline
3. The pipeline will automatically:
- Create signed cart offer (MerchantAgent)
- Get consent and process payment (CredentialsProvider)
4. After pipeline completes, summarize the transaction
CRITICAL RULES:
- Phase 1 may take multiple conversation turns (this is normal)
- Only proceed to Phase 2 after IntentMandate exists
- Don't rush the user during charity selection
- Don't ask user to "proceed" between phases - transition automatically
EXAMPLE FLOW:
User: "I want to donate to education"
You: [delegate to shopping_agent]
Shopping: "Here are 3 education charities..." [waits]
User: "Tell me more about the first one"
Shopping: "Room to Read focuses on..." [waits]
User: "Great, I'll donate $50 to Room to Read"
Shopping: "IntentMandate created (ID: intent_123)..."
You: "Perfect! Processing your $50 donation to Room to Read..." [delegate to DonationProcessingPipeline]
Pipeline: [creates offer, gets consent, processes payment]
You: "Done! Your donation was processed successfully. Transaction ID: txn_456"
Your personality:
- Warm and encouraging
- Patient during charity selection
- Clear about educational nature
- Smooth transitions between phases""",
# MODULE_7_STEP_3C_ADD_ROOT_AGENT_SUBAGENTS
ขั้นตอนที่ 3C: เพิ่มตัวแทนย่อย
สุดท้าย ให้สิทธิ์เข้าถึงทั้งเอเจนต์ช็อปปิ้งและไปป์ไลน์การประมวลผลแก่ที่ปรึกษาด้านการกุศล แล้วปิดคำจำกัดความของเอเจนต์
👉 ค้นหา:
# MODULE_7_STEP_3C_ADD_ROOT_AGENT_SUBAGENTS
👉 แทนที่บรรทัดเดียวด้วย
sub_agents=[
shopping_agent,
donation_processing_pipeline
]
)
ขั้นตอนที่ 4: ยืนยันระบบที่สมบูรณ์
มาตรวจสอบกันว่าการจัดการเป็นกลุ่มได้รับการกำหนดค่าอย่างถูกต้อง
👉
charity_advisor/agent.py
ควรมีลักษณะดังนี้
"""
Main orchestration: The donation processing pipeline and root orchestrator agent.
"""
from google.adk.agents import Agent, SequentialAgent
from charity_advisor.shopping_agent.agent import shopping_agent
from charity_advisor.merchant_agent.agent import merchant_agent
from charity_advisor.credentials_provider.agent import credentials_provider
# Create the donation processing pipeline
# This runs Merchant → Credentials in sequence AFTER charity is selected
donation_processing_pipeline = SequentialAgent(
    name="DonationProcessingPipeline",
    description="Creates signed offer and processes payment after charity is selected",
    sub_agents=[
        merchant_agent,
        credentials_provider
    ]
)
# Create the root orchestrator agent
# This is what users interact with directly
root_agent = Agent(
name="CharityAdvisor",
model="gemini-2.5-flash",
description="A friendly charity giving assistant that helps users donate to verified organizations.",
instruction="""You are a helpful and friendly charity giving advisor.
Your workflow has TWO distinct phases:
PHASE 1: CHARITY SELECTION (delegate to shopping_agent)
When a user expresses interest in donating:
1. Delegate to shopping_agent immediately
2. The shopping_agent will:
- Search for charities matching their cause
- Present verified options with ratings
- Engage in conversation (user may ask questions, change their mind)
- Wait for user to select a specific charity and amount
- Create an IntentMandate when user decides
3. Wait for shopping_agent to complete
You'll know Phase 1 is complete when shopping_agent's response includes:
- "IntentMandate created" or "Intent ID: intent_xxx"
- Charity name and donation amount
PHASE 2: PAYMENT PROCESSING (delegate to DonationProcessingPipeline)
After shopping_agent completes:
1. Acknowledge the user's selection naturally:
"Perfect! Let me process your $X donation to [Charity]..."
2. Delegate to DonationProcessingPipeline
3. The pipeline will automatically:
- Create signed cart offer (MerchantAgent)
- Get consent and process payment (CredentialsProvider)
4. After pipeline completes, summarize the transaction
CRITICAL RULES:
- Phase 1 may take multiple conversation turns (this is normal)
- Only proceed to Phase 2 after IntentMandate exists
- Don't rush the user during charity selection
- Don't ask user to "proceed" between phases - transition automatically
EXAMPLE FLOW:
User: "I want to donate to education"
You: [delegate to shopping_agent]
Shopping: "Here are 3 education charities..." [waits]
User: "Tell me more about the first one"
Shopping: "Room to Read focuses on..." [waits]
User: "Great, I'll donate $50 to Room to Read"
Shopping: "IntentMandate created (ID: intent_123)..."
You: "Perfect! Processing your $50 donation to Room to Read..." [delegate to DonationProcessingPipeline]
Pipeline: [creates offer, gets consent, processes payment]
You: "Done! Your donation was processed successfully. Transaction ID: txn_456"
Your personality:
- Warm and encouraging
- Patient during charity selection
- Clear about educational nature
- Smooth transitions between phases""",
    sub_agents=[
        shopping_agent,
        donation_processing_pipeline
    ]
)
ขั้นตอนที่ 5: เพิ่มความปลอดภัยด้วยการเรียกกลับเพื่อตรวจสอบ (ไม่บังคับ ข้ามไปขั้นตอนที่ 7)
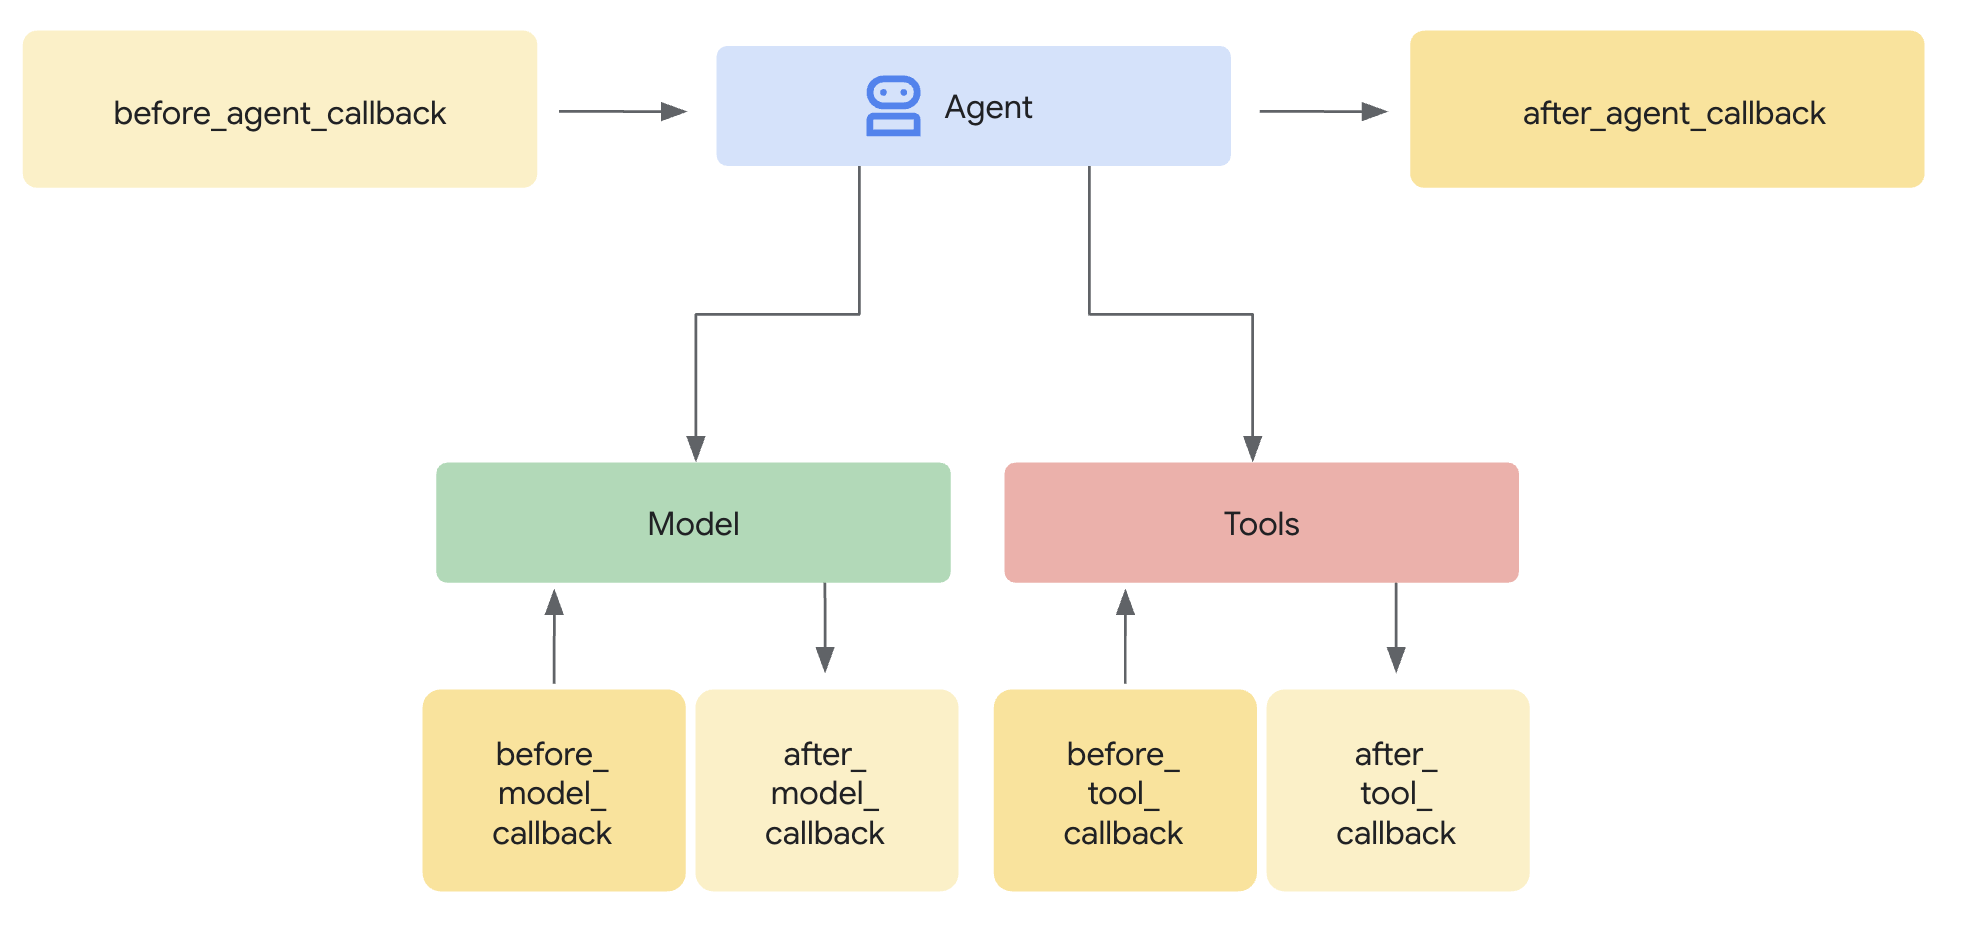
SequentialAgent รับประกันลำดับการดำเนินการ แต่จะเกิดอะไรขึ้นหาก
- Shopping Agent ทำงานล้มเหลวโดยไม่มีข้อความแจ้ง (ไม่เคยสร้าง IntentMandate)
- ผ่านไป 1 ชั่วโมงระหว่าง Shopping กับ Merchant (ความตั้งใจหมดอายุ)
- สถานะเสียหายหรือถูกล้าง
- มีคนพยายามโทรหาผู้ขายโดยตรงโดยข้าม Shopping
การเรียกกลับช่วยบังคับใช้สถาปัตยกรรม - โดยจะตรวจสอบข้อกำหนดเบื้องต้นก่อนที่ Agent จะเริ่มการเรียก LLM นี่คือการป้องกันแบบหลายชั้น โดยเครื่องมือจะตรวจสอบระหว่างการดำเนินการ และการเรียกกลับจะตรวจสอบก่อนการดำเนินการ
มาเพิ่มการเรียกกลับการตรวจสอบความถูกต้องให้กับเอเจนต์ผู้ให้บริการ Merchant และเอเจนต์ผู้ให้บริการข้อมูลเข้าสู่ระบบกัน
ขั้นตอนที่ 5A: เพิ่มการตรวจสอบผู้ขาย - นำเข้าประเภทการเรียกกลับ
ก่อนอื่น มาเพิ่มการนำเข้าที่จำเป็นสำหรับการเรียกกลับกัน
👉 เปิด
charity_advisor/merchant_agent/agent.py
ที่ด้านบนของไฟล์ หลังจากข้อมูลที่นำเข้าที่มีอยู่ ให้เพิ่มข้อมูลต่อไปนี้
from typing import Optional
from datetime import datetime, timezone
from google.adk.agents.callback_context import CallbackContext
from google.genai.types import Content, Part
import logging

logger = logging.getLogger(__name__)
ขั้นตอนที่ 5B: สร้างฟังก์ชันการตรวจสอบความตั้งใจ
ตอนนี้มาสร้างฟังก์ชัน Callback ที่จะตรวจสอบ IntentMandate ก่อนที่ Merchant Agent จะทำงานกัน
👉 In
charity_advisor/merchant_agent/agent.py
ให้เพิ่มฟังก์ชันนี้ก่อน
merchant_agent = Agent(...)
คำจำกัดความ:
def validate_intent_before_merchant(
    callback_context: CallbackContext,
) -> Optional[Content]:
    """
    Validates IntentMandate exists and hasn't expired before Merchant runs.

    This callback enforces that the Shopping Agent completed successfully
    before the Merchant Agent attempts to create a CartMandate.

    Returns:
        None: Allow Merchant Agent to proceed normally
        Content: Skip Merchant Agent and return error to user
    """
    state = callback_context.state

    # Check credential exists
    if "intent_mandate" not in state:
        logger.error("❌ IntentMandate missing - Shopping Agent may have failed")
        return Content(parts=[Part(text=(
            "Error: Cannot create cart. User intent was not properly recorded. "
            "Please restart the donation process."
        ))])

    intent_mandate = state["intent_mandate"]

    # Validate expiry (critical security check)
    try:
        expiry_time = datetime.fromisoformat(
            intent_mandate["intent_expiry"].replace('Z', '+00:00')
        )
        now = datetime.now(timezone.utc)

        if expiry_time < now:
            logger.error(f"❌ IntentMandate expired at {intent_mandate['intent_expiry']}")
            return Content(parts=[Part(text=(
                "Error: Your donation intent has expired. "
                "Please select a charity again to restart."
            ))])

        time_remaining = expiry_time - now
        logger.info(f"✓ IntentMandate validated. Expires in {time_remaining.total_seconds():.0f}s")

    except (KeyError, ValueError) as e:
        logger.error(f"❌ Invalid IntentMandate structure: {e}")
        return Content(parts=[Part(text=(
            "Error: Invalid intent data. Please restart the donation."
        ))])

    # All checks passed - allow Merchant Agent to proceed
    logger.info(f"✓ Prerequisites met for Merchant Agent: {intent_mandate['intent_id']}")
    return None
ขั้นตอนที่ 5ค: แนบการโทรกลับไปยังตัวแทนผู้ขาย
ตอนนี้เรามาเชื่อมต่อการโทรกลับกับตัวแทนกัน
👉 In
charity_advisor/merchant_agent/agent.py
, แก้ไข
merchant_agent = Agent(...)
คำจำกัดความ:
ค้นหาบรรทัดนี้ในคำจำกัดความของ Agent
merchant_agent = Agent(
    name="MerchantAgent",
    model="gemini-2.5-flash",
    description="Creates formal, signed CartMandates for charity donations following W3C PaymentRequest standards.",
เพิ่มบรรทัดนี้ต่อจาก
description
line:
before_agent_callback=validate_intent_before_merchant,
ตอนนี้คำจำกัดความของเอเจนต์ควรมีลักษณะดังนี้
merchant_agent = Agent(
    name="MerchantAgent",
    model="gemini-2.5-flash",
    description="Creates formal, signed CartMandates for charity donations following W3C PaymentRequest standards.",
    before_agent_callback=validate_intent_before_merchant,
    tools=[
        FunctionTool(func=create_cart_mandate)
    ],
    instruction="""..."""
)
ขั้นตอนที่ 6: เพิ่มการตรวจสอบผู้ให้บริการข้อมูลเข้าสู่ระบบ (ไม่บังคับ ข้ามไปขั้นตอนที่ 7)
รูปแบบเดียวกัน - มาเพิ่มการตรวจสอบสำหรับขั้นตอนการชำระเงินกัน
ขั้นตอนที่ 6A: นำเข้าประเภทการโทรกลับ
👉 เปิด
charity_advisor/credentials_provider/agent.py
ที่ด้านบนของไฟล์ หลังจากข้อมูลที่นำเข้าที่มีอยู่ ให้เพิ่มข้อมูลต่อไปนี้
from typing import Optional
from datetime import datetime, timezone
from google.adk.agents.callback_context import CallbackContext
from google.genai.types import Content, Part
import logging

logger = logging.getLogger(__name__)
ขั้นตอนที่ 6B: สร้างฟังก์ชันการตรวจสอบรถเข็น
👉 In
charity_advisor/credentials_provider/agent.py
ให้เพิ่มฟังก์ชันนี้ก่อน
credentials_provider = Agent(...)
คำจำกัดความ:
def validate_cart_before_payment(
    callback_context: CallbackContext,
) -> Optional[Content]:
    """
    Validates CartMandate exists and hasn't expired before payment processing.

    This callback enforces that the Merchant Agent completed successfully
    before the Credentials Provider attempts to process payment.

    Returns:
        None: Allow Credentials Provider to proceed
        Content: Skip payment processing and return error
    """
    state = callback_context.state

    # Check credential exists
    if "cart_mandate" not in state:
        logger.error("❌ CartMandate missing - Merchant Agent may have failed")
        return Content(parts=[Part(text=(
            "Error: Cannot process payment. Cart was not properly created. "
            "Please restart the donation process."
        ))])

    cart_mandate = state["cart_mandate"]

    # Validate AP2 structure
    if "contents" not in cart_mandate:
        logger.error("❌ CartMandate missing AP2 contents wrapper")
        return Content(parts=[Part(text=(
            "Error: Invalid cart structure. Please restart."
        ))])

    # Validate expiry
    try:
        contents = cart_mandate["contents"]
        expiry_time = datetime.fromisoformat(
            contents["cart_expiry"].replace('Z', '+00:00')
        )
        now = datetime.now(timezone.utc)

        if expiry_time < now:
            logger.error(f"❌ CartMandate expired at {contents['cart_expiry']}")
            return Content(parts=[Part(text=(
                "Error: Your cart has expired (15 minute limit). "
                "Please restart the donation to get a fresh offer."
            ))])

        time_remaining = expiry_time - now
        logger.info(f"✓ CartMandate validated. Expires in {time_remaining.total_seconds():.0f}s")

    except (KeyError, ValueError) as e:
        logger.error(f"❌ Invalid CartMandate structure: {e}")
        return Content(parts=[Part(text=(
            "Error: Invalid cart data. Please restart the donation."
        ))])

    # All checks passed - allow payment processing
    logger.info(f"✓ Prerequisites met for Credentials Provider: {contents['id']}")
    return None
ขั้นตอนที่ 6C: แนบการเรียกกลับไปยังผู้ให้บริการข้อมูลเข้าสู่ระบบ
👉 In
charity_advisor/credentials_provider/agent.py
, แก้ไข
credentials_provider = Agent(...)
คำจำกัดความ:
ค้นหาบรรทัดนี้ในคำจำกัดความของ Agent
credentials_provider = Agent(
    name="CredentialsProvider",
    model="gemini-2.5-flash",
    description="Securely processes payments by creating PaymentMandates and executing transactions with user consent.",
เพิ่มบรรทัดนี้ต่อจาก
description
line:
before_agent_callback=validate_cart_before_payment,
ตอนนี้คำจำกัดความของเอเจนต์ควรมีลักษณะดังนี้
credentials_provider = Agent(
    name="CredentialsProvider",
    model="gemini-2.5-flash",
    description="Securely processes payments by creating PaymentMandates and executing transactions with user consent.",
    before_agent_callback=validate_cart_before_payment,
    tools=[
        FunctionTool(func=create_payment_mandate)
    ],
    instruction="""..."""
)
ขั้นตอนที่ 7: ทดสอบด้วย ADK Web UI
ตอนนี้มาทดสอบระบบที่เสริมความแข็งแกร่งอย่างสมบูรณ์โดยเปิดใช้การเรียกกลับการตรวจสอบ
👉 ในเทอร์มินัล Cloud Shell ให้เรียกใช้
adk web
คุณควรเห็นเอาต์พุตดังนี้
+-----------------------------------------------------------------------------+
| ADK Web Server started                                                      |
|                                                                             |
| For local testing, access at http://localhost:8000.                         |
+-----------------------------------------------------------------------------+

INFO:     Application startup complete.
INFO:     Uvicorn running on http://0.0.0.0:8000 (Press CTRL+C to quit)
👉 จากนั้น หากต้องการเข้าถึง UI บนเว็บของ ADK จากเบราว์เซอร์ ให้ทำดังนี้
จากไอคอนตัวอย่างเว็บ (มีลักษณะคล้ายดวงตาหรือสี่เหลี่ยมที่มีลูกศร) ในแถบเครื่องมือ Cloud Shell (โดยปกติจะอยู่ด้านขวาบน) ให้เลือกเปลี่ยนพอร์ต ในหน้าต่างป๊อปอัป ให้ตั้งค่าพอร์ตเป็น 8000 แล้วคลิก "เปลี่ยนและแสดงตัวอย่าง" จากนั้น Cloud Shell จะเปิดแท็บเบราว์เซอร์ใหม่ที่แสดง Web UI ของ ADK
👉 เลือกตัวแทนจากเมนูแบบเลื่อนลง:
ในเว็บ UI ของ ADK คุณจะเห็นเมนูแบบเลื่อนลงที่ด้านบน เลือก charity_advisor จากรายการ
คุณจะเห็นอินเทอร์เฟซเว็บของ ADK ที่มีข้อมูลต่อไปนี้
- แผงแชท: ด้านซ้ายสำหรับการสนทนา
- แผงการติดตาม: ด้านขวาสำหรับการสังเกตการณ์ (เราจะใช้แผงนี้ในโมดูลที่ 9)
การทดสอบ 1: ทำขั้นตอนการบริจาคให้เสร็จสมบูรณ์ (กรณีปกติ)
👉 ในอินเทอร์เฟซแชท ให้พิมพ์
I want to donate to an education charity
ดูโฟลว์ทั้งหมดได้ที่
สิ่งที่เกิดขึ้น (มองเห็นได้ในแผงการติดตามทางด้านขวา):
1. ที่ปรึกษามอบสิทธิ์ให้ ShoppingAgent:
- ShoppingAgent ค้นหามูลนิธิการศึกษา
- แสดงตัวเลือกที่ยืนยันแล้ว 3 รายการพร้อมรายละเอียด
2. คุณโต้ตอบกับ ShoppingAgent (อาจต้องโต้ตอบหลายครั้ง)
User: "Tell me more about Room to Read"
Shopping: [explains mission and impact]
User: "I'll donate $50 to Room to Read"
3. ShoppingAgent สร้าง IntentMandate:
- สร้างและลงนามในความตั้งใจ
- แสดงการยืนยันพร้อมรหัส Intent
4. ที่ปรึกษาจะเปลี่ยนไปสู่ระยะการประมวลผล
เยี่ยมเลย กำลังประมวลผลการบริจาค $50 ให้กับ Room to Read...
5. DonationProcessingPipeline จะเปิดใช้งานเมื่อ
- การเรียกกลับของผู้ขายจะตรวจสอบ IntentMandate (✓ ผ่าน) ← ใหม่!
- ตัวแทนผู้ขายสร้าง CartMandate พร้อมลายเซ็น
- การเรียกกลับของข้อมูลเข้าสู่ระบบจะตรวจสอบ CartMandate (✓ ผ่าน) ← ใหม่!
- ผู้ให้บริการเอกสารรับรองเตรียมการชำระเงิน
6. กระบวนการชำระเงิน
- ผู้ให้บริการเอกสารรับรองสร้าง PaymentMandate
- จำลองการประมวลผลการชำระเงิน
- รหัสธุรกรรมการคืนสินค้า
7. Advisor สรุปว่า
เยี่ยมเลย ระบบประมวลผลการบริจาคของคุณเรียบร้อยแล้ว 🎉
รายละเอียด:
- จำนวนเงิน: $50.00
- การกุศล: Room to Read (EIN: 77-0479905)
- รหัสธุรกรรม: txn_a3f7b2c8d9e1f4a2
การทดสอบที่ 2: ยืนยันว่าการเรียกกลับตรวจพบความล้มเหลว (การทดสอบขั้นสูงที่ไม่บังคับ)
หากต้องการดูการเรียกกลับที่ทำงานเพื่อตรวจหาข้อผิดพลาด คุณจะต้องทำให้สถานะเสียหายด้วยตนเอง (การแก้ไขข้อบกพร่องขั้นสูง) แต่ในเวอร์ชันที่ใช้งานจริง การเรียกกลับจะตรวจพบสิ่งต่อไปนี้
- เครื่องมือ Shopping Agent ทำงานไม่สำเร็จ → บล็อกการเรียกกลับของผู้ขาย: "ข้อผิดพลาด: สร้างรถเข็นไม่ได้..."
- ผ่านไป 2 ชั่วโมง → การเรียกกลับของผู้ขายถูกบล็อก: "ข้อผิดพลาด: Intent หมดอายุแล้ว..."
- รถเข็นหมดอายุ → การเรียกกลับของข้อมูลเข้าสู่ระบบถูกบล็อก: "ข้อผิดพลาด: รถเข็นหมดอายุ (จำกัด 15 นาที)..."
ตอนนี้ระบบจะบังคับใช้ตามสถาปัตยกรรมสำหรับกรณีข้อยกเว้นเหล่านี้โดยใช้การเรียกกลับการตรวจสอบ
สิ่งที่คุณเพิ่งสร้าง
คุณได้ประสานงานเอเจนต์เฉพาะทาง 3 รายให้เป็นระบบที่ราบรื่นและเชื่อถือได้ด้วยการตรวจสอบสถาปัตยกรรม
ขั้นตอนถัดไป
ตอนนี้คุณได้ดำเนินการตามขั้นตอนหลักทางเทคนิคในการสร้างเอเจนต์ที่เชื่อถือได้เรียบร้อยแล้ว
คุณได้สร้างระบบที่เชื่อถือได้โดยสมบูรณ์ในเครื่องซึ่งบังคับใช้ห่วงโซ่ข้อมูลเข้าสู่ระบบ ตอนนี้เรามาทำให้ผู้ใช้จริงเข้าถึงได้ผ่านการติดตั้งใช้งานเวอร์ชันที่ใช้งานจริง และเปิดใช้เส้นทางการตรวจสอบที่ทำให้โมดูลที่ 9 เป็นไปได้
มาทำให้เอเจนต์ที่เพิ่มความปลอดภัยใช้งานได้ใน Google Cloud กัน
8. การทำให้ใช้งานได้
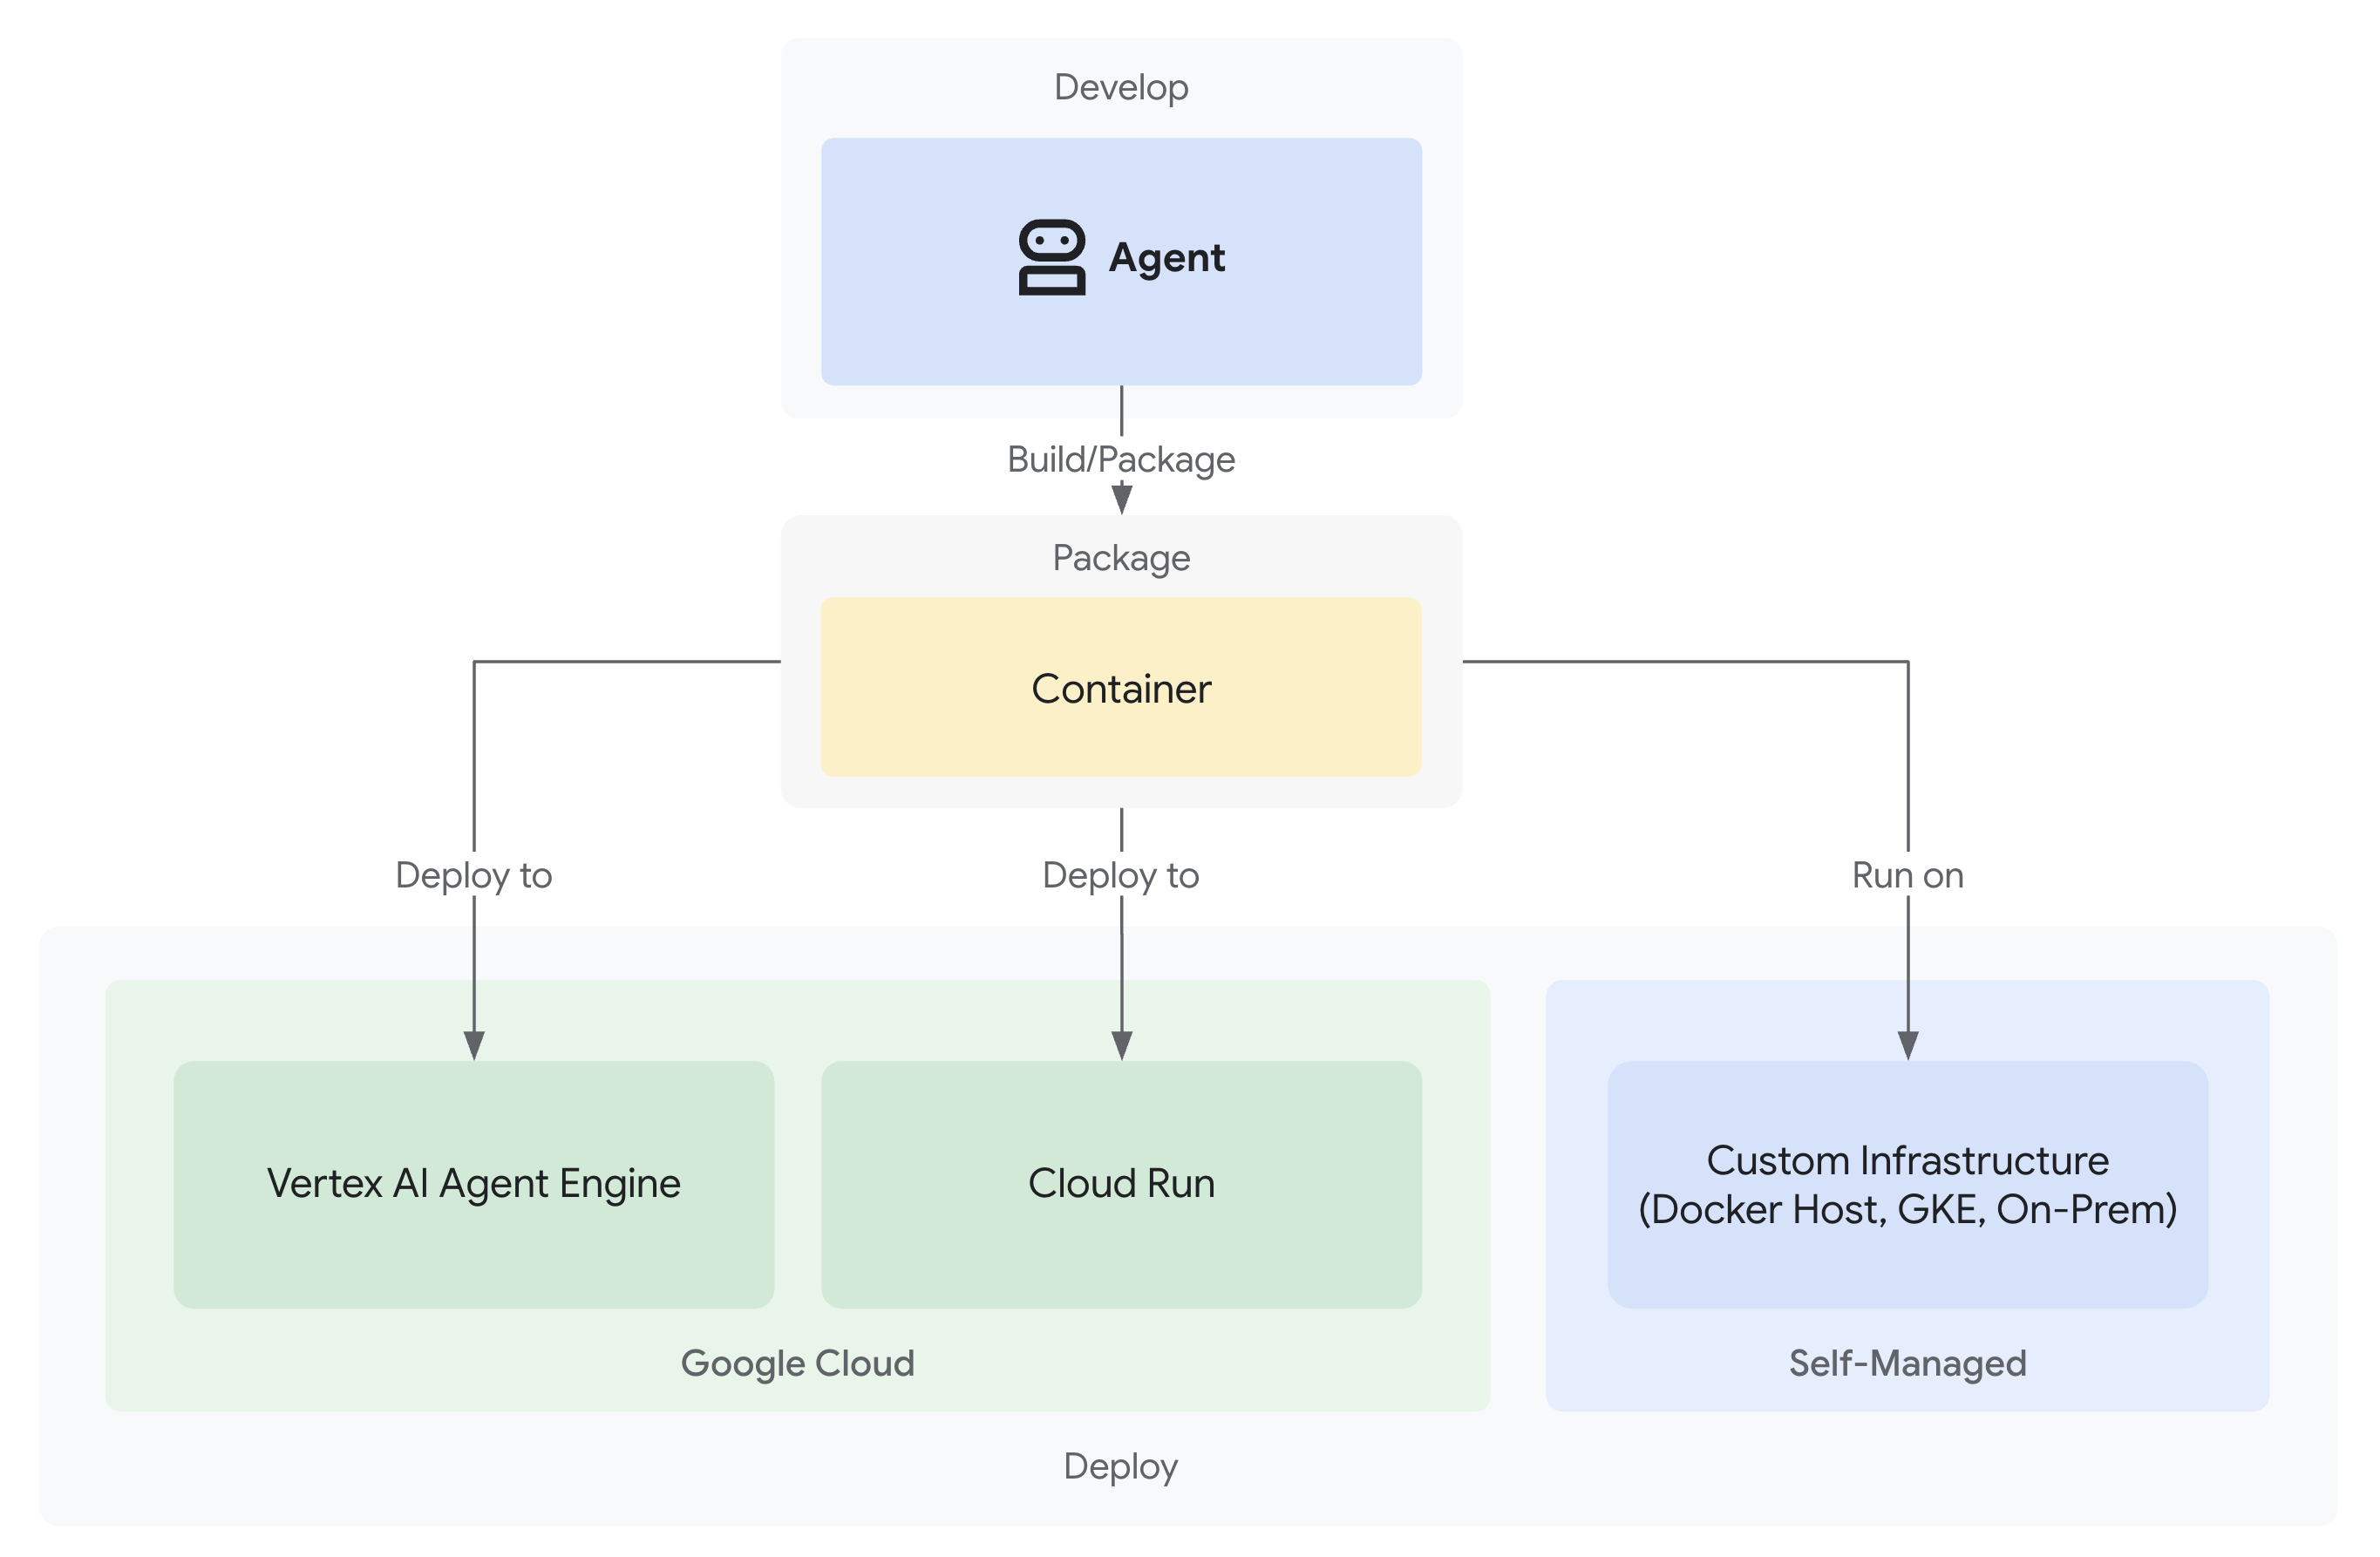
ตอนนี้ระบบการบริจาคที่เชื่อถือได้ของคุณมีตัวแทนผู้เชี่ยวชาญ 3 คนที่ทำงานในพื้นที่แล้ว
แต่จะทำงานในคอมพิวเตอร์สำหรับการพัฒนาซอฟต์แวร์เท่านั้น หากต้องการให้ระบบนี้มีประโยชน์ต่อผู้ใช้จริงและบันทึกเส้นทางการตรวจสอบที่พิสูจน์ความน่าเชื่อถือ คุณต้องนําไปใช้งานจริง
โมดูลนี้จะแนะนำขั้นตอนการทำให้ Agent ใช้งานได้ใน Google Cloud โดยเปิดใช้ความสามารถในการสังเกตตั้งแต่แรก --trace_to_cloud ค่าสถานะที่คุณจะใช้ในระหว่างการติดตั้งใช้งานคือสิ่งที่ทำให้การตรวจสอบย้อนกลับในโมดูลที่ 9 เป็นไปได้
ทำความเข้าใจตัวเลือกการติดตั้งใช้งาน
ADK รองรับเป้าหมายการติดตั้งใช้งานหลายรายการ แต่ละแบบมีลักษณะที่แตกต่างกันในด้านความซับซ้อน การจัดการเซสชัน การปรับขนาด และต้นทุน ดังนี้
ปัจจัย | ท้องถิ่น ( | Agent Engine | Cloud Run |
ความซับซ้อน | มินิมอล | ต่ำ | ปานกลาง |
ความต่อเนื่องของเซสชัน | ในหน่วยความจำเท่านั้น (หายไปเมื่อรีสตาร์ท) | Vertex AI ที่มีการจัดการ (อัตโนมัติ) | Cloud SQL (PostgreSQL) หรือในหน่วยความจำ |
โครงสร้างพื้นฐาน | ไม่มี (เฉพาะเครื่องสำหรับนักพัฒนาแอป) | การจัดการครบวงจร | คอนเทนเนอร์ + ฐานข้อมูล (ไม่บังคับ) |
Cold Start | ไม่มี | 100-500 มิลลิวินาที | 100-2000 มิลลิวินาที |
การปรับขนาด | อินสแตนซ์เดียว | อัตโนมัติ | อัตโนมัติ (เป็น 0) |
รูปแบบต้นทุน | ฟรี (การประมวลผลในพื้นที่) | อิงตามการประมวลผล | ตามคำขอ + รุ่นฟรี |
การรองรับ UI | มี (ในตัว) | ไม่มี (API เท่านั้น) | ใช่ (ผ่าน |
การตั้งค่าความสามารถในการสังเกต | โปรแกรมดูการติดตามในเครื่อง | อัตโนมัติด้วย | ต้องมีธง |
เหมาะสำหรับ | การพัฒนาและการทดสอบ | ตัวแทนการผลิต | ตัวแทนการผลิต |
คำแนะนำ: สำหรับระบบการบริจาคที่เชื่อถือได้นี้ เราขอแนะนำให้ใช้ Agent Engine เป็นการติดตั้งใช้งานจริงหลักเนื่องจากมีข้อดีดังนี้
- โครงสร้างพื้นฐานที่มีการจัดการครบวงจร (ไม่ต้องจัดการคอนเทนเนอร์)
- การคงเซสชันในตัวผ่าน
VertexAiSessionService - การปรับขนาดอัตโนมัติโดยไม่มีการเริ่มระบบใหม่
- การนำไปใช้งานที่ง่ายดาย (ไม่จำเป็นต้องมีความรู้เกี่ยวกับ Docker)
- การผสานรวม Cloud Trace โดยไม่ต้องกำหนดค่า
ตัวเลือกเพิ่มเติม: Google Kubernetes Engine (GKE)
สำหรับผู้ใช้ขั้นสูงที่ต้องการการควบคุมระดับ Kubernetes, เครือข่ายที่กำหนดเอง หรือการจัดการเป็นกลุ่มบริการหลายรายการ คุณสามารถใช้การทำให้ใช้งานได้ GKE ได้ ตัวเลือกนี้มีความยืดหยุ่นสูงสุด แต่ต้องใช้ความเชี่ยวชาญด้านการปฏิบัติงานมากขึ้น (การจัดการคลัสเตอร์, ไฟล์ Manifest, บัญชีบริการ)
การติดตั้งใช้งาน GKE ไม่ได้อยู่ใน Codelab นี้ แต่มีเอกสารประกอบครบถ้วนในคู่มือการติดตั้งใช้งาน ADK GKE
ข้อกำหนดเบื้องต้น
1. การตั้งค่าโปรเจ็กต์ Google Cloud
คุณต้องมีโปรเจ็กต์ Google Cloud ที่เปิดใช้การเรียกเก็บเงิน หากยังไม่มีบัญชี ให้ทำดังนี้
- สร้างโปรเจ็กต์: คอนโซล Google Cloud
- เปิดใช้การเรียกเก็บเงิน: เปิดใช้การเรียกเก็บเงิน
- จดรหัสโปรเจ็กต์ (ไม่ใช่ชื่อหรือหมายเลขโปรเจ็กต์)
2. การตรวจสอบสิทธิ์อีกครั้ง (ไม่บังคับ)
ตรวจสอบสิทธิ์ด้วย Google Cloud
gcloud auth application-default login
gcloud config set project YOUR_PROJECT_ID
แทนที่ YOUR_PROJECT_ID ด้วยรหัสโปรเจ็กต์ Google Cloud จริง
ยืนยันการตรวจสอบสิทธิ์
gcloud config get-value project
# Should output: YOUR_PROJECT_ID
3. ตัวแปรสภาพแวดล้อม
ใช้คำสั่งต่อไปนี้เพื่อป้อนข้อมูลในไฟล์ .env โดยอัตโนมัติ
# Get your current Project ID
PROJECT_ID=$(gcloud config get-value project)
STAGING_BUCKET_VALUE="gs://${PROJECT_ID}-staging"
ENV_FILE=".env"

# Check if STAGING_BUCKET is already set in the .env file
if grep -q "^STAGING_BUCKET=" "${ENV_FILE}"; then
  # If it exists, replace the line
  # The sed command finds the line starting with STAGING_BUCKET= and replaces the entire line.
  # Using | as a delimiter to avoid issues with slashes in the bucket name.
  sed -i "s|^STAGING_BUCKET=.*|STAGING_BUCKET=${STAGING_BUCKET_VALUE}|" "${ENV_FILE}"
  echo "Updated STAGING_BUCKET in ${ENV_FILE}"
else
  # If it doesn't exist, add it to the end of the file
  echo "STAGING_BUCKET=${STAGING_BUCKET_VALUE}" >> "${ENV_FILE}"
  echo "Added STAGING_BUCKET to ${ENV_FILE}"
fi

# Verify it was added or updated correctly
echo "Current STAGING_BUCKET setting:"
grep "^STAGING_BUCKET=" "${ENV_FILE}"
คุณควรเห็นข้อมูลต่อไปนี้
STAGING_BUCKET=gs://your-actual-project-id-staging
หมายเหตุสำคัญ
- แทนที่
YOUR_PROJECT_IDด้วยรหัสโปรเจ็กต์จริง (หรือใช้คำสั่งด้านบน) - สำหรับ
GOOGLE_CLOUD_LOCATIONให้ใช้ภูมิภาคที่รองรับ - ระบบจะสร้างที่เก็บข้อมูล Staging โดยอัตโนมัติหากยังไม่มีเมื่อคุณเรียกใช้สคริปต์การติดตั้งใช้งาน
4. เปิดใช้ API ที่จำเป็น
กระบวนการติดตั้งใช้งานต้องเปิดใช้ Google Cloud APIs หลายรายการ เรียกใช้คำสั่งนี้เพื่อเปิดใช้
gcloud services enable \
    aiplatform.googleapis.com \
    storage.googleapis.com \
    cloudbuild.googleapis.com \
    cloudtrace.googleapis.com \
    compute.googleapis.com
คำสั่งนี้ช่วยให้คุณทำสิ่งต่อไปนี้ได้
- AI Platform API - สำหรับ Agent Engine และโมเดล Vertex AI
- Cloud Storage API - สำหรับที่เก็บข้อมูล Staging
- Cloud Build API - สำหรับการสร้างคอนเทนเนอร์ (Cloud Run)
- Cloud Trace API - สำหรับเส้นทางการตรวจสอบและการติดตามความรับผิดชอบ
- Compute Engine API - สำหรับการจัดการบัญชีบริการ
ขั้นตอนที่ 1: ทำความเข้าใจโครงสร้างพื้นฐานของการติดตั้งใช้งาน
โปรเจ็กต์ของคุณมีสคริปต์การติดตั้งใช้งานแบบรวม (deploy.sh) ที่จัดการโหมดการติดตั้งใช้งานทั้งหมด
👉 ตรวจสอบสคริปต์การติดตั้งใช้งาน (ไม่บังคับ):
cat deploy.sh
สคริปต์มีโหมดการติดตั้งใช้งาน 3 โหมด ดังนี้
./deploy.sh local- เรียกใช้ในเครื่องด้วยพื้นที่เก็บข้อมูลในหน่วยความจำ./deploy.sh agent-engine- นำไปใช้งานใน Vertex AI Agent Engine (แนะนำ)./deploy.sh cloud-run- ทำให้ใช้งานได้กับ Cloud Run โดยมี UI ที่ไม่บังคับ
วิธีการทำงานเบื้องหลัง
สำหรับการติดตั้งใช้งาน Agent Engine สคริปต์จะดำเนินการดังนี้
adk deploy agent_engine \
  --project=$GOOGLE_CLOUD_PROJECT \
  --region=$GOOGLE_CLOUD_LOCATION \
  --staging_bucket=$STAGING_BUCKET \
  --display_name="Charity Advisor" \
  --trace_to_cloud \
  charity_advisor
สำหรับการติดตั้งใช้งาน Cloud Run ระบบจะดำเนินการดังนี้
adk deploy cloud_run \
  --project=$GOOGLE_CLOUD_PROJECT \
  --region=$GOOGLE_CLOUD_LOCATION \
  --service_name="charity-advisor" \
  --app_name="charity_advisor" \
  --with_ui \
  --trace_to_cloud \
  charity_advisor
--trace_to_cloudแฟล็กมีความสำคัญอย่างยิ่งสำหรับการติดตั้งใช้งานทั้ง 2 ประเภท เนื่องจากจะเปิดใช้การผสานรวม Cloud Trace สำหรับเส้นทางการตรวจสอบที่คุณจะสำรวจในโมดูลที่ 9
ขั้นตอนที่ 2: เตรียม Agent Engine Wrapper
Agent Engine ต้องมีจุดแรกเข้าที่เฉพาะเจาะจงซึ่งจะห่อหุ้ม Agent สำหรับรันไทม์ที่มีการจัดการ ระบบได้สร้างไฟล์นี้ให้คุณแล้ว
👉 ตรวจสอบ
charity_advisor/agent_engine_app.py
:
"""Agent Engine application wrapper.

This file prepares the Charity Advisor agent for deployment to Vertex AI Agent Engine.
"""

from vertexai import agent_engines
from .agent import root_agent

# Wrap the agent in an AdkApp object for Agent Engine deployment
app = agent_engines.AdkApp(
    agent=root_agent,
    enable_tracing=True,  # Enables Cloud Trace integration automatically
)
เหตุผลที่ต้องใช้ไฟล์นี้
- Agent Engine กำหนดให้ต้องห่อหุ้ม Agent ในออบเจ็กต์
AdkApp - พารามิเตอร์
enable_tracing=Trueจะเปิดใช้การผสานรวม Cloud Trace โดยอัตโนมัติ - ADK CLI จะอ้างอิง Wrapper นี้ในระหว่างการติดตั้งใช้งาน
- กำหนดค่า
VertexAiSessionServiceเพื่อให้เซสชันคงอยู่โดยอัตโนมัติ
ขั้นตอนที่ 3: ทำให้ใช้งานได้กับ Agent Engine (แนะนำ)
Agent Engine คือการติดตั้งใช้งานเวอร์ชันที่ใช้งานจริงที่แนะนำสำหรับระบบการบริจาคที่เชื่อถือได้ เนื่องจากมีโครงสร้างพื้นฐานที่จัดการครบวงจรพร้อมการคงเซสชันในตัว
เรียกใช้การทำให้ใช้งานได้
จากรูทของโปรเจ็กต์ ให้ทำดังนี้
chmod +x deploy.sh
./deploy.sh agent-engine
ระยะการติดตั้งใช้งาน
ดูสคริปต์ดำเนินการในระยะต่างๆ ดังนี้
Phase 1: API Enablement
  ✓ aiplatform.googleapis.com
  ✓ storage.googleapis.com
  ✓ cloudbuild.googleapis.com
  ✓ cloudtrace.googleapis.com
  ✓ compute.googleapis.com

Phase 2: IAM Setup
  ✓ Getting project number
  ✓ Granting Storage Object Admin
  ✓ Granting Vertex AI User
  ✓ Granting Cloud Trace Agent

Phase 3: Staging Bucket
  ✓ Creating gs://your-project-id-staging (if needed)
  ✓ Setting permissions

Phase 4: Validation
  ✓ Checking agent.py exists
  ✓ Verifying root_agent defined
  ✓ Checking agent_engine_app.py exists
  ✓ Validating requirements.txt

Phase 5: Build & Deploy
  ✓ Packaging agent code
  ✓ Uploading to staging bucket
  ✓ Creating Agent Engine instance
  ✓ Configuring session persistence
  ✓ Setting up Cloud Trace integration
  ✓ Running health checks
กระบวนการนี้จะใช้เวลาประมาณ 5-10 นาที เนื่องจากระบบจะแพ็กเกจเอเจนต์และติดตั้งใช้งานในโครงสร้างพื้นฐานของ Vertex AI
บันทึกรหัส Agent Engine
เมื่อการติดตั้งใช้งานสำเร็จแล้ว
✅ Agent Engine created successfully!

   Agent Engine ID: 7917477678498709504
   Resource Name: projects/123456789/locations/us-central1/reasoningEngines/7917477678498709504
   Endpoint: https://us-central1-aiplatform.googleapis.com/v1/...

   ⚠️  IMPORTANT: Save the Agent Engine ID from the output above
   Add it to your .env file as:
   AGENT_ENGINE_ID=7917477678498709504

   This ID is required for:
   - Testing the deployed agent
   - Updating the deployment later
   - Accessing logs and traces
อัปเดตไฟล์ .env ทันที
echo "AGENT_ENGINE_ID=7917477678498709504" >> .env
สิ่งที่ได้รับการติดตั้งใช้งาน
การติดตั้งใช้งาน Agent Engine ของคุณตอนนี้มีสิ่งต่อไปนี้
✅ ทั้ง 3 เอเจนต์ (Shopping, Merchant, Credentials) ที่ทำงานในรันไทม์ที่มีการจัดการ
✅ ตรรกะห่วงโซ่ข้อมูลเข้าสู่ระบบที่สมบูรณ์ (Intent → Cart → Payment mandates)
✅ กลไกการขอความยินยอมของผู้ใช้ที่มีเวิร์กโฟลว์การยืนยัน
✅ การคงเซสชันอัตโนมัติผ่าน VertexAiSessionService
✅ โครงสร้างพื้นฐานการปรับขนาดอัตโนมัติที่ Google จัดการ
✅ การผสานรวม Cloud Trace เพื่อความสามารถในการสังเกตที่สมบูรณ์
ขั้นตอนที่ 4: ทดสอบเอเจนต์ที่ติดตั้งใช้งาน
อัปเดตสภาพแวดล้อม
ตรวจสอบว่า .env มีรหัสเครื่องมือตัวแทน
AGENT_ENGINE_ID=7917477678498709504  # From deployment output
GOOGLE_CLOUD_PROJECT=your-project-id
GOOGLE_CLOUD_LOCATION=us-central1
STAGING_BUCKET=gs://your-project-id-staging
เรียกใช้สคริปต์ทดสอบ
โปรเจ็กต์ของคุณมีสคริปต์การทดสอบสำหรับการติดตั้งใช้งาน Agent Engine โดยเฉพาะ
👉 ทำการทดสอบ:
python scripts/test_deployed_agent.py
ผลลัพธ์ที่คาดหวัง
Testing Agent Engine deployment...
Project: your-project-id
Location: us-central1
Agent Engine ID: 7917477678498709504
Endpoint: https://us-central1-aiplatform.googleapis.com/v1/...

Creating session...
✓ Session created: 4857885913439920384

Sending donation query...
✓ Response received:
  Event 1: I'll help you donate $50 to a children's education charity...
  Event 2: Here are some highly-rated children's education charities...
  Event 3: Which charity would you like to support?...

✅ Test completed successfully!

Session ID: 4857885913439920384

This donation generated a trace in Cloud Trace.
View it in Module 9: Observability

To view traces:
https://console.cloud.google.com/traces/list?project=your-project-id
รายการตรวจสอบการยืนยัน
หลังจากทดสอบแล้ว ให้ยืนยันดังนี้
✅ ตัวแทนตอบคำถาม
✅ ตัวแทนทั้ง 3 รายดำเนินการตามลำดับ (Shopping → ผู้ขาย → ข้อมูลเข้าสู่ระบบ)
✅ กลไกการขอความยินยอมเปิดใช้งาน (ขอการยืนยัน)
✅ เซสชันยังคงอยู่ในการร้องขอ
✅ ไม่มีข้อผิดพลาดในการตรวจสอบสิทธิ์
✅ ไม่มีการหมดเวลาการเชื่อมต่อ
หากพบข้อผิดพลาด ให้ทำดังนี้
- ตรวจสอบว่าได้ตั้งค่าตัวแปรสภาพแวดล้อมอย่างถูกต้อง
- ตรวจสอบว่าได้เปิดใช้ API แล้ว
gcloud services list --enabled - ตรวจสอบบันทึกของ Agent Engine ใน Vertex AI Console
- ตรวจสอบว่ามีไฟล์
agent_engine_app.pyอยู่ในโฟลเดอร์charity_advisor
ขั้นตอนที่ 5: ทำให้ใช้งานได้กับ Cloud Run (ไม่บังคับ)
แม้ว่าเราจะแนะนำให้ใช้ Agent Engine เพื่อการติดตั้งใช้งานการผลิตที่มีประสิทธิภาพ แต่ Cloud Run จะให้การควบคุมที่มากขึ้นและรองรับ UI เว็บของ ADK ส่วนนี้เป็นส่วนที่ไม่บังคับ
กรณีที่ควรใช้ Cloud Run
เลือก Cloud Run หากคุณต้องการสิ่งต่อไปนี้
- UI เว็บของ ADK สำหรับการโต้ตอบของผู้ใช้
- ควบคุมสภาพแวดล้อมของคอนเทนเนอร์ได้อย่างเต็มที่
- การกำหนดค่าฐานข้อมูลที่กำหนดเอง
- การผสานรวมกับบริการ Cloud Run ที่มีอยู่
เรียกใช้การทำให้ใช้งานได้
chmod +x deploy.sh
./deploy.sh cloud-run
สิ่งที่จะเปลี่ยนแปลง
สคริปต์จะดำเนินการต่อไปนี้โดยอัตโนมัติ
- สร้างคอนเทนเนอร์ Docker ด้วยโค้ดของ Agent
- สร้างฐานข้อมูล PostgreSQL ใน Cloud SQL (หากจำเป็น)
- กำหนดค่าการเชื่อมต่อฐานข้อมูล
- ติดตั้งใช้งานโดยเปิดใช้ UI เว็บของ ADK
การติดตั้งใช้งานจะใช้เวลา 10-15 นาทีเนื่องจากการจัดสรร Cloud SQL
การจัดการเซสชัน:
- ใช้
DatabaseSessionServiceแทนVertexAiSessionService - ต้องใช้ข้อมูลเข้าสู่ระบบฐานข้อมูลใน
.env(หรือสร้างขึ้นโดยอัตโนมัติ) - สถานะจะยังคงอยู่ในฐานข้อมูล PostgreSQL
การสนับสนุน UI:
- UI บนเว็บพร้อมให้บริการที่
https://charity-advisor-xyz.a.run.app
การทดสอบการติดตั้งใช้งาน Cloud Run
หากคุณทำให้ใช้งานได้กับ Cloud Run ด้วย --with_ui คุณจะทดสอบในเบราว์เซอร์ได้โดยตรง
- ไปที่ URL ของบริการ (ระบุไว้ในเอาต์พุตการติดตั้งใช้งาน)
- คุณจะเห็นอินเทอร์เฟซเว็บของ ADK เลือกเอเจนต์จากเมนูแบบเลื่อนลง
- เริ่มการบริจาคทดสอบ
I want to donate $50 to a children's education charity
- สังเกตลำดับการดำเนินการ
- ShoppingAgent จะค้นหาองค์กรการกุศลและบันทึกความตั้งใจของคุณ
- MerchantAgent สร้างหนังสือมอบอำนาจสำหรับรถเข็น
- CredentialsProvider สร้างคำสั่งชำระเงินและขอการยืนยัน
- หลังจากที่คุณยืนยันแล้ว ระบบจะประมวลผลการชำระเงิน
- ตรวจสอบว่าคำตอบมีข้อมูลต่อไปนี้
- คำแนะนำเกี่ยวกับองค์กรการกุศล
- คำขอการยืนยัน
- ข้อความแสดงความสำเร็จหลังการอนุมัติ
การแก้ปัญหา
ปัญหาทั่วไป
ปัญหา: ERROR: GOOGLE_CLOUD_PROJECT is not set
วิธีแก้ไข: ตรวจสอบว่าไฟล์ .env มีรหัสโปรเจ็กต์ที่ถูกต้อง
GOOGLE_CLOUD_PROJECT=your-actual-project-id
ปัญหา: ระบบไม่สร้างที่เก็บข้อมูล Staging โดยอัตโนมัติ
วิธีแก้ปัญหา: สคริปต์ควรสร้างที่เก็บโดยอัตโนมัติ หากไม่มี ให้สร้างด้วยตนเองโดยทำดังนี้
gsutil mb -p $GOOGLE_CLOUD_PROJECT -l $GOOGLE_CLOUD_LOCATION $STAGING_BUCKET
สรุป
คุณทำสิ่งต่อไปนี้สำเร็จแล้ว
✅ เข้าใจโครงสร้างพื้นฐานในการทำให้ใช้งานได้ที่ deploy.sh
จัดเตรียมไว้ให้ ✅ ตรวจสอบการกำหนดค่า Wrapper ของ Agent Engine
✅ ทำให้ใช้งานได้ระบบการบริจาคที่เชื่อถือได้กับ Agent Engine (แนะนำ)
✅ เปิดใช้การผสานรวม Cloud Trace กับ --trace_to_cloud
✅ ยืนยันว่าเข้าถึงและใช้งาน Agent ได้
✅ สร้างรากฐานสำหรับเส้นทางการตรวจสอบความรับผิดในโมดูลที่ 9
ในโมดูลถัดไป คุณจะเห็นว่าแฟล็กนี้ปลดล็อกอะไรได้บ้าง นั่นคือการมองเห็นที่สมบูรณ์ในทุกการบริจาค ทุกช่วงเวลาที่ได้รับความยินยอม และทุกขั้นตอนของเชนข้อมูลเข้าสู่ระบบ
9. ความสามารถในการสังเกต
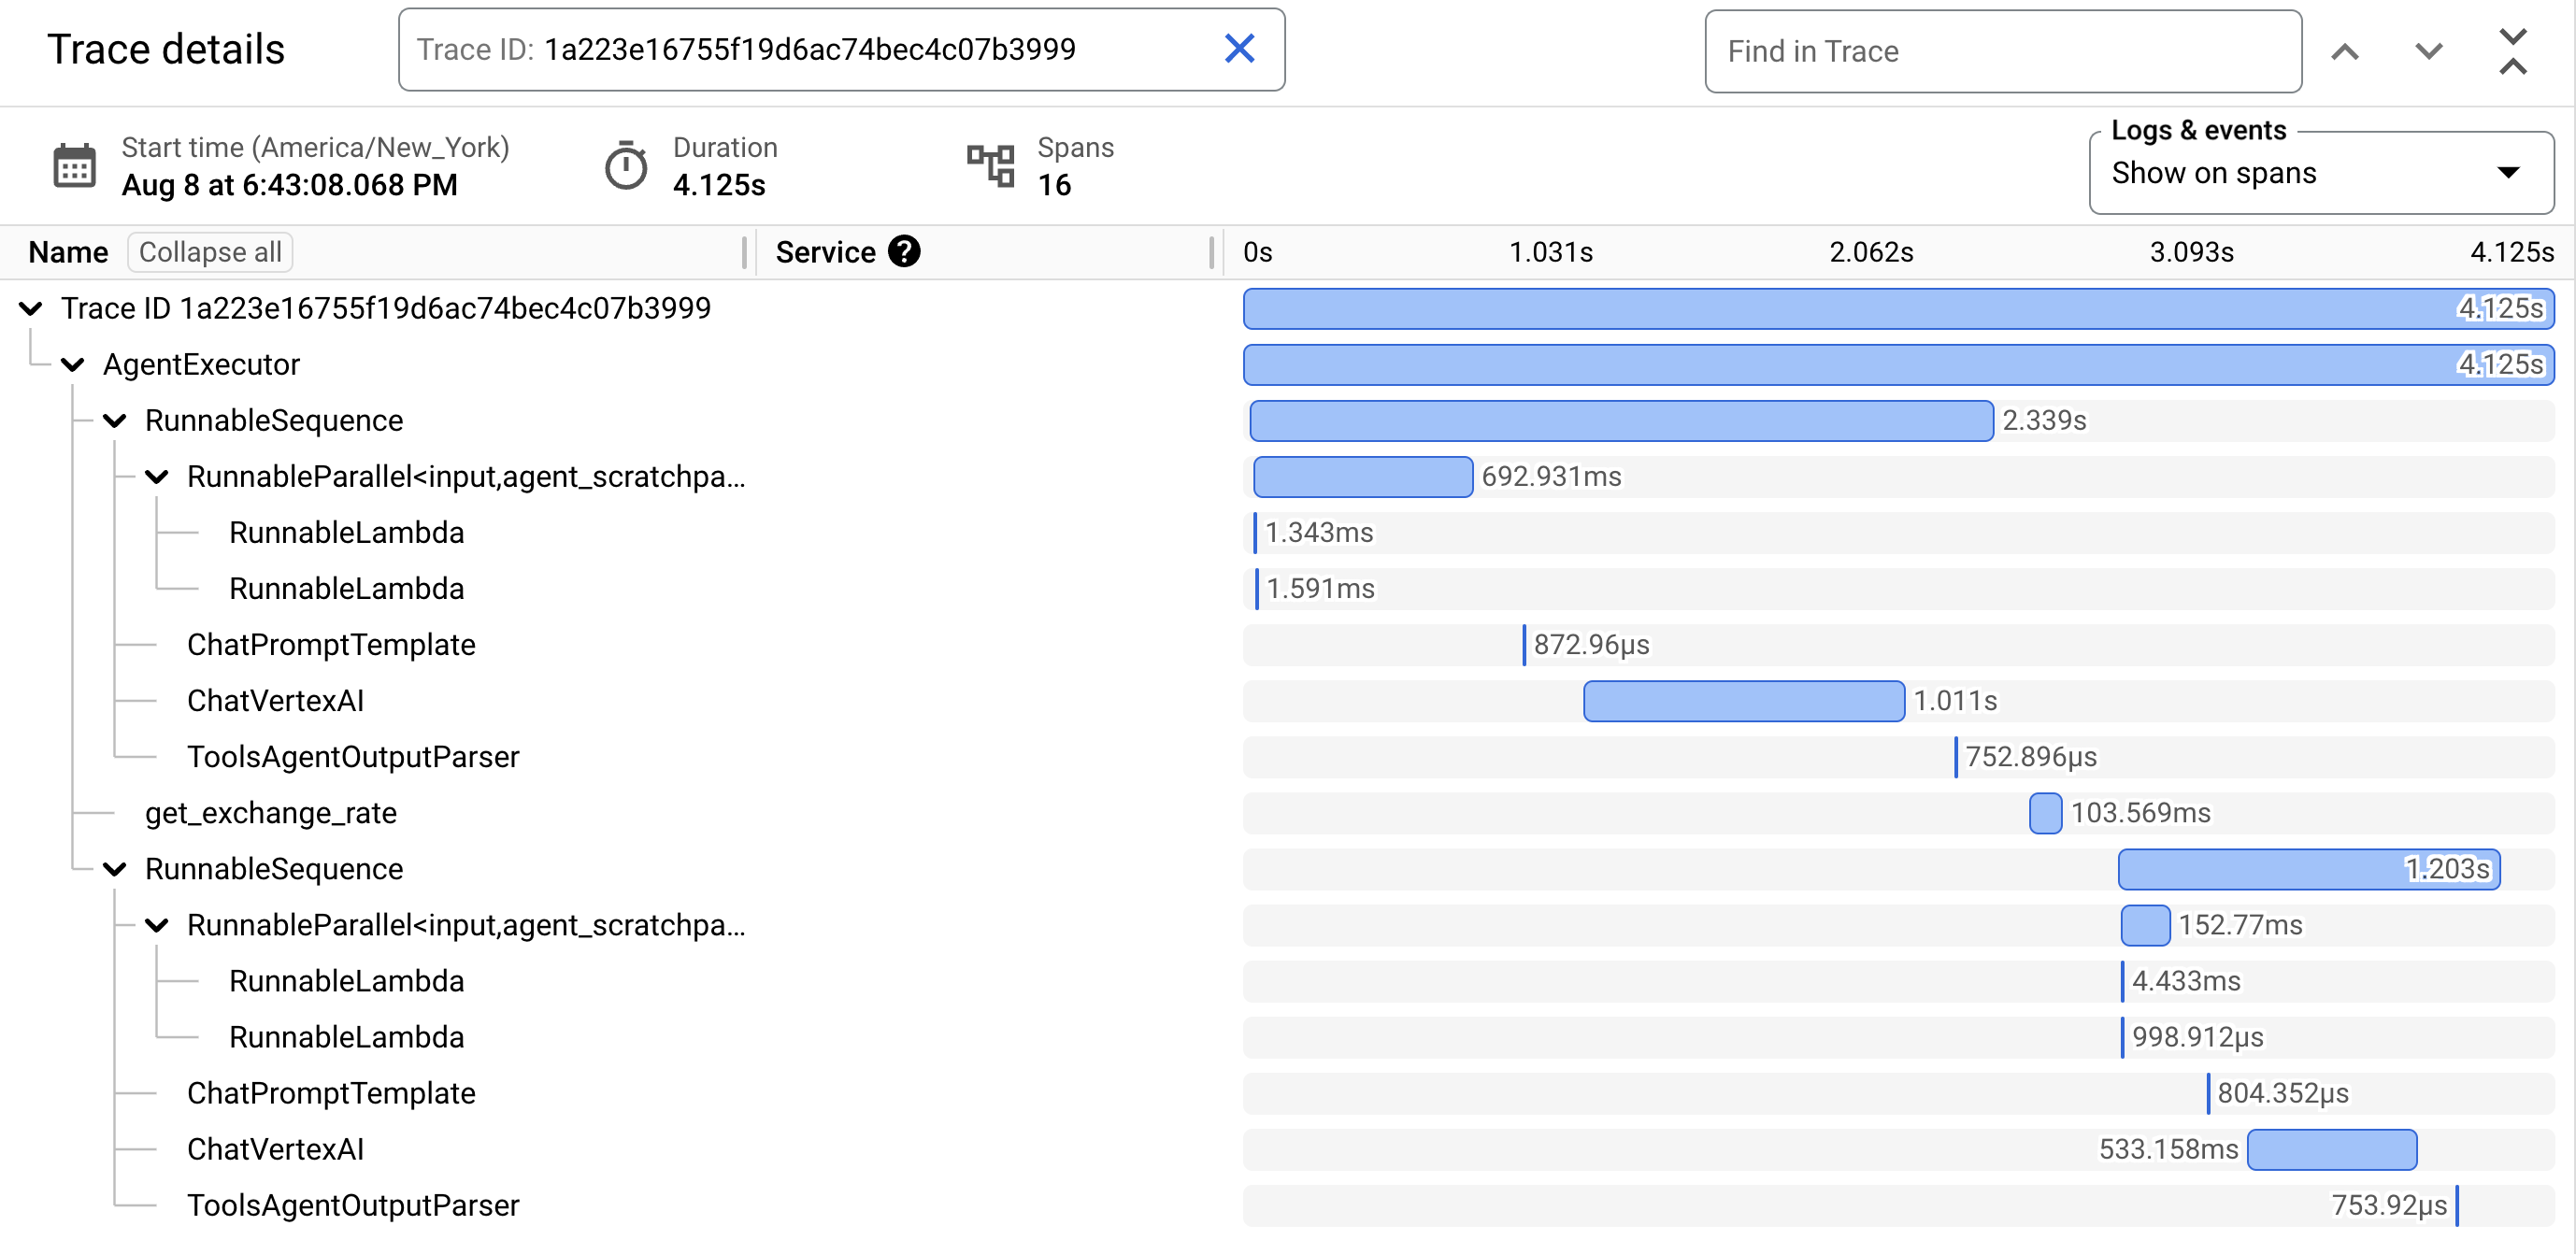
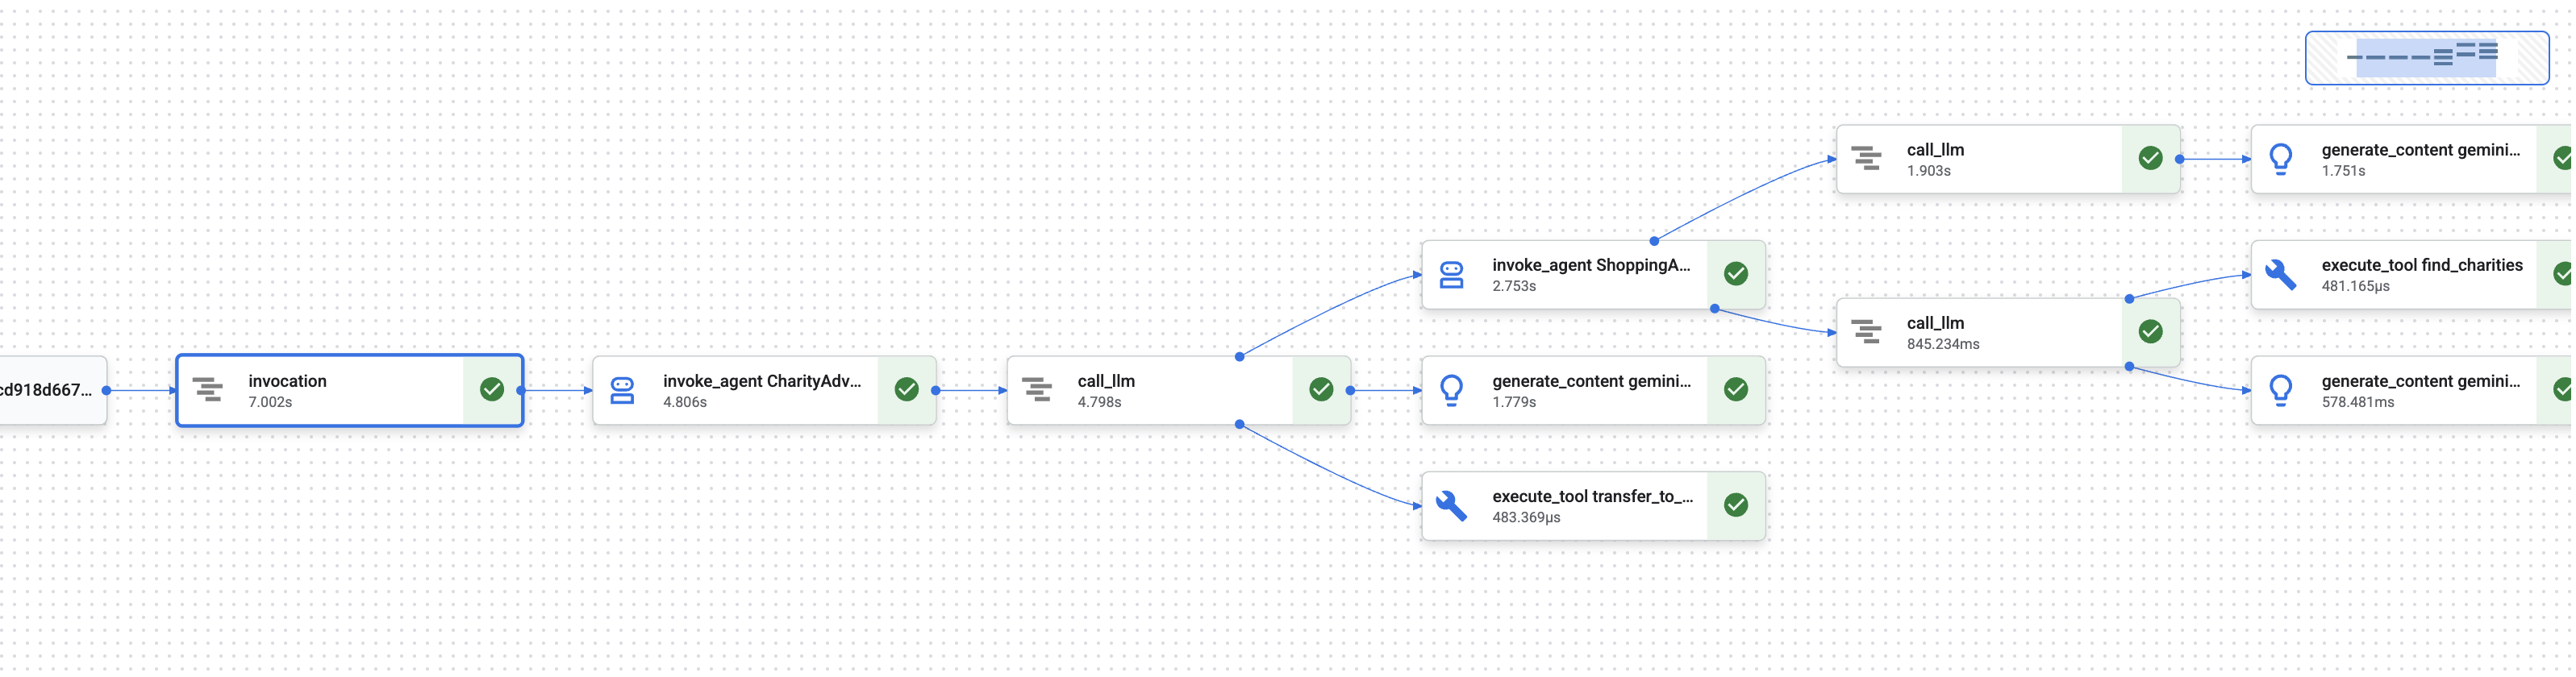
ในโมดูลที่ 1 คุณได้เรียนรู้เกี่ยวกับปัญหาพื้นฐานที่ว่าเมื่อ AI Agent จัดการเงิน คุณจะพิสูจน์สิ่งที่เกิดขึ้นได้อย่างไร
ผู้ใช้สามารถอ้างสิทธิ์ในสิ่งต่อไปนี้
- "ฉันไม่เคยเลือกองค์กรการกุศลนั้นเลย"
- "ฉันไม่อนุญาตให้ชำระเงินนั้น!"
- "ระบบเรียกเก็บเงินจากฉันโดยไม่ได้รับความยินยอม"
ในระบบ AI แบบกล่องดำแบบดั้งเดิม คุณจะไม่มีทางพิสูจน์เป็นอย่างอื่นได้ แต่ระบบการบริจาคที่เชื่อถือได้ของคุณนั้นแตกต่างออกไป ในโมดูลที่ 8 คุณได้ติดตั้งใช้งานด้วยแฟล็ก --trace_to_cloud ซึ่งหมายความว่าตอนนี้การบริจาคทุกครั้งจะสร้างเส้นทางการตรวจสอบที่สมบูรณ์และป้องกันการแก้ไขใน Cloud Trace
โมดูลนี้จะสอนวิธีอ่านร่องรอยเหล่านั้นและใช้เป็นหลักฐาน คุณจะได้เรียนรู้วิธี
- ไปยังส่วนต่างๆ ของ Cloud Trace Explorer เพื่อค้นหาร่องรอยการติดตามการผลิต
- อ่านมุมมองแบบ Waterfall เพื่อทำความเข้าใจโฟลว์การดำเนินการ
- ค้นหาห่วงโซ่ข้อมูลเข้าสู่ระบบ (Intent → รถเข็น → การให้สิทธิ์การชำระเงิน)
- ค้นหาช่วงเวลาที่ได้รับความยินยอมด้วยหลักฐานการประทับเวลา
- ใช้การติดตามเพื่อการระงับข้อพิพาท
- ส่งออกการติดตามเพื่อการปฏิบัติตามข้อกำหนดและการตรวจสอบ
สิ่งนี้คือสิ่งที่ทำให้ระบบที่เชื่อถือได้แตกต่างจากระบบที่มีความสามารถแต่ไม่โปร่งใส นั่นคือความสามารถในการพิสูจน์สิ่งที่เกิดขึ้นด้วยความแม่นยำระดับนิติวิทยาศาสตร์
ทำความเข้าใจการติดตามและช่วง
ก่อนดูการติดตามใน Cloud Trace คุณต้องทำความเข้าใจสิ่งที่คุณกำลังดู
Trace คืออะไร
การติดตามคือไทม์ไลน์ที่สมบูรณ์ของเอเจนต์ที่จัดการคำขอเดียว โดยจะบันทึกทุกอย่างตั้งแต่เมื่อผู้ใช้ส่งคำค้นหาจนกว่าจะได้รับการตอบกลับสุดท้าย
โดยแต่ละร่องรอยจะแสดงข้อมูลต่อไปนี้
- ระยะเวลาทั้งหมดของคำขอ
- การดำเนินการทั้งหมดที่ดำเนินการ
- ความสัมพันธ์ระหว่างการดำเนินการ (ความสัมพันธ์ระหว่างการดำเนินการหลักกับการดำเนินการย่อย)
- เวลาที่การดำเนินการแต่ละอย่างเริ่มและสิ้นสุด
- สถานะสำเร็จหรือไม่สำเร็จ
สำหรับตัวแทนการกุศล: การติดตาม 1 ครั้ง = ขั้นตอนการบริจาคที่สมบูรณ์ 1 ขั้นตอนตั้งแต่ "ฉันต้องการบริจาค" ไปจนถึง "ชำระเงินสำเร็จ"
Span คืออะไร
Spanแสดงถึงหน่วยงานเดียวภายในร่องรอย ให้คิดว่าช่วงคือองค์ประกอบพื้นฐานของร่องรอย
ประเภทช่วงทั่วไปในระบบการบริจาค
ประเภท Span | สิ่งที่แสดง | ตัวอย่าง |
| การดำเนินการของตัวแทน |
|
| คำขอไปยังโมเดลภาษา |
|
| การดำเนินการฟังก์ชันเครื่องมือ |
|
| การอ่านจากหน่วยความจำของเซสชัน | กำลังดึงข้อมูล |
| การเขียนไปยังหน่วยความจำของเซสชัน | จัดเก็บ |
แต่ละช่วงประกอบด้วย
- ชื่อ: การดำเนินการที่แสดง
- ระยะเวลาที่ใช้ (เวลาเริ่มต้น → เวลาสิ้นสุด)
- แอตทริบิวต์: ข้อมูลเมตา เช่น อินพุตของเครื่องมือ คำตอบของโมเดล จำนวนโทเค็น
- สถานะ: สำเร็จ (
OK) หรือข้อผิดพลาด (ERROR) - ความสัมพันธ์หลักกับย่อย: การดำเนินการใดที่ทริกเกอร์การดำเนินการใด
ช่วงเวลาสร้างการติดตามได้อย่างไร
ช่วงจะซ้อนกันเพื่อแสดงความเป็นเหตุเป็นผล ดังนี้
Root Span: CharityAdvisor.run (entire request)
  └─ Child: DonationPipeline.run (sequential workflow)
      ├─ Child: ShoppingAgent.run
      │   ├─ Grandchild: call_llm (Gemini processes charity search)
      │   ├─ Grandchild: execute_tool (find_charities)
      │   └─ Grandchild: execute_tool (save_user_choice)
      ├─ Child: MerchantAgent.run
      │   ├─ Grandchild: call_llm (Gemini generates cart)
      │   └─ Grandchild: execute_tool (create_cart_mandate)
      └─ Child: CredentialsProvider.run
          ├─ Grandchild: call_llm (Gemini processes payment)
          └─ Grandchild: execute_tool (create_payment_mandate) [CONSENT!]
ลำดับชั้นนี้แสดงสิ่งที่เกิดขึ้นอย่างชัดเจนและตามลำดับ คุณจะเห็นว่ามีการสร้างคำสั่งให้ชำระเงินหลังจากคำสั่งให้ใช้รถเข็น ซึ่งเกิดขึ้นหลังจากที่ผู้ใช้เลือกองค์กรการกุศล
ขั้นตอนที่ 1: เข้าถึง Cloud Trace Explorer
ตอนนี้มาดูการติดตามจริงจากเอเจนต์ที่ติดตั้งใช้งานกัน
ไปที่ Cloud Trace
- เปิดคอนโซล Google Cloud: console.cloud.google.com
- เลือกโปรเจ็กต์จากเมนูแบบเลื่อนลงที่ด้านบน (ควรเลือกไว้ล่วงหน้าหากคุณเคยทำงานในโปรเจ็กต์นั้น)
- ไปที่ Cloud Trace Explorer
- ในแถบด้านข้างทางซ้าย ให้เลื่อนไปที่ส่วนการสังเกตการณ์
- คลิกติดตาม
- หรือใช้ลิงก์โดยตรง console.cloud.google.com/traces/list
สิ่งที่คุณกำลังดู
Trace Explorer จะแสดงรายการการติดตามทั้งหมดจากโปรเจ็กต์ของคุณ
คอลัมน์ | สิ่งที่แสดง |
คำขอ | เมธอด HTTP และปลายทาง (สำหรับคำขอ API) |
เวลาเริ่มต้น | เมื่อคำขอเริ่มต้น |
เวลาในการตอบสนอง | ระยะเวลาทั้งหมดของคำขอ |
Spans | จำนวนการดำเนินการในร่องรอย |
แต่ละแถวแสดงคำขอที่สมบูรณ์ 1 รายการไปยัง Agent ที่คุณติดตั้งใช้งาน
สร้างการติดตามการทดสอบ (หากจำเป็น)
หากยังไม่เห็นร่องรอยใดๆ รายการอาจว่างเปล่าเนื่องจากสาเหตุต่อไปนี้
- ยังไม่มีการส่งคำขอไปยัง Agent ที่คุณติดตั้งใช้งาน
- ร่องรอยจะปรากฏภายใน 1-2 นาทีหลังจากส่งคำขอ
สร้างการติดตามการทดสอบ
หากคุณทําการติดตั้งใช้งานใน Cloud Run ด้วย UI ให้ไปที่ URL ของบริการและทําการบริจาคในเบราว์เซอร์
หากคุณทำให้ใช้งานได้กับ Agent Engine ให้เรียกใช้สคริปต์การทดสอบจากโมดูลที่ 8 ดังนี้
python scripts/test_deployed_agent.py
รอ 1-2 นาที แล้วรีเฟรชหน้า Cloud Trace Explorer ตอนนี้คุณควรเห็นร่องรอย
กรองการติดตาม
ใช้ตัวเลือกตัวกรองที่ด้านบนเพื่อค้นหาร่องรอยที่เฉพาะเจาะจง
- ช่วงเวลา: เปลี่ยนจาก "ชั่วโมงล่าสุด" เป็น "24 ชั่วโมงที่ผ่านมา" หากจำเป็น
- เวลาในการตอบสนองขั้นต่ำ / เวลาในการตอบสนองสูงสุด: กรองคำขอที่ช้า
- ตัวกรองคำขอ: ค้นหาตามการดำเนินการที่เฉพาะเจาะจง (เช่น "DonationPipeline")
สำหรับโมดูลนี้ ให้มุ่งเน้นที่การติดตามที่มีระยะเวลานานขึ้น (>5 วินาที) เนื่องจากแสดงถึงขั้นตอนการบริจาคที่สมบูรณ์ซึ่งมีตัวแทนทั้ง 3 รายดำเนินการ
ขั้นตอนที่ 2: ตรวจสอบขั้นตอนการบริจาคที่สมบูรณ์
คลิกการติดตามใดก็ได้ในรายการเพื่อเปิดมุมมองน้ำตก ซึ่งเป็นที่ที่คุณจะใช้เวลาส่วนใหญ่ในการวิเคราะห์พฤติกรรมของตัวแทน
ทำความเข้าใจมุมมอง Waterfall
มุมมองแบบน้ำตกคือกรานต์ชาร์ตที่แสดงไทม์ไลน์การดำเนินการทั้งหมด
━━━━━━━━━━━━━━━━━━━━━━━━━━━━━━━━━━━━━━━━━━━━━━━━━
              Timeline (horizontal = time) →
━━━━━━━━━━━━━━━━━━━━━━━━━━━━━━━━━━━━━━━━━━━━━━━━━

invocation                           ▓▓▓▓▓▓▓▓▓▓▓▓▓▓▓▓▓▓▓▓▓▓ 8.2s
  agent_run: CharityAdvisor          ▓▓▓▓▓▓▓▓▓▓▓▓▓▓▓▓▓▓▓▓▓ 8.1s
    agent_run: DonationPipeline      ▓▓▓▓▓▓▓▓▓▓▓▓▓▓▓▓▓▓▓▓ 7.9s
      agent_run: ShoppingAgent       ▓▓▓▓▓▓ 2.1s
        call_llm: gemini-2.5-flash   ▓▓▓▓ 1.2s
        execute_tool: find_charities ▓▓ 0.5s
        execute_tool: save_user_choice ▓ 0.3s
      agent_run: MerchantAgent       ▓▓▓ 1.8s
        call_llm: gemini-2.5-flash   ▓▓ 0.9s
        execute_tool: create_cart_mandate ▓ 0.7s
      agent_run: CredentialsProvider ▓▓▓▓▓▓▓▓ 4.0s
        call_llm: gemini-2.5-flash   ▓▓ 0.8s
        execute_tool: create_payment_mandate ▓▓▓▓▓ 3.0s [CONSENT]
การอ่านแผนภูมิ
แต่ละแท่งแสดงถึงช่วงเวลาต่อไปนี้
- ตำแหน่งแนวนอน: เมื่อเริ่ม
- ระยะเวลา: ระยะเวลาที่ใช้
- การเยื้อง: แสดงความสัมพันธ์ระดับบนสุดและระดับย่อย
- สี: โดยปกติจะเป็นสีน้ำเงินสำหรับสถานะปกติ และสีแดงสำหรับข้อผิดพลาด
ข้อสังเกตสำคัญจากการติดตามตัวอย่างนี้มีดังนี้
✅ ระยะเวลาทั้งหมด: 8.2 วินาที
✅ การดำเนินการตามลำดับ: ShoppingAgent เสร็จสมบูรณ์ก่อนที่ MerchantAgent จะเริ่ม
✅ MerchantAgent เสร็จสมบูรณ์
ก่อน
CredentialsProvider started
✅ Consent was the longest operation: 3.0 seconds for create_payment_mandate (because it waited for user confirmation)
✅ LLM calls are visible: Each agent made one Gemini request
✅ Tool calls are captured: All six tools executed successfully
ภาพนี้จะแสดงให้เห็นทันทีว่าใช้เวลาไปกับอะไรและการดำเนินการทำงานตามลำดับใด
คลิก Span เพื่อดูรายละเอียด
คลิกที่สแปน invocation (สแปนรูทที่ด้านบน) คุณจะเห็นแอตทริบิวต์แบบละเอียดในแผงด้านขวา
{
  "http.method": "POST",
  "http.status_code": 200,
  "http.url": "https://charity-advisor-xyz.a.run.app/api/run",
  "user_id": "test_user_123",
  "session_id": "4857885913439920384",
  "trace_id": "a1b2c3d4e5f6...",
  "span_id": "1234567890abcdef"
}
แอตทริบิวต์เหล่านี้ให้บริบทเกี่ยวกับคำขอทั้งหมด
ขั้นตอนที่ 3: ค้นหาห่วงโซ่ใบรับรอง
ระบบที่เชื่อถือได้ของคุณใช้ห่วงโซ่ข้อมูลเข้าสู่ระบบเพื่อพิสูจน์การให้สิทธิ์ในแต่ละขั้นตอน ดังนี้
IntentMandate (User chose charity)
    ↓
CartMandate (Merchant created cart, signed IntentMandate)
    ↓
PaymentMandate (Payment provider created payment, signed CartMandate)
มาดูกันว่าแต่ละคำสั่งอยู่ในร่องรอยที่ไหน
การค้นหา IntentMandate
คลิกที่สแปน execute_tool: save_user_choice (ในส่วน ShoppingAgent)
ในแผงแอตทริบิวต์ คุณจะเห็นข้อมูลต่อไปนี้
{
  "tool.name": "save_user_choice",
  "tool.input.charity_name": "Save the Children",
  "tool.input.amount": 50,
  "tool.output.status": "success",
  "tool.output.intent_mandate": {
    "charity_name": "Save the Children",
    "amount": 50,
    "timestamp": "2024-11-08T15:30:12.345Z",
    "signature": "a3f7b9c1d2e4..."
  }
}
ซึ่งพิสูจน์ได้ดังนี้
- ✅ ผู้ใช้เลือก "Save the Children"
- ✅ จำนวนเงินคือ $50
- ✅ ระบบบันทึกตัวเลือกเมื่อเวลา 15:30:12 น. (UTC)
- ✅ สร้างลายเซ็นแล้ว (ในเวอร์ชันที่ใช้งานจริง ลายเซ็นนี้จะเป็นแบบเข้ารหัส)
ตอนนี้ IntentMandate อยู่ในสถานะเซสชันและพร้อมให้บริการแก่ตัวแทนที่ตามมา
การค้นหา CartMandate
คลิกที่สแปน execute_tool: create_cart_mandate (ในส่วน MerchantAgent)
ในแผงแอตทริบิวต์ ให้ทำดังนี้
{
  "tool.name": "create_cart_mandate",
  "tool.input.intent_mandate": {
    "charity_name": "Save the Children",
    "amount": 50,
    "signature": "a3f7b9c1d2e4..."
  },
  "tool.output.status": "success",
  "tool.output.cart_mandate": {
    "cart_id": "cart_7893",
    "intent_signature": "a3f7b9c1d2e4...",
    "cart_signature": "e8f2a9b3c7d1...",
    "timestamp": "2024-11-08T15:30:14.789Z"
  }
}
ซึ่งพิสูจน์ได้ดังนี้
- ✅ MerchantAgent ได้รับ IntentMandate (อินพุตแสดงให้เห็น)
- ✅ สร้างรถเข็นที่มีรหัส "cart_7893" แล้ว
- ✅ ลายเซ็นรถเข็นอ้างอิงลายเซ็น IntentMandate (ลิงก์เชน)
- ✅ สร้างเมื่อเวลา 15:30:14 UTC (2.4 วินาทีหลังจากตั้งใจ)
ตอนนี้ CartMandate อ้างอิง IntentMandate ซึ่งเป็นการสร้างเชน
การค้นหา PaymentMandate
คลิกที่ช่วง execute_tool: create_payment_mandate (ในส่วน CredentialsProvider)
ในแผงแอตทริบิวต์ ให้ทำดังนี้
{
  "tool.name": "create_payment_mandate",
  "tool.input.cart_mandate": {
    "cart_id": "cart_7893",
    "intent_signature": "a3f7b9c1d2e4...",
    "cart_signature": "e8f2a9b3c7d1..."
  },
  "tool.confirmation_required": true,
  "tool.confirmation_timestamp": "2024-11-08T15:30:17.891Z",
  "tool.user_response": "CONFIRMED",
  "tool.wait_duration_ms": 29168,
  "tool.output.status": "success",
  "tool.output.payment_mandate": {
    "payment_id": "pay_9821",
    "cart_signature": "e8f2a9b3c7d1...",
    "payment_signature": "b4c9e2a7f8d3...",
    "timestamp": "2024-11-08T15:30:47.059Z"
  }
}
ซึ่งพิสูจน์ว่าห่วงโซ่สมบูรณ์
- ✅ CredentialsProvider ได้รับ CartMandate (อินพุตแสดงให้เห็น)
- ✅ การชำระเงินอ้างอิงถึงลายเซ็น CartMandate (ลิงก์ลูกโซ่)
- ✅ ต้องมีการยืนยัน (
confirmation_required: true) - ✅ ผู้ใช้ได้รับการยืนยันเมื่อเวลา 15:30:17 น. UTC
- ✅ ระบบรอ 29.2 วินาทีเพื่อการตัดสินใจของผู้ใช้
- ✅ สร้างการชำระเงินแล้วหลังจากได้รับการยืนยัน (การประทับเวลา: 15:30:47)
การแสดงภาพเชน
การติดตามแสดงให้เห็นว่าห่วงโซ่ข้อมูลเข้าสู่ระบบทำงานได้อย่างถูกต้อง
15:30:12 UTC → IntentMandate created (signature: a3f7...)
                  ↓
15:30:14 UTC → CartMandate created (references: a3f7...)
                  ↓
15:30:17 UTC → User consent requested
                  ↓
15:30:47 UTC → PaymentMandate created (references: e8f2...)
โดยแต่ละคำสั่งจะอ้างอิงลายเซ็นของคำสั่งก่อนหน้า ซึ่งเป็นการป้องกันการดัดแปลง คุณสามารถยืนยันห่วงโซ่ได้โดยตรวจสอบว่าลายเซ็นตรงกัน
ขั้นตอนที่ 4: วิเคราะห์ประสิทธิภาพและคอขวด
Cloud Trace ไม่ได้เพียงพิสูจน์สิ่งที่เกิดขึ้น แต่ยังแสดงให้เห็นจุดที่ใช้เวลาเพื่อให้คุณเพิ่มประสิทธิภาพได้
ระบุเส้นทางที่สำคัญ
ในมุมมองน้ำตก ให้มองหาช่วงที่ยาวที่สุดในกองแนวตั้ง ซึ่งแสดงถึงจุดคอขวดของประสิทธิภาพ
จากร่องรอยตัวอย่าง
Total: 8.2 seconds

Breakdown:
  - ShoppingAgent:         2.1s (26%)
  - MerchantAgent:         1.8s (22%)
  - CredentialsProvider:   4.0s (49%)  ← Bottleneck
  - Other overhead:        0.3s (3%)
ข้อมูลเชิงลึกที่สำคัญ: บัญชี CredentialsProvider คิดเป็น 49% ของเวลาทั้งหมด เหตุผล
เจาะลึกช่วง CredentialsProvider
CredentialsProvider: 4.0s
  - call_llm:              0.8s (20%)
  - create_payment_mandate: 3.0s (75%)  ← User consent wait
  - Other:                 0.2s (5%)
ความล่าช้า 3.0 วินาทีเป็นเรื่องปกติและดี เนื่องจากผู้ใช้จะพิจารณาก่อนยืนยัน นี่ไม่ใช่ปัญหาด้านประสิทธิภาพ แต่เป็นหลักฐานของการขอความยินยอมอย่างรอบคอบ
การติดตามต้นทุน LLM
คลิกช่วง call_llm ใดก็ได้เพื่อดูการใช้โทเค็น
{
  "llm.model": "gemini-2.5-flash",
  "llm.usage.prompt_tokens": 487,
  "llm.usage.completion_tokens": 156,
  "llm.usage.total_tokens": 643,
  "llm.response_time_ms": 1243
}
ซึ่งนำไปใช้เพื่อจุดประสงค์เหล่านี้ได้
- ติดตามต้นทุนต่อคำขอ (โทเค็น × ราคาของโมเดล)
- ระบุพรอมต์ที่ยาวเกินความจำเป็น
- เปรียบเทียบประสิทธิภาพของโมเดล (Flash กับ Pro)
- เพิ่มประสิทธิภาพเพื่อเวลาในการตอบสนองเทียบกับคุณภาพ
ตัวอย่างการคำนวณ:
Gemini 2.5 Flash pricing (as of Nov 2024):
  Input:  $0.075 per 1M tokens
  Output: $0.30 per 1M tokens

This request:
  Input:  487 tokens × $0.075 / 1M = $0.000037
  Output: 156 tokens × $0.30 / 1M  = $0.000047
  Total:                            = $0.000084 (~$0.00008)

For 10,000 donations/month:
  10,000 × 3 agents × $0.00008 = $2.40/month in LLM costs
การมองเห็นแบบละเอียดนี้ช่วยให้คุณตัดสินใจเลือกโมเดลโดยอิงตามข้อมูลได้
การเปรียบเทียบในร่องรอยต่างๆ
กรองการติดตามหลายรายการและเปรียบเทียบระยะเวลา
Trace 1: 8.2s  (with consent wait: 3.0s)
Trace 2: 12.5s (with consent wait: 7.8s)  ← User took longer
Trace 3: 5.1s  (with consent wait: 0.2s)  ← User clicked fast
Trace 4: 6.3s  (with consent wait: 1.5s)
ข้อมูลเชิงลึก: ความแตกต่างส่วนใหญ่เกิดจากเวลาที่ผู้ใช้ตัดสินใจ ไม่ใช่ประสิทธิภาพของระบบ การดำเนินการของเอเจนต์หลัก (ไม่รวมความยินยอม) จะสอดคล้องกันที่ประมาณ 5 วินาที
ซึ่งแสดงว่าระบบทำงานได้อย่างน่าเชื่อถือ
สำหรับระบบที่ใช้งานจริง ให้ตั้งค่าการแจ้งเตือนเพื่อตรวจหาปัญหาก่อนที่ผู้ใช้จะร้องเรียน
แจ้งเตือนเกี่ยวกับอัตราข้อผิดพลาดสูง
สร้างการแจ้งเตือนเมื่อการติดตามมากกว่า 5% มีข้อผิดพลาด
- ไปที่ Cloud Monitoring
- คลิก "การแจ้งเตือน" → "สร้างนโยบาย"
- กำหนดค่า
Resource: Cloud Trace Span
Metric: Span error count
Condition: Rate > 5% over 5 minutes
Notification: Email your-team@example.com
แจ้งเตือนเมื่อเวลาในการตอบสนองสูง
สร้างการแจ้งเตือนเมื่อเวลาในการตอบสนอง p95 นานเกินกว่า 15 วินาที
Resource: Cloud Trace
Metric: Span duration (95th percentile)
Condition: > 15000ms for 5 minutes
Notification: PagerDuty
ซึ่งจะช่วยตรวจจับประสิทธิภาพที่ลดลงก่อนที่จะส่งผลต่อประสบการณ์ของผู้ใช้
การแจ้งเตือนเมื่อไม่มีความยินยอม
สร้างการแจ้งเตือนหากมีการประมวลผลการชำระเงินโดยไม่มีการยืนยัน
Resource: Cloud Trace Span
Filter: tool.name="create_payment_mandate" AND tool.confirmation_required!=true
Condition: Any match
Notification: Critical alert to security team
นี่คือเครื่องตรวจจับการละเมิดนโยบายด้านความปลอดภัย หากเครื่องตรวจจับเริ่มทำงาน แสดงว่ากลไกการขอความยินยอมของคุณมีข้อผิดพลาดร้ายแรง
สิ่งที่คุณได้เรียนรู้
ตอนนี้คุณเข้าใจวิธีทำสิ่งต่อไปนี้ผ่าน Cloud Trace แล้ว
✅ ไปยังเครื่องมือสำรวจ Cloud Trace เพื่อค้นหาการติดตามเวอร์ชันที่ใช้งานจริง
✅ อ่านมุมมองแบบ Waterfall เพื่อดูขั้นตอนการดำเนินการที่สมบูรณ์
✅ ติดตามห่วงโซ่ข้อมูลเข้าสู่ระบบผ่าน IntentMandate → CartMandate → PaymentMandate ✅ ใช้การติดตามเป็นหลักฐานสำหรับการระงับข้อพิพาท
✅ วิเคราะห์ประสิทธิภาพเพื่อระบุจุดคอขวด
✅ ติดตามต้นทุน LLM ในระดับแบบละเอียด
ความแตกต่างที่เกิดขึ้น
เปรียบเทียบ 2 ระบบที่จัดการการร้องเรียน "ฉันไม่เคยอนุญาตให้ดำเนินการนี้!" เหมือนกัน
ระบบที่ไม่มีความสามารถในการสังเกต
User: "I never authorized that $50 donation!"
You:  "Our logs show the transaction completed successfully."
User: "But I didn't approve it!"
You:  "The system requires confirmation before processing."
User: "I never saw any confirmation!"
You:  "..." [no way to prove what happened]

Result: Refund issued, trust lost, user never returns.
ระบบที่มี Cloud Trace
User: "I never authorized that $50 donation!"
You:  "Let me pull up the trace from your session..."
      [Shows waterfall with consent span]
You:  "Here's the evidence:
       - 15:30:17 UTC: System asked for confirmation
       - Message shown: 'You are about to donate $50...'
       - 15:30:47 UTC: You clicked 'CONFIRM'
       - Wait time: 29.2 seconds

       The system waited almost 30 seconds for your decision.
       Here's the exact timestamp of your confirmation."

User: "Oh... I remember now. My mistake. Sorry!"

Result: Trust preserved, no refund needed, user continues using service.
นี่คือพลังของเส้นทางการตรวจสอบความรับผิด คุณเปลี่ยนจาก "เชื่อเรา" เป็น "เราจะแสดงให้คุณเห็นว่าเกิดอะไรขึ้น"
ขั้นตอนถัดไป
ตอนนี้คุณได้ดำเนินการตามขั้นตอนหลักทางเทคนิคในการสร้างเอเจนต์ที่เชื่อถือได้เรียบร้อยแล้ว
✅ โมดูล 1-6: ออกแบบสถาปัตยกรรมที่เชื่อถือได้ (บทบาท ข้อมูลเข้าสู่ระบบ ความยินยอม)
✅ โมดูล 7: จัดเวิร์กโฟลว์ที่ซับซ้อน (SequentialAgent)
✅ โมดูล 8: ทำให้ใช้งานได้โดยเปิดใช้ความสามารถในการสังเกต
✅ โมดูล 9: เรียนรู้วิธีอ่านและใช้เส้นทางการตรวจสอบความรับผิด
สถาปัตยกรรมที่คุณสร้างขึ้น ไม่ว่าจะเป็นการแยกบทบาท เชนข้อมูลเข้าสู่ระบบ กลไกการขอความยินยอม ความสามารถในการสังเกต จะโอนไปยังระบบเวอร์ชันที่ใช้งานจริงที่จัดการเงินจริง ข้อมูลจริง และผลลัพธ์จริงโดยตรง
10. เส้นทางสู่ความสำเร็จ
สิ่งที่คุณสร้าง
คุณเริ่มเวิร์กช็อปนี้ด้วยคำถามที่ว่า "ฉันจะสร้างเอเจนต์ AI ที่เชื่อถือได้จริงเรื่องเงินได้อย่างไร"
ตอนนี้คุณก็รู้คำตอบแล้ว
จุดที่คุณเริ่มต้น (โมดูล 3):
simple_agent = Agent(
    model="gemini-2.5-flash",
    instruction="Find charities and donate",
    tools=[google_search]
)
ตอนนี้คุณอยู่ที่ไหน (โมดูล 10):
- ✅ ตัวแทนผู้เชี่ยวชาญ 3 คนที่มีการแยกบทบาท
- ✅ ข้อมูลเข้าสู่ระบบที่ตรวจสอบได้ 3 รายการ (ความตั้งใจ → รถเข็น → การให้สิทธิ์การชำระเงิน)
- ✅ สร้างห่วงโซ่ข้อมูลเข้าสู่ระบบให้เสร็จสมบูรณ์พร้อมการตรวจสอบวันหมดอายุในแต่ละขั้นตอน
- ✅ กลไกการขอความยินยอมโดยชัดแจ้งพร้อมหลักฐานการประทับเวลา
- ✅ การทำให้ใช้งานจริงใน Agent Engine พร้อมการสังเกตการณ์
- ✅ มีบันทึกการตรวจสอบที่สมบูรณ์ใน Cloud Trace
- ✅ หลักฐานทางนิติเวชสำหรับการระงับข้อพิพาท
เวิร์กช็อปเทียบกับโปรดักชัน: ช่องว่าง
ระบบของคุณแสดงสถาปัตยกรรมและรูปแบบที่ถูกต้อง แต่ใช้การลดความซับซ้อนเพื่อการศึกษาซึ่งต้องได้รับการอัปเกรดสำหรับเงินจริงและผู้ใช้จริง
สิ่งที่เราปรับให้ง่ายขึ้นและสิ่งที่ต้องใช้ในการผลิตมีดังนี้
ส่วนประกอบ | การใช้งานเวิร์กช็อป | ข้อกำหนดในการผลิต |
ลายเซ็น | แฮช SHA-256 ( | ลายเซ็นเข้ารหัสลับจริงโดยใช้ PKI หรือ JWT ที่มีคีย์ส่วนตัว |
การประมวลผลการชำระเงิน | การคืนสินค้าจำลอง (ธง | การผสานรวมกับ API การชำระเงินจริง (Stripe, PayPal, Square) |
การตรวจสอบสิทธิ์ของผู้ใช้ | ความน่าเชื่อถือโดยนัย (ไม่ต้องเข้าสู่ระบบ) | OAuth 2.0, WebAuthn หรือการจัดการเซสชัน |
การจัดการข้อมูลลับ | ตัวแปรสภาพแวดล้อมในไฟล์ | Google Secret Manager หรือ Cloud KMS ที่มีการเข้ารหัส |
ฐานข้อมูลการกุศล | ไฟล์ JSON จำลองที่มีองค์กรการกุศล 9 แห่ง | การผสานรวม API แบบสด (การค้นหาองค์กรที่ได้รับการยกเว้นภาษีของ IRS, Charity Navigator API) |
การจัดการข้อผิดพลาด | try-catch พื้นฐานที่มีข้อความแสดงข้อผิดพลาด | ตรรกะการลองใหม่ที่มี Exponential Backoff, Circuit Breaker, คิวจดหมายที่ส่งไม่ได้ |
การทดสอบ | การยืนยันด้วยตนเองผ่านสคริปต์ | ชุดทดสอบหน่วย/การผสานรวม/E2E ที่ครอบคลุมพร้อม CI/CD |
ความต่อเนื่องของเซสชัน | ในหน่วยความจำ (ในเครื่อง) หรืออัตโนมัติ (Agent Engine) | ฐานข้อมูลการผลิตที่มีข้อมูลสำรองและการกู้ข้อมูลคืนหลังจากภัยพิบัติ |
การจำกัดอัตรา | ไม่มี (สภาพแวดล้อมทางการศึกษา) | การจำกัดอัตราต่อผู้ใช้ การควบคุมตาม IP การตรวจหาการละเมิด |
รูปแบบสถาปัตยกรรมหลักที่คุณเชี่ยวชาญ
รูปแบบที่คุณได้เรียนรู้ในเวิร์กช็อปนี้เป็นรูปแบบการใช้งานจริง อย่าสงสัยในตัวพวกเขา
การแยกบทบาท (หลักการ AP2 ข้อที่ 1)
ตัวแทนแต่ละรายจะมีงานที่ชัดเจน 1 อย่างและจะเห็นเฉพาะสิ่งที่จำเป็นเท่านั้น หากเอเจนต์รายหนึ่งถูกบุกรุก ผู้โจมตีจะเข้าถึงข้อมูลของเอเจนต์รายอื่นไม่ได้ ซึ่งจะจำกัดขอบเขตของปัญหา
ระบบการใช้งานจริงที่ใช้สิ่งนี้: การประมวลผลการชำระเงิน เวิร์กโฟลว์เอกสาร ห่วงโซ่อนุมัติ แบบฟอร์มหลายขั้นตอนที่มีเกตการตรวจสอบ
ข้อมูลเข้าสู่ระบบที่ตรวจสอบได้ (หลักการ AP2 ข้อที่ 2)
ข้อมูลเข้าสู่ระบบแต่ละรายการจะมีเวลาหมดอายุ อ้างอิงข้อมูลเข้าสู่ระบบก่อนหน้า และต้องมีการตรวจสอบก่อนที่จะดำเนินการในขั้นตอนถัดไป ซึ่งจะสร้างห่วงโซ่การตรวจสอบที่ป้องกันการดัดแปลง
คุณค่าของการผลิต: หลักฐานที่สมบูรณ์ของสิ่งที่เกิดขึ้น เมื่อใด และตามลำดับใด จำเป็นสำหรับการระงับข้อพิพาทและการปฏิบัติตามกฎระเบียบ
ความยินยอมอย่างชัดแจ้ง (หลักการ AP2 #3)
การประทับเวลาที่พิสูจน์ว่าผู้ใช้อนุมัติการดำเนินการ โต้แย้งไม่ได้
มูลค่าการผลิต: ข้อกำหนดทางกฎหมายสำหรับธุรกรรมทางการเงิน ปกป้องทั้งผู้ใช้และบริษัท
การจัดการเป็นกลุ่มตามลำดับ (รูปแบบ ADK)
บังคับใช้ลำดับการดำเนินการที่ถูกต้อง ป้องกันการข้ามขั้นตอน รับประกันว่าตัวแทนแต่ละรายจะเห็นเอาต์พุตของตัวแทนก่อนหน้า
ค่าเวอร์ชันที่ใช้งานจริง: เหมาะสำหรับระบบที่มีมนุษย์เป็นผู้ควบคุมซึ่งผู้ใช้คาดหวังว่าจะได้รับผลลัพธ์ทันที นี่คือรูปแบบที่เหมาะสมสำหรับขั้นตอนการบริจาค กระบวนการชำระเงิน และห่วงโซ่อนุมัติ
ความสามารถในการสังเกตที่สมบูรณ์ (OpenTelemetry + Cloud Trace)
ทุกการตัดสินใจ การเรียกใช้เครื่องมือ ช่วงเวลาที่ได้รับความยินยอม และการส่งต่อข้อมูลเข้าสู่ระบบจะได้รับการบันทึกโดยอัตโนมัติ
ค่าการผลิต: หลักฐานทางนิติเวชสำหรับการโต้แย้ง ข้อมูลการเพิ่มประสิทธิภาพ บันทึกการตรวจสอบการปฏิบัติตามข้อกำหนด ดีบักปัญหาในเวอร์ชันที่ใช้งานจริงได้อย่างแม่นยำ
แหล่งข้อมูลสำหรับการเรียนรู้เพิ่มเติม
เอกสารประกอบ ADK:
AP2 และมาตรฐานที่เกี่ยวข้อง:
บริการของ Google Cloud:
แหล่งข้อมูลการล้างข้อมูล
หากไม่ต้องการให้มีการเรียกเก็บเงินต่อไป ให้ลบการติดตั้งใช้งานโดยทำดังนี้
Agent Engine: ทำตามขั้นตอนในเอกสารของ Agent Engine
Cloud Run (หากมีการติดตั้งใช้งาน):
gcloud run services delete charity-advisor \
    --region=$GOOGLE_CLOUD_LOCATION
ที่เก็บข้อมูลของพื้นที่เก็บข้อมูล:
gsutil -m rm -r gs://$GOOGLE_CLOUD_PROJECT-staging
gsutil -m rm -r gs://$GOOGLE_CLOUD_PROJECT-artifacts
การเดินทางของคุณดำเนินต่อไป
คุณเริ่มต้นด้วยคำถามง่ายๆ และสร้างคำตอบที่สมบูรณ์ คุณได้เชี่ยวชาญรูปแบบพื้นฐานสำหรับเอเจนต์ AI ที่น่าเชื่อถือแล้ว รูปแบบเหล่านี้จะโอนไปยังโดเมนใดก็ตามที่เอเจนต์ AI จัดการการดำเนินการที่ละเอียดอ่อน เช่น ธุรกรรมทางการเงิน การตัดสินใจด้านการดูแลสุขภาพ เอกสารทางกฎหมาย การดำเนินการในซัพพลายเชน
หลักการจะโอน โมเดลความน่าเชื่อถือใช้งานได้จริง
ตอนนี้ก็ไปสร้างสิ่งที่น่าเชื่อถือกันเลย ❤️