
1. परिचय
A2UI की मदद से, एआई एजेंट ऐसे शानदार और इंटरैक्टिव यूज़र इंटरफ़ेस जनरेट कर सकते हैं जो वेब, मोबाइल, और डेस्कटॉप पर नेटिव तौर पर रेंडर होते हैं. इसके लिए, आर्बिट्रेरी कोड को एक्ज़ीक्यूट करने की ज़रूरत नहीं होती. सिर्फ़ टेक्स्ट वाले जवाबों या जोखिम भरे कोड एक्ज़ीक्यूशन के बजाय, A2UI की मदद से एजेंट, कॉम्पोनेंट के बारे में जानकारी देने वाले जवाब भेज सकते हैं. क्लाइंट, इन जवाबों को अपने नेटिव विजेट का इस्तेमाल करके रेंडर करते हैं. यह ऐसा है जैसे एजेंट, यूज़र इंटरफ़ेस (यूआई) की किसी ऐसी भाषा में बात कर रहे हों जो सभी के लिए उपलब्ध हो.
इस हैंड्स-ऑन लैब में, सबसे पहले Agent Development Kit (ADK) और Gemini 3.1 Flash Image (इसे Nano Banana 2 भी कहा जाता है) का इस्तेमाल करके, इमेज जनरेट करने वाला एजेंट बनाया जाएगा. इसके बाद, A2UI का इस्तेमाल करके एक कस्टम इंटरफ़ेस बनाया जाएगा. यह इंटरफ़ेस, सामान्य चैटबॉट से अलग होगा. इसमें यह दिखाया जाएगा कि एजेंट और उपयोगकर्ता के बीच बेहतर इंटरैक्शन के लिए, डाइनैमिक तरीके से इंटरफ़ेस कैसे जनरेट किए जा सकते हैं.
आपको क्या सीखने को मिलेगा
- ADK Python का इस्तेमाल करके एजेंट बनाना
- एजेंट को कॉन्फ़िगर करें, ताकि वह A2UI कॉम्पोनेंट को फ़्रंटएंड पर स्ट्रीम कर सके
- A2UI एलिमेंट रेंडर करने के लिए, कस्टम फ़्रंटएंड बनाना
ज़रूरी शर्तें
- एआई एजेंट के बारे में बुनियादी जानकारी
- Python सिंटैक्स की बुनियादी जानकारी
- फ़्रंटएंड के कॉन्सेप्ट की बुनियादी जानकारी
2. सेटअप
इस कोडलैब के लिए ज़रूरी Google Cloud प्रोजेक्ट को शुरू करने के लिए, यहां दिए गए निर्देशों का पालन करें. प्रोजेक्ट शुरू करने के बाद, हमारा सुझाव है कि आप इस कोडलैब को Cloud Shell पर चलाएं. ऐसा इसलिए, क्योंकि इसमें इसे चलाने के लिए ज़रूरी सभी टूल पहले से मौजूद होते हैं.
अगर आपको इस कोडलैब को अपने लोकल एनवायरमेंट में चलाना है, तो आगे बढ़ने से पहले आपको Python, uv, और कोड एडिटर इंस्टॉल करना होगा. इस कोडलैब में दिए गए सभी निर्देशों में यह माना गया है कि इसे Cloud Shell में चलाया जा रहा है. हालांकि, अगर ऐसा नहीं है, तो इसके बारे में बताया गया है.
अपनी स्पीड से एनवायरमेंट सेट अप करना
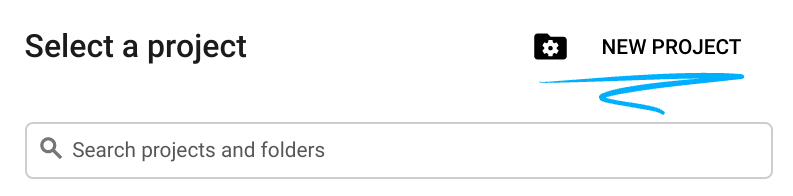
- Google Cloud Console में साइन इन करें और नया प्रोजेक्ट बनाएं या किसी मौजूदा प्रोजेक्ट का फिर से इस्तेमाल करें. अगर आपके पास पहले से कोई Gmail या Google Workspace खाता नहीं है, तो आपको एक खाता बनाना होगा.

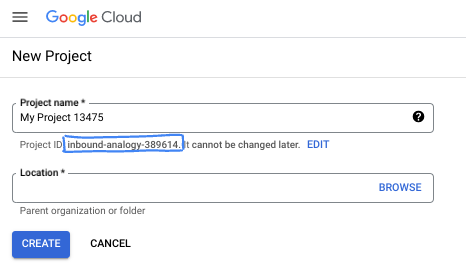
- प्रोजेक्ट का नाम, इस प्रोजेक्ट में हिस्सा लेने वाले लोगों के लिए डिसप्ले नेम होता है. यह एक वर्ण स्ट्रिंग है, जिसका इस्तेमाल Google API नहीं करते हैं. इसे कभी भी अपडेट किया जा सकता है.
- प्रोजेक्ट आईडी, सभी Google Cloud प्रोजेक्ट के लिए यूनीक होता है. साथ ही, इसे बदला नहीं जा सकता. Cloud Console, यूनीक स्ट्रिंग अपने-आप जनरेट करता है. आम तौर पर, आपको इससे कोई फ़र्क़ नहीं पड़ता कि यह क्या है. ज़्यादातर कोडलैब में, आपको अपने प्रोजेक्ट आईडी (आम तौर पर
PROJECT_IDके तौर पर पहचाना जाता है) का रेफ़रंस देना होगा. अगर आपको जनरेट किया गया आईडी पसंद नहीं है, तो कोई दूसरा रैंडम आईडी जनरेट किया जा सकता है. इसके अलावा, आपके पास अपना नाम आज़माने का विकल्प भी है. इससे आपको पता चलेगा कि वह नाम उपलब्ध है या नहीं. इस चरण के बाद, इसे बदला नहीं जा सकता. यह प्रोजेक्ट की अवधि तक बना रहता है. - आपकी जानकारी के लिए बता दें कि एक तीसरी वैल्यू भी होती है, जिसे प्रोजेक्ट नंबर कहते हैं. इसका इस्तेमाल कुछ एपीआई करते हैं. इन तीनों वैल्यू के बारे में ज़्यादा जानने के लिए, दस्तावेज़ देखें.
- इसके बाद, आपको Cloud Console में बिलिंग की सुविधा चालू करनी होगी, ताकि Cloud संसाधनों/एपीआई का इस्तेमाल किया जा सके. इस कोडलैब को पूरा करने में ज़्यादा समय नहीं लगेगा. इस ट्यूटोरियल के बाद बिलिंग से बचने के लिए, संसाधनों को बंद किया जा सकता है. इसके लिए, बनाए गए संसाधनों को मिटाएं या प्रोजेक्ट को मिटाएं. Google Cloud के नए उपयोगकर्ताओं को, 300 डॉलर का क्रेडिट मुफ़्त में आज़माने का प्रोग्राम मिलता है.
Cloud Shell शुरू करना
Google Cloud को अपने लैपटॉप से रिमोटली ऐक्सेस किया जा सकता है. हालांकि, इस कोडलैब में Google Cloud Shell का इस्तेमाल किया जाएगा. यह क्लाउड में चलने वाला कमांड लाइन एनवायरमेंट है.
Google Cloud Console में, सबसे ऊपर दाएं कोने में मौजूद टूलबार पर, Cloud Shell आइकॉन पर क्लिक करें:
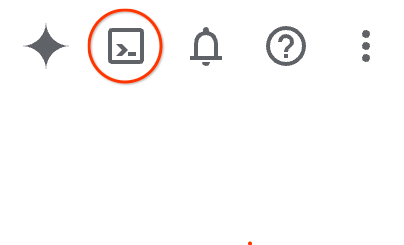
इसे चालू करने और एनवायरमेंट से कनेक्ट करने में सिर्फ़ कुछ सेकंड लगेंगे. यह प्रोसेस पूरी होने के बाद, आपको कुछ ऐसा दिखेगा:

इस वर्चुअल मशीन में, डेवलपमेंट के लिए ज़रूरी सभी टूल पहले से मौजूद हैं. यह 5 जीबी की होम डायरेक्ट्री उपलब्ध कराता है. साथ ही, Google Cloud पर काम करता है. इससे नेटवर्क की परफ़ॉर्मेंस और पुष्टि करने की प्रोसेस बेहतर होती है. इस कोडलैब में मौजूद सभी टास्क, ब्राउज़र में किए जा सकते हैं. आपको कुछ भी इंस्टॉल करने की ज़रूरत नहीं है.
3. नया ADK एजेंट बनाना
- इस वर्कशॉप के लिए,
a2ui_labनाम का फ़ोल्डर बनाएं:
mkdir -p ~/a2ui_lab && cd ~/a2ui_lab
- इस फ़ोल्डर में uv पैकेज मैनेजर को कॉन्फ़िगर करें और डिपेंडेंसी इंस्टॉल करें:
uv init && uv add google-adk fastapi uvicorn a2ui-agent-sdk
- Gemini मॉडल कॉल करने के लिए, AI Platform API चालू करें
gcloud services enable aiplatform.googleapis.com
- इस फ़ोल्डर में ADK एजेंट को शुरू करें:
export GOOGLE_CLOUD_PROJECT=`gcloud config get project`
uv run adk create --model gemini-3.5-flash --project $GOOGLE_CLOUD_PROJECT --region global art_creator
आपको इससे मिलता-जुलता आउटपुट दिखेगा:
$ uv run adk create --model gemini-3.5-flash --project $GOOGLE_CLOUD_PROJECT --region global art_creator
Agent created in ~/a2ui_lab/art_creator:
- .env
- __init__.py
- agent.py
⚠️  WARNING: Secrets (like GOOGLE_API_KEY) are stored in .env.
Please ensure .env is added to your .gitignore to avoid committing secrets to version control.
कृपया ध्यान दें कि uv run एक ऐसी कमांड है जो मौजूदा uv रिपॉज़िटरी के कॉन्टेक्स्ट में कमांड को एक्ज़ीक्यूट करती है. हमने uv init को चलाने के दौरान इस रिपॉज़िटरी को बनाया था. हमने google-adk पैकेज डिपेंडेंसी को जोड़ते समय, इस डेटाबेस में adk कमांड इंस्टॉल की थी.
ADK के दस्तावेज़ में, आपको अक्सर uv run प्रीफ़िक्स के बिना adk कमांड दिखेंगी. हालांकि, इस वर्कशॉप में कमांड चलाते समय, हमेशा adk को uv run से प्रीफ़िक्स करें, ताकि यह सही कमांड-लाइन यूटिलिटी चला सके.
अब जब एजेंट का बुनियादी स्ट्रक्चर बन गया है, तो हम agent.py में इमेज जनरेट करने वाले एजेंट को तय कर सकते हैं.
- Cloud Shell एडिटर को इस कमांड से खोलें:
cloudshell workspace ~/a2ui_lab
art_creator/agent.pyके कॉन्टेंट की जगह नीचे दिया गया कोड डालें:
art_creator/agent.py
import os
import time
from google.adk.agents.llm_agent import Agent
from google.adk.tools.tool_context import ToolContext
from google.genai import types

# Load env variables
from dotenv import load_dotenv
load_dotenv(os.path.join(os.path.dirname(__file__), ".env"))

async def generate_image(prompt: str, tool_context: ToolContext) -> dict:
    """Generates a high-quality image based on the user's detailed description prompt.

    Args:
        prompt: A descriptive text prompt describing the image to generate.
        tool_context: Context for the tool execution.
    """
    from google.genai import Client
    client = Client(
        vertexai=True,
        project=os.environ.get("GOOGLE_CLOUD_PROJECT"),
        location=os.environ.get("GOOGLE_CLOUD_LOCATION", "global")
    )

    try:
        response = client.models.generate_content(
            model="gemini-3.1-flash-image",
            contents=prompt,
            config=types.GenerateContentConfig(
                response_modalities=['TEXT', 'IMAGE'],
            )
        )

        image_bytes = None
        for part in response.parts or []:
            if part.inline_data is not None:
                image_bytes = part.inline_data.data
                break

        if not image_bytes:
            return {"status": "failed", "detail": "No image data returned"}

        filename = f"image_{int(time.time())}.png"
        await tool_context.save_artifact(
            filename,
            types.Part.from_bytes(data=image_bytes, mime_type='image/png'),
        )

        return {
            "status": "success",
            "filename": filename,
            "url": f"/api/artifacts/{tool_context.session.id}/{filename}"
        }
    except Exception as e:
        return {"status": "failed", "detail": str(e)}

root_agent = Agent(
    name="art_agent",
    model="gemini-3.5-flash",
    description="A basic art generation agent.",
    instruction=(
        "You are an art assistant. When the user describes an image they want to generate, "
        "use the generate_image tool to create it, then return a text message containing the image's URL."
    ),
    tools=[generate_image],
)
- अब ADK के डेवलपमेंट यूज़र इंटरफ़ेस (यूआई) में, एजेंट की जांच की जा सकती है. इसके लिए,
uv run adk webकमांड का इस्तेमाल करें:
uv run adk web --port 8080 --allow_origins "*" --reload_agents
इसके बाद, वेब की झलक देखने वाले बटन पर क्लिक करें और पोर्ट 8080 पर झलक देखें को चुनें. इससे आपके ब्राउज़र पर डेवलपमेंट यूज़र इंटरफ़ेस (यूआई) खुल जाएगा.
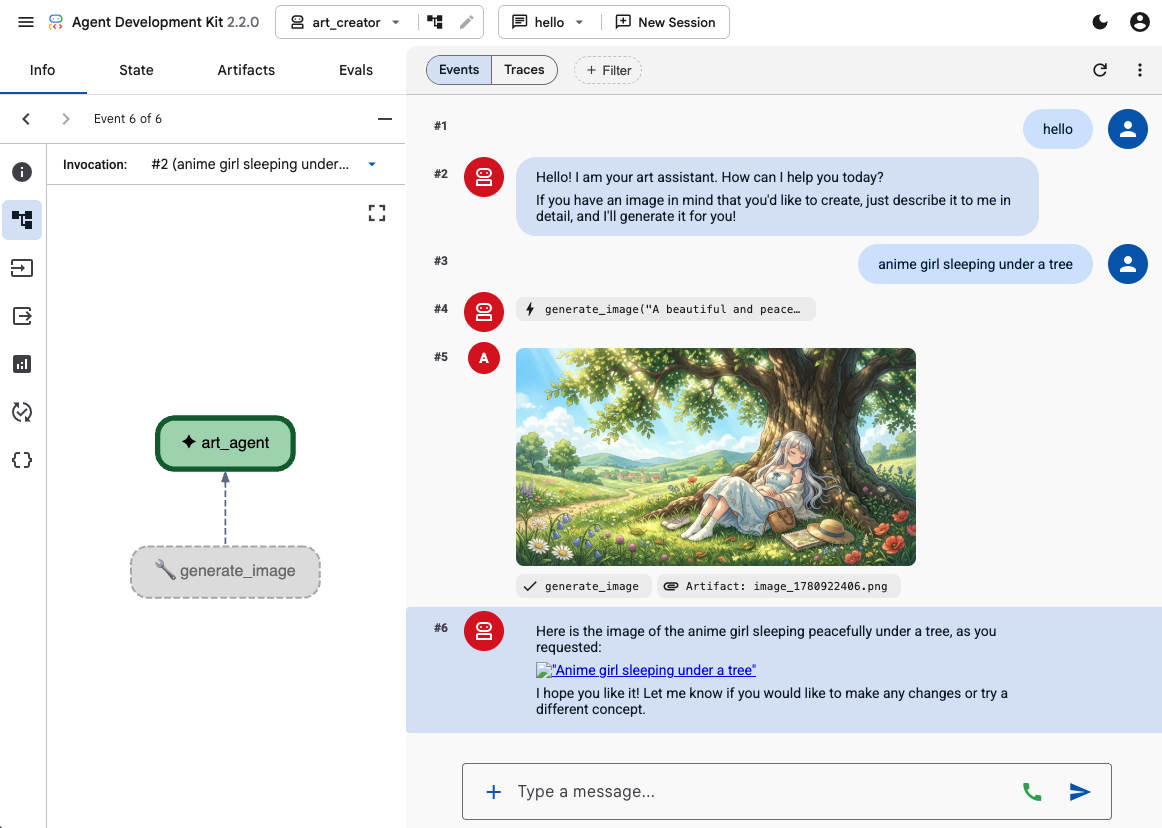
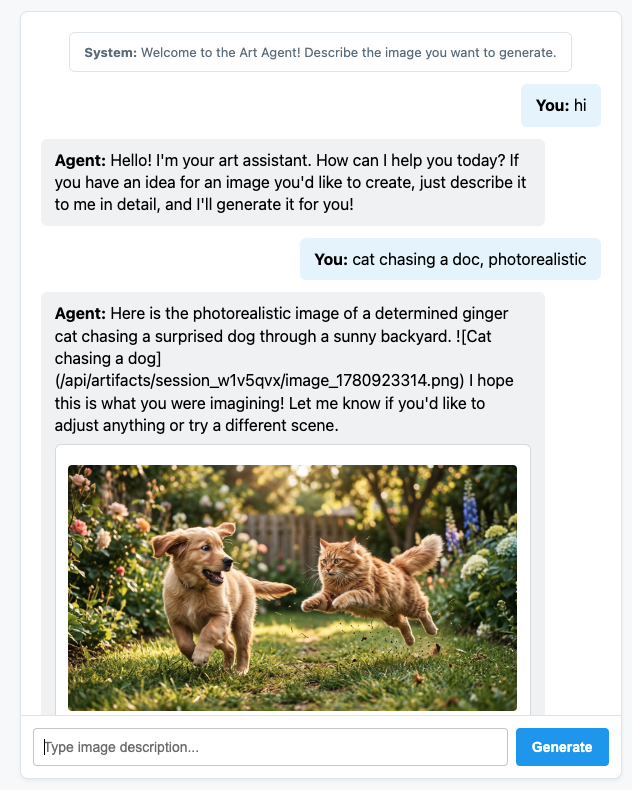
एजेंट की क्षमताओं को टेस्ट करने के लिए, ADK के डेवलपमेंट यूज़र इंटरफ़ेस का इस्तेमाल करें. इसके लिए, एजेंट को कुछ प्रॉम्प्ट दें. जैसे:
- पेड़ के नीचे सोती हुई ऐनिमे गर्ल. पेस्टल कलर. 16:9
- झील में दिख रहे केबिन की फ़ोटो. दोपहर के बाद. पुरानी यादें ताज़ा करने वाला.
आपको एजेंट का जवाब टेक्स्ट और जनरेट की गई इमेज के साथ दिखेगा.
4. एक सामान्य फ़्रंटएंड बनाना
अब हम अपने एजेंट के लिए एक वेब ऐप्लिकेशन बनाएंगे. हम अपने ADK रनर को चलाने और एक पेज वाला आसान चैट इंटरफ़ेस देने के लिए, FastAPI का इस्तेमाल करेंगे.
सबसे पहले, अपने टर्मिनल में Ctrl+C टाइप करके, ADK डेवलपमेंट सर्वर को बंद करें. इसके बाद, वर्कस्पेस के रूट (~/a2ui_lab/main.py) में main.py नाम की फ़ाइल बनाएं और उसमें यह कॉन्टेंट शामिल करें:
main.py
import os
import logging
from fastapi import FastAPI, HTTPException
from fastapi.staticfiles import StaticFiles
from pydantic import BaseModel
from google.adk.runners import InMemoryRunner
from google.adk.agents.run_config import RunConfig
from google.genai import types

from art_creator.agent import root_agent

logging.basicConfig(level=logging.INFO)
logger = logging.getLogger(__name__)

app = FastAPI(title="Art Agent - Simple Chat")

class ChatRequest(BaseModel):
    prompt: str
    session_id: str = "default_session"

static_dir = os.path.join(os.path.dirname(__file__), "static")
os.makedirs(static_dir, exist_ok=True)

runner = InMemoryRunner(agent=root_agent)
runner.auto_create_session = True

@app.get("/api/artifacts/{session_id}/{filename}")
async def get_artifact(session_id: str, filename: str):
    user_id = "default_user"
    part = await runner.artifact_service.load_artifact(
        app_name=runner.app_name,
        user_id=user_id,
        filename=filename,
        session_id=session_id
    )
    if not part:
        raise HTTPException(status_code=404, detail="Artifact not found")
    if part.inline_data:
        from fastapi.responses import Response
        return Response(content=part.inline_data.data, media_type=part.inline_data.mime_type)
    raise HTTPException(status_code=400, detail="Unsupported artifact format")

@app.post("/api/chat")
async def chat_endpoint(request: ChatRequest):
    if not request.prompt.strip():
        raise HTTPException(status_code=400, detail="Prompt cannot be empty")

    user_id = "default_user"
    content = types.Content(
        role="user",
        parts=[types.Part.from_text(text=request.prompt)]
    )

    full_response_text = ""
    try:
        async for event in runner.run_async(
            user_id=user_id,
            session_id=request.session_id,
            new_message=content,
            run_config=RunConfig(save_input_blobs_as_artifacts=True),
        ):
            if event.content and event.content.parts:
                if event.author != "user":
                    for part in event.content.parts:
                        if part.text:
                            full_response_text += part.text
                        elif part.inline_data:
                            try:
                                # Process raw binary/custom text parts (A2UI callback packages)
                                text_data = part.inline_data.data.decode("utf-8")
                                full_response_text += text_data
                            except Exception:
                                pass
    except Exception as e:
        logger.exception("Error running ADK agent:")
        raise HTTPException(status_code=500, detail=str(e))

    image_url = None
    try:
        artifact_keys = await runner.artifact_service.list_artifact_keys(
            app_name=runner.app_name,
            user_id=user_id,
            session_id=request.session_id
        )
        image_keys = [k for k in artifact_keys if k.startswith("image_") and k.endswith(".png")]
        if image_keys:
            sorted_keys = sorted(image_keys, reverse=True)
            image_url = f"/api/artifacts/{request.session_id}/{sorted_keys[0]}"
    except Exception:
        pass

    return {
        "text": full_response_text.strip(),
        "image_url": image_url
    }

app.mount("/static", StaticFiles(directory=static_dir), name="static")

@app.get("/")
async def read_index():
    from fastapi.responses import FileResponse
    return FileResponse(os.path.join(static_dir, "index.html"))
इसके बाद, फ़्रंटएंड फ़ाइलों को सेव करने के लिए static डायरेक्ट्री बनाएं:
mkdir -p static
अब इंडेक्स एचटीएमएल (static/index.html) जोड़ें:
static/index.html
<!DOCTYPE html>
<html lang="en">
<head>
    <meta charset="UTF-8">
    <meta name="viewport" content="width=device-width, initial-scale=1.0">
    <title>Art Agent - Simple Chat</title>
    <link rel="stylesheet" href="/static/style.css">
</head>
<body>
    <div class="container">
        <div id="chat-messages" class="messages">
            <div class="message system">
                <strong>System:</strong> Welcome to the Art Agent! Describe the image you want to generate.
            </div>
        </div>
        <form id="chat-form" class="input-form">
            <input type="text" id="user-input" placeholder="Type image description..." autocomplete="off" required>
            <button type="submit">Generate</button>
        </form>
    </div>
    <script src="/static/app.js"></script>
</body>
</html>
स्टाइलिंग सीएसएस (static/style.css):
static/style.css
body {
    font-family: -apple-system, BlinkMacSystemFont, "Segoe UI", Roboto, Helvetica, Arial, sans-serif;
    background-color: #f7f9fa;
    margin: 0;
    padding: 20px;
    display: flex;
    justify-content: center;
}

.container {
    width: 100%;
    max-width: 600px;
    background: #ffffff;
    border: 1px solid #e1e8ed;
    border-radius: 8px;
    box-shadow: 0 2px 4px rgba(0,0,0,0.05);
    display: flex;
    flex-direction: column;
    height: 80vh;
}

.messages {
    flex: 1;
    overflow-y: auto;
    padding: 20px;
    display: flex;
    flex-direction: column;
    gap: 12px;
}

.message {
    padding: 10px 14px;
    border-radius: 6px;
    max-width: 85%;
    line-height: 1.4;
    word-wrap: break-word;
}

.message.user {
    background-color: #e8f5fe;
    align-self: flex-end;
}

.message.agent {
    background-color: #f1f3f4;
    align-self: flex-start;
}

.message.system {
    background-color: #fff;
    border: 1px solid #e1e8ed;
    color: #657786;
    align-self: center;
    font-size: 13px;
    text-align: center;
}

.input-form {
    display: flex;
    border-top: 1px solid #e1e8ed;
    padding: 12px;
}

.input-form input {
    flex: 1;
    border: 1px solid #ccc;
    border-radius: 4px;
    padding: 10px;
    font-size: 14px;
    outline: none;
}

.input-form button {
    background-color: #1da1f2;
    color: white;
    border: none;
    border-radius: 4px;
    padding: 10px 16px;
    margin-left: 8px;
    font-size: 14px;
    font-weight: bold;
    cursor: pointer;
}

.input-form button:hover {
    background-color: #1a91da;
}

.generated-img {
    max-width: 100%;
    border-radius: 4px;
    margin-top: 8px;
    display: block;
}

.image-card {
    border: 1px solid #ddd;
    border-radius: 6px;
    padding: 12px;
    background-color: #fff;
    margin-top: 8px;
}

.btn-download {
    background-color: #1da1f2;
    color: white;
    border: none;
    border-radius: 4px;
    padding: 8px 12px;
    font-size: 13px;
    font-weight: bold;
    cursor: pointer;
    margin-top: 8px;
    width: 100%;
}
आखिर में, JavaScript कंट्रोलर (static/app.js) जोड़ें:
static/app.js
document.addEventListener('DOMContentLoaded', () => {
    const chatForm = document.getElementById('chat-form');
    const userInput = document.getElementById('user-input');
    const chatMessages = document.getElementById('chat-messages');
    const sessionId = "session_" + Math.random().toString(36).substring(2, 9);

    chatForm.addEventListener('submit', async (e) => {
        e.preventDefault();
        const prompt = userInput.value.trim();
        if (!prompt) return;

        userInput.value = '';
        appendMessage('user', prompt);

        const tempBubble = appendMessage('agent', '...');

        try {
            const response = await fetch('/api/chat', {
                method: 'POST',
                headers: { 'Content-Type': 'application/json' },
                body: JSON.stringify({ prompt, session_id: sessionId })
            });
            const data = await response.json();
            tempBubble.remove();

            const textValue = (data && typeof data === 'object' && data.text) ? data.text : "";
            const imageUrl = (data && typeof data === 'object' && data.image_url) ? data.image_url : null;
            appendMessage('agent', textValue, imageUrl);
        } catch (error) {
            tempBubble.remove();
            appendMessage('agent', `Error: ${error.message}`);
        }
    });

    function appendMessage(sender, text, imageUrl = null) {
        const bubble = document.createElement('div');
        bubble.className = `message ${sender}`;

        const content = document.createElement('span');
        content.innerHTML = `<strong>${sender === 'user' ? 'You' : 'Agent'}:</strong> `;

        const textNode = document.createTextNode(text);
        content.appendChild(textNode);
        bubble.appendChild(content);

        // Always format multi-line JSON blocks nicely if the message is from the agent and looks like JSON
        if (sender === 'agent' && text && (text.startsWith('{') || text.startsWith('['))) {
            bubble.style.fontFamily = 'monospace';
            bubble.style.whiteSpace = 'pre-wrap';
            bubble.style.fontSize = '12px';
        }

        if (imageUrl) {
            const card = document.createElement('div');
            card.className = 'image-card';
            const img = document.createElement('img');
            img.src = imageUrl;
            img.className = 'generated-img';
            card.appendChild(img);

            const dlBtn = document.createElement('button');
            dlBtn.className = 'btn-download';
            dlBtn.textContent = 'Download PNG';
            dlBtn.onclick = () => {
                const link = document.createElement('a');
                link.href = imageUrl;
                link.download = `generation-${Date.now()}.png`;
                link.click();
            };
            card.appendChild(dlBtn);
            bubble.appendChild(card);
        }

        chatMessages.appendChild(bubble);
        chatMessages.scrollTop = chatMessages.scrollHeight;
        return bubble;
    }
});
FastAPI सर्वर शुरू करके, अपने वेब ऐप्लिकेशन की जांच करें:
uv run python -m uvicorn main:app --port 8080 --host 0.0.0.0
अपनी पसंद के मुताबिक बनाई गई चैट को ऐक्सेस करने के लिए, पोर्ट 8080 पर वेब प्रीव्यू का इस्तेमाल करें. अब सीधे एजेंट से बात की जा सकती है.
5. एजेंट को A2UI मैसेज भेजने के लिए कॉन्फ़िगर करना
अब हम एजेंट को अपडेट करेंगे, ताकि वह सिर्फ़ टेक्स्ट के बजाय स्ट्रक्चर्ड यूज़र इंटरफ़ेस (यूआई) दिखा सके. हम एजेंट के लिए, A2UI के बारे में जानकारी देने वाला सिस्टम प्रॉम्प्ट बनाने के लिए, आधिकारिक a2ui-agent-sdk का इस्तेमाल करेंगे.
A2UI SDK का इस्तेमाल करते समय, हम सीधे तौर पर एजेंट के निर्देशों को तय करने के बजाय, A2uiSchemaManager क्लास का इस्तेमाल करते हैं. यह क्लास, एजेंट के सिस्टम प्रॉम्प्ट को स्ट्रक्चर करेगी, ताकि A2UI की इंटरफ़ेस जनरेट करने की क्षमताओं को समझा जा सके. इसमें कॉम्पोनेंट कैटलॉग, कॉम्पोनेंट का पूरा स्कीमा, और इस्तेमाल के उदाहरणों (अगर उपलब्ध हों) को ऐक्सेस करने की सुविधा देना शामिल है.
- सबसे पहले, Ctrl+C दबाकर FastAPI सर्वर को बंद करें.
A2uiSchemaManagerऔर हमारे नएa2ui_callbackहुक को इंटिग्रेट करने के लिए,art_creator/agent.pyमें बदलाव करें:
art_creator/agent.py
import os
import time
from google.adk.agents.llm_agent import Agent
from google.adk.tools.tool_context import ToolContext
from google.genai import types
from a2ui.schema.manager import A2uiSchemaManager
from a2ui.basic_catalog.provider import BasicCatalog

# Load env variables
from dotenv import load_dotenv
load_dotenv(os.path.join(os.path.dirname(__file__), ".env"))


async def generate_image(prompt: str, tool_context: ToolContext) -> dict:
    """Generates a high-quality image based on the user's detailed description prompt."""
    from google.genai import Client
    client = Client(
        vertexai=True,
        project=os.environ.get("GOOGLE_CLOUD_PROJECT"),
        location=os.environ.get("GOOGLE_CLOUD_LOCATION", "global")
    )

    try:
        response = client.models.generate_content(
            model="gemini-3.1-flash-image",
            contents=prompt,
            config=types.GenerateContentConfig(
                response_modalities=['TEXT', 'IMAGE'],
            )
        )

        image_bytes = None
        for part in response.parts or []:
            if part.inline_data is not None:
                image_bytes = part.inline_data.data
                break

        if not image_bytes:
            return {"status": "failed", "detail": "No image data returned"}

        filename = f"image_{int(time.time())}.png"
        await tool_context.save_artifact(
            filename,
            types.Part.from_bytes(data=image_bytes, mime_type='image/png'),
        )

        return {
            "status": "success",
            "filename": filename,
            "url": f"/api/artifacts/{tool_context.session.id}/{filename}"
        }
    except Exception as e:
        return {"status": "failed", "detail": str(e)}

schema_manager = A2uiSchemaManager(
    version="0.8",
    catalogs=[BasicCatalog.get_config("0.8")],
)

instruction = schema_manager.generate_system_prompt(
    role_description=(
        "You are a specialized Image Creator agent. "
        "When given an image description, analyze the prompt and ask the user for any missing details. "
        "The image generation prompt should include: "
        "Subject, environment, style, lighting, color and mood. "
    ),
    workflow_description=(
        "1. if the user greets you, greet the user back explaining your purpose. "
        "2. if the user describes an image, DO NOT GENERATE IT IMMEDIATELY: compare with "
        "   the ideal generation prompt and ask the user for any missing details using "
        "   rich A2UI UI elements only. NOTE: only run this step once per image, if the user "
        "   decides to not detail one or more elements it is ok. "
        "3. combine the original prompt with the responses in the UI elements and call `generate_image` "
        "   with the generated prompt. "
        "   DO NOT INCLUDE EXAMPLES IN THE GENERATED PROMPT, ONLY THE ELEMENTS THE USER ASKED FOR. "
        "4. display the resulting image to the user in a card including the image, the prompt and a "
        "   download button"
    ),
    ui_description=(
        "Use Card, Text, Image, Multichoice and Button components to present the options. "
        "Always include a single choice selection box for image resolution (1K, 2K or 4K) and one for "
        "aspect ratio (1:1, 16:9 or 9:16). "
        "When rendering the final output (generated image) always render the generated image using an "
        "Image component with the url bound to the image's URL/path returned by the tool. "
        "Add a Text component with the prompt that generated the image. "
        "Include a Button component labeled 'Download PNG' to allow downloading the image. "
        "Do NOT use markdown formatting in text values. Use the usageHint property for heading levels instead. "
        "Respond ONLY with the A2UI JSON array. Do NOT include any text "
        "outside the JSON. Put all explanations into Text components."
    ),
    include_schema=True,
)

root_agent = Agent(
    model="gemini-3.5-flash",
    name="art_agent_a2ui",
    instruction=instruction,
    tools=[generate_image],
)
ध्यान दें कि अब एजेंट के लिए निर्देश, एजेंट की परिभाषा में हार्डकोड करने के बजाय schema_manager.generate_system_prompt कॉल से जनरेट किए जाते हैं.
FastAPI सर्वर शुरू करके, अपने वेब ऐप्लिकेशन की जांच करें:
uv run python -m uvicorn main:app --port 8080 --host 0.0.0.0
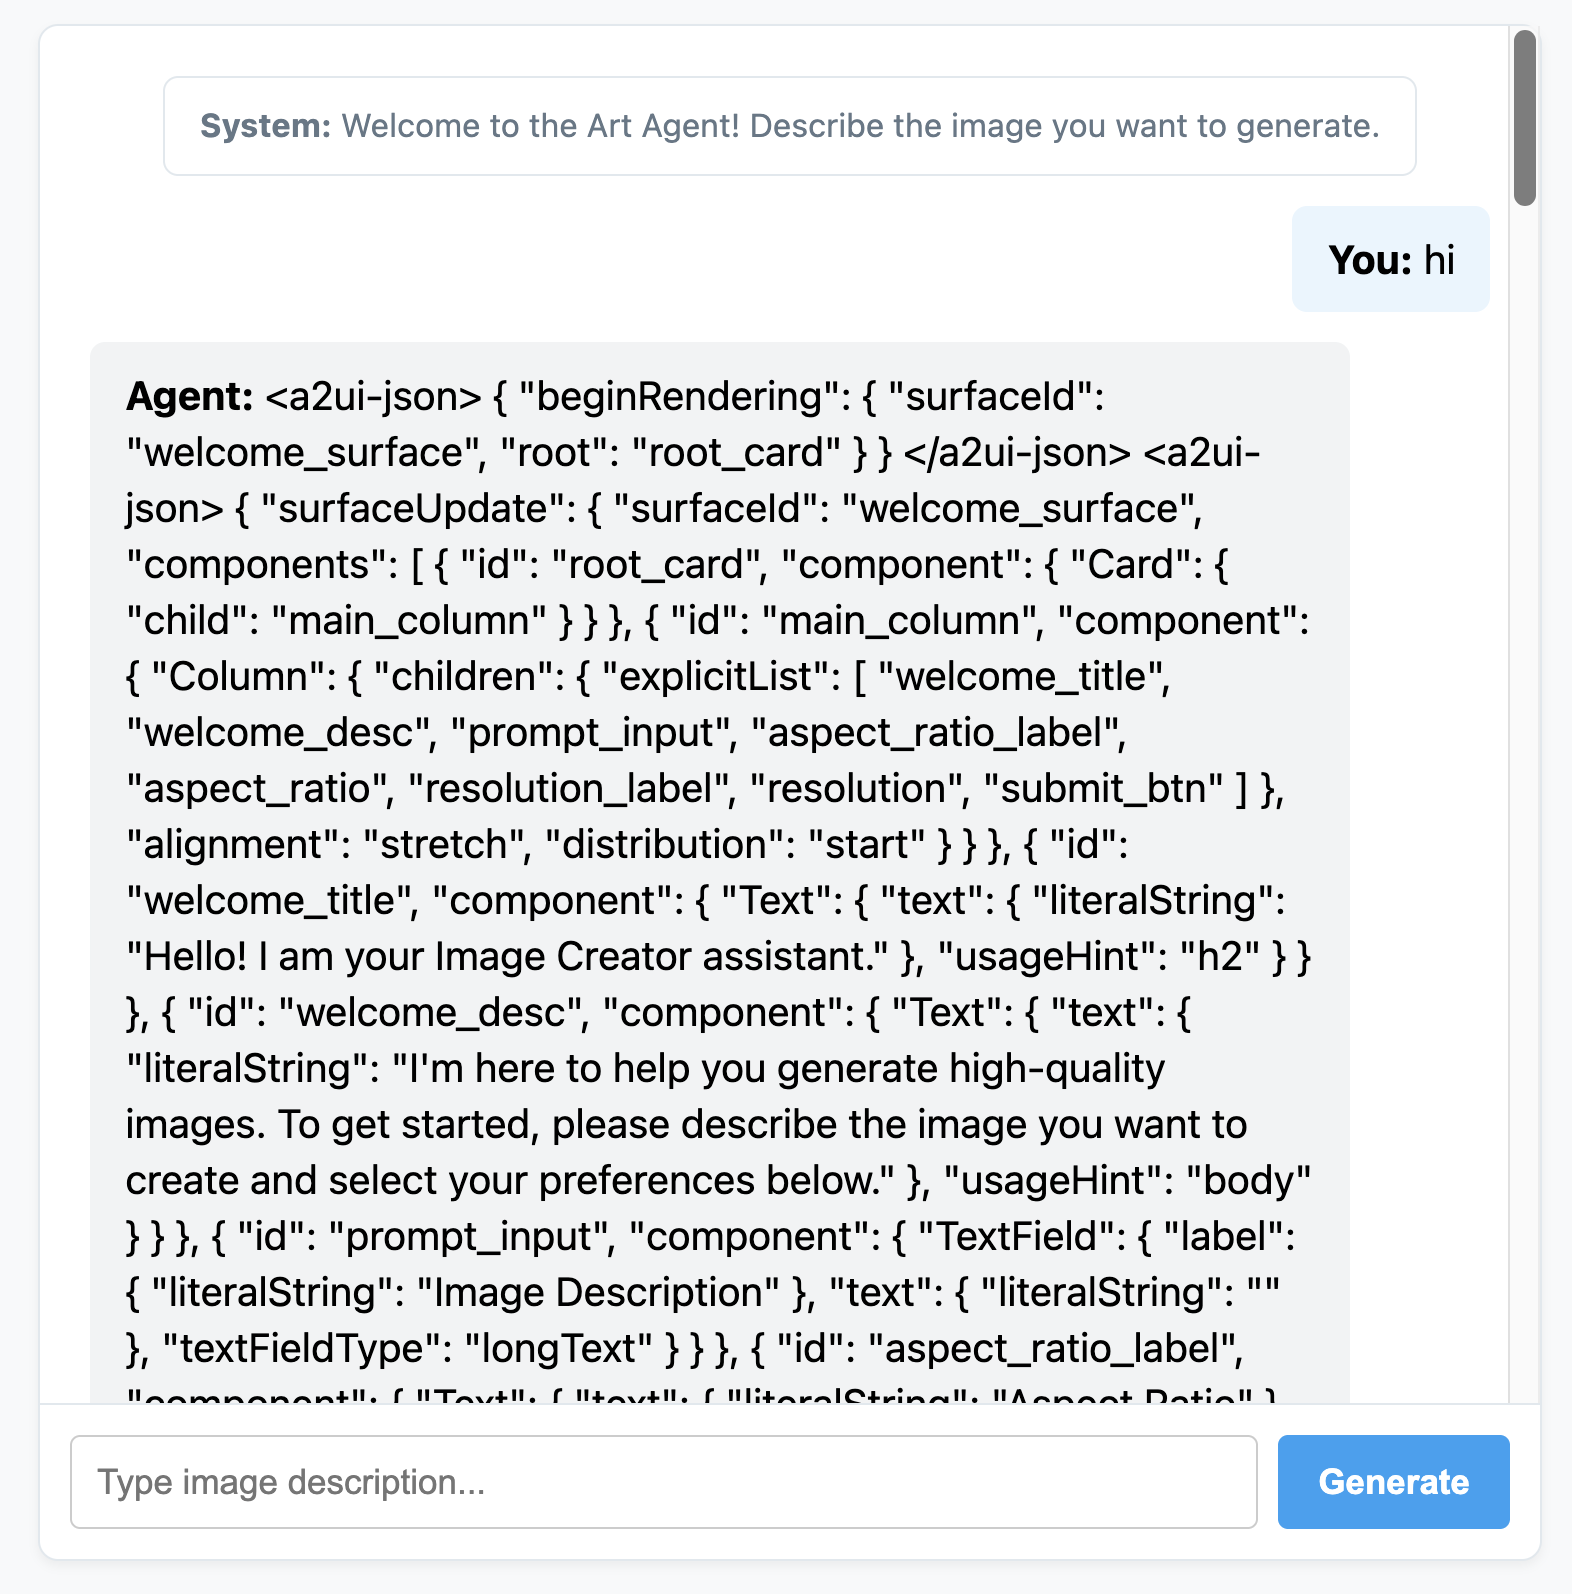
अपनी पसंद के मुताबिक बनाई गई चैट को ऐक्सेस करने के लिए, पोर्ट 8080 पर वेब प्रीव्यू का इस्तेमाल करें. आपको दिखेगा कि अब एजेंट, सामान्य टेक्स्ट के बजाय JSON मैसेज भेज रहा है. यह A2UI एलिमेंट का इंटरनल रिप्रेजेंटेशन है. इसे हम अगले सेक्शन में रेंडर करेंगे.
6. एजेंट के लिए कस्टम फ़्रंटएंड बनाना
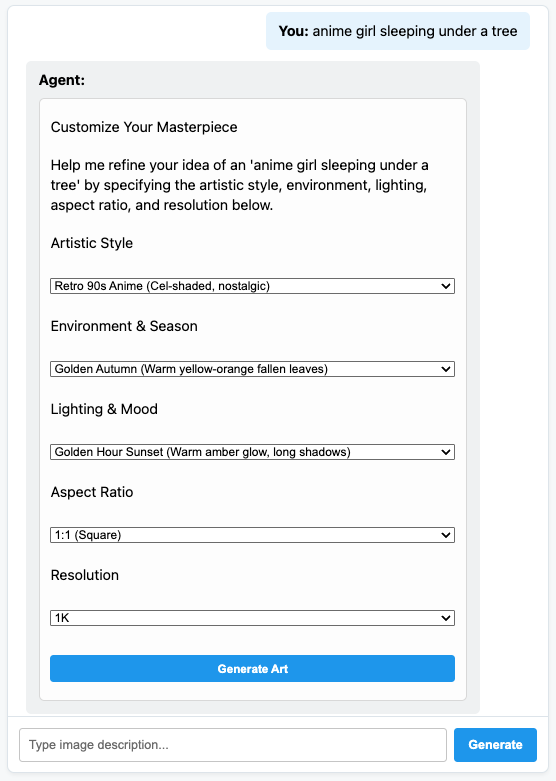
इस चरण में, हमारे क्लाइंट को A2UI के ऐसे मैसेज की सूची मिलती है जिनमें कोई गड़बड़ी नहीं है (beginRendering, surfaceUpdate, और dataModelUpdate). अब हम सादे JavaScript में कस्टम क्लाइंट-साइड रेंडरिंग इंजन बनाएंगे, ताकि इन कॉम्पोनेंट को काम करते हुए देखा जा सके.
यहां A2UI पार्सिंग और रेंडरिंग लॉजिक के साथ पूरा static/app.js दिया गया है:
static/app.js
document.addEventListener('DOMContentLoaded', () => {
const chatForm = document.getElementById('chat-form');
const userInput = document.getElementById('user-input');
const chatMessages = document.getElementById('chat-messages');
const sessionId = "session_" + Math.random().toString(36).substring(2, 9);
async function sendChat(prompt, showInUi = true) {
if (!prompt) return;
if (showInUi) {
appendMessage('user', prompt);
}
const tempBubble = appendMessage('agent', '...');
try {
const response = await fetch('/api/chat', {
method: 'POST',
headers: { 'Content-Type': 'application/json' },
body: JSON.stringify({ prompt, session_id: sessionId })
});
const data = await response.json();
tempBubble.remove();
let text = data.text || "";
let a2uiMessages = [];
// 1. Extract <a2ui-json> blocks
const a2uiRegex = /<a2ui-json>(.*?)<\/a2ui-json>/gs;
let match;
while ((match = a2uiRegex.exec(text)) !== null) {
try {
const jsonStr = match[1].trim();
const parsed = JSON.parse(jsonStr);
const parsedList = Array.isArray(parsed) ? parsed : [parsed];
for (const msg of parsedList) {
if (msg && typeof msg === 'object') {
a2uiMessages.push(msg);
}
}
} catch (e) {
console.error("Error parsing <a2ui-json> block:", e);
}
}
// 2. Extract <a2a_datapart_json> blocks (for robust history/callback parsing)
const a2aRegex = /<a2a_datapart_json>(.*?)<\/a2a_datapart_json>/gs;
while ((match = a2aRegex.exec(text)) !== null) {
try {
const jsonStr = match[1].trim();
const parsed = JSON.parse(jsonStr);
const dataMsg = (parsed && parsed.kind === 'data') ? parsed.data : parsed;
if (dataMsg && typeof dataMsg === 'object') {
a2uiMessages.push(dataMsg);
}
} catch (e) {
console.error("Error parsing <a2a_datapart_json> block:", e);
}
}
// 3. Clean XML and A2UI JSON tags from displayed conversational text
const cleanText = text.replace(/<(a2ui-json|a2a_datapart_json)>.*?<\/\1>/gs, '').trim();
const imageUrl = (data && typeof data === 'object' && data.image_url) ? data.image_url : null;
appendMessage('agent', cleanText, imageUrl, a2uiMessages);
} catch (error) {
tempBubble.remove();
appendMessage('agent', `Error: ${error.message}`);
}
}
chatForm.addEventListener('submit', async (e) => {
e.preventDefault();
const prompt = userInput.value.trim();
if (!prompt) return;
userInput.value = '';
await sendChat(prompt, true);
});
function renderA2UI(a2uiMessages) {
try {
let rootId = null;
const components = {};
const dataModel = {};
for (const msg of a2uiMessages) {
if (msg.beginRendering) {
rootId = msg.beginRendering.root;
} else if (msg.surfaceUpdate) {
for (const item of msg.surfaceUpdate.components) {
components[item.id] = item.component;
}
} else if (msg.dataModelUpdate) {
for (const item of msg.dataModelUpdate.contents) {
const val = item.valueString !== undefined ? item.valueString :
item.valueBool !== undefined ? item.valueBool :
item.valueInt !== undefined ? item.valueInt :
item.valueDouble !== undefined ? item.valueDouble : item.valueString;
dataModel[item.key] = val;
}
}
}
if (!rootId || Object.keys(components).length === 0) {
return null;
}
function resolveValue(valObj) {
if (!valObj) return '';
let val = '';
if (typeof valObj === 'string') val = valObj;
else if (valObj.literalString !== undefined) val = valObj.literalString;
else if (valObj.path !== undefined) val = dataModel[valObj.path] || '';
else val = JSON.stringify(valObj);
// Dynamically replace any wrong session IDs in artifact URLs with the active sessionId
if (typeof val === 'string' && val.includes('/api/artifacts/')) {
val = val.replace(/\/api\/artifacts\/session_[a-z0-9]+/g, `/api/artifacts/${sessionId}`);
}
return val;
}
function buildElement(id) {
try {
const compDesc = components[id];
if (!compDesc) return null;
const type = Object.keys(compDesc)[0];
const props = compDesc[type];
const el = document.createElement('div');
el.className = `a2ui-component a2ui-${type.toLowerCase()}`;
el.style.margin = '4px 0';
if (type === 'Column') {
el.style.display = 'flex';
el.style.flexDirection = 'column';
el.style.gap = '8px';
const children = props.children?.explicitList || [];
for (const childId of children) {
const childEl = buildElement(childId);
if (childEl) el.appendChild(childEl);
}
} else if (type === 'Row') {
el.style.display = 'flex';
el.style.flexDirection = 'row';
el.style.gap = '8px';
el.style.alignItems = 'center';
const children = props.children?.explicitList || [];
for (const childId of children) {
const childEl = buildElement(childId);
if (childEl) el.appendChild(childEl);
}
} else if (type === 'Card') {
el.style.border = '1px solid #ddd';
el.style.borderRadius = '6px';
el.style.padding = '12px';
el.style.backgroundColor = '#fdfdfd';
el.style.marginTop = '8px';
if (props.child) {
const childEl = buildElement(props.child);
if (childEl) el.appendChild(childEl);
}
} else if (type === 'Text') {
const textVal = resolveValue(props.text);
const tag = props.usageHint === 'h1' ? 'h3' :
props.usageHint === 'h2' ? 'h4' : 'p';
const textEl = document.createElement(tag);
textEl.textContent = textVal;
textEl.style.margin = '0 0 4px 0';
el.appendChild(textEl);
} else if (type === 'Image') {
const srcVal = resolveValue(props.url) || resolveValue(props.src);
const imgEl = document.createElement('img');
imgEl.src = srcVal;
imgEl.style.maxWidth = '100%';
imgEl.style.borderRadius = '4px';
imgEl.style.display = 'block';
imgEl.style.marginTop = '6px';
imgEl.className = 'generated-img';
el.appendChild(imgEl);
} else if (type === 'Divider') {
const hrEl = document.createElement('hr');
hrEl.style.border = '0';
hrEl.style.borderTop = '1px solid #eee';
hrEl.style.margin = '12px 0';
el.appendChild(hrEl);
} else if (type === 'MultipleChoice') {
const labelVal = resolveValue(props.label);
const options = props.options?.explicitList || (Array.isArray(props.options) ? props.options : []);
const container = document.createElement('div');
container.style.display = 'flex';
container.style.flexDirection = 'column';
container.style.gap = '4px';
container.style.margin = '8px 0';
if (labelVal) {
const labelEl = document.createElement('label');
labelEl.textContent = labelVal;
labelEl.style.fontSize = '12px';
labelEl.style.fontWeight = 'bold';
container.appendChild(labelEl);
}
const selectEl = document.createElement('select');
selectEl.className = 'a2ui-select';
selectEl.name = id;
for (const option of options) {
const optEl = document.createElement('option');
optEl.value = option.value !== undefined ? option.value : (option.id !== undefined ? option.id : '');
optEl.textContent = resolveValue(option.label);
selectEl.appendChild(optEl);
}
container.appendChild(selectEl);
el.appendChild(container);
} else if (type === 'Button') {
let labelVal = props.label ? resolveValue(props.label) : '';
if (!labelVal && props.child) {
const childComp = components[props.child];
if (childComp && childComp.Text) {
labelVal = resolveValue(childComp.Text.text);
}
}
const btnEl = document.createElement('button');
btnEl.className = 'btn-download';
btnEl.textContent = labelVal || 'Submit';
btnEl.addEventListener('click', (e) => {
e.preventDefault();
const action = props.action;
let downloadUrl = null;
if (action && (action.name === 'download_file' || action.name === 'download') && action.context) {
const urlContext = action.context.find(ctx => ctx.key === 'url');
if (urlContext) {
downloadUrl = resolveValue(urlContext.value);
}
}
const isDownload = downloadUrl || (labelVal && labelVal.toLowerCase().includes('download'));
if (isDownload) {
const finalUrl = downloadUrl || (el.closest('.message')?.querySelector('img')?.src);
if (finalUrl) {
const link = document.createElement('a');
link.href = finalUrl;
link.download = `generation-${Date.now()}.png`;
link.click();
}
} else {
const bubbleEl = el.closest('.message');
const selects = bubbleEl.querySelectorAll('.a2ui-select');
let answers = [];
selects.forEach(sel => {
let labelText = sel.previousSibling ? sel.previousSibling.textContent : sel.name;
const selectedText = sel.options[sel.selectedIndex]?.textContent || sel.value;
answers.push(`- ${labelText}: ${selectedText}`);
});
if (answers.length > 0) {
const responseText = `Selected options:\n` + answers.join('\n');
sendChat(responseText, false);
} else {
sendChat(labelVal || 'Submit', false);
}
}
});
el.appendChild(btnEl);
}
return el;
} catch (err) {
console.error('Error building component:', id, err);
return null;
}
}
return buildElement(rootId);
} catch (err) {
console.error('Error in renderA2UI:', err);
return null;
}
}
function appendMessage(sender, text, imageUrl = null, a2ui = null) {
const bubble = document.createElement('div');
bubble.className = `message ${sender}`;
const textSpan = document.createElement('span');
textSpan.innerHTML = `<strong>${sender === 'user' ? 'You' : 'Agent'}:</strong> `;
bubble.appendChild(textSpan);
if (text) {
const textContent = document.createTextNode(text);
textSpan.appendChild(textContent);
}
if (sender === 'agent' && a2ui && a2ui.length > 0) {
const a2uiEl = renderA2UI(a2ui);
if (a2uiEl) {
bubble.appendChild(a2uiEl);
}
}
if (imageUrl) {
const imgContainer = document.createElement('div');
imgContainer.style.marginTop = '8px';
const img = document.createElement('img');
img.src = imageUrl;
img.style.maxWidth = '100%';
img.style.borderRadius = '4px';
img.className = 'generated-img';
imgContainer.appendChild(img);
bubble.appendChild(imgContainer);
}
chatMessages.appendChild(bubble);
chatMessages.scrollTop = chatMessages.scrollHeight;
return bubble;
}
});
FastAPI ऐप्लिकेशन सर्वर को फिर से शुरू करें:
uv run python -m uvicorn main:app --port 8080 --host 0.0.0.0
साथ ही, पूरी तरह से डाइनैमिक A2UI आर्ट क्रिएटर एजेंट से बात करें!
7. बधाई हो!
आपने एक ऐसा ADK एजेंट बनाया है जो A2UI का इस्तेमाल करके, यूज़र इंटरफ़ेस (यूआई) के एलिमेंट डाइनैमिक तरीके से जनरेट करता है. अपनी लर्निंग जारी रखने के लिए, अलग-अलग फ़्रेमवर्क इंटिग्रेशन एक्सप्लोर करें. इसके अलावा, यहां दिए गए रेफ़रंस में मौजूद दस्तावेज़ देखें.
प्रोडक्शन फ़्रंटएंड बनाना
इस वर्कशॉप में, हमने सिखाने के मकसद से, कस्टम बनाया गया प्योर JS फ़्रंटएंड इस्तेमाल किया है. हालांकि, प्रोडक्शन के लिए आपको आधिकारिक A2UI रेंडरर में से किसी एक का इस्तेमाल करके फ़्रंटएंड बनाना होगा:
प्लैटफ़ॉर्म | प्रतिपादक | इंस्टॉल करें |
वेब (React) | @a2ui/react | npm install @a2ui/react |
वेब (Lit) | @a2ui/lit | npm install @a2ui/lit |
वेब (Angular) | @a2ui/angular | npm install @a2ui/angular |
मोबाइल/डेस्कटॉप | Flutter GenUI SDK |