
1. Introduction
In this Codelab, you will build an agent with ADK that is powered by Gemini 3.1 Pro. The agent will be equipped with tools from two remote (Google-hosted) MCP servers to securely access BigQuery for demographic, pricing, and sales data, and Google Maps for real-world location analysis and validation.
The agent orchestrates requests between the user and Google Cloud services to solve business problems related to the fictitious bakery dataset.

What you'll do
- Set up the Data: Create the foundational bakery dataset in BigQuery.
- Develop the Agent: Build an intelligent agent using the Agent Development Kit (ADK).
- Integrate Tools: Equip the agent with BigQuery and Maps functionalities via the MCP server.
- Analyze the Market: Interact with the agent to assess market trends and saturation.
What you'll need
- A web browser such as Chrome
- A Google Cloud project with billing enabled or a Gmail account.
This Codelab is for developers of all levels, including beginners. You will use the command-line interface in Google Cloud Shell and Python code for ADK development. You don't need to be a Python expert, but a basic understanding of how to read code will help you understand the concepts.
2. Before you begin
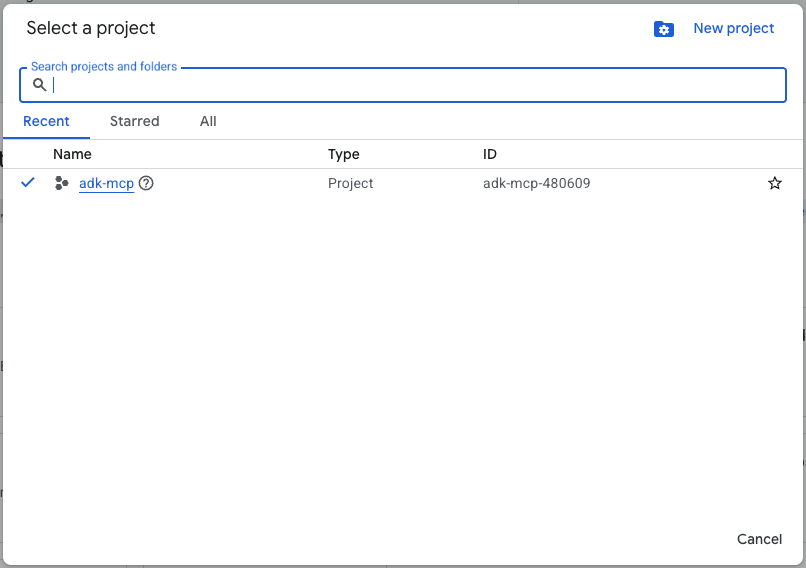
Create a Google Cloud Project
- In the Google Cloud Console, on the project selector page, select or create a Google Cloud project.
- Make sure that billing is enabled for your Cloud project. Learn how to check if billing is enabled on a project.
Start Cloud Shell
Cloud Shell is a command-line environment running in Google Cloud that comes preloaded with necessary tools.
- Click Activate Cloud Shell at the top of the Google Cloud console:

- Once connected to Cloud Shell, run this command to verify your authentication in Cloud Shell:
gcloud auth list
- Run the following command to confirm that your project is configured for use with gcloud:
gcloud config get project
- Confirm the project is as expected, and then run the command below to set your project id:
export PROJECT_ID=$(gcloud config get project)
3. Get the Code
Clone the Repository
- Clone the repository to your Cloud Shell environment:
git clone https://github.com/google/mcp.git
- Navigate to the demo directory:
cd mcp/examples/launchmybakery
Authenticate
Run the following command to authenticate with your Google Cloud account. This is required for the ADK to access BigQuery.
gcloud auth application-default login
Follow the prompts to complete the authentication process.
4. Configure environment and BigQuery
Run Setup Scripts
- Run the environment setup script. This script enables the BigQuery and Google Maps APIs, and creates a
.envfile with your Project ID and Maps API Key.
chmod +x setup/setup_env.sh
./setup/setup_env.sh
- Run the BigQuery setup script. This script automates creating the Cloud Storage bucket, uploading data, and provisioning the BigQuery dataset and tables.
chmod +x ./setup/setup_bigquery.sh
./setup/setup_bigquery.sh
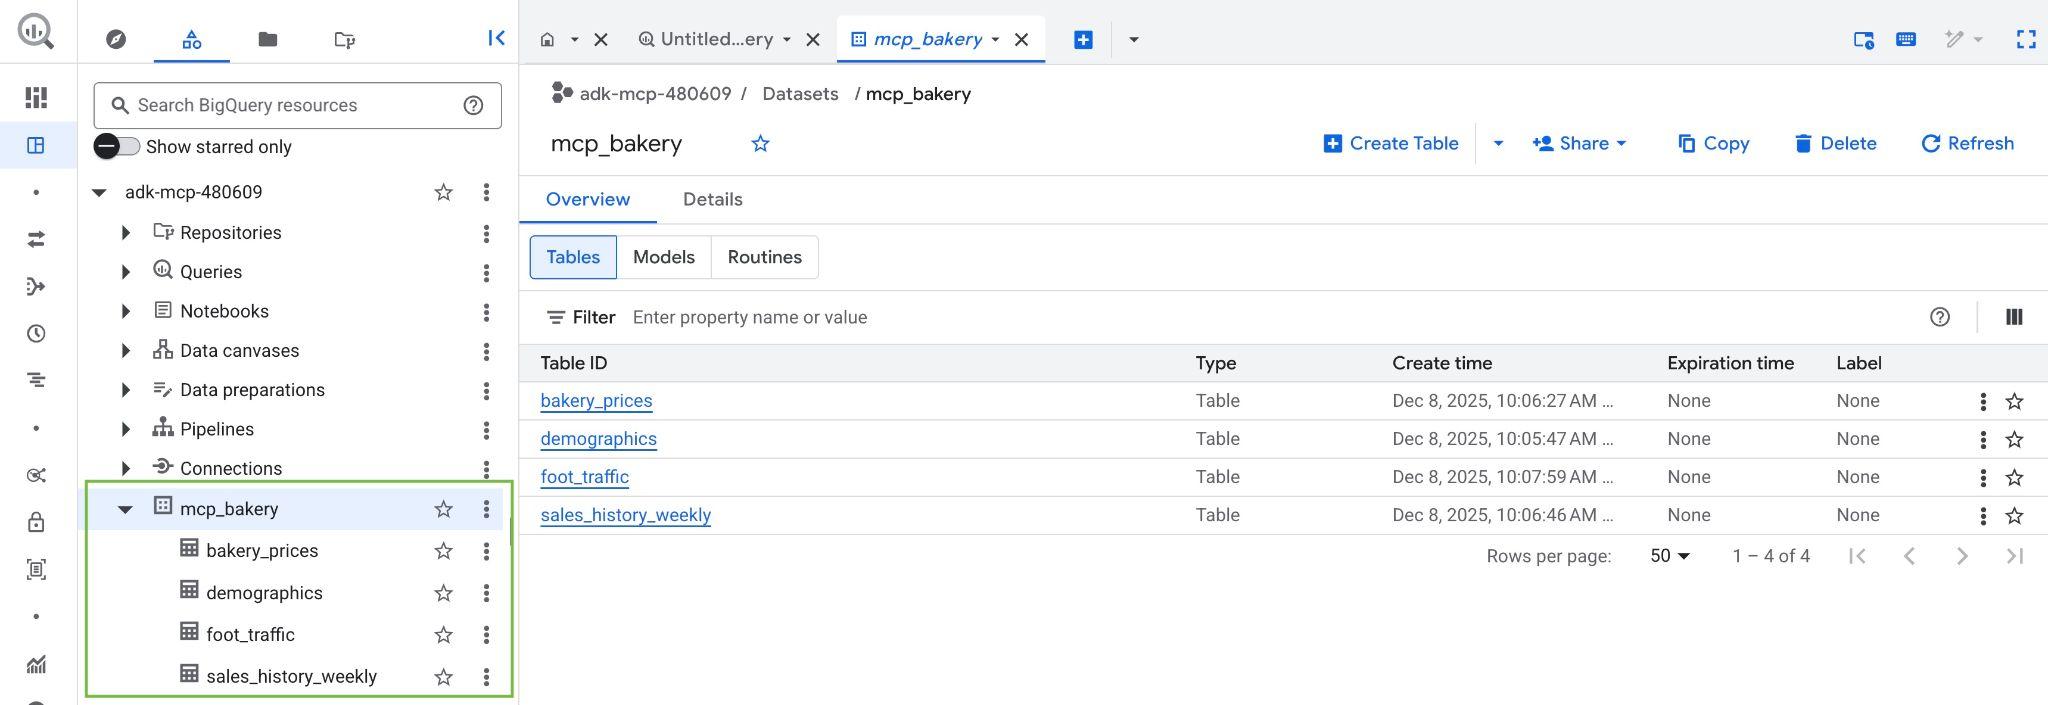
Once the script completes, the mcp_bakery dataset should be created and be populated with the following tables:
- demographics - census data and population characteristics by zip code.
- bakery_prices - competitor pricing and product details for various baked goods.
- sales_history_weekly - weekly sales performance (quantity and revenue) by store and product.
- foot_traffic - estimated foot traffic scores by zip code and time of day.
- Verify the dataset and tables are created by visiting the BigQuery console in your Google Cloud Project:
5. Install ADK
Now that the infrastructure is ready, let's create a virtual Python environment and install the required packages for ADK.
- Create a virtual environment:
python3 -m venv .venv
- Activate the virtual environment:
source .venv/bin/activate
- Install the ADK:
pip install google-adk==1.28.0
- Navigate to the agent directory:
cd adk_agent/
6. Inspect the ADK application
Click the Open Editor button in Cloud Shell to open Cloud Shell Editor and view the cloned repository under the mcp/examples/launchmybakery directory.

The agent code is already provided in the adk_agent/ directory. Let's explore the solution structure:
launchmybakery/
├── data/                        # Pre-generated CSV files for BigQuery
├── adk_agent/                   # AI Agent Application (ADK)
│   └── mcp_bakery_app/          # App directory
│       ├── agent.py             # Agent definition
│       ├── tools.py             # Custom tools for the agent
│       └── .env                 # Project configuration (created by setup script)
├── setup/                       # Infrastructure setup scripts
└── cleanup/                     # Infrastructure cleanup scripts
Key files in mcp_bakery_app:
agent.py: The core logic defining the agent, its tools, and the model (Gemini 3.1 Pro Preview).tools.py: Contains any custom tool definitions..env: Contains your project configuration and secrets (like API keys) created by the setup script.
1. MCP Toolset Initialization:
Now, open adk_agent/mcp_bakery_app/tools.py in the Editor to understand how the MCP toolsets are initialized.
To enable our agent to communicate with BigQuery and Google Maps, we need to configure the Model Context Protocol (MCP) clients.
The code establishes secure connections to Google's remote MCP servers using StreamableHTTPConnectionParams.
def get_maps_mcp_toolset():
    dotenv.load_dotenv()
    maps_api_key = os.getenv('MAPS_API_KEY', 'no_api_found')

    tools = MCPToolset(
        connection_params=StreamableHTTPConnectionParams(
            url=MAPS_MCP_URL,
            headers={
                "X-Goog-Api-Key": maps_api_key
            }
        )
    )
    print("MCP Toolset configured for Streamable HTTP connection.")
    return tools


def get_bigquery_mcp_toolset():

    credentials, project_id = google.auth.default(
            scopes=["https://www.googleapis.com/auth/bigquery"]
    )

    credentials.refresh(google.auth.transport.requests.Request())
    oauth_token = credentials.token

    HEADERS_WITH_OAUTH = {
        "Authorization": f"Bearer {oauth_token}",
        "x-goog-user-project": project_id
    }

    tools = MCPToolset(
        connection_params=StreamableHTTPConnectionParams(
            url=BIGQUERY_MCP_URL,
            headers=HEADERS_WITH_OAUTH
        )
    )
    print("MCP Toolset configured for Streamable HTTP connection.")
    return tools
- Maps Toolset: Configures the connection to the Maps MCP server using your API Key.
- BigQuery Toolset: This function configures the connection to the BigQuery MCP server. It uses google.auth to automatically retrieve your Cloud credentials, generates an OAuth Bearer token, and injects it into the Authorization header.
2. Agent Definition:
Now, open adk_agent/mcp_bakery_app/agent.py in the Editor to see how the agent is defined.
The LlmAgent is initialized with the gemini-3.1-pro-preview model.
maps_toolset = tools.get_maps_mcp_toolset()
bigquery_toolset = tools.get_bigquery_mcp_toolset()

root_agent = LlmAgent(
    model='gemini-3.1-pro-preview',
    name='root_agent',
    instruction=f"""
                Help the user answer questions by strategically combining insights from two sources:

                1.  **BigQuery toolset:** Access demographic (inc. foot traffic index), product pricing, and historical sales data in the  mcp_bakery dataset. Do not use any other dataset.
                Run all query jobs from project id: {project_id}.

                2.  **Maps Toolset:** Use this for real-world location analysis, finding competition/places and calculating necessary travel routes.
                    Include a hyperlink to an interactive map in your response where appropriate.
            """,
    tools=[maps_toolset, bigquery_toolset]
)
- System Instructions: The agent is given specific instructions to combine insights from both BigQuery (for data) and Maps (for location analysis).
- Tools: Both the
maps_toolsetandbigquery_toolsetare assigned to the agent, giving it access to the capabilities of both services.
The agent complies with the instructions and tools defined in the repo. Feel free to make changes to the instructions to see how it affects the agent's behavior.
7. Chat with your agent!
Return to the terminal in Cloud Shell and run this command to navigate to the adk_agent directory (if you haven't done this already):
cd adk_agent/
Run the following command to start the ADK web interface. This command spins up a lightweight web server to host the chat application:
adk web --allow_origins 'regex:https://.*\.cloudshell\.dev'
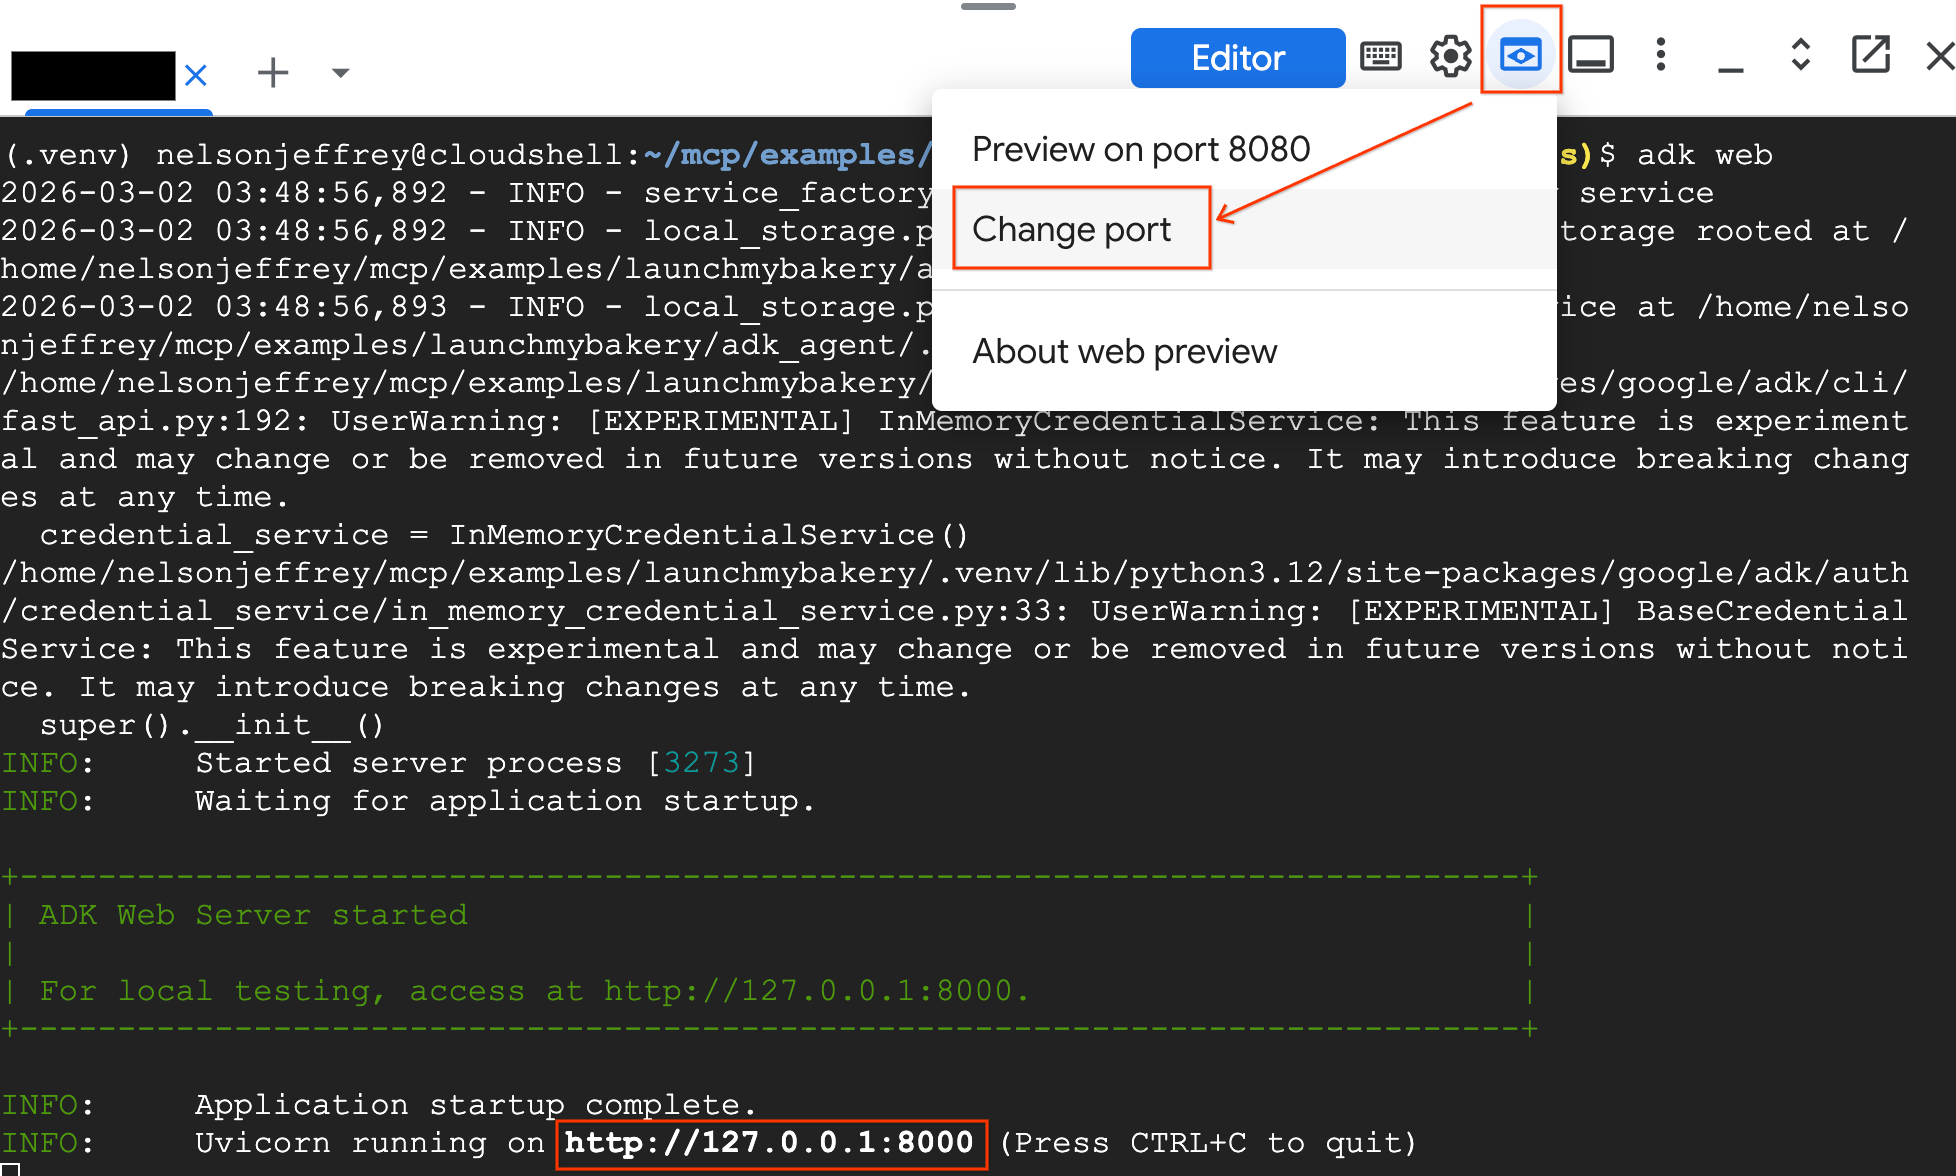
Once the server starts, you will see the following in Cloud Shell:
+-----------------------------------------------------------------------------+
| ADK Web Server started                                                      |
|                                                                             |
| For local testing, access at http://127.0.0.1:8000.                         |
+-----------------------------------------------------------------------------+

INFO:     Application startup complete.
INFO:     Uvicorn running on http://127.0.0.1:8000 (Press CTRL+C to quit)
You have two options to access the ADK UI:
Option 1: Click the local link Click the http://127.0.0.1:8000 link that appears in your Cloud Shell terminal.
Option 2: Use Web Preview
- Click the Web Preview button in the top right corner of the Cloud Shell.
- Select Change port.
- Enter 8000 as the port number and click Change and Preview.
Interact with the Agent by asking the following questions in the Web UI. You should see the relevant tools being called.
- Find the Neighborhood (Macro): "I want to open a bakery in Los Angeles. Find the zip code with the highest morning foot traffic score."
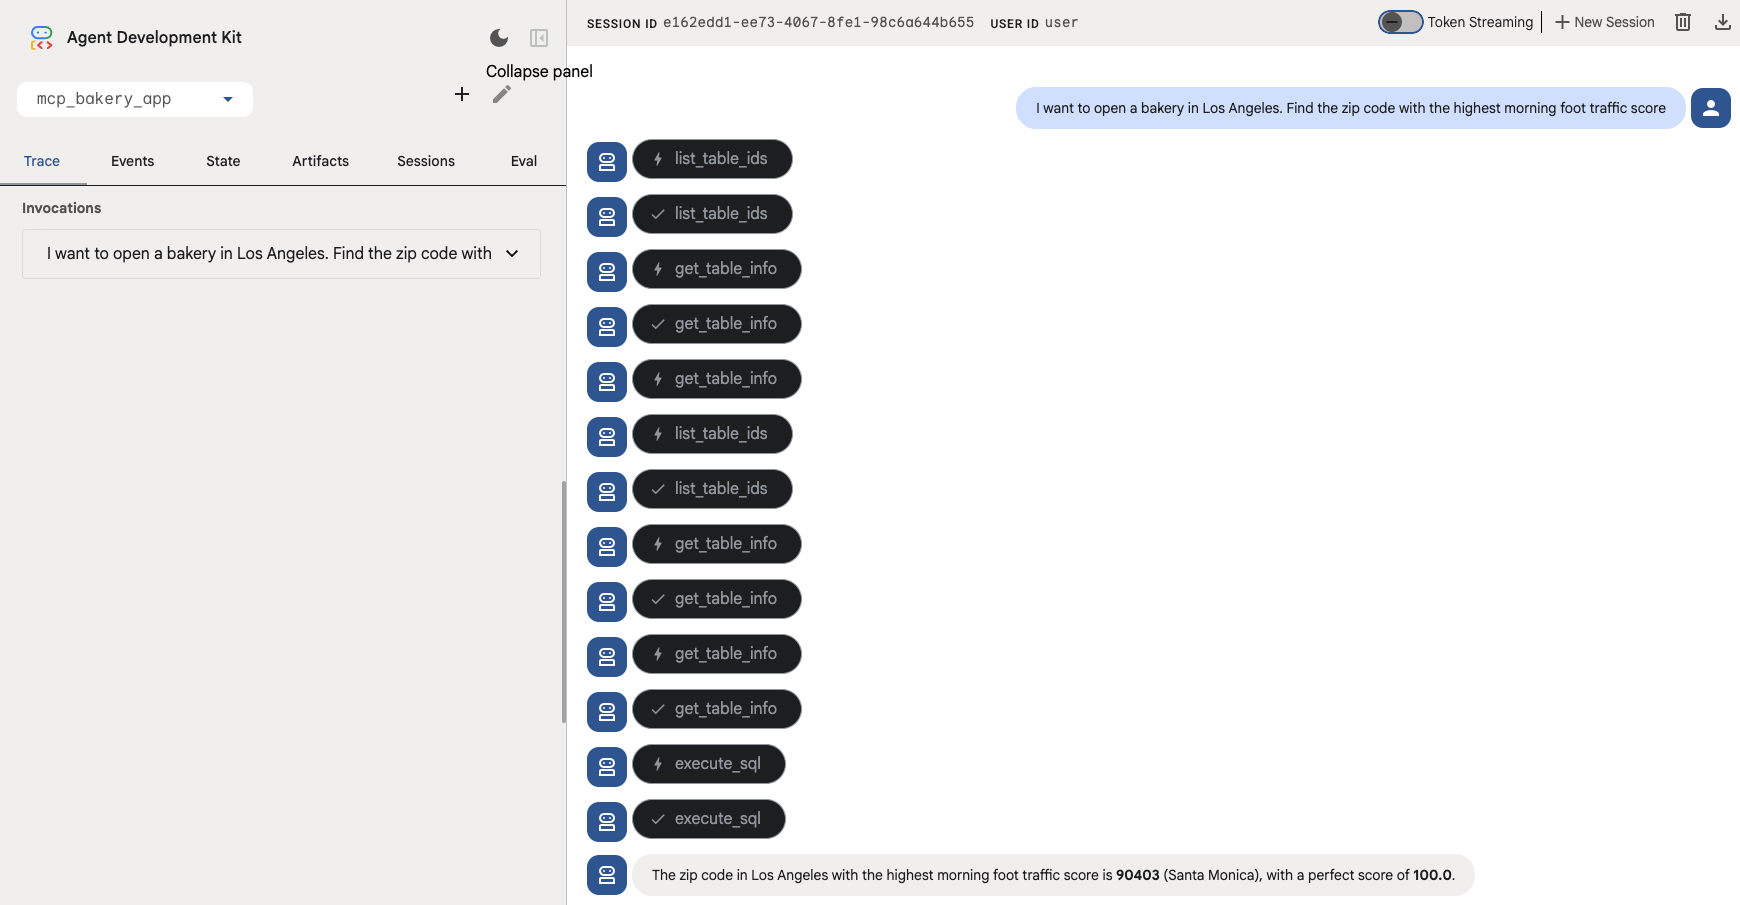
The agent should use tools such get_table_info and execute_sql to query the foot_traffic table in BigQuery.
- Validate the Location (Micro): "Can you search for ‘Bakeries' in that zip code to see if it's saturated?"
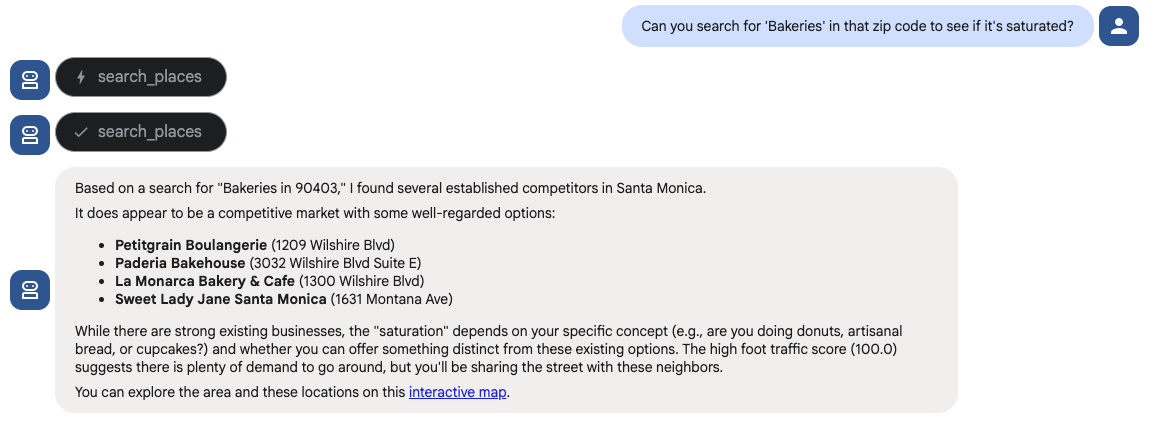
The agent should use the search places tools in the Maps toolset to answer this question.
Give it a go! Check out these sample questions to see your ADK agent in action:
- "I'm looking to open my fourth bakery location in Los Angeles. I need a neighborhood with early activity. Find the zip code with the highest ‘morning' foot traffic score."
- "Can you search for ‘Bakeries' in that zip code to see if it's saturated? If there are too many, check for ‘Specialty Coffee' shops, so I can position myself near them to capture foot traffic."
- "Okay and I want to position this as a premium brand. What is the maximum price being charged for a ‘Sourdough Loaf' in the LA Metro area?"
- "Now I want a revenue projection for December 2025. Look at my sales history and take data from my best performing store for the ‘Sourdough Loaf'. Run a forecast for December 2025 to estimate the quantity I'll sell. Then, calculate the projected total revenue using just under the premium price we found (let's use $18)"
- "That'll cover my rent. Lastly, let's verify logistics. Find the closest "Restaurant Depot" to the proposed area and make sure that drive time is under 30 minutes for daily restocking."
When you are finished testing your agent, you can terminate the ADK web interface by pressing Ctrl+C in your Cloud Shell terminal.
8. Clean Up
To avoid ongoing charges to your Google Cloud account, delete the resources created during this Codelab.
Run the cleanup script. This script will delete the BigQuery dataset, the Cloud Storage bucket, and the API keys created during setup.
chmod +x ../cleanup/cleanup_env.sh
./../cleanup/cleanup_env.sh
9. Congratulations
Mission Complete! You have successfully built a Location Intelligence Agent using the Agent Development Kit (ADK).
By bridging the gap between your "enterprise" data in BigQuery and real-world location context from Google Maps, you've created a powerful tool capable of complex business reasoning - all powered by the Model Context Protocol (MCP) and Gemini.
What you accomplished:
- Infrastructure as Code: You provisioned a data stack using Google Cloud CLI tools.
- MCP Integration: You connected an AI agent to two distinct remote MCP servers (BigQuery & Maps) without writing complex API wrappers.
- Unified Reasoning: You built a single agent capable of strategically combining insights from two different domains to solve a business problem.