
1. 📖 Introduction
In the previous codelab , you learn about how to design a multimodal data interaction in ADK. Now we will take a further step on how to design a multimodal data interaction with MCP Server using MCP Toolset. We will expand the capabilities of previously developed product photo editor agent with capabilities to generate short videos using Veo model utilizing the Veo MCP Server
Through the codelab, you will employ a step by step approach as follows:
- Prepare Google Cloud project and base agent directory
- Configure a MCP Server which require file data as input
- Equipping the ADK agent to connect with the MCP Server
- Design a prompt strategy and callback function to modify function call request to MCP Toolset
- Design a callback function to handle multimodal data response from MCP Toolset
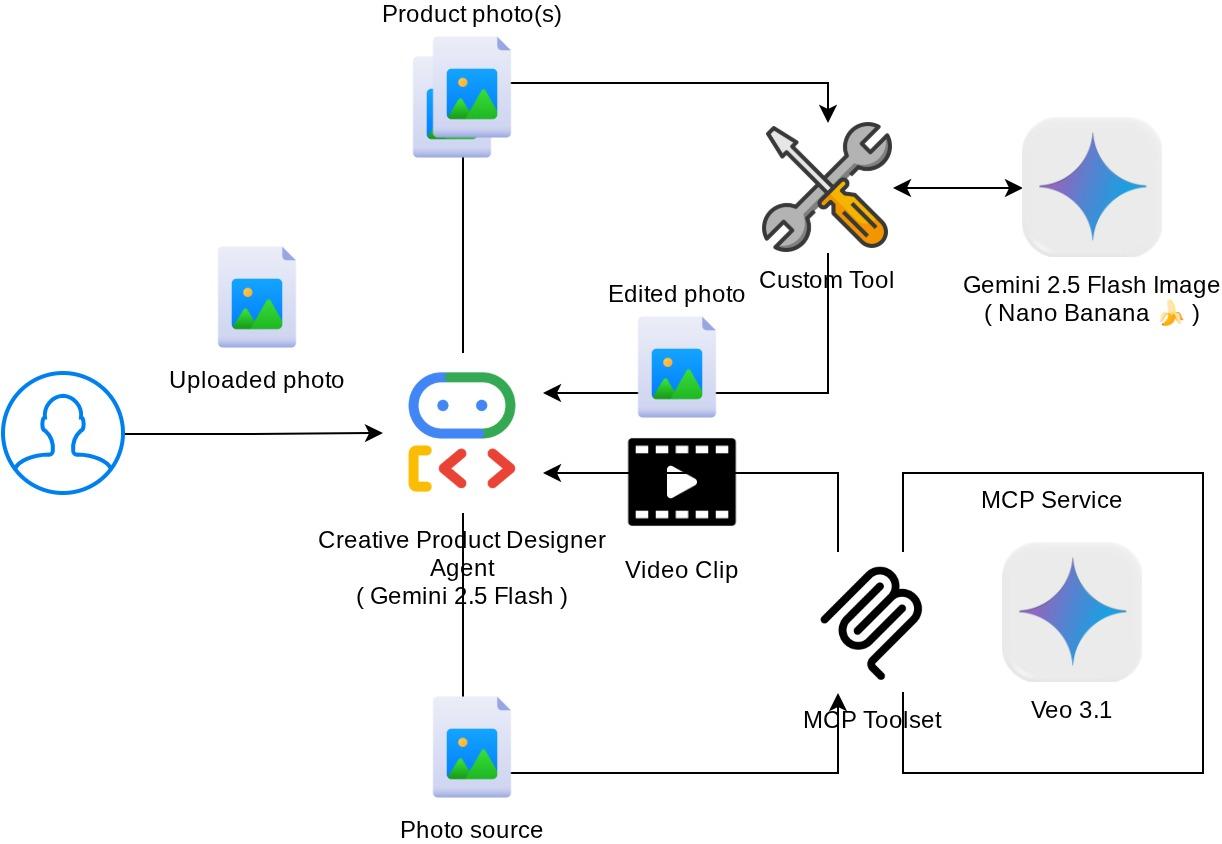
Architecture Overview
The overall interaction in this codelab is shown in the following diagram
Prerequisites
- Comfortable working with Python
- (Optional) Foundational codelabs about Agent Development Kit (ADK)
- (Optional) ADK Multimodal Tool Part 1 codelab : goo.gle/adk-multimodal-tool-1
What you'll learn
- How to create short video using Veo 3.1 with prompt and image starter
- How to develop Multimodal MCP Server using FastMCP
- How to setup ADK to use MCP Toolset
- How to modify tool call to MCP Toolset via tool callback
- How to modify tool response from MCP Toolset via tool callback
What you'll need
- Chrome web browser
- A Gmail account
- A Cloud Project with billing account enabled
This codelab, designed for developers of all levels (including beginners), uses Python in its sample application. However, Python knowledge isn't required for understanding the concepts presented.
2. 🚀 ( Optional ) Preparing Workshop Development Setup
Step 1: Select Active Project in the Cloud Console
In the Google Cloud Console, on the project selector page, select or create a Google Cloud project (see top left section of your console)

Click on it, and you will see list of all of your project like this example,
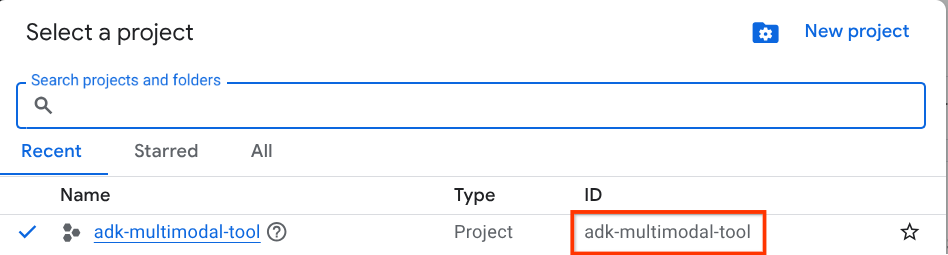
The value that is indicated by the red box is the PROJECT ID and this value will be used throughout the tutorial.
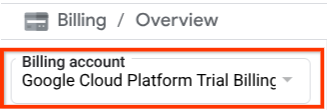
Make sure that billing is enabled for your Cloud project. To check this, click on the burger icon ☰ on your top left bar which shows the Navigation Menu and find the Billing menu

If you see the "Google Cloud Platform Trial Billing Account" under the Billing / Overview title ( top left section of your cloud console ), your project is ready to be utilized for this tutorial. If not, go back to the start of this tutorial and redeem the trial billing account
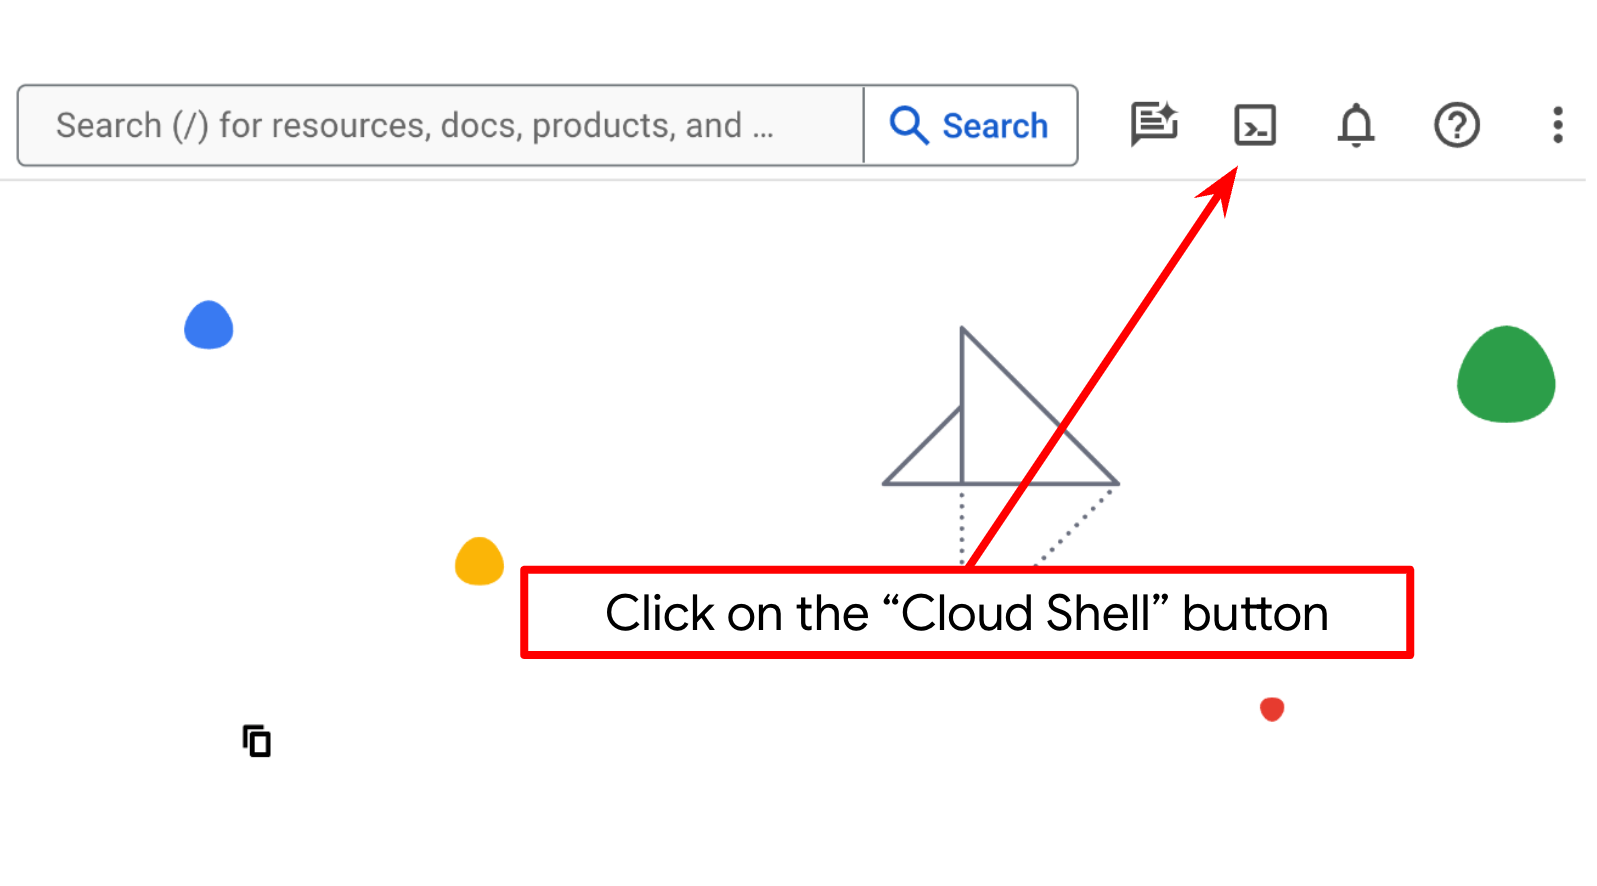
Step 2: Familiarize with Cloud Shell
You'll use Cloud Shell for most part of the tutorials, Click Activate Cloud Shell at the top of the Google Cloud console. If it prompts you to authorize, click Authorize
Once connected to Cloud Shell, we will need to check whether the shell ( or terminal ) is already authenticated with our account
gcloud auth list
If you see your personal gmail like below example output, all is good
Credentialed Accounts

ACTIVE: *
ACCOUNT: alvinprayuda@gmail.com

To set the active account, run:
    $ gcloud config set account `ACCOUNT`
If not, try refreshing your browser and ensure you click the Authorize when prompted ( it might be interrupted due to connection issue )
Next, we also need to check whether the shell is already configured to the correct PROJECT ID that you have, if you see there is value inside ( ) before the $ icon in the terminal ( in below screenshot, the value is "adk-multimodal-tool" ) this value shows the configured project for your active shell session.

If the shown value is already correct, you can skip the next command. However if it's not correct or missing, run the following command
gcloud config set project <YOUR_PROJECT_ID>
Then, clone the template working directory for this codelab from Github, run the following command. It will create the working directory in the adk-multimodal-tool directory
git clone https://github.com/alphinside/adk-mcp-multimodal.git adk-multimodal-tool
Step 3: Familiarize with Cloud Shell Editor and Setup Application Working Directory
Now, we can set up our code editor to do some coding stuff. We will use the Cloud Shell Editor for this
Click on the Open Editor button, this will open a Cloud Shell Editor 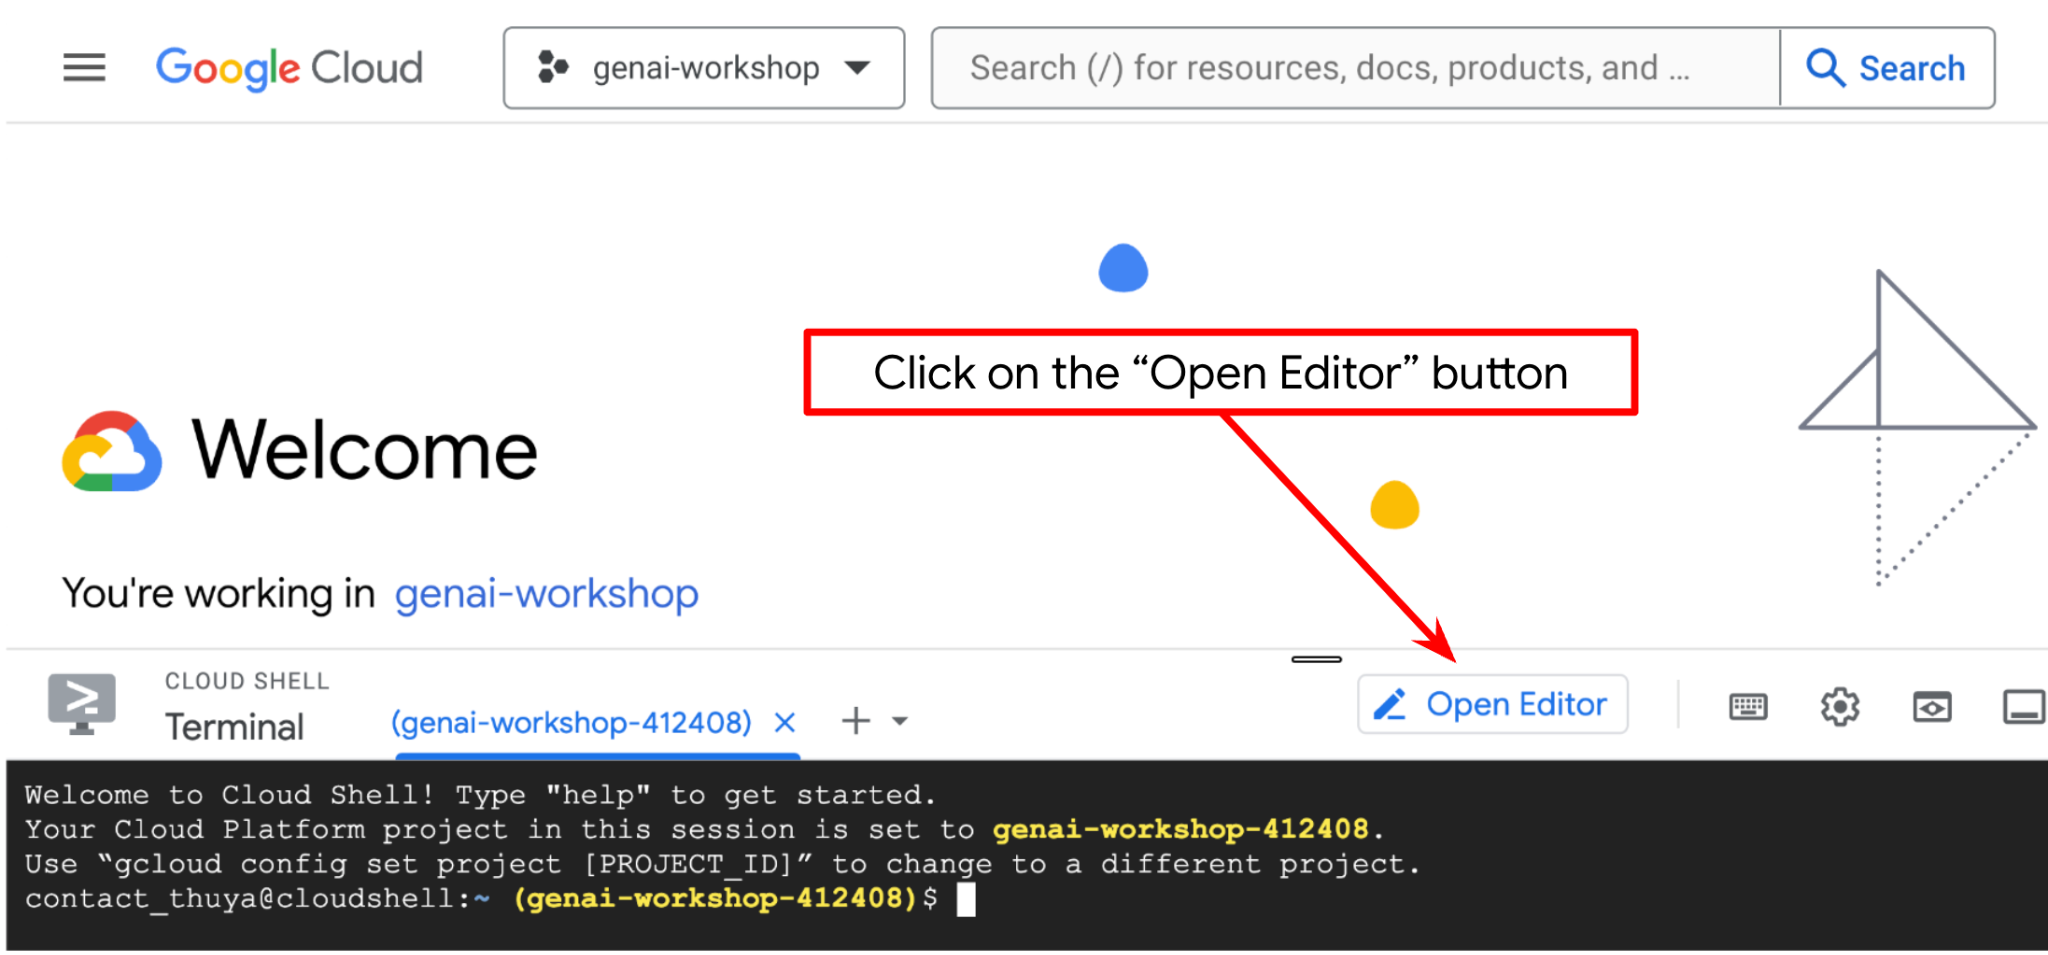
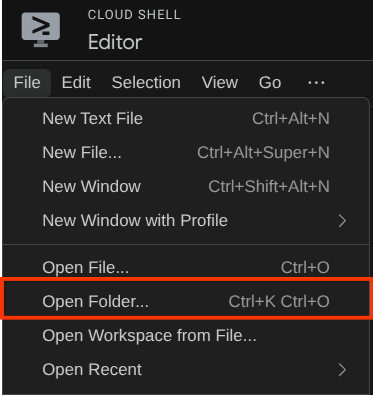
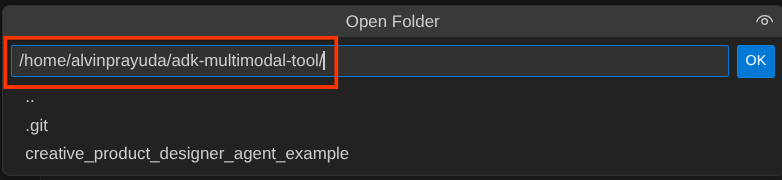
After that, go to the top section of the Cloud Shell Editor and click File->Open Folder, find your username directory and find the adk-multimodal-tool directory then click the OK button. This will make the chosen directory as the main working directory. In this example, the username is alvinprayuda, hence the directory path is shown below
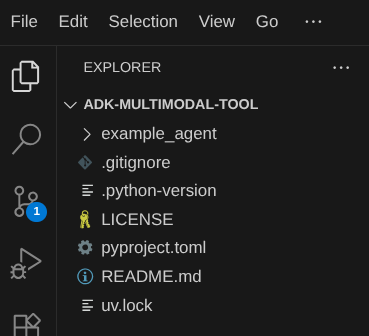
Now, your Cloud Shell Editor working directory should look like this ( inside adk-multimodal-tool )
Now, open the terminal for the editor. You can do it by clicking on Terminal -> New Terminal on the menu bar, or use Ctrl + Shift + C , it will open a terminal window on the bottom part of the browser

Your current active terminal should be inside the adk-multimodal-tool working directory. We will utilize Python 3.12 in this codelab and we will use uv python project manager to simplify the need of creating and managing python version and virtual environment. This uv package is already preinstalled on Cloud Shell.
Run this command to install the required dependencies to the virtual environment on the .venv directory
uv sync --frozen
Check the pyproject.toml to see the declared dependencies for this tutorial which are google-adk, and python-dotenv.
Now, we will need to enable the required APIs via the command shown below. This could take a while.
gcloud services enable aiplatform.googleapis.com
On successful execution of the command, you should see a message similar to the one shown below:
Operation "operations/..." finished successfully.
The template agent structure is already provided for you inside part2_starter_agent directory on the cloned repository. Now, we will need to rename it first to be ready for this tutorial
mv part1_ckpt_agent product_photo_editor
After that, copy the product_photo_editor/.env.example to product_photo_editor/.env
cp product_photo_editor/.env.example product_photo_editor/.env
When you open the product_photo_editor/.env file, you will see content like shown below
GOOGLE_GENAI_USE_VERTEXAI=1
GOOGLE_CLOUD_PROJECT=your-project-id
GOOGLE_CLOUD_LOCATION=global
Then, you will need to update the your-project-id value with the correct your own project ID. Now we are ready for the next step
3. 🚀 Initialize the Veo MCP Server
First, let's create the MCP service directory using this command
mkdir veo_mcp
Then, create the veo_mcp/main.py by using this command
touch veo_mcp/main.py
After that copy the following code the veo_mcp/main.py
from fastmcp import FastMCP
from typing import Annotated
from pydantic import Field
import base64
import asyncio
import os
from google import genai
from google.genai import types
from dotenv import load_dotenv
import logging

# Load environment variables from .env file
load_dotenv()

mcp = FastMCP("Veo MCP Server")


@mcp.tool
async def generate_video_with_image(
    prompt: Annotated[
        str, Field(description="Text description of the video to generate")
    ],
    image_data: Annotated[
        str, Field(description="Base64-encoded image data to use as starting frame")
    ],
    negative_prompt: Annotated[
        str | None,
        Field(description="Things to avoid in the generated video"),
    ] = None,
) -> dict:
    """Generates a professional product marketing video from text prompt and starting image using Google's Veo API.

    This function uses an image as the first frame of the generated video and automatically
    enriches your prompt with professional video production quality guidelines to create
    high-quality marketing assets suitable for commercial use.

    AUTOMATIC ENHANCEMENTS APPLIED:
    - 4K cinematic quality with professional color grading
    - Smooth, stabilized camera movements
    - Professional studio lighting setup
    - Shallow depth of field for product focus
    - Commercial-grade production quality
    - Marketing-focused visual style

    PROMPT WRITING TIPS:
    Describe what you want to see in the video. Focus on:
    - Product actions/movements (e.g., "rotating slowly", "zooming into details")
    - Desired camera angles (e.g., "close-up of the product", "wide shot")
    - Background/environment (e.g., "minimalist white backdrop", "lifestyle setting")
    - Any specific details about the product presentation

    The system will automatically enhance your prompt with professional production quality.

    Args:
        prompt: Description of the video to generate. Focus on the core product presentation
                you want. The system will automatically add professional quality enhancements.
        image_data: Base64-encoded image data to use as the starting frame
        negative_prompt: Optional prompt describing what to avoid in the video

    Returns:
        dict: A dictionary containing:
            - status: 'success' or 'error'
            - message: Description of the result
            - video_data: Base64-encoded video data (on success only)
    """
    try:
        # Initialize the Gemini client
        client = genai.Client(
            vertexai=True,
            project=os.getenv("GOOGLE_CLOUD_PROJECT"),
            location=os.getenv("GOOGLE_CLOUD_LOCATION"),
        )

        # Decode the image
        image_bytes = base64.b64decode(image_data)
        print(f"Successfully decoded image data: {len(image_bytes)} bytes")

        # Create image object
        image = types.Image(image_bytes=image_bytes, mime_type="image/png")

        # Prepare the config
        config = types.GenerateVideosConfig(
            duration_seconds=8,
            number_of_videos=1,
        )

        if negative_prompt:
            config.negative_prompt = negative_prompt

        # Enrich the prompt for professional marketing quality
        enriched_prompt = enrich_prompt_for_marketing(prompt)

        # Generate the video (async operation)
        operation = client.models.generate_videos(
            model="veo-3.1-generate-preview",
            prompt=enriched_prompt,
            image=image,
            config=config,
        )

        # Poll until the operation is complete
        poll_count = 0
        while not operation.done:
            poll_count += 1
            print(f"Waiting for video generation to complete... (poll {poll_count})")
            await asyncio.sleep(5)
            operation = client.operations.get(operation)

        # Download the video and convert to base64
        video = operation.response.generated_videos[0]

        # Get video bytes and encode to base64
        video_bytes = video.video.video_bytes
        video_base64 = base64.b64encode(video_bytes).decode("utf-8")

        print(f"Video generated successfully: {len(video_bytes)} bytes")

        return {
            "status": "success",
            "message": f"Video with image generated successfully after {poll_count * 5} seconds",
            "complete_prompt": enriched_prompt,
            "video_data": video_base64,
        }
    except Exception as e:
        logging.error(e)
        return {
            "status": "error",
            "message": f"Error generating video with image: {str(e)}",
        }


def enrich_prompt_for_marketing(user_prompt: str) -> str:
    """Enriches user prompt with professional video production quality enhancements.

    Adds cinematic quality, professional lighting, smooth camera work, and marketing-focused
    elements to ensure high-quality product marketing videos.
    """
    enhancement_prefix = """Create a high-quality, professional product marketing video with the following characteristics:

TECHNICAL SPECIFICATIONS:
- 4K cinematic quality with professional color grading
- Smooth, stabilized camera movements
- Professional studio lighting setup with soft, even illumination
- Shallow depth of field for product focus
- High dynamic range (HDR) for vibrant colors

VISUAL STYLE:
- Clean, minimalist aesthetic suitable for premium brand marketing
- Elegant and sophisticated presentation
- Commercial-grade production quality
- Attention to detail in product showcase

USER'S SPECIFIC REQUIREMENTS:
"""

    enhancement_suffix = """

ADDITIONAL QUALITY GUIDELINES:
- Ensure smooth transitions and natural motion
- Maintain consistent lighting throughout
- Keep the product as the clear focal point
- Use professional camera techniques (slow pans, tracking shots, or dolly movements)
- Apply subtle motion blur for cinematic feel
- Ensure brand-appropriate tone and style"""

    return f"{enhancement_prefix}{user_prompt}{enhancement_suffix}"


if __name__ == "__main__":
    mcp.run()
The following code do the following things:
- Creates a FastMCP server that exposes a Veo 3.1 video generation tool to ADK agents
- Accepts base64-encoded images,text prompts,and negative prompts as input
- Generates 8-second videos asynchronously by submitting requests to Veo 3.1 API and polling every 5 seconds until completion
- Returns base64-encoded video data along with the enriched prompt
This Veo MCP tool will require the same environment variable with our agent, so we can just copy paste the .env file. Run the following command to do that
cp product_photo_editor/.env veo_mcp/
Now, we can test if the MCP server running correctly by running this command
uv run veo_mcp/main.py
And it will show console log like this
╭────────────────────────────────────────────────────────────────────────────╮
│                                                                            │
│        _ __ ___  _____           __  __  _____________    ____    ____     │
│       _ __ ___ .'____/___ ______/ /_/  |/  / ____/ __ \  |___ \  / __ \    │
│      _ __ ___ / /_  / __ `/ ___/ __/ /|_/ / /   / /_/ /  ___/ / / / / /    │
│     _ __ ___ / __/ / /_/ (__  ) /_/ /  / / /___/ ____/  /  __/_/ /_/ /     │
│    _ __ ___ /_/    \____/____/\__/_/  /_/\____/_/      /_____(*)____/      │
│                                                                            │
│                                                                            │
│                                FastMCP  2.0                                │
│                                                                            │
│                                                                            │
│                 🖥️  Server name:     Veo MCP Server                         │
│                 📦 Transport:       STDIO                                  │
│                                                                            │
│                 🏎️  FastMCP version: 2.12.5                                 │
│                 🤝 MCP SDK version: 1.16.0                                 │
│                                                                            │
│                 📚 Docs:            https://gofastmcp.com                  │
│                 🚀 Deploy:          https://fastmcp.cloud                  │
│                                                                            │
╰────────────────────────────────────────────────────────────────────────────╯


[10/22/25 08:28:53] INFO     Starting MCP server 'Veo MCP Server' with          server.py:1502
                             transport 'stdio'
Now kill the MCP service process using CTRL+C. This command will be invoked from ADK MCP Toolset later on. We can move to the next step to allow our agent utilize this MCP tools
4. 🚀 Connect the Veo MCP Server to ADK Agent
Now, let's connect the Veo MCP server so that it can be utilized by our agent. First, let's create a different script to contain the toolset, run the following command
touch product_photo_editor/mcp_tools.py
Then, copy the following code to the product_photo_editor/mcp_tools.py
from google.adk.tools.mcp_tool.mcp_toolset import MCPToolset
from google.adk.tools.mcp_tool.mcp_session_manager import StdioConnectionParams
from mcp import StdioServerParameters


mcp_toolset = MCPToolset(
    connection_params=StdioConnectionParams(
        server_params=StdioServerParameters(
            command="uv",
            args=[
                "run",
                "veo_mcp/main.py",
            ],
        ),
        timeout=120, # seconds
    ),
)

# Option to connect to remote MCP server

# from google.adk.tools.mcp_tool.mcp_session_manager import StreamableHTTPConnectionParams

# mcp_toolset = MCPToolset(
#     connection_params=StreamableHTTPConnectionParams(
#         url="http://localhost:8000/mcp",
#         timeout=120,
#     ),
# )
The code above shows how we can connect to a MCP server using ADK MCPToolset. In this example we connect to the MCP server using the STDIO communication channel. In the command we specify how we can run the MCP server and set the timeout parameter.
5. 🚀 Tool Call Parameter Modification
In the MCP server tool declaration, we designed tool generate_video_with_image which specify base64 string as the tool parameters. We cannot ask the LLM to do this for us, hence we need to design a specific strategy to handle this.
In the previous lab, we handle the user-uploaded and tool response image in the before_model_callback to be saved as an artifact, which is also reflected in the agent template prepared previously. We will utilize this and do the following strategies:
- Instruct the LLM to always send the artifact_id value if specific tool parameter require it to send base64 string data
- Intercept the tool call invocation in the
before_tool_callbackand transform the parameter from the artifact_id to its bytes content by loading the artifact and overwrite the tool arguments
See image below for the visualization of of the part that we will intercept

First, let's prepare the before_tool_callback function, create a new file product_photo_editor/tool_callbacks.py by running the following command
touch product_photo_editor/tool_callbacks.py
Then, copy the following code to the file
# product_photo_editor/tool_callbacks.py

from google.genai.types import Part
from typing import Any
from google.adk.tools.tool_context import ToolContext
from google.adk.tools.base_tool import BaseTool
from google.adk.tools.mcp_tool.mcp_tool import McpTool
import base64
import logging
import json
from mcp.types import CallToolResult


async def before_tool_modifier(
    tool: BaseTool, args: dict[str, Any], tool_context: ToolContext
):
    # Identify which tool input should be modified
    if isinstance(tool, McpTool) and tool.name == "generate_video_with_image":
        logging.info("Modify tool args for artifact: %s", args["image_data"])
        # Get the artifact filename from the tool input argument
        artifact_filename = args["image_data"]
        artifact = await tool_context.load_artifact(filename=artifact_filename)
        file_data = artifact.inline_data.data

        # Convert byte data to base64 string
        base64_data = base64.b64encode(file_data).decode("utf-8")

        # Then modify the tool input argument
        args["image_data"] = base64_data
The code above shows the following steps:
- Check whether the tool invoked is a McpTool object and it is the targeted tool call that we want to modify
- Get the value of
image_dataarguments in which is the argument that is requested in base64 format but we request the LLM to return artifact_id on it - Load the artifact by utilizing artifact service on the
tool_context - Overwrite the
image_dataarguments with the base64 data
Now, we will need to add this callback to the agent and also slightly modify the instructions so that the agent will always fill base64 tool args with the artifact id instead.
Open product_photo_editor/agent.py and modify the content with the following code
# product_photo_editor/agent.py

from google.adk.agents.llm_agent import Agent
from product_photo_editor.custom_tools import edit_product_asset
from product_photo_editor.mcp_tools import mcp_toolset
from product_photo_editor.model_callbacks import before_model_modifier
from product_photo_editor.tool_callbacks import before_tool_modifier
from product_photo_editor.prompt import AGENT_INSTRUCTION

root_agent = Agent(
    model="gemini-2.5-flash",
    name="product_photo_editor",
    description="""A friendly product photo editor assistant that helps small business
owners edit and enhance their product photos. Perfect for improving photos of handmade
goods, food products, crafts, and small retail items""",
    instruction=AGENT_INSTRUCTION
    + """
**IMPORTANT: Base64 Argument Rule on Tool Call**

If you found any tool call arguments that requires base64 data,
ALWAYS provide the artifact_id of the referenced file to
the tool call. NEVER ask user to provide base64 data.
Base64 data encoding process is out of your
responsibility and will be handled in another part of the system.
""",
    tools=[
        edit_product_asset,
        mcp_toolset,
    ],
    before_model_callback=before_model_modifier,
    before_tool_callback=before_tool_modifier,
)
Alright now, let's try to interact with the agent to test this modification. Run the following command to run the web dev UI
uv run adk web --port 8080
It will spawn output like the following example, means that we can already access the web interface
INFO:     Started server process [xxxx]
INFO:     Waiting for application startup.

+-----------------------------------------------------------------------------+
| ADK Web Server started                                                      |
|                                                                             |
| For local testing, access at http://127.0.0.1:8080.                         |
+-----------------------------------------------------------------------------+

INFO:     Application startup complete.
INFO:     Uvicorn running on http://127.0.0.1:8080 (Press CTRL+C to quit)
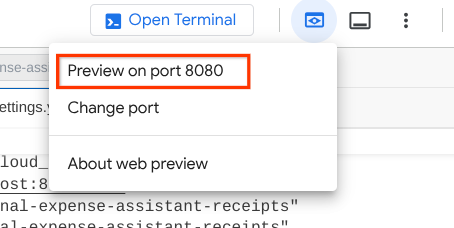
Now, to check it you can Ctrl + Click on the URL or click the Web Preview button on the top area of your Cloud Shell Editor and select Preview on port 8080
You will see the following web page where you can select available agents on the top left drop down button ( in our case it should be product_photo_editor ) and interact with the bot.
Then, upload the following image and ask the agent to generate promotional clip from it
Generate a slow zoom in and moving from left and right animation

You will encounter the following error
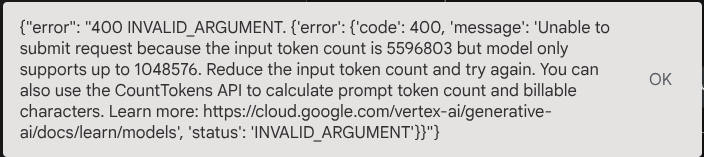
Why? Because the tool returned results directly in the form of base64 string too, that will exceed the maximum token. Now, let's handle this error in the next section.
6. 🚀 Tool Response Modification
In this section, we will handle the tool response from the MCP response. We will do the following things:
- Store the video response by the tool in the artifact service
- Return the artifact identifier instead to the agent
As a reminder we will tap in the following agent runtime
First, let's implement the callback function, open the product_photo_editor/tool_callbacks.py and modify it to implement the after_tool_modifier
# product_photo_editor/tool_callbacks.py

from google.genai.types import Part
from typing import Any
from google.adk.tools.tool_context import ToolContext
from google.adk.tools.base_tool import BaseTool
from google.adk.tools.mcp_tool.mcp_tool import McpTool
import base64
import logging
import json
from mcp.types import CallToolResult


async def before_tool_modifier(
    tool: BaseTool, args: dict[str, Any], tool_context: ToolContext
):
    # Identify which tool input should be modified
    if isinstance(tool, McpTool) and tool.name == "generate_video_with_image":
        logging.info("Modify tool args for artifact: %s", args["image_data"])
        # Get the artifact filename from the tool input argument
        artifact_filename = args["image_data"]
        artifact = await tool_context.load_artifact(filename=artifact_filename)
        file_data = artifact.inline_data.data

        # Convert byte data to base64 string
        base64_data = base64.b64encode(file_data).decode("utf-8")

        # Then modify the tool input argument
        args["image_data"] = base64_data


async def after_tool_modifier(
    tool: BaseTool,
    args: dict[str, Any],
    tool_context: ToolContext,
    tool_response: dict | CallToolResult,
):
    if isinstance(tool, McpTool) and tool.name == "generate_video_with_image":
        tool_result = json.loads(tool_response.content[0].text)

        # Get the expected response field which contains the video data
        video_data = tool_result["video_data"]
        artifact_filename = f"video_{tool_context.function_call_id}.mp4"

        # Convert base64 string to byte data
        video_bytes = base64.b64decode(video_data)

        # Save the video as artifact
        await tool_context.save_artifact(
            filename=artifact_filename,
            artifact=Part(inline_data={"mime_type": "video/mp4", "data": video_bytes}),
        )

        # Remove the video data from the tool response
        tool_result.pop("video_data")

        # Then modify the tool response to include the artifact filename and remove the base64 string
        tool_result["video_artifact_id"] = artifact_filename
        logging.info(
            "Modify tool response for artifact: %s", tool_result["video_artifact_id"]
        )

        return tool_result
After that, we need to equip our agent with this function. Open the product_photo_editor/agent.py and modify it to the following code
# product_photo_editor/agent.py

from google.adk.agents.llm_agent import Agent
from product_photo_editor.custom_tools import edit_product_asset
from product_photo_editor.mcp_tools import mcp_toolset
from product_photo_editor.model_callbacks import before_model_modifier
from product_photo_editor.tool_callbacks import (
    before_tool_modifier,
    after_tool_modifier,
)
from product_photo_editor.prompt import AGENT_INSTRUCTION

root_agent = Agent(
    model="gemini-2.5-flash",
    name="product_photo_editor",
    description="""A friendly product photo editor assistant that helps small business
owners edit and enhance their product photos. Perfect for improving photos of handmade
goods, food products, crafts, and small retail items""",
    instruction=AGENT_INSTRUCTION
    + """
**IMPORTANT: Base64 Argument Rule on Tool Call**

If you found any tool call arguments that requires base64 data,
ALWAYS provide the artifact_id of the referenced file to
the tool call. NEVER ask user to provide base64 data.
Base64 data encoding process is out of your
responsibility and will be handled in another part of the system.
""",
    tools=[
        edit_product_asset,
        mcp_toolset,
    ],
    before_model_callback=before_model_modifier,
    before_tool_callback=before_tool_modifier,
    after_tool_callback=after_tool_modifier,
)
It's done, now you can ask the agent to not only help you to edit the photo, but also generate video for you! Run the following command again
uv run adk web --port 8080
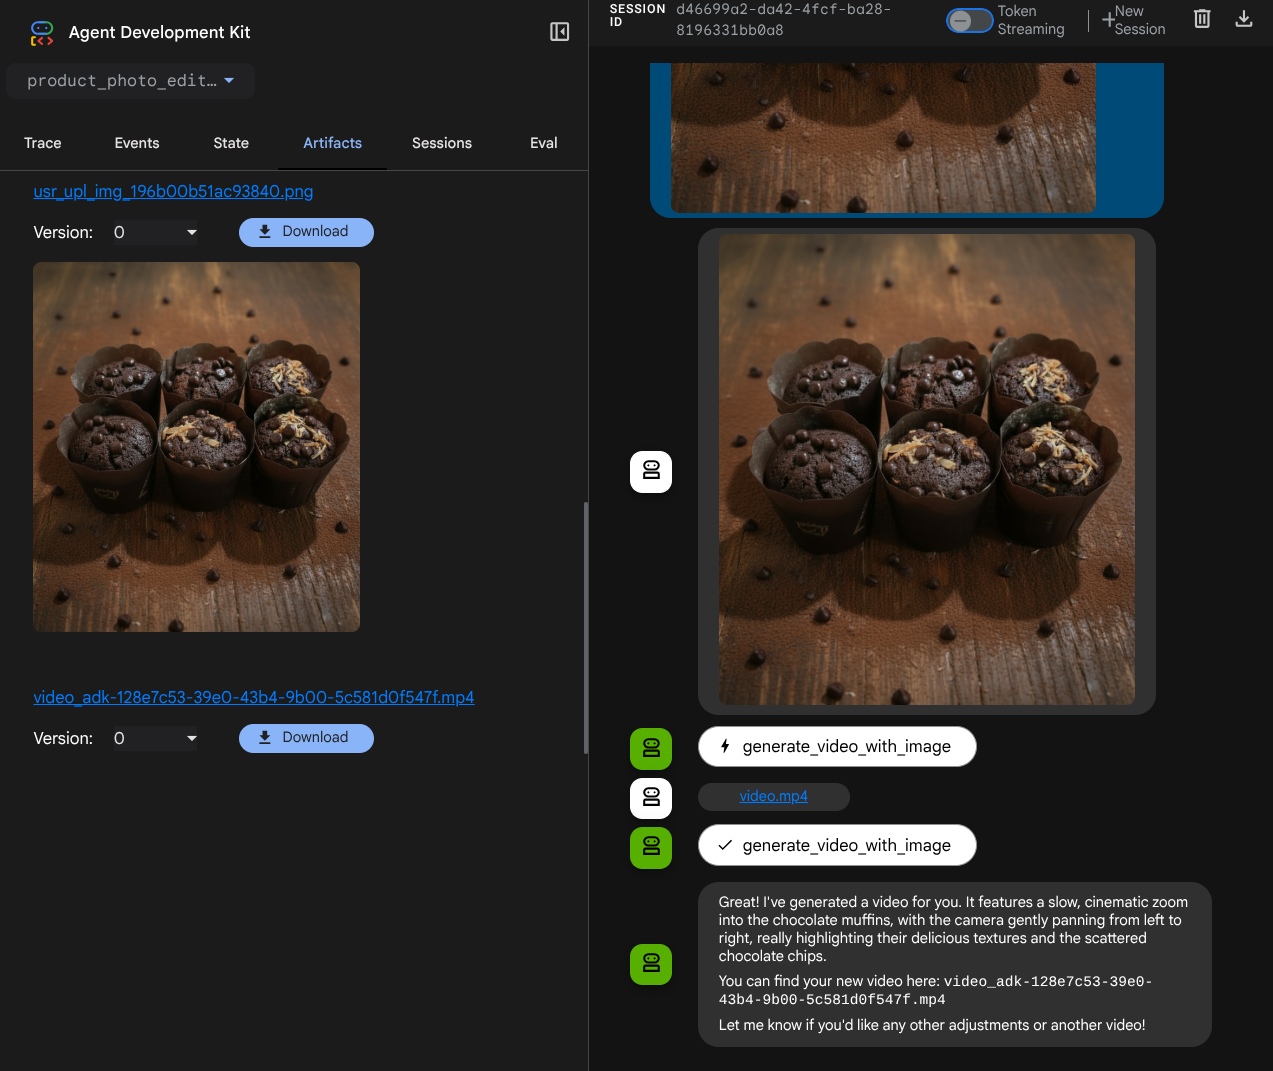
Then, try to create video using this image
Generate a slow zoom in and moving from left and right animation
You will see the video generated like example shown below and already saved as artifact
7. ⭐ Summary
Now let's revisit what we've already done during this codelab, here is the key learning:
- Multimodal Data Handling (Tool I/O): Reinforced the strategy to manage multimodal data (like images and videos) for tool input and output by using the ADK's Artifacts service and specialized callbacks instead of passing raw byte data directly.
- MCP Toolset Integration: Developed and integrated an external Veo MCP Server using FastMCP via the ADK MCP Toolset to add video generation capabilities to the agent.
- Tool Input Modification (before_tool_callback): Implemented a callback to intercept the generate_video_with_image tool call, transforming the file's artifact_id (selected by the LLM) into the required base64-encoded image data for the MCP server's input.
- Tool Output Modification (after_tool_callback): Implemented a callback to intercept the large base64-encoded video response from the MCP server, save the video as a new artifact, and return a clean video_artifact_id reference to the LLM.
8. 🧹 Clean up
To avoid incurring charges to your Google Cloud account for the resources used in this codelab, follow these steps:
- In the Google Cloud console, go to the Manage resources page.
- In the project list, select the project that you want to delete, and then click Delete.
- In the dialog, type the project ID, and then click Shut down to delete the project.