
1. What you will learn
Welcome to the ADK Master Class - Your Journey into Multi-Agent Systems
You're about to step into the exciting world of AI agents. Forget simple chatbots that just answer questions. We're diving deep into the Agent Development Kit (ADK) to build sophisticated, autonomous systems that can reason, plan, and use tools to accomplish complex tasks.
By the end of this tutorial, you will be able to:
- Build Your First AI Agent: Go from zero to a fully functional agent that can understand a user's needs, use tools like Google Search, and generate detailed, helpful responses.
- Construct Multi-Agent Systems: Learn the "Agent-as-a-Tool" pattern, a revolutionary concept where agents delegate tasks to other specialized agents, creating a team of AI experts that work together.
- Orchestrate Complex Workflows: Go beyond simple delegation and master advanced patterns like Routers, Sequential Chains, Loops, and Parallel Execution to build robust, efficient, and intelligent applications that can handle almost any requests.
- Give Your Agents Memory: Understand the critical role of conversational memory, enabling your agents to handle follow-up questions, learn from feedback, and manage multi-step tasks seamlessly.
- Connect with MCP: Connect wih MCP toolbox.
Let's get started! 🚀
2. Setup: Get Your API Key
Google AI Studio API Key Setup
What you'll need:
- Python 3.9 or higher (
python3 --versionto check) - A Google account (to create the AI Studio key)
- A terminal — your local machine or Cloud Shell both work
- ~10 minutes
To power our AI agents, we need a Gemini API key from Google AI Studio. This is the fastest way to get started.
Step 1 — Get Your Gemini API Key from AI Studio (1 min)
- Open https://aistudio.google.com/app/apikey in a new browser tab.
- Sign in with your Google account.
- Click "Create API key" (top-right).
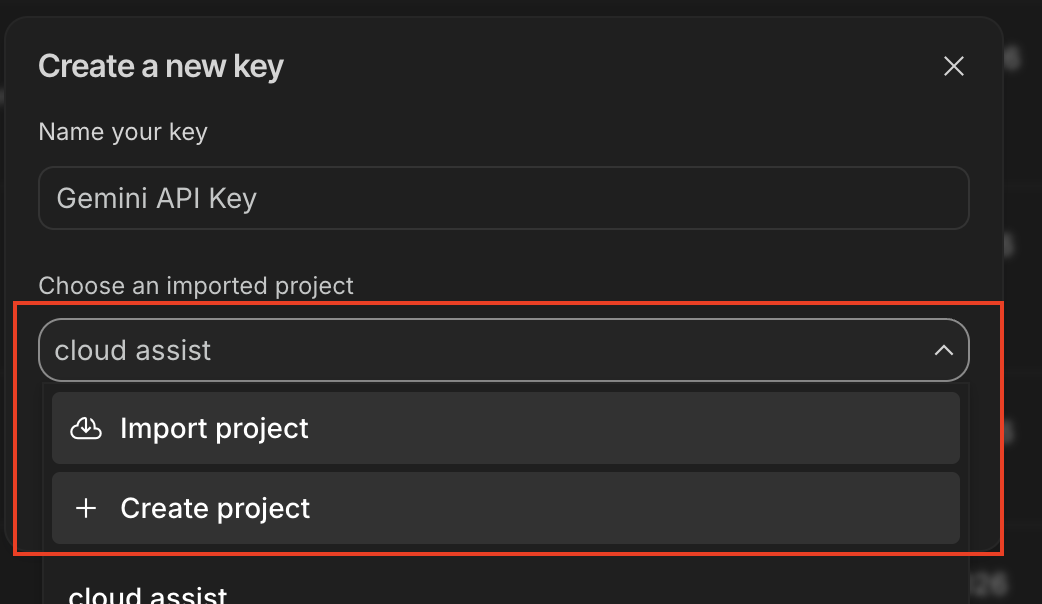
- A dialog opens with a project dropdown:
- If you already have a Google project created before: Select it and click "Create API key in existing project"
- If NOT in the list: Click "Create Project".
- Copy the API key that appears. It starts with
AIza...and is ~40 characters.
✏️ Paste it somewhere safe — you'll need it in Step 4 below.
Step 2 — Clone the Repository (1 min)
👉💻 Open your terminal (or Cloud Shell) and clone the tutorial repo:
git clone https://github.com/cuppibla/adk_tutorial.git
cd ~/adk_tutorial
Step 3 — Create the Virtual Environment & Install Dependencies
👉💻 Create and activate a virtual environment named .adk_env, then install the dependencies:
python3 -m venv .adk_env
source .adk_env/bin/activate
pip install --upgrade pip
pip install -r requirements.txt
You should see (.adk_env) at the beginning of your terminal prompt.
Step 4 — 🔥 IMPORTANT: Add Your API Key
⚠️ Don't skip this step! Create a .env file in the root of the adk_tutorial folder. This one file powers every session in this codelab — the ADK Web sessions (1–5) and the command-line Memory and MCP sessions (6–7) all read it automatically.
👉💻 Create the .env file with your key (replace your_actual_api_key_here with the key from Step 1):
cat > .env <<'EOF'
GOOGLE_GENAI_USE_VERTEXAI=FALSE
GOOGLE_API_KEY=your_actual_api_key_here
EOF
Your ~/adk_tutorial/.env should now contain:
GOOGLE_GENAI_USE_VERTEXAI=FALSE
GOOGLE_API_KEY=your_actual_api_key_here
🚨 CRITICAL: Replace your_actual_api_key_here with your actual API key from Step 1 (it starts with AIza...).
✅ Checkpoint: You have a .env file at ~/adk_tutorial/.env containing your AIza... key, and your terminal prompt shows (.adk_env). You're ready to build agents!
3. Session 1: Your First Agent in ADK Web

Open ADK Web by Running:
cd ~/adk_tutorial
source .adk_env/bin/activate
adk web
After running the commands, you should see output in your terminal indicating that the ADK Web Server has started, similar to this:
+-----------------------------------------------------------------------------+
| ADK Web Server started                                                      |
|                                                                             |
| For local testing, access at http://localhost:8000.                         |
+-----------------------------------------------------------------------------+


INFO:     Application startup complete.
INFO:     Uvicorn running on http://0.0.0.0:8000 (Press CTRL+C to quit)
👉 Next, open your browser to http://localhost:8000 to access the ADK Dev UI.
👉 Your summoning ritual is complete, and the agent is now running. The ADK Dev UI in your browser is your direct connection to the Familiar.
choose your first agent In the dropdown menu at the top of the UI, choose a_single_agent.
You can select a_single_agent here: 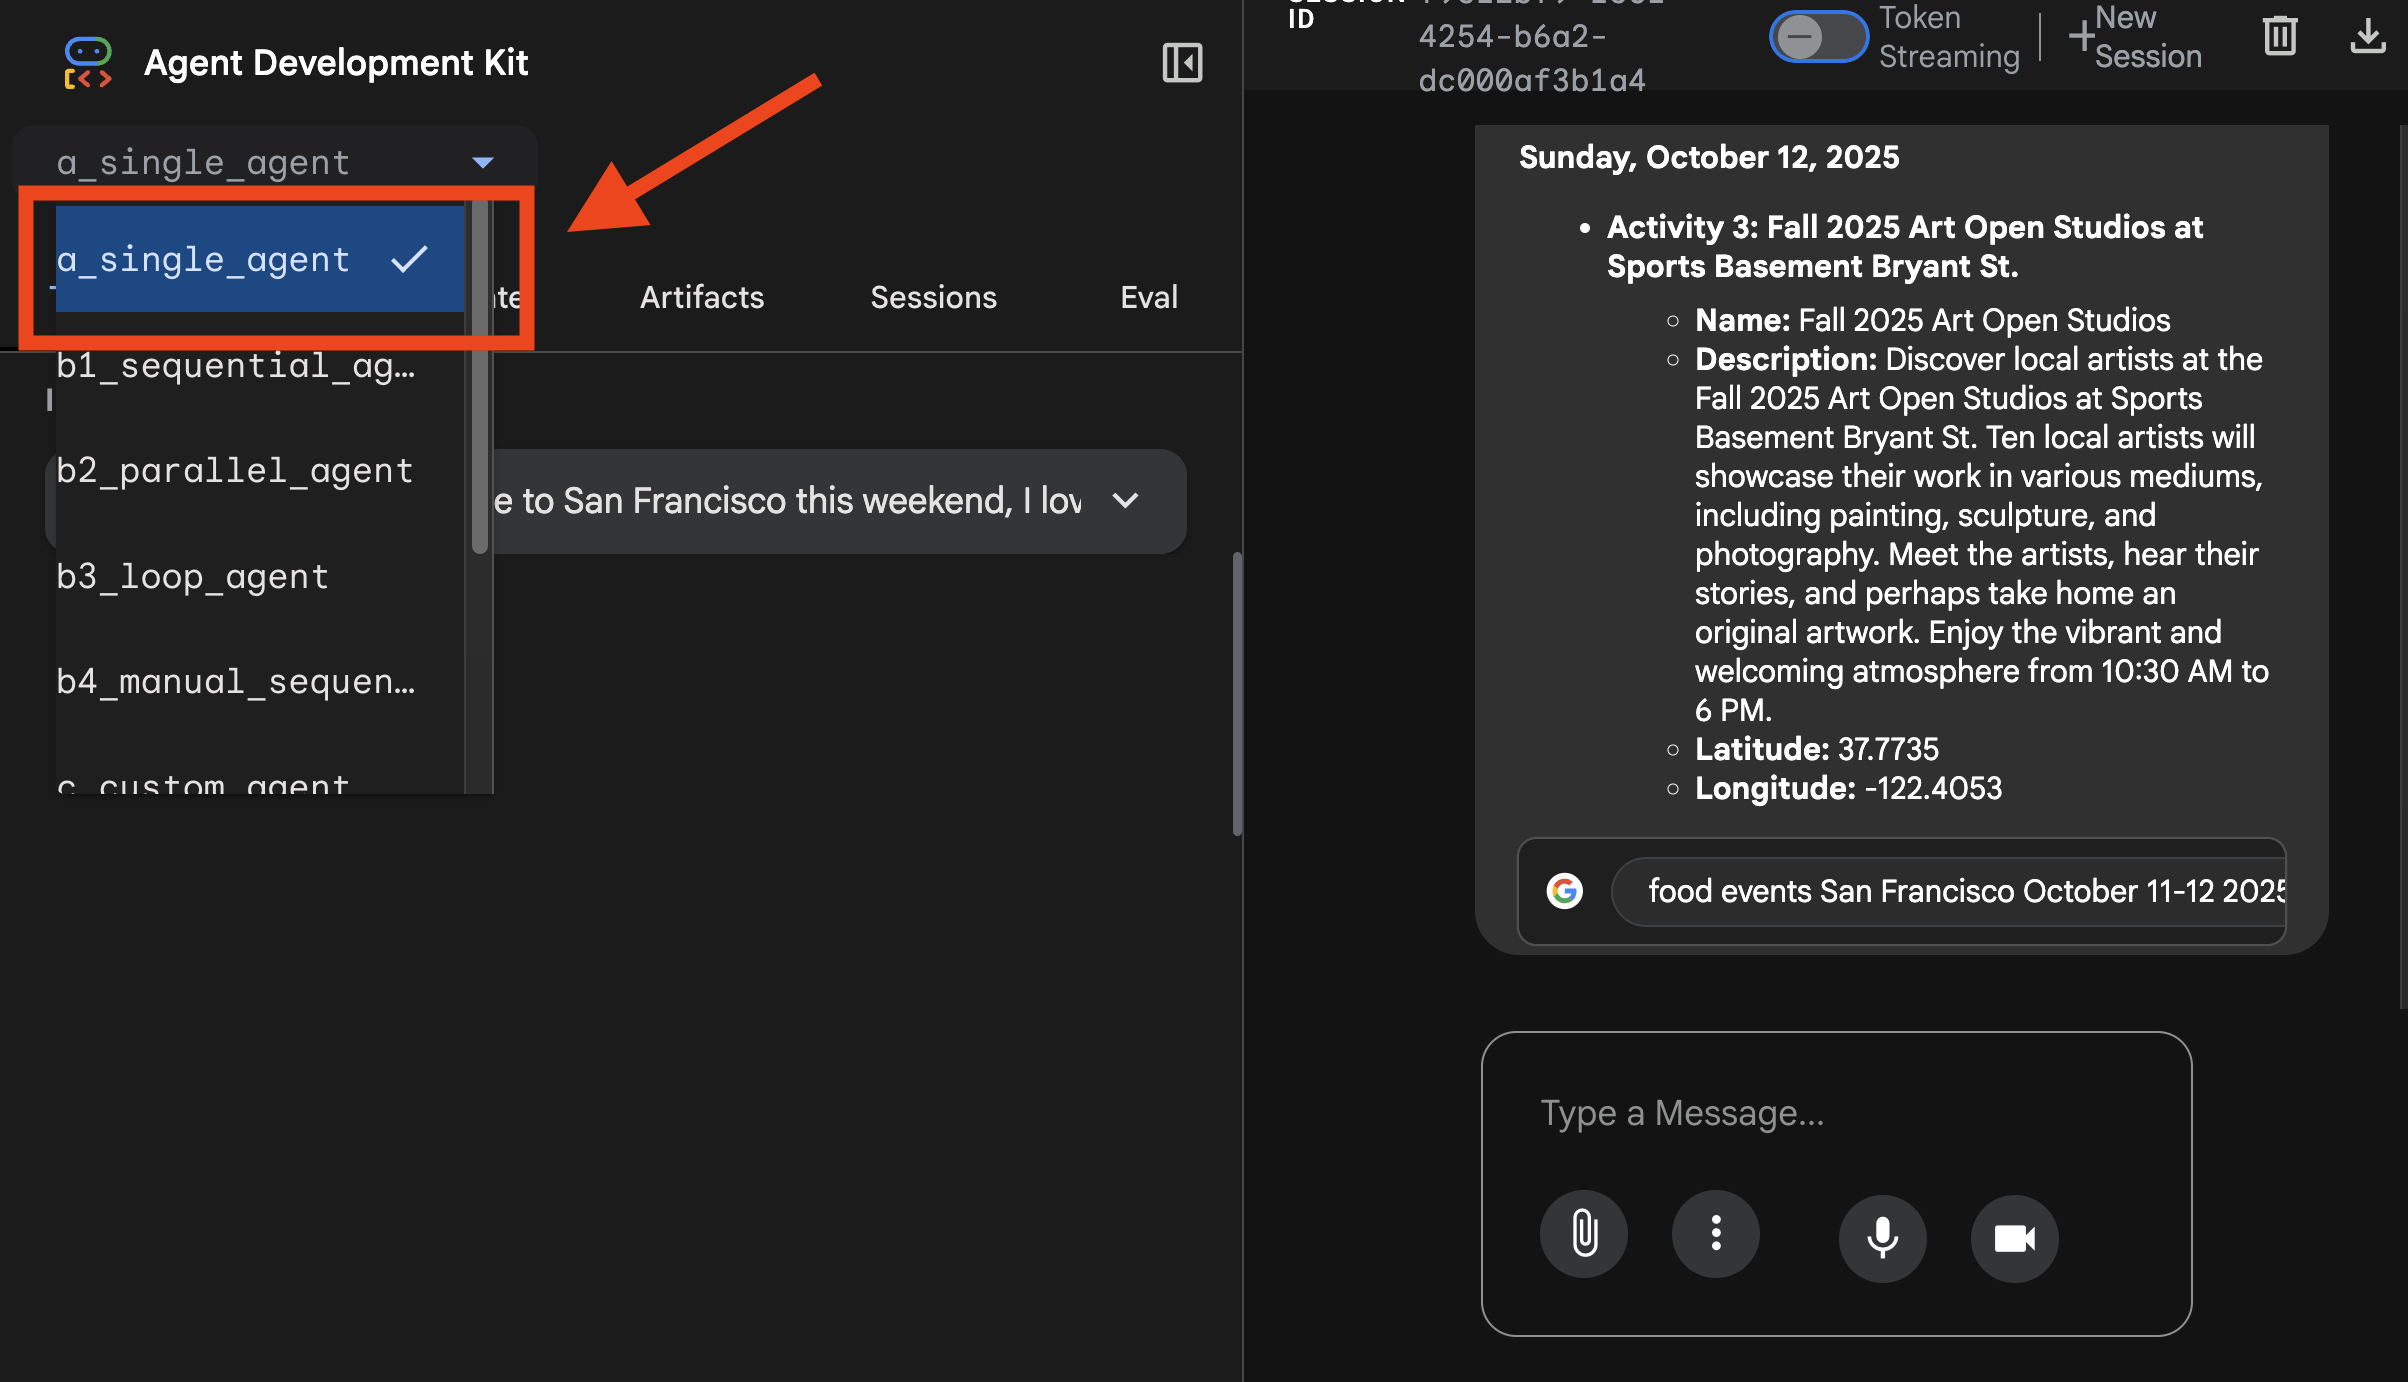
You can see the tracing here: 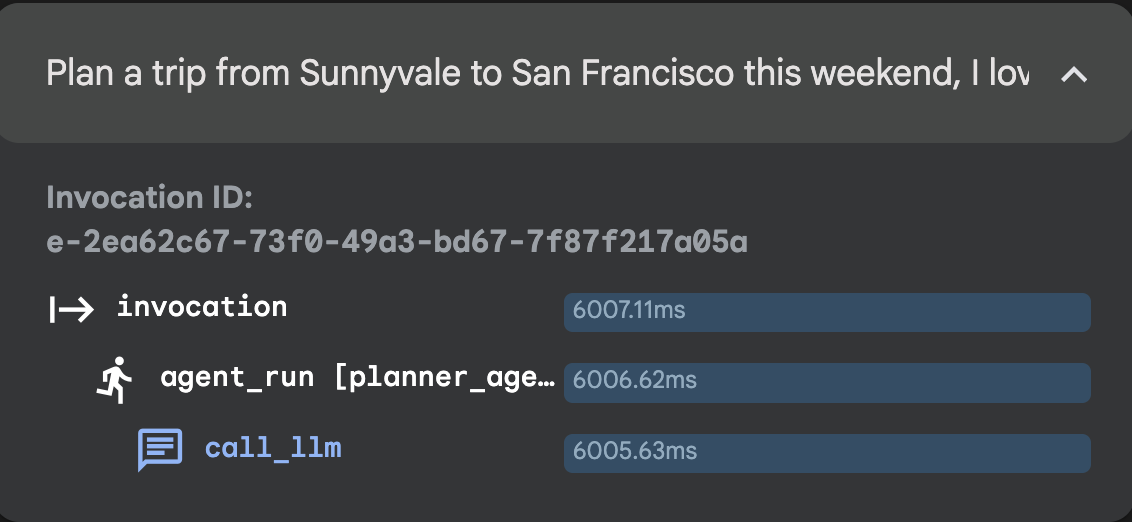
👉 Test Prompt:
Plan a trip from Sunnyvale to San Francisco this weekend, I love food and art.
4. Session 2: Workflow Agent: Sequential Agent, Parallel Agent, Loop Agent
Parallel Agent

choose the parallel workflow agent In the dropdown menu at the top of the UI, choose b2_parallel_agent.
👉 Test Prompt:
Plan my trip to San Francisco, I want to find some good concert, restaurant and museum.
You can select b2_parallel_agent here: 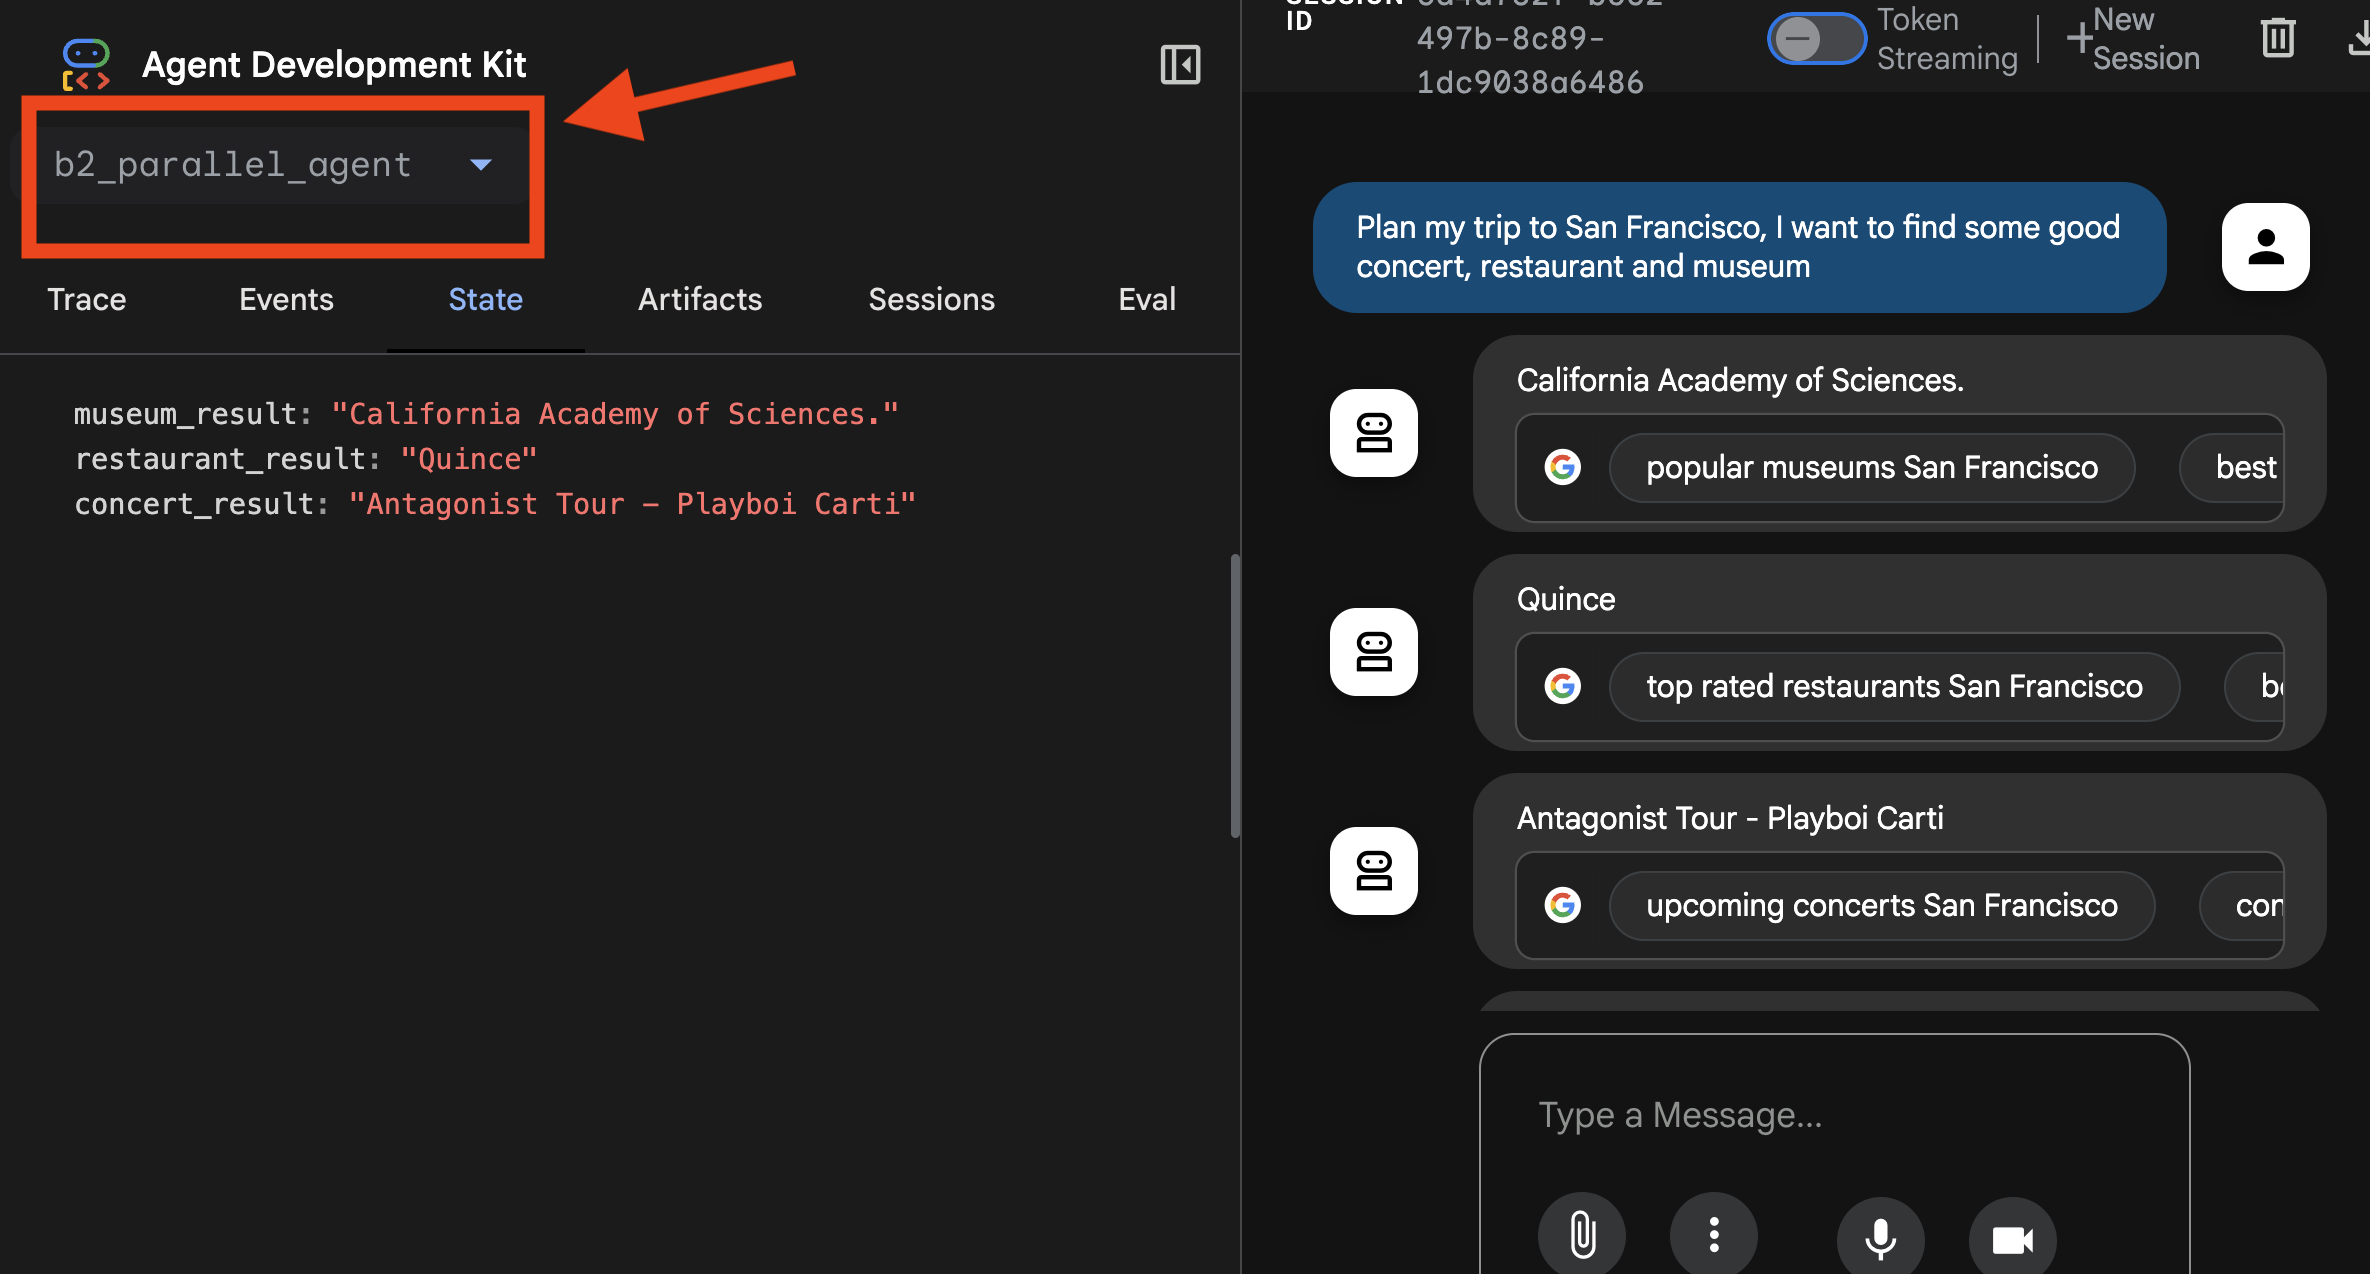
You can see the tracing here: 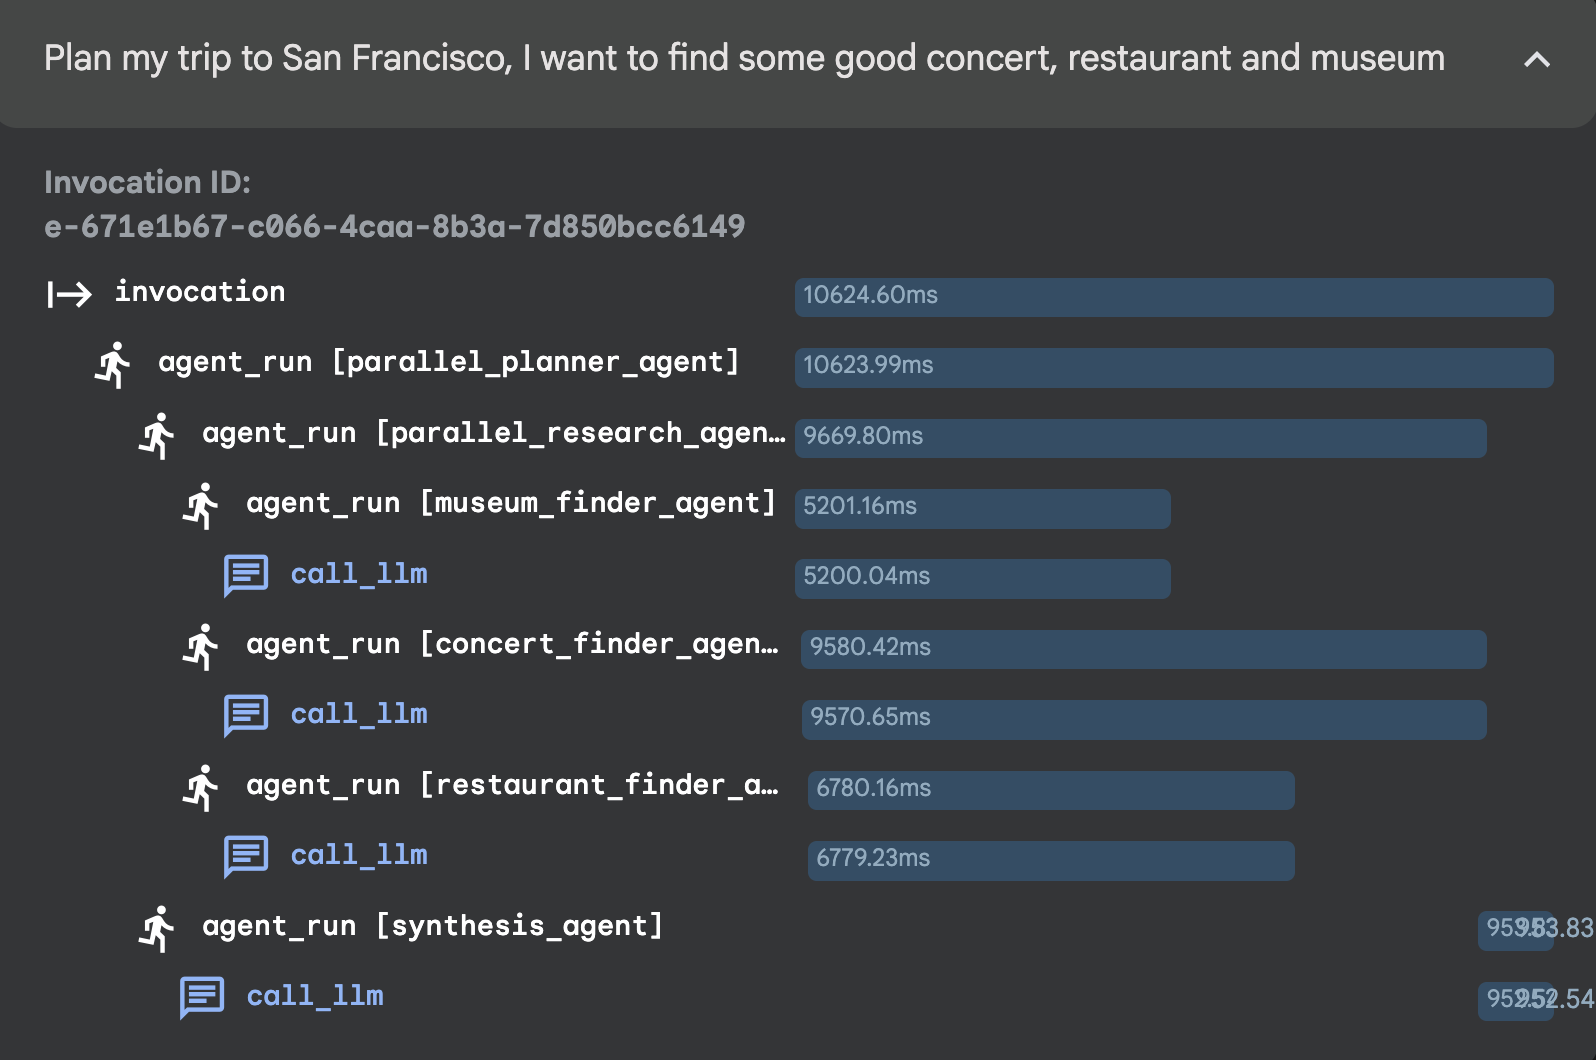
Sequential Agent

choose the sequential workflow agent In the dropdown menu at the top of the UI, choose b1_sequential_agent.
👉 Test Prompt:
Find a good sushi near Standford and tell me how to get there.
You can select b1_sequential_agent here: 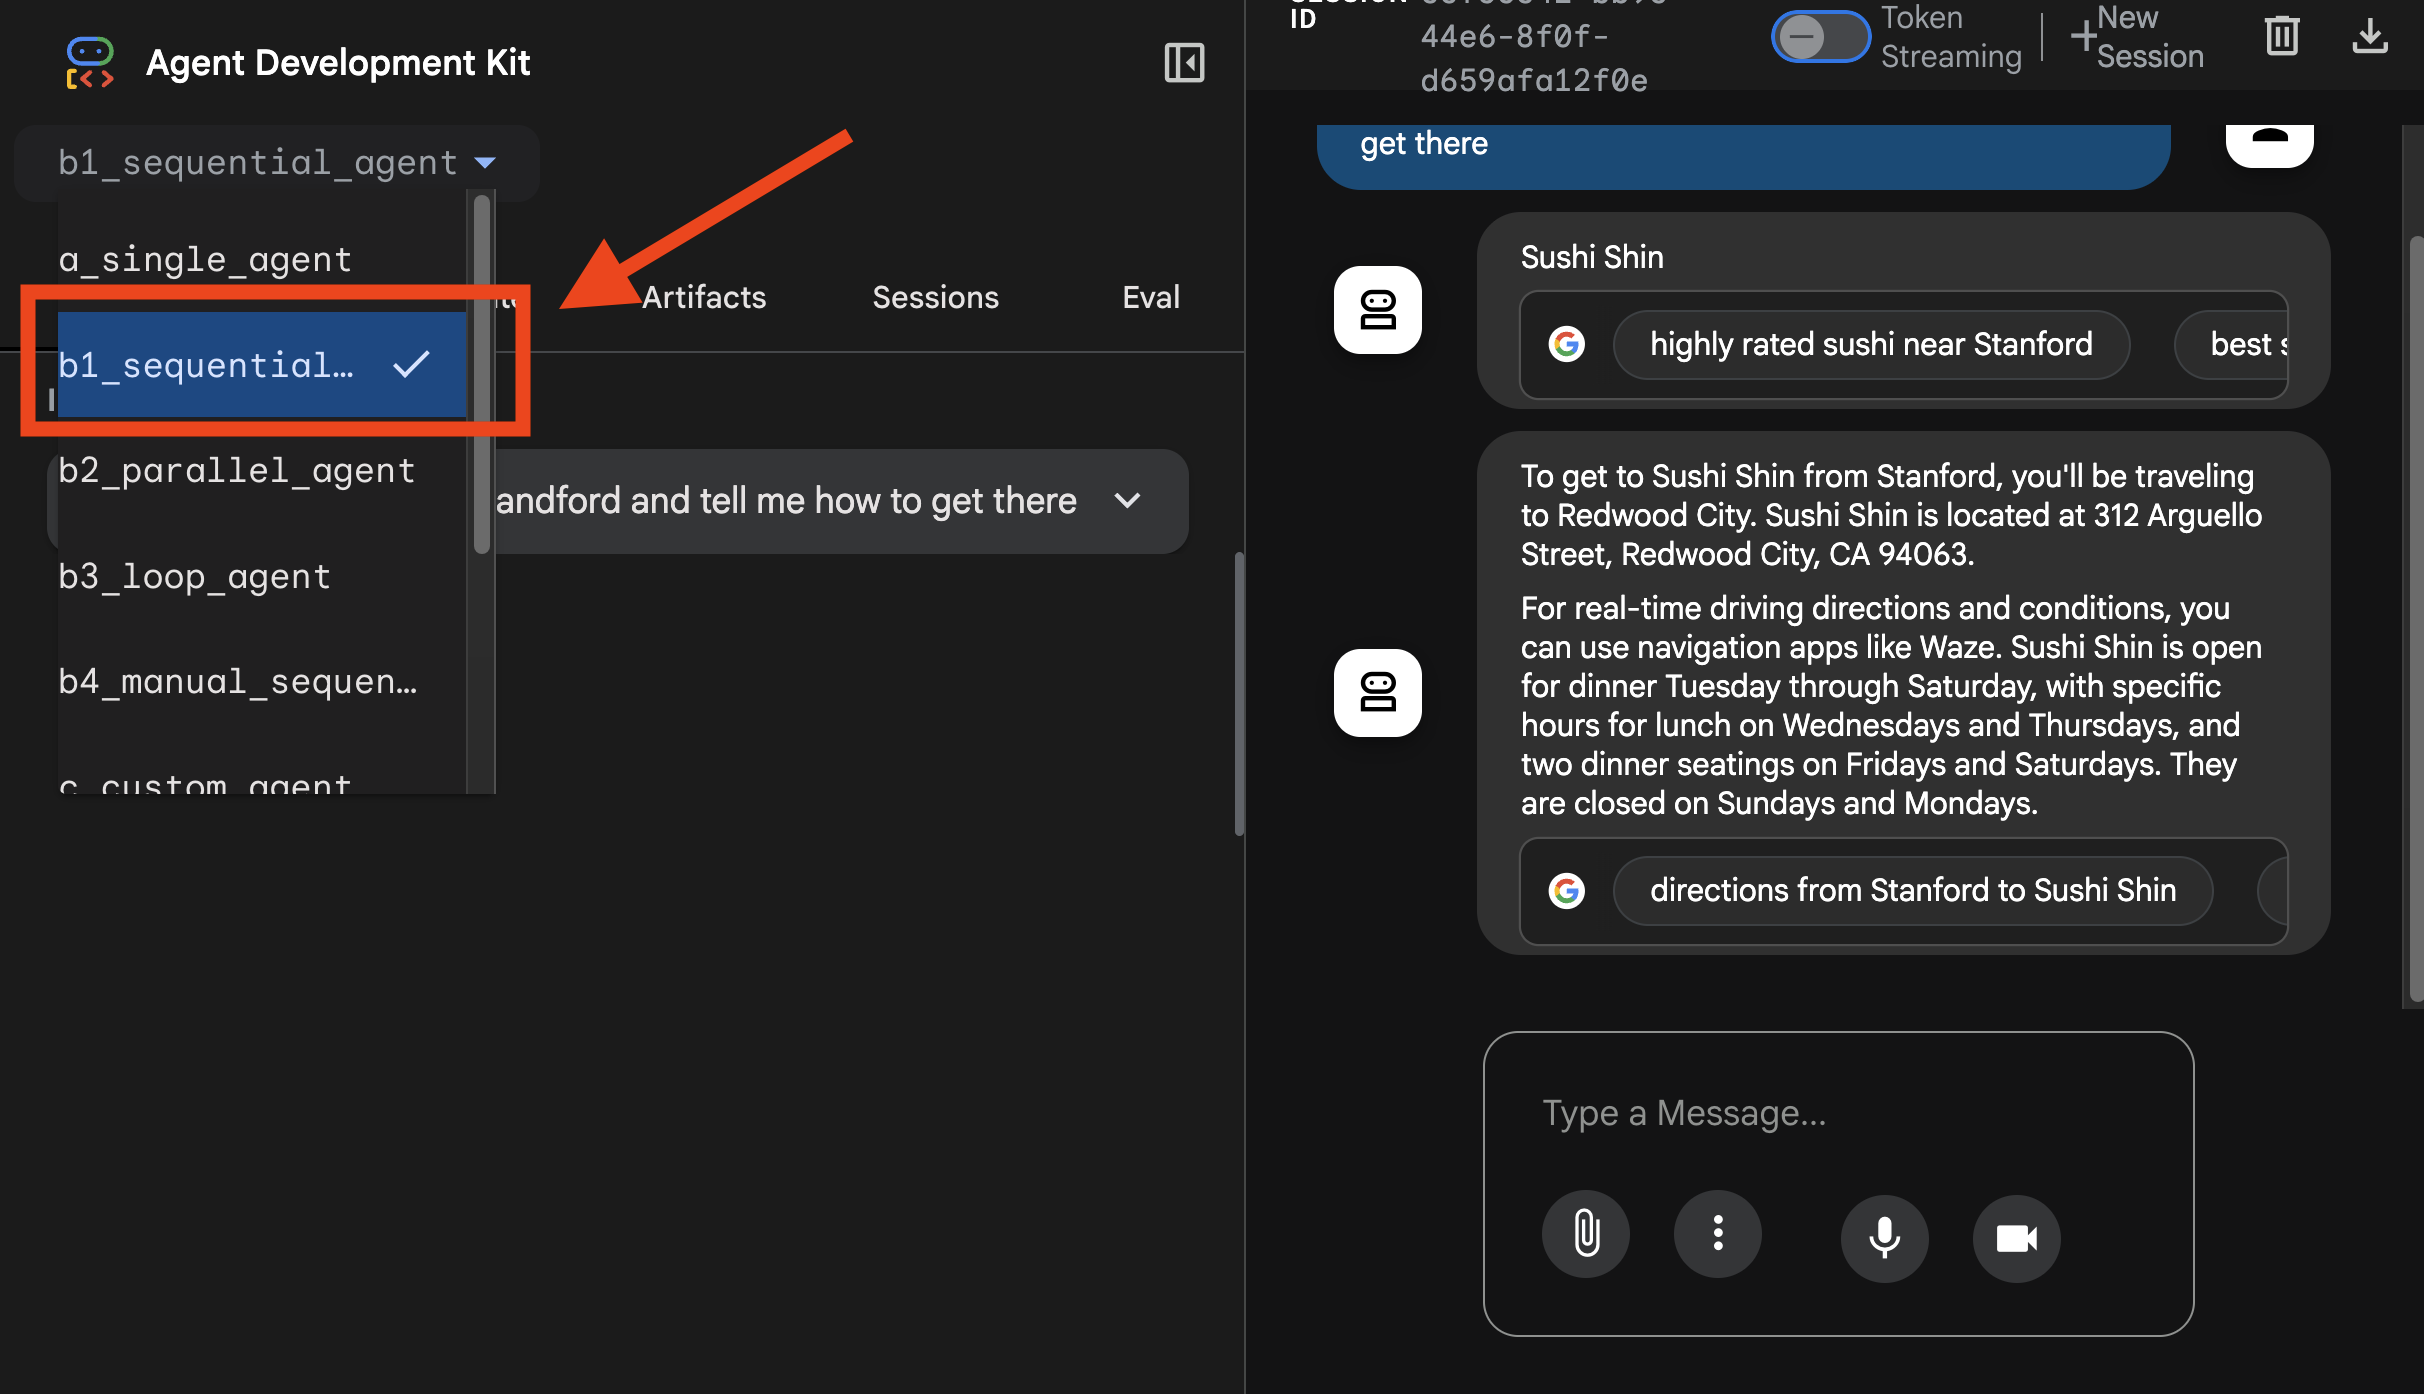
You can see the tracing here: 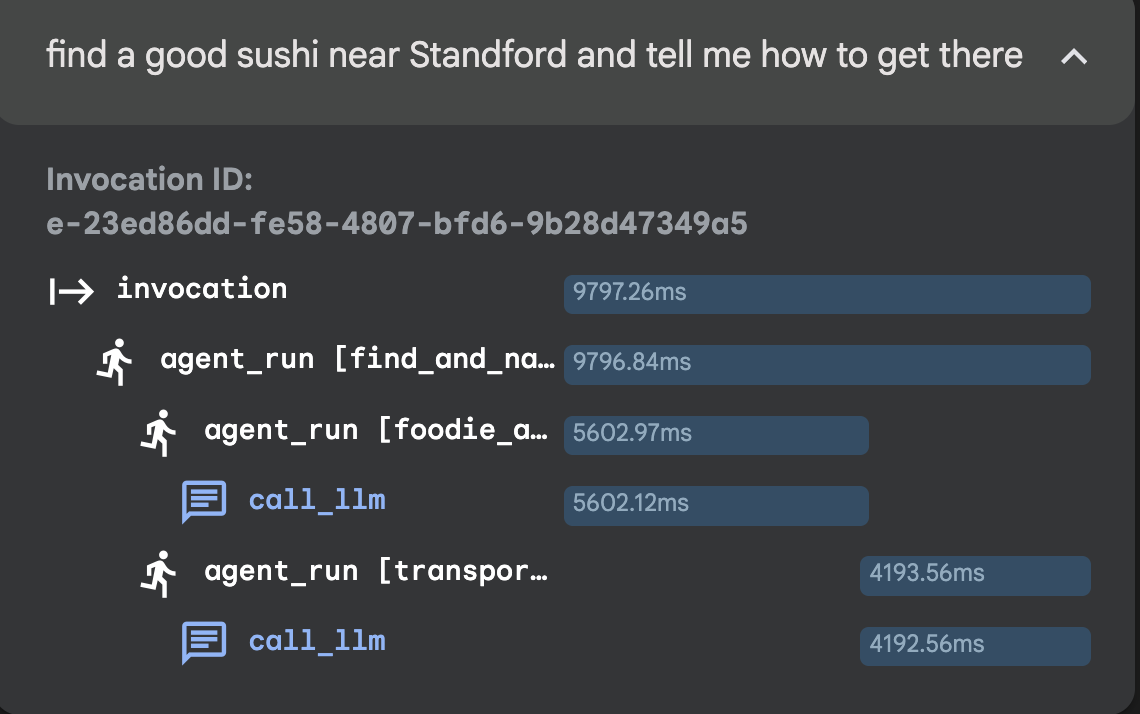
Loop Agent

choose the loop workflow agent In the dropdown menu at the top of the UI, choose b3_loop_agent.
👉 Test Prompt:
Plan a trip from Sunnyvale to San Francisco today.
You can select b3_loop_agent here: 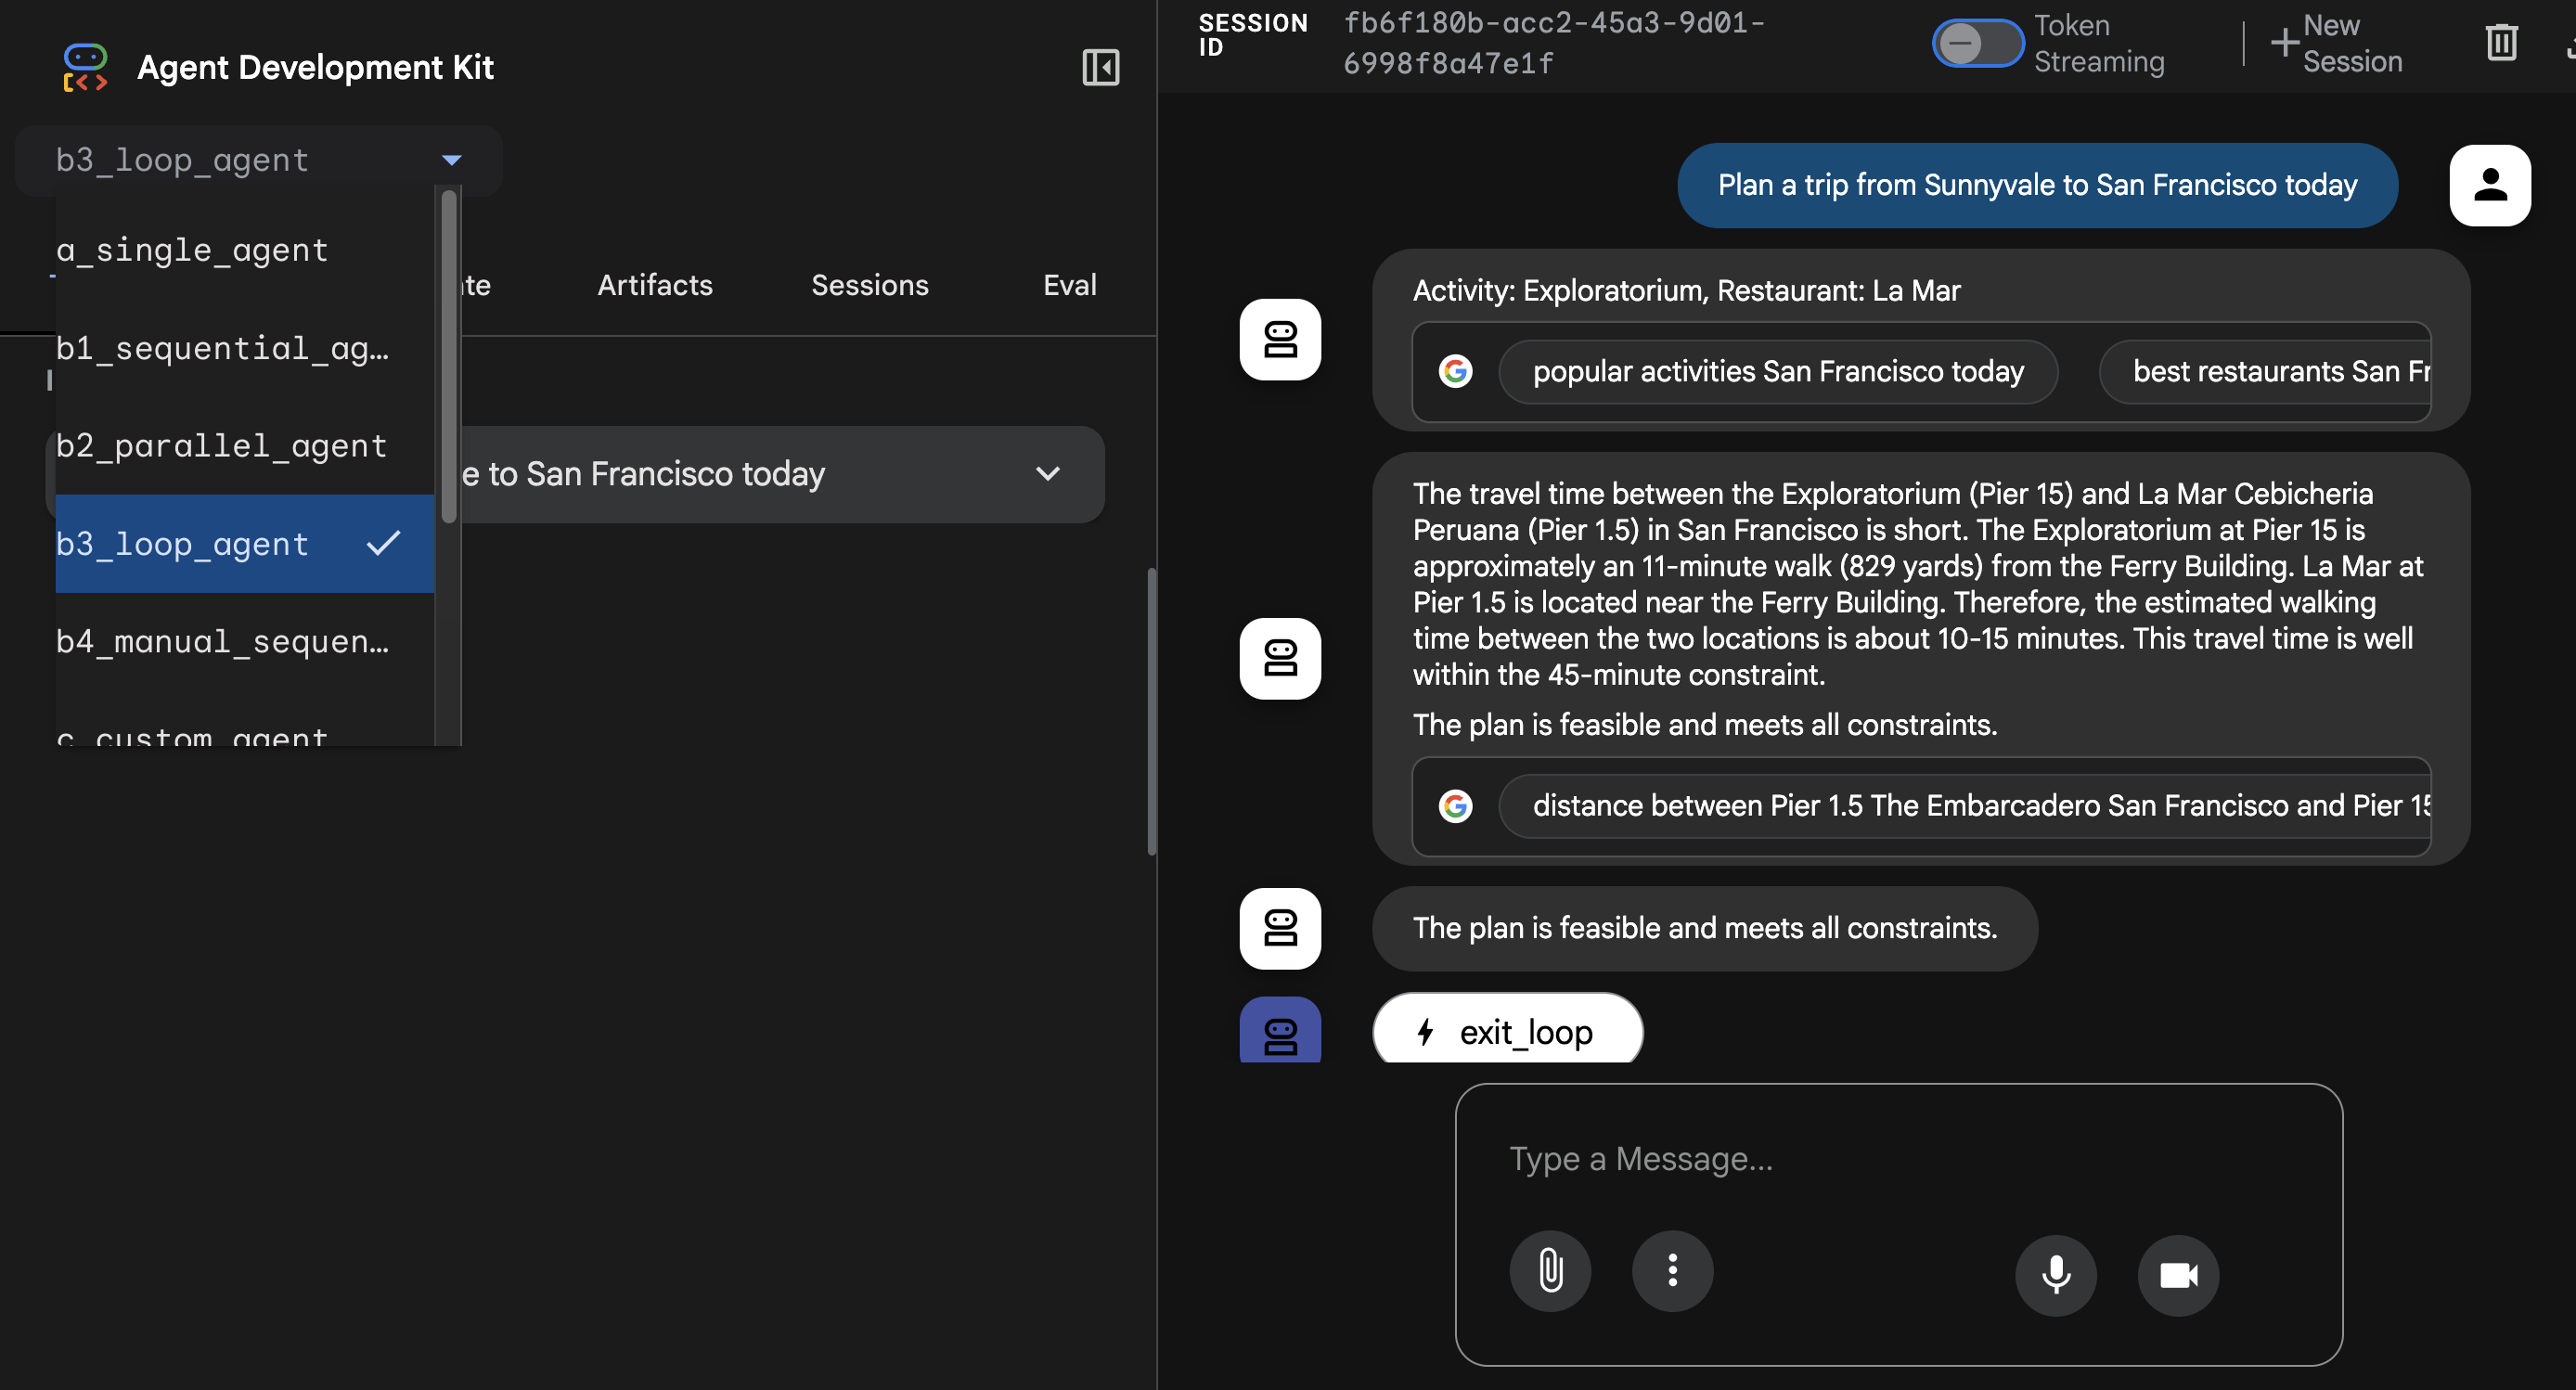
You can see the tracing here: 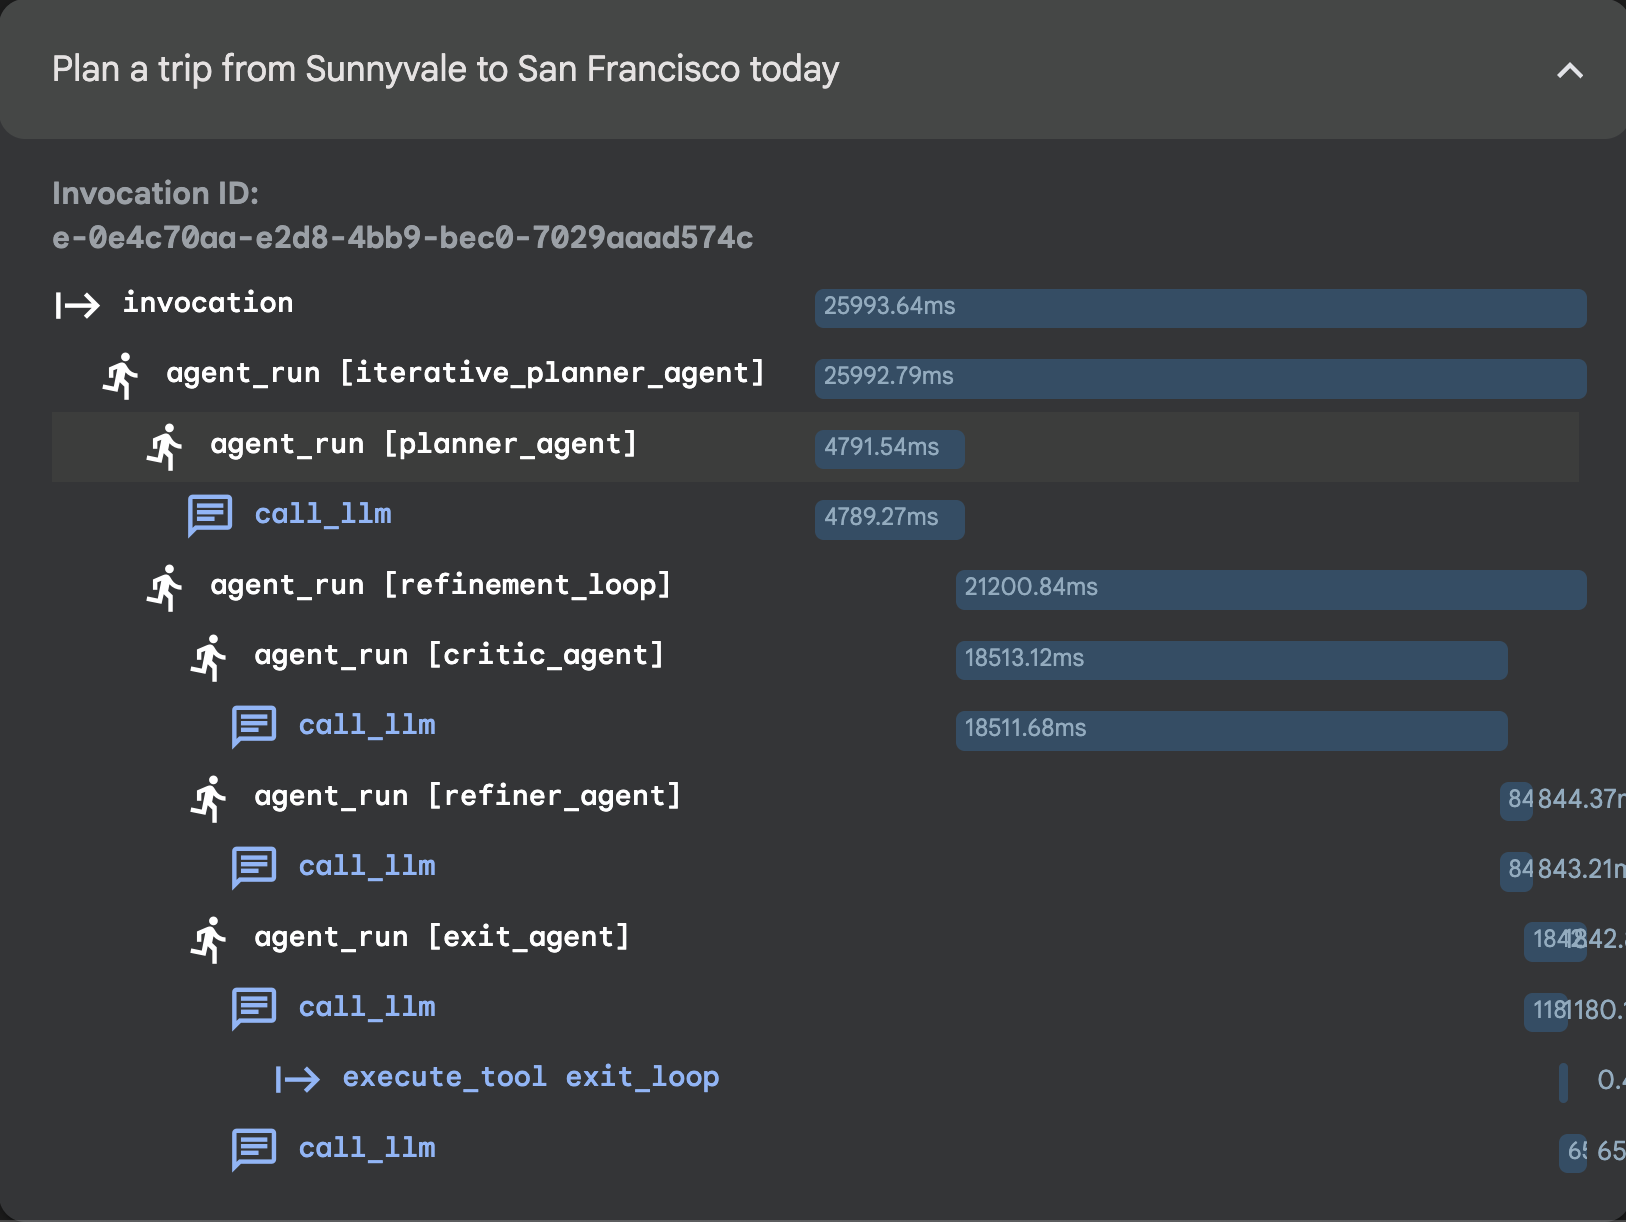
5. Session 3: Custom Agent
Once your ADK Web UI is open, choose c_custom_agent from the dropdown.
👉 Test Prompt:
Plan a trip from Sunnyvale to San Francisco this weekend, I love food and art. Make sure within budget of 100 dollars.
You can select c_custom_agent here: 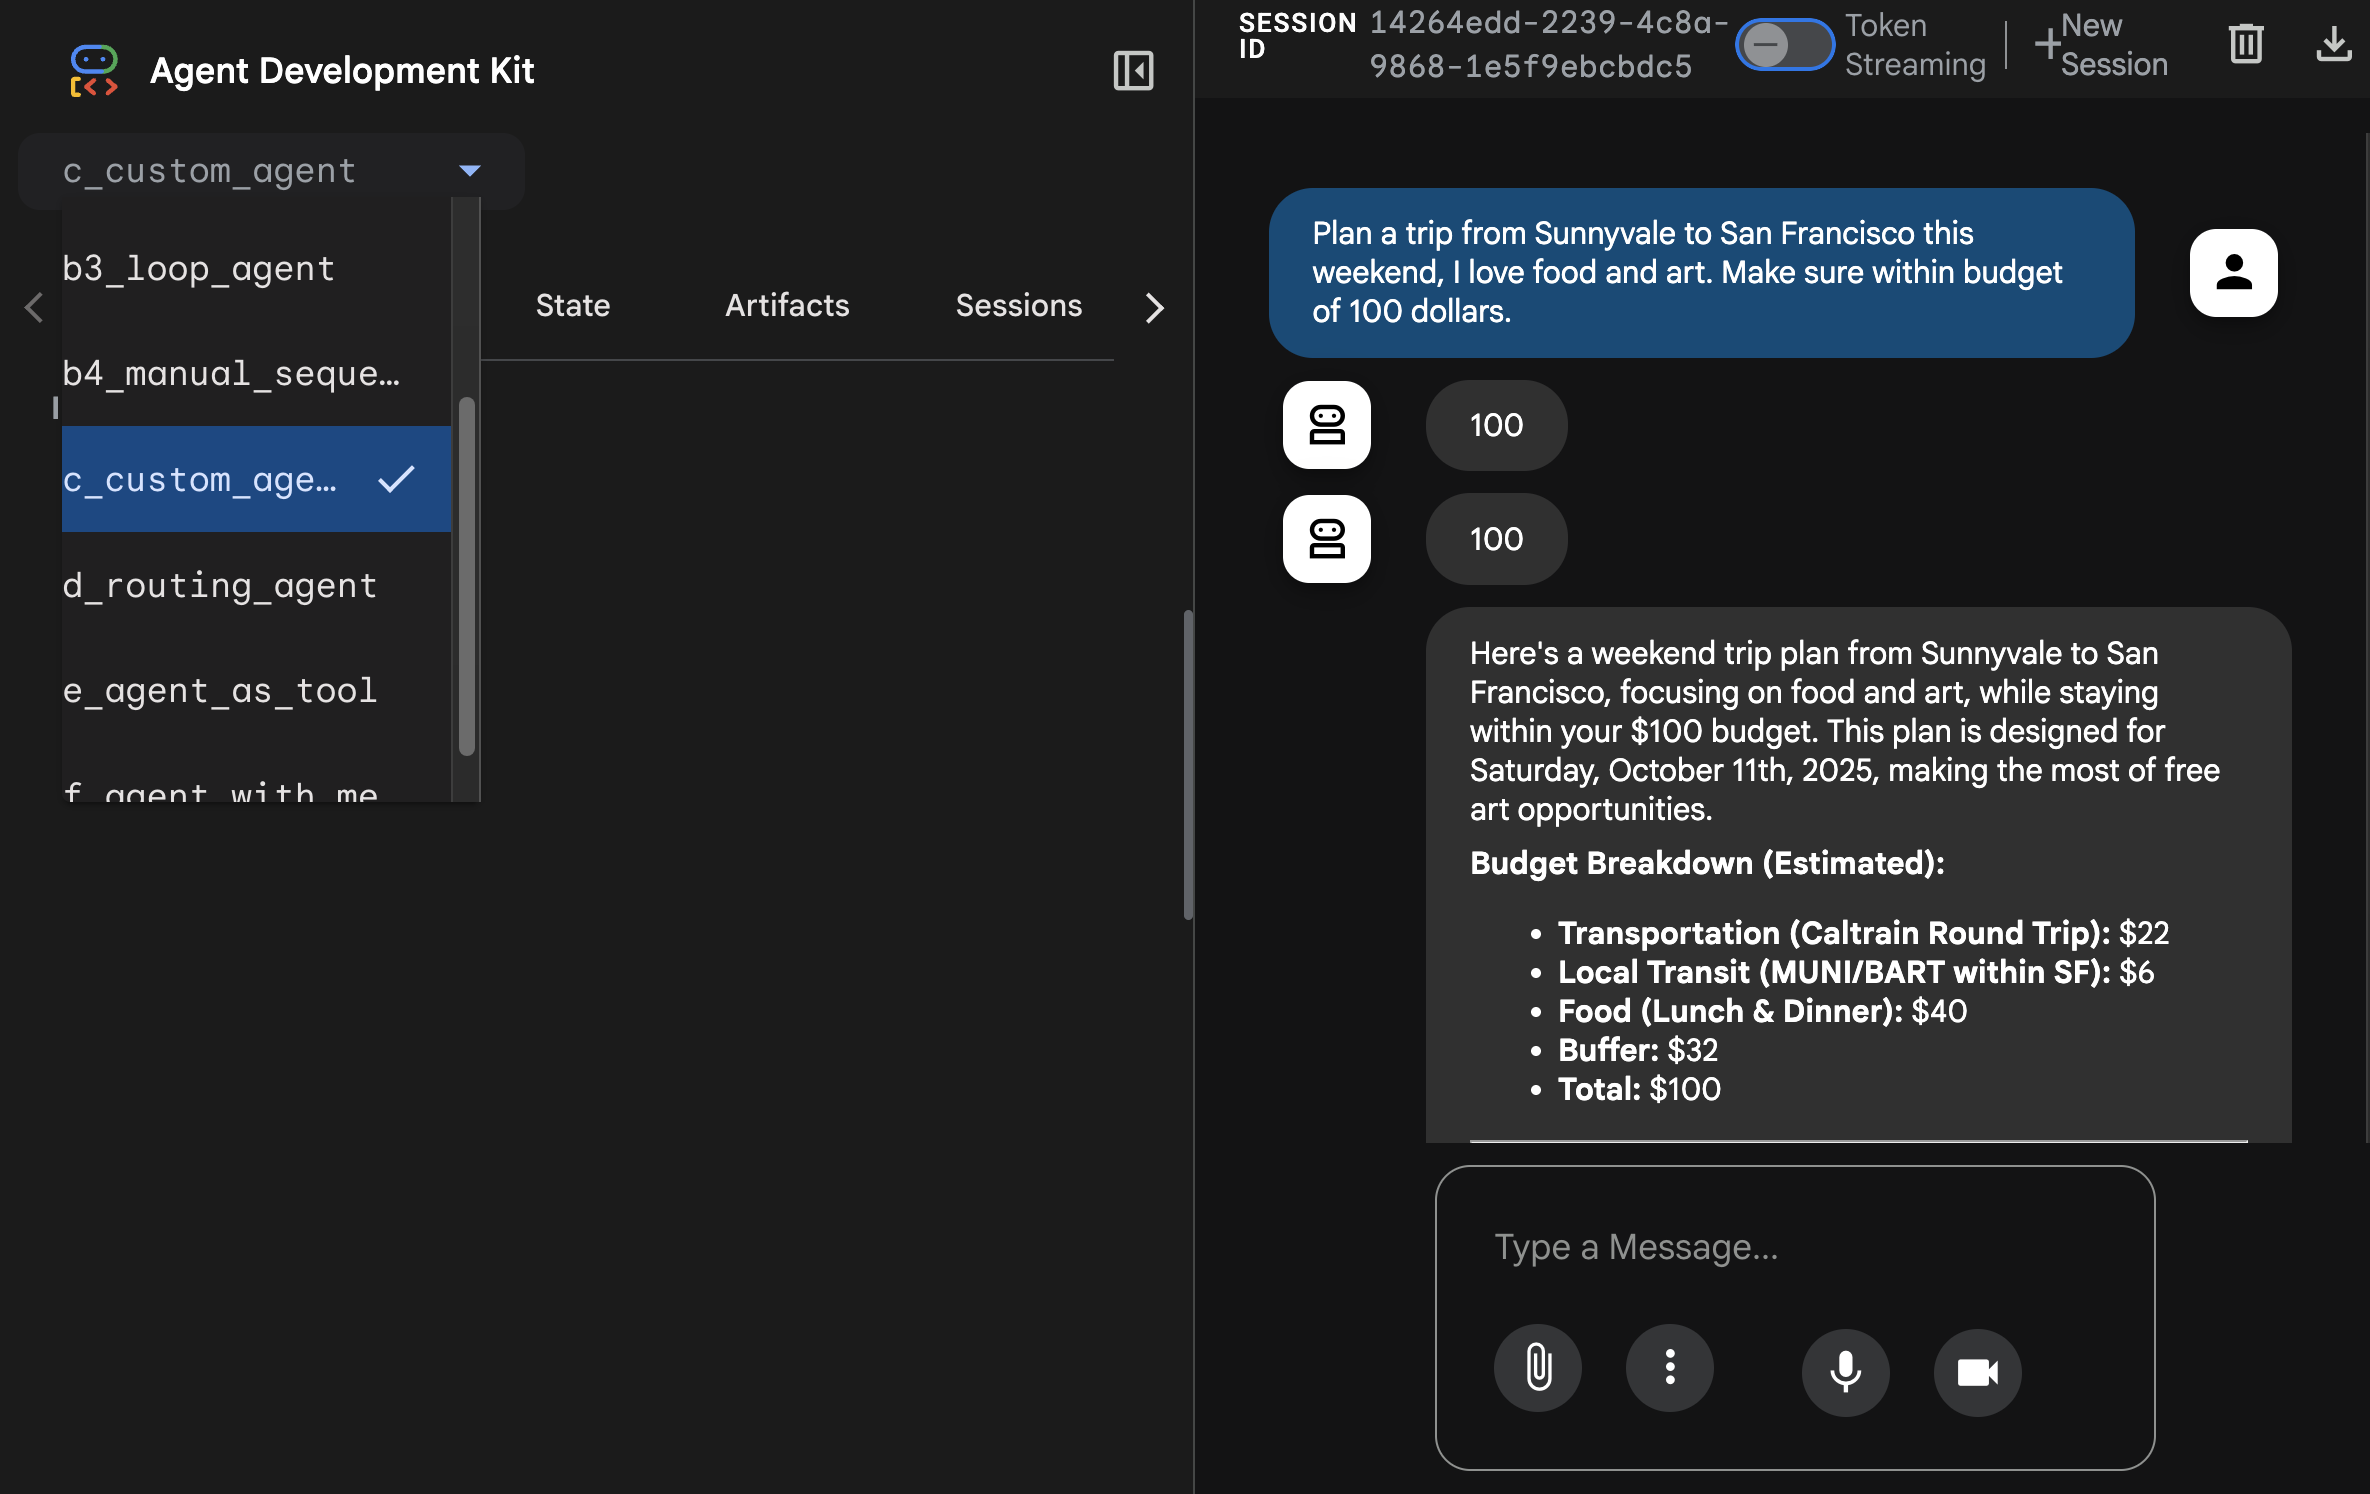
You can see the tracing here: 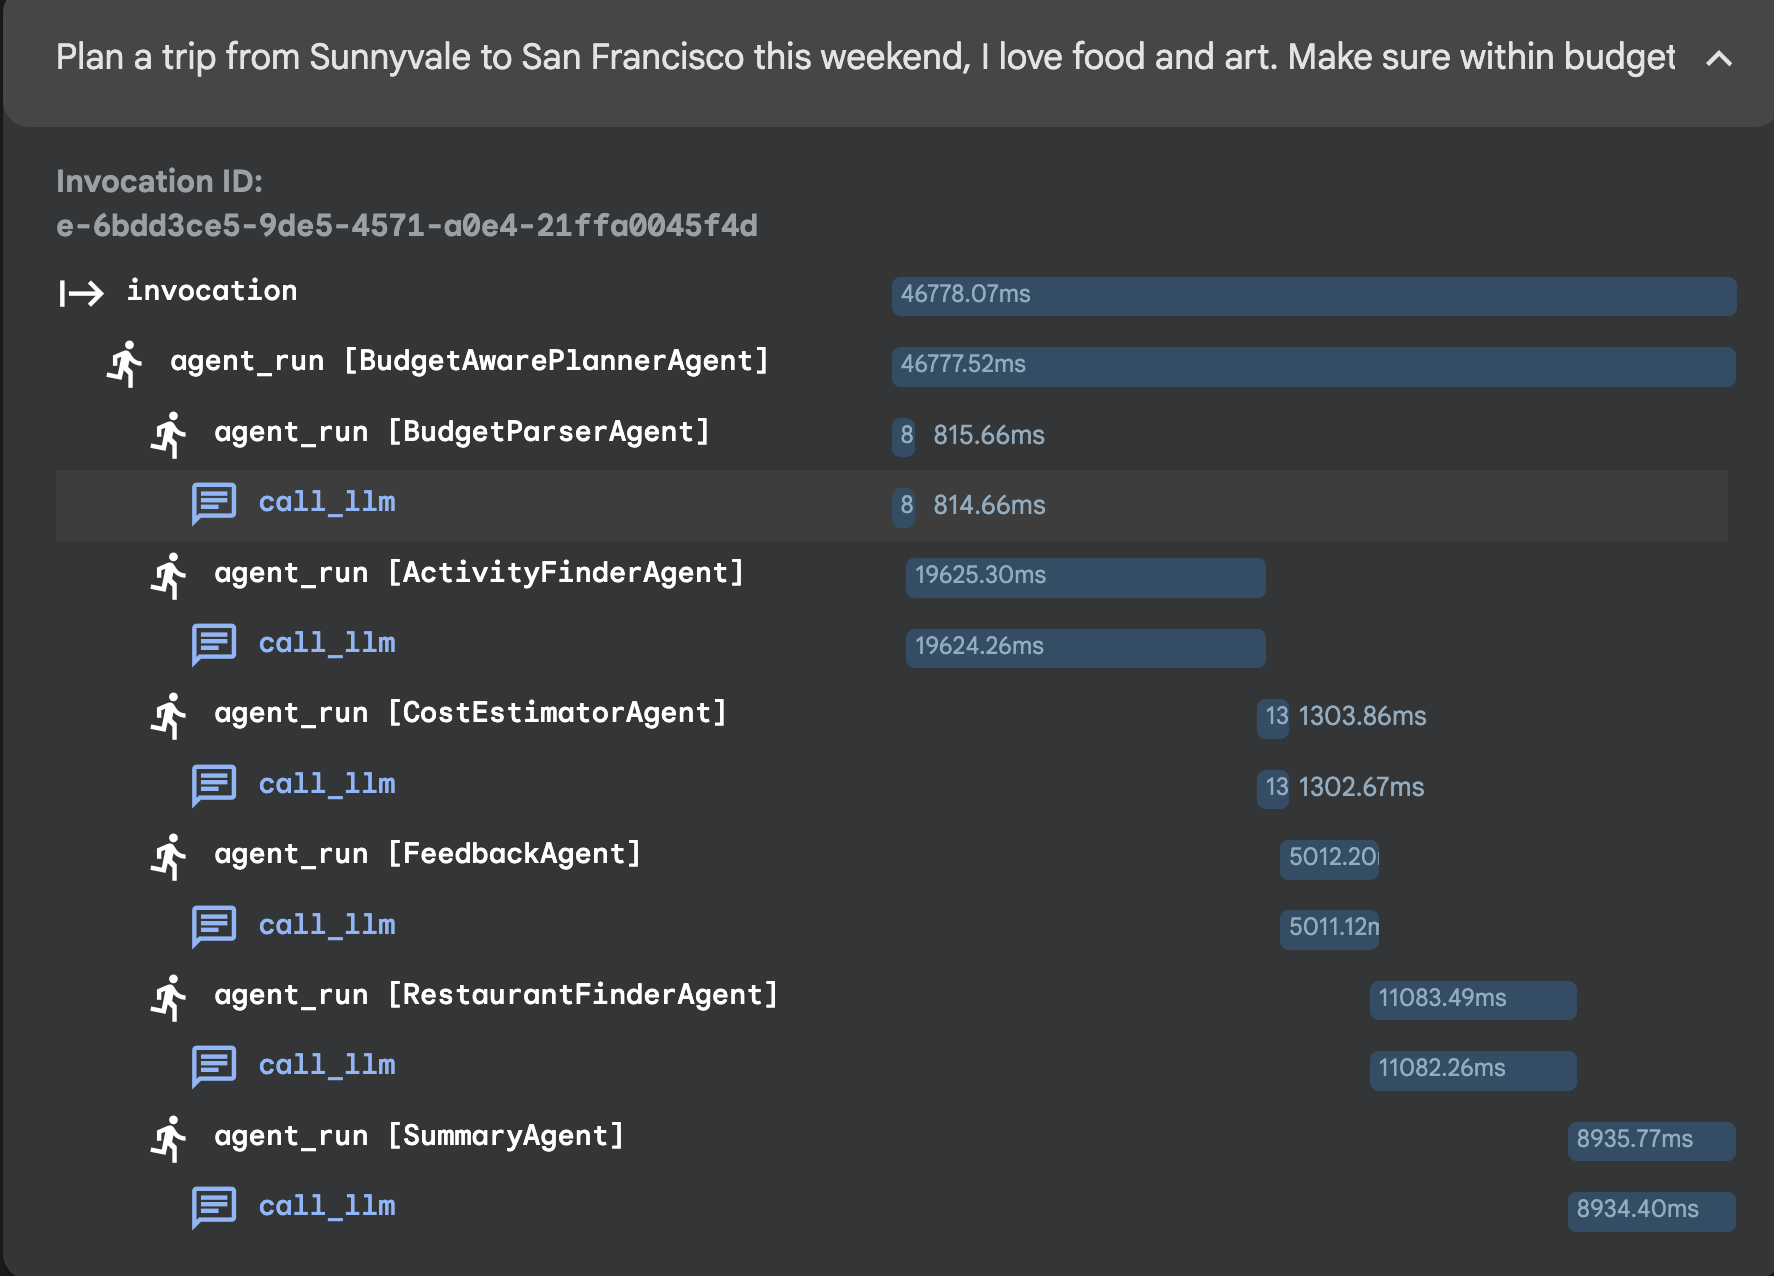
6. Session 4: Orchestrator Pattern - Routing Agent

Once your ADK Web UI is open, choose d_routing_agent from the dropdown.
👉 Test Prompt:
Plan a trip from Sunnyvale to San Francisco this weekend, I love concert, restaurant and museum.
You can select d_routing_agent here: 
You can see the tracing here: 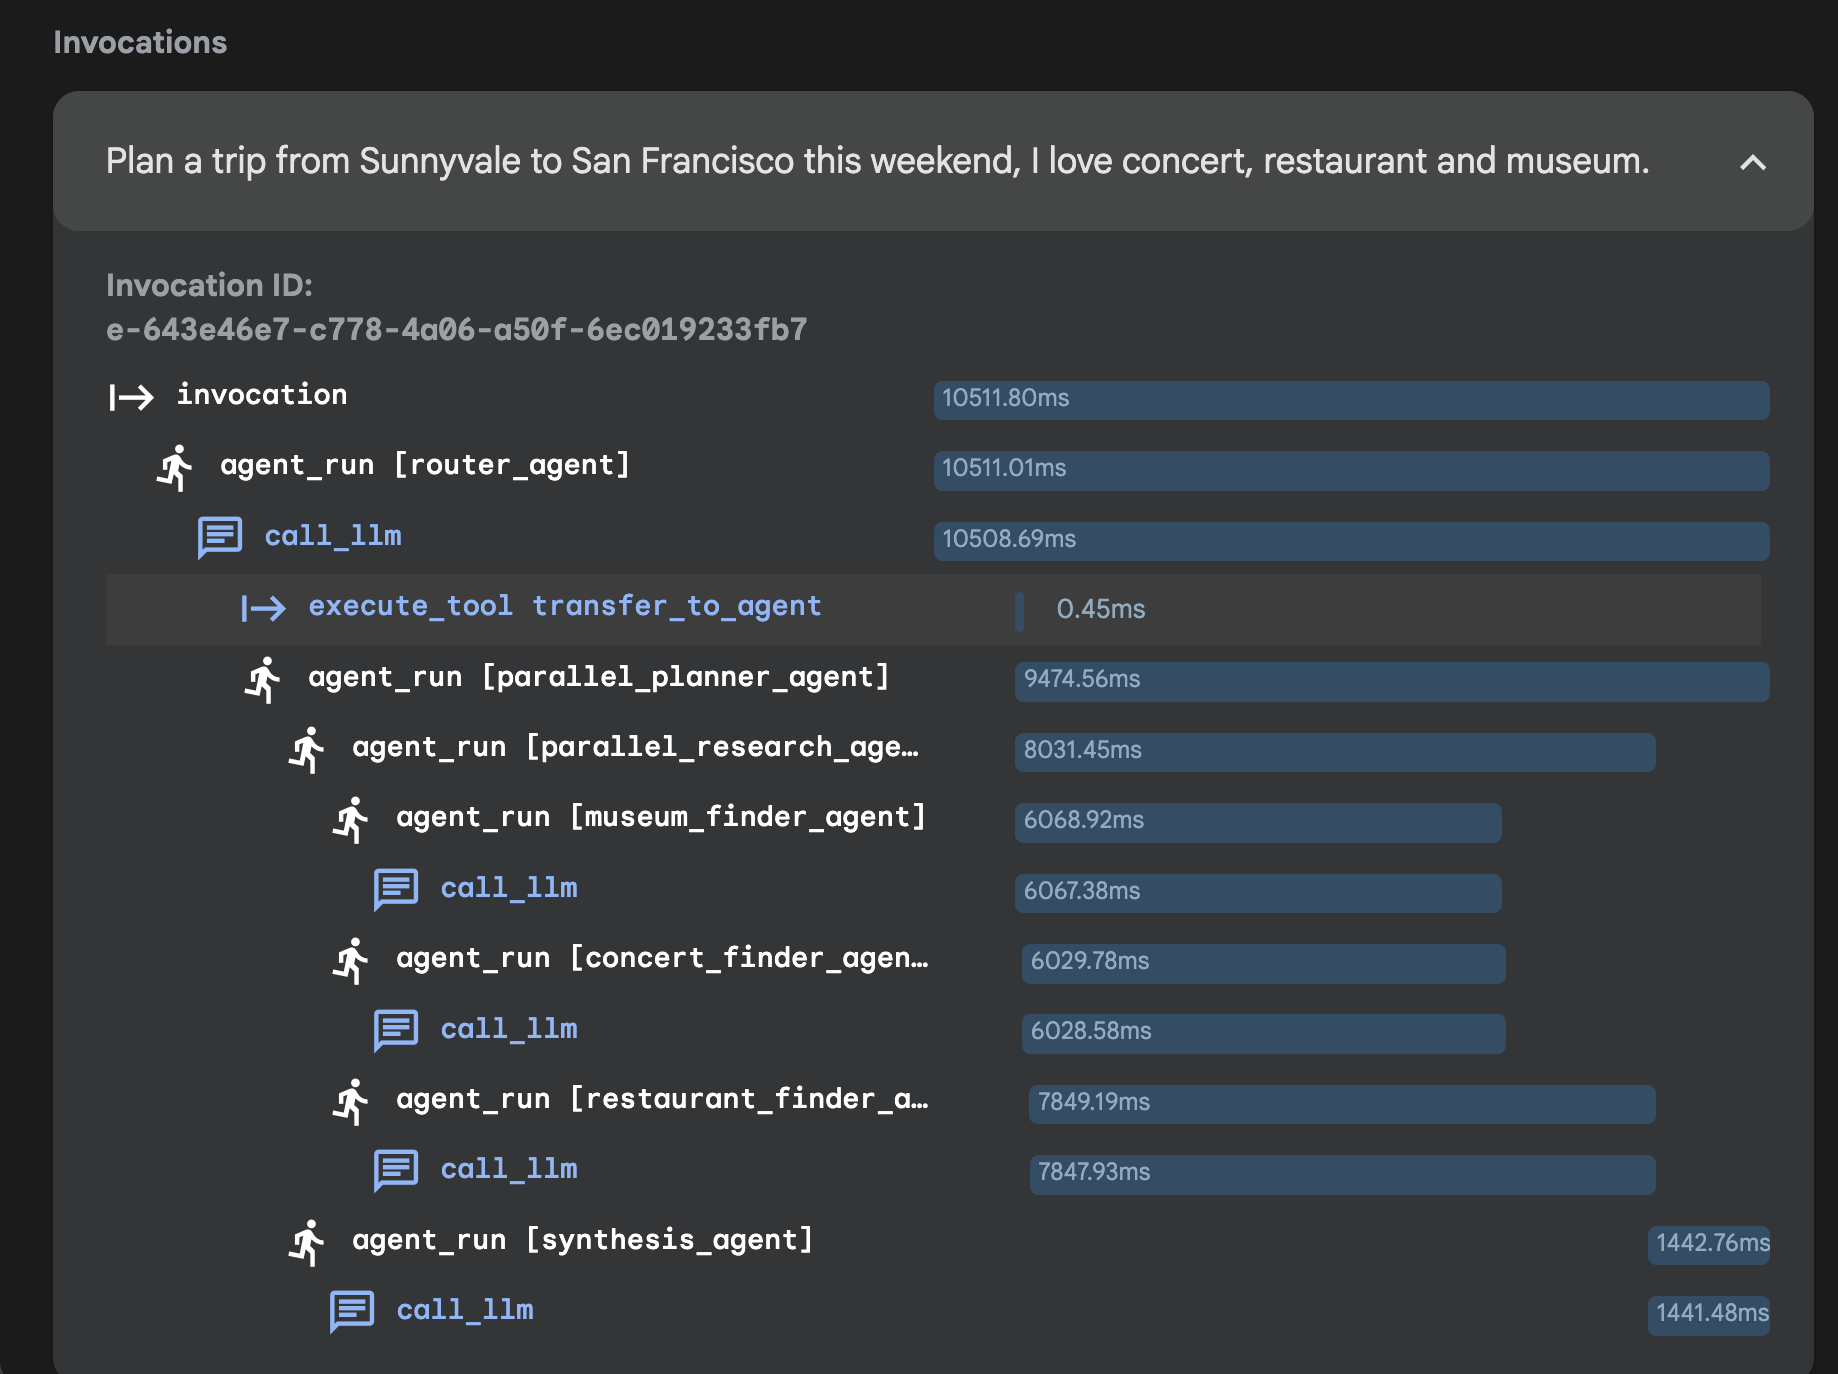
7. Session 5: Agent as tool
Once your ADK Web UI is open, choose e_agent_as_tool from the dropdown.
👉 Test Prompt:
Plan a trip from Sunnyvale to San Francisco this weekend, I love concert, restaurant and museum.
You can select e_agent_as_tool here: 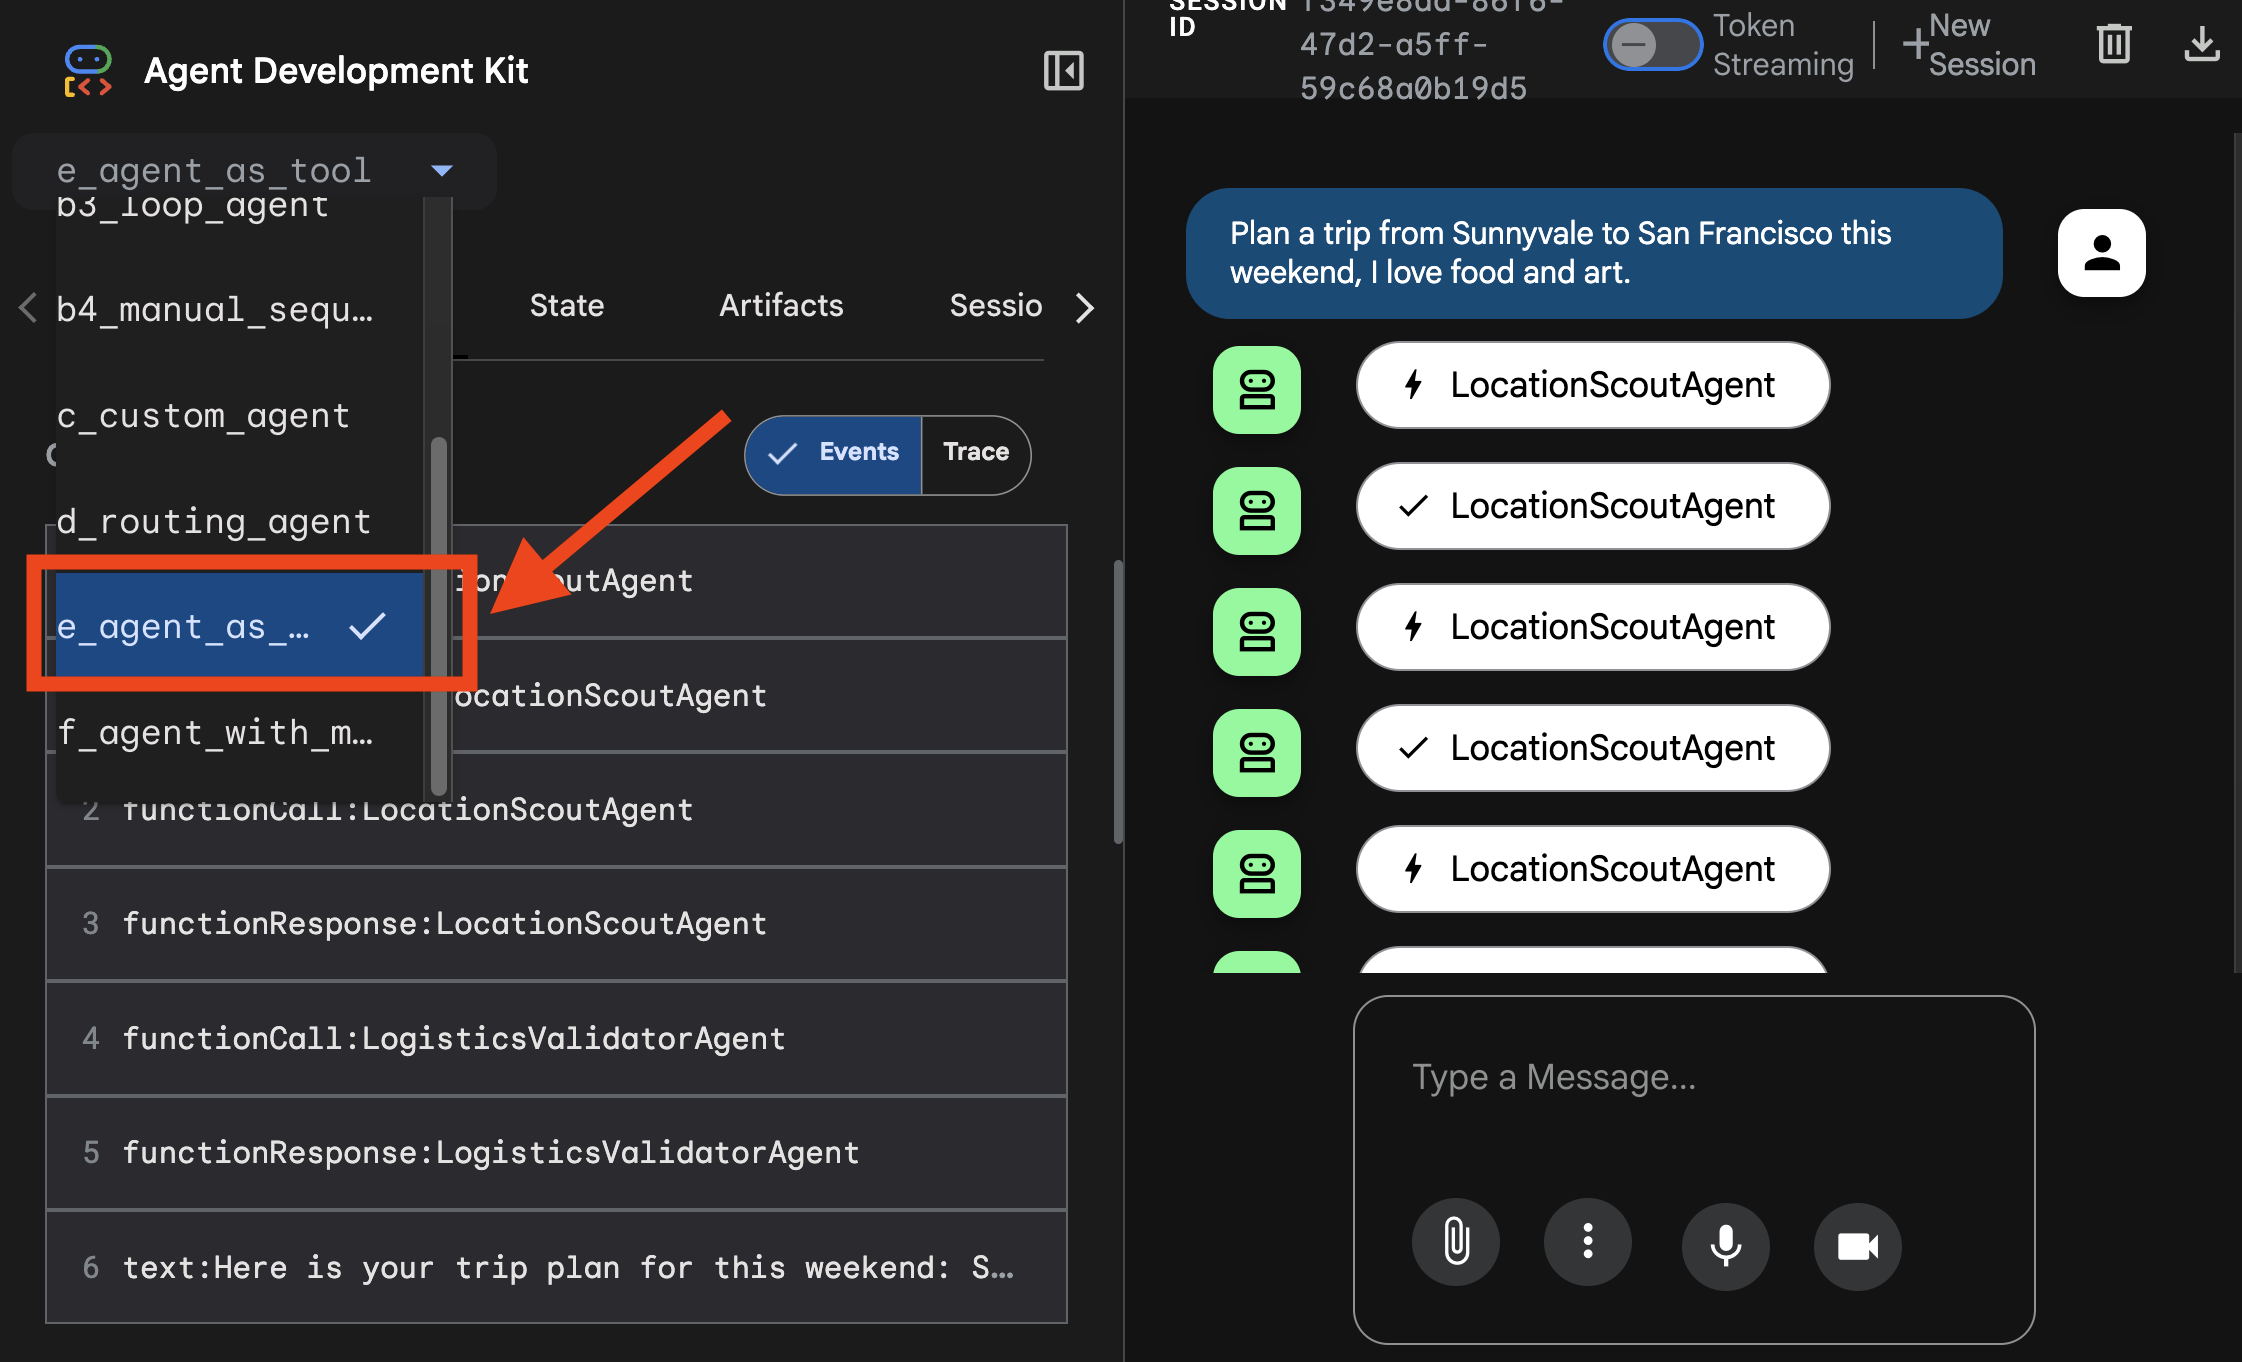
You can see the tracing here: 
8. Session 6: Agent With Long Term Memory
👉💻 Test your long term memory by go to the folder and use the runner to power up the agent:
cd ~/adk_tutorial
source .adk_env/bin/activate
cd ~/adk_tutorial/f_agent_with_memory
python main.py
👉 Test Prompt:
I like Art and Italian food.
Then end the session by pressing Ctrl+C. Restart the session:
cd ~/adk_tutorial
source .adk_env/bin/activate
cd ~/adk_tutorial/f_agent_with_memory
python main.py
👉 Test Prompt:
Plan a trip to San Francisco based on my preference.
9. Session 7: Empower your agent with MCP
Step 1: Prepare the Local Database
👉💻 From the repo root, create the sample database:
cd ~/adk_tutorial
source .adk_env/bin/activate
chmod +x setup_trip_database.py
./setup_trip_database.py
This creates destinations.db in ~/adk_tutorial/.
Step 2: Install and Run the MCP Toolbox Server
👉💻 Download the MCP Toolbox binary for your operating system:
cd ~/adk_tutorial/mcp_tool_box
export VERSION=0.16.0

# Choose the line that matches your machine:
export OS=linux/amd64      # Cloud Shell or Linux (x86_64)
# export OS=darwin/arm64   # macOS Apple Silicon (M1/M2/M3)
# export OS=darwin/amd64   # macOS Intel

curl -O https://storage.googleapis.com/genai-toolbox/v$VERSION/$OS/toolbox
once finishing downloading, and then run
chmod +x toolbox
Step 3
In one terminal Run the following command (leave it running — the agent connects to it at http://127.0.0.1:7001):
cd ~/adk_tutorial
source .adk_env/bin/activate
cd ~/adk_tutorial/mcp_tool_box
./toolbox --tools-file "trip_tools.yaml" --port 7001
In another terminal Run the following command
cd ~/adk_tutorial
source .adk_env/bin/activate
cd ~/adk_tutorial/g_agents_mcp
python main.py
👉 Test Prompts (use the cities that exist in the sample database — Paris, Rome, New York, or Tokyo):
What are the top-rated things to do in Tokyo?
Show me the museums in Rome.
What can I do in New York for under 25 dollars?