
1. What you will learn
Welcome to the ADK Master Class - Your Journey into Multi-Agent Systems
You're about to step into the exciting world of AI agents. Forget simple chatbots that just answer questions. We're diving deep into the Agent Development Kit (ADK) to build sophisticated, autonomous systems that can reason, plan, and use tools to accomplish complex tasks.

By the end of this tutorial, you will be able to:
- Build Your First AI Agent: Go from zero to a fully functional agent that can understand a user's needs, use tools like Google Search, and generate detailed, helpful responses.
- Construct Multi-Agent Systems: Learn the "Agent-as-a-Tool" pattern, a revolutionary concept where agents delegate tasks to other specialized agents, creating a team of AI experts that work together.
- Orchestrate Complex Workflows: Go beyond simple delegation and master advanced patterns like Routers, Sequential Chains, Loops, and Parallel Execution to build robust, efficient, and intelligent applications that can handle almost any requests.
- Give Your Agents Memory: Understand the critical role of conversational memory, enabling your agents to handle follow-up questions, learn from feedback, and manage multi-step tasks seamlessly.
- Connect with MCP: Connect wih MCP toolbox.
Let's get started! 🚀
2. Setup GCP & Gemini API Key
Setting Up Your GCP Project & Gemini API Key
To power our AI agents, we need two things: a Google Cloud Project to provide the foundation and a Gemini API Key to access Google's powerful models.
Step 1: Enable Billing Account
To run this codelab, you need a billing account with some credit. Use the credits from the banner at the top of this codelab to get started. If you are already connected to a billing account, you can skip this step.
Step 2: Create A New GCP Project
- Go to Google Cloud Console and create a new project.
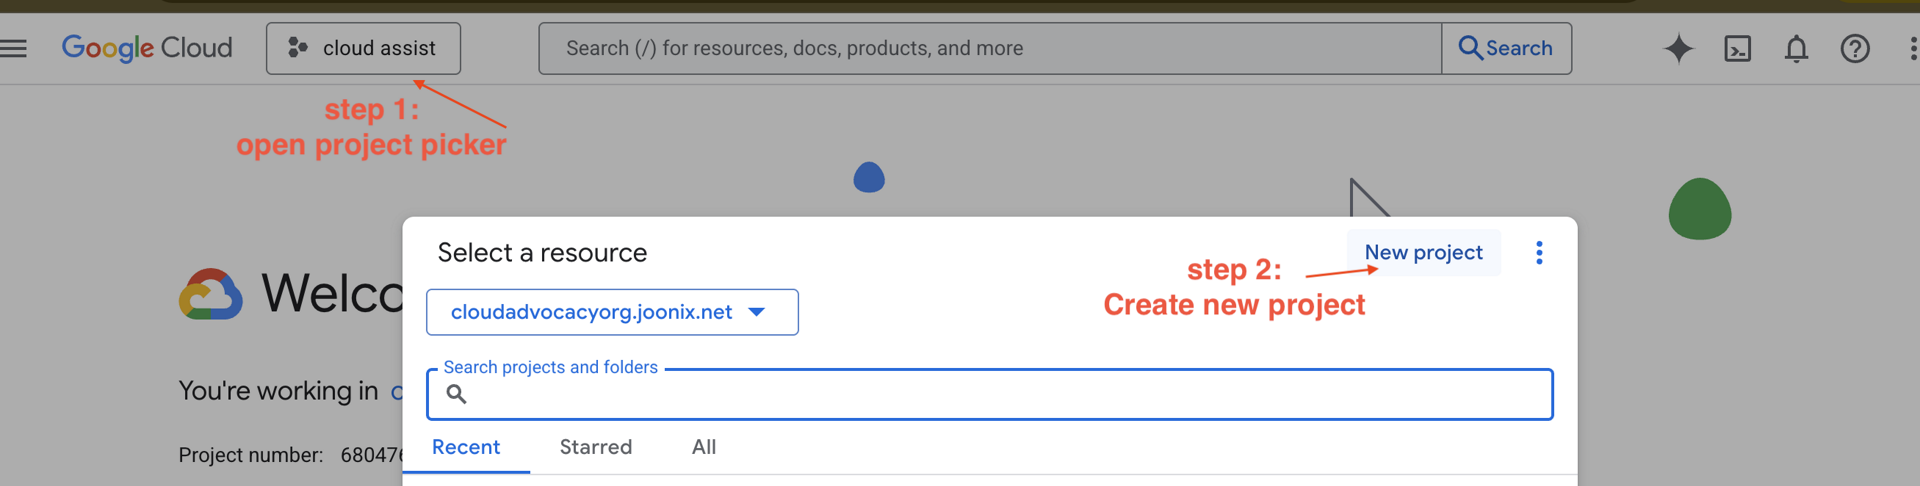
- Go to Google Cloud Console and create a new project.
- Open left panel, click
Billing, check whether the billing account is linked to this gcp account.
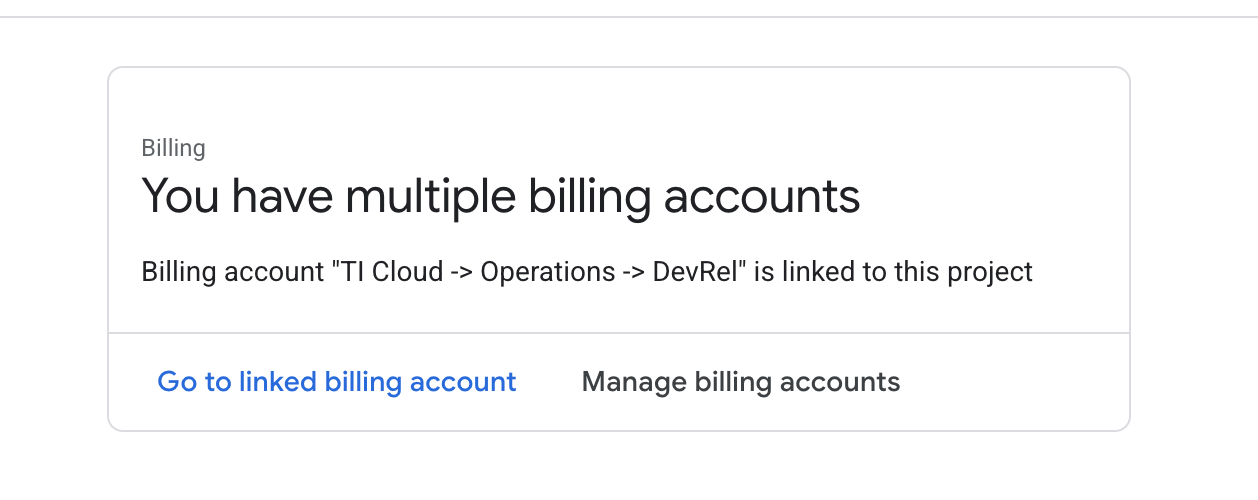
If you see this page, check the manage billing account, choose the Google Cloud Trial One and linked to it.
Step 3: Find your Google Cloud Project ID
👉Click Activate Cloud Shell at the top of the Google Cloud console (It's the terminal shape icon at the top of the Cloud Shell pane), 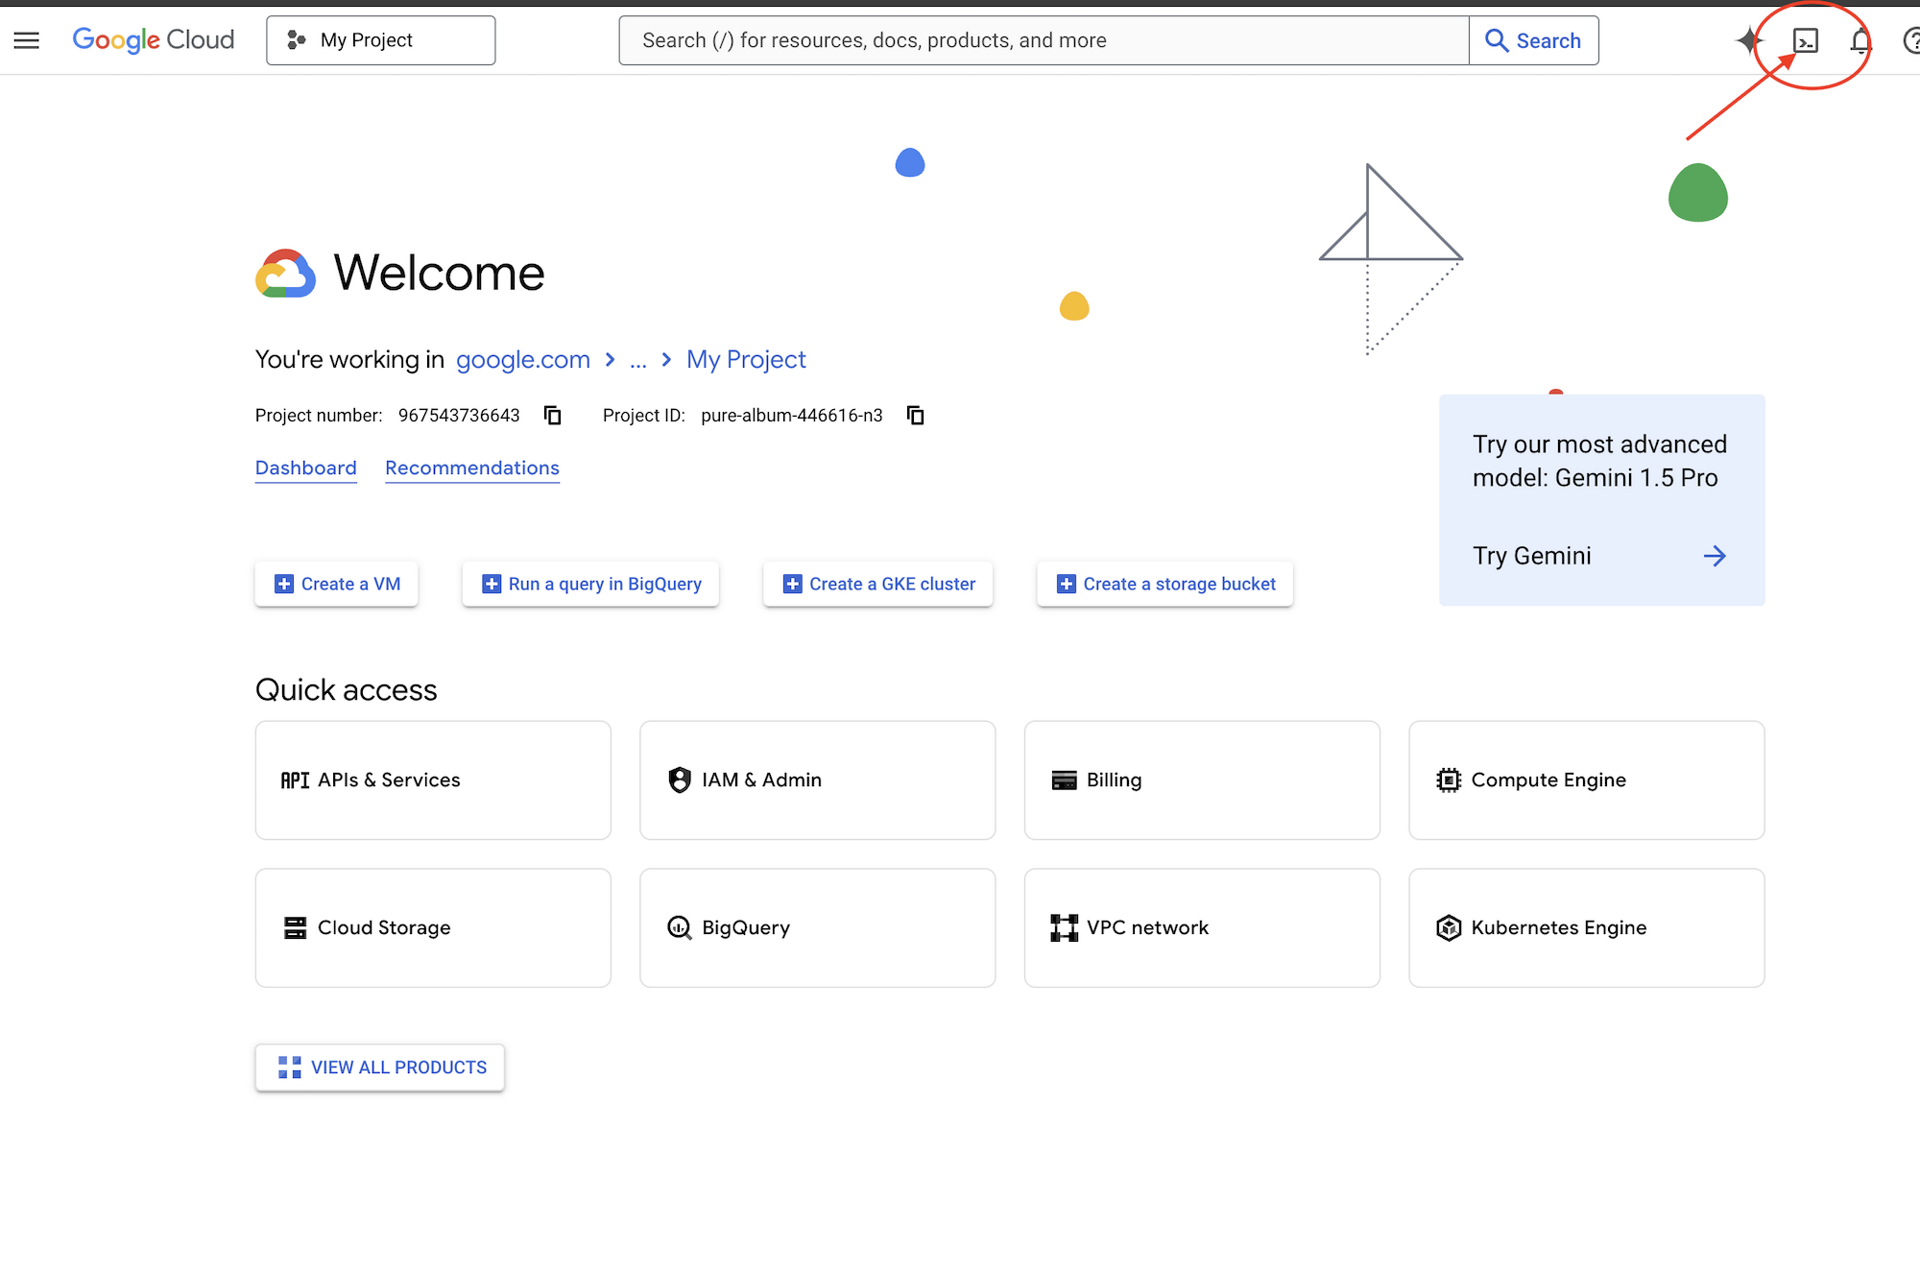
👉Click on the "Open Editor" button (it looks like an open folder with a pencil). This will open the Cloud Shell Code Editor in the window. You'll see a file explorer on the left side. 
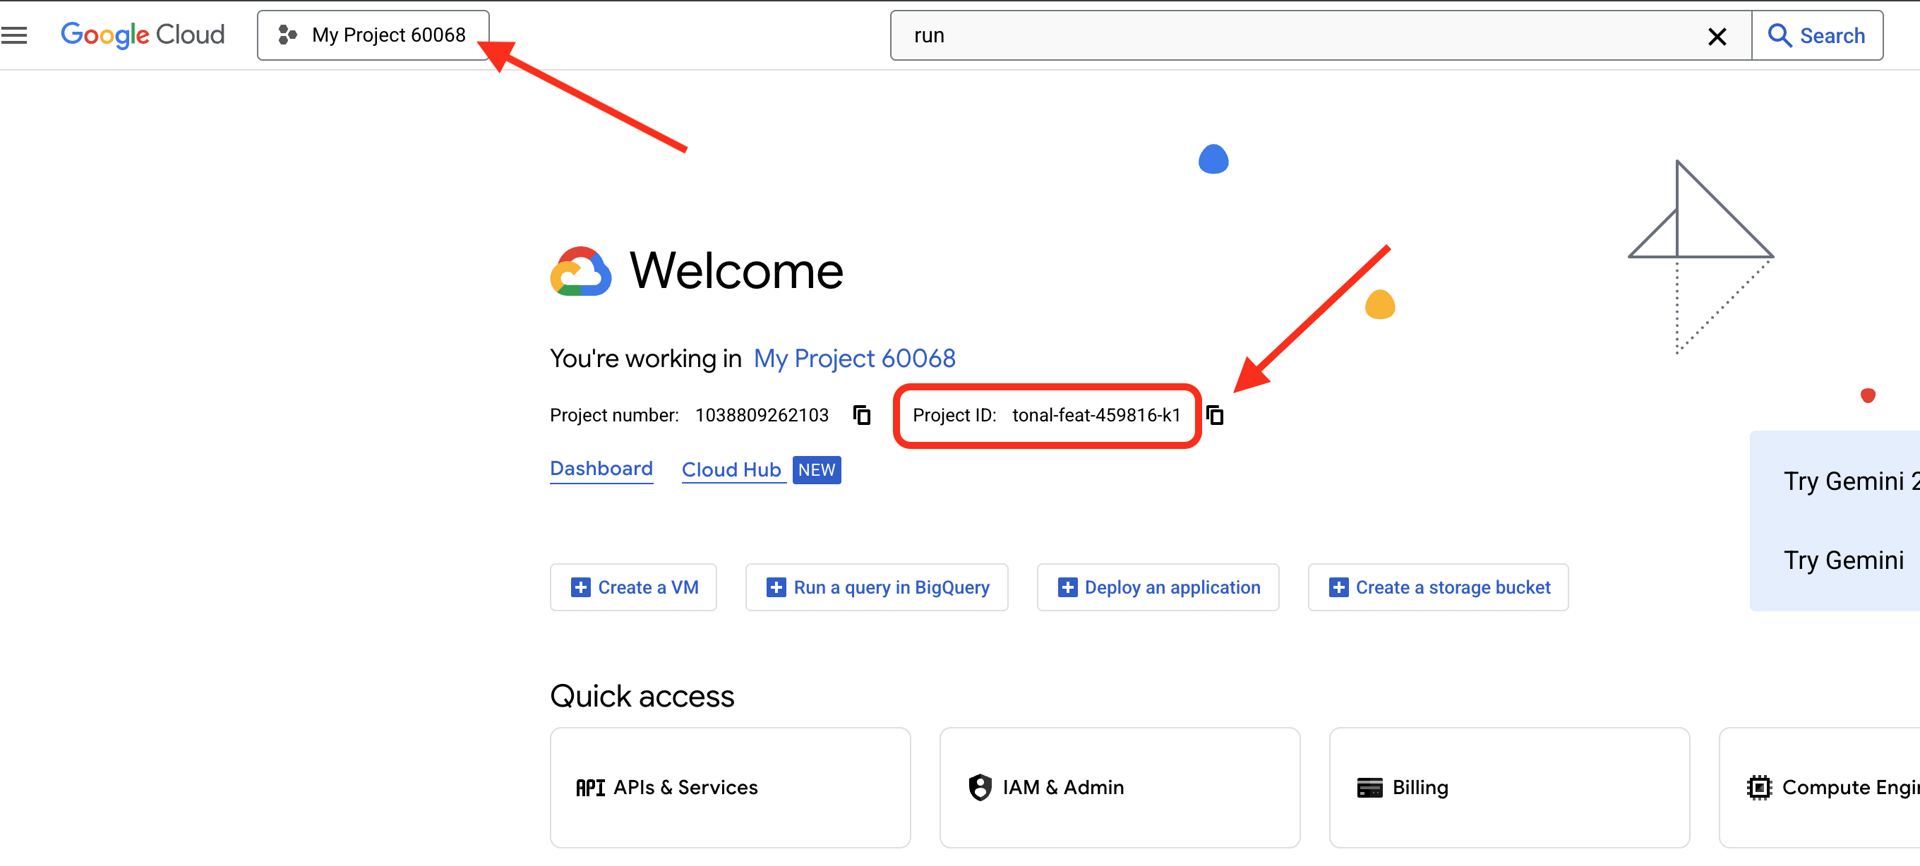
👉Find your Google Cloud Project ID:
- Open the Google Cloud Console: link
- Select the project you want to use for this workshop from the project drop down at the top of the page.
- Your Project ID is displayed in the Project info card on the Dashboard
👉💻 In the terminal, verify that you're already authenticated and that the project is set to your project ID using the following command:
gcloud auth list
👉💻 Clone the bootstrap project from GitHub:
git clone https://github.com/cuppibla/adk_tutorial.git
👉💻 Run the initialization script, this script will prompt you to enter your Google Cloud Project ID. And enter Google Cloud Project ID you found from the last step when prompted by the setup_venv.sh script.
cd ~/adk_tutorial
./setup_venv.sh

gcloud services enable  compute.googleapis.com \
                        artifactregistry.googleapis.com \
                        run.googleapis.com \
                        iam.googleapis.com \
                        aiplatform.googleapis.com \
                        cloudresourcemanager.googleapis.com
3. Session 1: Your First Agent in ADK Web
Open ADK Web by Running:
cd ~/adk_tutorial
source .adk_env/bin/activate
adk web
After running the commands, you should see output in your terminal indicating that the ADK Web Server has started, similar to this:
+-----------------------------------------------------------------------------+
| ADK Web Server started                                                      |
|                                                                             |
| For local testing, access at http://localhost:8000.                         |
+-----------------------------------------------------------------------------+

INFO:     Application startup complete.
INFO:     Uvicorn running on http://0.0.0.0:8000 (Press CTRL+C to quit)
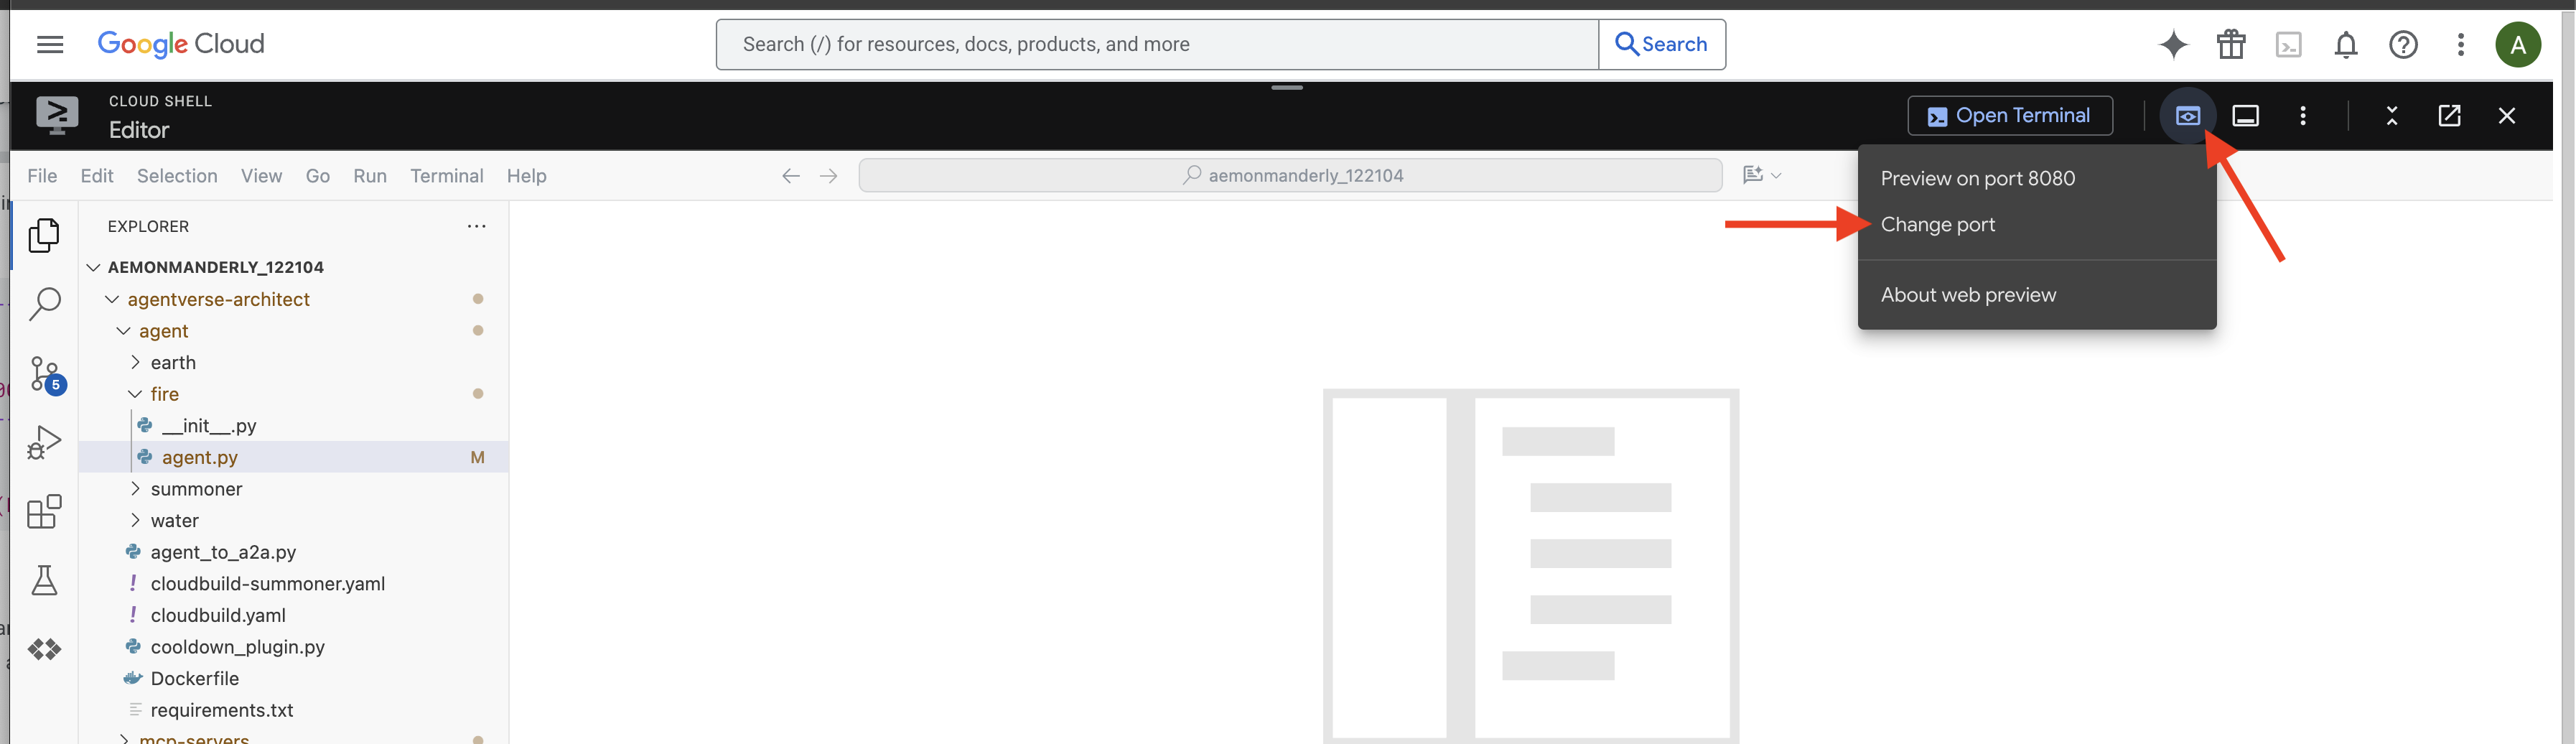
👉 Next, to access the ADK Dev UI from your browser:
From the Web preview icon (often looks like an eye or a square with an arrow) in the Cloud Shell toolbar (usually top right), select Change port. In the pop-up window, set the port to 8000 and click "Change and Preview". Cloud Shell will then open a new browser tab or window displaying the ADK Dev UI.
👉 Your summoning ritual is complete, and the agent is now running. The ADK Dev UI in your browser is your direct connection to the Familiar.
choose the parallel workflow agent In the dropdown menu at the top of the UI, choose the parallel_agent.
You can select the single_agent here: 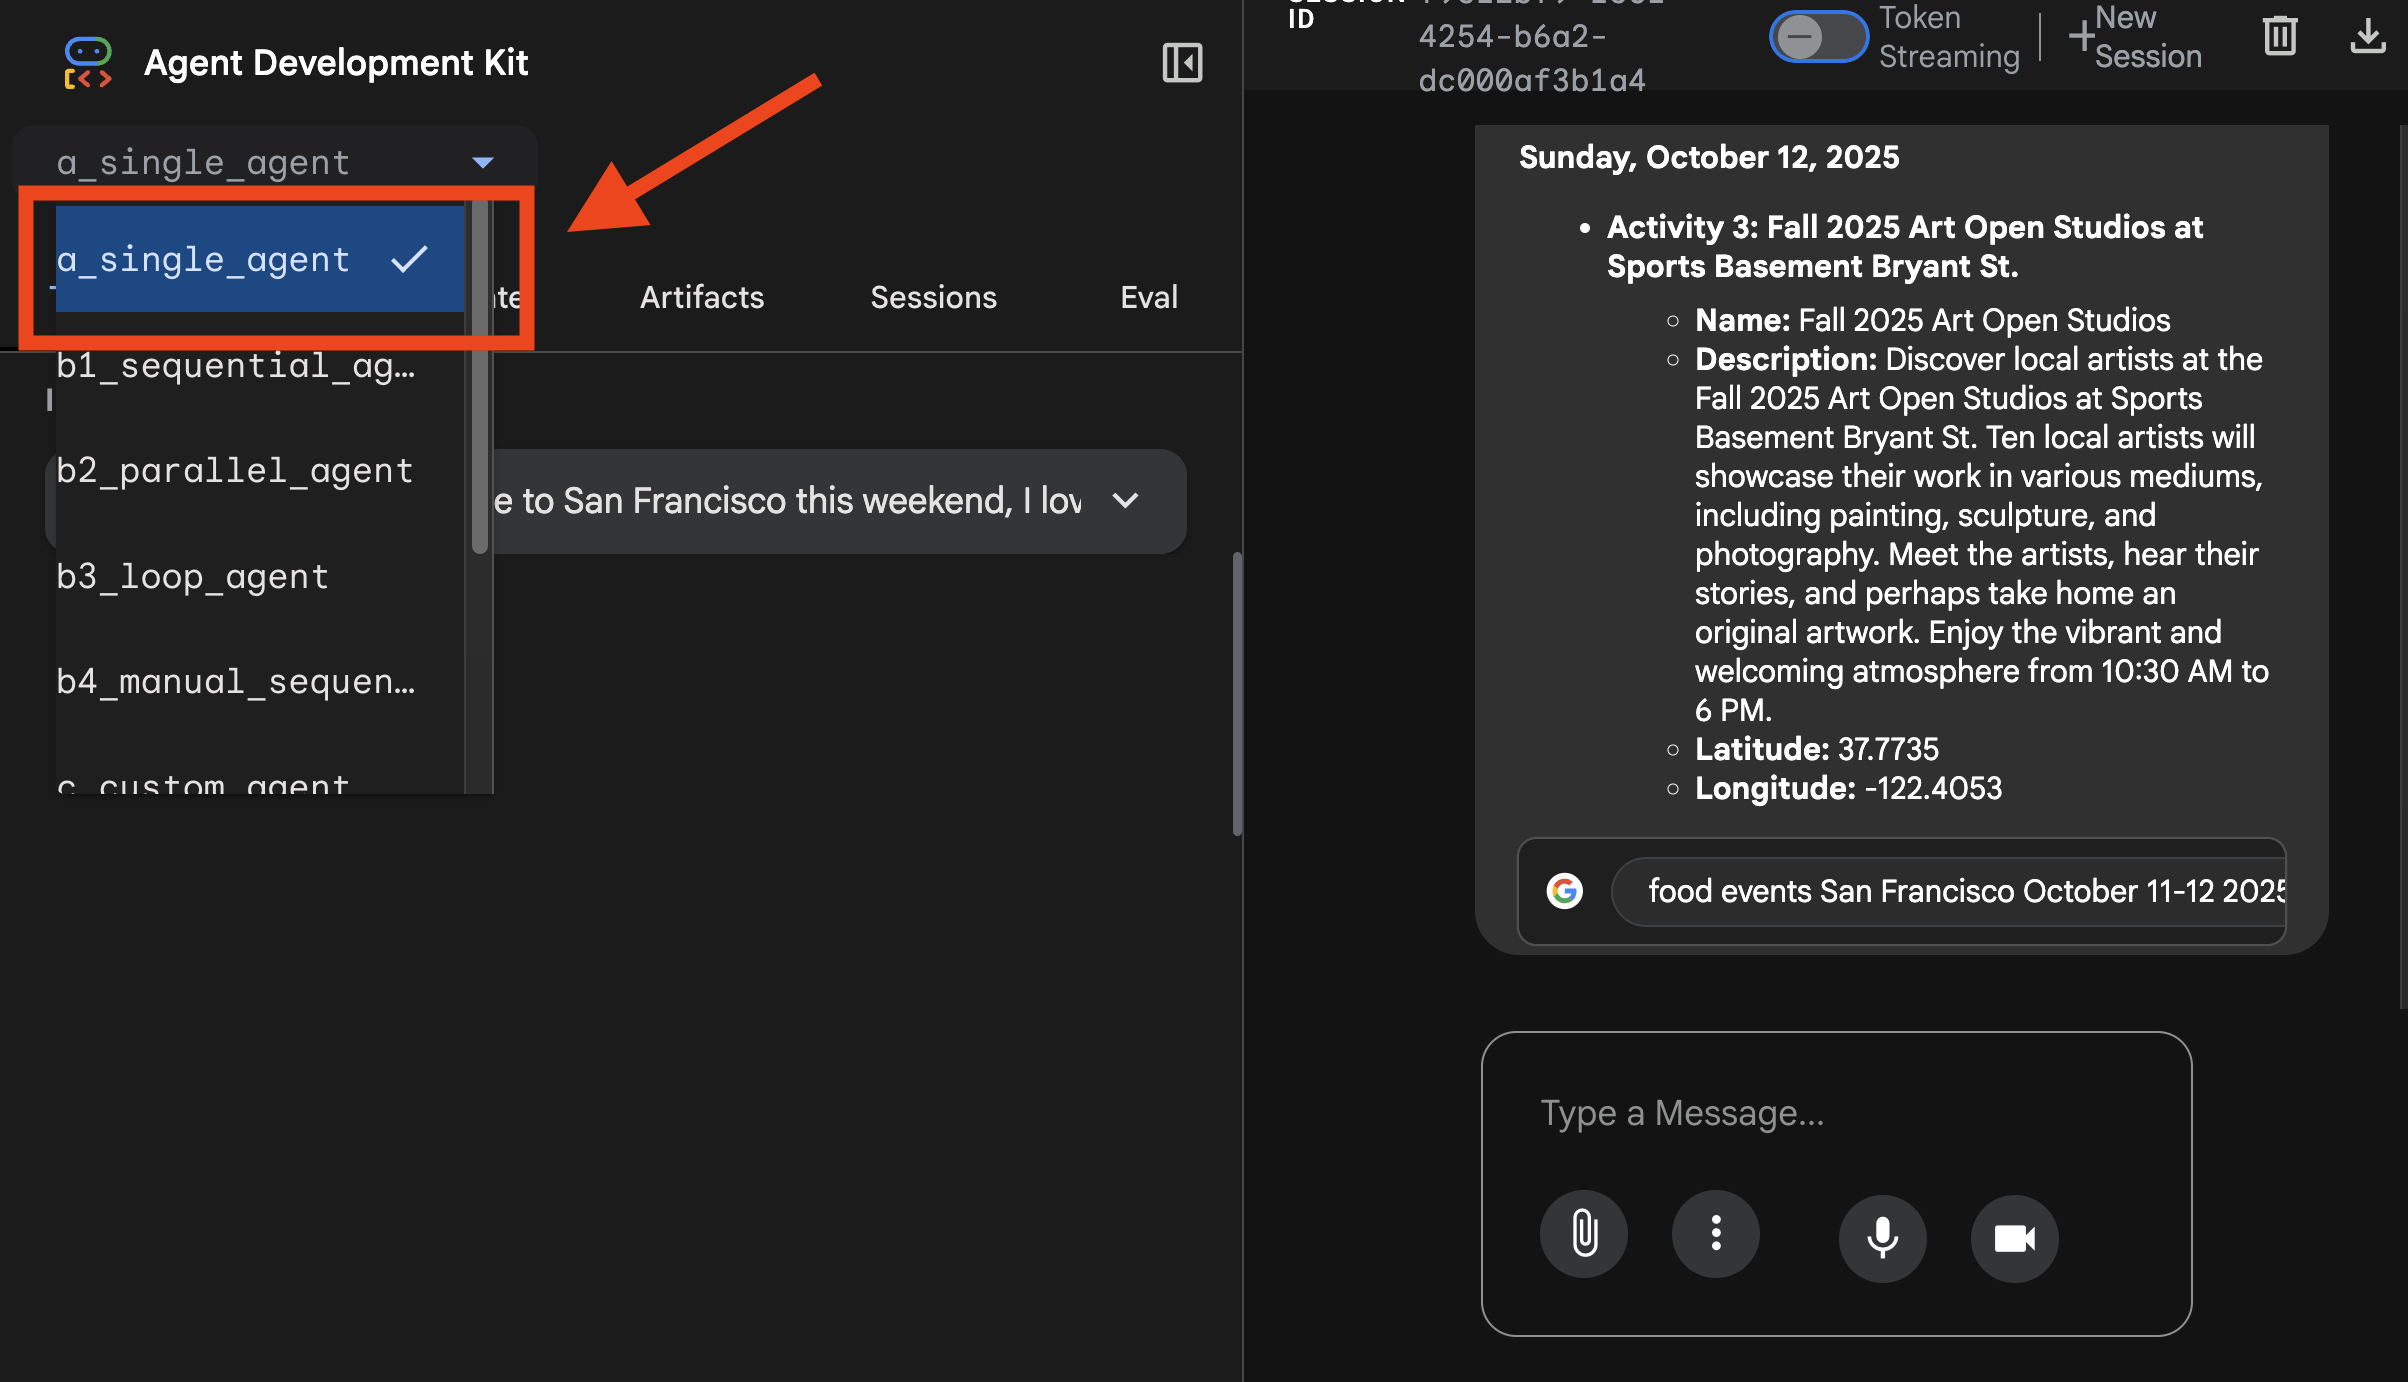
You can see the tracing here: 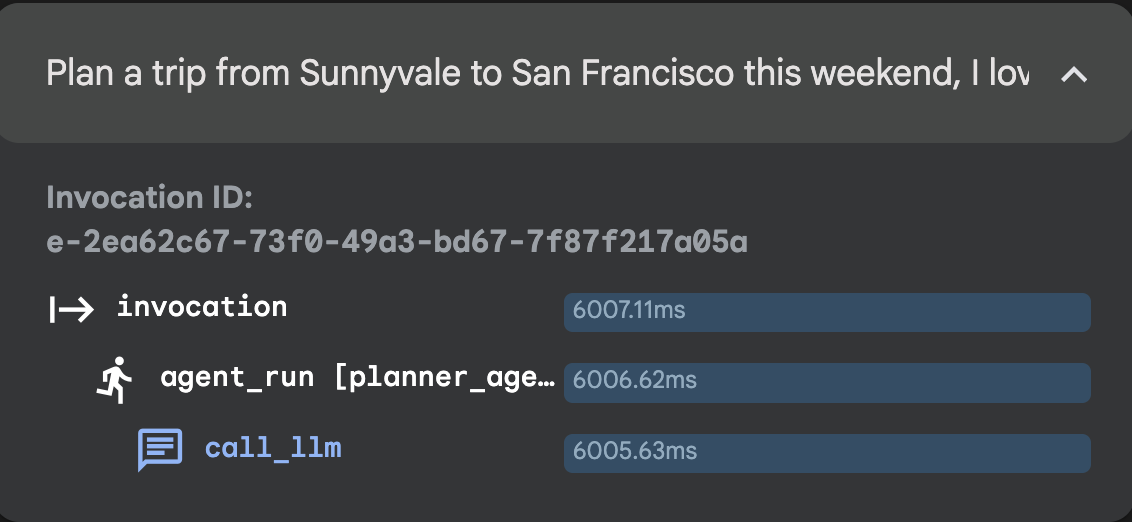
👉 Test Prompt:
Plan a trip from Sunnyvale to San Francisco this weekend, I love food and art.
4. Session 2: Workflow Agent: Sequential Agent, Parallel Agent, Loop Agent
Parallel Agent
choose the parallel workflow agent In the dropdown menu at the top of the UI, choose the parallel_agent.
👉 Test Prompt:
Plan my trip to San Francisco, I want to find some good concert, restaurant and museum.
You can select the parallel_agent here: 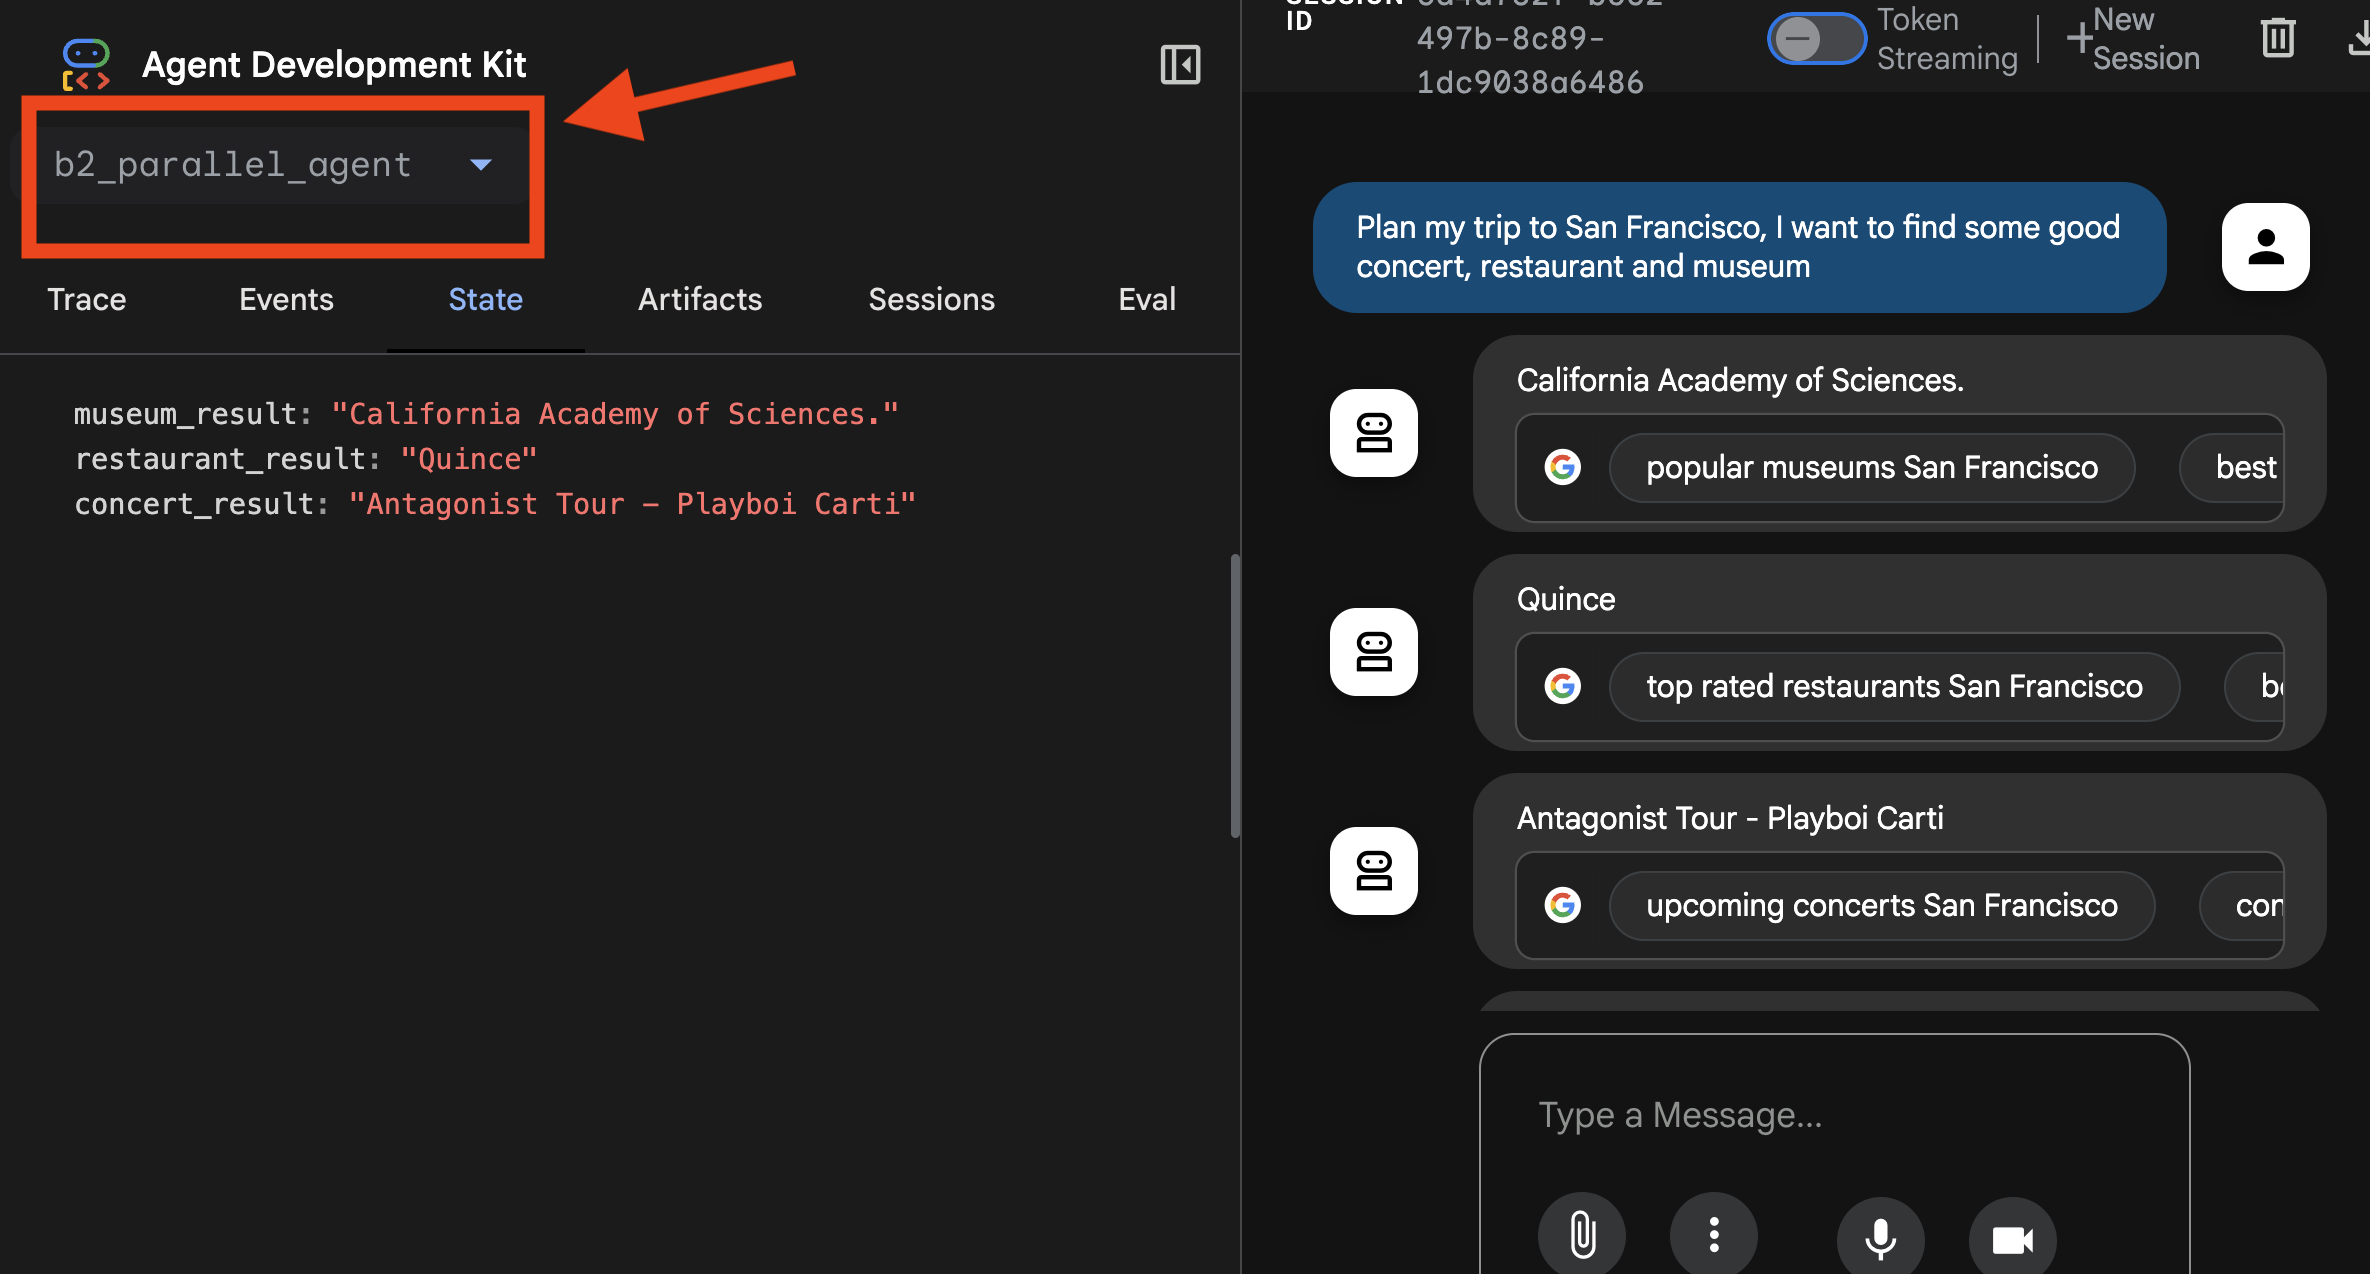
You can see the tracing here: 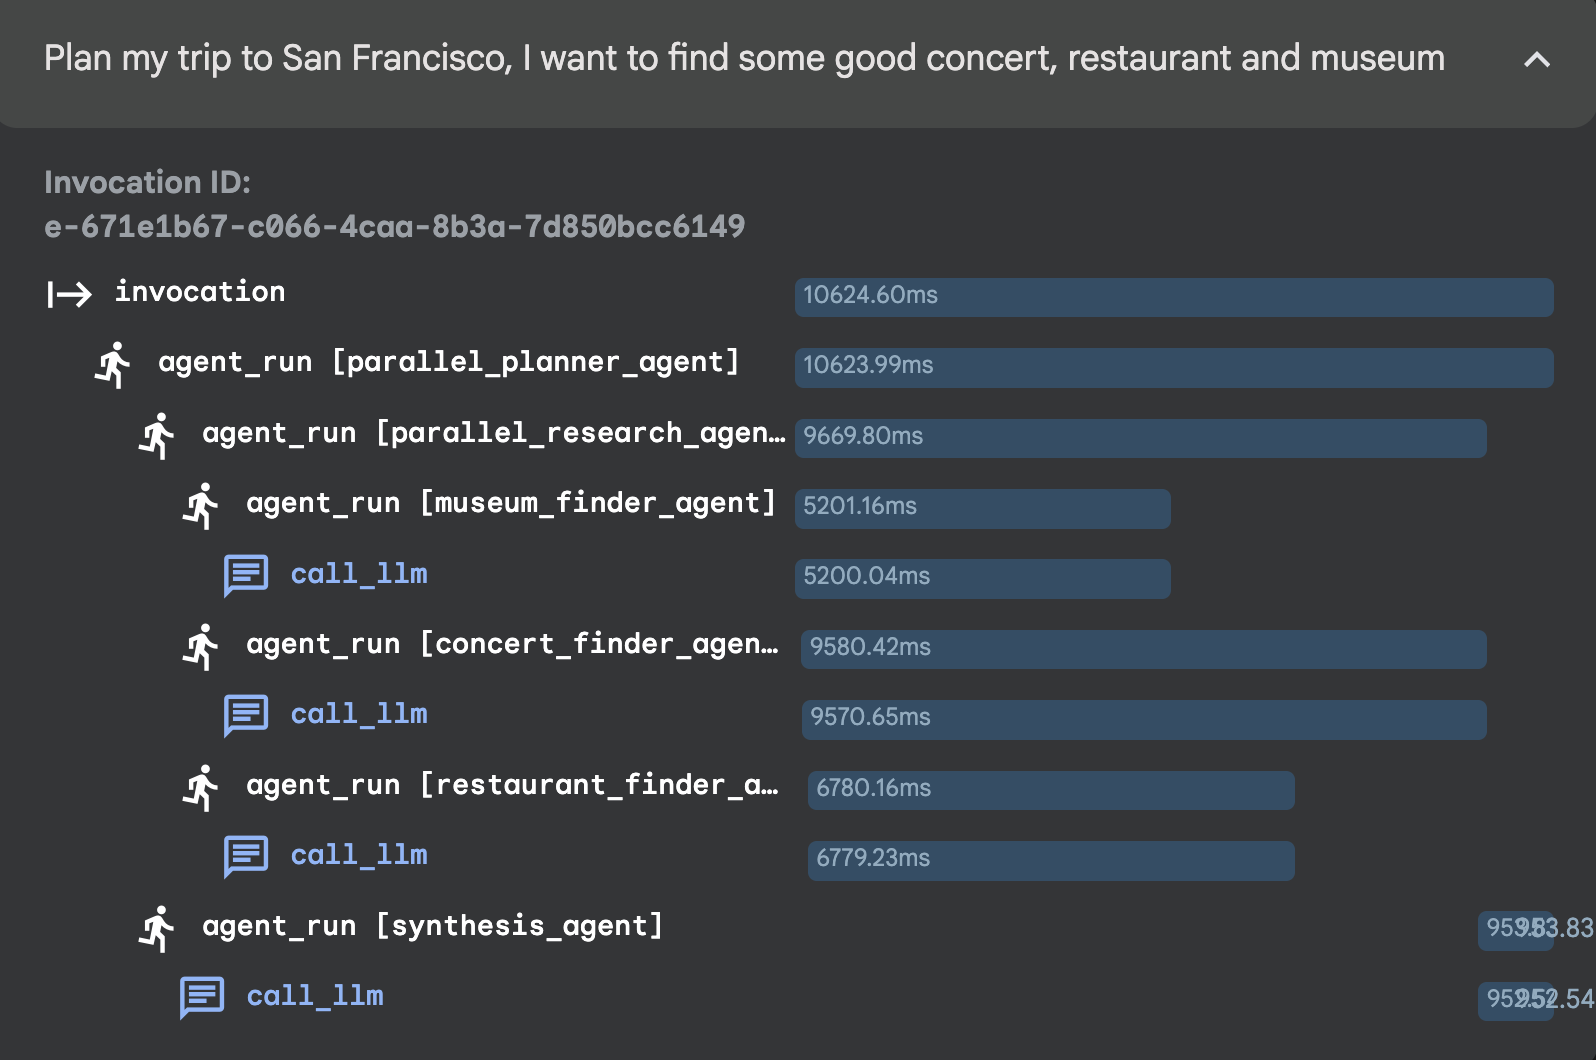
Sequential Agent
choose the sequential workflow agent In the dropdown menu at the top of the UI, choose the sequential_agent.
👉 Test Prompt:
Find a good sushi near Standford and tell me how to get there.
You can select the sequential_agent here: 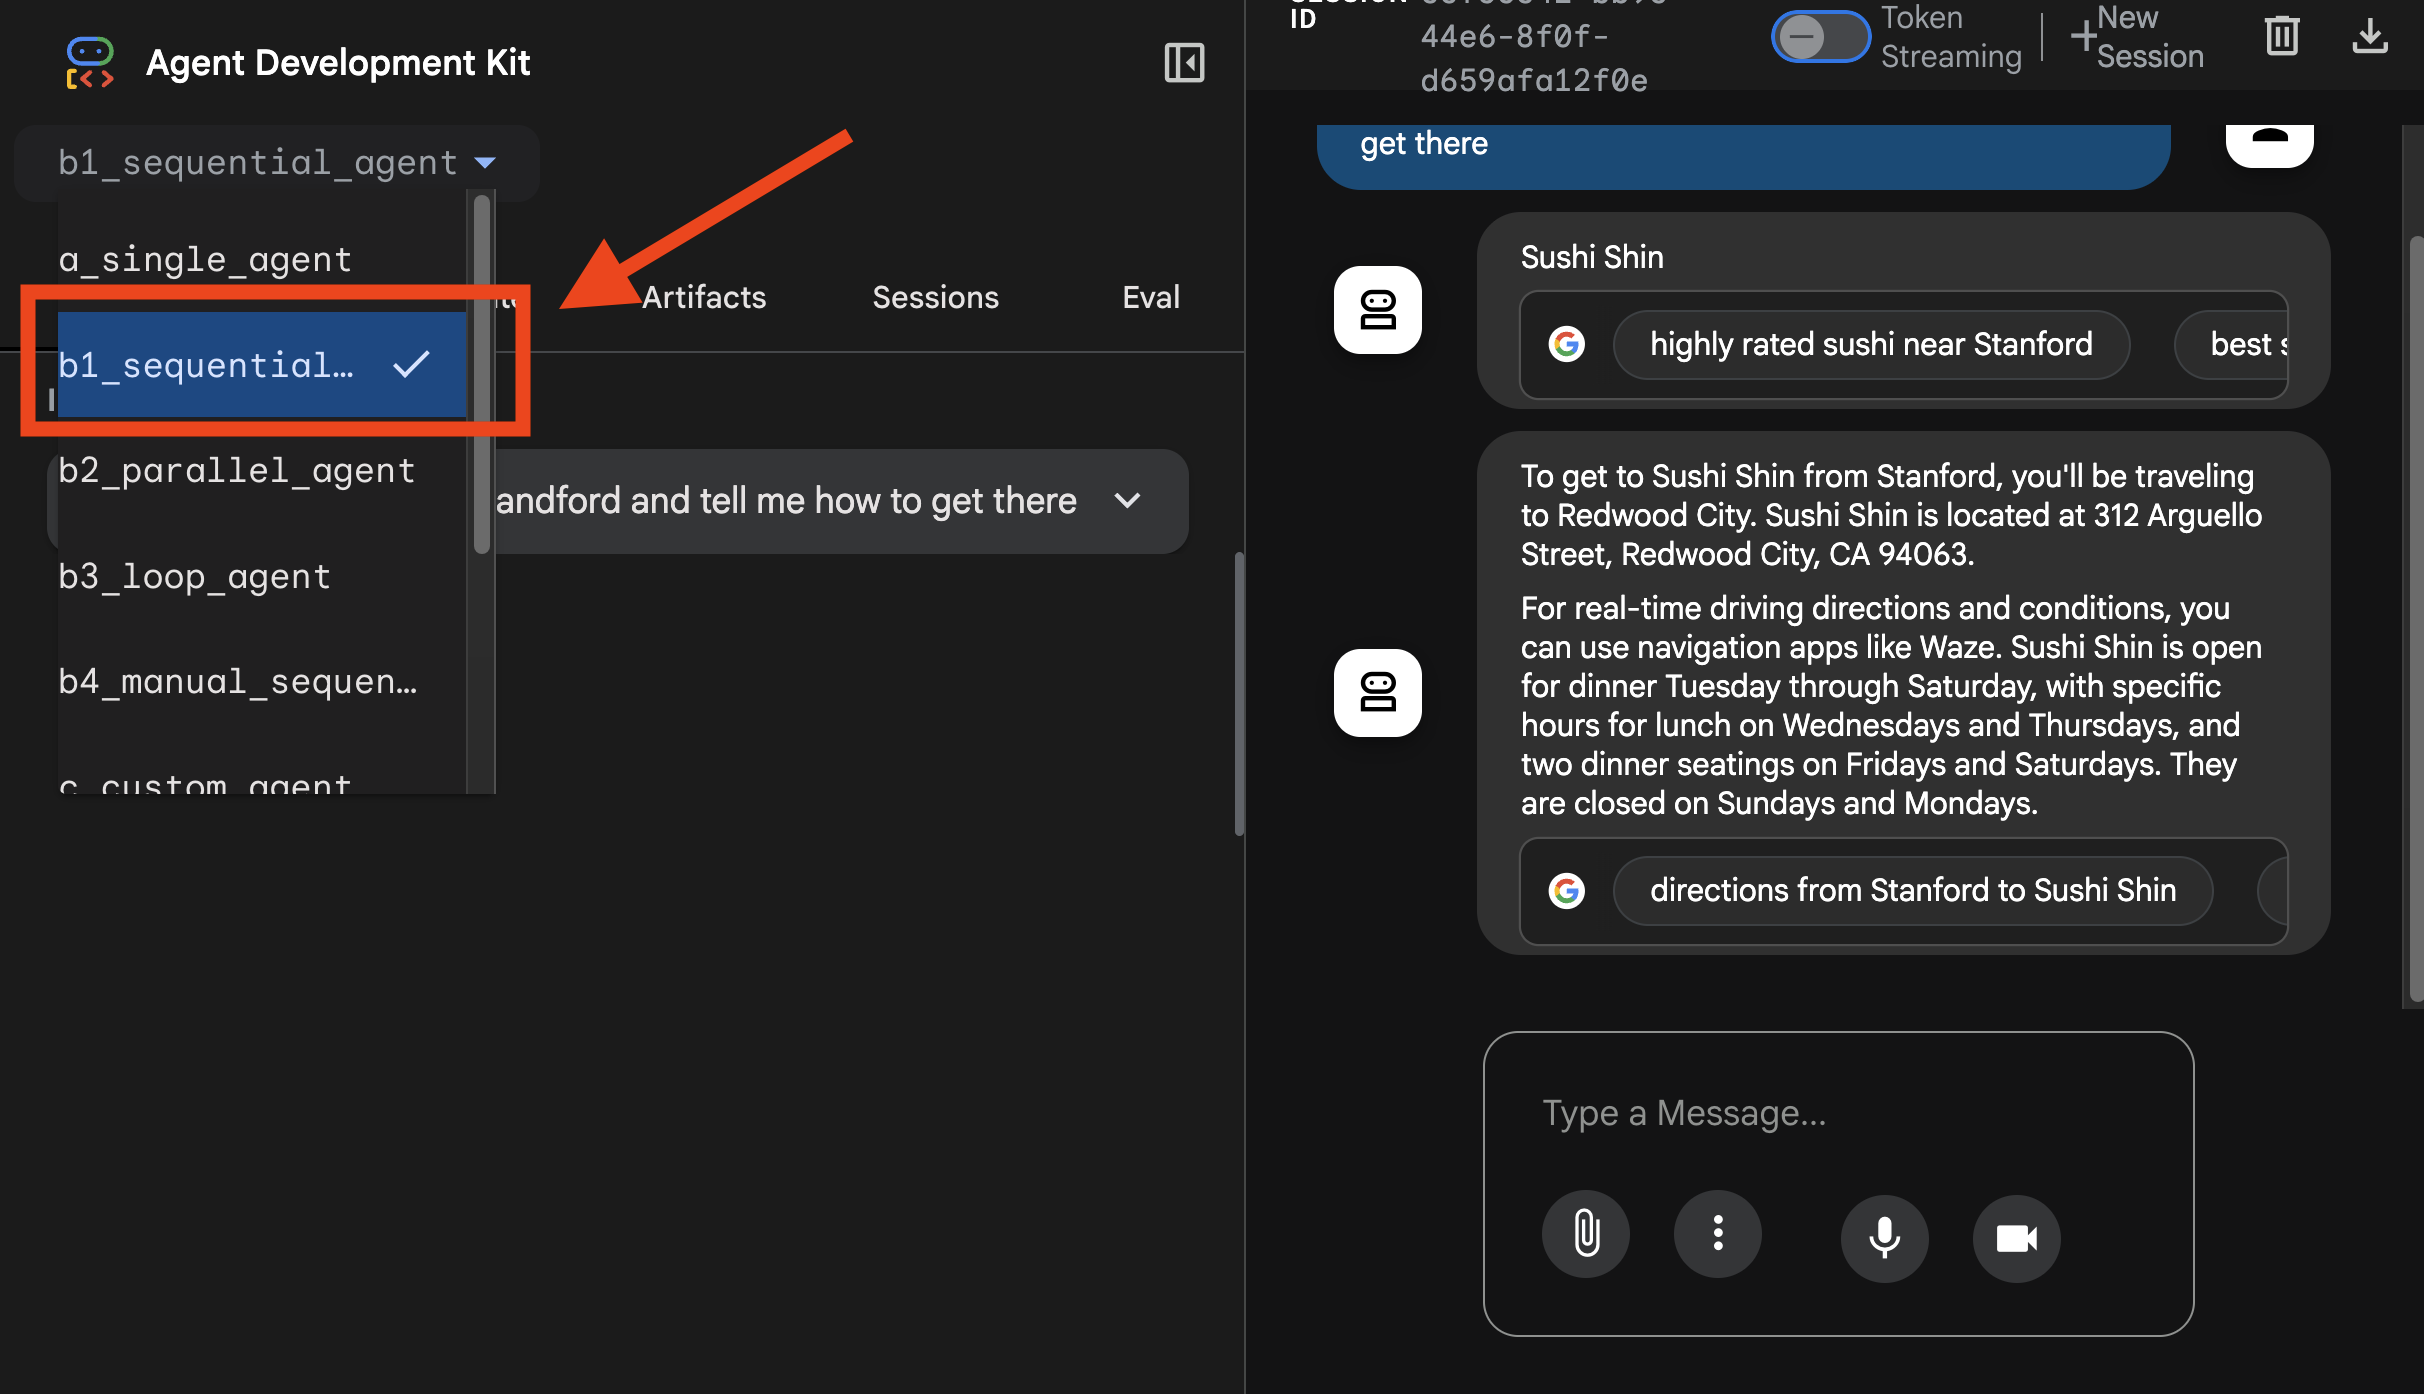
You can see the tracing here: 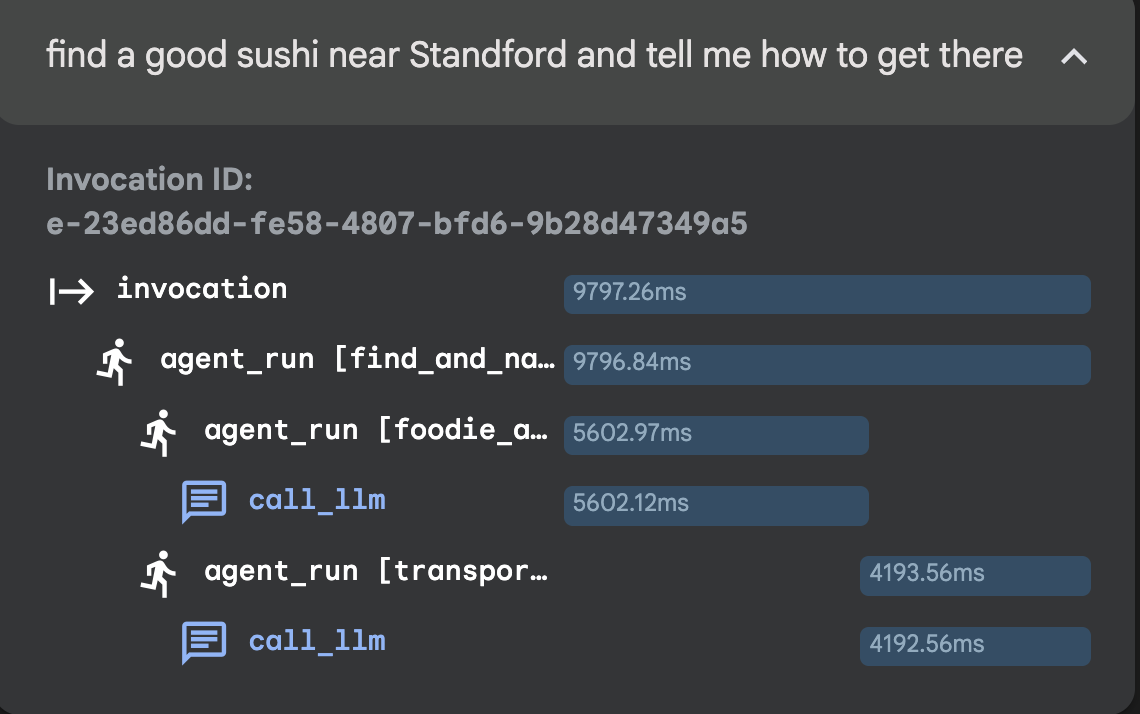
Loop Agent
choose the loop workflow agent In the dropdown menu at the top of the UI, choose the loop_agent.
👉 Test Prompt:
Plan a trip from Sunnyvale to San Francisco today.
You can select the loop_agent here: 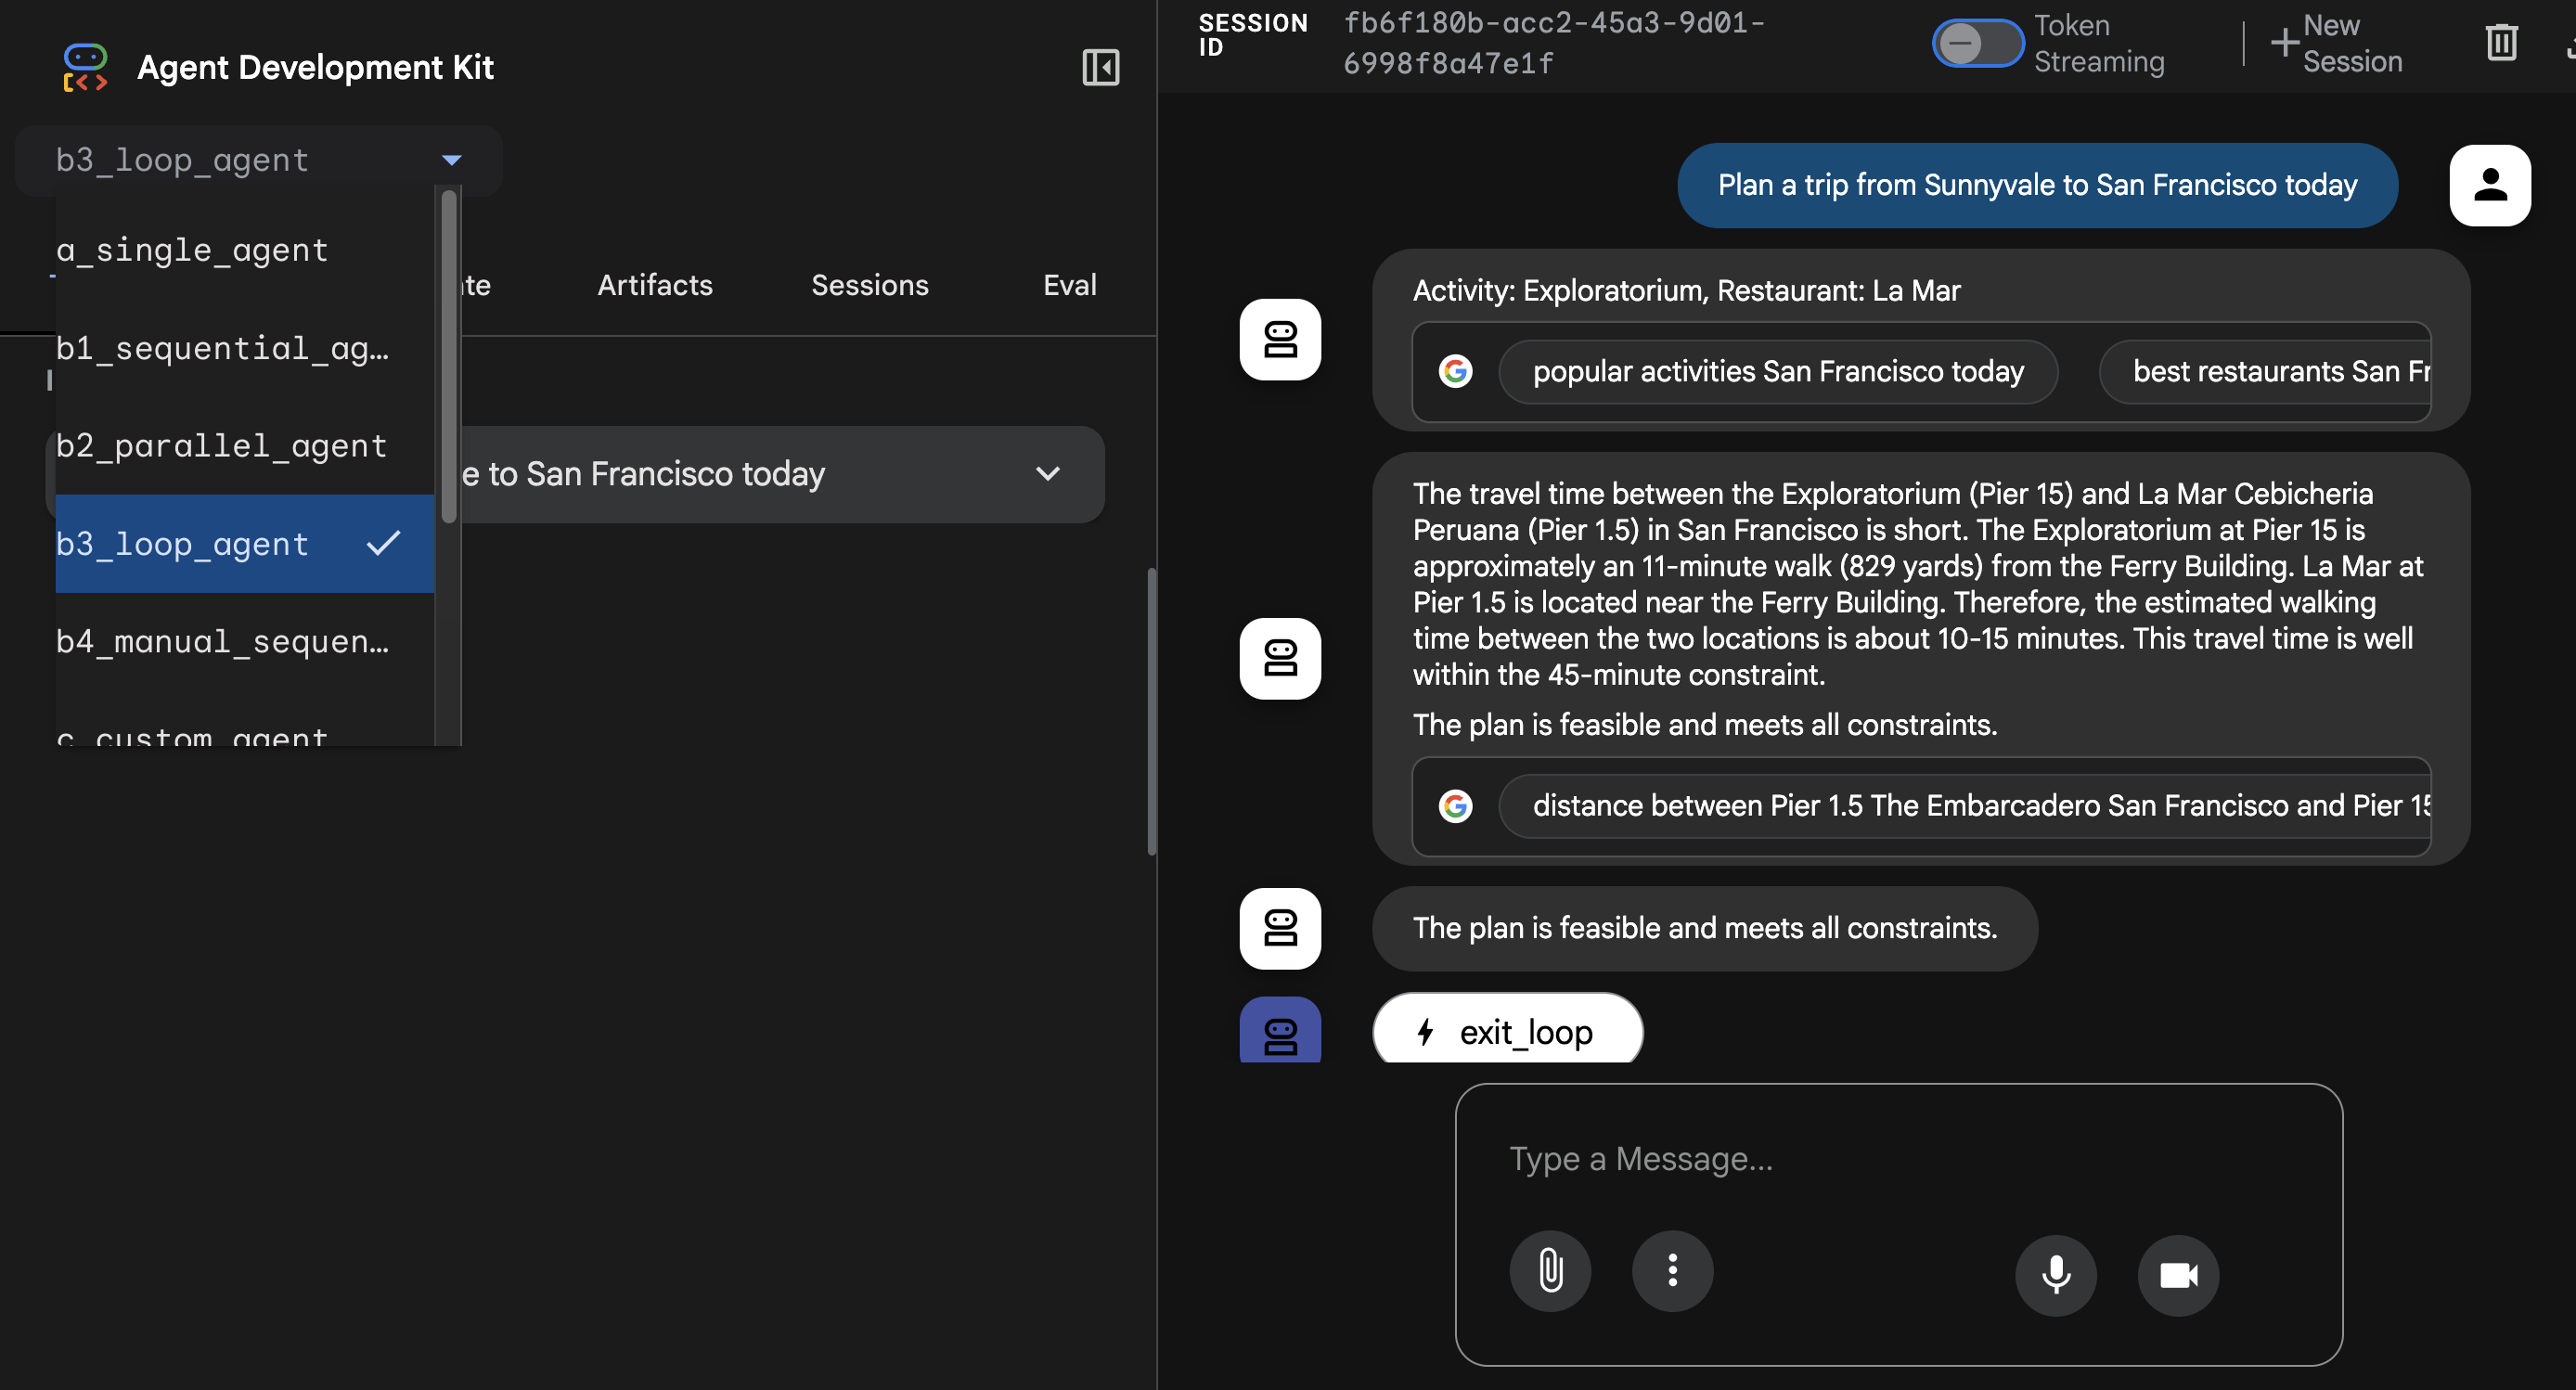
You can see the tracing here: 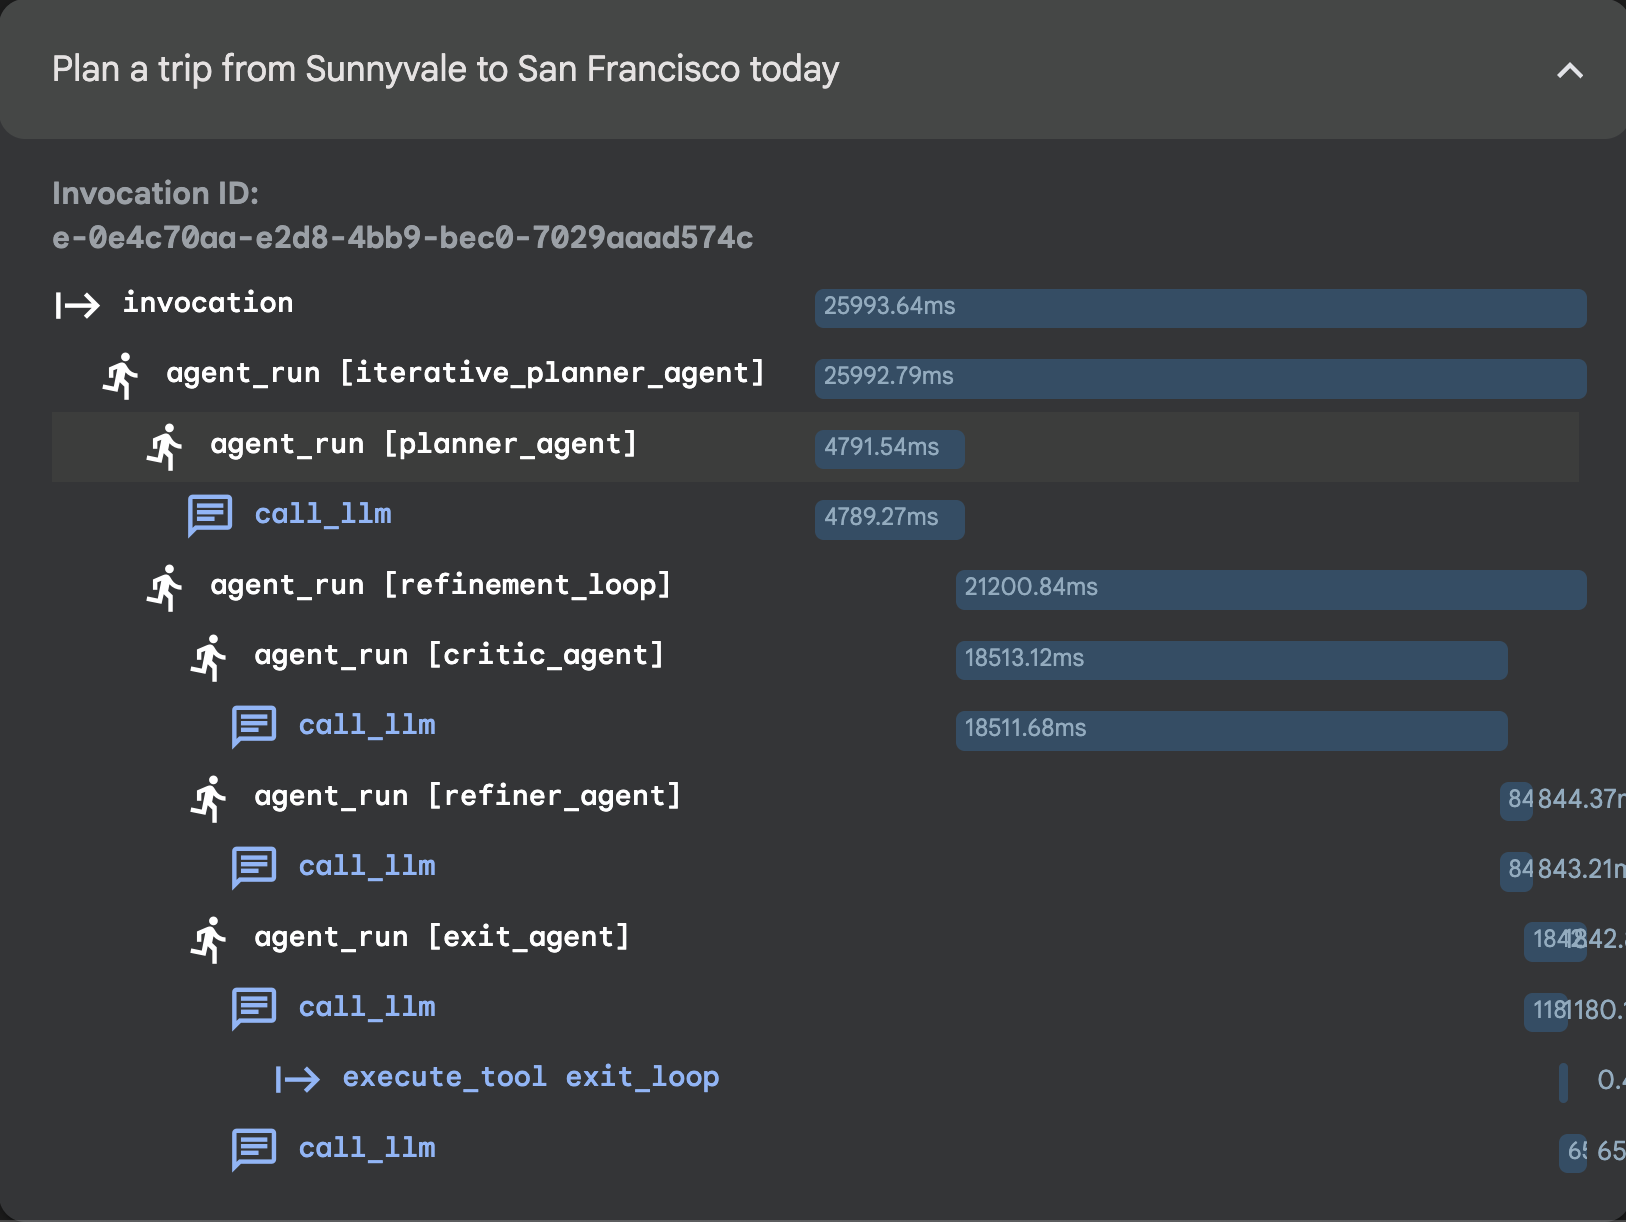
5. Session 3: Custom Agent
Once your ADK Web UI is open, you can select the Custom_Agent agent.
👉 Test Prompt:
Plan a trip from Sunnyvale to San Francisco this weekend, I love food and art. Make sure within budget of 100 dollars.
You can select the Custom_Agent here: 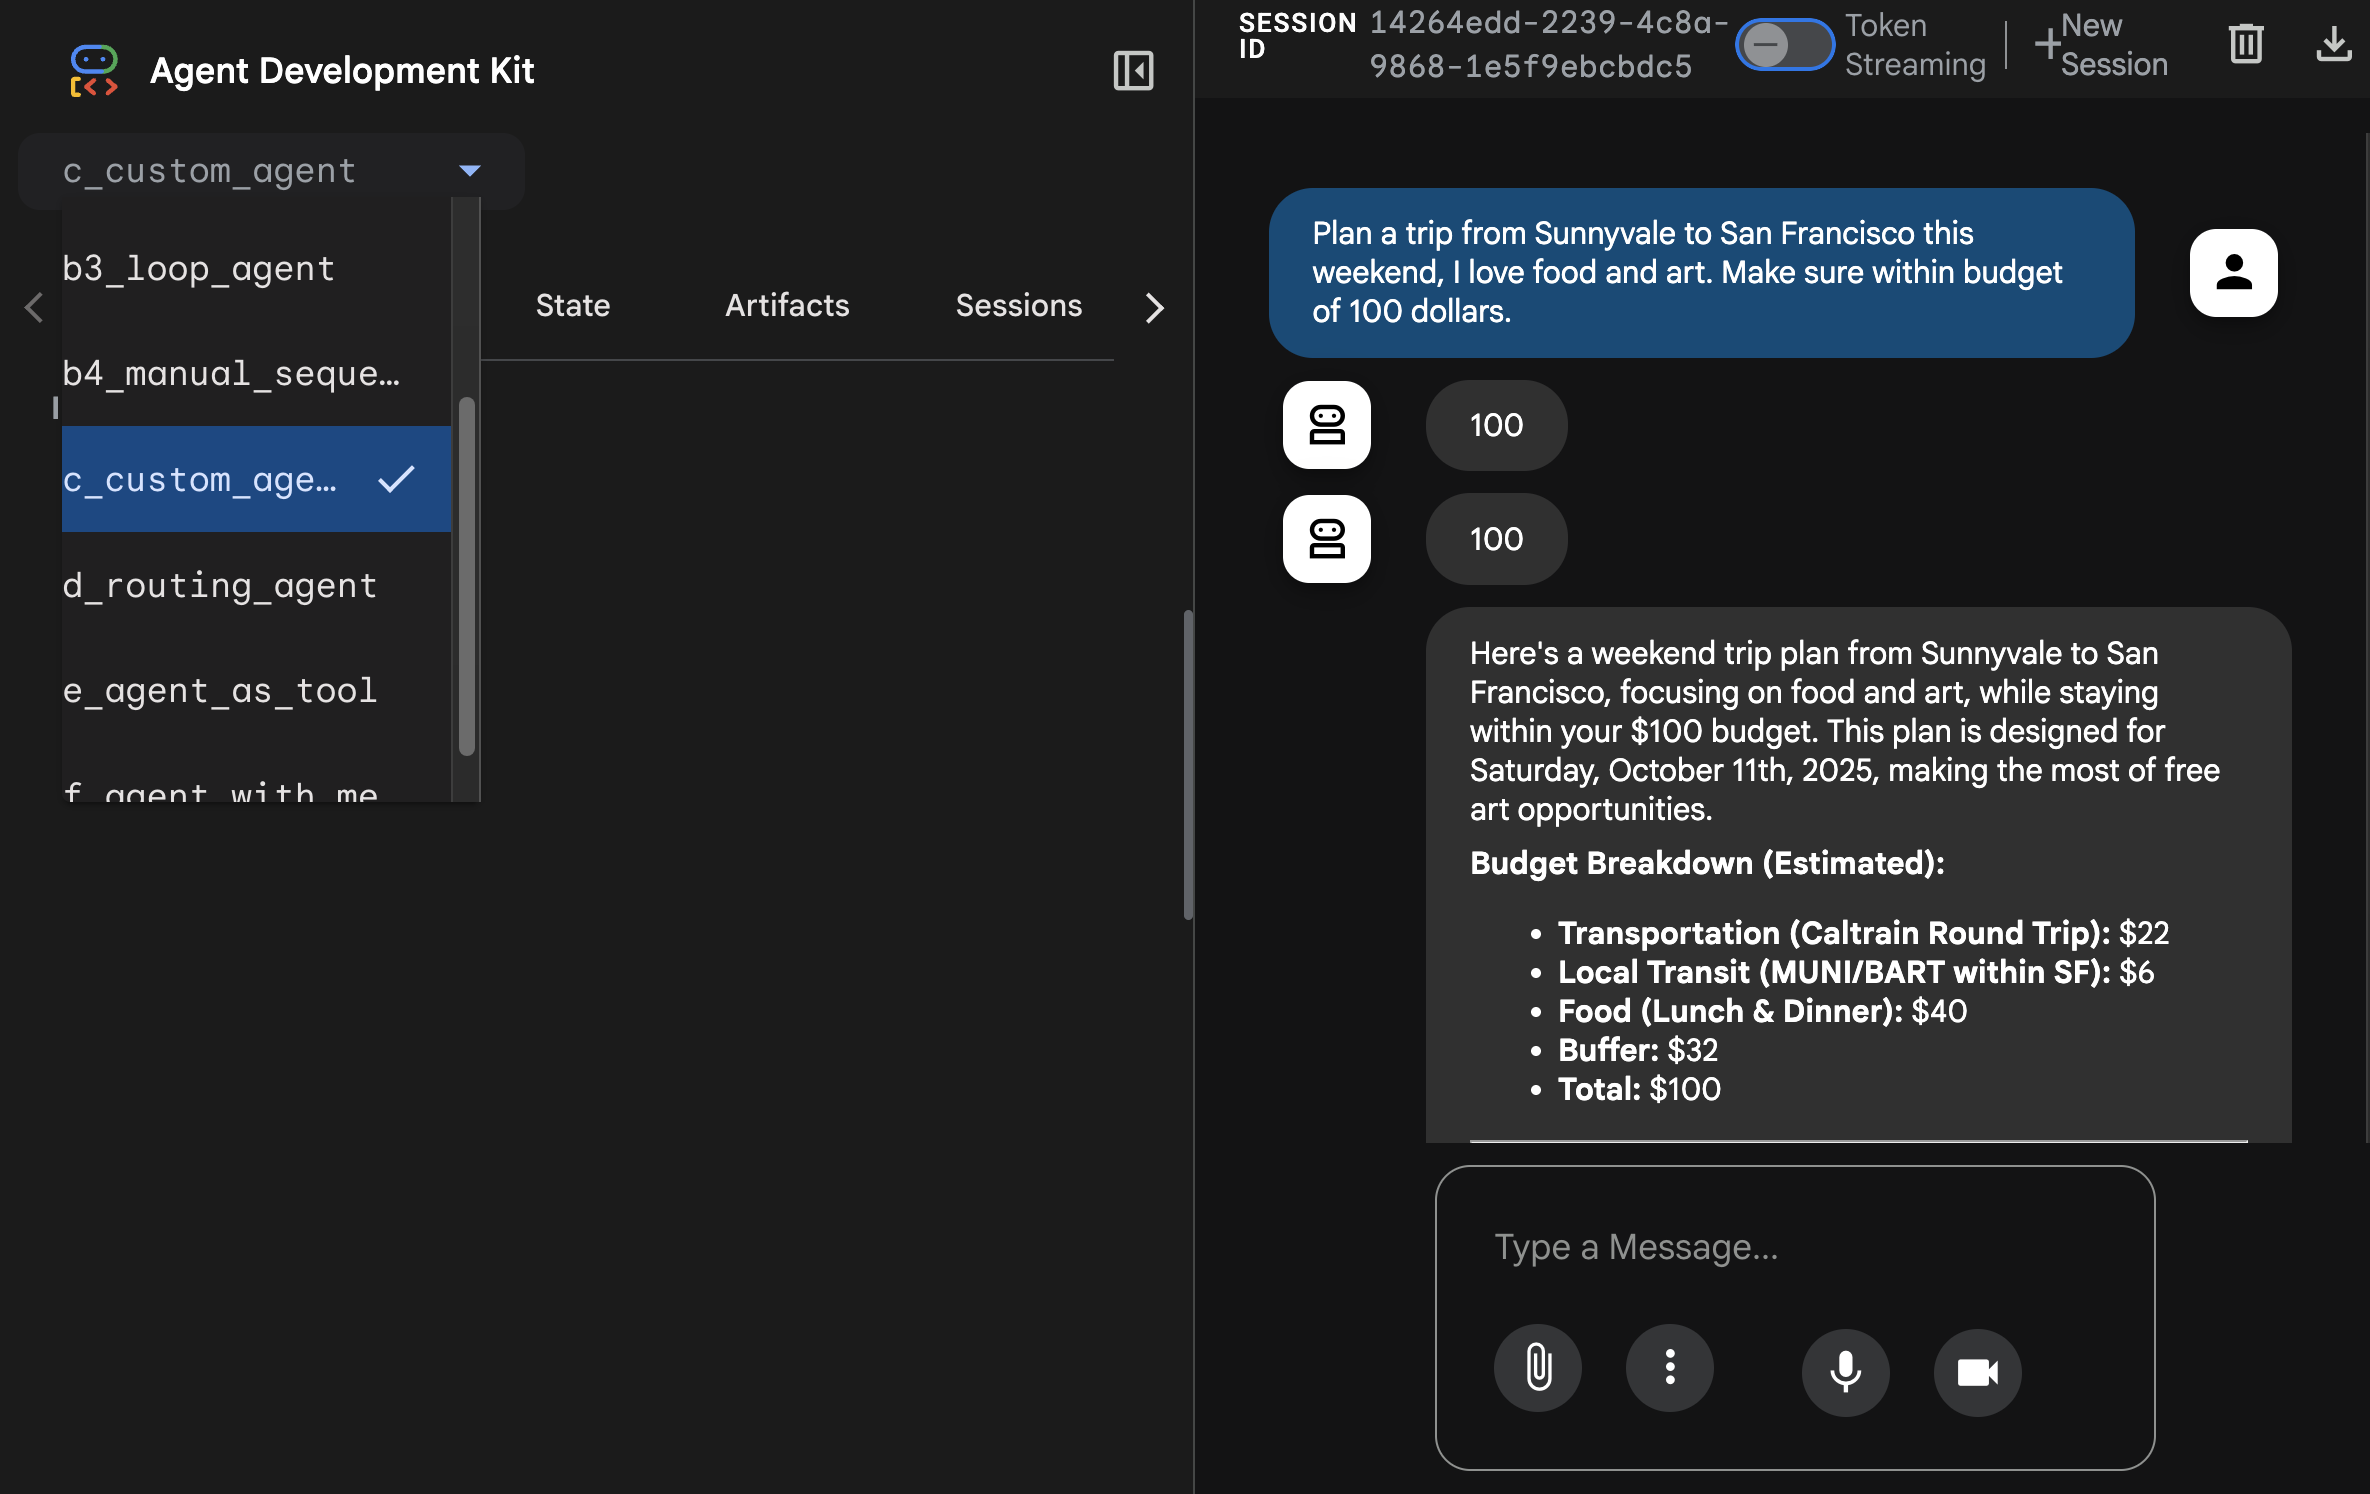
You can see the tracing here: 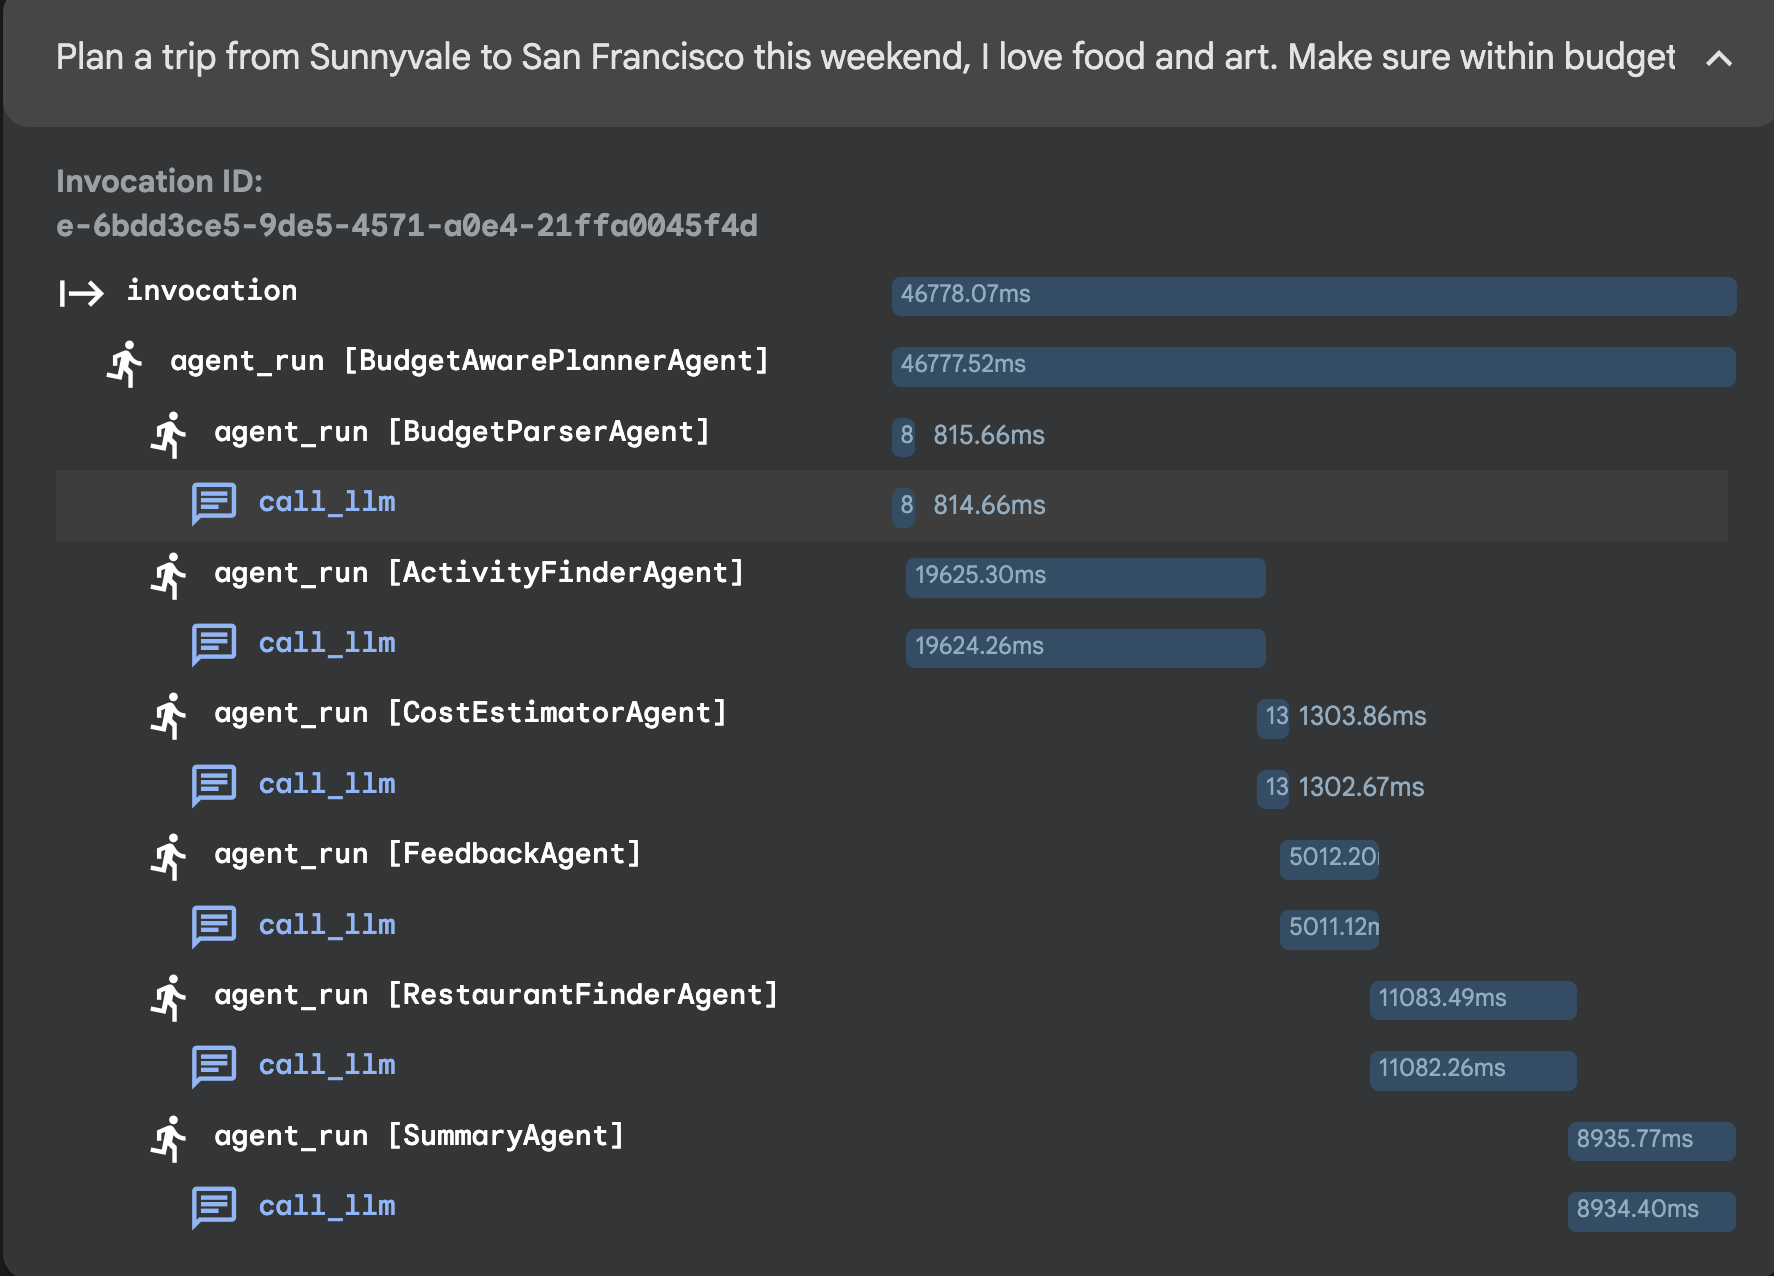
6. Session 4: Orchestrator Pattern - Routing Agent
Once your ADK Web UI is open, you can select the routing_agent.
👉 Test Prompt:
Plan a trip from Sunnyvale to San Francisco this weekend, I love concert, restaurant and museum.
You can select the routing_agent here: 
You can see the tracing here: 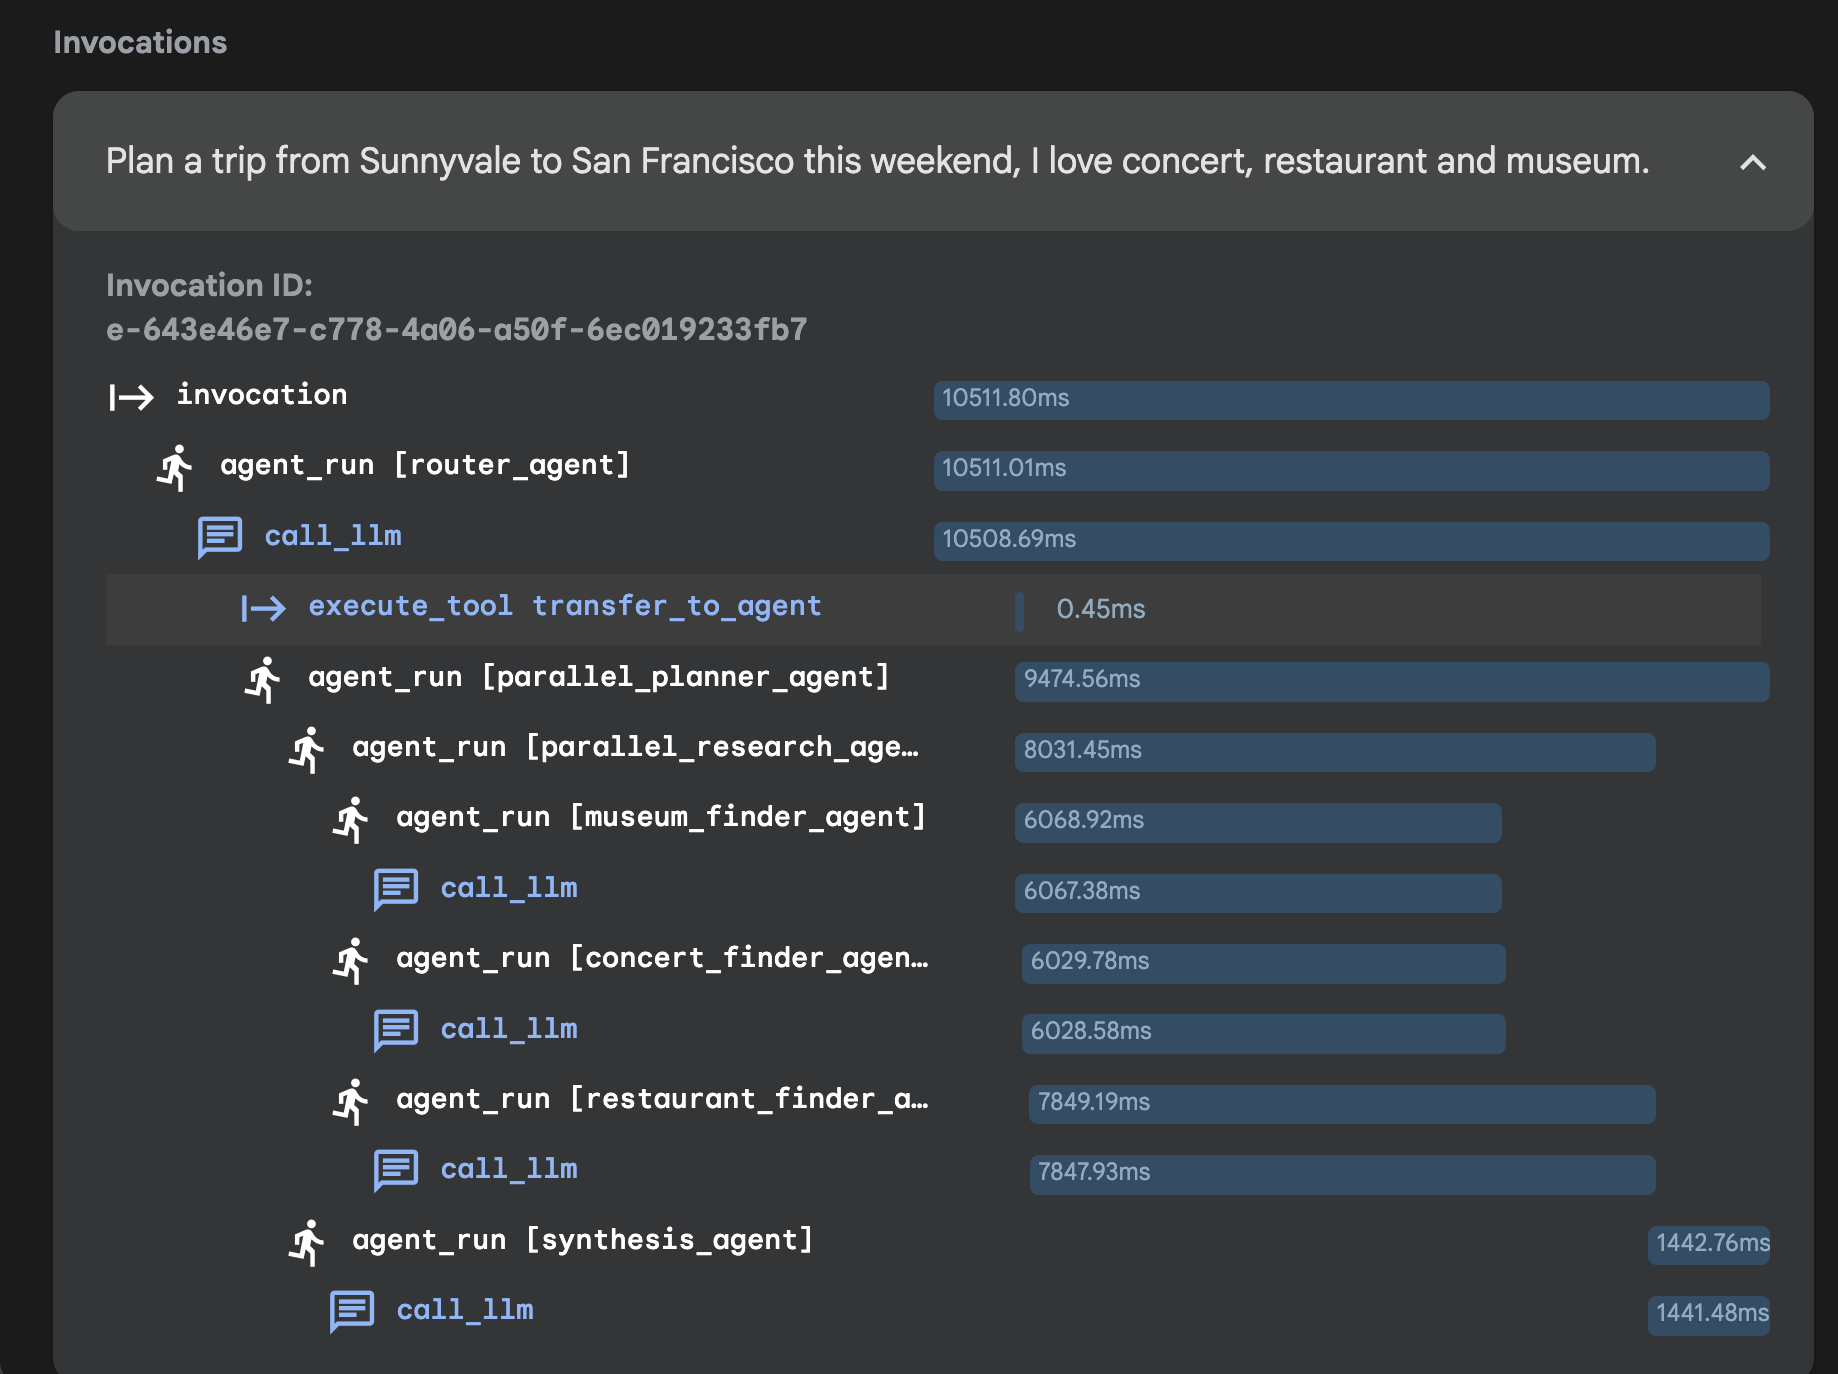
7. Session 5: Agent as tool
Once your ADK Web UI is open, you can select the Agent_as_tool agent.
👉 Test Prompt:
Plan a trip from Sunnyvale to San Francisco this weekend, I love concert, restaurant and museum.
You can select the agent_as_tool here: 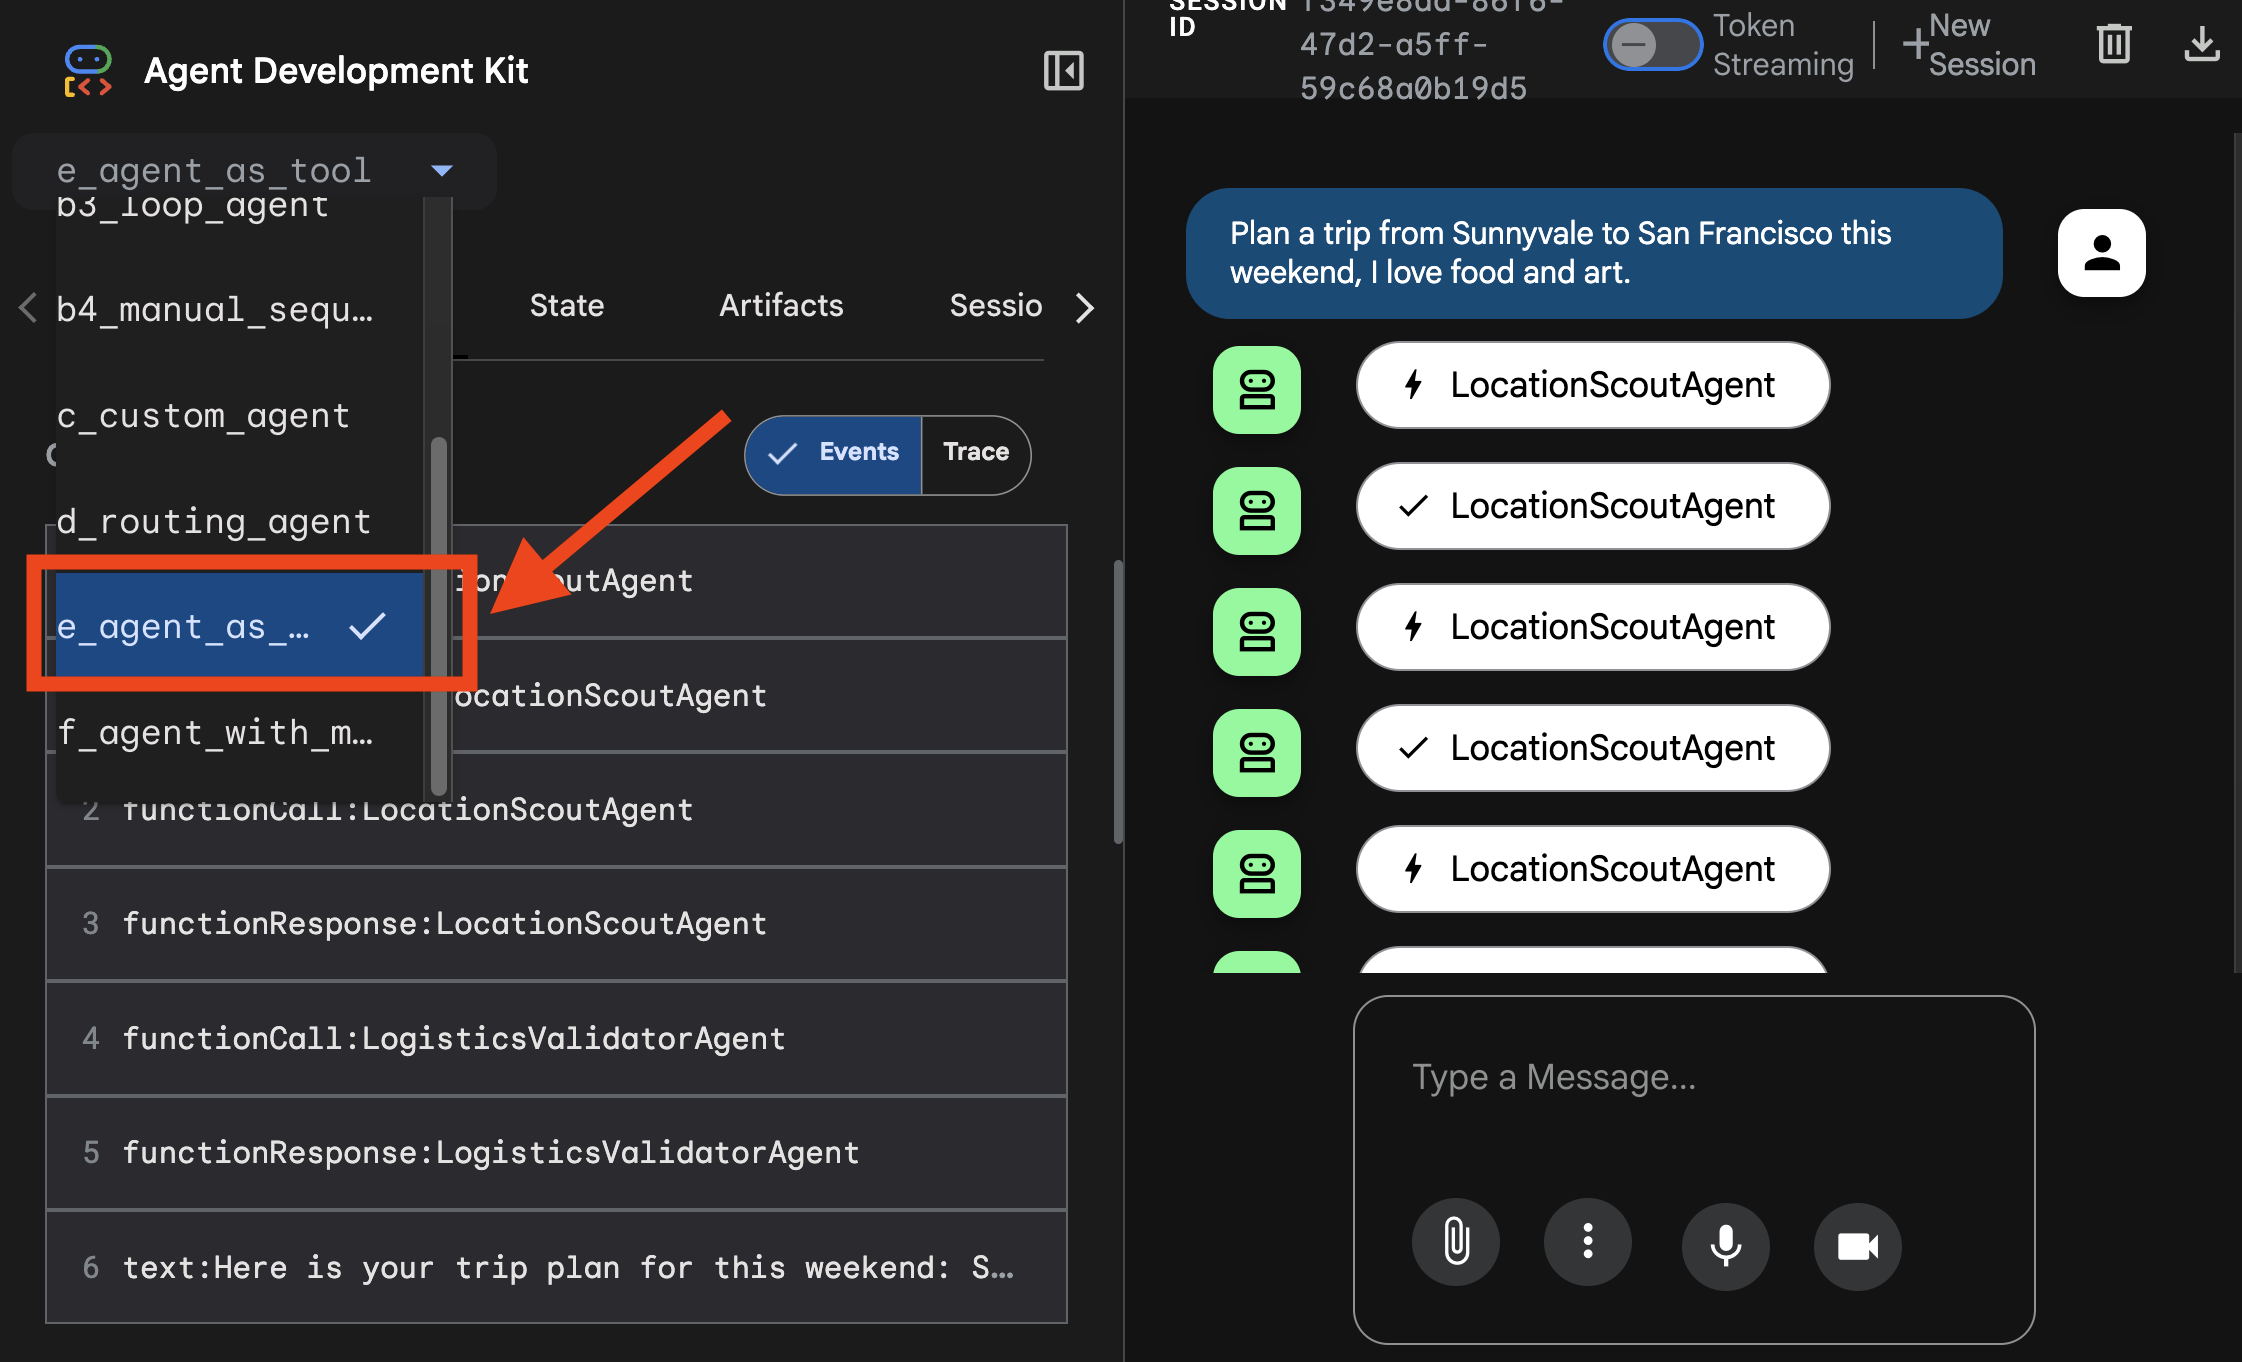
You can see the tracing here: 
8. Session 6: Agent With Long Term Memory
👉💻 Test your long term memory by go to the folder and use the runner to power up the agent:
cd ~/adk_tutorial
source .adk_env/bin/activate
cd ~/adk_tutorial/f_agent_with_memory
python main.py
👉 Test Prompt:
I like Art and Italian food.
Then end the session by pressing "crtl+C". Restart the session:
cd ~/adk_tutorial
source .adk_env/bin/activate
cd ~/adk_tutorial/f_agent_with_memory
python main.py
👉 Test Prompt:
Plan a trip to San Francisco based on my preference.
9. Session 7: Empower your agent with MCP
Step 1: Prepare the Local Database
👉💻 run the following command in your terminal
cd ~/adk_tutorial
source .adk_env/bin/activate
chmod +x setup_trip_database.py
./setup_trip_database.py
Step 2: Install and Run the MCP Toolbox Server
👉💻 run the following command in your terminal
cd ~/adk_tutorial/mcp_tool_box
export VERSION=0.16.0
curl -O https://storage.googleapis.com/mcp-toolbox-for-databases/v$VERSION/linux/amd64/toolbox
once finishing downloading, and then run
chmod +x toolbox
Step 3
In one terminal Run the following command
cd ~/adk_tutorial
source .adk_env/bin/activate
cd ~/adk_tutorial/mcp_tool_box
./toolbox --tools-file "trip_tools.yaml" --port 7001
In another terminal Run the following command
cd ~/adk_tutorial
source .adk_env/bin/activate
cd ~/adk_tutorial/g_agents_mcp
python main.py