
1. Introduction
Agentforce Sales for Gemini Enterprise can engage leads, create meeting briefs, surface deal risks and guidance, and manage pipeline and CRM updates — securely and in real-time — without leaving Gemini Enterprise. With the agent handling the grind of manual tasks, sellers can focus on relationship building and strategic selling to win.
Agent skills
- Read, create, and update Salesforce records — accounts, contacts, leads, opportunities, and custom objects and fields — directly from Gemini without switching tools.
- Query and summarize your pipeline, surface uncontacted leads, and track opportunity progress — all in real time from your Salesforce data.
- Create and retrieve structured account plans with competitive insights, SWOT analysis, and strategic priorities grounded in your Salesforce data.
- View your calendar, review activity history, and get AI-summarized call transcripts to walk into every meeting fully prepared.
- Assign leads and contacts to the Agentforce Lead Nurturing agent to trigger automated, personalized sales outreach without leaving Gemini.
2. Pre-requisites
Before you begin, ensure you have completed the following:
Google Cloud Project Administrator
- Grant Cloud Marketplace permissions: Ensure your account has the necessary IAM roles.
- For purchasing: Billing Account Administrator or Consumer Procurement Order Administrator (
roles/consumerprocurement.orderAdmin) on the billing account. - For managing access: Consumer Procurement Entitlement Manager (
roles/consumerprocurement.entitlementManager) at the project or organization level. - Tip: You can grant the project-level role via
gcloud:gcloud projects add-iam-policy-binding YOUR_PROJECT_ID \ --member="user:YOUR_USER_EMAIL@example.com" \ --role="roles/consumerprocurement.entitlementManager"
- For purchasing: Billing Account Administrator or Consumer Procurement Order Administrator (
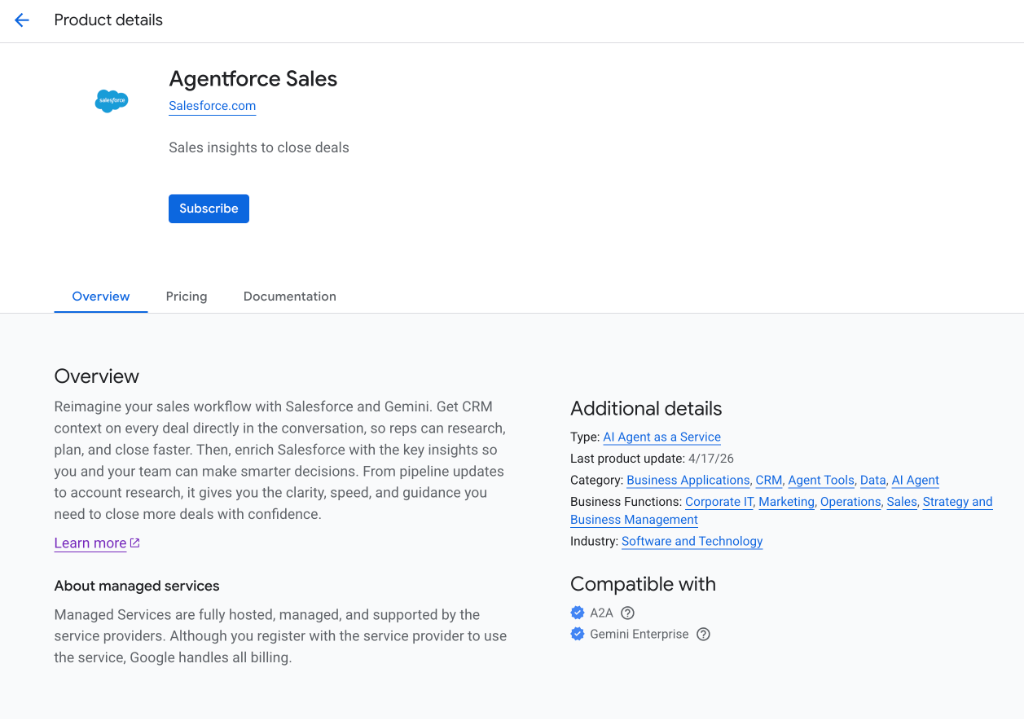
- Go to Google Cloud Marketplace to subscribe to "Agentforce Sales":
- Navigate to Marketplace in the Google Cloud Console.
- Search for "Agentforce Sales".
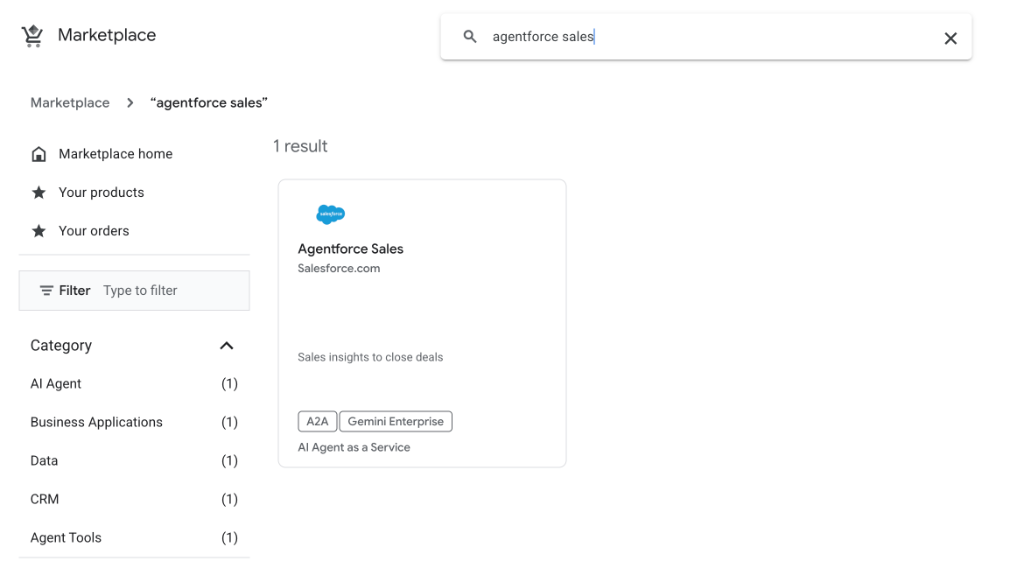
- Click on the product and follow the subscription flow to link it to your project and billing account.
At Salesforce Side
- Turn On Agentforce Sales Agent for Gemini: Turn on the Sales Agent in Salesforce so you can set it up for your users.
- From the gear icon, select Salesforce Go.
- Search for Agentforce Sales Agent for Gemini (Beta).
- Go to the Agentforce Sales Agent for Gemini (Beta) page and turn it on.
- Create and Configure an External Client App: To create an External Client App, go to Setup. On the External Client App Manager page, click New External Client App.
- Enter the app name:
Gemini Integration. Add your Salesforce email, and leave the Distribution State as Local. - Open API (Enable OAuth Settings) and select Enable OAuth.
- In Callback URL, add these URLs, each on a separate line:
https://vertexaisearch.cloud.google.com/oauth-redirect https://vertexaisearch.cloud.google.com/static/oauth/oauth.html - In OAuth Scopes, select:
Access Salesforce hosted MCP servers (mcp_api)Perform requests at any time (refresh_token, offline_access)
- Deselect all checkboxes in Flow Enablement.
- In Security, select only these settings, and deselect the remaining checkboxes:
Require secret for Web Server FlowRequire secret for Refresh Token FlowEnable Refresh Token RotationIssue JSON Web Token (JWT)-based access tokens for named users
- Click Create.
- Open your newly created ECA, and on the Settings tab, expand OAuth Settings.
- Click Consumer Key and Secret. Copy and store the values securely to use later when adding the Client ID and Client Secret on the agent card in Gemini.
- On the Policies tab, expand OAuth Policies. In App Authorizations, change the refresh token validity period from 365 days to 30 days and save.
- Enter the app name:
- Give Users Access:
- To give users access, enter
Permissionin the Quick Find box, and then select Permission Sets. - Click New.
- Enter a label, such as
Custom Gemini Permission Set, and save. - Return to the External Client App Manager page, and open the ECA you created.
- On the External Client App Policies tab, under OAuth Policies, set Permitted Users to
Admin approved users are pre-authorized. - In Select Permission Sets, add the permission set, then save.
- Assign the permission set to users who want access to the Agentforce Sales Agent for Gemini.
- To give users access, enter
Source Documentation
For more details, refer to: https://help.salesforce.com/s/articleView?id=sales.sales_gemini_agent_admin_setup.htm&type=5
3. Setup Details
Credential Information
You will need the following information during setup:
- Username:
- Password:
- Client ID:
- Client secret:
- Authorization URL:
https://login.salesforce.com/services/oauth2/authorize?prompt=select_account - Token URL:
https://login.salesforce.com/services/oauth2/token - OAuth scopes:
refresh_token mcp_api
Setup Steps:
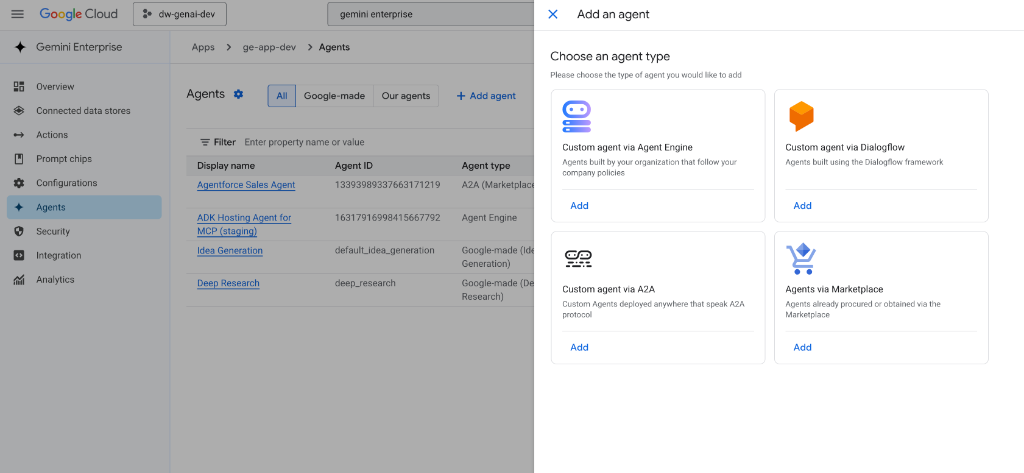
- Go to your Gemini Enterprise App.
- Select Agents from the left hand panel.
- Select + Add agent.
- Add via Agents via Marketplace.
- Select Agentforce Sales Agent, click Next, then click Next again.
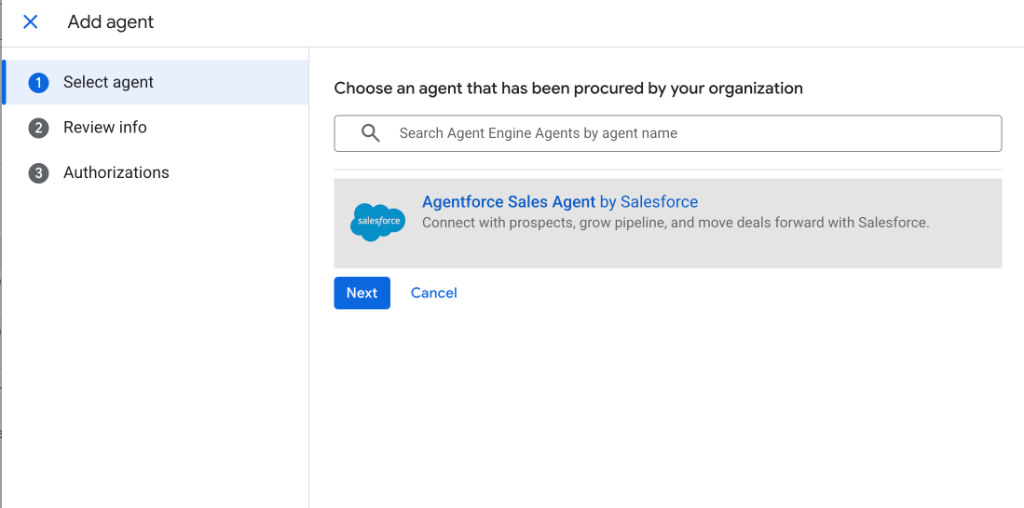
- Input your authentication details, then click Finish.

4. Test your agent
First time run:
When you run the agent for the first time, it will ask you to authorize. Please follow the prompt window, and input your salesforce username and password.
Sample queries:
Try asking the agent:
- "What's on my calendar?"
- "What're my top 5 opportunities?"
5. Q&A
If you have any questions, please refer to the documentation or contact support.