
1. Introduction
In this codelab you will deploy an internal tcp proxy load balancer and hybrid network endpoint group (NEG), Published as a PSC Producer Service. The NEG will consist of the IP Address and Port of the cross cloud self-hosted database e.g JIRA, Confluence, Sharepoint.
Private Service Connect is a capability of Google Cloud networking that allows Consumers to access managed services privately from inside their VPC network. Similarly, it allows managed service Producers to host these services in their own VPC or Cross Cloud network, offering a private connection to their Consumers. For example, when you use Private Service Connect to access a cross cloud database, you are the service Producer, and Google (Agentspace) is the service Consumer.
What you'll learn
- Network requirements for Agentspace
- Agentspace networking best practices
- Create a Private Service Connect Producer service
What you'll need
- Google Cloud Project with Owner permissions
2. What you'll build
You'll establish a Producer network, agentspace-psc-demo, to deploy internal tcp proxy load balancer and Hybrid NEG published as a service via Private Service Connect (PSC).
3. Network requirements
Below is the breakdown of network requirements for the Producer network, the Consumer in this codelab is Agentspace.
Components | Description |
VPC (agentspace-psc-demo) | Custom mode VPC |
PSC NAT Subnet | Packets from the Consumer VPC network are translated using source NAT (SNAT) so that their original source IP addresses are converted to source IP addresses from the NAT subnet in the Producer's VPC network. PSC NAT supports a /29 subnet per Service Attachment. |
PSC forwarding rule subnet | Used to allocate an IP address for the Regional Internal TCP Proxy Load Balancer.The forwarding rule subnet is considered a regular subnet. |
Proxy Only Subnet | Each of the load balancer's proxies is assigned an internal IP address. Packets sent from a proxy to a backend VM or network endpoint group has a source IP address from the proxy-only subnet.A /23 subnet is recommended although the minimum, /26 is supported. One regional proxy subnet is required per region. |
Hybrid NEG | On-premises and other cloud services are treated like any other Cloud Load Balancing backend. The key difference is that you use a hybrid connectivity NEG to configure the endpoints of these backends. The endpoints must be valid IP:port combinations that your load balancer can reach by using hybrid connectivity products such as Cloud VPN or Cloud Interconnect. |
Backend Service | A backend service acts as a bridge between your load balancer and your backend resources. In the tutorial, the backend service is associated with the Hybrid NEG. |
4. Best Practices
- AgentSpace supports cross-cloud access to self-hosted databases deployed on-premises or compute (e.g., AWS EC2 & Azure VMs) when published as a Service Producer.
- Traffic to the cross-cloud database will originate from the regional proxy subnet. Therefore, firewall rules must be updated to allowlist this traffic.
- Although the proxy-only subnet is advertised by default by the Cloud Router, confirm that the cross-cloud network has learned this subnet.
- Verify that the Agentspace VPC network has learned the cross-cloud database's subnet or host IP address.
- Enable Global Access on the Producer forwarding rule before creating the Service Attachment.
- Enable Global access when creating the Agentspace endpoint.
5. Codelab topology

6. Setup and Requirements
Self-paced environment setup
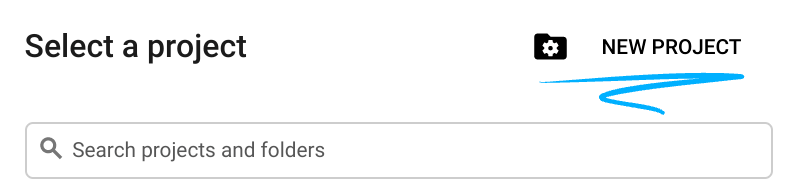
- Sign-in to the Google Cloud Console and create a new project or reuse an existing one. If you don't already have a Gmail or Google Workspace account, you must create one.

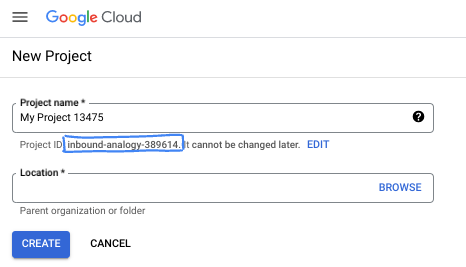
- The Project name is the display name for this project's participants. It is a character string not used by Google APIs. You can always update it.
- The Project ID is unique across all Google Cloud projects and is immutable (cannot be changed after it has been set). The Cloud Console auto-generates a unique string; usually you don't care what it is. In most codelabs, you'll need to reference your Project ID (typically identified as
PROJECT_ID). If you don't like the generated ID, you might generate another random one. Alternatively, you can try your own, and see if it's available. It can't be changed after this step and remains for the duration of the project. - For your information, there is a third value, a Project Number, which some APIs use. Learn more about all three of these values in the documentation.
- Next, you'll need to enable billing in the Cloud Console to use Cloud resources/APIs. Running through this codelab won't cost much, if anything at all. To shut down resources to avoid incurring billing beyond this tutorial, you can delete the resources you created or delete the project. New Google Cloud users are eligible for the $300 USD Free Trial program.
Start Cloud Shell
While Google Cloud can be operated remotely from your laptop, in this codelab you will be using Google Cloud Shell, a command line environment running in the Cloud.
From the Google Cloud Console, click the Cloud Shell icon on the top right toolbar:

It should only take a few moments to provision and connect to the environment. When it is finished, you should see something like this:

This virtual machine is loaded with all the development tools you'll need. It offers a persistent 5GB home directory, and runs on Google Cloud, greatly enhancing network performance and authentication. All of your work in this codelab can be done within a browser. You do not need to install anything.
7. Before you begin
Enable APIs
Inside Cloud Shell, make sure that your project id is set up:
gcloud config list project
gcloud config set project [YOUR-PROJECT-ID]
project=[YOUR-PROJECT-ID]
region=[YOUR-REGION]
zone=[YOUR-ZONE]
echo $project
echo $region
Enable all necessary services:
gcloud services enable compute.googleapis.com
8. Create Producer VPC Network
VPC Network
Inside Cloud Shell, perform the following:
gcloud compute networks create agentspace-psc-demo --subnet-mode custom
Create Subnets
The PSC subnet will be associated with the PSC Service Attachment for the purpose of Network Address Translation.
Inside Cloud Shell, create the PSC NAT Subnet:
gcloud compute networks subnets create producer-psc-nat-subnet --network agentspace-psc-demo --range 172.16.10.0/28 --region $region --purpose=PRIVATE_SERVICE_CONNECT
Inside Cloud Shell, create the Producer forwarding rule subnet:
gcloud compute networks subnets create producer-psc-fr-subnet --network agentspace-psc-demo --range 172.16.20.0/28 --region $region --enable-private-ip-google-access
Inside Cloud Shell, create the Producer regional proxy only subnet, observed by the cross cloud database as the source IP.
gcloud compute networks subnets create $region-proxy-only-subnet \
  --purpose=REGIONAL_MANAGED_PROXY \
  --role=ACTIVE \
  --region=$region \
  --network=agentspace-psc-demo \
  --range=10.10.10.0/24
Reserve the load balancer's IP address
Inside Cloud Shell, reserve an internal IP address for the load balancer:
gcloud compute addresses create hybrid-neg-lb-ip \
  --region=$region \
  --subnet=producer-psc-fr-subnet
Inside Cloud Shell, view the reserved IP Address.
gcloud compute addresses describe hybrid-neg-lb-ip \
  --region=$region | grep -i address:
Example output:
gcloud compute addresses describe hybrid-neg-lb-ip   --region=$region | grep -i address:
address: 172.16.20.2
Set up the Hybrid NEG
Create a Hybrid NEG, and set the –network-endpoint-type to NON_GCP_PRIVATE_IP_PORT
Inside Cloud Shell, create a Hybrid NEG used to access the on-prem database:
gcloud compute network-endpoint-groups create on-prem-hybrid-neg \
    --network-endpoint-type=NON_GCP_PRIVATE_IP_PORT \
    --network=agentspace-psc-demo \
    --zone=$zone
Inside Cloud Shell, update the Hybrid NEG with the IP:Port of the cross cloud database, 192.168.10.10 & Port 443 per the reference architecture:
gcloud compute network-endpoint-groups update on-prem-hybrid-neg \
    --add-endpoint=ip=192.168.10.10,port=443 \
    --zone=$zone
Create a regional health check
Inside Cloud Shell, create a health-check that probes the on-prem database port, 443:
gcloud compute health-checks create tcp on-prem-443-healthcheck \
    --region=$region \
    --port=443
Create Network Firewall Policy and Firewall Rules
Inside Cloud Shell, perform the following:
gcloud compute network-firewall-policies create agentspace-psc-demo-policy --global

gcloud compute network-firewall-policies associations create --firewall-policy agentspace-psc-demo-policy --network agentspace-psc-demo --name agentspace-psc-demo --global-firewall-policy
The following firewall rule allows traffic from the PSC NAT Subnet range to all instances in the network.
Inside Cloud Shell, perform the following:
gcloud compute network-firewall-policies rules create 2001 --action ALLOW --firewall-policy agentspace-psc-demo-policy --description "allow traffic from PSC NAT subnet" --direction INGRESS --src-ip-ranges 172.16.10.0/28 --global-firewall-policy --layer4-configs=tcp
9. Create Producer Service
Create Load Balancer Components
Inside Cloud Shell, create a backend service::
gcloud compute backend-services create producer-backend-svc --region=$region --load-balancing-scheme=INTERNAL_MANAGED --protocol=TCP --region=$region --health-checks=on-prem-443-healthcheck --health-checks-region=$region
Inside Cloud Shell, add the Hybrid NEG backend to the backend service:
gcloud compute backend-services add-backend producer-backend-svc --network-endpoint-group=on-prem-hybrid-neg --network-endpoint-group-zone=$zone --balancing-mode=CONNECTION --max-connections=100 --region=$region
In Cloud Shell, Create a target TCP proxy to route requests to your backend service:
gcloud compute target-tcp-proxies create producer-lb-tcp-proxy \
      --backend-service=producer-backend-svc  \
      --region=$region
In the following syntax, create a forwarding rule (internal tcp proxy load balancer) with global access enabled.
In Cloud Shell, perform the following:
gcloud compute forwarding-rules create producer-hybrid-neg-fr \
     --load-balancing-scheme=INTERNAL_MANAGED \
     --network-tier=PREMIUM \
     --network=agentspace-psc-demo \
     --subnet=producer-psc-fr-subnet \
     --address=hybrid-neg-lb-ip \
     --target-tcp-proxy=producer-lb-tcp-proxy \
     --target-tcp-proxy-region=$region \
     --region=$region \
     --allow-global-access \
     --ports=443
Create Service Attachment
To publish a service, you must create a service attachment. You can publish the service with either automatic approval or explicit approval.
- To publish the service and automatically allow any Consumer to connect to it, follow the instructions at Publish a service with automatic approval.
- To publish the service with explicit Consumer approval, in the service attachment connection settings, select Accept connections for selected projects and leave the Accepted projects field blank.
- After you generate the service attachment, Consumer endpoints that request access to the Producer service will initially enter a pending state. To authorize the connection, the Producer must then accept the project from which the Consumer endpoint request originated.
Inside Cloud Shell, create the Service Attachment, cc-database1-svc-attachment with automatic approval:
gcloud compute service-attachments create cc-database1-svc-attachment --region=$region --producer-forwarding-rule=producer-hybrid-neg-fr --connection-preference=ACCEPT_AUTOMATIC --nat-subnets=producer-psc-nat-subnet
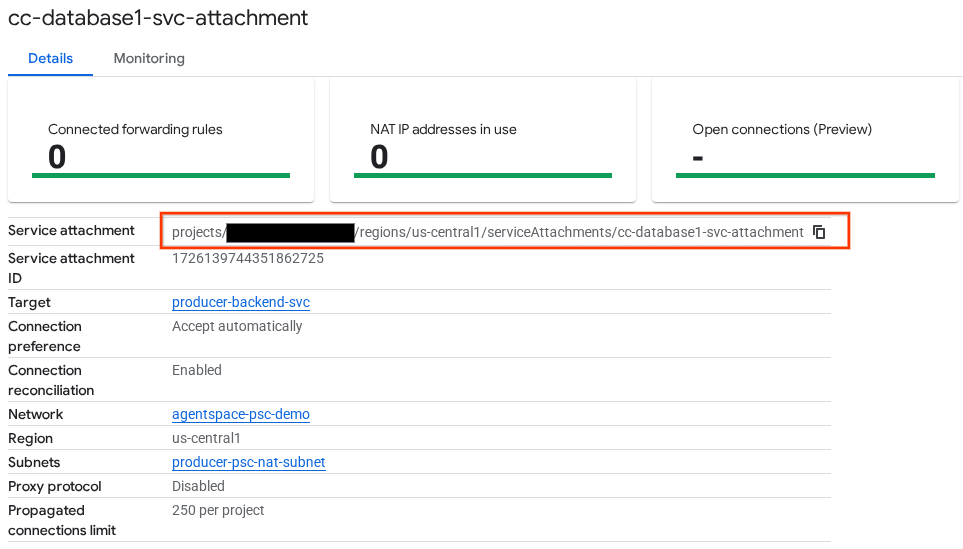
Next, obtain and note the Service Attachment listed in the selfLink URI starting with projects to configure the PSC endpoint in Agentspace.
selfLink: projects/<your-project-id>/regions/<your-region>/serviceAttachments/cc-database1-svc-attachment
Inside Cloud Shell, perform the following:
gcloud compute service-attachments describe cc-database1-svc-attachment --region=$region
Example Expected Output:
connectionPreference: ACCEPT_AUTOMATIC
creationTimestamp: '2025-07-06T16:05:14.706-07:00'
description: ''
enableProxyProtocol: false
fingerprint: rXjeAOjb41k=
id: '1726139744351862725'
kind: compute#serviceAttachment
name: cc-database1-svc-attachment
natSubnets:
- https://www.googleapis.com/compute/v1/projects/$project/regions/us-central1/subnetworks/producer-psc-nat-subnet
pscServiceAttachmentId:
  high: '54619734758392808'
  low: '1726139744351862725'
reconcileConnections: false
region: https://www.googleapis.com/compute/v1/projects/$project/regions/us-central1
selfLink: https://www.googleapis.com/compute/v1/projects/$project/regions/us-central1/serviceAttachments/cc-database1-svc-attachment
targetService: https://www.googleapis.com/compute/v1/projects/$project/regions/us-central1/forwardingRules/producer-hybrid-neg-fr
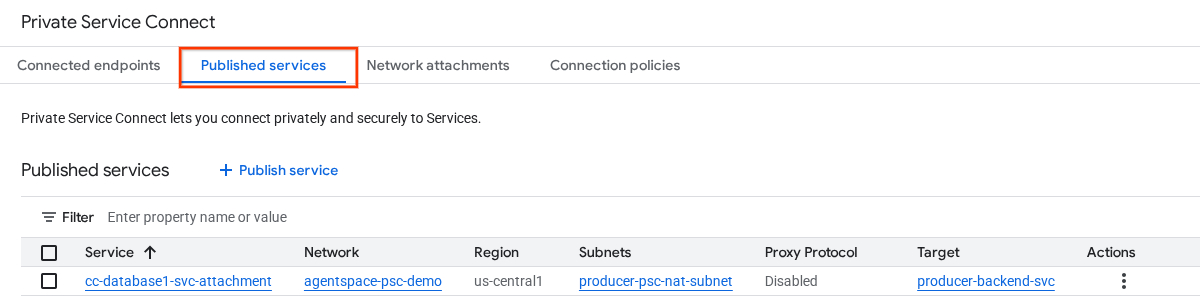
In Cloud Console, navigate to:
Network Services → Private Service Connect → Published Services
10. Establish a PSC Endpoint Connection in Agentspace
Before associating the Producer Service Attachment to Agentspace, ensure the following validations are complete:
- The cross-cloud network firewall allow-lists the regional proxy subnet.
- The cross-cloud network has learned the regional proxy subnet.
- The Agentspace VPC has learned the cross-cloud database subnet or host IP.
Associate the Producers Service Attachment URI with Agentspace, ensuring global access is selected. Below is an example of global access enablement with the reference architecture Service Attachment.
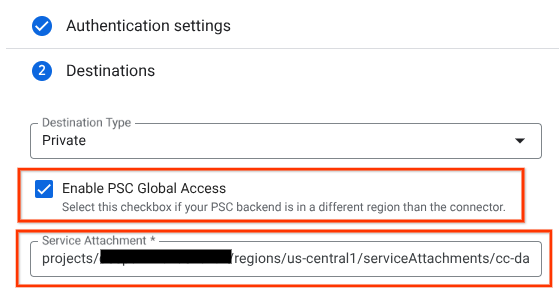
To finalize private networking, consult Agentspace third-party data sources for further instructions.
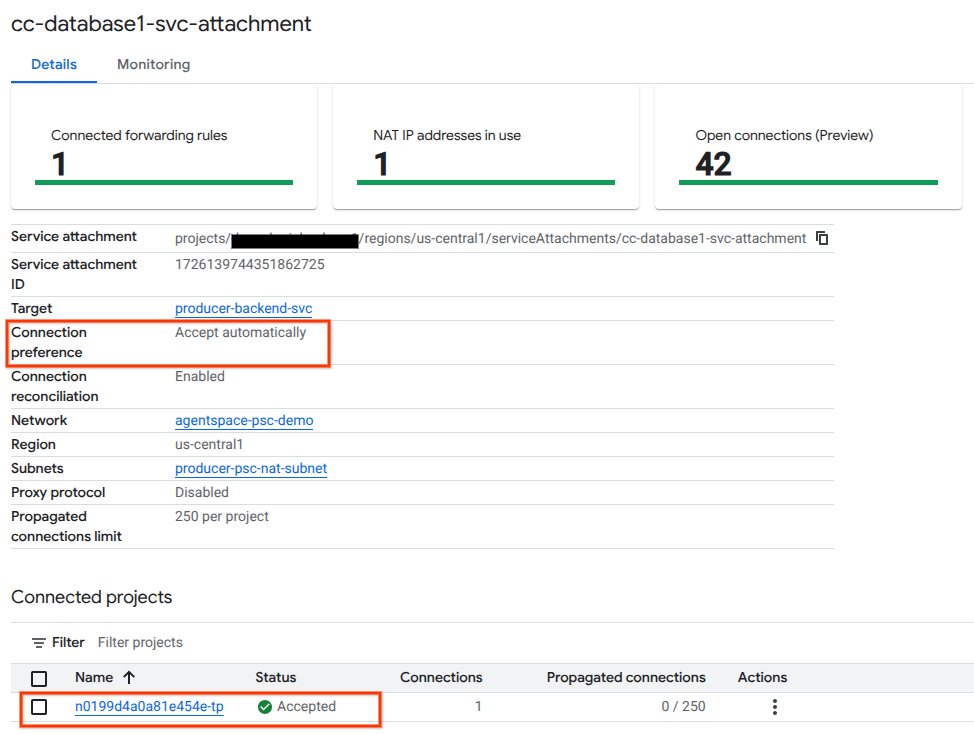
Validate the PSC endpoint in Cloud Console
To confirm a successful PSC connection between Agentspace (the Consumer) and the Producer, verify the Agentspace tenant project linked to the Producer Service. This can be found under ‘Connected Projects'. The tenant project ID is randomly assigned but will always end with ‘tp'.
From Cloud Console you can validate the PSC Connection. In Cloud Console, navigate to:
Network Services → Private Service Connect → Published Service, then select the Service, cc-database1-svc-attachment.
11. Clean up
From a single Cloud Shell terminal delete lab components
gcloud compute service-attachments delete cc-database1-svc-attachment --region=$region -q

gcloud compute forwarding-rules delete producer-hybrid-neg-fr --region=$region -q

gcloud compute target-tcp-proxies delete producer-lb-tcp-proxy --region=$region -q

gcloud compute backend-services delete producer-backend-svc --region=$region -q

gcloud compute network-firewall-policies rules delete 2001 --firewall-policy agentspace-psc-demo-policy --global-firewall-policy -q

gcloud compute network-firewall-policies associations delete --firewall-policy=agentspace-psc-demo-policy  --name=agentspace-psc-demo --global-firewall-policy -q

gcloud compute network-firewall-policies delete agentspace-psc-demo-policy --global -q

gcloud compute network-endpoint-groups delete on-prem-hybrid-neg --zone=$zone -q

gcloud compute addresses delete hybrid-neg-lb-ip --region=$region -q

gcloud compute networks subnets delete $region-proxy-only-subnet --region=$region -q

gcloud compute networks subnets delete producer-psc-nat-subnet --region=$region -q

gcloud compute networks subnets delete producer-psc-fr-subnet --region=$region -q

gcloud compute health-checks delete on-prem-443-healthcheck --region=us-central1 -q

gcloud compute networks delete agentspace-psc-demo -q
12. Congratulations
Congratulations, you've successfully configured and published a Producer service with Private Service Connected.
You created the Producer infrastructure, learned how to create a Hybrid NEG, Producer Service and associate the service attachment to Agentspace.
Cosmopup thinks codelabs are awesome!!

What's next?
Check out some of these codelabs...
- Using Private Service Connect to publish and consume services
- Connect to on-prem services over Hybrid Networking using Private Service Connect and an internal TCP Proxy load balancer
- Access to all published Private Service Connect codelabs