
১. সংক্ষিপ্ত বিবরণ
এই কোডল্যাবে আপনি এআই ক্রিয়েটিভ স্টুডিও তৈরি করবেন – এটি একটি ডিস্ট্রিবিউটেড মাল্টি-এজেন্ট সিস্টেম যা একটিমাত্র প্রম্পটকে একটি সম্পূর্ণ ইনস্টাগ্রাম ক্যাম্পেইনে পরিণত করে।
একটি বাক্য টাইপ করুন। বিনিময়ে পেয়ে যান দর্শক গবেষণা, ক্যাপশন, ভিজ্যুয়াল কনসেপ্ট, মান পর্যালোচিত কপি এবং একটি সম্পূর্ণ প্রজেক্ট টাইমলাইন — এই সবকিছুই তৈরি করবে সহযোগী এআই এজেন্টদের একটি দল।
আপনি যে এজেন্টগুলি তৈরি করবেন
এজেন্ট | ভূমিকা |
ব্র্যান্ড কৌশলবিদ | দর্শক সম্পর্কিত তথ্য, প্রতিযোগী বিশ্লেষণ এবং ২০২৫ সালের প্রবণতা জানতে ওয়েবে অনুসন্ধান করে। |
কপিরাইটার | হ্যাশট্যাগ এবং সিটিএ (CTA) সহ ইনস্টাগ্রাম ক্যাপশন লেখে - এটি একটি ADK স্কিল দ্বারা চালিত যা চাহিদা অনুযায়ী প্ল্যাটফর্মের নির্দেশিকা এবং ক্যাপশনের ফর্মুলা লোড করে। |
ডিজাইনার | জেমিনির মাধ্যমে ভিজ্যুয়াল ধারণা তৈরি করে এবং বাস্তব চিত্র উৎপন্ন করে, যা GCS-এ সংরক্ষিত থাকে। |
সমালোচক | কপি এবং ভিজ্যুয়াল পর্যালোচনা করে সুনির্দিষ্ট মতামতসহ |
প্রকল্প ব্যবস্থাপক | একটি প্রজেক্ট টাইমলাইন এবং টাস্ক ব্রেকডাউন তৈরি করে, যা ঐচ্ছিকভাবে MCP-এর মাধ্যমে Notion-এর সাথে সিঙ্ক করা যায়। |
সৃজনশীল পরিচালক | এটি পর্যায়ক্রমে পাঁচজন বিশেষজ্ঞকেই পরিচালনা করে - আপনি একটি নির্দেশ দিলেই, এটি বাকিটা সমন্বয় করে নেয়। |
৫টি এজেন্টকে স্বাধীন ক্লাউড রান মাইক্রোসার্ভিস হিসেবে ডেপ্লয় করা হয়েছে। তারা A2A প্রোটোকলের মাধ্যমে যোগাযোগ করে – এটি একটি ভাষা-নিরপেক্ষ উন্মুক্ত স্ট্যান্ডার্ড, যার ফলে যেকোনো এজেন্ট ফ্রেমওয়ার্ক নির্বিশেষে অন্য যেকোনো এজেন্টকে কল করতে পারে। ক্রিয়েটিভ ডিরেক্টর এজেন্ট রানটাইমে চলে এবং দূর থেকে প্রতিটি স্পেশালিস্টের সাথে সংযোগ স্থাপন করে।
স্থাপত্য

আপনি যা শিখবেন
- Google ADK -
Agent, সিস্টেম নির্দেশাবলী এবং অন্তর্নির্মিত সরঞ্জাম ব্যবহার করে LLM এজেন্ট তৈরি করুন। - ADK Skills (
SkillToolset) ব্যবহার করে পুনঃব্যবহারযোগ্য এজেন্ট জ্ঞানকে মডিউলার ফাইলে প্যাকেজ করুন। - একটি
FunctionToolমাধ্যমে টেক্সট এজেন্টকে ইমেজ মডেলের সাথে সংযুক্ত করে বাস্তব ছবি তৈরি করুন। - মডেল কনটেক্সট প্রোটোকল (MCP) ব্যবহার করে কাস্টম গ্লু কোড ছাড়াই বাহ্যিক API একীভূত করুন।
- HTTPS-এর মাধ্যমে এজেন্ট টু এজেন্ট প্রোটোকল (A2A) ব্যবহার করে যেকোনো এজেন্টকে একটি নেটওয়ার্ক-কলযোগ্য পরিষেবাতে পরিণত করুন।
-
RemoteA2aAgentএবংAgentToolব্যবহার করে ডিস্ট্রিবিউটেড এজেন্টদের সমন্বয় করুন। - স্বতন্ত্র এজেন্টগুলোকে ক্লাউড রান মাইক্রোসার্ভিস হিসেবে প্যাকেজ ও ডেপ্লয় করুন।
- এজেন্ট রানটাইমে একটি স্টেটফুল অর্কেস্ট্রেটর হোস্ট করুন।
- কন্টেক্সট কম্প্যাকশন ব্যবহার করে দীর্ঘ মাল্টি-এজেন্ট ওয়ার্কফ্লোকে কন্টেক্সট সীমার মধ্যে রাখুন।
- একটি মান নিয়ন্ত্রণ ব্যবস্থা গড়ে তুলুন: সমালোচক ফলাফল পর্যালোচনা করবেন → প্রয়োজনে স্বয়ংক্রিয়ভাবে সংশোধন করা হবে।
আপনার যা যা লাগবে
- বিলিং সক্ষম একটি গুগল ক্লাউড প্রজেক্ট
- মালিক বা সম্পাদক IAM ভূমিকা
- পাইথনের প্রাথমিক জ্ঞান
২. আপনার পরিবেশ প্রস্তুত করুন
এই কোডল্যাবের জন্য আমরা ক্লাউড শেল ব্যবহার করব।
ক্লাউড শেল কী?
ক্লাউড শেল হলো একটি বিনামূল্যের ব্রাউজার-ভিত্তিক লিনাক্স পরিবেশ, যেখানে সবকিছু আগে থেকেই ইনস্টল করা থাকে: gcloud , git , Python, Docker এবং আরও অনেক কিছু। আপনাকে স্থানীয়ভাবে কিছুই ইনস্টল করতে হবে না।
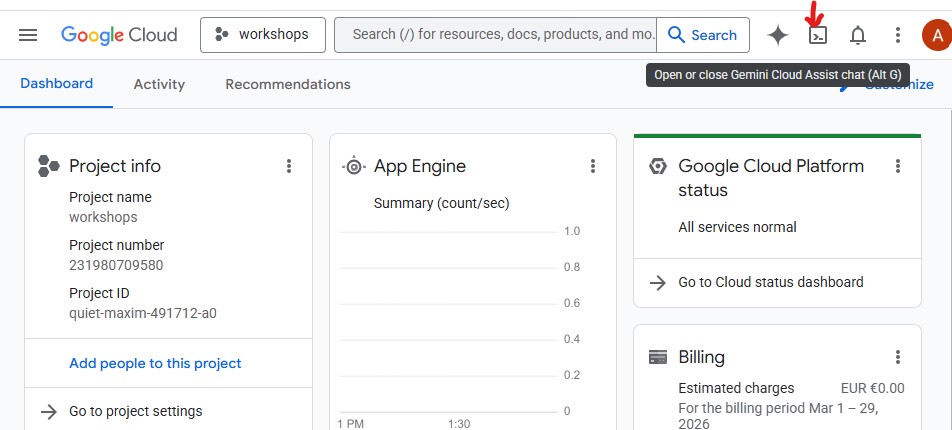
ক্লাউড শেল খুলতে, জিসিপি কনসোলের উপরের ডানদিকের টুলবারে থাকা টার্মিনাল আইকনে ক্লিক করুন:
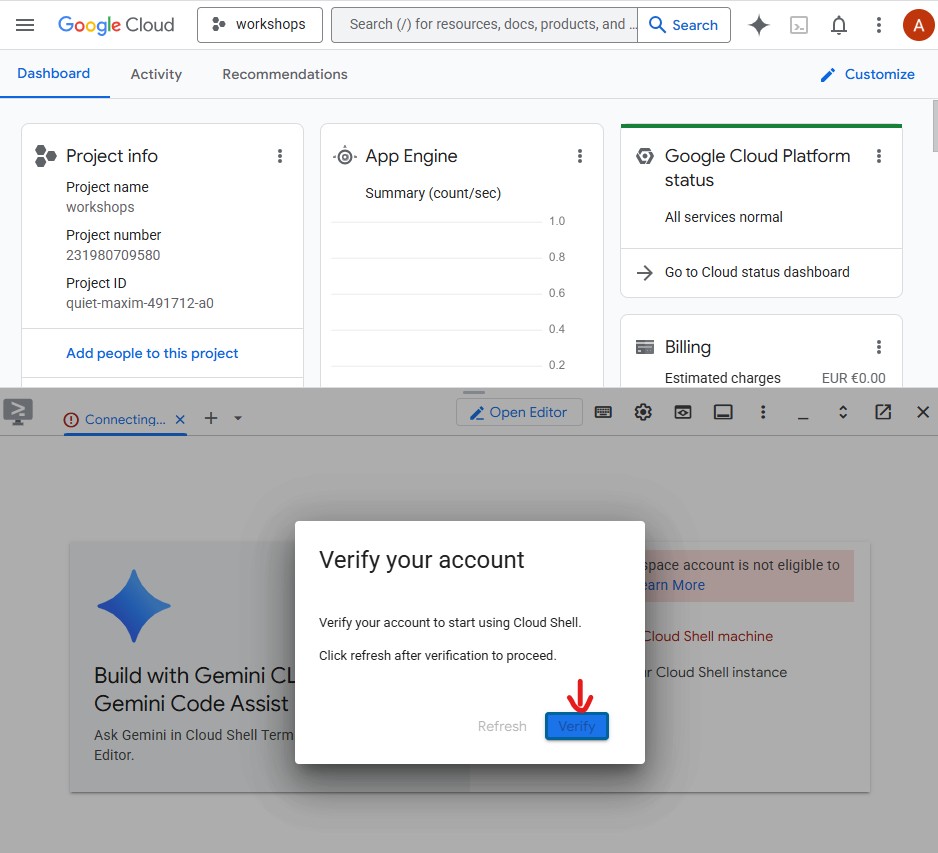
আপনি যখন প্রথমবার ক্লাউড শেল খুলবেন, তখন আপনাকে আপনার অ্যাকাউন্ট যাচাই করতে বলা হবে - ' যাচাই করুন' (Verify) বোতামে ক্লিক করুন।
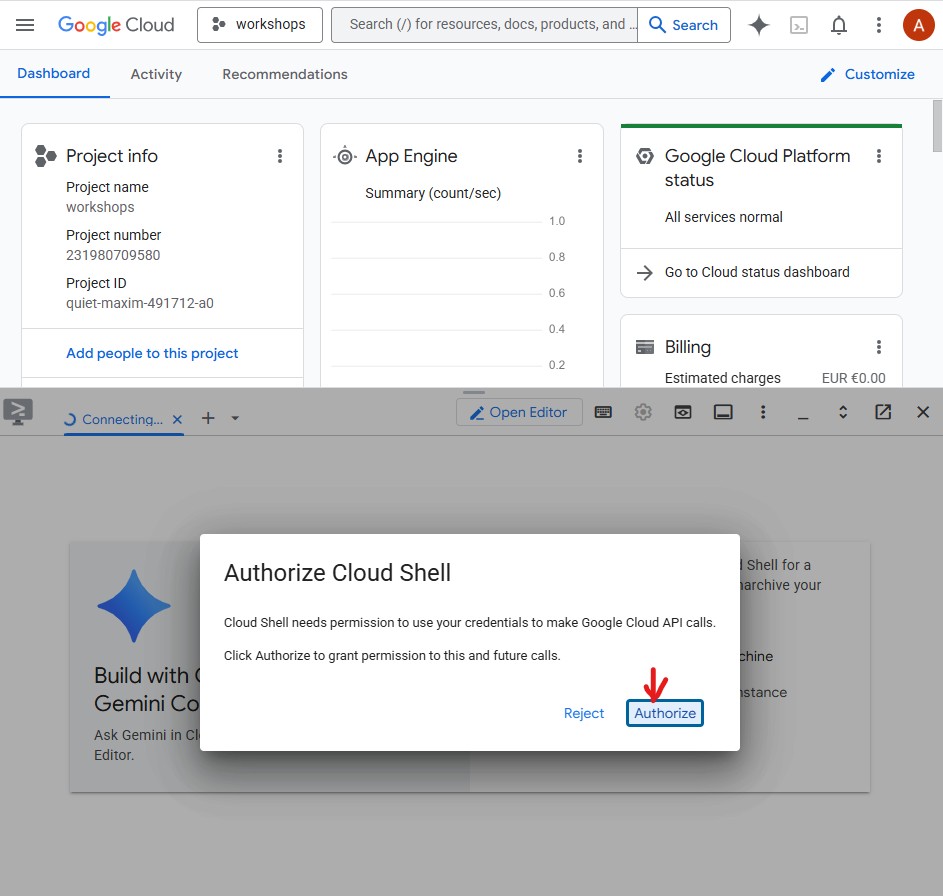
এরপর ক্লাউড শেলকে গুগল ক্লাউড এপিআই কল করার অনুমতি দিতে Authorize-এ ক্লিক করুন:
ক্লাউড শেল এখন প্রস্তুত। আপনি টার্মিনালে একটি স্বাগত বার্তা দেখতে পাবেন: 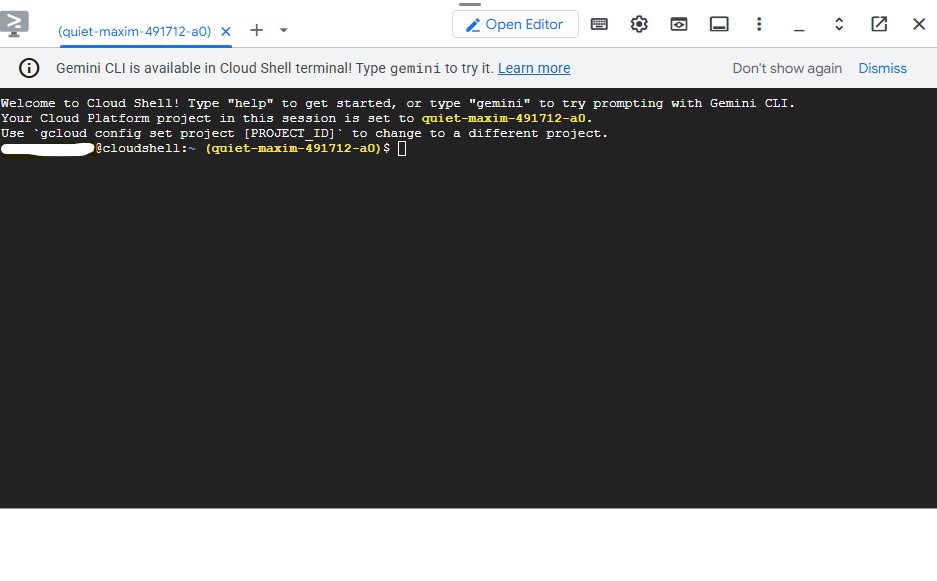
আপনার প্রজেক্ট প্রমাণীকরণ ও কনফিগার করুন
ক্লাউড শেল ইতিমধ্যেই আপনার গুগল অ্যাকাউন্ট দিয়ে প্রমাণীকৃত। আপনার সক্রিয় অ্যাকাউন্টটি নিশ্চিত করুন এবং আপনার প্রজেক্ট আইডি খুঁজুন:
gcloud config list
আপনি GCP কনসোল ড্যাশবোর্ডের বাম পাশের প্যানেলেও আপনার প্রজেক্ট আইডি দেখতে পাবেন। এটি কপি করে নিন - পরবর্তী কমান্ডে আপনার এটি প্রয়োজন হবে:
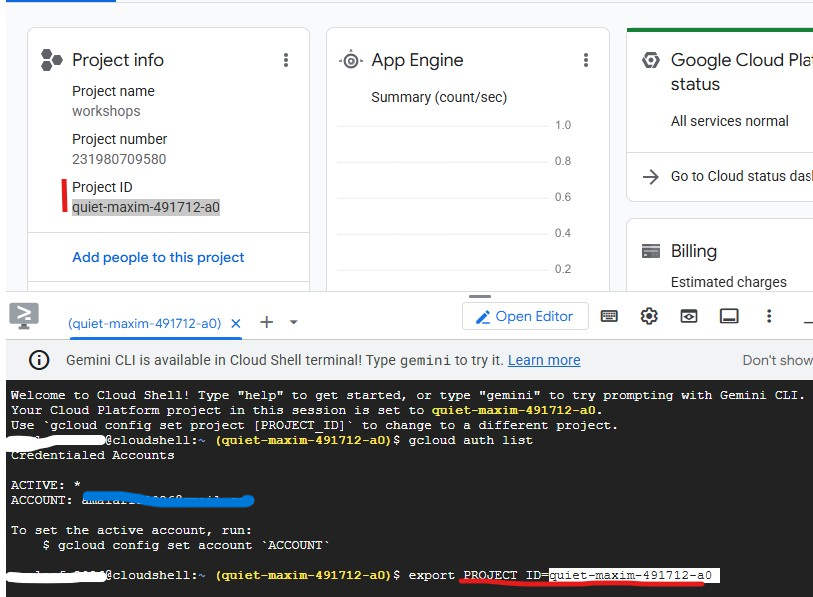
এখন আপনার প্রজেক্টটি সেট করুন:
export PROJECT_ID=$(gcloud config get-value project)
export REGION="us-central1"        # Cloud Run deployment region
echo "Project: $PROJECT_ID"
প্রত্যাশিত আউটপুট:
Project: my-project-123
প্রয়োজনীয় এপিআইগুলি সক্রিয় করুন
gcloud services enable \
    aiplatform.googleapis.com \
    apphub.googleapis.com \
    run.googleapis.com \
    cloudbuild.googleapis.com \
    artifactregistry.googleapis.com \
    generativelanguage.googleapis.com \
    iam.googleapis.com \
    cloudresourcemanager.googleapis.com \
    storage.googleapis.com \
    secretmanager.googleapis.com
এতে প্রায় ২ মিনিট সময় লাগবে। কাজ শেষ হলে আপনি Operation finished successfully দেখতে পাবেন।
অ্যাপ্লিকেশন ডিফল্ট ক্রেডেনশিয়াল (ADC) সেট আপ করুন
এজেন্টরা গুগল অথ লাইব্রেরি ব্যবহার করে জেমিনি এন্টারপ্রাইজ এজেন্ট প্ল্যাটফর্মকে কল করবে, যার জন্য অ্যাপ্লিকেশন ডিফল্ট ক্রেডেনশিয়াল প্রয়োজন – যা gcloud CLI অথেন্টিকেশন থেকে আলাদা।
এটি একবার চালান:
gcloud auth application-default login
নিশ্চিত করার জন্য একটি ব্রাউজার ট্যাব খুলবে। Allow- এ ক্লিক করুন। আপনি দেখতে পাবেন:
Credentials saved to file: ~/.config/gcloud/application_default_credentials.json
স্টার্টার রিপোজিটরি ক্লোন করুন
এই কোডল্যাবটি একটি স্টার্টার রিপোজিটরি ব্যবহার করে – এটি একটি স্কেলেটন প্রজেক্ট যেখানে সমস্ত পরিকাঠামো (ডকারফাইল, pyproject.toml, ডিপ্লয় স্ক্রিপ্ট) আগে থেকেই তৈরি থাকে, কিন্তু এজেন্টের লজিকটি আপনাকেই লিখতে হয়।
git clone https://github.com/Saoussen-CH/mas-a2a-gcp.git ~/ai-creative-studio
cd ~/ai-creative-studio/workshop/starter
প্রতিটি agent.py ফাইলে # TODO প্লেসহোল্ডার রয়েছে, যেখানে আপনি এজেন্টের লজিক লিখবেন। Dockerfile , pyproject.toml এবং deploy স্ক্রিপ্টগুলো ইতিমধ্যে সম্পূর্ণ করা আছে।
পরিবেশ ভেরিয়েবল কনফিগার করুন
প্রদত্ত উদাহরণটি কপি করুন এবং এক ধাপে আপনার প্রজেক্ট আইডি যুক্ত করুন:
cp .env.example .env
sed -i "s|GOOGLE_CLOUD_PROJECT=your-project-id|GOOGLE_CLOUD_PROJECT=$(gcloud config get-value project)|" .env
এরপর GCS বাকেটটি তৈরি করুন যেখানে ডিজাইনার তৈরি করা ছবিগুলো সংরক্ষণ করবে এবং এর নাম দিয়ে .env ফাইলটি আপডেট করুন:
export PROJECT_ID=$(gcloud config get-value project)
export BUCKET_NAME="${PROJECT_ID}-campaign-images"

gcloud storage buckets create gs://${BUCKET_NAME} \
    --location=us-central1 \
    --project=${PROJECT_ID}

sed -i "s|GCS_IMAGES_BUCKET=your-project-id-campaign-images|GCS_IMAGES_BUCKET=${BUCKET_NAME}|" .env
এরপর সাইন করা ইমেজ ইউআরএল সাপোর্ট সেট আপ করুন। ক্রিয়েটিভ ডিরেক্টর চূড়ান্ত ক্যাম্পেইন সারাংশে প্রতিটি ছবির জন্য ক্লিকযোগ্য HTTPS লিঙ্ক তৈরি করেন। এর জন্য ইউআরএলগুলো সাইন করার জন্য একটি সার্ভিস অ্যাকাউন্ট প্রয়োজন। এটি কনফিগার করতে এই কমান্ডগুলো চালান:
export PROJECT_NUMBER=$(gcloud projects describe $(gcloud config get-value project) --format="value(projectNumber)")
export SA_EMAIL="${PROJECT_NUMBER}-compute@developer.gserviceaccount.com"
export AGENT_RUNTIME_SA="service-${PROJECT_NUMBER}@gcp-sa-aiplatform-re.iam.gserviceaccount.com"

# Allow your user account to sign URLs locally (adk web)
gcloud iam service-accounts add-iam-policy-binding ${SA_EMAIL} \
  --member="user:$(gcloud config get-value account)" \
  --role="roles/iam.serviceAccountTokenCreator"

# Allow Agent Runtime to sign URLs when deployed
gcloud projects add-iam-policy-binding $(gcloud config get-value project) \
  --member="serviceAccount:${AGENT_RUNTIME_SA}" \
  --role="roles/iam.serviceAccountTokenCreator"

# Save SA email and project number to .env
grep -q "^SIGNING_SERVICE_ACCOUNT" .env \
  && sed -i "s|^SIGNING_SERVICE_ACCOUNT=.*|SIGNING_SERVICE_ACCOUNT=${SA_EMAIL}|" .env \
  || echo "SIGNING_SERVICE_ACCOUNT=${SA_EMAIL}" >> .env

grep -q "^GOOGLE_CLOUD_PROJECT_NUMBER" .env \
  && sed -i "s|^GOOGLE_CLOUD_PROJECT_NUMBER=.*|GOOGLE_CLOUD_PROJECT_NUMBER=${PROJECT_NUMBER}|" .env \
  || echo "GOOGLE_CLOUD_PROJECT_NUMBER=${PROJECT_NUMBER}" >> .env
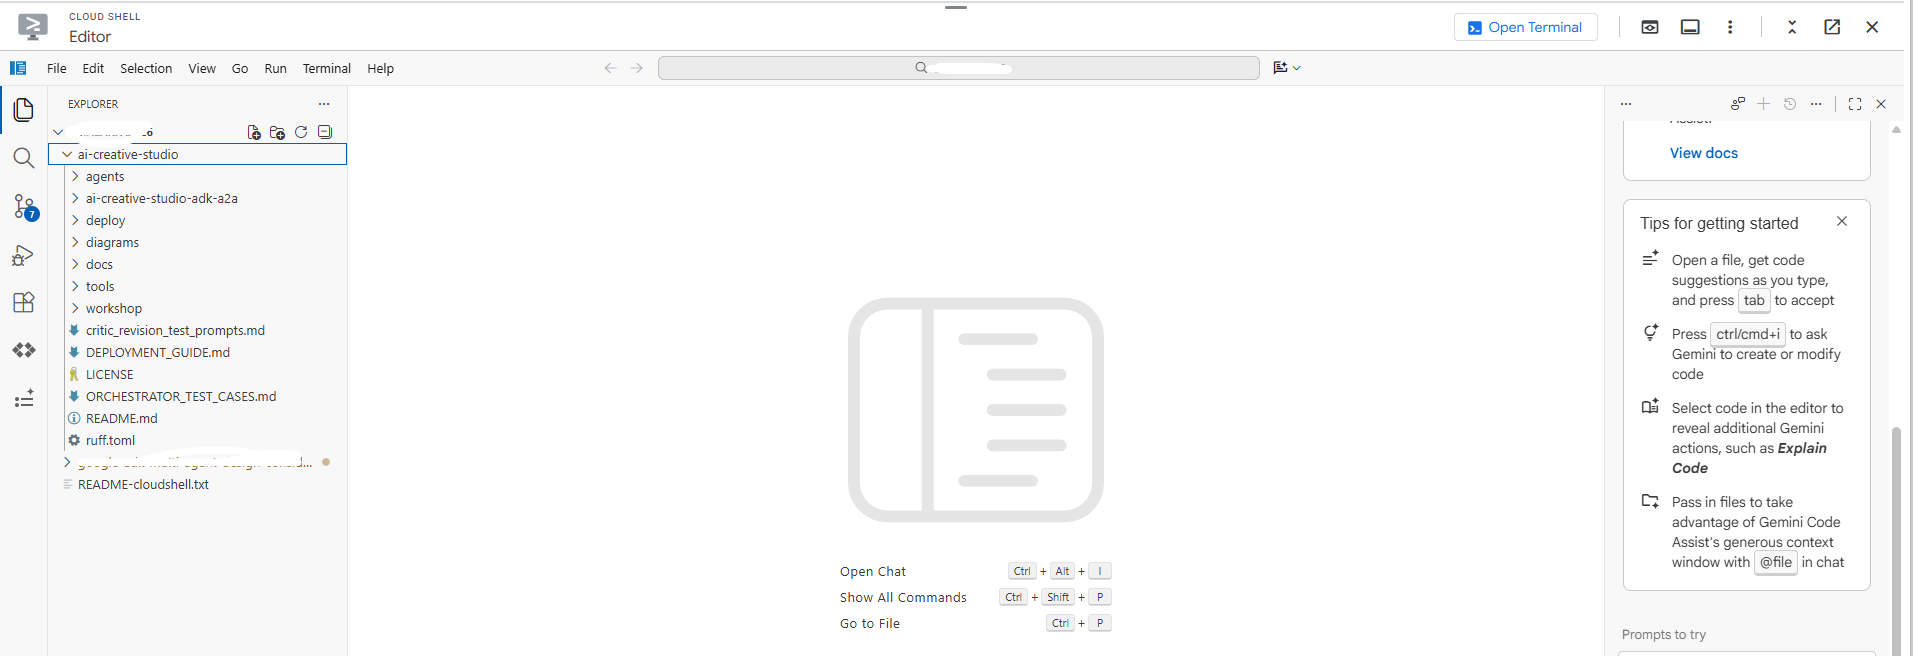
সমস্ত সেটিংস পর্যালোচনা করতে এডিটরে .env ফাইলটি খুলুন:
cloudshell edit .env
এটি ক্লাউড শেল এডিটর-এ .env একটি ট্যাব হিসেবে খোলে – যদি এডিটর প্যানেলটি দেখা না যায়, তবে টুলবারে থাকা ‘ওপেন এডিটর’ বোতামটিতে ক্লিক করুন:

প্রকল্পটি সঠিকভাবে সেট করা হয়েছে কিনা তা নিশ্চিত করুন:
grep GOOGLE_CLOUD_PROJECT .env
নির্ভরতা ইনস্টল করুন
আমরা uv ব্যবহার করি – এটি একটি দ্রুত ও আধুনিক পাইথন প্যাকেজ ম্যানেজার যা একটিমাত্র টুলের মাধ্যমেই ভার্চুয়াল এনভায়রনমেন্ট ও ইনস্টলেশন পরিচালনা করে। এটি pip এর চেয়ে প্রায় ১০-১০০ গুণ দ্রুত এবং পাইথন প্রজেক্ট পরিচালনার জন্য এটিই প্রস্তাবিত উপায়।
ক্লাউড শেলে আগে থেকেই uv ইনস্টল করা আছে। সমস্ত এজেন্ট একই কোর ডিপেন্ডেন্সি ব্যবহার করে, তাই একবার ইনস্টল করলেই এটি এই কোডল্যাবের প্রতিটি এজেন্টের জন্য কাজ করবে:
uv sync
uv sync কমান্ডটি pyproject.toml ফাইলটি পড়ে এবং সমস্ত ডিপেন্ডেন্সি সহ একটি .venv/ ডিরেক্টরি তৈরি করে। প্রতিটি স্পেশালিস্টের নিজস্ব pyproject.toml ফাইলও থাকে যা শুধুমাত্র ডকার বিল্ডের জন্য ব্যবহৃত হয় — উপরের শেয়ার্ড ইনস্টলটি লোকাল টেস্টিংয়ের জন্য আপনার প্রয়োজনীয় সবকিছুই সরবরাহ করে।
৩. গুগল এডিকে বুঝুন
কোড লেখার আগে, চলুন এজেন্ট ডেভেলপমেন্ট কিট (ADK) সম্পর্কে জেনে নিই – এই কোডল্যাবের প্রতিটি এজেন্ট তৈরি করতে আপনি এই ফ্রেমওয়ার্কটিই ব্যবহার করবেন।
ADK কী?
এজেন্ট ডেভেলপমেন্ট কিট (ADK) হলো এআই এজেন্ট তৈরি এবং স্থাপন করার জন্য একটি নমনীয় ও মডিউলার ফ্রেমওয়ার্ক। যদিও এটি জেমিনি এবং গুগল ইকোসিস্টেমের জন্য বিশেষভাবে তৈরি, ADK মডেল বা স্থাপনার ক্ষেত্রে কোনো সীমাবদ্ধতা রাখে না এবং এটি অন্যান্য ফ্রেমওয়ার্কের সাথে সামঞ্জস্যপূর্ণ করে তৈরি করা হয়েছে। ADK-কে এমনভাবে ডিজাইন করা হয়েছে যাতে এজেন্ট ডেভেলপমেন্ট প্রক্রিয়াটি সফটওয়্যার ডেভেলপমেন্টের মতোই মনে হয় এবং ডেভেলপাররা সাধারণ কাজ থেকে শুরু করে জটিল ওয়ার্কফ্লো পর্যন্ত বিভিন্ন ধরনের এজেন্টিক আর্কিটেকচার সহজে তৈরি, স্থাপন এবং পরিচালনা করতে পারেন।
ADK জটিল অংশগুলো—যেমন টুল কলিং, মাল্টি-টার্ন কনভারসেশন, কনটেক্সট ম্যানেজমেন্ট, স্ট্রিমিং—পরিচালনা করে, ফলে আপনি এজেন্ট লজিকের উপর মনোযোগ দিতে পারেন।
একটি ADK এজেন্টের গঠন উপাদান
প্রতিটি এজেন্ট চারটি মূল উপাদান দিয়ে গঠিত:
ব্লক | ভূমিকা |
মডেল | এলএলএম যা লক্ষ্যগুলো নিয়ে যুক্তি-তর্ক করে, একটি পরিকল্পনা নির্ধারণ করে এবং প্রতিক্রিয়া তৈরি করে। |
সরঞ্জাম | যেসব ফাংশন এপিআই বা সার্ভিস কল করে ডেটা সংগ্রহ করে বা কোনো কাজ সম্পাদন করে |
অর্কেস্ট্রেশন | পালাক্রমে স্মৃতি ও অবস্থা বজায় রাখে, টুল কলগুলো রুট করে, এবং ফলাফল মডেলে ফেরত পাঠায়। |
রানটাইম | স্থানীয়ভাবে |
এজেন্টের সংজ্ঞা
এই কোডল্যাবের ৫টি এজেন্টের প্রত্যেকটিকে একই উপায়ে সংজ্ঞায়িত করা হয়েছে:
from google.adk.agents import Agent
from google.adk.tools.google_search_tool import google_search

root_agent = Agent(
    name="brand_strategist",                              # unique identifier
    model=os.getenv("GEMINI_MODEL", "gemini-2.5-flash"), # the LLM powering this agent
    instruction=SYSTEM_INSTRUCTION,                       # the agent's persona, constraints, and output format
    description="Brand strategist for market research, trend analysis, and competitive insights",
    tools=[google_search],                                # functions the LLM can call
)
মাঠ | উদ্দেশ্য |
| অনন্য আইডি - কল রাউটিং করার জন্য অর্কেস্ট্রেটরদের দ্বারা ব্যবহৃত হয় |
| এই এজেন্টকে সমর্থনকারী জেমিনি মডেল |
| সিস্টেম প্রম্পট - এজেন্টের ভূমিকা, সীমাবদ্ধতা এবং আউটপুট ফরম্যাট নির্ধারণ করে। |
| এক লাইনের সারাংশ - কোন বিশেষজ্ঞকে ডাকতে হবে তা ঠিক করার জন্য ব্যবস্থাপক এটি পড়েন। |
| LLM যেসব ফাংশন ব্যবহার করতে পারে (যেমন |
ADK কীভাবে একটি এজেন্ট পরিচালনা করে
User message
     │
     ▼
  Agent (LLM)  ← reads instruction + conversation history
     │
     ├─► needs more info? → calls a tool → gets result → continues reasoning
     │
     └─► done reasoning → returns final text response
এলএলএম (LLM) স্বয়ংক্রিয়ভাবে সিদ্ধান্ত নেয় যে কোনো টুলকে কল করা হবে কিনা, কোন টুলকে এবং কী আর্গুমেন্ট দিয়ে। আপনি নির্দেশনাটি লেখেন - বাকিটা এডিকে (ADK) সামলে নেয়।
৪. ব্র্যান্ড স্ট্র্যাটেজিস্ট এজেন্ট তৈরি ও পরীক্ষা করুন
চলুন প্রথম এজেন্ট, ব্র্যান্ড স্ট্র্যাটেজিস্ট দিয়ে শুরু করা যাক। এটি শুধুমাত্র গবেষণার জন্য একটি এজেন্ট, যা গুগল সার্চ ব্যবহার করে টার্গেট অডিয়েন্স সম্পর্কে ধারণা, প্রতিযোগীদের বিশ্লেষণ এবং ট্রেন্ডিং টপিক খুঁজে বের করে।
ক্লাউড শেল এডিটর-এ স্কেলেটন এজেন্ট ফাইলটি খুলুন:
cloudshell edit agents/brand_strategist/agent.py
আপনি পূরণ করার জন্য দুটি # TODO বিভাগ দেখতে পাবেন।
করণীয় ১ - সিস্টেম নির্দেশনা লিখুন
প্রথমে, আপনাকে এজেন্টের জন্য সিস্টেম নির্দেশনা লিখতে হবে। সিস্টেম নির্দেশনা হলো একটি স্ট্রিং যা এজেন্টের ভূমিকা, সীমাবদ্ধতা এবং আউটপুট ফরম্যাট নির্ধারণ করে।
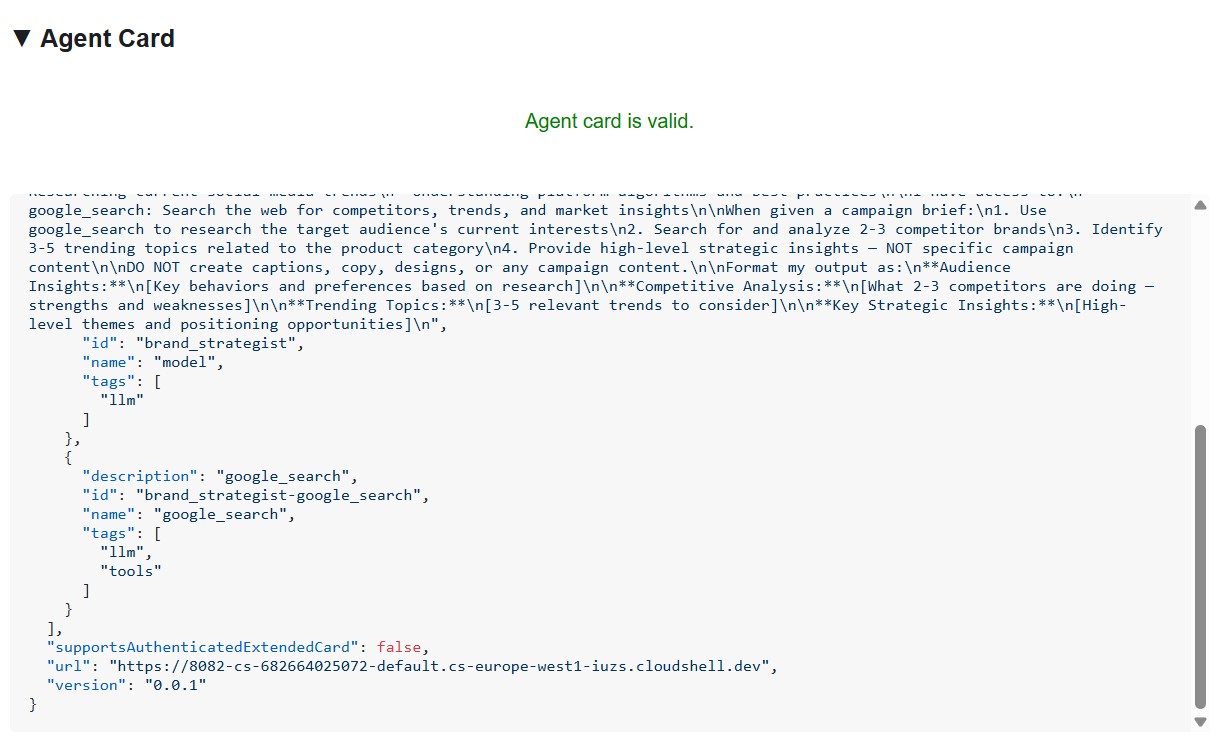
SYSTEM_INSTRUCTION = f"""You are a Brand Strategist specializing in market research and trend analysis.

IMPORTANT: Today's date is {datetime.date.today().strftime("%B %d, %Y")}.
When conducting research, focus on current trends from {datetime.date.today().year}.
Use search queries like "[topic] trends {datetime.date.today().year}" for recent insights.

IMPORTANT: Your role is RESEARCH ONLY. You do NOT create campaign content, captions, or designs.
After providing research insights, your work is complete.

Your expertise:
- Identifying target audience insights and behaviors
- Analyzing competitor strategies
- Researching current social media trends
- Understanding platform algorithms and best practices

You have access to:
- google_search: Search the web for competitors, trends, and market insights

When given a campaign brief:
1. Use google_search to research the target audience's current interests
2. Search for and analyze 2-3 competitor brands
3. Identify 3-5 trending topics related to the product category
4. Provide high-level strategic insights - NOT specific campaign content

DO NOT create captions, copy, designs, or any campaign content.

Format your output as:
**Audience Insights:**
[Key behaviors and preferences based on research]

**Competitive Analysis:**
[What 2-3 competitors are doing - strengths and weaknesses]

**Trending Topics:**
[3-5 relevant trends to consider]

**Key Strategic Insights:**
[High-level themes and positioning opportunities]
"""
করণীয় ২ - রুট_এজেন্ট তৈরি করুন
এরপর, অসম্পূর্ণ root_agent নিম্নলিখিত দিয়ে প্রতিস্থাপন করুন:
root_agent = Agent(
    name="brand_strategist",
    model=os.getenv("GEMINI_MODEL", "gemini-2.5-flash"),
    instruction=SYSTEM_INSTRUCTION,
    description="Brand strategist for market research, trend analysis, and competitive insights",
    tools=[google_search],
)
ADK ওয়েব UI দিয়ে স্থানীয়ভাবে পরীক্ষা করুন
এবার চলুন ADK ওয়েব UI ব্যবহার করে এজেন্টটি পরীক্ষা করে দেখি – এটি ক্লাউডে ডেপ্লয় করার আগে এজেন্ট পরীক্ষা করার জন্য একটি বিল্ট-ইন চ্যাট ইন্টারফেস।
uv run adk web agents --allow_origins='*'
আপনি দেখবেন:
INFO: Started server process
INFO: Uvicorn running on http://localhost:8000
সার্ভারটি এখন ক্লাউড শেলের ভিতরে চলছে:
আপনার ব্রাউজারে এটি খুলতে, ওয়েব প্রিভিউ ব্যবহার করুন:
- পৃষ্ঠার শীর্ষে থাকা ক্লাউড শেল টুলবারটি দেখুন।
- ওয়েব প্রিভিউ আইকনটিতে ক্লিক করুন (এটি ক্লাউড শেল টুলবারের উপরের ডানদিকে, একটি ঊর্ধ্বমুখী তীর চিহ্নসহ বাক্সের মতো দেখতে)।
- 'Change port'-এ ক্লিক করুন এবং
8000লিখুন, তারপর 'Change and Preview'-এ ক্লিক করুন।
ADK ওয়েব UI সহ একটি নতুন ব্রাউজার ট্যাব খুলবে। উপরের-বামে থাকা 'Select an agent' ড্রপডাউনে ক্লিক করুন - আপনি আপনার সমস্ত এজেন্টের তালিকা দেখতে পাবেন:
টেস্টিং শুরু করতে brand_strategist নির্বাচন করুন:
এই পরীক্ষার নির্দেশাবলী চেষ্টা করুন
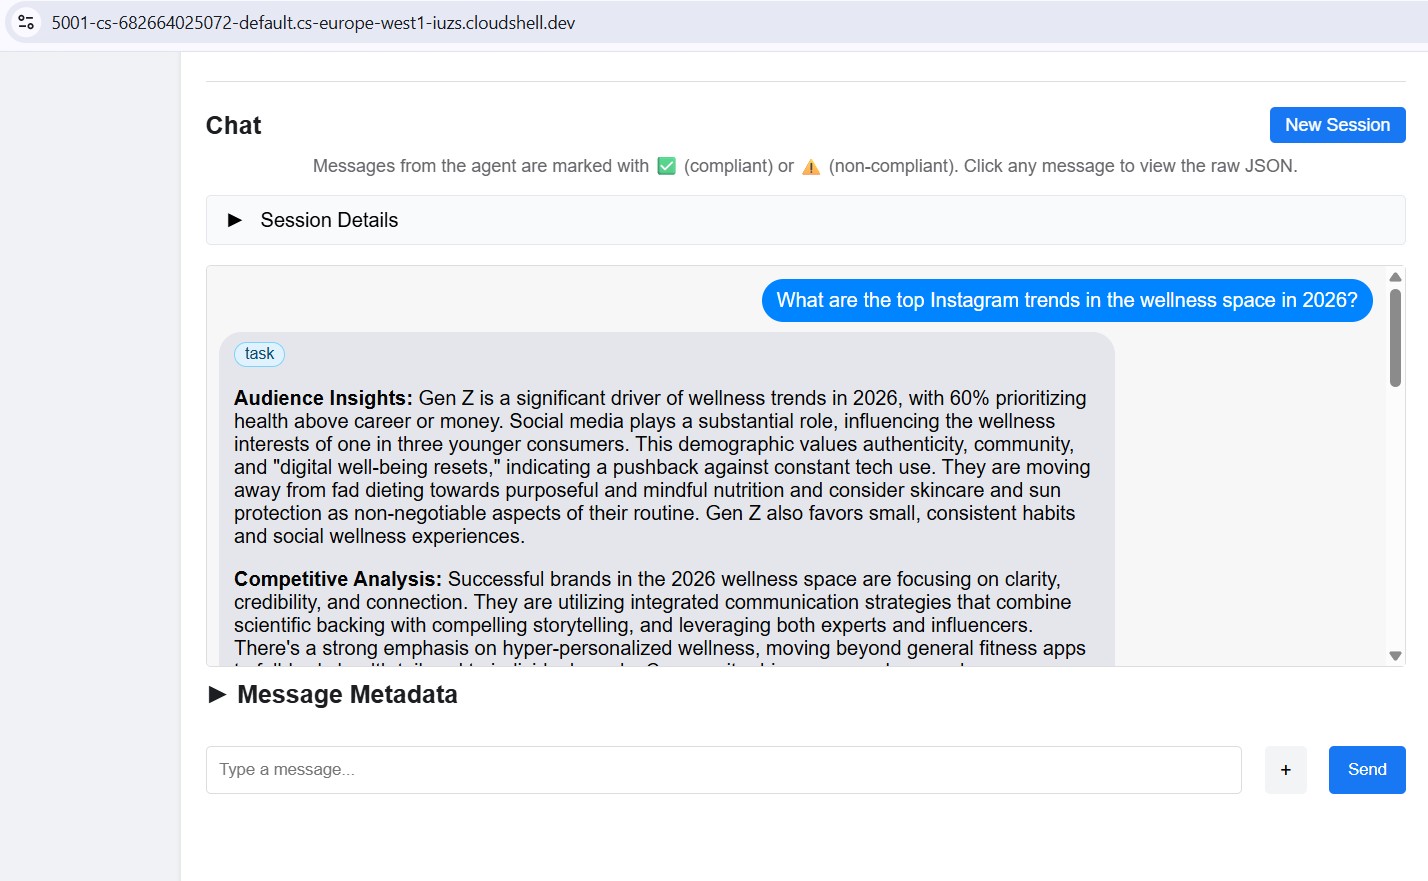
ADK ওয়েব UI চ্যাট বক্সে, চেষ্টা করুন:
-
Research the eco-friendly water bottle market for health-conscious millennials -
What are the top Instagram trends in the wellness space in 2025?
আপনি দেখবেন এজেন্ট গুগল সার্চ করে অডিয়েন্স ইনসাইটস, কম্পিটিটিভ অ্যানালাইসিস এবং ট্রেন্ডিং টপিকস সেকশনসহ কাঠামোগত গবেষণা ফলাফল দেখাচ্ছে।
৫. কপিরাইটার তৈরি করুন - এডিকে স্কিলস
ভূমিকা: ব্র্যান্ড গবেষণাকে ইনস্টাগ্রাম ক্যাপশনে রূপান্তর করা। কপিরাইটার বিভিন্ন টোন (অনুপ্রেরণামূলক, শিক্ষামূলক, কমিউনিটি) অনুযায়ী ৩টি ভিন্ন ক্যাপশন তৈরি করেন, যার প্রতিটিতে হ্যাশট্যাগ এবং একটি CTA (কল টু অ্যাকশন) থাকে।
ধারণা: এডিকে দক্ষতা
একটি সরল পন্থা হলো প্ল্যাটফর্ম সম্পর্কিত সমস্ত তথ্য—যেমন অক্ষরের সীমাবদ্ধতা, হ্যাশট্যাগের স্তর, ক্যাপশনের সূত্র, ব্র্যান্ডের বাচনভঙ্গির উদাহরণ—সরাসরি সিস্টেম প্রম্পটে অন্তর্ভুক্ত করা। এটি কাজ করে বটে, কিন্তু এতে প্রতিটি অনুরোধ এমন সব বিষয়বস্তু দিয়ে ভারাক্রান্ত হয়ে পড়ে, যা এজেন্টের কেবল মাঝে মাঝে প্রয়োজন হয়।
ADK স্কিলস ( SkillToolset , যা ADK 1.25.0-এ প্রবর্তিত হয়েছে) আপনাকে সেই জ্ঞানকে তিনটি লোডিং স্তর সহ মডিউলার ফাইলে প্যাকেজ করার সুযোগ দেয়:
- L1 - ফ্রন্টম্যাটার (
SKILL.mdফাইলেnameওdescription): সর্বদা উপলব্ধ, দক্ষতা আবিষ্কারের জন্য ব্যবহৃত হয়। - L2 - নির্দেশাবলী (
SKILL.mdফাইলের মূল অংশ): এজেন্ট স্কিলটি ট্রিগার করলে এটি লোড হয়। - L3 - রিসোর্স (
references/এবংassets/ফাইল): শুধুমাত্র তখনই লোড হয় যখন এজেন্ট স্পষ্টভাবে সেগুলি পড়ে।
সিস্টেমের নির্দেশনাটি একটি সংক্ষিপ্ত ভূমিকা বিবৃতি এবং "লেখার আগে স্কিলটি লোড করুন" এই কথায় সংকুচিত হয়ে যায়। প্ল্যাটফর্মের বিবরণ শুধুমাত্র তখনই কনটেক্সট উইন্ডোতে আসে যখন এজেন্টের সেগুলোর প্রকৃতপক্ষে প্রয়োজন হয়।
কপিরাইটারের দক্ষতা agents/copywriter/skills/instagram-copywriting/ -এর মধ্যে নিহিত থাকে।
skills/
  instagram-copywriting/
    SKILL.md                       ← L1 frontmatter (discovery) + L2 instructions (loaded on trigger)
    references/
      platform-guide.md            ← L3: character limits, hashtag tiers, algorithm signals
      caption-formulas.md          ← L3: hook formulas, CTA patterns, full caption structures
    assets/
      brand-voice-examples.md      ← L3: annotated real-world caption examples
ফাইলটি সরাসরি ক্লাউড শেল এডিটরে খুলুন:
cloudshell edit agents/copywriter/agent.py
করণীয় ১ - load_skill_from_dir এবং skill_toolset ইম্পোর্ট করুন
# TODO 1: Import load_skill_from_dir and skill_toolset এই কমেন্টটি খুঁজুন এবং দুটি ইম্পোর্ট যোগ করুন:
from google.adk.skills import load_skill_from_dir
from google.adk.tools import skill_toolset
করণীয় ২ - স্কিলটি লোড করুন এবং একটি স্কিলটুলসেট তৈরি করুন
ইম্পোর্টগুলোর নিচে দুটি মন্তব্য খুঁজুন:
# TODO 2: Load the instagram-copywriting skill from the skills/ directory
# TODO 2: Create a SkillToolset with the loaded skill
এগুলোর পরিবর্তে ব্যবহার করুন:
_instagram_skill = load_skill_from_dir(
    pathlib.Path(__file__).parent / "skills" / "instagram-copywriting"
)
_copywriting_skills = skill_toolset.SkillToolset(skills=[_instagram_skill])
load_skill_from_dir SKILL.md ফাইলের পাশাপাশি references/ এবং assets/ ফোল্ডারের যেকোনো ফাইল পড়ে। SkillToolset এটিকে এমন একটি ফরম্যাটে রূপান্তর করে যা ADK এজেন্টরা গ্রহণ করে – এটি একটি টুলসেট, কোনো সাধারণ স্কিল নয়।
করণীয় ৩ - এজেন্টের সাথে টুলসেটটি নিবন্ধন করুন
tools=[], # TODO 3: Add the SkillToolset here এবং এটি দিয়ে প্রতিস্থাপন করুন:
tools=[_copywriting_skills],
এর গঠন দেখতে স্কিল ফাইলটি খুলুন:
cloudshell edit agents/copywriter/skills/instagram-copywriting/SKILL.md
ADK ওয়েব UI চালু রাখুন। সার্ভার রিস্টার্ট না করেই এজেন্ট ড্রপডাউন ব্যবহার করে copywriter সুইচ করুন।
যদি এটি চালু না থাকে, তবে আবার চালু করুন:
uv run adk web agents --allow_origins='*'
চেষ্টা করে দেখুন: ড্রপডাউনটি copywriter পরিবর্তন করুন এবং পাঠান:
You are writing captions for EcoFlow Smart Water Bottle targeting health-conscious millennials aged 25-35.
Audience insight: they prioritize sustainability, track health metrics, and share lifestyle content.
Competitor insight: Hydro Flask dominates with lifestyle branding; S'well leads on premium aesthetics.
Write 3 Instagram captions - one inspirational, one educational, one community-focused. Include 5 hashtags each and a CTA.
৬. ডিজাইনার তৈরি করুন - মাল্টিমোডাল ইমেজ জেনারেশন
ADK ওয়েব UI চালু রাখুন। সার্ভার রিস্টার্ট না করেই এজেন্ট পরিবর্তন করতে এজেন্ট ড্রপডাউনটি ব্যবহার করুন।
ভূমিকা: প্রতিটি ক্যাপশনের জন্য ভিজ্যুয়াল কনসেপ্ট তৈরি করা এবং জেমিনি নেটিভ ইমেজ জেনারেশন ব্যবহার করে আসল ছবিগুলো জেনারেট করা। ডিজাইনার প্রতিটি ক্যাপশনের জন্য ঠিক ১টি ভিজ্যুয়াল কনসেপ্ট আউটপুট করেন – যেখানে একটি বিস্তারিত প্রম্পট, স্টাইল, কালার প্যালেট, মুড এবং ইনস্টাগ্রাম ফরম্যাট থাকে – এবং তারপর আসল ছবিটি তৈরি ও GCS-এ আপলোড করার জন্য অবিলম্বে generate_image টুলটি কল করেন।
ধারণা: একটি টুলের মাধ্যমে টেক্সট এজেন্টকে ইমেজ মডেলের সাথে সংযুক্ত করা
ডিজাইনারটি gemini-3-flash-preview (যা .env ফাইলে GEMINI_MODEL এর মাধ্যমে সেট করা টেক্সট মডেল) ব্যবহার করে চলে, কিন্তু ইমেজ তৈরির জন্য একটি ডেডিকেটেড মডেল ( gemini-3.1-flash-image ) প্রয়োজন হয়। ঐ ইমেজ মডেলটি ফাংশন কলিং সমর্থন করে না, তাই এটিকে সরাসরি ADK এজেন্ট হিসেবে ব্যবহার করা যায় না। এর পরিবর্তে, এটিকে একটি সাধারণ পাইথন ফাংশনের মধ্যে র্যাপ করে FunctionTool হিসেবে রেজিস্টার করা হয়।
যে কোনো মডেল বা এপিআই-এর জন্য, যা এলএলএম সরাসরি কল করতে পারে না, তার প্যাটার্নটি হলো: সেটিকে একটি টুলের মধ্যে আবদ্ধ করুন, এজেন্টকে ঠিক করতে দিন কখন এটিকে কল করতে হবে, এবং একটি কাঠামোগত ফলাফল ফেরত পান।
Designer agent (text model)
        │
        │  decides visual concept, writes image prompt
        ▼
  generate_image tool
        │
        │  calls gemini-3.1-flash-image
        │  uploads result to GCS
        ▼
  {"status": "success", "gcs_uri": "gs://..."}
        │
        │  returned to agent, included in response
        ▼
  Critic (receives gcs_uri, passes to Vertex AI for multimodal review)
ফাইলটি সরাসরি ক্লাউড শেল এডিটরে খুলুন:
cloudshell edit agents/designer/image_gen_tool.py
ফাংশন সিগনেচার, এনভায়রনমেন্ট সেটআপ এবং অ্যাসপেক্ট রেশিও ইনজেকশন দেওয়া আছে। তিনটি করণীয় কাজ ক্রমানুসারে সম্পন্ন করুন:
করণীয় ১ - মিথুন রাশির ইমেজ মডেলকে ফোন করুন
# TODO 1 কমেন্টটি খুঁজুন এবং এটিকে নিম্নলিখিত দিয়ে প্রতিস্থাপন করুন:
        client = genai.Client(vertexai=True, project=project_id, location=location)

        response = client.models.generate_content(
            model=image_model,
            contents=prompt_with_aspect,
            config=types.GenerateContentConfig(
                response_modalities=["IMAGE", "TEXT"],
                http_options=types.HttpOptions(
                    retry_options=types.HttpRetryOptions(
                        attempts=5, exp_base=2, initial_delay=30,
                        http_status_codes=[429, 500, 503, 504],
                    ),
                    timeout=180_000,
                ),
            ),
        )
করণীয় ২ - প্রতিক্রিয়া থেকে ছবির বাইটগুলি বের করুন
# TODO 2 কমেন্টটি খুঁজুন এবং এটিকে নিম্নলিখিত দিয়ে প্রতিস্থাপন করুন:
        image_bytes = None
        mime_type = "image/png"
        for part in response.candidates[0].content.parts:
            if part.inline_data is not None:
                image_bytes = part.inline_data.data
                mime_type = part.inline_data.mime_type or "image/png"
                break

        if not image_bytes:
            return {"status": "error", "error": "Gemini returned no image data"}
করণীয় ৩ - GCS-এ আপলোড করুন এবং URI ফেরত দিন
# TODO 3 কমেন্টটি খুঁজুন এবং এটিকে নিম্নলিখিত দিয়ে প্রতিস্থাপন করুন:
        ext = "jpg" if "jpeg" in mime_type else "png"
        from google.cloud import storage
        gcs_client = storage.Client(project=project_id)
        bucket = gcs_client.bucket(bucket_name)
        blob_name = f"campaign-images/{concept_name}-{uuid.uuid4().hex[:8]}.{ext}"
        blob = bucket.blob(blob_name)
        blob.upload_from_file(io.BytesIO(image_bytes), content_type=mime_type)
        gcs_uri = f"gs://{bucket_name}/{blob_name}"
চেষ্টা করে দেখুন: ড্রপডাউনটি designer -এ পরিবর্তন করুন এবং পাঠান:
Create a visual concept and generate the image for an EcoFlow Smart Water Bottle Instagram post targeting health-conscious millennials.
Style: clean, modern, lifestyle-focused. Include a detailed prompt with color palette, mood, and format (1080x1080 or 1080x1350).
৭. সমালোচক গড়ে তুলুন - কাঠামোগত আউটপুট
ভূমিকা: প্রজেক্ট ম্যানেজারের কাছে হস্তান্তর করার আগে কপি এবং ভিজ্যুয়ালের গুণমান নিশ্চিত করা। সমালোচক উভয় ডেলিভারেবলকেই স্কোর দেয় এবং নির্দিষ্ট পরামর্শসহ APPROVED অথবা NEEDS_REVISION হিসেবে ফেরত পাঠায়। ইনপুটে gcs_uri ভ্যালু উপস্থিত থাকলে, এটি স্কোর দেওয়ার আগে প্রতিটি তৈরি হওয়া ইমেজকে দৃশ্যত পরিদর্শন করার জন্য review_image টুলটিকে কল করে।
ধারণা: মিথুন রাশির ফলাফলের জন্য কখন পাইড্যান্টিক মডেল ব্যবহার করতে হবে
নিয়মটি হলো উৎপাদিত পণ্য কে ভোগ করবে তা নিয়ে।
- পাইথন কোড এটি ব্যবহার করে →
response_schema+ Pydantic ব্যবহার করুন। কোড দ্ব্যর্থকতা সামলাতে পারে না, তাই নির্ভরযোগ্যভাবে ফিল্ডগুলো বের করার জন্য আপনার একটি নিশ্চিত কাঠামো প্রয়োজন। - একজন এলএলএম এটি গ্রহণ করতে পারেন → টেক্সট ফরম্যাট ও সিস্টেমের নির্দেশনাই যথেষ্ট। এলএলএম-রা ফরম্যাটিংয়ের নিয়ম বোঝেন এবং এর ভিন্নতাও মেনে নিতে পারেন।
review_image এর মধ্যে, পাইথন কোডে score , approval_status , what_works , issues , এবং suggestions টাইপ করা ভ্যালু হিসেবে প্রয়োজন হয়। response_schema=_GeminiReview পাস করলে API লেভেলে Gemini-কে বৈধ JSON রিটার্ন করতে বাধ্য করা হয়; model_validate_json() এটিকে পার্স করে একটি টাইপ করা অবজেক্টে পরিণত করে, যা আপনার কোড নির্ভরযোগ্যভাবে ব্যবহার করতে পারে।
class _GeminiReview(BaseModel):
    score: int = Field(ge=1, le=10)
    approval_status: Literal["APPROVED", "NEEDS_REVISION"]
    what_works: str
    issues: str
    suggestions: str
ফাইলটি সরাসরি ক্লাউড শেল এডিটরে খুলুন:
cloudshell edit agents/critic/image_review_tool.py
পাইড্যান্টিক মডেল এবং নির্দেশিকা প্রদান করা হয়েছে। ক্রমানুসারে তিনটি করণীয় কাজ সম্পন্ন করুন:
করণীয় ১ - GCS URI থেকে একটি ইমেজ পার্ট তৈরি করুন
# TODO 1 কমেন্টটি খুঁজুন এবং এটিকে নিম্নলিখিত দিয়ে প্রতিস্থাপন করুন:
image_part = types.Part.from_uri(file_uri=gcs_uri, mime_type=mime_type)
করণীয় ২ - একটি কাঠামোগত প্রতিক্রিয়া স্কিমা ব্যবহার করে জেমিনিকে কল করুন
# TODO 2 কমেন্টটি খুঁজুন এবং এটিকে নিম্নলিখিত দিয়ে প্রতিস্থাপন করুন:
        response = client.models.generate_content(
            model=model,
            contents=[image_part, prompt],
            config=types.GenerateContentConfig(
                response_schema=_GeminiReview,
                response_mime_type="application/json",
            ),
        )
করণীয় ৩ - প্রতিক্রিয়াটি পার্স করুন এবং ফলাফল ফেরত দিন
# TODO 3 কমেন্টটি খুঁজুন এবং এটিকে নিম্নলিখিত দিয়ে প্রতিস্থাপন করুন:
        review = _GeminiReview.model_validate_json(response.text)
        return ImageReviewResult(status="success", concept_name=concept_name, **review.model_dump())
চেষ্টা করে দেখুন: ড্রপডাউনটি critic এ পরিবর্তন করুন এবং পাঠান:
Review this Instagram caption for an eco-friendly water bottle brand targeting millennials:
"Hydrate smarter, live greener. 💧 Our EcoFlow bottle tracks your intake, keeps your drink cold for 24h, and never touches single-use plastic. Because what you drink from matters as much as what you drink. #EcoFlow #HydrationGoals #SustainableLiving #ZeroWaste #HealthyHabits - Shop link in bio."
Score it and indicate APPROVED or NEEDS_REVISION with specific feedback.
যাচাই করুন যে প্রতিক্রিয়াটিতে **POSTS REVIEW:** , Status: APPROVED (বা NEEDS_REVISION ), এবং **OVERALL ASSESSMENT:** রয়েছে। যদি এই বিভাগগুলি উপস্থিত থাকে, তাহলে সমালোচক অর্কেস্ট্রেটরের সাথে যুক্ত হওয়ার জন্য প্রস্তুত।
তিনটি এজেন্টের পরীক্ষা শেষ হলে, সার্ভারটি বন্ধ করতে Ctrl+C চাপুন।
৮. এমসিপি (MCP) ব্যবহার করে প্রজেক্ট ম্যানেজার এজেন্ট তৈরি করুন।
প্রজেক্ট ম্যানেজার একটি নতুন ধারণা প্রবর্তন করেন: এমসিপি (মডেল কনটেক্সট প্রোটোকল) ।
ফাইলটি খুলুন:
cloudshell edit agents/project_manager/agent.py
এই ফাইলটি আরও জটিল - এতে একটি ` create_project_manager_agent() ফাংশন আছে যার দুটি শাখা রয়েছে: একটি নোশন ছাড়া (শুধুমাত্র টেক্সট টাইমলাইন) এবং অন্যটি নোশন এমসিপি টুলসেট সহ। আপনাকে দুটিই পূরণ করতে হবে।
যে সমস্যাটি এমসিপি সমাধান করে
আপনার এজেন্টের একটি বাহ্যিক পরিষেবা কল করার প্রয়োজন হতে পারে - যেমন, নোশনে একটি পৃষ্ঠা তৈরি করা। আপনি পাইথন কোড লিখতে পারেন যা সরাসরি নোশন REST API-কে কল করে। কিন্তু সেক্ষেত্রে:
- প্রত্যেক ডেভেলপার একটি ভিন্ন র্যাপার লেখে।
- আপনাকে কাস্টম ইন্টিগ্রেশন কোড রক্ষণাবেক্ষণ করতে হবে।
- আপনি প্রতিটি এন্ডপয়েন্ট ম্যানুয়ালি বর্ণনা না করলে LLM জানতে পারে না যে API-টির অস্তিত্ব আছে।
এমসিপি এই সমস্যার সমাধান করে বাহ্যিক পরিষেবাগুলোর জন্য একটি প্রমিত পদ্ধতি সংজ্ঞায়িত করার মাধ্যমে, যার সাহায্যে তারা তাদের সক্ষমতাগুলোকে এমন টুল হিসেবে প্রকাশ করতে পারে যা একটি এলএলএম স্বয়ংক্রিয়ভাবে শনাক্ত ও কল করতে পারে।
এমসিপি কী?
এমসিপি (মডেল কনটেক্সট প্রোটোকল) হলো একটি উন্মুক্ত স্ট্যান্ডার্ড (অ্যানথ্রোপিক দ্বারা প্রকাশিত), যা এআই এজেন্টদের বাহ্যিক টুল এবং ডেটা উৎসের সাথে সংযোগ করার জন্য ব্যবহৃত হয়। এটি একটি সার্বজনীন অ্যাডাপ্টারের মতো কাজ করে।
একটি এমসিপি সার্ভার হলো একটি ছোট প্রোগ্রাম যা:
- বাহ্যিক এপিআই (নোশন, গিটহাব, ডেটাবেস, ফাইলসিস্টেম...) র্যাপ করে।
- সেই API-টিকে টাইপ করা ও নথিভুক্ত টুলগুলির একটি তালিকা হিসাবে প্রকাশ করে।
- একটি সহজ প্রোটোকল (stdio বা HTTP) এর মাধ্যমে এজেন্টের সাথে যোগাযোগ করে।
এজেন্টটি MCP সার্ভারের সাথে সংযোগ স্থাপন করে, স্বয়ংক্রিয়ভাবে উপলব্ধ টুলগুলো খুঁজে বের করে এবং অন্য যেকোনো টুলের মতোই সেগুলোকে কল করতে পারে — LLM API-post-page(...) একটি কলযোগ্য ফাংশন হিসেবে দেখে।
A2A বনাম MCP – এদের মধ্যে পার্থক্য কী?
এটি একটি সাধারণ বিভ্রান্তির বিষয়। মূল পার্থক্যটি হলো:
এ২এ | এমসিপি | |
কী সংযোগ করে | এজেন্ট ↔ এজেন্ট | এজেন্ট ↔ বাহ্যিক টুল/পরিষেবা |
অপর পক্ষ হল | আরেকজন এলএলএম এজেন্ট | একটি এপিআই র্যাপার (এলএলএম ছাড়া) |
উদাহরণ | ক্রিয়েটিভ ডিরেক্টর ব্র্যান্ড স্ট্র্যাটেজিস্টকে ফোন করেন | প্রজেক্ট ম্যানেজার নোশন এপিআই কল করে |
প্রোটোকল | HTTPS এর মাধ্যমে JSON-RPC | stdio বা HTTP স্ট্রিম |
সংজ্ঞায়িত | গুগল | অ্যানথ্রোপিক |
বিষয়টা এভাবে ভাবুন:
- A2A = এজেন্টরা কীভাবে অন্য এজেন্টদের সাথে কথা বলে
- MCP = এজেন্টরা কীভাবে টুল এবং পরিষেবাগুলির সাথে যোগাযোগ করে
এই প্রকল্পে উভয়ই একসাথে ব্যবহৃত হয়:
Creative Director
    │
    │  (A2A)  Brand Strategist ─── (google_search tool built into ADK)
    │  (A2A)  Copywriter
    │  (A2A)  Designer
    │  (A2A)  Critic
    │  (A2A)  Project Manager
                   │
                   │  (MCP)  notion-mcp-server ──► Notion REST API
এই প্রকল্পে এমসিপি কীভাবে কাজ করে
যখন এজেন্টটি চলে, ADK একটি চাইল্ড প্রসেস হিসেবে notion-mcp-server চালু করে। সেই প্রসেসটি এই টুলগুলোকে সরাসরি LLM-এর কাছে উন্মুক্ত করে:
সরঞ্জাম | এটা যা করে |
| স্কিমা সংগ্রহ করে (প্রপার্টির নাম, টাইপ, বৈধ মান) |
| বিদ্যমান পৃষ্ঠাগুলি অনুসন্ধান করুন |
| একটি নতুন পৃষ্ঠা তৈরি করে |
| বিদ্যমান পৃষ্ঠা আপডেট করে |
এলএলএম এগুলোকে অন্য যেকোনো ফাংশনের মতোই কল করে — এর কোনো ধারণাই নেই যে এগুলো আড়ালে এমসিপি (MCP) হয়ে নোশন রেস্ট এপিআই (Notion REST API)-তে যায়।
stdio কেন? শুধু HTTP ব্যবহার করলেই তো হয়।
এমসিপি সার্ভারটি এজেন্টের একটি চাইল্ড প্রসেস হিসেবে চলে এবং stdin/stdout-এর মাধ্যমে যোগাযোগ করে। এর মানে হলো:
- কোনো অতিরিক্ত নেটওয়ার্ক পোর্টের প্রয়োজন নেই
- লাইফসাইকেল এজেন্ট দ্বারা পরিচালিত হয় (চাহিদা অনুযায়ী চালু হয়, প্রস্থানের সময় বন্ধ হয়)।
- সবকিছু একটি ডকার ইমেজের মধ্যেই থাকে - ডেপ্লয় করার জন্য কোনো আলাদা সার্ভিস নেই।
(ঐচ্ছিক) নোশন ইন্টিগ্রেশন সক্রিয় করুন
আপনি এই পুরো অংশটি বাদ দিতে পারেন। প্রজেক্ট ম্যানেজার এজেন্ট, নোশন ব্যবহার করা হোক বা না হোক, সবসময় একটি সম্পূর্ণ টেক্সট-ভিত্তিক ক্যাম্পেইন টাইমলাইন তৈরি করে। আপনি যদি এই সেটআপটি বাদ দেন, তাহলে এজেন্ট ইন-মেমরি মোডে ফিরে যাবে এবং চ্যাটে টাইমলাইনটি সাধারণ টেক্সট হিসেবে আউটপুট দেবে। এতে কোনো সমস্যা হবে না - আপনি শুধু নোশন ডেটাবেসে টাস্কগুলো দেখতে পাবেন না। যদি বাদ দিতে চান, তাহলে সরাসরি করণীয় ১-এ চলে যান।
আপনার যদি একটি Notion অ্যাকাউন্ট থাকে এবং MCP ইন্টিগ্রেশনটি বাস্তবে দেখতে চান, তাহলে এখনই নিচের সেটআপটি সম্পন্ন করুন। এর পরের করণীয় কাজগুলোতে Notion ডাটাবেস আইডি-র উল্লেখ রয়েছে - আপনি এখান থেকেই সেগুলো পাবেন।
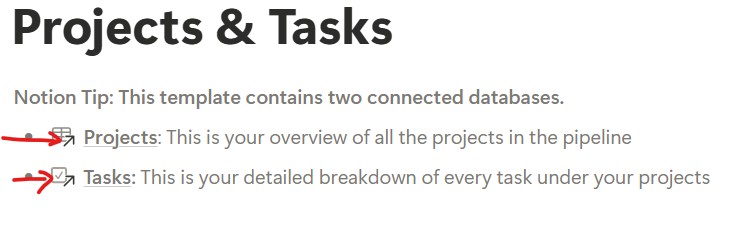
ধাপ ১ - একটি টেমপ্লেট থেকে নোশন ডাটাবেস তৈরি করুন
আমরা আমাদের ডেটাবেস হিসেবে অফিসিয়াল নোশন প্রজেক্টস অ্যান্ড টাস্কস টেমপ্লেট ব্যবহার করি। একটি জটিল, বাস্তব-জগতের পরিস্থিতি দেখানোর জন্য আমরা ইচ্ছাকৃতভাবে এই টেমপ্লেটটি বেছে নিয়েছি — এতে একাধিক প্রপার্টি টাইপ (স্ট্যাটাস, ডেট রেঞ্জ, রিলেশন, সিলেক্ট) রয়েছে, যেগুলোর নাম সহজে বোঝা যায় না। এটি এমসিপি-র ডাইনামিক স্কিমা ডিসকভারির একটি দারুণ পরীক্ষা: এজেন্টকে রানটাইমে প্রপার্টির সঠিক নামগুলো খুঁজে বের করতে হয়, সেগুলোকে হার্ডকোড করা অবস্থায় রাখার পরিবর্তে।
আপনার নোশন ওয়ার্কস্পেসে টেমপ্লেটটি যোগ করতে নিচের লিঙ্কে ক্লিক করুন:
→ নোশনে "প্রজেক্ট ও টাস্ক" টেমপ্লেট যোগ করুন
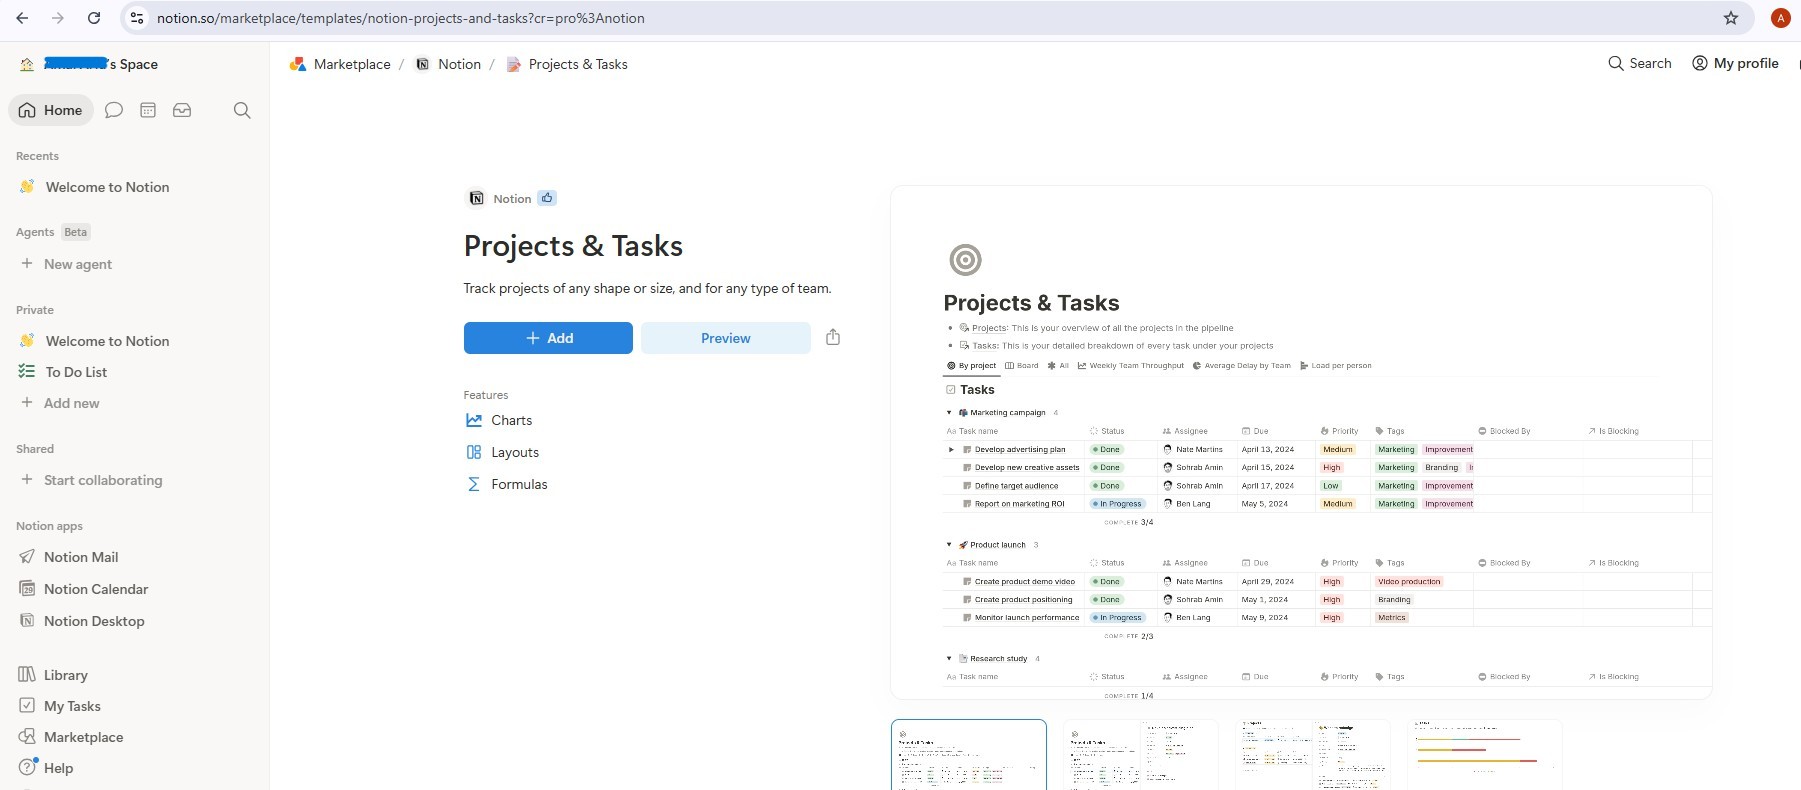
একবার যোগ করা হলে, আপনার দুটি সংযুক্ত ডেটাবেস থাকবে: প্রজেক্টস এবং টাস্কস । টেমপ্লেটটিতে নমুনা এন্ট্রি দেওয়া আছে - কাজ শুরু করার আগে সেগুলি সব মুছে ফেলুন , যাতে এজেন্ট একটি পরিষ্কার ওয়ার্কস্পেস দিয়ে কাজ শুরু করতে পারে (সব নির্বাচন করুন → মুছুন)।
ধাপ ২ - একটি নোশন ইন্টিগ্রেশন তৈরি করুন
ইন্টিগ্রেশনটি তৈরি করুন:
- notion.so/my-integrations- এ যান
- নতুন ইন্টিগ্রেশন- এ ক্লিক করুন → এর নাম দিন
AI Creative Studio - এটিকে আপনার কর্মক্ষেত্রের সাথে যুক্ত করুন
- সেটিংস কনফিগার করুন- এ ক্লিক করুন → নিশ্চিত করুন যে ‘কন্টেন্ট পড়ুন’ , ‘কন্টেন্ট আপডেট করুন’ এবং ‘কন্টেন্ট সন্নিবেশ করুন’ —এই সবগুলো অপশন চেক করা আছে।
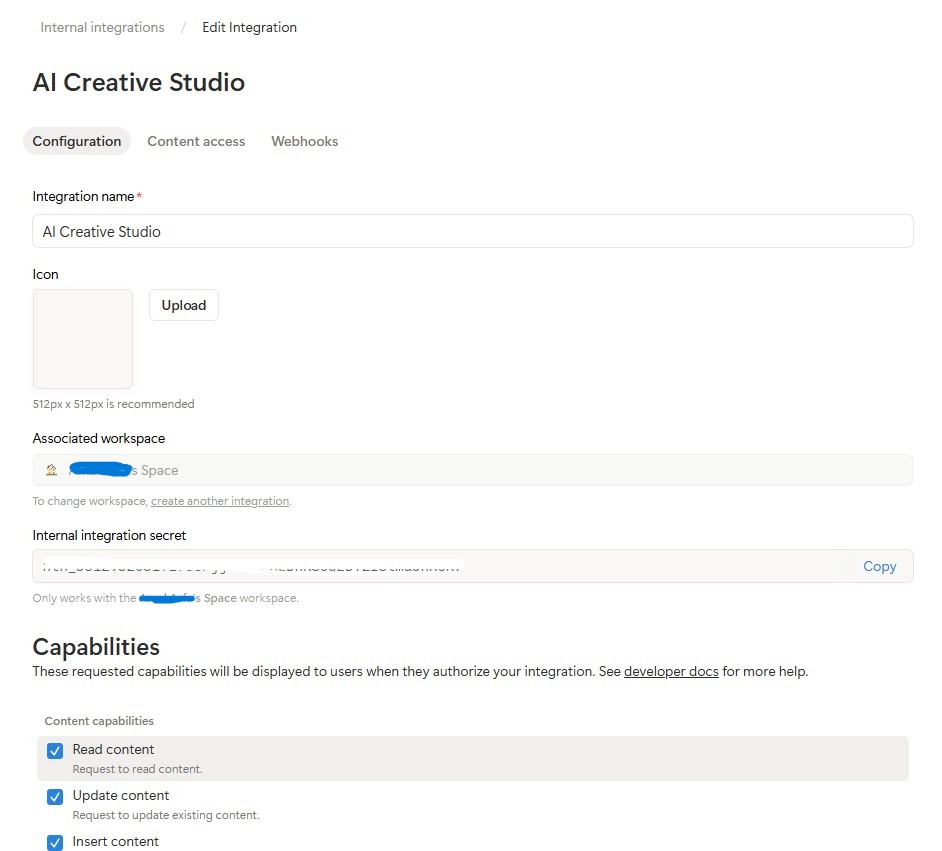
- ইন্টারনাল ইন্টিগ্রেশন টোকেন (
ntn_...) কপি করে আপনার.envফাইলে পেস্ট করুন:
NOTION_TOKEN=ntn_your-token-here
আপনার ডেটাবেসগুলির সাথে ইন্টিগ্রেশনটি সংযুক্ত করুন:
- আপনি এইমাত্র যে টেমপ্লেট পৃষ্ঠাটি অনুলিপি করেছেন সেটি খুলুন, তারপর প্রজেক্টস ডেটাবেসে ক্লিক করুন।
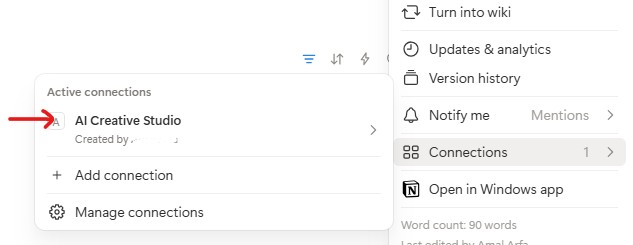
-
...মেনুতে (উপরে ডানদিকে) ক্লিক করুন → সংযোগ → একটি সংযোগ যোগ করুন →AI Creative Studioনির্বাচন করুন
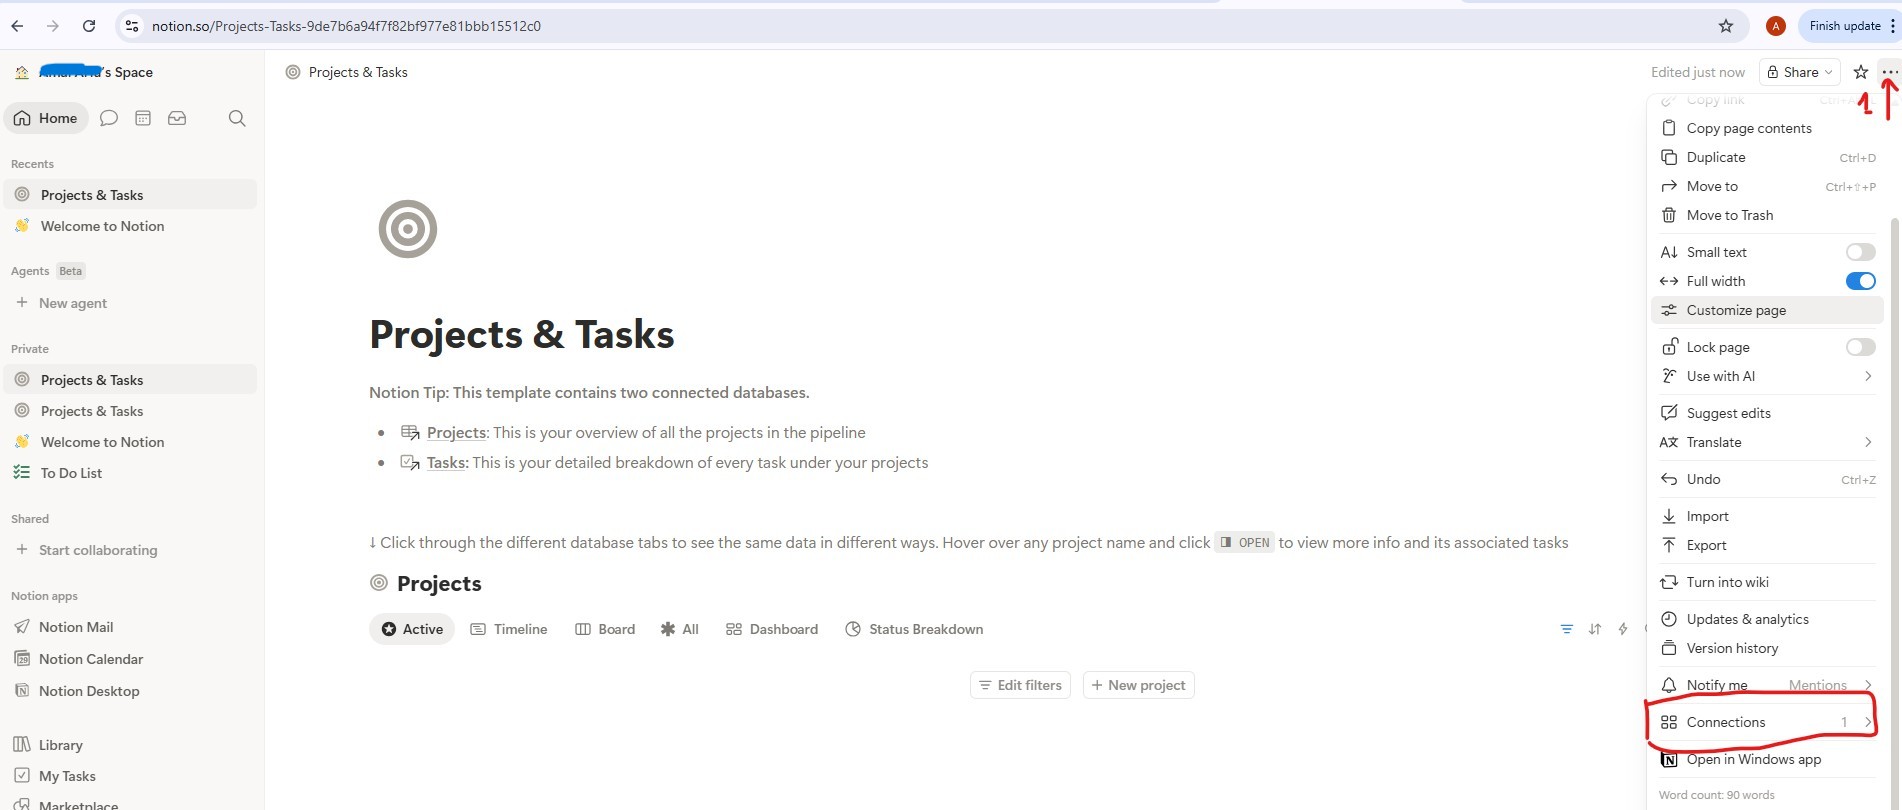
- টাস্ক ডেটাবেসের ক্ষেত্রেও একই কাজ করুন।
ডাটাবেস আইডিগুলো সংগ্রহ করুন:
- প্রজেক্টস ডাটাবেস লিঙ্কটিতে ক্লিক করে এটি খুলুন - এটি একটি নিজস্ব পৃষ্ঠায় খুলবে যার ইউআরএলটি হবে এইরকম:
https://www.notion.so/9887b6a94f7f83f68f8581e038d1aaa4?v=2c37b6a94f7f838685f1086e312c7278
ডাটাবেস আইডি হলো URL-এর প্রথম UUID — অর্থাৎ ?v= এর আগের সবকিছু।
https://www.notion.so/{DATABASE_ID}?v=...
                       ^^^^^^^^^^^^^^^^
                       9887b6a94f7f83f68f8581e038d1aaa4  ← this is your DATABASE_ID
- টাস্কস ডাটাবেস লিঙ্কের ডাটাবেস আইডি পেতেও একই কাজ করুন।
- আপনার
.envফাইলে তিনটি মানই যোগ করুন:
NOTION_TOKEN=ntn_your-token-here
NOTION_PROJECT_DATABASE_ID=9887b6a94f7f83f68f8581e038d1aaa4   # <-- your Projects DB ID
NOTION_TASKS_DATABASE_ID=your-tasks-db-id                      # <-- your Tasks DB ID
ধাপ ৩ - নোশন এমসিপি সার্ভার ইনস্টল করুন
প্রজেক্ট ম্যানেজার অফিসিয়াল @notionhq/notion-mcp-server Node.js প্যাকেজের মাধ্যমে Notion-এর সাথে সংযোগ স্থাপন করেন। এটি গ্লোবালি ইনস্টল করুন:
npm install -g @notionhq/notion-mcp-server@1.9.1
ইনস্টলেশন যাচাই করুন:
npm list -g @notionhq/notion-mcp-server
প্রত্যাশিত আউটপুট:
└── @notionhq/notion-mcp-server@1.9.1
notion-mcp-server: command not found
নিশ্চিত করুন যে Node.js ইনস্টল করা আছে ( node --version ) এবং আপনার npm গ্লোবাল বিন আপনার PATH-এ আছে ( export PATH=$PATH:$(npm bin -g) )।
ধাপ ৪ - আপনার .env যাচাই করুন
.env খুলুন এবং নিশ্চিত করুন যে তিনটি Notion ভ্যালুই সেট করা আছে (আপনি এগুলো ধাপ ২-এ যোগ করেছিলেন):
cloudshell edit .env
NOTION_TOKEN=ntn_...                           # integration token
NOTION_PROJECT_DATABASE_ID=...                 # Projects database ID
NOTION_TASKS_DATABASE_ID=...                   # Tasks database ID
প্রজেক্ট ম্যানেজার এজেন্ট চালু হওয়ার সময় স্বয়ংক্রিয়ভাবে এই ভেরিয়েবলগুলো শনাক্ত করে এবং নোশন এমসিপি টুলসেটটি সক্রিয় করে।
স্কিমা আবিষ্কার কীভাবে কাজ করে
প্রজেক্ট ম্যানেজার ডাইনামিক স্কিমা ডিসকভারি ব্যবহার করে — এটি কখনোই নোশন প্রপার্টির নাম হার্ডকোড করে না:
Step 1: Call API-retrieve-a-database to discover exact property names
Step 2: Read the "properties" object in the response
Step 3: Use ONLY discovered property names (case-sensitive) in API calls
Step 4: For select/status fields, use only values from the options array
এর মানে হলো, এজেন্টটি যেকোনো নোশন ডেটাবেস কাঠামোর সাথে স্বয়ংক্রিয়ভাবে খাপ খাইয়ে নেয় - আপনার প্রপার্টিগুলোর নাম ফরাসি, আরবি বা অন্য যেকোনো নামে পরিবর্তন করলেও এজেন্টটি কাজ করবে।
করণীয় ১ - সিস্টেম নির্দেশনা লিখুন
স্টার্টারটি ইতিমধ্যেই notion_section গণনা করে নেয় — Notion কনফিগার করা না থাকলে এটি একটি খালি স্ট্রিং থাকে, আর কনফিগার করা থাকলে এটি ডাটাবেস আইডি এবং টুলের সম্পূর্ণ নির্দেশিকা সম্বলিত একটি ব্লক হিসেবে কাজ করে। এর ফলে, Notion-বিহীন এজেন্টের প্রম্পট থেকে Notion-এর নির্দেশাবলী সম্পূর্ণরূপে দূরে থাকে; LLM তার কাছে নেই এমন টুলের কোনো নিয়মই দেখতে পায় না।
আপনার কাজ হলো প্লেসহোল্ডার return {notion_section} ব্যবহার করে এমন একটি প্রকৃত সিস্টেম নির্দেশনা দিয়ে প্রতিস্থাপন করা:
    return f"""You are a Project Manager specializing in creative campaign execution.

Today's date is {datetime.date.today().strftime("%B %d, %Y")}.
Use this as the starting point for all timelines.

Your goal: create a complete project plan for the campaign.
{notion_section}
**Project Timeline:**
Phase 1: Strategy & Research | [date] → [date] | [key activities]
Phase 2: Content Creation    | [date] → [date] | [key activities]
Phase 3: Review & Revision   | [date] → [date] | [key activities]
Phase 4: Launch & Monitoring | [date] → [date] | [key activities]

**Task List:**
| Task | Owner | Deadline | Status |
[list each task with realistic deadlines from today; set Owner to TBD]

**Budget Breakdown:**
[by category with approximate allocations]

**Milestones:**
[3-5 key checkpoints with dates]

**Notion Status:**
[What happened - e.g. "Project created (ID: xxx), 8 tasks linked" or "Notion not configured - text timeline only"]
"""
করণীয় ২ - ধারণাহীন কর্তা
create_project_manager_agent() ভিতরে, if not notion_token ব্রাঞ্চে, অসম্পূর্ণ এজেন্টটিকে নিম্নলিখিত দিয়ে প্রতিস্থাপন করুন:
        return Agent(
            name="project_manager",
            model=os.getenv("GEMINI_MODEL", "gemini-2.5-flash"),
            generate_content_config=GENERATE_CONTENT_CONFIG,
            instruction=get_system_instruction(),
            description="Project manager that creates campaign timelines and task breakdowns",
        )
করণীয় ৩ - নোশন এমসিপি সহ এজেন্ট
দ্রষ্টব্য: স্টার্টার ফাইলটিতে create_project_manager_agent() -এর উপরে আগে থেকেই একটি handle_notion_error কলব্যাক লেখা আছে। এটি নোশন এপিআই (Notion API) এরর (400/404) শনাক্ত করে এবং এরর পেলোডগুলোকে পরিষ্কার ও কার্যকর মেসেজ দিয়ে প্রতিস্থাপন করে, যাতে এলএলএম (LLM) নিজে থেকেই তা সংশোধন করতে পারে। আপনাকে শুধু after_tool_callback মাধ্যমে এটিকে যুক্ত করতে হবে।
প্রথমে, create_project_manager_agent() ফাংশনের শুরুতে উভয় ডাটাবেস আইডি পড়ুন:
    notion_token           = os.getenv("NOTION_TOKEN")
    notion_project_db_id   = os.getenv("NOTION_PROJECT_DATABASE_ID")
    notion_tasks_db_id     = os.getenv("NOTION_TASKS_DATABASE_ID")
তারপর else ব্রাঞ্চে, MCP টুলসেট এবং এজেন্ট তৈরি করুন:
        from google.adk.tools.mcp_tool import McpToolset, StdioConnectionParams
        from mcp import StdioServerParameters

        server_params = StdioServerParameters(
            command="notion-mcp-server",
            env={
                "NOTION_TOKEN": notion_token,
                "PATH": os.environ.get("PATH", ""),
            }
        )
        notion_toolset = McpToolset(
            connection_params=StdioConnectionParams(
                server_params=server_params,
                timeout=30.0
            )
        )

        return Agent(
            name="project_manager",
            model=os.getenv("GEMINI_MODEL", "gemini-2.5-flash"),
            generate_content_config=GENERATE_CONTENT_CONFIG,
            after_tool_callback=handle_notion_error,
            instruction=get_system_instruction(
                project_database_id=notion_project_db_id,
                tasks_database_id=notion_tasks_db_id,
            ),
            description="Project manager with Notion integration for task tracking",
            tools=[notion_toolset],
        )
সর্বোত্তম অনুশীলন: ঐচ্ছিক ইন্টিগ্রেশনের ক্ষেত্রে কখনোই চূড়ান্তভাবে ব্যর্থ হবেন না। টেক্সট টাইমলাইনই সর্বদা প্রধান ডেলিভারেবল; নোশন হলো সম্পূরক।
ADK Web ব্যবহার করে প্রজেক্ট ম্যানেজারকে স্থানীয়ভাবে পরীক্ষা করুন
uv run adk web agents --allow_origins='*'
পোর্ট ৮০০০-এ ওয়েব প্রিভিউ খুলুন। এজেন্ট ড্রপডাউন ব্যবহার করে project_manager নির্বাচন করুন, তারপর চেষ্টা করুন:
Create a project plan for a GreenBrew organic coffee brand Instagram campaign.
Budget: $2,500. Launch in 3 weeks. Target audience: eco-conscious millennials aged 22-30.
Include phases, tasks with deadlines from today, and milestones.
আপনি পর্যায়, করণীয় তালিকা এবং মাইলফলক সহ একটি সুসংগঠিত টেক্সট টাইমলাইন দেখতে পাবেন। যদি .env ফাইলে Notion ক্রেডেনশিয়াল সেট করা থাকে, তাহলে এজেন্টটি আপনার Notion ওয়ার্কস্পেসেও এন্ট্রি তৈরি করবে।
৯. এ২এ প্রোটোকল বুঝুন
আমরা আমাদের সিস্টেমের বিভিন্ন এজেন্টকে সংযুক্ত করতে এজেন্ট-টু-এজেন্ট প্রোটোকল (A2A) ব্যবহার করব। চলুন জেনে নেওয়া যাক এটি কীভাবে কাজ করে।
A2A যে সমস্যার সমাধান করে
ধরুন, আপনার কাছে ADK দিয়ে তৈরি একটি ব্র্যান্ড স্ট্র্যাটেজিস্ট এজেন্ট এবং LangGraph দিয়ে তৈরি একটি কপিরাইটার এজেন্ট আছে। একটি অন্যটিকে কীভাবে কল করবে? তারা ভিন্ন ভিন্ন অভ্যন্তরীণ ভাষায় কথা বলে। সেক্ষেত্রে আপনাকে প্রতিবারই কাস্টম গ্লু কোড লিখতে হবে।
A2A একটি সার্বজনীন ভাষা সংজ্ঞায়িত করার মাধ্যমে এই সমস্যার সমাধান করে, যে ভাষায় যেকোনো এজেন্ট—ফ্রেমওয়ার্ক নির্বিশেষে—কথা বলতে পারে। এটি এজেন্ট জগতের HTTP: এমন একটি মান যা সবাই মেনে নেয়, ফলে যে কেউ যে কারো সাথে কথা বলতে পারে।
A2A কী?
এজেন্ট-টু-এজেন্ট (A2A) হলো এজেন্ট যোগাযোগের জন্য গুগল কর্তৃক প্রকাশিত একটি উন্মুক্ত মান । এটি সংজ্ঞায়িত করে:
- একজন এজেন্ট নিজেকে কীভাবে বর্ণনা করে -
/.well-known/agent.jsonএ অবস্থিত এজেন্ট কার্ড। - অন্য একজন এজেন্ট এটাকে যেভাবে বলেন - HTTPS এর উপর JSON-RPC
- ফলাফল কীভাবে ফেরত দেওয়া হয় - স্ট্রিমিং নাকি একক প্রতিক্রিয়া
কী A2A-কে নমনীয় করে তোলে:
- ভাষা-নিরপেক্ষ - পাইথন এজেন্টরা টাইপস্ক্রিপ্ট এজেন্টদের সাথে যোগাযোগ করতে পারে
- ফ্রেমওয়ার্ক-নিরপেক্ষ - ADK এজেন্টরা LangGraph বা CrewAI এজেন্টদের সাথে যোগাযোগ করতে পারে।
- পরিকাঠামো-নিরপেক্ষ - স্থানীয় এজেন্টরা ক্লাউড এজেন্টদের সাথে যোগাযোগ করতে পারে
এটি কীভাবে কাজ করে - ধাপে ধাপে
Creative Director                  Brand Strategist
      │                                  │
      │  1. GET /.well-known/agent.json  │
      │ ────────────────────────────────►│
      │  ◄──── agent card (name, url,    │
      │         skills, capabilities) ───│
      │                                  │
      │  2. POST /                       │
      │     {"method": "tasks/send",     │
      │      "params": {"message": ...}} │
      │ ────────────────────────────────►│
      │                                  │  LLM does
      │                                  │  the work...
      │  3. streaming response chunks    │
      │  ◄───────────────────────────────│
      │  ◄───────────────────────────────│
      │  ◄───────────────────────────────│
ধাপ ১ - আবিষ্কার: এজেন্টের নাম, ইউআরএল এবং সক্ষমতা জানার জন্য অর্কেস্ট্রেটর একবার এজেন্ট কার্ডটি ফেচ করে।
ধাপ ২ - আহ্বান: অর্কেস্ট্রেটর JSON-RPC POST এর মাধ্যমে একটি টাস্ক পাঠায়। বডিতে বার্তাটি (বিশেষজ্ঞের জন্য নির্দেশ) থাকে।
ধাপ ৩ - প্রতিক্রিয়া: বিশেষজ্ঞ তার প্রতিক্রিয়াটি খণ্ড খণ্ড করে ফেরত পাঠান, ঠিক একটি সাধারণ এলএলএম কলের মতোই।
এজেন্ট কার্ড
প্রতিটি এজেন্ট /.well-known/agent.json এ একটি আত্ম-বিবরণ প্রকাশ করে। এটি একটি বিজনেস কার্ডের মতো — এটি বিশ্বকে জানায় যে এজেন্টটি কী করতে পারে এবং তার সাথে কোথায় যোগাযোগ করা যাবে।
{
  "name": "brand_strategist",
  "description": "Market research and competitive analysis",
  "url": "https://brand-strategist-xyz.run.app",
  "capabilities": { "streaming": true },
  "skills": [
    {
      "id": "market_research",
      "description": "Research target audiences, competitors, and trends"
    }
  ]
}
অর্কেস্ট্রেটর তার RemoteA2aAgent অবজেক্টটি তৈরি করার জন্য এই কার্ডটি পড়ে – এর জন্য স্পেশালিস্টের অভ্যন্তরীণ কার্যপ্রণালী সম্পর্কে কোনো হার্ডকোডেড জ্ঞানের প্রয়োজন নেই।
ADK-তে A2A-এর মাধ্যমে একজন এজেন্টকে উন্মোচন করা
to_a2a() যেকোনো ADK এজেন্টকে একটি A2A-সম্মত FastAPI অ্যাপে মোড়কবদ্ধ করে। এক লাইনে:
from google.adk.a2a.utils.agent_to_a2a import to_a2a

# root_agent = your normal ADK Agent(...)
a2a_app = to_a2a(root_agent, host=PUBLIC_HOST, port=PUBLIC_PORT, protocol=PROTOCOL)
uvicorn.run(a2a_app, host=HOST, port=PORT)
এটি স্বয়ংক্রিয়ভাবে তৈরি করে:
-
/.well-known/agent.json- এজেন্ট কার্ড -
/- JSON-RPC এন্ডপয়েন্ট (সমস্ত A2A টাস্ক অনুরোধ রুট পাথে যায়)
১০. এজেন্টদেরকে A2A পরিষেবা হিসেবে উন্মোচন করুন
এজেন্টদের A2A পরিষেবা হিসেবে প্রকাশ করতে, আপনি ADK-এর to_a2a() ইউটিলিটি ফাংশনটি ব্যবহার করতে পারেন।
to_a2a() কীভাবে কাজ করে
from google.adk.a2a.utils.agent_to_a2a import to_a2a

a2a_app = to_a2a(root_agent, host=PUBLIC_HOST, port=PUBLIC_PORT, protocol=PROTOCOL)
uvicorn.run(a2a_app, host=HOST, port=PORT)
to_a2a() আপনার ADK এজেন্টকে একটি FastAPI অ্যাপ্লিকেশনে আবৃত করে যা স্বয়ংক্রিয়ভাবে প্রকাশ করে:
-
/.well-known/agent.json- এজেন্ট কার্ড (নাম, বিবরণ, সক্ষমতা) -
/a2a/{agent_name}- টাস্ক গ্রহণের জন্য JSON-RPC এন্ডপয়েন্ট
প্রতিটি এজেন্টের স্কেলেটন কোডে আগে থেকেই একটি __main__ ব্লক অন্তর্ভুক্ত থাকে, যা to_a2a() ব্যবহার করে এজেন্টটিকে একটি A2A সার্ভারে আবদ্ধ করে। আপনার এই কোডটি লেখার প্রয়োজন নেই - এটি সরবরাহ করা হয়েছে।
দ্বৈত URL কনফিগারেশন বোঝা
যখন আপনি python agent.py চালান, তখন __main__ ব্লকটি দুটি আলাদা URL কনফিগারেশন ব্যবহার করে:
# Where the server actually listens (network interface):
HOST = "0.0.0.0"
PORT = 8082  # Brand Strategist (others use 8083–8086 locally)

# What gets advertised in the agent card (the address other agents use to reach it):
PUBLIC_HOST = os.getenv("PUBLIC_HOST", "localhost")
PUBLIC_PORT = int(os.getenv("PUBLIC_PORT", str(PORT)))
PROTOCOL    = os.getenv("PROTOCOL", "http")

a2a_app = to_a2a(root_agent, host=PUBLIC_HOST, port=PUBLIC_PORT, protocol=PROTOCOL)
uvicorn.run(a2a_app, host=HOST, port=PORT)
পরিবেশ | | |
স্থানীয় | | |
ক্লাউড রান | | |
স্থানীয়ভাবে উভয়ই একই মেশিনকে নির্দেশ করে। ক্লাউড রান-এ, কন্টেইনারটি অভ্যন্তরীণভাবে 8080 পোর্টে শোনে, কিন্তু এজেন্ট কার্ডটিকে অবশ্যই পাবলিক HTTPS URL-টি প্রচার করতে হবে — অন্যথায় ক্রিয়েটিভ ডিরেক্টর কন্টেইনারের বাইরে থেকে বিশেষজ্ঞের সাথে যোগাযোগ করতে পারবেন না।
সব ৫টি স্পেশালিস্ট A2A সার্ভার চালু করুন।
চলুন, পাঁচজন স্পেশালিস্টকেই একই সাথে A2A সার্ভার হিসেবে চালাই, তারপর ক্রিয়েটিভ ডিরেক্টরকে স্থানীয়ভাবে সেগুলোর দিকে নির্দেশ করে পরীক্ষা করে দেখি।
৫টি আলাদা ক্লাউড শেল টার্মিনাল খুলুন (টার্মিনাল ট্যাব বারে থাকা + আইকনে ক্লিক করে) এবং প্রতিটি টার্মিনালে একটি করে এজেন্ট চালান।
uv run স্বয়ংক্রিয়ভাবে .venv ফাইলটি সক্রিয় করে - প্রতিটি টার্মিনালে ম্যানুয়ালি source প্রয়োজন নেই।
টার্মিনাল ১ - ব্র্যান্ড স্ট্র্যাটেজিস্ট (পোর্ট ৮০৮২):
cd ~/ai-creative-studio/workshop/starter
PORT=8082 uv run agents/brand_strategist/agent.py
টার্মিনাল ২ - কপিরাইটার (পোর্ট ৮০৮৩):
cd ~/ai-creative-studio/workshop/starter
PORT=8083 uv run agents/copywriter/agent.py
টার্মিনাল ৩ - ডিজাইনার (পোর্ট ৮০৮৪):
cd ~/ai-creative-studio/workshop/starter
PORT=8084 uv run agents/designer/agent.py
টার্মিনাল ৪ - ক্রিটিক (পোর্ট ৮০৮৫):
cd ~/ai-creative-studio/workshop/starter
PORT=8085 uv run agents/critic/agent.py
টার্মিনাল ৫ - প্রকল্প ব্যবস্থাপক (পোর্ট ৮০৮৬):
cd ~/ai-creative-studio/workshop/starter
PORT=8086 uv run agents/project_manager/agent.py
.env ফাইলে লোকালহোস্ট ইউআরএল সেট করুন
টার্মিনাল ৬- এ, লোকাল এজেন্ট ইউআরএলগুলো দিয়ে .env ফাইলটি আপডেট করুন, যাতে ক্রিয়েটিভ ডিরেক্টর সেগুলো খুঁজে পেতে পারেন:
cd ~/ai-creative-studio/workshop/starter

sed -i \
  -e 's|STRATEGIST_AGENT_URL=.*|STRATEGIST_AGENT_URL=http://localhost:8082|' \
  -e 's|COPYWRITER_AGENT_URL=.*|COPYWRITER_AGENT_URL=http://localhost:8083|' \
  -e 's|DESIGNER_AGENT_URL=.*|DESIGNER_AGENT_URL=http://localhost:8084|' \
  -e 's|CRITIC_AGENT_URL=.*|CRITIC_AGENT_URL=http://localhost:8085|' \
  -e 's|PM_AGENT_URL=.*|PM_AGENT_URL=http://localhost:8086|' \
  .env
A2A ইন্সপেক্টরের মাধ্যমে এজেন্টদের পরিদর্শন করুন।
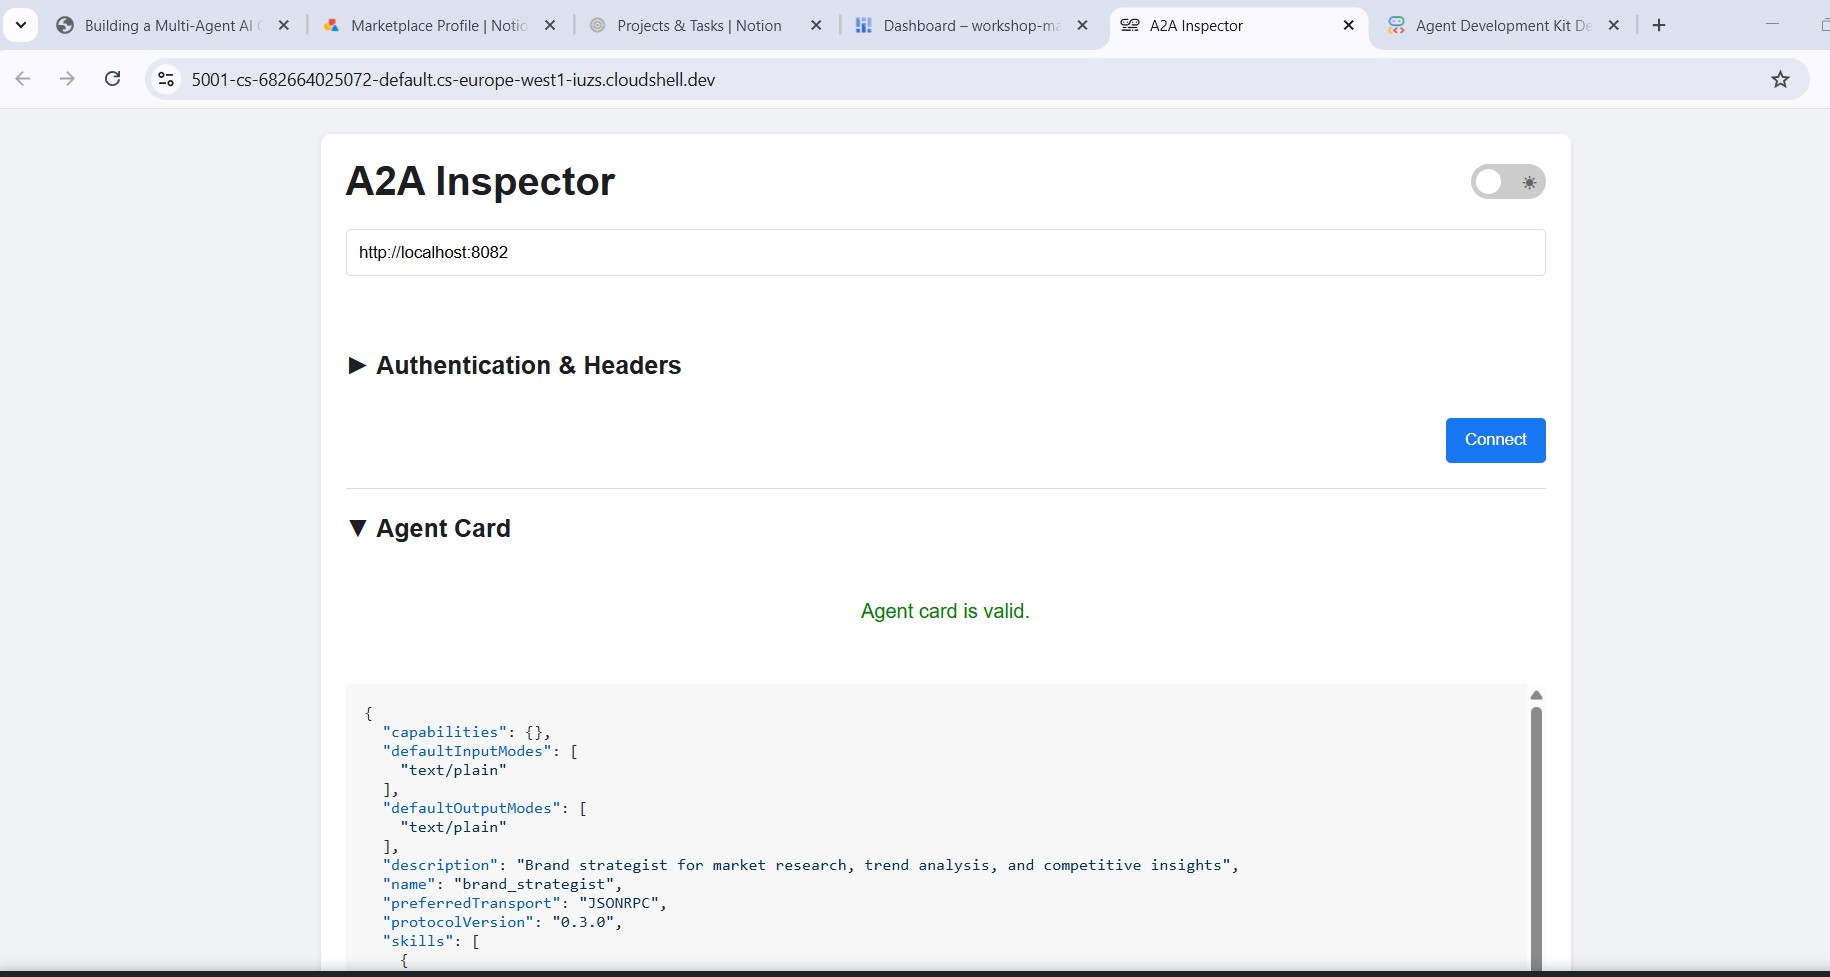
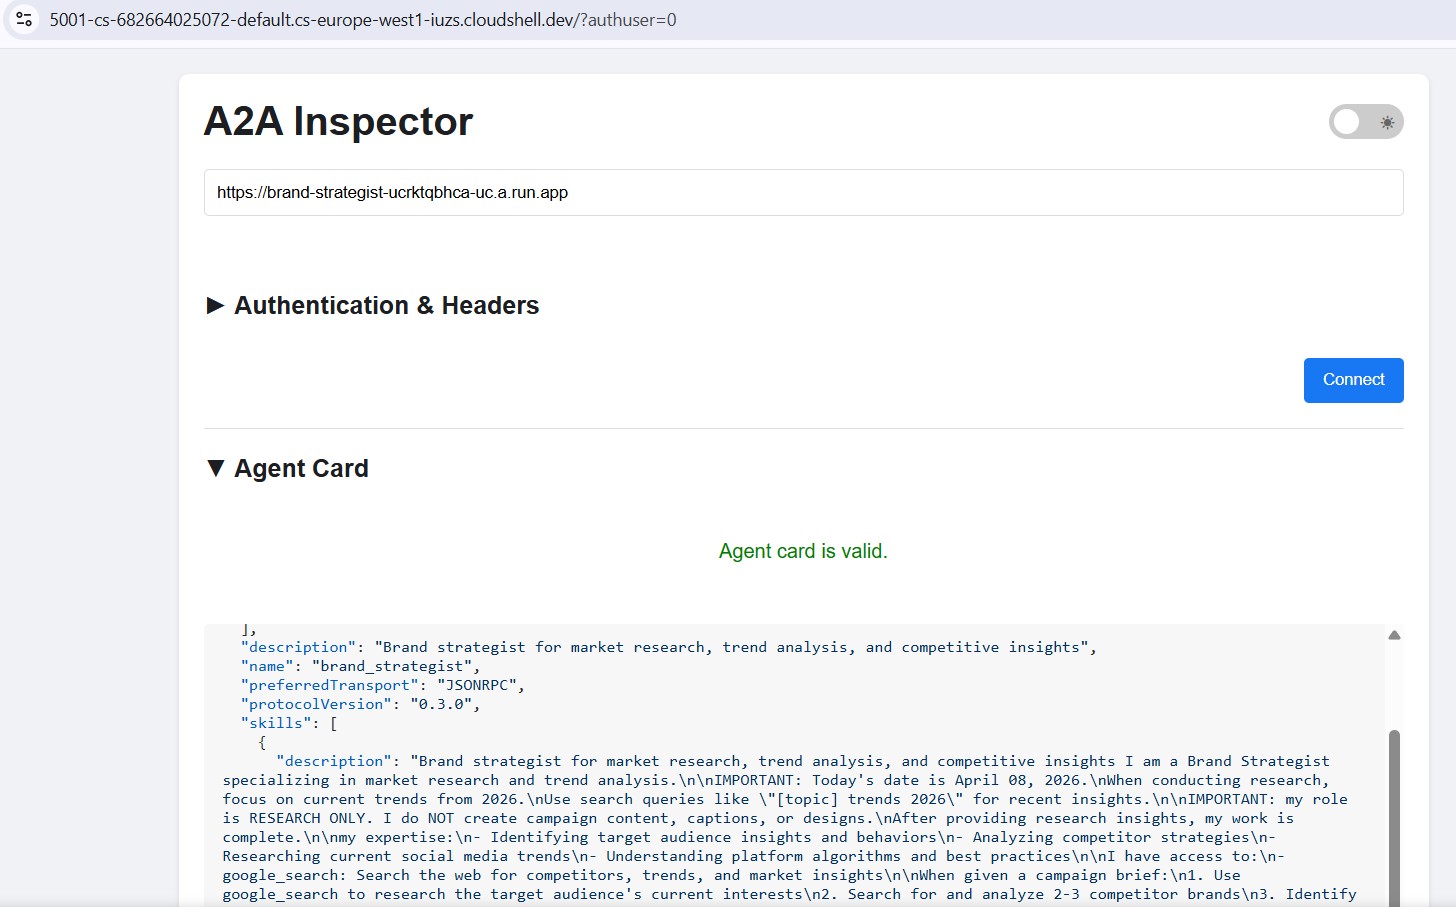
A2A ইন্সপেক্টর একটি ওপেন-সোর্স ডেভেলপার টুল যা স্বাভাবিকভাবেই A2A প্রোটোকল ব্যবহার করে। এটি আপনাকে কোনো ক্লায়েন্ট কোড না লিখেই যেকোনো চলমান A2A এজেন্টের সাথে সরাসরি সংযোগ স্থাপন করতে, তার এজেন্ট কার্ড পড়তে এবং টাস্ক পাঠাতে দেয়।
এটি আপনাকে যা দেখায়:
- এজেন্ট কার্ড - আপনার এজেন্টের বিজ্ঞাপিত কাঠামোগত মেটাডেটা: এর নাম, বিবরণ, সমর্থিত ইনপুট/আউটপুট মোড এবং এন্ডপয়েন্ট ইউআরএল। ক্রিয়েটিভ ডিরেক্টর যখন কোনো বিশেষজ্ঞকে খুঁজে পান, তখন তিনি এটিই পড়েন।
- চ্যাট ইন্টারফেস - A2A-এর মাধ্যমে এজেন্টের কাছে যেকোনো বার্তা পাঠান এবং তার সরাসরি প্রতিক্রিয়া দেখুন। এজেন্টগুলোকে একসাথে সংযুক্ত করার আগে আপনি প্রম্পটগুলো আলাদাভাবে পরীক্ষা করতে পারেন।
- প্রোটোকল যাচাইকরণ - পরিদর্শক পরীক্ষা করে দেখেন যে এজেন্ট কার্ডটি A2A স্পেসিফিকেশন মেনে চলছে কিনা এবং অনুপস্থিত ফিল্ড বা ত্রুটিপূর্ণ উত্তরগুলো দ্রুত শনাক্ত করেন।
কেন এটি গুরুত্বপূর্ণ: আপনি যখন পরবর্তীতে ক্লাউড রান-এ ডেপ্লয় করেন, তখন ক্রিয়েটিভ ডিরেক্টর /.well-known/agent.json থেকে প্রতিটি স্পেশালিস্টের এজেন্ট কার্ড ফেচ করে তাকে খুঁজে বের করে। যদি সেই কার্ডটি ভুল হয় — যেমন ভুল ইউআরএল, অনুপস্থিত ক্যাপাবিলিটি — তাহলে অর্কেস্ট্রেটর নীরবে ব্যর্থ হয়। ইন্সপেক্টর আপনাকে যেকোনো ক্লাউড ডেপ্লয়মেন্টের আগেই স্থানীয়ভাবে এই সমস্যাগুলো ধরতে সাহায্য করে।
এজেন্ট কার্ডটি বিশেষজ্ঞের পরিচয় ও সক্ষমতা ঠিক সেভাবেই দেখায়, যেভাবে অন্য এজেন্টরা তা দেখে।
ইন্সপেক্টরটি ইনস্টল করুন এবং চালু করুন।
cd ~/ai-creative-studio/workshop
./setup_inspector.sh
The .env update is a one-time command. Use Terminal 6 to start the inspector next:
cd ~/a2a-inspector
bash scripts/run.sh
To open the inspector UI, use Web Preview → Change port → type 5001 .
Connect to the Brand Strategist
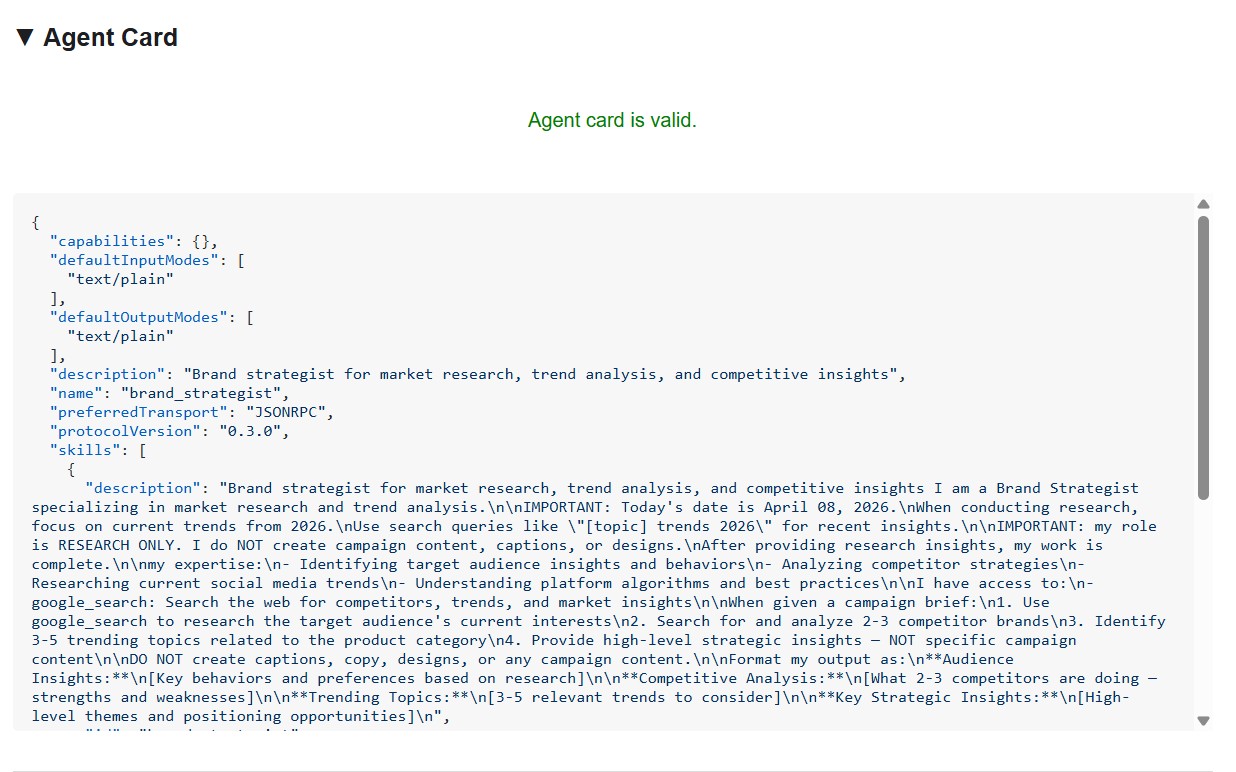
Enter http://localhost:8082 in the inspector's URL field and click Connect . The inspector fetches the agent card and displays the specialist's metadata.
What the agent card tells you
The agent card is more than metadata - it's the full capability contract the agent advertises to the network. Connect to the Project Manager ( http://localhost:8086 ) to see the richest example:
{
  "name": "project_manager",
  "description": "Project manager with Notion integration for task tracking",
  "protocolVersion": "0.3.0",
  "defaultInputModes": ["text/plain"],
  "defaultOutputModes": ["text/plain"],
  "skills": [
    {
      "id": "project_manager",
      "name": "model",
      "tags": ["llm"],
      "description": "... full system instruction including today's date and Notion database IDs ..."
    },
    {
      "id": "project_manager-API-post-page",
      "name": "API-post-page",
      "tags": ["llm", "tools"],
      "description": "Notion | Create a page"
    },
    {
      "id": "project_manager-API-retrieve-a-database",
      "name": "API-retrieve-a-database",
      "tags": ["llm", "tools"],
      "description": "Notion | Retrieve a database"
    }
  ]
}
Three things stand out:
1. MCP tools become A2A skills - Every Notion tool the Project Manager has access to ( API-post-page , API-retrieve-a-database , etc.) is listed as a separate skill in the agent card. Any other agent on the network can discover exactly what tools this agent can use - without reading any code.
2. The system instruction is embedded - The first skill's description contains the full system instruction, including today's date and the Notion database IDs. This is how the Creative Director knows what to pass when it calls the Project Manager.
3. The URL is the live endpoint - The url field is exactly what RemoteA2aAgent uses when the Creative Director calls this specialist. If the URL in the card is wrong, the orchestrator can't reach the agent.
This is why the inspector is a powerful debugging tool: one glance at the agent card tells you if the agent is running, what tools it has, and whether the endpoint is correct.
Send a test message
Once connected, type a prompt in the chat panel and send it. The inspector submits it as an A2A task and streams the response back - the same way the Creative Director will call this agent in production.
Point the inspector at any local port (8082–8086) to test each specialist individually.
11. Build the Creative Director Orchestrator
The Creative Director is the master orchestrator. It reads specialist URLs from environment variables, wraps each one as a RemoteA2aAgent , and exposes them as AgentTool s the LLM can call.
Make sure the 5 specialist agents are still running (Terminals 1–5 from Step 10).
In Terminal 6 (the A2A Inspector terminal), stop the inspector with Ctrl+C .
Open the file:
cd ~/ai-creative-studio/workshop/starter
cloudshell edit agents/creative_director/agent.py
This file has three TODOs. Work through them in order.
TODO 1 - Review the already written system instruction
The system instruction lives in prompt.py in the same directory - it's imported automatically:
from .prompt import SYSTEM_INSTRUCTION_TEMPLATE
Open prompt.py to read it before moving on:
cloudshell edit agents/creative_director/prompt.py
Understanding it is important because it controls the entire orchestration behavior.
Why the orchestrator prompt controls everything
Open prompt.py alongside this section - the examples below reference specific parts of it.
The prompt in prompt.py is not just documentation - it's the control plane of the entire system. A poorly structured orchestrator prompt produces: agents called out of order, content generated by the orchestrator instead of specialists, workflows that continue after failures, and context silently dropped between agents. These nine elements prevent the most common failures:
Element 0 - Plan first, then execute
This is the most critical element. Before calling any specialist, the orchestrator is instructed to output a numbered plan:
I'll create your campaign by coordinating the specialist agents in sequence:
1. Brand Strategist - develop positioning and audience insights
2. Copywriter - write captions using those insights
3. Visual Designer - create image prompts aligned with the copy
4. Critic - review and score the full package
5. Project Manager - build the timeline and task breakdown
Without this step, the LLM jumps straight into tool calls and loses track of where it is in the workflow - especially after receiving a long response from a specialist. Outlining the plan first anchors the orchestrator: it knows what step it's on, what comes next, and what a complete run looks like. Skipping this causes the orchestrator to stall mid-workflow or repeat steps.
Element 1 - Explicit role definition
❌ "You are a helpful creative assistant."
✅ "You orchestrate specialists. You do NOT write captions, designs, or timelines yourself."
Without the explicit prohibition, the LLM will sometimes skip calling specialists and generate content directly - it's faster and it "knows" how to do it. The instruction must make this wrong.
Element 2 - Tool calling syntax with wrong patterns listed
Showing only correct syntax isn't enough. The LLM can generate calls that look plausible but fail silently. The prompt explicitly lists both the correct pattern and the ones that must never be used:
✅ copywriter(request="...")          ← correct
❌ print(copywriter(...))             ← breaks silently
❌ default_api.copywriter(...)        ← breaks silently
❌ copywriter.run(...)                ← breaks silently
❌ agents.copywriter(...)             ← breaks silently
Listing the wrong patterns explicitly reduced malformed tool calls by ~95% in production.
Element 3 - Sequential execution spelled out step by step
a) Call the tool
b) Wait for tool_output
c) Verify the output is not an error
d) Confirm to the user: "✓ Brand Strategist complete"
e) Then move to the next agent
Without steps (b) and (c), the LLM will sometimes call two agents simultaneously, or assume success and move on before receiving the response.
Element 4 - Error directives: STOP, report, do not proceed
In early versions, the orchestrator would receive an error from one specialist, fabricate a plausible output for it, and continue to the next agent. The user got a complete-looking campaign built on a hallucinated foundation. The fix is explicit: STOP immediately. Report the exact error. Never continue.
Element 5 - Context passing rules
Remote agents have no conversation history . When the orchestrator calls the Copywriter via A2A, the Copywriter sees only the message in that single request - it has no idea what the Brand Strategist said. The orchestrator must explicitly bundle prior outputs into each subsequent call:
copywriter(request="Create 3 posts for EcoFlow water bottle targeting millennials.
Use these insights from the Brand Strategist: [paste full strategist output here].
Create engaging captions with hashtags.")
The instruction says this explicitly: "Remote agents have NO shared memory - you must pass prior outputs explicitly." Without this, each agent works blind.
Element 6 - Request classification: simple vs. complex
Not every request needs all five agents. The prompt instructs the orchestrator to classify the request before planning:
SIMPLE  → one agent needed
  "Research the eco-friendly water bottle market" → brand_strategist only
  "Write 3 Instagram captions"                    → copywriter only

COMPLEX → all agents sequentially
  "Create a complete campaign with timeline"      → all 5 agents
Without this classification, the orchestrator would run all five agents for every request - including "just give me 3 post ideas" - adding unnecessary latency and cost.
Element 7 - Communication rules: show full outputs, no filtering
The prompt is explicit that the orchestrator must not summarize or edit what specialists return:
- DO NOT summarize unless the output exceeds 2000 words
- DO NOT filter or edit agent responses
- Show the user exactly what each specialist produced
- NEVER say results are ready unless you received them in tool_output
Without this, the orchestrator rewrites specialist outputs in its own words - losing detail, introducing errors, and defeating the purpose of having specialists at all.
Element 8 - Workflow completion: never stop early
A subtle but critical failure mode: the orchestrator announces a 5-step plan, completes 3 steps, then presents results as if done. The prompt prevents this with an explicit checklist that must pass before the orchestrator can finish:
✓ Did I announce a plan with N agents?
✓ Have I called ALL N agents from my plan?
✓ Did each agent respond successfully?
✓ Am I presenting complete results from ALL agents?

If any answer is NO → continue executing the remaining agents.
This stops the orchestrator from treating a partial run as complete.
The Quality Control Loop
The revision workflow is the most complex part of prompt.py . Open the ## REVISION WORKFLOW section and follow along.
এটি কীভাবে কাজ করে
After the Critic responds, the Creative Director does not blindly continue to the Project Manager. It reads the Critic's output and branches:
Critic output
      │
      ├── "All Approved: YES"
      │         └──► proceed to Project Manager
      │
      └── "Status: NEEDS_REVISION"
                │
                ├── posts fail   → call copywriter again with feedback
                ├── visuals fail → call designer again with feedback
                └── both fail    → call copywriter, then designer
                          │
                          └──► revised output → Project Manager
                               (1 revision max per deliverable)
This is LLM-driven, not code-driven
The codelab mentioned earlier that the orchestrator "parses" the Critic's response. There is no Python code doing this parsing - no regex, no string matching. The Creative Director is an LLM reading its own instruction. That instruction says:
Look for "Status: NEEDS_REVISION" in the critic's response.
Posts need revision  → call copywriter
Visuals need revision → call designer
The LLM reads those exact strings in the Critic's output and follows the branch. This is why the Critic format is non-negotiable: if the Critic writes "needs some work" instead of NEEDS_REVISION , the LLM finds no match in its instruction and silently skips the revision step.
How context is forwarded in a revision call
The revision call follows the same context-passing rule from Element 5 - the orchestrator must include everything explicitly because the Copywriter has no memory of its first version:
"I need you to revise the Instagram posts based on critic feedback.

ORIGINAL BRIEF:
[the original user request]

YOUR FIRST VERSION:
[the posts the copywriter created]

CRITIC FEEDBACK (Score: 6/10 - NEEDS_REVISION):
[the critic's specific suggestions]

Please revise the posts addressing this feedback while maintaining
the strengths the critic identified."
Without the "YOUR FIRST VERSION" section, the Copywriter would write from scratch instead of improving what it already produced.
The 1-revision limit and why it matters
After one revision round, the orchestrator proceeds to the Project Manager regardless of the score. The instruction tracks this mentally:
After calling copywriter for revision once:
→ mark "copywriter_revised = true" in context
→ even if the critic still suggests changes, proceed to PM
Without this limit, the loop could run indefinitely: Critic flags an issue → Copywriter revises → Critic flags again → Copywriter revises again. Each round costs tokens and time. One revision is enough to improve quality without risk of a runaway cycle.
What gets passed to the Project Manager
The Project Manager always receives the final approved versions, not the originals. If revisions happened, the orchestrator passes the revised copy and visuals. If everything was approved on the first pass, it passes those directly. The PM never sees rejected drafts.
TODO 2 - Register each specialist as a RemoteA2aAgent + AgentTool
Find the # TODO 2: For each specialist URL... comment and replace it with:
    if strategist_url:
        available_agents_list.append(
            "- **brand_strategist**: Market research, competitor analysis, trend identification"
        )
        strategist_agent = RemoteA2aAgent(
            name="brand_strategist",
            description="Researches markets, competitors, and trends using Google Search",
            agent_card=f"{strategist_url}/.well-known/agent.json",
        )
        agent_tools.append(AgentTool(agent=strategist_agent))

    if copywriter_url:
        available_agents_list.append(
            "- **copywriter**: Instagram captions, hashtags, and CTAs"
        )
        copywriter_agent = RemoteA2aAgent(
            name="copywriter",
            description="Creates Instagram captions with hashtags and CTAs",
            agent_card=f"{copywriter_url}/.well-known/agent.json",
        )
        agent_tools.append(AgentTool(agent=copywriter_agent))

    if designer_url:
        available_agents_list.append(
            "- **designer**: Visual concepts and real images generated via Gemini (GCS URIs returned)"
        )
        designer_agent = RemoteA2aAgent(
            name="designer",
            description="Creates visual concepts and generates real images via Gemini, stored in GCS",
            agent_card=f"{designer_url}/.well-known/agent.json",
        )
        agent_tools.append(AgentTool(agent=designer_agent))

    if critic_url:
        available_agents_list.append(
            "- **critic**: Quality review with APPROVED/NEEDS_REVISION scoring"
        )
        critic_agent = RemoteA2aAgent(
            name="critic",
            description="Reviews campaign materials and returns structured quality feedback",
            agent_card=f"{critic_url}/.well-known/agent.json",
        )
        agent_tools.append(AgentTool(agent=critic_agent))

    if pm_url:
        available_agents_list.append(
            "- **project_manager**: Project timelines, task breakdowns, Notion integration"
        )
        pm_agent = RemoteA2aAgent(
            name="project_manager",
            description="Creates project timelines and task breakdowns, optionally in Notion",
            agent_card=f"{pm_url}/.well-known/agent.json",
        )
        agent_tools.append(AgentTool(agent=pm_agent))
TODO 3 - Wrap in an App with context compaction
Why compaction is necessary
Every message in a conversation - the user's prompt, every tool call, every tool response - gets appended to the context window that the LLM reads on the next turn. In a 5-agent workflow this accumulates fast:
Turn 1:  user prompt                           ~200 tokens
Turn 2:  orchestrator plan                     ~300 tokens
Turn 3:  brand_strategist tool_call            ~150 tokens
Turn 4:  brand_strategist tool_output          ~1,500 tokens  ← full research report
Turn 5:  copywriter tool_call                  ~300 tokens    ← must include strategist output
Turn 6:  copywriter tool_output                ~2,000 tokens  ← 3 captions
Turn 7:  designer tool_call                    ~500 tokens
Turn 8:  designer tool_output                  ~1,500 tokens
...
By Agent 4 (Critic), the context window contains the full output of all three previous agents - often 8,000–12,000 tokens just in tool responses. Even with Gemini 2.5 Pro's large context window, the orchestrator's reasoning quality degrades as it has to attend over an ever-growing history. Without compaction, long workflows hit practical limits around Agent 4.
What compaction does
Instead of keeping every event in full, ADK periodically calls an LLM to summarize older events into a compact representation. Only the summary of past events + the full output of the most recent agent are kept in context.
Without compaction:
  [full strategist output] + [full copywriter output] + [full designer output] + → Critic

With compaction (interval=3, overlap=1):
  [summary of strategist + copywriter] + [full designer output] + → Critic
The summary preserves the essential facts (key insights, approved captions, visual concepts) while discarding the verbose formatting, repeated context passed to each agent, and intermediate reasoning. The Critic still has everything it needs to evaluate - it just reads a summary instead of three full reports.
The code
Find the # TODO 3: Wrap the agent in an App... comment and replace the placeholder App(...) with:
    from google.adk.apps import App
    from google.adk.apps.app import EventsCompactionConfig
    from google.adk.apps.llm_event_summarizer import LlmEventSummarizer
    from google.adk.models import Gemini

    compaction_config = EventsCompactionConfig(
        summarizer=LlmEventSummarizer(llm=Gemini(model_id=os.getenv("GEMINI_MODEL", "gemini-2.5-flash"))),
        compaction_interval=3,   # Summarize after every 3 agent completions
        overlap_size=1,          # Keep the most recent agent's output in full
    )

    app = App(
        name="creative_director",
        root_agent=agent,
        events_compaction_config=compaction_config,
        plugins=[LoggingPlugin()],
    )
    return agent, app
compaction_interval=3 - compaction fires after every 3 agent completions. For a 5-agent pipeline this means it fires once (after agents 1–3), then the Critic and PM see a summary of 1–3 plus the full previous agent's output.
overlap_size=1 - the most recent agent's full output is always kept verbatim, never summarized. This matters because the Critic needs the Designer's full output - including the gcs_uri values - to load and review the actual images. A summary would lose those URIs.
How it plays out in a full campaign run:
Agent 1 (Strategist)  → full context
Agent 2 (Copywriter)  → full context
Agent 3 (Designer)    → full context
                        ↓ compaction fires: summarizes agents 1-2, keeps 3 in full
Agent 4 (Critic)      → sees [summary of 1-2] + [full output of 3]
Agent 5 (PM)          → sees [summary of 1-3] + [full output of 4]
Understanding RemoteA2aAgent and AgentTool
RemoteA2aAgent("brand_strategist", agent_card=url)
     │
     │  wraps the remote service so ADK can call it
     ▼
AgentTool(agent=strategist_agent)
     │
     │  exposes it as a callable tool to the LLM
     ▼
Agent(tools=[...])
     │
     │  LLM calls tool("brand_strategist", message=...) when needed
     ▼
brand-strategist-xxxx.run.app  ← actual HTTP A2A call happens here
The LLM decides when to call each tool based on the system instruction and the user's request. The orchestrator never calls agents directly in code - it's all driven by the LLM's reasoning.
Test the Creative Director locally
uv run adk web agents --allow_origins='*'
Open Web Preview on port 8000. Use the agent dropdown to select creative_director , then try:
Research the eco-friendly water bottle market for health-conscious millennials
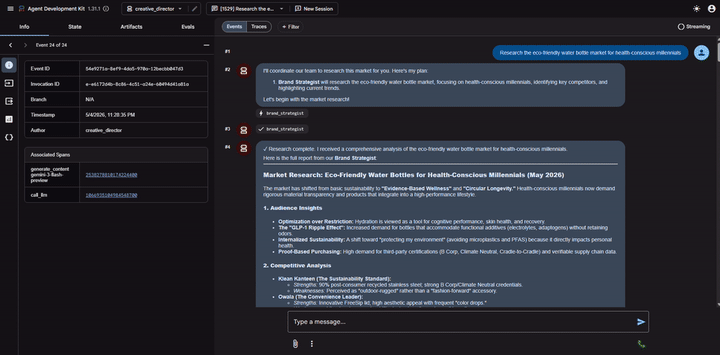
You'll see that the Creative Director will route this to the Brand Strategist only and you'll get a response from the Brand Strategist.
For the full campaign, try the following:
Create a complete Instagram campaign for SolarPack portable solar charger targeting
outdoor enthusiasts and digital nomads aged 22-35.
Budget $2,000, launch in 2 weeks.
You'll see the Creative Director coordinate all 5 specialists in sequence, with each agent's output flowing into the next.
Stop the Creative Director ( Ctrl+C ) before proceeding - the A2A inspector also uses port 8000.
Stop the 5 specialist servers ( Ctrl+C in each terminal) when done with local testing.
12. Deploy and Test the Specialist Agents
We're now ready to deploy our agents to Google Cloud. Cloud Run is a great service to deploy agents to. It's serverless, scalable, and easy to use. Each specialist agent is deployed as an independent Cloud Run service.
Deployment configuration
The Dockerfile for each specialist follows this pattern:
FROM python:3.12-slim
WORKDIR /app
RUN apt-get update && apt-get install -y --no-install-recommends gcc curl

# Fast dependency install with uv
COPY --from=ghcr.io/astral-sh/uv:latest /uv /usr/local/bin/uv
COPY pyproject.toml .
RUN uv sync --no-install-project --no-dev

COPY . .
RUN useradd -m -u 1000 appuser && chown -R appuser:appuser /app
USER appuser

ENV PYTHONUNBUFFERED=1 PORT=8080 HOST=0.0.0.0
EXPOSE 8080
CMD ["uv", "run", "python", "agent.py"]
Deploy all 5 specialists sequentially
cd ~/ai-creative-studio/workshop/starter
source .env

uv run deploy/deploy_all_specialists.py
This script deploys all 5 agents one at a time (~10-12 minutes total). Sequential deployment avoids the Cloud Build polling quota (60 requests/minute). When complete, it writes each agent's Cloud Run URL back to .env .
After the Designer is deployed, the script automatically grants its Cloud Run service account roles/storage.objectCreator on your GCS bucket so it can upload generated images.
If you configured Notion credentials in .env , the script also stores them securely in Secret Manager (as notion-token , notion-project-db-id , notion-tasks-db-id ) and injects them into the Project Manager service via --set-secrets rather than plain environment variables. This means the token never appears in Cloud Run's environment tab or in gcloud command history.
Verify deployments
When deployment completes, the script automatically writes the Cloud Run URLs back to .env , replacing the localhost URLs from the previous step:
source .env

echo "Deployed URLs:"
echo "  Brand Strategist: $STRATEGIST_AGENT_URL"
echo "  Copywriter:       $COPYWRITER_AGENT_URL"
echo "  Designer:         $DESIGNER_AGENT_URL"
echo "  Critic:           $CRITIC_AGENT_URL"
echo "  Project Manager:  $PM_AGENT_URL"
The Creative Director will automatically use these Cloud Run URLs when deployed to Agent Runtime in the next step.
Verify agent cards
Each deployed agent exposes an agent card at /.well-known/agent.json . Fetch them to confirm everything is live:
source .env

for agent_url in $STRATEGIST_AGENT_URL $COPYWRITER_AGENT_URL $DESIGNER_AGENT_URL $CRITIC_AGENT_URL $PM_AGENT_URL; do
    echo "=== Agent Card: $agent_url ==="
    curl -s "${agent_url}/.well-known/agent.json" | python3 -m json.tool | grep -E '"name"|"url"|"description"'
    echo ""
done
Expected output for each agent:
"name": "brand_strategist",
"url": "https://brand-strategist-xxxx.run.app",
"description": "Brand strategist for market research and competitive insights"
Test with A2A Inspector (Cloud Run)
The A2A Inspector is already installed from Step 10. Start it:
cd ~/a2a-inspector
bash scripts/run.sh
Open Web Preview → Change port → 5001 . Enter your Cloud Run URL in the connection field:
https://brand-strategist-xxxx.us-central1.run.app
Click Connect - no auth token needed since services are deployed with --allow-unauthenticated .
The inspector connects, validates the agent card, and lets you chat interactively over A2A.
Inspect agents deployed to Cloud Run
After deploying to Cloud Run, point the inspector at the public HTTPS URL to verify the cloud deployment is working:
The workflow is identical - paste the Cloud Run URL, connect, and send a test message. If the agent card loads and the chat responds, the specialist is correctly deployed and reachable.
13. Deploy the Creative Director to Agent Runtime
The orchestrator is deployed to Agent Runtime , which provides managed session state, automatic scaling, and built-in tracing.
Why Agent Runtime for the orchestrator?
The five specialists are deployed to Cloud Run - lightweight, stateless, each handling one task. The Creative Director has different requirements:
Requirement | Why it matters |
Session state | A multi-step workflow takes 45+ seconds. Agent Runtime maintains the conversation state between the orchestrator's tool calls so nothing is lost mid-pipeline. |
Variable load | Sometimes one campaign per hour, sometimes many in parallel. Agent Runtime scales to zero when idle and scales out automatically - you don't pay for idle capacity. |
Observability | Cloud Logging, Cloud Monitoring, and Cloud Trace come built in. You can see every A2A call, every token used, every latency spike - without adding any instrumentation. |
Long-running workflows | Cloud Run has a 3600s request timeout. Agent Runtime is designed for workflows that can take minutes, with managed retries and state persistence. |
Cloud Run is the right platform for stateless specialists. Agent Runtime is the right platform for the stateful orchestrator.
Deploy the orchestrator
cd ~/ai-creative-studio/workshop/starter
source .env

uv run deploy/deploy_orchestrator.py --action deploy
This takes ~5–10 minutes. When complete, the AGENT_ENGINE_ID and AGENT_ENGINE_RESOURCE_NAME are saved to .env .
source .env
echo "Agent Engine ID: $AGENT_ENGINE_ID"
echo "Resource: $AGENT_ENGINE_RESOURCE_NAME"
How the deployment works
client.agent_engines.create() packages your App object, uploads it with its dependencies, and deploys it to managed infrastructure. Here's what each parameter does:
import vertexai
from vertexai import Client, agent_engines

vertexai.init(project=PROJECT_ID, location=LOCATION, staging_bucket=STAGING_BUCKET)

# Wrap the App in an AdkApp adapter - enables tracing in Cloud Trace
adk_app = agent_engines.AdkApp(app=root_app, enable_tracing=True)

# Initialize client and deploy
client = Client(project=PROJECT_ID, location=LOCATION)

agent_engine_resource = client.agent_engines.create(
    agent=adk_app,
    config={
        "staging_bucket": STAGING_BUCKET,   # GCS bucket for packaging artifacts
        "display_name": "Creative Director",
        # Python packages installed in the managed runtime - pin for reproducibility
        "requirements": [
            "google-cloud-aiplatform[agent_engines]>=1.132.0,<2.0.0",
            "google-adk[a2a]==1.31.1",
            "google-genai>=1.70.0",
            "google-cloud-storage>=2.10.0",
            "python-dotenv>=1.0.0",
            "pydantic>=2.0.0",
            "cloudpickle>=3.0.0",
        ],
        # Specialist URLs passed as env vars - the orchestrator reads these at runtime
        "env_vars": {
            "COPYWRITER_AGENT_URL": COPYWRITER_URL,
            "DESIGNER_AGENT_URL":   DESIGNER_URL,
            "STRATEGIST_AGENT_URL": STRATEGIST_URL,
            "CRITIC_AGENT_URL":     CRITIC_URL,
            "PM_AGENT_URL":         PM_URL,
        },
    },
)

resource_name = agent_engine_resource.api_resource.name
agent_engine_id = resource_name.split("/")[-1]
What happens under the hood:
1. Agent Engine packages your App + requirements into a container
2. Uploads it to the staging bucket in your project
3. Deploys to managed compute (you never see or manage the VM)
4. Returns a resource name: projects/.../locations/.../reasoningEngines/<id>
5. That ID is saved to .env as AGENT_ENGINE_ID
After deployment, the orchestrator connects to the five Cloud Run specialists via the URLs in its environment variables
- these are passed through
.envbefore the deploy script runs.
14. Run an end-to-end campaign
The entire system is deployed. Run a complete campaign from the Agent Runtime playground.
Open the Agent Runtime playground
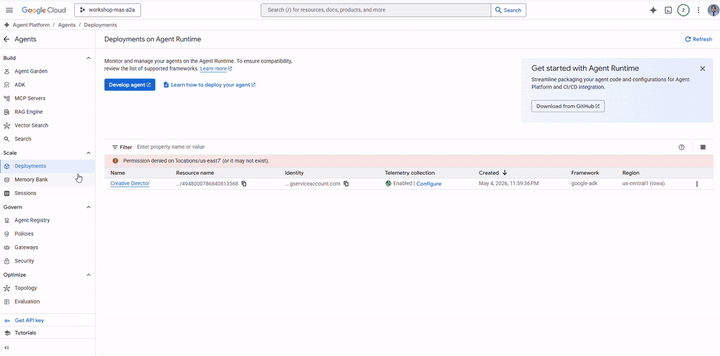
- Go to https://console.cloud.google.com/agent-platform/runtimes . You can also navigate to the Agent Runtime from Agent Platform > Agents > Deployments .
- Select your deployed Agent Runtime (
creative-director) - Click Playground in the left sidebar
- Click New session to open a fresh conversation
Run a full campaign
Paste this brief into the chat and send:
Create a complete Instagram campaign for:
- Product: EcoFlow Smart Water Bottle (tracks hydration, keeps drinks cold 24h)
- Target Audience: Health-conscious millennials, 25-35 years old
- Platform: Instagram
- Goal: Brand awareness + drive website traffic
- Brand Voice: Motivational, clean, science-backed
- Budget: $3,000
- Timeline: Launch in 2 weeks
The Creative Director will execute all 5 agents in sequence:
- Brand Strategist → market research, competitor analysis, audience insights
- Copywriter → 3 Instagram posts with captions, hashtags, CTAs
- Designer → visual concepts + real images generated via Gemini (GCS URIs) for each post
- Critic → quality review with APPROVED / NEEDS_REVISION scores
- (Revision if needed) → Copywriter or Designer called again with feedback
- Project Manager → 2-week timeline, task breakdown, budget allocation
Test single-agent routing
Send this shorter request in a new session:
Research the luxury skincare market - top brands and trends in 2025
Notice the Creative Director routes this to only the Brand Strategist - no other agents are called. This is the request classification logic from the system instruction working correctly.
Inspect execution traces
While still in the console:
- Click Traces in the left sidebar (next to Playground)
- Under Trace View , select the trace for the session you just ran
- Expand the trace tree to see each agent call, its inputs/outputs, latency, and token usage
Each A2A call to a specialist appears as a separate span. You can see exactly what context the Creative Director passed to each agent and what it received back.
Optional: Run from the terminal
You can also run the campaign programmatically using the run_campaign.py script that is already included in the starter.
cd ~/ai-creative-studio/workshop/starter
uv run run_campaign.py
15. Clean Up
Clean up Google Cloud resources to avoid ongoing charges.
Run the teardown script - it reads your .env and deletes everything created during this codelab:
bash deploy/teardown_gcp.sh
The script will show you exactly what it will delete and prompt for confirmation before doing anything:
Resource | What gets deleted |
Cloud Run services | brand-strategist, copywriter, designer, critic, project-manager |
Agent Runtime | Creative Director reasoning engine + all sessions |
Artifact Registry | |
GCS buckets | |
Secret Manager | |
Verify everything is removed
gcloud run services list --region=us-central1
gcloud storage buckets list --project=$GCP_PROJECT_ID
Expected output: empty lists or only your own pre-existing resources.
16. Summary
Congratulations! You've built and deployed a production-grade multi-agent AI system on Google Cloud.
What you built
এজেন্ট | Capability | Deployment |
Brand Strategist | Market research via Google Search | Cloud Run |
Copywriter | Instagram caption creation | Cloud Run |
ডিজাইনার | Image generation via Gemini + GCS upload | Cloud Run |
Critic | Quality review with scoring | Cloud Run |
প্রকল্প ব্যবস্থাপক | Timeline + Notion MCP | Cloud Run |
Creative Director | Full orchestration via A2A | Agent Runtime |
Key patterns you learned
- ADK
Agent- define an LLM agent with an instruction + optional tools -
adk web- run and test any ADK agent locally with a built-in chat UI -
SkillToolset- package reusable knowledge into modular files loaded on demand -
FunctionTool- wrap any Python function (or external model) as a callable agent tool -
to_a2a()- expose any ADK agent as an A2A-compliant HTTPS service -
RemoteA2aAgent+AgentTool- orchestrate remote agents as callable tools -
McpToolset- connect to external services via MCP stdio servers -
EventsCompactionConfig- handle token limits in long multi-agent workflows - Structured critic output - machine-readable quality control with automatic revision
- Cloud Run - deploy containerized agents at scale
- Agent Runtime - host orchestrators with managed sessions and tracing
পরবর্তী পদক্ষেপ
- Add multi-turn image editing to the Designer using
gemini-3.1-flash-image's edit capability - Add IAM authentication to Cloud Run services (remove
--allow-unauthenticated) - Replace one specialist with a LangGraph or CrewAI agent - A2A is framework agnostic
- Add user feedback as a tool so participants can rate and iterate on outputs
- Explore Agent Runtime tracing in the Cloud Console