
1. Обзор
В этом практическом занятии вы создадите AI Creative Studio — распределенную многоагентную систему, которая превращает один запрос в полноценную рекламную кампанию в Instagram.
Напишите одно предложение. Получите в ответ результаты исследования целевой аудитории, подписи, визуальные концепции, проверенный на качество текст и полный график проекта — все это сгенерировано командой взаимодействующих агентов искусственного интеллекта.
Агенты, которых вы создадите
Агент | Роль |
Бренд-стратег | Искать в интернете информацию об аудитории, анализ конкурентов и тенденции 2025 года. |
Копирайтер | Создает подписи к фотографиям в Instagram с хэштегами и призывами к действию — на основе навыка ADK, который загружает рекомендации платформы и формулы для создания подписей по запросу. |
Дизайнер | Создаёт визуальные концепции и генерирует реальные изображения с помощью Gemini, которые хранятся в GCS. |
Критик | Проверяет текст и визуальное оформление — возвращает |
Руководитель проекта | Создает график проекта и разбивку задач, при необходимости синхронизируясь с Notion через MCP. |
Креативный директор | Управляет последовательной работой всех пяти специалистов — вы задаете одну команду, а она координирует остальных. |
Пять агентов развернуты как независимые микросервисы Cloud Run . Они взаимодействуют по протоколу A2A — открытому стандарту, не зависящему от языка программирования, поэтому любой агент может вызывать любого другого агента независимо от используемой платформы. Creative Director работает на Agent Runtime и подключается к каждому специалисту удаленно.
Архитектура

Что вы узнаете
- Создавайте LLM-агенты с помощью Google ADK -
Agent, системных инструкций и встроенных инструментов. - С помощью ADK Skills (
SkillToolset) можно упаковывать многократно используемые знания об агентах в модульные файлы. - Генерируйте реальные изображения, связывая текстового агента с моделью изображения с помощью
FunctionTool. - Интегрируйте внешние API без написания собственного связующего кода, используя протокол контекста модели (MCP) .
- Превратите любой агент в сетевую службу, используя протокол Agent to Agent Protocol (A2A) по протоколу HTTPS.
- Организуйте работу распределенных агентов с помощью
RemoteA2aAgentиAgentTool. - Упаковывайте и развертывайте независимых агентов в виде микросервисов Cloud Run .
- Разместите оркестратор с сохранением состояния в Agent Runtime .
- Используйте сжатие контекста для оптимизации длинных многоагентных рабочих процессов, чтобы они оставались в пределах допустимых значений контекста.
- Создайте цикл контроля качества : Критик проверяет результаты → автоматическая доработка при необходимости.
Что вам понадобится
- Проект Google Cloud с включенной функцией выставления счетов.
- Роль владельца или редактора IAM
- Базовые знания Python
2. Настройте свою среду.
Для этой практической работы мы будем использовать Cloud Shell.
Что такое Cloud Shell?
Cloud Shell — это бесплатная браузерная среда Linux со всем необходимым, предустановленным в ней: gcloud , git , Python, Docker и многое другое. Вам не нужно ничего устанавливать локально.
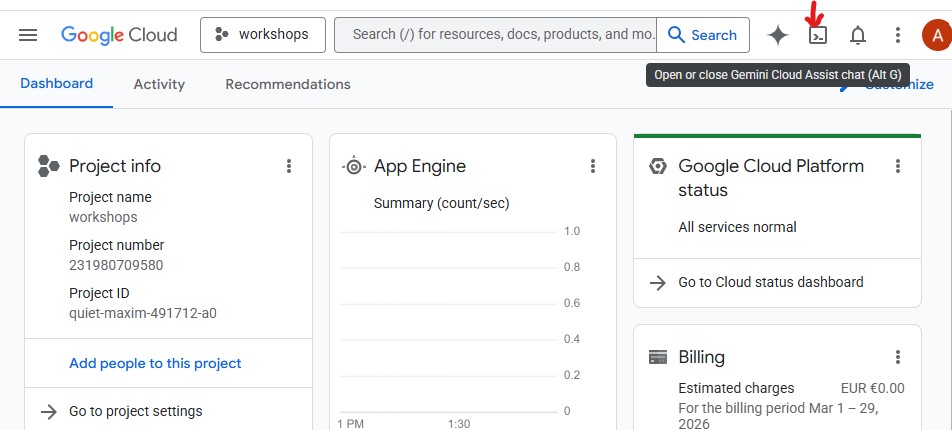
Чтобы открыть Cloud Shell, щелкните значок терминала в правом верхнем углу панели инструментов консоли GCP:
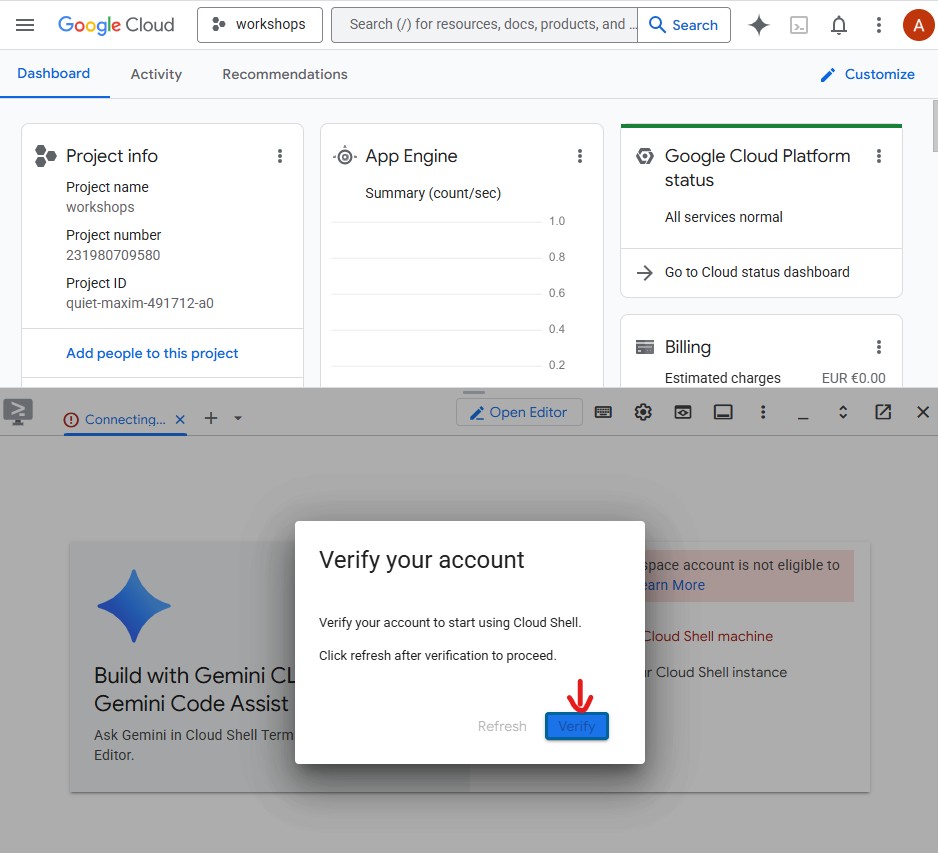
При первом запуске Cloud Shell вам будет предложено подтвердить свою учетную запись — нажмите «Подтвердить» :
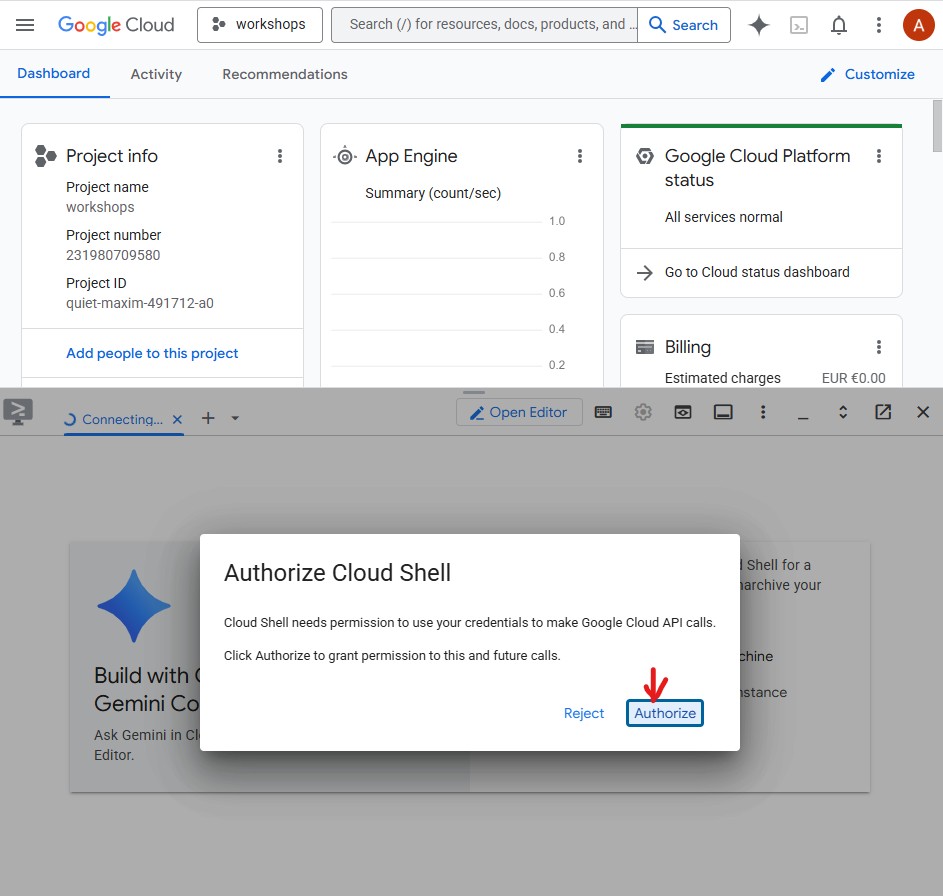
Затем нажмите «Авторизовать» , чтобы разрешить Cloud Shell выполнять вызовы к API Google Cloud:
Cloud Shell готов к работе. В терминале вы увидите приветственное сообщение: 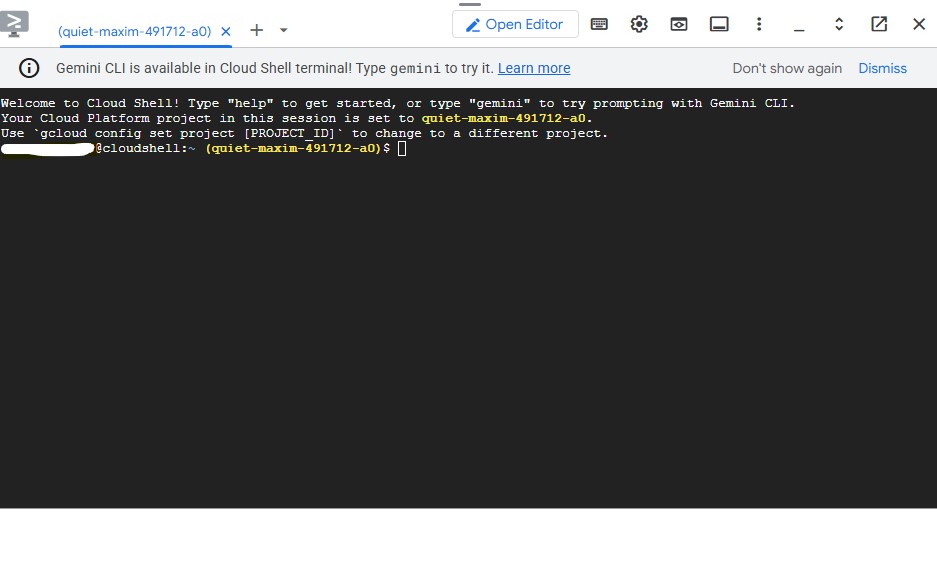
Аутентифицируйте и настройте свой проект.
Cloud Shell уже авторизован в вашей учетной записи Google. Подтвердите свою активную учетную запись и найдите идентификатор своего проекта:
gcloud config list
Идентификатор вашего проекта также можно увидеть на панели управления консоли GCP в левой части экрана. Скопируйте его — он понадобится вам в следующей команде:
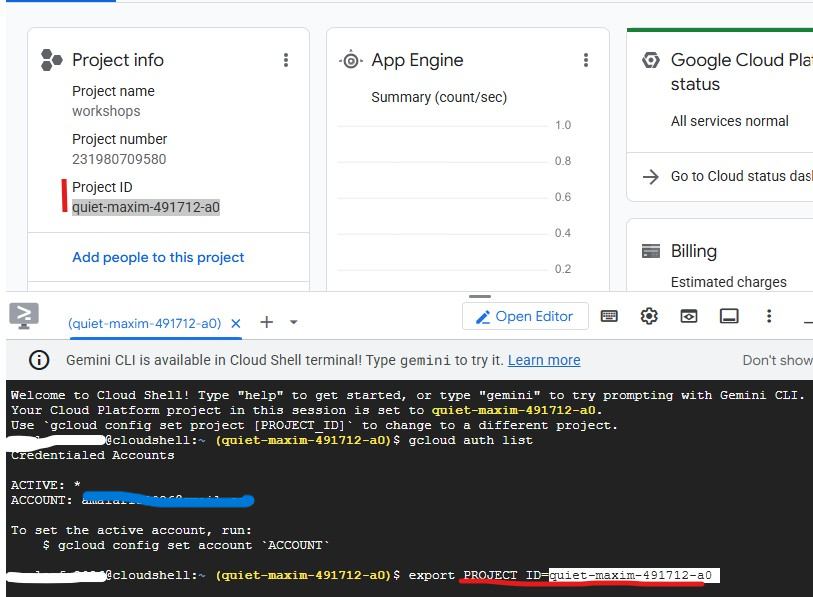
Теперь настройте свой проект:
export PROJECT_ID=$(gcloud config get-value project)
export REGION="us-central1"        # Cloud Run deployment region
echo "Project: $PROJECT_ID"
Ожидаемый результат:
Project: my-project-123
Включите необходимые API.
gcloud services enable \
    aiplatform.googleapis.com \
    apphub.googleapis.com \
    run.googleapis.com \
    cloudbuild.googleapis.com \
    artifactregistry.googleapis.com \
    generativelanguage.googleapis.com \
    iam.googleapis.com \
    cloudresourcemanager.googleapis.com \
    storage.googleapis.com \
    secretmanager.googleapis.com
Это займет около 2 минут. После завершения операции вы увидите Operation finished successfully .
Настройка учетных данных приложения по умолчанию (ADC)
Агенты будут обращаться к платформе Gemini Enterprise Agent Platform, используя библиотеку Google Auth , для которой требуются учетные данные приложения по умолчанию — отдельно от аутентификации через CLI gcloud .
Выполните это один раз:
gcloud auth application-default login
Откроется вкладка браузера с запросом подтверждения. Нажмите «Разрешить» . Вы увидите:
Credentials saved to file: ~/.config/gcloud/application_default_credentials.json
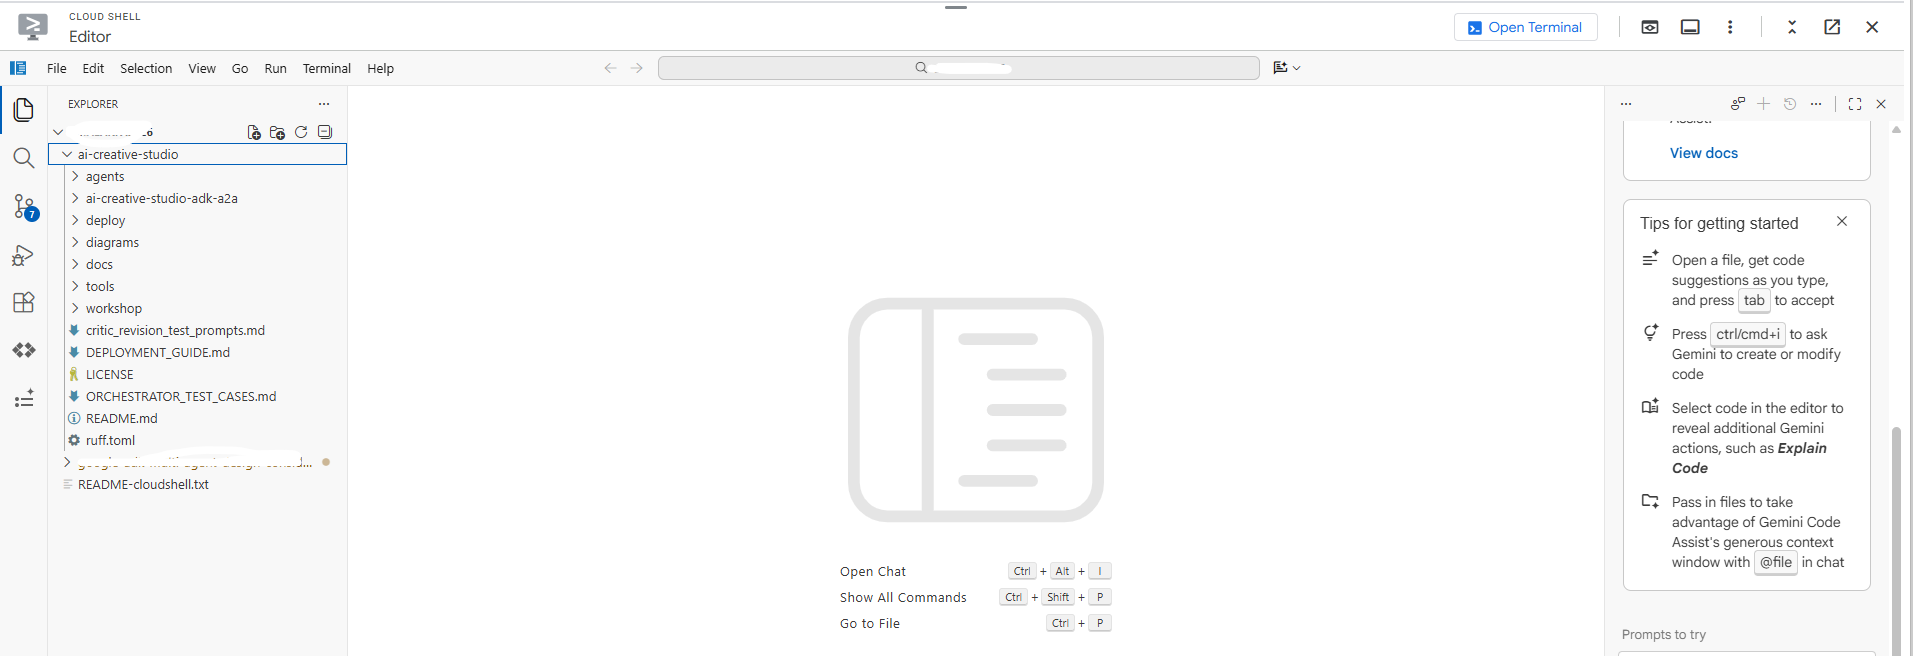
Клонируйте стартовый репозиторий
В этом практическом занятии используется стартовый репозиторий — каркасный проект со всей необходимой инфраструктурой (Dockerfile, pyproject.toml, скрипты развертывания), но логику агента вам предстоит написать самостоятельно.
git clone https://github.com/Saoussen-CH/mas-a2a-gcp.git ~/ai-creative-studio
cd ~/ai-creative-studio/workshop/starter
В каждом agent.py содержатся заполнители # TODO , где вы напишете логику работы агента. Dockerfile , pyproject.toml и скрипты развертывания уже готовы.
Настройка переменных среды
Скопируйте предоставленный пример и введите идентификатор вашего проекта за один шаг:
cp .env.example .env
sed -i "s|GOOGLE_CLOUD_PROJECT=your-project-id|GOOGLE_CLOUD_PROJECT=$(gcloud config get-value project)|" .env
Затем создайте хранилище GCS, где Designer будет хранить сгенерированные изображения, и обновите файл .env , указав его имя:
export PROJECT_ID=$(gcloud config get-value project)
export BUCKET_NAME="${PROJECT_ID}-campaign-images"

gcloud storage buckets create gs://${BUCKET_NAME} \
    --location=us-central1 \
    --project=${PROJECT_ID}

sed -i "s|GCS_IMAGES_BUCKET=your-project-id-campaign-images|GCS_IMAGES_BUCKET=${BUCKET_NAME}|" .env
Затем настройте поддержку подписанных URL-адресов изображений. Креативный директор генерирует кликабельные HTTPS-ссылки для каждого изображения в итоговом обзоре кампании. Для этого требуется учетная запись службы для подписи URL-адресов. Выполните следующие команды для настройки:
export PROJECT_NUMBER=$(gcloud projects describe $(gcloud config get-value project) --format="value(projectNumber)")
export SA_EMAIL="${PROJECT_NUMBER}-compute@developer.gserviceaccount.com"
export AGENT_RUNTIME_SA="service-${PROJECT_NUMBER}@gcp-sa-aiplatform-re.iam.gserviceaccount.com"

# Allow your user account to sign URLs locally (adk web)
gcloud iam service-accounts add-iam-policy-binding ${SA_EMAIL} \
  --member="user:$(gcloud config get-value account)" \
  --role="roles/iam.serviceAccountTokenCreator"

# Allow Agent Runtime to sign URLs when deployed
gcloud projects add-iam-policy-binding $(gcloud config get-value project) \
  --member="serviceAccount:${AGENT_RUNTIME_SA}" \
  --role="roles/iam.serviceAccountTokenCreator"

# Save SA email and project number to .env
grep -q "^SIGNING_SERVICE_ACCOUNT" .env \
  && sed -i "s|^SIGNING_SERVICE_ACCOUNT=.*|SIGNING_SERVICE_ACCOUNT=${SA_EMAIL}|" .env \
  || echo "SIGNING_SERVICE_ACCOUNT=${SA_EMAIL}" >> .env

grep -q "^GOOGLE_CLOUD_PROJECT_NUMBER" .env \
  && sed -i "s|^GOOGLE_CLOUD_PROJECT_NUMBER=.*|GOOGLE_CLOUD_PROJECT_NUMBER=${PROJECT_NUMBER}|" .env \
  || echo "GOOGLE_CLOUD_PROJECT_NUMBER=${PROJECT_NUMBER}" >> .env
Откройте файл .env в редакторе, чтобы просмотреть все настройки:
cloudshell edit .env
Это откроет файл .env в виде вкладки в редакторе Cloud Shell. Если панель редактора не видна, нажмите кнопку « Открыть редактор» на панели инструментов.

Убедитесь, что проект настроен правильно:
grep GOOGLE_CLOUD_PROJECT .env
Установите зависимости
Мы используем uv — быстрый и современный менеджер пакетов Python, который управляет виртуальными средами и устанавливает пакеты одним инструментом. Он примерно в 10-100 раз быстрее, чем pip , и является рекомендуемым способом управления проектами Python.
В Cloud Shell уже установлен uv . Все агенты используют одни и те же основные зависимости, поэтому установите его один раз , и он будет работать для всех агентов в этом практическом задании:
uv sync
Команда uv sync считывает файл pyproject.toml и создает каталог .venv/ со всеми зависимостями. У каждого специалиста также есть свой собственный файл pyproject.toml используемый исключительно для сборок Docker — приведенная выше общая установка покрывает все необходимое для локального тестирования.
3. Разберитесь в Google ADK.
Прежде чем писать код, давайте разберемся с Agent Development Kit (ADK) — фреймворком, который вы будете использовать для создания каждого агента в этом практическом занятии.
Что такое ADK?
Agent Development Kit (ADK) — это гибкая и модульная платформа для разработки и развертывания агентов искусственного интеллекта. Оптимизированный для Gemini и экосистемы Google, ADK не зависит от модели, способа развертывания и совместимости с другими платформами. ADK разработан для того, чтобы разработка агентов больше походила на разработку программного обеспечения, упрощая разработчикам создание, развертывание и управление агентными архитектурами, от простых задач до сложных рабочих процессов.
ADK берет на себя сложные задачи — вызов инструментов, многоэтапный диалог, управление контекстом, потоковую передачу данных — поэтому вы можете сосредоточиться на логике работы агента.
Основные компоненты агента ADK
Каждый агент состоит из четырех строительных блоков:
Блокировать | Роль |
Модель | Магистр права (LLM) — это специалист, который анализирует цели, разрабатывает план и генерирует ответные действия. |
Инструменты | Функции, которые получают данные или выполняют действия путем вызова API или сервисов. |
Оркестровка | Сохраняет память и состояние между поворотами, направляет вызовы инструментов, передает результаты обратно в модель. |
Среда выполнения | Запускает систему при вызове — локально через |
Определение агента
Каждый из 5 агентов в этом практическом занятии определяется одинаково:
from google.adk.agents import Agent
from google.adk.tools.google_search_tool import google_search

root_agent = Agent(
    name="brand_strategist",                              # unique identifier
    model=os.getenv("GEMINI_MODEL", "gemini-2.5-flash"), # the LLM powering this agent
    instruction=SYSTEM_INSTRUCTION,                       # the agent's persona, constraints, and output format
    description="Brand strategist for market research, trend analysis, and competitive insights",
    tools=[google_search],                                # functions the LLM can call
)
Поле | Цель |
| Уникальный идентификатор — используется оркестраторами для маршрутизации вызовов. |
| Модель Gemini, поддерживающая этого агента. |
| Системная подсказка — определяет роль агента, ограничения и формат вывода. |
| Краткое резюме — координатор зачитывает его, чтобы решить, к какому специалисту обратиться. |
| Функции, которые может вызывать LLM (встроенные, такие как |
Как ADK управляет агентом
User message
     │
     ▼
  Agent (LLM)  ← reads instruction + conversation history
     │
     ├─► needs more info? → calls a tool → gets result → continues reasoning
     │
     └─► done reasoning → returns final text response
Модуль LLM самостоятельно решает, вызывать ли инструмент, какой именно инструмент и с какими аргументами. Вы пишете инструкцию — ADK обрабатывает всё остальное.
4. Создайте и протестируйте агента «Стратег бренда».
Начнём с первого агента: Бренд-стратег. Этот агент занимается исключительно исследованиями, поиском информации о целевой аудитории, анализом конкурентов и актуальными темами с помощью поиска Google.
Откройте файл-шаблон агента в редакторе Cloud Shell:
cloudshell edit agents/brand_strategist/agent.py
Вы увидите два раздела # TODO , которые вам нужно заполнить.
TODO 1 - Напишите системную инструкцию
Сначала вам нужно будет написать системную инструкцию для агента. Системная инструкция представляет собой строку, определяющую роль агента, ограничения и формат вывода.
SYSTEM_INSTRUCTION = f"""You are a Brand Strategist specializing in market research and trend analysis.

IMPORTANT: Today's date is {datetime.date.today().strftime("%B %d, %Y")}.
When conducting research, focus on current trends from {datetime.date.today().year}.
Use search queries like "[topic] trends {datetime.date.today().year}" for recent insights.

IMPORTANT: Your role is RESEARCH ONLY. You do NOT create campaign content, captions, or designs.
After providing research insights, your work is complete.

Your expertise:
- Identifying target audience insights and behaviors
- Analyzing competitor strategies
- Researching current social media trends
- Understanding platform algorithms and best practices

You have access to:
- google_search: Search the web for competitors, trends, and market insights

When given a campaign brief:
1. Use google_search to research the target audience's current interests
2. Search for and analyze 2-3 competitor brands
3. Identify 3-5 trending topics related to the product category
4. Provide high-level strategic insights - NOT specific campaign content

DO NOT create captions, copy, designs, or any campaign content.

Format your output as:
**Audience Insights:**
[Key behaviors and preferences based on research]

**Competitive Analysis:**
[What 2-3 competitors are doing - strengths and weaknesses]

**Trending Topics:**
[3-5 relevant trends to consider]

**Key Strategic Insights:**
[High-level themes and positioning opportunities]
"""
TODO 2 - Создать root_agent
Далее замените неполный root_agent следующим образом:
root_agent = Agent(
    name="brand_strategist",
    model=os.getenv("GEMINI_MODEL", "gemini-2.5-flash"),
    instruction=SYSTEM_INSTRUCTION,
    description="Brand strategist for market research, trend analysis, and competitive insights",
    tools=[google_search],
)
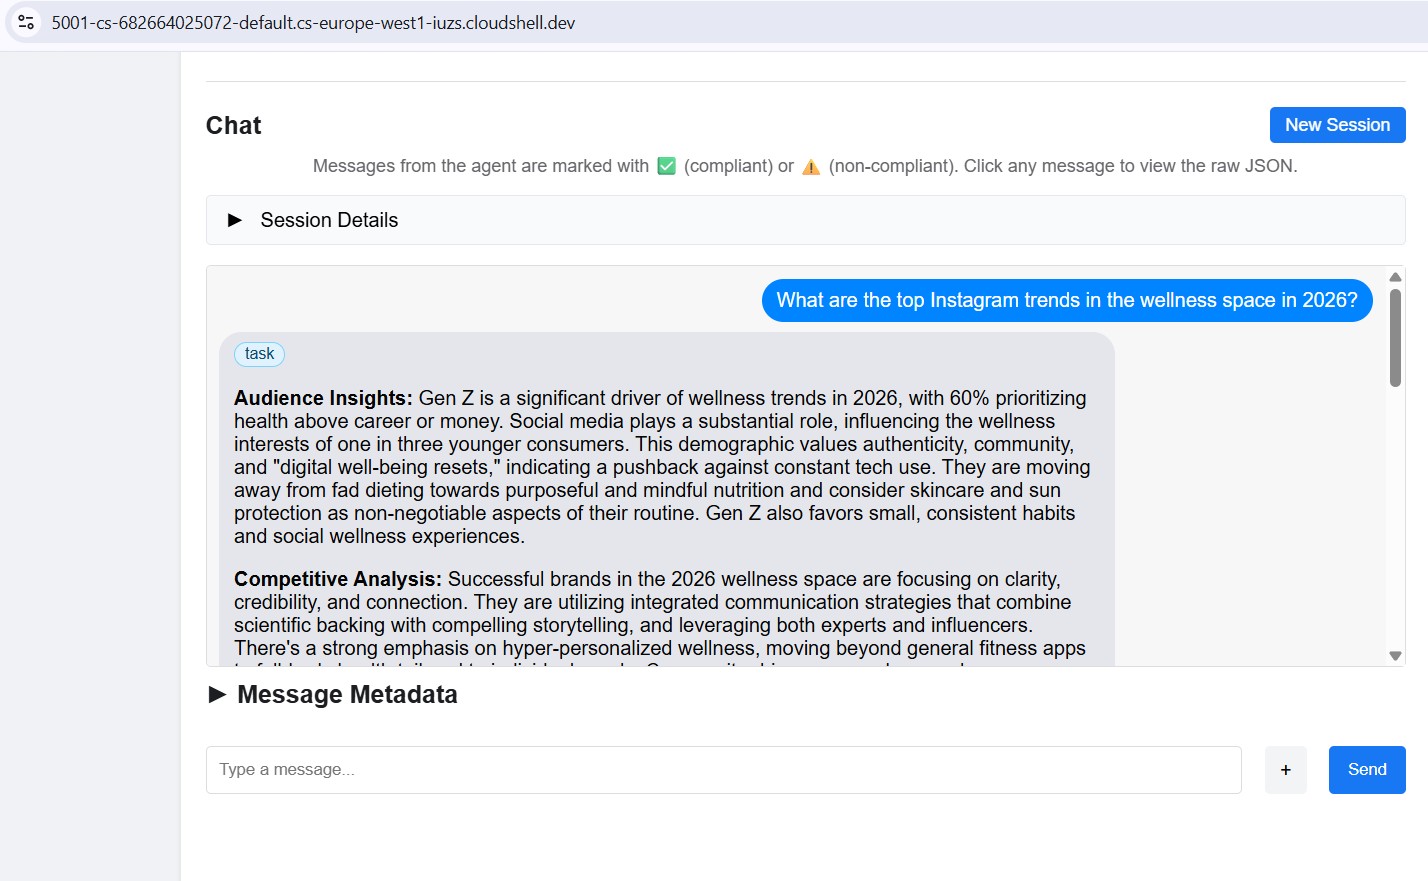
Протестируйте локально с помощью веб-интерфейса ADK.
Теперь давайте протестируем агента, используя веб-интерфейс ADK — встроенный чат-интерфейс для тестирования агентов перед развертыванием в облаке.
uv run adk web agents --allow_origins='*'
Вы увидите:
INFO: Started server process
INFO: Uvicorn running on http://localhost:8000
Сервер теперь работает в оболочке Cloud Shell:
Чтобы открыть его в браузере, используйте функцию предварительного просмотра веб-страниц :
- Обратите внимание на панель инструментов Cloud Shell в верхней части страницы.
- Нажмите на значок «Предварительный просмотр веб-страницы» (он выглядит как прямоугольник со стрелкой вверх, расположенный в правом верхнем углу панели инструментов Cloud Shell).
- Нажмите «Изменить порт» и введите
8000, затем нажмите «Изменить и просмотреть».
В новой вкладке браузера откроется веб-интерфейс ADK. Щелкните раскрывающийся список «Выберите агента» в верхнем левом углу — вы увидите список всех ваших агентов:
Выберите brand_strategist , чтобы начать тестирование:
Попробуйте выполнить эти тестовые задания.
В окне чата веб-интерфейса ADK попробуйте следующее:
-
Research the eco-friendly water bottle market for health-conscious millennials -
What are the top Instagram trends in the wellness space in 2025?
Вы должны увидеть, как агент позвонит в Google Поиск и предоставит структурированное исследование, содержащее разделы «Анализ аудитории», «Конкурентный анализ» и «Актуальные темы».
5. Развитие навыков копирайтера - ADK Skills
Задача: Преобразовать результаты исследования бренда в подписи для Instagram. Копирайтер создаст 3 варианта подписей, отражающих разные тона (вдохновляющие, образовательные, посвященные сообществу), каждый с хэштегами и призывом к действию.
Концепция: ADK Skills
Наивный подход заключался бы в том, чтобы встроить всю информацию о платформе — ограничения по количеству символов, уровни хэштегов, формулы для подписей, примеры фирменного стиля — непосредственно в системное сообщение. Это работает, но раздувает каждый запрос контентом, который агенту нужен лишь изредка.
ADK Skills ( SkillToolset , представленный в ADK 1.25.0) позволяет упаковывать эти знания в модульные файлы с тремя уровнями загрузки:
- L1 - вводная часть (
name+descriptionвSKILL.md): всегда доступна, используется для поиска навыков. - L2 - инструкции (тело файла
SKILL.md): загружаются, когда агент активирует навык. - L3 - ресурсы (файлы
references/иassets/): загружаются только тогда, когда агент явно их считывает.
Системная инструкция сокращается до короткого описания роли плюс «загрузить навык перед записью». Информация о платформе появляется в контекстном окне только тогда, когда агенту она действительно необходима.
Навыки копирайтера можно найти в разделе agents/copywriter/skills/instagram-copywriting/ :
skills/
  instagram-copywriting/
    SKILL.md                       ← L1 frontmatter (discovery) + L2 instructions (loaded on trigger)
    references/
      platform-guide.md            ← L3: character limits, hashtag tiers, algorithm signals
      caption-formulas.md          ← L3: hook formulas, CTA patterns, full caption structures
    assets/
      brand-voice-examples.md      ← L3: annotated real-world caption examples
Откройте файл непосредственно в редакторе Cloud Shell:
cloudshell edit agents/copywriter/agent.py
TODO 1 - Импортировать load_skill_from_dir и skill_toolset
Найдите комментарий # TODO 1: Import load_skill_from_dir and skill_toolset и добавьте два импорта:
from google.adk.skills import load_skill_from_dir
from google.adk.tools import skill_toolset
TODO 2 - Загрузить навык и создать SkillToolset
Ниже импортированных данных находятся два комментария:
# TODO 2: Load the instagram-copywriting skill from the skills/ directory
# TODO 2: Create a SkillToolset with the loaded skill
Замените их на:
_instagram_skill = load_skill_from_dir(
    pathlib.Path(__file__).parent / "skills" / "instagram-copywriting"
)
_copywriting_skills = skill_toolset.SkillToolset(skills=[_instagram_skill])
load_skill_from_dir считывает файл SKILL.md , а также любые файлы из папок references/ и assets/ . SkillToolset преобразует его в формат, принимаемый агентами ADK — набор инструментов, а не сам навык.
TODO 3 - Зарегистрировать набор инструментов у агента
Найти tools=[], # TODO 3: Add the SkillToolset here и заменить его на:
tools=[_copywriting_skills],
Откройте файл с навыками, чтобы посмотреть, как он структурирован:
cloudshell edit agents/copywriter/skills/instagram-copywriting/SKILL.md
Не забывайте оставлять веб-интерфейс ADK запущенным. Используйте выпадающее меню «Агент» , чтобы переключиться на copywriter без перезапуска сервера.
Если программа не запускается, запустите её снова:
uv run adk web agents --allow_origins='*'
Попробуйте: выберите в выпадающем списке пункт copywriter и отправьте:
You are writing captions for EcoFlow Smart Water Bottle targeting health-conscious millennials aged 25-35.
Audience insight: they prioritize sustainability, track health metrics, and share lifestyle content.
Competitor insight: Hydro Flask dominates with lifestyle branding; S'well leads on premium aesthetics.
Write 3 Instagram captions - one inspirational, one educational, one community-focused. Include 5 hashtags each and a CTA.
6. Создание дизайнера — генерация мультимодальных изображений
Не забывайте оставлять веб-интерфейс ADK запущенным. Используйте выпадающее меню «Агент» , чтобы переключать агентов без перезапуска сервера.
Задача: Создание визуальных концепций для каждой подписи и генерация реальных изображений с использованием встроенной функции генерации изображений Gemini. Дизайнер создает ровно одну визуальную концепцию для каждой подписи — с подробным описанием, стилем, цветовой палитрой, настроением и форматом для Instagram — а затем немедленно запускает инструмент generate_image для создания реального изображения и загружает его в GCS.
Концепция: Объединение текстового агента и модели изображений с помощью инструмента.
Designer работает на основе gemini-3-flash-preview (текстовая модель задается через GEMINI_MODEL в .env ), но для генерации изображений требуется отдельная модель ( gemini-3.1-flash-image ). Эта модель изображений не поддерживает вызов функций, поэтому ее нельзя использовать напрямую в качестве агента ADK. Вместо этого она обернута в простую функцию Python и зарегистрирована как FunctionTool .
Это шаблон для любой модели или API, к которым LLM не может обратиться напрямую: оберните его в инструмент, позвольте агенту управлять моментом вызова и получите структурированный результат.
Designer agent (text model)
        │
        │  decides visual concept, writes image prompt
        ▼
  generate_image tool
        │
        │  calls gemini-3.1-flash-image
        │  uploads result to GCS
        ▼
  {"status": "success", "gcs_uri": "gs://..."}
        │
        │  returned to agent, included in response
        ▼
  Critic (receives gcs_uri, passes to Vertex AI for multimodal review)
Откройте файл непосредственно в редакторе Cloud Shell:
cloudshell edit agents/designer/image_gen_tool.py
Предоставляются сигнатура функции, настройки среды и внедрение соотношения сторон. Выполните три задачи в указанном порядке:
TODO 1 - Вызвать модель изображения Gemini
Найдите комментарий # TODO 1 и замените его на:
        client = genai.Client(vertexai=True, project=project_id, location=location)

        response = client.models.generate_content(
            model=image_model,
            contents=prompt_with_aspect,
            config=types.GenerateContentConfig(
                response_modalities=["IMAGE", "TEXT"],
                http_options=types.HttpOptions(
                    retry_options=types.HttpRetryOptions(
                        attempts=5, exp_base=2, initial_delay=30,
                        http_status_codes=[429, 500, 503, 504],
                    ),
                    timeout=180_000,
                ),
            ),
        )
TODO 2 - Извлечь байты изображения из ответа
Найдите комментарий # TODO 2 и замените его на:
        image_bytes = None
        mime_type = "image/png"
        for part in response.candidates[0].content.parts:
            if part.inline_data is not None:
                image_bytes = part.inline_data.data
                mime_type = part.inline_data.mime_type or "image/png"
                break

        if not image_bytes:
            return {"status": "error", "error": "Gemini returned no image data"}
TODO 3 - Загрузить в GCS и вернуть URI
Найдите комментарий # TODO 3 и замените его на:
        ext = "jpg" if "jpeg" in mime_type else "png"
        from google.cloud import storage
        gcs_client = storage.Client(project=project_id)
        bucket = gcs_client.bucket(bucket_name)
        blob_name = f"campaign-images/{concept_name}-{uuid.uuid4().hex[:8]}.{ext}"
        blob = bucket.blob(blob_name)
        blob.upload_from_file(io.BytesIO(image_bytes), content_type=mime_type)
        gcs_uri = f"gs://{bucket_name}/{blob_name}"
Попробуйте: переключитесь в выпадающее меню на designer и отправьте:
Create a visual concept and generate the image for an EcoFlow Smart Water Bottle Instagram post targeting health-conscious millennials.
Style: clean, modern, lifestyle-focused. Include a detailed prompt with color palette, mood, and format (1080x1080 or 1080x1350).
7. Создайте структурированный отчет критика.
Роль: Контроль качества текста и визуальных материалов перед передачей их руководителю проекта. Критик оценивает оба результата и возвращает APPROVED или NEEDS_REVISION с конкретными предложениями. Если во входных данных присутствуют значения gcs_uri , вызывается инструмент review_image для визуальной проверки каждого сгенерированного изображения перед выставлением оценки.
Концепция: Когда использовать пидантическую модель для вывода данных Gemini?
Правило касается того, кто потребляет продукцию :
- Код на Python использует это → используйте
response_schema+ Pydantic. Код не может обрабатывать неоднозначность, поэтому вам нужна гарантированная структура для надежного извлечения полей. - Для студентов магистратуры достаточно ознакомиться с текстовым форматом и инструкциями по его использованию . Студенты магистратуры понимают правила форматирования и допускают их вариативность.
В review_image коду Python необходимы значения score , approval_status , what_works , issues и suggestions в виде типов. Передача response_schema=_GeminiReview ограничивает Gemini на уровне API возвратом корректного JSON; model_validate_json() преобразует его в типизированный объект, который ваш код сможет надежно использовать.
class _GeminiReview(BaseModel):
    score: int = Field(ge=1, le=10)
    approval_status: Literal["APPROVED", "NEEDS_REVISION"]
    what_works: str
    issues: str
    suggestions: str
Откройте файл непосредственно в редакторе Cloud Shell:
cloudshell edit agents/critic/image_review_tool.py
Модели Pydantic и задание предоставлены. Выполните три задачи в указанном порядке:
Задача 1 — Создать часть изображения на основе URI системы координат.
Найдите комментарий # TODO 1 и замените его на:
image_part = types.Part.from_uri(file_uri=gcs_uri, mime_type=mime_type)
TODO 2 - Позвонить в Gemini, используя схему структурированного ответа.
Найдите комментарий # TODO 2 и замените его на:
        response = client.models.generate_content(
            model=model,
            contents=[image_part, prompt],
            config=types.GenerateContentConfig(
                response_schema=_GeminiReview,
                response_mime_type="application/json",
            ),
        )
TODO 3 - Разобрать ответ и вернуть результат
Найдите комментарий # TODO 3 и замените его на:
        review = _GeminiReview.model_validate_json(response.text)
        return ImageReviewResult(status="success", concept_name=concept_name, **review.model_dump())
Попробуйте: переключите выпадающее меню на critic и отправьте:
Review this Instagram caption for an eco-friendly water bottle brand targeting millennials:
"Hydrate smarter, live greener. 💧 Our EcoFlow bottle tracks your intake, keeps your drink cold for 24h, and never touches single-use plastic. Because what you drink from matters as much as what you drink. #EcoFlow #HydrationGoals #SustainableLiving #ZeroWaste #HealthyHabits - Shop link in bio."
Score it and indicate APPROVED or NEEDS_REVISION with specific feedback.
Убедитесь, что ответ содержит **POSTS REVIEW:** , Status: APPROVED (или NEEDS_REVISION ) и **OVERALL ASSESSMENT:** . Если эти разделы присутствуют, критик готов подключиться к оркестратору.
После завершения тестирования всех трех агентов нажмите Ctrl+C , чтобы остановить сервер.
8. Создайте агент менеджера проекта с помощью MCP.
Руководитель проекта представляет новую концепцию: MCP (Model Context Protocol) .
Откройте файл:
cloudshell edit agents/project_manager/agent.py
Этот файл сложнее — в нём есть функция create_project_manager_agent() с двумя ветвями: одна без Notion (только текстовые временные шкалы), а другая с набором инструментов Notion MCP. Вам нужно будет заполнить обе ветви.
Проблема, которую решает MCP.
Вашему агенту необходимо обратиться к внешнему сервису — например, создать страницу в Notion. Вы могли бы написать код на Python, который напрямую вызывает REST API Notion. Но тогда:
- Каждый разработчик пишет свою собственную обертку.
- Вам необходимо поддерживать собственный код интеграции.
- LLM не знает о существовании API, если вы не опишете каждую конечную точку вручную.
MCP решает эту проблему , определяя стандартный способ для внешних сервисов предоставлять доступ к своим возможностям в виде инструментов, которые магистр права может автоматически обнаруживать и вызывать.
Что такое MCP?
MCP (Model Context Protocol) — это открытый стандарт (опубликованный Anthropic) для подключения агентов ИИ к внешним инструментам и источникам данных. Он работает как универсальный адаптер.
Сервер MCP — это небольшая программа, которая:
- Оборачивает внешний API (Notion, GitHub, базы данных, файловые системы и т.д.).
- Предоставляет доступ к этому API в виде списка типизированных, документированных инструментов.
- Общается с агентом по простому протоколу (stdio или HTTP).
Агент подключается к серверу MCP, автоматически обнаруживает доступные инструменты и может вызывать их так же, как и любые другие инструменты — LLM рассматривает API-post-page(...) как вызываемую функцию.
A2A против MCP — в чем разница?
Это распространённый источник путаницы. Вот ключевое различие:
A2A | МКП | |
Что связывает | Агент ↔ Агент | Агент ↔ Внешний инструмент/сервис |
Другая сторона — | Еще один агент LLM | Оболочка API (без LLM) |
Пример | Креативный директор звонит бренд-стратегу. | Менеджер проекта вызывает API Notion |
Протокол | JSON-RPC через HTTPS | стандартный ввод или HTTP-поток |
Определяется | Антропический |
Подумайте об этом так:
- A2A = как агенты общаются друг с другом.
- MCP = как агенты взаимодействуют с инструментами и сервисами
В этом проекте они используются вместе:
Creative Director
    │
    │  (A2A)  Brand Strategist ─── (google_search tool built into ADK)
    │  (A2A)  Copywriter
    │  (A2A)  Designer
    │  (A2A)  Critic
    │  (A2A)  Project Manager
                   │
                   │  (MCP)  notion-mcp-server ──► Notion REST API
Как работает MCP в этом проекте
Когда агент запускается, ADK запускает notion-mcp-server в качестве дочернего процесса. Этот процесс предоставляет доступ к данным инструментам непосредственно LLM:
Инструмент | Что это делает |
| Получает схему (имена свойств, типы, допустимые значения). |
| Запросы существующих страниц |
| Создает новую страницу |
| Обновляет существующую страницу |
В рамках программы LLM эти функции вызываются как любые другие — программа понятия не имеет, что они проходят через MCP к REST API Notion, который находится внутри системы.
Почему стандартный ввод/вывод (stdio)? Почему бы просто не использовать HTTP?
Сервер MCP работает как дочерний процесс агента, обмениваясь данными через стандартный ввод/вывод. Это означает:
- Дополнительный сетевой порт не требуется.
- Жизненный цикл управляется агентом (запускается по запросу, останавливается при выходе).
- Все компоненты поставляются в одном образе Docker — нет необходимости развертывать отдельный сервис.
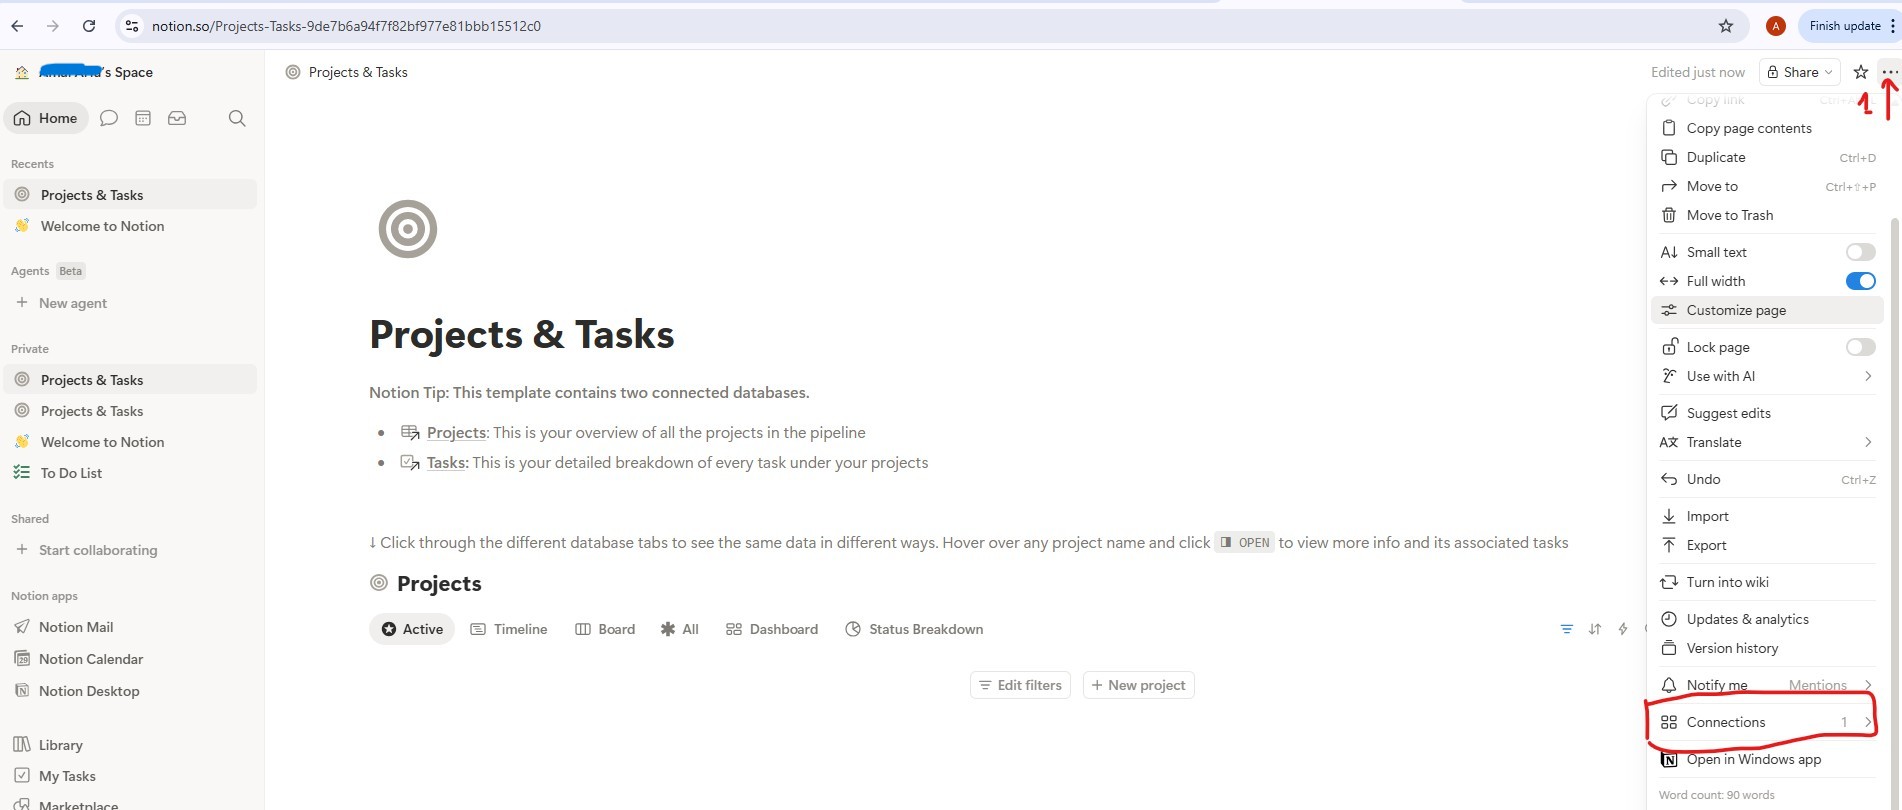
(Необязательно) Включить интеграцию с Notion
Вы можете пропустить весь этот раздел. Агент Project Manager всегда создает полную текстовую хронологию кампании, с Notion или без него. Если вы пропустите эту настройку, агент переключится в режим работы в оперативной памяти и выведет хронологию в виде обычного текста в чат. Ничего не сломается — вы просто не увидите задачи в базе данных Notion. Если хотите пропустить этот раздел, сразу переходите к TODO 1.
Если у вас есть учетная запись Notion и вы хотите увидеть интеграцию с MCP в действии, выполните настройку, описанную ниже, прямо сейчас. Следующие пункты TODO содержат идентификаторы баз данных Notion — вы можете получить их здесь.
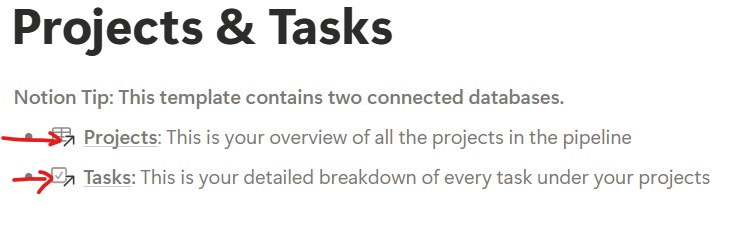
Шаг 1 — Создайте базу данных Notion на основе шаблона.
В качестве базы данных мы используем официальный шаблон Notion Projects & Tasks . Мы выбрали этот шаблон намеренно, чтобы продемонстрировать сложную реальную ситуацию — в нем есть несколько типов свойств (статус, диапазоны дат, связи, выпадающие списки) с неочевидными названиями. Это отличная проверка динамического обнаружения схемы в MCP: агент должен определить точные названия свойств во время выполнения, а не иметь их жестко закодированными.
Нажмите на ссылку ниже, чтобы добавить шаблон в ваше рабочее пространство Notion:
→ Добавить шаблон «Проекты и задачи» в Notion
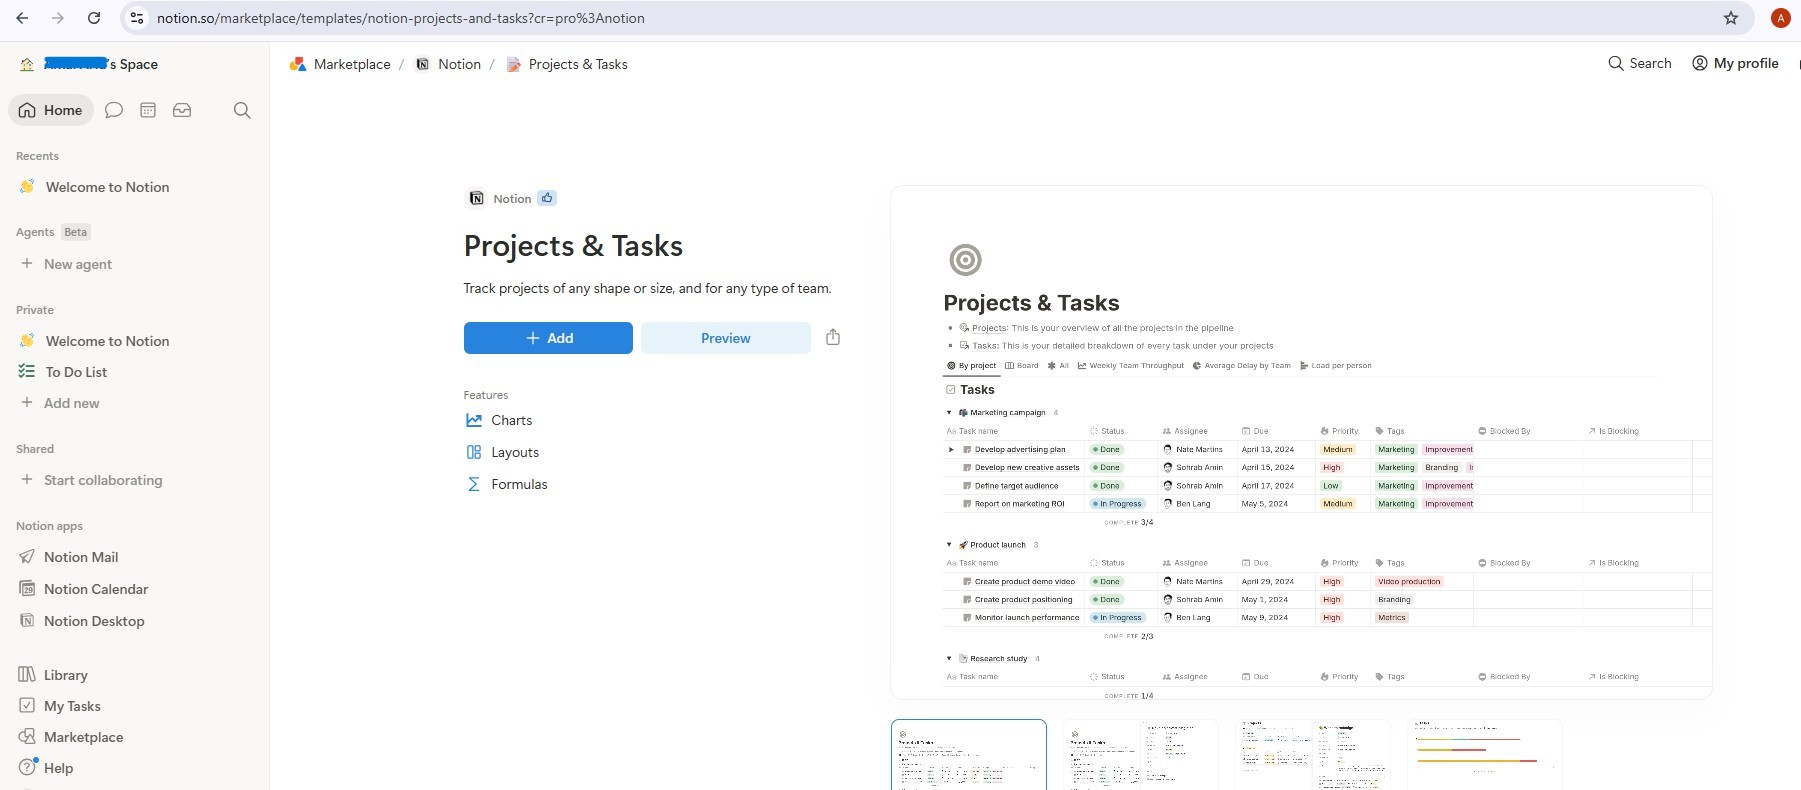
После добавления у вас будет две связанные базы данных: «Проекты» и «Задачи» . Шаблон содержит примеры записей — удалите их все перед продолжением, чтобы агент начал работу с чистым рабочим пространством (выбрать все → Удалить).
Шаг 2 — Создайте интеграцию с Notion.
Создайте интеграцию:
- Перейдите по ссылке notion.so/my-integrations
- Нажмите «Новая интеграция» → назовите её
AI Creative Studio - Свяжите его со своим рабочим пространством
- Нажмите «Настроить параметры» → убедитесь, что отмечены параметры «Чтение содержимого» , «Обновление содержимого» и «Вставка содержимого».
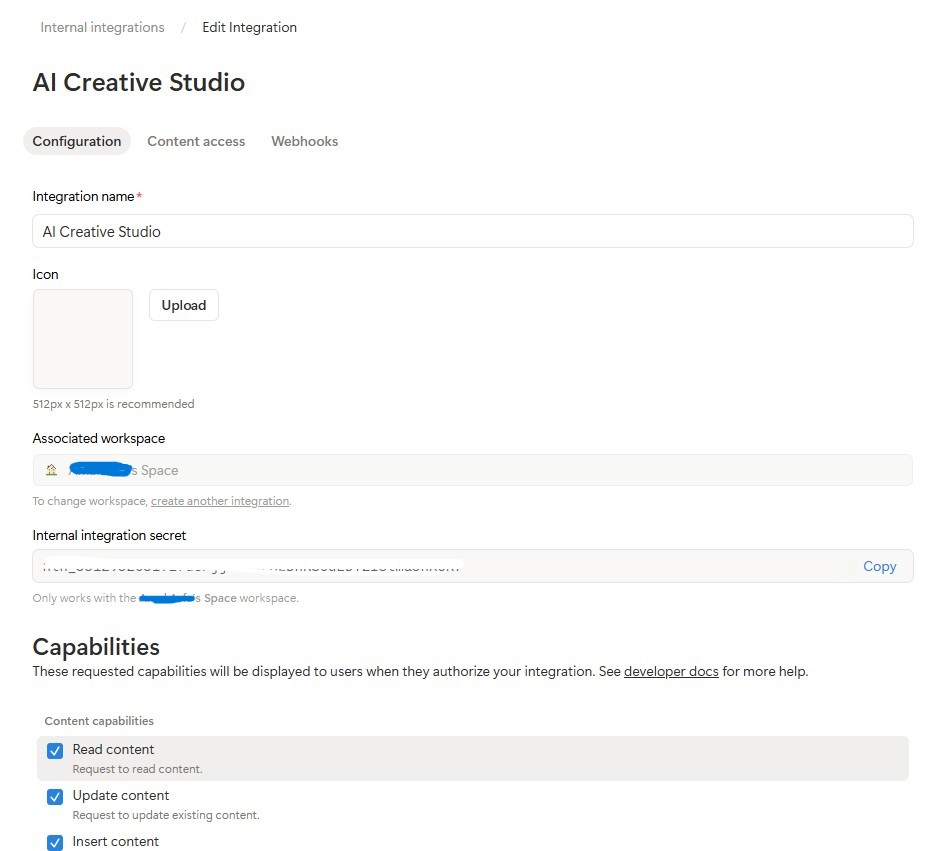
- Скопируйте внутренний интеграционный токен (
ntn_...) и вставьте его в файл.env:
NOTION_TOKEN=ntn_your-token-here
Подключите интеграцию к вашим базам данных:
- Откройте только что скопированную страницу шаблона, затем перейдите в базу данных проектов.
- Нажмите на меню
...(в правом верхнем углу) → "Подключения" → "Добавить подключение" → выберитеAI Creative Studio
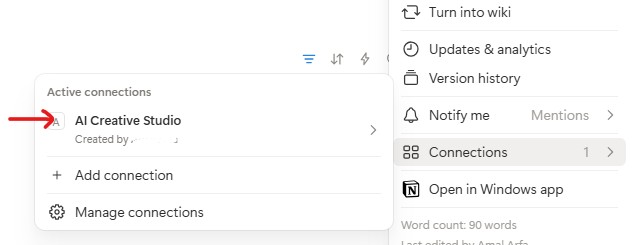
- Сделайте то же самое для базы данных задач .
Получите идентификаторы баз данных:
- Чтобы открыть базу данных проектов, нажмите на ссылку «База данных проектов» — она откроется на отдельной странице с URL-адресом примерно такого вида:
https://www.notion.so/9887b6a94f7f83f68f8581e038d1aaa4?v=2c37b6a94f7f838685f1086e312c7278
Идентификатор базы данных — это первый UUID в URL-адресе — всё, что находится перед ?v= :
https://www.notion.so/{DATABASE_ID}?v=...
                       ^^^^^^^^^^^^^^^^
                       9887b6a94f7f83f68f8581e038d1aaa4  ← this is your DATABASE_ID
- Сделайте то же самое для ссылки на базу данных задач , чтобы получить ее идентификатор в базе данных.
- Добавьте все три значения в ваш
.env:
NOTION_TOKEN=ntn_your-token-here
NOTION_PROJECT_DATABASE_ID=9887b6a94f7f83f68f8581e038d1aaa4   # <-- your Projects DB ID
NOTION_TASKS_DATABASE_ID=your-tasks-db-id                      # <-- your Tasks DB ID
Шаг 3 — Установка сервера Notion MCP
Менеджер проекта подключается к Notion через официальный пакет Node.js @notionhq/notion-mcp-server . Установите его глобально:
npm install -g @notionhq/notion-mcp-server@1.9.1
Проверьте установку:
npm list -g @notionhq/notion-mcp-server
Ожидаемый результат:
└── @notionhq/notion-mcp-server@1.9.1
notion-mcp-server: command not found
Убедитесь , что Node.js установлен ( node --version ) и что глобальный исполняемый файл npm находится в переменной PATH ( export PATH=$PATH:$(npm bin -g) ).
Шаг 4 — Проверьте свой файл .env
Откройте файл .env и убедитесь, что все три значения Notion установлены (вы добавили их на шаге 2):
cloudshell edit .env
NOTION_TOKEN=ntn_...                           # integration token
NOTION_PROJECT_DATABASE_ID=...                 # Projects database ID
NOTION_TASKS_DATABASE_ID=...                   # Tasks database ID
Агент Project Manager автоматически обнаруживает эти переменные при запуске и активирует набор инструментов Notion MCP.
Как работает обнаружение схемы
Менеджер проекта использует динамическое обнаружение схемы — он никогда не задает имена свойств Notion жестко:
Step 1: Call API-retrieve-a-database to discover exact property names
Step 2: Read the "properties" object in the response
Step 3: Use ONLY discovered property names (case-sensitive) in API calls
Step 4: For select/status fields, use only values from the options array
Это означает, что агент автоматически адаптируется к любой структуре базы данных Notion — переименуйте свои свойства на французский, арабский или любой другой язык, и агент всё равно будет работать.
TODO 1 - Напишите системную инструкцию
Стартовый модуль уже вычисляет notion_section — пустую строку, если Notion не настроен, или блок, содержащий идентификаторы базы данных и полные инструкции по использованию инструментов, если он настроен. Это полностью исключает инструкции Notion из командной строки агента без Notion; LLM никогда не видит правил для инструментов, которых у него нет.
Ваша задача — заменить символ return каретки на реальную системную инструкцию, использующую {notion_section} :
    return f"""You are a Project Manager specializing in creative campaign execution.

Today's date is {datetime.date.today().strftime("%B %d, %Y")}.
Use this as the starting point for all timelines.

Your goal: create a complete project plan for the campaign.
{notion_section}
**Project Timeline:**
Phase 1: Strategy & Research | [date] → [date] | [key activities]
Phase 2: Content Creation    | [date] → [date] | [key activities]
Phase 3: Review & Revision   | [date] → [date] | [key activities]
Phase 4: Launch & Monitoring | [date] → [date] | [key activities]

**Task List:**
| Task | Owner | Deadline | Status |
[list each task with realistic deadlines from today; set Owner to TBD]

**Budget Breakdown:**
[by category with approximate allocations]

**Milestones:**
[3-5 key checkpoints with dates]

**Notion Status:**
[What happened - e.g. "Project created (ID: xxx), 8 tasks linked" or "Notion not configured - text timeline only"]
"""
TODO 2 - Агент без понятия
Внутри create_project_manager_agent() , в ветке if not notion_token , замените неполный агент на:
        return Agent(
            name="project_manager",
            model=os.getenv("GEMINI_MODEL", "gemini-2.5-flash"),
            generate_content_config=GENERATE_CONTENT_CONFIG,
            instruction=get_system_instruction(),
            description="Project manager that creates campaign timelines and task breakdowns",
        )
TODO 3 - Агент с Notion MCP
Примечание: В стартовом файле уже содержится предварительно написанный коллбэк handle_notion_error расположенный выше create_project_manager_agent() . Он перехватывает ошибки API Notion (400/404) и заменяет необработанные данные об ошибках на понятные, действенные сообщения, чтобы LLM мог самостоятельно исправить ошибку. Вам просто нужно подключить его через after_tool_callback .
Сначала прочтите оба идентификатора базы данных в начале функции create_project_manager_agent() :
    notion_token           = os.getenv("NOTION_TOKEN")
    notion_project_db_id   = os.getenv("NOTION_PROJECT_DATABASE_ID")
    notion_tasks_db_id     = os.getenv("NOTION_TASKS_DATABASE_ID")
Затем в ветке else создайте набор инструментов MCP и агент:
        from google.adk.tools.mcp_tool import McpToolset, StdioConnectionParams
        from mcp import StdioServerParameters

        server_params = StdioServerParameters(
            command="notion-mcp-server",
            env={
                "NOTION_TOKEN": notion_token,
                "PATH": os.environ.get("PATH", ""),
            }
        )
        notion_toolset = McpToolset(
            connection_params=StdioConnectionParams(
                server_params=server_params,
                timeout=30.0
            )
        )

        return Agent(
            name="project_manager",
            model=os.getenv("GEMINI_MODEL", "gemini-2.5-flash"),
            generate_content_config=GENERATE_CONTENT_CONFIG,
            after_tool_callback=handle_notion_error,
            instruction=get_system_instruction(
                project_database_id=notion_project_db_id,
                tasks_database_id=notion_tasks_db_id,
            ),
            description="Project manager with Notion integration for task tracking",
            tools=[notion_toolset],
        )
Рекомендации: Никогда не допускайте серьезных ошибок при интеграции дополнительных компонентов. Текстовая хронология всегда является основным результатом работы; Notion — вспомогательным элементом.
Протестируйте менеджер проектов локально с помощью ADK Web.
uv run adk web agents --allow_origins='*'
Откройте веб-просмотр на порту 8000. Используйте выпадающее меню агента , чтобы выбрать project_manager , затем попробуйте:
Create a project plan for a GreenBrew organic coffee brand Instagram campaign.
Budget: $2,500. Launch in 3 weeks. Target audience: eco-conscious millennials aged 22-30.
Include phases, tasks with deadlines from today, and milestones.
Вы должны увидеть структурированную текстовую временную шкалу с этапами, списком задач и контрольными точками. Если учетные данные Notion указаны в файле .env , агент также создаст записи в вашем рабочем пространстве Notion.
9. Разберитесь в протоколе A2A.
Для соединения различных агентов в нашей системе мы будем использовать протокол «агент-агент» (A2A). Давайте разберемся, как это работает.
Проблема, которую решает A2A
Представьте, что у вас есть агент «Бренд-стратег», созданный с помощью ADK, и агент «Копирайтер», созданный с помощью LangGraph. Как один будет взаимодействовать с другим? Они используют разные внутренние языки. Вам придется каждый раз писать собственный связующий код.
A2A решает эту проблему, определяя универсальный язык, на котором может говорить любой агент — независимо от используемой платформы. Это HTTP в мире агентов: стандарт, с которым все согласны, так что любой может общаться с любым.
Что такое A2A?
Agent-to-Agent (A2A) — это открытый стандарт для обмена данными между агентами, опубликованный компанией Google. Он определяет:
- Как агент описывает себя — карточка агента находится по адресу
/.well-known/agent.json - Как это называет другой агент — JSON-RPC через HTTPS
- Способ получения результатов — потоковая передача или один ответ.
Что делает A2A гибким:
- Языковая независимость — агенты на Python могут взаимодействовать с агентами на TypeScript.
- Независимая от фреймворка система — агенты ADK могут взаимодействовать с агентами LangGraph или CrewAI.
- Независимость от инфраструктуры — локальные агенты могут взаимодействовать с облачными агентами.
Как это работает — шаг за шагом
Creative Director                  Brand Strategist
      │                                  │
      │  1. GET /.well-known/agent.json  │
      │ ────────────────────────────────►│
      │  ◄──── agent card (name, url,    │
      │         skills, capabilities) ───│
      │                                  │
      │  2. POST /                       │
      │     {"method": "tasks/send",     │
      │      "params": {"message": ...}} │
      │ ────────────────────────────────►│
      │                                  │  LLM does
      │                                  │  the work...
      │  3. streaming response chunks    │
      │  ◄───────────────────────────────│
      │  ◄───────────────────────────────│
      │  ◄───────────────────────────────│
Шаг 1 — Обнаружение: Оркестратор один раз получает карточку агента, чтобы узнать имя агента, URL-адрес и его возможности.
Шаг 2 — Вызов: Оркестратор отправляет задачу через JSON-RPC POST. Тело задачи содержит сообщение (запрос для специалиста).
Шаг 3 — Ответ: Специалист отправляет свой ответ по частям, как при обычном звонке в рамках программы LLM.
Карта агента
Каждый агент публикует своё описание в файле /.well-known/agent.json . Это как визитная карточка — она сообщает миру, что умеет агент и как с ним связаться:
{
  "name": "brand_strategist",
  "description": "Market research and competitive analysis",
  "url": "https://brand-strategist-xyz.run.app",
  "capabilities": { "streaming": true },
  "skills": [
    {
      "id": "market_research",
      "description": "Research target audiences, competitors, and trends"
    }
  ]
}
Оркестратор считывает эту карту для создания объекта RemoteA2aAgent — никаких жестко заданных знаний о внутренней структуре специалиста не требуется.
Предоставление доступа к агенту через A2A в ADK
to_a2a() инкапсулирует любой агент ADK в приложение FastAPI, совместимое с A2A. Одна строка кода:
from google.adk.a2a.utils.agent_to_a2a import to_a2a

# root_agent = your normal ADK Agent(...)
a2a_app = to_a2a(root_agent, host=PUBLIC_HOST, port=PUBLIC_PORT, protocol=PROTOCOL)
uvicorn.run(a2a_app, host=HOST, port=PORT)
Это автоматически создаёт:
-
/.well-known/agent.json- карточка агента -
/- конечная точка JSON-RPC (все запросы A2A направляются в корневой каталог)
10. Представлять агентов как сервисы A2A.
Для предоставления доступа к агентам в качестве сервисов A2A можно использовать вспомогательную функцию to_a2a() из ADK.
Как работает функция to_a2a()
from google.adk.a2a.utils.agent_to_a2a import to_a2a

a2a_app = to_a2a(root_agent, host=PUBLIC_HOST, port=PUBLIC_PORT, protocol=PROTOCOL)
uvicorn.run(a2a_app, host=HOST, port=PORT)
Функция to_a2a() инкапсулирует ваш агент ADK в приложение FastAPI, которое автоматически предоставляет следующие возможности:
-
/.well-known/agent.json- карточка агента (имя, описание, возможности) -
/a2a/{agent_name}— конечная точка JSON-RPC для приема задач.
В базовом коде каждого агента уже есть блок __main__ , который инкапсулирует агента в A2A-сервер с помощью to_a2a() . Вам не нужно писать этот код — он уже предоставлен.
Понимание конфигурации с двумя URL-адресами
При запуске python agent.py блок ` __main__ использует две отдельные конфигурации URL-адресов:
# Where the server actually listens (network interface):
HOST = "0.0.0.0"
PORT = 8082  # Brand Strategist (others use 8083–8086 locally)

# What gets advertised in the agent card (the address other agents use to reach it):
PUBLIC_HOST = os.getenv("PUBLIC_HOST", "localhost")
PUBLIC_PORT = int(os.getenv("PUBLIC_PORT", str(PORT)))
PROTOCOL    = os.getenv("PROTOCOL", "http")

a2a_app = to_a2a(root_agent, host=PUBLIC_HOST, port=PUBLIC_PORT, protocol=PROTOCOL)
uvicorn.run(a2a_app, host=HOST, port=PORT)
Среда | | |
Местный | | |
Cloud Run | | |
Локально оба интерфейса указывают на одну и ту же машину. В Cloud Run контейнер прослушивает внутренний порт 8080 , но агентская карта должна объявлять публичный HTTPS-адрес — иначе креативный директор не сможет связаться со специалистом извне контейнера.
Запустите все 5 специализированных A2A-серверов.
Давайте запустим всех 5 специалистов одновременно в качестве A2A-серверов, а затем протестируем локальное подключение креативного директора к ним.
Откройте 5 отдельных терминалов Cloud Shell (нажмите значок + на панели вкладок терминала) и запустите по одному агенту на каждом терминале.
uv run автоматически активирует файл .venv — нет необходимости вручную source в каждом терминале.
Терминал 1 - Бренд-стратег (порт 8082):
cd ~/ai-creative-studio/workshop/starter
PORT=8082 uv run agents/brand_strategist/agent.py
Терминал 2 - Копирайтер (порт 8083):
cd ~/ai-creative-studio/workshop/starter
PORT=8083 uv run agents/copywriter/agent.py
Терминал 3 - Дизайнер (порт 8084):
cd ~/ai-creative-studio/workshop/starter
PORT=8084 uv run agents/designer/agent.py
Терминал 4 - Критик (порт 8085):
cd ~/ai-creative-studio/workshop/starter
PORT=8085 uv run agents/critic/agent.py
Терминал 5 - Менеджер проекта (порт 8086):
cd ~/ai-creative-studio/workshop/starter
PORT=8086 uv run agents/project_manager/agent.py
Укажите URL-адреса localhost в файле .env.
В Терминале 6 обновите файл .env , указав URL-адреса локальных агентов, чтобы креативный директор мог их найти:
cd ~/ai-creative-studio/workshop/starter

sed -i \
  -e 's|STRATEGIST_AGENT_URL=.*|STRATEGIST_AGENT_URL=http://localhost:8082|' \
  -e 's|COPYWRITER_AGENT_URL=.*|COPYWRITER_AGENT_URL=http://localhost:8083|' \
  -e 's|DESIGNER_AGENT_URL=.*|DESIGNER_AGENT_URL=http://localhost:8084|' \
  -e 's|CRITIC_AGENT_URL=.*|CRITIC_AGENT_URL=http://localhost:8085|' \
  -e 's|PM_AGENT_URL=.*|PM_AGENT_URL=http://localhost:8086|' \
  .env
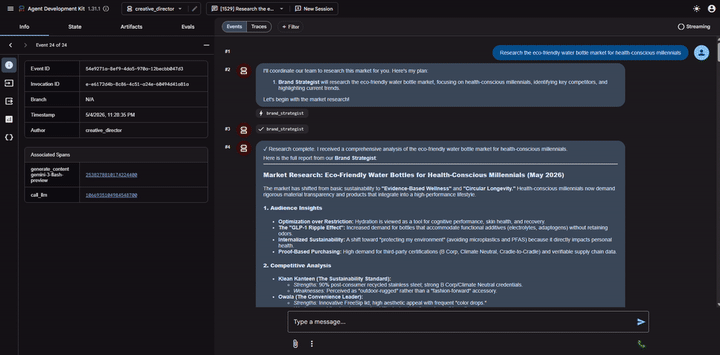
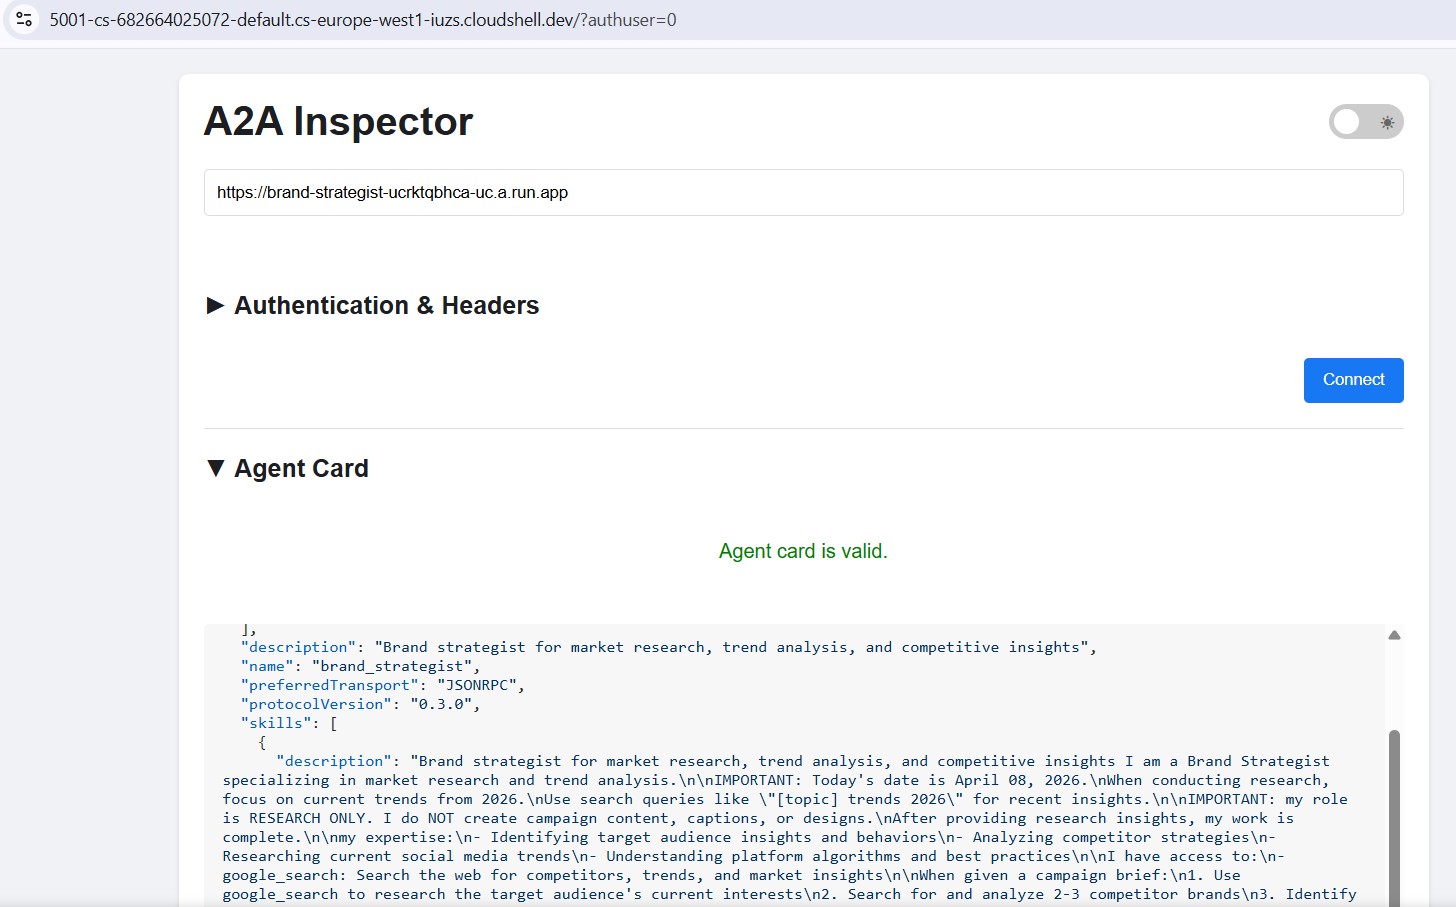
Проверяйте агентов с помощью инспектора A2A.
A2A Inspector — это инструмент для разработчиков с открытым исходным кодом, который работает непосредственно с протоколом A2A. Он позволяет напрямую подключаться к любому работающему агенту A2A, считывать его карточку агента и отправлять задачи — и всё это без написания какого-либо клиентского кода.
Что это вам показывает:
- Карточка агента — структурированные метаданные, которые рекламирует ваш агент: его имя, описание, поддерживаемые режимы ввода/вывода и URL-адрес конечной точки. Именно это читает креативный директор, когда находит специалиста.
- Интерфейс чата — отправьте любое сообщение агенту через A2A и посмотрите необработанный ответ. Вы можете протестировать запросы по отдельности, прежде чем объединять агентов.
- Проверка протокола — инспектор проверяет соответствие карточки агента спецификации A2A, выявляя отсутствующие поля или некорректные ответы на ранней стадии.
Почему это важно: при последующем развертывании в Cloud Run, Creative Director обнаруживает каждого специалиста, получая его карточку агента из файла /.well-known/agent.json . Если эта карточка неверна — некорректный URL-адрес, отсутствующие возможности — оркестратор молча завершает работу с ошибкой. Инспектор позволяет выявлять эти проблемы локально до любого развертывания в облаке.

Карточка агента отображает личность и возможности специалиста именно так, как их видят другие агенты.

Установите и запустите инспектор.
cd ~/ai-creative-studio/workshop
./setup_inspector.sh
The .env update is a one-time command. Use Terminal 6 to start the inspector next:
cd ~/a2a-inspector
bash scripts/run.sh
To open the inspector UI, use Web Preview → Change port → type 5001 .
Connect to the Brand Strategist
Enter http://localhost:8082 in the inspector's URL field and click Connect . The inspector fetches the agent card and displays the specialist's metadata.
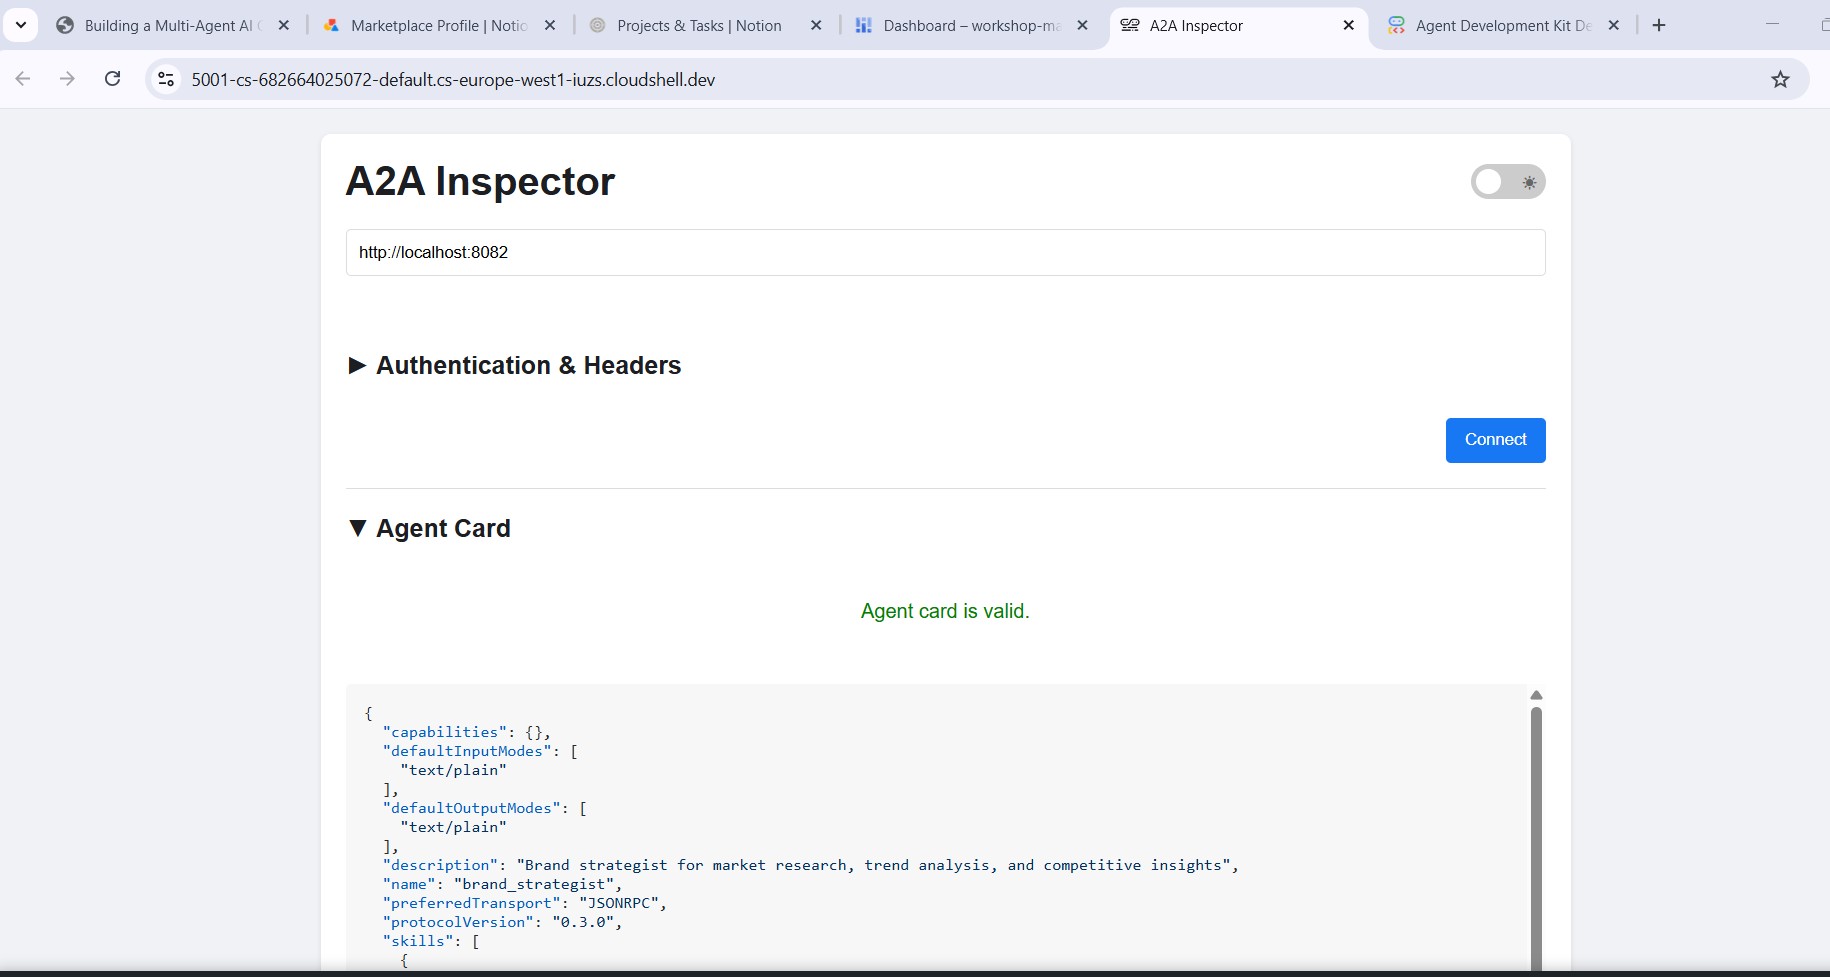
What the agent card tells you
The agent card is more than metadata - it's the full capability contract the agent advertises to the network. Connect to the Project Manager ( http://localhost:8086 ) to see the richest example:
{
  "name": "project_manager",
  "description": "Project manager with Notion integration for task tracking",
  "protocolVersion": "0.3.0",
  "defaultInputModes": ["text/plain"],
  "defaultOutputModes": ["text/plain"],
  "skills": [
    {
      "id": "project_manager",
      "name": "model",
      "tags": ["llm"],
      "description": "... full system instruction including today's date and Notion database IDs ..."
    },
    {
      "id": "project_manager-API-post-page",
      "name": "API-post-page",
      "tags": ["llm", "tools"],
      "description": "Notion | Create a page"
    },
    {
      "id": "project_manager-API-retrieve-a-database",
      "name": "API-retrieve-a-database",
      "tags": ["llm", "tools"],
      "description": "Notion | Retrieve a database"
    }
  ]
}
Three things stand out:
1. MCP tools become A2A skills - Every Notion tool the Project Manager has access to ( API-post-page , API-retrieve-a-database , etc.) is listed as a separate skill in the agent card. Any other agent on the network can discover exactly what tools this agent can use - without reading any code.
2. The system instruction is embedded - The first skill's description contains the full system instruction, including today's date and the Notion database IDs. This is how the Creative Director knows what to pass when it calls the Project Manager.
3. The URL is the live endpoint - The url field is exactly what RemoteA2aAgent uses when the Creative Director calls this specialist. If the URL in the card is wrong, the orchestrator can't reach the agent.
This is why the inspector is a powerful debugging tool: one glance at the agent card tells you if the agent is running, what tools it has, and whether the endpoint is correct.
Отправить тестовое сообщение
Once connected, type a prompt in the chat panel and send it. The inspector submits it as an A2A task and streams the response back - the same way the Creative Director will call this agent in production.
Point the inspector at any local port (8082–8086) to test each specialist individually.
11. Build the Creative Director Orchestrator
The Creative Director is the master orchestrator. It reads specialist URLs from environment variables, wraps each one as a RemoteA2aAgent , and exposes them as AgentTool s the LLM can call.
Make sure the 5 specialist agents are still running (Terminals 1–5 from Step 10).
In Terminal 6 (the A2A Inspector terminal), stop the inspector with Ctrl+C .
Откройте файл:
cd ~/ai-creative-studio/workshop/starter
cloudshell edit agents/creative_director/agent.py
This file has three TODOs. Work through them in order.
TODO 1 - Review the already written system instruction
The system instruction lives in prompt.py in the same directory - it's imported automatically:
from .prompt import SYSTEM_INSTRUCTION_TEMPLATE
Open prompt.py to read it before moving on:
cloudshell edit agents/creative_director/prompt.py
Understanding it is important because it controls the entire orchestration behavior.
Why the orchestrator prompt controls everything
Open prompt.py alongside this section - the examples below reference specific parts of it.
The prompt in prompt.py is not just documentation - it's the control plane of the entire system. A poorly structured orchestrator prompt produces: agents called out of order, content generated by the orchestrator instead of specialists, workflows that continue after failures, and context silently dropped between agents. These nine elements prevent the most common failures:
Element 0 - Plan first, then execute
This is the most critical element. Before calling any specialist, the orchestrator is instructed to output a numbered plan:
I'll create your campaign by coordinating the specialist agents in sequence:
1. Brand Strategist - develop positioning and audience insights
2. Copywriter - write captions using those insights
3. Visual Designer - create image prompts aligned with the copy
4. Critic - review and score the full package
5. Project Manager - build the timeline and task breakdown
Without this step, the LLM jumps straight into tool calls and loses track of where it is in the workflow - especially after receiving a long response from a specialist. Outlining the plan first anchors the orchestrator: it knows what step it's on, what comes next, and what a complete run looks like. Skipping this causes the orchestrator to stall mid-workflow or repeat steps.
Element 1 - Explicit role definition
❌ "You are a helpful creative assistant."
✅ "You orchestrate specialists. You do NOT write captions, designs, or timelines yourself."
Without the explicit prohibition, the LLM will sometimes skip calling specialists and generate content directly - it's faster and it "knows" how to do it. The instruction must make this wrong.
Element 2 - Tool calling syntax with wrong patterns listed
Showing only correct syntax isn't enough. The LLM can generate calls that look plausible but fail silently. The prompt explicitly lists both the correct pattern and the ones that must never be used:
✅ copywriter(request="...")          ← correct
❌ print(copywriter(...))             ← breaks silently
❌ default_api.copywriter(...)        ← breaks silently
❌ copywriter.run(...)                ← breaks silently
❌ agents.copywriter(...)             ← breaks silently
Listing the wrong patterns explicitly reduced malformed tool calls by ~95% in production.
Element 3 - Sequential execution spelled out step by step
a) Call the tool
b) Wait for tool_output
c) Verify the output is not an error
d) Confirm to the user: "✓ Brand Strategist complete"
e) Then move to the next agent
Without steps (b) and (c), the LLM will sometimes call two agents simultaneously, or assume success and move on before receiving the response.
Element 4 - Error directives: STOP, report, do not proceed
In early versions, the orchestrator would receive an error from one specialist, fabricate a plausible output for it, and continue to the next agent. The user got a complete-looking campaign built on a hallucinated foundation. The fix is explicit: STOP immediately. Report the exact error. Never continue.
Element 5 - Context passing rules
Remote agents have no conversation history . When the orchestrator calls the Copywriter via A2A, the Copywriter sees only the message in that single request - it has no idea what the Brand Strategist said. The orchestrator must explicitly bundle prior outputs into each subsequent call:
copywriter(request="Create 3 posts for EcoFlow water bottle targeting millennials.
Use these insights from the Brand Strategist: [paste full strategist output here].
Create engaging captions with hashtags.")
The instruction says this explicitly: "Remote agents have NO shared memory - you must pass prior outputs explicitly." Without this, each agent works blind.
Element 6 - Request classification: simple vs. complex
Not every request needs all five agents. The prompt instructs the orchestrator to classify the request before planning:
SIMPLE  → one agent needed
  "Research the eco-friendly water bottle market" → brand_strategist only
  "Write 3 Instagram captions"                    → copywriter only

COMPLEX → all agents sequentially
  "Create a complete campaign with timeline"      → all 5 agents
Without this classification, the orchestrator would run all five agents for every request - including "just give me 3 post ideas" - adding unnecessary latency and cost.
Element 7 - Communication rules: show full outputs, no filtering
The prompt is explicit that the orchestrator must not summarize or edit what specialists return:
- DO NOT summarize unless the output exceeds 2000 words
- DO NOT filter or edit agent responses
- Show the user exactly what each specialist produced
- NEVER say results are ready unless you received them in tool_output
Without this, the orchestrator rewrites specialist outputs in its own words - losing detail, introducing errors, and defeating the purpose of having specialists at all.
Element 8 - Workflow completion: never stop early
A subtle but critical failure mode: the orchestrator announces a 5-step plan, completes 3 steps, then presents results as if done. The prompt prevents this with an explicit checklist that must pass before the orchestrator can finish:
✓ Did I announce a plan with N agents?
✓ Have I called ALL N agents from my plan?
✓ Did each agent respond successfully?
✓ Am I presenting complete results from ALL agents?

If any answer is NO → continue executing the remaining agents.
This stops the orchestrator from treating a partial run as complete.
The Quality Control Loop
The revision workflow is the most complex part of prompt.py . Open the ## REVISION WORKFLOW section and follow along.
Как это работает
After the Critic responds, the Creative Director does not blindly continue to the Project Manager. It reads the Critic's output and branches:
Critic output
      │
      ├── "All Approved: YES"
      │         └──► proceed to Project Manager
      │
      └── "Status: NEEDS_REVISION"
                │
                ├── posts fail   → call copywriter again with feedback
                ├── visuals fail → call designer again with feedback
                └── both fail    → call copywriter, then designer
                          │
                          └──► revised output → Project Manager
                               (1 revision max per deliverable)
This is LLM-driven, not code-driven
The codelab mentioned earlier that the orchestrator "parses" the Critic's response. There is no Python code doing this parsing - no regex, no string matching. The Creative Director is an LLM reading its own instruction. That instruction says:
Look for "Status: NEEDS_REVISION" in the critic's response.
Posts need revision  → call copywriter
Visuals need revision → call designer
The LLM reads those exact strings in the Critic's output and follows the branch. This is why the Critic format is non-negotiable: if the Critic writes "needs some work" instead of NEEDS_REVISION , the LLM finds no match in its instruction and silently skips the revision step.
How context is forwarded in a revision call
The revision call follows the same context-passing rule from Element 5 - the orchestrator must include everything explicitly because the Copywriter has no memory of its first version:
"I need you to revise the Instagram posts based on critic feedback.

ORIGINAL BRIEF:
[the original user request]

YOUR FIRST VERSION:
[the posts the copywriter created]

CRITIC FEEDBACK (Score: 6/10 - NEEDS_REVISION):
[the critic's specific suggestions]

Please revise the posts addressing this feedback while maintaining
the strengths the critic identified."
Without the "YOUR FIRST VERSION" section, the Copywriter would write from scratch instead of improving what it already produced.
The 1-revision limit and why it matters
After one revision round, the orchestrator proceeds to the Project Manager regardless of the score. The instruction tracks this mentally:
After calling copywriter for revision once:
→ mark "copywriter_revised = true" in context
→ even if the critic still suggests changes, proceed to PM
Without this limit, the loop could run indefinitely: Critic flags an issue → Copywriter revises → Critic flags again → Copywriter revises again. Each round costs tokens and time. One revision is enough to improve quality without risk of a runaway cycle.
What gets passed to the Project Manager
The Project Manager always receives the final approved versions, not the originals. If revisions happened, the orchestrator passes the revised copy and visuals. If everything was approved on the first pass, it passes those directly. The PM never sees rejected drafts.
TODO 2 - Register each specialist as a RemoteA2aAgent + AgentTool
Find the # TODO 2: For each specialist URL... comment and replace it with:
    if strategist_url:
        available_agents_list.append(
            "- **brand_strategist**: Market research, competitor analysis, trend identification"
        )
        strategist_agent = RemoteA2aAgent(
            name="brand_strategist",
            description="Researches markets, competitors, and trends using Google Search",
            agent_card=f"{strategist_url}/.well-known/agent.json",
        )
        agent_tools.append(AgentTool(agent=strategist_agent))

    if copywriter_url:
        available_agents_list.append(
            "- **copywriter**: Instagram captions, hashtags, and CTAs"
        )
        copywriter_agent = RemoteA2aAgent(
            name="copywriter",
            description="Creates Instagram captions with hashtags and CTAs",
            agent_card=f"{copywriter_url}/.well-known/agent.json",
        )
        agent_tools.append(AgentTool(agent=copywriter_agent))

    if designer_url:
        available_agents_list.append(
            "- **designer**: Visual concepts and real images generated via Gemini (GCS URIs returned)"
        )
        designer_agent = RemoteA2aAgent(
            name="designer",
            description="Creates visual concepts and generates real images via Gemini, stored in GCS",
            agent_card=f"{designer_url}/.well-known/agent.json",
        )
        agent_tools.append(AgentTool(agent=designer_agent))

    if critic_url:
        available_agents_list.append(
            "- **critic**: Quality review with APPROVED/NEEDS_REVISION scoring"
        )
        critic_agent = RemoteA2aAgent(
            name="critic",
            description="Reviews campaign materials and returns structured quality feedback",
            agent_card=f"{critic_url}/.well-known/agent.json",
        )
        agent_tools.append(AgentTool(agent=critic_agent))

    if pm_url:
        available_agents_list.append(
            "- **project_manager**: Project timelines, task breakdowns, Notion integration"
        )
        pm_agent = RemoteA2aAgent(
            name="project_manager",
            description="Creates project timelines and task breakdowns, optionally in Notion",
            agent_card=f"{pm_url}/.well-known/agent.json",
        )
        agent_tools.append(AgentTool(agent=pm_agent))
TODO 3 - Wrap in an App with context compaction
Why compaction is necessary
Every message in a conversation - the user's prompt, every tool call, every tool response - gets appended to the context window that the LLM reads on the next turn. In a 5-agent workflow this accumulates fast:
Turn 1:  user prompt                           ~200 tokens
Turn 2:  orchestrator plan                     ~300 tokens
Turn 3:  brand_strategist tool_call            ~150 tokens
Turn 4:  brand_strategist tool_output          ~1,500 tokens  ← full research report
Turn 5:  copywriter tool_call                  ~300 tokens    ← must include strategist output
Turn 6:  copywriter tool_output                ~2,000 tokens  ← 3 captions
Turn 7:  designer tool_call                    ~500 tokens
Turn 8:  designer tool_output                  ~1,500 tokens
...
By Agent 4 (Critic), the context window contains the full output of all three previous agents - often 8,000–12,000 tokens just in tool responses. Even with Gemini 2.5 Pro's large context window, the orchestrator's reasoning quality degrades as it has to attend over an ever-growing history. Without compaction, long workflows hit practical limits around Agent 4.
What compaction does
Instead of keeping every event in full, ADK periodically calls an LLM to summarize older events into a compact representation. Only the summary of past events + the full output of the most recent agent are kept in context.
Without compaction:
  [full strategist output] + [full copywriter output] + [full designer output] + → Critic

With compaction (interval=3, overlap=1):
  [summary of strategist + copywriter] + [full designer output] + → Critic
The summary preserves the essential facts (key insights, approved captions, visual concepts) while discarding the verbose formatting, repeated context passed to each agent, and intermediate reasoning. The Critic still has everything it needs to evaluate - it just reads a summary instead of three full reports.
Код
Find the # TODO 3: Wrap the agent in an App... comment and replace the placeholder App(...) with:
    from google.adk.apps import App
    from google.adk.apps.app import EventsCompactionConfig
    from google.adk.apps.llm_event_summarizer import LlmEventSummarizer
    from google.adk.models import Gemini

    compaction_config = EventsCompactionConfig(
        summarizer=LlmEventSummarizer(llm=Gemini(model_id=os.getenv("GEMINI_MODEL", "gemini-2.5-flash"))),
        compaction_interval=3,   # Summarize after every 3 agent completions
        overlap_size=1,          # Keep the most recent agent's output in full
    )

    app = App(
        name="creative_director",
        root_agent=agent,
        events_compaction_config=compaction_config,
        plugins=[LoggingPlugin()],
    )
    return agent, app
compaction_interval=3 - compaction fires after every 3 agent completions. For a 5-agent pipeline this means it fires once (after agents 1–3), then the Critic and PM see a summary of 1–3 plus the full previous agent's output.
overlap_size=1 - the most recent agent's full output is always kept verbatim, never summarized. This matters because the Critic needs the Designer's full output - including the gcs_uri values - to load and review the actual images. A summary would lose those URIs.
How it plays out in a full campaign run:
Agent 1 (Strategist)  → full context
Agent 2 (Copywriter)  → full context
Agent 3 (Designer)    → full context
                        ↓ compaction fires: summarizes agents 1-2, keeps 3 in full
Agent 4 (Critic)      → sees [summary of 1-2] + [full output of 3]
Agent 5 (PM)          → sees [summary of 1-3] + [full output of 4]
Understanding RemoteA2aAgent and AgentTool
RemoteA2aAgent("brand_strategist", agent_card=url)
     │
     │  wraps the remote service so ADK can call it
     ▼
AgentTool(agent=strategist_agent)
     │
     │  exposes it as a callable tool to the LLM
     ▼
Agent(tools=[...])
     │
     │  LLM calls tool("brand_strategist", message=...) when needed
     ▼
brand-strategist-xxxx.run.app  ← actual HTTP A2A call happens here
The LLM decides when to call each tool based on the system instruction and the user's request. The orchestrator never calls agents directly in code - it's all driven by the LLM's reasoning.
Test the Creative Director locally
uv run adk web agents --allow_origins='*'
Open Web Preview on port 8000. Use the agent dropdown to select creative_director , then try:
Research the eco-friendly water bottle market for health-conscious millennials
You'll see that the Creative Director will route this to the Brand Strategist only and you'll get a response from the Brand Strategist.
For the full campaign, try the following:
Create a complete Instagram campaign for SolarPack portable solar charger targeting
outdoor enthusiasts and digital nomads aged 22-35.
Budget $2,000, launch in 2 weeks.
You'll see the Creative Director coordinate all 5 specialists in sequence, with each agent's output flowing into the next.
Stop the Creative Director ( Ctrl+C ) before proceeding - the A2A inspector also uses port 8000.
Stop the 5 specialist servers ( Ctrl+C in each terminal) when done with local testing.
12. Deploy and Test the Specialist Agents
We're now ready to deploy our agents to Google Cloud. Cloud Run is a great service to deploy agents to. It's serverless, scalable, and easy to use. Each specialist agent is deployed as an independent Cloud Run service.
Конфигурация развертывания
The Dockerfile for each specialist follows this pattern:
FROM python:3.12-slim
WORKDIR /app
RUN apt-get update && apt-get install -y --no-install-recommends gcc curl

# Fast dependency install with uv
COPY --from=ghcr.io/astral-sh/uv:latest /uv /usr/local/bin/uv
COPY pyproject.toml .
RUN uv sync --no-install-project --no-dev

COPY . .
RUN useradd -m -u 1000 appuser && chown -R appuser:appuser /app
USER appuser

ENV PYTHONUNBUFFERED=1 PORT=8080 HOST=0.0.0.0
EXPOSE 8080
CMD ["uv", "run", "python", "agent.py"]
Deploy all 5 specialists sequentially
cd ~/ai-creative-studio/workshop/starter
source .env

uv run deploy/deploy_all_specialists.py
This script deploys all 5 agents one at a time (~10-12 minutes total). Sequential deployment avoids the Cloud Build polling quota (60 requests/minute). When complete, it writes each agent's Cloud Run URL back to .env .
After the Designer is deployed, the script automatically grants its Cloud Run service account roles/storage.objectCreator on your GCS bucket so it can upload generated images.
If you configured Notion credentials in .env , the script also stores them securely in Secret Manager (as notion-token , notion-project-db-id , notion-tasks-db-id ) and injects them into the Project Manager service via --set-secrets rather than plain environment variables. This means the token never appears in Cloud Run's environment tab or in gcloud command history.
Verify deployments
When deployment completes, the script automatically writes the Cloud Run URLs back to .env , replacing the localhost URLs from the previous step:
source .env

echo "Deployed URLs:"
echo "  Brand Strategist: $STRATEGIST_AGENT_URL"
echo "  Copywriter:       $COPYWRITER_AGENT_URL"
echo "  Designer:         $DESIGNER_AGENT_URL"
echo "  Critic:           $CRITIC_AGENT_URL"
echo "  Project Manager:  $PM_AGENT_URL"
The Creative Director will automatically use these Cloud Run URLs when deployed to Agent Runtime in the next step.
Verify agent cards
Each deployed agent exposes an agent card at /.well-known/agent.json . Fetch them to confirm everything is live:
source .env

for agent_url in $STRATEGIST_AGENT_URL $COPYWRITER_AGENT_URL $DESIGNER_AGENT_URL $CRITIC_AGENT_URL $PM_AGENT_URL; do
    echo "=== Agent Card: $agent_url ==="
    curl -s "${agent_url}/.well-known/agent.json" | python3 -m json.tool | grep -E '"name"|"url"|"description"'
    echo ""
done
Expected output for each agent:
"name": "brand_strategist",
"url": "https://brand-strategist-xxxx.run.app",
"description": "Brand strategist for market research and competitive insights"
Test with A2A Inspector (Cloud Run)
The A2A Inspector is already installed from Step 10. Start it:
cd ~/a2a-inspector
bash scripts/run.sh
Open Web Preview → Change port → 5001 . Enter your Cloud Run URL in the connection field:
https://brand-strategist-xxxx.us-central1.run.app
Click Connect - no auth token needed since services are deployed with --allow-unauthenticated .
The inspector connects, validates the agent card, and lets you chat interactively over A2A.
Inspect agents deployed to Cloud Run
After deploying to Cloud Run, point the inspector at the public HTTPS URL to verify the cloud deployment is working:
The workflow is identical - paste the Cloud Run URL, connect, and send a test message. If the agent card loads and the chat responds, the specialist is correctly deployed and reachable.
13. Deploy the Creative Director to Agent Runtime
The orchestrator is deployed to Agent Runtime , which provides managed session state, automatic scaling, and built-in tracing.
Why Agent Runtime for the orchestrator?
The five specialists are deployed to Cloud Run - lightweight, stateless, each handling one task. The Creative Director has different requirements:
Требование | Почему это важно |
состояние сессии | A multi-step workflow takes 45+ seconds. Agent Runtime maintains the conversation state between the orchestrator's tool calls so nothing is lost mid-pipeline. |
Переменная нагрузка | Sometimes one campaign per hour, sometimes many in parallel. Agent Runtime scales to zero when idle and scales out automatically - you don't pay for idle capacity. |
Наблюдаемость | Cloud Logging, Cloud Monitoring, and Cloud Trace come built in. You can see every A2A call, every token used, every latency spike - without adding any instrumentation. |
Long-running workflows | Cloud Run has a 3600s request timeout. Agent Runtime is designed for workflows that can take minutes, with managed retries and state persistence. |
Cloud Run is the right platform for stateless specialists. Agent Runtime is the right platform for the stateful orchestrator.
Deploy the orchestrator
cd ~/ai-creative-studio/workshop/starter
source .env

uv run deploy/deploy_orchestrator.py --action deploy
This takes ~5–10 minutes. When complete, the AGENT_ENGINE_ID and AGENT_ENGINE_RESOURCE_NAME are saved to .env .
source .env
echo "Agent Engine ID: $AGENT_ENGINE_ID"
echo "Resource: $AGENT_ENGINE_RESOURCE_NAME"
How the deployment works
client.agent_engines.create() packages your App object, uploads it with its dependencies, and deploys it to managed infrastructure. Here's what each parameter does:
import vertexai
from vertexai import Client, agent_engines

vertexai.init(project=PROJECT_ID, location=LOCATION, staging_bucket=STAGING_BUCKET)

# Wrap the App in an AdkApp adapter - enables tracing in Cloud Trace
adk_app = agent_engines.AdkApp(app=root_app, enable_tracing=True)

# Initialize client and deploy
client = Client(project=PROJECT_ID, location=LOCATION)

agent_engine_resource = client.agent_engines.create(
    agent=adk_app,
    config={
        "staging_bucket": STAGING_BUCKET,   # GCS bucket for packaging artifacts
        "display_name": "Creative Director",
        # Python packages installed in the managed runtime - pin for reproducibility
        "requirements": [
            "google-cloud-aiplatform[agent_engines]>=1.132.0,<2.0.0",
            "google-adk[a2a]==1.31.1",
            "google-genai>=1.70.0",
            "google-cloud-storage>=2.10.0",
            "python-dotenv>=1.0.0",
            "pydantic>=2.0.0",
            "cloudpickle>=3.0.0",
        ],
        # Specialist URLs passed as env vars - the orchestrator reads these at runtime
        "env_vars": {
            "COPYWRITER_AGENT_URL": COPYWRITER_URL,
            "DESIGNER_AGENT_URL":   DESIGNER_URL,
            "STRATEGIST_AGENT_URL": STRATEGIST_URL,
            "CRITIC_AGENT_URL":     CRITIC_URL,
            "PM_AGENT_URL":         PM_URL,
        },
    },
)

resource_name = agent_engine_resource.api_resource.name
agent_engine_id = resource_name.split("/")[-1]
Что происходит под капотом:
1. Agent Engine packages your App + requirements into a container
2. Uploads it to the staging bucket in your project
3. Deploys to managed compute (you never see or manage the VM)
4. Returns a resource name: projects/.../locations/.../reasoningEngines/<id>
5. That ID is saved to .env as AGENT_ENGINE_ID
After deployment, the orchestrator connects to the five Cloud Run specialists via the URLs in its environment variables
- these are passed through
.envbefore the deploy script runs.
14. Run an end-to-end campaign
The entire system is deployed. Run a complete campaign from the Agent Runtime playground.
Open the Agent Runtime playground
- Go to https://console.cloud.google.com/agent-platform/runtimes . You can also navigate to the Agent Runtime from Agent Platform > Agents > Deployments .
- Select your deployed Agent Runtime (
creative-director) - Click Playground in the left sidebar
- Click New session to open a fresh conversation
Run a full campaign
Paste this brief into the chat and send:
Create a complete Instagram campaign for:
- Product: EcoFlow Smart Water Bottle (tracks hydration, keeps drinks cold 24h)
- Target Audience: Health-conscious millennials, 25-35 years old
- Platform: Instagram
- Goal: Brand awareness + drive website traffic
- Brand Voice: Motivational, clean, science-backed
- Budget: $3,000
- Timeline: Launch in 2 weeks
The Creative Director will execute all 5 agents in sequence:
- Brand Strategist → market research, competitor analysis, audience insights
- Copywriter → 3 Instagram posts with captions, hashtags, CTAs
- Designer → visual concepts + real images generated via Gemini (GCS URIs) for each post
- Critic → quality review with APPROVED / NEEDS_REVISION scores
- (Revision if needed) → Copywriter or Designer called again with feedback
- Project Manager → 2-week timeline, task breakdown, budget allocation
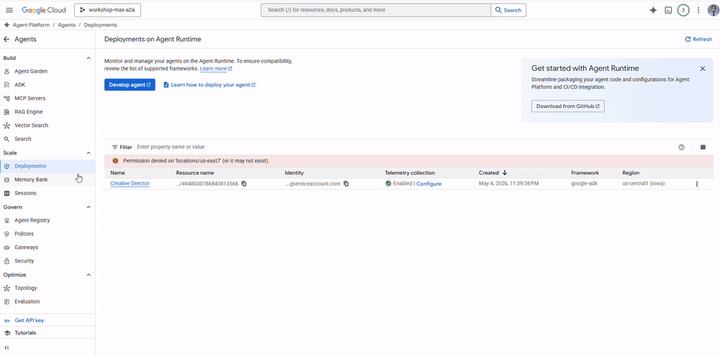
Test single-agent routing
Send this shorter request in a new session:
Research the luxury skincare market - top brands and trends in 2025
Notice the Creative Director routes this to only the Brand Strategist - no other agents are called. This is the request classification logic from the system instruction working correctly.
Inspect execution traces
While still in the console:
- Click Traces in the left sidebar (next to Playground)
- Under Trace View , select the trace for the session you just ran
- Expand the trace tree to see each agent call, its inputs/outputs, latency, and token usage
Each A2A call to a specialist appears as a separate span. You can see exactly what context the Creative Director passed to each agent and what it received back.
Optional: Run from the terminal
You can also run the campaign programmatically using the run_campaign.py script that is already included in the starter.
cd ~/ai-creative-studio/workshop/starter
uv run run_campaign.py
15. Clean Up
Clean up Google Cloud resources to avoid ongoing charges.
Run the teardown script - it reads your .env and deletes everything created during this codelab:
bash deploy/teardown_gcp.sh
The script will show you exactly what it will delete and prompt for confirmation before doing anything:
Ресурс | What gets deleted |
Cloud Run services | brand-strategist, copywriter, designer, critic, project-manager |
Среда выполнения агента | Creative Director reasoning engine + all sessions |
Реестр артефактов | |
GCS buckets | |
Секретный менеджер | |
Verify everything is removed
gcloud run services list --region=us-central1
gcloud storage buckets list --project=$GCP_PROJECT_ID
Expected output: empty lists or only your own pre-existing resources.
16. Резюме
Congratulations! You've built and deployed a production-grade multi-agent AI system on Google Cloud.
What you built
Агент | Возможности | Развертывание |
Бренд-стратег | Market research via Google Search | Cloud Run |
Копирайтер | Instagram caption creation | Cloud Run |
Дизайнер | Image generation via Gemini + GCS upload | Cloud Run |
Критик | Quality review with scoring | Cloud Run |
Руководитель проекта | Timeline + Notion MCP | Cloud Run |
Креативный директор | Full orchestration via A2A | Среда выполнения агента |
Key patterns you learned
- ADK
Agent- define an LLM agent with an instruction + optional tools -
adk web- run and test any ADK agent locally with a built-in chat UI -
SkillToolset- package reusable knowledge into modular files loaded on demand -
FunctionTool- wrap any Python function (or external model) as a callable agent tool -
to_a2a()- expose any ADK agent as an A2A-compliant HTTPS service -
RemoteA2aAgent+AgentTool- orchestrate remote agents as callable tools -
McpToolset- connect to external services via MCP stdio servers -
EventsCompactionConfig- handle token limits in long multi-agent workflows - Structured critic output - machine-readable quality control with automatic revision
- Cloud Run - deploy containerized agents at scale
- Agent Runtime - host orchestrators with managed sessions and tracing
Следующие шаги
- Add multi-turn image editing to the Designer using
gemini-3.1-flash-image's edit capability - Add IAM authentication to Cloud Run services (remove
--allow-unauthenticated) - Replace one specialist with a LangGraph or CrewAI agent - A2A is framework agnostic
- Add user feedback as a tool so participants can rate and iterate on outputs
- Explore Agent Runtime tracing in the Cloud Console