
1. Introduction
In this codelab you'll learn how to build and deploy an AI-Powered Agent Diet Planner. For UI using Streamlit, LLM model using Gemini Pro 2.5, Agentic AI Engine Orchestrator using Vertex AI for development Agentic AI, BigQuery for store data and Cloud Run for deployment.
Through the codelab, you will employ a step by step approach as follows:
- Prepare your Google Cloud project and Enable all the required API on it
- Build Agentic AI Diet Planner using streamlit, Vertex AI and BigQuery
- Deploy the application to the Cloud Run
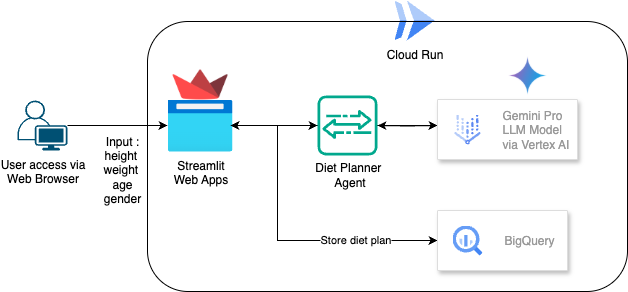
Architecture Overview
Prerequisite
- A Google Cloud Platform (GCP) project with billing enabled.
- Basic knowledge Python
What you'll learn
- How to build Agentic AI Diet Planner using streamlit, Vertex AI and store data to BigQuery
- How to deploy the application to the Cloud Run
What you'll need
- Chrome web browser
- A Gmail account
- A Cloud Project with billing enabled
2. Basic setup and Requirements
Self-paced environment setup
- Sign-in to the Google Cloud Console and create a new project or reuse an existing one. If you don't already have a Gmail or Google Workspace account, you must create one.

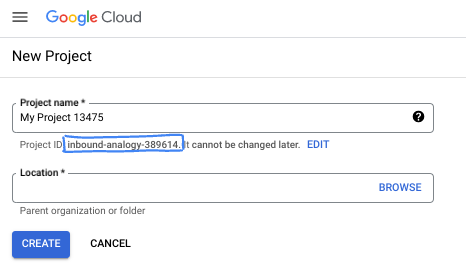
- The Project name is the display name for this project's participants. It is a character string not used by Google APIs. You can always update it.
- The Project ID is unique across all Google Cloud projects and is immutable (cannot be changed after it has been set). The Cloud Console auto-generates a unique string; usually you don't care what it is. In most codelabs, you'll need to reference your Project ID (typically identified as
PROJECT_ID). If you don't like the generated ID, you might generate another random one. Alternatively, you can try your own, and see if it's available. It can't be changed after this step and remains for the duration of the project. - For your information, there is a third value, a Project Number, which some APIs use. Learn more about all three of these values in the documentation.
- Next, you'll need to enable billing in the Cloud Console to use Cloud resources/APIs. Running through this codelab won't cost much, if anything at all. To shut down resources to avoid incurring billing beyond this tutorial, you can delete the resources you created or delete the project. New Google Cloud users are eligible for the $300 USD Free Trial program.
3. Before you begin
Setup Cloud Project in Cloud Shell Editor
This codelab assumes that you already have a Google Cloud project with billing enabled. If you do not have it yet, you can follow the instructions below to get started.
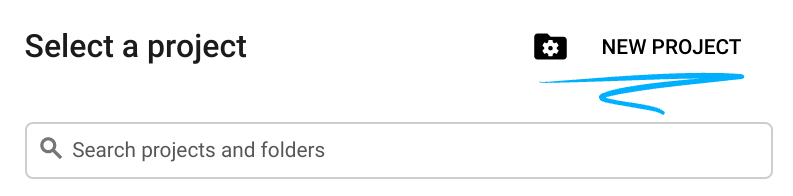
- In the Google Cloud Console, on the project selector page, select or create a Google Cloud project.
- Make sure that billing is enabled for your Cloud project. Learn how to check if billing is enabled on a project .
- You'll use Cloud Shell, a command-line environment running in Google Cloud that comes preloaded with bq. Click Activate Cloud Shell at the top of the Google Cloud console.

- Once connected to Cloud Shell, you check that you're already authenticated and that the project is set to your project ID using the following command:
gcloud auth list
- Run the following command in Cloud Shell to confirm that the gcloud command knows about your project.
gcloud config list project
- If your project is not set, use the following command to set it:
gcloud config set project <YOUR_PROJECT_ID>
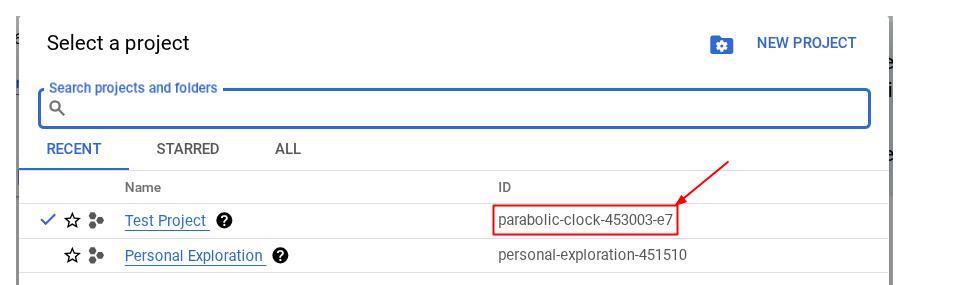
Alternatively, you also can see the PROJECT_ID id in the console

Click it and you will all of your project and the project ID on the right side
- Enable the required APIs via the command shown below. This could take a few minutes, so please be patient.
gcloud services enable aiplatform.googleapis.com \
                           run.googleapis.com \
                           cloudbuild.googleapis.com \
                           cloudresourcemanager.googleapis.com \
                    bigquery.googleapis.com
On successful execution of the command, you should see a message similar to the one shown below:
Operation "operations/..." finished successfully.
The alternative to the gcloud command is through the console by searching for each product or using this link.
If any API is missed, you can always enable it during the course of the implementation.
Refer documentation for gcloud commands and usage.
Setup Application Working Directory
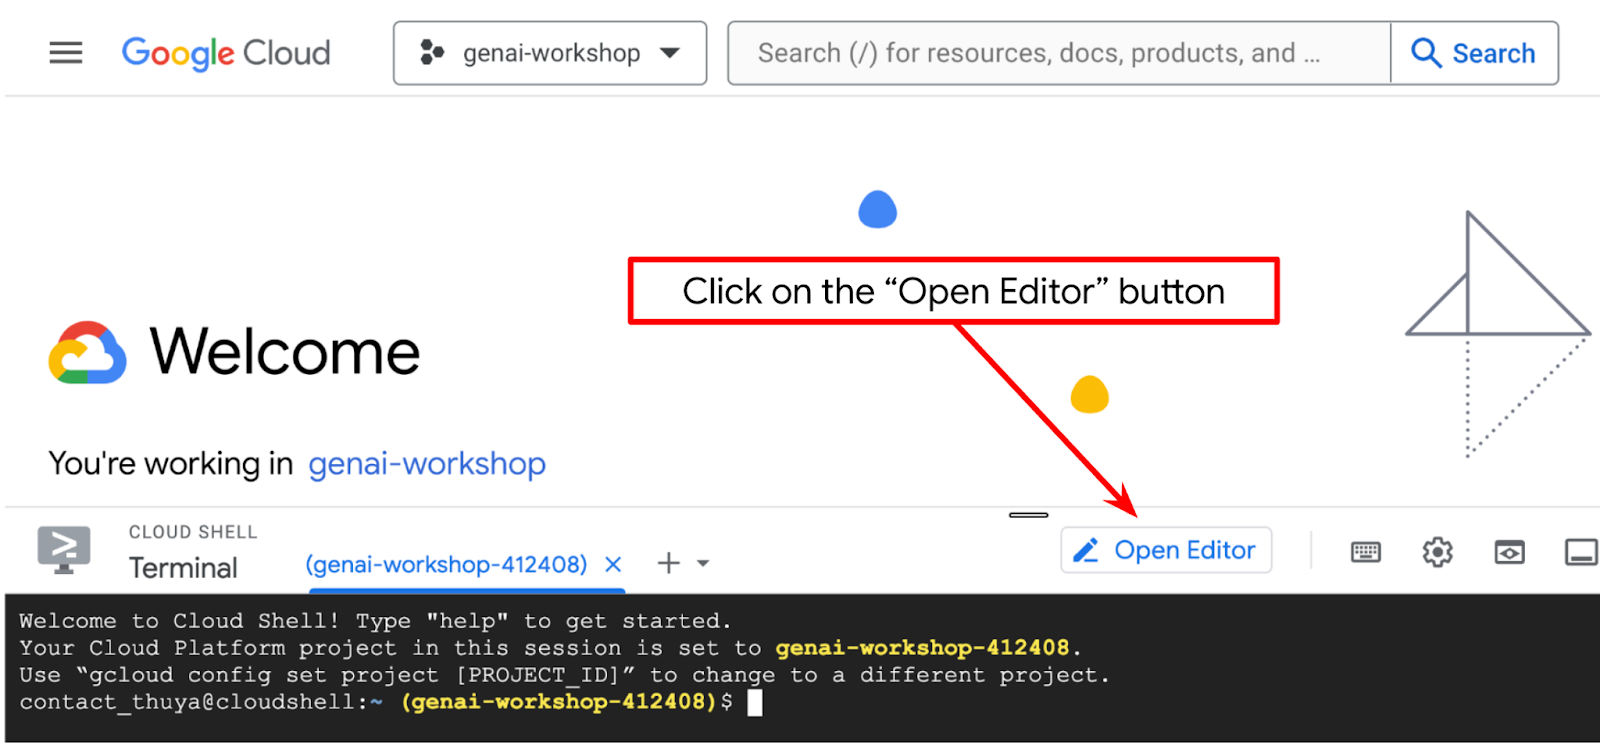
- Click on the Open Editor button, this will open a Cloud Shell Editor, we can write our code here
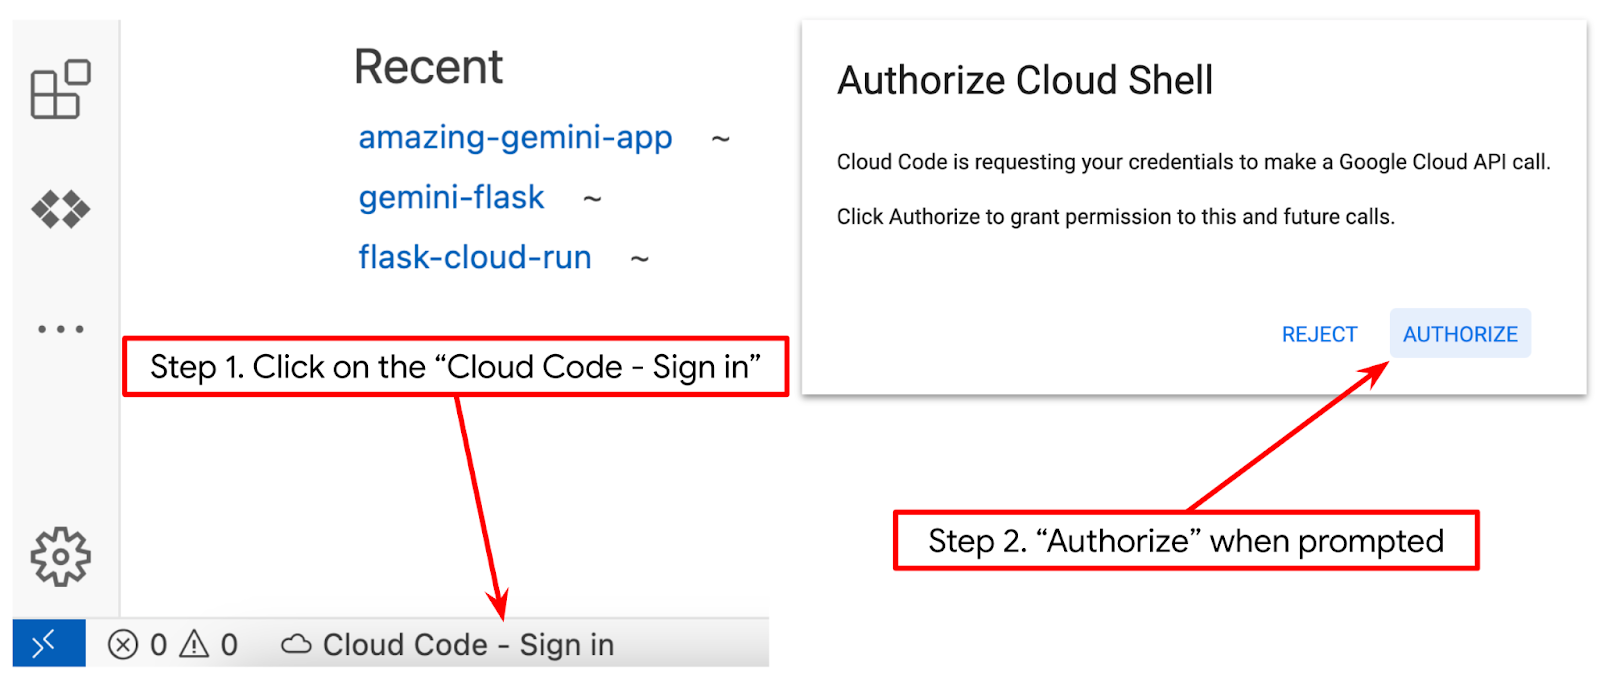
- Make sure the Cloud Code project is set in the bottom left corner (status bar) of the Cloud Shell editor, as highlighted in the image below and is set to the active Google Cloud project where you have billing enabled. Authorize if prompted. It might take a while after initializing the Cloud Shell Editor so that Cloud Code - Sign In button will appear, please be patient.
Next, we will prepare our python environment
Environment Setup
Prepare Python Virtual Environment
The next step is to prepare the development environment. We will utilize Python 3.12 in this codelab and we will use python virtualenv to simplify the need of creating and managing python version and virtual environment
- If you haven't opened the terminal yet, open it by clicking on Terminal -> New Terminal , or use Ctrl + Shift + C

- Create new folder and change location to this folder with run the following command
mkdir agent_diet_planner
cd agent_diet_planner
- Create new virtualenv with run the following command
python -m venv .env
- Activate virtualenv with the following command
source .env/bin/activate
- Create
requirements.txt. Click File → New Text File and fill with content below. Then save it asrequirements.txt
streamlit==1.33.0
google-cloud-aiplatform
google-cloud-bigquery
pandas==2.2.2
db-dtypes==1.2.0
pyarrow==16.1.0
- Then install all dependencies from requirements.txt with run the following command
pip install -r requirements.txt
- Type the following command below to check are all python libraries dependencies are installed
pip list
Setup Configuration Files
Now we will need to set up configuration files for this project. Configuration files are used to store variable and service account credentials.
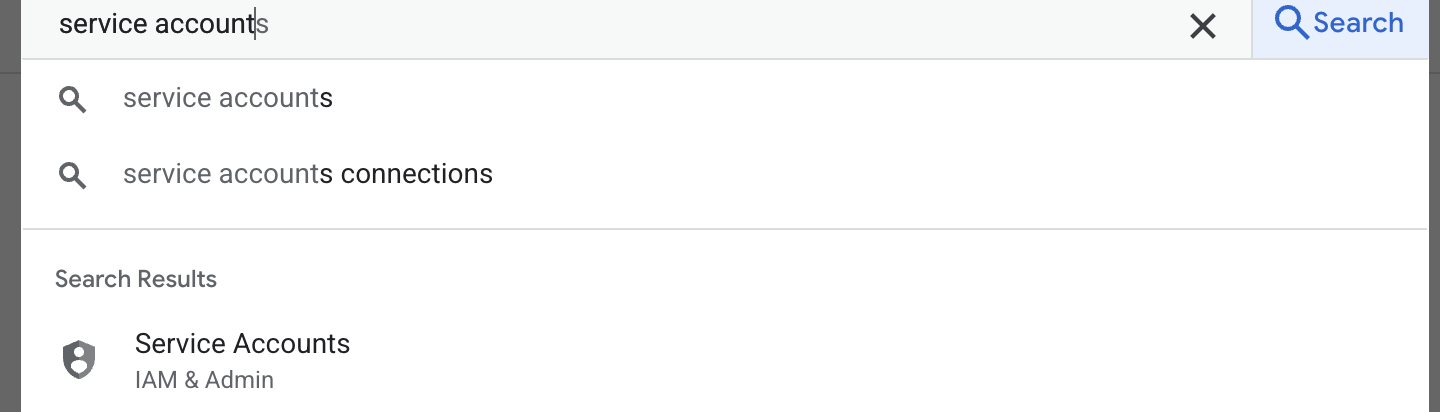
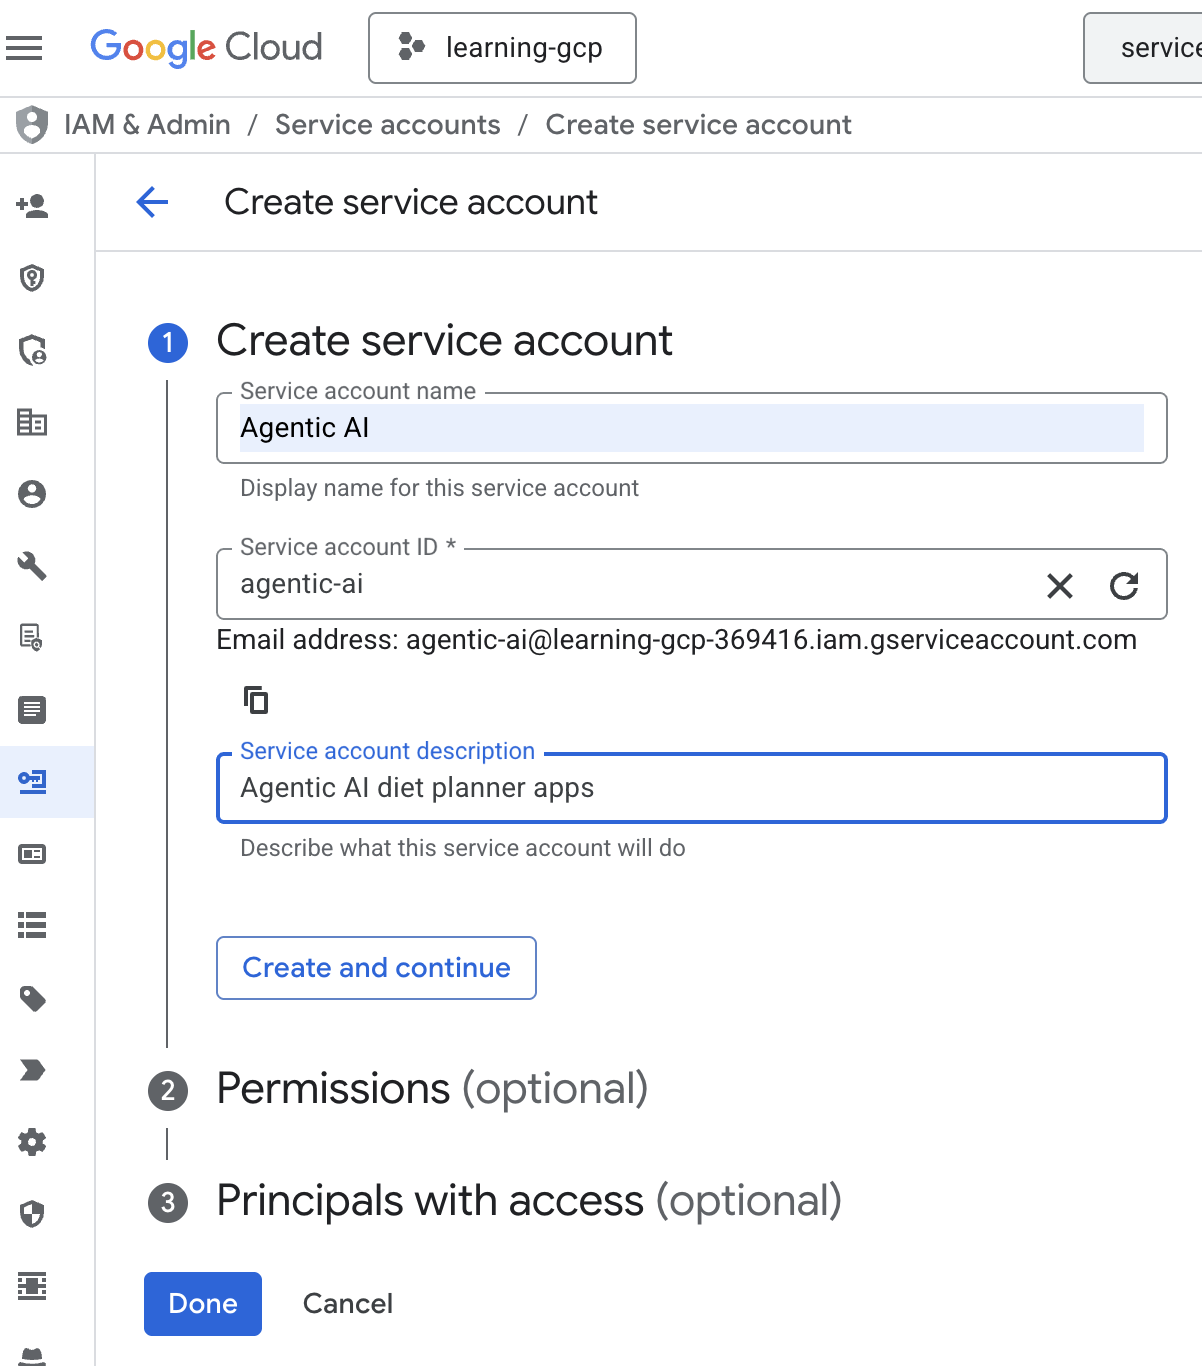
- The first step is to create a service account. Type service account in search then click service account.
- Click + Create service account. Input Service account name then click create and continue.
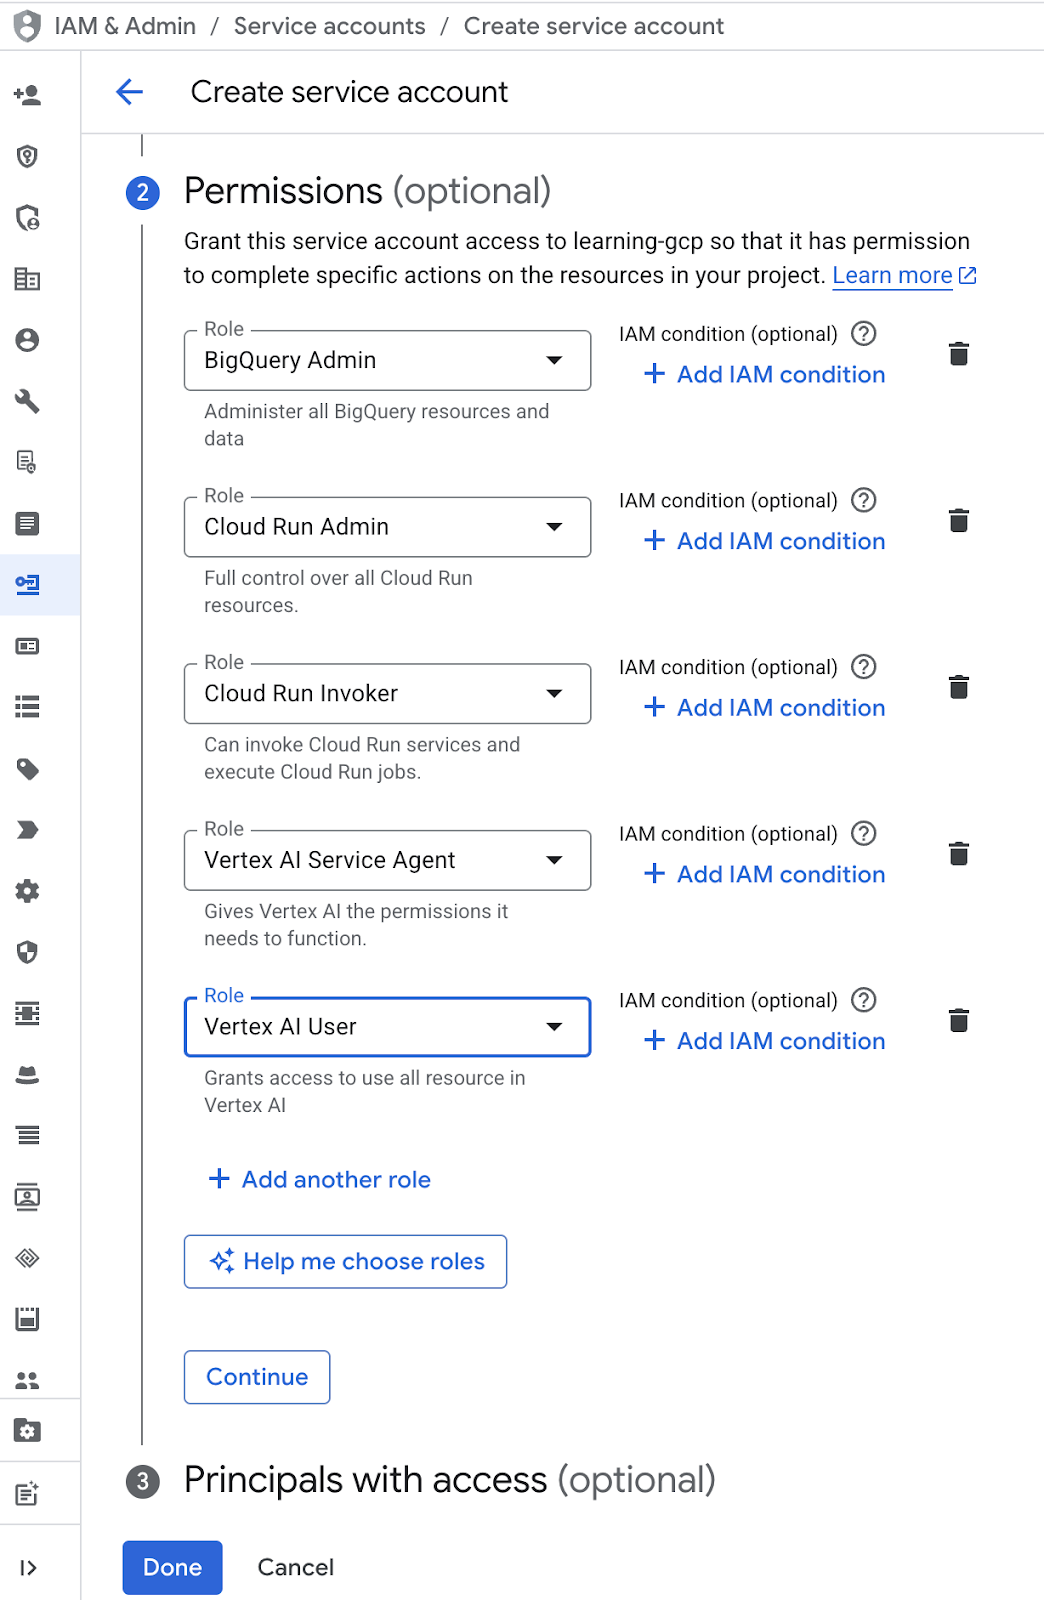
- In permission, Choose role Service Account User. Click + Add another role and choose IAM role : BigQuery Admin, Cloud Run Admin, Cloud Run Invoker, Vertex AI Service Agent and Vertex AI User then Click Done
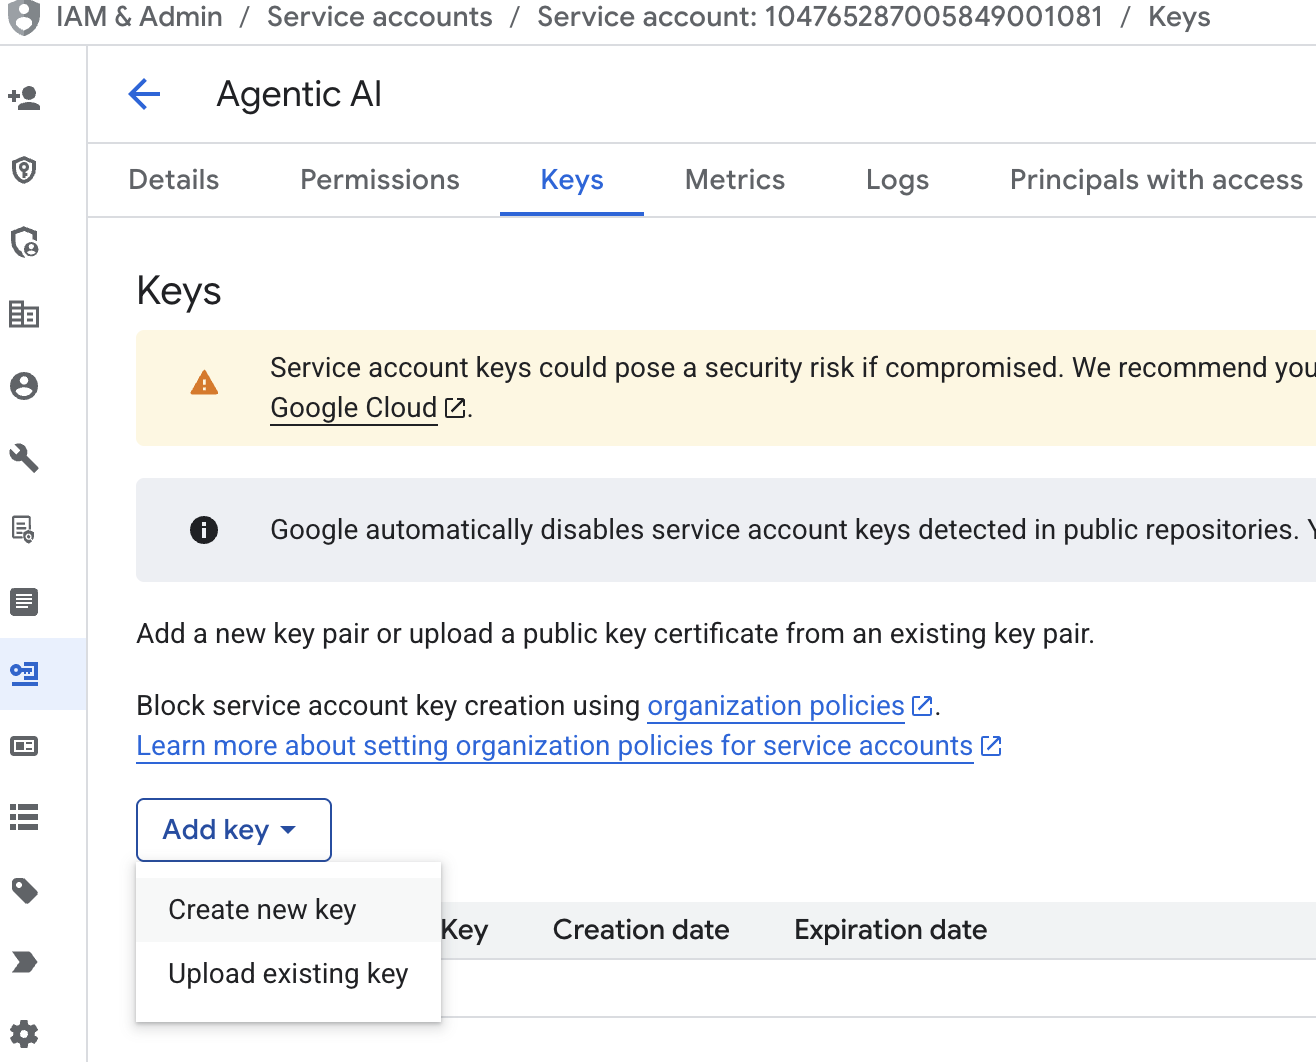
- Click Service account email, click tab key, click add key → Create new key.
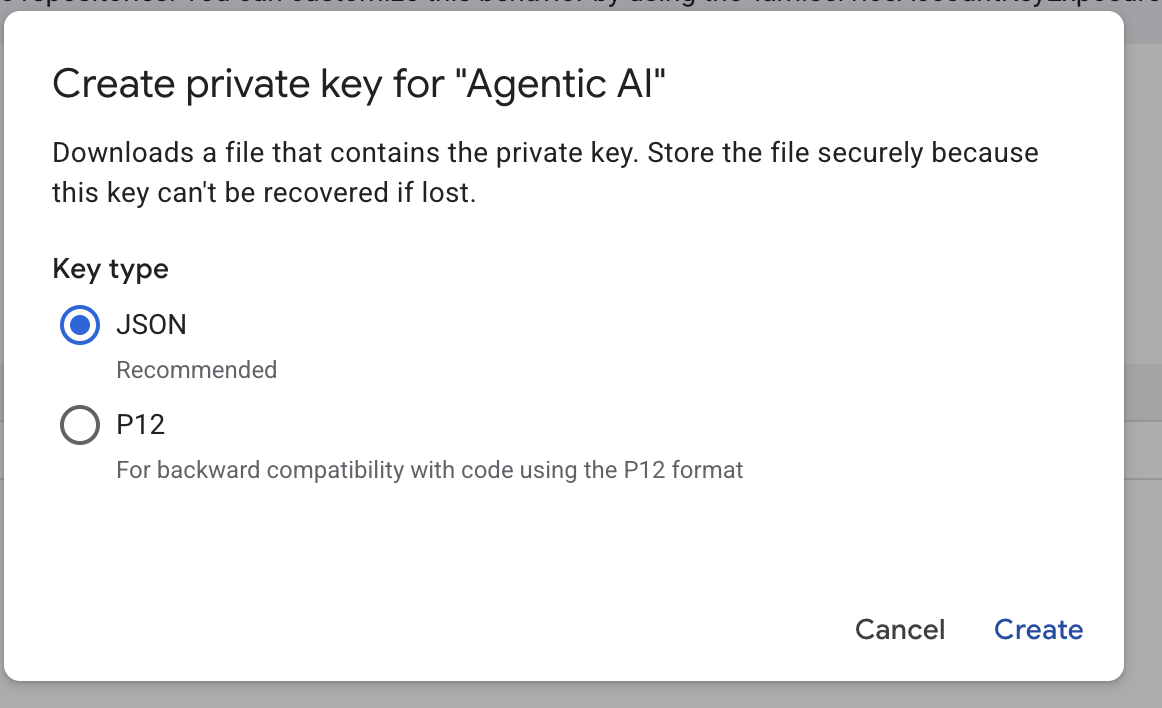
- Choose json then click Create. Save this service account file to local for next step
- Create a folder named .streamlit with the following configuration. Right Click mouse, Click New Folder and type folder name
.streamlit - Right Click in folder
.streamlitthen click New File and fill with value below. Then save it assecrets.toml
# secrets.toml (for Streamlit sharing)
# Store in .streamlit/secrets.toml

[gcp]
project_id = "your_gcp_project"
location = "us-central1"

[gcp_service_account]
type = "service_account"
project_id = "your-project-id"
private_key_id = "your-private-key-id"
private_key = '''-----BEGIN PRIVATE KEY-----
YOUR_PRIVATE_KEY_HERE
-----END PRIVATE KEY-----'''
client_email = "your-sa@project-id.iam.gserviceaccount.com"
client_id = "your-client-id"
auth_uri = "https://accounts.google.com/o/oauth2/auth"
token_uri = "https://oauth2.googleapis.com/token"
auth_provider_x509_cert_url = "https://www.googleapis.com/oauth2/v1/certs"
client_x509_cert_url = "https://www.googleapis.com/robot/v1/metadata/x509/your-sa%40project-id.iam.gserviceaccount.com"
- Update value for
project_id,private_key_id,private_key,client_email,client_id , and auth_provider_x509_cert_urlbased on your service account that created in previous step
Prepare BigQuery Dataset
Next step is to create a BigQuery Dataset for save generation results to BigQuery.
- Type BigQuery in search then click BigQuery.
- Click
 then click Create Dataset
 - Input dataset id
diet_planner_datathen click Create dataset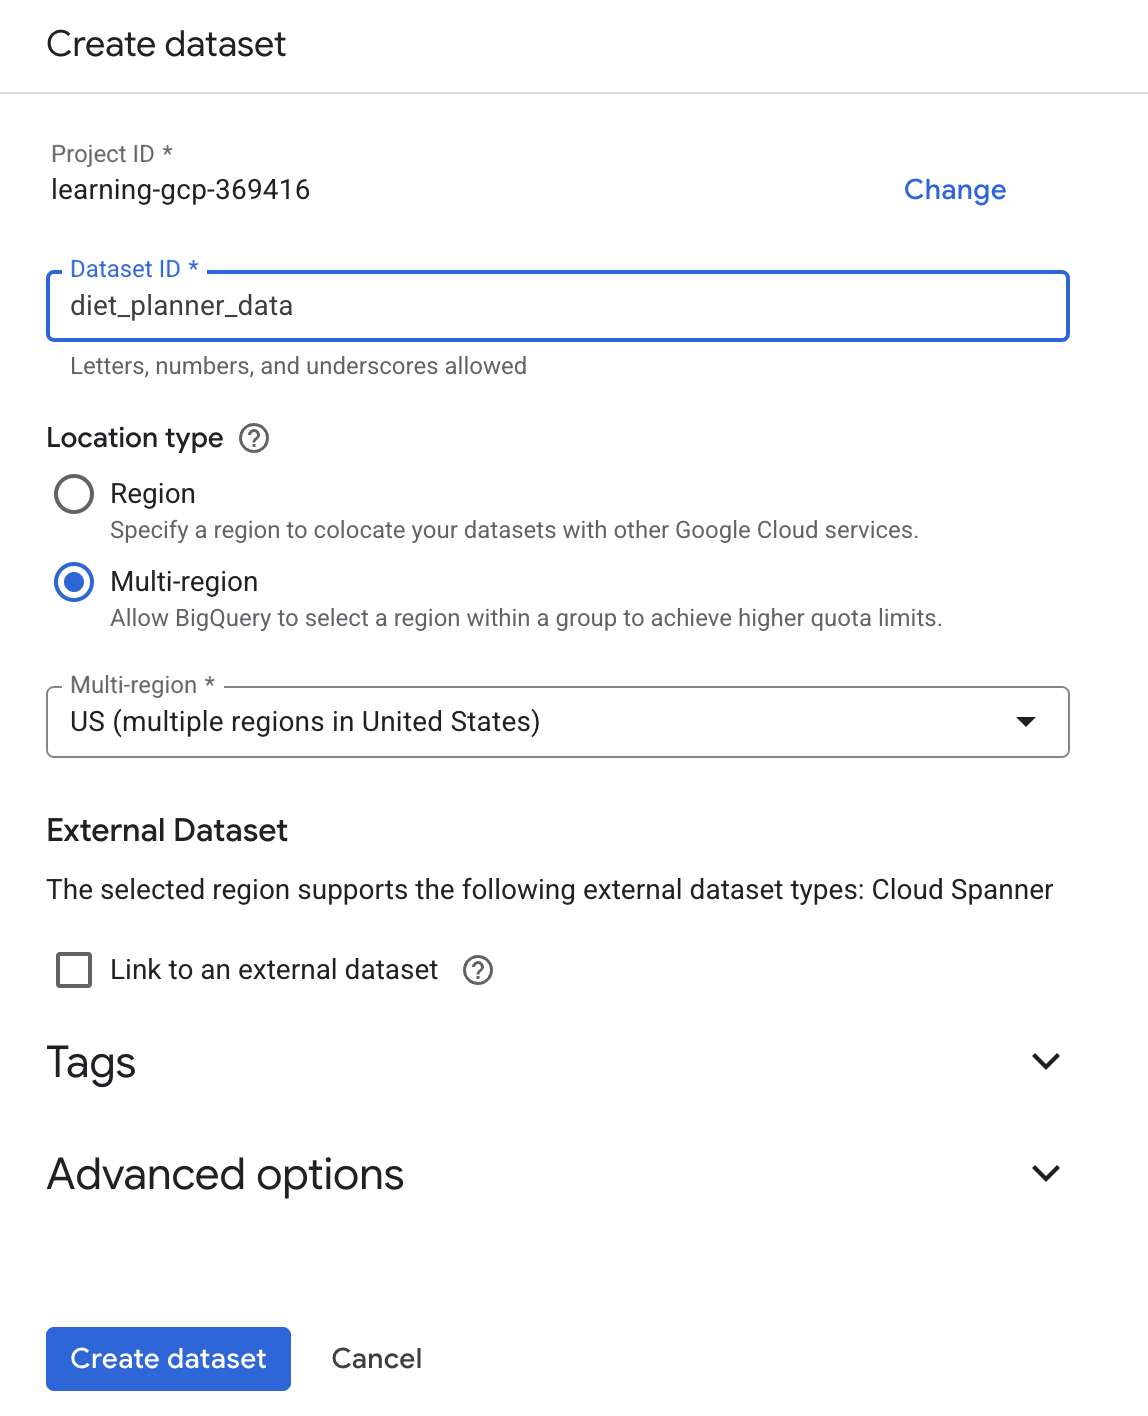
4. Build an Agent Diet Planner apps
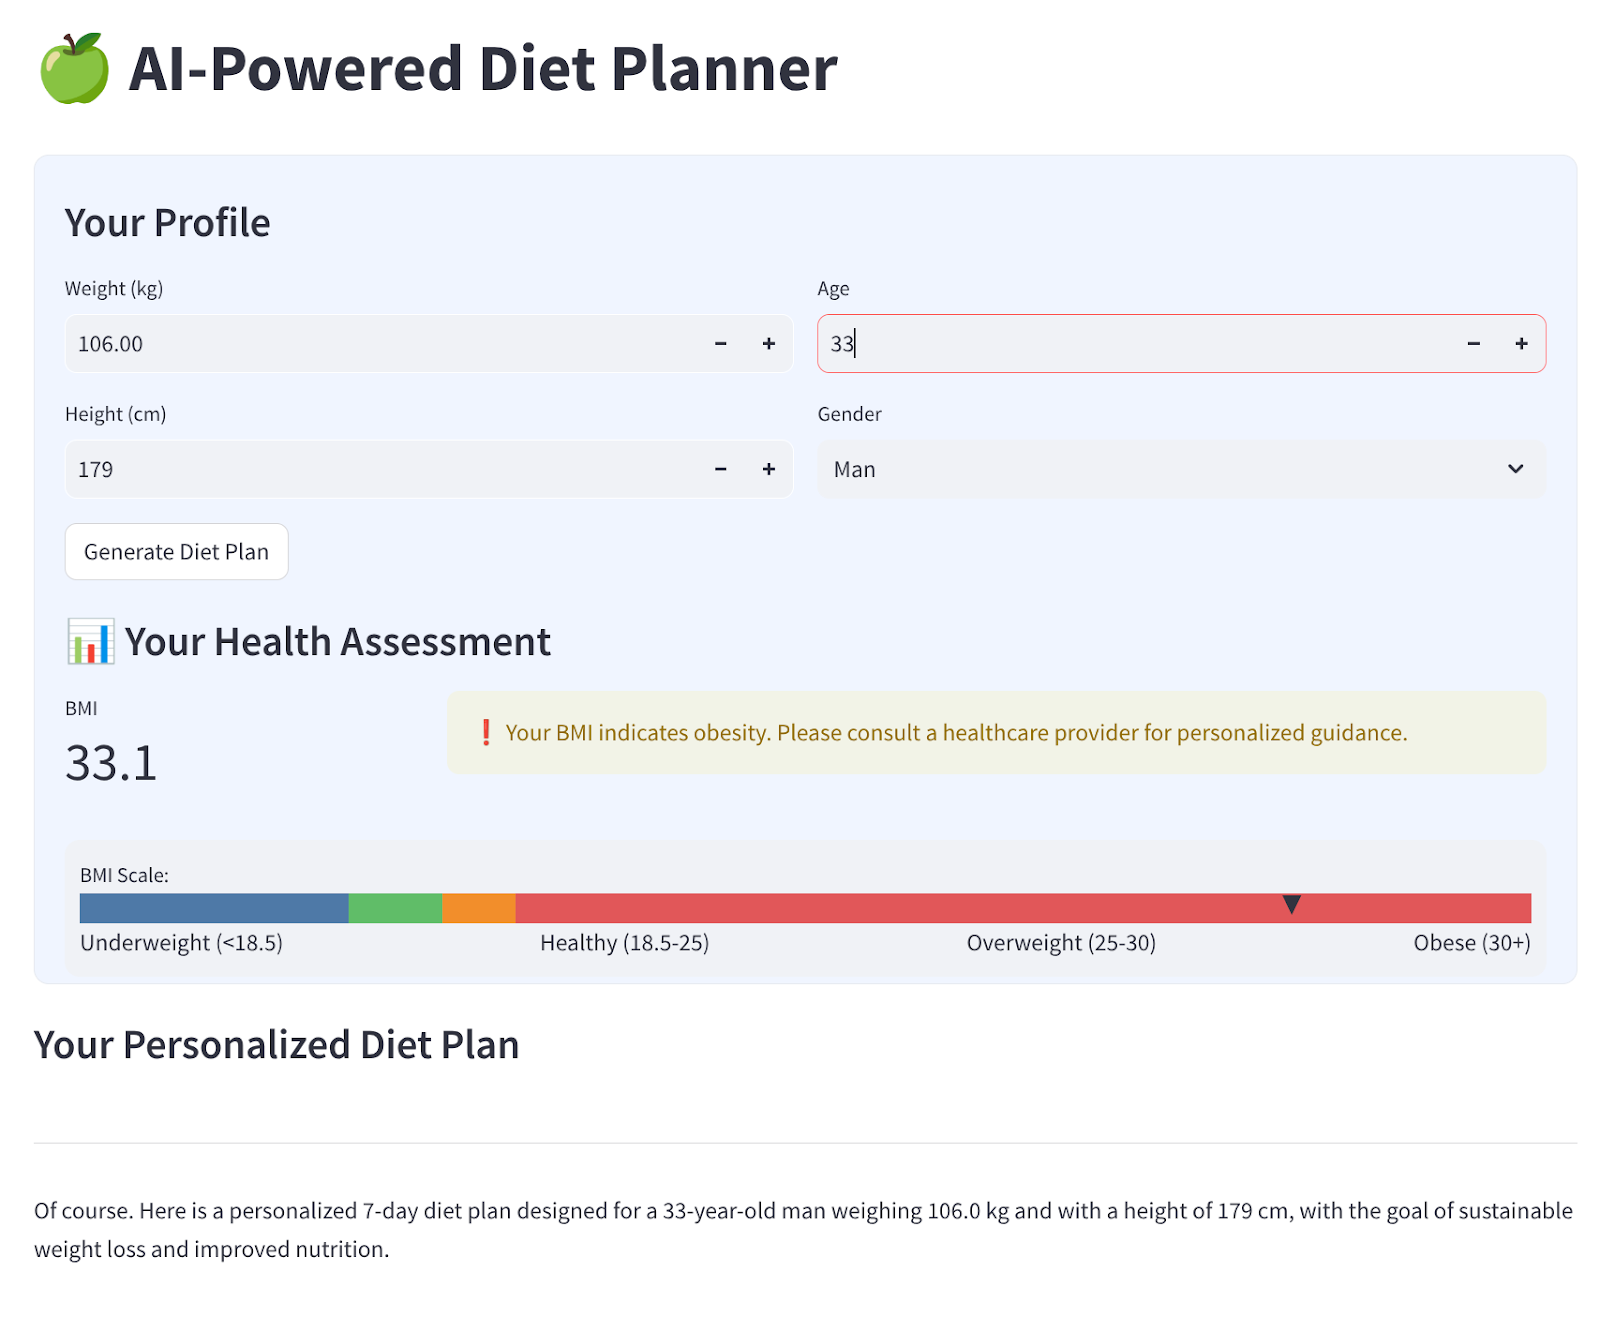
We will build a simple web interface with 4 input which looks like this
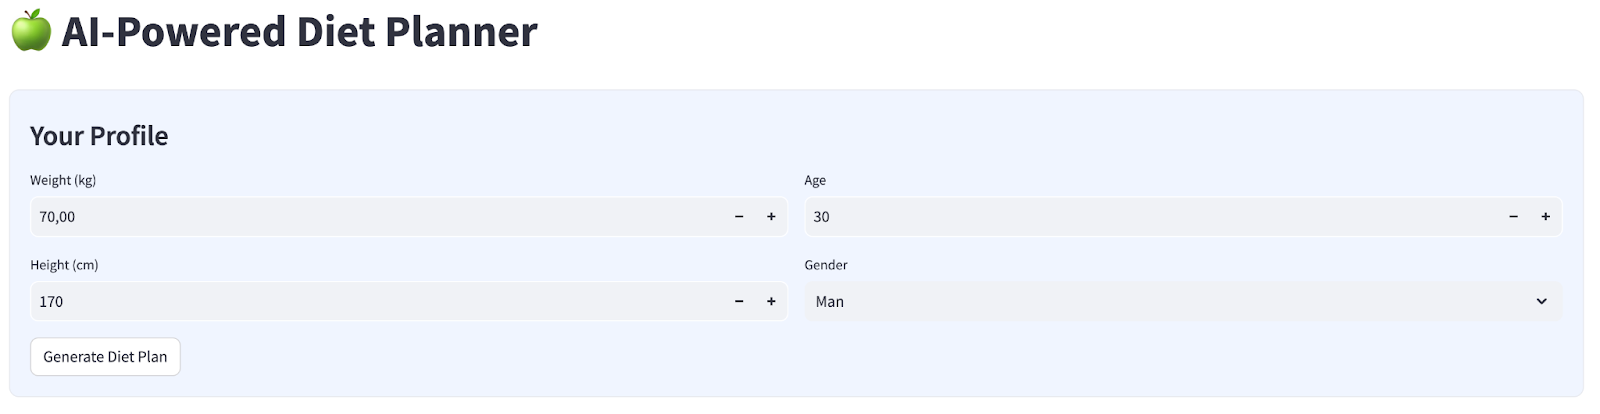
Change weight, height, age and gender based on your profile then click generate. It will call the LLM model Gemini Pro 2.5 in the Vertex AI library and store generated results to BigQuery.
The code will separate by 6 parts in order not to be too long.
Create function calculate bmi status
- Right Click
agent_diet_plannerfolder → New File .. → input filenamebmi_calc.pythen press enter - Fill code with following
# Add this function to calculate BMI and health status
def calculate_bmi_status(weight, height):
   """
   Calculate BMI and return status message
   """
   height_m = height / 100  # Convert cm to meters
   bmi = weight / (height_m ** 2)

   if bmi < 18.5:
       status = "underweight"
       message = "⚠️ Your BMI suggests you're underweight. Consider increasing calorie intake with nutrient-dense foods."
   elif 18.5 <= bmi < 25:
       status = "normal"
       message = "✅ Your BMI is in the healthy range. Let's maintain this balance!"
   elif 25 <= bmi < 30:
       status = "overweight"
       message = "⚠️ Your BMI suggests you're overweight. Focus on gradual weight loss through balanced nutrition."
   else:
       status = "obese"
       message = "❗ Your BMI indicates obesity. Please consult a healthcare provider for personalized guidance."

   return {
       "value": round(bmi, 1),
       "status": status,
       "message": message
   }
Create agent diet planner main apps
- Right Click
agent_diet_plannerfolder → New File .. → input filenameapp.pythen press enter. - Fill code with following
import os
from google.oauth2 import service_account
import streamlit as st
from google.cloud import bigquery
from vertexai.preview.generative_models import GenerativeModel
import vertexai
import datetime
import time
import pandas as pd
from bmi_calc import calculate_bmi_status

# Get configuration from environment
PROJECT_ID = os.environ.get("GCP_PROJECT_ID", "your_gcp_project_id")
LOCATION = os.environ.get("GCP_LOCATION", "us-central1")

#CONSTANTS Dataset and table in BigQuery
DATASET = "diet_planner_data"
TABLE = "user_plans"

# Initialize Vertex AI
vertexai.init(project=PROJECT_ID, location=LOCATION)

# Initialize BigQuery client
try:
   # For Cloud Run, use default credentials
   bq_client = bigquery.Client()
except:
   # For local development, use service account from secrets
   if "gcp_service_account" in st.secrets:
       service_account_info = dict(st.secrets["gcp_service_account"])
       credentials = service_account.Credentials.from_service_account_info(service_account_info)
       bq_client = bigquery.Client(credentials=credentials, project=PROJECT_ID)
   else:
       st.error("BigQuery client initialization failed")
       st.stop()
Change value your_gcp_project_id with your project id.
Create agent diet planner main apps - setup_bq_tables
In this section, we will create a function named setup_bq_table with 1 input parameter bq_client. This function will define schema in the bigquery table and create a table if it does not exist.
Fill code with following below previous code in app.py
# Create BigQuery table if not exists
def setup_bq_table(bq_client):
   dataset_id = f"{st.secrets['gcp']['project_id']}.{DATASET}"
   table_id = f"{dataset_id}.{TABLE}"

   schema = [
       bigquery.SchemaField("user_id", "STRING", mode="REQUIRED"),
       bigquery.SchemaField("timestamp", "TIMESTAMP", mode="REQUIRED"),
       bigquery.SchemaField("weight", "FLOAT", mode="REQUIRED"),
       bigquery.SchemaField("height", "INTEGER", mode="REQUIRED"),
       bigquery.SchemaField("age", "INTEGER", mode="REQUIRED"),
       bigquery.SchemaField("gender", "STRING", mode="REQUIRED"),
       bigquery.SchemaField("diet_plan", "STRING", mode="REQUIRED")
   ]

   try:
       bq_client.get_table(table_id)
   except:
       table = bigquery.Table(table_id, schema=schema)
       bq_client.create_table(table)
       st.toast("BigQuery table created successfully")
Create agent diet planner main apps - generate_diet_plan
In this section, we will create a function named generate_diet_plan with 1 input parameter. This function will call the LLM model Gemini Pro 2.5 with define prompt and generate results.
Fill code with following below previous code in app.py
# Generate diet plan using Gemini Pro
def generate_diet_plan(params):
   try:
       model = GenerativeModel("gemini-2.5-pro")
       prompt = f"""
       Create a personalized 7-day diet plan for:
       - {params['gender']}, {params['age']} years old
       - Weight: {params['weight']} kg
       - Height: {params['height']} cm

       Include:
       1. Daily calorie target
       2. Macronutrient breakdown (carbs, protein, fat)
       3. Meal timing and frequency
       4. Food recommendations
       5. Hydration guidance

       Make the plan:
       - Nutritionally balanced
       - Practical for daily use
       - Culturally adaptable
       - With portion size guidance
       """

       response = model.generate_content(prompt)
       return response.text
   except Exception as e:
       st.error(f"AI generation error: {str(e)}")
       return None
Create agent diet planner main apps - save_to_bq
In this section, we will create a function named save_to_bq with 3 input parameters : bq_client, user_id and plan. This function will save generate result to bigquery table
Fill code with following below previous code in app.py
# Save user data to BigQuery
def save_to_bq(bq_client, user_id, plan):
   try:
       dataset_id = f"{st.secrets['gcp']['project_id']}.{DATASET}"
       table_id = f"{dataset_id}.{TABLE}"

       row = {
           "user_id": user_id,
           "timestamp": datetime.datetime.utcnow().isoformat(),
           "weight": st.session_state.user_data["weight"],
           "height": st.session_state.user_data["height"],
           "age": st.session_state.user_data["age"],
           "gender": st.session_state.user_data["gender"],
           "diet_plan": plan
       }

       errors = bq_client.insert_rows_json(table_id, [row])
       if errors:
           st.error(f"BigQuery error: {errors}")
       else:
           return True
   except Exception as e:
       st.error(f"Data saving error: {str(e)}")
       return False
Create agent diet planner main apps - main
In this section, we will create a function named main with no input parameter. This function mostly handles streamlit UI script, display generated result, display historical generated result from bigquery table and for downloading data to markdown file.
Fill code with following below previous code in app.py
# Streamlit UI
def main():
   st.set_page_config(page_title="AI Diet Planner", page_icon="🍏", layout="wide")

   # Initialize session state
   if "user_data" not in st.session_state:
       st.session_state.user_data = None
   if "diet_plan" not in st.session_state:
       st.session_state.diet_plan = None

   # Initialize clients
   #bq_client = init_clients()
   setup_bq_table(bq_client)

   st.title("🍏 AI-Powered Diet Planner")
   st.markdown("""
   <style>
   .stProgress > div > div > div > div {
       background-color: #4CAF50;
   }
   [data-testid="stForm"] {
       background: #f0f5ff;
       padding: 20px;
       border-radius: 10px;
       border: 1px solid #e6e9ef;
   }
   </style>
   """, unsafe_allow_html=True)

   # User input form
   with st.form("user_profile", clear_on_submit=False):
       st.subheader("Your Profile")
       col1, col2 = st.columns(2)

       with col1:
           weight = st.number_input("Weight (kg)", min_value=30.0, max_value=200.0, value=70.0)
           height = st.number_input("Height (cm)", min_value=100, max_value=250, value=170)

       with col2:
           age = st.number_input("Age", min_value=18, max_value=100, value=30)
           gender = st.selectbox("Gender", ["Man", "Woman"])

       submitted = st.form_submit_button("Generate Diet Plan")

       if submitted:
           user_data = {
               "weight": weight,
               "height": height,
               "age": age,
               "gender": gender
           }

           st.session_state.user_data = user_data
           # Calculate BMI
           bmi_result = calculate_bmi_status(weight, height)

           # Display BMI results in a visually distinct box
           with st.container():
               st.subheader("📊 Your Health Assessment")
               col1, col2 = st.columns([1, 3])

               with col1:
                   st.metric("BMI", bmi_result["value"])

               with col2:
                   if bmi_result["status"] != "normal":
                       st.warning(bmi_result["message"])
                   else:
                       st.success(bmi_result["message"])

           # Add BMI scale visualization
           st.markdown(f"""
           <div style="background:#f0f2f6;padding:10px;border-radius:10px;margin-top:10px">
           <small>BMI Scale:</small><br>
           <div style="display:flex;height:20px;background:linear-gradient(90deg,
           #4e79a7 0%,
           #4e79a7 18.5%,
           #60bd68 18.5%,
           #60bd68 25%,
           #f28e2b 25%,
           #f28e2b 30%,
           #e15759 30%,
           #e15759 100%);position:relative">
           <div style="position:absolute;left:{min(100, max(0, (bmi_result["value"]/40)*100))}%;top:-5px">
               ▼
           </div>
           </div>
           <div style="display:flex;justify-content:space-between">
           <span>Underweight (<18.5)</span>
           <span>Healthy (18.5-25)</span>
           <span>Overweight (25-30)</span>
           <span>Obese (30+)</span>
           </div>
           </div>
           """, unsafe_allow_html=True)

           # Store BMI in session state
           st.session_state.bmi = bmi_result

   # Plan generation and display
   if submitted and st.session_state.user_data:
       with st.spinner("🧠 Generating your personalized diet plan using Gemini AI..."):
           #diet_plan = generate_diet_plan(st.session_state.user_data)
           diet_plan = generate_diet_plan({**st.session_state.user_data,"bmi": bmi_result["value"],
                                           "bmi_status": bmi_result["status"]
           })

           if diet_plan:
               st.session_state.diet_plan = diet_plan

               # Generate unique user ID
               user_id = f"user_{int(time.time())}"

               # Save to BigQuery
               if save_to_bq(bq_client, user_id, diet_plan):
                   st.toast("✅ Plan saved to database!")

   # Display generated plan
   if st.session_state.diet_plan:
       st.subheader("Your Personalized Diet Plan")
       st.markdown("---")
       st.markdown(st.session_state.diet_plan)

       # Download button
       st.download_button(
           label="Download Plan",
           data=st.session_state.diet_plan,
           file_name="my_diet_plan.md",
           mime="text/markdown"
       )

       # Show history
       st.subheader("Your Plan History")
       try:
           query = f"""
               SELECT timestamp, weight, height, age, gender
               FROM `{st.secrets['gcp']['project_id']}.{DATASET}.{TABLE}`
               WHERE user_id LIKE 'user_%'
               ORDER BY timestamp DESC
               LIMIT 5
           """
           history = bq_client.query(query).to_dataframe()
           if not history.empty:
               history["timestamp"] = pd.to_datetime(history["timestamp"])
               st.dataframe(history.style.format({
                   "weight": "{:.1f} kg",
                   "height": "{:.0f} cm"
               }))
           else:
               st.info("No previous plans found")
       except Exception as e:
           st.error(f"History load error: {str(e)}")

if __name__ == "__main__":
   main()
Save code with name app.py.
5. Deploy apps use cloud build to Cloud Run
Now, of course we want to showcase this amazing app to the others. In order to do so, we can package this application and deploy it to Cloud Run as a public service that can be accessed by others. In order to do that, let's revisit the architecture
First we need Dockerfile, Click File->New Text File, and copy paste the following code then save it as Dockerfile
# Use official Python image
FROM python:3.12-slim

# Set environment variables
ENV PYTHONDONTWRITEBYTECODE 1
ENV PYTHONUNBUFFERED 1
ENV PORT 8080

# Install system dependencies
RUN apt-get update && \
   apt-get install -y --no-install-recommends \
   build-essential \
   libpq-dev \
   && rm -rf /var/lib/apt/lists/*

# Set working directory
WORKDIR /app

# Copy requirements
COPY requirements.txt .

# Install Python dependencies
RUN pip install --no-cache-dir -r requirements.txt

# Copy application files
COPY . .

# Expose port
EXPOSE $PORT

# Run the application
CMD ["streamlit", "run", "app.py", "--server.port", "8080", "--server.address", "0.0.0.0"]
Next is we will create cloudbuid.yaml for build apps to become docker images, push to artifact registry and deploy to cloud run.
Click File->New Text File, and copy paste the following code then save it as cloudbuild.yaml
steps:
 # Build Docker image
 - name: 'gcr.io/cloud-builders/docker'
   args: ['build', '-t', 'gcr.io/$PROJECT_ID/diet-planner:$BUILD_ID', '--no-cache',
        '--progress=plain',
        '.']
   id: 'Build'
   timeout: 1200s
   waitFor: ['-']
   dir: '.'
  # Push to Container Registry
 - name: 'gcr.io/cloud-builders/docker'
   args: ['push', 'gcr.io/$PROJECT_ID/diet-planner:$BUILD_ID']
   id: 'Push'
   waitFor: ['Build']
  # Deploy to Cloud Run
 - name: 'gcr.io/google.com/cloudsdktool/cloud-sdk'
   entrypoint: gcloud
   args:
     - 'run'
     - 'deploy'
     - 'diet-planner-service'
     - '--image=gcr.io/$PROJECT_ID/diet-planner:$BUILD_ID'
     - '--port=8080'
     - '--region=us-central1'
     - '--platform=managed'
     - '--allow-unauthenticated'
     - '--set-env-vars=GCP_PROJECT_ID=$PROJECT_ID,GCP_LOCATION=us-central1'
     - '--cpu=1'
     - '--memory=1Gi'
     - '--timeout=300'
   waitFor: ['Push']

options:
 logging: CLOUD_LOGGING_ONLY
 machineType: 'E2_HIGHCPU_8'
 diskSizeGb: 100

images:
 - 'gcr.io/$PROJECT_ID/diet-planner:$BUILD_ID'
At this point, we already have all files needed to build apps to become docker images, push to artifact registry and deploy it to Cloud Run, let's deploy it. Navigate to the Cloud Shell Terminal and make sure the current project is configured to your active project, if not you have use the gcloud configure command to set the project id:
gcloud config set project [PROJECT_ID]
Then, run the following command to build apps to become docker images, push to artifact registry and deploy it to Cloud Run
gcloud builds submit --config cloudbuild.yaml
It will build the Docker container based on our previously provided Dockerfile and push it to the Artifact Registry. After that we will deploy the constructed image to the Cloud Run. All of this process is defined in the cloudbuild.yaml steps.
Note that we are allowing unauthenticated access here because this is a demo application. Recommendation is to use appropriate authentication for your enterprise and production applications.
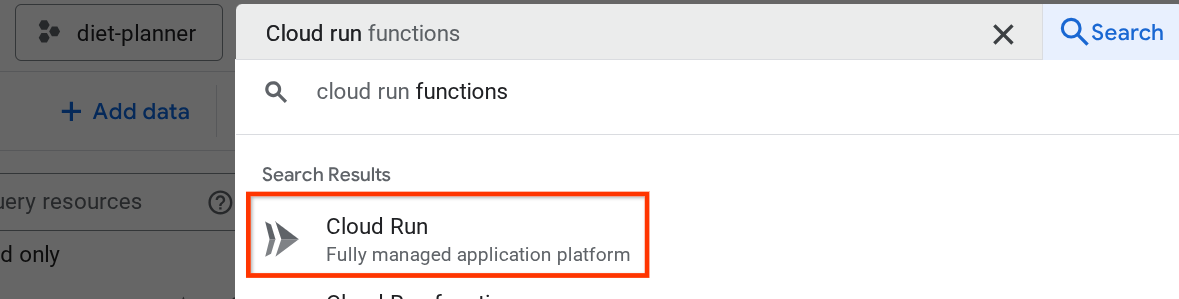
Once the deployment is complete, we can check it in the Cloud Run page, search Cloud Run in the top cloud console search bar and click the Cloud Run product
After that you can inspect the deployed service listed in the Cloud Run Service page, Clik on the service so that we can get the service URL
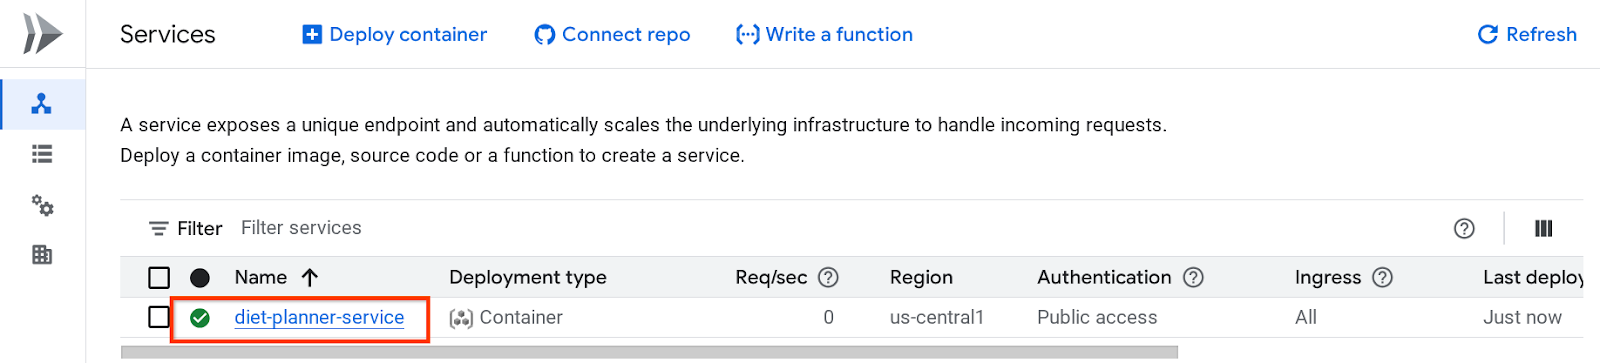
The service URL will be on the top bar
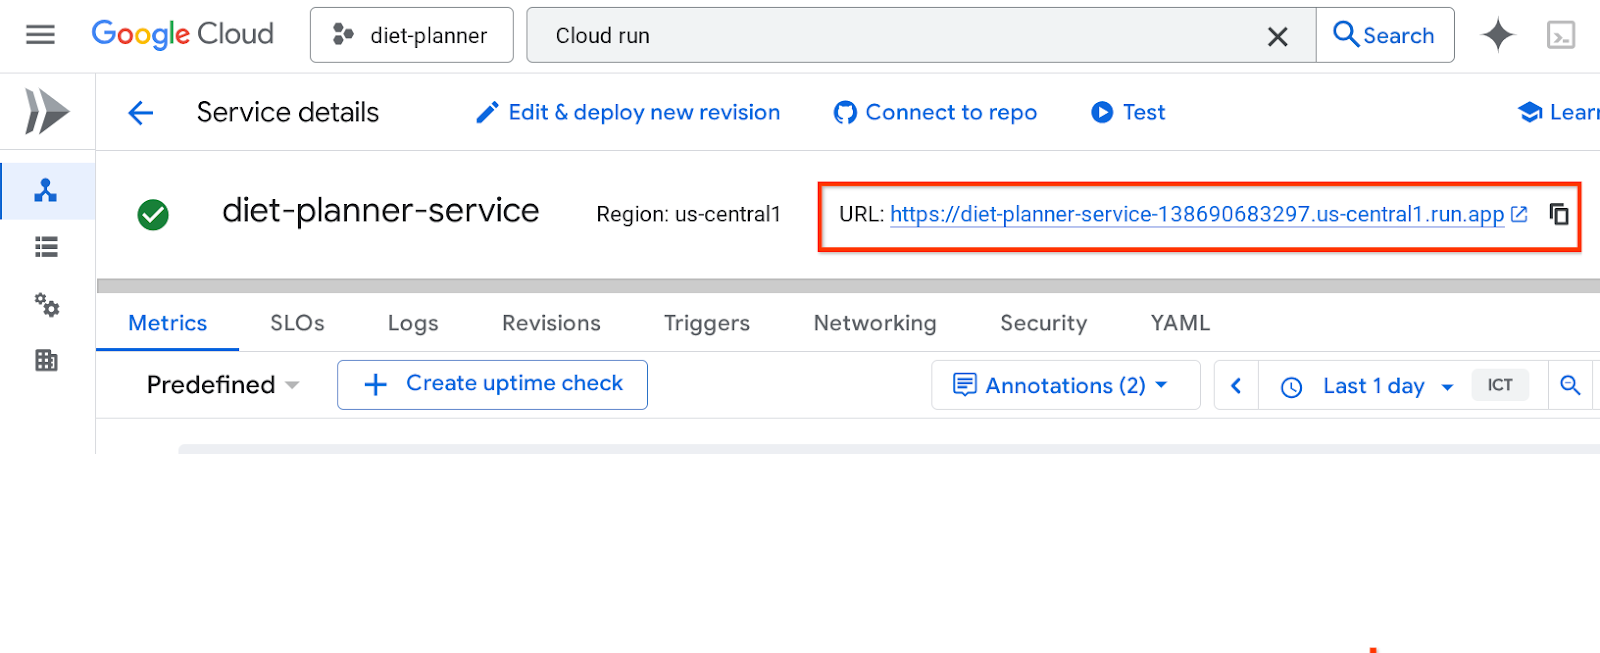 Go ahead and use your application from the Incognito window or your mobile device. It should be live already.
6. Clean up
To avoid incurring charges to your Google Cloud account for the resources used in this codelab, follow these steps:
- In the Google Cloud console, go to the Manage resources page.
- In the project list, select the project that you want to delete, and then click Delete.
- In the dialog, type the project ID, and then click Shut down to delete the project.
- Alternatively you can go to Cloud Run on the console, select the service you just deployed and delete.