
1. 簡介
你好啊!您對代理程式的概念很感興趣,也就是不必動手就能完成工作的得力助手,對吧?太棒了!但說實話,一個代理程式不一定能滿足需求,尤其是在處理更大、更複雜的專案時。你可能需要整個團隊的成員!這時多代理系統就能派上用場。
與舊式硬式編碼相比,LLM 驅動的代理程式可提供極大的彈性。但 (總是會有但),這類技術也帶來了一系列棘手的挑戰。這正是本研討會要深入探討的主題!

以下是您可望學到的內容,可視為提升特務技能的機會:
使用 LangGraph 建構第一個代理程式:我們將使用熱門的 LangGraph 框架,實際建構您自己的代理程式。您將瞭解如何建立連結資料庫的工具、運用最新的 Gemini 2 API 進行網路搜尋,以及最佳化提示和回覆,讓代理程式不僅能與 LLM 互動,也能與現有服務互動。我們也會說明函式呼叫的運作方式。
隨心所欲協調代理:我們會探討各種協調代理的方式,從簡單的直線路徑到更複雜的多路徑情境。這就像是引導代理程式團隊的流程。
多代理系統:您將瞭解如何設定系統,讓代理程式協作並共同完成工作,這一切都要歸功於事件驅動架構。
LLM 自由度:使用最適合的工作:我們不只會使用一個 LLM!您將瞭解如何使用多個 LLM,並指派不同角色,運用酷炫的「思考模型」提升解決問題的能力。
什麼是動態內容?沒問題!:想像一下,您的代理程式會即時為每位使用者量身打造動態內容。我們將說明如何操作!
透過 Google Cloud 邁向雲端:別再只是在筆記本中玩玩而已。我們將說明如何在 Google Cloud 上架構及部署多代理系統,讓您做好準備,迎接真實世界!
這個專案是運用我們討論的所有技巧的絕佳範例。
2. 架構
當老師或從事教育工作很有成就感,但不可否認的是,工作量 (尤其是備課) 可能很繁重。此外,學校通常沒有足夠的員工,而且家教費用高昂。因此,我們建議採用 AI 輔助教學助理。這項工具可減輕教育工作者的負擔,並協助彌補教職員短缺和缺乏平價輔導所造成的落差。
我們的 AI 教學助理可以快速製作詳細的教案、有趣的測驗、簡單易懂的音訊重點摘要,以及個人化的作業。讓老師專心發揮所長,與學生交流互動,幫助他們愛上學習。
這個系統有兩個網站:一個供老師建立未來幾週的教案,

以及學生存取測驗、語音摘要和作業的連結。
好的,我們來逐步瞭解教學助理 Aidemy 的架構。如您所見,我們將其分解為幾個主要元件,這些元件共同運作,才能實現這項功能。

主要架構元素和技術:
Google Cloud Platform (GCP):整個系統的核心:
- Vertex AI:存取 Google 的 Gemini LLM。
- Cloud Run:無伺服器平台,用於部署容器化代理程式和函式。
- Cloud SQL:用於課程資料的 PostgreSQL 資料庫。
- Pub/Sub 和 Eventarc:事件導向架構的基礎,可讓元件之間進行非同步通訊。
- Cloud Storage:儲存語音摘要和作業檔案。
- Secret Manager:安全地管理資料庫憑證。
- Artifact Registry:儲存代理程式的 Docker 映像檔。
- Compute Engine:部署自行代管的 LLM,而非依賴供應商解決方案
LLM:系統的「大腦」:
- Google 的 Gemini 模型:(Gemini x Pro、Gemini x Flash、Gemini x Flash Thinking) 用於規劃課程、生成內容、建立動態 HTML、說明測驗,以及合併作業。
- DeepSeek:用於生成自學作業的專門任務
LangChain 和 LangGraph:LLM 應用程式開發架構
- 有助於建立複雜的多代理工作流程。
- 可智慧協調工具 (API 呼叫、資料庫查詢、網路搜尋)。
- 實作事件導向架構,提升系統的擴充性和彈性。
基本上,我們的架構結合了大型語言模型、結構化資料和事件導向通訊的強大功能,而且全都在 Google Cloud 上執行。這有助於我們建構可擴充、可靠且有效的教學助理。
3. 事前準備
在 Google Cloud 控制台的專案選取器頁面中,選取或建立 Google Cloud 專案。確認 Cloud 專案已啟用計費功能。瞭解如何檢查專案是否已啟用計費功能。
在 Cloud Shell IDE 中啟用 Gemini Code Assist
👉 在 Google Cloud 控制台中,前往 Gemini Code Assist 工具,同意條款及細則,即可免費啟用 Gemini Code Assist。

忽略權限設定,離開這個頁面。
使用 Cloud Shell 編輯器
👉點選 Google Cloud 控制台頂端的「啟用 Cloud Shell」 (這是 Cloud Shell 窗格頂端的終端機形狀圖示),然後點選「開啟編輯器」按鈕 (看起來像是有鉛筆的開啟資料夾)。視窗中會開啟 Cloud Shell 程式碼編輯器。左側會顯示檔案總管。

👉點選底部狀態列中的「Cloud Code Sign-in」按鈕,如下圖所示。依指示授權外掛程式。如果狀態列顯示「Cloud Code - no project」,請選取該項目,然後在「Select a Google Cloud Project」(選取 Google Cloud 專案) 下拉式選單中,選取您建立的特定 Google Cloud 專案。

👉在雲端 IDE 中開啟終端機,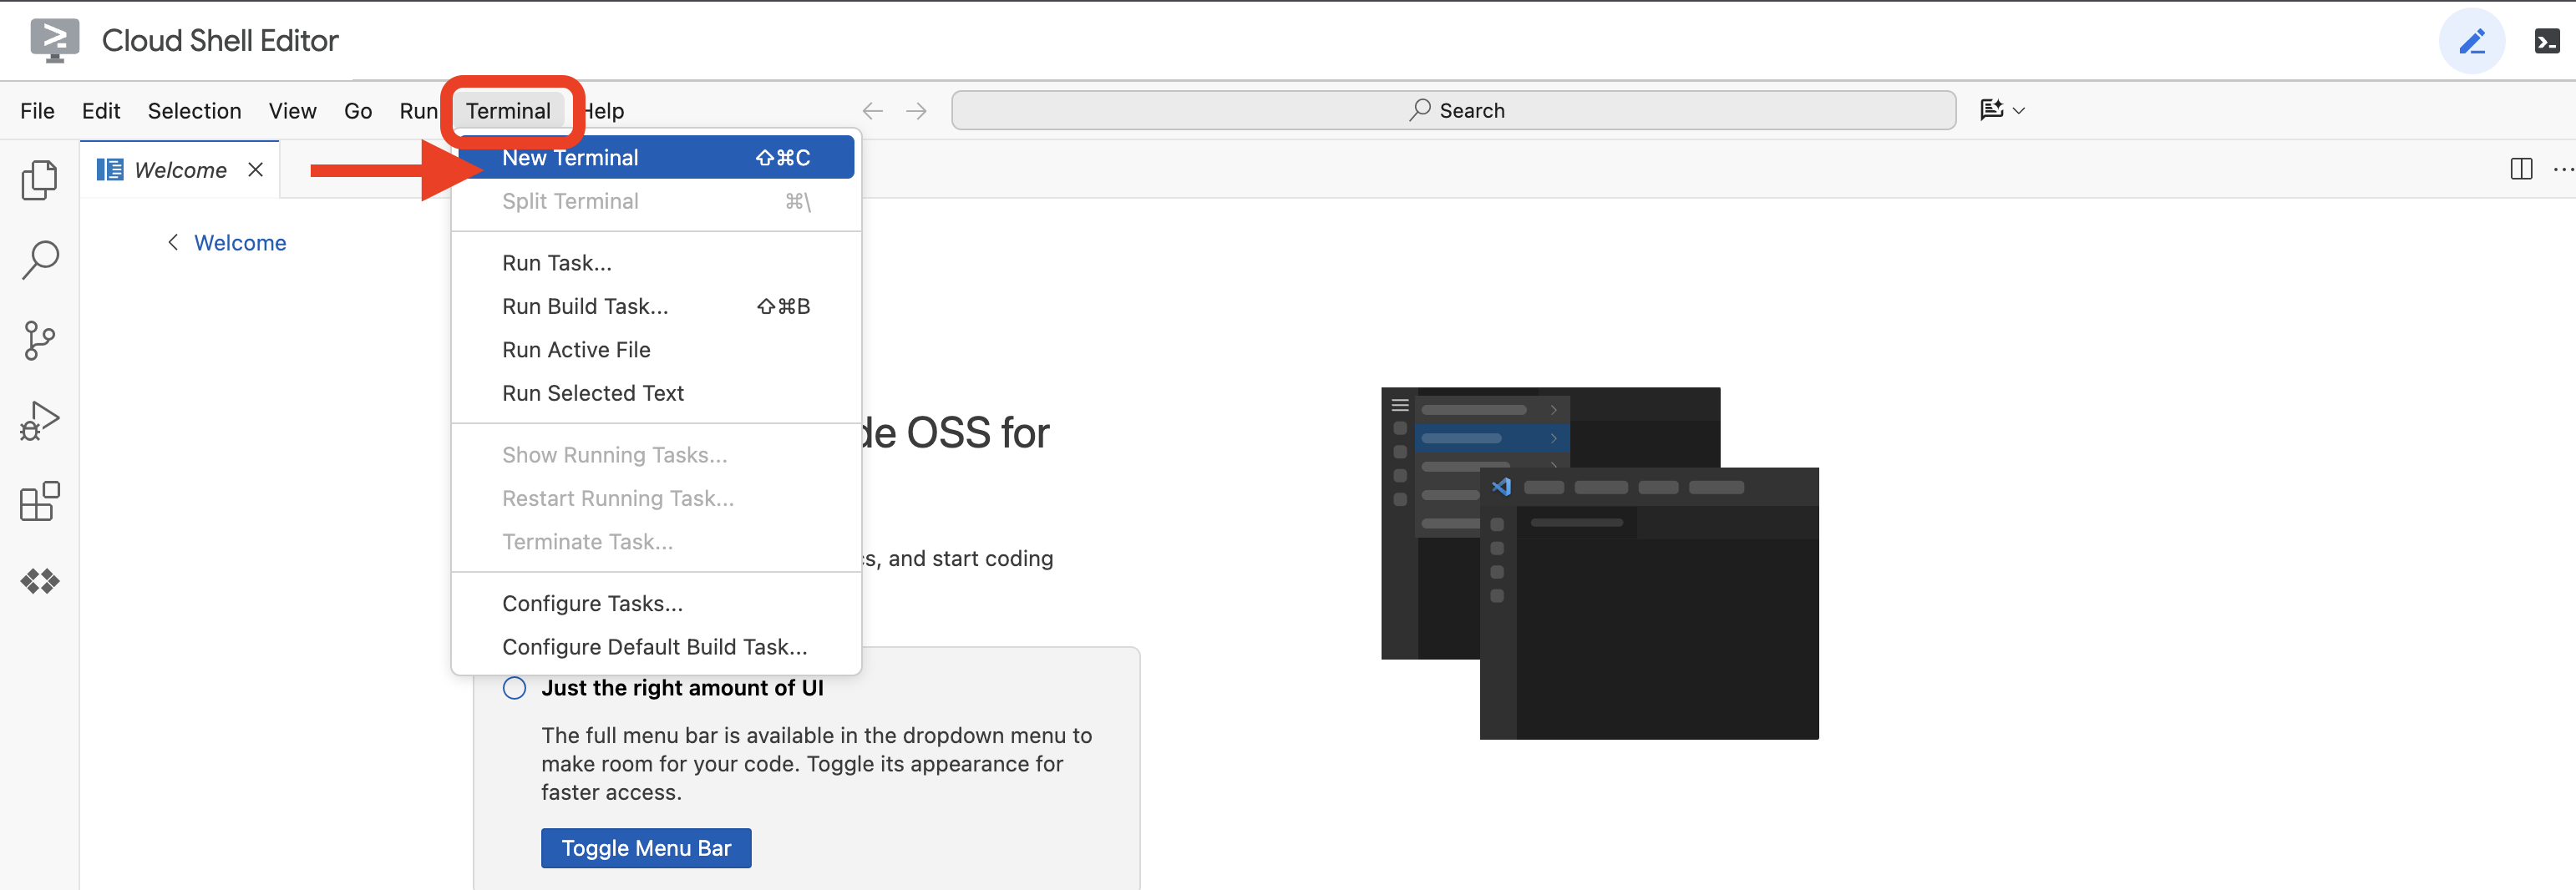 或
或 
👉在終端機中,使用下列指令確認您已通過驗證,且專案已設為您的專案 ID:
gcloud auth list
👉並執行下列指令,請務必將 <YOUR_PROJECT_ID> 替換為您的專案 ID:
echo <YOUR_PROJECT_ID> > ~/project_id.txt
gcloud config set project $(cat ~/project_id.txt)
👉執行下列指令,啟用必要的 Google Cloud API:
gcloud services enable compute.googleapis.com  \
                        storage.googleapis.com  \
                        run.googleapis.com  \
                        artifactregistry.googleapis.com  \
                        aiplatform.googleapis.com \
                        eventarc.googleapis.com \
                        sqladmin.googleapis.com \
                        secretmanager.googleapis.com \
                        cloudbuild.googleapis.com \
                        cloudresourcemanager.googleapis.com \
                        cloudfunctions.googleapis.com \
                        cloudaicompanion.googleapis.com
這項作業可能需要幾分鐘才能完成。
設定權限
👉設定服務帳戶權限。在終端機中執行:
gcloud config set project $(cat ~/project_id.txt)
export PROJECT_ID=$(gcloud config get project)
export SERVICE_ACCOUNT_NAME=$(gcloud compute project-info describe --format="value(defaultServiceAccount)")

echo "Here's your SERVICE_ACCOUNT_NAME $SERVICE_ACCOUNT_NAME"
授予權限。在終端機中執行:
#Cloud Storage (Read/Write):
gcloud projects add-iam-policy-binding $PROJECT_ID \
  --member="serviceAccount:$SERVICE_ACCOUNT_NAME" \
  --role="roles/storage.objectAdmin"

#Pub/Sub (Publish/Receive):
gcloud projects add-iam-policy-binding $PROJECT_ID \
  --member="serviceAccount:$SERVICE_ACCOUNT_NAME" \
  --role="roles/pubsub.publisher"

gcloud projects add-iam-policy-binding $PROJECT_ID \
  --member="serviceAccount:$SERVICE_ACCOUNT_NAME" \
  --role="roles/pubsub.subscriber"


#Cloud SQL (Read/Write):
gcloud projects add-iam-policy-binding $PROJECT_ID \
  --member="serviceAccount:$SERVICE_ACCOUNT_NAME" \
  --role="roles/cloudsql.editor"


#Eventarc (Receive Events):
gcloud projects add-iam-policy-binding $PROJECT_ID \
  --member="serviceAccount:$SERVICE_ACCOUNT_NAME" \
  --role="roles/iam.serviceAccountTokenCreator"

gcloud projects add-iam-policy-binding $PROJECT_ID \
  --member="serviceAccount:$SERVICE_ACCOUNT_NAME" \
  --role="roles/eventarc.eventReceiver"

#Vertex AI (User):
gcloud projects add-iam-policy-binding $PROJECT_ID \
  --member="serviceAccount:$SERVICE_ACCOUNT_NAME" \
  --role="roles/aiplatform.user"

#Secret Manager (Read):
gcloud projects add-iam-policy-binding $PROJECT_ID \
  --member="serviceAccount:$SERVICE_ACCOUNT_NAME" \
  --role="roles/secretmanager.secretAccessor"
👉在 IAM 控制台中驗證結果
👉在終端機中執行下列指令,建立名為 aidemy 的 Cloud SQL 執行個體。稍後會用到,但由於這個程序可能需要一段時間,因此我們現在就來執行。
gcloud sql instances create aidemy \
    --database-version=POSTGRES_14 \
    --cpu=2 \
    --memory=4GB \
    --region=us-central1 \
    --root-password=1234qwer \
    --storage-size=10GB \
    --storage-auto-increase
4. 建立第一個代理程式
在深入探討複雜的多代理系統之前,我們需要先建立基本構成元素:單一功能代理。在本節中,我們將建立簡單的「書籍供應商」代理程式,踏出第一步。書籍供應商代理程式會將類別做為輸入內容,並使用 Gemini LLM 生成該類別的 JSON 表示法書籍。然後以 REST API 端點的形式提供這些書籍推薦內容。

👉在另一個瀏覽器分頁中,透過網路瀏覽器開啟 Google Cloud 控制台。在導覽選單 (☰) 中,前往「Cloud Run」。按一下「+ ... WRITE A FUNCTION」(+ ... 編寫函式) 按鈕。

👉接下來,我們要設定 Cloud Run 函式的基本設定:
- 服務名稱:
book-provider - 區域:
us-central1 - 執行階段:
Python 3.12 - 驗證:
Allow unauthenticated invocations設為「已啟用」。
👉其他設定維持預設,然後點選「建立」。系統會將你導向程式碼編輯器。
畫面上會顯示預先填入內容的 main.py 和 requirements.txt 檔案。
main.py 會包含函式的商業邏輯,requirements.txt 則會包含所需的套件。
👉現在我們準備好編寫一些程式碼了!不過,在深入瞭解之前,先看看 Gemini Code Assist 能否協助我們快速入門。返回 Cloud Shell 編輯器,點選頂端的 Gemini Code Assist 圖示,應該會開啟 Gemini Code Assist 對話。

👉 將下列要求貼到提示詞輸入框:
Use the functions_framework library to be deployable as an HTTP function.
Accept a request with category and number_of_book parameters (either in JSON body or query string).
Use langchain and gemini to generate the data for book with fields bookname, author, publisher, publishing_date.
Use pydantic to define a Book model with the fields: bookname (string, description: "Name of the book"), author (string, description: "Name of the author"), publisher (string, description: "Name of the publisher"), and publishing_date (string, description: "Date of publishing").
Use langchain and gemini model to generate book data. the output should follow the format defined in Book model.

The logic should use JsonOutputParser from langchain to enforce output format defined in Book Model.
Have a function get_recommended_books(category) that internally uses langchain and gemini to return a single book object.
The main function, exposed as the Cloud Function, should call get_recommended_books() multiple times (based on number_of_book) and return a JSON list of the generated book objects.
Handle the case where category or number_of_book are missing by returning an error JSON response with a 400 status code.
return a JSON string representing the recommended books. use os library to retrieve GOOGLE_CLOUD_PROJECT env var. Use ChatVertexAI from langchain for the LLM call
Code Assist 接著會生成可能的解決方案,提供原始碼和 requirements.txt 依附元件檔案。(請勿使用這個代碼)
建議您將 Code Assist 生成的程式碼,與下方經過測試的正確解決方案進行比較。這樣一來,您就能評估工具的成效,並找出任何潛在差異。雖然不應盲目信任 LLM,但 Code Assist 是快速製作原型和產生初始程式碼結構的絕佳工具,可做為良好的開端。
由於這是工作坊,我們將繼續使用下方提供的已驗證程式碼。不過,您可以自行試用 Code Assist 生成的程式碼,深入瞭解這項功能的能力和限制。
👉返回 Cloud Run 函式的原始碼編輯器 (位於另一個瀏覽器分頁)。請小心地將 main.py 的現有內容替換為下列程式碼:
import functions_framework
import json
from flask import Flask, jsonify, request
from langchain_google_vertexai import ChatVertexAI
from langchain_core.output_parsers import JsonOutputParser
from langchain_core.prompts import PromptTemplate
from pydantic import BaseModel, Field
import os

class Book(BaseModel):
    bookname: str = Field(description="Name of the book")
    author: str = Field(description="Name of the author")
    publisher: str = Field(description="Name of the publisher")
    publishing_date: str = Field(description="Date of publishing")


project_id = os.environ.get("GOOGLE_CLOUD_PROJECT")

llm = ChatVertexAI(model_name="gemini-2.0-flash-lite-001")

def get_recommended_books(category):
    """
    A simple book recommendation function.

    Args:
        category (str): category

    Returns:
        str: A JSON string representing the recommended books.
    """
    parser = JsonOutputParser(pydantic_object=Book)
    question = f"Generate a random made up book on {category} with bookname, author and publisher and publishing_date"

    prompt = PromptTemplate(
        template="Answer the user query.\n{format_instructions}\n{query}\n",
        input_variables=["query"],
        partial_variables={"format_instructions": parser.get_format_instructions()},
    )

    chain = prompt | llm | parser
    response = chain.invoke({"query": question})

    return  json.dumps(response)


@functions_framework.http
def recommended(request):
    request_json = request.get_json(silent=True) # Get JSON data
    if request_json and 'category' in request_json and 'number_of_book' in request_json:
        category = request_json['category']
        number_of_book = int(request_json['number_of_book'])
    elif request.args and 'category' in request.args and 'number_of_book' in request.args:
        category = request.args.get('category')
        number_of_book = int(request.args.get('number_of_book'))

    else:
        return jsonify({'error': 'Missing category or number_of_book parameters'}), 400


    recommendations_list = []
    for i in range(number_of_book):
        book_dict = json.loads(get_recommended_books(category))
        print(f"book_dict=======>{book_dict}")

        recommendations_list.append(book_dict)


    return jsonify(recommendations_list)
👉將 requirements.txt 的內容替換為下列內容:
functions-framework==3.*
google-genai==1.0.0
flask==3.1.0
jsonify==0.5
langchain_google_vertexai==2.0.13
langchain_core==0.3.34
pydantic==2.10.5
👉 我們將設定「函式進入點」:recommended

👉點選「儲存並部署」 (或「儲存並重新部署」),即可部署函式。等待部署程序完成。Cloud 控制台會顯示狀態。應該會在幾分鐘內完成。
 👉部署完成後,返回 Cloud Shell 編輯器,在終端機中執行下列指令:
gcloud config set project $(cat ~/project_id.txt)
export PROJECT_ID=$(gcloud config get project)
export BOOK_PROVIDER_URL=$(gcloud run services describe book-provider --region=us-central1 --project=$PROJECT_ID --format="value(status.url)")

curl -X POST -H "Content-Type: application/json" -d '{"category": "Science Fiction", "number_of_book": 2}' $BOOK_PROVIDER_URL
應該會顯示一些 JSON 格式的書籍資料。
[
  {"author":"Anya Sharma","bookname":"Echoes of the Singularity","publisher":"NovaLight Publishing","publishing_date":"2077-03-15"},
  {"author":"Anya Sharma","bookname":"Echoes of the Quantum Dawn","publisher":"Nova Genesis Publishing","publishing_date":"2077-03-15"}
]
恭喜!您已成功部署 Cloud Run 函式。開發 Aidemy 代理程式時,我們會整合這項服務。
5. 建構工具:將代理連結至 RESTful 服務和資料
請繼續下載 Bootstrap Skeleton Project,並確認您位於 Cloud Shell 編輯器中。在終端機中執行
git clone https://github.com/weimeilin79/aidemy-bootstrap.git
執行這項指令後,Cloud Shell 殼層環境中會建立名為 aidemy-bootstrap 的新資料夾。
在 Cloud Shell 編輯器的「Explorer」窗格 (通常位於左側) 中,您現在應該會看到複製 Git 存放區時建立的資料夾 aidemy-bootstrap。在 Explorer 中開啟專案的根資料夾。你會在其中看到 planner 子資料夾,請一併開啟。
現在開始建構代理程式使用的工具,讓代理程式真正發揮作用。如您所知,LLM 擅長推論和生成文字,但需要存取外部資源,才能執行實際工作並提供準確的最新資訊。這些工具就像代理的「瑞士刀」,可讓代理與世界互動。
建構代理程式時,很容易會硬式編碼大量詳細資料。這樣建立的代理程式不具彈性。反之,代理程式可透過建立及使用工具存取外部邏輯或系統,同時享有 LLM 和傳統程式設計的優點。
在本節中,我們將為規劃工具代理建立基礎,供老師用來生成教案。在代理開始生成教案前,我們想先提供更多有關科目和主題的詳細資料,設定界線。我們將建構三種工具:
- RESTful API 呼叫:與現有 API 互動以擷取資料。
- 資料庫查詢:從 Cloud SQL 資料庫擷取結構化資料。
- Google 搜尋:從網路上取得即時資訊。
從 API 擷取書籍推薦內容
首先,請建立工具,從上一節部署的 book-provider API 擷取書籍推薦內容。這項功能可讓代理程式運用現有服務。

在 Cloud Shell 編輯器中,開啟您在前一節複製的 aidemy-bootstrap 專案。
👉編輯 planner 資料夾中的 book.py,並在檔案結尾貼上以下程式碼:
def recommend_book(query: str):
    """
    Get a list of recommended book from an API endpoint

    Args:
        query: User's request string
    """

    region = get_next_region();
    llm = VertexAI(model_name="gemini-1.5-pro", location=region)

    query = f"""The user is trying to plan a education course, you are the teaching assistant. Help define the category of what the user requested to teach, respond the categroy with no more than two word.

    user request:   {query}
    """
    print(f"-------->{query}")
    response = llm.invoke(query)
    print(f"CATEGORY RESPONSE------------>: {response}")

    # call this using python and parse the json back to dict
    category = response.strip()

    headers = {"Content-Type": "application/json"}
    data = {"category": category, "number_of_book": 2}

    books = requests.post(BOOK_PROVIDER_URL, headers=headers, json=data)

    return books.text

if __name__ == "__main__":
    print(recommend_book("I'm doing a course for my 5th grade student on Math Geometry, I'll need to recommend few books come up with a teach plan, few quizes and also a homework assignment."))
說明:
- recommend_book(query: str):這個函式會將使用者的查詢做為輸入內容。
- LLM Interaction:使用 LLM 從查詢中擷取類別。這個範例會示範如何使用 LLM 協助建立工具的參數。
- API 呼叫:向 book-provider API 發出 POST 要求,並傳遞類別和所需書籍數量。
👉如要測試這項新函式,請設定環境變數,然後執行:
gcloud config set project $(cat ~/project_id.txt)
export PROJECT_ID=$(gcloud config get project)
cd ~/aidemy-bootstrap/planner/
export BOOK_PROVIDER_URL=$(gcloud run services describe book-provider --region=us-central1 --project=$PROJECT_ID --format="value(status.url)")
👉 安裝依附元件並執行程式碼,確保程式碼正常運作:
cd ~/aidemy-bootstrap/planner/
python -m venv env
source env/bin/activate
gcloud config set project $(cat ~/project_id.txt)
export PROJECT_ID=$(gcloud config get project)
pip install -r requirements.txt
python book.py
您應該會看到 JSON 字串,其中包含從 book-provider API 擷取的書籍推薦內容。結果是隨機產生。你收到的書籍可能不同,但應該會收到兩本 JSON 格式的書籍推薦。
[{"author":"Anya Sharma","bookname":"Echoes of the Singularity","publisher":"NovaLight Publishing","publishing_date":"2077-03-15"},{"author":"Anya Sharma","bookname":"Echoes of the Quantum Dawn","publisher":"Nova Genesis Publishing","publishing_date":"2077-03-15"}]
如果看到這個畫面,表示第一個工具運作正常!
我們並非使用特定參數明確製作 RESTful API 呼叫,而是使用自然語言 (「我正在修讀課程...」)。接著,代理程式會使用自然語言處理技術,智慧地擷取必要參數 (例如類別),凸顯代理程式如何運用自然語言理解技術與 API 互動。

👉移除 book.py 中的下列測試程式碼
if __name__ == "__main__":
    print(recommend_book("I'm doing a course for my 5th grade student on Math Geometry, I'll need to recommend few books come up with a teach plan, few quizes and also a homework assignment."))
從資料庫取得課程資料
接著,我們會建構工具,從 Cloud SQL PostgreSQL 資料庫擷取結構化課程資料。這樣一來,代理程式就能存取可靠的資訊來源,協助老師規劃課程。

還記得您在上一個步驟中建立的 aidemy Cloud SQL 執行個體嗎?用途如下:
👉 在終端機中執行下列指令,在新執行個體中建立名為 aidemy-db 的資料庫。
gcloud sql databases create aidemy-db \
    --instance=aidemy
請在 Google Cloud 控制台的 Cloud SQL 中驗證執行個體,您應該會看到名為 aidemy 的 Cloud SQL 執行個體。
👉 按一下執行個體名稱即可查看詳細資料。👉 在 Cloud SQL 執行個體詳細資料頁面中,按一下左側導覽選單中的「Cloud SQL Studio」。系統會開啟新分頁。
選取 aidemy-db 做為資料庫,輸入 postgres 做為使用者,並輸入 1234qwer 做為密碼。
按一下「驗證」

👉在 SQL Studio 查詢編輯器中,前往「編輯器 1」分頁,貼上下列 SQL 程式碼:
CREATE TABLE curriculums (
    id SERIAL PRIMARY KEY,
    year INT,
    subject VARCHAR(255),
    description TEXT
);

-- Inserting detailed curriculum data for different school years and subjects
INSERT INTO curriculums (year, subject, description) VALUES
-- Year 5
(5, 'Mathematics', 'Introduction to fractions, decimals, and percentages, along with foundational geometry and problem-solving techniques.'),
(5, 'English', 'Developing reading comprehension, creative writing, and basic grammar, with a focus on storytelling and poetry.'),
(5, 'Science', 'Exploring basic physics, chemistry, and biology concepts, including forces, materials, and ecosystems.'),
(5, 'Computer Science', 'Basic coding concepts using block-based programming and an introduction to digital literacy.'),

-- Year 6
(6, 'Mathematics', 'Expanding on fractions, ratios, algebraic thinking, and problem-solving strategies.'),
(6, 'English', 'Introduction to persuasive writing, character analysis, and deeper comprehension of literary texts.'),
(6, 'Science', 'Forces and motion, the human body, and introductory chemical reactions with hands-on experiments.'),
(6, 'Computer Science', 'Introduction to algorithms, logical reasoning, and basic text-based programming (Python, Scratch).'),

-- Year 7
(7, 'Mathematics', 'Algebraic expressions, geometry, and introduction to statistics and probability.'),
(7, 'English', 'Analytical reading of classic and modern literature, essay writing, and advanced grammar skills.'),
(7, 'Science', 'Introduction to cells and organisms, chemical reactions, and energy transfer in physics.'),
(7, 'Computer Science', 'Building on programming skills with Python, introduction to web development, and cyber safety.');
這段 SQL 程式碼會建立名為 curriculums 的資料表,並插入一些範例資料。
👉 按一下「執行」,執行 SQL 程式碼。畫面上應會顯示確認訊息,指出陳述式已順利執行。
👉 展開探索工具,找出新建立的資料表 curriculums,然後按一下「查詢」。系統應會開啟新的編輯器分頁,並為您產生 SQL,

SELECT * FROM
  "public"."curriculums" LIMIT 1000;
👉按一下「執行」。
結果資料表應會顯示您在上一個步驟中插入的資料列,確認資料表和資料已正確建立。
您已成功建立資料庫並匯入課程資料範例,接下來要建構擷取資料的工具。
👉在 Cloud Code 編輯器中,編輯 aidemy-bootstrap 資料夾中的 curriculums.py 檔案,然後將下列程式碼貼到檔案結尾:
def connect_with_connector() -> sqlalchemy.engine.base.Engine:

    db_user = os.environ["DB_USER"]
    db_pass = os.environ["DB_PASS"]
    db_name = os.environ["DB_NAME"]

    print(f"--------------------------->db_user: {db_user!r}")
    print(f"--------------------------->db_pass: {db_pass!r}")
    print(f"--------------------------->db_name: {db_name!r}")

    connector = Connector()

    pool = sqlalchemy.create_engine(
        "postgresql+pg8000://",
        creator=lambda: connector.connect(
            instance_connection_name,
            "pg8000",
            user=db_user,
            password=db_pass,
            db=db_name,
        ),
        pool_size=2,
        max_overflow=2,
        pool_timeout=30,  # 30 seconds
        pool_recycle=1800,  # 30 minutes
    )
    return pool

def get_curriculum(year: int, subject: str):
    """
    Get school curriculum

    Args:
        subject: User's request subject string
        year: User's request year int
    """
    try:
        stmt = sqlalchemy.text(
            "SELECT description FROM curriculums WHERE year = :year AND subject = :subject"
        )

        with db.connect() as conn:
            result = conn.execute(stmt, parameters={"year": year, "subject": subject})
            row = result.fetchone()
        if row:
            return row[0]
        else:
            return None

    except Exception as e:
        print(e)
        return None

db = connect_with_connector()
說明:
- 環境變數:程式碼會從環境變數擷取資料庫憑證和連線資訊 (詳情請見下文)。
- connect_with_connector():這個函式會使用 Cloud SQL 連接器,與資料庫建立安全連線。
- get_curriculum(year: int, subject: str):這個函式會將年份和科目做為輸入內容,查詢課程表,並傳回相應的課程說明。
👉執行程式碼前,我們必須設定一些環境變數,請在終端機中執行:
gcloud config set project $(cat ~/project_id.txt)
export PROJECT_ID=$(gcloud config get project)
export INSTANCE_NAME="aidemy"
export REGION="us-central1"
export DB_USER="postgres"
export DB_PASS="1234qwer"
export DB_NAME="aidemy-db"
👉如要測試,請在 curriculums.py 結尾新增下列程式碼:
if __name__ == "__main__":
    print(get_curriculum(6, "Mathematics"))
👉執行程式碼:
cd ~/aidemy-bootstrap/planner/
source env/bin/activate
python curriculums.py
控制台應會顯示 6 年級數學課程的說明。
Expanding on fractions, ratios, algebraic thinking, and problem-solving strategies.
如果看到課程說明,表示資料庫工具運作正常!如果指令碼仍在執行,請按下 Ctrl+C 停止。
👉移除 curriculums.py 中的下列測試程式碼
if __name__ == "__main__":
    print(get_curriculum(6, "Mathematics"))
👉在終端機中執行以下指令,結束虛擬環境:
deactivate
6. 建構工具:從網路上取得即時資訊
最後,我們會建構一項工具,透過整合 Gemini 2 和 Google 搜尋來存取網路上的即時資訊。這有助於確保代理程式掌握最新資訊,並提供相關結果。
Gemini 2 與 Google 搜尋 API 整合後,可提供更準確且符合脈絡的搜尋結果,進而提升代理程式功能。這樣一來,代理就能存取最新資訊,並根據真實世界的資料回覆,盡量減少幻覺。改良後的 API 整合功能也支援更多自然語言查詢,讓服務專員能擬定複雜且細緻的搜尋要求。

這項函式會將搜尋查詢、課程、科目和年份做為輸入內容,並使用 Gemini API 和 Google 搜尋工具從網際網路擷取相關資訊。仔細觀察會發現,這個範例使用 Google 生成式 AI SDK 執行函式呼叫,沒有使用任何其他框架。
👉在 aidemy-bootstrap 資料夾中編輯 search.py,然後將下列程式碼貼到檔案結尾:
model_id = "gemini-2.0-flash-001"

google_search_tool = Tool(
    google_search = GoogleSearch()
)

def search_latest_resource(search_text: str, curriculum: str, subject: str, year: int):
    """
    Get latest information from the internet

    Args:
        search_text: User's request category   string
        subject: "User's request subject" string
        year: "User's request year"  integer
    """
    search_text = "%s in the context of year %d and subject %s with following curriculum detail %s " % (search_text, year, subject, curriculum)
    region = get_next_region()
    client = genai.Client(vertexai=True, project=PROJECT_ID, location=region)
    print(f"search_latest_resource text-----> {search_text}")
    response = client.models.generate_content(
        model=model_id,
        contents=search_text,
        config=GenerateContentConfig(
            tools=[google_search_tool],
            response_modalities=["TEXT"],
        )
    )
    print(f"search_latest_resource response-----> {response}")
    return response

if __name__ == "__main__":
  response = search_latest_resource("What are the syllabus for Year 6 Mathematics?", "Expanding on fractions, ratios, algebraic thinking, and problem-solving strategies.", "Mathematics", 6)
  for each in response.candidates[0].content.parts:
    print(each.text)
說明:
- 定義工具 - google_search_tool:將 GoogleSearch 物件包裝在 Tool 中
- search_latest_resource(search_text: str, subject: str, year: int):這個函式會將搜尋查詢、科目和年份做為輸入內容,並使用 Gemini API 執行 Google 搜尋。
- GenerateContentConfig:定義可存取 GoogleSearch 工具
Gemini 模型會在內部分析 search_text,判斷是否能直接回答問題,或需要使用 GoogleSearch 工具。這是 LLM 推理過程中的重要步驟。模型經過訓練,可辨識需要外部工具的情況。如果模型決定使用 GoogleSearch 工具,Google 生成式 AI SDK 會處理實際的呼叫作業。SDK 會採用模型決策和產生的參數,並傳送至 Google 搜尋 API。這部分會隱藏在程式碼中,使用者不會看到。
Gemini 模型隨後會將搜尋結果整合到回覆中。這項資訊可用於回答使用者問題、生成摘要或執行其他工作。
👉如要測試,請執行下列程式碼:
cd ~/aidemy-bootstrap/planner/
gcloud config set project $(cat ~/project_id.txt)
export PROJECT_ID=$(gcloud config get project)
source env/bin/activate
python search.py
您應該會看到 Gemini 搜尋 API 回應,其中包含與「Year 5 Mathematics 的課程大綱」相關的搜尋結果。實際輸出內容會因搜尋結果而異,但會是包含搜尋資訊的 JSON 物件。
如果看到搜尋結果,表示 Google 搜尋工具運作正常!如果指令碼仍在執行,請按下 Ctrl+C 停止指令碼。
👉並移除程式碼的最後一部分。
if __name__ == "__main__":
  response = search_latest_resource("What are the syllabus for Year 6 Mathematics?", "Expanding on fractions, ratios, algebraic thinking, and problem-solving strategies.", "Mathematics", 6)
  for each in response.candidates[0].content.parts:
    print(each.text)
👉在終端機中執行以下指令,結束虛擬環境:
deactivate
恭喜!您現在已為規劃師代理程式建構三項強大工具:API 連接器、資料庫連接器和 Google 搜尋工具。這些工具可讓代理程式存取所需資訊和功能,進而制定有效的教學計畫。
7. 使用 LangGraph 自動化調度管理
現在我們已建構個別工具,接下來要使用 LangGraph 協調這些工具。這樣我們就能建立更精密的「規劃工具」代理程式,根據使用者的要求,智慧地決定要使用哪些工具及使用時機。
LangGraph 是 Python 程式庫,可讓您更輕鬆地使用大型語言模型 (LLM) 建構具狀態的多參與者應用程式。這項架構可自動調度管理涉及 LLM、工具和其他代理的複雜對話和工作流程。
基本概念:
- 圖表結構:LangGraph 會將應用程式的邏輯表示為有向圖。圖表中的每個節點都代表程序中的一個步驟 (例如呼叫 LLM、叫用工具、條件檢查)。邊緣:定義節點之間的執行流程。
- 狀態:LangGraph 會在應用程式在圖表中移動時管理應用程式的狀態。這個狀態可以包含變數,例如使用者輸入內容、工具呼叫結果、LLM 的中繼輸出內容,以及步驟之間需要保留的任何其他資訊。
- 節點:每個節點代表一項運算或互動。包括:
- 工具節點:使用工具 (例如執行網路搜尋、查詢資料庫)
- 函式節點:執行 Python 函式。
- 邊緣:連結節點,定義執行流程。包括:
- 直接邊緣:從一個節點到另一個節點的簡單無條件流程。
- 條件邊緣:流程取決於條件節點的結果。

我們會使用 LangGraph 實作自動化調度管理功能。現在來編輯 aidemy-bootstrap 資料夾下的 aidemy.py 檔案,定義 LangGraph 邏輯。
👉 在 結尾附加下列程式碼:
aidemy.py:
tools = [get_curriculum, search_latest_resource, recommend_book]

def determine_tool(state: MessagesState):
    llm = ChatVertexAI(model_name="gemini-2.0-flash-001", location=get_next_region())
    sys_msg = SystemMessage(
                    content=(
                        f"""You are a helpful teaching assistant that helps gather all needed information.
                            Your ultimate goal is to create a detailed 3-week teaching plan.
                            You have access to tools that help you gather information.
                            Based on the user request, decide which tool(s) are needed.

                        """
                    )
                )

    llm_with_tools = llm.bind_tools(tools)
    return {"messages": llm_with_tools.invoke([sys_msg] + state["messages"])}
這個函式負責取得目前的對話狀態、向 LLM 提供系統訊息,然後要求 LLM 生成回覆。LLM 可以直接回覆使用者,也可以選擇使用其中一項可用工具。
tools:這個清單代表代理程式可用的工具組合。其中包含我們在先前步驟中定義的三個工具函式:get_curriculum、search_latest_resource 和 recommend_book。llm.bind_tools(tools):將工具清單「繫結」至 llm 物件。繫結工具會告知 LLM 這些工具可用,並提供工具使用方式的相關資訊 (例如工具名稱、可接受的參數,以及工具的作用)。
我們會使用 LangGraph 實作自動化調度管理功能。
👉 在 結尾附加下列程式碼:
aidemy.py:
def prep_class(prep_needs):

    builder = StateGraph(MessagesState)
    builder.add_node("determine_tool", determine_tool)
    builder.add_node("tools", ToolNode(tools))

    builder.add_edge(START, "determine_tool")
    builder.add_conditional_edges("determine_tool",tools_condition)
    builder.add_edge("tools", "determine_tool")


    memory = MemorySaver()
    graph = builder.compile(checkpointer=memory)

    config = {"configurable": {"thread_id": "1"}}
    messages = graph.invoke({"messages": prep_needs},config)
    print(messages)
    for m in messages['messages']:
        m.pretty_print()
    teaching_plan_result = messages["messages"][-1].content


    return teaching_plan_result

if __name__ == "__main__":
  prep_class("I'm doing a course for  year 5 on subject Mathematics in Geometry, , get school curriculum, and come up with few books recommendation plus  search latest resources on the internet base on the curriculum outcome. And come up with a 3 week teaching plan")
說明:
StateGraph(MessagesState):建立StateGraph物件。AStateGraph是 LangGraph 的核心概念。以圖形表示代理程式的工作流程,圖形中的每個節點代表程序中的一個步驟。可視為定義代理程式的推論和行動方式藍圖。- 條件式 Edge:
tools_condition引數源自"determine_tool"節點,很可能是一個函式,可根據determine_tool函式的輸出內容,決定要追蹤哪個 Edge。條件式邊緣可讓圖表根據 LLM 決定要使用的工具 (或是否直接回覆使用者) 分支。這時,代理程式的「智慧」就能派上用場,根據情況動態調整行為。 - 迴圈:在圖表中新增邊緣,將
"tools"節點連回"determine_tool"節點。這會在圖表中建立迴圈,讓代理重複使用工具,直到收集足夠資訊來完成工作並提供令人滿意的答案為止。對於需要多個推論和資訊收集步驟的複雜任務,這個迴圈至關重要。
現在來測試規劃工具代理,看看它如何協調不同的工具。
這段程式碼會使用特定使用者輸入內容執行 prep_class 函式,模擬要求,根據課程、書籍建議和最新的網路資源,為 5 年級的幾何數學建立教學計畫。
👉 如果您已關閉終端機或環境變數不再設定,請在終端機中重新執行下列指令
export BOOK_PROVIDER_URL=$(gcloud run services describe book-provider --region=us-central1 --project=$PROJECT_ID --format="value(status.url)")
gcloud config set project $(cat ~/project_id.txt)
export PROJECT_ID=$(gcloud config get project)
export INSTANCE_NAME="aidemy"
export REGION="us-central1"
export DB_USER="postgres"
export DB_PASS="1234qwer"
export DB_NAME="aidemy-db"
👉執行程式碼:
cd ~/aidemy-bootstrap/planner/
source env/bin/activate
pip install -r requirements.txt
python aidemy.py
在終端機中查看記錄。您應該會看到證據,證明代理程式在提供最終教學計畫前,已呼叫所有三項工具 (取得學校課程、取得書籍建議,以及搜尋最新資源)。這表示 LangGraph 編排作業正常運作,且代理程式會智慧地使用所有可用工具來滿足使用者的要求。
================================ Human Message =================================

I'm doing a course for  year 5 on subject Mathematics in Geometry, , get school curriculum, and come up with few books recommendation plus  search latest resources on the internet base on the curriculum outcome. And come up with a 3 week teaching plan
================================== Ai Message ==================================
Tool Calls:
  get_curriculum (xxx)
 Call ID: xxx
  Args:
    year: 5.0
    subject: Mathematics
================================= Tool Message =================================
Name: get_curriculum

Introduction to fractions, decimals, and percentages, along with foundational geometry and problem-solving techniques.
================================== Ai Message ==================================
Tool Calls:
  search_latest_resource (xxxx)
 Call ID: xxxx
  Args:
    year: 5.0
    search_text: Geometry
    curriculum: {"content": "Introduction to fractions, decimals, and percentages, along with foundational geometry and problem-solving techniques."}
    subject: Mathematics
================================= Tool Message =================================
Name: search_latest_resource

candidates=[Candidate(content=Content(parts=[Part(.....) automatic_function_calling_history=[] parsed=None
================================== Ai Message ==================================
Tool Calls:
  recommend_book (93b48189-4d69-4c09-a3bd-4e60cdc5f1c6)
 Call ID: 93b48189-4d69-4c09-a3bd-4e60cdc5f1c6
  Args:
    query: Mathematics Geometry Year 5
================================= Tool Message =================================
Name: recommend_book

[{.....}]

================================== Ai Message ==================================

Based on the curriculum outcome, here is a 3-week teaching plan for year 5 Mathematics Geometry:

**Week 1: Introduction to Shapes and Properties**
.........
如果指令碼仍在執行,請按下 Ctrl+C 停止指令碼。
👉 (此步驟為選用) 將測試程式碼換成其他提示,這會要求呼叫不同的工具。
if __name__ == "__main__":
  prep_class("I'm doing a course for year 5 on subject Mathematics in Geometry, search latest resources on the internet base on the subject. And come up with a 3 week teaching plan")
👉 如果您已關閉終端機或環境變數不再設定,請重新執行下列指令
gcloud config set project $(cat ~/project_id.txt)
export BOOK_PROVIDER_URL=$(gcloud run services describe book-provider --region=us-central1 --project=$PROJECT_ID --format="value(status.url)")
export PROJECT_ID=$(gcloud config get project)
export INSTANCE_NAME="aidemy"
export REGION="us-central1"
export DB_USER="postgres"
export DB_PASS="1234qwer"
export DB_NAME="aidemy-db"
👉 (這個步驟為選用步驟,只有在執行上一個步驟後才需要執行) 再次執行程式碼:
cd ~/aidemy-bootstrap/planner/
source env/bin/activate
python aidemy.py
這次你注意到什麼?代理程式呼叫了哪些工具?您應該會看到代理程式這次只呼叫 search_latest_resource 工具。這是因為提示並未指定需要其他兩項工具,而 LLM 夠聰明,不會呼叫其他工具。
================================ Human Message =================================

I'm doing a course for  year 5 on subject Mathematics in Geometry, search latest resources on the internet base on the subject. And come up with a 3 week teaching plan
================================== Ai Message ==================================
Tool Calls:
  get_curriculum (xxx)
 Call ID: xxx
  Args:
    year: 5.0
    subject: Mathematics
================================= Tool Message =================================
Name: get_curriculum

Introduction to fractions, decimals, and percentages, along with foundational geometry and problem-solving techniques.
================================== Ai Message ==================================
Tool Calls:
  search_latest_resource (xxx)
 Call ID: xxxx
  Args:
    year: 5.0
    subject: Mathematics
    curriculum: {"content": "Introduction to fractions, decimals, and percentages, along with foundational geometry and problem-solving techniques."}
    search_text: Geometry
================================= Tool Message =================================
Name: search_latest_resource

candidates=[Candidate(content=Content(parts=[Part(.......token_count=40, total_token_count=772) automatic_function_calling_history=[] parsed=None
================================== Ai Message ==================================

Based on the information provided, a 3-week teaching plan for Year 5 Mathematics focusing on Geometry could look like this:

**Week 1:  Introducing 2D Shapes**
........
* Use visuals, manipulatives, and real-world examples to make the learning experience engaging and relevant.
按下 Ctrl+C 鍵停止指令碼。
👉 (請勿略過這個步驟!) 移除測試程式碼,保持 aidemy.py 檔案乾淨:
if __name__ == "__main__":
  prep_class("I'm doing a course for  year 5 on subject Mathematics in Geometry, search latest resources on the internet base on the subject. And come up with a 3 week teaching plan")
現在我們已定義代理程式邏輯,接下來要啟動 Flask 網頁應用程式。老師可透過熟悉的表單式介面與代理互動。雖然聊天機器人互動是 LLM 的常見用途,但我們選擇採用傳統的表單提交 UI,因為對許多教育工作者來說,這可能更直覺易懂。
👉 如果您已關閉終端機或環境變數不再設定,請重新執行下列指令
export BOOK_PROVIDER_URL=$(gcloud run services describe book-provider --region=us-central1 --project=$PROJECT_ID --format="value(status.url)")
gcloud config set project $(cat ~/project_id.txt)
export PROJECT_ID=$(gcloud config get project)
export INSTANCE_NAME="aidemy"
export REGION="us-central1"
export DB_USER="postgres"
export DB_PASS="1234qwer"
export DB_NAME="aidemy-db"
👉 啟動網頁版 UI。
cd ~/aidemy-bootstrap/planner/
source env/bin/activate
python app.py
在 Cloud Shell 終端機輸出內容中尋找啟動訊息。Flask 通常會列印訊息,指出正在執行,以及執行所在的通訊埠。
Running on http://127.0.0.1:8080
Running on http://127.0.0.1:8080
The application needs to keep running to serve requests.
👉 從右上角的「網頁預覽」選單中,選擇「透過以下通訊埠預覽:8080」。Cloud Shell 會開啟新的瀏覽器分頁或視窗,顯示應用程式的網頁預覽畫面。

在應用程式介面中,選取「年」的 5,然後選取科目 Mathematics,並在「Add-on Request」中輸入 Geometry
👉 如果您已離開應用程式 UI,請返回並查看產生的輸出內容。
👉 在終端機中按下 Ctrl+C,停止執行指令碼。
👉 在終端機中結束虛擬環境:
deactivate
8. 將規劃工具代理程式部署至雲端
建構映像檔並推送至登錄檔

現在要將這個模型部署至雲端。
👉 在終端機中,建立構件存放區,用於儲存我們即將建構的 Docker 映像檔。
gcloud artifacts repositories create agent-repository \
    --repository-format=docker \
    --location=us-central1 \
    --description="My agent repository"
您應該會看到「Created repository [agent-repository]」(已建立存放區 [agent-repository])。
👉 執行下列指令來建構 Docker 映像檔。
cd ~/aidemy-bootstrap/planner/
gcloud config set project $(cat ~/project_id.txt)
export PROJECT_ID=$(gcloud config get project)
docker build -t gcr.io/${PROJECT_ID}/aidemy-planner .
👉 我們需要重新標記映像檔,讓映像檔託管在 Artifact Registry 中,而非 GCR,並將標記的映像檔推送至 Artifact Registry:
gcloud config set project $(cat ~/project_id.txt)
export PROJECT_ID=$(gcloud config get project)
docker tag gcr.io/${PROJECT_ID}/aidemy-planner us-central1-docker.pkg.dev/${PROJECT_ID}/agent-repository/aidemy-planner
docker push us-central1-docker.pkg.dev/${PROJECT_ID}/agent-repository/aidemy-planner
推送完成後,您可以確認映像檔是否已成功儲存在 Artifact Registry 中。
👉 前往 Google Cloud 控制台的 Artifact Registry。您應該會在 agent-repository 存放區中找到 aidemy-planner 映像檔。
使用 Secret Manager 保護資料庫憑證
我們會使用 Google Cloud Secret Manager 安全地管理及存取資料庫憑證。這可防止在應用程式程式碼中硬式編碼敏感資訊,並提升安全性。
我們會為資料庫使用者名稱、密碼和資料庫名稱建立個別密鑰。這樣我們就能獨立管理每項憑證。
👉 在終端機中執行下列指令:
gcloud secrets create db-user
printf "postgres" | gcloud secrets versions add db-user --data-file=-

gcloud secrets create db-pass
printf "1234qwer" | gcloud secrets versions add db-pass --data-file=-

gcloud secrets create db-name
printf "aidemy-db" | gcloud secrets versions add db-name --data-file=-
使用 Secret Manager 是保護應用程式的重要步驟,可防止機密憑證意外曝光。遵循雲端部署作業的安全最佳做法。
部署至 Cloud Run
Cloud Run 是全代管無伺服器平台,可讓您快速輕鬆地部署容器化應用程式,並省去基礎架構管理工作,讓您專心編寫及部署程式碼。我們會以 Cloud Run 服務的形式部署規劃工具。
👉在 Google Cloud 控制台中,前往「Cloud Run」。按一下「DEPLOY CONTAINER」(部署容器),然後選取「SERVICE」(服務)SERVICE。設定 Cloud Run 服務:

- 容器映像檔:按一下網址欄位中的「選取」。找出您推送至 Artifact Registry 的映像檔網址 (例如 us-central1-docker.pkg.dev/YOUR_PROJECT_ID/agent-repository/aidemy-planner/YOUR_IMG)。
- 服務名稱:
aidemy-planner - 區域:選取
us-central1區域。 - 驗證:在本研討會中,您可以允許「允許未經驗證的叫用」。在正式環境中,您可能需要限制存取權。
- 展開「容器、磁碟區、網路與安全性」專區,然後在「容器」分頁中設定下列項目:
- 「設定」分頁:
- 資源
- 記憶體:2GiB
- 資源
- 「變數與密鑰」分頁:
- 環境變數:按一下「+ Add Variable」按鈕,新增下列變數:
- 新增名稱:
GOOGLE_CLOUD_PROJECT和值:<YOUR_PROJECT_ID> - 新增名稱:
BOOK_PROVIDER_URL,並將值設為書籍供應商函式網址,您可以在終端機中使用下列指令判斷該網址:gcloud config set project $(cat ~/project_id.txt) gcloud run services describe book-provider \ --region=us-central1 \ --project=$PROJECT_ID \ --format="value(status.url)"
- 新增名稱:
- 在「以環境變數形式公開的密鑰」部分下方,按一下「+ Reference as a secret」(以密鑰形式參照) 按鈕,新增下列密鑰:
- 新增名稱:
DB_USER、密鑰:選取db-user和版本:latest - 新增名稱:
DB_PASS、密鑰:選取db-pass和版本:latest - 新增名稱:
DB_NAME、密鑰:選取db-name和版本:latest
- 新增名稱:
- 環境變數:按一下「+ Add Variable」按鈕,新增下列變數:
- 「設定」分頁:

其他值則保留預設值。
👉 按一下「建立」。
Cloud Run 會部署服務。
部署完成後,如果還沒前往詳細資料頁面,請按一下服務名稱前往該頁面。部署的網址會顯示在頂端。

👉 在應用程式介面中,選取「年」7,選擇「主題」Mathematics,然後在「外掛程式要求」欄位中輸入 Algebra。
👉 按一下「生成計畫」。這樣一來,代理程式就能取得必要背景資訊,產生量身打造的教案。
恭喜!您已使用強大的 AI 代理程式,成功建立教學計畫。這項功能展現了代理程式的潛力,可大幅減少工作量並簡化工作,進而提高效率,讓教育工作者更輕鬆。
9. 多代理系統
我們已成功實作教案建立工具,接下來要將重點轉移到建構學生入口網站。學生可透過這個入口網站存取與課程相關的測驗、音訊摘要和作業。考量到這項功能的範圍,我們將運用多代理系統的強大功能,建立模組化且可擴充的解決方案。
如先前所述,多代理系統可將工作負載細分為較小的專業工作,並由專屬代理處理,而非仰賴單一代理處理所有事項。這種做法有幾個主要優點:
模組化和可維護性:與其建立單一代理來處理所有事項,不如建立責任明確的專用小型代理。這種模組化設計可讓您更輕鬆地瞭解、維護及偵錯系統。發生問題時,您可以將問題歸咎於特定代理程式,不必從龐大的程式碼集篩選。
可擴充性:擴充單一複雜代理程式可能會造成瓶頸。多代理系統可根據個別代理的需求調度資源,舉例來說,如果某個代理程式要處理大量要求,您可以輕鬆啟動更多該代理程式的執行個體,而不會影響系統的其餘部分。
團隊專業化:舉例來說,您不會要求一位工程師從頭建構整個應用程式。而是要組建專家團隊,每位成員都專精於特定領域。同樣地,多代理系統可讓您運用不同 LLM 和工具的優勢,將這些資源指派給最適合特定工作的代理。
平行開發:不同團隊可以同時處理不同代理程式,加快開發程序。由於代理程式是獨立的,因此變更一個代理程式不太可能影響其他代理程式。
事件導向架構
為確保這些代理程式能有效溝通及協調,我們將採用事件導向架構。也就是說,代理程式會對系統中發生的「事件」做出反應。
代理程式會訂閱特定事件類型 (例如「已產生教學計畫」、「已建立作業」)。發生事件時,系統會通知相關代理程式,代理程式可以視情況採取行動。這種解耦方式可提高彈性、擴充性和即時回應能力。

現在,為了啟動作業,我們需要一種方法來廣播這些事件。為此,我們將設定 Pub/Sub 主題。首先,請建立名為「plan」的主題。
👉 前往 Google Cloud 控制台 的 Pub/Sub 頁面。
👉 點選「建立主題」按鈕。
👉 使用 ID/名稱 plan 設定「主題」,然後取消勾選Add a default subscription,其餘保留預設值,然後點選「建立」。
Pub/Sub 頁面會重新整理,您應該會在表格中看到新建立的主題。
現在,我們將 Pub/Sub 事件發布功能整合至規劃工具代理程式。我們會新增工具,將「方案」事件傳送至剛建立的 Pub/Sub 主題。這個事件會向系統中的其他代理程式 (例如學生入口網站中的代理程式) 發出信號,表示有新的教學計畫。
👉返回 Cloud Code 編輯器,開啟位於 planner 資料夾中的 app.py 檔案。我們將新增發布活動的函式。取代:
##ADD SEND PLAN EVENT FUNCTION HERE
使用下列程式碼
def send_plan_event(teaching_plan:str):
    """
    Send the teaching event to the topic called plan

    Args:
        teaching_plan: teaching plan
    """
    publisher = pubsub_v1.PublisherClient()
    print(f"-------------> Sending event to topic plan: {teaching_plan}")
    topic_path = publisher.topic_path(PROJECT_ID, "plan")

    message_data = {"teaching_plan": teaching_plan}
    data = json.dumps(message_data).encode("utf-8")

    future = publisher.publish(topic_path, data)

    return f"Published message ID: {future.result()}"
- send_plan_event:這個函式會將產生的教學計畫做為輸入內容,建立 Pub/Sub 發布端用戶端、建構主題路徑、將教學計畫轉換為 JSON 字串,並將訊息發布至主題。
在同一個 app.py 檔案中
👉更新提示,指示代理程式在生成教學計畫後,將教學計畫事件傳送至 Pub/Sub 主題。*取代
### ADD send_plan_event CALL
下列:
send_plan_event(teaching_plan)
新增 send_plan_event 工具並修改提示後,規劃人員代理程式就能將事件發布至 Pub/Sub,讓系統的其他元件對新教學計畫的建立做出反應。在接下來的章節中,我們將建立可運作的多代理程式系統。
10. 透過隨選測驗協助學生
試想一下,在學習環境中,學生可以無限制地使用根據個人學習計畫量身打造的測驗。這些測驗會立即提供回饋,包括答案和說明,有助於學生更深入瞭解教材。這就是我們希望透過 AI 輔助測驗入口網站發揮的潛力。
為實現這項願景,我們將建構測驗生成元件,根據教學計畫內容建立選擇題。

👉 在 Cloud Code 編輯器的「Explorer」窗格中,前往 portal 資料夾。開啟 quiz.py 檔案,然後複製並貼上以下程式碼到檔案結尾。
def generate_quiz_question(file_name: str, difficulty: str, region:str ):
    """Generates a single multiple-choice quiz question using the LLM.

    ```json
    {
      "question": "The question itself",
      "options": ["Option A", "Option B", "Option C", "Option D"],
      "answer": "The correct answer letter (A, B, C, or D)"
    }
    ```
    """

    print(f"region: {region}")
    # Connect to resourse needed from Google Cloud
    llm = VertexAI(model_name="gemini-2.5-flash-preview-04-17", location=region)


    plan=None
    #load the file using file_name and read content into string call plan
    with open(file_name, 'r') as f:
        plan = f.read()

    parser = JsonOutputParser(pydantic_object=QuizQuestion)


    instruction = f"You'll provide one question with difficulty level of {difficulty}, 4 options as multiple choices and provide the anwsers, the quiz needs to be related to the teaching plan {plan}"

    prompt = PromptTemplate(
        template="Generates a single multiple-choice quiz question\n {format_instructions}\n  {instruction}\n",
        input_variables=["instruction"],
        partial_variables={"format_instructions": parser.get_format_instructions()},
    )

    chain = prompt | llm | parser
    response = chain.invoke({"instruction": instruction})

    print(f"{response}")
    return  response
在代理程式中,這會建立專門用於解讀及建構 LLM 輸出內容的 JSON 輸出剖析器。這項函式會使用我們稍早定義的 QuizQuestion 模型,確保剖析的輸出內容符合正確格式 (問題、選項和答案)。
👉 在終端機中,執行下列指令來設定虛擬環境、安裝依附元件,並啟動代理程式:
gcloud config set project $(cat ~/project_id.txt)
cd ~/aidemy-bootstrap/portal/
python -m venv env
source env/bin/activate
pip install -r requirements.txt
python app.py
👉 從右上角的「網頁預覽」選單中,選擇「透過以下通訊埠預覽:8080」。Cloud Shell 會開啟新的瀏覽器分頁或視窗,顯示應用程式的網頁預覽畫面。
👉 在網頁應用程式中,按一下「測驗」連結,該連結位於頂端導覽列或索引頁面的資訊卡中。學生應該會看到系統隨機產生的三份測驗。這些測驗是根據教學計畫製作,可展現 AI 輔助測驗生成系統的強大功能。

👉如要停止在本機執行的程序,請在終端機中按下 Ctrl+C。
Gemini 2 Thinking 解釋功能
好,我們已經有測驗了,這是個好的開始!但如果學生答錯了呢?這才是真正的學習,對吧?如果我們能說明他們答錯的原因,以及如何得出正確答案,他們就更有可能記住。此外,這也有助於消除任何疑慮,並提升他們的信心。
因此,我們將請出 Gemini 2 的思考型模型!這就像是讓 AI 多一點時間思考,再進行說明。這樣一來,AI 就能提供更詳細且更優質的回饋。
我們想瞭解這項工具是否能協助學生,例如提供協助、回答問題及詳細說明。為了測試這項功能,我們將從微積分這個出了名的棘手科目開始。

👉首先,請前往 portal 資料夾中的 answer.py Cloud Code 編輯器。取代下列函式程式碼
def answer_thinking(question, options, user_response, answer, region):
    return ""
使用下列程式碼片段:
def answer_thinking(question, options, user_response, answer, region):
    try:
        llm = VertexAI(model_name="gemini-2.0-flash-001",location=region)

        input_msg = HumanMessage(content=[f"Here the question{question}, here are the available options {options}, this student's answer {user_response}, whereas the correct answer is {answer}"])
        prompt_template = ChatPromptTemplate.from_messages(
            [
                SystemMessage(
                    content=(
                        "You are a helpful teacher trying to teach the student on question, you were given the question and a set of multiple choices "
                        "what's the correct answer. use friendly tone"
                    )
                ),
                input_msg,
            ]
        )

        prompt = prompt_template.format()

        response = llm.invoke(prompt)
        print(f"response: {response}")

        return response
    except Exception as e:
        print(f"Error sending message to chatbot: {e}") # Log this error too!
        return f"Unable to process your request at this time. Due to the following reason: {str(e)}"


if __name__ == "__main__":
    question = "Evaluate the limit: lim (x→0) [(sin(5x) - 5x) / x^3]"
    options = ["A) -125/6", "B) -5/3 ", "C) -25/3", "D) -5/6"]
    user_response = "B"
    answer = "A"
    region = "us-central1"
    result = answer_thinking(question, options, user_response, answer, region)
這是非常簡單的 LangChain 應用程式,可初始化 Gemini 2 Flash 模型,並指示模型扮演樂於助人的老師,提供說明
👉在終端機中執行下列指令:
gcloud config set project $(cat ~/project_id.txt)
cd ~/aidemy-bootstrap/portal/
source env/bin/activate
python answer.py
輸出內容應與原始操作說明中的範例類似。目前的模型可能無法提供詳盡的說明。
Okay, I see the question and the choices. The question is to evaluate the limit:

lim (x→0) [(sin(5x) - 5x) / x^3]

You chose option B, which is -5/3, but the correct answer is A, which is -125/6.

It looks like you might have missed a step or made a small error in your calculations. This type of limit often involves using L'Hôpital's Rule or Taylor series expansion. Since we have the form 0/0, L'Hôpital's Rule is a good way to go! You need to apply it multiple times. Alternatively, you can use the Taylor series expansion of sin(x) which is:
sin(x) = x - x^3/3! + x^5/5! - ...
So, sin(5x) = 5x - (5x)^3/3! + (5x)^5/5! - ...
Then,  (sin(5x) - 5x) = - (5x)^3/3! + (5x)^5/5! - ...
Finally, (sin(5x) - 5x) / x^3 = - 5^3/3! + (5^5 * x^2)/5! - ...
Taking the limit as x approaches 0, we get -125/6.

Keep practicing, you'll get there!
👉 在 answer.py 檔案中,將
model_name 從 gemini-2.0-flash-001 變更為 gemini-2.0-flash-thinking-exp-01-21 函式中的 answer_thinking。
這會將 LLM 變更為更擅長推理的 LLM。這有助於模型生成更優質的說明。
👉 再次執行 answer.py 指令碼,測試新的思考型模型:
gcloud config set project $(cat ~/project_id.txt)
cd ~/aidemy-bootstrap/portal/
source env/bin/activate
python answer.py
以下是思考型模型的回覆範例,內容更詳盡,並提供微積分問題的解題步驟。這凸顯了「思考」模型在生成高品質說明方面的強大能力。您應該會看到類似以下的輸出內容:
Hey there! Let's take a look at this limit problem together. You were asked to evaluate:

lim (x→0) [(sin(5x) - 5x) / x^3]

and you picked option B, -5/3, but the correct answer is actually A, -125/6. Let's figure out why!

It's a tricky one because if we directly substitute x=0, we get (sin(0) - 0) / 0^3 = (0 - 0) / 0 = 0/0, which is an indeterminate form. This tells us we need to use a more advanced technique like L'Hopital's Rule or Taylor series expansion.

Let's use the Taylor series expansion for sin(y) around y=0. Do you remember it?  It looks like this:

sin(y) = y - y^3/3! + y^5/5! - ...
where 3! (3 factorial) is 3 × 2 × 1 = 6, 5! is 5 × 4 × 3 × 2 × 1 = 120, and so on.

In our problem, we have sin(5x), so we can substitute y = 5x into the Taylor series:

sin(5x) = (5x) - (5x)^3/3! + (5x)^5/5! - ...
sin(5x) = 5x - (125x^3)/6 + (3125x^5)/120 - ...

Now let's plug this back into our limit expression:

[(sin(5x) - 5x) / x^3] =  [ (5x - (125x^3)/6 + (3125x^5)/120 - ...) - 5x ] / x^3
Notice that the '5x' and '-5x' cancel out!  So we are left with:
= [ - (125x^3)/6 + (3125x^5)/120 - ... ] / x^3
Now, we can divide every term in the numerator by x^3:
= -125/6 + (3125x^2)/120 - ...

Finally, let's take the limit as x approaches 0.  As x gets closer and closer to zero, terms with x^2 and higher powers will become very, very small and approach zero.  So, we are left with:
lim (x→0) [ -125/6 + (3125x^2)/120 - ... ] = -125/6

Therefore, the correct answer is indeed **A) -125/6**.

It seems like your answer B, -5/3, might have come from perhaps missing a factor somewhere during calculation or maybe using an incorrect simplification. Double-check your steps when you were trying to solve it!

Don't worry, these limit problems can be a bit tricky sometimes! Keep practicing and you'll get the hang of it.  Let me know if you want to go through another similar example or if you have any more questions! 😊


Now that we have confirmed it works, let's use the portal.
👉從 answer.py移除下列測試程式碼:
if __name__ == "__main__":
    question = "Evaluate the limit: lim (x→0) [(sin(5x) - 5x) / x^3]"
    options = ["A) -125/6", "B) -5/3 ", "C) -25/3", "D) -5/6"]
    user_response = "B"
    answer = "A"
    region = "us-central1"
    result = answer_thinking(question, options, user_response, answer, region)
👉在終端機中執行下列指令,設定虛擬環境、安裝依附元件,並啟動代理程式:
gcloud config set project $(cat ~/project_id.txt)
cd ~/aidemy-bootstrap/portal/
source env/bin/activate
python app.py
👉 從右上角的「網頁預覽」選單中,選擇「透過以下通訊埠預覽:8080」。Cloud Shell 會開啟新的瀏覽器分頁或視窗,顯示應用程式的網頁預覽畫面。
👉 在網頁應用程式中,按一下頂端導覽列或索引頁面資訊卡中的「測驗」連結。
👉 回答所有測驗問題,並確保至少答錯一題,然後按一下「提交」。

等待回覆時,請切換至 Cloud Editor 的終端機,您可以在模擬器的終端機中,觀察函式的進度,以及產生的任何輸出內容或錯誤訊息。😁
👉 在終端機中按下 Ctrl+C,停止在本機執行的程序。
11. 選用:使用 Eventarc 自動化調度管理代理程式
目前為止,學生入口網站都是根據預設的教學計畫產生測驗。這很有幫助,但這表示規劃代理程式和入口網站的測驗代理程式並未真正溝通。還記得我們新增的功能嗎?規劃人員代理程式會將新產生的教學計畫發布至 Pub/Sub 主題。現在要將該項目連結至入口網站代理程式!

我們希望入口網站能在生成新的教學計畫時,自動更新測驗內容。為此,我們會在入口網站中建立可接收這些新方案的端點。
👉 在 Cloud Code 編輯器的「Explorer」窗格中,前往 portal 資料夾。
👉 開啟 app.py 檔案進行編輯。 使用下列程式碼取代 ## REPLACE ME! NEW TEACHING PLAN 行:
@app.route('/new_teaching_plan', methods=['POST'])
def new_teaching_plan():
    try:

        # Get data from Pub/Sub message delivered via Eventarc
        envelope = request.get_json()
        if not envelope:
            return jsonify({'error': 'No Pub/Sub message received'}), 400

        if not isinstance(envelope, dict) or 'message' not in envelope:
            return jsonify({'error': 'Invalid Pub/Sub message format'}), 400

        pubsub_message = envelope['message']
        print(f"data: {pubsub_message['data']}")

        data = pubsub_message['data']
        data_str = base64.b64decode(data).decode('utf-8')
        data = json.loads(data_str)

        teaching_plan = data['teaching_plan']

        print(f"File content: {teaching_plan}")

        with open("teaching_plan.txt", "w") as f:
            f.write(teaching_plan)

        print(f"Teaching plan saved to local file: teaching_plan.txt")

        return jsonify({'message': 'File processed successfully'})


    except Exception as e:
        print(f"Error processing file: {e}")
        return jsonify({'error': 'Error processing file'}), 500
重建並部署至 Cloud Run
您必須更新並重新部署規劃工具和入口網站代理程式至 Cloud Run。確保他們擁有最新程式碼,並已設定透過事件進行通訊。

👉首先,我們要重建並推送 planner 代理程式映像檔,請返回終端機執行:
cd ~/aidemy-bootstrap/planner/
gcloud config set project $(cat ~/project_id.txt)
export PROJECT_ID=$(gcloud config get project)
docker build -t gcr.io/${PROJECT_ID}/aidemy-planner .
export PROJECT_ID=$(gcloud config get project)
docker tag gcr.io/${PROJECT_ID}/aidemy-planner us-central1-docker.pkg.dev/${PROJECT_ID}/agent-repository/aidemy-planner
docker push us-central1-docker.pkg.dev/${PROJECT_ID}/agent-repository/aidemy-planner
👉我們也會執行相同操作,建構並推送 portal 代理程式映像檔:
cd ~/aidemy-bootstrap/portal/
gcloud config set project $(cat ~/project_id.txt)
export PROJECT_ID=$(gcloud config get project)
docker build -t gcr.io/${PROJECT_ID}/aidemy-portal .
export PROJECT_ID=$(gcloud config get project)
docker tag gcr.io/${PROJECT_ID}/aidemy-portal us-central1-docker.pkg.dev/${PROJECT_ID}/agent-repository/aidemy-portal
docker push us-central1-docker.pkg.dev/${PROJECT_ID}/agent-repository/aidemy-portal
👉 前往 Artifact Registry,您應該會看到 aidemy-planner 和 aidemy-portal 容器映像檔列在 agent-repository 下方。

👉返回終端機,執行下列指令,更新規劃工具代理的 Cloud Run 映像檔:
gcloud config set project $(cat ~/project_id.txt)
export PROJECT_ID=$(gcloud config get project)
gcloud run services update aidemy-planner \
    --region=us-central1 \
    --image=us-central1-docker.pkg.dev/${PROJECT_ID}/agent-repository/aidemy-planner:latest
您應該會看到類似以下的輸出內容:
OK Deploying... Done.
  OK Creating Revision...
  OK Routing traffic...
Done.
Service [aidemy-planner] revision [aidemy-planner-xxxxx] has been deployed and is serving 100 percent of traffic.
Service URL: https://aidemy-planner-xxx.us-central1.run.app
記下服務網址,這是已部署規劃工具代理程式的連結。如要稍後判斷規劃工具代理程式服務網址,請使用下列指令:
gcloud config set project $(cat ~/project_id.txt)
export PROJECT_ID=$(gcloud config get project)
gcloud run services describe aidemy-planner \
    --region=us-central1 \
    --format 'value(status.url)'
👉執行這項指令,為 portal 代理程式建立 Cloud Run 執行個體
gcloud config set project $(cat ~/project_id.txt)
export PROJECT_ID=$(gcloud config get project)
gcloud run deploy aidemy-portal \
  --image=us-central1-docker.pkg.dev/${PROJECT_ID}/agent-repository/aidemy-portal:latest \
  --region=us-central1 \
  --platform=managed \
  --allow-unauthenticated \
  --memory=2Gi \
  --cpu=2 \
  --set-env-vars=GOOGLE_CLOUD_PROJECT=${PROJECT_ID}
您應該會看到類似以下的輸出內容:
Deploying container to Cloud Run service [aidemy-portal] in project [xxxx] region [us-central1]
OK Deploying new service... Done.
  OK Creating Revision...
  OK Routing traffic...
  OK Setting IAM Policy...
Done.
Service [aidemy-portal] revision [aidemy-portal-xxxx] has been deployed and is serving 100 percent of traffic.
Service URL: https://aidemy-portal-xxxx.us-central1.run.app
請記下服務網址,這是已部署學生入口網站的連結。如要稍後判斷學生入口網站服務網址,請使用下列指令:
gcloud config set project $(cat ~/project_id.txt)
export PROJECT_ID=$(gcloud config get project)
gcloud run services describe aidemy-portal \
    --region=us-central1 \
    --format 'value(status.url)'
建立 Eventarc 觸發條件
但這裡有個大問題:當 Pub/Sub 主題中有新的方案時,這個端點如何收到通知?這時 Eventarc 就能派上用場!
Eventarc 會做為橋樑,監聽特定事件 (例如 Pub/Sub 主題中收到新訊息),並自動觸發相應動作。在本例中,這項服務會偵測到新的教學計畫發布時間,然後將信號傳送至入口網站的端點,通知入口網站需要更新。
Eventarc 會處理事件導向的通訊,因此我們可以順暢地連結規劃工具代理程式和入口網站代理程式,建立真正動態且回應迅速的學習系統。就像有個智慧型即時通訊工具,會自動將最新課程計畫傳送到正確位置!
👉按一下「+ CREATE TRIGGER」(+ 建立觸發條件) 按鈕。
設定觸發條件 (基本):
- 觸發條件名稱:
plan-topic-trigger - 觸發條件類型:Google 來源
- 事件供應商:Cloud Pub/Sub
- 活動類型:
google.cloud.pubsub.topic.v1.messagePublished - Cloud Pub/Sub 主題:選取
projects/PROJECT_ID/topics/plan - 區域:
us-central1。 - 服務帳戶:
- 將
roles/iam.serviceAccountTokenCreator角色授予服務帳戶 - 使用預設值:預設的運算服務帳戶
- 將
- 事件目的地:Cloud Run
- Cloud Run 服務:
aidemy-portal - 忽略錯誤訊息:存取「locations/me-central2」時遭拒 (或該位置不存在)。
- 服務網址路徑:
/new_teaching_plan
👉 按一下「建立」。
Eventarc 觸發條件頁面會重新整理,您應該會在表格中看到新建立的觸發條件。
現在,請使用 Service URL 存取 planner 代理程式,要求新的教學計畫。
👉 在終端機中執行這項指令,判斷規劃工具代理程式服務網址:
gcloud config set project $(cat ~/project_id.txt)
export PROJECT_ID=$(gcloud config get project)
gcloud run services list --platform=managed --region=us-central1 --format='value(URL)' | grep planner
👉 前往輸出內容中的網址,這次嘗試「年份」5、「科目」Science和「外掛程式要求」atoms。
接著等待一到兩分鐘,再次提醒,由於本實驗室的帳單限制,才會出現這段延遲時間,正常情況下不會有延遲。
最後,使用服務網址存取學生入口網站。
在終端機中執行這項指令,判斷學生入口網站代理程式服務網址:
gcloud config set project $(cat ~/project_id.txt)
export PROJECT_ID=$(gcloud config get project)
gcloud run services list --platform=managed --region=us-central1 --format='value(URL)' | grep portal
您應該會看到測驗已更新,現在與您剛生成的全新教學計畫一致!這表示 Eventarc 已成功整合至 Aidemy 系統!

恭喜!您已成功在 Google Cloud 上建構多代理系統,並運用事件導向架構提升擴充性和彈性!你已奠定穩固基礎,但還有更多內容等你探索。如要深入瞭解這項架構的實際優點、探索 Gemini 2 的多模態 Live API 強大功能,以及瞭解如何透過 LangGraph 實作單一路徑自動化調度管理,請繼續閱讀接下來兩章。
12. 選用:使用 Gemini 生成語音摘要
Gemini 可解讀及處理各種來源的資訊,例如文字、圖片,甚至是音訊,為學習和內容創作開啟全新可能。Gemini 的「看」、「聽」和「讀」能力,確實能帶來創意十足且引人入勝的使用者體驗。
除了製作圖像或文字,有效歸納和回顧也是學習過程中的重要步驟。想想看,您是不是更容易記住朗朗上口的歌詞,而不是教科書上的內容?聲音的記憶力非常驚人!因此,我們將運用 Gemini 的多模態功能,生成教學計畫的語音摘要,讓學生以輕鬆有趣的方式複習教材,透過聽覺學習的力量,提升記憶力和理解力。

我們需要儲存產生的音訊檔案。Cloud Storage 提供可擴充且可靠的解決方案。
👉前往控制台的「儲存空間」。按一下左側選單中的「Buckets」。按一下頂端的「+ 建立」按鈕。
👉設定新 bucket:
- bucket 名稱:
aidemy-recap-UNIQUE_NAME。- 重要事項:請務必定義開頭為
aidemy-recap-的不重複 bucket 名稱。這個不重複的前置字串非常重要,可避免建立 Cloud Storage bucket 時發生命名衝突。
- 重要事項:請務必定義開頭為
- 區域:
us-central1。 - 儲存空間級別:「標準」。Standard 適合經常存取的資料。
- 存取控管:保留預設選取的「統一」存取控管。這可提供一致的值區層級存取控管。
- 進階選項:本研討會通常不需要變更預設設定。
按一下「CREATE」(建立) 按鈕,建立值區。
- 系統可能會顯示禁止公開存取的彈出式視窗。勾選「強制禁止公開存取這個 bucket」方塊,然後點選
Confirm。
現在您會在 Bucket 清單中看到新建立的 bucket。請記下 bucket 名稱,後續步驟會用到。
在 Cloud Code 編輯器的終端機中,執行下列指令,授予服務帳戶 bucket 的存取權:
gcloud config set project $(cat ~/project_id.txt)
export PROJECT_ID=$(gcloud config get project)
export COURSE_BUCKET_NAME=$(gcloud storage buckets list --format="value(name)" | grep aidemy-recap)
export SERVICE_ACCOUNT_NAME=$(gcloud compute project-info describe --format="value(defaultServiceAccount)")
gcloud storage buckets add-iam-policy-binding gs://$COURSE_BUCKET_NAME \
    --member "serviceAccount:$SERVICE_ACCOUNT_NAME" \
    --role "roles/storage.objectViewer"

gcloud storage buckets add-iam-policy-binding gs://$COURSE_BUCKET_NAME \
    --member "serviceAccount:$SERVICE_ACCOUNT_NAME" \
    --role "roles/storage.objectCreator"
👉 在 Cloud Code 編輯器中,開啟 courses 資料夾內的 audio.py。將下列程式碼貼到檔案結尾:
config = LiveConnectConfig(
    response_modalities=["AUDIO"],
    speech_config=SpeechConfig(
        voice_config=VoiceConfig(
            prebuilt_voice_config=PrebuiltVoiceConfig(
                voice_name="Charon",
            )
        )
    ),
)

async def process_weeks(teaching_plan: str):
    region = "us-east5" #To workaround onRamp quota limits
    client = genai.Client(vertexai=True, project=PROJECT_ID, location=region)

    clientAudio = genai.Client(vertexai=True, project=PROJECT_ID, location="us-central1")
    async with clientAudio.aio.live.connect(
        model=MODEL_ID,
        config=config,
    ) as session:
        for week in range(1, 4):
            response = client.models.generate_content(
                model="gemini-2.0-flash-001",
                contents=f"Given the following teaching plan: {teaching_plan}, Extrace content plan for week {week}. And return just the plan, nothingh else  " # Clarified prompt
            )

            prompt = f"""
                Assume you are the instructor.
                Prepare a concise and engaging recap of the key concepts and topics covered.
                This recap should be suitable for generating a short audio summary for students.
                Focus on the most important learnings and takeaways, and frame it as a direct address to the students.
                Avoid overly formal language and aim for a conversational tone, tell a few jokes.

                Teaching plan: {response.text} """
            print(f"prompt --->{prompt}")

            await session.send(input=prompt, end_of_turn=True)
            with open(f"temp_audio_week_{week}.raw", "wb") as temp_file:
                async for message in session.receive():
                    if message.server_content.model_turn:
                        for part in message.server_content.model_turn.parts:
                            if part.inline_data:
                                temp_file.write(part.inline_data.data)

            data, samplerate = sf.read(f"temp_audio_week_{week}.raw", channels=1, samplerate=24000, subtype='PCM_16', format='RAW')
            sf.write(f"course-week-{week}.wav", data, samplerate)

            storage_client = storage.Client()
            bucket = storage_client.bucket(BUCKET_NAME)
            blob = bucket.blob(f"course-week-{week}.wav")  # Or give it a more descriptive name
            blob.upload_from_filename(f"course-week-{week}.wav")
            print(f"Audio saved to GCS: gs://{BUCKET_NAME}/course-week-{week}.wav")
    await session.close()


def breakup_sessions(teaching_plan: str):
    asyncio.run(process_weeks(teaching_plan))
- 串流連線:首先,系統會與 Live API 端點建立持續連線。與傳送要求並取得回應的標準 API 呼叫不同,這個連線會保持開啟狀態,以便持續交換資料。
- 設定多模態:使用設定指定所需的輸出類型 (本例為音訊),甚至可以指定要使用的參數 (例如語音選取、音訊編碼)
- 非同步處理:這項 API 採用非同步運作方式,因此在等待音訊生成完成時,不會封鎖主執行緒。這項技術會即時處理資料並分批傳送輸出內容,因此使用者幾乎可以立即獲得回覆。
現在的重點是:音訊生成程序應在何時執行?理想情況下,我們希望在建立新的教學計畫後,就能立即提供音訊摘要。由於我們已將教學計畫發布至 Pub/Sub 主題,實作事件導向架構,因此只要訂閱該主題即可。
不過,我們不會經常產生新的教學計畫。如果讓代理程式持續執行並等待新計畫,效率會很低。因此,將這項音訊生成邏輯部署為 Cloud Run 函式,是相當合理的做法。
以函式形式部署後,系統會等到新訊息發布至 Pub/Sub 主題時,才會啟動函式。這時系統會自動觸發函式,生成語音摘要並儲存在 bucket 中。
👉在 main.py 檔案的 courses 資料夾中,這個檔案會定義在有新的教學計畫時觸發的 Cloud Run 函式。並接收計畫,然後開始生成語音摘要。在檔案結尾新增下列程式碼片段。
@functions_framework.cloud_event
def process_teaching_plan(cloud_event):
    print(f"CloudEvent received: {cloud_event.data}")
    time.sleep(60)
    try:
        if isinstance(cloud_event.data.get('message', {}).get('data'), str):  # Check for base64 encoding
            data = json.loads(base64.b64decode(cloud_event.data['message']['data']).decode('utf-8'))
            teaching_plan = data.get('teaching_plan') # Get the teaching plan
        elif 'teaching_plan' in cloud_event.data: # No base64
            teaching_plan = cloud_event.data["teaching_plan"]
        else:
            raise KeyError("teaching_plan not found") # Handle error explicitly

        #Load the teaching_plan as string and from cloud event, call audio breakup_sessions
        breakup_sessions(teaching_plan)

        return "Teaching plan processed successfully", 200

    except (json.JSONDecodeError, AttributeError, KeyError) as e:
        print(f"Error decoding CloudEvent data: {e} - Data: {cloud_event.data}")
        return "Error processing event", 500

    except Exception as e:
        print(f"Error processing teaching plan: {e}")
        return "Error processing teaching plan", 500
@functions_framework.cloud_event:這個裝飾器會將函式標示為 Cloud Run 函式,並由 CloudEvent 觸發。
在本機測試
👉我們會在虛擬環境中執行這項操作,並安裝 Cloud Run 函式所需的 Python 程式庫。
cd ~/aidemy-bootstrap/courses
gcloud config set project $(cat ~/project_id.txt)
export PROJECT_ID=$(gcloud config get project)
export COURSE_BUCKET_NAME=$(gcloud storage buckets list --format="value(name)" | grep aidemy-recap)
python -m venv env
source env/bin/activate
pip install -r requirements.txt
👉 Cloud Run 函式模擬器可讓我們在本機測試函式,再部署至 Google Cloud。執行下列指令,啟動本機模擬器:
functions-framework --target process_teaching_plan --signature-type=cloudevent --source main.py
👉模擬器執行期間,您可以將測試 CloudEvent 傳送至模擬器,模擬發布新教學計畫。在新的終端機中:

👉執行:
  curl -X POST \
  http://localhost:8080/ \
  -H "Content-Type: application/json" \
  -H "ce-id: event-id-01" \
  -H "ce-source: planner-agent" \
  -H "ce-specversion: 1.0" \
  -H "ce-type: google.cloud.pubsub.topic.v1.messagePublished" \
  -d '{
    "message": {
      "data": "eyJ0ZWFjaGluZ19wbGFuIjogIldlZWsgMTogMkQgU2hhcGVzIGFuZCBBbmdsZXMgLSBEYXkgMTogUmV2aWV3IG9mIGJhc2ljIDJEIHNoYXBlcyAoc3F1YXJlcywgcmVjdGFuZ2xlcywgdHJpYW5nbGVzLCBjaXJjbGVzKS4gRGF5IDI6IEV4cGxvcmluZyBkaWZmZXJlbnQgdHlwZXMgb2YgdHJpYW5nbGVzIChlcXVpbGF0ZXJhbCwgaXNvc2NlbGVzLCBzY2FsZW5lLCByaWdodC1hbmdsZWQpLiBEYXkgMzogRXhwbG9yaW5nIHF1YWRyaWxhdGVyYWxzIChzcXVhcmUsIHJlY3RhbmdsZSwgcGFyYWxsZWxvZ3JhbSwgcmhvbWJ1cywgdHJhcGV6aXVtKS4gRGF5IDQ6IEludHJvZHVjdGlvbiB0byBhbmdsZXM6IHJpZ2h0IGFuZ2xlcywgYWN1dGUgYW5nbGVzLCBhbmQgb2J0dXNlIGFuZ2xlcy4gRGF5IDU6IE1lYXN1cmluZyBhbmdsZXMgdXNpbmcgYSBwcm90cmFjdG9yLiBXZWVrIDI6IDNEIFNoYXBlcyBhbmQgU3ltbWV0cnkgLSBEYXkgNjogSW50cm9kdWN0aW9uIHRvIDNEIHNoYXBlczogY3ViZXMsIGN1Ym9pZHMsIHNwaGVyZXMsIGN5bGluZGVycywgY29uZXMsIGFuZCBweXJhbWlkcy4gRGF5IDc6IERlc2NyaWJpbmcgM0Qgc2hhcGVzIHVzaW5nIGZhY2VzLCBlZGdlcywgYW5kIHZlcnRpY2VzLiBEYXkgODogUmVsYXRpbmcgMkQgc2hhcGVzIHRvIDNEIHNoYXBlcy4gRGF5IDk6IElkZW50aWZ5aW5nIGxpbmVzIG9mIHN5bW1ldHJ5IGluIDJEIHNoYXBlcy4gRGF5IDEwOiBDb21wbGV0aW5nIHN5bW1ldHJpY2FsIGZpZ3VyZXMuIFdlZWsgMzogUG9zaXRpb24sIERpcmVjdGlvbiwgYW5kIFByb2JsZW0gU29sdmluZyAtIERheSAxMTogRGVzY3JpYmluZyBwb3NpdGlvbiB1c2luZyBjb29yZGluYXRlcyBpbiB0aGUgZmlyc3QgcXVhZHJhbnQuIERheSAxMjogUGxvdHRpbmcgY29vcmRpbmF0ZXMgdG8gZHJhdyBzaGFwZXMuIERheSAxMzogVW5kZXJzdGFuZGluZyB0cmFuc2xhdGlvbiAoc2xpZGluZyBhIHNoYXBlKS4gRGF5IDE0OiBVbmRlcnN0YW5kaW5nIHJlZmxlY3Rpb24gKGZsaXBwaW5nIGEgc2hhcGUpLiBEYXkgMTU6IFByb2JsZW0tc29sdmluZyBhY3Rpdml0aWVzIGludm9sdmluZyBwZXJpbWV0ZXIsIGFyZWEsIGFuZCBtaXNzaW5nIGFuZ2xlcy4ifQ=="
    }
  }'
等待回覆時,請切換至另一個 Cloud Shell 終端機,您可以在模擬器的終端機中,觀察函式的進度,以及產生的任何輸出內容或錯誤訊息。😁
返回第 2 個終端機,您應該會看到系統傳回 OK。
👉 驗證 Bucket 中的資料:前往 Cloud Storage,依序選取「Bucket」分頁和 aidemy-recap-UNIQUE_NAME

👉在執行模擬器的終端機中,輸入 ctrl+c 即可結束。然後關閉第二個終端機。關閉第二個終端機,然後執行 deactivate 指令,即可離開虛擬環境。
deactivate
部署至 Google Cloud
 👉在本機測試後,即可將課程代理程式部署至 Google Cloud。在終端機中執行下列指令:
cd ~/aidemy-bootstrap/courses
gcloud config set project $(cat ~/project_id.txt)
export PROJECT_ID=$(gcloud config get project)
export COURSE_BUCKET_NAME=$(gcloud storage buckets list --format="value(name)" | grep aidemy-recap)
gcloud functions deploy courses-agent \
  --region=us-central1 \
  --gen2 \
  --source=. \
  --runtime=python312 \
  --trigger-topic=plan \
  --entry-point=process_teaching_plan \
  --set-env-vars=GOOGLE_CLOUD_PROJECT=${PROJECT_ID},COURSE_BUCKET_NAME=$COURSE_BUCKET_NAME
前往 Google Cloud 控制台的 Cloud Run,確認部署作業。您應該會看到名為 courses-agent 的新服務。

如要檢查觸發條件設定,請按一下 courses-agent 服務來查看詳細資料。前往「觸發條件」分頁。
您應該會看到已設定的觸發條件,用於監聽發布至方案主題的訊息。

最後,我們來看看端對端執行情況。
👉我們需要設定入口網站代理程式,讓它知道要從何處尋找產生的音訊檔案。在終端機中執行:
export COURSE_BUCKET_NAME=$(gcloud storage buckets list --format="value(name)" | grep aidemy-recap)
gcloud config set project $(cat ~/project_id.txt)
export PROJECT_ID=$(gcloud config get project)
gcloud run services update aidemy-portal \
    --region=us-central1 \
    --set-env-vars=GOOGLE_CLOUD_PROJECT=${PROJECT_ID},COURSE_BUCKET_NAME=$COURSE_BUCKET_NAME
👉使用規劃工具代理網頁生成新的教學計畫。啟動可能需要幾分鐘的時間,請別擔心,這是無伺服器服務。
如要存取規劃工具代理程式,請在終端機中執行下列指令,取得服務網址:
gcloud run services list \
    --platform=managed \
    --region=us-central1 \
    --format='value(URL)' | grep planner
生成新計畫後,請等待 2 到 3 分鐘,讓系統生成音訊。由於這個實驗室帳戶的帳單限制,這項作業需要幾分鐘的時間。
如要監控 courses-agent 函式是否已收到教學計畫,請檢查函式的「TRIGGERS」(觸發條件) 分頁。定期重新整理頁面,最終應該會看到函式已叫用。如果超過 2 分鐘後仍未叫用函式,請嘗試再次生成教學計畫。不過,請避免連續快速生成多個計畫,因為代理程式會依序使用及處理每個生成的計畫,可能會造成積壓。

👉前往入口網站,然後按一下「課程」。畫面上應會顯示三張資訊卡,每張卡片都提供語音摘要。如要找出入口網站代理程式的網址,請按照下列步驟操作:
gcloud run services list \
    --platform=managed \
    --region=us-central1 \
    --format='value(URL)' | grep portal
點選各個課程的「播放」按鈕,確認語音摘要與您剛才產生的教學計畫一致!
結束虛擬環境。
deactivate
13. 選用:透過 Gemini 和 DeepSeek 進行角色導向協作
多方觀點非常重要,尤其是在設計引人入勝且經過深思熟慮的作業時。現在我們要建構多代理系統,運用兩種不同模型 (各具不同角色) 生成作業:一個模型促進協作,另一個模型鼓勵自學。我們將使用「單次」架構,工作流程會遵循固定路徑。
Gemini 作業生成器
 首先,我們要設定 Gemini 函式,生成強調協作的作業。編輯
 assignment 資料夾中的 gemini.py 檔案。
👉將下列程式碼貼到 gemini.py 檔案結尾:
def gen_assignment_gemini(state):
    region=get_next_region()
    client = genai.Client(vertexai=True, project=PROJECT_ID, location=region)
    print(f"---------------gen_assignment_gemini")
    response = client.models.generate_content(
        model=MODEL_ID, contents=f"""
        You are an instructor

        Develop engaging and practical assignments for each week, ensuring they align with the teaching plan's objectives and progressively build upon each other.

        For each week, provide the following:

        * **Week [Number]:** A descriptive title for the assignment (e.g., "Data Exploration Project," "Model Building Exercise").
        * **Learning Objectives Assessed:** List the specific learning objectives from the teaching plan that this assignment assesses.
        * **Description:** A detailed description of the task, including any specific requirements or constraints.  Provide examples or scenarios if applicable.
        * **Deliverables:** Specify what students need to submit (e.g., code, report, presentation).
        * **Estimated Time Commitment:**  The approximate time students should dedicate to completing the assignment.
        * **Assessment Criteria:** Briefly outline how the assignment will be graded (e.g., correctness, completeness, clarity, creativity).

        The assignments should be a mix of individual and collaborative work where appropriate.  Consider different learning styles and provide opportunities for students to apply their knowledge creatively.

        Based on this teaching plan: {state["teaching_plan"]}
        """
    )

    print(f"---------------gen_assignment_gemini answer {response.text}")

    state["model_one_assignment"] = response.text

    return state


import unittest

class TestGenAssignmentGemini(unittest.TestCase):
    def test_gen_assignment_gemini(self):
        test_teaching_plan = "Week 1: 2D Shapes and Angles - Day 1: Review of basic 2D shapes (squares, rectangles, triangles, circles). Day 2: Exploring different types of triangles (equilateral, isosceles, scalene, right-angled). Day 3: Exploring quadrilaterals (square, rectangle, parallelogram, rhombus, trapezium). Day 4: Introduction to angles: right angles, acute angles, and obtuse angles. Day 5: Measuring angles using a protractor. Week 2: 3D Shapes and Symmetry - Day 6: Introduction to 3D shapes: cubes, cuboids, spheres, cylinders, cones, and pyramids. Day 7: Describing 3D shapes using faces, edges, and vertices. Day 8: Relating 2D shapes to 3D shapes. Day 9: Identifying lines of symmetry in 2D shapes. Day 10: Completing symmetrical figures. Week 3: Position, Direction, and Problem Solving - Day 11: Describing position using coordinates in the first quadrant. Day 12: Plotting coordinates to draw shapes. Day 13: Understanding translation (sliding a shape). Day 14: Understanding reflection (flipping a shape). Day 15: Problem-solving activities involving perimeter, area, and missing angles."

        initial_state = {"teaching_plan": test_teaching_plan, "model_one_assignment": "", "model_two_assigmodel_one_assignmentnment": "", "final_assignment": ""}

        updated_state = gen_assignment_gemini(initial_state)

        self.assertIn("model_one_assignment", updated_state)
        self.assertIsNotNone(updated_state["model_one_assignment"])
        self.assertIsInstance(updated_state["model_one_assignment"], str)
        self.assertGreater(len(updated_state["model_one_assignment"]), 0)
        print(updated_state["model_one_assignment"])


if __name__ == '__main__':
    unittest.main()
這項功能會使用 Gemini 模型生成作業。
我們已準備好測試 Gemini Agent。
👉在終端機中執行下列指令,設定環境:
cd ~/aidemy-bootstrap/assignment
gcloud config set project $(cat ~/project_id.txt)
export PROJECT_ID=$(gcloud config get project)
python -m venv env
source env/bin/activate
pip install -r requirements.txt
👉你可以執行以下指令進行測試:
python gemini.py
輸出內容中應會顯示更多小組作業。最後的斷言測試也會輸出結果。
Here are some engaging and practical assignments for each week, designed to build progressively upon the teaching plan's objectives:

**Week 1: Exploring the World of 2D Shapes**

* **Learning Objectives Assessed:**
    * Identify and name basic 2D shapes (squares, rectangles, triangles, circles).
    * .....

* **Description:**
    * **Shape Scavenger Hunt:** Students will go on a scavenger hunt in their homes or neighborhoods, taking pictures of objects that represent different 2D shapes. They will then create a presentation or poster showcasing their findings, classifying each shape and labeling its properties (e.g., number of sides, angles, etc.).
    * **Triangle Trivia:** Students will research and create a short quiz or presentation about different types of triangles, focusing on their properties and real-world examples.
    * **Angle Exploration:** Students will use a protractor to measure various angles in their surroundings, such as corners of furniture, windows, or doors. They will record their measurements and create a chart categorizing the angles as right, acute, or obtuse.
....

**Week 2: Delving into the World of 3D Shapes and Symmetry**

* **Learning Objectives Assessed:**
    * Identify and name basic 3D shapes.
    * ....

* **Description:**
    * **3D Shape Construction:** Students will work in groups to build 3D shapes using construction paper, cardboard, or other materials. They will then create a presentation showcasing their creations, describing the number of faces, edges, and vertices for each shape.
    * **Symmetry Exploration:** Students will investigate the concept of symmetry by creating a visual representation of various symmetrical objects (e.g., butterflies, leaves, snowflakes) using drawing or digital tools. They will identify the lines of symmetry and explain their findings.
    * **Symmetry Puzzles:** Students will be given a half-image of a symmetrical figure and will be asked to complete the other half, demonstrating their understanding of symmetry. This can be done through drawing, cut-out activities, or digital tools.

**Week 3: Navigating Position, Direction, and Problem Solving**

* **Learning Objectives Assessed:**
    * Describe position using coordinates in the first quadrant.
    * ....

* **Description:**
    * **Coordinate Maze:** Students will create a maze using coordinates on a grid paper. They will then provide directions for navigating the maze using a combination of coordinate movements and translation/reflection instructions.
    * **Shape Transformations:** Students will draw shapes on a grid paper and then apply transformations such as translation and reflection, recording the new coordinates of the transformed shapes.
    * **Geometry Challenge:** Students will solve real-world problems involving perimeter, area, and angles. For example, they could be asked to calculate the perimeter of a room, the area of a garden, or the missing angle in a triangle.
....
停止使用 ctl+c,並清理測試程式碼。從 gemini.py REMOVE下列程式碼
import unittest

class TestGenAssignmentGemini(unittest.TestCase):
    def test_gen_assignment_gemini(self):
        test_teaching_plan = "Week 1: 2D Shapes and Angles - Day 1: Review of basic 2D shapes (squares, rectangles, triangles, circles). Day 2: Exploring different types of triangles (equilateral, isosceles, scalene, right-angled). Day 3: Exploring quadrilaterals (square, rectangle, parallelogram, rhombus, trapezium). Day 4: Introduction to angles: right angles, acute angles, and obtuse angles. Day 5: Measuring angles using a protractor. Week 2: 3D Shapes and Symmetry - Day 6: Introduction to 3D shapes: cubes, cuboids, spheres, cylinders, cones, and pyramids. Day 7: Describing 3D shapes using faces, edges, and vertices. Day 8: Relating 2D shapes to 3D shapes. Day 9: Identifying lines of symmetry in 2D shapes. Day 10: Completing symmetrical figures. Week 3: Position, Direction, and Problem Solving - Day 11: Describing position using coordinates in the first quadrant. Day 12: Plotting coordinates to draw shapes. Day 13: Understanding translation (sliding a shape). Day 14: Understanding reflection (flipping a shape). Day 15: Problem-solving activities involving perimeter, area, and missing angles."

        initial_state = {"teaching_plan": test_teaching_plan, "model_one_assignment": "", "model_two_assigmodel_one_assignmentnment": "", "final_assignment": ""}

        updated_state = gen_assignment_gemini(initial_state)

        self.assertIn("model_one_assignment", updated_state)
        self.assertIsNotNone(updated_state["model_one_assignment"])
        self.assertIsInstance(updated_state["model_one_assignment"], str)
        self.assertGreater(len(updated_state["model_one_assignment"]), 0)
        print(updated_state["model_one_assignment"])


if __name__ == '__main__':
    unittest.main()
設定 DeepSeek 指派生成器
雲端 AI 平台雖然方便,但自行代管 LLM 對於保護資料隱私權和確保資料主權至關重要。我們將在 Cloud Compute Engine 執行個體上部署最小的 DeepSeek 模型 (15 億個參數)。您也可以在 Google 的 Vertex AI 平台或 GKE 執行個體上代管,但由於這只是 AI 代理的研討會,我不想讓您久等,因此我們只會使用最簡單的方式。但如果您有興趣深入瞭解其他選項,請查看指派資料夾中的 deepseek-vertexai.py 檔案,其中提供與部署在 VertexAI 上的模型互動的程式碼範例。

👉在終端機中執行下列指令,建立自架 LLM 平台 Ollama:
cd ~/aidemy-bootstrap/assignment
gcloud config set project $(cat ~/project_id.txt)
gcloud compute instances create ollama-instance \
    --image-family=ubuntu-2204-lts \
    --image-project=ubuntu-os-cloud \
    --machine-type=e2-standard-4 \
    --zone=us-central1-a \
    --metadata-from-file startup-script=startup.sh \
    --boot-disk-size=50GB \
    --tags=ollama \
    --scopes=https://www.googleapis.com/auth/cloud-platform
如要確認 Compute Engine 執行個體正在運作,請按照下列步驟操作:
在 Google Cloud 控制台中,依序前往「Compute Engine」>「VM 執行個體」。您應該會看到 ollama-instance 列出,並標有綠色勾號,表示正在執行。如果沒有看到,請確認區域為 us-central1。如果沒有,請搜尋該應用程式。

👉 我們將安裝最小的 DeepSeek 模型並進行測試。返回 Cloud Shell 編輯器,在「New」(新增) 終端機中執行下列指令,透過 SSH 連線至 GCE 執行個體。
gcloud compute ssh ollama-instance --zone=us-central1-a
建立 SSH 連線後,系統可能會提示下列訊息:
「Do you want to continue (Y/n)?」
只要輸入 Y(不分大小寫),然後按 Enter 鍵即可繼續。
接著,系統可能會要求您為 SSH 金鑰建立通關密語。如不想使用通關密語,請按兩次 Enter 鍵,接受預設值 (不使用通關密語)。
👉現在您已進入虛擬機器,請提取最小的 DeepSeek R1 模型,並測試是否正常運作。
ollama pull deepseek-r1:1.5b
ollama run deepseek-r1:1.5b "who are you?"
👉在 SSH 終端機中輸入下列指令,退出 GCE 執行個體:
exit
👉 接著設定網路政策,讓其他服務可以存取 LLM。如要將這項功能用於正式環境,請限制執行個體的存取權,方法是為服務導入安全登入機制,或限制 IP 存取權。執行作業:
gcloud compute firewall-rules create allow-ollama-11434 \
    --allow=tcp:11434 \
    --target-tags=ollama \
    --description="Allow access to Ollama on port 11434"
👉如要確認防火牆政策是否正常運作,請嘗試執行:
export OLLAMA_HOST=http://$(gcloud compute instances describe ollama-instance --zone=us-central1-a --format='value(networkInterfaces[0].accessConfigs[0].natIP)'):11434
curl -X POST "${OLLAMA_HOST}/api/generate" \
     -H "Content-Type: application/json" \
     -d '{
          "prompt": "Hello, what are you?",
          "model": "deepseek-r1:1.5b",
          "stream": false
        }'
接著,我們將在作業代理程式中處理 Deepseek 函式,以產生個別工作重點的作業。
👉編輯 assignment 資料夾下的 deepseek.py,在結尾新增下列程式碼片段:
def gen_assignment_deepseek(state):
    print(f"---------------gen_assignment_deepseek")

    template = """
        You are an instructor who favor student to focus on individual work.

        Develop engaging and practical assignments for each week, ensuring they align with the teaching plan's objectives and progressively build upon each other.

        For each week, provide the following:

        * **Week [Number]:** A descriptive title for the assignment (e.g., "Data Exploration Project," "Model Building Exercise").
        * **Learning Objectives Assessed:** List the specific learning objectives from the teaching plan that this assignment assesses.
        * **Description:** A detailed description of the task, including any specific requirements or constraints.  Provide examples or scenarios if applicable.
        * **Deliverables:** Specify what students need to submit (e.g., code, report, presentation).
        * **Estimated Time Commitment:**  The approximate time students should dedicate to completing the assignment.
        * **Assessment Criteria:** Briefly outline how the assignment will be graded (e.g., correctness, completeness, clarity, creativity).

        The assignments should be a mix of individual and collaborative work where appropriate.  Consider different learning styles and provide opportunities for students to apply their knowledge creatively.

        Based on this teaching plan: {teaching_plan}
        """


    prompt = ChatPromptTemplate.from_template(template)

    model = OllamaLLM(model="deepseek-r1:1.5b",
                   base_url=OLLAMA_HOST)

    chain = prompt | model


    response = chain.invoke({"teaching_plan":state["teaching_plan"]})
    state["model_two_assignment"] = response

    return state

import unittest

class TestGenAssignmentDeepseek(unittest.TestCase):
    def test_gen_assignment_deepseek(self):
        test_teaching_plan = "Week 1: 2D Shapes and Angles - Day 1: Review of basic 2D shapes (squares, rectangles, triangles, circles). Day 2: Exploring different types of triangles (equilateral, isosceles, scalene, right-angled). Day 3: Exploring quadrilaterals (square, rectangle, parallelogram, rhombus, trapezium). Day 4: Introduction to angles: right angles, acute angles, and obtuse angles. Day 5: Measuring angles using a protractor. Week 2: 3D Shapes and Symmetry - Day 6: Introduction to 3D shapes: cubes, cuboids, spheres, cylinders, cones, and pyramids. Day 7: Describing 3D shapes using faces, edges, and vertices. Day 8: Relating 2D shapes to 3D shapes. Day 9: Identifying lines of symmetry in 2D shapes. Day 10: Completing symmetrical figures. Week 3: Position, Direction, and Problem Solving - Day 11: Describing position using coordinates in the first quadrant. Day 12: Plotting coordinates to draw shapes. Day 13: Understanding translation (sliding a shape). Day 14: Understanding reflection (flipping a shape). Day 15: Problem-solving activities involving perimeter, area, and missing angles."

        initial_state = {"teaching_plan": test_teaching_plan, "model_one_assignment": "", "model_two_assignment": "", "final_assignment": ""}

        updated_state = gen_assignment_deepseek(initial_state)

        self.assertIn("model_two_assignment", updated_state)
        self.assertIsNotNone(updated_state["model_two_assignment"])
        self.assertIsInstance(updated_state["model_two_assignment"], str)
        self.assertGreater(len(updated_state["model_two_assignment"]), 0)
        print(updated_state["model_two_assignment"])


if __name__ == '__main__':
    unittest.main()
👉讓我們執行下列指令來測試:
cd ~/aidemy-bootstrap/assignment
source env/bin/activate
gcloud config set project $(cat ~/project_id.txt)
export PROJECT_ID=$(gcloud config get project)
export OLLAMA_HOST=http://$(gcloud compute instances describe ollama-instance --zone=us-central1-a --format='value(networkInterfaces[0].accessConfigs[0].natIP)'):11434
python deepseek.py
您應該會看到有更多自主學習作業的指派內容。
**Assignment Plan for Each Week**

---

### **Week 1: 2D Shapes and Angles**
- **Week Title:** "Exploring 2D Shapes"
Assign students to research and present on various 2D shapes. Include a project where they create models using straws and tape for triangles, draw quadrilaterals with specific measurements, and compare their properties.

### **Week 2: 3D Shapes and Symmetry**
Assign students to create models or nets for cubes and cuboids. They will also predict how folding these nets form the 3D shapes. Include a project where they identify symmetrical properties using mirrors or folding techniques.

### **Week 3: Position, Direction, and Problem Solving**

Assign students to use mirrors or folding techniques for reflections. Include activities where they measure angles, use a protractor, solve problems involving perimeter/area, and create symmetrical designs.
....
👉停止 ctl+c,並清理測試程式碼。從 deepseek.py REMOVE下列程式碼
import unittest

class TestGenAssignmentDeepseek(unittest.TestCase):
    def test_gen_assignment_deepseek(self):
        test_teaching_plan = "Week 1: 2D Shapes and Angles - Day 1: Review of basic 2D shapes (squares, rectangles, triangles, circles). Day 2: Exploring different types of triangles (equilateral, isosceles, scalene, right-angled). Day 3: Exploring quadrilaterals (square, rectangle, parallelogram, rhombus, trapezium). Day 4: Introduction to angles: right angles, acute angles, and obtuse angles. Day 5: Measuring angles using a protractor. Week 2: 3D Shapes and Symmetry - Day 6: Introduction to 3D shapes: cubes, cuboids, spheres, cylinders, cones, and pyramids. Day 7: Describing 3D shapes using faces, edges, and vertices. Day 8: Relating 2D shapes to 3D shapes. Day 9: Identifying lines of symmetry in 2D shapes. Day 10: Completing symmetrical figures. Week 3: Position, Direction, and Problem Solving - Day 11: Describing position using coordinates in the first quadrant. Day 12: Plotting coordinates to draw shapes. Day 13: Understanding translation (sliding a shape). Day 14: Understanding reflection (flipping a shape). Day 15: Problem-solving activities involving perimeter, area, and missing angles."

        initial_state = {"teaching_plan": test_teaching_plan, "model_one_assignment": "", "model_two_assignment": "", "final_assignment": ""}

        updated_state = gen_assignment_deepseek(initial_state)

        self.assertIn("model_two_assignment", updated_state)
        self.assertIsNotNone(updated_state["model_two_assignment"])
        self.assertIsInstance(updated_state["model_two_assignment"], str)
        self.assertGreater(len(updated_state["model_two_assignment"]), 0)
        print(updated_state["model_two_assignment"])


if __name__ == '__main__':
    unittest.main()
現在,我們將使用相同的 Gemini 模型,將這兩項作業合併為一項新的作業。編輯 assignment 資料夾中的 gemini.py 檔案。
👉將下列程式碼貼到 gemini.py 檔案結尾:
def combine_assignments(state):
    print(f"---------------combine_assignments ")
    region=get_next_region()
    client = genai.Client(vertexai=True, project=PROJECT_ID, location=region)
    response = client.models.generate_content(
        model=MODEL_ID, contents=f"""
        Look at all the proposed assignment so far {state["model_one_assignment"]} and {state["model_two_assignment"]}, combine them and come up with a final assignment for student.
        """
    )

    state["final_assignment"] = response.text

    return state
為結合這兩種模型的優點,我們將使用 LangGraph 調度管理定義的工作流程。這個工作流程包含三個步驟:首先,Gemini 模型會生成以協作為主的作業;其次,DeepSeek 模型會生成以個人作業為主的作業;最後,Gemini 會將這兩項作業整合成一份完整的作業。由於我們預先定義了步驟順序,且沒有 LLM 決策,因此這構成單一路徑、使用者定義的協調。

👉將下列程式碼貼到 assignment 資料夾下的 main.py 檔案結尾:
def create_assignment(teaching_plan: str):
    print(f"create_assignment---->{teaching_plan}")
    builder = StateGraph(State)
    builder.add_node("gen_assignment_gemini", gen_assignment_gemini)
    builder.add_node("gen_assignment_deepseek", gen_assignment_deepseek)
    builder.add_node("combine_assignments", combine_assignments)

    builder.add_edge(START, "gen_assignment_gemini")
    builder.add_edge("gen_assignment_gemini", "gen_assignment_deepseek")
    builder.add_edge("gen_assignment_deepseek", "combine_assignments")
    builder.add_edge("combine_assignments", END)

    graph = builder.compile()
    state = graph.invoke({"teaching_plan": teaching_plan})

    return state["final_assignment"]


import unittest

class TestCreateAssignment(unittest.TestCase):
    def test_create_assignment(self):
        test_teaching_plan = "Week 1: 2D Shapes and Angles - Day 1: Review of basic 2D shapes (squares, rectangles, triangles, circles). Day 2: Exploring different types of triangles (equilateral, isosceles, scalene, right-angled). Day 3: Exploring quadrilaterals (square, rectangle, parallelogram, rhombus, trapezium). Day 4: Introduction to angles: right angles, acute angles, and obtuse angles. Day 5: Measuring angles using a protractor. Week 2: 3D Shapes and Symmetry - Day 6: Introduction to 3D shapes: cubes, cuboids, spheres, cylinders, cones, and pyramids. Day 7: Describing 3D shapes using faces, edges, and vertices. Day 8: Relating 2D shapes to 3D shapes. Day 9: Identifying lines of symmetry in 2D shapes. Day 10: Completing symmetrical figures. Week 3: Position, Direction, and Problem Solving - Day 11: Describing position using coordinates in the first quadrant. Day 12: Plotting coordinates to draw shapes. Day 13: Understanding translation (sliding a shape). Day 14: Understanding reflection (flipping a shape). Day 15: Problem-solving activities involving perimeter, area, and missing angles."
        initial_state = {"teaching_plan": test_teaching_plan, "model_one_assignment": "", "model_two_assignment": "", "final_assignment": ""}
        updated_state = create_assignment(initial_state)

        print(updated_state)


if __name__ == '__main__':
    unittest.main()
👉如要初步測試 create_assignment 函式,並確認結合 Gemini 和 DeepSeek 的工作流程是否正常運作,請執行下列指令:
cd ~/aidemy-bootstrap/assignment
source env/bin/activate
pip install -r requirements.txt
python main.py
您應該會看到結合這兩種模型的內容,其中包含學生學習和學生群組作業的個別觀點。
**Tasks:**

1. **Clue Collection:** Gather all the clues left by the thieves. These clues will include:
    * Descriptions of shapes and their properties (angles, sides, etc.)
    * Coordinate grids with hidden messages
    * Geometric puzzles requiring transformation (translation, reflection, rotation)
    * Challenges involving area, perimeter, and angle calculations

2. **Clue Analysis:** Decipher each clue using your geometric knowledge. This will involve:
    * Identifying the shape and its properties
    * Plotting coordinates and interpreting patterns on the grid
    * Solving geometric puzzles by applying transformations
    * Calculating area, perimeter, and missing angles

3. **Case Report:** Create a comprehensive case report outlining your findings. This report should include:
    * A detailed explanation of each clue and its solution
    * Sketches and diagrams to support your explanations
    * A step-by-step account of how you followed the clues to locate the artifact
    * A final conclusion about the thieves and their motives
👉停止 ctl+c,並清理測試程式碼。從 main.py REMOVE下列程式碼
import unittest

class TestCreateAssignment(unittest.TestCase):
    def test_create_assignment(self):
        test_teaching_plan = "Week 1: 2D Shapes and Angles - Day 1: Review of basic 2D shapes (squares, rectangles, triangles, circles). Day 2: Exploring different types of triangles (equilateral, isosceles, scalene, right-angled). Day 3: Exploring quadrilaterals (square, rectangle, parallelogram, rhombus, trapezium). Day 4: Introduction to angles: right angles, acute angles, and obtuse angles. Day 5: Measuring angles using a protractor. Week 2: 3D Shapes and Symmetry - Day 6: Introduction to 3D shapes: cubes, cuboids, spheres, cylinders, cones, and pyramids. Day 7: Describing 3D shapes using faces, edges, and vertices. Day 8: Relating 2D shapes to 3D shapes. Day 9: Identifying lines of symmetry in 2D shapes. Day 10: Completing symmetrical figures. Week 3: Position, Direction, and Problem Solving - Day 11: Describing position using coordinates in the first quadrant. Day 12: Plotting coordinates to draw shapes. Day 13: Understanding translation (sliding a shape). Day 14: Understanding reflection (flipping a shape). Day 15: Problem-solving activities involving perimeter, area, and missing angles."
        initial_state = {"teaching_plan": test_teaching_plan, "model_one_assignment": "", "model_two_assignment": "", "final_assignment": ""}
        updated_state = create_assignment(initial_state)

        print(updated_state)


if __name__ == '__main__':
    unittest.main()

為使作業生成程序自動化,並因應新的教學計畫,我們將運用現有的事件驅動架構。下列程式碼定義了 Cloud Run 函式 (generate_assignment),每當有新的教學計畫發布至 Pub/Sub 主題「plan」,就會觸發該函式。
👉在 assignment 資料夾中,將下列程式碼新增至 main.py 結尾:
@functions_framework.cloud_event
def generate_assignment(cloud_event):
    print(f"CloudEvent received: {cloud_event.data}")

    try:
        if isinstance(cloud_event.data.get('message', {}).get('data'), str):
            data = json.loads(base64.b64decode(cloud_event.data['message']['data']).decode('utf-8'))
            teaching_plan = data.get('teaching_plan')
        elif 'teaching_plan' in cloud_event.data:
            teaching_plan = cloud_event.data["teaching_plan"]
        else:
            raise KeyError("teaching_plan not found")

        assignment = create_assignment(teaching_plan)

        print(f"Assignment---->{assignment}")

        #Store the return assignment into bucket as a text file
        storage_client = storage.Client()
        bucket = storage_client.bucket(ASSIGNMENT_BUCKET)
        file_name = f"assignment-{random.randint(1, 1000)}.txt"
        blob = bucket.blob(file_name)
        blob.upload_from_string(assignment)

        return f"Assignment generated and stored in {ASSIGNMENT_BUCKET}/{file_name}", 200

    except (json.JSONDecodeError, AttributeError, KeyError) as e:
        print(f"Error decoding CloudEvent data: {e} - Data: {cloud_event.data}")
        return "Error processing event", 500

    except Exception as e:
        print(f"Error generate assignment: {e}")
        return "Error generate assignment", 500
在本機測試
部署至 Google Cloud 之前,建議先在本機測試 Cloud Run 函式。這樣一來,您就能更快地反覆運算,並輕鬆進行偵錯。
首先,請建立 Cloud Storage bucket 來儲存產生的作業檔案,並授予服務帳戶該 bucket 的存取權。在終端機中執行下列指令:
👉重要事項:請務必定義以「aidemy-assignment-」開頭的不重複 ASSIGNMENT_BUCKET 名稱。這個不重複名稱非常重要,可避免建立 Cloud Storage bucket 時發生命名衝突。(將 <YOUR_NAME> 替換為任何隨機字詞)
export ASSIGNMENT_BUCKET=aidemy-assignment-<YOUR_NAME> #Name must be unqiue
👉然後執行:
gcloud config set project $(cat ~/project_id.txt)
export PROJECT_ID=$(gcloud config get project)
export SERVICE_ACCOUNT_NAME=$(gcloud compute project-info describe --format="value(defaultServiceAccount)")
gsutil mb -p $PROJECT_ID -l us-central1 gs://$ASSIGNMENT_BUCKET

gcloud storage buckets add-iam-policy-binding gs://$ASSIGNMENT_BUCKET \
    --member "serviceAccount:$SERVICE_ACCOUNT_NAME" \
    --role "roles/storage.objectViewer"

gcloud storage buckets add-iam-policy-binding gs://$ASSIGNMENT_BUCKET \
    --member "serviceAccount:$SERVICE_ACCOUNT_NAME" \
    --role "roles/storage.objectCreator"
👉現在,啟動 Cloud Run 函式模擬器:
cd ~/aidemy-bootstrap/assignment
functions-framework \
    --target generate_assignment \
    --signature-type=cloudevent \
    --source main.py
👉在一個終端機中執行模擬器時,請在 Cloud Shell 中開啟第二個終端機。在第二個終端機中,將測試 CloudEvent 傳送至模擬器,模擬發布新的教學計畫:
  curl -X POST \
  http://localhost:8080/ \
  -H "Content-Type: application/json" \
  -H "ce-id: event-id-01" \
  -H "ce-source: planner-agent" \
  -H "ce-specversion: 1.0" \
  -H "ce-type: google.cloud.pubsub.topic.v1.messagePublished" \
  -d '{
    "message": {
      "data": "eyJ0ZWFjaGluZ19wbGFuIjogIldlZWsgMTogMkQgU2hhcGVzIGFuZCBBbmdsZXMgLSBEYXkgMTogUmV2aWV3IG9mIGJhc2ljIDJEIHNoYXBlcyAoc3F1YXJlcywgcmVjdGFuZ2xlcywgdHJpYW5nbGVzLCBjaXJjbGVzKS4gRGF5IDI6IEV4cGxvcmluZyBkaWZmZXJlbnQgdHlwZXMgb2YgdHJpYW5nbGVzIChlcXVpbGF0ZXJhbCwgaXNvc2NlbGVzLCBzY2FsZW5lLCByaWdodC1hbmdsZWQpLiBEYXkgMzogRXhwbG9yaW5nIHF1YWRyaWxhdGVyYWxzIChzcXVhcmUsIHJlY3RhbmdsZSwgcGFyYWxsZWxvZ3JhbSwgcmhvbWJ1cywgdHJhcGV6aXVtKS4gRGF5IDQ6IEludHJvZHVjdGlvbiB0byBhbmdsZXM6IHJpZ2h0IGFuZ2xlcywgYWN1dGUgYW5nbGVzLCBhbmQgb2J0dXNlIGFuZ2xlcy4gRGF5IDU6IE1lYXN1cmluZyBhbmdsZXMgdXNpbmcgYSBwcm90cmFjdG9yLiBXZWVrIDI6IDNEIFNoYXBlcyBhbmQgU3ltbWV0cnkgLSBEYXkgNjogSW50cm9kdWN0aW9uIHRvIDNEIHNoYXBlczogY3ViZXMsIGN1Ym9pZHMsIHNwaGVyZXMsIGN5bGluZGVycywgY29uZXMsIGFuZCBweXJhbWlkcy4gRGF5IDc6IERlc2NyaWJpbmcgM0Qgc2hhcGVzIHVzaW5nIGZhY2VzLCBlZGdlcywgYW5kIHZlcnRpY2VzLiBEYXkgODogUmVsYXRpbmcgMkQgc2hhcGVzIHRvIDNEIHNoYXBlcy4gRGF5IDk6IElkZW50aWZ5aW5nIGxpbmVzIG9mIHN5bW1ldHJ5IGluIDJEIHNoYXBlcy4gRGF5IDEwOiBDb21wbGV0aW5nIHN5bW1ldHJpY2FsIGZpZ3VyZXMuIFdlZWsgMzogUG9zaXRpb24sIERpcmVjdGlvbiwgYW5kIFByb2JsZW0gU29sdmluZyAtIERheSAxMTogRGVzY3JpYmluZyBwb3NpdGlvbiB1c2luZyBjb29yZGluYXRlcyBpbiB0aGUgZmlyc3QgcXVhZHJhbnQuIERheSAxMjogUGxvdHRpbmcgY29vcmRpbmF0ZXMgdG8gZHJhdyBzaGFwZXMuIERheSAxMzogVW5kZXJzdGFuZGluZyB0cmFuc2xhdGlvbiAoc2xpZGluZyBhIHNoYXBlKS4gRGF5IDE0OiBVbmRlcnN0YW5kaW5nIHJlZmxlY3Rpb24gKGZsaXBwaW5nIGEgc2hhcGUpLiBEYXkgMTU6IFByb2JsZW0tc29sdmluZyBhY3Rpdml0aWVzIGludm9sdmluZyBwZXJpbWV0ZXIsIGFyZWEsIGFuZCBtaXNzaW5nIGFuZ2xlcy4ifQ=="
    }
  }'
等待回覆時,請切換至另一個 Cloud Shell 終端機,您可以在模擬器的終端機中,觀察函式的進度,以及產生的任何輸出內容或錯誤訊息。😁
curl 指令應會列印「OK」(不含換行符號,因此「OK」可能會顯示在終端機殼層提示的同一行)。
如要確認作業已順利產生並儲存,請前往 Google Cloud 控制台,依序前往「Storage」>「Cloud Storage」。選取您建立的 aidemy-assignment 值區。bucket 中應該會顯示名為 assignment-{random number}.txt 的文字檔。按一下檔案即可下載並驗證內容。這會驗證新檔案是否包含剛產生的新指派項目。

👉在執行模擬器的終端機中,輸入 ctrl+c 即可結束。然後關閉第二個終端機。👉此外,請在執行模擬器的終端機中結束虛擬環境。
deactivate
👉 接著,我們會將指派代理程式部署至雲端
cd ~/aidemy-bootstrap/assignment
export ASSIGNMENT_BUCKET=$(gcloud storage buckets list --format="value(name)" | grep aidemy-assignment)
export OLLAMA_HOST=http://$(gcloud compute instances describe ollama-instance --zone=us-central1-a --format='value(networkInterfaces[0].accessConfigs[0].natIP)'):11434
gcloud config set project $(cat ~/project_id.txt)
export PROJECT_ID=$(gcloud config get project)
gcloud functions deploy assignment-agent \
 --gen2 \
 --timeout=540 \
 --memory=2Gi \
 --cpu=1 \
 --set-env-vars="ASSIGNMENT_BUCKET=${ASSIGNMENT_BUCKET}" \
 --set-env-vars=GOOGLE_CLOUD_PROJECT=${GOOGLE_CLOUD_PROJECT} \
 --set-env-vars=OLLAMA_HOST=${OLLAMA_HOST} \
 --region=us-central1 \
 --runtime=python312 \
 --source=. \
 --entry-point=generate_assignment \
 --trigger-topic=plan
前往 Google Cloud 控制台的 Cloud Run 頁面,確認部署作業。您應該會看到名為「courses-agent」的新服務。
我們已實作、測試及部署作業生成工作流程,現在可以繼續下一個步驟:在學生入口網站中提供這些作業。
14. 選用:透過角色與 Gemini 和 DeepSeek 協作 - 續上頁
動態生成網站
為提升學生入口網站的參與度,我們將為作業頁面導入動態 HTML 生成功能。目標是每當產生新的作業時,就自動更新入口網站,採用新穎且吸引人的設計。這項功能會運用 LLM 的程式碼編寫能力,打造更動態有趣的使用者體驗。

👉在 Cloud Shell 編輯器中,編輯 portal 資料夾中的 render.py 檔案,並將
def render_assignment_page():
    return ""
使用下列程式碼片段:
def render_assignment_page(assignment: str):
    try:
        region=get_next_region()
        llm = VertexAI(model_name="gemini-2.0-flash-001", location=region)
        input_msg = HumanMessage(content=[f"Here the assignment {assignment}"])
        prompt_template = ChatPromptTemplate.from_messages(
            [
                SystemMessage(
                    content=(
                        """
                        As a frontend developer, create HTML to display a student assignment with a creative look and feel. Include the following navigation bar at the top:
                        ```
                        <nav>
                            <a href="/">Home</a>
                            <a href="/quiz">Quizzes</a>
                            <a href="/courses">Courses</a>
                            <a href="/assignment">Assignments</a>
                        </nav>
                        ```
                        Also include these links in the <head> section:
                        ```
                        <link rel="stylesheet" href="{{ url_for('static', filename='style.css') }}">
                        <link rel="preconnect" href="https://fonts.googleapis.com">
                        <link rel="preconnect" href="https://fonts.gstatic.com" crossorigin>
                        <link href="https://fonts.googleapis.com/css2?family=Roboto:wght@400;500&display=swap" rel="stylesheet">

                        ```
                        Do not apply inline styles to the navigation bar.
                        The HTML should display the full assignment content. In its CSS, be creative with the rainbow colors and aesthetic.
                        Make it creative and pretty
                        The assignment content should be well-structured and easy to read.
                        respond with JUST the html file
                        """
                    )
                ),
                input_msg,
            ]
        )

        prompt = prompt_template.format()

        response = llm.invoke(prompt)

        response = response.replace("```html", "")
        response = response.replace("```", "")
        with open("templates/assignment.html", "w") as f:
            f.write(response)


        print(f"response: {response}")

        return response
    except Exception as e:
        print(f"Error sending message to chatbot: {e}") # Log this error too!
        return f"Unable to process your request at this time. Due to the following reason: {str(e)}"
這項功能會使用 Gemini 模型,動態生成作業的 HTML。這項工具會將作業內容做為輸入內容,並使用提示詞指示 Gemini 建立具有創意風格的吸睛 HTML 網頁。
接著,我們會建立端點,每當有新文件新增至作業值區時,就會觸發該端點:
👉在入口網站資料夾中,編輯 app.py 檔案,然後將 ## REPLACE ME! RENDER ASSIGNMENT 行取代為下列程式碼:
@app.route('/render_assignment', methods=['POST'])
def render_assignment():
    try:
        data = request.get_json()
        file_name = data.get('name')
        bucket_name = data.get('bucket')

        if not file_name or not bucket_name:
            return jsonify({'error': 'Missing file name or bucket name'}), 400

        storage_client = storage.Client()
        bucket = storage_client.bucket(bucket_name)
        blob = bucket.blob(file_name)
        content = blob.download_as_text()

        print(f"File content: {content}")

        render_assignment_page(content)

        return jsonify({'message': 'Assignment rendered successfully'})

    except Exception as e:
        print(f"Error processing file: {e}")
        return jsonify({'error': 'Error processing file'}), 500
觸發後,這項函式會從要求資料中擷取檔案名稱和 bucket 名稱,從 Cloud Storage 下載作業內容,並呼叫 render_assignment_page 函式來產生 HTML。
👉我們將在本機執行:
cd ~/aidemy-bootstrap/portal
source env/bin/activate
python app.py
👉在 Cloud Shell 視窗頂端的「網頁預覽」選單中,選取「透過以下通訊埠預覽:8080」。系統會在新的瀏覽器分頁中開啟應用程式。前往導覽列中的「作業」連結。此時您應該會看到空白頁面,這是正常現象,因為我們尚未在作業代理程式和入口網站之間建立通訊橋樑,以動態填入內容。

請按下 Ctrl+C 停止指令碼。
👉如要納入這些變更並部署更新的程式碼,請重建並推送入口網站代理程式映像檔:
cd ~/aidemy-bootstrap/portal/
gcloud config set project $(cat ~/project_id.txt)
export PROJECT_ID=$(gcloud config get project)
docker build -t gcr.io/${PROJECT_ID}/aidemy-portal .
docker tag gcr.io/${PROJECT_ID}/aidemy-portal us-central1-docker.pkg.dev/${PROJECT_ID}/agent-repository/aidemy-portal
docker push us-central1-docker.pkg.dev/${PROJECT_ID}/agent-repository/aidemy-portal
👉推送新映像檔後,請重新部署 Cloud Run 服務。執行下列指令碼,強制更新 Cloud Run:
gcloud config set project $(cat ~/project_id.txt)
export PROJECT_ID=$(gcloud config get project)
export COURSE_BUCKET_NAME=$(gcloud storage buckets list --format="value(name)" | grep aidemy-recap)
gcloud run services update aidemy-portal \
    --region=us-central1 \
    --set-env-vars=GOOGLE_CLOUD_PROJECT=${PROJECT_ID},COURSE_BUCKET_NAME=$COURSE_BUCKET_NAME
👉現在,我們要部署 Eventarc 觸發條件,監聽在作業值區中建立 (完成) 的任何新物件。建立新的作業檔案時,這個觸發條件會自動叫用入口服務的 /render_assignment 端點。
gcloud config set project $(cat ~/project_id.txt)
export PROJECT_ID=$(gcloud config get project)
gcloud projects add-iam-policy-binding $PROJECT_ID \
  --member="serviceAccount:$(gcloud storage service-agent --project $PROJECT_ID)" \
  --role="roles/pubsub.publisher"
export SERVICE_ACCOUNT_NAME=$(gcloud compute project-info describe --format="value(defaultServiceAccount)")
gcloud eventarc triggers create portal-assignment-trigger \
--location=us-central1 \
--service-account=$SERVICE_ACCOUNT_NAME \
--destination-run-service=aidemy-portal \
--destination-run-region=us-central1 \
--destination-run-path="/render_assignment" \
--event-filters="bucket=$ASSIGNMENT_BUCKET" \
--event-filters="type=google.cloud.storage.object.v1.finalized"
如要確認觸發條件是否建立成功,請前往 Google Cloud 控制台的「Eventarc Triggers」(Eventarc 觸發條件) 頁面。表格中應該會列出「portal-assignment-trigger」。按一下觸發條件名稱即可查看詳細資料。
新觸發條件最多可能需要 2 到 3 分鐘才會生效。
如要查看動態指派生成作業,請執行下列指令,找出規劃工具代理程式的網址 (如果手邊沒有網址):
gcloud run services list --platform=managed --region=us-central1 --format='value(URL)' | grep planner
找出入口網站代理程式的網址:
gcloud run services list --platform=managed --region=us-central1 --format='value(URL)' | grep portal
在規劃工具代理程式中,產生新的教學計畫。

幾分鐘後 (讓系統完成生成音訊、指派作業和算繪 HTML),前往學生入口網站。
👉按一下導覽列中的「作業」連結。您應該會看到新建立的作業,其中包含動態產生的 HTML。每次產生的教學計畫都應是動態作業。

恭喜您完成 Aidemy 多代理程式系統!您已獲得實務經驗,並深入瞭解:
- 多代理系統的優點,包括模組化、可擴充性、專業化和簡化維護作業。
- 事件導向架構對於建構反應靈敏的鬆耦合應用程式有多重要。
- 策略性地運用 LLM,為工作選擇合適的模型,並與工具整合,發揮實際影響力。
- 運用 Google Cloud 服務的雲端原生開發做法,打造可擴充且可靠的解決方案。
- 考慮資料隱私權和自架主機模型的重要性,做為供應商解決方案的替代方案。
您現在已具備紮實的基礎,可在 Google Cloud 上建構進階的 AI 輔助應用程式!
15. 挑戰與後續步驟
恭喜您建構完成 Aidemy 多代理系統!您已為 AI 輔助教育奠定穩固基礎。現在,讓我們來看看一些挑戰,以及未來可能進行的強化措施,進一步擴展功能並滿足實際需求:
透過即時問答進行互動式學習:
- 挑戰:您能否運用 Gemini 2 的 Live API,為學生建立即時問與答功能?想像一下,在虛擬教室中,學生可以提出問題,並立即收到 AI 生成的回覆。
自動提交作業和評分:
- 挑戰:設計及實作一套系統,讓學生以數位方式繳交作業,並由 AI 自動評分,同時具備偵測及防止抄襲的機制。這項挑戰提供絕佳機會,可探索檢索增強生成 (RAG) 技術,提升評分和抄襲偵測程序的準確度和可靠性。

16. 清理
我們已建構並探索 Aidemy 多代理系統,現在要清理 Google Cloud 環境。
👉刪除 Cloud Run 服務
gcloud run services delete aidemy-planner --region=us-central1 --quiet
gcloud run services delete aidemy-portal --region=us-central1 --quiet
gcloud run services delete courses-agent --region=us-central1 --quiet
gcloud run services delete book-provider --region=us-central1 --quiet
gcloud run services delete assignment-agent --region=us-central1 --quiet
👉刪除 Eventarc 觸發條件
gcloud eventarc triggers delete portal-assignment-trigger --location=us --quiet
gcloud eventarc triggers delete plan-topic-trigger --location=us-central1 --quiet
gcloud eventarc triggers delete portal-assignment-trigger --location=us-central1 --quiet
ASSIGNMENT_AGENT_TRIGGER=$(gcloud eventarc triggers list --project="$PROJECT_ID" --location=us-central1 --filter="name:assignment-agent" --format="value(name)")
COURSES_AGENT_TRIGGER=$(gcloud eventarc triggers list --project="$PROJECT_ID" --location=us-central1 --filter="name:courses-agent" --format="value(name)")
gcloud eventarc triggers delete $ASSIGNMENT_AGENT_TRIGGER --location=us-central1 --quiet
gcloud eventarc triggers delete $COURSES_AGENT_TRIGGER --location=us-central1 --quiet
👉刪除 Pub/Sub 主題
gcloud pubsub topics delete plan --project="$PROJECT_ID" --quiet
👉刪除 Cloud SQL 執行個體
gcloud sql instances delete aidemy --quiet
👉刪除 Artifact Registry 存放區
gcloud artifacts repositories delete agent-repository --location=us-central1 --quiet
👉刪除 Secret Manager 密鑰
gcloud secrets delete db-user --quiet
gcloud secrets delete db-pass --quiet
gcloud secrets delete db-name --quiet
👉刪除 Compute Engine 執行個體 (如為 Deepseek 建立)
gcloud compute instances delete ollama-instance --zone=us-central1-a --quiet
👉刪除 Deepseek 執行個體的防火牆規則
gcloud compute firewall-rules delete allow-ollama-11434 --quiet
👉刪除 Cloud Storage bucket
export COURSE_BUCKET_NAME=$(gcloud storage buckets list --format="value(name)" | grep aidemy-recap)
export ASSIGNMENT_BUCKET=$(gcloud storage buckets list --format="value(name)" | grep aidemy-assignment)
gsutil rm -r gs://$COURSE_BUCKET_NAME
gsutil rm -r gs://$ASSIGNMENT_BUCKET
