

1. 簡介
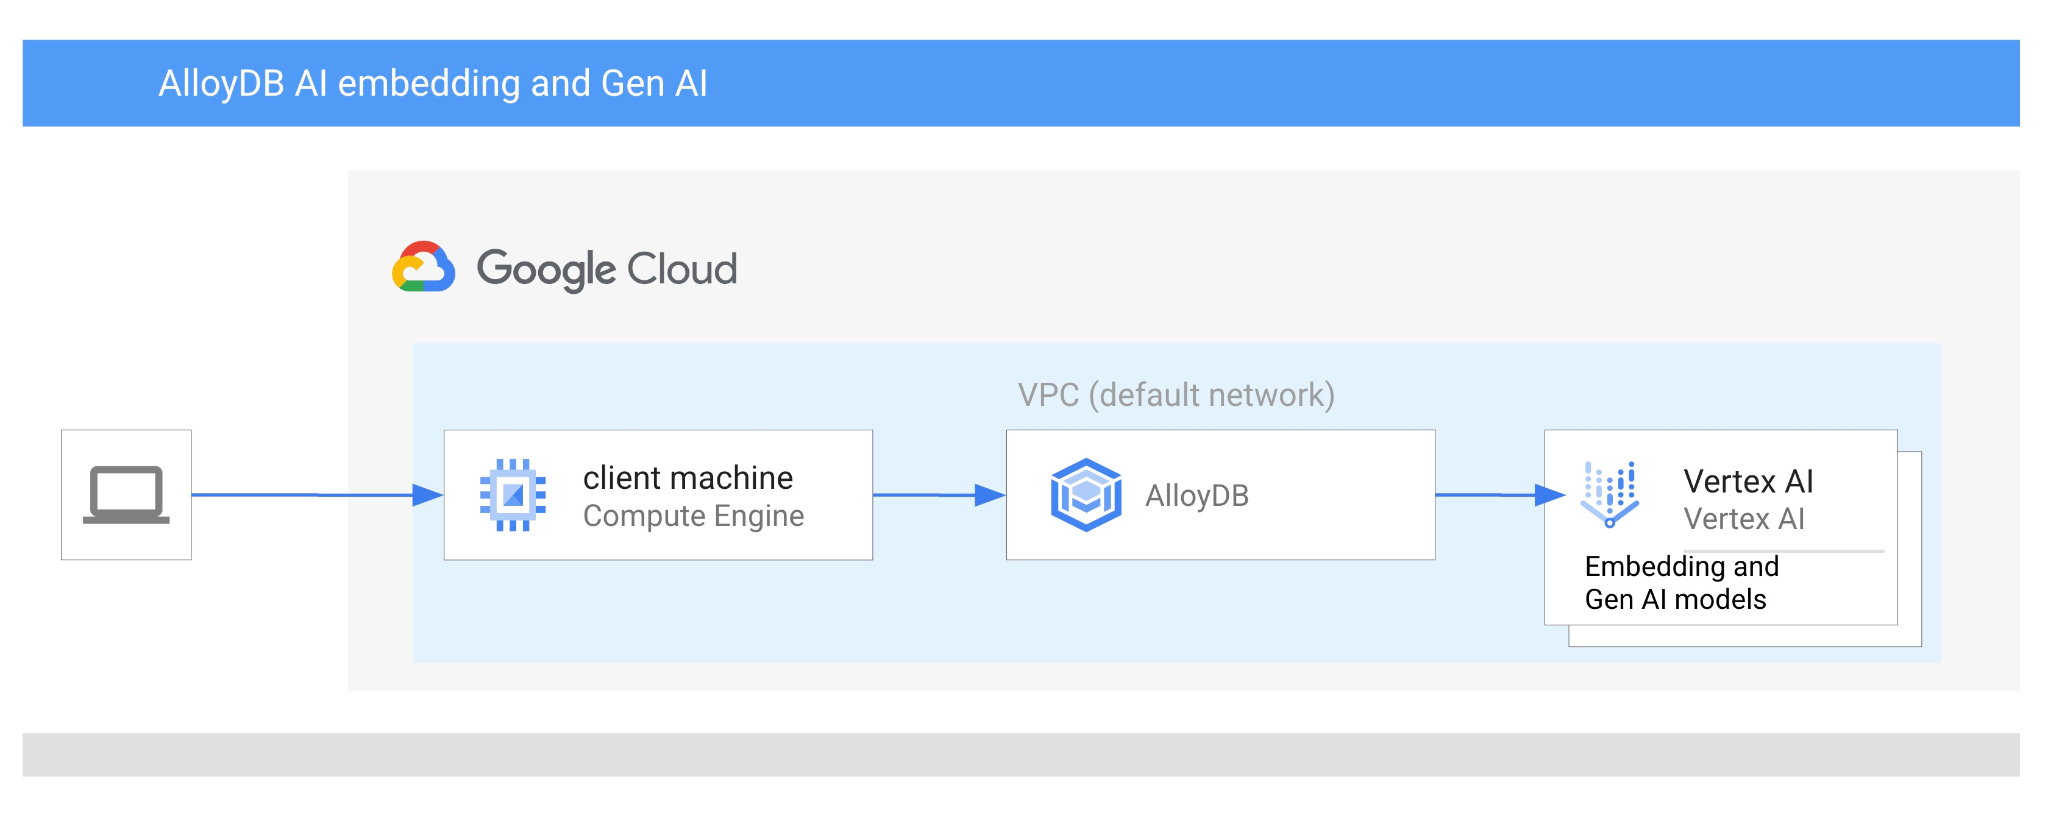
在本程式碼研究室中,您將瞭解如何結合向量搜尋與 Vertex AI 嵌入功能,使用 AlloyDB AI。本實驗室是 AlloyDB AI 功能專屬實驗室系列的一部分。詳情請參閱說明文件中的 AlloyDB AI 頁面。
必要條件
- 對 Google Cloud 控制台有基本瞭解
- 指令列介面和 Google Shell 的基本技能
課程內容
- 如何部署 AlloyDB 叢集和主要執行個體
- 如何從 Google Compute Engine VM 連線至 AlloyDB
- 如何建立資料庫並啟用 AlloyDB AI
- 如何將資料載入資料庫
- 如何使用 AlloyDB Studio
- 如何在 AlloyDB 中使用 Vertex AI 嵌入模型
- 如何使用 Vertex AI Studio
- 如何使用 Vertex AI 生成模型充實結果
- 如何使用向量索引提升效能
軟硬體需求
- Google Cloud 帳戶和 Google Cloud 專案
- 網路瀏覽器,例如 Chrome
2. 設定和需求條件
專案設定
- 登入 Google Cloud 控制台。如果沒有 Gmail 或 Google Workspace 帳戶,請先建立帳戶。
請改用個人帳戶,而非公司或學校帳戶。
- 建立新專案或重複使用現有專案。如要在 Google Cloud 控制台中建立新專案,請在標題中按一下「選取專案」按鈕,開啟彈出式視窗。

在「選取專案」視窗中,按下「新專案」按鈕,開啟新專案的對話方塊。

在對話方塊中輸入偏好的專案名稱,然後選擇位置。
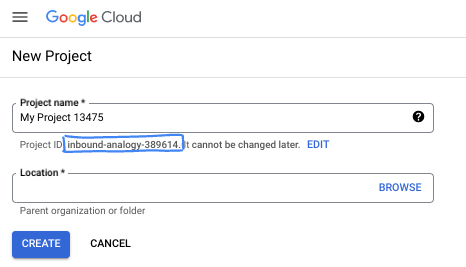
- 專案名稱是這個專案參與者的顯示名稱。Google API 不會使用專案名稱,且專案名稱可隨時變更。
- 專案 ID 在所有 Google Cloud 專案中不得重複,且設定後即無法變更。Google Cloud 控制台會自動產生專屬 ID,但您可以自訂 ID。如果不喜歡系統產生的 ID,可以產生另一個隨機 ID,或提供自己的 ID 並檢查是否可用。在大多數程式碼研究室中,您需要參照專案 ID,通常會以 PROJECT_ID 預留位置識別。
- 請注意,部分 API 會使用第三個值,也就是「專案編號」。如要進一步瞭解這三種值,請參閱說明文件。
啟用計費功能
如要啟用計費功能,有兩種方法。你可以使用個人帳單帳戶,也可以按照下列步驟兌換抵免額。
兌換 Google Cloud 抵免額 (選用)
如要參加這個研討會,您需要有具備抵免額的帳單帳戶。使用本程式碼研究室頂端橫幅中的抵免額,即可開始。如果已連結帳單帳戶,可以略過這個步驟。
設定個人帳單帳戶
如果使用 Google Cloud 抵免額設定計費,則可略過此步驟。
如要設定個人帳單帳戶,請前往這裡在 Cloud 控制台中啟用帳單功能。
注意事項:
- 完成本實驗室的雲端資源費用應不到 $3 美元。
- 您可以按照本實驗室結尾的步驟刪除資源,以免產生後續費用。
- 新使用者可獲得價值 $300 美元的免費試用期。
啟動 Cloud Shell
雖然可以透過筆電遠端操作 Google Cloud,但在本程式碼研究室中,您將使用 Google Cloud Shell,這是可在雲端執行的指令列環境。
在 Google Cloud 控制台中,點選右上角工具列的 Cloud Shell 圖示:

你也可以依序按下 G 和 S 鍵。如果您位於 Google Cloud 控制台中,或使用這個連結,這個序列會啟用 Cloud Shell。
佈建並連線至環境的作業需要一些時間才能完成。完成後,您應該會看到如下的內容:

這部虛擬機器搭載各種您需要的開發工具,並提供永久的 5GB 主目錄,而且可在 Google Cloud 運作,大幅提升網路效能並強化驗證功能。您可以在瀏覽器中完成本程式碼研究室的所有作業。您不需要安裝任何軟體。
3. 事前準備
啟用 API
輸出內容:
如要使用 AlloyDB、Compute Engine、網路服務和 Vertex AI,您需要在 Google Cloud 專案中啟用各自的 API。
啟用 API
在終端機的 Cloud Shell 中,確認專案 ID 已設定完畢:
gcloud config set project [YOUR-PROJECT-ID]
設定環境變數 PROJECT_ID:
PROJECT_ID=$(gcloud config get-value project)
啟用所有必要的 API:
gcloud services enable alloydb.googleapis.com \
                       compute.googleapis.com \
                       cloudresourcemanager.googleapis.com \
                       servicenetworking.googleapis.com \
                       aiplatform.googleapis.com
預期的輸出內容:
student@cloudshell:~ (test-project-001-402417)$ gcloud config set project test-project-001-402417
Updated property [core/project].
student@cloudshell:~ (test-project-001-402417)$ PROJECT_ID=$(gcloud config get-value project)
Your active configuration is: [cloudshell-14650]
student@cloudshell:~ (test-project-001-402417)$
student@cloudshell:~ (test-project-001-402417)$ gcloud services enable alloydb.googleapis.com \
                       compute.googleapis.com \
                       cloudresourcemanager.googleapis.com \
                       servicenetworking.googleapis.com \
                       aiplatform.googleapis.com
Operation "operations/acat.p2-4470404856-1f44ebd8-894e-4356-bea7-b84165a57442" finished successfully.
API 簡介
- AlloyDB API (
alloydb.googleapis.com) 可讓您建立、管理及擴充 AlloyDB for PostgreSQL 叢集。這項服務提供與 PostgreSQL 相容的全代管資料庫服務,專為要求嚴苛的企業交易和分析工作負載而設計。 - Compute Engine API (
compute.googleapis.com) 可讓您建立及管理虛擬機器 (VM)、永久磁碟和網路設定。這個服務提供執行工作負載所需的基礎架構即服務 (IaaS) 基礎,以及許多代管服務的基礎架構。 - Cloud Resource Manager API (
cloudresourcemanager.googleapis.com) 可讓您以程式輔助方式管理 Google Cloud 雲端專案的中繼資料和設定。您可以在專案階層中整理資源、處理 Identity and Access Management (IAM) 政策,以及驗證權限。 - Service Networking API (
servicenetworking.googleapis.com) 可讓您自動設定虛擬私有雲 (VPC) 網路與 Google 管理服務之間的私密連線。您必須啟用這項功能,才能為 AlloyDB 等服務建立私人 IP 存取權,確保服務能與其他資源安全通訊。 - Vertex AI API (
aiplatform.googleapis.com) 可讓應用程式建構、部署及擴充機器學習模型。這個平台提供統一的介面,方便您使用所有 Google Cloud AI 服務,包括存取生成式 AI 模型 (如 Gemini) 和模型訓練。
您也可以選擇設定預設區域,使用 Vertex AI 嵌入模型。進一步瞭解 Vertex AI 適用地區。本範例使用 us-central1 區域。
gcloud config set compute/region us-central1
4. 部署 AlloyDB
建立 AlloyDB 叢集前,我們需要虛擬私有雲中可用的私人 IP 範圍,供日後的 AlloyDB 執行個體使用。如果沒有,我們需要建立該帳戶,並指派給內部 Google 服務使用,之後才能建立叢集和執行個體。
建立私人 IP 範圍
我們需要在虛擬私有雲中為 AlloyDB 設定私人服務存取權。這裡的假設是專案中有「預設」虛擬私有雲網路,且所有動作都會使用這個網路。
建立私人 IP 範圍:
gcloud compute addresses create psa-range \
    --global \
    --purpose=VPC_PEERING \
    --prefix-length=24 \
    --description="VPC private service access" \
    --network=default
使用分配的 IP 範圍建立私人連線:
gcloud services vpc-peerings connect \
    --service=servicenetworking.googleapis.com \
    --ranges=psa-range \
    --network=default
預期的控制台輸出內容:
student@cloudshell:~ (test-project-402417)$ gcloud compute addresses create psa-range \
    --global \
    --purpose=VPC_PEERING \
    --prefix-length=24 \
    --description="VPC private service access" \
    --network=default
Created [https://www.googleapis.com/compute/v1/projects/test-project-402417/global/addresses/psa-range].

student@cloudshell:~ (test-project-402417)$ gcloud services vpc-peerings connect \
    --service=servicenetworking.googleapis.com \
    --ranges=psa-range \
    --network=default
Operation "operations/pssn.p24-4470404856-595e209f-19b7-4669-8a71-cbd45de8ba66" finished successfully.

student@cloudshell:~ (test-project-402417)$
建立 AlloyDB 叢集
在本節中,我們將在 us-central1 區域建立 AlloyDB 叢集。
定義 postgres 使用者的密碼。您可以自行定義密碼,也可以使用隨機函式產生密碼
export PGPASSWORD=`openssl rand -hex 12`
預期的控制台輸出內容:
student@cloudshell:~ (test-project-402417)$ export PGPASSWORD=`openssl rand -hex 12`
請記下 PostgreSQL 密碼,以供日後使用。
echo $PGPASSWORD
日後以 postgres 使用者身分連線至執行個體時,需要使用該密碼。建議您記下或複製這組代碼,以供日後使用。
預期的控制台輸出內容:
student@cloudshell:~ (test-project-402417)$ echo $PGPASSWORD
bbefbfde7601985b0dee5723
建立免費試用叢集
如果您從未使用過 AlloyDB,可以建立免費試用叢集:
定義區域和 AlloyDB 叢集名稱。我們將使用 us-central1 區域,並以 alloydb-aip-01 做為叢集名稱:
export REGION=us-central1
export ADBCLUSTER=alloydb-aip-01
執行指令來建立叢集:
gcloud alloydb clusters create $ADBCLUSTER \
    --password=$PGPASSWORD \
    --network=default \
    --region=$REGION \
    --subscription-type=TRIAL
預期的控制台輸出內容:
export REGION=us-central1
export ADBCLUSTER=alloydb-aip-01
gcloud alloydb clusters create $ADBCLUSTER \
    --password=$PGPASSWORD \
    --network=default \
    --region=$REGION \
    --subscription-type=TRIAL
Operation ID: operation-1697655441138-6080235852277-9e7f04f5-2012fce4
Creating cluster...done.
在同一個 Cloud Shell 工作階段中,為叢集建立 AlloyDB 主要執行個體。如果連線中斷,您需要再次定義區域和叢集名稱環境變數。
gcloud alloydb instances create $ADBCLUSTER-pr \
    --instance-type=PRIMARY \
    --cpu-count=8 \
    --region=$REGION \
    --cluster=$ADBCLUSTER
預期的控制台輸出內容:
student@cloudshell:~ (test-project-402417)$ gcloud alloydb instances create $ADBCLUSTER-pr \
    --instance-type=PRIMARY \
    --cpu-count=8 \
    --region=$REGION \
    --availability-type ZONAL \
    --cluster=$ADBCLUSTER
Operation ID: operation-1697659203545-6080315c6e8ee-391805db-25852721
Creating instance...done.
建立 AlloyDB Standard 叢集
如果這不是專案中的第一個 AlloyDB 叢集,請繼續建立標準叢集。
定義區域和 AlloyDB 叢集名稱。我們將使用 us-central1 區域,並以 alloydb-aip-01 做為叢集名稱:
export REGION=us-central1
export ADBCLUSTER=alloydb-aip-01
執行指令來建立叢集:
gcloud alloydb clusters create $ADBCLUSTER \
    --password=$PGPASSWORD \
    --network=default \
    --region=$REGION
預期的控制台輸出內容:
export REGION=us-central1
export ADBCLUSTER=alloydb-aip-01
gcloud alloydb clusters create $ADBCLUSTER \
    --password=$PGPASSWORD \
    --network=default \
    --region=$REGION
Operation ID: operation-1697655441138-6080235852277-9e7f04f5-2012fce4
Creating cluster...done.
在同一個 Cloud Shell 工作階段中,為叢集建立 AlloyDB 主要執行個體。如果連線中斷,您需要再次定義區域和叢集名稱環境變數。
gcloud alloydb instances create $ADBCLUSTER-pr \
    --instance-type=PRIMARY \
    --cpu-count=2 \
    --region=$REGION \
    --cluster=$ADBCLUSTER
預期的控制台輸出內容:
student@cloudshell:~ (test-project-402417)$ gcloud alloydb instances create $ADBCLUSTER-pr \
    --instance-type=PRIMARY \
    --cpu-count=2 \
    --region=$REGION \
    --availability-type ZONAL \
    --cluster=$ADBCLUSTER
Operation ID: operation-1697659203545-6080315c6e8ee-391805db-25852721
Creating instance...done.
5. 連線至 AlloyDB
AlloyDB 是透過僅限私人的連線部署,因此我們需要安裝 PostgreSQL 用戶端的虛擬機器,才能使用資料庫。
部署 GCE VM
在與 AlloyDB 叢集相同的區域和 VPC 中建立 GCE VM。
在 Cloud Shell 中執行下列指令:
export ZONE=us-central1-a
gcloud compute instances create instance-1 \
    --zone=$ZONE \
    --create-disk=auto-delete=yes,boot=yes,image=projects/debian-cloud/global/images/$(gcloud compute images list --filter="family=debian-12 AND family!=debian-12-arm64" --format="value(name)") \
    --scopes=https://www.googleapis.com/auth/cloud-platform
預期的控制台輸出內容:
student@cloudshell:~ (test-project-402417)$ export ZONE=us-central1-a
student@cloudshell:~ (test-project-402417)$ export ZONE=us-central1-a
gcloud compute instances create instance-1 \
    --zone=$ZONE \
    --create-disk=auto-delete=yes,boot=yes,image=projects/debian-cloud/global/images/$(gcloud compute images list --filter="family=debian-12 AND family!=debian-12-arm64" --format="value(name)") \
    --scopes=https://www.googleapis.com/auth/cloud-platform

Created [https://www.googleapis.com/compute/v1/projects/test-project-402417/zones/us-central1-a/instances/instance-1].
NAME: instance-1
ZONE: us-central1-a
MACHINE_TYPE: n1-standard-1
PREEMPTIBLE:
INTERNAL_IP: 10.128.0.2
EXTERNAL_IP: 34.71.192.233
STATUS: RUNNING
安裝 Postgres 用戶端
在已部署的 VM 上安裝 PostgreSQL 用戶端軟體
連線至 VM:
gcloud compute ssh instance-1 --zone=us-central1-a
預期的控制台輸出內容:
student@cloudshell:~ (test-project-402417)$ gcloud compute ssh instance-1 --zone=us-central1-a
Updating project ssh metadata...working..Updated [https://www.googleapis.com/compute/v1/projects/test-project-402417].
Updating project ssh metadata...done.
Waiting for SSH key to propagate.
Warning: Permanently added 'compute.5110295539541121102' (ECDSA) to the list of known hosts.
Linux instance-1.us-central1-a.c.gleb-test-short-001-418811.internal 6.1.0-18-cloud-amd64 #1 SMP PREEMPT_DYNAMIC Debian 6.1.76-1 (2024-02-01) x86_64

The programs included with the Debian GNU/Linux system are free software;
the exact distribution terms for each program are described in the
individual files in /usr/share/doc/*/copyright.

Debian GNU/Linux comes with ABSOLUTELY NO WARRANTY, to the extent
permitted by applicable law.
student@instance-1:~$
在 VM 內執行下列指令,安裝軟體:
sudo apt-get update
sudo apt-get install --yes postgresql-client
預期的控制台輸出內容:
student@instance-1:~$ sudo apt-get update
sudo apt-get install --yes postgresql-client
Get:1 https://packages.cloud.google.com/apt google-compute-engine-bullseye-stable InRelease [5146 B]
Get:2 https://packages.cloud.google.com/apt cloud-sdk-bullseye InRelease [6406 B]
Hit:3 https://deb.debian.org/debian bullseye InRelease
Get:4 https://deb.debian.org/debian-security bullseye-security InRelease [48.4 kB]
Get:5 https://packages.cloud.google.com/apt google-compute-engine-bullseye-stable/main amd64 Packages [1930 B]
Get:6 https://deb.debian.org/debian bullseye-updates InRelease [44.1 kB]
Get:7 https://deb.debian.org/debian bullseye-backports InRelease [49.0 kB]
...redacted...
update-alternatives: using /usr/share/postgresql/13/man/man1/psql.1.gz to provide /usr/share/man/man1/psql.1.gz (psql.1.gz) in auto mode
Setting up postgresql-client (13+225) ...
Processing triggers for man-db (2.9.4-2) ...
Processing triggers for libc-bin (2.31-13+deb11u7) ...
連線至執行個體
使用 psql 從 VM 連線至主要執行個體。
在同一個 Cloud Shell 分頁中,開啟連往 instance-1 VM 的 SSH 工作階段。
使用記下的 AlloyDB 密碼 (PGPASSWORD) 值和 AlloyDB 叢集 ID,從 GCE VM 連線至 AlloyDB:
export PGPASSWORD=<Noted password>
export PROJECT_ID=$(gcloud config get-value project)
export REGION=us-central1
export ADBCLUSTER=alloydb-aip-01
export INSTANCE_IP=$(gcloud alloydb instances describe $ADBCLUSTER-pr --cluster=$ADBCLUSTER --region=$REGION --format="value(ipAddress)")
psql "host=$INSTANCE_IP user=postgres sslmode=require"
預期的控制台輸出內容:
student@instance-1:~$ export PGPASSWORD=CQhOi5OygD4ps6ty
student@instance-1:~$ ADBCLUSTER=alloydb-aip-01
student@instance-1:~$ REGION=us-central1
student@instance-1:~$ INSTANCE_IP=$(gcloud alloydb instances describe $ADBCLUSTER-pr --cluster=$ADBCLUSTER --region=$REGION --format="value(ipAddress)")
gleb@instance-1:~$ psql "host=$INSTANCE_IP user=postgres sslmode=require"
psql (15.6 (Debian 15.6-0+deb12u1), server 15.5)
SSL connection (protocol: TLSv1.3, cipher: TLS_AES_256_GCM_SHA384, compression: off)
Type "help" for help.

postgres=>
關閉 psql 工作階段:
exit
6. 準備資料庫
我們需要建立資料庫、啟用 Vertex AI 整合功能、建立資料庫物件,以及匯入資料。
授予 AlloyDB 必要權限
為 AlloyDB 服務代理新增 Vertex AI 權限。
使用頂端的「+」符號開啟另一個 Cloud Shell 分頁。
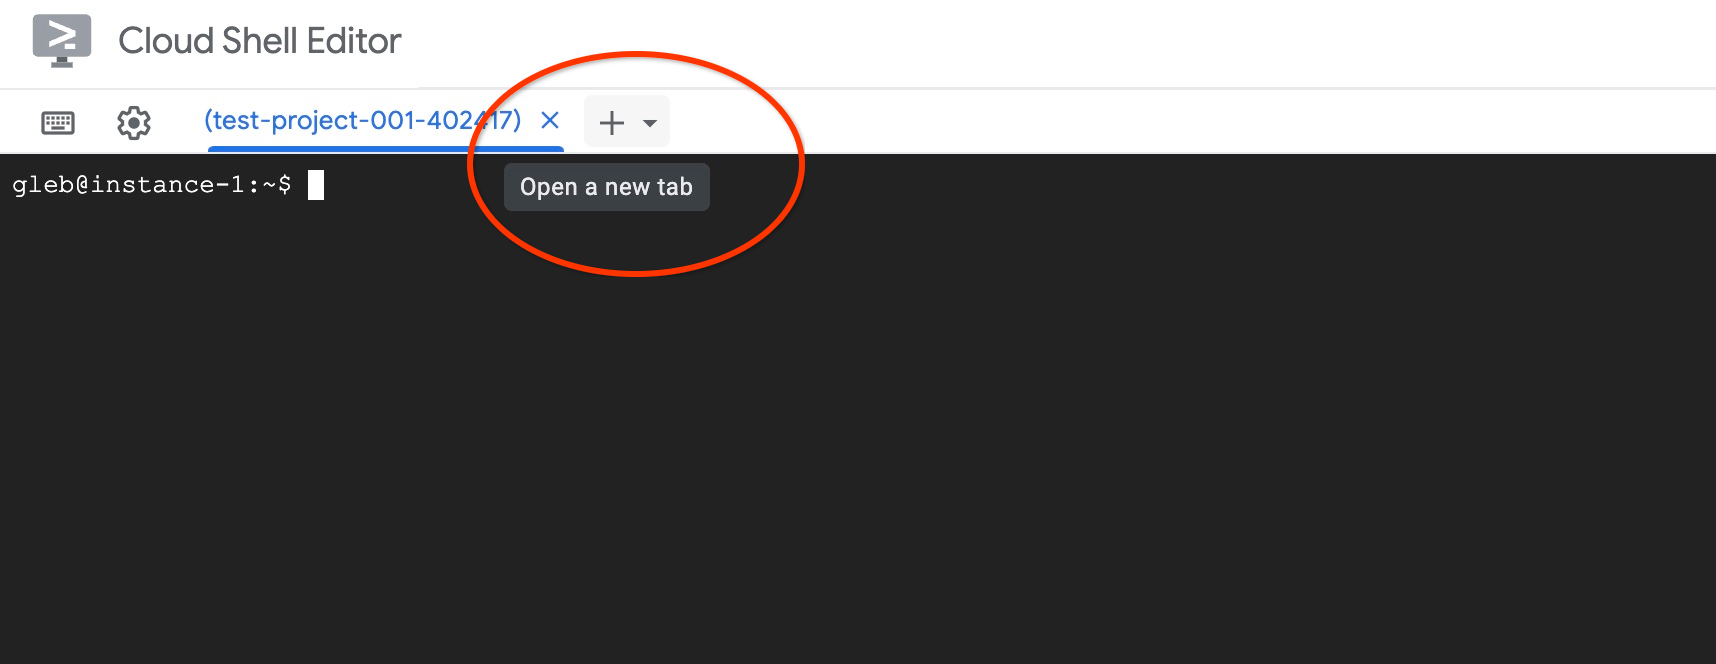
在新開啟的 Cloud Shell 分頁中執行下列指令:
PROJECT_ID=$(gcloud config get-value project)
gcloud projects add-iam-policy-binding $PROJECT_ID \
  --member="serviceAccount:service-$(gcloud projects describe $PROJECT_ID --format="value(projectNumber)")@gcp-sa-alloydb.iam.gserviceaccount.com" \
  --role="roles/aiplatform.user"
預期的控制台輸出內容:
student@cloudshell:~ (test-project-001-402417)$ PROJECT_ID=$(gcloud config get-value project)
Your active configuration is: [cloudshell-11039]
student@cloudshell:~ (test-project-001-402417)$ gcloud projects add-iam-policy-binding $PROJECT_ID \
  --member="serviceAccount:service-$(gcloud projects describe $PROJECT_ID --format="value(projectNumber)")@gcp-sa-alloydb.iam.gserviceaccount.com" \
  --role="roles/aiplatform.user"
Updated IAM policy for project [test-project-001-402417].
bindings:
- members:
  - serviceAccount:service-4470404856@gcp-sa-alloydb.iam.gserviceaccount.com
  role: roles/aiplatform.user
- members:
...
etag: BwYIEbe_Z3U=
version: 1
在分頁中執行「exit」指令,關閉分頁:
exit
建立資料庫
建立資料庫快速入門。
在 GCE VM 工作階段中執行下列指令:
建立資料庫:
psql "host=$INSTANCE_IP user=postgres" -c "CREATE DATABASE quickstart_db"
預期的控制台輸出內容:
student@instance-1:~$ psql "host=$INSTANCE_IP user=postgres" -c "CREATE DATABASE quickstart_db"
CREATE DATABASE
student@instance-1:~$
啟用 Vertex AI 整合功能
在資料庫中啟用 Vertex AI 整合功能和 pgvector 擴充功能。
在 GCE VM 中執行下列指令:
psql "host=$INSTANCE_IP user=postgres dbname=quickstart_db" -c "CREATE EXTENSION IF NOT EXISTS google_ml_integration CASCADE"
psql "host=$INSTANCE_IP user=postgres dbname=quickstart_db" -c "CREATE EXTENSION IF NOT EXISTS vector"
預期的控制台輸出內容:
student@instance-1:~$ psql "host=$INSTANCE_IP user=postgres dbname=quickstart_db" -c "CREATE EXTENSION IF NOT EXISTS google_ml_integration CASCADE"
psql "host=$INSTANCE_IP user=postgres dbname=quickstart_db" -c "CREATE EXTENSION IF NOT EXISTS vector"
CREATE EXTENSION
CREATE EXTENSION
student@instance-1:~$
匯入資料
下載準備好的資料,然後匯入新資料庫。
在 GCE VM 中執行下列指令:
gcloud storage cat gs://cloud-training/gcc/gcc-tech-004/cymbal_demo_schema.sql |psql "host=$INSTANCE_IP user=postgres dbname=quickstart_db"
gcloud storage cat gs://cloud-training/gcc/gcc-tech-004/cymbal_products.csv |psql "host=$INSTANCE_IP user=postgres dbname=quickstart_db" -c "\copy cymbal_products from stdin csv header"
gcloud storage cat gs://cloud-training/gcc/gcc-tech-004/cymbal_inventory.csv |psql "host=$INSTANCE_IP user=postgres dbname=quickstart_db" -c "\copy cymbal_inventory from stdin csv header"
gcloud storage cat gs://cloud-training/gcc/gcc-tech-004/cymbal_stores.csv |psql "host=$INSTANCE_IP user=postgres dbname=quickstart_db" -c "\copy cymbal_stores from stdin csv header"
預期的控制台輸出內容:
student@instance-1:~$ gsutil cat gs://cloud-training/gcc/gcc-tech-004/cymbal_demo_schema.sql |psql "host=$INSTANCE_IP user=postgres dbname=quickstart_db"
SET
SET
SET
SET
SET
 set_config
------------

(1 row)
SET
SET
SET
SET
SET
SET
CREATE TABLE
ALTER TABLE
CREATE TABLE
ALTER TABLE
CREATE TABLE
ALTER TABLE
CREATE TABLE
ALTER TABLE
CREATE SEQUENCE
ALTER TABLE
ALTER SEQUENCE
ALTER TABLE
ALTER TABLE
ALTER TABLE
student@instance-1:~$ gsutil cat gs://cloud-training/gcc/gcc-tech-004/cymbal_products.csv |psql "host=$INSTANCE_IP user=postgres dbname=quickstart_db" -c "\copy cymbal_products from stdin csv header"
COPY 941
student@instance-1:~$ gsutil cat gs://cloud-training/gcc/gcc-tech-004/cymbal_inventory.csv |psql "host=$INSTANCE_IP user=postgres dbname=quickstart_db" -c "\copy cymbal_inventory from stdin csv header"
COPY 263861
student@instance-1:~$ gsutil cat gs://cloud-training/gcc/gcc-tech-004/cymbal_stores.csv |psql "host=$INSTANCE_IP user=postgres dbname=quickstart_db" -c "\copy cymbal_stores from stdin csv header"
COPY 4654
student@instance-1:~$
7. 計算嵌入
匯入資料後,我們在 cymbal_products 表格中取得產品資料,在 cymbal_inventory 表格中取得各商店的可用產品數量,並在 cymbal_stores 表格中取得商店清單。我們需要根據產品說明計算向量資料,並使用 embedding 函式。我們將使用這個函式,透過 Vertex AI 整合功能,根據產品說明計算向量資料,並將資料新增至表格。如要進一步瞭解使用的技術,請參閱說明文件。
產生幾列的資料很容易,但如果資料有數千列,該如何有效率地產生?接下來,我將說明如何為大型資料表產生及管理嵌入。如要進一步瞭解不同選項和技術,請參閱指南。
啟用快速生成嵌入項目
使用 AlloyDB 執行個體 IP 和 postgres 密碼,從 VM 透過 psql 連線至資料庫:
psql "host=$INSTANCE_IP user=postgres dbname=quickstart_db"
確認 google_ml_integration 擴充功能版本。
SELECT extversion FROM pg_extension WHERE extname = 'google_ml_integration';
版本必須為 1.5.2 以上。以下是輸出內容範例:
quickstart_db=> SELECT extversion FROM pg_extension WHERE extname = 'google_ml_integration';
 extversion
------------
 1.5.2
(1 row)
預設版本應為 1.5.2 以上,但如果執行個體顯示較舊的版本,可能需要更新。檢查執行個體是否已停用維護作業。
接著,我們需要驗證資料庫旗標。我們需要啟用 google_ml_integration.enable_faster_embedding_generation 旗標。在同一個 psql 工作階段中,檢查旗標的值。
show google_ml_integration.enable_faster_embedding_generation;
如果旗標位置正確,預期輸出內容如下:
quickstart_db=> show google_ml_integration.enable_faster_embedding_generation;
 google_ml_integration.enable_faster_embedding_generation
----------------------------------------------------------
 on
(1 row)
但如果顯示「off」,則需要更新執行個體。如說明文件所述,您可以使用網頁版控制台或 gcloud 指令執行這項操作。以下說明如何使用 gcloud 指令執行這項操作:
export PROJECT_ID=$(gcloud config get-value project)
export REGION=us-central1
export ADBCLUSTER=alloydb-aip-01
gcloud beta alloydb instances update $ADBCLUSTER-pr \
   --database-flags google_ml_integration.enable_faster_embedding_generation=on \
   --region=$REGION \
   --cluster=$ADBCLUSTER \
   --project=$PROJECT_ID \
   --update-mode=FORCE_APPLY
這可能需要幾分鐘,但最終標記值應會切換為「開啟」。完成後即可繼續進行後續步驟。
建立嵌入欄
使用 psql 連線至資料庫,並在 cymbal_products 資料表中,使用嵌入函式建立含有向量資料的虛擬資料欄。嵌入函式會根據 product_description 欄提供的資料,從 Vertex AI 傳回向量資料。
psql "host=$INSTANCE_IP user=postgres dbname=quickstart_db"
連線至資料庫後,在 psql 工作階段中執行:
ALTER TABLE cymbal_products ADD COLUMN embedding vector(768);
這項指令會建立虛擬資料欄,並填入向量資料。
預期的控制台輸出內容:
quickstart_db=> ALTER TABLE cymbal_products ADD COLUMN embedding vector(768);
ALTER TABLE
quickstart_db=>
現在,我們可以透過批次作業產生嵌入內容,每批 50 列。您可以嘗試不同的批次大小,看看執行時間是否會有所變化。在同一個 psql 工作階段中執行下列指令:
啟用計時功能,測量所需時間:
\timing
執行下列指令:
CALL ai.initialize_embeddings(
    model_id => 'text-embedding-005',
    table_name => 'cymbal_products',
    content_column => 'product_description',
    embedding_column => 'embedding',
    batch_size => 50
);
主控台輸出內容顯示,產生嵌入內容的時間不到 2 秒:
quickstart_db=> CALL ai.initialize_embeddings(
    model_id => 'text-embedding-005',
    table_name => 'cymbal_products',
    content_column => 'product_description',
    embedding_column => 'embedding',
    batch_size => 50
);
NOTICE:  Initialize embedding completed successfully for table cymbal_products
CALL
Time: 1458.704 ms (00:01.459)
quickstart_db=>
根據預設,如果對應的 product_description 欄位更新,或插入全新資料列,系統不會重新整理嵌入內容。但您可以定義 incremental_refresh_mode 參數來完成這項操作。讓我們建立「product_embeddings」product_embeddings欄,並設為自動更新。
ALTER TABLE cymbal_products ADD COLUMN product_embedding vector(768);
CALL ai.initialize_embeddings(
    model_id => 'text-embedding-005',
    table_name => 'cymbal_products',
    content_column => 'product_description',
    embedding_column => 'product_embedding',
    batch_size => 50,
    incremental_refresh_mode => 'transactional'
);
現在,如果我們在表格中插入新資料列。
INSERT INTO "cymbal_products" ("uniq_id", "crawl_timestamp", "product_url", "product_name", "product_description", "list_price", "sale_price", "brand", "item_number", "gtin", "package_size", "category", "postal_code", "available", "product_embedding", "embedding") VALUES ('fd604542e04b470f9e6348e640cff794', NOW(), 'https://example.com/new_product', 'New Cymbal Product', 'This is a new cymbal product description.', 199.99, 149.99, 'Example Brand', 'EB123', '1234567890', 'Single', 'Cymbals', '12345', TRUE, NULL, NULL);
我們可以透過下列查詢,比較資料欄的差異:
SELECT uniq_id,embedding, (product_embedding::real[])[1:5] as product_embedding FROM cymbal_products WHERE uniq_id='fd604542e04b470f9e6348e640cff794';
在輸出內容中,我們可以看到「embedding」欄位保持空白,「product_embedding」欄位則自動更新
quickstart_db=> SELECT uniq_id,embedding, (product_embedding::real[])[1:5] as product_embedding  FROM cymbal_products WHERE uniq_id='fd604542e04b470f9e6348e640cff794';
             uniq_id              | embedding |                       product_embedding
----------------------------------+-----------+---------------------------------------------------------------
 fd604542e04b470f9e6348e640cff794 |           | {0.015003494,-0.005349732,-0.059790313,-0.0087091,-0.0271452}
(1 row)

Time: 3.295 ms
8. 執行相似度搜尋
現在,我們可以根據說明計算出的向量值,以及要求取得的向量值,使用相似度搜尋執行搜尋。
您可以從相同的 psql 指令列介面執行 SQL 查詢,也可以使用 AlloyDB Studio。任何多列和複雜的輸出內容在 AlloyDB Studio 中可能看起來會更好。
連線至 AlloyDB Studio
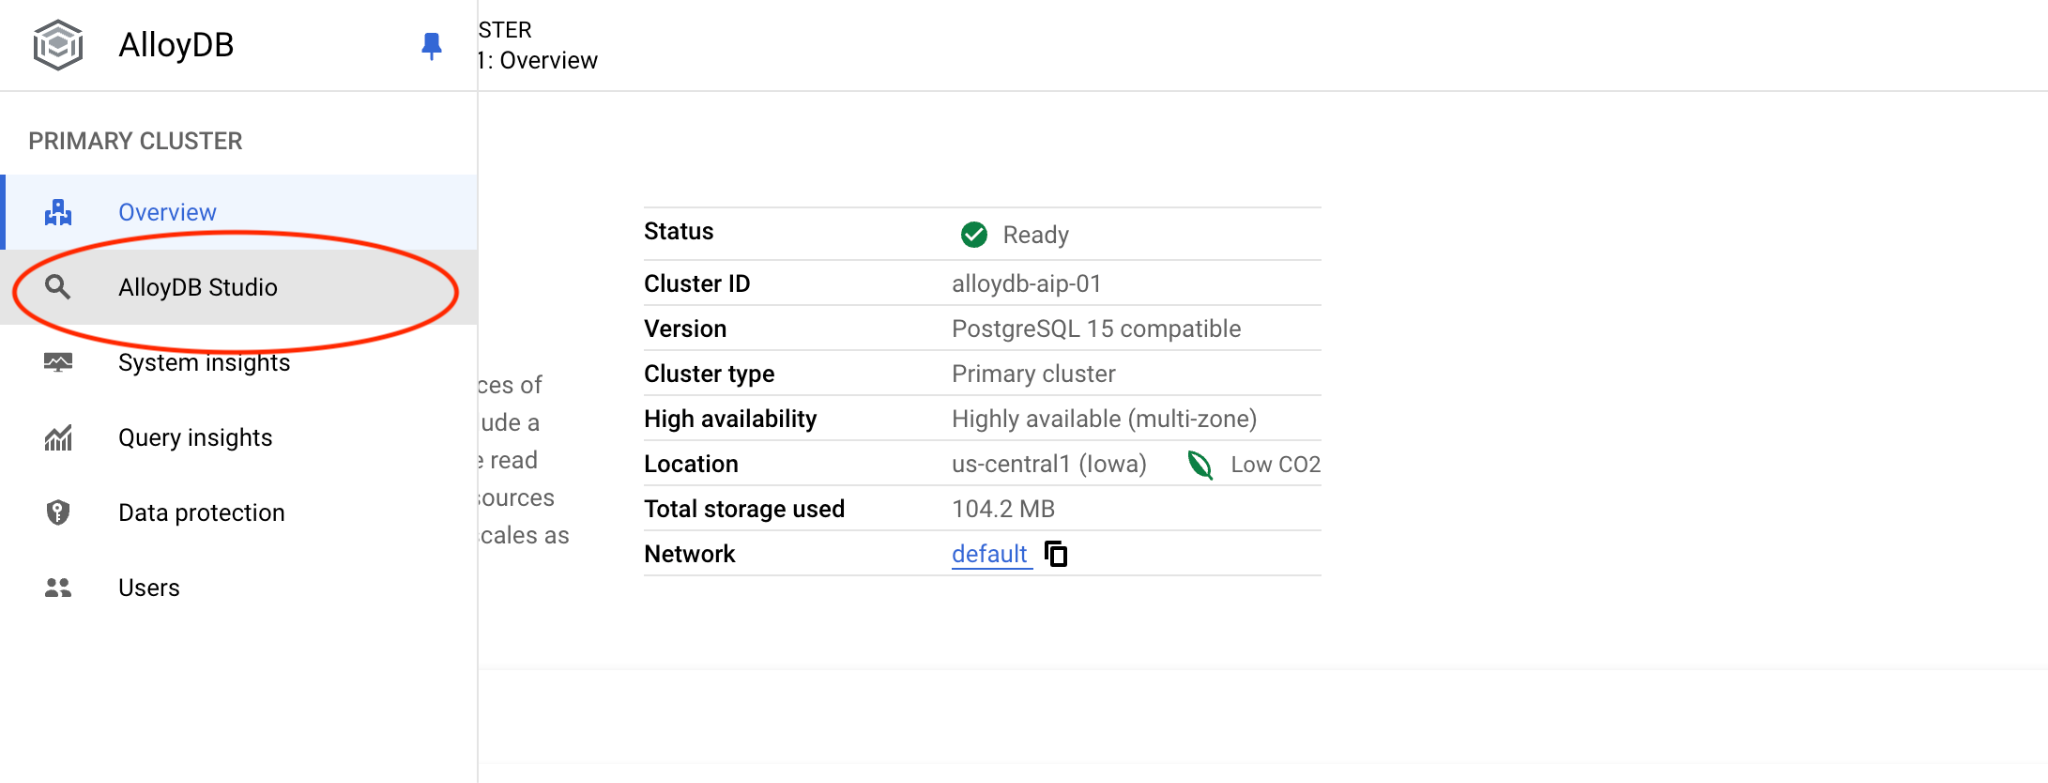
在後續章節中,所有需要連線至資料庫的 SQL 指令,都可以在 AlloyDB Studio 中執行。如要執行指令,請按一下主要執行個體,開啟 AlloyDB 叢集的網頁控制台介面。
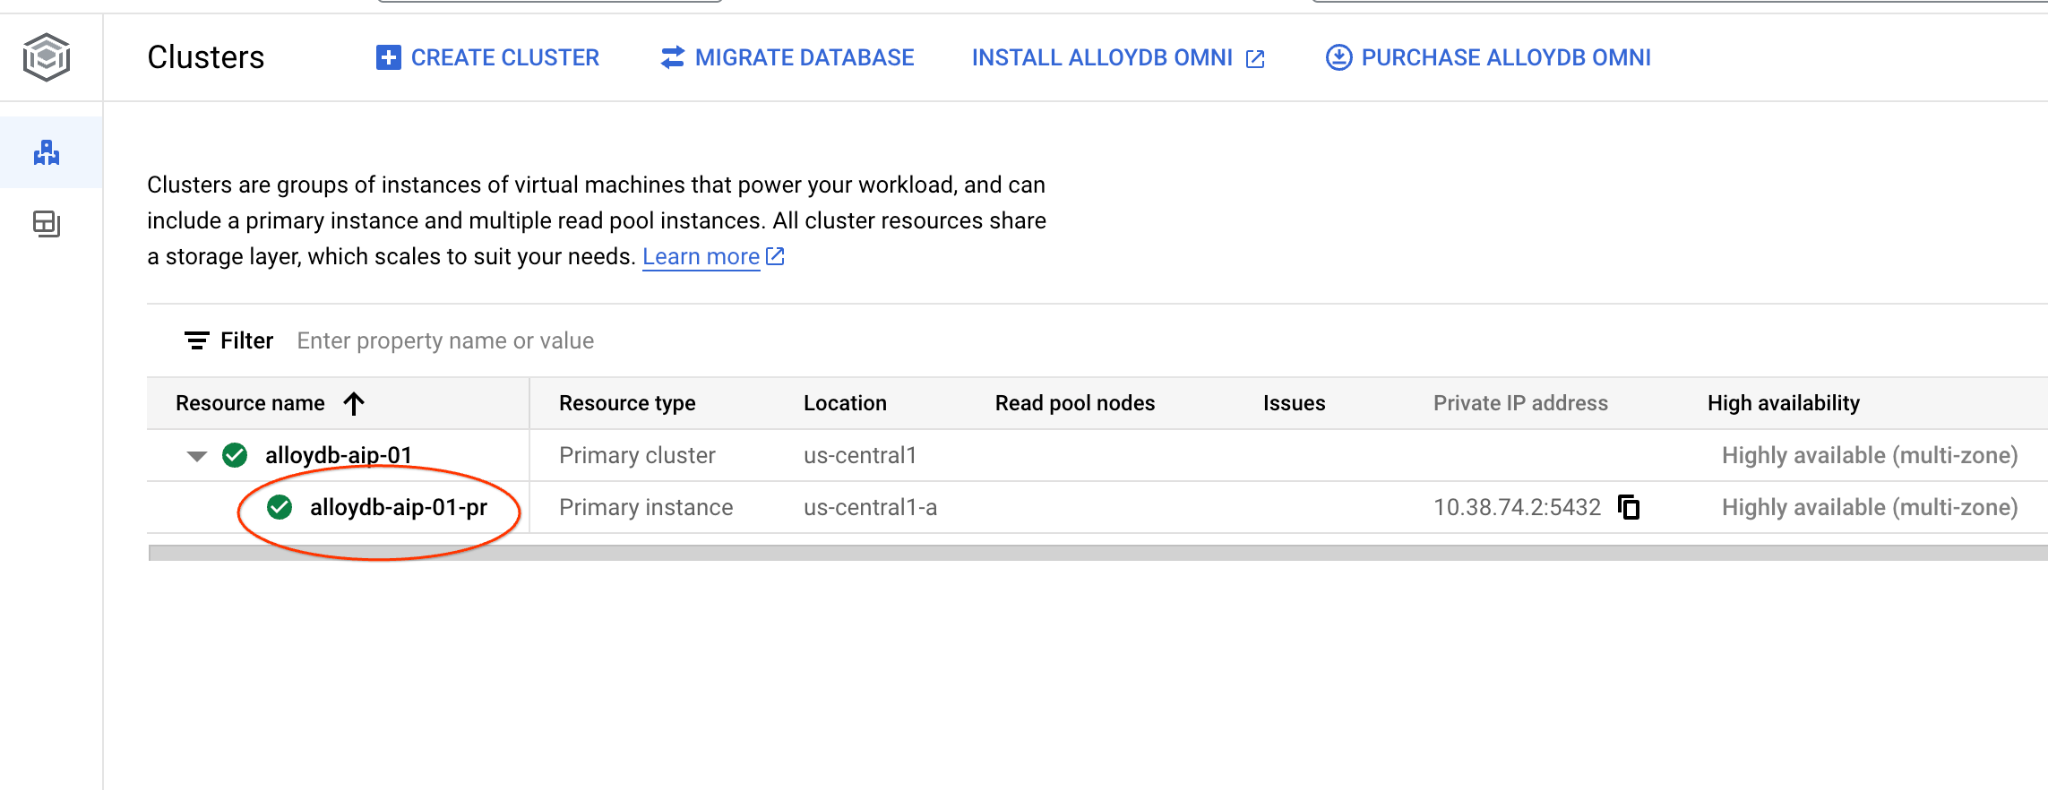
然後按一下左側的 AlloyDB Studio:
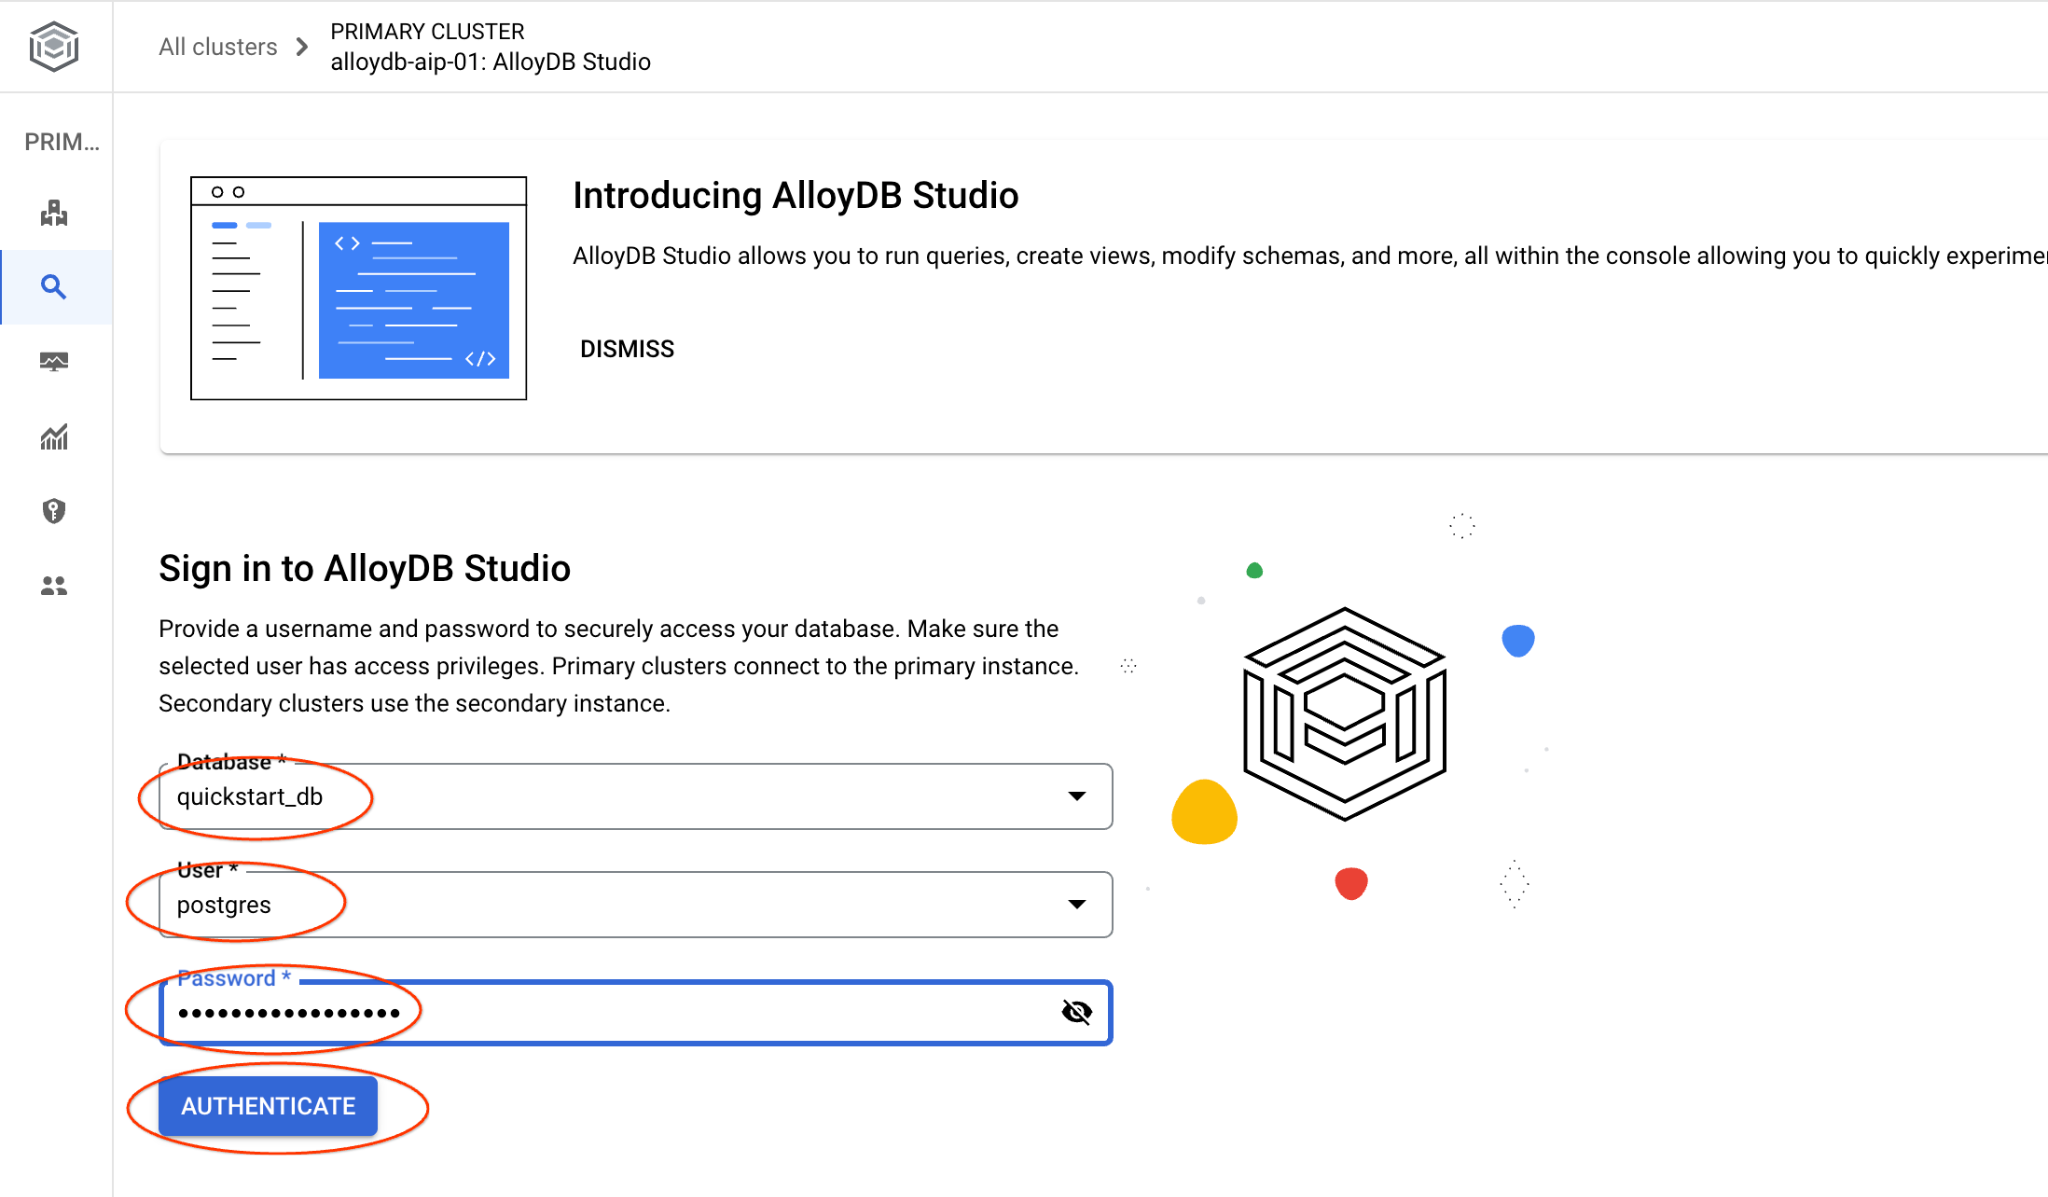
選擇 quickstart_db 資料庫和使用者 postgres,並提供建立叢集時記下的密碼。然後按一下「驗證」按鈕。
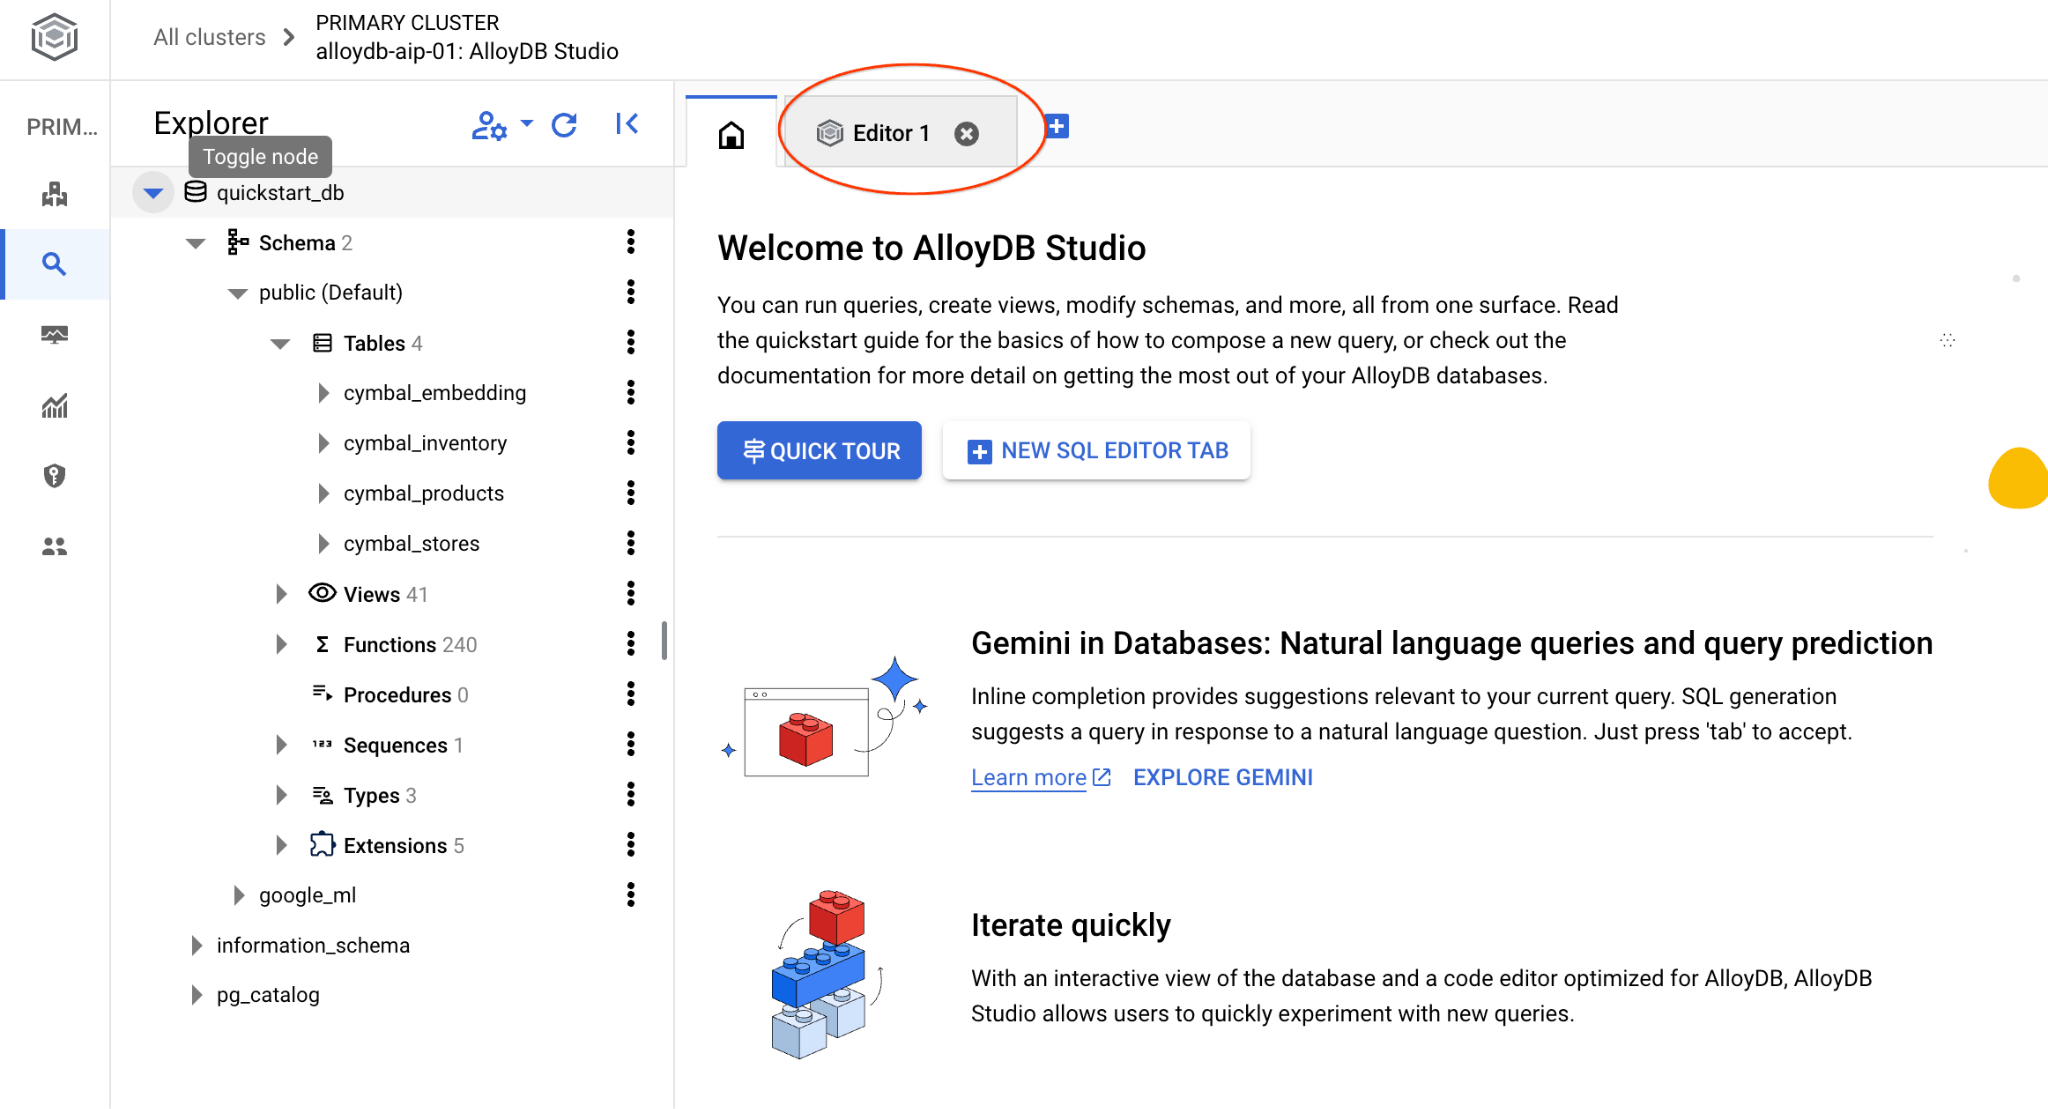
AlloyDB Studio 介面隨即開啟。如要在資料庫中執行指令,請點選右側的「編輯器 1」分頁。
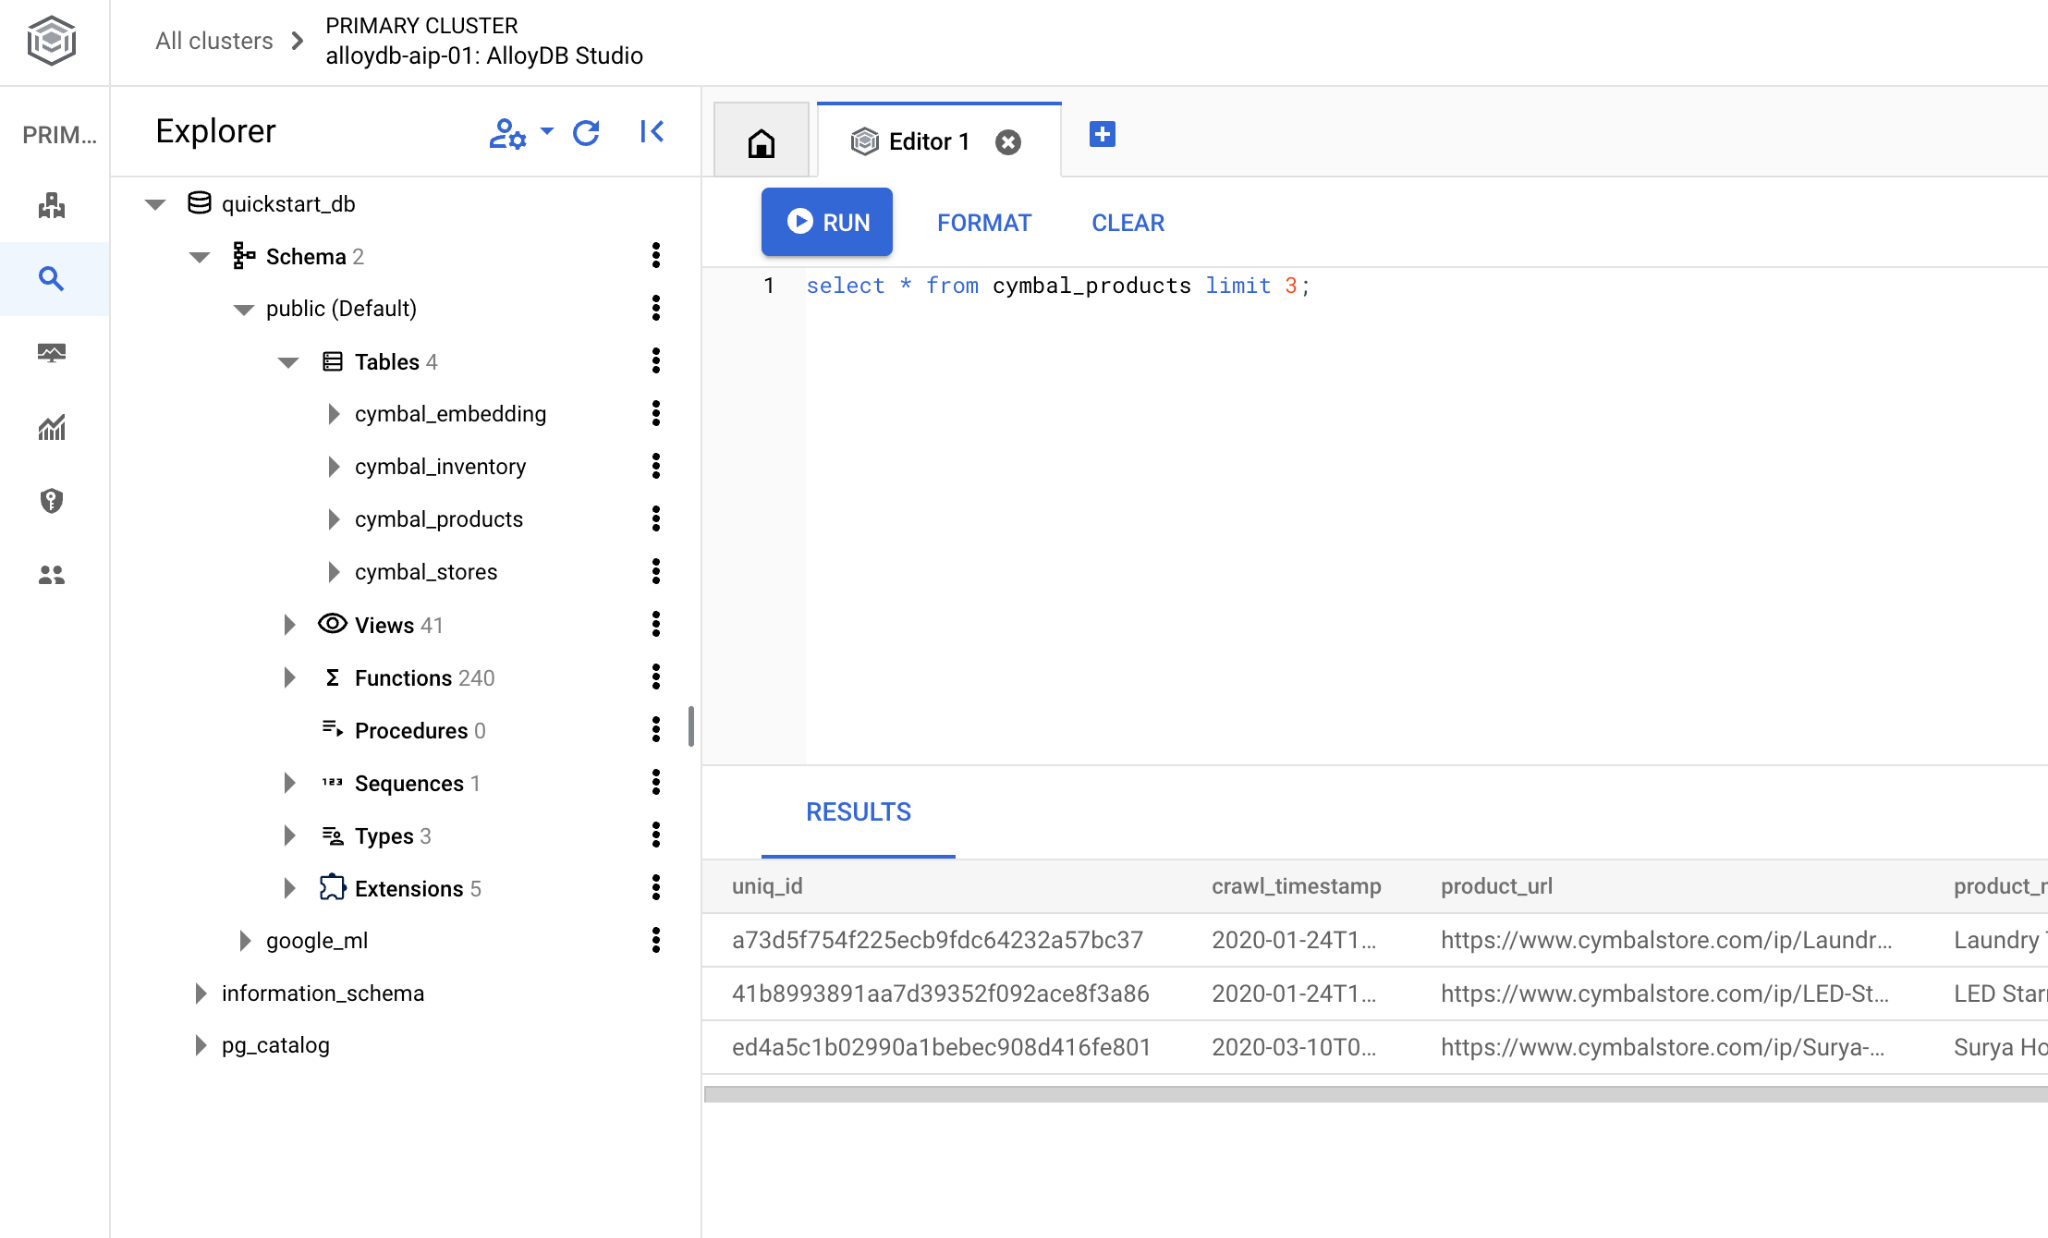
系統會開啟介面,供您執行 SQL 指令
如果您偏好使用 psql 指令列,請按照替代路徑操作,並從 VM SSH 工作階段連線至資料庫,如先前章節所述。
從 psql 執行相似度搜尋
如果資料庫工作階段已中斷連線,請使用 psql 或 AlloyDB Studio 重新連線至資料庫。
連線至資料庫:
psql "host=$INSTANCE_IP user=postgres dbname=quickstart_db"
執行查詢,取得與客戶要求最相關的可用產品清單。我們要傳遞給 Vertex AI 的要求是「這裡適合種植哪種果樹?」,藉此取得向量值。
以下是您可以執行的查詢,選取最適合我們要求的 10 個項目:
SELECT
        cp.product_name,
        left(cp.product_description,80) as description,
        cp.sale_price,
        cs.zip_code,
        (cp.embedding <=> embedding('text-embedding-005','What kind of fruit trees grow well here?')::vector) as distance
FROM
        cymbal_products cp
JOIN cymbal_inventory ci on
        ci.uniq_id=cp.uniq_id
JOIN cymbal_stores cs on
        cs.store_id=ci.store_id
        AND ci.inventory>0
        AND cs.store_id = 1583
ORDER BY
        distance ASC
LIMIT 10;
預期的輸出內容如下:
quickstart_db=> SELECT
        cp.product_name,
        left(cp.product_description,80) as description,
        cp.sale_price,
        cs.zip_code,
        (cp.embedding <=> embedding('text-embedding-005','What kind of fruit trees grow well here?')::vector) as distance
FROM
        cymbal_products cp
JOIN cymbal_inventory ci on
        ci.uniq_id=cp.uniq_id
JOIN cymbal_stores cs on
        cs.store_id=ci.store_id
        AND ci.inventory>0
        AND cs.store_id = 1583
ORDER BY
        distance ASC
LIMIT 10;
      product_name       |                                   description                                    | sale_price | zip_code |      distance
-------------------------+----------------------------------------------------------------------------------+------------+----------+---------------------
 Cherry Tree             | This is a beautiful cherry tree that will produce delicious cherries. It is an d |      75.00 |    93230 | 0.43922018972266397
 Meyer Lemon Tree        | Meyer Lemon trees are California's favorite lemon tree! Grow your own lemons by  |         34 |    93230 |  0.4685112926118228
 Toyon                   | This is a beautiful toyon tree that can grow to be over 20 feet tall. It is an e |      10.00 |    93230 |  0.4835677149651668
 California Lilac        | This is a beautiful lilac tree that can grow to be over 10 feet tall. It is an d |       5.00 |    93230 |  0.4947204525907498
 California Peppertree   | This is a beautiful peppertree that can grow to be over 30 feet tall. It is an e |      25.00 |    93230 |  0.5054166905547247
 California Black Walnut | This is a beautiful walnut tree that can grow to be over 80 feet tall. It is a d |     100.00 |    93230 |  0.5084219510932597
 California Sycamore     | This is a beautiful sycamore tree that can grow to be over 100 feet tall. It is  |     300.00 |    93230 |  0.5140519790508755
 Coast Live Oak          | This is a beautiful oak tree that can grow to be over 100 feet tall. It is an ev |     500.00 |    93230 |  0.5143126438081371
 Fremont Cottonwood      | This is a beautiful cottonwood tree that can grow to be over 100 feet tall. It i |     200.00 |    93230 |  0.5174774727252058
 Madrone                 | This is a beautiful madrona tree that can grow to be over 80 feet tall. It is an |      50.00 |    93230 |  0.5227400803389093
9. 改善回覆內容
您可以運用查詢結果改善用戶端應用程式的回應,並將提供的查詢結果做為提示的一部分,傳送給 Vertex AI 生成式基礎語言模型,準備有意義的輸出內容。
為此,我們打算從向量搜尋結果產生 JSON,然後將產生的 JSON 新增至 Vertex AI 中文字 LLM 模型的提示,藉此建立有意義的輸出內容。首先,我們會產生 JSON,然後在 Vertex AI Studio 中測試,最後將其併入 SQL 陳述式,以便在應用程式中使用。
以 JSON 格式產生輸出內容
修改查詢,以 JSON 格式產生輸出內容,並只傳回一個資料列,以便傳遞至 Vertex AI
查詢範例如下:
WITH trees as (
SELECT
        cp.product_name,
        left(cp.product_description,80) as description,
        cp.sale_price,
        cs.zip_code,
        cp.uniq_id as product_id
FROM
        cymbal_products cp
JOIN cymbal_inventory ci on
        ci.uniq_id=cp.uniq_id
JOIN cymbal_stores cs on
        cs.store_id=ci.store_id
        AND ci.inventory>0
        AND cs.store_id = 1583
ORDER BY
        (cp.embedding <=> embedding('text-embedding-005','What kind of fruit trees grow well here?')::vector) ASC
LIMIT 1)
SELECT json_agg(trees) FROM trees;
以下是預期的 JSON 輸出內容:
[{"product_name":"Cherry Tree","description":"This is a beautiful cherry tree that will produce delicious cherries. It is an d","sale_price":75.00,"zip_code":93230,"product_id":"d536e9e823296a2eba198e52dd23e712"}]
在 Vertex AI Studio 中執行提示
我們可以將產生的 JSON 做為提示的一部分,提供給 Vertex AI Studio 中的生成式 AI 文字模型
在 Cloud 控制台中開啟 Vertex AI Studio。
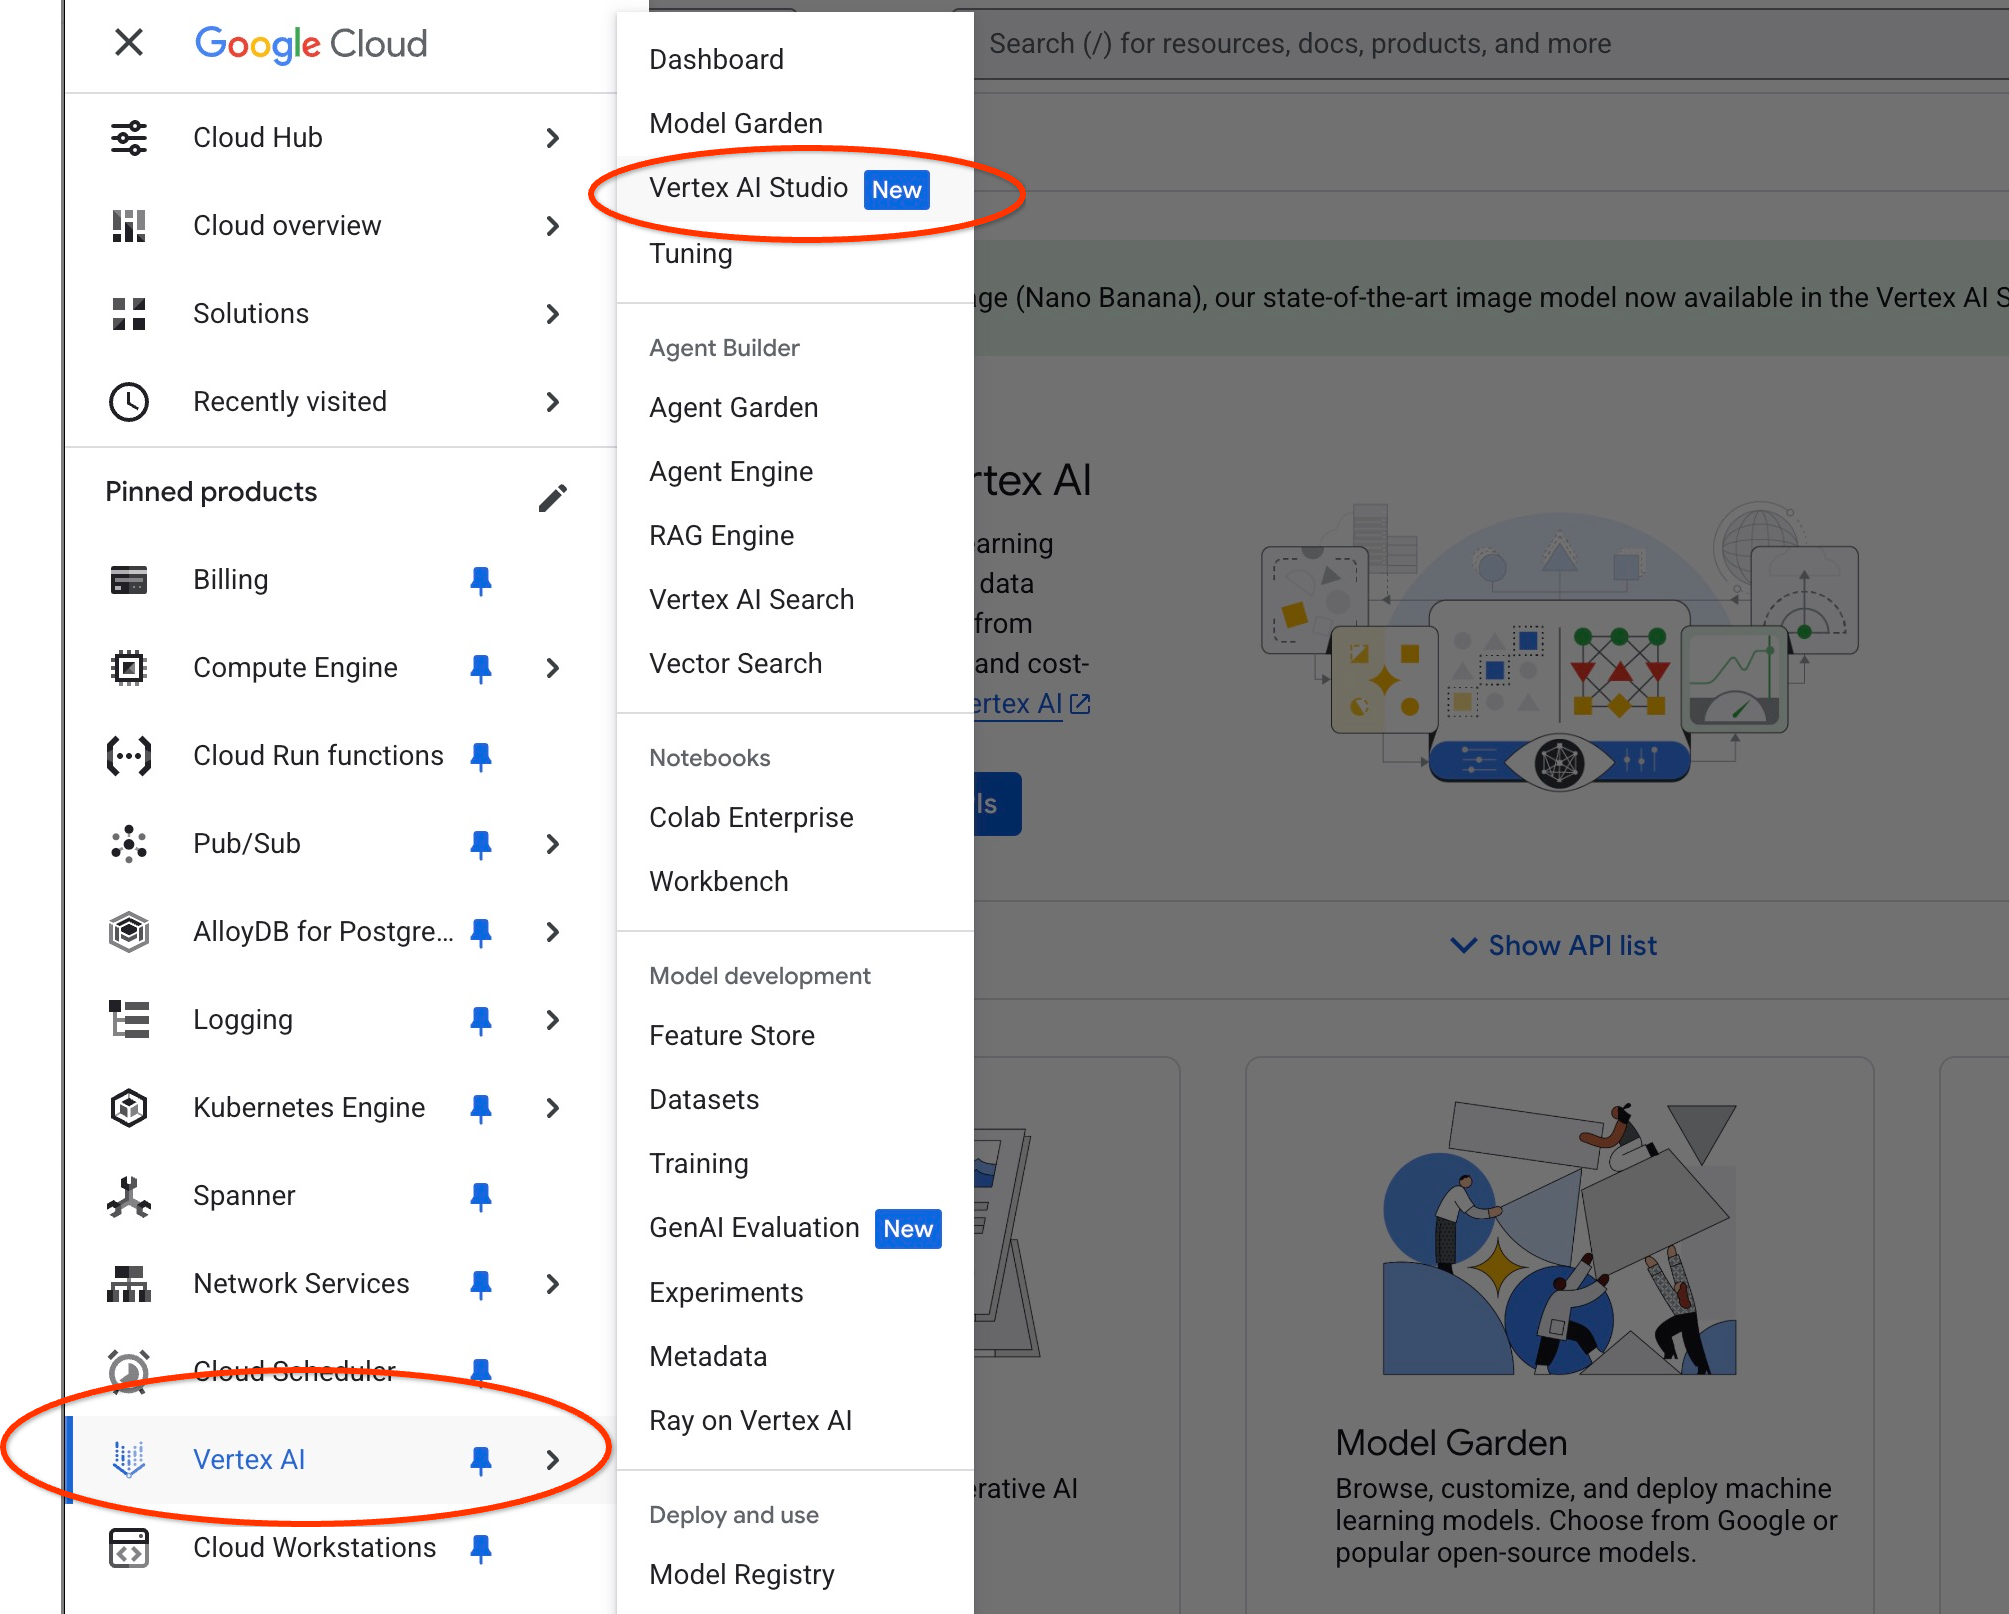
如果先前未使用過,系統可能會要求您同意使用條款。按下「同意並繼續」按鈕
在介面中撰寫提示。
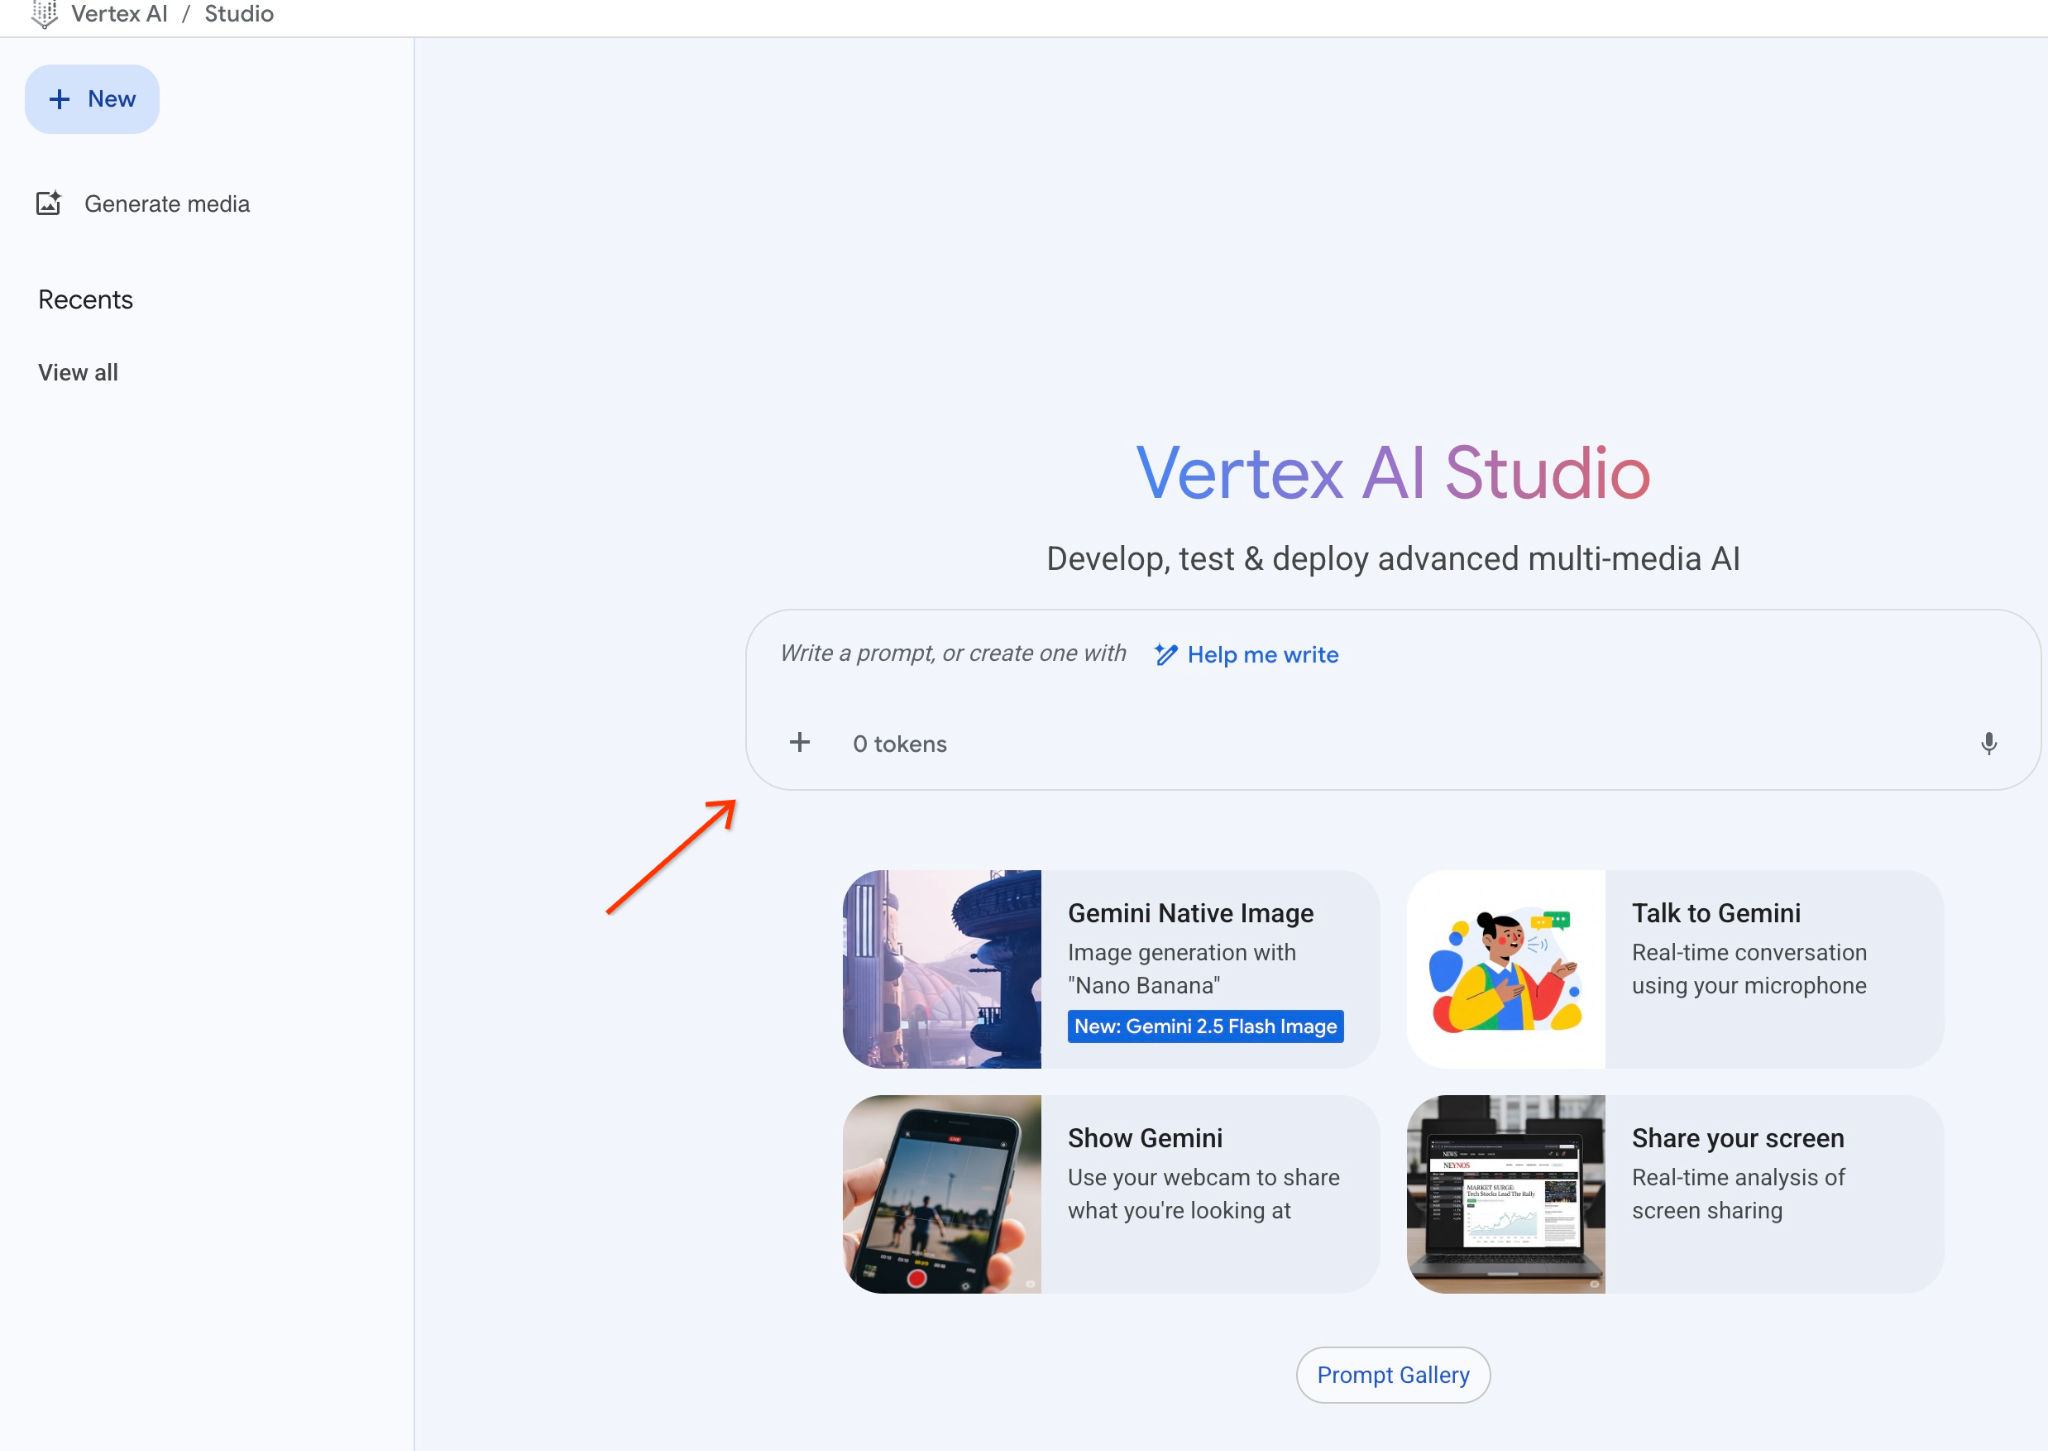
系統可能會要求您啟用其他 API,但您可以忽略這項要求。我們不需要任何其他 API 即可完成實驗室。
以下是我們將使用的提示,以及先前查詢樹木時的 JSON 輸出內容:
你是一位友善的顧問,會根據顧客需求協助尋找產品。
我們已根據客戶要求,載入與搜尋內容密切相關的產品清單。
JSON 格式的清單,包含值清單,例如:{"product_name":"name","description":"some description","sale_price":10,"zip_code": 10234, "produt_id": "02056727942aeb714dc9a2313654e1b0"}
以下是產品清單:
{"product_name":"Cherry Tree","description":"This is a beautiful cherry tree that will produce delicious cherries. It is an d","sale_price":75.00,"zip_code":93230,"product_id":"d536e9e823296a2eba198e52dd23e712"}
顧客問:「這裡最適合種什麼樹?」
你應提供產品、價格和一些補充資訊
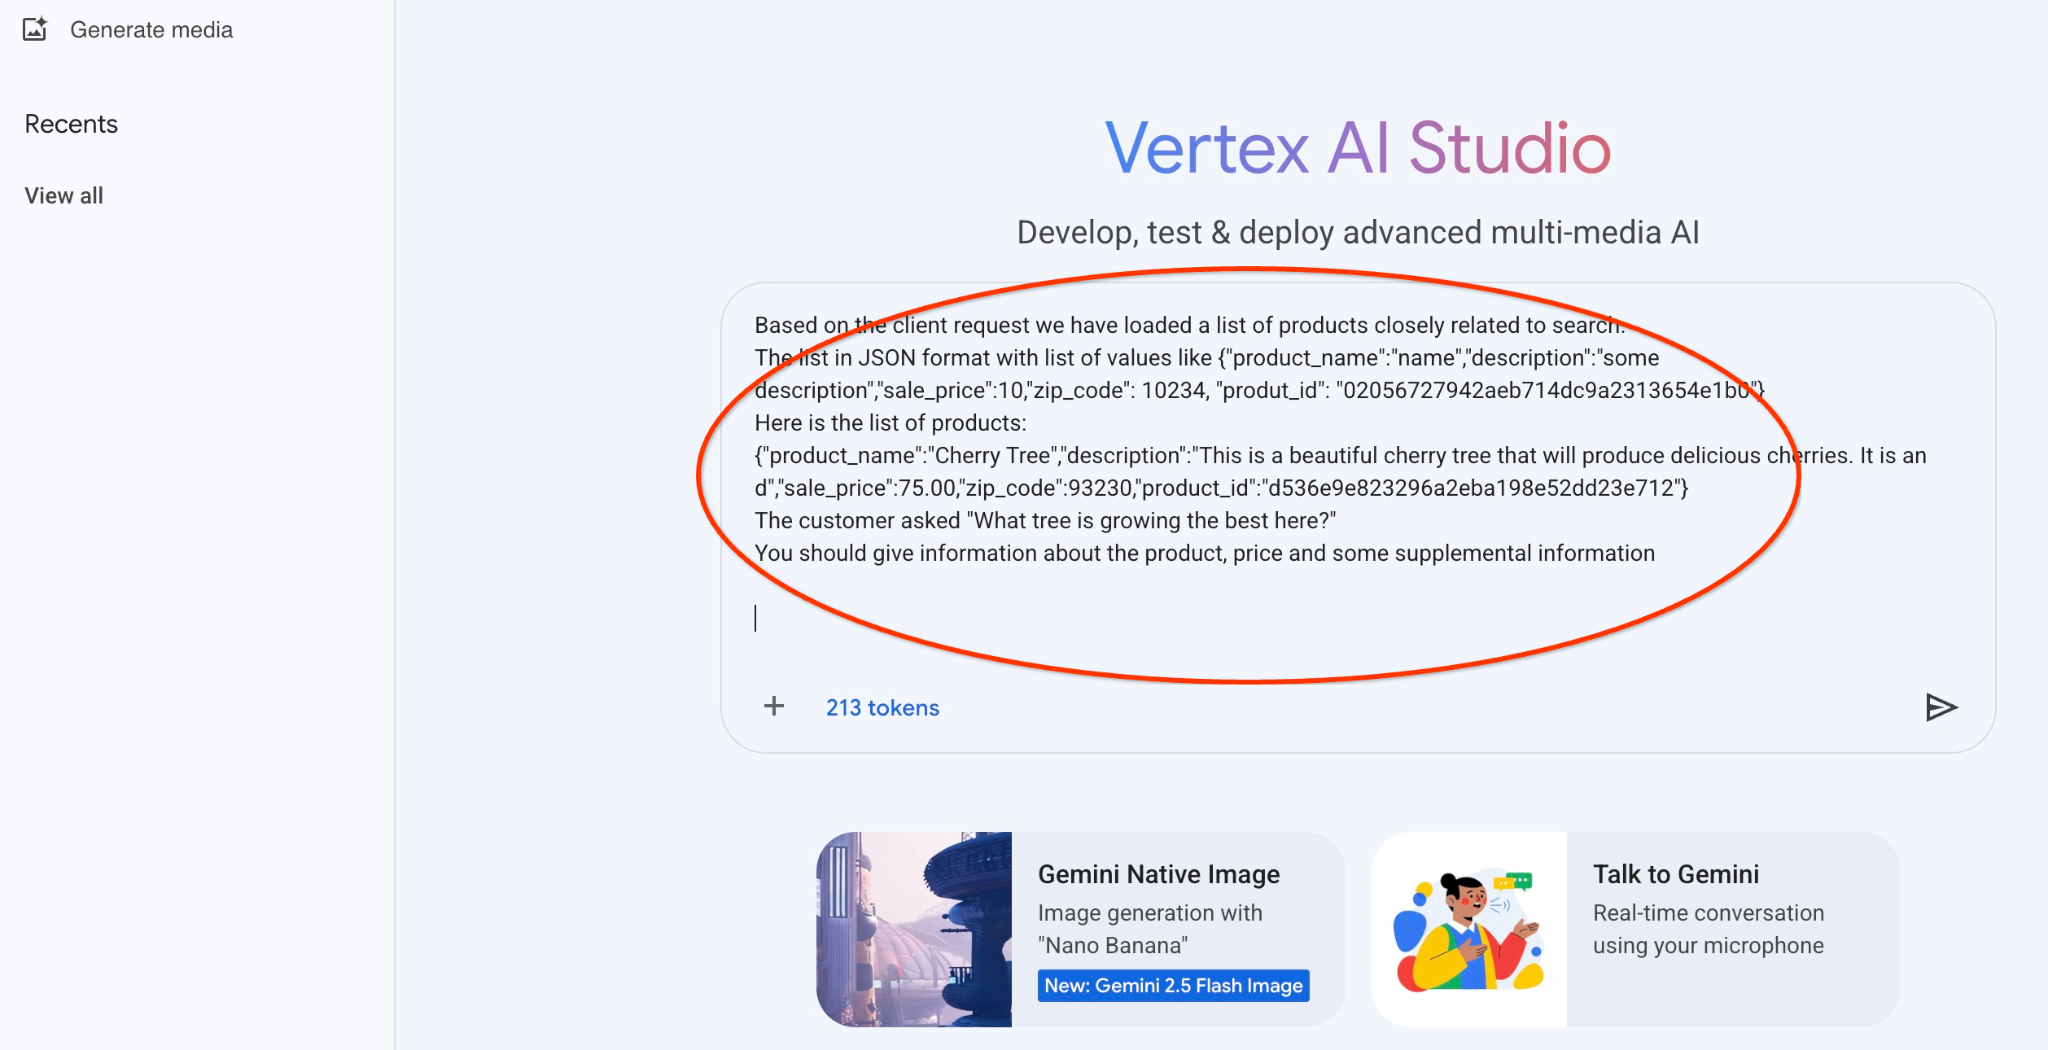
以下是使用 gemini-2.5-flash-light 模型,並以 JSON 值執行提示的結果:
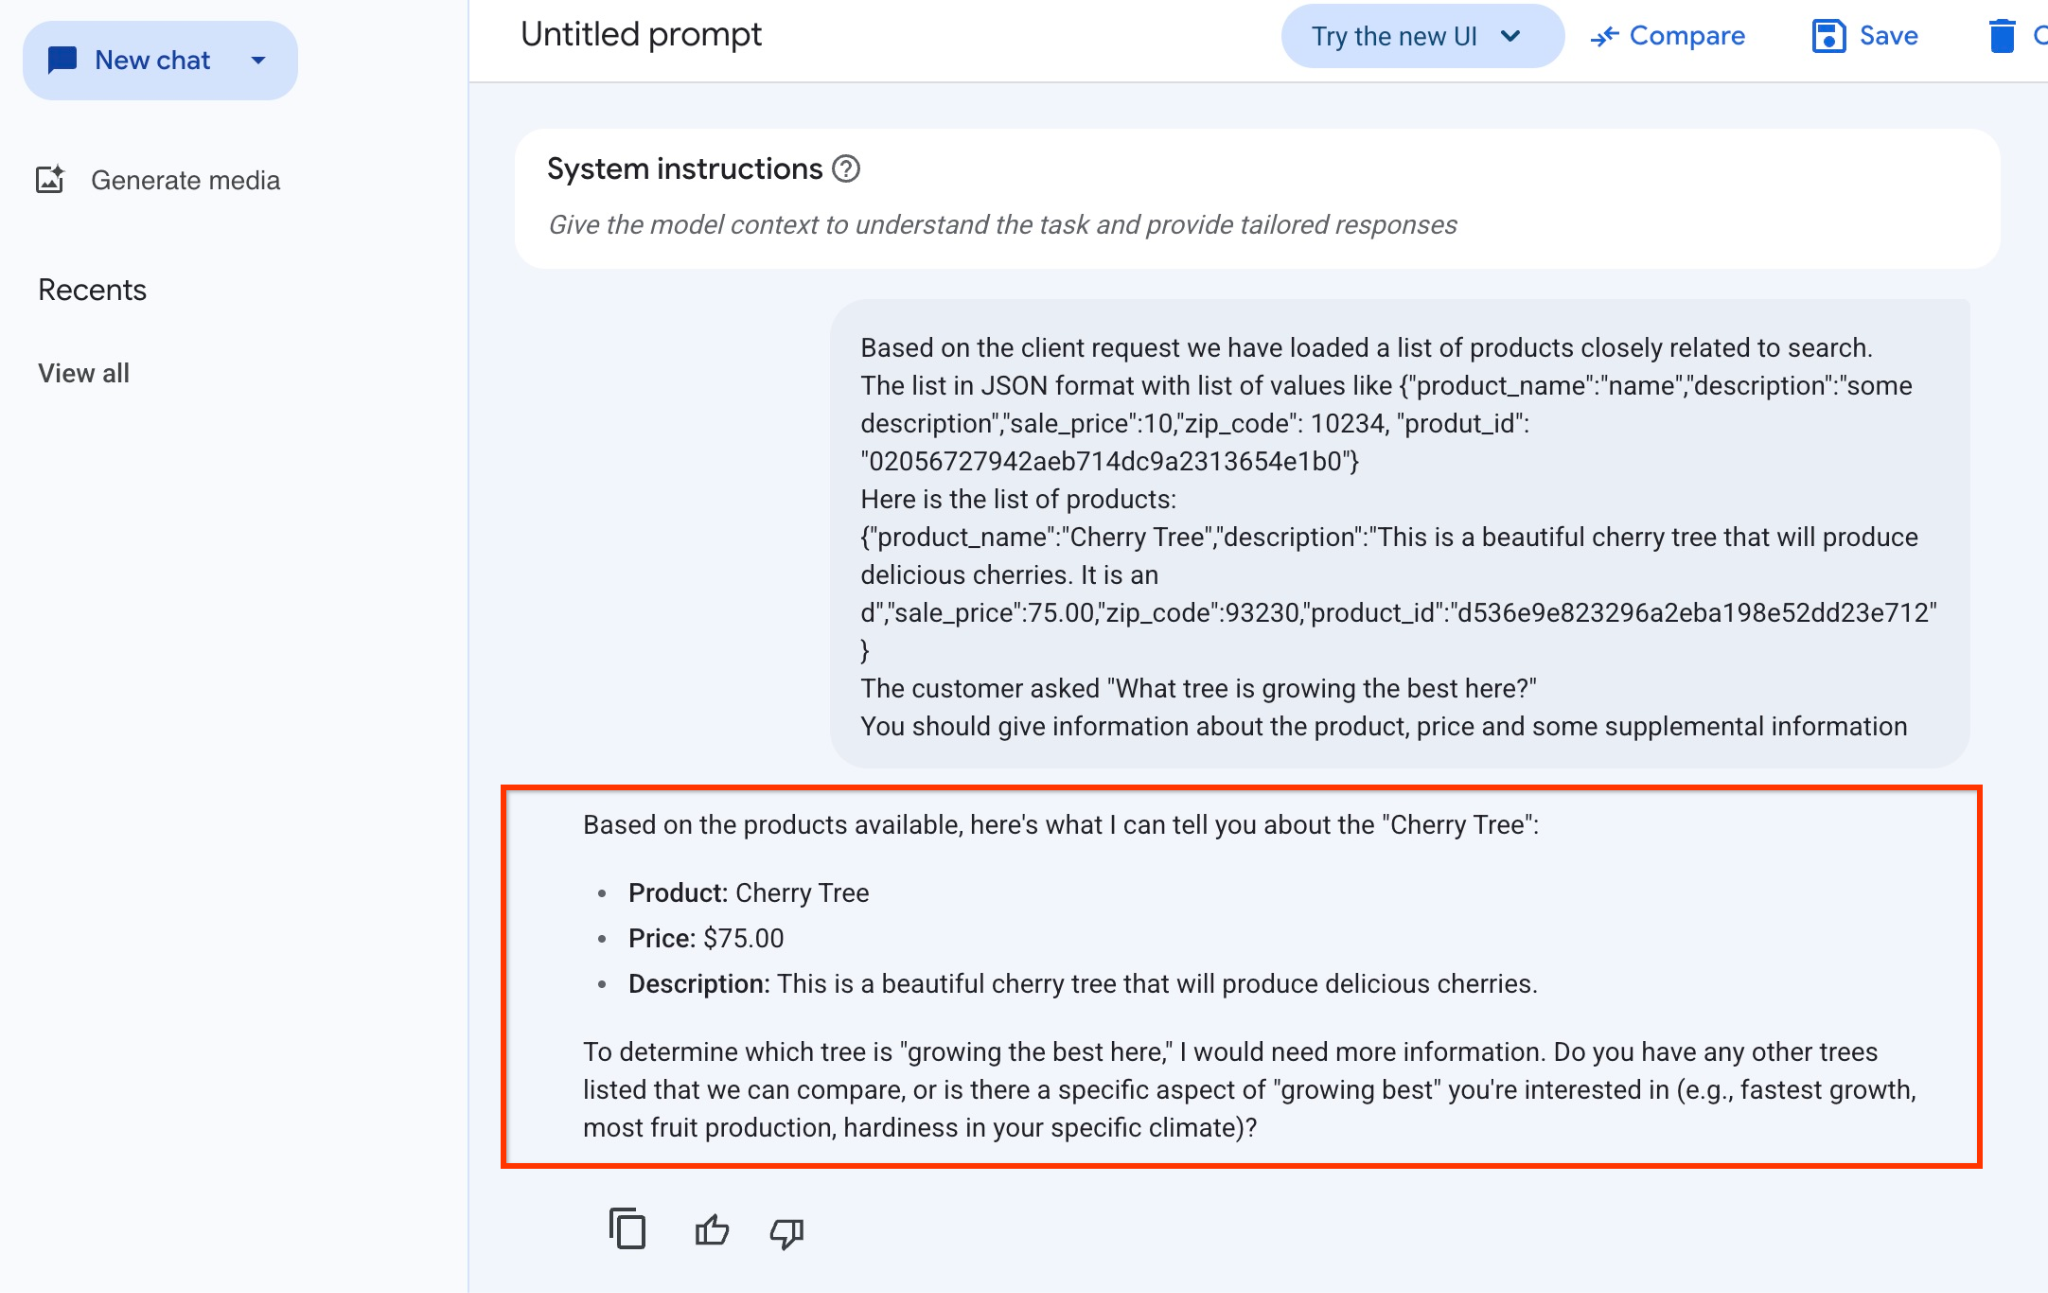
本範例中,模型回覆的答案如下。請注意,由於模型和參數會隨時間變更,因此您收到的答案可能不同:
「根據現有產品,以下是『櫻桃樹』的相關資訊:
產品:櫻桃樹
價格:$75.00 美元
說明:這是一棵美麗的櫻桃樹,會結出美味的櫻桃。
如要判斷哪棵樹「在這裡長得最好」,我需要更多資訊。你是否列出其他樹木可供比較,或是對『最適合生長』的特定方面感興趣 (例如生長速度最快、產量最多、在特定氣候條件下最耐寒)?
在 PSQL 中執行提示詞
我們可以透過 AlloyDB AI 與 Vertex AI 的整合功能,直接在資料庫中使用 SQL,從生成模型取得相同的回覆。但如要使用 gemini-1.5-flash 模型,我們需要先註冊。
驗證 google_ml_integration 擴充功能。版本應為 1.4.2 以上。
如先前所示,從 psql 連線至 quickstart_db 資料庫 (或使用 AlloyDB Studio),然後執行:
SELECT extversion from pg_extension where extname='google_ml_integration';
檢查 google_ml_integration.enable_model_support 資料庫旗標。
show google_ml_integration.enable_model_support;
psql 工作階段的預期輸出內容為「on」:
postgres=> show google_ml_integration.enable_model_support;
 google_ml_integration.enable_model_support
--------------------------------------------
 on
(1 row)
如果顯示「off」,則需要將 google_ml_integration.enable_model_support 資料庫旗標設為「on」。如要執行這項操作,可以使用 AlloyDB 網頁控制台介面,或執行下列 gcloud 指令。
PROJECT_ID=$(gcloud config get-value project)
REGION=us-central1
ADBCLUSTER=alloydb-aip-01
gcloud beta alloydb instances update $ADBCLUSTER-pr \
  --database-flags google_ml_integration.enable_faster_embedding_generation=on,google_ml_integration.enable_model_support=on \
  --region=$REGION \
  --cluster=$ADBCLUSTER \
  --project=$PROJECT_ID \
  --update-mode=FORCE_APPLY
指令會在背景執行,大約需要 1 到 3 分鐘。然後再次驗證標記。
查詢需要兩個模型。第一個是已使用的 text-embedding-005 模型,第二個是其中一個通用的 Google Gemini 模型。
我們從文字嵌入模型開始。如要在 psql 或 AlloyDB Studio 中註冊模型執行作業,請執行下列程式碼:
CALL
  google_ml.create_model(
    model_id => 'text-embedding-005',
    model_provider => 'google',
    model_qualified_name => 'text-embedding-005',
    model_type => 'text_embedding',
    model_auth_type => 'alloydb_service_agent_iam',
    model_in_transform_fn => 'google_ml.vertexai_text_embedding_input_transform',
    model_out_transform_fn => 'google_ml.vertexai_text_embedding_output_transform');
下一個要註冊的模型是 gemini-2.0-flash-001,這個模型會用於生成易於理解的輸出內容。
CALL
  google_ml.create_model(
    model_id => 'gemini-2.5-flash',
    model_request_url => 'publishers/google/models/gemini-2.5-flash:streamGenerateContent',
    model_provider => 'google',
    model_auth_type => 'alloydb_service_agent_iam');
您隨時可以從 google_ml.model_info_view 選取資訊,驗證已註冊的模型清單。
select model_id,model_type from google_ml.model_info_view;
以下是輸出內容範例
quickstart_db=> select model_id,model_type from google_ml.model_info_view;
        model_id         |   model_type
-------------------------+----------------
 textembedding-gecko     | text_embedding
 textembedding-gecko@001 | text_embedding
 text-embedding-005      | text_embedding
 gemini-2.5-flash        | generic
(4 rows)
現在,我們可以使用子查詢 JSON 中產生的內容,透過 SQL 將其當做提示的一部分,提供給生成式 AI 文字模型。
在資料庫的 psql 或 AlloyDB Studio 工作階段中執行查詢
WITH trees AS (
SELECT
        cp.product_name,
        cp.product_description AS description,
        cp.sale_price,
        cs.zip_code,
        cp.uniq_id AS product_id
FROM
        cymbal_products cp
JOIN cymbal_inventory ci ON
        ci.uniq_id = cp.uniq_id
JOIN cymbal_stores cs ON
        cs.store_id = ci.store_id
        AND ci.inventory>0
        AND cs.store_id = 1583
ORDER BY
        (cp.embedding <=> embedding('text-embedding-005',
        'What kind of fruit trees grow well here?')::vector) ASC
LIMIT 1),
prompt AS (
SELECT
        'You are a friendly advisor helping to find a product based on the customer''s needs.
Based on the client request we have loaded a list of products closely related to search.
The list in JSON format with list of values like {"product_name":"name","product_description":"some description","sale_price":10}
Here is the list of products:' || json_agg(trees) || 'The customer asked "What kind of fruit trees grow well here?"
You should give information about the product, price and some supplemental information' AS prompt_text
FROM
        trees),
response AS (
SELECT
        json_array_elements(google_ml.predict_row( model_id =>'gemini-2.5-flash',
        request_body => json_build_object('contents',
        json_build_object('role',
        'user',
        'parts',
        json_build_object('text',
        prompt_text)))))->'candidates'->0->'content'->'parts'->0->'text' AS resp
FROM
        prompt)
SELECT
        string_agg(resp::text,
        ' ')
FROM
        response;
預期的輸出內容如下。輸出內容可能因模型版本和參數而異:
"Hello there! I can certainly help you with finding a great fruit tree for your area.\n\nBased on what grows well, we have a wonderful **Cherry Tree** that could be a perfect fit!\n\nThis beautiful cherry tree is an excellent choice for producing delicious cherries right in your garden. It's an deciduous tree that typically" " grows to about 15 feet tall. Beyond its fruit, it offers lovely aesthetics with dark green leaves in the summer that transition to a beautiful red in the fall, making it great for shade and privacy too.\n\nCherry trees generally prefer a cool, moist climate and sandy soil, and they are best suited for USDA Zones" " 4-9. Given the zip code you're inquiring about (93230), which is typically in USDA Zone 9, this Cherry Tree should thrive wonderfully!\n\nYou can get this magnificent tree for just **$75.00**.\n\nLet me know if you have any other questions!" "
10. 建立向量索引
我們的資料集相當小,回覆時間主要取決於與 AI 模型的互動。但當您有數百萬個向量時,向量搜尋部分可能會佔用大量的回應時間,並對系統造成高負載。為改善這點,我們可以在向量上建立索引。
建立 ScaNN 索引
如要建構 SCANN 索引,我們需要再啟用一個擴充功能。alloydb_scann 擴充功能提供介面,可使用 Google ScaNN 演算法處理 ANN 類型的向量索引。
CREATE EXTENSION IF NOT EXISTS alloydb_scann;
預期輸出內容:
quickstart_db=> CREATE EXTENSION IF NOT EXISTS alloydb_scann;
CREATE EXTENSION
Time: 27.468 ms
quickstart_db=>
索引可以在 MANUAL 或 AUTO 模式下建立。系統預設會啟用 MANUAL 模式,您可以建立及維護索引,就像其他索引一樣。但如果啟用「自動」模式,您就能建立索引,不需要自行維護。如要詳細瞭解所有選項,請參閱說明文件。本文將說明如何啟用 AUTO 模式及建立索引。在本例中,我們沒有足夠的資料列,無法在 AUTO 模式下建立索引,因此將以 MANUAL 模式建立索引。
在下列範例中,我將大多數參數保留為預設值,只為索引提供分割區數量 (num_leaves):
CREATE INDEX cymbal_products_embeddings_scann ON cymbal_products
  USING scann (embedding cosine)
  WITH (num_leaves=31, max_num_levels = 2);
如要瞭解如何調整索引參數,請參閱說明文件。
預期輸出內容:
quickstart_db=> CREATE INDEX cymbal_products_embeddings_scann ON cymbal_products
  USING scann (embedding cosine)
  WITH (num_leaves=31, max_num_levels = 2);
CREATE INDEX
quickstart_db=>
比較回覆
現在我們可以在 EXPLAIN 模式下執行向量搜尋查詢,並驗證是否已使用索引。
EXPLAIN (analyze)
WITH trees as (
SELECT
        cp.product_name,
        left(cp.product_description,80) as description,
        cp.sale_price,
        cs.zip_code,
        cp.uniq_id as product_id
FROM
        cymbal_products cp
JOIN cymbal_inventory ci on
        ci.uniq_id=cp.uniq_id
JOIN cymbal_stores cs on
        cs.store_id=ci.store_id
        AND ci.inventory>0
        AND cs.store_id = 1583
ORDER BY
        (cp.embedding <=> embedding('text-embedding-005','What kind of fruit trees grow well here?')::vector) ASC
LIMIT 1)
SELECT json_agg(trees) FROM trees;
預期輸出內容 (為求明確而經過編輯):
...
Aggregate (cost=16.59..16.60 rows=1 width=32) (actual time=2.875..2.877 rows=1 loops=1)
-> Subquery Scan on trees (cost=8.42..16.59 rows=1 width=142) (actual time=2.860..2.862 rows=1 loops=1)
-> Limit (cost=8.42..16.58 rows=1 width=158) (actual time=2.855..2.856 rows=1 loops=1)
-> Nested Loop (cost=8.42..6489.19 rows=794 width=158) (actual time=2.854..2.855 rows=1 loops=1)
-> Nested Loop (cost=8.13..6466.99 rows=794 width=938) (actual time=2.742..2.743 rows=1 loops=1)
-> Index Scan using cymbal_products_embeddings_scann on cymbal_products cp (cost=7.71..111.99 rows=876 width=934) (actual time=2.724..2.724 rows=1 loops=1)
Order By: (embedding <=> '[0.008864171,0.03693164,-0.024245683,-0.00355923,0.0055611245,0.015985578,...<redacted>...5685,-0.03914233,-0.018452475,0.00826032,-0.07372604]'::vector)
-> Index Scan using walmart_inventory_pkey on cymbal_inventory ci (cost=0.42..7.26 rows=1 width=37) (actual time=0.015..0.015 rows=1 loops=1)
Index Cond: ((store_id = 1583) AND (uniq_id = (cp.uniq_id)::text))
...
從輸出內容中,我們可清楚看出查詢是使用「Index Scan using cymbal_products_embeddings_scann on cymbal_products」。
如果我們執行查詢時沒有說明:
WITH trees as (
SELECT
        cp.product_name,
        left(cp.product_description,80) as description,
        cp.sale_price,
        cs.zip_code,
        cp.uniq_id as product_id
FROM
        cymbal_products cp
JOIN cymbal_inventory ci on
        ci.uniq_id=cp.uniq_id
JOIN cymbal_stores cs on
        cs.store_id=ci.store_id
        AND ci.inventory>0
        AND cs.store_id = 1583
ORDER BY
        (cp.embedding <=> embedding('text-embedding-005','What kind of fruit trees grow well here?')::vector) ASC
LIMIT 1)
SELECT json_agg(trees) FROM trees;
預期輸出內容:
[{"product_name":"Cherry Tree","description":"This is a beautiful cherry tree that will produce delicious cherries. It is an d","sale_price":75.00,"zip_code":93230,"product_id":"d536e9e823296a2eba198e52dd23e712"}]
我們可以發現,結果與未建立索引的搜尋結果頂端相同,都是櫻桃樹。有時可能並非如此,回覆可能會傳回其他樹狀結構,而非相同的樹狀結構。因此,這個索引可提供效能,但仍夠準確,可產生良好的結果。
您可以試用向量可用的不同索引,並在說明文件頁面上查看更多實驗室和範例,瞭解如何整合 LangChain。
11. 清理環境
完成實驗室後,請終止 AlloyDB 執行個體和叢集。
刪除 AlloyDB 叢集和所有執行個體
如果您使用過 AlloyDB 試用版,如果您打算使用試用叢集測試其他實驗室和資源,請勿刪除試用叢集。您無法在同一個專案中建立其他試用叢集。
使用 force 選項終止叢集,這也會刪除叢集中的所有執行個體。
如果連線中斷,且所有先前的設定都遺失,請在 Cloud Shell 中定義專案和環境變數:
gcloud config set project <your project id>
export REGION=us-central1
export ADBCLUSTER=alloydb-aip-01
export PROJECT_ID=$(gcloud config get-value project)
刪除叢集:
gcloud alloydb clusters delete $ADBCLUSTER --region=$REGION --force
預期的控制台輸出內容:
student@cloudshell:~ (test-project-001-402417)$ gcloud alloydb clusters delete $ADBCLUSTER --region=$REGION --force
All of the cluster data will be lost when the cluster is deleted.

Do you want to continue (Y/n)?  Y

Operation ID: operation-1697820178429-6082890a0b570-4a72f7e4-4c5df36f
Deleting cluster...done.
刪除 AlloyDB 備份
刪除叢集的所有 AlloyDB 備份:
for i in $(gcloud alloydb backups list --filter="CLUSTER_NAME: projects/$PROJECT_ID/locations/$REGION/clusters/$ADBCLUSTER" --format="value(name)" --sort-by=~createTime) ; do gcloud alloydb backups delete $(basename $i) --region $REGION --quiet; done
預期的控制台輸出內容:
student@cloudshell:~ (test-project-001-402417)$ for i in $(gcloud alloydb backups list --filter="CLUSTER_NAME: projects/$PROJECT_ID/locations/$REGION/clusters/$ADBCLUSTER" --format="value(name)" --sort-by=~createTime) ; do gcloud alloydb backups delete $(basename $i) --region $REGION --quiet; done
Operation ID: operation-1697826266108-60829fb7b5258-7f99dc0b-99f3c35f
Deleting backup...done.
現在可以刪除 VM
刪除 GCE VM
在 Cloud Shell 中執行下列指令:
export GCEVM=instance-1
export ZONE=us-central1-a
gcloud compute instances delete $GCEVM \
    --zone=$ZONE \
    --quiet
預期的控制台輸出內容:
student@cloudshell:~ (test-project-001-402417)$ export GCEVM=instance-1
export ZONE=us-central1-a
gcloud compute instances delete $GCEVM \
    --zone=$ZONE \
    --quiet
Deleted
12. 恭喜
恭喜您完成本程式碼研究室。
這個實驗室屬於「Google Cloud 學習路徑:打造可用於正式環境的 AI」的一部分。
- 探索完整課程,從設計原型開始,一步步把專案投入正式環境。
- 使用主題標記
#ProductionReadyAI分享你的進度。
涵蓋內容
- 如何部署 AlloyDB 叢集和主要執行個體
- 如何從 Google Compute Engine VM 連線至 AlloyDB
- 如何建立資料庫並啟用 AlloyDB AI
- 如何將資料載入資料庫
- 如何使用 AlloyDB Studio
- 如何在 AlloyDB 中使用 Vertex AI 嵌入模型
- 如何使用 Vertex AI Studio
- 如何使用 Vertex AI 生成模型充實結果
- 如何使用向量索引提升效能
13. 問卷調查
輸出內容: