
1. 簡介

在本程式碼研究室中,您將瞭解如何部署 AlloyDB,以及如何使用 AI 自然語言查詢資料,並調整設定以進行可預測且有效率的查詢。這個實驗室是 AlloyDB AI 功能專屬實驗室系列的一部分。詳情請參閱說明文件中的 AlloyDB AI 頁面。
必要條件
- 對 Google Cloud 和控制台有基本瞭解
- 指令列介面和 Cloud Shell 的基本技能
課程內容
- 如何部署 AlloyDB for Postgres
- 如何啟用 AlloyDB AI 自然語言
- 如何建立及調整 AI 自然語言的設定
- 如何使用自然語言生成 SQL 查詢並取得結果
軟硬體需求
- Google Cloud 帳戶和 Google Cloud 專案
- 支援 Google Cloud 控制台和 Cloud Shell 的網路瀏覽器,例如 Chrome
2. 設定和需求
自行設定環境
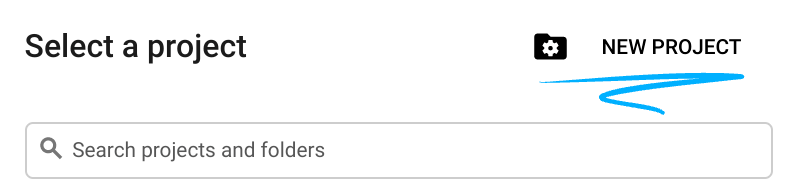
- 登入 Google Cloud 控制台,然後建立新專案或重複使用現有專案。如果沒有 Gmail 或 Google Workspace 帳戶,請建立帳戶。

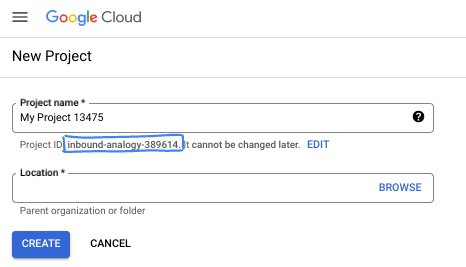
- 專案名稱是這個專案參與者的顯示名稱。這是 Google API 未使用的字元字串。你隨時可以更新。
- 專案 ID 在所有 Google Cloud 專案中都是不重複的,而且設定後即無法變更。Cloud 控制台會自動產生專屬字串,通常您不需要在意該字串為何。在大多數程式碼研究室中,您需要參照專案 ID (通常標示為
PROJECT_ID)。如果您不喜歡產生的 ID,可以產生另一個隨機 ID。你也可以嘗試使用自己的名稱,看看是否可用。完成這個步驟後就無法變更,且專案期間會維持不變。 - 請注意,有些 API 會使用第三個值,也就是「專案編號」。如要進一步瞭解這三種值,請參閱說明文件。
- 接著,您需要在 Cloud 控制台中啟用帳單,才能使用 Cloud 資源/API。完成這個程式碼研究室的費用不高,甚至可能完全免費。如要關閉資源,避免在本教學課程結束後繼續產生費用,請刪除您建立的資源或專案。Google Cloud 新使用者可參加價值$300 美元的免費試用計畫。
啟動 Cloud Shell
雖然您可以透過筆電遠端操作 Google Cloud,但在本程式碼研究室中,您將使用 Google Cloud Shell,這是可在雲端執行的指令列環境。
在 Google Cloud 控制台中,點選右上工具列的 Cloud Shell 圖示:

佈建並連線至環境的作業很快就能完成。完成後,您應該會看到如下的內容:

這部虛擬機器搭載各種您需要的開發工具,提供永久的 5 GB 主目錄,而且在 Google Cloud 中運作,可大幅提升網路效能和驗證。您可以在瀏覽器中完成本程式碼研究室的所有作業。您不需要安裝任何軟體。
3. 事前準備
啟用 API
在 Cloud Shell 中,確認專案 ID 是否已設定完畢:
gcloud config set project [YOUR-PROJECT-ID]
設定環境變數 PROJECT_ID:
PROJECT_ID=$(gcloud config get-value project)
啟用所有必要服務:
gcloud services enable alloydb.googleapis.com \
                       compute.googleapis.com \
                       cloudresourcemanager.googleapis.com \
                       servicenetworking.googleapis.com \
                       aiplatform.googleapis.com \
                       discoveryengine.googleapis.com \
                       secretmanager.googleapis.com
預期的輸出內容:
student@cloudshell:~ (test-project-001-402417)$ gcloud config set project test-project-001-402417
Updated property [core/project].
student@cloudshell:~ (test-project-001-402417)$ PROJECT_ID=$(gcloud config get-value project)
Your active configuration is: [cloudshell-14650]
student@cloudshell:~ (test-project-001-402417)$
student@cloudshell:~ (test-project-001-402417)$ gcloud services enable alloydb.googleapis.com \
                       compute.googleapis.com \
                       cloudresourcemanager.googleapis.com \
                       servicenetworking.googleapis.com \
                       aiplatform.googleapis.com
Operation "operations/acat.p2-4470404856-1f44ebd8-894e-4356-bea7-b84165a57442" finished successfully.
4. 部署 AlloyDB
建立 AlloyDB 叢集和主要執行個體。下列程序說明如何使用 Google Cloud SDK 建立 AlloyDB 叢集和執行個體。如果您偏好使用控制台,請參閱這份說明文件。
建立 AlloyDB 叢集前,我們需要虛擬私有雲中可用的私人 IP 範圍,供日後的 AlloyDB 執行個體使用。如果沒有,我們就必須建立,並指派給內部 Google 服務使用,之後才能建立叢集和執行個體。
建立私人 IP 範圍
我們需要在 AlloyDB 的虛擬私有雲中設定私人服務連線。這裡的假設是專案中具有「預設」虛擬私有雲網路,且所有動作都會使用該網路。
建立私人 IP 範圍:
gcloud compute addresses create psa-range \
    --global \
    --purpose=VPC_PEERING \
    --prefix-length=24 \
    --description="VPC private service access" \
    --network=default
使用分配的 IP 範圍建立私人連線:
gcloud services vpc-peerings connect \
    --service=servicenetworking.googleapis.com \
    --ranges=psa-range \
    --network=default
預期的控制台輸出內容:
student@cloudshell:~ (test-project-402417)$ gcloud compute addresses create psa-range \
    --global \
    --purpose=VPC_PEERING \
    --prefix-length=24 \
    --description="VPC private service access" \
    --network=default
Created [https://www.googleapis.com/compute/v1/projects/test-project-402417/global/addresses/psa-range].

student@cloudshell:~ (test-project-402417)$ gcloud services vpc-peerings connect \
    --service=servicenetworking.googleapis.com \
    --ranges=psa-range \
    --network=default
Operation "operations/pssn.p24-4470404856-595e209f-19b7-4669-8a71-cbd45de8ba66" finished successfully.

student@cloudshell:~ (test-project-402417)$
建立 AlloyDB 叢集
在本節中,我們將在 us-central1 區域建立 AlloyDB 叢集。
定義 postgres 使用者的密碼。您可以自行定義密碼,也可以使用隨機函式產生密碼
export PGPASSWORD=`openssl rand -hex 12`
預期的控制台輸出內容:
student@cloudshell:~ (test-project-402417)$ export PGPASSWORD=`openssl rand -hex 12`
請記下 PostgreSQL 密碼,以供日後使用。
echo $PGPASSWORD
日後以 postgres 使用者身分連線至執行個體時,需要使用這個密碼。建議您將這組號碼寫下來或複製到某處,以供日後使用。
預期的控制台輸出內容:
student@cloudshell:~ (test-project-402417)$ echo $PGPASSWORD
bbefbfde7601985b0dee5723
建立免費試用叢集
如果您先前未使用過 AlloyDB,可以建立免費試用叢集:
定義區域和 AlloyDB 叢集名稱。我們將使用 us-central1 地區,並以 alloydb-aip-01 做為叢集名稱:
export REGION=us-central1
export ADBCLUSTER=alloydb-aip-01
執行指令來建立叢集:
gcloud alloydb clusters create $ADBCLUSTER \
    --password=$PGPASSWORD \
    --network=default \
    --region=$REGION \
    --subscription-type=TRIAL
預期的控制台輸出內容:
export REGION=us-central1
export ADBCLUSTER=alloydb-aip-01
gcloud alloydb clusters create $ADBCLUSTER \
    --password=$PGPASSWORD \
    --network=default \
    --region=$REGION \
    --subscription-type=TRIAL
Operation ID: operation-1697655441138-6080235852277-9e7f04f5-2012fce4
Creating cluster...done.
在同一個 Cloud Shell 工作階段中,為叢集建立 AlloyDB 主要執行個體。如果連線中斷,您需要再次定義區域和叢集名稱環境變數。
gcloud alloydb instances create $ADBCLUSTER-pr \
    --instance-type=PRIMARY \
    --cpu-count=8 \
    --region=$REGION \
    --cluster=$ADBCLUSTER
預期的控制台輸出內容:
student@cloudshell:~ (test-project-402417)$ gcloud alloydb instances create $ADBCLUSTER-pr \
    --instance-type=PRIMARY \
    --cpu-count=8 \
    --region=$REGION \
    --availability-type ZONAL \
    --cluster=$ADBCLUSTER
Operation ID: operation-1697659203545-6080315c6e8ee-391805db-25852721
Creating instance...done.
建立 AlloyDB Standard 叢集
如果這不是專案中的第一個 AlloyDB 叢集,請繼續建立標準叢集。
定義區域和 AlloyDB 叢集名稱。我們將使用 us-central1 地區,並以 alloydb-aip-01 做為叢集名稱:
export REGION=us-central1
export ADBCLUSTER=alloydb-aip-01
執行指令來建立叢集:
gcloud alloydb clusters create $ADBCLUSTER \
    --password=$PGPASSWORD \
    --network=default \
    --region=$REGION
預期的控制台輸出內容:
export REGION=us-central1
export ADBCLUSTER=alloydb-aip-01
gcloud alloydb clusters create $ADBCLUSTER \
    --password=$PGPASSWORD \
    --network=default \
    --region=$REGION
Operation ID: operation-1697655441138-6080235852277-9e7f04f5-2012fce4
Creating cluster...done.
在同一個 Cloud Shell 工作階段中,為叢集建立 AlloyDB 主要執行個體。如果連線中斷,您需要再次定義區域和叢集名稱環境變數。
gcloud alloydb instances create $ADBCLUSTER-pr \
    --instance-type=PRIMARY \
    --cpu-count=2 \
    --region=$REGION \
    --cluster=$ADBCLUSTER
預期的控制台輸出內容:
student@cloudshell:~ (test-project-402417)$ gcloud alloydb instances create $ADBCLUSTER-pr \
    --instance-type=PRIMARY \
    --cpu-count=2 \
    --region=$REGION \
    --availability-type ZONAL \
    --cluster=$ADBCLUSTER
Operation ID: operation-1697659203545-6080315c6e8ee-391805db-25852721
Creating instance...done.
5. 準備資料庫
我們需要建立資料庫、啟用 Vertex AI 整合功能、建立資料庫物件,以及匯入資料。
授予 AlloyDB 必要權限
將 Vertex AI 權限新增至 AlloyDB 服務代理。
使用頂端的「+」符號開啟另一個 Cloud Shell 分頁。
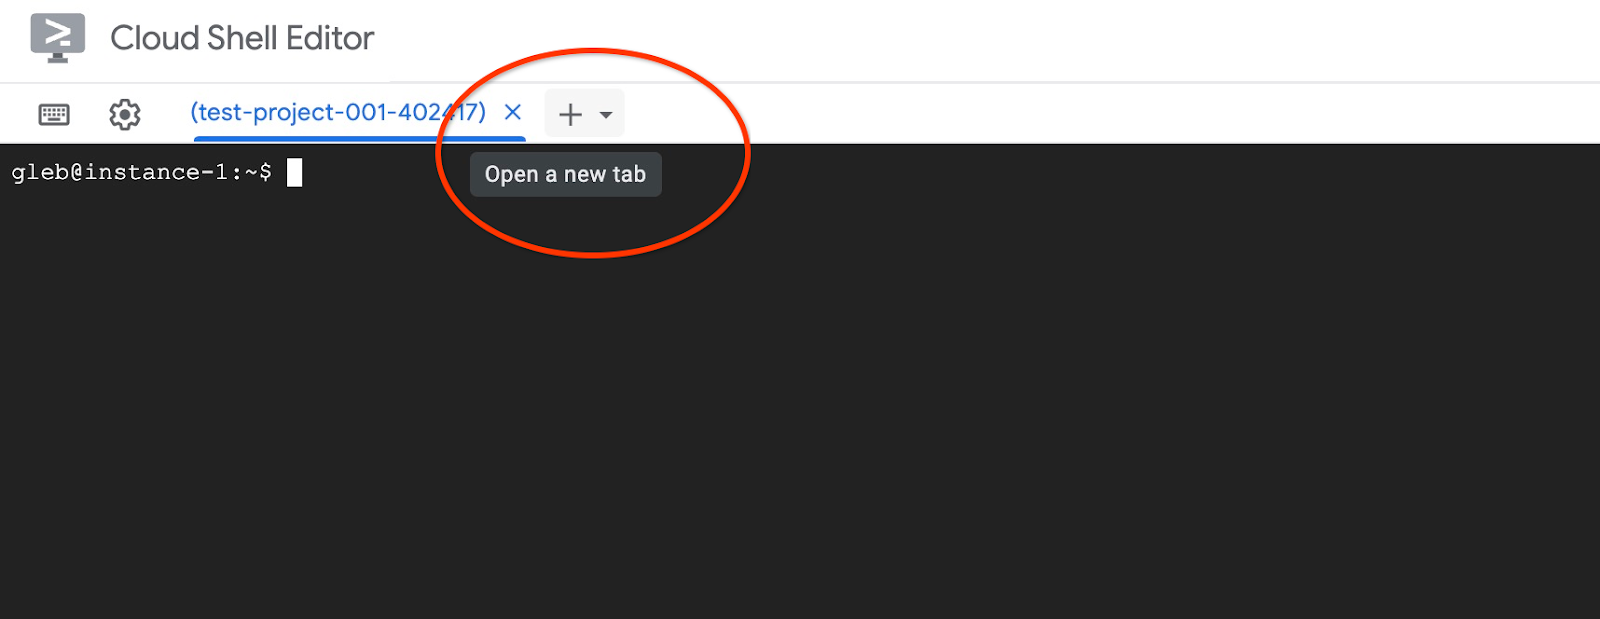
在新的 Cloud Shell 分頁中執行下列指令:
PROJECT_ID=$(gcloud config get-value project)
gcloud projects add-iam-policy-binding $PROJECT_ID \
  --member="serviceAccount:service-$(gcloud projects describe $PROJECT_ID --format="value(projectNumber)")@gcp-sa-alloydb.iam.gserviceaccount.com" \
  --role="roles/aiplatform.user"
預期的控制台輸出內容:
student@cloudshell:~ (test-project-001-402417)$ PROJECT_ID=$(gcloud config get-value project)
Your active configuration is: [cloudshell-11039]
student@cloudshell:~ (test-project-001-402417)$ gcloud projects add-iam-policy-binding $PROJECT_ID \
  --member="serviceAccount:service-$(gcloud projects describe $PROJECT_ID --format="value(projectNumber)")@gcp-sa-alloydb.iam.gserviceaccount.com" \
  --role="roles/aiplatform.user"
Updated IAM policy for project [test-project-001-402417].
bindings:
- members:
  - serviceAccount:service-4470404856@gcp-sa-alloydb.iam.gserviceaccount.com
  role: roles/aiplatform.user
- members:
...
etag: BwYIEbe_Z3U=
version: 1
在分頁中執行「exit」指令,關閉分頁:
exit
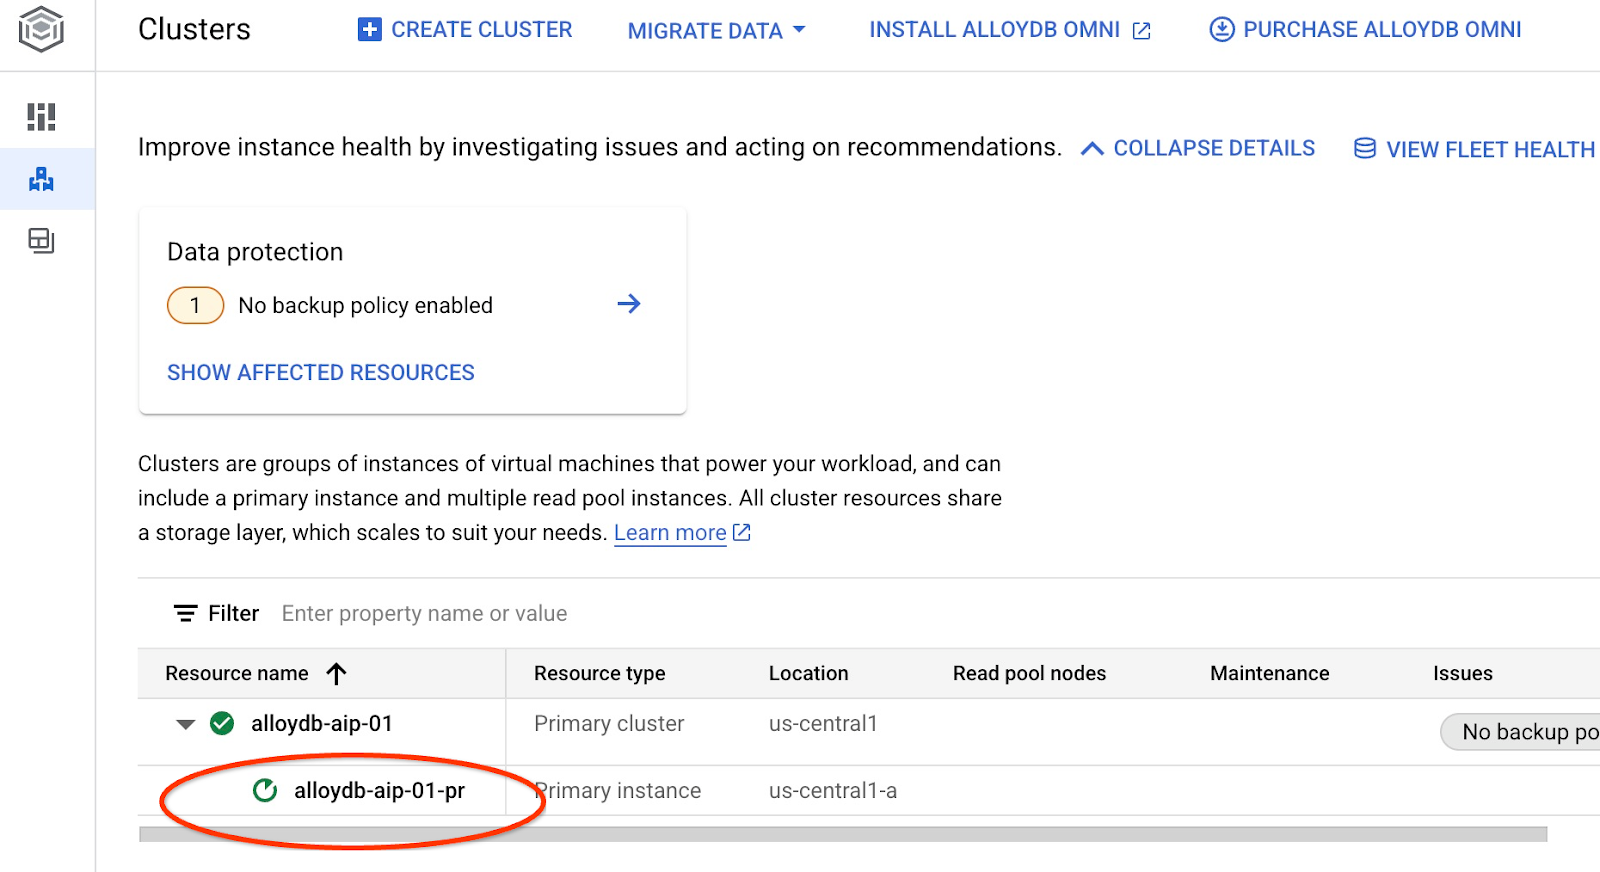
連線至 AlloyDB Studio
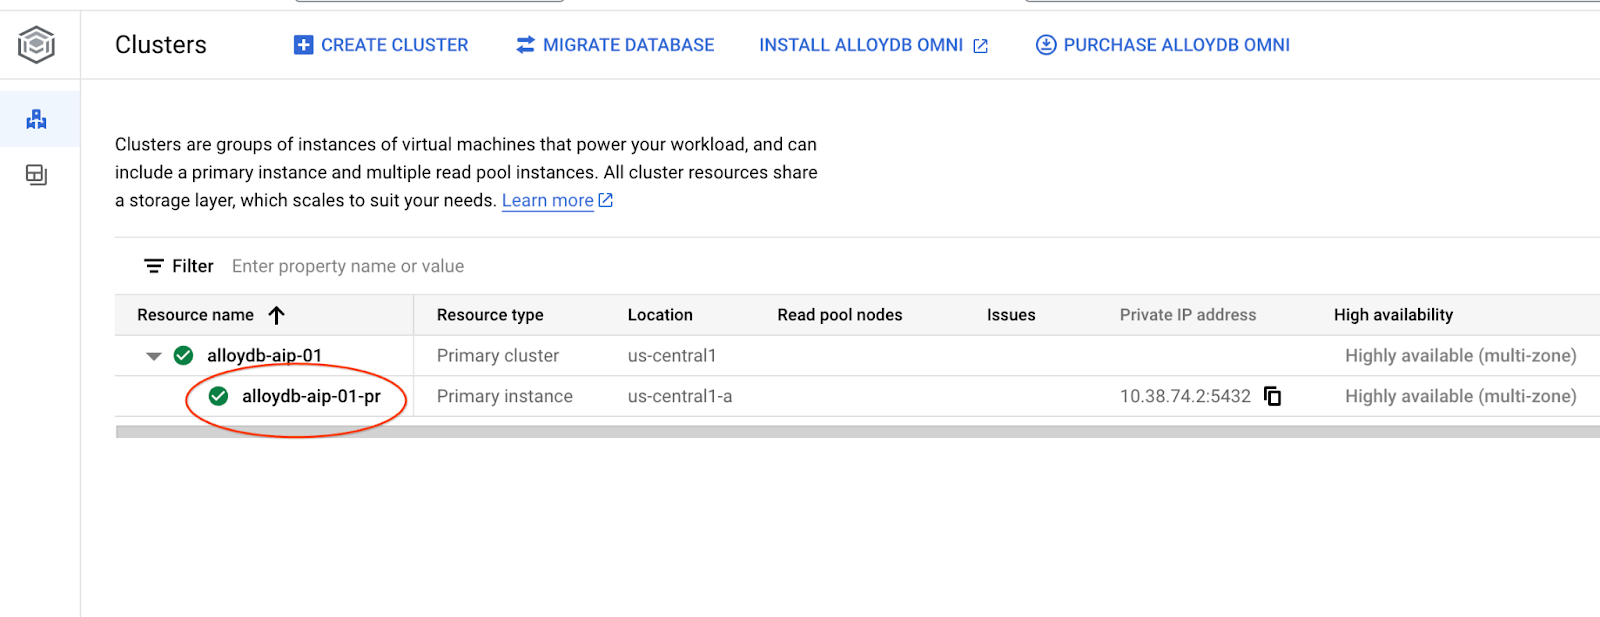
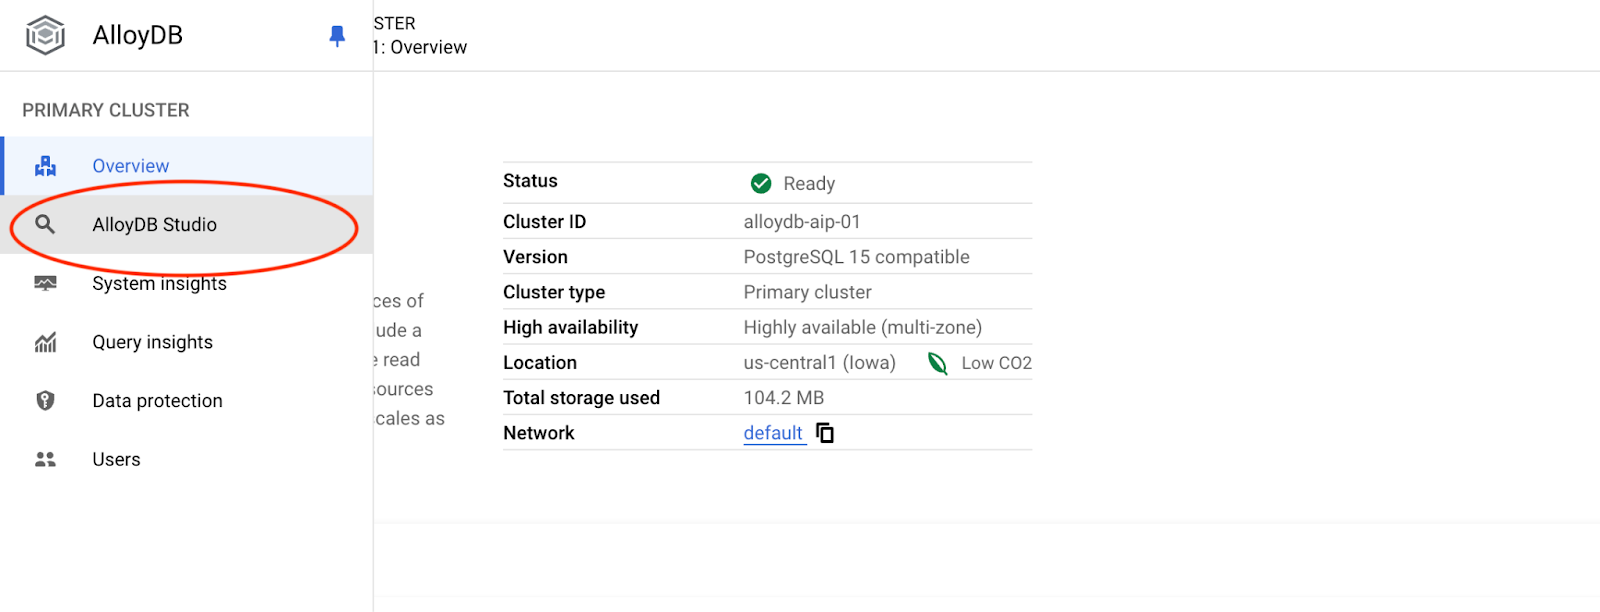
在後續章節中,所有需要連線至資料庫的 SQL 指令,都可以在 AlloyDB Studio 中執行。如要執行指令,請按一下主要執行個體,開啟 AlloyDB 叢集的網頁控制台介面。
然後按一下左側的 AlloyDB Studio:
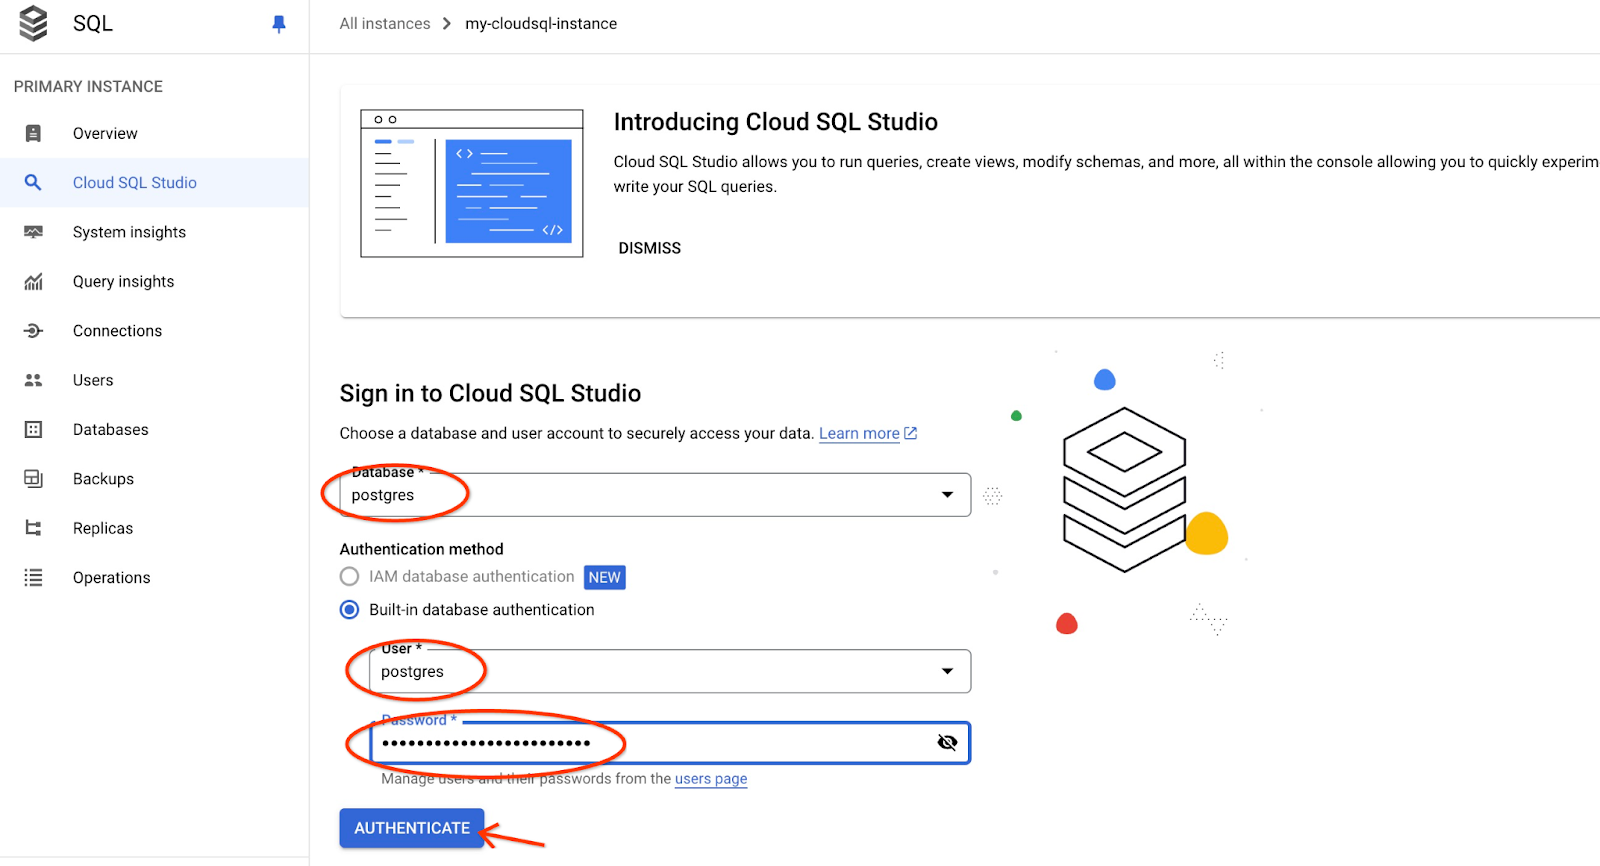
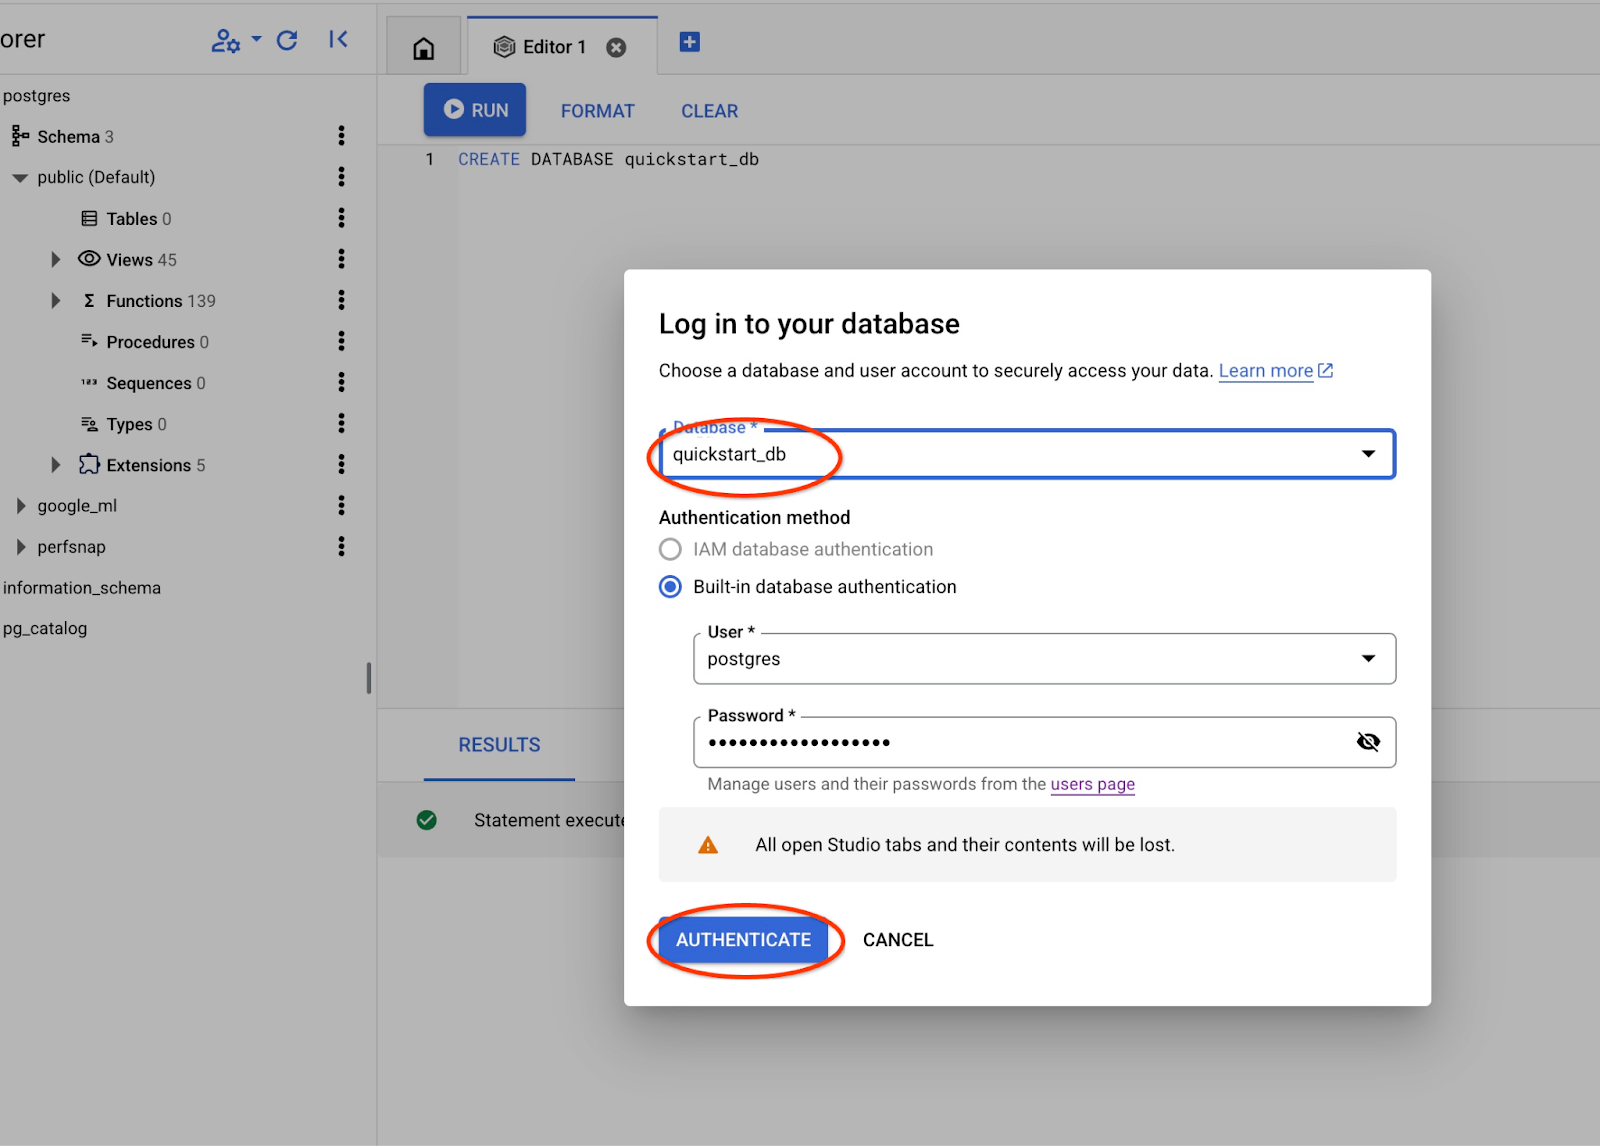
選擇 postgres 資料庫和使用者 postgres,並提供建立叢集時記下的密碼。然後按一下「驗證」按鈕。
系統會開啟 AlloyDB Studio 介面。如要在資料庫中執行指令,請按一下右側的「Editor 1」分頁標籤。

系統會開啟介面,供您執行 SQL 指令
建立資料庫
建立資料庫快速入門。
在 AlloyDB Studio 編輯器中執行下列指令。
建立資料庫:
CREATE DATABASE quickstart_db
預期輸出內容:
Statement executed successfully
連線至 quickstart_db
使用切換使用者/資料庫的按鈕,重新連線至工作室。
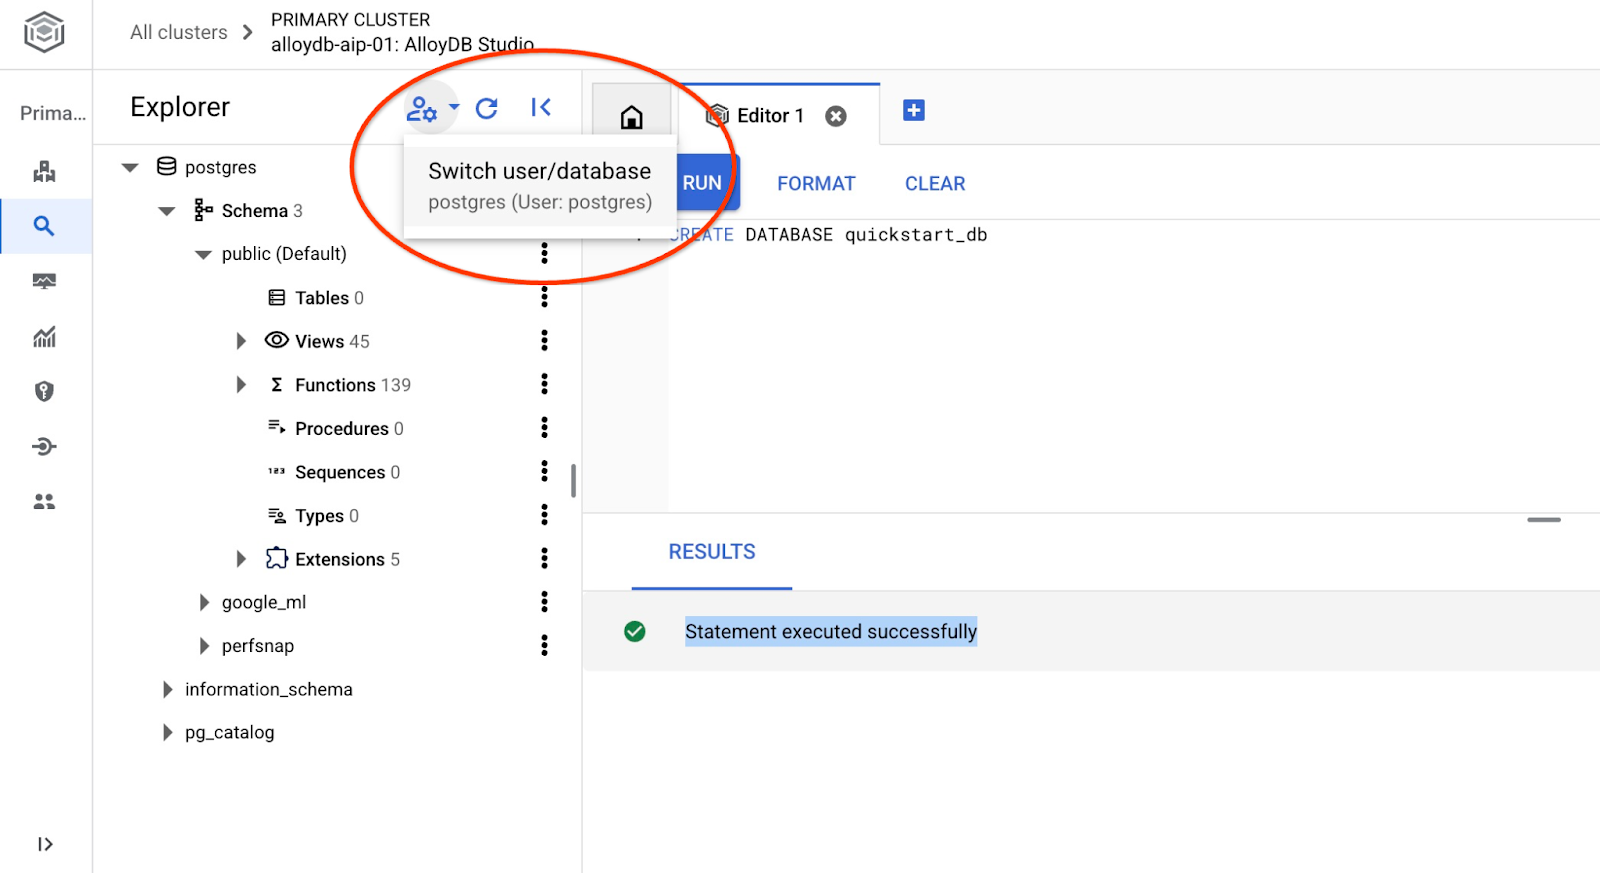
從下拉式清單中選取新的 quickstart_db 資料庫,並使用與先前相同的使用者名稱和密碼。
系統會開啟新連線,您可以在其中使用 quickstart_db 資料庫中的物件。
6. 範例資料
現在我們需要在資料庫中建立物件並載入資料。我們將使用虛構的「Cymbal ecomm」商店,其中包含一組網路商店的資料表。其中包含多個由鍵連結的資料表,類似於關聯式資料庫結構定義。
資料集會準備好並以 SQL 檔案形式放置,可透過匯入介面載入資料庫。在 Cloud Shell 中執行下列指令:
export REGION=us-central1
export ADBCLUSTER=alloydb-aip-01
gcloud alloydb clusters import $ADBCLUSTER --region=$REGION --database=quickstart_db --gcs-uri='gs://sample-data-and-media/ecomm-retail/ecom_generic.sql' --user=postgres --sql
這項指令會使用 AlloyDB SDK 建立 ecomm 結構定義,然後直接從 GCS 儲存空間匯入範例資料至資料庫,建立所有必要物件並插入資料。
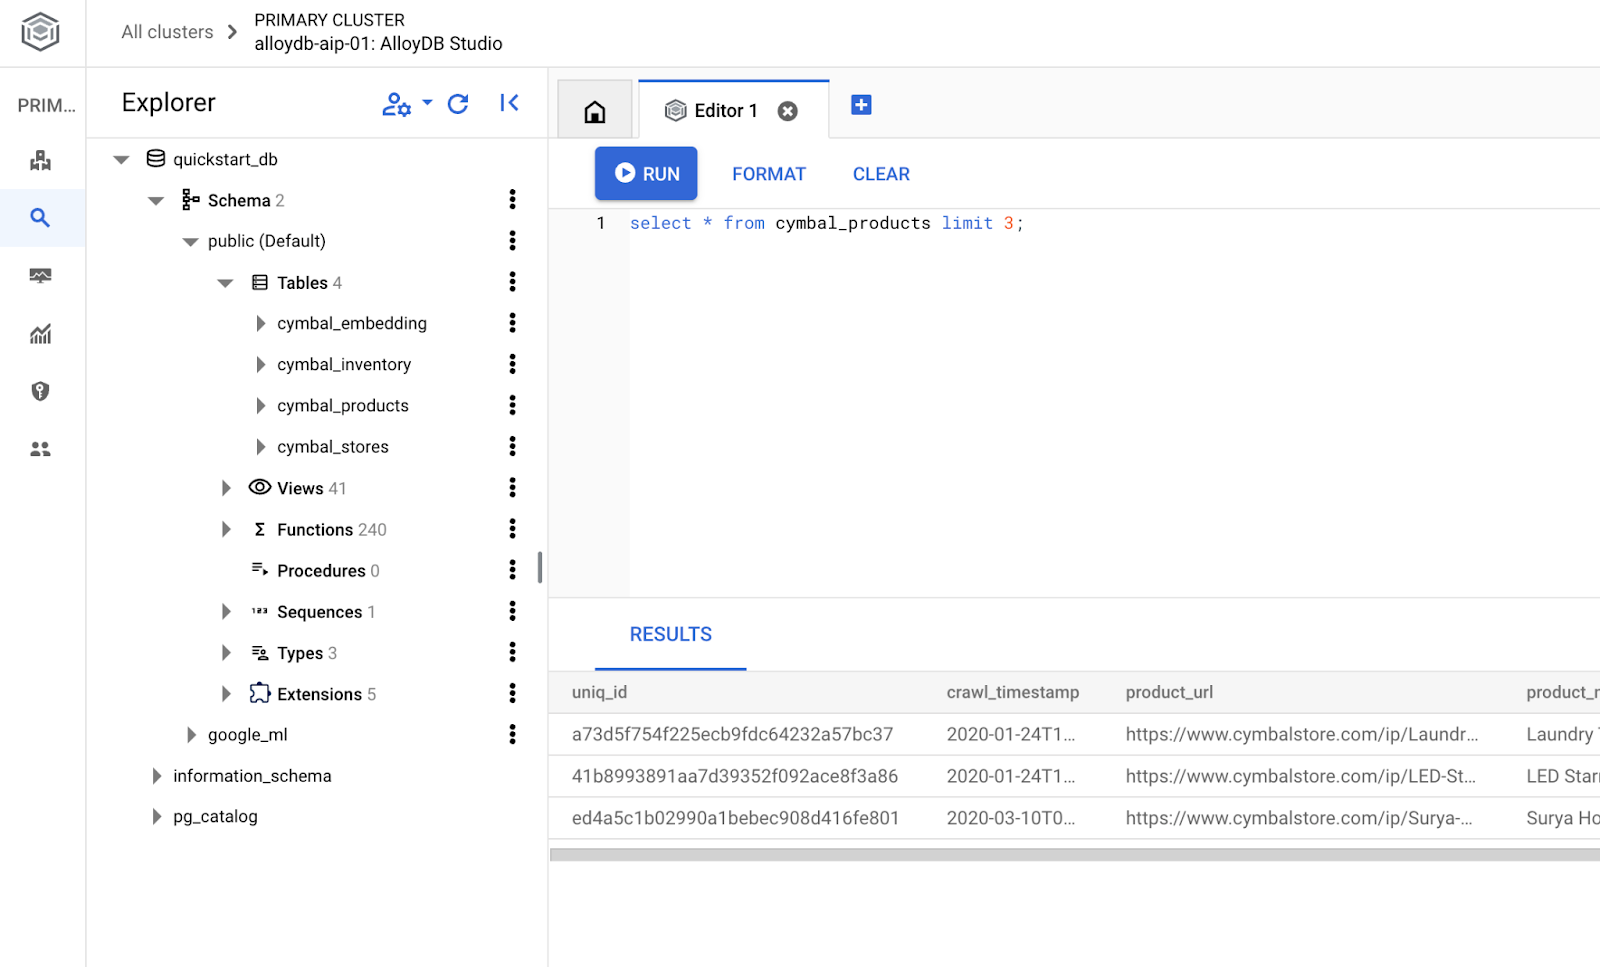
匯入完成後,我們可以在 AlloyDB Studio 中檢查資料表

並確認資料表中的資料列數。

7. 設定 NL SQL
在本章中,我們將設定 NL,以便與範例結構定義搭配運作
安裝 alloydb_nl_ai 擴充功能
我們需要在資料庫中安裝 alloydb_ai_nl 擴充功能。請先將資料庫旗標 alloydb_ai_nl.enabled 設為開啟,再執行這項操作。
在 Cloud Shell 工作階段中執行
export REGION=us-central1
export ADBCLUSTER=alloydb-aip-01
gcloud alloydb instances update $ADBCLUSTER-pr \
  --cluster=$ADBCLUSTER \
  --region=$REGION \
  --database-flags=alloydb_ai_nl.enabled=on
系統會開始更新執行個體。您可以在網頁版控制台中查看執行個體的更新狀態:
執行個體更新後 (執行個體狀態為綠色),即可啟用 alloydb_ai_nl 擴充功能。
在 AlloyDB Studio 中執行
CREATE EXTENSION IF NOT EXISTS google_ml_integration;
CREATE EXTENSION alloydb_ai_nl cascade;
建立自然語言設定
如要使用擴充功能,我們需要建立設定。您必須進行設定,才能將應用程式與特定結構定義、查詢範本和模型端點建立關聯。我們來建立 ID 為 cymbal_ecomm_config 的設定。
在 AlloyDB Studio 中執行
SELECT
  alloydb_ai_nl.g_create_configuration(
    configuration_id => 'cymbal_ecomm_config'
  );
現在可以在設定中註冊電子商務結構定義。我們已將資料匯入電子商務結構定義,因此要將該結構定義新增至 NL 設定。
SELECT
  alloydb_ai_nl.g_manage_configuration(
    operation => 'register_schema',
    configuration_id_in => 'cymbal_ecomm_config',
    schema_names_in => '{ecomm}'
  );
8. 為 NL SQL 新增情境
新增一般情境
我們可以為已註冊的結構定義新增一些背景資訊。系統會根據背景資訊,為使用者要求生成更優質的結果。舉例來說,如果使用者未明確定義偏好的品牌,我們就能說某個品牌是使用者的偏好品牌。讓我們將「Clades」(虛構品牌) 設為預設品牌。
在 AlloyDB Studio 中執行下列指令:
SELECT
  alloydb_ai_nl.g_manage_configuration(
    operation => 'add_general_context',
    configuration_id_in => 'cymbal_ecomm_config',
    general_context_in => '{"If the user doesn''t clearly define preferred brand then use Clades."}'
  );
讓我們驗證一般情境的運作方式。
在 AlloyDB Studio 中執行下列指令:
SELECT
  alloydb_ai_nl.get_sql(
    nl_config_id => 'cymbal_ecomm_config',
    nl_question => 'How many products do we have of our preferred brand?'
  );
產生的查詢會使用稍早在一般環境中定義的預設品牌:
{"sql": "SELECT count(*) FROM \"ecomm\".\"products\" WHERE \"brand\" = 'Clades'", "method": "default", "prompt": "", "retries": 0, "time(ms)": {"llm": 505.628000, "magic": 424.019000}, "error_msg": "", "nl_question": "How many products do we have of our preferred brand?", "toolbox_used": false}
我們可以清除多餘內容,只輸出 SQL 陳述式。
例如:
SELECT
  alloydb_ai_nl.get_sql(
    nl_config_id => 'cymbal_ecomm_config',
    nl_question => 'How many products do we have of our preferred brand?'
  ) ->> 'sql';
清除輸出內容:
SELECT count(*) FROM "ecomm"."products" WHERE "brand" = 'Clades'
您發現系統自動選擇了 inventory_items 資料表,而非產品,並使用該資料表建構查詢。這或許適用於某些情況,但不適用於我們的結構定義。在我們的案例中,inventory_items 表格用於追蹤銷售量,如果您沒有內部資訊,可能會造成誤導。稍後我們會說明如何提高查詢準確度。
結構定義內容
結構定義內容會說明結構定義物件 (例如資料表、檢視區塊和個別資料欄),並將資訊儲存為結構定義物件中的註解。
我們可以透過下列查詢,為定義設定中的所有結構定義物件自動建立該物件:
SELECT
  alloydb_ai_nl.generate_schema_context(
    nl_config_id => 'cymbal_ecomm_config',
    overwrite_if_exist => TRUE
  );
「TRUE」參數會指示我們重新產生並覆寫內容。執行時間會因資料模型而異。關係和連結越多,所需時間就越長。
建立內容後,我們可以使用下列查詢,檢查內容為裝置清單資料表建立的項目:
SELECT
  object_context
FROM
  alloydb_ai_nl.generated_schema_context_view
WHERE
  schema_object = 'ecomm.inventory_items';
清除輸出內容:
The `ecomm.inventory_items` table stores information about individual inventory items in an e-commerce system. Each item is uniquely identified by an `id` (primary key). The table tracks the `product_id` (foreign key referencing `ecomm.products`), the timestamp when the item was `created_at`, and the timestamp when it was `sold_at` (which can be null if the item hasn't been sold). The `cost` represents the cost of the item to the business, while `product_retail_price` is the price at which the item is sold. Additional product details include `product_category`, `product_name`, `product_brand`, `product_department`, and `product_sku` (stock keeping unit). The `product_distribution_center_id` (foreign key referencing `ecomm.distribution_centers`) indicates the distribution center where the item is located. The table includes information on both men's and women's apparel across various categories like jeans, tops & tees, activewear, sleep & lounge, intimates, swim, and accessories. The `sold_at` column indicates whether an item has been sold and when.
感覺說明缺少一些重要部分,而 inventory_items 表格反映了項目的移動情形。我們可以將這項重要資訊新增至 ecomm.inventory_items 關係的內容,藉此更新資訊。
SELECT alloydb_ai_nl.update_generated_relation_context(
  relation_name => 'ecomm.inventory_items',
  relation_context => 'The `ecomm.inventory_items` table stores information about moving and sales of inventory items in an e-commerce system. Each movement is uniquely identified by an `id` (primary key) and used in order_items table as `inventory_item_id`. The table tracks sales and movements for the `product_id` (foreign key referencing `ecomm.products`), the timestamp when the movement for the item was `created_at`, and the timestamp when it was `sold_at` (which can be null if the item hasn''t been sold). The `cost` represents the cost of the item to the business, while `product_retail_price` is the price at which the item is sold. Additional product details include `product_category`, `product_name`, `product_brand`, `product_department`, and `product_sku` (stock keeping unit). The `product_distribution_center_id` (foreign key referencing `ecomm.distribution_centers`) indicates the distribution center where the item is located. The table includes information on both men''s and women''s apparel across various categories like jeans, tops & tees, activewear, sleep & lounge, intimates, swim, and accessories. The `sold_at` column indicates whether an item has been sold and when.'
);
我們也可以驗證產品表格說明的準確性。
SELECT
  object_context
FROM
  alloydb_ai_nl.generated_schema_context_view
WHERE
  schema_object = 'ecomm.products';
我發現系統自動為產品表格產生的背景資訊相當準確,不需要進行任何變更。
我也檢查了兩個資料表中每個資料欄的資訊,確認也都正確無誤。
現在將為 ecomm.inventory_items 和 ecomm.products 產生的內容套用至設定。
SELECT alloydb_ai_nl.apply_generated_relation_context(
  relation_name => 'ecomm.inventory_items',
  overwrite_if_exist => TRUE
);

SELECT alloydb_ai_nl.apply_generated_relation_context(
  relation_name => 'ecomm.products',
  overwrite_if_exist => TRUE
);
你是否還記得我們用來為「我們有多少偏好品牌的產品?」這個問題生成 SQL 的查詢? 嗎?現在我們可以重複執行,看看輸出內容是否有所不同。
SELECT
  alloydb_ai_nl.get_sql(
    nl_config_id => 'cymbal_ecomm_config',
    nl_question => 'How many products do we have of our preferred brand?'
  ) ->> 'sql';
以下是新的輸出內容。
SELECT COUNT(*) FROM "ecomm"."products" WHERE "brand" = 'Clades';
現在系統會檢查 ecomm.products,這項作業更準確,且會傳回約 300 項產品,而非 5000 項庫存項目作業。
9. 使用值索引
值連結功能會將值片語連結至預先註冊的概念類型和資料欄名稱,藉此強化自然語言查詢。有助於提高結果的可預測性。
設定價值指數
我們可以透過產品表格中的品牌欄提出查詢,並定義概念類型,然後將其與 ecomm.products.brand 欄建立關聯,藉此搜尋品牌較穩定的產品。
現在來建立概念,並與資料欄建立關聯:
SELECT alloydb_ai_nl.add_concept_type(
    concept_type_in => 'brand_name',
    match_function_in => 'alloydb_ai_nl.get_concept_and_value_generic_entity_name',
    additional_info_in => '{
      "description": "Concept type for brand name.",
      "examples": "SELECT alloydb_ai_nl.get_concept_and_value_generic_entity_name(''Auto Forge'')" }'::jsonb
);
SELECT alloydb_ai_nl.associate_concept_type(
    column_names_in => 'ecomm.products.brand',
    concept_type_in => 'brand_name',
    nl_config_id_in => 'cymbal_ecomm_config'
);
您可以查詢 alloydb_ai_nl.list_concept_types(),驗證這個概念
SELECT alloydb_ai_nl.list_concept_types();
接著,我們可以在設定中為所有已建立和預先建構的關聯建立索引:
SELECT alloydb_ai_nl.create_value_index(
  nl_config_id_in => 'cymbal_ecomm_config'
);
使用值索引
如果您執行查詢來使用品牌名稱建立 SQL,但未定義這是品牌名稱,系統就能正確識別實體和資料欄。查詢如下:
SELECT
  alloydb_ai_nl.get_sql(
    nl_config_id => 'cymbal_ecomm_config',
    nl_question => 'How many Clades do we have?'
  ) ->> 'sql';
輸出結果會正確將「Clades」識別為品牌名稱
SELECT COUNT(*) FROM "ecomm"."products" WHERE "brand" = 'Clades';
10. 使用查詢範本
查詢範本有助於為重要業務應用程式定義穩定查詢,減少不確定性並提高準確度。
建立查詢範本
讓我們建立查詢範本,聯結多個資料表,取得去年購買「Republic Outpost」產品的顧客資訊。我們知道查詢可以使用 ecomm.products 資料表,也可以使用 ecomm.inventory_items 資料表,因為兩者都有品牌相關資訊。但資料表 products 的資料列少了 15 倍,且主鍵上有聯結的索引。使用產品表格可能更有效率。因此,我們要建立查詢範本。
SELECT alloydb_ai_nl.add_template(
    nl_config_id => 'cymbal_ecomm_config',
    intent => 'List the last names and the country of all customers who bought products of `Republic Outpost` in the last year.',
    sql => 'SELECT DISTINCT u."last_name", u."country" FROM "ecomm"."users" AS u INNER JOIN "ecomm"."order_items" AS oi ON u.id = oi."user_id" INNER JOIN "ecomm"."products" AS ep ON oi.product_id = ep.id WHERE ep.brand = ''Republic Outpost'' AND oi.created_at >= DATE_TRUNC(''year'', CURRENT_DATE - INTERVAL ''1 year'') AND oi.created_at < DATE_TRUNC(''year'', CURRENT_DATE)',
    sql_explanation => 'To answer this question, JOIN `ecomm.users` with `ecom.order_items` on having the same `users.id` and `order_items.user_id`, and JOIN the result with ecom.products on having the same `order_items.product_id` and `products.id`. Then filter rows with products.brand = ''Republic Outpost'' and by `order_items.created_at` for the last year. Return the `last_name` and the `country` of the users with matching records.',
    check_intent => TRUE
);
現在可以要求建立查詢。
SELECT
  alloydb_ai_nl.get_sql(
    nl_config_id => 'cymbal_ecomm_config',
    nl_question => 'Show me last name and country about customers who bought "Republic Outpost" products last year.'
  ) ->> 'sql';
並產生所需輸出內容。
SELECT DISTINCT u."last_name", u."country" FROM "ecomm"."users" AS u INNER JOIN "ecomm"."order_items" AS oi ON u.id = oi."user_id" INNER JOIN "ecomm"."products" AS ep ON oi.product_id = ep.id WHERE ep.brand = 'Republic Outpost' AND oi.created_at >= DATE_TRUNC('year', CURRENT_DATE - INTERVAL '1 year') AND oi.created_at < DATE_TRUNC('year', CURRENT_DATE)
或者,您也可以使用下列查詢直接執行查詢:
SELECT
alloydb_ai_nl.execute_nl_query(
    nl_config_id => 'cymbal_ecomm_config',
    nl_question => 'Show me last name and country about customers who bought "Republic Outpost" products last year.'
);
系統會以 JSON 格式傳回結果,方便您剖析。
                    execute_nl_query
--------------------------------------------------------
 {"last_name":"Adams","country":"China"}
 {"last_name":"Adams","country":"Germany"}
 {"last_name":"Aguilar","country":"China"}
 {"last_name":"Allen","country":"China"}
11. 清除環境
完成實驗室後,請終止 AlloyDB 執行個體和叢集。
刪除 AlloyDB 叢集和所有執行個體
如果您使用過 AlloyDB 試用版,如果您打算使用試用叢集測試其他實驗室和資源,請勿刪除試用叢集。您將無法在同一個專案中建立其他試用叢集。
使用 force 選項終止叢集,這也會刪除叢集中的所有執行個體。
如果連線中斷,且所有先前的設定都遺失,請在 Cloud Shell 中定義專案和環境變數:
gcloud config set project <your project id>
export REGION=us-central1
export ADBCLUSTER=alloydb-aip-01
export PROJECT_ID=$(gcloud config get-value project)
刪除叢集:
gcloud alloydb clusters delete $ADBCLUSTER --region=$REGION --force
預期的控制台輸出內容:
student@cloudshell:~ (test-project-001-402417)$ gcloud alloydb clusters delete $ADBCLUSTER --region=$REGION --force
All of the cluster data will be lost when the cluster is deleted.

Do you want to continue (Y/n)?  Y

Operation ID: operation-1697820178429-6082890a0b570-4a72f7e4-4c5df36f
Deleting cluster...done.
刪除 AlloyDB 備份
刪除叢集的所有 AlloyDB 備份:
for i in $(gcloud alloydb backups list --filter="CLUSTER_NAME: projects/$PROJECT_ID/locations/$REGION/clusters/$ADBCLUSTER" --format="value(name)" --sort-by=~createTime) ; do gcloud alloydb backups delete $(basename $i) --region $REGION --quiet; done
預期的控制台輸出內容:
student@cloudshell:~ (test-project-001-402417)$ for i in $(gcloud alloydb backups list --filter="CLUSTER_NAME: projects/$PROJECT_ID/locations/$REGION/clusters/$ADBCLUSTER" --format="value(name)" --sort-by=~createTime) ; do gcloud alloydb backups delete $(basename $i) --region $REGION --quiet; done
Operation ID: operation-1697826266108-60829fb7b5258-7f99dc0b-99f3c35f
Deleting backup...done.
12. 恭喜
恭喜您完成本程式碼研究室。您現在可以嘗試使用 AlloyDB 的 NL2SQL 功能,實作自己的解決方案。建議您試試其他與 AlloyDB 和 AlloyDB AI 相關的程式碼研究室。如要瞭解 AlloyDB 中的多模態嵌入功能,請參閱這個程式碼研究室。
涵蓋內容
- 如何部署 AlloyDB for Postgres
- 如何啟用 AlloyDB AI 自然語言
- 如何建立及調整 AI 自然語言的設定
- 如何使用自然語言生成 SQL 查詢並取得結果
13. 問卷調查
輸出: