
1. Introduction
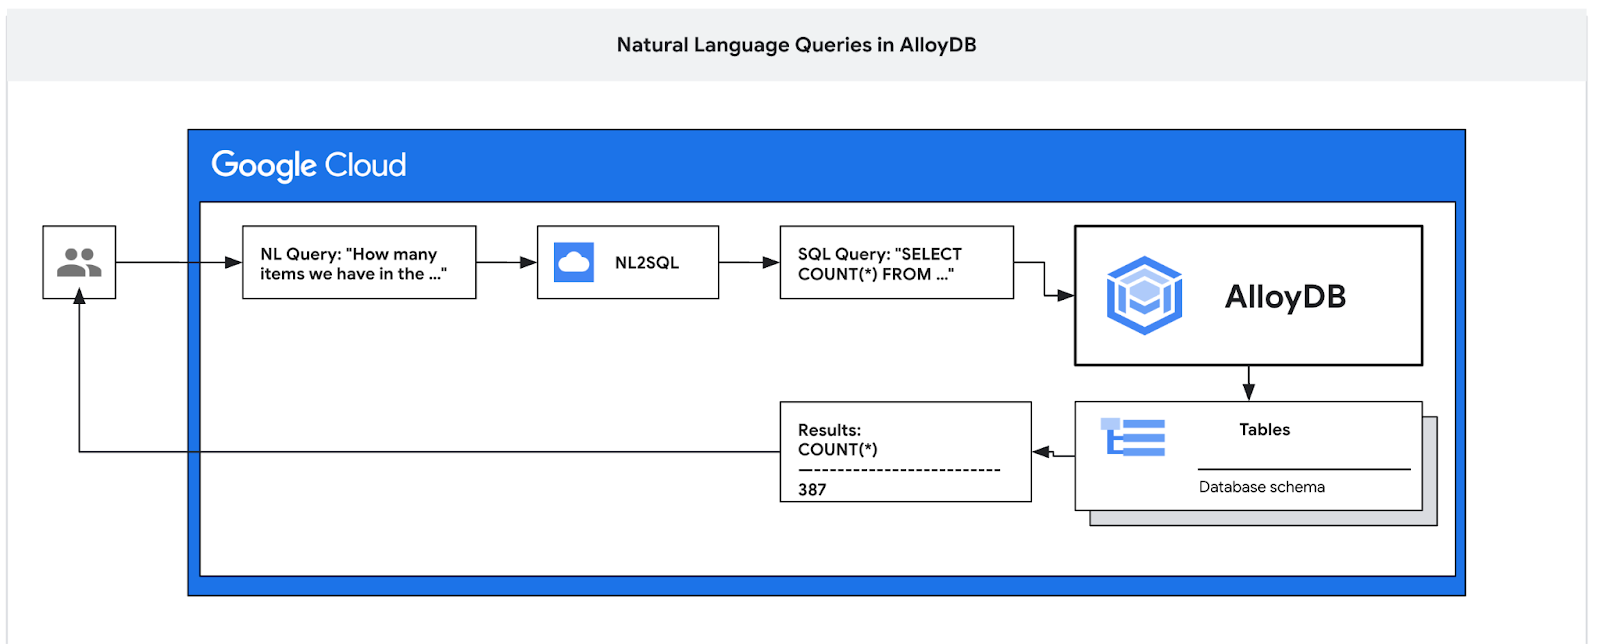
In this codelab you'll learn how to deploy AlloyDB and use AI natural language to query data and tune configuration for the predictable and efficient queries. This lab is part of a lab collection dedicated to AlloyDB AI features. You can read more on the AlloyDB AI page in documentation.
Prerequisites
- A basic understanding of Google Cloud, console
- Basic skills in command line interface and Cloud Shell
What you'll learn
- How to deploy AlloyDB for Postgres
- How to enable AlloyDB AI natural language
- How to create and tune configuration for AI natural language
- How to generate SQL queries and get results using natural language
What you'll need
- A Google Cloud Account and Google Cloud Project
- A web browser such as Chrome supporting Google Cloud console and Cloud Shell
2. Setup and Requirements
Self-paced environment setup
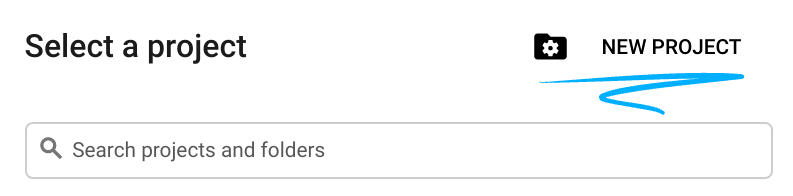
- Sign-in to the Google Cloud Console and create a new project or reuse an existing one. If you don't already have a Gmail or Google Workspace account, you must create one.

- The Project name is the display name for this project's participants. It is a character string not used by Google APIs. You can always update it.
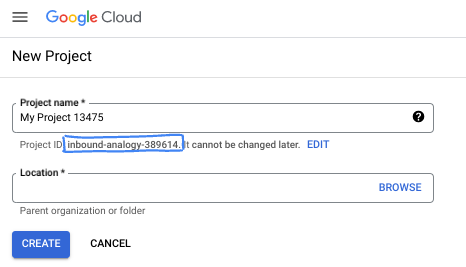
- The Project ID is unique across all Google Cloud projects and is immutable (cannot be changed after it has been set). The Cloud Console auto-generates a unique string; usually you don't care what it is. In most codelabs, you'll need to reference your Project ID (typically identified as
PROJECT_ID). If you don't like the generated ID, you might generate another random one. Alternatively, you can try your own, and see if it's available. It can't be changed after this step and remains for the duration of the project. - For your information, there is a third value, a Project Number, which some APIs use. Learn more about all three of these values in the documentation.
- Next, you'll need to enable billing in the Cloud Console to use Cloud resources/APIs. Running through this codelab won't cost much, if anything at all. To shut down resources to avoid incurring billing beyond this tutorial, you can delete the resources you created or delete the project. New Google Cloud users are eligible for the $300 USD Free Trial program.
Start Cloud Shell
While Google Cloud can be operated remotely from your laptop, in this codelab you will be using Google Cloud Shell, a command line environment running in the Cloud.
From the Google Cloud Console, click the Cloud Shell icon on the top right toolbar:

It should only take a few moments to provision and connect to the environment. When it is finished, you should see something like this:

This virtual machine is loaded with all the development tools you'll need. It offers a persistent 5GB home directory, and runs on Google Cloud, greatly enhancing network performance and authentication. All of your work in this codelab can be done within a browser. You do not need to install anything.
3. Before you begin
Enable API
Inside Cloud Shell, make sure that your project ID is setup:
gcloud config set project [YOUR-PROJECT-ID]
Set environment variable PROJECT_ID:
PROJECT_ID=$(gcloud config get-value project)
Enable all necessary services:
gcloud services enable alloydb.googleapis.com \
                       compute.googleapis.com \
                       cloudresourcemanager.googleapis.com \
                       servicenetworking.googleapis.com \
                       aiplatform.googleapis.com \
                       discoveryengine.googleapis.com \
                       secretmanager.googleapis.com
Expected output
student@cloudshell:~ (test-project-001-402417)$ gcloud config set project test-project-001-402417
Updated property [core/project].
student@cloudshell:~ (test-project-001-402417)$ PROJECT_ID=$(gcloud config get-value project)
Your active configuration is: [cloudshell-14650]
student@cloudshell:~ (test-project-001-402417)$
student@cloudshell:~ (test-project-001-402417)$ gcloud services enable alloydb.googleapis.com \
                       compute.googleapis.com \
                       cloudresourcemanager.googleapis.com \
                       servicenetworking.googleapis.com \
                       aiplatform.googleapis.com
Operation "operations/acat.p2-4470404856-1f44ebd8-894e-4356-bea7-b84165a57442" finished successfully.
4. Deploy AlloyDB
Create AlloyDB cluster and primary instance. The following procedure describes how to create an AlloyDB cluster and instance using Google Cloud SDK. If you prefer the console approach you can follow the documentation here.
Before creating an AlloyDB cluster we need an available private IP range in our VPC to be used by the future AlloyDB instance. If we don't have it then we need to create it, assign it to be used by internal Google services and after that we will be able to create the cluster and instance.
Create private IP range
We need to configure Private Service Access configuration in our VPC for AlloyDB. The assumption here is that we have the "default" VPC network in the project and it is going to be used for all actions.
Create the private IP range:
gcloud compute addresses create psa-range \
    --global \
    --purpose=VPC_PEERING \
    --prefix-length=24 \
    --description="VPC private service access" \
    --network=default
Create private connection using the allocated IP range:
gcloud services vpc-peerings connect \
    --service=servicenetworking.googleapis.com \
    --ranges=psa-range \
    --network=default
Expected console output:
student@cloudshell:~ (test-project-402417)$ gcloud compute addresses create psa-range \
    --global \
    --purpose=VPC_PEERING \
    --prefix-length=24 \
    --description="VPC private service access" \
    --network=default
Created [https://www.googleapis.com/compute/v1/projects/test-project-402417/global/addresses/psa-range].

student@cloudshell:~ (test-project-402417)$ gcloud services vpc-peerings connect \
    --service=servicenetworking.googleapis.com \
    --ranges=psa-range \
    --network=default
Operation "operations/pssn.p24-4470404856-595e209f-19b7-4669-8a71-cbd45de8ba66" finished successfully.

student@cloudshell:~ (test-project-402417)$
Create AlloyDB Cluster
In this section we are creating an AlloyDB cluster in the us-central1 region.
Define password for the postgres user. You can define your own password or use a random function to generate one
export PGPASSWORD=`openssl rand -hex 12`
Expected console output:
student@cloudshell:~ (test-project-402417)$ export PGPASSWORD=`openssl rand -hex 12`
Note the PostgreSQL password for future use.
echo $PGPASSWORD
You will need that password in the future to connect to the instance as the postgres user. I suggest writing it down or copying it somewhere to be able to use later.
Expected console output:
student@cloudshell:~ (test-project-402417)$ echo $PGPASSWORD
bbefbfde7601985b0dee5723
Create a Free Trial Cluster
If you haven't been using AlloyDB before you can create a free trial cluster:
Define region and AlloyDB cluster name. We are going to use us-central1 region and alloydb-aip-01 as a cluster name:
export REGION=us-central1
export ADBCLUSTER=alloydb-aip-01
Run command to create the cluster:
gcloud alloydb clusters create $ADBCLUSTER \
    --password=$PGPASSWORD \
    --network=default \
    --region=$REGION \
    --subscription-type=TRIAL
Expected console output:
export REGION=us-central1
export ADBCLUSTER=alloydb-aip-01
gcloud alloydb clusters create $ADBCLUSTER \
    --password=$PGPASSWORD \
    --network=default \
    --region=$REGION \
    --subscription-type=TRIAL
Operation ID: operation-1697655441138-6080235852277-9e7f04f5-2012fce4
Creating cluster...done.
Create an AlloyDB primary instance for our cluster in the same cloud shell session. If you are disconnected you will need to define the region and cluster name environment variables again.
gcloud alloydb instances create $ADBCLUSTER-pr \
    --instance-type=PRIMARY \
    --cpu-count=8 \
    --region=$REGION \
    --cluster=$ADBCLUSTER
Expected console output:
student@cloudshell:~ (test-project-402417)$ gcloud alloydb instances create $ADBCLUSTER-pr \
    --instance-type=PRIMARY \
    --cpu-count=8 \
    --region=$REGION \
    --availability-type ZONAL \
    --cluster=$ADBCLUSTER
Operation ID: operation-1697659203545-6080315c6e8ee-391805db-25852721
Creating instance...done.
Create AlloyDB Standard Cluster
If it is not your first AlloyDB cluster in the project proceed with creation of a standard cluster.
Define region and AlloyDB cluster name. We are going to use us-central1 region and alloydb-aip-01 as a cluster name:
export REGION=us-central1
export ADBCLUSTER=alloydb-aip-01
Run command to create the cluster:
gcloud alloydb clusters create $ADBCLUSTER \
    --password=$PGPASSWORD \
    --network=default \
    --region=$REGION
Expected console output:
export REGION=us-central1
export ADBCLUSTER=alloydb-aip-01
gcloud alloydb clusters create $ADBCLUSTER \
    --password=$PGPASSWORD \
    --network=default \
    --region=$REGION
Operation ID: operation-1697655441138-6080235852277-9e7f04f5-2012fce4
Creating cluster...done.
Create an AlloyDB primary instance for our cluster in the same cloud shell session. If you are disconnected you will need to define the region and cluster name environment variables again.
gcloud alloydb instances create $ADBCLUSTER-pr \
    --instance-type=PRIMARY \
    --cpu-count=2 \
    --region=$REGION \
    --cluster=$ADBCLUSTER
Expected console output:
student@cloudshell:~ (test-project-402417)$ gcloud alloydb instances create $ADBCLUSTER-pr \
    --instance-type=PRIMARY \
    --cpu-count=2 \
    --region=$REGION \
    --availability-type ZONAL \
    --cluster=$ADBCLUSTER
Operation ID: operation-1697659203545-6080315c6e8ee-391805db-25852721
Creating instance...done.
5. Prepare Database
We need to create a database, enable Vertex AI integration, create database objects and import the data.
Grant Necessary Permissions to AlloyDB
Add Vertex AI permissions to the AlloyDB service agent.
Open another Cloud Shell tab using the sign "+" at the top.
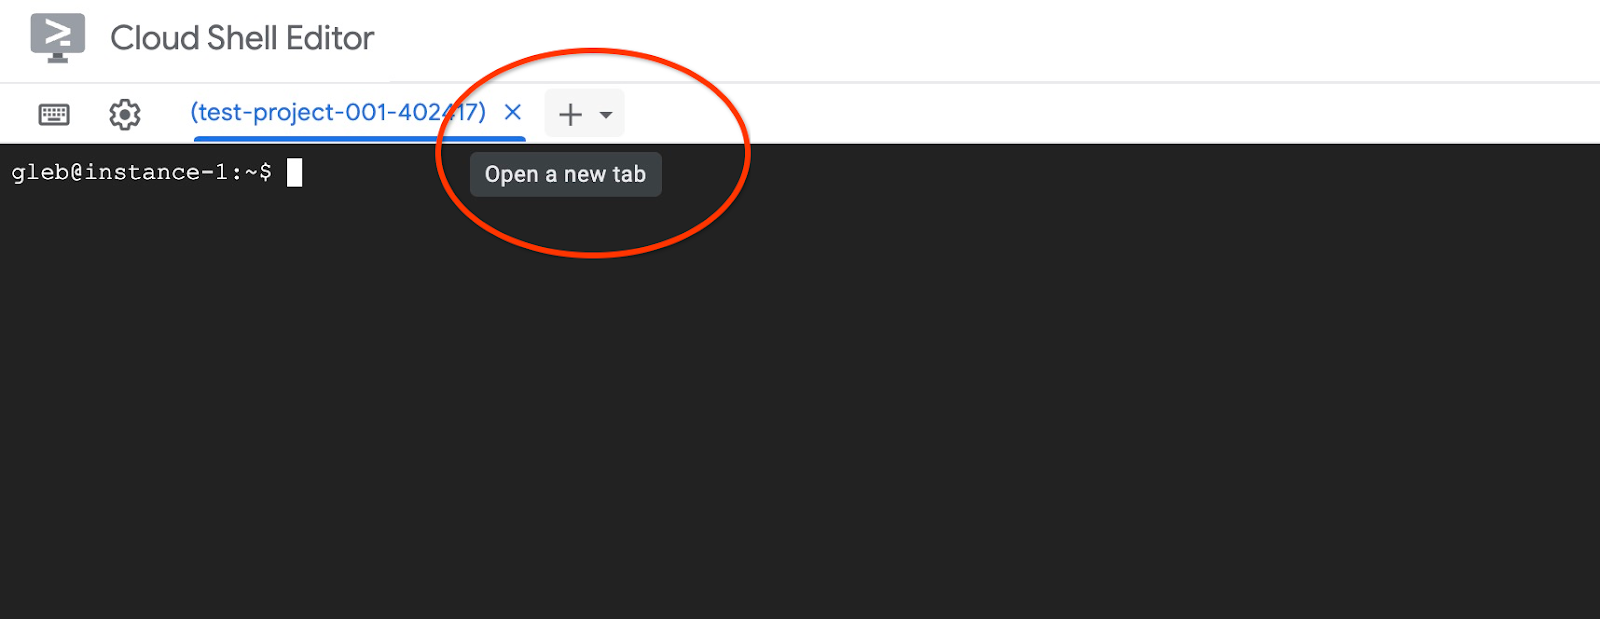
In the new cloud shell tab execute:
PROJECT_ID=$(gcloud config get-value project)
gcloud projects add-iam-policy-binding $PROJECT_ID \
  --member="serviceAccount:service-$(gcloud projects describe $PROJECT_ID --format="value(projectNumber)")@gcp-sa-alloydb.iam.gserviceaccount.com" \
  --role="roles/aiplatform.user"
Expected console output:
student@cloudshell:~ (test-project-001-402417)$ PROJECT_ID=$(gcloud config get-value project)
Your active configuration is: [cloudshell-11039]
student@cloudshell:~ (test-project-001-402417)$ gcloud projects add-iam-policy-binding $PROJECT_ID \
  --member="serviceAccount:service-$(gcloud projects describe $PROJECT_ID --format="value(projectNumber)")@gcp-sa-alloydb.iam.gserviceaccount.com" \
  --role="roles/aiplatform.user"
Updated IAM policy for project [test-project-001-402417].
bindings:
- members:
  - serviceAccount:service-4470404856@gcp-sa-alloydb.iam.gserviceaccount.com
  role: roles/aiplatform.user
- members:
...
etag: BwYIEbe_Z3U=
version: 1
Close the tab by either execution command "exit" in the tab:
exit
Connect to AlloyDB Studio
In the following chapters all the SQL commands requiring connection to the database can be alternatively executed in the AlloyDB Studio. To run the command you need to open the web console interface for your AlloyDB cluster by clicking on the primary instance.
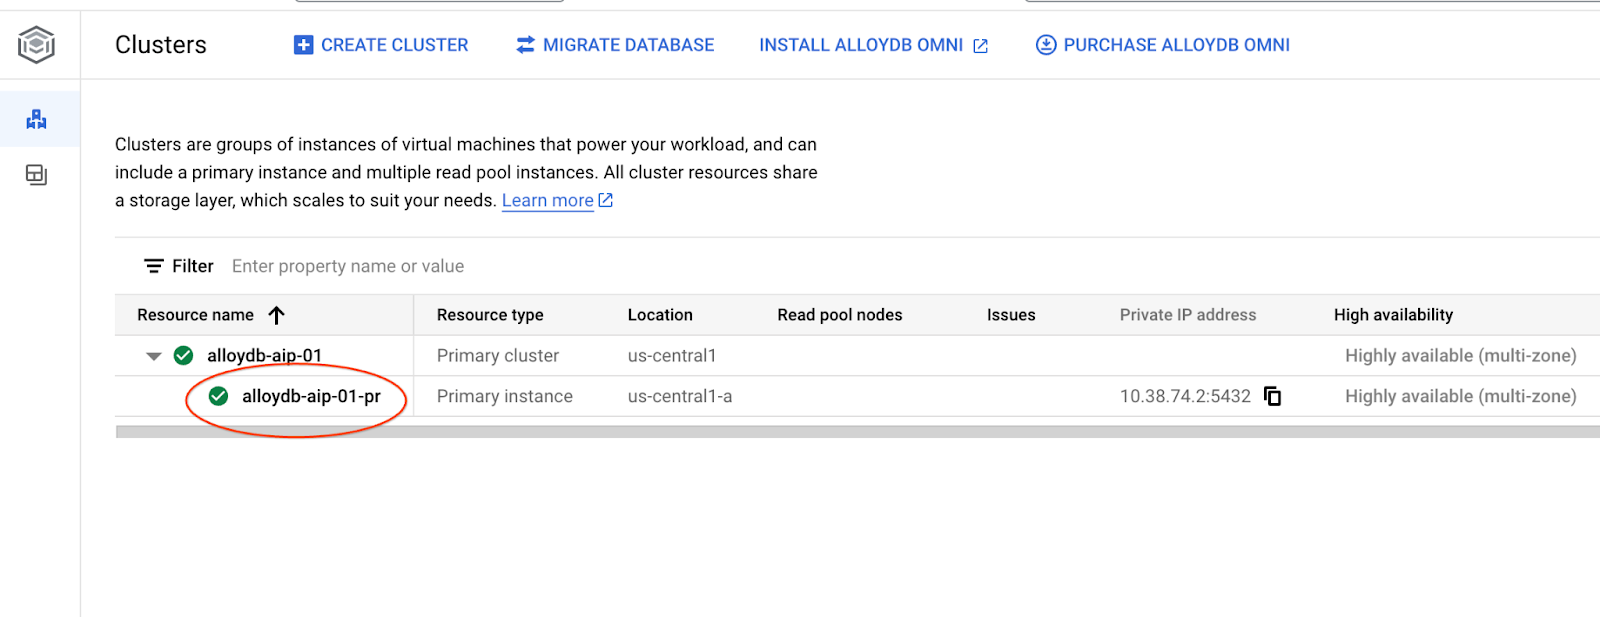
Then click on AlloyDB Studio on the left:
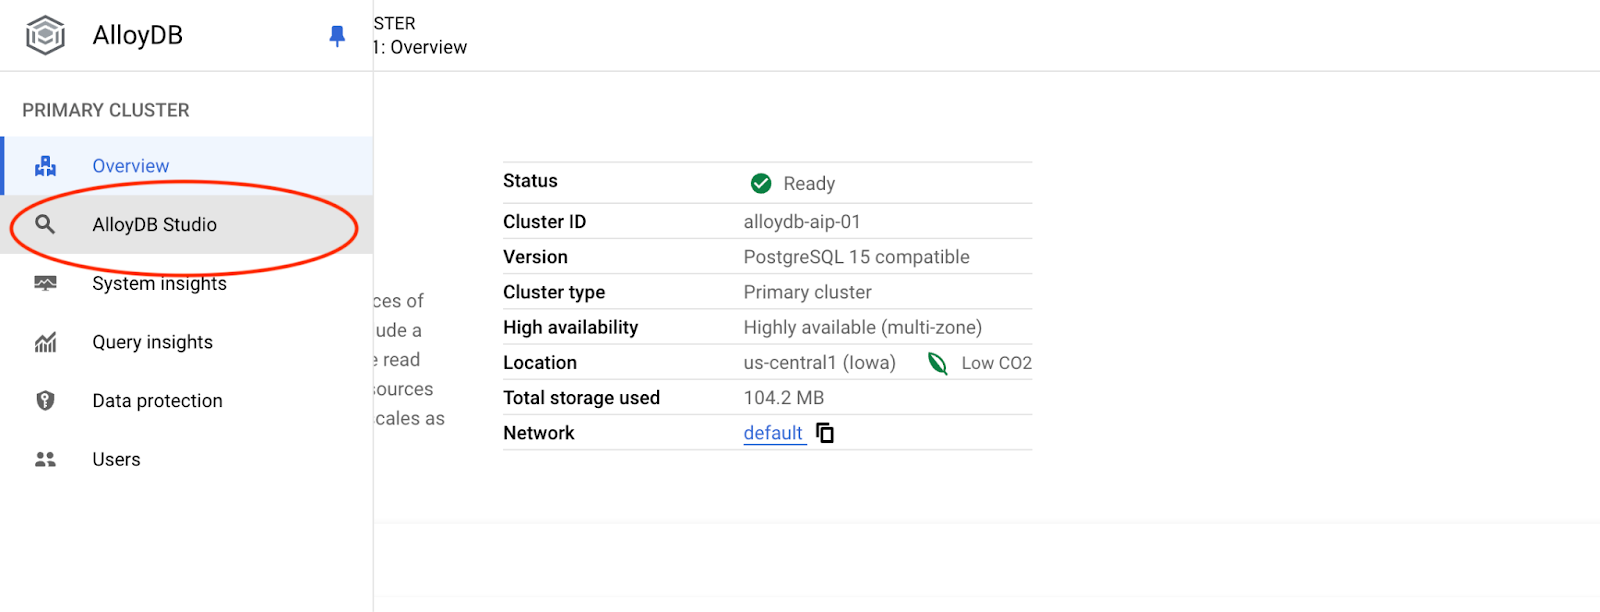
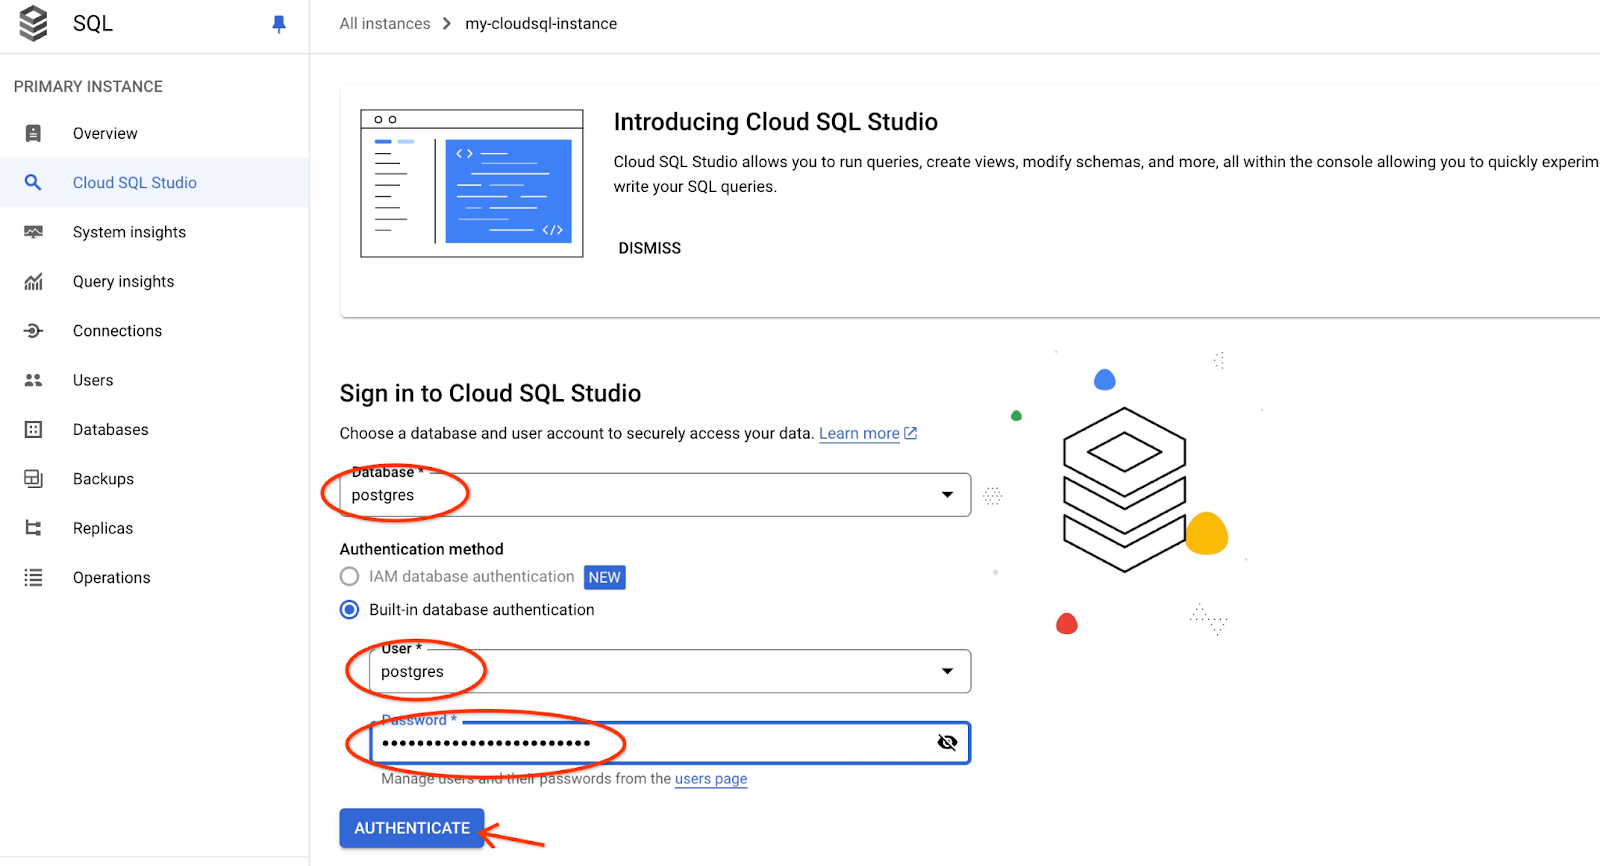
Choose the postgres database, user postgres and provide the password noted when we created the cluster. Then click on the "Authenticate" button.
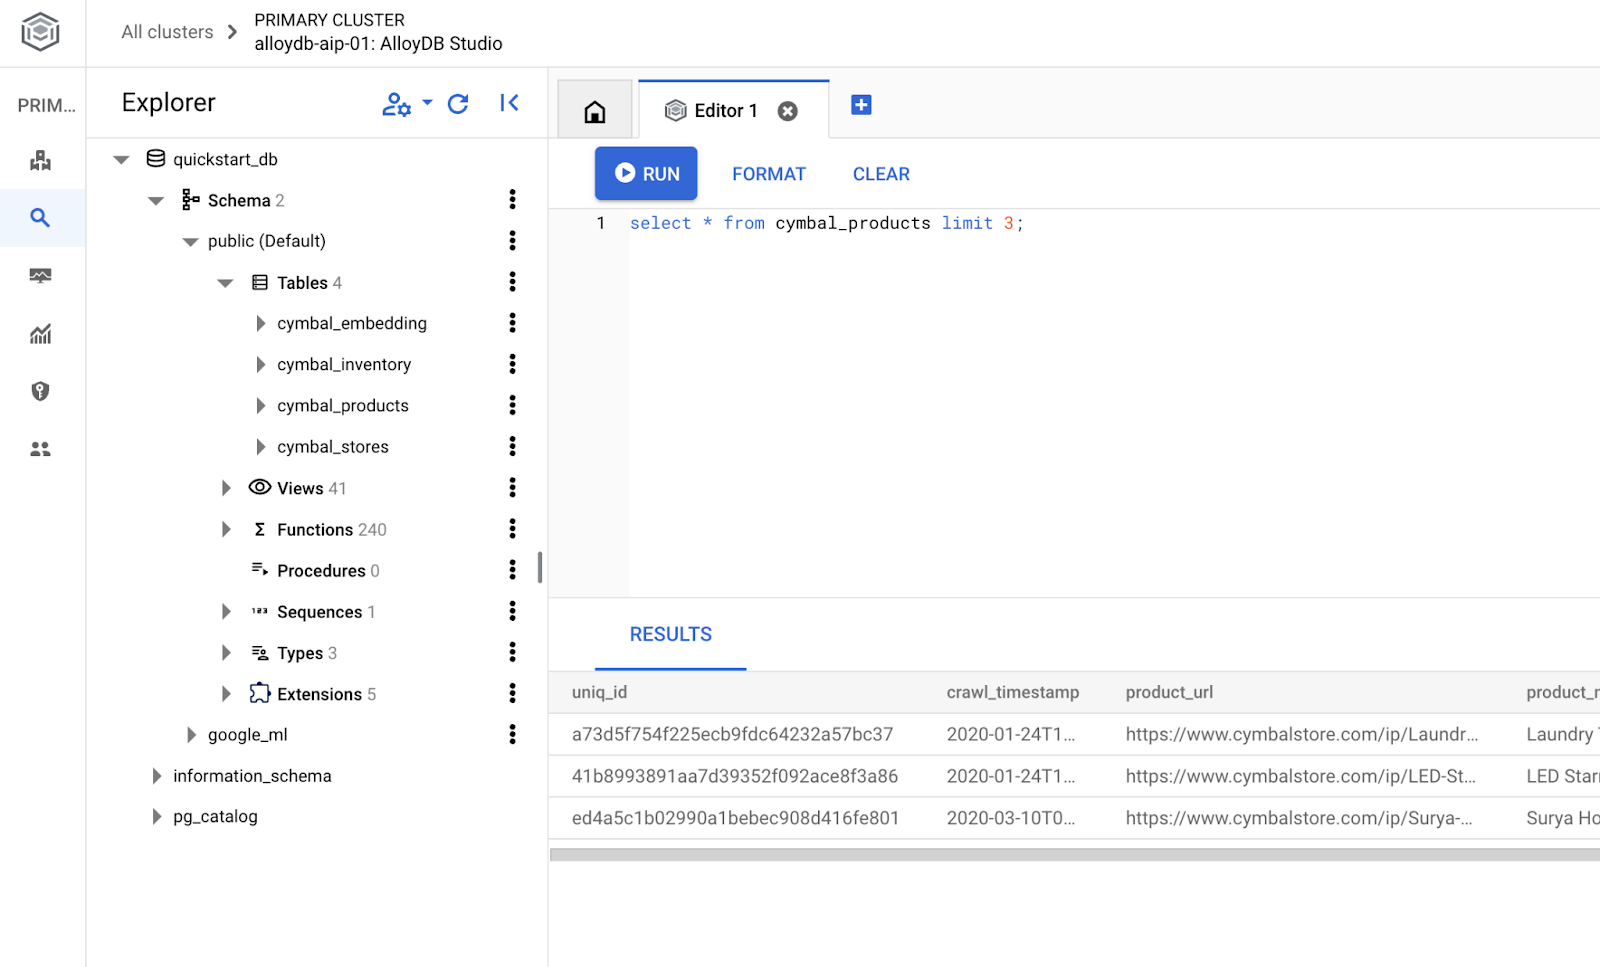
It will open the AlloyDB Studio interface. To run the commands in the database you click on the "Editor 1" tab on the right.
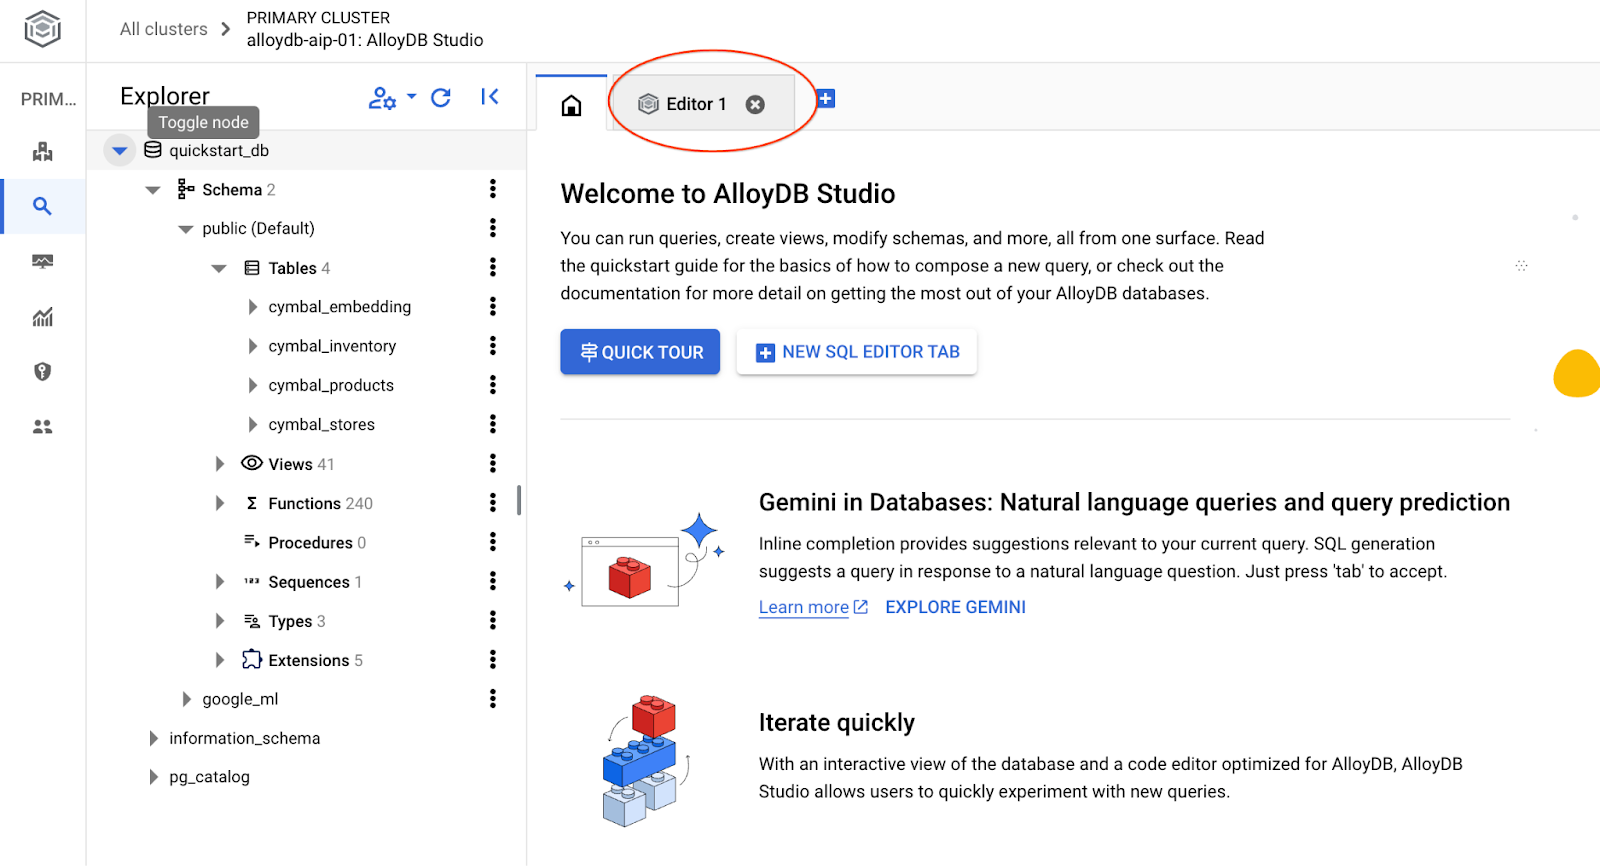
It opens interface where you can run SQL commands
Create Database
Create database quickstart.
In the AlloyDB Studio Editor execute the following command.
Create database:
CREATE DATABASE quickstart_db
Expected output:
Statement executed successfully
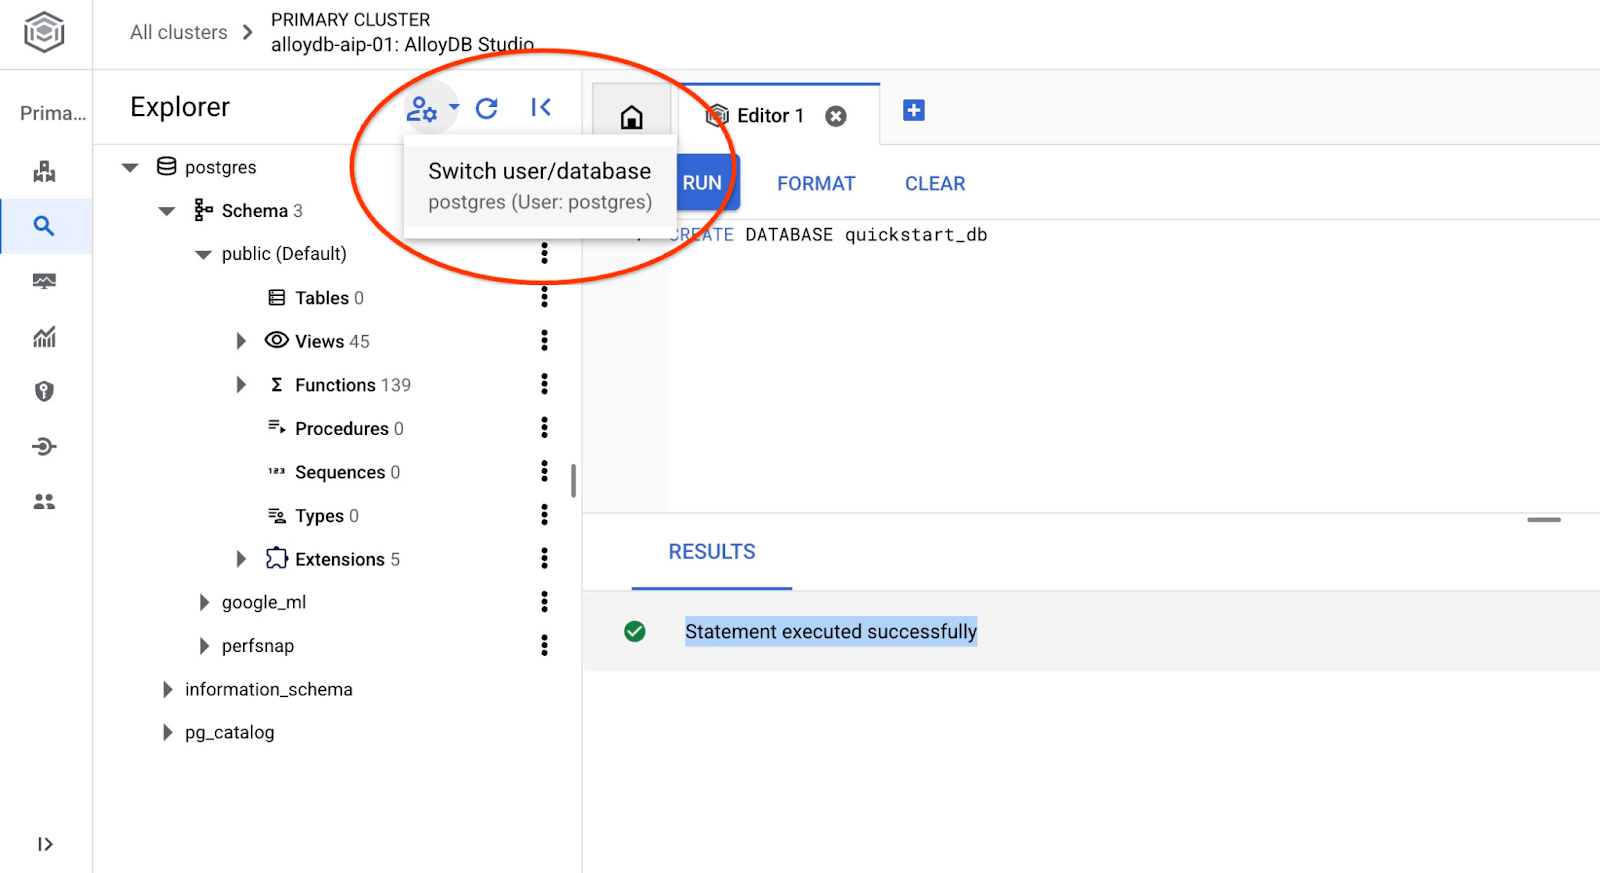
Connect to quickstart_db
Reconnect to the studio using the button to switch user/database.
Pick up from the dropdown list the new quickstart_db database and use the same user and password as before.
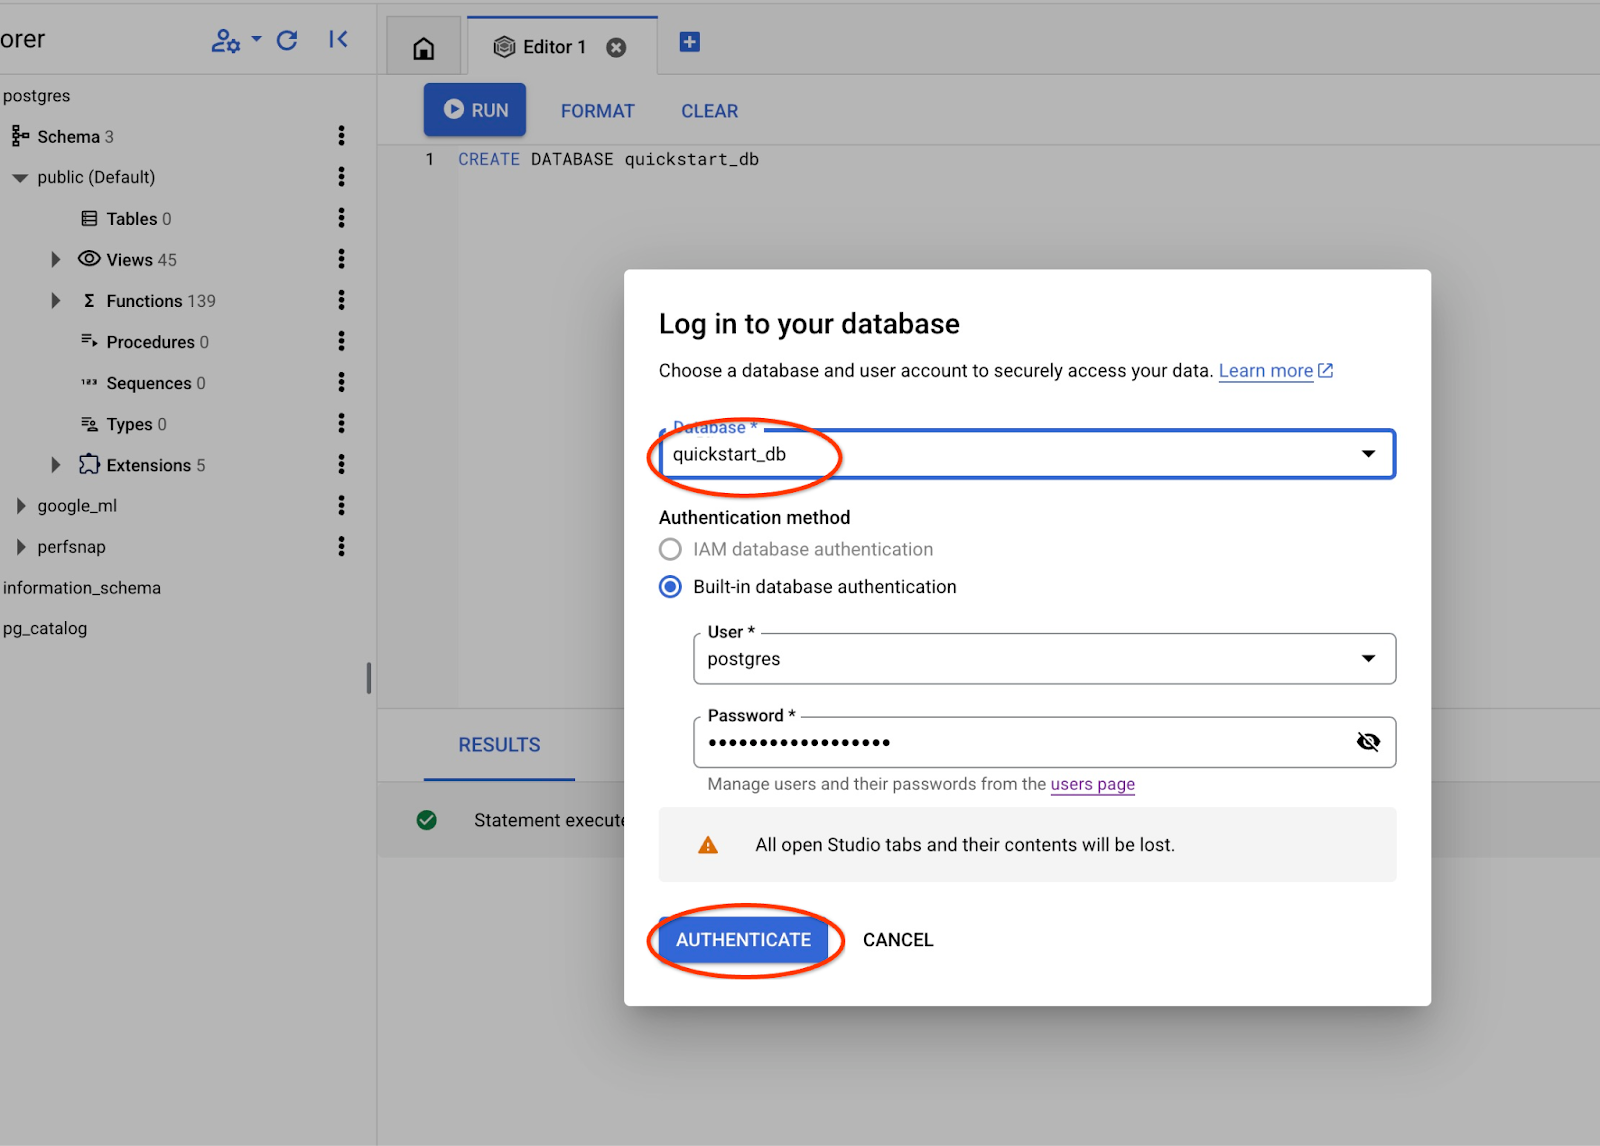
It will open a new connection where you can work with objects from the quickstart_db database.
6. Sample Data
Now we need to create objects in the database and load data. We are going to use a fictional "Cymbal ecomm" store with a set of tables for online stores. It contains several tables connected by their keys resembling a relational database schema.
The dataset is prepared and placed as an SQL file which can be loaded to the database using the import interface. In the cloud Shell execute the following commands:
export REGION=us-central1
export ADBCLUSTER=alloydb-aip-01
gcloud alloydb clusters import $ADBCLUSTER --region=$REGION --database=quickstart_db --gcs-uri='gs://sample-data-and-media/ecomm-retail/ecom_generic.sql' --user=postgres --sql
The command is using AlloyDB SDK and creates an ecomm schema and then imports sample data directly from the GCS bucket to the database creating all necessary objects and inserting data.
After the import we can check the tables in AlloyDB Studio

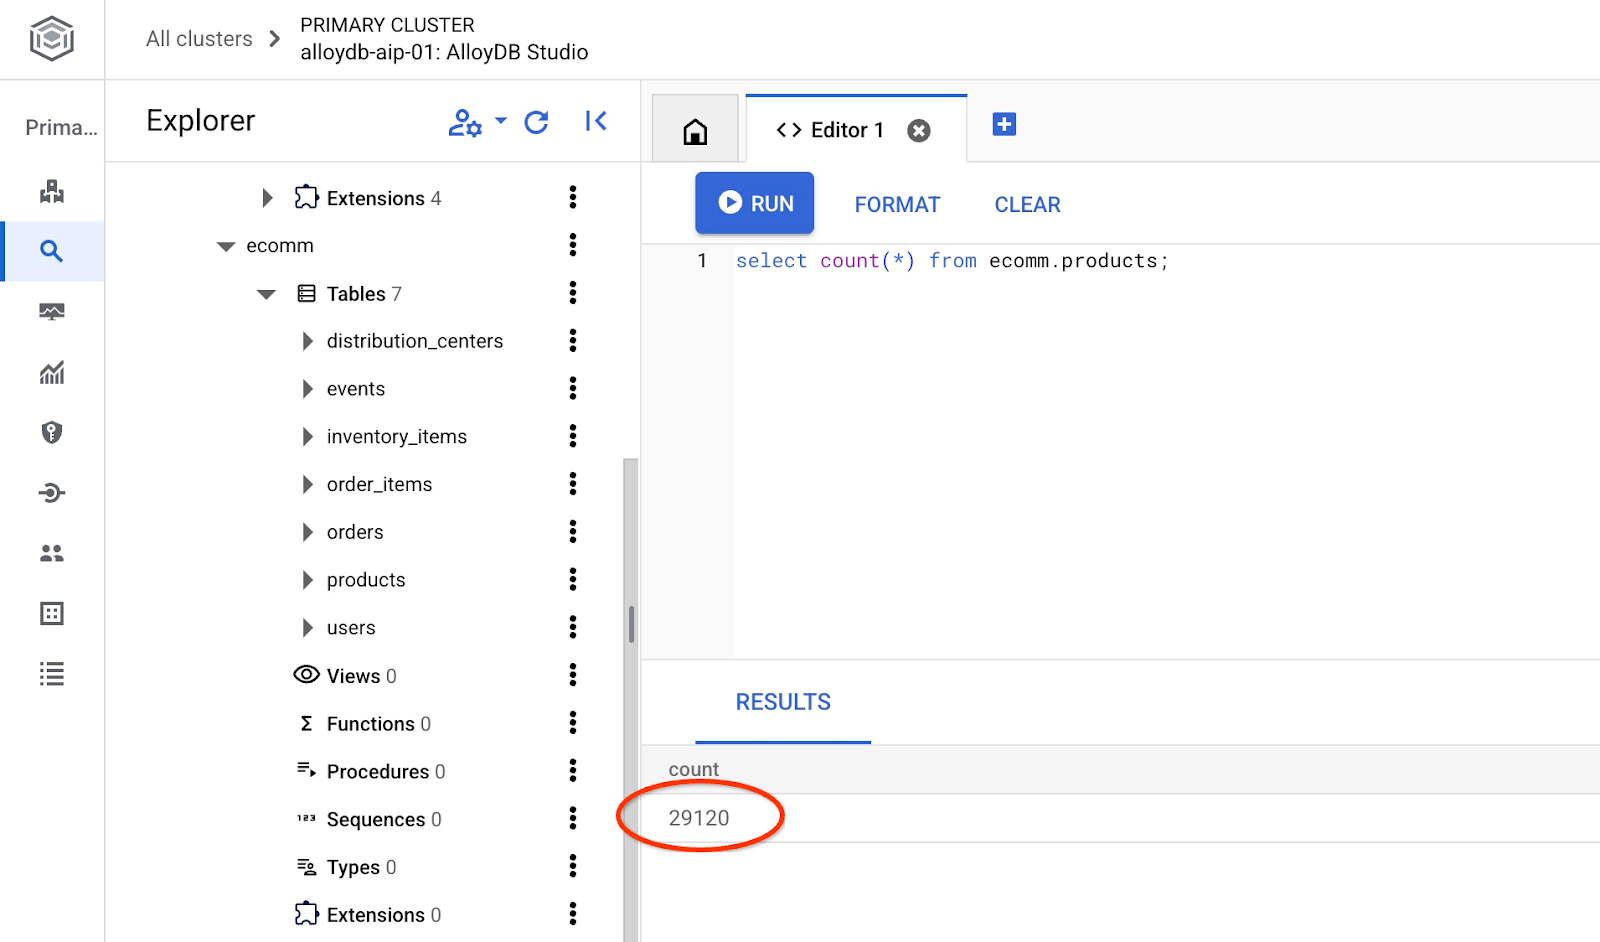
And verify the number of rows in the table.
7. Configure NL SQL
In this chapter we will configure NL to work with your sample schema
Install the alloydb_nl_ai extension
We need to install the alloydb_ai_nl extension to our database. Before doing so we have to set up the database flag alloydb_ai_nl.enabled to on.
In the Cloud Shell session execute
export REGION=us-central1
export ADBCLUSTER=alloydb-aip-01
gcloud alloydb instances update $ADBCLUSTER-pr \
  --cluster=$ADBCLUSTER \
  --region=$REGION \
  --database-flags=alloydb_ai_nl.enabled=on
It will initiate the instance update. You can see the status of the updating instance in the web console:
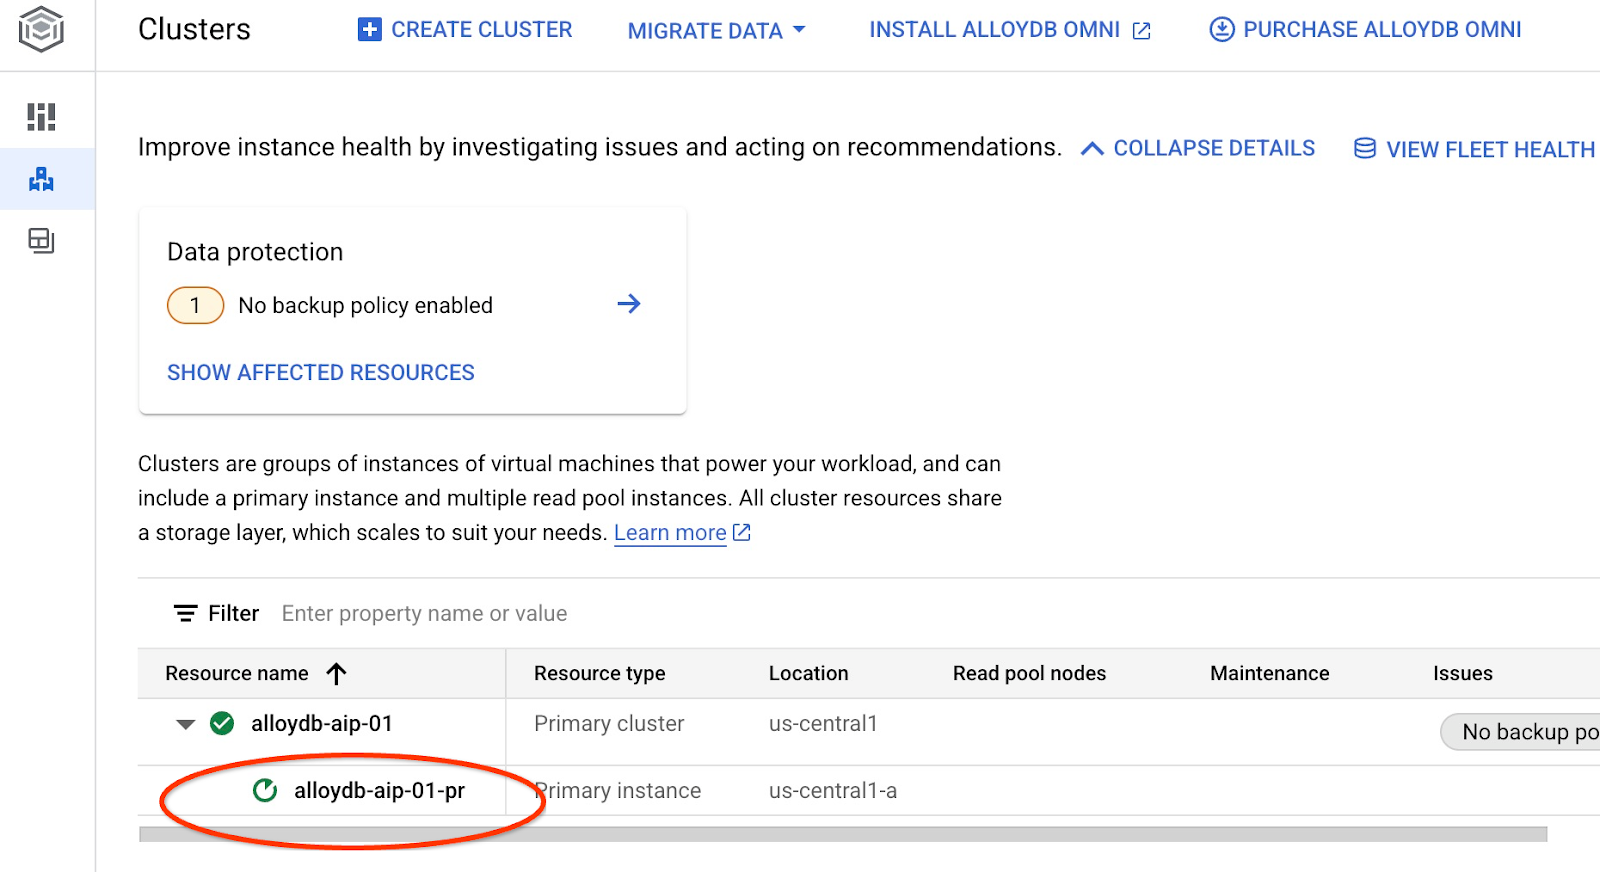
When the instance is updated (the instance status is green) you can enable the alloydb_ai_nl extension.
In the AlloyDB Studio execute
CREATE EXTENSION IF NOT EXISTS google_ml_integration;
CREATE EXTENSION alloydb_ai_nl cascade;
Create a natural language configuration
To use extensions we need to create a configuration. The configuration is necessary to associate applications to certain schemas, query templates, and model endpoints. Let's create a configuration with id cymbal_ecomm_config.
In the AlloyDB Studio execute
SELECT
  alloydb_ai_nl.g_create_configuration(
    configuration_id => 'cymbal_ecomm_config'
  );
Now we can register our ecomm schema in the configuration. We've imported data into the ecomm schema, so we are going to add that schema to our NL configuration.
SELECT
  alloydb_ai_nl.g_manage_configuration(
    operation => 'register_schema',
    configuration_id_in => 'cymbal_ecomm_config',
    schema_names_in => '{ecomm}'
  );
8. Add Context to NL SQL
Add general context
We can add some context for our registered schema. The context is supposed to help to generate better results in return to users requests. For example we can say that one brand is the preferred brand for a user when it is not explicitly defined. Let's make Clades (fictional brand) as our default brand.
In the AlloyDB Studio execute:
SELECT
  alloydb_ai_nl.g_manage_configuration(
    operation => 'add_general_context',
    configuration_id_in => 'cymbal_ecomm_config',
    general_context_in => '{"If the user doesn''t clearly define preferred brand then use Clades."}'
  );
Let's verify how the general context works for us.
In the AlloyDB Studio execute:
SELECT
  alloydb_ai_nl.get_sql(
    nl_config_id => 'cymbal_ecomm_config',
    nl_question => 'How many products do we have of our preferred brand?'
  );
The generated query is using the our default brand defined earlier in the general context:
{"sql": "SELECT count(*) FROM \"ecomm\".\"products\" WHERE \"brand\" = 'Clades'", "method": "default", "prompt": "", "retries": 0, "time(ms)": {"llm": 505.628000, "magic": 424.019000}, "error_msg": "", "nl_question": "How many products do we have of our preferred brand?", "toolbox_used": false}
We can clean it up and produce only the SQL statement as output.
For example:
SELECT
  alloydb_ai_nl.get_sql(
    nl_config_id => 'cymbal_ecomm_config',
    nl_question => 'How many products do we have of our preferred brand?'
  ) ->> 'sql';
Cleared output:
SELECT count(*) FROM "ecomm"."products" WHERE "brand" = 'Clades'
You noticed that it automatically chose the inventory_items table instead of products and used it to build the query. That might work for some cases but not for our schema. In our case the inventory_items table serves to track sales which can be misleading if you don't have insider information. We are going to check later how to make our queries more accurate.
Schema context
Schema context describes schema objects like tables, views and individual columns storing information as comments in the schema objects.
We can create it automatically for all schema objects in our defined configuration using the following query:
SELECT
  alloydb_ai_nl.generate_schema_context(
    nl_config_id => 'cymbal_ecomm_config',
    overwrite_if_exist => TRUE
  );
The "TRUE" parameter directs us to regenerate the context and overwrite it. The execution will take some time depending on the data model. More relations and connections you have - longer it might take.
After creating the context we can check what it has created for the inventory items table by using the query:
SELECT
  object_context
FROM
  alloydb_ai_nl.generated_schema_context_view
WHERE
  schema_object = 'ecomm.inventory_items';
Cleared output:
The `ecomm.inventory_items` table stores information about individual inventory items in an e-commerce system. Each item is uniquely identified by an `id` (primary key). The table tracks the `product_id` (foreign key referencing `ecomm.products`), the timestamp when the item was `created_at`, and the timestamp when it was `sold_at` (which can be null if the item hasn't been sold). The `cost` represents the cost of the item to the business, while `product_retail_price` is the price at which the item is sold. Additional product details include `product_category`, `product_name`, `product_brand`, `product_department`, and `product_sku` (stock keeping unit). The `product_distribution_center_id` (foreign key referencing `ecomm.distribution_centers`) indicates the distribution center where the item is located. The table includes information on both men's and women's apparel across various categories like jeans, tops & tees, activewear, sleep & lounge, intimates, swim, and accessories. The `sold_at` column indicates whether an item has been sold and when.
It feels like the description is missing some key parts that the inventory_items table reflects movement of the items. We can update it by adding this key information to the context for the ecomm.inventory_items relation.
SELECT alloydb_ai_nl.update_generated_relation_context(
  relation_name => 'ecomm.inventory_items',
  relation_context => 'The `ecomm.inventory_items` table stores information about moving and sales of inventory items in an e-commerce system. Each movement is uniquely identified by an `id` (primary key) and used in order_items table as `inventory_item_id`. The table tracks sales and movements for the `product_id` (foreign key referencing `ecomm.products`), the timestamp when the movement for the item was `created_at`, and the timestamp when it was `sold_at` (which can be null if the item hasn''t been sold). The `cost` represents the cost of the item to the business, while `product_retail_price` is the price at which the item is sold. Additional product details include `product_category`, `product_name`, `product_brand`, `product_department`, and `product_sku` (stock keeping unit). The `product_distribution_center_id` (foreign key referencing `ecomm.distribution_centers`) indicates the distribution center where the item is located. The table includes information on both men''s and women''s apparel across various categories like jeans, tops & tees, activewear, sleep & lounge, intimates, swim, and accessories. The `sold_at` column indicates whether an item has been sold and when.'
);
Also we can verify accuracy of the description for our products table.
SELECT
  object_context
FROM
  alloydb_ai_nl.generated_schema_context_view
WHERE
  schema_object = 'ecomm.products';
I found the automatically generated context for the products table to be quite accurate and not requiring any changes.
I also checked information about each column in both tables and found it correct too.
Let's apply the generated context for the ecomm.inventory_items and ecomm.products to our configuration.
SELECT alloydb_ai_nl.apply_generated_relation_context(
  relation_name => 'ecomm.inventory_items',
  overwrite_if_exist => TRUE
);

SELECT alloydb_ai_nl.apply_generated_relation_context(
  relation_name => 'ecomm.products',
  overwrite_if_exist => TRUE
);
Do you remember our query to generate SQL for the question ‘How many products do we have of our preferred brand?' ? Now we can repeat it and see if the output is changed.
SELECT
  alloydb_ai_nl.get_sql(
    nl_config_id => 'cymbal_ecomm_config',
    nl_question => 'How many products do we have of our preferred brand?'
  ) ->> 'sql';
Here is the new output.
SELECT COUNT(*) FROM "ecomm"."products" WHERE "brand" = 'Clades';
And now it is checking the ecomm.products which is more accurate and returns about 300 products instead of 5000 of operations with inventory items.
9. Working with Value Index
Value linking enriches natural language queries by connecting value phrases to pre-registered concept types and column names. It can help to make the results more predictable.
Configure the Value Index
We can make our queries using the brand column in the products table and search for products with brands more stable by defining the concept type and associate it with the ecomm.products.brand column.
Let's create the concept and associate it with the column:
SELECT alloydb_ai_nl.add_concept_type(
    concept_type_in => 'brand_name',
    match_function_in => 'alloydb_ai_nl.get_concept_and_value_generic_entity_name',
    additional_info_in => '{
      "description": "Concept type for brand name.",
      "examples": "SELECT alloydb_ai_nl.get_concept_and_value_generic_entity_name(''Auto Forge'')" }'::jsonb
);
SELECT alloydb_ai_nl.associate_concept_type(
    column_names_in => 'ecomm.products.brand',
    concept_type_in => 'brand_name',
    nl_config_id_in => 'cymbal_ecomm_config'
);
You can verify the concept by querying the alloydb_ai_nl.list_concept_types()
SELECT alloydb_ai_nl.list_concept_types();
Then we can create the index in our configuration for all the created and prebuilt associations:
SELECT alloydb_ai_nl.create_value_index(
  nl_config_id_in => 'cymbal_ecomm_config'
);
Use the Value Index
If you run a query to create an SQL using brand names but not defining that it is a brand name it helps to properly identify the entity and the column. Here is the query:
SELECT
  alloydb_ai_nl.get_sql(
    nl_config_id => 'cymbal_ecomm_config',
    nl_question => 'How many Clades do we have?'
  ) ->> 'sql';
And the output shows the correct identification of word ‘Clades' as a brand name
SELECT COUNT(*) FROM "ecomm"."products" WHERE "brand" = 'Clades';
10. Working with Query Templates
Query templates help to define stable queries for business critical applications reducing uncertainty and improving accuracy.
Create a Query Template
Let's create a query template joining several tables to get information about customers who bought "Republic Outpost" products last year. We know that the query can use either ecomm.products table or it can use ecomm.inventory_items table since both have information about the brands. But the table products has 15 times less rows and an index on the primary key for the join. It might be more efficient to use the products table. So, we are creating a template for the query.
SELECT alloydb_ai_nl.add_template(
    nl_config_id => 'cymbal_ecomm_config',
    intent => 'List the last names and the country of all customers who bought products of `Republic Outpost` in the last year.',
    sql => 'SELECT DISTINCT u."last_name", u."country" FROM "ecomm"."users" AS u INNER JOIN "ecomm"."order_items" AS oi ON u.id = oi."user_id" INNER JOIN "ecomm"."products" AS ep ON oi.product_id = ep.id WHERE ep.brand = ''Republic Outpost'' AND oi.created_at >= DATE_TRUNC(''year'', CURRENT_DATE - INTERVAL ''1 year'') AND oi.created_at < DATE_TRUNC(''year'', CURRENT_DATE)',
    sql_explanation => 'To answer this question, JOIN `ecomm.users` with `ecom.order_items` on having the same `users.id` and `order_items.user_id`, and JOIN the result with ecom.products on having the same `order_items.product_id` and `products.id`. Then filter rows with products.brand = ''Republic Outpost'' and by `order_items.created_at` for the last year. Return the `last_name` and the `country` of the users with matching records.',
    check_intent => TRUE
);
We can now request to create a query.
SELECT
  alloydb_ai_nl.get_sql(
    nl_config_id => 'cymbal_ecomm_config',
    nl_question => 'Show me last name and country about customers who bought "Republic Outpost" products last year.'
  ) ->> 'sql';
And it produces the desirable output.
SELECT DISTINCT u."last_name", u."country" FROM "ecomm"."users" AS u INNER JOIN "ecomm"."order_items" AS oi ON u.id = oi."user_id" INNER JOIN "ecomm"."products" AS ep ON oi.product_id = ep.id WHERE ep.brand = 'Republic Outpost' AND oi.created_at >= DATE_TRUNC('year', CURRENT_DATE - INTERVAL '1 year') AND oi.created_at < DATE_TRUNC('year', CURRENT_DATE)
Or you can execute the query directly using the following query:
SELECT
alloydb_ai_nl.execute_nl_query(
    nl_config_id => 'cymbal_ecomm_config',
    nl_question => 'Show me last name and country about customers who bought "Republic Outpost" products last year.'
);
It will return results in JSON format which can be parsed.
                    execute_nl_query
--------------------------------------------------------
 {"last_name":"Adams","country":"China"}
 {"last_name":"Adams","country":"Germany"}
 {"last_name":"Aguilar","country":"China"}
 {"last_name":"Allen","country":"China"}
11. Clean up environment
Destroy the AlloyDB instances and cluster when you are done with the lab.
Delete AlloyDB cluster and all instances
If you've used the trial version of AlloyDB. Do not delete the trial cluster if you have plans to test other labs and resources using the trial cluster. You will not be able to create another trial cluster in the same project.
The cluster is destroyed with option force which also deletes all the instances belonging to the cluster.
In the cloud shell define the project and environment variables if you've been disconnected and all the previous settings are lost:
gcloud config set project <your project id>
export REGION=us-central1
export ADBCLUSTER=alloydb-aip-01
export PROJECT_ID=$(gcloud config get-value project)
Delete the cluster:
gcloud alloydb clusters delete $ADBCLUSTER --region=$REGION --force
Expected console output:
student@cloudshell:~ (test-project-001-402417)$ gcloud alloydb clusters delete $ADBCLUSTER --region=$REGION --force
All of the cluster data will be lost when the cluster is deleted.

Do you want to continue (Y/n)?  Y

Operation ID: operation-1697820178429-6082890a0b570-4a72f7e4-4c5df36f
Deleting cluster...done.
Delete AlloyDB Backups
Delete all AlloyDB backups for the cluster:
for i in $(gcloud alloydb backups list --filter="CLUSTER_NAME: projects/$PROJECT_ID/locations/$REGION/clusters/$ADBCLUSTER" --format="value(name)" --sort-by=~createTime) ; do gcloud alloydb backups delete $(basename $i) --region $REGION --quiet; done
Expected console output:
student@cloudshell:~ (test-project-001-402417)$ for i in $(gcloud alloydb backups list --filter="CLUSTER_NAME: projects/$PROJECT_ID/locations/$REGION/clusters/$ADBCLUSTER" --format="value(name)" --sort-by=~createTime) ; do gcloud alloydb backups delete $(basename $i) --region $REGION --quiet; done
Operation ID: operation-1697826266108-60829fb7b5258-7f99dc0b-99f3c35f
Deleting backup...done.
12. Congratulations
Congratulations for completing the codelab. You can now try to implement your own solutions using NL2SQL features of AlloyDB. We recommend trying other codelabs related to AlloyDB and AlloyDB AI. You can check how multimodal embeddings work in AlloyDB in this codelab.
What we've covered
- How to deploy AlloyDB for Postgres
- How to enable AlloyDB AI natural language
- How to create and tune configuration for AI natural language
- How to generate SQL queries and get results using natural language
13. Survey
Output: