
1. 简介
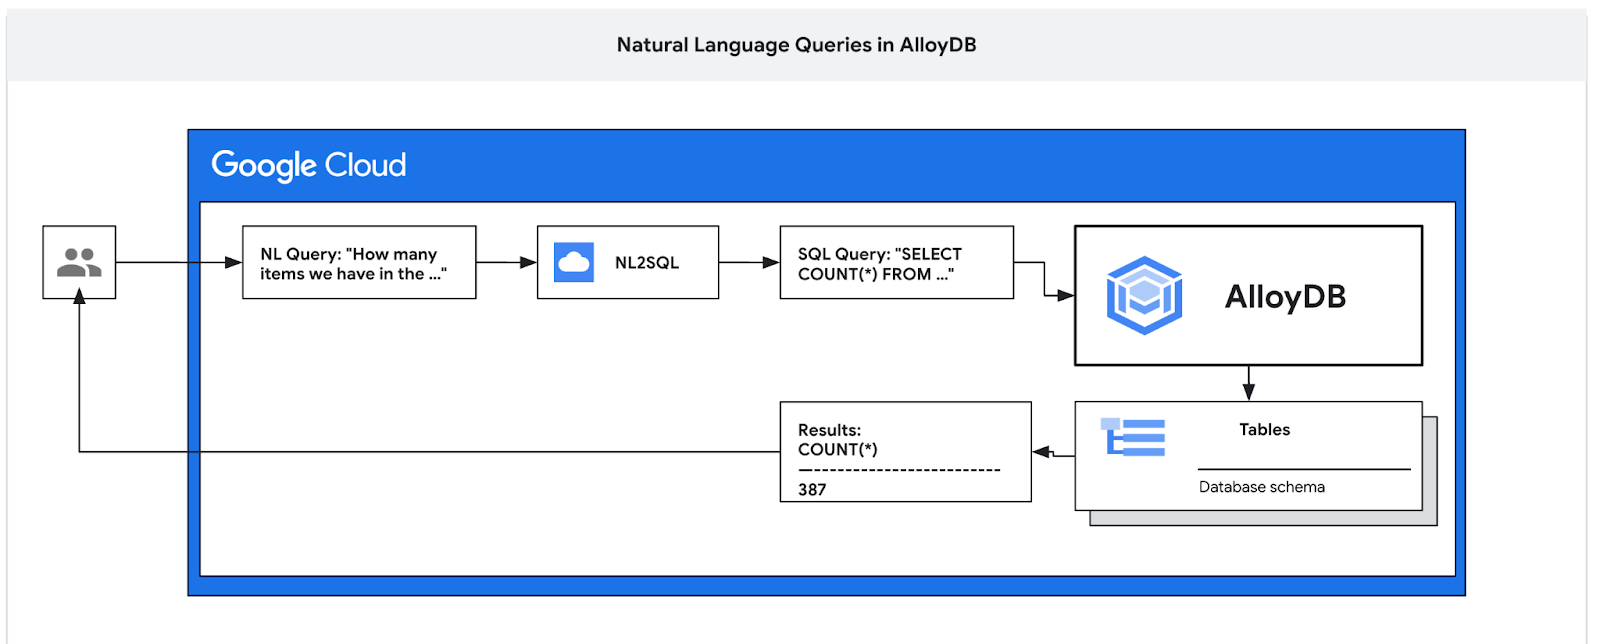
在此 Codelab 中,您将学习如何部署 AlloyDB,以及如何使用 AI 自然语言查询数据和调整配置,以实现可预测的高效查询。本实验是专门介绍 AlloyDB AI 功能的实验合集中的一个实验。如需了解详情,请参阅文档中的 AlloyDB AI 页面。
前提条件
- 对 Google Cloud 控制台有基本的了解
- 具备命令行界面和 Cloud Shell 方面的基本技能
学习内容
- 如何部署 AlloyDB for Postgres
- 如何启用 AlloyDB AI 自然语言
- 如何为 AI 自然语言创建和调整配置
- 如何使用自然语言生成 SQL 查询并获取结果
所需条件
- Google Cloud 账号和 Google Cloud 项目
- 支持 Google Cloud 控制台和 Cloud Shell 的网络浏览器,例如 Chrome
2. 设置和要求
自定进度的环境设置
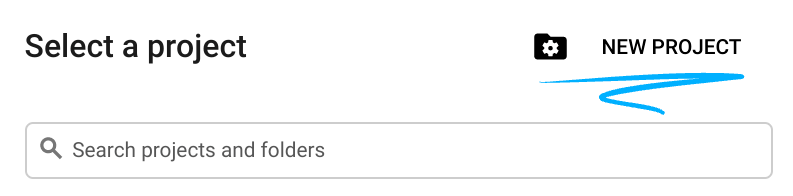
- 登录 Google Cloud 控制台,然后创建一个新项目或重复使用现有项目。如果您还没有 Gmail 或 Google Workspace 账号,则必须创建一个。

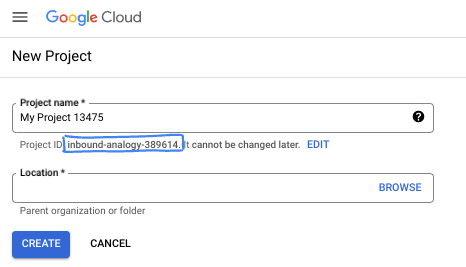
- 项目名称是此项目参与者的显示名称。它是 Google API 尚未使用的字符串。您可以随时对其进行更新。
- 项目 ID 在所有 Google Cloud 项目中是唯一的,并且是不可变的(一经设置便无法更改)。Cloud 控制台会自动生成一个唯一字符串;通常情况下,您无需关注该字符串。在大多数 Codelab 中,您都需要引用项目 ID(通常用
PROJECT_ID标识)。如果您不喜欢生成的 ID,可以再随机生成一个 ID。或者,您也可以尝试自己的项目 ID,看看是否可用。完成此步骤后便无法更改该 ID,并且此 ID 在项目期间会一直保留。 - 此外,还有第三个值,即部分 API 使用的项目编号,供您参考。如需详细了解所有这三个值,请参阅文档。
- 接下来,您需要在 Cloud 控制台中启用结算功能,以便使用 Cloud 资源/API。运行此 Codelab 应该不会产生太多的费用(如果有的话)。若要关闭资源以避免产生超出本教程范围的结算费用,您可以删除自己创建的资源或删除项目。Google Cloud 新用户符合参与 300 美元免费试用计划的条件。
启动 Cloud Shell
虽然可以通过笔记本电脑对 Google Cloud 进行远程操作,但在此 Codelab 中,您将使用 Google Cloud Shell,这是一个在云端运行的命令行环境。
在 Google Cloud 控制台 中,点击右上角工具栏中的 Cloud Shell 图标:

预配和连接到环境应该只需要片刻时间。完成后,您应该会看到如下内容:

这个虚拟机已加载了您需要的所有开发工具。它提供了一个持久的 5 GB 主目录,并且在 Google Cloud 中运行,大大增强了网络性能和身份验证功能。您在此 Codelab 中的所有工作都可以在浏览器中完成。您无需安装任何程序。
3. 准备工作
启用 API
在 Cloud Shell 中,确保项目 ID 已设置:
gcloud config set project [YOUR-PROJECT-ID]
设置环境变量 PROJECT_ID:
PROJECT_ID=$(gcloud config get-value project)
启用所有必要的服务:
gcloud services enable alloydb.googleapis.com \
                       compute.googleapis.com \
                       cloudresourcemanager.googleapis.com \
                       servicenetworking.googleapis.com \
                       aiplatform.googleapis.com \
                       discoveryengine.googleapis.com \
                       secretmanager.googleapis.com
预期输出
student@cloudshell:~ (test-project-001-402417)$ gcloud config set project test-project-001-402417
Updated property [core/project].
student@cloudshell:~ (test-project-001-402417)$ PROJECT_ID=$(gcloud config get-value project)
Your active configuration is: [cloudshell-14650]
student@cloudshell:~ (test-project-001-402417)$
student@cloudshell:~ (test-project-001-402417)$ gcloud services enable alloydb.googleapis.com \
                       compute.googleapis.com \
                       cloudresourcemanager.googleapis.com \
                       servicenetworking.googleapis.com \
                       aiplatform.googleapis.com
Operation "operations/acat.p2-4470404856-1f44ebd8-894e-4356-bea7-b84165a57442" finished successfully.
4. 部署 AlloyDB
创建 AlloyDB 集群和主实例。以下步骤介绍了如何使用 Google Cloud SDK 创建 AlloyDB 集群和实例。如果您偏好使用控制台方法,可以点击此处查看相关文档。
在创建 AlloyDB 集群之前,我们需要在 VPC 中分配一个可用的专用 IP 范围,以供未来的 AlloyDB 实例使用。如果我们没有该服务账号,则需要创建该服务账号,并将其分配给内部 Google 服务使用,之后我们才能创建集群和实例。
创建专用 IP 范围
我们需要在 VPC 中为 AlloyDB 配置专用服务访问配置。这里假设我们的项目中有“默认”VPC 网络,它将用于所有操作。
创建专用 IP 范围:
gcloud compute addresses create psa-range \
    --global \
    --purpose=VPC_PEERING \
    --prefix-length=24 \
    --description="VPC private service access" \
    --network=default
使用分配的 IP 范围创建专用连接:
gcloud services vpc-peerings connect \
    --service=servicenetworking.googleapis.com \
    --ranges=psa-range \
    --network=default
预期的控制台输出:
student@cloudshell:~ (test-project-402417)$ gcloud compute addresses create psa-range \
    --global \
    --purpose=VPC_PEERING \
    --prefix-length=24 \
    --description="VPC private service access" \
    --network=default
Created [https://www.googleapis.com/compute/v1/projects/test-project-402417/global/addresses/psa-range].

student@cloudshell:~ (test-project-402417)$ gcloud services vpc-peerings connect \
    --service=servicenetworking.googleapis.com \
    --ranges=psa-range \
    --network=default
Operation "operations/pssn.p24-4470404856-595e209f-19b7-4669-8a71-cbd45de8ba66" finished successfully.

student@cloudshell:~ (test-project-402417)$
创建 AlloyDB 集群
在此部分中,我们将在 us-central1 区域中创建一个 AlloyDB 集群。
为 postgres 用户定义密码。您可以自行定义密码,也可以使用随机函数生成密码
export PGPASSWORD=`openssl rand -hex 12`
预期的控制台输出:
student@cloudshell:~ (test-project-402417)$ export PGPASSWORD=`openssl rand -hex 12`
请记下该 PostgreSQL 密码,以备将来使用。
echo $PGPASSWORD
您日后需要使用该密码以 postgres 用户身份连接到实例。建议您将其写下来或复制到某个地方,以便日后使用。
预期的控制台输出:
student@cloudshell:~ (test-project-402417)$ echo $PGPASSWORD
bbefbfde7601985b0dee5723
创建免费试用集群
如果您之前未使用过 AlloyDB,可以创建免费试用集群:
定义区域和 AlloyDB 集群名称。我们将使用 us-central1 区域,并将 alloydb-aip-01 作为集群名称:
export REGION=us-central1
export ADBCLUSTER=alloydb-aip-01
运行命令以创建集群:
gcloud alloydb clusters create $ADBCLUSTER \
    --password=$PGPASSWORD \
    --network=default \
    --region=$REGION \
    --subscription-type=TRIAL
预期的控制台输出:
export REGION=us-central1
export ADBCLUSTER=alloydb-aip-01
gcloud alloydb clusters create $ADBCLUSTER \
    --password=$PGPASSWORD \
    --network=default \
    --region=$REGION \
    --subscription-type=TRIAL
Operation ID: operation-1697655441138-6080235852277-9e7f04f5-2012fce4
Creating cluster...done.
在同一 Cloud Shell 会话中为集群创建 AlloyDB 主实例。如果您断开连接,则需要再次定义区域和集群名称环境变量。
gcloud alloydb instances create $ADBCLUSTER-pr \
    --instance-type=PRIMARY \
    --cpu-count=8 \
    --region=$REGION \
    --cluster=$ADBCLUSTER
预期的控制台输出:
student@cloudshell:~ (test-project-402417)$ gcloud alloydb instances create $ADBCLUSTER-pr \
    --instance-type=PRIMARY \
    --cpu-count=8 \
    --region=$REGION \
    --availability-type ZONAL \
    --cluster=$ADBCLUSTER
Operation ID: operation-1697659203545-6080315c6e8ee-391805db-25852721
Creating instance...done.
创建 AlloyDB Standard 集群
如果这不是您在项目中创建的第一个 AlloyDB 集群,请继续创建标准集群。
定义区域和 AlloyDB 集群名称。我们将使用 us-central1 区域,并将 alloydb-aip-01 作为集群名称:
export REGION=us-central1
export ADBCLUSTER=alloydb-aip-01
运行命令以创建集群:
gcloud alloydb clusters create $ADBCLUSTER \
    --password=$PGPASSWORD \
    --network=default \
    --region=$REGION
预期的控制台输出:
export REGION=us-central1
export ADBCLUSTER=alloydb-aip-01
gcloud alloydb clusters create $ADBCLUSTER \
    --password=$PGPASSWORD \
    --network=default \
    --region=$REGION
Operation ID: operation-1697655441138-6080235852277-9e7f04f5-2012fce4
Creating cluster...done.
在同一 Cloud Shell 会话中为集群创建 AlloyDB 主实例。如果您断开连接,则需要再次定义区域和集群名称环境变量。
gcloud alloydb instances create $ADBCLUSTER-pr \
    --instance-type=PRIMARY \
    --cpu-count=2 \
    --region=$REGION \
    --cluster=$ADBCLUSTER
预期的控制台输出:
student@cloudshell:~ (test-project-402417)$ gcloud alloydb instances create $ADBCLUSTER-pr \
    --instance-type=PRIMARY \
    --cpu-count=2 \
    --region=$REGION \
    --availability-type ZONAL \
    --cluster=$ADBCLUSTER
Operation ID: operation-1697659203545-6080315c6e8ee-391805db-25852721
Creating instance...done.
5. 准备数据库
我们需要创建数据库、启用 Vertex AI 集成、创建数据库对象并导入数据。
向 AlloyDB 授予必要权限
向 AlloyDB 服务代理添加 Vertex AI 权限。
使用顶部的“+”号打开另一个 Cloud Shell 标签页。

在新的 Cloud Shell 标签页中,执行以下命令:
PROJECT_ID=$(gcloud config get-value project)
gcloud projects add-iam-policy-binding $PROJECT_ID \
  --member="serviceAccount:service-$(gcloud projects describe $PROJECT_ID --format="value(projectNumber)")@gcp-sa-alloydb.iam.gserviceaccount.com" \
  --role="roles/aiplatform.user"
预期的控制台输出:
student@cloudshell:~ (test-project-001-402417)$ PROJECT_ID=$(gcloud config get-value project)
Your active configuration is: [cloudshell-11039]
student@cloudshell:~ (test-project-001-402417)$ gcloud projects add-iam-policy-binding $PROJECT_ID \
  --member="serviceAccount:service-$(gcloud projects describe $PROJECT_ID --format="value(projectNumber)")@gcp-sa-alloydb.iam.gserviceaccount.com" \
  --role="roles/aiplatform.user"
Updated IAM policy for project [test-project-001-402417].
bindings:
- members:
  - serviceAccount:service-4470404856@gcp-sa-alloydb.iam.gserviceaccount.com
  role: roles/aiplatform.user
- members:
...
etag: BwYIEbe_Z3U=
version: 1
在标签页中执行命令“exit”,关闭该标签页:
exit
连接到 AlloyDB Studio
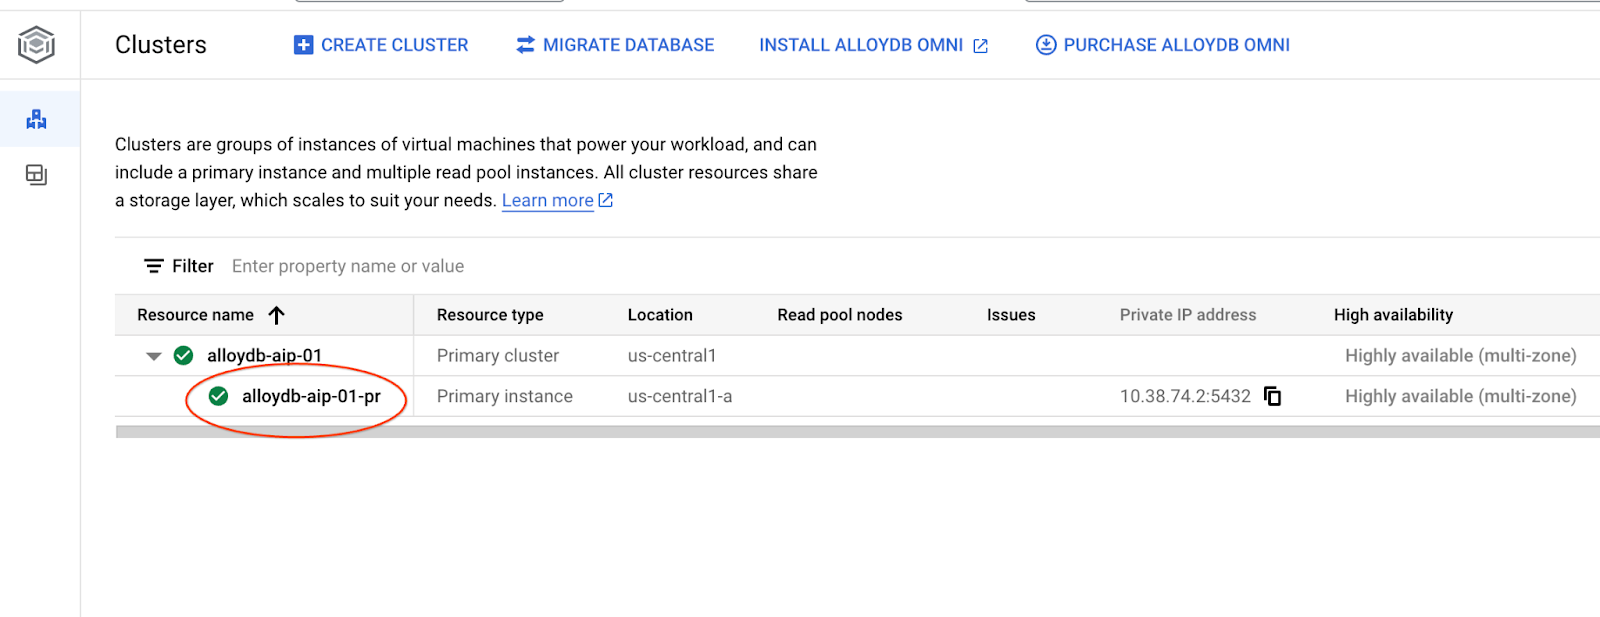
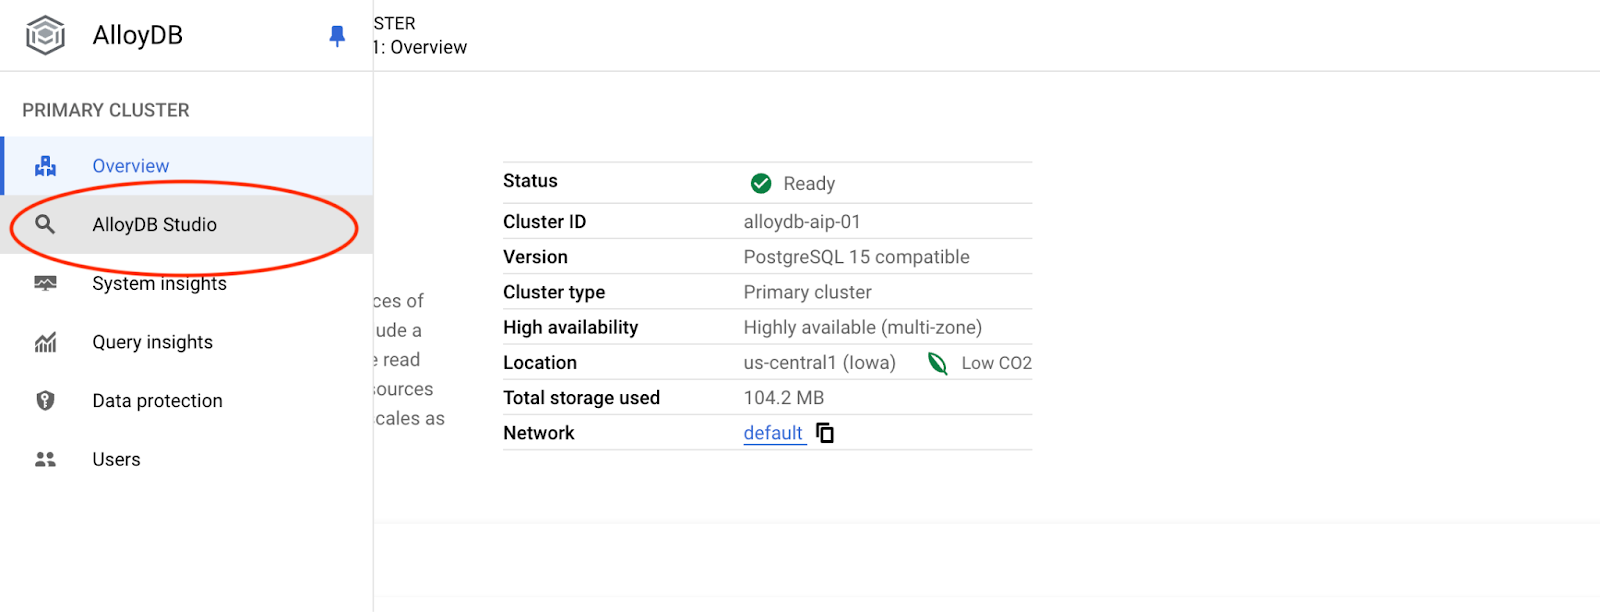
在以下章节中,所有需要连接到数据库的 SQL 命令都可以通过 AlloyDB Studio 执行。如需运行该命令,您需要点击主实例,打开 AlloyDB 集群的 Web 控制台界面。
然后点击左侧的 AlloyDB Studio:
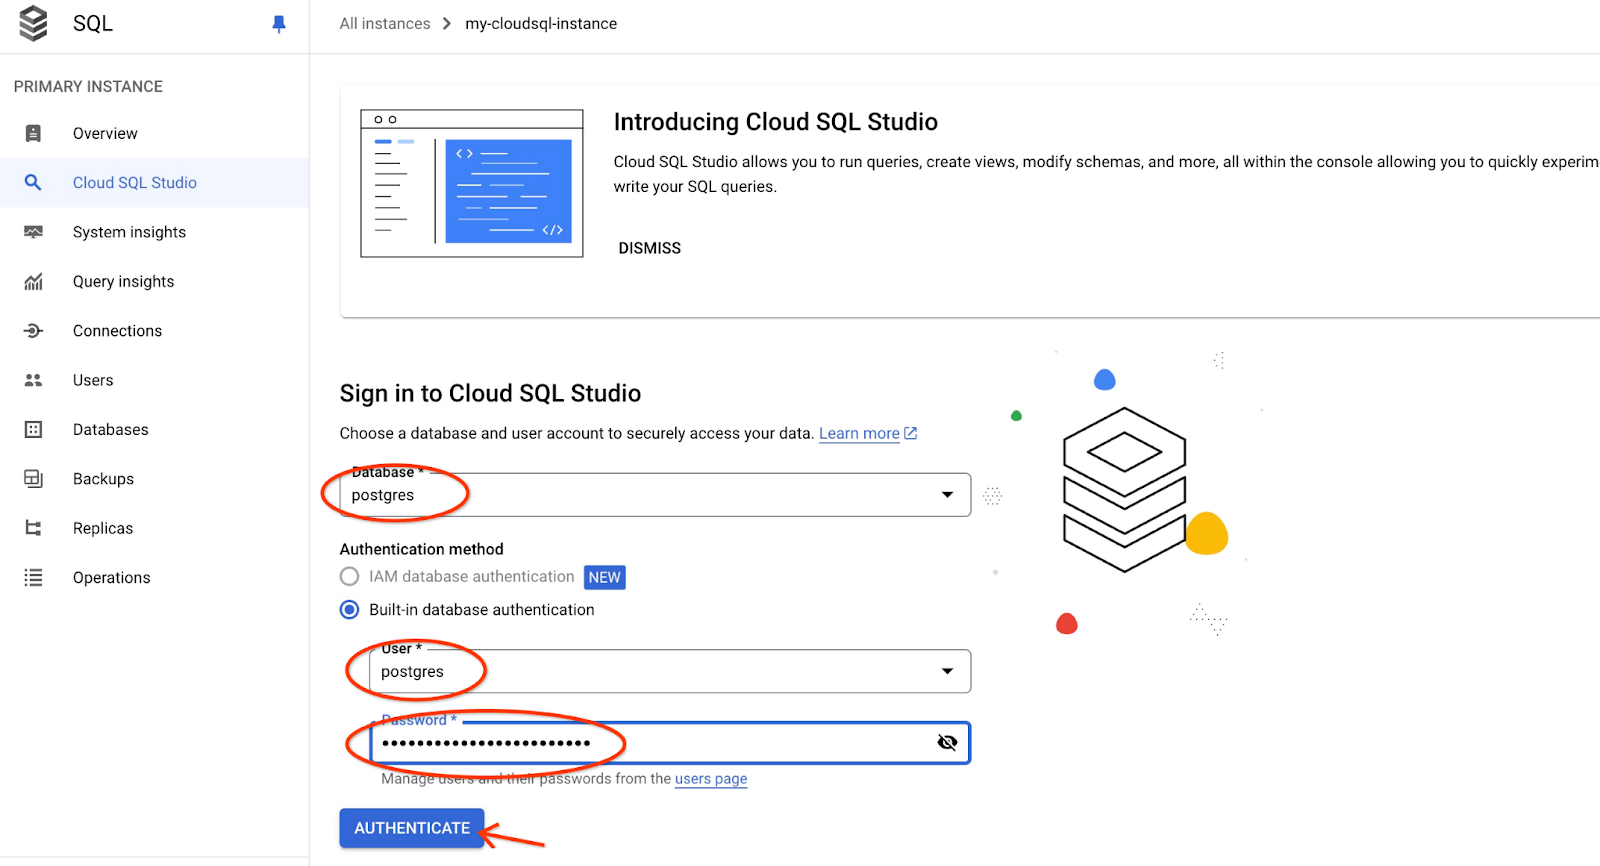
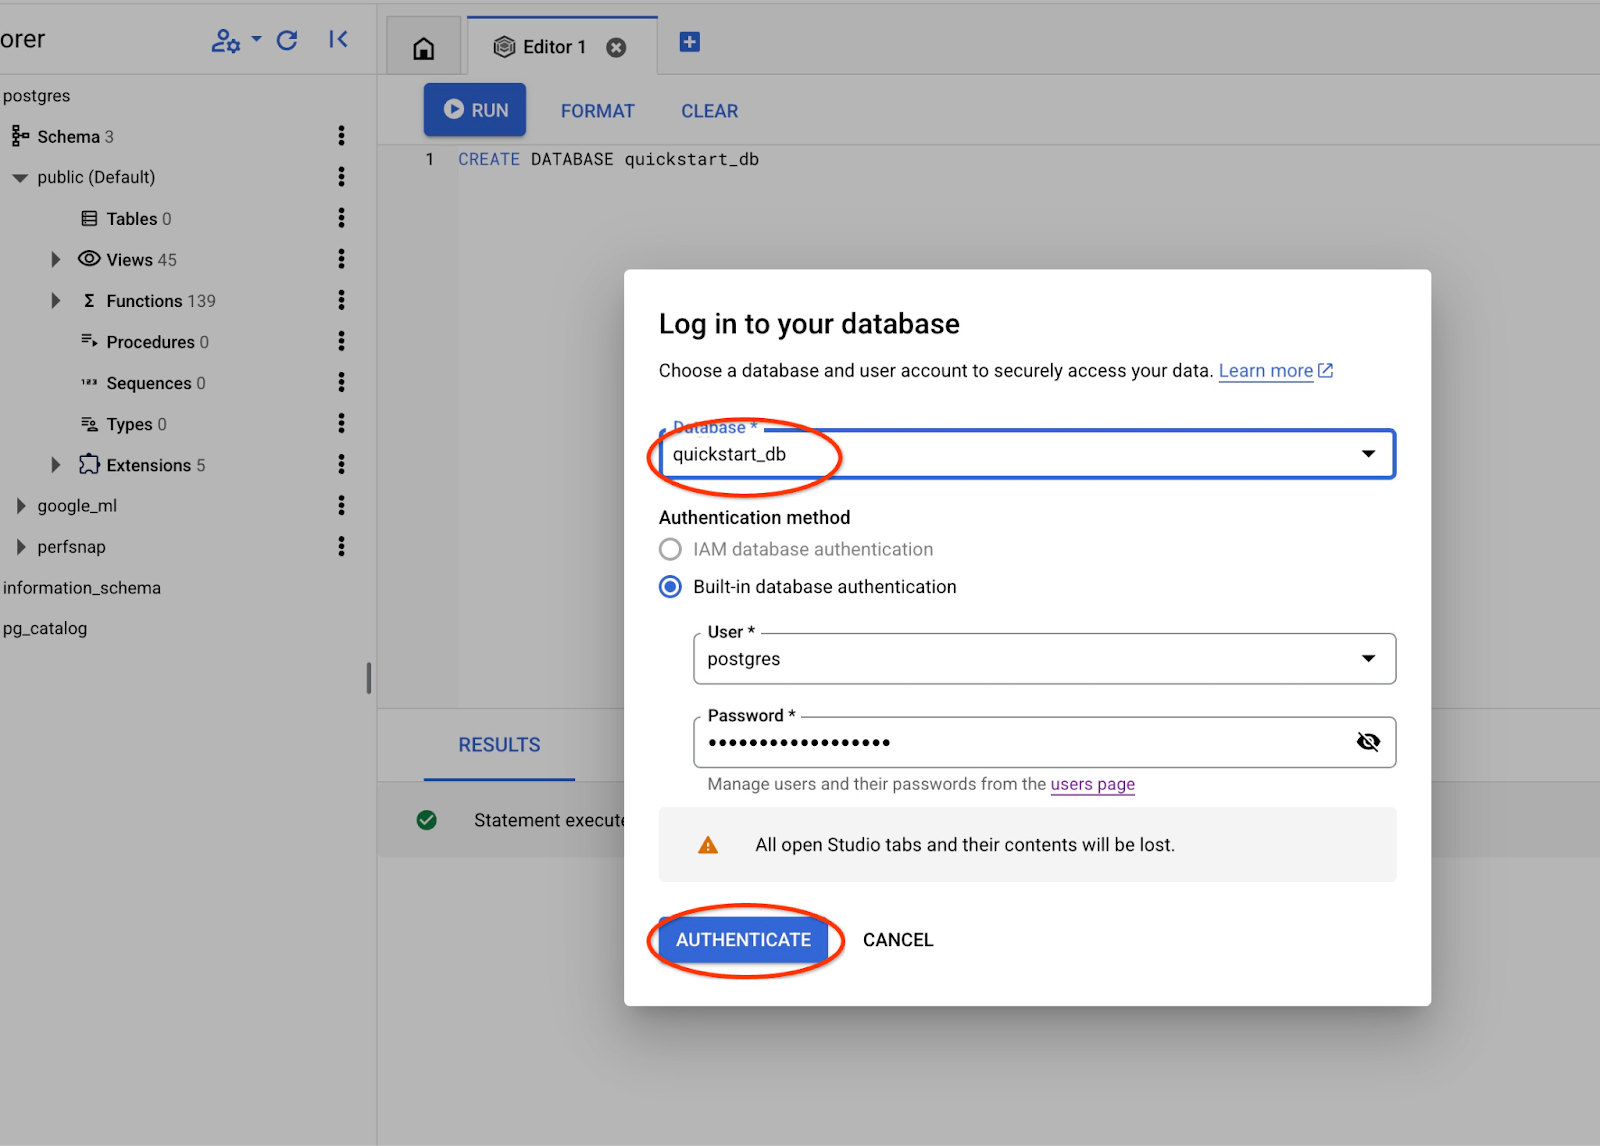
选择 postgres 数据库、用户 postgres,并提供我们在创建集群时记录的密码。然后点击“验证”按钮。
系统会打开 AlloyDB Studio 界面。如需在数据库中运行命令,请点击右侧的“编辑器 1”标签页。
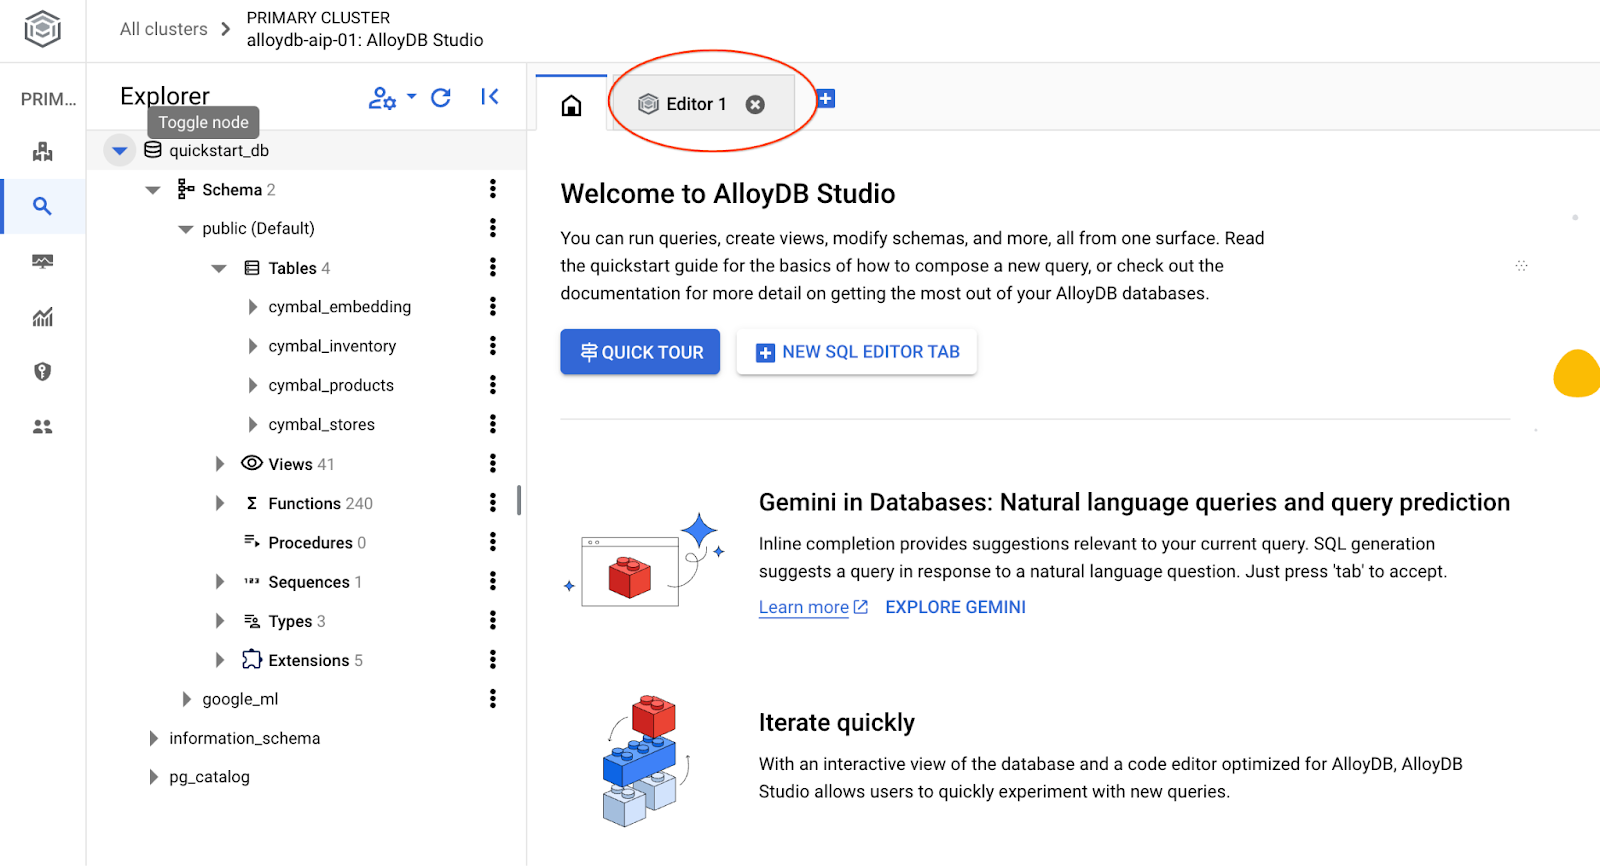
系统会打开一个界面,您可以在其中运行 SQL 命令

创建数据库
创建数据库快速入门。
在 AlloyDB Studio 编辑器中,执行以下命令。
创建数据库:
CREATE DATABASE quickstart_db
预期输出:
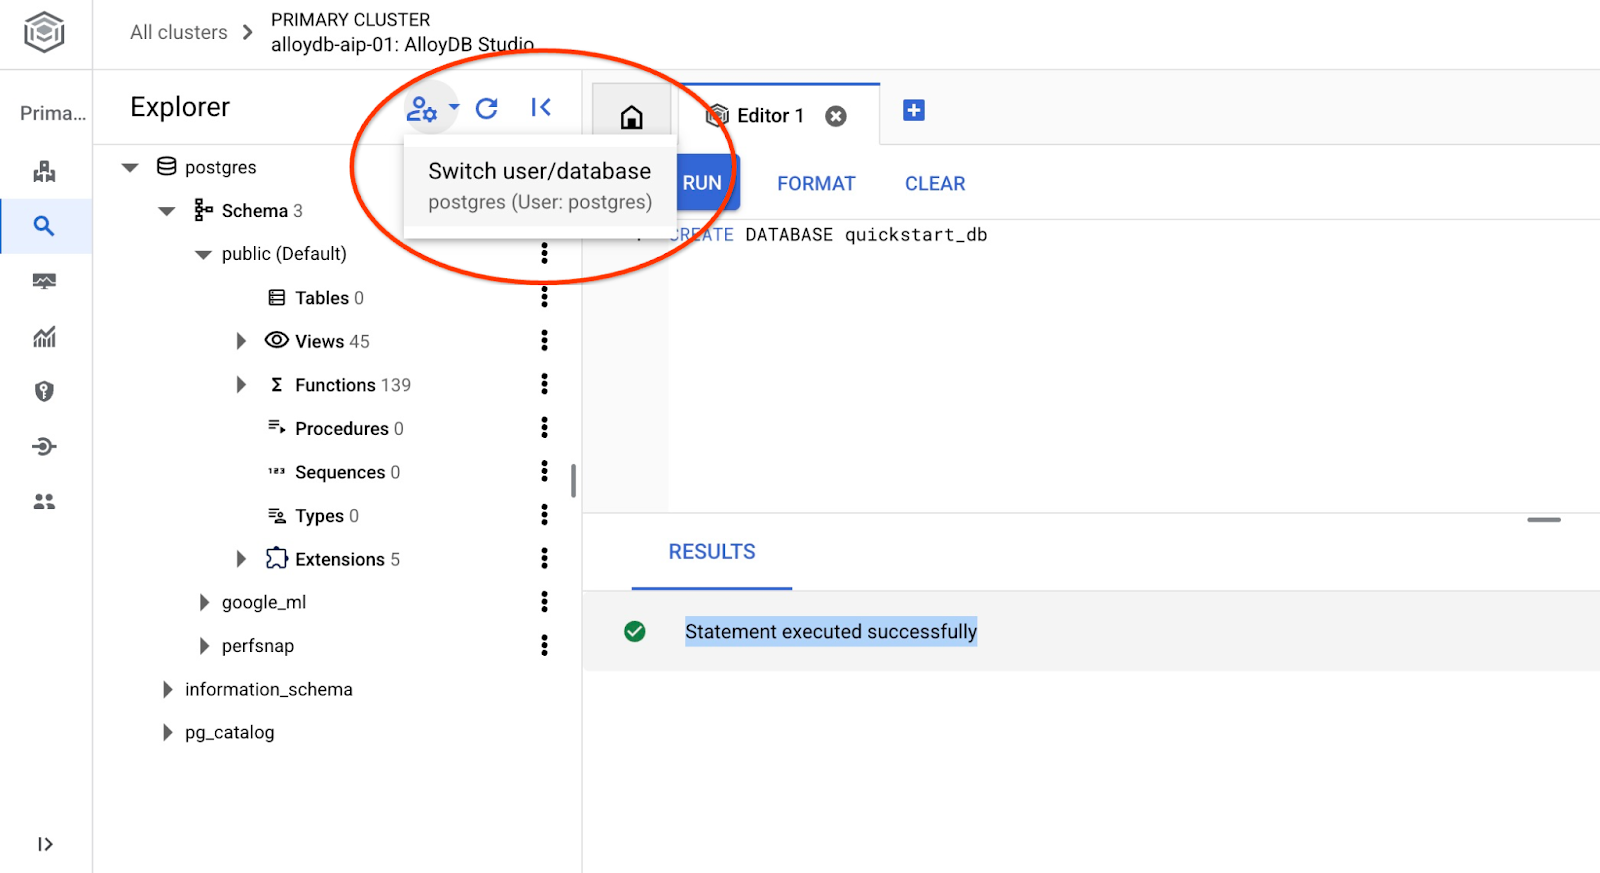
Statement executed successfully
连接到 quickstart_db
使用切换用户/数据库的按钮重新连接到 Studio。
从下拉列表中选择新的 quickstart_db 数据库,并使用与之前相同的用户和密码。
系统将打开一个新连接,您可以在其中处理 quickstart_db 数据库中的对象。
6. 示例数据
现在,我们需要在数据库中创建对象并加载数据。我们将使用一个虚构的“Cymbal ecomm”商店,其中包含一组用于在线商店的表。它包含多个通过键连接的表,类似于关系型数据库架构。
数据集已准备好并以 SQL 文件形式放置,可以使用导入界面加载到数据库中。在 Cloud Shell 中,执行以下命令:
export REGION=us-central1
export ADBCLUSTER=alloydb-aip-01
gcloud alloydb clusters import $ADBCLUSTER --region=$REGION --database=quickstart_db --gcs-uri='gs://sample-data-and-media/ecomm-retail/ecom_generic.sql' --user=postgres --sql
该命令使用 AlloyDB SDK 创建电子商务架构,然后直接从 GCS 存储分区将示例数据导入数据库,从而创建所有必需的对象并插入数据。
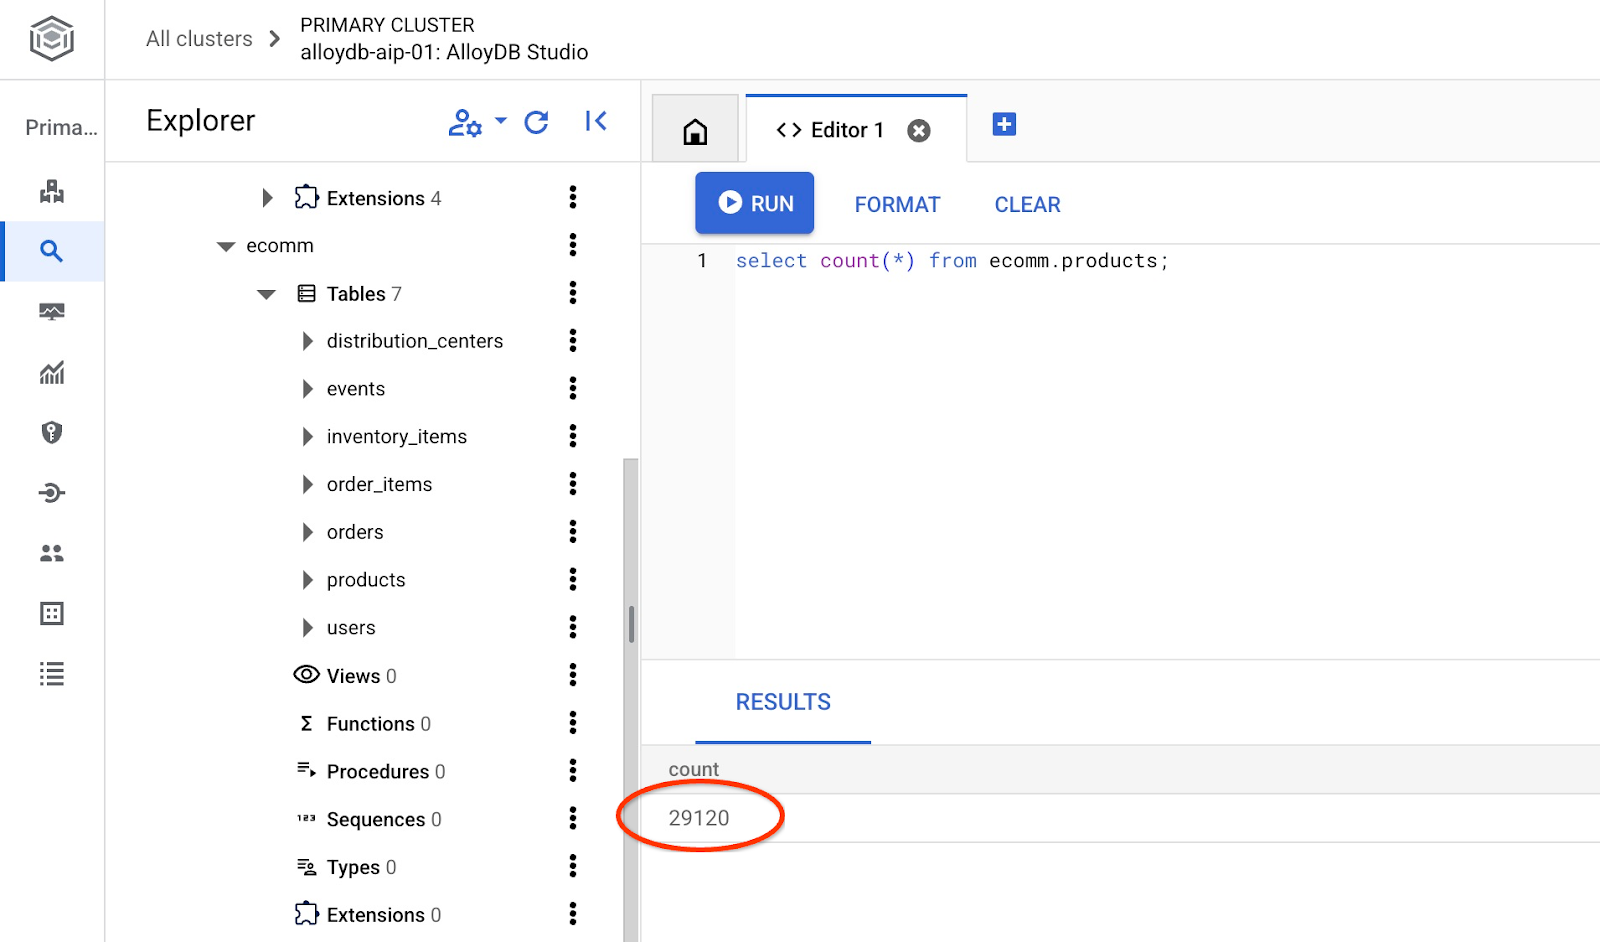
导入完成后,我们可以在 AlloyDB Studio 中查看表
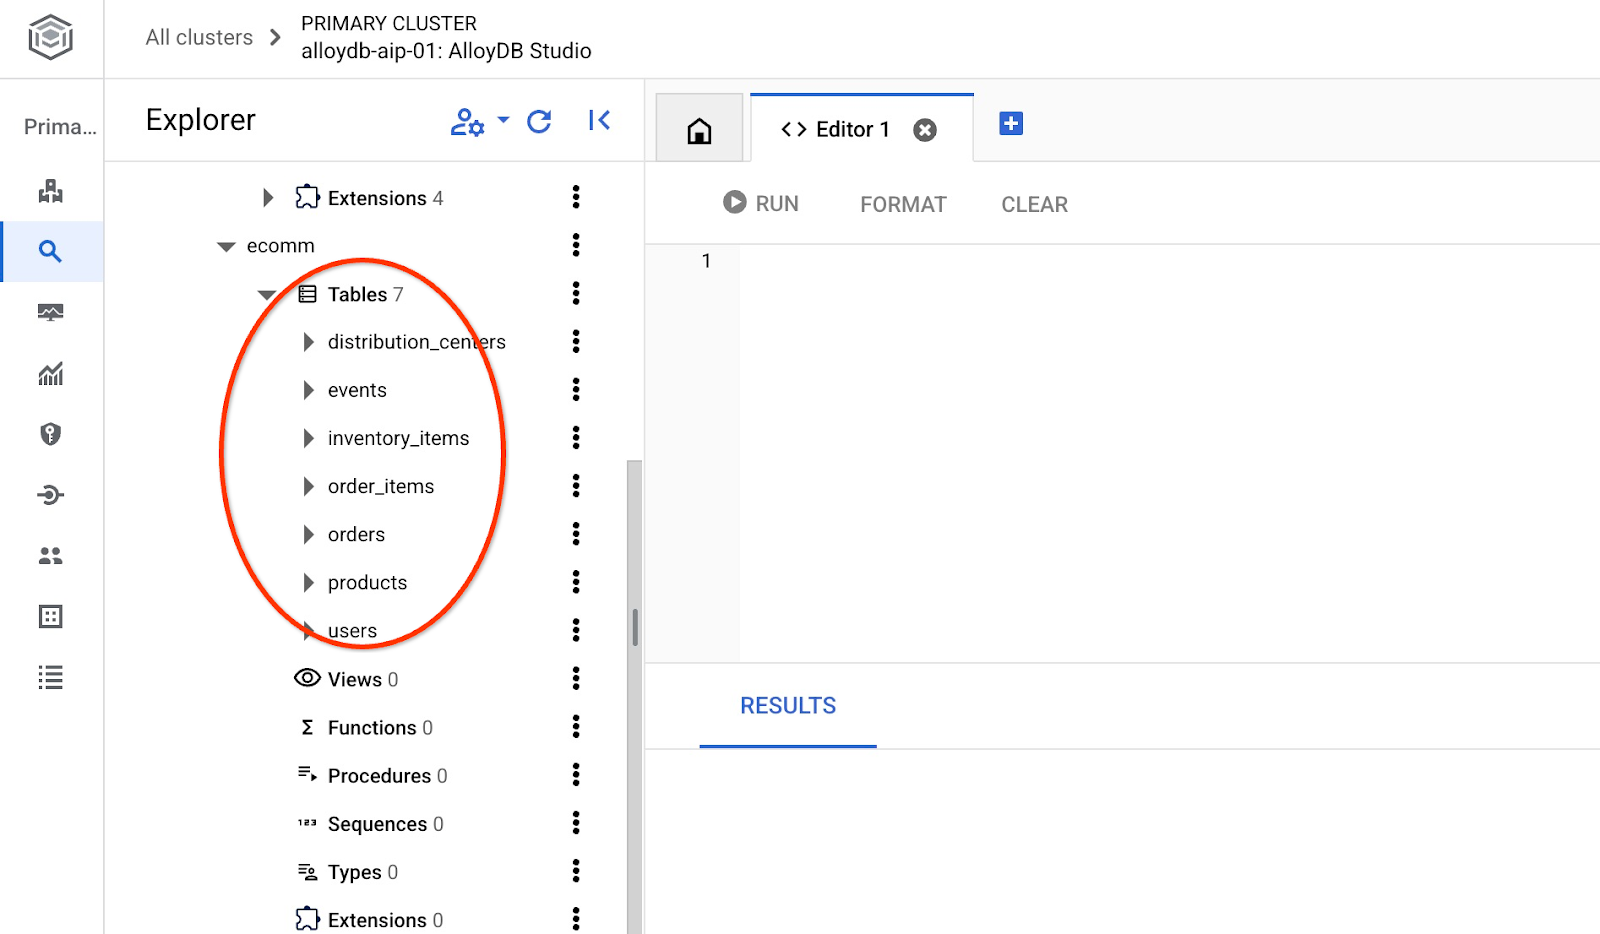
并验证表中的行数。
7. 配置 NL SQL
在本章中,我们将配置 NL 以使其与您的示例架构搭配使用
安装 alloydb_nl_ai 扩展程序
我们需要将 alloydb_ai_nl 扩展程序安装到数据库中。在此之前,我们必须将数据库标志 alloydb_ai_nl.enabled 设置为 on。
在 Cloud Shell 会话中,执行以下命令
export REGION=us-central1
export ADBCLUSTER=alloydb-aip-01
gcloud alloydb instances update $ADBCLUSTER-pr \
  --cluster=$ADBCLUSTER \
  --region=$REGION \
  --database-flags=alloydb_ai_nl.enabled=on
系统将开始更新实例。您可以在 Web 控制台中查看更新实例的状态:
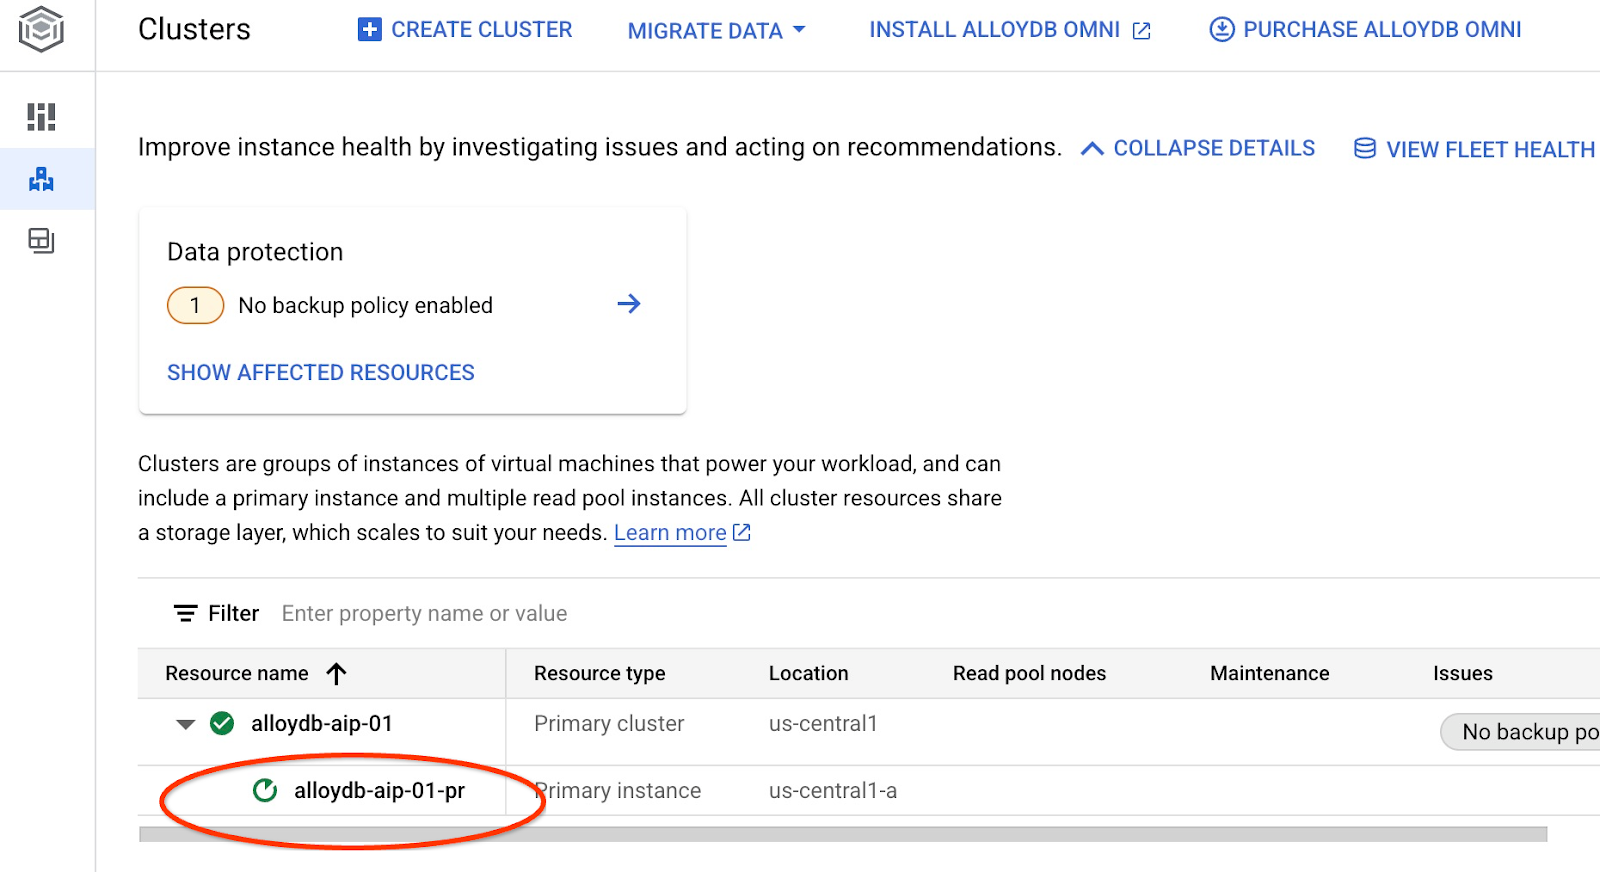
当实例更新完毕(实例状态为绿色)后,您可以启用 alloydb_ai_nl 扩展程序。
在 AlloyDB Studio 中执行
CREATE EXTENSION IF NOT EXISTS google_ml_integration;
CREATE EXTENSION alloydb_ai_nl cascade;
创建自然语言配置
如需使用扩展程序,我们需要创建配置。此配置对于将应用关联到特定架构、查询模板和模型端点是必需的。我们来创建一个 ID 为 cymbal_ecomm_config 的配置。
在 AlloyDB Studio 中执行
SELECT
  alloydb_ai_nl.g_create_configuration(
    configuration_id => 'cymbal_ecomm_config'
  );
现在,我们可以在配置中注册电子商务架构。我们已将数据导入到 ecomm 架构中,因此接下来要将该架构添加到 NL 配置中。
SELECT
  alloydb_ai_nl.g_manage_configuration(
    operation => 'register_schema',
    configuration_id_in => 'cymbal_ecomm_config',
    schema_names_in => '{ecomm}'
  );
8. 为 NL SQL 添加上下文
添加一般背景信息
我们可以为已注册的架构添加一些上下文。上下文应该有助于生成更好的结果来回应用户请求。例如,当未明确定义时,我们可以说某个品牌是用户的首选品牌。我们将 Clades(虚构品牌)设为默认品牌。
在 AlloyDB Studio 中,执行以下命令:
SELECT
  alloydb_ai_nl.g_manage_configuration(
    operation => 'add_general_context',
    configuration_id_in => 'cymbal_ecomm_config',
    general_context_in => '{"If the user doesn''t clearly define preferred brand then use Clades."}'
  );
我们来验证一下一般上下文对我们有何作用。
在 AlloyDB Studio 中,执行以下命令:
SELECT
  alloydb_ai_nl.get_sql(
    nl_config_id => 'cymbal_ecomm_config',
    nl_question => 'How many products do we have of our preferred brand?'
  );
生成的查询使用了之前在一般上下文中定义的默认品牌:
{"sql": "SELECT count(*) FROM \"ecomm\".\"products\" WHERE \"brand\" = 'Clades'", "method": "default", "prompt": "", "retries": 0, "time(ms)": {"llm": 505.628000, "magic": 424.019000}, "error_msg": "", "nl_question": "How many products do we have of our preferred brand?", "toolbox_used": false}
我们可以清理它,并仅生成 SQL 语句作为输出。
例如:
SELECT
  alloydb_ai_nl.get_sql(
    nl_config_id => 'cymbal_ecomm_config',
    nl_question => 'How many products do we have of our preferred brand?'
  ) ->> 'sql';
清除后的输出:
SELECT count(*) FROM "ecomm"."products" WHERE "brand" = 'Clades'
您会注意到,它自动选择了 inventory_items 表,而不是 products 表,并使用该表构建了查询。这可能适用于某些情况,但不适用于我们的架构。在我们的示例中,inventory_items 表用于跟踪销售情况,如果您没有内部信息,可能会被误导。我们稍后将了解如何提高查询的准确性。
架构上下文
架构上下文描述了架构对象(例如表、视图和各个列),这些对象会将信息以注释的形式存储在架构对象中。
我们可以使用以下查询,为已定义配置中的所有架构对象自动创建该视图:
SELECT
  alloydb_ai_nl.generate_schema_context(
    nl_config_id => 'cymbal_ecomm_config',
    overwrite_if_exist => TRUE
  );
“TRUE”参数指示我们重新生成上下文并覆盖它。执行需要一些时间,具体取决于数据模型。您的关系和连接越多,所需的时间可能就越长。
创建上下文后,我们可以使用以下查询来检查它为商品目录项表创建了哪些内容:
SELECT
  object_context
FROM
  alloydb_ai_nl.generated_schema_context_view
WHERE
  schema_object = 'ecomm.inventory_items';
清除后的输出:
The `ecomm.inventory_items` table stores information about individual inventory items in an e-commerce system. Each item is uniquely identified by an `id` (primary key). The table tracks the `product_id` (foreign key referencing `ecomm.products`), the timestamp when the item was `created_at`, and the timestamp when it was `sold_at` (which can be null if the item hasn't been sold). The `cost` represents the cost of the item to the business, while `product_retail_price` is the price at which the item is sold. Additional product details include `product_category`, `product_name`, `product_brand`, `product_department`, and `product_sku` (stock keeping unit). The `product_distribution_center_id` (foreign key referencing `ecomm.distribution_centers`) indicates the distribution center where the item is located. The table includes information on both men's and women's apparel across various categories like jeans, tops & tees, activewear, sleep & lounge, intimates, swim, and accessories. The `sold_at` column indicates whether an item has been sold and when.
感觉说明缺少了一些关键部分,而 inventory_items 表反映了商品的移动。我们可以通过将此关键信息添加到 ecomm.inventory_items 关系的上下文中来更新它。
SELECT alloydb_ai_nl.update_generated_relation_context(
  relation_name => 'ecomm.inventory_items',
  relation_context => 'The `ecomm.inventory_items` table stores information about moving and sales of inventory items in an e-commerce system. Each movement is uniquely identified by an `id` (primary key) and used in order_items table as `inventory_item_id`. The table tracks sales and movements for the `product_id` (foreign key referencing `ecomm.products`), the timestamp when the movement for the item was `created_at`, and the timestamp when it was `sold_at` (which can be null if the item hasn''t been sold). The `cost` represents the cost of the item to the business, while `product_retail_price` is the price at which the item is sold. Additional product details include `product_category`, `product_name`, `product_brand`, `product_department`, and `product_sku` (stock keeping unit). The `product_distribution_center_id` (foreign key referencing `ecomm.distribution_centers`) indicates the distribution center where the item is located. The table includes information on both men''s and women''s apparel across various categories like jeans, tops & tees, activewear, sleep & lounge, intimates, swim, and accessories. The `sold_at` column indicates whether an item has been sold and when.'
);
我们还可以验证商品表格中说明的准确性。
SELECT
  object_context
FROM
  alloydb_ai_nl.generated_schema_context_view
WHERE
  schema_object = 'ecomm.products';
我发现系统为商品表自动生成的上下文非常准确,无需进行任何更改。
我还检查了两个表格中每个列的相关信息,发现这些信息也正确无误。
我们将生成的 ecomm.inventory_items 和 ecomm.products 上下文应用到配置中。
SELECT alloydb_ai_nl.apply_generated_relation_context(
  relation_name => 'ecomm.inventory_items',
  overwrite_if_exist => TRUE
);

SELECT alloydb_ai_nl.apply_generated_relation_context(
  relation_name => 'ecomm.products',
  overwrite_if_exist => TRUE
);
您是否还记得我们用于为“我们有多少个首选品牌的商品?”这个问题生成 SQL 的查询??现在,我们可以重复执行该命令,看看输出是否发生了变化。
SELECT
  alloydb_ai_nl.get_sql(
    nl_config_id => 'cymbal_ecomm_config',
    nl_question => 'How many products do we have of our preferred brand?'
  ) ->> 'sql';
以下是新的输出。
SELECT COUNT(*) FROM "ecomm"."products" WHERE "brand" = 'Clades';
现在,它会检查 ecomm.products,这更加准确,并且会返回大约 300 个商品,而不是 5,000 个包含库存商品的运营。
9. 使用值索引
值关联会将值短语与预注册的概念类型和列名称相关联,从而丰富自然语言查询。这有助于使结果更具可预测性。
配置值索引
我们可以使用商品表中的品牌列来查询品牌更稳定的商品,方法是定义概念类型并将其与 ecomm.products.brand 列相关联。
我们来创建概念并将其与列相关联:
SELECT alloydb_ai_nl.add_concept_type(
    concept_type_in => 'brand_name',
    match_function_in => 'alloydb_ai_nl.get_concept_and_value_generic_entity_name',
    additional_info_in => '{
      "description": "Concept type for brand name.",
      "examples": "SELECT alloydb_ai_nl.get_concept_and_value_generic_entity_name(''Auto Forge'')" }'::jsonb
);
SELECT alloydb_ai_nl.associate_concept_type(
    column_names_in => 'ecomm.products.brand',
    concept_type_in => 'brand_name',
    nl_config_id_in => 'cymbal_ecomm_config'
);
您可以通过查询 alloydb_ai_nl.list_concept_types() 来验证概念
SELECT alloydb_ai_nl.list_concept_types();
然后,我们可以在配置中为所有已创建和预构建的关联创建索引:
SELECT alloydb_ai_nl.create_value_index(
  nl_config_id_in => 'cymbal_ecomm_config'
);
使用价值指数
如果您运行查询以使用品牌名称创建 SQL,但未定义该名称为品牌名称,则有助于正确识别实体和列。查询如下:
SELECT
  alloydb_ai_nl.get_sql(
    nl_config_id => 'cymbal_ecomm_config',
    nl_question => 'How many Clades do we have?'
  ) ->> 'sql';
输出显示正确识别了“Clades”一词作为品牌名称
SELECT COUNT(*) FROM "ecomm"."products" WHERE "brand" = 'Clades';
10. 使用查询模板
查询模板有助于为关键业务应用定义稳定的查询,从而减少不确定性并提高准确性。
创建查询模板
我们来创建一个查询模板,联接多个表,以获取去年购买过“Republic Outpost”产品的客户的相关信息。我们知道,该查询可以使用 ecomm.products 表,也可以使用 ecomm.inventory_items 表,因为这两个表都包含有关品牌的信息。但 products 表的行数少了 15 倍,并且在联接的主键上有一个索引。使用商品表可能更高效。因此,我们正在为查询创建模板。
SELECT alloydb_ai_nl.add_template(
    nl_config_id => 'cymbal_ecomm_config',
    intent => 'List the last names and the country of all customers who bought products of `Republic Outpost` in the last year.',
    sql => 'SELECT DISTINCT u."last_name", u."country" FROM "ecomm"."users" AS u INNER JOIN "ecomm"."order_items" AS oi ON u.id = oi."user_id" INNER JOIN "ecomm"."products" AS ep ON oi.product_id = ep.id WHERE ep.brand = ''Republic Outpost'' AND oi.created_at >= DATE_TRUNC(''year'', CURRENT_DATE - INTERVAL ''1 year'') AND oi.created_at < DATE_TRUNC(''year'', CURRENT_DATE)',
    sql_explanation => 'To answer this question, JOIN `ecomm.users` with `ecom.order_items` on having the same `users.id` and `order_items.user_id`, and JOIN the result with ecom.products on having the same `order_items.product_id` and `products.id`. Then filter rows with products.brand = ''Republic Outpost'' and by `order_items.created_at` for the last year. Return the `last_name` and the `country` of the users with matching records.',
    check_intent => TRUE
);
我们现在可以请求创建查询。
SELECT
  alloydb_ai_nl.get_sql(
    nl_config_id => 'cymbal_ecomm_config',
    nl_question => 'Show me last name and country about customers who bought "Republic Outpost" products last year.'
  ) ->> 'sql';
并生成所需的输出。
SELECT DISTINCT u."last_name", u."country" FROM "ecomm"."users" AS u INNER JOIN "ecomm"."order_items" AS oi ON u.id = oi."user_id" INNER JOIN "ecomm"."products" AS ep ON oi.product_id = ep.id WHERE ep.brand = 'Republic Outpost' AND oi.created_at >= DATE_TRUNC('year', CURRENT_DATE - INTERVAL '1 year') AND oi.created_at < DATE_TRUNC('year', CURRENT_DATE)
或者,您也可以使用以下查询直接执行查询:
SELECT
alloydb_ai_nl.execute_nl_query(
    nl_config_id => 'cymbal_ecomm_config',
    nl_question => 'Show me last name and country about customers who bought "Republic Outpost" products last year.'
);
它将以 JSON 格式返回可解析的结果。
                    execute_nl_query
--------------------------------------------------------
 {"last_name":"Adams","country":"China"}
 {"last_name":"Adams","country":"Germany"}
 {"last_name":"Aguilar","country":"China"}
 {"last_name":"Allen","country":"China"}
11. 清理环境
完成实验后销毁 AlloyDB 实例和集群。
删除 AlloyDB 集群和所有实例
如果您曾使用 AlloyDB 试用版。如果您计划使用试用集群测试其他实验和资源,请勿删除试用集群。您将无法在同一项目中创建其他试用集群。
系统会通过强制选项销毁集群,该选项还会删除属于该集群的所有实例。
如果您已断开连接且之前的所有设置都已丢失,请在 Cloud Shell 中定义项目和环境变量:
gcloud config set project <your project id>
export REGION=us-central1
export ADBCLUSTER=alloydb-aip-01
export PROJECT_ID=$(gcloud config get-value project)
删除集群:
gcloud alloydb clusters delete $ADBCLUSTER --region=$REGION --force
预期的控制台输出:
student@cloudshell:~ (test-project-001-402417)$ gcloud alloydb clusters delete $ADBCLUSTER --region=$REGION --force
All of the cluster data will be lost when the cluster is deleted.

Do you want to continue (Y/n)?  Y

Operation ID: operation-1697820178429-6082890a0b570-4a72f7e4-4c5df36f
Deleting cluster...done.
删除 AlloyDB 备份
删除集群的所有 AlloyDB 备份:
for i in $(gcloud alloydb backups list --filter="CLUSTER_NAME: projects/$PROJECT_ID/locations/$REGION/clusters/$ADBCLUSTER" --format="value(name)" --sort-by=~createTime) ; do gcloud alloydb backups delete $(basename $i) --region $REGION --quiet; done
预期的控制台输出:
student@cloudshell:~ (test-project-001-402417)$ for i in $(gcloud alloydb backups list --filter="CLUSTER_NAME: projects/$PROJECT_ID/locations/$REGION/clusters/$ADBCLUSTER" --format="value(name)" --sort-by=~createTime) ; do gcloud alloydb backups delete $(basename $i) --region $REGION --quiet; done
Operation ID: operation-1697826266108-60829fb7b5258-7f99dc0b-99f3c35f
Deleting backup...done.
12. 恭喜
恭喜您完成此 Codelab。现在,您可以尝试使用 AlloyDB 的 NL2SQL 功能来实现自己的解决方案。我们建议您尝试其他与 AlloyDB 和 AlloyDB AI 相关的 Codelab。您可以参阅此 Codelab,了解 AlloyDB 中的多模态嵌入如何运作。
所学内容
- 如何部署 AlloyDB for Postgres
- 如何启用 AlloyDB AI 自然语言
- 如何为 AI 自然语言创建和调整配置
- 如何使用自然语言生成 SQL 查询并获取结果
13. 调查问卷
输出如下: