
1. Introduction
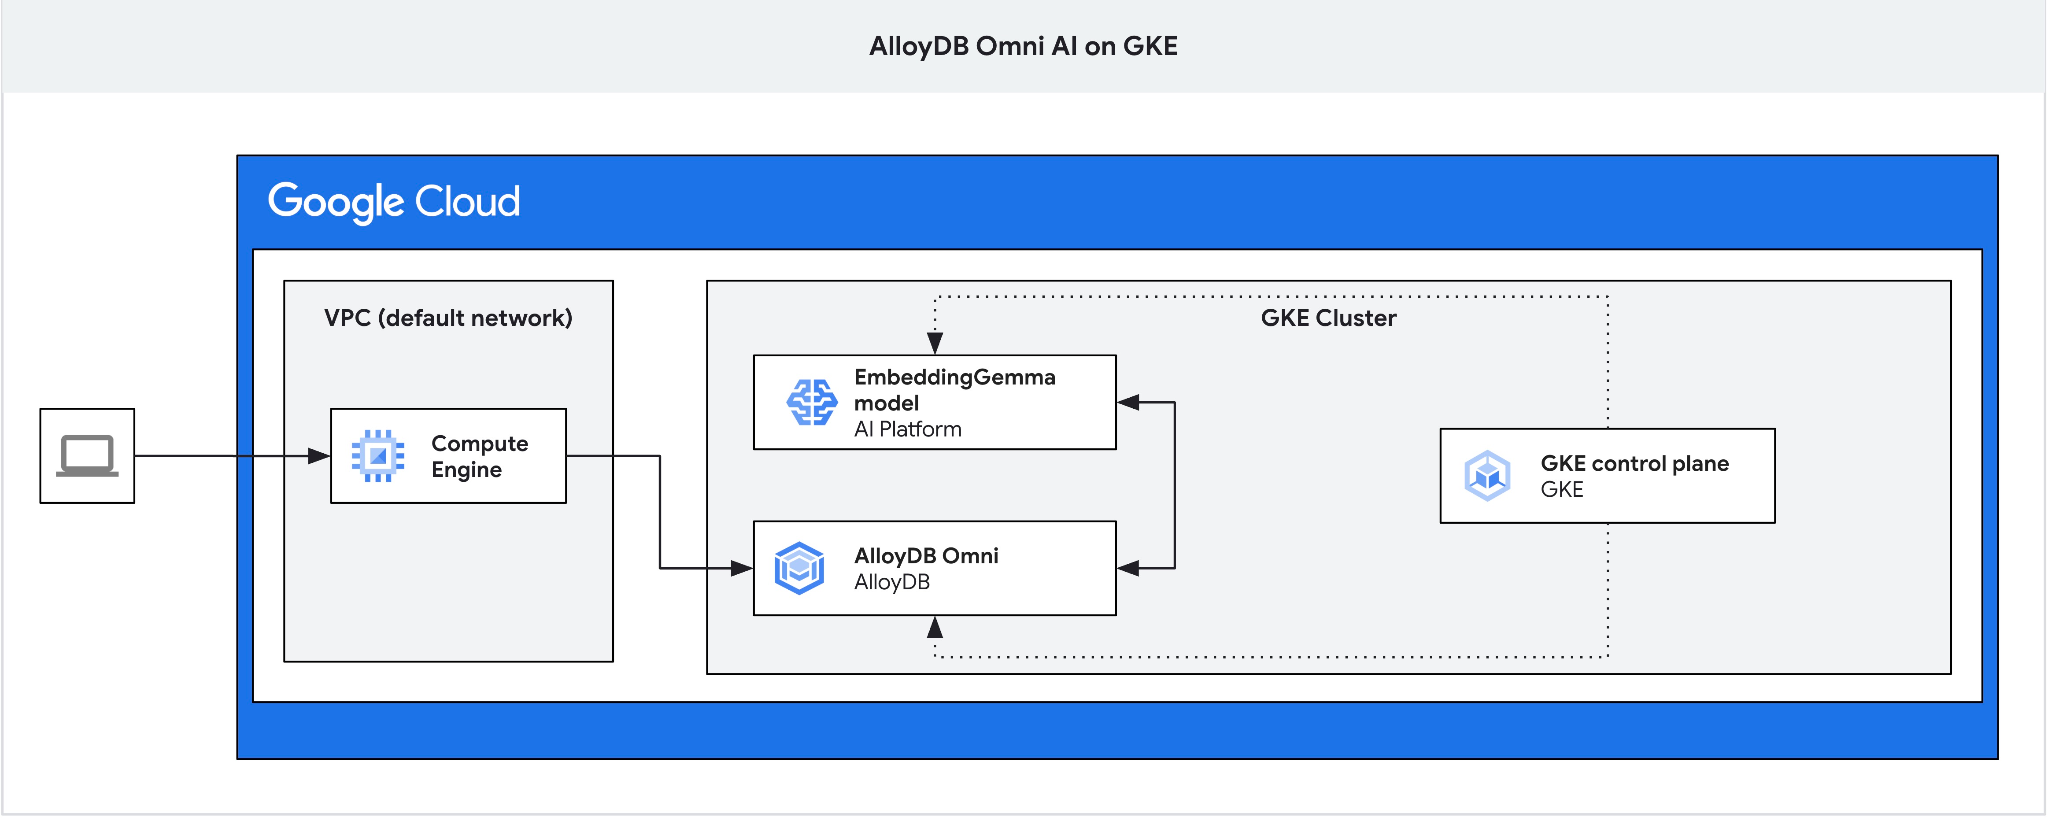
In this codelab you will learn how to deploy AlloyDB Omni on GKE and use it with an open embedding model deployed in the same Kubernetes cluster. The deployment of a model next to the database instance in the same GKE cluster reduces latency and dependencies on 3rd party services. In addition to that, local deployment might be a requirement set up by the security and compliances when the data should not leave the organization and usage of 3rd party services is not allowed.
Prerequisites
- A basic understanding of Google Cloud, console
- Basic knowledge of Kubernetes and GKE
- Basic skills in command line interface and Cloud Shell
What you'll learn
- How to deploy AlloyDB Omni on Google Kubernetes cluster
- How to connect to the AlloyDB Omni
- How to load data to AlloyDB Omni
- How to deploy an open embedding model to GKE
- How to register embedding model in AlloyDB Omni
- How to generate embeddings for semantic search
- How to use generated embeddings for semantic search in AlloyDB Omni
- How to create and use vector indexes in AlloyDB
What you'll need
- A Google Cloud Account and Google Cloud Project
- A web browser such as Chrome supporting Google Cloud console and Cloud Shell
2. Setup and Requirements
Project Setup
- Sign-in to the Google Cloud Console. If you don't already have a Gmail or Google Workspace account, you must create one.
Use a personal account instead of a work or school account.
- Create a new project or reuse an existing one. To create a new project in the Google Cloud console, in the header, click the Select a project button which will open a popup window.

In the Select a project window push the button New Project which will open a dialog box for the new project.
In the dialog box put your preferable Project name and choose the location.
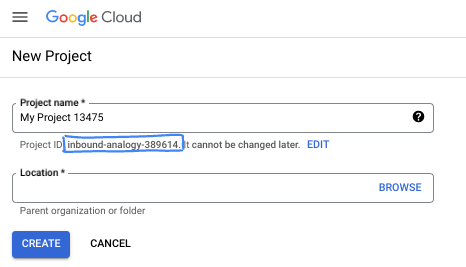
- The Project name is the display name for this project's participants. The project name isn't used by Google APIs, and it can be changed at any time.
- The Project ID is unique across all Google Cloud projects and is immutable (it can't be changed after it has been set). The Google Cloud console automatically generates a unique ID, but you can customize it. If you don't like the generated ID, you can generate another random one or provide your own to check its availability. In most codelabs, you'll need to reference your project ID, which is typically identified with the placeholder PROJECT_ID.
- For your information, there is a third value, a Project Number, which some APIs use. Learn more about all three of these values in the documentation.
Enable Billing
Set up a personal billing account
If you set up billing using Google Cloud credits, you can skip this step.
To set up a personal billing account, go here to enable billing in the Cloud Console.
Some Notes:
- Completing this lab should cost less than $3 USD in Cloud resources.
- You can follow the steps at the end of this lab to delete resources to avoid further charges.
- New users are eligible for the $300 USD Free Trial.
Start Cloud Shell
While Google Cloud can be operated remotely from your laptop, in this codelab you will be using Google Cloud Shell, a command line environment running in the Cloud.
From the Google Cloud Console, click the Cloud Shell icon on the top right toolbar:

Alternatively you can press G then S. This sequence will activate Cloud Shell if you are within the Google Cloud Console or use this link.
It should only take a few moments to provision and connect to the environment. When it is finished, you should see something like this:

This virtual machine is loaded with all the development tools you'll need. It offers a persistent 5GB home directory, and runs on Google Cloud, greatly enhancing network performance and authentication. All of your work in this codelab can be done within a browser. You do not need to install anything.
3. Before you begin
Enable API
Output:
To use Google Kubernetes Engine (GKE) for AlloyDB Omni and open models deployments you need to enable their respective APIs in your Google Cloud project.
Inside Cloud Shell, make sure that your project ID is setup:
PROJECT_ID=$(gcloud config get-value project)
echo $PROJECT_ID
If it is not defined in the cloud shell configuration set it up using following commands
export PROJECT_ID=<your project>
gcloud config set project $PROJECT_ID
Enable all necessary services:
gcloud services enable compute.googleapis.com
gcloud services enable container.googleapis.com
Expected output
student@cloudshell:~ (test-project-001-402417)$ PROJECT_ID=test-project-001-402417
student@cloudshell:~ (test-project-001-402417)$ gcloud config set project test-project-001-402417
Updated property [core/project].
student@cloudshell:~ (test-project-001-402417)$ gcloud services enable compute.googleapis.com
gcloud services enable container.googleapis.com
Operation "operations/acat.p2-4470404856-1f44ebd8-894e-4356-bea7-b84165a57442" finished successfully.
Introducing the APIs
- Kubernetes Engine API (
container.googleapis.com) allows you to create and manage Google Kubernetes Engine (GKE) clusters. It provides a managed environment for deploying, managing, and scaling your containerized applications using Google's infrastructure. - Compute Engine API (
compute.googleapis.com) allows you to create and manage virtual machines (VMs), persistent disks, and network settings. It provides the core Infrastructure-as-a-Service (IaaS) foundation required to run your workloads and host the underlying infrastructure for many managed services.
4. Deploy AlloyDB Omni on GKE
To deploy AlloyDB Omni on GKE we need to prepare a Kubernetes cluster following the requirements listed in the AlloyDB Omni operator requirements.
Create a GKE Cluster
We need to deploy a standard GKE cluster with a pool configuration sufficient to deploy a pod with AlloyDB Omni instance. For AlloyDB Omni we need at least 2 CPU and 8 GB of RAM and have some room for operator and monitoring services containers. We are going to use the e2-standard-4 VM type.
Set up the environment variables for your deployment.
export PROJECT_ID=$(gcloud config get project)
export LOCATION=us-central1
export CLUSTER_NAME=alloydb-ai-gke
export MACHINE_TYPE=e2-standard-4
Then we use gcloud to create the GKE standard cluster.
gcloud container clusters create ${CLUSTER_NAME} \
  --project=${PROJECT_ID} \
  --region=${LOCATION} \
  --workload-pool=${PROJECT_ID}.svc.id.goog \
  --release-channel=rapid \
  --machine-type=${MACHINE_TYPE} \
  --num-nodes=1
Expected console output:
student@cloudshell:~ (gleb-test-short-001-415614)$ export PROJECT_ID=$(gcloud config get project)
export LOCATION=us-central1
export CLUSTER_NAME=alloydb-ai-gke
export MACHINE_TYPE=n2-highmem-2
Your active configuration is: [gleb-test-short-001-415614]
student@cloudshell:~ (gleb-test-short-001-415614)$ gcloud container clusters create ${CLUSTER_NAME} \
  --project=${PROJECT_ID} \
  --region=${LOCATION} \
  --workload-pool=${PROJECT_ID}.svc.id.goog \
  --release-channel=rapid \
  --machine-type=${MACHINE_TYPE} \
  --num-nodes=1
Note: The Kubelet readonly port (10255) is now deprecated. Please update your workloads to use the recommended alternatives. See https://cloud.google.com/kubernetes-engine/docs/how-to/disable-kubelet-readonly-port for ways to check usage and for migration instructions.
Note: Your Pod address range (`--cluster-ipv4-cidr`) can accommodate at most 1008 node(s).
Creating cluster alloydb-ai-gke in us-central1..


NAME: omni01
ZONE: us-central1-a
MACHINE_TYPE: e2-standard-4
PREEMPTIBLE:
INTERNAL_IP: 10.128.0.3
EXTERNAL_IP: 35.232.157.123
STATUS: RUNNING
student@cloudshell:~ (gleb-test-short-001-415614)$
Prepare the Cluster
We need to install required components such as cert-manager service - native certificates manager for kubernetes. We can follow steps in the documentation for cert-manager installation
We use the Kubernetes command-line tool, kubectl, which is already installed in the Cloud Shell by default. Before using the utility we need to get credentials for our cluster.
gcloud container clusters get-credentials ${CLUSTER_NAME} --region=${LOCATION}
Now we can use kubectl to install the cert-manager:
kubectl apply -f https://github.com/cert-manager/cert-manager/releases/download/v1.19.2/cert-manager.yaml
Expected console output(redacted):
student@cloudshell:~$ kubectl apply -f https://github.com/cert-manager/cert-manager/releases/download/v1.16.2/cert-manager.yaml
namespace/cert-manager created
customresourcedefinition.apiextensions.k8s.io/certificaterequests.cert-manager.io created
customresourcedefinition.apiextensions.k8s.io/certificates.cert-manager.io created
customresourcedefinition.apiextensions.k8s.io/challenges.acme.cert-manager.io created
customresourcedefinition.apiextensions.k8s.io/clusterissuers.cert-manager.io created
...
validatingwebhookconfiguration.admissionregistration.k8s.io/cert-manager-webhook created
Install AlloyDB Omni
Install AlloyDB Omni operator can be installed using the helm utility.
Run the following command to install AlloyDB Omni operator:
export GCS_BUCKET=alloydb-omni-operator
export HELM_PATH=$(gcloud storage cat gs://$GCS_BUCKET/latest)
export OPERATOR_VERSION="${HELM_PATH%%/*}"
gcloud storage cp gs://$GCS_BUCKET/$HELM_PATH ./ --recursive
helm install alloydbomni-operator alloydbomni-operator-${OPERATOR_VERSION}.tgz \
--create-namespace \
--namespace alloydb-omni-system \
--atomic \
--timeout 5m
Expected console output(redacted):
student@cloudshell:~$ gcloud storage cp gs://$GCS_BUCKET/$HELM_PATH ./ --recursive
Copying gs://alloydb-omni-operator/1.2.0/alloydbomni-operator-1.2.0.tgz to file://./alloydbomni-operator-1.2.0.tgz
  Completed files 1/1 | 126.5kiB/126.5kiB
student@cloudshell:~$ helm install alloydbomni-operator alloydbomni-operator-${OPERATOR_VERSION}.tgz \
> --create-namespace \
> --namespace alloydb-omni-system \
> --atomic \
> --timeout 5m
NAME: alloydbomni-operator
LAST DEPLOYED: Mon Jan 20 13:13:20 2025
NAMESPACE: alloydb-omni-system
STATUS: deployed
REVISION: 1
TEST SUITE: None
student@cloudshell:~$
When the AlloyDB Omni operator is installed we can follow up with the deployment of our database cluster.
Here is example of deployment manifest with enabled googleMLExtension parameter and internal (private) load balancer.:
apiVersion: v1
kind: Secret
metadata:
  name: db-pw-my-omni
type: Opaque
data:
  my-omni: "VmVyeVN0cm9uZ1Bhc3N3b3Jk"
---
apiVersion: alloydbomni.dbadmin.goog/v1
kind: DBCluster
metadata:
  name: my-omni
spec:
  databaseVersion: "15.13.0"
  primarySpec:
    adminUser:
      passwordRef:
        name: db-pw-my-omni
    features:
      googleMLExtension:
        enabled: true
    resources:
      cpu: 1
      memory: 8Gi
      disks:
      - name: DataDisk
        size: 20Gi
        storageClass: standard
    dbLoadBalancerOptions:
      annotations:
        networking.gke.io/load-balancer-type: "internal"
  allowExternalIncomingTraffic: true
The secret value for the password is a Base64 representation of the password word "VeryStrongPassword". The more reliable way is to use Google secret manager to store the password value. You can read about it more in the documentation.
Save the manifest as my-omni.yaml to be applied in the next step. If you are in the Cloud Shell you can do it using the editor by pressing the "Open Editor" button on the top right of the terminal.
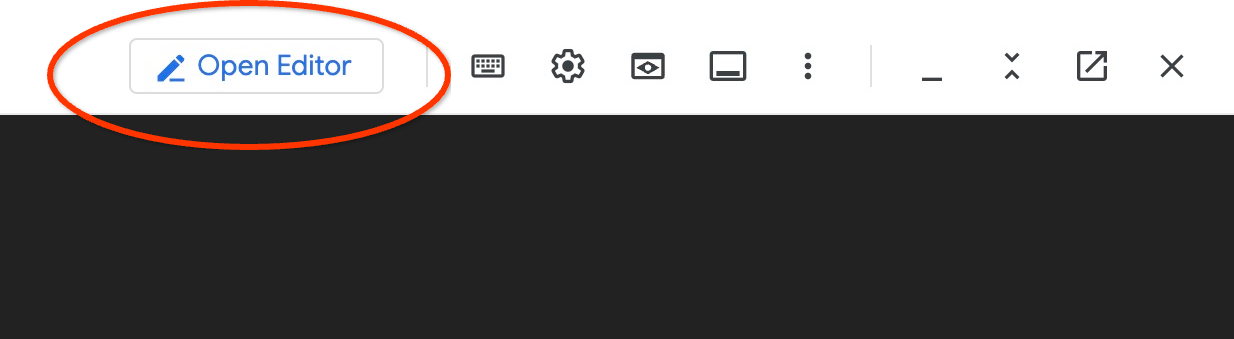
After saving the file with the name my-omni.yaml return back to the terminal by pressing the "Open Terminal" button.
Apply the my-omni.yaml manifest to the cluster using kubectl utility:
kubectl apply -f my-omni.yaml
Expected console output:
secret/db-pw-my-omni created
dbcluster.alloydbomni.dbadmin.goog/my-omni created
Check status of your my-omni cluster status using kubectl utility:
kubectl get dbclusters.alloydbomni.dbadmin.goog my-omni -n default
During deployment the cluster goes through different phases and eventually should end with DBClusterReady state.
Expected console output:
$ kubectl get dbclusters.alloydbomni.dbadmin.goog my-omni -n default
NAME      PRIMARYENDPOINT   PRIMARYPHASE   DBCLUSTERPHASE   HAREADYSTATUS   HAREADYREASON
my-omni   10.131.0.33        Ready          DBClusterReady
Connect to AlloyDB Omni
Connect Using Kubernetes Pod
When the cluster is ready we can use the PostgreSQL client binaries on the AlloyDB Omni instance pod. We find the pod id and then use kubectl to directly connect to the pod and run client software. The password is VeryStrongPassword as set via the kubernetes secret in the my-omni.yaml manifest:
DB_CLUSTER_NAME=my-omni
DB_CLUSTER_NAMESPACE=default
DBPOD=`kubectl get pod --selector=alloydbomni.internal.dbadmin.goog/dbcluster=$DB_CLUSTER_NAME,alloydbomni.internal.dbadmin.goog/task-type=database -n $DB_CLUSTER_NAMESPACE -o jsonpath='{.items[0].metadata.name}'`
kubectl exec -ti $DBPOD -n $DB_CLUSTER_NAMESPACE -c database -- psql -h localhost -U postgres
Sample console output:
DB_CLUSTER_NAME=my-omni
DB_CLUSTER_NAMESPACE=default
DBPOD=`kubectl get pod --selector=alloydbomni.internal.dbadmin.goog/dbcluster=$DB_CLUSTER_NAME,alloydbomni.internal.dbadmin.goog/task-type=database -n $DB_CLUSTER_NAMESPACE -o jsonpath='{.items[0].metadata.name}'`
kubectl exec -ti $DBPOD -n $DB_CLUSTER_NAMESPACE -c database -- psql -h localhost -U postgres
Password for user postgres:
psql (15.7)
SSL connection (protocol: TLSv1.3, cipher: TLS_AES_128_GCM_SHA256, compression: off)
Type "help" for help.

postgres=#
5. Deploy AI Model on GKE
To test the AlloyDB Omni AI integration with local models we need to deploy a model to the cluster. We are going to use Google's EmbeddingGemma model.
Create a Node Pool for the Model
To run the model we need to prepare a node pool to run inference. We can run it using a CPU only pool or a pool with GPU accelerators. The CPU only approach might be more feasible in some regions due to high concurrency for the resources. In our lab we are going to use the CPU approach but the best approach from a performance point of view is a pool with graphic accelerators using a node configuration like g2-standard-8 with L4 Nvidia accelerator.
CPU Based Node Pool
Create a node pool with e2-standard-32 nodes. We are going to limit our pull to one node to save resources.
export PROJECT_ID=$(gcloud config get project)
export LOCATION=us-central1
export CLUSTER_NAME=alloydb-ai-gke
gcloud container node-pools create cpupool \
  --project=${PROJECT_ID} \
  --location=${LOCATION} \
  --node-locations=${LOCATION}-a \
  --cluster=${CLUSTER_NAME} \
  --machine-type=c3-standard-8 \
  --num-nodes=1
Expected output
student@cloudshell$ export PROJECT_ID=$(gcloud config get project)
Your active configuration is: [pant]
export LOCATION=us-central1
export CLUSTER_NAME=alloydb-ai-gke
student@cloudshell$ gcloud container node-pools create cpupool \
>   --project=${PROJECT_ID} \
>   --location=${LOCATION} \
>   --node-locations=${LOCATION}-a \
>   --cluster=${CLUSTER_NAME} \
>   --machine-type=c3-standard-8 \
>   --num-nodes=1
Creating node pool cpupool...done.
Created [https://container.googleapis.com/v1/projects/gleb-test-short-003-483115/zones/us-central1/clusters/alloydb-ai-gke/nodePools/cpupool].
NAME     MACHINE_TYPE    DISK_SIZE_GB  NODE_VERSION
cpupool  c3-standard-8  100           1.34.1-gke.3355002
Get Hugging Face Token
In this lab we use a partnership with Hugging Face to deploy the EmbeddingGemma model and to do so we need to get a Hugging Face token.
Follow the steps below to generate a new token if you haven't got one before.
- Log in or sign up on the Hugging Face site using either Log In or Sign Up links in the top right corner.
- Click Your Profile -> Access Tokens
- Confirm your identity
- Click on Create new token
- Choose a name for your token
- Select a role for the token - you need at least Read privilege
- Click Create token at the bottom of the page
- Copy the generated token and save it for use later
Also you need to accept the conditions to access files and content related to the EmbeddingGemma on Hugging Face on the page https://huggingface.co/google/embeddinggemma-300m
Create a kubernetes secret using the token
In the cloud shell session execute (replace the value for the HF_TOKEN by your HF token).
export HF_TOKEN=hf_QjgW...lfrXF
kubectl create secret generic hf-secret \
    --from-literal=hf_api_token=$HF_TOKEN \
    --dry-run=client -o yaml | kubectl apply -f -
Prepare Deployment Manifest
To deploy the model we need to prepare a deployment manifest.
We are using Google's EmbeddingGemma model from Hugging Face. You can read the model card here. To deploy the model we are going to use an approach based on the instructions from Hugging Face and the deployment package from GitHub.
Clone the package from GitHub
git clone https://github.com/huggingface/Google-Cloud-Containers
Adjust the manifest for tei (text embedding interface) on CPU nodes. We need to replace several parameters including the model, image, correct resource allocation and add the Hugging Face token secret to the configuration.
Edit the manifest (using any available editor)
vi Google-Cloud-Containers/examples/gke/tei-deployment/cpu-config/deployment.yaml
Here is a corrected manifest d=for deployment on a CPU based pool.
apiVersion: apps/v1
kind: Deployment
metadata:
  name: tei-deployment
spec:
  replicas: 1
  selector:
    matchLabels:
      app: tei-server
  template:
    metadata:
      labels:
        app: tei-server
        hf.co/model: Google--embeddinggemma-300m
        hf.co/task: text-embeddings
    spec:
      containers:
        - name: tei-container
          image: ghcr.io/huggingface/text-embeddings-inference:cpu-latest
          #image: us-docker.pkg.dev/deeplearning-platform-release/gcr.io/huggingface-text-embeddings-inference-cpu.1-4:latest
          resources:
            requests:
              cpu: "6"
              memory: "24Gi"
            limits:
              cpu: "6"
              memory: "24Gi"
          env:
            - name: MODEL_ID
              value: google/embeddinggemma-300m
            - name: NUM_SHARD
              value: "1"
            - name: PORT
              value: "8080"
            - name: HF_TOKEN
              valueFrom:
                secretKeyRef:
                  name: hf-secret
                  key: hf_api_token
          volumeMounts:
            - mountPath: /tmp
              name: tmp
      volumes:
        - name: tmp
          emptyDir: {}
      nodeSelector:
        #cloud.google.com/compute-class: "Performance"
        cloud.google.com/machine-family: "c3"
Deploy the Model
Deploy the model by applying the modified manifest for CPU deployments.
kubectl apply -f Google-Cloud-Containers/examples/gke/tei-deployment/cpu-config
Verify the deployments
kubectl get pods
Verify the model service
kubectl get service tei-service
It is supposed to show the running service type ClusterIP
Sample output:
student@cloudshell$ kubectl get service tei-service
NAME          TYPE        CLUSTER-IP      EXTERNAL-IP   PORT(S)    AGE
tei-service   ClusterIP   34.118.233.48   <none>        8080/TCP   10m
The CLUSTER-IP for the service is what we are going to use as our endpoint address. The model embedding can respond by URI http://34.118.233.48:8080/embed. It will be used later when you register the model in AlloyDB Omni.
We can test it by exposing it using the kubectl port-forward command.
kubectl port-forward service/tei-service 8080:8080
If you are using Cloud Shell then the port forwarding can be running in one Cloud Shell session and we need another session to test it.
Open another Cloud Shell tab using the sign "+" at the top.
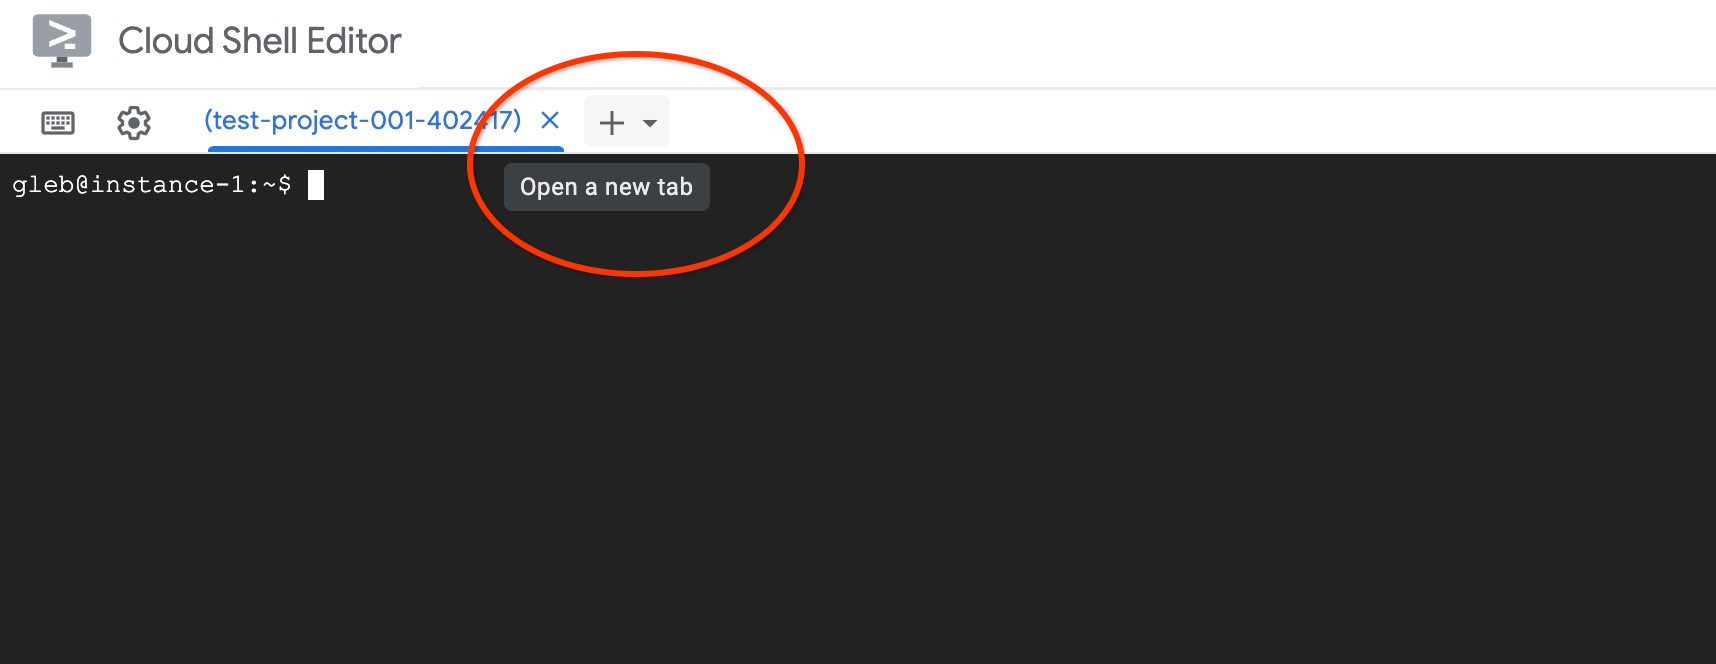
And run a curl command in the new shell session.
curl http://localhost:8080/embed \
    -X POST \
    -d '{"inputs":"Test"}' \
    -H 'Content-Type: application/json'
It should return a vector array like in the following sample output (redacted):
curl http://localhost:8080/embed \
>     -X POST \
>     -d '{"inputs":"Test"}' \
>     -H 'Content-Type: application/json'
[[-0.018975832,0.0071419072,0.06347208,0.022992613,0.014205903
...
-0.03677433,0.01636146,0.06731572]]
If we see the numbers we can confirm that we have successfully tested the model and now can register it in our AlloyDB Omni to be used directly from SQL.
6. Register the Model in AlloyDB Omni
To test how our AlloyDB Omni works with the deployed model we need to create a database and register the model.
Create Database
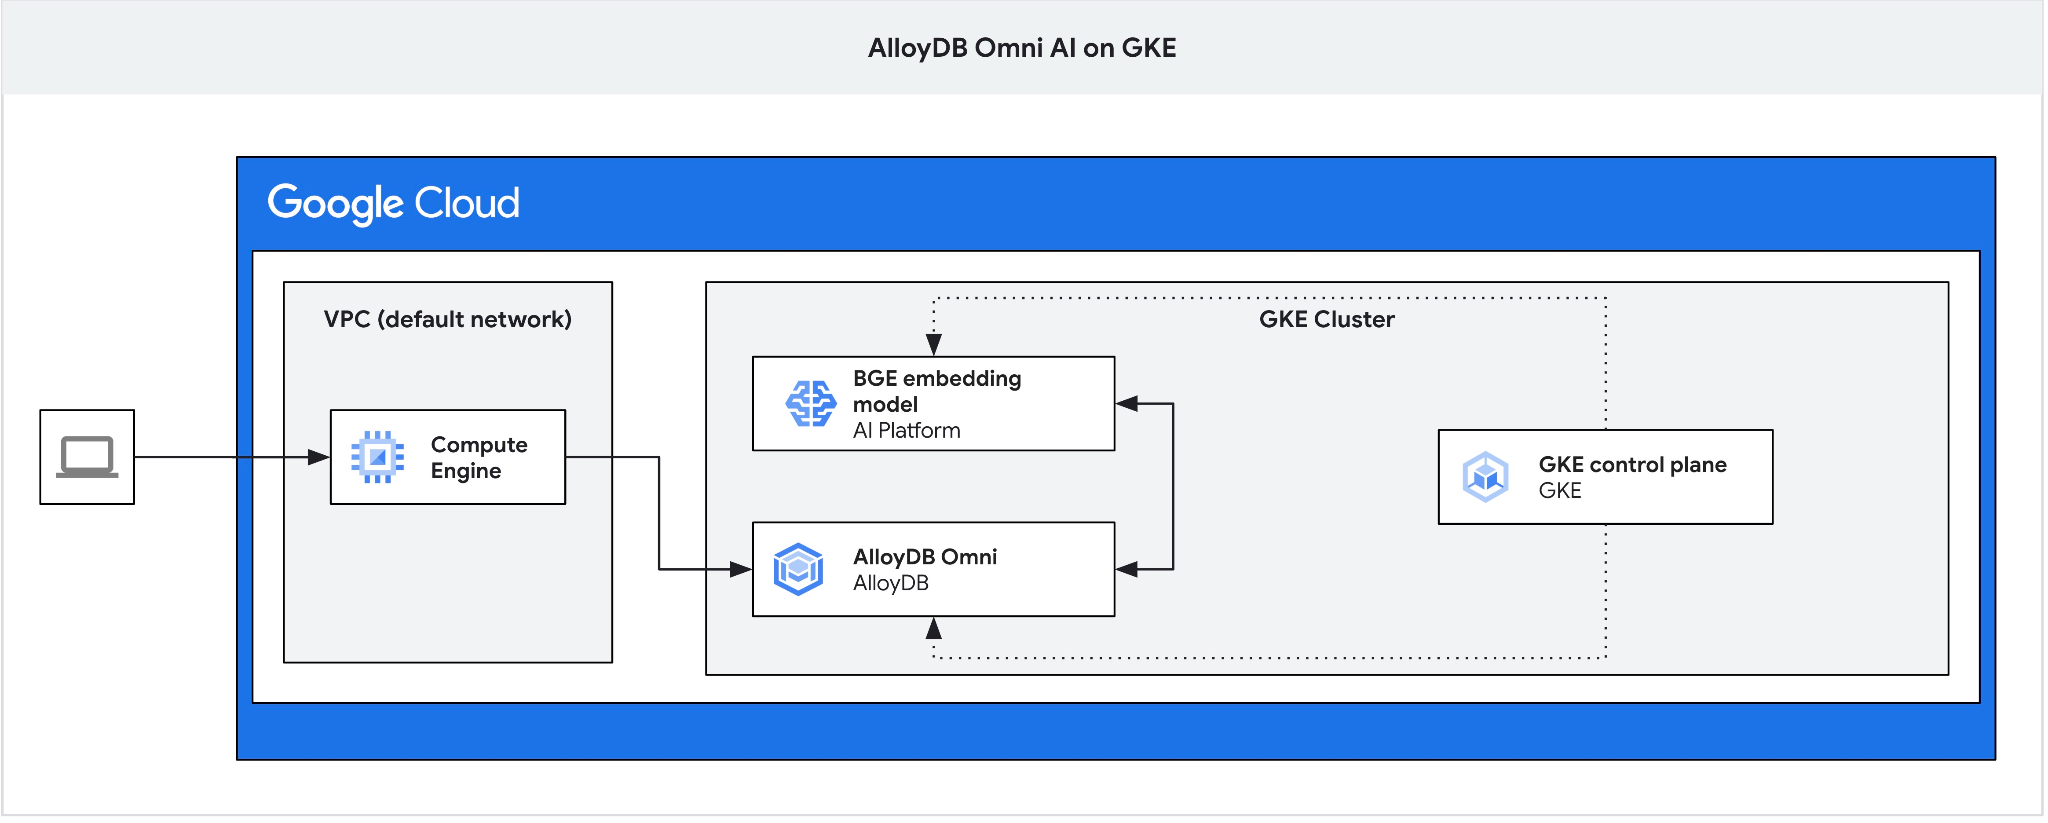
Create a GCE VM as a jump box to connect to the AlloyDB Omni from your client VM and create a database.
We need the jump box since the GKE external load balancer for Omni gives you access from the VPC using private IP addressing but doesn't allow you to connect from outside of VPC. It is more secure in general and doesn't expose your database instance to the internet. Please check the diagram for clarity.
To create a VM in the Cloud Shell session execute:
export ZONE=us-central1-a
gcloud compute instances create instance-1 \
    --zone=$ZONE
Find AlloyDB Omni endpoint IP using kubectl in the Cloud Shell:
kubectl get dbclusters.alloydbomni.dbadmin.goog my-omni -n default
Note down the PRIMARYENDPOINT.
Here is an example output:
student@cloudshell:~$ kubectl get dbclusters.alloydbomni.dbadmin.goog my-omni -n default
NAME      PRIMARYENDPOINT   PRIMARYPHASE   DBCLUSTERPHASE   HAREADYSTATUS   HAREADYREASON
my-omni   10.131.0.33        Ready          DBClusterReady
student@cloudshell:~$
The 10.131.0.33 is the IP we will be using in our examples to connect to the AlloyDB Omni instance.
Connect to VM using gcloud:
gcloud compute ssh instance-1 --zone=$ZONE
If prompted for ssh key generation, follow the instructions. Read more about ssh connection in the documentation.
In the ssh session to the VM install PostgreSQL client:
sudo apt-get update
sudo apt-get install --yes postgresql-client
Export the AlloyDB Omni load balancer IP variable using the following example (replace IP by your load balancer IP):
export INSTANCE_IP=10.131.0.33
Connect to the AlloyDB Omni, the password is VeryStrongPassword as set via the hash in my-omni.yaml:
psql "host=$INSTANCE_IP user=postgres sslmode=require"
In the established psql session execute:
create database demo;
Exit the session and connect to the database demo (or you can simply run \c demo in the same session)
psql "host=$INSTANCE_IP user=postgres sslmode=require dbname=demo"
Create transform functions
For 3rd party embedding models we need to create transform functions which format the input and output to the format expected by the model and our internal functions. Those functions perform as translators to make format conversion between different interfaces.
Here is the transform function which handles the input:
-- Input Transform Function corresponding to the custom model endpoint
CREATE OR REPLACE FUNCTION tei_text_input_transform(model_id VARCHAR(100), input_text TEXT)
RETURNS JSON
LANGUAGE plpgsql
AS $$
DECLARE
  transformed_input JSON;
  model_qualified_name TEXT;
BEGIN
  SELECT json_build_object('inputs', input_text, 'truncate', true)::JSON INTO transformed_input;
  RETURN transformed_input;
END;
$$;
Execute the provided code while connected to the demo database as it is shown in the sample output:
demo=# -- Input Transform Function corresponding to the custom model endpoint
CREATE OR REPLACE FUNCTION tei_text_input_transform(model_id VARCHAR(100), input_text TEXT)
RETURNS JSON
LANGUAGE plpgsql
AS $$
DECLARE
  transformed_input JSON;
  model_qualified_name TEXT;
BEGIN
  SELECT json_build_object('inputs', input_text, 'truncate', true)::JSON INTO transformed_input;
  RETURN transformed_input;
END;
$$;
CREATE FUNCTION
demo=#
And here is the output function which transforms the response from the model to the real numbers array:
-- Output Transform Function corresponding to the custom model endpoint
CREATE OR REPLACE FUNCTION tei_text_output_transform(model_id VARCHAR(100), response_json JSON)
RETURNS REAL[]
LANGUAGE plpgsql
AS $$
DECLARE
  transformed_output REAL[];
BEGIN
  SELECT ARRAY(SELECT json_array_elements_text(response_json->0)) INTO transformed_output;
  RETURN transformed_output;
END;
$$;
Execute it in the same session:
demo=# -- Output Transform Function corresponding to the custom model endpoint
CREATE OR REPLACE FUNCTION tei_text_output_transform(model_id VARCHAR(100), response_json JSON)
RETURNS REAL[]
LANGUAGE plpgsql
AS $$
DECLARE
  transformed_output REAL[];
BEGIN
  SELECT ARRAY(SELECT json_array_elements_text(response_json->0)) INTO transformed_output;
  RETURN transformed_output;
END;
$$;
CREATE FUNCTION
demo=#
Register the model
Now we can register the model in the database.
Here is the procedure call to register the model with name embeddinggemma. We use tei-service service name in our model_request_url parameter when we register the model. That is the internal kubernetes cluster service name and translates to the internal IP in the GKE cluster:
CALL
  google_ml.create_model(
    model_id => 'embeddinggemma',
    model_request_url => 'http://tei-service:8080/embed',
    model_provider => 'custom',
    model_type => 'text_embedding',
    model_in_transform_fn => 'tei_text_input_transform',
    model_out_transform_fn => 'tei_text_output_transform');
Execute the provided code while connected to the demo database:
demo=# CALL
  google_ml.create_model(
    model_id => 'embeddinggemma',
    model_request_url => 'http://tei-service:8080/embed',
    model_provider => 'custom',
    model_type => 'text_embedding',
    model_in_transform_fn => 'tei_text_input_transform',
    model_out_transform_fn => 'tei_text_output_transform');
CALL
demo=#
We can test the register model using the following test query which should return a real numbers array.
select google_ml.embedding('embeddinggemma','What is AlloyDB Omni?');
Don't be surprised by the prolonged delay before getting the vector data back. For this test we use CPU based nodes pool to host the embedding model and it works much faster on nodes with GPU.
7. Test the Model in AlloyDB Omni
Load Data
To test how our AlloyDB Omni works with the deployed model we need to load some data. I used the same data as in one of the other codelabs for vector search in AlloyDB.
One way to load the data is to use the Google Cloud SDK and the PostgreSQL client software. We can use the same client VM. The Google Cloud SDK should be already installed there if you've used the defaults for the VM image. But if you've used a custom image without Google SDK you can add it following the documentation.
Export the AlloyDB Omni load balancer IP as in the following example (replace IP by your load balancer IP):
export INSTANCE_IP=10.131.0.33
Connect to the database and enable pgvector extension.
psql "host=$INSTANCE_IP user=postgres sslmode=require dbname=demo"
In the psql session:
CREATE EXTENSION IF NOT EXISTS vector;
Exit the psql session and in the command line session execute commands to load the data to the demo database.
Create the tables. The following command will get the cymbal_demo_schema.sql file and execute the SQL with all tables definitions in the demo database:
gcloud storage cat gs://cloud-training/gcc/gcc-tech-004/cymbal_demo_schema.sql |psql "host=$INSTANCE_IP user=postgres dbname=demo"
Expected console output:
student@cloudshell:~$ gcloud storage cat gs://cloud-training/gcc/gcc-tech-004/cymbal_demo_schema.sql |psql "host=$INSTANCE_IP user=postgres dbname=demo"
Password for user postgres:
SET
SET
SET
SET
SET
 set_config
------------

(1 row)

SET
SET
SET
SET
SET
SET
CREATE TABLE
ALTER TABLE
CREATE TABLE
ALTER TABLE
CREATE TABLE
ALTER TABLE
CREATE TABLE
ALTER TABLE
CREATE SEQUENCE
ALTER TABLE
ALTER SEQUENCE
ALTER TABLE
ALTER TABLE
ALTER TABLE
student@cloudshell:~$
Here is the list of created tables:
psql "host=$INSTANCE_IP user=postgres dbname=demo" -c "\dt+"
Output:
student@cloudshell:~$ psql "host=$INSTANCE_IP user=postgres dbname=demo" -c "\dt+"
Password for user postgres:
                                           List of relations
 Schema |       Name       | Type  |  Owner   | Persistence | Access method |    Size    | Description
--------+------------------+-------+----------+-------------+---------------+------------+-------------
 public | cymbal_embedding | table | postgres | permanent   | heap          | 8192 bytes |
 public | cymbal_inventory | table | postgres | permanent   | heap          | 8192 bytes |
 public | cymbal_products  | table | postgres | permanent   | heap          | 8192 bytes |
 public | cymbal_stores    | table | postgres | permanent   | heap          | 8192 bytes |
(4 rows)
student@cloudshell:~$
Load data to the cymbal_products table:
gcloud storage cat gs://cloud-training/gcc/gcc-tech-004/cymbal_products.csv |psql "host=$INSTANCE_IP user=postgres dbname=demo" -c "\copy cymbal_products from stdin csv header"
Expected console output:
student@cloudshell:~$ gcloud storage cat gs://cloud-training/gcc/gcc-tech-004/cymbal_products.csv |psql "host=$INSTANCE_IP user=postgres dbname=demo" -c "\copy cymbal_products from stdin csv header"
COPY 941
student@cloudshell:~$
Here is a sample of a few rows from the cymbal_products table.
psql "host=$INSTANCE_IP user=postgres dbname=demo" -c "SELECT uniq_id,left(product_name,30),left(product_description,50),sale_price FROM cymbal_products limit 3"
Output:
student@cloudshell:~$ psql "host=$INSTANCE_IP user=postgres dbname=demo" -c "SELECT uniq_id,left(product_name,30),left(product_description,50),sale_price FROM cymbal_products limit 3"
Password for user postgres:
             uniq_id              |              left              |                        left                        | sale_price
----------------------------------+--------------------------------+----------------------------------------------------+------------
 a73d5f754f225ecb9fdc64232a57bc37 | Laundry Tub Strainer Cup       |   Laundry tub strainer cup Chrome For 1-.50, drain |      11.74
 41b8993891aa7d39352f092ace8f3a86 | LED Starry Star Night Light La |  LED Starry Star Night Light Laser Projector 3D Oc |      46.97
 ed4a5c1b02990a1bebec908d416fe801 | Surya Horizon HRZ-1060 Area Ru |  The 100% polypropylene construction of the Surya  |       77.4
(3 rows)
student@cloudshell:~$
Load data to the cymbal_inventory table:
gcloud storage cat gs://cloud-training/gcc/gcc-tech-004/cymbal_inventory.csv |psql "host=$INSTANCE_IP user=postgres dbname=demo" -c "\copy cymbal_inventory from stdin csv header"
Expected console output:
student@cloudshell:~$ gcloud storage cat gs://cloud-training/gcc/gcc-tech-004/cymbal_inventory.csv |psql "host=$INSTANCE_IP user=postgres dbname=demo" -c "\copy cymbal_inventory from stdin csv header"
Password for user postgres:
COPY 263861
student@cloudshell:~$
Here is a sample of a few rows from the cymbal_inventory table.
psql "host=$INSTANCE_IP user=postgres dbname=demo" -c "SELECT * FROM cymbal_inventory LIMIT 3"
Output:
student@cloudshell:~$ psql "host=$INSTANCE_IP user=postgres dbname=demo" -c "SELECT * FROM cymbal_inventory LIMIT 3"
Password for user postgres:
 store_id |             uniq_id              | inventory
----------+----------------------------------+-----------
     1583 | adc4964a6138d1148b1d98c557546695 |         5
     1490 | adc4964a6138d1148b1d98c557546695 |         4
     1492 | adc4964a6138d1148b1d98c557546695 |         3
(3 rows)
student@cloudshell:~$
Load data to the cymbal_stores table:
gcloud storage cat gs://cloud-training/gcc/gcc-tech-004/cymbal_stores.csv |psql "host=$INSTANCE_IP user=postgres dbname=demo" -c "\copy cymbal_stores from stdin csv header"
Expected console output:
student@cloudshell:~$ gcloud storage cat gs://cloud-training/gcc/gcc-tech-004/cymbal_stores.csv |psql "host=$INSTANCE_IP user=postgres dbname=demo" -c "\copy cymbal_stores from stdin csv header"
Password for user postgres:
COPY 4654
student@cloudshell:~$
Here is a sample of a few rows from the cymbal_stores table.
psql "host=$INSTANCE_IP user=postgres dbname=demo" -c "SELECT store_id, name, zip_code FROM cymbal_stores limit 3"
Output:
student@cloudshell:~$ psql "host=$INSTANCE_IP user=postgres dbname=demo" -c "SELECT store_id, name, zip_code FROM cymbal_stores limit 3"
Password for user postgres:
 store_id |       name        | zip_code
----------+-------------------+----------
     1990 | Mayaguez Store    |      680
     2267 | Ware Supercenter  |     1082
     4359 | Ponce Supercenter |      780
(3 rows)
student@cloudshell:~$
Build Embeddings
Connect to the demo database using psql and build embeddings for the products described in the cymbal_products table based on the products descriptions.
Connect to the demo database:
psql "host=$INSTANCE_IP user=postgres sslmode=require dbname=demo"
We are using a cymbal_embedding table with column embedding to store our embeddings and we use product description as the text input to the function.
Enable timing for your queries to compare later with remote models.:
\timing
Run the query to build the embeddings:
INSERT INTO cymbal_embedding(uniq_id,embedding) SELECT uniq_id, google_ml.embedding('embeddinggemma',product_description)::vector FROM cymbal_products;
Expected console output:
demo=# INSERT INTO cymbal_embedding(uniq_id,embedding)  SELECT uniq_id, google_ml.embedding('embeddinggemma',product_description)::vector FROM cymbal_products;
INSERT 0 941
Time: 497878.136 ms (08:17.878)
demo=#
In this example, building embeddings took about 8 minutes. That is expected for CPU based node pool. For a pool with GPU accelerators it can be significantly faster depending on the GPU type.
Run Test Queries
Connect to the demo database using psql and enable timing to measure execution time for our queries as we did for building embeddings.
Let's find the top 5 products matching a request like "What kind of fruit trees grow well here?" using cosine distance as the algorithm for vector search.
In the psql session execute:
SELECT
        cp.product_name,
        left(cp.product_description,80) as description,
        cp.sale_price,
        cs.zip_code,
        (ce.embedding <=> google_ml.embedding('embeddinggemma','What kind of fruit trees grow well here?')::vector) as distance
FROM
        cymbal_products cp
JOIN cymbal_embedding ce on
        ce.uniq_id=cp.uniq_id
JOIN cymbal_inventory ci on
        ci.uniq_id=cp.uniq_id
JOIN cymbal_stores cs on
        cs.store_id=ci.store_id
        AND ci.inventory>0
        AND cs.store_id = 1583
ORDER BY
        distance ASC
LIMIT 5;
Expected console output:
demo=# SELECT
        cp.product_name,
        left(cp.product_description,80) as description,
        cp.sale_price,
        cs.zip_code,
        (ce.embedding <=> google_ml.embedding('embeddinggemma','What kind of fruit trees grow well here?')::vector) as distance
FROM
        cymbal_products cp
JOIN cymbal_embedding ce on
        ce.uniq_id=cp.uniq_id
JOIN cymbal_inventory ci on
        ci.uniq_id=cp.uniq_id
JOIN cymbal_stores cs on
        cs.store_id=ci.store_id
        AND ci.inventory>0
        AND cs.store_id = 1583
ORDER BY
        distance ASC
LIMIT 5;
     product_name      |                                   description                                    | sale_price | zip_code |      distance
-----------------------+----------------------------------------------------------------------------------+------------+----------+--------------------
 Cherry Tree           | This is a beautiful cherry tree that will produce delicious cherries. It is an d |      75.00 |    93230 | 0.5210549378080666
 California Lilac      | This is a beautiful lilac tree that can grow to be over 10 feet tall. It is an d |       5.00 |    93230 | 0.5639421771781971
 Toyon                 | This is a beautiful toyon tree that can grow to be over 20 feet tall. It is an e |      10.00 |    93230 | 0.5670010914504852
 Rose Bush             | This is a beautiful rose bush that will produce fragrant roses. It is a perennia |      50.00 |    93230 | 0.5731542622882957
 California Peppertree | This is a beautiful peppertree that can grow to be over 30 feet tall. It is an e |      25.00 |    93230 | 0.5750934653011995
(5 rows)

Time: 83.610 ms
demo=#
The query ran 83 ms and returned a list of trees from the cymbal_products table matching the request and with inventory available in the store with number 1583.
Build ANN Index
When we have only a small data set it is easy to use exact search scanning all embeddings but when the data grows then load and response time increases as well. To improve performance you can build indexes on your embedding data. Here is an example of how to do it using Google ScaNN index for vector data.
Reconnect to the demo database if you've lost the connection:
psql "host=$INSTANCE_IP user=postgres sslmode=require dbname=demo"
Enable alloydb_scann extension:
CREATE EXTENSION IF NOT EXISTS alloydb_scann;
Build the index:
CREATE INDEX cymbal_embedding_scann ON cymbal_embedding USING scann (embedding cosine);
Try the same query as before and compare the results:
demo=# SELECT
        cp.product_name,
        left(cp.product_description,80) as description,
        cp.sale_price,
        cs.zip_code,
        (ce.embedding <=> google_ml.embedding('embeddinggemma','What kind of fruit trees grow well here?')::vector) as distance
FROM
        cymbal_products cp
JOIN cymbal_embedding ce on
        ce.uniq_id=cp.uniq_id
JOIN cymbal_inventory ci on
        ci.uniq_id=cp.uniq_id
JOIN cymbal_stores cs on
        cs.store_id=ci.store_id
        AND ci.inventory>0
        AND cs.store_id = 1583
ORDER BY
        distance ASC
LIMIT 5;
     product_name      |                                   description                                    | sale_price | zip_code |      distance
-----------------------+----------------------------------------------------------------------------------+------------+----------+--------------------
 Cherry Tree           | This is a beautiful cherry tree that will produce delicious cherries. It is an d |      75.00 |    93230 | 0.5210549378080666
 California Lilac      | This is a beautiful lilac tree that can grow to be over 10 feet tall. It is an d |       5.00 |    93230 | 0.5639421771781971
 Toyon                 | This is a beautiful toyon tree that can grow to be over 20 feet tall. It is an e |      10.00 |    93230 | 0.5670010914504852
 Rose Bush             | This is a beautiful rose bush that will produce fragrant roses. It is a perennia |      50.00 |    93230 | 0.5731542622882957
 California Peppertree | This is a beautiful peppertree that can grow to be over 30 feet tall. It is an e |      25.00 |    93230 | 0.5750934653011995
(5 rows)

Time: 64.783 ms
The query execution time has slightly reduced and that gain would be more noticeable with larger datasets. The results are quite similar and we got the same top 5 trees in the result..
Try other queries and read more about choosing vector index in documentation.
And don't forget AlloyDB Omni has more features and labs.
8. Clean up environment
Now we can delete our GKE cluster with AlloyDB Omni and a AI model
Delete GKE Cluster
In Cloud Shell execute:
export PROJECT_ID=$(gcloud config get project)
export LOCATION=us-central1
export CLUSTER_NAME=alloydb-ai-gke
gcloud container clusters delete ${CLUSTER_NAME} \
  --project=${PROJECT_ID} \
  --region=${LOCATION}
Expected console output:
student@cloudshell:~$ gcloud container clusters delete ${CLUSTER_NAME} \
>   --project=${PROJECT_ID} \
>   --region=${LOCATION}
The following clusters will be deleted.
 - [alloydb-ai-gke] in [us-central1]

Do you want to continue (Y/n)?  Y

Deleting cluster alloydb-ai-gke...done.
Deleted
Delete VM
In Cloud Shell execute:
export PROJECT_ID=$(gcloud config get project)
export ZONE=us-central1-a
gcloud compute instances delete instance-1 \
  --project=${PROJECT_ID} \
  --zone=${ZONE}
Expected console output:
student@cloudshell:~$ export PROJECT_ID=$(gcloud config get project)
export ZONE=us-central1-a
gcloud compute instances delete instance-1 \
  --project=${PROJECT_ID} \
  --zone=${ZONE}
Your active configuration is: [cloudshell-5399]
The following instances will be deleted. Any attached disks configured to be auto-deleted will be deleted unless they are attached to any other instances or the `--keep-disks` flag is given and specifies them for keeping. Deleting a disk
is irreversible and any data on the disk will be lost.
 - [instance-1] in [us-central1-a]

Do you want to continue (Y/n)?  Y

Deleted
If you created a new project for this codelab, you can instead delete the full project: https://console.cloud.google.com/cloud-resource-manager
9. Congratulations
Congratulations for completing the codelab.
What we've covered
- How to deploy AlloyDB Omni on Google Kubernetes cluster
- How to connect to the AlloyDB Omni
- How to load data to AlloyDB Omni
- How to deploy an open embedding model to GKE
- How to register embedding model in AlloyDB Omni
- How to generate embeddings for semantic search
- How to use generated embeddings for semantic search in AlloyDB Omni
- How to create and use vector indexes in AlloyDB
You can read more about working with AI in AlloyDB Omni in the documentation.
10. Survey
Output: