
1. 簡介
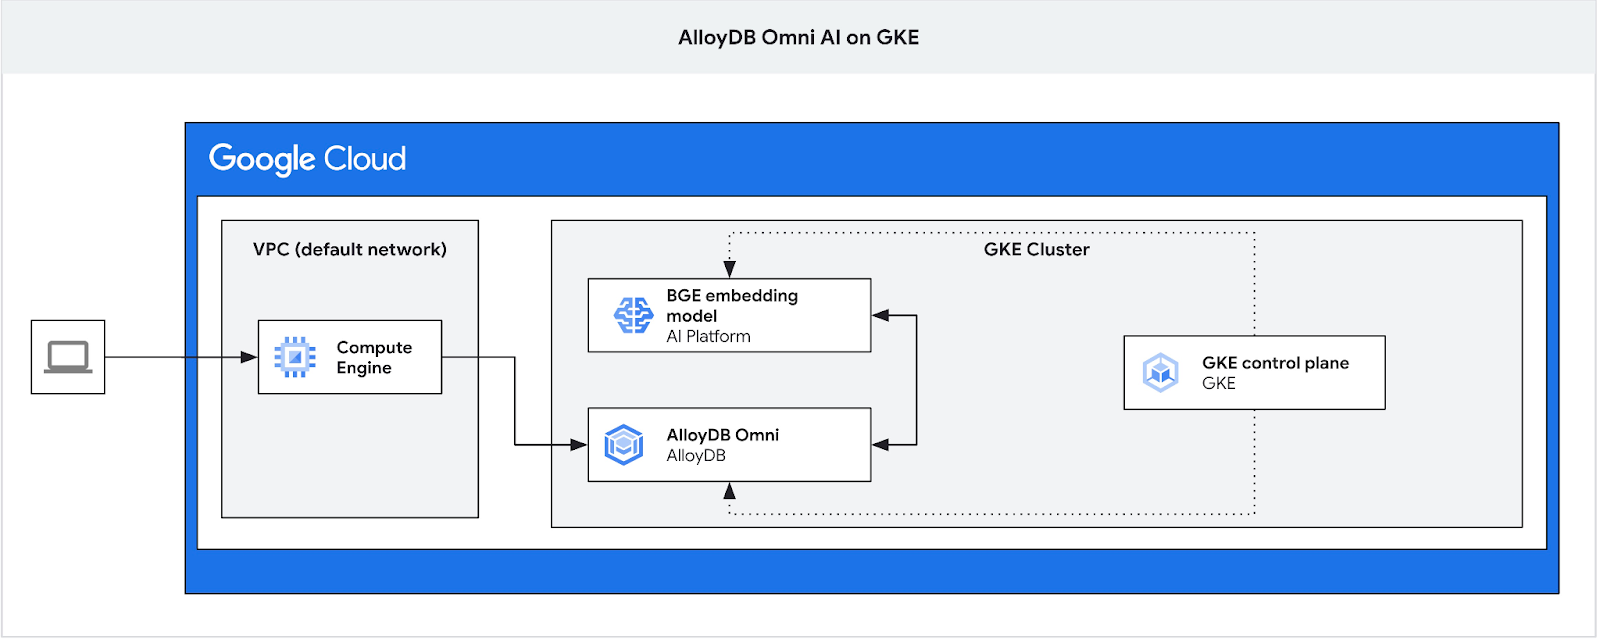
在本程式碼研究室中,您將瞭解如何在 GKE 部署 AlloyDB Omni,並搭配使用部署於同一個 Kubernetes 叢集的開放式嵌入模型。在同一個 GKE 叢集中,將模型部署在資料庫執行個體旁,可減少延遲,並降低對第三方服務的依附元件。此外,如果資料不得離開機構,且不允許使用第三方服務,安全性規定也可能要求您這麼做。
必要條件
- 對 Google Cloud 和控制台有基本瞭解
- 指令列介面和 Cloud Shell 的基本技能
課程內容
- 如何在 Google Kubernetes 叢集上部署 AlloyDB Omni
- 如何連線至 AlloyDB Omni
- 如何將資料載入 AlloyDB Omni
- 如何將開放式嵌入模型部署至 GKE
- 如何在 AlloyDB Omni 註冊嵌入模型
- 如何生成語意搜尋的嵌入
- 如何在 AlloyDB Omni 中使用產生的嵌入項目進行語意搜尋
- 如何在 AlloyDB 中建立及使用向量索引
軟硬體需求
- Google Cloud 帳戶和 Google Cloud 專案
- 支援 Google Cloud 控制台和 Cloud Shell 的網路瀏覽器,例如 Chrome
2. 設定和需求條件
自行設定環境
- 登入 Google Cloud 控制台,然後建立新專案或重複使用現有專案。如果沒有 Gmail 或 Google Workspace 帳戶,請先建立帳戶。

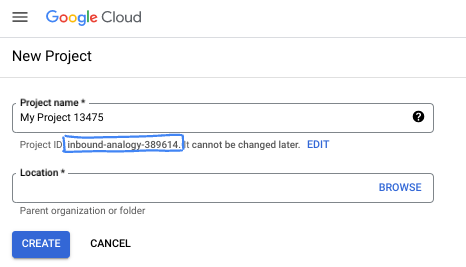
- 「專案名稱」是這個專案參與者的顯示名稱。這是 Google API 未使用的字元字串。你隨時可以更新。
- 專案 ID 在所有 Google Cloud 專案中都是不重複的,而且設定後即無法變更。Cloud 控制台會自動產生專屬字串,通常您不需要在意該字串為何。在大多數程式碼研究室中,您需要參照專案 ID (通常標示為
PROJECT_ID)。如果您不喜歡產生的 ID,可以產生另一個隨機 ID。你也可以嘗試使用自己的名稱,看看是否可用。完成這個步驟後就無法變更,且專案期間會維持不變。 - 請注意,有些 API 會使用第三個值,也就是「專案編號」。如要進一步瞭解這三種值,請參閱說明文件。
- 接著,您需要在 Cloud 控制台中啟用帳單,才能使用 Cloud 資源/API。完成這個程式碼研究室的費用不高,甚至可能完全免費。如要關閉資源,避免在本教學課程結束後繼續產生費用,請刪除您建立的資源或專案。Google Cloud 新使用者可參加價值$300 美元的免費試用計畫。
啟動 Cloud Shell
雖然可以透過筆電遠端操作 Google Cloud,但在本程式碼研究室中,您將使用 Google Cloud Shell,這是可在雲端執行的指令列環境。
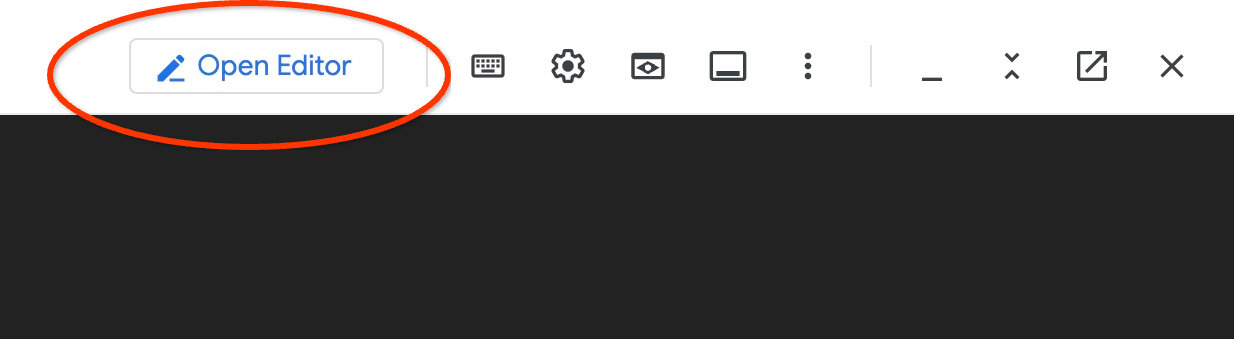
在 Google Cloud 控制台中,點選右上工具列的 Cloud Shell 圖示:

佈建並連線至環境的作業需要一些時間才能完成。完成後,您應該會看到如下的內容:

這部虛擬機器搭載各種您需要的開發工具,並提供永久的 5GB 主目錄,而且可在 Google Cloud 運作,大幅提升網路效能並強化驗證功能。您可以在瀏覽器中完成本程式碼研究室的所有作業。您不需要安裝任何軟體。
3. 事前準備
啟用 API
輸出內容:
在 Cloud Shell 中,確認專案 ID 已設定完畢:
PROJECT_ID=$(gcloud config get-value project)
echo $PROJECT_ID
如果未在 Cloud Shell 設定中定義,請使用下列指令進行設定
export PROJECT_ID=<your project>
gcloud config set project $PROJECT_ID
啟用所有必要服務:
gcloud services enable compute.googleapis.com
gcloud services enable container.googleapis.com
預期的輸出內容:
student@cloudshell:~ (test-project-001-402417)$ PROJECT_ID=test-project-001-402417
student@cloudshell:~ (test-project-001-402417)$ gcloud config set project test-project-001-402417
Updated property [core/project].
student@cloudshell:~ (test-project-001-402417)$ gcloud services enable compute.googleapis.com
gcloud services enable container.googleapis.com
Operation "operations/acat.p2-4470404856-1f44ebd8-894e-4356-bea7-b84165a57442" finished successfully.
4. 在 GKE 上部署 AlloyDB Omni
如要在 GKE 上部署 AlloyDB Omni,請按照 AlloyDB Omni 運算子需求列出的需求,準備 Kubernetes 叢集。
建立 GKE 叢集
我們需要部署標準 GKE 叢集,並提供足夠的集區設定,才能部署含有 AlloyDB Omni 執行個體的 Pod。我們需要至少 2 個 CPU 和 8 GB 的 RAM,才能為運算子和監控服務提供一些空間。
設定部署作業的環境變數。
export PROJECT_ID=$(gcloud config get project)
export LOCATION=us-central1
export CLUSTER_NAME=alloydb-ai-gke
export MACHINE_TYPE=e2-standard-4
接著,我們使用 gcloud 建立 GKE Standard 叢集。
gcloud container clusters create ${CLUSTER_NAME} \
  --project=${PROJECT_ID} \
  --region=${LOCATION} \
  --workload-pool=${PROJECT_ID}.svc.id.goog \
  --release-channel=rapid \
  --machine-type=${MACHINE_TYPE} \
  --num-nodes=1
預期的控制台輸出內容:
student@cloudshell:~ (gleb-test-short-001-415614)$ export PROJECT_ID=$(gcloud config get project)
export LOCATION=us-central1
export CLUSTER_NAME=alloydb-ai-gke
export MACHINE_TYPE=n2-highmem-2
Your active configuration is: [gleb-test-short-001-415614]
student@cloudshell:~ (gleb-test-short-001-415614)$ gcloud container clusters create ${CLUSTER_NAME} \
  --project=${PROJECT_ID} \
  --region=${LOCATION} \
  --workload-pool=${PROJECT_ID}.svc.id.goog \
  --release-channel=rapid \
  --machine-type=${MACHINE_TYPE} \
  --num-nodes=1
Note: The Kubelet readonly port (10255) is now deprecated. Please update your workloads to use the recommended alternatives. See https://cloud.google.com/kubernetes-engine/docs/how-to/disable-kubelet-readonly-port for ways to check usage and for migration instructions.
Note: Your Pod address range (`--cluster-ipv4-cidr`) can accommodate at most 1008 node(s).
Creating cluster alloydb-ai-gke in us-central1..


NAME: omni01
ZONE: us-central1-a
MACHINE_TYPE: e2-standard-4
PREEMPTIBLE:
INTERNAL_IP: 10.128.0.3
EXTERNAL_IP: 35.232.157.123
STATUS: RUNNING
student@cloudshell:~ (gleb-test-short-001-415614)$
準備叢集
我們需要安裝必要的元件,例如 cert-manager 服務。我們可以按照這份說明文件中的步驟安裝 cert-manager
我們使用 Kubernetes 指令列工具 kubectl,Cloud Shell 已安裝此工具。使用這項公用程式前,我們需要取得叢集的憑證。
gcloud container clusters get-credentials ${CLUSTER_NAME} --region=${LOCATION}
現在可以使用 kubectl 安裝 cert-manager:
kubectl apply -f https://github.com/cert-manager/cert-manager/releases/download/v1.16.2/cert-manager.yaml
預期的控制台輸出內容(已遮蓋):
student@cloudshell:~$ kubectl apply -f https://github.com/cert-manager/cert-manager/releases/download/v1.16.2/cert-manager.yaml
namespace/cert-manager created
customresourcedefinition.apiextensions.k8s.io/certificaterequests.cert-manager.io created
customresourcedefinition.apiextensions.k8s.io/certificates.cert-manager.io created
customresourcedefinition.apiextensions.k8s.io/challenges.acme.cert-manager.io created
customresourcedefinition.apiextensions.k8s.io/clusterissuers.cert-manager.io created
...
validatingwebhookconfiguration.admissionregistration.k8s.io/cert-manager-webhook created
安裝 AlloyDB Omni
您可以使用 Helm 公用程式安裝 AlloyDB Omni 運算子。
執行下列指令,安裝 AlloyDB Omni 運算子:
export GCS_BUCKET=alloydb-omni-operator
export HELM_PATH=$(gcloud storage cat gs://$GCS_BUCKET/latest)
export OPERATOR_VERSION="${HELM_PATH%%/*}"
gcloud storage cp gs://$GCS_BUCKET/$HELM_PATH ./ --recursive
helm install alloydbomni-operator alloydbomni-operator-${OPERATOR_VERSION}.tgz \
--create-namespace \
--namespace alloydb-omni-system \
--atomic \
--timeout 5m
預期的控制台輸出內容(已遮蓋):
student@cloudshell:~$ gcloud storage cp gs://$GCS_BUCKET/$HELM_PATH ./ --recursive
Copying gs://alloydb-omni-operator/1.2.0/alloydbomni-operator-1.2.0.tgz to file://./alloydbomni-operator-1.2.0.tgz
  Completed files 1/1 | 126.5kiB/126.5kiB
student@cloudshell:~$ helm install alloydbomni-operator alloydbomni-operator-${OPERATOR_VERSION}.tgz \
> --create-namespace \
> --namespace alloydb-omni-system \
> --atomic \
> --timeout 5m
NAME: alloydbomni-operator
LAST DEPLOYED: Mon Jan 20 13:13:20 2025
NAMESPACE: alloydb-omni-system
STATUS: deployed
REVISION: 1
TEST SUITE: None
student@cloudshell:~$
安裝 AlloyDB Omni 運算子後,我們就能繼續部署資料庫叢集。
以下是部署資訊清單範例,其中已啟用 googleMLExtension 參數和內部 (私人) 負載平衡器:
apiVersion: v1
kind: Secret
metadata:
  name: db-pw-my-omni
type: Opaque
data:
  my-omni: "VmVyeVN0cm9uZ1Bhc3N3b3Jk"
---
apiVersion: alloydbomni.dbadmin.goog/v1
kind: DBCluster
metadata:
  name: my-omni
spec:
  databaseVersion: "15.13.0"
  primarySpec:
    adminUser:
      passwordRef:
        name: db-pw-my-omni
    features:
      googleMLExtension:
        enabled: true
    resources:
      cpu: 1
      memory: 8Gi
      disks:
      - name: DataDisk
        size: 20Gi
        storageClass: standard
    dbLoadBalancerOptions:
      annotations:
        networking.gke.io/load-balancer-type: "internal"
  allowExternalIncomingTraffic: true
密碼的密鑰值是密碼字「VeryStrongPassword」的 Base64 表示法。更可靠的方法是使用 Google Secret Manager 儲存密碼值。詳情請參閱說明文件。
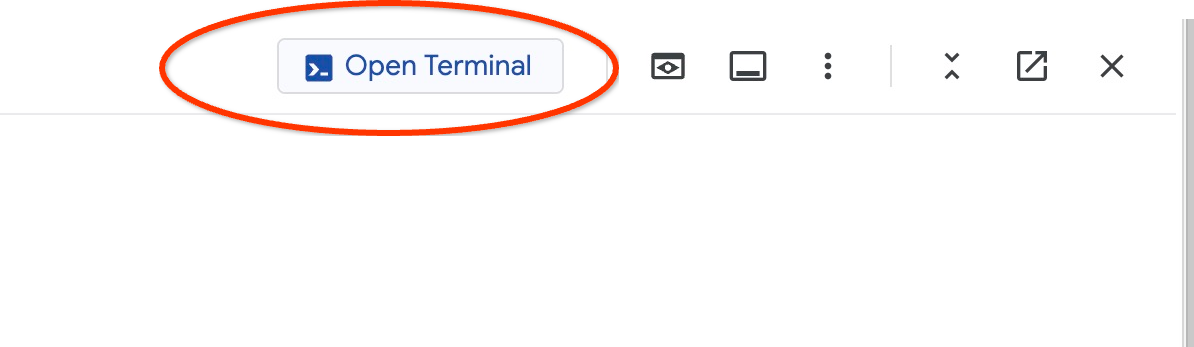
將資訊清單儲存為 my-omni.yaml,以便在下一個步驟中套用。如果您在 Cloud Shell 中,可以使用編輯器執行這項操作,方法是按下終端機右上方的「Open Editor」(開啟編輯器) 按鈕。
將檔案儲存為 my-omni.yaml 後,請按下「Open Terminal」(開啟終端機) 按鈕,返回終端機。
使用 kubectl 公用程式,將 my-omni.yaml 資訊清單套用到叢集:
kubectl apply -f my-omni.yaml
預期的控制台輸出內容:
secret/db-pw-my-omni created
dbcluster.alloydbomni.dbadmin.goog/my-omni created
使用 kubectl 公用程式檢查 my-omni 叢集狀態:
kubectl get dbclusters.alloydbomni.dbadmin.goog my-omni -n default
部署期間,叢集會經歷不同階段,最終應以 DBClusterReady 狀態結束。
預期的控制台輸出內容:
$ kubectl get dbclusters.alloydbomni.dbadmin.goog my-omni -n default
NAME      PRIMARYENDPOINT   PRIMARYPHASE   DBCLUSTERPHASE   HAREADYSTATUS   HAREADYREASON
my-omni   10.131.0.33        Ready          DBClusterReady
連線至 AlloyDB Omni
使用 Kubernetes Pod 連線
叢集準備就緒後,我們就可以在 AlloyDB Omni 執行個體 Pod 中使用 PostgreSQL 用戶端二進位檔。我們會找出 Pod ID,然後使用 kubectl 直接連線至 Pod 並執行用戶端軟體。密碼是 VeryStrongPassword,如 my-omni.yaml 中的雜湊值所設定:
DB_CLUSTER_NAME=my-omni
DB_CLUSTER_NAMESPACE=default
DBPOD=`kubectl get pod --selector=alloydbomni.internal.dbadmin.goog/dbcluster=$DB_CLUSTER_NAME,alloydbomni.internal.dbadmin.goog/task-type=database -n $DB_CLUSTER_NAMESPACE -o jsonpath='{.items[0].metadata.name}'`
kubectl exec -ti $DBPOD -n $DB_CLUSTER_NAMESPACE -c database -- psql -h localhost -U postgres
控制台輸出內容範例:
DB_CLUSTER_NAME=my-omni
DB_CLUSTER_NAMESPACE=default
DBPOD=`kubectl get pod --selector=alloydbomni.internal.dbadmin.goog/dbcluster=$DB_CLUSTER_NAME,alloydbomni.internal.dbadmin.goog/task-type=database -n $DB_CLUSTER_NAMESPACE -o jsonpath='{.items[0].metadata.name}'`
kubectl exec -ti $DBPOD -n $DB_CLUSTER_NAMESPACE -c database -- psql -h localhost -U postgres
Password for user postgres:
psql (15.7)
SSL connection (protocol: TLSv1.3, cipher: TLS_AES_128_GCM_SHA256, compression: off)
Type "help" for help.

postgres=#
5. 在 GKE 上部署 AI 模型
如要測試 AlloyDB Omni AI 與本機模型的整合,我們需要將模型部署至叢集。
為模型建立節點集區
如要執行模型,我們需要準備節點集區來執行推論。從效能角度來看,最佳做法是使用節點設定 (例如 g2-standard-8 搭配 L4 Nvidia 加速器) 的圖形加速器集區。
使用 L4 加速器建立節點集區:
export PROJECT_ID=$(gcloud config get project)
export LOCATION=us-central1
export CLUSTER_NAME=alloydb-ai-gke
gcloud container node-pools create gpupool \
  --accelerator type=nvidia-l4,count=1,gpu-driver-version=latest \
  --project=${PROJECT_ID} \
  --location=${LOCATION} \
  --node-locations=${LOCATION}-a \
  --cluster=${CLUSTER_NAME} \
  --machine-type=g2-standard-8 \
  --num-nodes=1
預期的輸出內容:
student@cloudshell$ export PROJECT_ID=$(gcloud config get project)
Your active configuration is: [pant]
export LOCATION=us-central1
export CLUSTER_NAME=alloydb-ai-gke
student@cloudshell$ gcloud container node-pools create gpupool \
>   --accelerator type=nvidia-l4,count=1,gpu-driver-version=latest \
>   --project=${PROJECT_ID} \
>   --location=${LOCATION} \
>   --node-locations=${LOCATION}-a \
>   --cluster=${CLUSTER_NAME} \
>   --machine-type=g2-standard-8 \
>   --num-nodes=1
Note: Machines with GPUs have certain limitations which may affect your workflow. Learn more at https://cloud.google.com/kubernetes-engine/docs/how-to/gpus
Note: Starting in GKE 1.30.1-gke.115600, if you don't specify a driver version, GKE installs the default GPU driver for your node's GKE version.
Creating node pool gpupool...done.
Created [https://container.googleapis.com/v1/projects/student-test-001/zones/us-central1/clusters/alloydb-ai-gke/nodePools/gpupool].
NAME     MACHINE_TYPE   DISK_SIZE_GB  NODE_VERSION
gpupool  g2-standard-8  100           1.31.4-gke.1183000
準備部署資訊清單
如要部署模型,我們需要準備部署資訊清單。
我們使用 Hugging Face 的 BGE Base v1.5 嵌入模型。如要閱讀模型資訊卡,請按這裡。如要部署模型,可以使用 Hugging Face 提供的說明,以及 GitHub 上的部署套件。
複製套件
git clone https://github.com/huggingface/Google-Cloud-Containers
編輯資訊清單,將 cloud.google.com/gke-accelerator 值替換為 nvidia-l4,並新增資源限制。
vi Google-Cloud-Containers/examples/gke/tei-deployment/gpu-config/deployment.yaml
以下是修正後的資訊清單。
apiVersion: apps/v1
kind: Deployment
metadata:
  name: tei-deployment
spec:
  replicas: 1
  selector:
    matchLabels:
      app: tei-server
  template:
    metadata:
      labels:
        app: tei-server
        hf.co/model: Snowflake--snowflake-arctic-embed-m
        hf.co/task: text-embeddings
    spec:
      containers:
        - name: tei-container
          image: us-docker.pkg.dev/deeplearning-platform-release/gcr.io/huggingface-text-embeddings-inference-cu122.1-4.ubuntu2204:latest
          resources:
            requests:
              nvidia.com/gpu: 1
            limits:
              nvidia.com/gpu: 1
          env:
            - name: MODEL_ID
              value: Snowflake/snowflake-arctic-embed-m
            - name: NUM_SHARD
              value: "1"
            - name: PORT
              value: "8080"
          volumeMounts:
            - mountPath: /dev/shm
              name: dshm
            - mountPath: /data
              name: data
      volumes:
        - name: dshm
          emptyDir:
            medium: Memory
            sizeLimit: 1Gi
        - name: data
          emptyDir: {}
      nodeSelector:
        cloud.google.com/gke-accelerator: nvidia-l4
部署模型
我們需要準備服務帳戶和命名空間,以進行部署。
建立 Kubernetes 命名空間 hf-gke-namespace。
export NAMESPACE=hf-gke-namespace
kubectl create namespace $NAMESPACE
建立 Kubernetes 服務帳戶
export SERVICE_ACCOUNT=hf-gke-service-account
kubectl create serviceaccount $SERVICE_ACCOUNT --namespace $NAMESPACE
部署模型
kubectl apply -f Google-Cloud-Containers/examples/gke/tei-deployment/gpu-config
驗證部署作業
kubectl get pods
驗證模型服務
kubectl get service tei-service
應該會顯示正在執行的服務類型 ClusterIP
輸出內容範例:
student@cloudshell$ kubectl get service tei-service
NAME          TYPE        CLUSTER-IP      EXTERNAL-IP   PORT(S)    AGE
tei-service   ClusterIP   34.118.233.48   <none>        8080/TCP   10m
服務的 CLUSTER-IP 將做為端點位址。模型嵌入內容可透過 URI http://34.118.233.48:8080/embed 回應。稍後在 AlloyDB Omni 中註冊模型時,會用到這項資訊。
我們可以使用 kubectl port-forward 指令公開服務,藉此進行測試。
kubectl port-forward service/tei-service 8080:8080
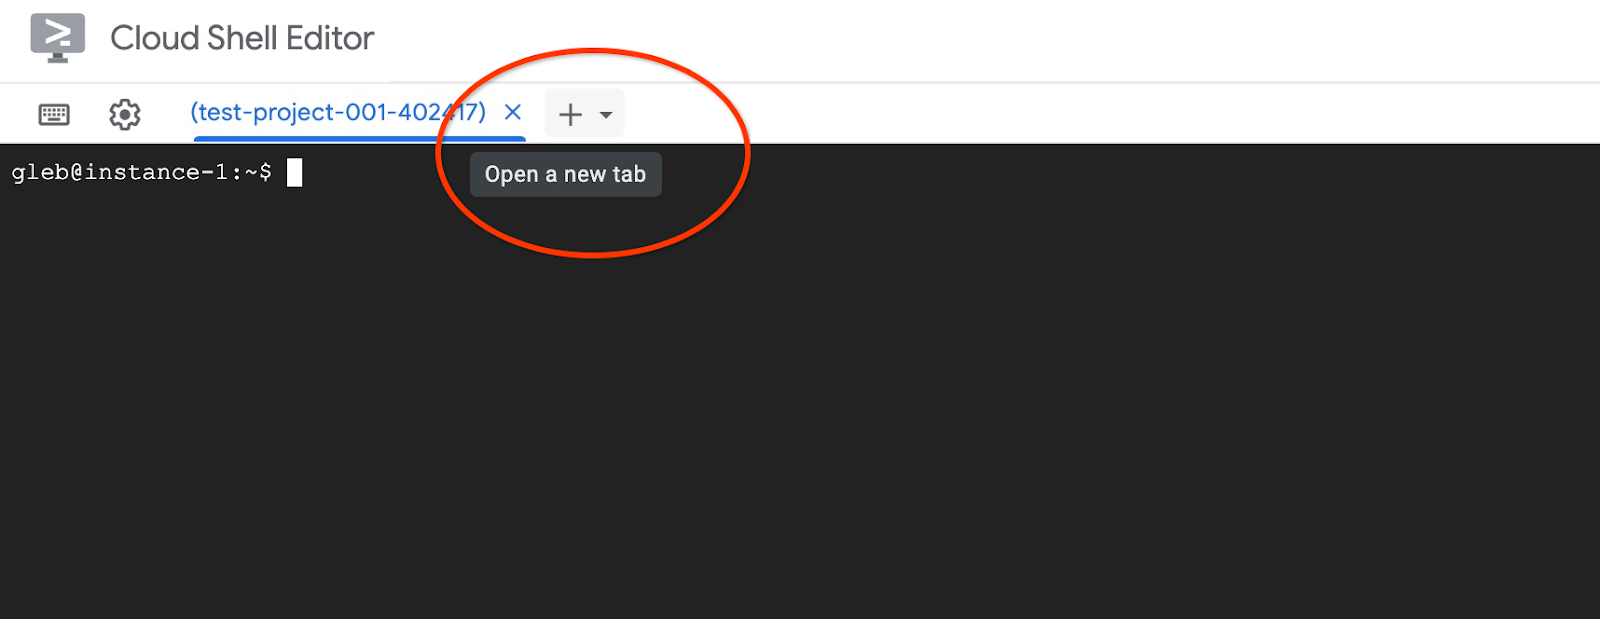
通訊埠轉送會在一個 Cloud Shell 工作階段中執行,我們需要另一個工作階段來測試。
使用頂端的「+」符號開啟另一個 Cloud Shell 分頁。
並在新殼層工作階段中執行 curl 指令。
curl http://localhost:8080/embed \
    -X POST \
    -d '{"inputs":"Test"}' \
    -H 'Content-Type: application/json'
系統應會傳回向量陣列,如下列範例輸出內容 (已刪除部分內容) 所示:
curl http://localhost:8080/embed \
>     -X POST \
>     -d '{"inputs":"Test"}' \
>     -H 'Content-Type: application/json'
[[-0.018975832,0.0071419072,0.06347208,0.022992613,0.014205903
...
-0.03677433,0.01636146,0.06731572]]
6. 在 AlloyDB Omni 中註冊模型
如要測試 AlloyDB Omni 與已部署模型的搭配運作方式,我們需要建立資料庫並註冊模型。
建立資料庫
建立 GCE VM 做為跳板主機,從用戶端 VM 連線至 AlloyDB Omni,然後建立資料庫。
由於 Omni 的 GKE 外部負載平衡器可讓您使用私人 IP 位址從 VPC 存取,但無法從 VPC 外部連線,因此我們需要跳板主機。一般來說,這類連線更安全,且不會將資料庫執行個體暴露在網際網路上。請參閱圖表,瞭解詳細資訊。
如要在 Cloud Shell 工作階段中建立 VM,請執行下列指令:
export ZONE=us-central1-a
gcloud compute instances create instance-1 \
    --zone=$ZONE
在 Cloud Shell 中使用 kubectl 找出 AlloyDB Omni 端點 IP:
kubectl get dbclusters.alloydbomni.dbadmin.goog my-omni -n default
記下 PRIMARYENDPOINT。我們來看個例子
output:
student@cloudshell:~$ kubectl get dbclusters.alloydbomni.dbadmin.goog my-omni -n default
NAME      PRIMARYENDPOINT   PRIMARYPHASE   DBCLUSTERPHASE   HAREADYSTATUS   HAREADYREASON
my-omni   10.131.0.33        Ready          DBClusterReady
student@cloudshell:~$
在範例中,我們會使用 10.131.0.33 這個 IP 位址連線至 AlloyDB Omni 執行個體。
使用 gcloud 連線至 VM:
gcloud compute ssh instance-1 --zone=$ZONE
如果系統提示您產生 SSH 金鑰,請按照指示操作。如要進一步瞭解 SSH 連線,請參閱說明文件。
在 VM 的 SSH 工作階段中,安裝 PostgreSQL 用戶端:
sudo apt-get update
sudo apt-get install --yes postgresql-client
匯出 AlloyDB Omni 負載平衡器 IP,如下列範例所示 (將 IP 替換為負載平衡器 IP):
export INSTANCE_IP=10.131.0.33
連線至 AlloyDB Omni,密碼為 VeryStrongPassword,如 my-omni.yaml 中的雜湊值所設定:
psql "host=$INSTANCE_IP user=postgres sslmode=require"
在建立的 psql 工作階段中執行:
create database demo;
結束工作階段並連線至資料庫示範 (或您可以在同一個工作階段中執行「\c demo」)
psql "host=$INSTANCE_IP user=postgres sslmode=require dbname=demo"
建立轉換函式
如果是第三方嵌入模型,我們需要建立轉換函式,將輸入和輸出內容格式化為模型和內部函式預期的格式。
以下是處理輸入內容的轉換函式:
-- Input Transform Function corresponding to the custom model endpoint
CREATE OR REPLACE FUNCTION tei_text_input_transform(model_id VARCHAR(100), input_text TEXT)
RETURNS JSON
LANGUAGE plpgsql
AS $$
DECLARE
  transformed_input JSON;
  model_qualified_name TEXT;
BEGIN
  SELECT json_build_object('inputs', input_text, 'truncate', true)::JSON INTO transformed_input;
  RETURN transformed_input;
END;
$$;
連線至範例輸出內容中顯示的示範資料庫時,請執行提供的程式碼:
demo=# -- Input Transform Function corresponding to the custom model endpoint
CREATE OR REPLACE FUNCTION tei_text_input_transform(model_id VARCHAR(100), input_text TEXT)
RETURNS JSON
LANGUAGE plpgsql
AS $$
DECLARE
  transformed_input JSON;
  model_qualified_name TEXT;
BEGIN
  SELECT json_build_object('inputs', input_text, 'truncate', true)::JSON INTO transformed_input;
  RETURN transformed_input;
END;
$$;
CREATE FUNCTION
demo=#
以下是輸出函式,可將模型的回應轉換為實數陣列:
-- Output Transform Function corresponding to the custom model endpoint
CREATE OR REPLACE FUNCTION tei_text_output_transform(model_id VARCHAR(100), response_json JSON)
RETURNS REAL[]
LANGUAGE plpgsql
AS $$
DECLARE
  transformed_output REAL[];
BEGIN
  SELECT ARRAY(SELECT json_array_elements_text(response_json->0)) INTO transformed_output;
  RETURN transformed_output;
END;
$$;
在同一工作階段中執行:
demo=# -- Output Transform Function corresponding to the custom model endpoint
CREATE OR REPLACE FUNCTION tei_text_output_transform(model_id VARCHAR(100), response_json JSON)
RETURNS REAL[]
LANGUAGE plpgsql
AS $$
DECLARE
  transformed_output REAL[];
BEGIN
  SELECT ARRAY(SELECT json_array_elements_text(response_json->0)) INTO transformed_output;
  RETURN transformed_output;
END;
$$;
CREATE FUNCTION
demo=#
註冊模型
現在我們可以在資料庫中註冊模型。
以下是註冊名為 bge-base-1.5 的模型的程序呼叫,請將 IP 34.118.233.48 替換為模型服務 IP 位址 (kubectl get service tei-service 的輸出內容):
CALL
  google_ml.create_model(
    model_id => 'bge-base-1.5',
    model_request_url => 'http://34.118.233.48:8080/embed',
    model_provider => 'custom',
    model_type => 'text_embedding',
    model_in_transform_fn => 'tei_text_input_transform',
    model_out_transform_fn => 'tei_text_output_transform');
連線至示範資料庫時,請執行提供的程式碼:
demo=# CALL
  google_ml.create_model(
    model_id => 'bge-base-1.5',
    model_request_url => 'http://34.118.233.48:8080/embed',
    model_provider => 'custom',
    model_type => 'text_embedding',
    model_in_transform_fn => 'tei_text_input_transform',
    model_out_transform_fn => 'tei_text_output_transform');
CALL
demo=#
我們可以使用下列測試查詢測試註冊模型,這項查詢應會傳回實數陣列。
select google_ml.embedding('bge-base-1.5','What is AlloyDB Omni?');
7. 在 AlloyDB Omni 中測試模型
載入資料
如要測試 AlloyDB Omni 與已部署模型的搭配運作方式,我們需要載入一些資料。我使用的資料與其中一個 其他程式碼研究室的資料相同,用於 AlloyDB 中的向量搜尋。
載入資料的方法之一是使用 Google Cloud SDK 和 PostgreSQL 用戶端軟體。我們可以沿用建立示範資料庫時使用的用戶端 VM。如果您使用 VM 映像檔的預設值,Google Cloud SDK 應該已安裝在該處。但如果您使用沒有 Google SDK 的自訂映像檔,可以按照說明文件新增。
匯出 AlloyDB Omni 負載平衡器 IP,如下列範例所示 (將 IP 替換為負載平衡器 IP):
export INSTANCE_IP=10.131.0.33
連線至資料庫並啟用 pgvector 擴充功能。
psql "host=$INSTANCE_IP user=postgres sslmode=require dbname=demo"
在 psql 工作階段中:
CREATE EXTENSION IF NOT EXISTS vector;
退出 psql 工作階段,並在指令列工作階段中執行指令,將資料載入示範資料庫。
建立資料表:
gcloud storage cat gs://cloud-training/gcc/gcc-tech-004/cymbal_demo_schema.sql |psql "host=$INSTANCE_IP user=postgres dbname=demo"
預期的控制台輸出內容:
student@cloudshell:~$ gcloud storage cat gs://cloud-training/gcc/gcc-tech-004/cymbal_demo_schema.sql |psql "host=$INSTANCE_IP user=postgres dbname=demo"
Password for user postgres:
SET
SET
SET
SET
SET
 set_config
------------

(1 row)

SET
SET
SET
SET
SET
SET
CREATE TABLE
ALTER TABLE
CREATE TABLE
ALTER TABLE
CREATE TABLE
ALTER TABLE
CREATE TABLE
ALTER TABLE
CREATE SEQUENCE
ALTER TABLE
ALTER SEQUENCE
ALTER TABLE
ALTER TABLE
ALTER TABLE
student@cloudshell:~$
以下是建立的資料表清單:
psql "host=$INSTANCE_IP user=postgres dbname=demo" -c "\dt+"
輸出內容:
student@cloudshell:~$ psql "host=$INSTANCE_IP user=postgres dbname=demo" -c "\dt+"
Password for user postgres:
                                           List of relations
 Schema |       Name       | Type  |  Owner   | Persistence | Access method |    Size    | Description
--------+------------------+-------+----------+-------------+---------------+------------+-------------
 public | cymbal_embedding | table | postgres | permanent   | heap          | 8192 bytes |
 public | cymbal_inventory | table | postgres | permanent   | heap          | 8192 bytes |
 public | cymbal_products  | table | postgres | permanent   | heap          | 8192 bytes |
 public | cymbal_stores    | table | postgres | permanent   | heap          | 8192 bytes |
(4 rows)
student@cloudshell:~$
將資料載入 cymbal_products 資料表:
gcloud storage cat gs://cloud-training/gcc/gcc-tech-004/cymbal_products.csv |psql "host=$INSTANCE_IP user=postgres dbname=demo" -c "\copy cymbal_products from stdin csv header"
預期的控制台輸出內容:
student@cloudshell:~$ gcloud storage cat gs://cloud-training/gcc/gcc-tech-004/cymbal_products.csv |psql "host=$INSTANCE_IP user=postgres dbname=demo" -c "\copy cymbal_products from stdin csv header"
COPY 941
student@cloudshell:~$
以下是 cymbal_products 資料表中的幾列範例。
psql "host=$INSTANCE_IP user=postgres dbname=demo" -c "SELECT uniq_id,left(product_name,30),left(product_description,50),sale_price FROM cymbal_products limit 3"
輸出內容:
student@cloudshell:~$ psql "host=$INSTANCE_IP user=postgres dbname=demo" -c "SELECT uniq_id,left(product_name,30),left(product_description,50),sale_price FROM cymbal_products limit 3"
Password for user postgres:
             uniq_id              |              left              |                        left                        | sale_price
----------------------------------+--------------------------------+----------------------------------------------------+------------
 a73d5f754f225ecb9fdc64232a57bc37 | Laundry Tub Strainer Cup       |   Laundry tub strainer cup Chrome For 1-.50, drain |      11.74
 41b8993891aa7d39352f092ace8f3a86 | LED Starry Star Night Light La |  LED Starry Star Night Light Laser Projector 3D Oc |      46.97
 ed4a5c1b02990a1bebec908d416fe801 | Surya Horizon HRZ-1060 Area Ru |  The 100% polypropylene construction of the Surya  |       77.4
(3 rows)
student@cloudshell:~$
將資料載入 cymbal_inventory 資料表:
gcloud storage cat gs://cloud-training/gcc/gcc-tech-004/cymbal_inventory.csv |psql "host=$INSTANCE_IP user=postgres dbname=demo" -c "\copy cymbal_inventory from stdin csv header"
預期的控制台輸出內容:
student@cloudshell:~$ gcloud storage cat gs://cloud-training/gcc/gcc-tech-004/cymbal_inventory.csv |psql "host=$INSTANCE_IP user=postgres dbname=demo" -c "\copy cymbal_inventory from stdin csv header"
Password for user postgres:
COPY 263861
student@cloudshell:~$
以下是 cymbal_inventory 表格的幾列範例。
psql "host=$INSTANCE_IP user=postgres dbname=demo" -c "SELECT * FROM cymbal_inventory LIMIT 3"
輸出內容:
student@cloudshell:~$ psql "host=$INSTANCE_IP user=postgres dbname=demo" -c "SELECT * FROM cymbal_inventory LIMIT 3"
Password for user postgres:
 store_id |             uniq_id              | inventory
----------+----------------------------------+-----------
     1583 | adc4964a6138d1148b1d98c557546695 |         5
     1490 | adc4964a6138d1148b1d98c557546695 |         4
     1492 | adc4964a6138d1148b1d98c557546695 |         3
(3 rows)
student@cloudshell:~$
將資料載入 cymbal_stores 資料表:
gcloud storage cat gs://cloud-training/gcc/gcc-tech-004/cymbal_stores.csv |psql "host=$INSTANCE_IP user=postgres dbname=demo" -c "\copy cymbal_stores from stdin csv header"
預期的控制台輸出內容:
student@cloudshell:~$ gcloud storage cat gs://cloud-training/gcc/gcc-tech-004/cymbal_stores.csv |psql "host=$INSTANCE_IP user=postgres dbname=demo" -c "\copy cymbal_stores from stdin csv header"
Password for user postgres:
COPY 4654
student@cloudshell:~$
以下是 cymbal_stores 資料表中的幾列範例。
psql "host=$INSTANCE_IP user=postgres dbname=demo" -c "SELECT store_id, name, zip_code FROM cymbal_stores limit 3"
輸出內容:
student@cloudshell:~$ psql "host=$INSTANCE_IP user=postgres dbname=demo" -c "SELECT store_id, name, zip_code FROM cymbal_stores limit 3"
Password for user postgres:
 store_id |       name        | zip_code
----------+-------------------+----------
     1990 | Mayaguez Store    |      680
     2267 | Ware Supercenter  |     1082
     4359 | Ponce Supercenter |      780
(3 rows)
student@cloudshell:~$
建構嵌入
使用 psql 連線至示範資料庫,並根據產品名稱和說明,為 cymbal_products 資料表中的產品建立嵌入項目。
連線至示範資料庫:
psql "host=$INSTANCE_IP user=postgres sslmode=require dbname=demo"
我們使用 cymbal_embedding 資料表和欄嵌入來儲存嵌入,並使用產品說明做為函式的文字輸入。
為查詢啟用計時功能,以便稍後與遠端模型比較:
\timing
執行查詢來建構嵌入:
INSERT INTO cymbal_embedding(uniq_id,embedding) SELECT uniq_id, google_ml.embedding('bge-base-1.5',product_description)::vector FROM cymbal_products;
預期的控制台輸出內容:
demo=#  INSERT INTO cymbal_embedding(uniq_id,embedding)  SELECT uniq_id, google_ml.embedding('bge-base-1.5',product_description)::vector FROM cymbal_products;
INSERT 0 941
Time: 11069.762 ms (00:11.070)
demo=#
在本範例中,為 941 筆記錄建構嵌入內容約需 11 秒。
執行測試查詢
使用 psql 連線至示範資料庫,並啟用計時功能,以便測量查詢的執行時間,就像我們建構嵌入內容時一樣。
假設我們想找出與「這裡適合種植哪種果樹?」這類要求最相符的 5 項產品,並使用餘弦距離做為向量搜尋的演算法。
在 psql 工作階段中執行:
SELECT
        cp.product_name,
        left(cp.product_description,80) as description,
        cp.sale_price,
        cs.zip_code,
        (ce.embedding <=> google_ml.embedding('bge-base-1.5','What kind of fruit trees grow well here?')::vector) as distance
FROM
        cymbal_products cp
JOIN cymbal_embedding ce on
        ce.uniq_id=cp.uniq_id
JOIN cymbal_inventory ci on
        ci.uniq_id=cp.uniq_id
JOIN cymbal_stores cs on
        cs.store_id=ci.store_id
        AND ci.inventory>0
        AND cs.store_id = 1583
ORDER BY
        distance ASC
LIMIT 5;
預期的控制台輸出內容:
demo=# SELECT
        cp.product_name,
        left(cp.product_description,80) as description,
        cp.sale_price,
        cs.zip_code,
        (ce.embedding <=> google_ml.embedding('bge-base-1.5','What kind of fruit trees grow well here?')::vector) as distance
FROM
        cymbal_products cp
JOIN cymbal_embedding ce on
        ce.uniq_id=cp.uniq_id
JOIN cymbal_inventory ci on
        ci.uniq_id=cp.uniq_id
JOIN cymbal_stores cs on
        cs.store_id=ci.store_id
        AND ci.inventory>0
        AND cs.store_id = 1583
ORDER BY
        distance ASC
LIMIT 5;
     product_name      |                                   description                                    | sale_price | zip_code |      distance
-----------------------+----------------------------------------------------------------------------------+------------+----------+---------------------
 California Sycamore   | This is a beautiful sycamore tree that can grow to be over 100 feet tall. It is  |     300.00 |    93230 | 0.22753925487632942
 Toyon                 | This is a beautiful toyon tree that can grow to be over 20 feet tall. It is an e |      10.00 |    93230 | 0.23497374266229387
 California Peppertree | This is a beautiful peppertree that can grow to be over 30 feet tall. It is an e |      25.00 |    93230 | 0.24215884459965364
 California Redwood    | This is a beautiful redwood tree that can grow to be over 300 feet tall. It is a |    1000.00 |    93230 | 0.24564130578287147
 Cherry Tree           | This is a beautiful cherry tree that will produce delicious cherries. It is an d |      75.00 |    93230 | 0.24846117929767153
(5 rows)

Time: 28.724 ms
demo=#
這項查詢執行了 28 毫秒,並從 cymbal_products 資料表傳回符合要求的樹狀結構清單,且商店 1583 號有現貨。
建構 ANN 索引
如果資料集很小,可以輕鬆使用精確搜尋掃描所有嵌入內容,但資料量增加時,載入和回應時間也會變長。如要提升效能,可以針對嵌入資料建立索引。以下範例說明如何使用向量資料的 Google ScaNN 索引執行這項操作。
如果連線中斷,請重新連線至試用資料庫:
psql "host=$INSTANCE_IP user=postgres sslmode=require dbname=demo"
啟用 alloydb_scann 擴充功能:
CREATE EXTENSION IF NOT EXISTS alloydb_scann;
建構索引:
CREATE INDEX cymbal_embedding_scann ON cymbal_embedding USING scann (embedding cosine);
請嘗試與先前相同的查詢,並比較結果:
demo=# SELECT
        cp.product_name,
        left(cp.product_description,80) as description,
        cp.sale_price,
        cs.zip_code,
        (ce.embedding <=> google_ml.embedding('bge-base-1.5','What kind of fruit trees grow well here?')::vector) as distance
FROM
        cymbal_products cp
JOIN cymbal_embedding ce on
        ce.uniq_id=cp.uniq_id
JOIN cymbal_inventory ci on
        ci.uniq_id=cp.uniq_id
JOIN cymbal_stores cs on
        cs.store_id=ci.store_id
        AND ci.inventory>0
        AND cs.store_id = 1583
ORDER BY
        distance ASC
LIMIT 5;
     product_name      |                                   description                                    | sale_price | zip_code |      distance
-----------------------+----------------------------------------------------------------------------------+------------+----------+---------------------
 California Sycamore   | This is a beautiful sycamore tree that can grow to be over 100 feet tall. It is  |     300.00 |    93230 | 0.22753925487632942
 Toyon                 | This is a beautiful toyon tree that can grow to be over 20 feet tall. It is an e |      10.00 |    93230 | 0.23497374266229387
 California Peppertree | This is a beautiful peppertree that can grow to be over 30 feet tall. It is an e |      25.00 |    93230 | 0.24215884459965364
 California Redwood    | This is a beautiful redwood tree that can grow to be over 300 feet tall. It is a |    1000.00 |    93230 | 0.24564130578287147
 Fremont Cottonwood    | This is a beautiful cottonwood tree that can grow to be over 100 feet tall. It i |     200.00 |    93230 |  0.2533482837690365
(5 rows)

Time: 14.665 ms
demo=#
查詢執行時間略為縮短,資料集越大,這項優勢就越明顯。結果相當類似,只有櫻桃樹被弗里蒙特棉白楊取代。
請嘗試其他查詢,並參閱說明文件,進一步瞭解如何選擇向量索引。
別忘了,AlloyDB Omni 還有更多功能和實驗室。
8. 清除環境
現在,我們可以刪除含有 AlloyDB Omni 和 AI 模型的 GKE 叢集
刪除 GKE 叢集
在 Cloud Shell 中執行下列指令:
export PROJECT_ID=$(gcloud config get project)
export LOCATION=us-central1
export CLUSTER_NAME=alloydb-ai-gke
gcloud container clusters delete ${CLUSTER_NAME} \
  --project=${PROJECT_ID} \
  --region=${LOCATION}
預期的控制台輸出內容:
student@cloudshell:~$ gcloud container clusters delete ${CLUSTER_NAME} \
>   --project=${PROJECT_ID} \
>   --region=${LOCATION}
The following clusters will be deleted.
 - [alloydb-ai-gke] in [us-central1]

Do you want to continue (Y/n)?  Y

Deleting cluster alloydb-ai-gke...done.
Deleted
刪除 VM
在 Cloud Shell 中執行下列指令:
export PROJECT_ID=$(gcloud config get project)
export ZONE=us-central1-a
gcloud compute instances delete instance-1 \
  --project=${PROJECT_ID} \
  --zone=${ZONE}
預期的控制台輸出內容:
student@cloudshell:~$ export PROJECT_ID=$(gcloud config get project)
export ZONE=us-central1-a
gcloud compute instances delete instance-1 \
  --project=${PROJECT_ID} \
  --zone=${ZONE}
Your active configuration is: [cloudshell-5399]
The following instances will be deleted. Any attached disks configured to be auto-deleted will be deleted unless they are attached to any other instances or the `--keep-disks` flag is given and specifies them for keeping. Deleting a disk
is irreversible and any data on the disk will be lost.
 - [instance-1] in [us-central1-a]

Do you want to continue (Y/n)?  Y

Deleted
如果您為本程式碼研究室建立新專案,可以改為刪除整個專案:https://console.cloud.google.com/cloud-resource-manager
9. 恭喜
恭喜您完成本程式碼研究室。
涵蓋內容
- 如何在 Google Kubernetes 叢集上部署 AlloyDB Omni
- 如何連線至 AlloyDB Omni
- 如何將資料載入 AlloyDB Omni
- 如何將開放式嵌入模型部署至 GKE
- 如何在 AlloyDB Omni 註冊嵌入模型
- 如何生成語意搜尋的嵌入
- 如何在 AlloyDB Omni 中使用產生的嵌入項目進行語意搜尋
- 如何在 AlloyDB 中建立及使用向量索引
如要進一步瞭解如何在 AlloyDB Omni 中使用 AI,請參閱說明文件。
10. 問卷調查
輸出內容: