

1. مقدمة
في هذا الدرس التطبيقي حول الترميز، ستتعرّف على كيفية نشر AlloyDB Omni على Google Kubernetes Engine (GKE) واستخدامه مع نماذج مفتوحة المصدر مثل EmbeddingGemma وGemma 4 لعمليات التضمين والتوقّعات. يؤدي تشغيل كلّ من قاعدة البيانات والنماذج في المجموعة نفسها إلى تقليل وقت الاستجابة للشبكة وتجنُّب الاعتماد على خدمات تابعة لجهات خارجية. ويساعد أيضًا في استيفاء متطلبات الامتثال ومتطلبات الإقامة في المنطقة الجغرافية، لأنّ بياناتك لا تغادر بيئتك أبدًا.
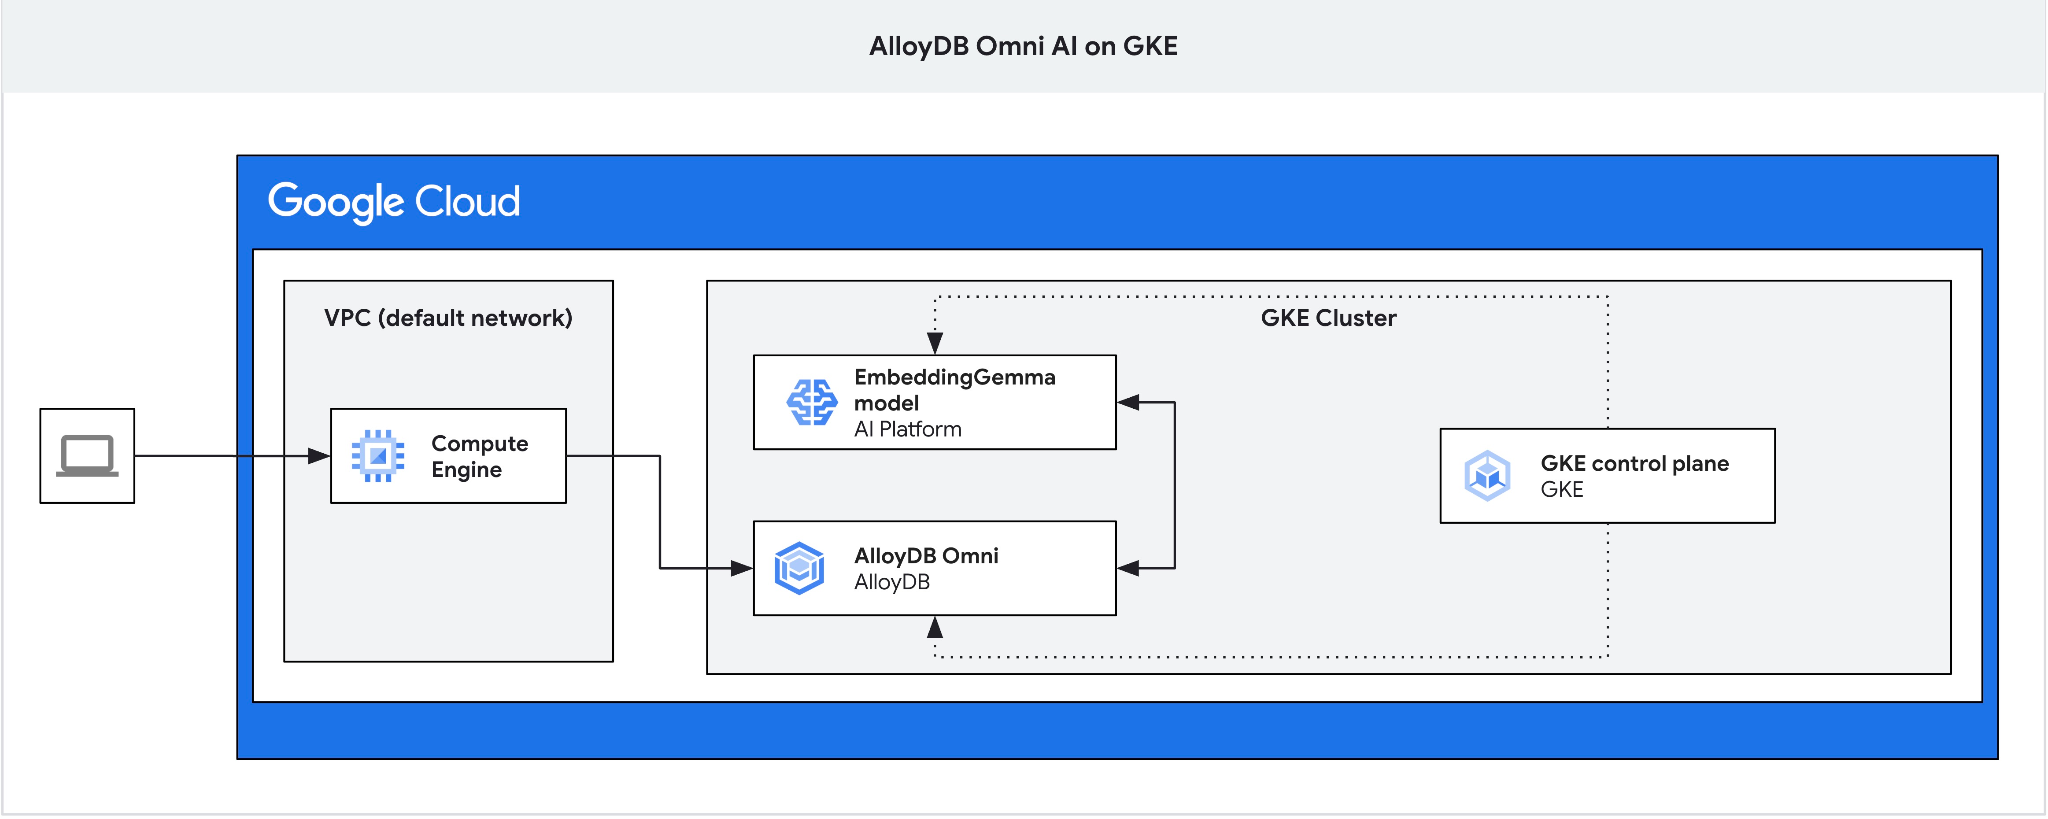
المتطلبات الأساسية
- فهم أساسي لـ Google Cloud وGoogle Cloud Console
- معرفة أساسية بمنصة Kubernetes وخدمة GKE
- الإلمام بواجهة سطر الأوامر وGoogle Cloud Shell
أهداف الدورة التعليمية
- كيفية نشر AlloyDB Omni على مجموعة GKE
- كيفية الاتصال بـ AlloyDB Omni
- كيفية تحميل البيانات إلى AlloyDB Omni
- كيفية نشر نماذج الذكاء الاصطناعي (التضمين والنماذج اللغوية الكبيرة) على GKE
- كيفية تسجيل نماذج الذكاء الاصطناعي في AlloyDB Omni
- كيفية إنشاء تضمينات للبحث الدلالي
- كيفية تنفيذ طلبات البحث الدلالية في AlloyDB Omni
- كيفية إنشاء فهارس المتّجهات واستخدامها في AlloyDB Omni
المتطلبات
- حساب Google Cloud ومشروع على السحابة الإلكترونية
- متصفّح ويب، مثل Chrome
2. الإعداد والمتطلبات
إعداد المشروع
- سجِّل الدخول إلى Google Cloud Console. إذا لم يكن لديك حساب على Gmail أو Google Workspace، يمكنك إنشاء حساب. استخدام حساب شخصي بدلاً من حساب تديره المؤسسة التعليمية أو حساب تابع للعمل.
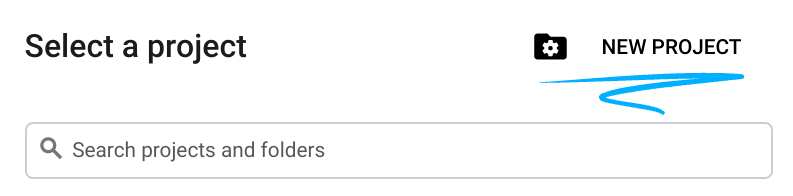
- أنشِئ مشروعًا جديدًا أو اختَر مشروعًا حاليًا. في عنوان Google Cloud Console، انقر على اختيار مشروع، ثم انقر على مشروع جديد.

في نافذة اختيار مشروع، انقر على مشروع جديد لفتح مربّع حوار إنشاء المشروع.
في مربّع الحوار، أدخِل اسم المشروع واختَر مؤسستك أو موقعك الجغرافي.
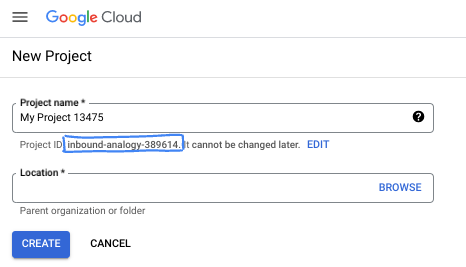
- اسم المشروع هو الاسم المعروض للمشاركين في هذا المشروع. لا تستخدم Google APIs اسم المشروع، ويمكنك تغييره في أي وقت.
- رقم تعريف المشروع هو معرّف فريد في جميع مشاريع Google Cloud ولا يمكن تغييره (لا يمكنك تغييره بعد ضبطه). تنشئ وحدة تحكّم Google Cloud تلقائيًا معرّفًا فريدًا، أو يمكنك تقديم معرّفك الخاص. في هذا الدرس العملي، يمكنك الرجوع إلى رقم تعريف مشروعك باستخدام العنصر النائب
- رقم المشروع هو معرّف ثالث تستخدمه بعض واجهات برمجة التطبيقات. لمزيد من المعلومات، يُرجى الاطّلاع على مستندات Resource Manager.
تفعيل الفوترة
إذا أعددت الفوترة باستخدام أرصدة Google Cloud، يمكنك تخطّي هذه الخطوة.
لإعداد حساب فوترة شخصي، فعِّل الفوترة في Google Cloud Console.
- لا تتجاوز تكلفة إكمال هذا الدرس التطبيقي 5 دولارات أمريكية من موارد Google Cloud.
- اتّبِع خطوات التنظيف في نهاية هذا المختبر لحذف الموارد وتجنُّب المزيد من الرسوم.
- يمكن للمستخدمين الجدد الاستفادة من الفترة التجريبية المجانية بقيمة 300 دولار أمريكي.
بدء Cloud Shell
في هذا الدرس التطبيقي حول الترميز، ستستخدم Google Cloud Shell، وهي بيئة سطر أوامر تعمل في السحابة الإلكترونية.
من وحدة تحكّم Google Cloud، انقر على رمز تفعيل Cloud Shell في شريط الأدوات أعلى يسار الصفحة:

بدلاً من ذلك، اضغط على G ثم S، أو افتح Google Cloud Shell مباشرةً.
عند الاتصال، يعرض Cloud Shell طلب سطر الأوامر في الجهاز الطرفي:

يتضمّن Cloud Shell مساحة تخزين ثابتة وأدوات تطوير. يمكنك تنفيذ جميع الخطوات الواردة في هذا الدرس التطبيقي حول الترميز من متصفّحك.
3- تفعيل واجهات برمجة التطبيقات
لاستخدام Google Kubernetes Engine (GKE) مع AlloyDB Omni وعمليات نشر النماذج، فعِّل واجهات برمجة التطبيقات Compute Engine وGKE في مشروعك على Google Cloud.
في Cloud Shell، تأكَّد من إعداد رقم تعريف مشروعك:
PROJECT_ID=$(gcloud config get-value project)
echo $PROJECT_ID
إذا لم يتم تحديد رقم تعريف مشروعك، عليك ضبطه باتّباع الخطوات التالية:
export PROJECT_ID=<YOUR_PROJECT_ID>
gcloud config set project $PROJECT_ID
فعِّل واجهات برمجة التطبيقات المطلوبة:
gcloud services enable compute.googleapis.com
gcloud services enable container.googleapis.com
الناتج المتوقّع:
student@cloudshell:~ (test-project-001-402417)$ PROJECT_ID=test-project-001-402417
student@cloudshell:~ (test-project-001-402417)$ gcloud config set project test-project-001-402417
Updated property [core/project].
student@cloudshell:~ (test-project-001-402417)$ gcloud services enable compute.googleapis.com
gcloud services enable container.googleapis.com
Operation "operations/acat.p2-4470404856-1f44ebd8-894e-4356-bea7-b84165a57442" finished successfully.
يمكنك الاطّلاع على معلومات حول كل واجهة برمجة تطبيقات مفعّلة في المستندات.
4. نشر AlloyDB Omni على GKE
لنشر AlloyDB Omni على GKE، عليك إعداد مجموعة Kubernetes باتّباع متطلبات مشغّل AlloyDB Omni.
إنشاء مجموعة GKE
نشر مجموعة GKE عادية تتضمّن سعة لتشغيل AlloyDB Omni وعامل التشغيل وحاويات المراقبة يتطلّب AlloyDB Omni وحدتَي معالجة مركزية (CPU) وذاكرة وصول عشوائي (RAM) بسعة 8 غيغابايت على الأقل. يستخدم هذا الدليل التعليمي نوع الجهاز n2-standard-4.
اضبط متغيّرات البيئة لعملية النشر:
export PROJECT_ID=$(gcloud config get-value project)
export LOCATION=us-central1
export CLUSTER_NAME=alloydb-ai-gke
export MACHINE_TYPE=n2-standard-4
أنشئ مجموعة GKE العادية:
gcloud container clusters create ${CLUSTER_NAME} \
  --project=${PROJECT_ID} \
  --region=${LOCATION} \
  --workload-pool=${PROJECT_ID}.svc.id.goog \
  --release-channel=rapid \
  --machine-type=${MACHINE_TYPE} \
  --num-nodes=1
الناتج المتوقّع في وحدة التحكّم:
student@cloudshell:~ (test-project-001-402417)$ export PROJECT_ID=$(gcloud config get project)
export LOCATION=us-central1
export CLUSTER_NAME=alloydb-ai-gke
export MACHINE_TYPE=n2-standard-4
Your active configuration is: [test-project-001-402417]
student@cloudshell:~ (test-project-001-402417)$ gcloud container clusters create ${CLUSTER_NAME} \
  --project=${PROJECT_ID} \
  --region=${LOCATION} \
  --workload-pool=${PROJECT_ID}.svc.id.goog \
  --release-channel=rapid \
  --machine-type=${MACHINE_TYPE} \
  --num-nodes=1
Note: Your Pod address range (`--cluster-ipv4-cidr`) can accommodate at most 1008 node(s).
Creating cluster alloydb-ai-gke in us-central1... Cluster is being health-checked (Kubernetes Control Plane is healthy)...done.
Created [https://container.googleapis.com/v1/projects/test-project-001-402417/zones/us-central1/clusters/alloydb-ai-gke].
To inspect the contents of your cluster, go to: https://console.cloud.google.com/kubernetes/workload_/gcloud/us-central1/alloydb-ai-gke?project=test-project-001-402417
kubeconfig entry generated for alloydb-ai-gke.
NAME: alloydb-ai-gke
LOCATION: us-central1
MASTER_VERSION: 1.36.3-gke.1640000
MASTER_IP: 34.121.243.65
MACHINE_TYPE: n2-standard-4
NODE_VERSION: 1.36.3-gke.1640000
NUM_NODES: 3
STATUS: RUNNING
STACK_TYPE: IPV4
إعداد المجموعة
ثبِّت المكوّنات المطلوبة، مثل cert-manager، وهو أداة التحكّم في الشهادات الأصلية في Kubernetes. لمزيد من التفاصيل، يُرجى الاطّلاع على مستندات تثبيت cert-manager.
يتضمّن Cloud Shell أداة سطر الأوامر Kubernetes kubectl. احصل على بيانات اعتماد المجموعة باستخدام gcloud:
gcloud container clusters get-credentials ${CLUSTER_NAME} --region=${LOCATION}
تثبيت تطبيق "cert-manager" باستخدام kubectl:
kubectl apply -f https://github.com/cert-manager/cert-manager/releases/download/v1.21.1/cert-manager.yaml
الناتج المتوقّع في وحدة التحكّم (تم إخفاء بعض المعلومات):
student@cloudshell:~$ kubectl apply -f https://github.com/cert-manager/cert-manager/releases/download/v1.21.1/cert-manager.yaml
namespace/cert-manager created
customresourcedefinition.apiextensions.k8s.io/certificaterequests.cert-manager.io created
customresourcedefinition.apiextensions.k8s.io/certificates.cert-manager.io created
customresourcedefinition.apiextensions.k8s.io/challenges.acme.cert-manager.io created
customresourcedefinition.apiextensions.k8s.io/clusterissuers.cert-manager.io created
...
validatingwebhookconfiguration.admissionregistration.k8s.io/cert-manager-webhook created
تثبيت مشغّل AlloyDB Omni
ثبِّت مشغّل AlloyDB Omni باستخدام Helm.
نزِّل الرسم البياني لعامل تشغيل AlloyDB Omni وثبِّته:
helm install alloydbomni-operator oci://gcr.io/alloydb-omni/alloydbomni-operator \
--version 1.8.1 \
--create-namespace \
--namespace alloydb-omni-system \
--atomic \
--timeout 5m
الناتج المتوقّع في وحدة التحكّم (تم إخفاء بعض المعلومات):
student@cloudshell:~$ helm install alloydbomni-operator oci://gcr.io/alloydb-omni/alloydbomni-operator \
> --version 1.8.0 \
> --create-namespace \
> --namespace alloydb-omni-system \
> --atomic \
> --timeout 5m
Flag --atomic has been deprecated, use --rollback-on-failure instead
Pulled: gcr.io/alloydb-omni/alloydbomni-operator:1.8.0
Digest: sha256:f2d98fa7a3b08dfc1e83b811582718b94e5c017b81aade700c83e917c59f0395
NAME: alloydbomni-operator
LAST DEPLOYED: Thu Aug 27 17:57:30 2026
NAMESPACE: alloydb-omni-system
STATUS: deployed
REVISION: 1
DESCRIPTION: Install complete
TEST SUITE: None
نشر مجموعة قواعد البيانات
يضبط ملف البيان التالي مجموعة قواعد بيانات مع تفعيل googleMLExtension وجهاز موازنة حمل داخلي:
cat << 'EOF' > my-omni.yaml
apiVersion: v1
kind: Secret
metadata:
  name: db-pw-my-omni
type: Opaque
data:
  my-omni: "VmVyeVN0cm9uZ1Bhc3N3b3Jk"
---
apiVersion: alloydbomni.dbadmin.goog/v1
kind: DBCluster
metadata:
  name: my-omni
spec:
  databaseVersion: "18.3.0"
  primarySpec:
    adminUser:
      passwordRef:
        name: db-pw-my-omni
    features:
      googleMLExtension:
        enabled: true
    resources:
      cpu: 1
      memory: 8Gi
      disks:
      - name: DataDisk
        size: 20Gi
        storageClass: standard
    dbLoadBalancerOptions:
      annotations:
        networking.gke.io/load-balancer-type: "internal"
  allowExternalIncomingTraffic: true
EOF
قيمة المفتاح السري لكلمة المرور هي تمثيل Base64 لـ VeryStrongPassword. في بيئات الإنتاج، استخدِم Google Secret Manager لإدارة كلمات المرور. لمزيد من التفاصيل، يُرجى الاطّلاع على مستندات Secret Manager.
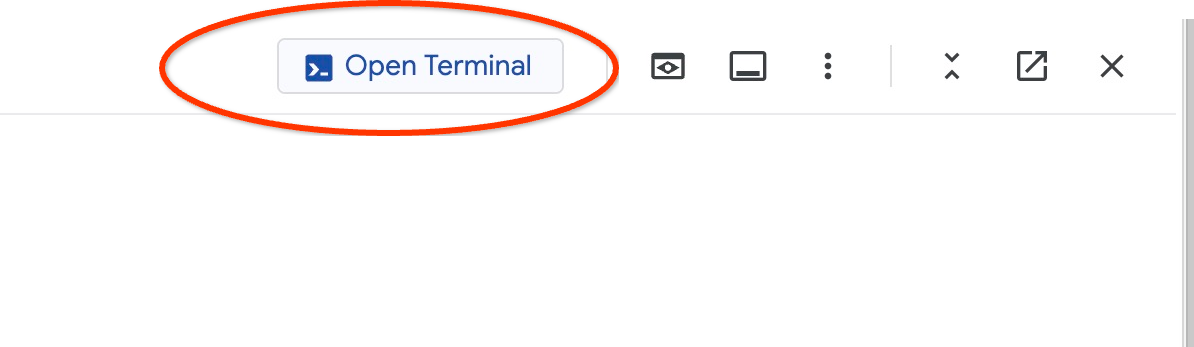
يتم حفظ ملف البيان بتنسيق my-omni.yaml. في Cloud Shell، انقر على فتح المحرّر في أعلى يسار نافذة الوحدة الطرفية واقرأ الملف.
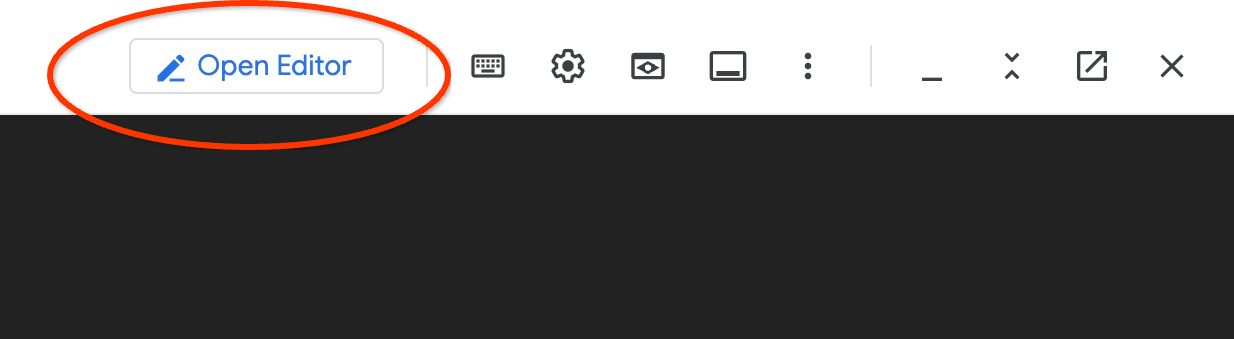
بعد قراءة ملف my-omni.yaml، انقر على فتح الوحدة الطرفية للرجوع إلى موجّه الأوامر.
طبِّق بيان my-omni.yaml:
kubectl apply -f my-omni.yaml
الناتج المتوقّع في وحدة التحكّم:
secret/db-pw-my-omni created
dbcluster.alloydbomni.dbadmin.goog/my-omni created
تحقَّق من حالة المجموعة my-omni:
kubectl get dbclusters.alloydbomni.dbadmin.goog my-omni -n default
أثناء عملية النشر، تنتقل مجموعة قواعد البيانات إلى مراحل الإعداد إلى أن تصل إلى الحالة DBClusterReady.
الناتج المتوقّع في وحدة التحكّم:
$ kubectl get dbclusters.alloydbomni.dbadmin.goog my-omni -n default
NAME      PRIMARYENDPOINT   PRIMARYPHASE   DBCLUSTERPHASE   HAREADYSTATUS   HAREADYREASON
my-omni   10.131.0.33        Ready          DBClusterReady
يمكنك اختياريًا مراقبة عملية نشر المجموعة باستخدام الأمر kubectl log:
kubectl logs -l alloydbomni.internal.dbadmin.goog/dbcluster=my-omni --all-containers -f
الربط بـ AlloyDB Omni
عندما تكون المجموعة جاهزة، اتّصِل بوحدة قاعدة البيانات باستخدام برنامج PostgreSQL (psql). كلمة المرور هي VeryStrongPassword كما هو محدّد في my-omni.yaml:
DB_CLUSTER_NAME=my-omni
DB_CLUSTER_NAMESPACE=default
DBPOD=`kubectl get pod --selector=alloydbomni.internal.dbadmin.goog/dbcluster=$DB_CLUSTER_NAME,alloydbomni.internal.dbadmin.goog/task-type=database -n $DB_CLUSTER_NAMESPACE -o jsonpath='{.items[0].metadata.name}'`
kubectl exec -ti $DBPOD -n $DB_CLUSTER_NAMESPACE -c database -- psql -h localhost -U postgres
مثال على الناتج في وحدة التحكّم:
DB_CLUSTER_NAME=my-omni
DB_CLUSTER_NAMESPACE=default
DBPOD=`kubectl get pod --selector=alloydbomni.internal.dbadmin.goog/dbcluster=$DB_CLUSTER_NAME,alloydbomni.internal.dbadmin.goog/task-type=database -n $DB_CLUSTER_NAMESPACE -o jsonpath='{.items[0].metadata.name}'`
kubectl exec -ti $DBPOD -n $DB_CLUSTER_NAMESPACE -c database -- psql -h localhost -U postgres
Password for user postgres:
psql (18.3)
SSL connection (protocol: TLSv1.3, cipher: TLS_AES_128_GCM_SHA256, compression: off, ALPN: postgresql)
Type "help" for help.

postgres=#
اخرج من جلسة psql بكتابة \q والضغط على Enter:
postgres=# \q
5- نشر نموذج EmbeddingGemma على GKE
لاختبار دمج AlloyDB Omni AI مع النماذج المحلية، يمكنك نشر نموذج تضمين في مجموعة GKE. يستخدم هذا البرنامج التعليمي نموذج EmbeddingGemma من Google.
إنشاء مجموعة أجهزة ذات التخصيص نفسه للنموذج
لتنفيذ استنتاج النموذج، عليك إعداد مجموعة أجهزة ذات التخصيص نفسه مخصّصة. يمكنك استخدام مجموعة أجهزة ذات التخصيص نفسه مخصّصة لوحدة المعالجة المركزية فقط أو مجموعة أجهزة ذات التخصيص نفسه مخصّصة لوحدة معالجة الرسومات (مثل g2-standard-8 مع وحدة معالجة الرسومات NVIDIA L4). يستخدم هذا البرنامج التعليمي مجموعة أجهزة ذات التخصيص نفسه مستندة إلى وحدة المعالجة المركزية (CPU) مع أنواع الأجهزة c3-standard-8.
أنشئ مجموعة أجهزة ذات التخصيص نفسه لوحدة المعالجة المركزية (CPU) بعقدة واحدة:
export PROJECT_ID=$(gcloud config get-value project)
export LOCATION=us-central1
export CLUSTER_NAME=alloydb-ai-gke
gcloud container node-pools create cpupool \
  --project=${PROJECT_ID} \
  --location=${LOCATION} \
  --node-locations=${LOCATION}-a \
  --cluster=${CLUSTER_NAME} \
  --machine-type=c3-standard-8 \
  --num-nodes=1
الناتج المتوقّع:
student@cloudshell$ export PROJECT_ID=$(gcloud config get project)
Your active configuration is: [pant]
export LOCATION=us-central1
export CLUSTER_NAME=alloydb-ai-gke
student@cloudshell$ gcloud container node-pools create cpupool \
>   --project=${PROJECT_ID} \
>   --location=${LOCATION} \
>   --node-locations=${LOCATION}-a \
>   --cluster=${CLUSTER_NAME} \
>   --machine-type=c3-standard-8 \
>   --num-nodes=1
Creating node pool cpupool...done.
Created [https://container.googleapis.com/v1/projects/gleb-test-short-003-483115/zones/us-central1/clusters/alloydb-ai-gke/nodePools/cpupool].
NAME     MACHINE_TYPE    DISK_SIZE_GB  NODE_VERSION
cpupool  c3-standard-8  100           1.34.1-gke.3355002
الحصول على رمز مميّز من Hugging Face
يوضّح هذا البرنامج التعليمي كيفية نشر نموذج EmbeddingGemma من Hugging Face. للوصول إلى أوزان النموذج، أنشئ رمز دخول إلى Hugging Face باتّباع الخطوات التالية:
- سجِّل الدخول إلى حسابك على Hugging Face أو أنشئ حسابًا.
- انتقِل إلى ملفك الشخصي > رموز الدخول.
- انقر على إنشاء رمز مميز جديد.
- أدخِل اسمًا للرمز المميّز واختَر دور القراءة.
- انقر على إنشاء رمز مميّز وانسخ قيمة الرمز المميز الذي تم إنشاؤه.
- اقبَل بنود النموذج على صفحة نموذج EmbeddingGemma إذا لم يسبق لك إجراء ذلك.
أنشئ سرًا في Kubernetes يحتوي على الرمز المميّز الخاص بك في Hugging Face في Cloud Shell (استبدِل العنصر النائب للرمز المميّز بالرمز المميّز الخاص بك):
export HF_TOKEN=<YOUR_HUGGING_FACE_TOKEN>
kubectl create secret generic hf-secret \
  --from-literal=hf_api_token=$HF_TOKEN \
  --dry-run=client -o yaml | kubectl apply -f -
إعداد ملف بيان النشر
لنشر النموذج، استخدِم حزمة حاوية Text Embeddings Inference (TEI) من Hugging Face. لمزيد من المعلومات، يُرجى الاطّلاع على مستندات Hugging Face GKE TEI.
استنسِخ مستودع النشر من GitHub:
git clone https://github.com/huggingface/Google-Cloud-Containers
فحص بيان إعداد وحدة المعالجة المركزية وتعديله:
edit Google-Cloud-Containers/examples/gke/tei-deployment/cpu-config/deployment.yaml
بيان التعديل الخاص بنشر وحدة المعالجة المركزية:
apiVersion: apps/v1
kind: Deployment
metadata:
  name: tei-deployment
spec:
  replicas: 1
  selector:
    matchLabels:
      app: tei-server
  template:
    metadata:
      labels:
        app: tei-server
        hf.co/model: Google--embeddinggemma-300m
        hf.co/task: text-embeddings
    spec:
      containers:
        - name: tei-container
          image: ghcr.io/huggingface/text-embeddings-inference:cpu-latest
          resources:
            requests:
              cpu: "6"
              memory: "24Gi"
            limits:
              cpu: "6"
              memory: "24Gi"
          env:
            - name: MODEL_ID
              value: google/embeddinggemma-300m
            - name: NUM_SHARD
              value: "1"
            - name: PORT
              value: "8080"
            - name: HF_TOKEN
              valueFrom:
                secretKeyRef:
                  name: hf-secret
                  key: hf_api_token
          volumeMounts:
            - mountPath: /tmp
              name: tmp
      volumes:
        - name: tmp
          emptyDir: {}
      nodeSelector:
        cloud.google.com/machine-family: "c3"
احفظ التغييرات بالضغط على ctrl+s، ثم ارجع إلى الجهاز.
نشر النموذج
طبِّق ملف البيان لنشر خادم TEI:
kubectl apply -f Google-Cloud-Containers/examples/gke/tei-deployment/cpu-config
راقِب عملية النشر إلى أن تصبح في حالة "جاهزة":
printf "Waiting for model to load..."; until kubectl logs -l app=tei-server --tail=50 2>/dev/null | grep -q "Ready"; do printf "."; sleep 3; done; printf '\n\033[1;32m========================================\n[SUCCESS] Model is loaded and ready!\nYou can now proceed to the next step.\n========================================\033[0m\n'
تحقَّق من tei-service خدمة Kubernetes:
kubectl get service tei-service
الناتج المتوقّع:
student@cloudshell$ kubectl get service tei-service
NAME          TYPE        CLUSTER-IP      EXTERNAL-IP   PORT(S)    AGE
tei-service   ClusterIP   34.118.233.48   <none>        8080/TCP   10m
تعالج الخدمة CLUSTER-IP الطلبات داخليًا على http://34.118.233.48:8080/embed.
اختبِر نقطة نهاية النموذج محليًا باستخدام kubectl port-forward:
kubectl port-forward service/tei-service 8080:8080
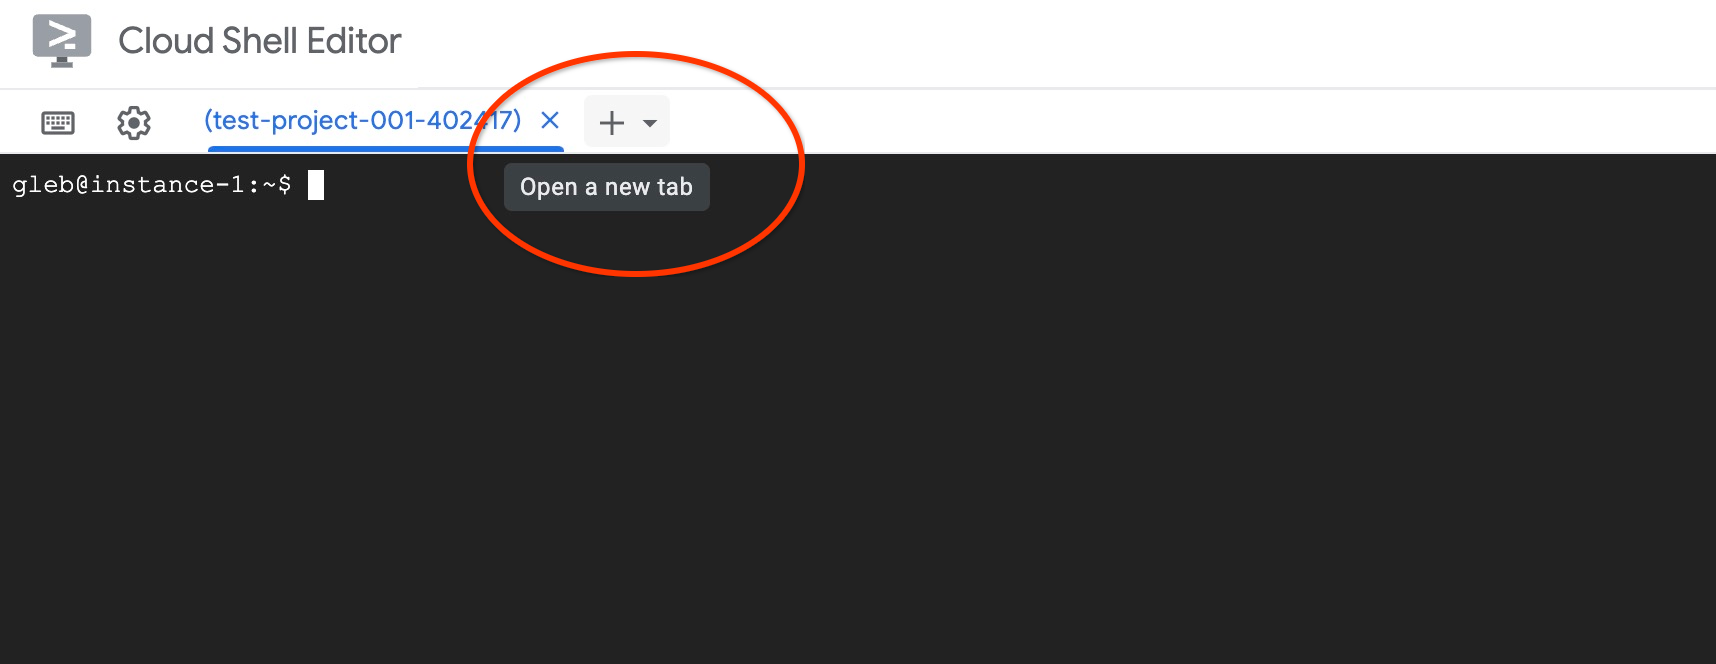
افتح علامة تبويب ثانية في Cloud Shell من خلال النقر على + في أعلى المحطة الطرفية:
في علامة التبويب الجديدة، اختبِر إنشاء عمليات تضمين باستخدام curl:
curl http://localhost:8080/embed \
  -X POST \
  -d '{"inputs":"Test"}' \
  -H 'Content-Type: application/json'
الناتج المتوقّع (مصفوفة متّجهة):
curl http://localhost:8080/embed \
>     -X POST \
>     -d '{"inputs":"Test"}' \
>     -H 'Content-Type: application/json'
[[-0.018975832,0.0071419072,0.06347208,0.022992613,0.014205903
...
-0.03677433,0.01636146,0.06731572]]
أوقِف عملية إعادة توجيه المنفذ في علامة التبويب الأولى بالضغط على ctrl+c.
6. تسجيل نموذج التضمين في AlloyDB Omni
لاستخدام النموذج الذي تم نشره من AlloyDB Omni، أنشئ قاعدة بيانات، وحدِّد دوال التحويل، وسجِّل نقطة نهاية النموذج.
إنشاء جهاز افتراضي وقاعدة بيانات للعميل
أنشئ مثيل جهاز Compute Engine الظاهري في شبكة VPC نفسها ليعمل كمضيف وسيط للعميل:
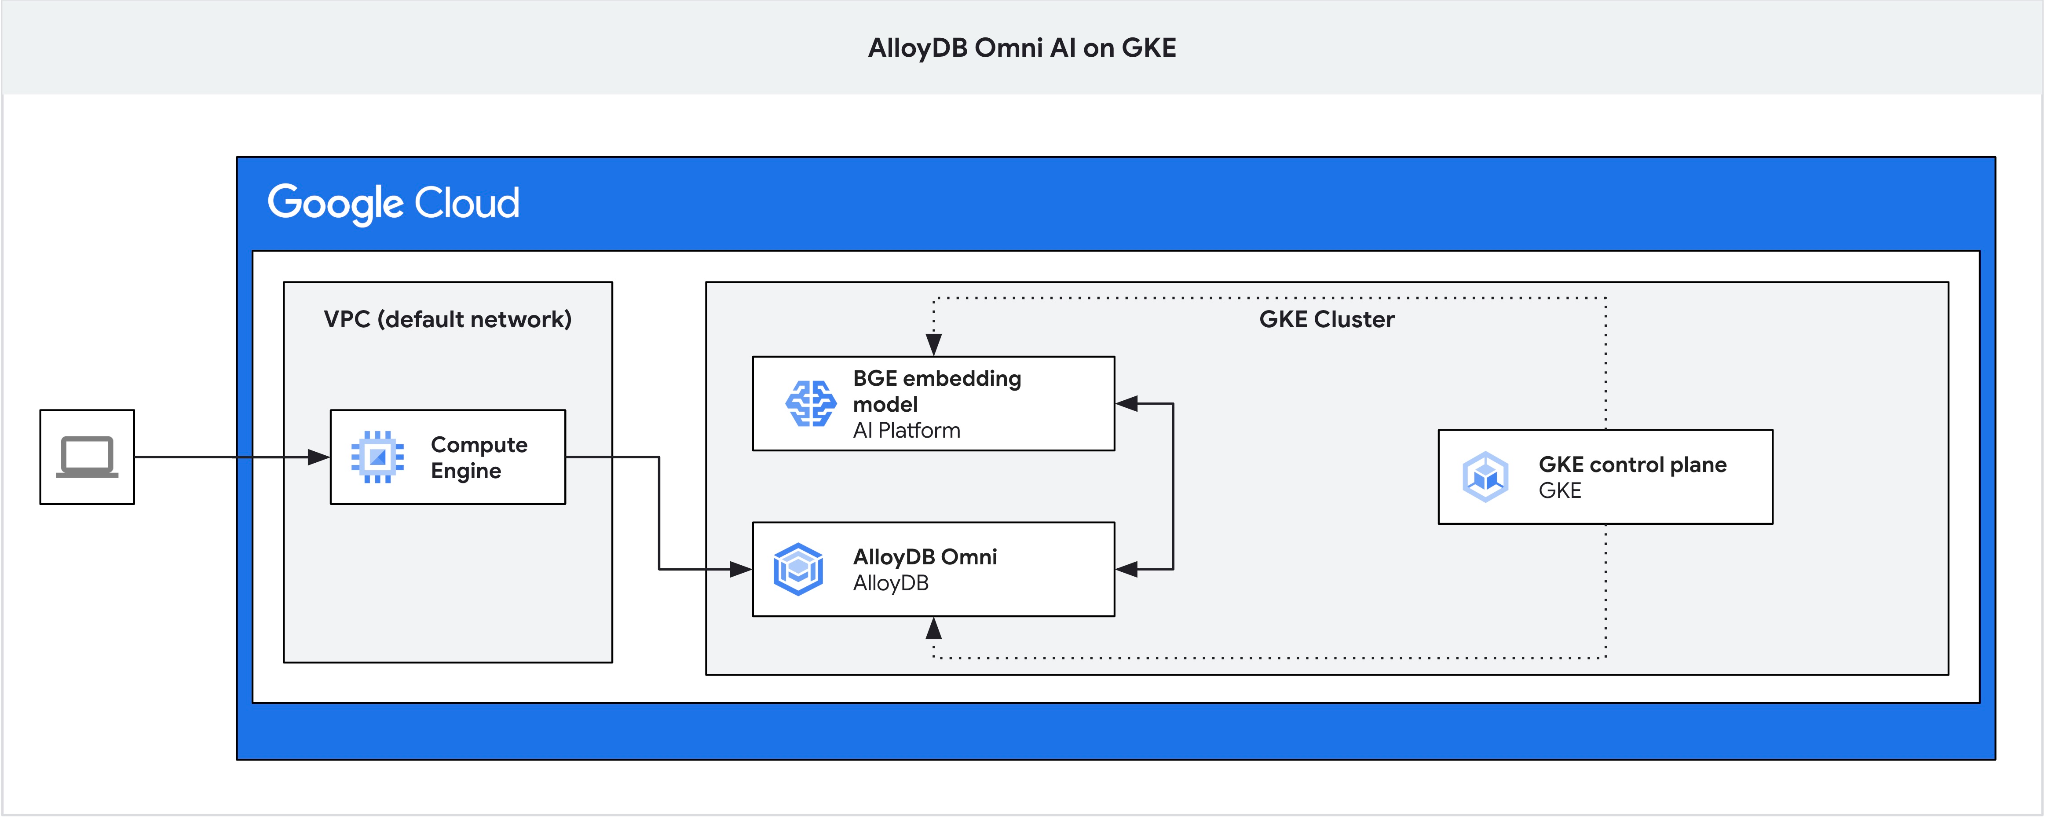
في Cloud Shell، أنشئ الجهاز الظاهري للعميل:
export ZONE=us-central1-a
gcloud compute instances create instance-1 \
  --zone=$ZONE
استرجِع عنوان IP لنقطة نهاية AlloyDB Omni:
echo "INSTANCE_IP=$(kubectl get dbclusters.alloydbomni.dbadmin.goog my-omni -n default -o jsonpath='{.status.primary.endpoint}')"
الناتج المتوقّع:
INSTANCE_IP=10.128.0.33
قيمة INSTANCE_IP هي عنوان IP لجهاز موازنة الحمل الداخلي لمجموعة AlloyDB Omni. في هذا المثال، تكون القيمة 10.131.0.33.
اتّصِل بمثيل الجهاز الافتراضي باستخدام بروتوكول SSH:
gcloud compute ssh instance-1 --zone=$ZONE
في جلسة SSH على instance-1، ثبِّت عميل PostgreSQL:
sudo apt-get update && sudo apt-get install --yes postgresql-client
صدِّر عنوان IP الخاص بموازنة الحمل في AlloyDB Omni (استبدِل PRIMARYENDPOINT بعنوان IP الخاص بك):
export INSTANCE_IP=10.131.0.33
اتّصِل بـ AlloyDB Omni باستخدام psql (كلمة المرور هي VeryStrongPassword):
psql "host=$INSTANCE_IP user=postgres sslmode=require"
في الجلسة psql، أنشئ قاعدة البيانات demo:
CREATE DATABASE demo;
التبديل إلى قاعدة بيانات demo:
\c demo
إنشاء دوال تحويل
تتطلّب نقاط نهاية التضمين المخصّصة وظائف تحويل الإدخال والإخراج لتكييف تنسيقات البيانات بين AlloyDB Omni وواجهة برمجة التطبيقات الخاصة بالنموذج.
أنشئ دالة تحويل الإدخال:
CREATE OR REPLACE FUNCTION tei_text_input_transform(model_id VARCHAR(100), input_text TEXT)
RETURNS JSON
LANGUAGE plpgsql
AS $$
DECLARE
  transformed_input JSON;
BEGIN
  SELECT json_build_object('inputs', input_text, 'truncate', true)::JSON INTO transformed_input;
  RETURN transformed_input;
END;
$$;
الناتج المتوقّع:
demo=# CREATE OR REPLACE FUNCTION tei_text_input_transform(model_id VARCHAR(100), input_text TEXT)
RETURNS JSON
LANGUAGE plpgsql
AS $$
DECLARE
  transformed_input JSON;
BEGIN
  SELECT json_build_object('inputs', input_text, 'truncate', true)::JSON INTO transformed_input;
  RETURN transformed_input;
END;
$$;
CREATE FUNCTION
demo=#
أنشئ دالة تحويل الناتج لتحليل استجابة مصفوفة المتجهات:
CREATE OR REPLACE FUNCTION tei_text_output_transform(model_id VARCHAR(100), response_json JSON)
RETURNS REAL[]
LANGUAGE plpgsql
AS $$
DECLARE
  transformed_output REAL[];
BEGIN
  SELECT ARRAY(SELECT json_array_elements_text(response_json->0)) INTO transformed_output;
  RETURN transformed_output;
END;
$$;
الناتج المتوقّع:
demo=# CREATE OR REPLACE FUNCTION tei_text_output_transform(model_id VARCHAR(100), response_json JSON)
RETURNS REAL[]
LANGUAGE plpgsql
AS $$
DECLARE
  transformed_output REAL[];
BEGIN
  SELECT ARRAY(SELECT json_array_elements_text(response_json->0)) INTO transformed_output;
  RETURN transformed_output;
END;
$$;
CREATE FUNCTION
demo=#
تسجيل النموذج
سجِّل النموذج في AlloyDB Omni باستخدام الإجراء google_ml.create_model. حدِّد http://tei-service:8080/embed كـ model_request_url لتوجيه الطلبات إلى خدمة مجموعة Kubernetes:
CALL
  google_ml.create_model(
    model_id => 'embeddinggemma',
    model_request_url => 'http://tei-service:8080/embed',
    model_provider => 'custom',
    model_type => 'text_embedding',
    model_in_transform_fn => 'tei_text_input_transform',
    model_out_transform_fn => 'tei_text_output_transform');
الناتج المتوقّع:
demo=# CALL
  google_ml.create_model(
    model_id => 'embeddinggemma',
    model_request_url => 'http://tei-service:8080/embed',
    model_provider => 'custom',
    model_type => 'text_embedding',
    model_in_transform_fn => 'tei_text_input_transform',
    model_out_transform_fn => 'tei_text_output_transform');
CALL
demo=#
اختبِر النموذج المسجَّل باستخدام نموذج استعلام SQL:
SELECT google_ml.embedding('embeddinggemma', 'What is AlloyDB Omni?');
تعرض الدالة تمثيل مصفوفة الأرقام الحقيقية الذي تم إنشاؤه بواسطة نموذج EmbeddingGemma المحلي الذي يعمل على GKE.
اضغط على q للرجوع إلى طلب جلسة psql.
الخروج من جلسة psql:
\q
7. اختبار النموذج باستخدام بيانات نموذجية
تحميل نموذج البيانات
يستخدم هذا البرنامج التعليمي مجموعة بيانات Cymbal للبيع بالتجزئة لتوضيح البحث عن التشابه بين المتجهات. ستستخدم حزمة تطوير البرامج (SDK) من Google Cloud وبرنامج PostgreSQL لاستيراد البيانات إلى AlloyDB Omni.
في جلسة SSH على instance-1، اتّصِل بقاعدة البيانات التجريبية وفعِّل الإضافة vector:
psql "host=$INSTANCE_IP user=postgres sslmode=require dbname=demo"
في جلسة psql:
CREATE EXTENSION IF NOT EXISTS vector;
اخرج من جلسة psql:
\q
نزِّل المخطط وطبِّقه لإنشاء جداول في قاعدة بيانات demo:
gcloud storage cat gs://cloud-training/gcc/gcc-tech-004/cymbal_demo_schema.sql |psql "host=$INSTANCE_IP user=postgres dbname=demo"
الناتج المتوقّع:
student@cloudshell:~$ gcloud storage cat gs://cloud-training/gcc/gcc-tech-004/cymbal_demo_schema.sql |psql "host=$INSTANCE_IP user=postgres dbname=demo"
Password for user postgres:
SET
SET
SET
SET
SET
 set_config
------------

(1 row)

SET
SET
SET
SET
SET
SET
CREATE TABLE
ALTER TABLE
CREATE TABLE
ALTER TABLE
CREATE TABLE
ALTER TABLE
CREATE TABLE
ALTER TABLE
CREATE SEQUENCE
ALTER TABLE
ALTER SEQUENCE
ALTER TABLE
ALTER TABLE
ALTER TABLE
student@cloudshell:~$
تحقَّق من الجداول التي تم إنشاؤها:
psql "host=$INSTANCE_IP user=postgres dbname=demo" -c "\dt+"
الناتج المتوقّع:
student@cloudshell:~$ psql "host=$INSTANCE_IP user=postgres dbname=demo" -c "\dt+"
Password for user postgres:
                                           List of relations
 Schema |       Name       | Type  |  Owner   | Persistence | Access method |    Size    | Description
--------+------------------+-------+----------+-------------+---------------+------------+-------------
 public | cymbal_embedding | table | postgres | permanent   | heap          | 8192 bytes |
 public | cymbal_inventory | table | postgres | permanent   | heap          | 8192 bytes |
 public | cymbal_products  | table | postgres | permanent   | heap          | 8192 bytes |
 public | cymbal_stores    | table | postgres | permanent   | heap          | 8192 bytes |
(4 rows)
حمِّل البيانات إلى الجدول cymbal_products:
gcloud storage cat gs://cloud-training/gcc/gcc-tech-004/cymbal_products.csv |psql "host=$INSTANCE_IP user=postgres dbname=demo" -c "\copy cymbal_products from stdin csv header"
الناتج المتوقّع:
student@cloudshell:~$ gcloud storage cat gs://cloud-training/gcc/gcc-tech-004/cymbal_products.csv |psql "host=$INSTANCE_IP user=postgres dbname=demo" -c "\copy cymbal_products from stdin csv header"
COPY 941
student@cloudshell:~$
في ما يلي عيّنة من بضعة صفوف من جدول cymbal_products.
psql "host=$INSTANCE_IP user=postgres dbname=demo" -c "SELECT uniq_id,left(product_name,30),left(product_description,50),sale_price FROM cymbal_products limit 3"
الناتج المتوقّع:
student@cloudshell:~$ psql "host=$INSTANCE_IP user=postgres dbname=demo" -c "SELECT uniq_id,left(product_name,30),left(product_description,50),sale_price FROM cymbal_products limit 3"
Password for user postgres:
             uniq_id              |              left              |                        left                        | sale_price
----------------------------------+--------------------------------+----------------------------------------------------+------------
 a73d5f754f225ecb9fdc64232a57bc37 | Laundry Tub Strainer Cup       |   Laundry tub strainer cup Chrome For 1-.50, drain |      11.74
 41b8993891aa7d39352f092ace8f3a86 | LED Starry Star Night Light La |  LED Starry Star Night Light Laser Projector 3D Oc |      46.97
 ed4a5c1b02990a1bebec908d416fe801 | Surya Horizon HRZ-1060 Area Ru |  The 100% polypropylene construction of the Surya  |       77.4
(3 rows)
student@cloudshell:~$
حمِّل البيانات إلى الجدول cymbal_inventory:
gcloud storage cat gs://cloud-training/gcc/gcc-tech-004/cymbal_inventory.csv |psql "host=$INSTANCE_IP user=postgres dbname=demo" -c "\copy cymbal_inventory from stdin csv header"
الناتج المتوقّع:
student@cloudshell:~$ gcloud storage cat gs://cloud-training/gcc/gcc-tech-004/cymbal_inventory.csv |psql "host=$INSTANCE_IP user=postgres dbname=demo" -c "\copy cymbal_inventory from stdin csv header"
Password for user postgres:
COPY 263861
student@cloudshell:~$
في ما يلي عيّنة من بضعة صفوف من جدول cymbal_inventory.
psql "host=$INSTANCE_IP user=postgres dbname=demo" -c "SELECT * FROM cymbal_inventory LIMIT 3"
إخراج:
student@cloudshell:~$ psql "host=$INSTANCE_IP user=postgres dbname=demo" -c "SELECT * FROM cymbal_inventory LIMIT 3"
Password for user postgres:
 store_id |             uniq_id              | inventory
----------+----------------------------------+-----------
     1583 | adc4964a6138d1148b1d98c557546695 |         5
     1490 | adc4964a6138d1148b1d98c557546695 |         4
     1492 | adc4964a6138d1148b1d98c557546695 |         3
(3 rows)
student@cloudshell:~$
حمِّل البيانات إلى الجدول cymbal_stores:
gcloud storage cat gs://cloud-training/gcc/gcc-tech-004/cymbal_stores.csv |psql "host=$INSTANCE_IP user=postgres dbname=demo" -c "\copy cymbal_stores from stdin csv header"
الناتج المتوقّع في وحدة التحكّم:
student@cloudshell:~$ gcloud storage cat gs://cloud-training/gcc/gcc-tech-004/cymbal_stores.csv |psql "host=$INSTANCE_IP user=postgres dbname=demo" -c "\copy cymbal_stores from stdin csv header"
Password for user postgres:
COPY 4654
student@cloudshell:~$
في ما يلي عيّنة من بضعة صفوف من جدول cymbal_stores.
psql "host=$INSTANCE_IP user=postgres dbname=demo" -c "SELECT store_id, name, zip_code FROM cymbal_stores limit 3"
إخراج:
student@cloudshell:~$ psql "host=$INSTANCE_IP user=postgres dbname=demo" -c "SELECT store_id, name, zip_code FROM cymbal_stores limit 3"
Password for user postgres:
 store_id |       name        | zip_code
----------+-------------------+----------
     1990 | Mayaguez Store    |      680
     2267 | Ware Supercenter  |     1082
     4359 | Ponce Supercenter |      780
(3 rows)
student@cloudshell:~$
إنشاء عمليات التضمين
اربط بقاعدة البيانات التجريبية باستخدام psql وأنشئ تضمينات للمنتجات الموضّحة في جدول cymbal_products استنادًا إلى أوصاف المنتجات.
الربط بقاعدة البيانات التجريبية:
psql "host=$INSTANCE_IP user=postgres sslmode=require dbname=demo"
استخدِم العمود embedding من النوع vector لتخزين تضمينات النص التي تم إنشاؤها لأوصاف المنتجات.
فعِّل توقيت الطلب:
\timing
أنشئ تضمينات لكل وصف منتج وخزِّنها في جدول cymbal_embedding:
INSERT INTO cymbal_embedding (uniq_id, embedding)
SELECT uniq_id, google_ml.embedding('embeddinggemma', product_description)::vector
FROM cymbal_products;
الناتج المتوقّع:
demo=# INSERT INTO cymbal_embedding(uniq_id,embedding)  SELECT uniq_id, google_ml.embedding('embeddinggemma',product_description)::vector FROM cymbal_products;
INSERT 0 941
Time: 497878.136 ms (08:17.878)
demo=#
تنفيذ طلبات بحث دلالية
في الجلسة psql، ابحث عن أفضل خمسة منتجات تطابق السؤال "What kind of fruit trees grow well here?" باستخدام مسافة جيب التمام (<=>):
SELECT
    cp.product_name,
    left(cp.product_description, 80) AS description,
    cp.sale_price,
    cs.zip_code,
    (ce.embedding <=> google_ml.embedding('embeddinggemma', 'What kind of fruit trees grow well here?')::vector) AS distance
FROM
    cymbal_products cp
JOIN cymbal_embedding ce ON ce.uniq_id = cp.uniq_id
JOIN cymbal_inventory ci ON ci.uniq_id = cp.uniq_id
JOIN cymbal_stores cs ON cs.store_id = ci.store_id
WHERE
    ci.inventory > 0
    AND cs.store_id = 1583
ORDER BY
    distance ASC
LIMIT 5;
الناتج المتوقّع:
demo=# SELECT
        cp.product_name,
        left(cp.product_description,80) as description,
        cp.sale_price,
        cs.zip_code,
        (ce.embedding <=> google_ml.embedding('embeddinggemma','What kind of fruit trees grow well here?')::vector) as distance
FROM
        cymbal_products cp
JOIN cymbal_embedding ce on ce.uniq_id=cp.uniq_id
JOIN cymbal_inventory ci on ci.uniq_id=cp.uniq_id
JOIN cymbal_stores cs on cs.store_id=ci.store_id
WHERE
    ci.inventory > 0
    AND cs.store_id = 1583
ORDER BY
    distance ASC
LIMIT 5;
     product_name      |                                   description                                    | sale_price | zip_code |      distance
-----------------------+----------------------------------------------------------------------------------+------------+----------+--------------------
 Cherry Tree           | This is a beautiful cherry tree that will produce delicious cherries. It is an d |      75.00 |    93230 | 0.5210549378080666
 California Lilac      | This is a beautiful lilac tree that can grow to be over 10 feet tall. It is an d |       5.00 |    93230 | 0.5639421771781971
 Toyon                 | This is a beautiful toyon tree that can grow to be over 20 feet tall. It is an e |      10.00 |    93230 | 0.5670010914504852
 Rose Bush             | This is a beautiful rose bush that will produce fragrant roses. It is a perennia |      50.00 |    93230 | 0.5731542622882957
 California Peppertree | This is a beautiful peppertree that can grow to be over 30 feet tall. It is an e |      25.00 |    93230 | 0.5750934653011995
(5 rows)

Time: 83.610 ms
demo=#
تم تنفيذ طلب البحث في 83 ملي ثانية وعرض قائمة بالأشجار من جدول cymbal_products التي تطابق الطلب وتتوفّر في المتجر رقم 1583.
إنشاء فهرس ANN
مع مجموعة بيانات صغيرة، يسهل استخدام البحث المطابق من خلال فحص جميع التضمينات، ولكن عندما تزداد البيانات، يزداد أيضًا وقت التحميل والاستجابة. لتحسين الأداء، يمكنك إنشاء فهارس على بيانات التضمين. في ما يلي مثال على كيفية إجراء ذلك باستخدام فهرس Google ScaNN لبيانات المتجهات.
أعِد الاتصال بقاعدة البيانات التجريبية إذا انقطع الاتصال:
psql "host=$INSTANCE_IP user=postgres sslmode=require dbname=demo"
فعِّل إضافة alloydb_scann:
CREATE EXTENSION IF NOT EXISTS alloydb_scann;
أنشئ فهرس ScaNN في العمود embedding:
CREATE INDEX cymbal_products_embeddings_scann ON cymbal_embedding
  USING scann (embedding cosine)
  WITH (num_leaves=10, max_num_levels = 1);
أعِد تنفيذ طلب البحث الدلالي لمقارنة أداء التنفيذ:
SELECT
    cp.product_name,
    left(cp.product_description, 80) AS description,
    cp.sale_price,
    cs.zip_code,
    (ce.embedding <=> google_ml.embedding('embeddinggemma', 'What kind of fruit trees grow well here?')::vector) AS distance
FROM
    cymbal_products cp
JOIN cymbal_embedding ce ON ce.uniq_id = cp.uniq_id
JOIN cymbal_inventory ci ON ci.uniq_id = cp.uniq_id
JOIN cymbal_stores cs ON cs.store_id = ci.store_id
WHERE
    ci.inventory > 0
    AND cs.store_id = 1583
ORDER BY
    distance ASC
LIMIT 5;
الناتج المتوقّع:
demo=# SELECT
    cp.product_name,
    left(cp.product_description,80) as description,
    cp.sale_price,
    cs.zip_code,
    (ce.embedding <=> google_ml.embedding('embeddinggemma', 'What kind of fruit trees grow well here?')::vector) AS distance
FROM
    cymbal_products cp
JOIN cymbal_embedding ce ON ce.uniq_id = cp.uniq_id
JOIN cymbal_inventory ci ON ci.uniq_id = cp.uniq_id
JOIN cymbal_stores cs ON cs.store_id = ci.store_id
WHERE
    ci.inventory > 0
    AND cs.store_id = 1583
ORDER BY
    distance ASC
LIMIT 5;
     product_name      |                                   description                                    | sale_price | zip_code |      distance
-----------------------+----------------------------------------------------------------------------------+------------+----------+--------------------
 Cherry Tree           | This is a beautiful cherry tree that will produce delicious cherries. It is an d |      75.00 |    93230 | 0.5210549378080666
 California Lilac      | This is a beautiful lilac tree that can grow to be over 10 feet tall. It is an d |       5.00 |    93230 | 0.5639421771781971
 Toyon                 | This is a beautiful toyon tree that can grow to be over 20 feet tall. It is an e |      10.00 |    93230 | 0.5670010914504852
 Rose Bush             | This is a beautiful rose bush that will produce fragrant roses. It is a perennia |      50.00 |    93230 | 0.5731542622882957
 California Peppertree | This is a beautiful peppertree that can grow to be over 30 feet tall. It is an e |      25.00 |    93230 | 0.5750934653011995
(5 rows)

Time: 64.783 ms
انخفض وقت تنفيذ طلب البحث قليلاً، وسيكون التحسّن أكثر وضوحًا مع مجموعات البيانات الأكبر. يجب أن تكون البيانات التي يتم إرجاعها مماثلة أو مشابهة جدًا للبيانات التي حصلنا عليها بدون فهرس.
جرِّب طلبات بحث أخرى واطّلِع على مزيد من المعلومات عن تحسين فهرس المتجهات في المستندات.
للخروج من جلسة psql، اتّبِع الخطوات التالية:
\q
ارجع إلى Google Cloud Shell من خلال قطع الاتصال بجلسة instance-1 ssh بالضغط على CTRL+D أو كتابة exit.
8. نشر Gemma باستخدام vLLM
إضافة مجموعة عُقد لـ Gemma
أولاً، تحقَّق من أنواع العُقد المتاحة في منطقتك:
export LOCATION=us-central1-a
gcloud compute accelerator-types list --filter="zone:${LOCATION}"
ستظهر لك قائمة بأنواع أدوات التسريع المتاحة، بما في ذلك أداة التسريع nvidia-l4. الآن، أنشئ مجموعة أجهزة ذات التخصيص نفسه باستخدام نوع مسرّع nvidia-l4:
export PROJECT_ID=$(gcloud config get project)
export LOCATION=us-central1
export CLUSTER_NAME=alloydb-ai-gke
gcloud container node-pools create gpupool \
    --accelerator type=nvidia-l4,count=1,gpu-driver-version=latest \
    --project=${PROJECT_ID} \
    --location=${LOCATION} \
    --node-locations=${LOCATION}-a \
    --cluster=${CLUSTER_NAME} \
    --machine-type=g2-standard-8 \
    --num-nodes=1
أنشئ بيان نشر لنموذج Google Gemini 4 12B باستخدام vLLM:
cat << 'EOF' > gemma-12b-gpu-vllm-deployment.yaml
apiVersion: apps/v1
kind: Deployment
metadata:
  name: gemma-12b-gpu-vllm-deployment
spec:
  replicas: 1
  selector:
    matchLabels:
      app: gemma-12b-gpu-vllm
  template:
    metadata:
      labels:
        app: gemma-12b-gpu-vllm
        ai.gke.io/model: gemma-4-12b-it
        ai.gke.io/inference-server: vllm
        examples.ai.gke.io/source: user-guide
    spec:
      containers:
      - name: inference-server
        image: us-docker.pkg.dev/vertex-ai/vertex-vision-model-garden-dockers/pytorch-vllm-serve:latest
        resources:
          requests:
            cpu: "4"
            memory: "16Gi"
            ephemeral-storage: "30Gi"
            nvidia.com/gpu: "1"
          limits:
            cpu: "8"
            memory: "24Gi"
            ephemeral-storage: "30Gi"
            nvidia.com/gpu: "1"
        command: ["python3", "-m", "vllm.entrypoints.api_server"]
        args:
          - --model=$(MODEL_ID)
          - --host=0.0.0.0
          - --port=8000
          - --tensor-parallel-size=1
          - --enable-log-requests
          - --enable-chunked-prefill
          - --enable-prefix-caching
          - --enable-auto-tool-choice
          - --generation-config=auto
          - --tool-call-parser=gemma4
          - --dtype=bfloat16
          - --max-num-seqs=16
          - --max-model-len=32768
          - --gpu-memory-utilization=0.95
          - --reasoning-parser=gemma4
          - --trust-remote-code
          - --quantization=fp8
        env:
        - name: LD_LIBRARY_PATH
          value: ${LD_LIBRARY_PATH}:/usr/local/nvidia/lib64
        - name: MODEL_ID
          value: google/gemma-4-12b-it
        - name: HF_TOKEN
          valueFrom:
            secretKeyRef:
              name: hf-secret
              key: hf_api_token
        volumeMounts:
        - mountPath: /dev/shm
          name: dshm
      volumes:
      - name: dshm
        emptyDir:
            medium: Memory
      nodeSelector:
        cloud.google.com/gke-accelerator: nvidia-l4
        cloud.google.com/gke-gpu-driver-version: latest
---
apiVersion: v1
kind: Service
metadata:
  name: gemma-12b-gpu-vllm-service
spec:
  selector:
    app: gemma-12b-gpu-vllm
  type: ClusterIP
  ports:
    - protocol: TCP
      port: 8000
      targetPort: 8000
EOF
طبِّق عملية النشر gemma-12b-gpu-vllm-deployment.yaml المحفوظة:
kubectl apply -f gemma-12b-gpu-vllm-deployment.yaml
الناتج المتوقّع:
$ kubectl apply -f gemma-12b-gpu-vllm-deployment.yaml
deployment.apps/gemma-12b-gpu-vllm-deployment created
service/gemma-12b-gpu-vllm-service created
انتظِر إلى أن يكتمل النشر ويتم تحميل النموذج. قد يستغرق ذلك عدّة دقائق.
printf "Waiting for model to load..."; until kubectl logs -l app=gemma-12b-gpu-vllm --tail=50 2>/dev/null | grep -q "Application startup complete"; do printf "."; sleep 3; done; printf '\n\033[1;32m========================================\n[SUCCESS] Model is loaded and ready!\nYou can now proceed to the next step.\n========================================\033[0m\n'
الناتج المتوقّع:
Waiting for model to load...
========================================
[SUCCESS] Model is loaded and ready!
You can now proceed to the next step.
========================================
اختبِر النموذج. فعِّل إعادة توجيه المنفذ للوصول إلى النموذج:
kubectl port-forward svc/gemma-12b-gpu-vllm-service 8090:8000
في نافذة وحدة طرفية أخرى، استخدِم curl لإرسال طلب إلى النموذج:
curl http://localhost:8090/v1/chat/completions \
  -H "Content-Type: application/json" \
  -d '{
    "messages": [
      {"role": "system", "content": "You are a helpful assistant running on GKE."},
      {"role": "user", "content": "What is AlloyDB Omni."}
    ],
    "temperature": 0.7
  }' | jq -r '.choices[0].message.content'
الناتج المتوقّع:
  % Total    % Received % Xferd  Average Speed   Time    Time     Time  Current
                                 Dload  Upload   Total   Spent    Left  Speed
100  3957  100  3761  100   196     85      4  0:00:49  0:00:43  0:00:06   830
**AlloyDB Omni** is a fully managed, PostgreSQL-compatible database engine from Google Cloud that can be run **on-premises, in other clouds, or in your own data centers.**

To understand it simply: It allows you to run the high-performance, enterprise-grade capabilities of Google's **AlloyDB** (a cloud-native database) on your own infrastructure.

Here is a breakdown of what makes it significant:

### 1. The "Best of Both Worlds" Architecture
Normally, you have to choose between:
*   **Managed Cloud Databases:** Easy to scale and manage, but you are locked into the cloud provider's infrastructure.
*   **Self-Managed Databases:** You have full control over the hardware/location, but you are responsible for scaling, patching, and high availability.

**AlloyDB Omni** bridges this gap. It provides the advanced features of a cloud-native database (like intelligent indexing, high availability, and massive scalability) while allowing you to run it anywhere.
أوقِف عملية إعادة توجيه المنفذ في الوحدة الطرفية الأولى (إذا كانت لا تزال قيد التشغيل) من خلال الضغط على Ctrl+C.
9. تسجيل نموذج Gemma 4 في AlloyDB Omni
سجِّل نموذج Gemma 12B في AlloyDB Omni باستخدام الإجراء google_ml.create_model. حدِّد http://gemma-12b-gpu-vllm-service:8000/v1/chat/completions كـ model_request_url لتوجيه الطلبات إلى خدمة مجموعة Kubernetes:
استرجِع عنوان IP لنقطة نهاية AlloyDB Omni:
echo "INSTANCE_IP=$(kubectl get dbclusters.alloydbomni.dbadmin.goog my-omni -n default -o jsonpath='{.status.primary.endpoint}')"
اتّصِل بمثيل الجهاز الافتراضي باستخدام بروتوكول SSH:
export ZONE=us-central1-a
gcloud compute ssh instance-1 --zone=$ZONE
بعد الاتصال بمتغيّر INSTANCE_IP لتصدير الجهاز الافتراضي من الخطوة السابقة (يتم تقديم القيمة 10.128.0.33 كمثال، لذا استبدِلها بعنوان IP الخاص بك):
export INSTANCE_IP=10.128.0.33
تصدير كلمة مرور AlloyDB:
export PGPASSWORD=VeryStrongPassword
الربط بقاعدة بيانات demo:
psql "host=$INSTANCE_IP user=postgres sslmode=require dbname=demo"
في جلسة psql، سجِّل النموذج:
CALL
  google_ml.create_model(
    model_id => 'gemma-12b-gpu',
    model_request_url => 'http://gemma-12b-gpu-vllm-service:8000/v1/chat/completions',
    model_provider => 'custom',
    model_type => 'llm');
اختبِر النموذج باستخدام نموذج طلب بحث بلغة الاستعلامات البنيوية (SQL):
SELECT google_ml.predict_row(
  model_id => 'gemma-12b-gpu',
  request_body => json_build_object(
    'messages', json_build_array(
      json_build_object('role', 'user', 'content', 'What is AlloyDB Omni?'))))->'choices'->0->'message'->'content';
اضغط على q للخروج من نافذة النتائج والعودة إلى طلب psql
الجمع بين البحث المتّجه والتوليد المعزّز بالاسترجاع (RAG) في النماذج اللغوية الكبيرة (LLM) في AlloyDB Omni
استخدِم البحث المتّجه مع طلب النموذج اللغوي الكبير لتوضيح عملية "التوليد المعزّز بالاسترجاع" (RAG) باستخدام النموذج اللغوي الكبير.
نفِّذ طلب بحث SQL في plsql:
WITH trees AS (
SELECT
        cp.product_name,
        cp.product_description AS description,
        cp.sale_price,
        cs.zip_code,
        cp.uniq_id AS product_id
FROM
    cymbal_products cp
JOIN cymbal_embedding ce ON ce.uniq_id = cp.uniq_id
JOIN cymbal_inventory ci ON ci.uniq_id = cp.uniq_id
JOIN cymbal_stores cs ON cs.store_id = ci.store_id
WHERE
        ci.inventory>0
        AND cs.store_id = 1583
ORDER BY
        (ce.embedding <=> embedding('embeddinggemma',
        'What kind of fruit trees grow well here?')::vector) ASC
LIMIT 1),
prompt AS (
SELECT
        'You are a friendly advisor helping to find a product based on the customer''s needs.
Based on the client request we have loaded a list of products closely related to search.
The list in JSON format with list of values like {"product_name":"name","product_description":"some description","sale_price":10}
Here is the list of products:' || json_agg(trees) || 'The customer asked "What kind of fruit trees grow well here?"
You should give information about the product, price and some supplemental information' AS prompt_text
FROM
        trees),
response AS (
SELECT
        google_ml.predict_row(
          model_id =>'gemma-12b-gpu',
          request_body => json_build_object(
            'messages', json_build_array(
              json_build_object('role', 'user', 'content',prompt_text)
            )))->'choices'->0->'message'->'content' AS resp
FROM
        prompt)
SELECT
REPLACE(resp::text, '\n', CHR(10))
FROM
        response;
الناتج المتوقّع:
----------------------------------------------------------------------------------------------------------------------------------------------
 "Hello there! I'd be happy to help you find the perfect tree for your garden.                                                               +
                                                                                                                                             +
 Based on your location, we have a wonderful option that would grow beautifully in your area:                                                +
                                                                                                                                             +
 **Cherry Tree**                                                                                                                             +
 *   **Price:** $75.00                                                                                                                       +
 *   **Description:** This is a stunning deciduous tree that not only provides a beautiful landscape but also produces delicious cherries.   +
 *   **Supplemental Information:**                                                                                                           +
     *   **Growth:** It grows to about 15 feet tall.                                                                                         +
     *   **Appearance:** You can look forward to dark green leaves in the summer that transform into a vibrant red in the fall.              +
     *   **Benefits:** It's a great choice if you're looking for both fruit and extra shade or privacy in your yard.                         +
     *   **Care Tips:** It performs best in a cool, moist climate with sandy soil. Since you are in a suitable zone, it should thrive nicely!+
                                                                                                                                             +
 Would you like more details on how to plant this, or would you like to proceed with an order?"
(1 row)
يُكمّل طلب البحث الطلب المقدَّم إلى النموذج اللغوي الكبير بنتائج البحث المتّجهي.
جرِّب طلبات بحث أخرى واختبِر أنماط التوليد المعزَّز بالاسترجاع. تتمثّل فائدة البنية المعروضة في اكتفائها الذاتي الكامل. لا يتم إرسال البيانات خارج مجموعتك ويمكن تشغيلها في بيئات معزولة تمامًا.
الخروج من جلسة psql:
\q
قطع الاتصال بجلسة SSH بالجهاز الظاهري:
exit
لا تنسَ أنّ AlloyDB Omni يتضمّن المزيد من الميزات والتجارب.
10. تنظيف البيئة
لتجنُّب تكبُّد رسوم مستمرة في حسابك على Google Cloud، احذف الموارد التي تم إنشاؤها في هذا الدرس العملي.
حذف مجموعة GKE
في Cloud Shell، احذف مجموعة GKE:
export PROJECT_ID=$(gcloud config get-value project)
export LOCATION=us-central1
export CLUSTER_NAME=alloydb-ai-gke
gcloud container clusters delete ${CLUSTER_NAME} \
  --project=${PROJECT_ID} \
  --region=${LOCATION}
الناتج المتوقّع:
student@cloudshell:~$ gcloud container clusters delete ${CLUSTER_NAME} \
>   --project=${PROJECT_ID} \
>   --region=${LOCATION}
The following clusters will be deleted.
 - [alloydb-ai-gke] in [us-central1]

Do you want to continue (Y/n)?  Y

Deleting cluster alloydb-ai-gke...done.
Deleted
حذف الجهاز الظاهري للعميل
في Cloud Shell، احذف آلة Compute Engine الافتراضية:
export PROJECT_ID=$(gcloud config get-value project)
export ZONE=us-central1-a
gcloud compute instances delete instance-1 \
  --project=${PROJECT_ID} \
  --zone=${ZONE}
الناتج المتوقّع:
student@cloudshell:~$ export PROJECT_ID=$(gcloud config get project)
export ZONE=us-central1-a
gcloud compute instances delete instance-1 \
  --project=${PROJECT_ID} \
  --zone=${ZONE}
Your active configuration is: [cloudshell-5399]
The following instances will be deleted. Any attached disks configured to be auto-deleted will be deleted unless they are attached to any other instances or the `--keep-disks` flag is given and specifies them for keeping. Deleting a disk
is irreversible and any data on the disk will be lost.
 - [instance-1] in [us-central1-a]

Do you want to continue (Y/n)?  Y

Deleted
إذا أنشأت مشروعًا جديدًا لهذا الدرس التطبيقي حول الترميز، يمكنك اختياريًا حذف المشروع بأكمله في Google Cloud Resource Manager.
11. تهانينا
تهانينا على إكمال الدرس العملي.
المواضيع التي تناولتها
- كيفية نشر AlloyDB Omni على مجموعة GKE
- كيفية الاتصال بـ AlloyDB Omni
- كيفية تحميل البيانات إلى AlloyDB Omni
- كيفية نشر نماذج الذكاء الاصطناعي (التضمين والنماذج اللغوية الكبيرة) على GKE
- كيفية تسجيل نماذج الذكاء الاصطناعي في AlloyDB Omni
- كيفية إنشاء تضمينات للبحث الدلالي
- كيفية تنفيذ طلبات البحث الدلالية في AlloyDB Omni
- كيفية إنشاء فهارس المتّجهات واستخدامها في AlloyDB Omni
يمكنك الاطّلاع على مزيد من المعلومات حول استخدام الذكاء الاصطناعي في AlloyDB Omni في المستندات.
استطلاع
إخراج: