

1. מבוא
ב-Codelab הזה תלמדו איך לפרוס את AlloyDB Omni ב-Google Kubernetes Engine (GKE) ואיך להשתמש בו עם מודלים פתוחים כמו EmbeddingGemma ו-Gemma 4 להטמעות ולתחזיות. הפעלת מסד הנתונים והמודלים באותו אשכול מצמצמת את זמן האחזור ברשת ומונעת תלות בשירותים של צד שלישי. היא גם עוזרת לעמוד בדרישות התאימות ודרישות מיקום אחסון הנתונים, כי הנתונים אף פעם לא יוצאים מהסביבה שלכם.
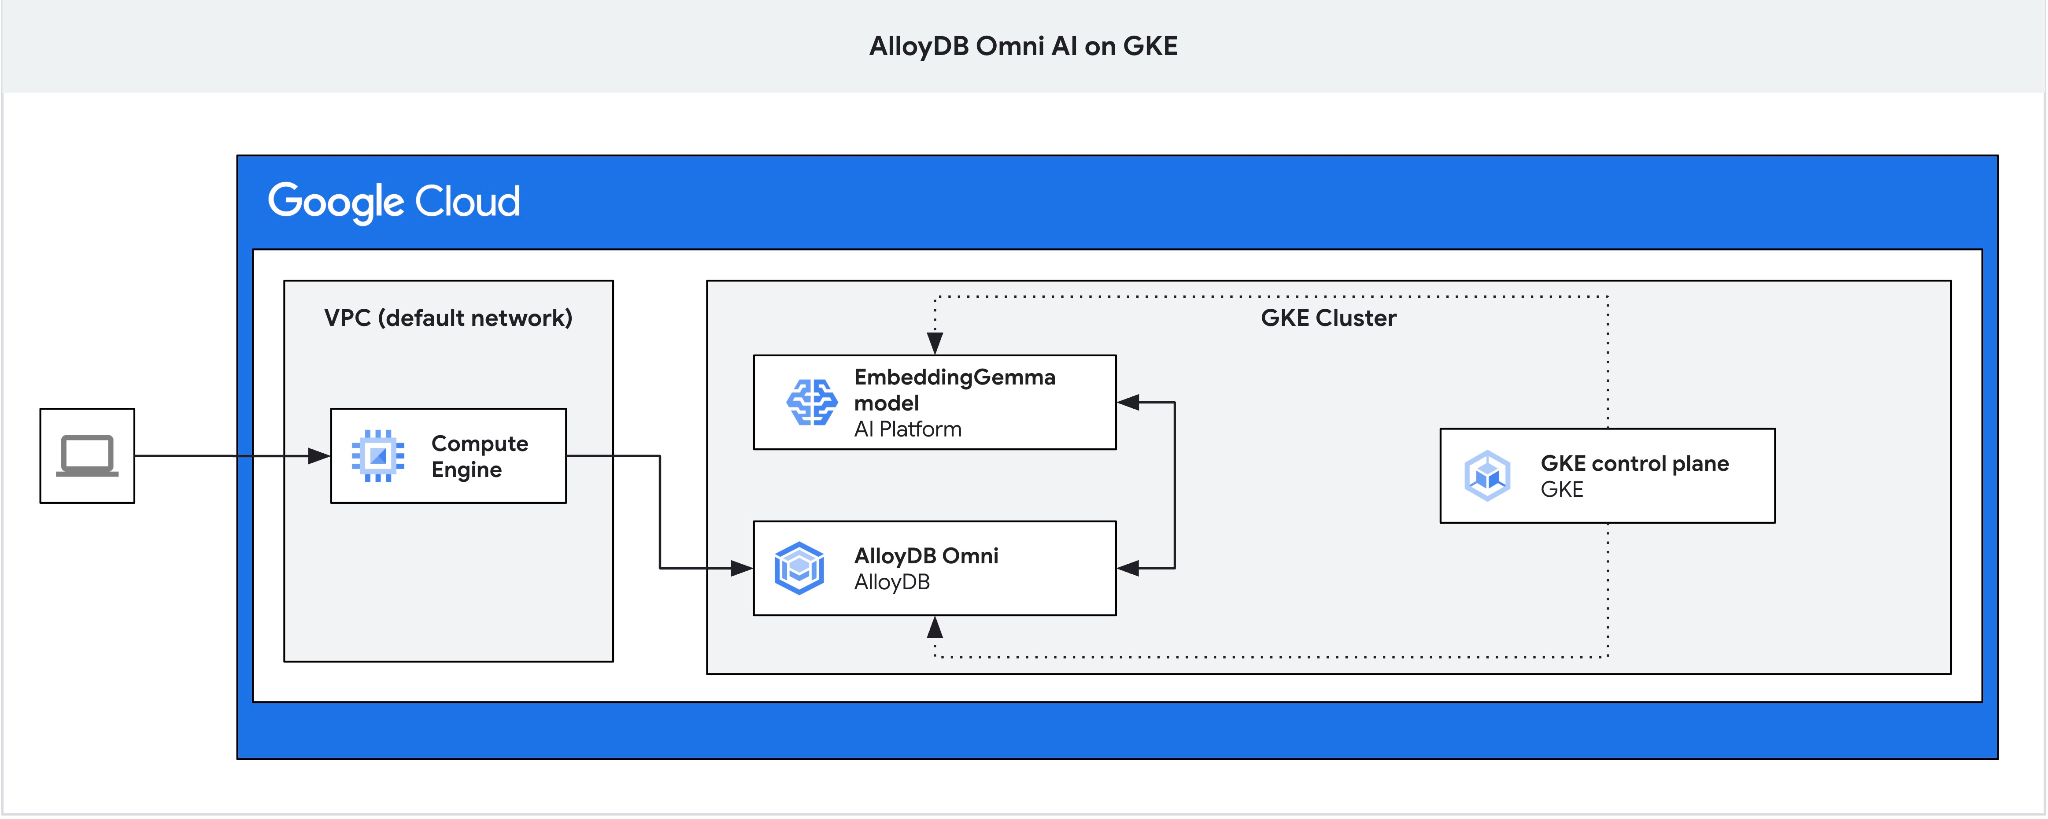
דרישות מוקדמות
- הבנה בסיסית של Google Cloud ומסוף Google Cloud
- ידע בסיסי ב-Kubernetes וב-GKE
- היכרות עם ממשק שורת הפקודה ועם Google Cloud Shell
מה תלמדו
- איך פורסים את AlloyDB Omni באשכול GKE
- איך מתחברים ל-AlloyDB Omni
- איך טוענים נתונים ל-AlloyDB Omni
- איך פורסים מודלים של AI (הטמעה ו-LLM) ב-GKE
- איך רושמים מודלים של AI ב-AlloyDB Omni
- איך ליצור הטמעות לחיפוש סמנטי
- איך מריצים שאילתות של חיפוש סמנטי ב-AlloyDB Omni
- איך יוצרים ומשתמשים באינדקסים וקטוריים ב-AlloyDB Omni
הדרישות
- חשבון ב-Google Cloud ופרויקט בענן של Google
- דפדפן אינטרנט כמו Chrome
2. הגדרה ודרישות
הגדרת הפרויקט
- נכנסים למסוף Google Cloud. אם עדיין אין לכם חשבון Gmail או חשבון Google Workspace, אתם צריכים ליצור חשבון. משתמשים בחשבון לשימוש אישי במקום בחשבון לצורכי עבודה או בחשבון בית ספרי.
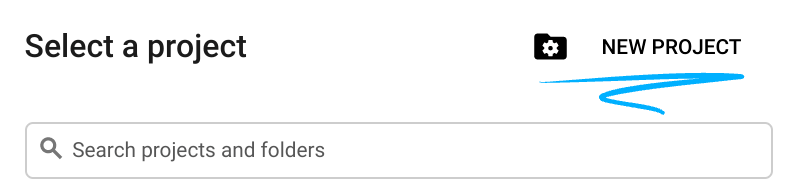
- יוצרים פרויקט חדש או בוחרים פרויקט קיים. בכותרת של מסוף Google Cloud, לוחצים על Select a project ואז על New Project.

בחלון Select a project, לוחצים על New Project כדי לפתוח את תיבת הדו-שיח ליצירת פרויקט.
בתיבת הדו-שיח, מזינים שם פרויקט ובוחרים את הארגון או המיקום.
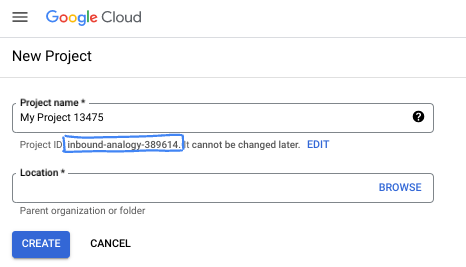
- שם הפרויקט הוא השם המוצג למשתתפים בפרויקט. שם הפרויקט לא נמצא בשימוש ב-Google APIs, ואפשר לשנות אותו בכל שלב.
- מזהה הפרויקט הוא ייחודי לכל הפרויקטים ב-Google Cloud ואי אפשר לשנות אותו אחרי שמגדירים אותו. מסוף Google Cloud יוצר מזהה ייחודי באופן אוטומטי, או שאתם יכולים לספק מזהה משלכם. ב-codelab הזה, מזהה הפרויקט מופיע כ-placeholder
- מספר הפרויקט הוא מזהה שלישי שמשמש חלק מממשקי ה-API. מידע נוסף מופיע בתיעוד של מנהל המשאבים.
הפעלת החיוב
אם הגדרתם חיוב באמצעות קרדיטים ב-Google Cloud, אתם יכולים לדלג על השלב הזה.
כדי להגדיר חשבון לחיוב לשימוש אישי, מפעילים את החיוב במסוף Google Cloud.
- העלות של השלמת ה-Lab הזה היא פחות מ-5 $ על משאבי Google Cloud.
- בסוף שיעור Lab הזה יש שלבים למחיקת משאבים כדי להימנע מחיובים נוספים.
- משתמשים חדשים זכאים לתקופת ניסיון בחינם בשווי 300$.
הפעלת Cloud Shell
בשיעור Codelab הזה תשתמשו ב-Google Cloud Shell, סביבת שורת פקודה שפועלת בענן.
במסוף Google Cloud, לוחצים על סמל הפעלת Cloud Shell בסרגל הכלים שבפינה השמאלית העליונה:
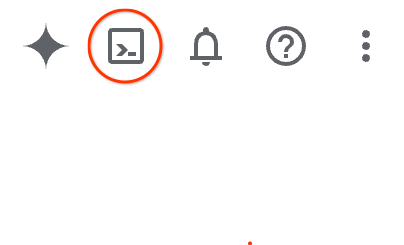
אפשר גם להקיש על G ואז על S, או לפתוח את Google Cloud Shell ישירות.
כשמתחברים, Cloud Shell מציג את הנחיית הטרמינל:

Cloud Shell כולל אחסון מתמיד וכלים למפתחים. אפשר להריץ את כל השלבים ב-codelab הזה מהדפדפן.
3. הפעלת ממשקי ה-API
כדי להשתמש ב-Google Kubernetes Engine (GKE) בשביל פריסות של AlloyDB Omni ומודלים, צריך להפעיל את ממשקי ה-API של Compute Engine ו-GKE בפרויקט בענן של Google.
ב-Cloud Shell, מוודאים שמזהה הפרויקט מוגדר:
PROJECT_ID=$(gcloud config get-value project)
echo $PROJECT_ID
אם מזהה הפרויקט לא מוגדר, צריך להגדיר אותו:
export PROJECT_ID=<YOUR_PROJECT_ID>
gcloud config set project $PROJECT_ID
מפעילים את ממשקי ה-API הנדרשים:
gcloud services enable compute.googleapis.com
gcloud services enable container.googleapis.com
הפלט אמור להיראות כך:
student@cloudshell:~ (test-project-001-402417)$ PROJECT_ID=test-project-001-402417
student@cloudshell:~ (test-project-001-402417)$ gcloud config set project test-project-001-402417
Updated property [core/project].
student@cloudshell:~ (test-project-001-402417)$ gcloud services enable compute.googleapis.com
gcloud services enable container.googleapis.com
Operation "operations/acat.p2-4470404856-1f44ebd8-894e-4356-bea7-b84165a57442" finished successfully.
מידע על כל API שמופעל זמין בתיעוד.
4. פריסת AlloyDB Omni ב-GKE
כדי לפרוס את AlloyDB Omni ב-GKE, צריך להכין אשכול Kubernetes בהתאם לדרישות של אופרטור AlloyDB Omni.
יצירת אשכול GKE
פריסת אשכול GKE רגיל עם קיבולת להרצת AlloyDB Omni, האופרטור וקונטיינרים של ניטור. AlloyDB Omni דורש לפחות שני מעבדים ו-8GB של זיכרון RAM. במדריך הזה נעשה שימוש בסוג המכונה n2-standard-4.
מגדירים את משתני הסביבה לפריסה:
export PROJECT_ID=$(gcloud config get-value project)
export LOCATION=us-central1
export CLUSTER_NAME=alloydb-ai-gke
export MACHINE_TYPE=n2-standard-4
יוצרים את אשכול GKE הרגיל:
gcloud container clusters create ${CLUSTER_NAME} \
  --project=${PROJECT_ID} \
  --region=${LOCATION} \
  --workload-pool=${PROJECT_ID}.svc.id.goog \
  --release-channel=rapid \
  --machine-type=${MACHINE_TYPE} \
  --num-nodes=1
הפלט הצפוי בקונסולה:
student@cloudshell:~ (test-project-001-402417)$ export PROJECT_ID=$(gcloud config get project)
export LOCATION=us-central1
export CLUSTER_NAME=alloydb-ai-gke
export MACHINE_TYPE=n2-standard-4
Your active configuration is: [test-project-001-402417]
student@cloudshell:~ (test-project-001-402417)$ gcloud container clusters create ${CLUSTER_NAME} \
  --project=${PROJECT_ID} \
  --region=${LOCATION} \
  --workload-pool=${PROJECT_ID}.svc.id.goog \
  --release-channel=rapid \
  --machine-type=${MACHINE_TYPE} \
  --num-nodes=1
Note: Your Pod address range (`--cluster-ipv4-cidr`) can accommodate at most 1008 node(s).
Creating cluster alloydb-ai-gke in us-central1... Cluster is being health-checked (Kubernetes Control Plane is healthy)...done.
Created [https://container.googleapis.com/v1/projects/test-project-001-402417/zones/us-central1/clusters/alloydb-ai-gke].
To inspect the contents of your cluster, go to: https://console.cloud.google.com/kubernetes/workload_/gcloud/us-central1/alloydb-ai-gke?project=test-project-001-402417
kubeconfig entry generated for alloydb-ai-gke.
NAME: alloydb-ai-gke
LOCATION: us-central1
MASTER_VERSION: 1.36.3-gke.1640000
MASTER_IP: 34.121.243.65
MACHINE_TYPE: n2-standard-4
NODE_VERSION: 1.36.3-gke.1640000
NUM_NODES: 3
STATUS: RUNNING
STACK_TYPE: IPV4
הכנת האשכול
מתקינים את הרכיבים הנדרשים, כמו cert-manager, בקר האישורים המקורי של Kubernetes. פרטים נוספים זמינים במסמכי התיעוד בנושא התקנת cert-manager.
Cloud Shell כולל את כלי שורת הפקודה של Kubernetes kubectl. מקבלים פרטי כניסה לאשכול באמצעות gcloud:
gcloud container clusters get-credentials ${CLUSTER_NAME} --region=${LOCATION}
התקנת cert-manager באמצעות kubectl:
kubectl apply -f https://github.com/cert-manager/cert-manager/releases/download/v1.21.1/cert-manager.yaml
הפלט הצפוי בקונסולה (הושמטו פרטים):
student@cloudshell:~$ kubectl apply -f https://github.com/cert-manager/cert-manager/releases/download/v1.21.1/cert-manager.yaml
namespace/cert-manager created
customresourcedefinition.apiextensions.k8s.io/certificaterequests.cert-manager.io created
customresourcedefinition.apiextensions.k8s.io/certificates.cert-manager.io created
customresourcedefinition.apiextensions.k8s.io/challenges.acme.cert-manager.io created
customresourcedefinition.apiextensions.k8s.io/clusterissuers.cert-manager.io created
...
validatingwebhookconfiguration.admissionregistration.k8s.io/cert-manager-webhook created
התקנת אופרטור AlloyDB Omni
מתקינים את אופרטור AlloyDB Omni באמצעות Helm.
מורידים ומתקינים את תרשים האופרטור AlloyDB Omni:
helm install alloydbomni-operator oci://gcr.io/alloydb-omni/alloydbomni-operator \
--version 1.8.1 \
--create-namespace \
--namespace alloydb-omni-system \
--atomic \
--timeout 5m
הפלט הצפוי בקונסולה (הושמטו פרטים):
student@cloudshell:~$ helm install alloydbomni-operator oci://gcr.io/alloydb-omni/alloydbomni-operator \
> --version 1.8.0 \
> --create-namespace \
> --namespace alloydb-omni-system \
> --atomic \
> --timeout 5m
Flag --atomic has been deprecated, use --rollback-on-failure instead
Pulled: gcr.io/alloydb-omni/alloydbomni-operator:1.8.0
Digest: sha256:f2d98fa7a3b08dfc1e83b811582718b94e5c017b81aade700c83e917c59f0395
NAME: alloydbomni-operator
LAST DEPLOYED: Thu Aug 27 17:57:30 2026
NAMESPACE: alloydb-omni-system
STATUS: deployed
REVISION: 1
DESCRIPTION: Install complete
TEST SUITE: None
פורסים את אשכול מסד הנתונים.
קובץ המניפסט הבא מגדיר אשכול מסדי נתונים עם googleMLExtension מופעל ומאזן עומסים פנימי:
cat << 'EOF' > my-omni.yaml
apiVersion: v1
kind: Secret
metadata:
  name: db-pw-my-omni
type: Opaque
data:
  my-omni: "VmVyeVN0cm9uZ1Bhc3N3b3Jk"
---
apiVersion: alloydbomni.dbadmin.goog/v1
kind: DBCluster
metadata:
  name: my-omni
spec:
  databaseVersion: "18.3.0"
  primarySpec:
    adminUser:
      passwordRef:
        name: db-pw-my-omni
    features:
      googleMLExtension:
        enabled: true
    resources:
      cpu: 1
      memory: 8Gi
      disks:
      - name: DataDisk
        size: 20Gi
        storageClass: standard
    dbLoadBalancerOptions:
      annotations:
        networking.gke.io/load-balancer-type: "internal"
  allowExternalIncomingTraffic: true
EOF
הערך הסודי של הסיסמה הוא ייצוג Base64 של VeryStrongPassword. בסביבות ייצור, מומלץ להשתמש ב-Google Secret Manager כדי לנהל סיסמאות. פרטים נוספים זמינים במסמכי התיעוד של Secret Manager.
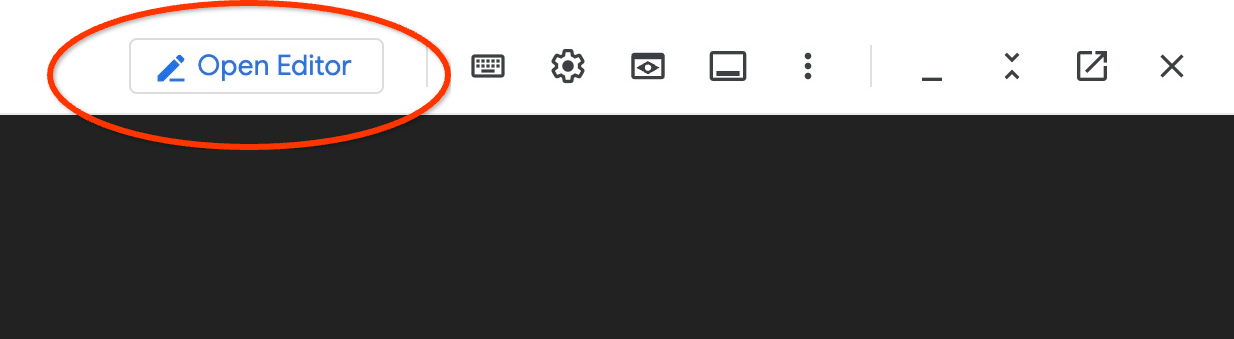
קובץ המניפסט נשמר בשם my-omni.yaml. ב-Cloud Shell, לוחצים על Open Editor (פתיחת העורך) בפינה השמאלית העליונה של חלון הטרמינל וקוראים את הקובץ.
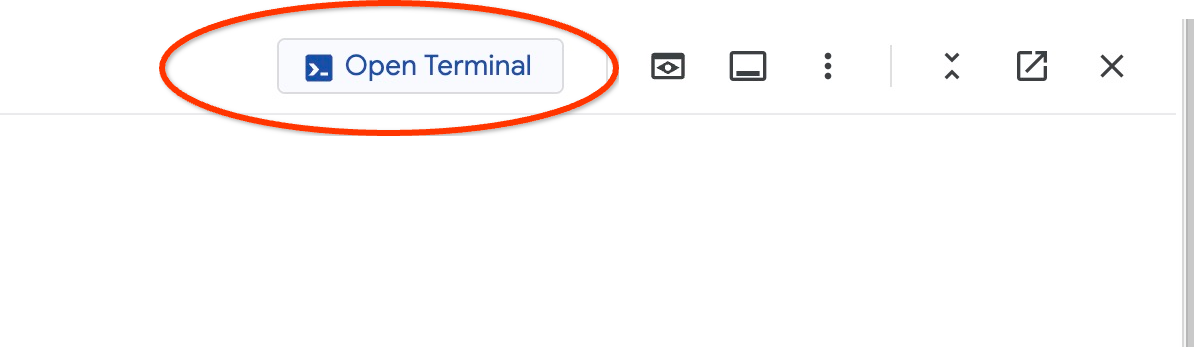
אחרי שקוראים את my-omni.yaml המניפסט, לוחצים על Open Terminal (פתיחת הטרמינל) כדי לחזור לשורת הפקודה.
החלת מניפסט my-omni.yaml:
kubectl apply -f my-omni.yaml
הפלט הצפוי בקונסולה:
secret/db-pw-my-omni created
dbcluster.alloydbomni.dbadmin.goog/my-omni created
בודקים את הסטטוס של אשכול my-omni:
kubectl get dbclusters.alloydbomni.dbadmin.goog my-omni -n default
במהלך הפריסה, אשכול מסדי הנתונים עובר דרך שלבי ההגדרה עד שהוא מגיע למצב DBClusterReady.
הפלט הצפוי בקונסולה:
$ kubectl get dbclusters.alloydbomni.dbadmin.goog my-omni -n default
NAME      PRIMARYENDPOINT   PRIMARYPHASE   DBCLUSTERPHASE   HAREADYSTATUS   HAREADYREASON
my-omni   10.131.0.33        Ready          DBClusterReady
אפשר גם לעקוב אחר פריסת האשכול באמצעות הפקודה kubectl log:
kubectl logs -l alloydbomni.internal.dbadmin.goog/dbcluster=my-omni --all-containers -f
התחברות ל-AlloyDB Omni
כשהאשכול מוכן, מתחברים ל-pod של מסד הנתונים באמצעות לקוח PostgreSQL (psql). הסיסמה היא VeryStrongPassword כפי שמוגדר ב-my-omni.yaml:
DB_CLUSTER_NAME=my-omni
DB_CLUSTER_NAMESPACE=default
DBPOD=`kubectl get pod --selector=alloydbomni.internal.dbadmin.goog/dbcluster=$DB_CLUSTER_NAME,alloydbomni.internal.dbadmin.goog/task-type=database -n $DB_CLUSTER_NAMESPACE -o jsonpath='{.items[0].metadata.name}'`
kubectl exec -ti $DBPOD -n $DB_CLUSTER_NAMESPACE -c database -- psql -h localhost -U postgres
פלט לדוגמה בקונסולה:
DB_CLUSTER_NAME=my-omni
DB_CLUSTER_NAMESPACE=default
DBPOD=`kubectl get pod --selector=alloydbomni.internal.dbadmin.goog/dbcluster=$DB_CLUSTER_NAME,alloydbomni.internal.dbadmin.goog/task-type=database -n $DB_CLUSTER_NAMESPACE -o jsonpath='{.items[0].metadata.name}'`
kubectl exec -ti $DBPOD -n $DB_CLUSTER_NAMESPACE -c database -- psql -h localhost -U postgres
Password for user postgres:
psql (18.3)
SSL connection (protocol: TLSv1.3, cipher: TLS_AES_128_GCM_SHA256, compression: off, ALPN: postgresql)
Type "help" for help.

postgres=#
כדי לצאת מהסשן של psql, מקלידים \q ומקישים על Enter:
postgres=# \q
5. פריסת מודל EmbeddingGemma ב-GKE
כדי לבדוק את השילוב של AlloyDB Omni AI עם מודלים מקומיים, פורסים מודל הטמעה באשכול GKE. במדריך הזה נעשה שימוש במודל EmbeddingGemma של Google.
יצירת מאגר צמתים למודל
כדי להריץ היקש של מודל, צריך להכין מאגר צמתים ייעודי. אפשר להשתמש במאגר צמתים עם מעבד בלבד או במאגר צמתים עם האצת GPU (כמו g2-standard-8 עם GPU של NVIDIA L4). במדריך הזה נעשה שימוש במאגר צמתים מבוסס-CPU עם סוגי מכונות c3-standard-8.
יוצרים מאגר צמתים של מעבדי CPU עם צומת יחיד:
export PROJECT_ID=$(gcloud config get-value project)
export LOCATION=us-central1
export CLUSTER_NAME=alloydb-ai-gke
gcloud container node-pools create cpupool \
  --project=${PROJECT_ID} \
  --location=${LOCATION} \
  --node-locations=${LOCATION}-a \
  --cluster=${CLUSTER_NAME} \
  --machine-type=c3-standard-8 \
  --num-nodes=1
הפלט אמור להיראות כך:
student@cloudshell$ export PROJECT_ID=$(gcloud config get project)
Your active configuration is: [pant]
export LOCATION=us-central1
export CLUSTER_NAME=alloydb-ai-gke
student@cloudshell$ gcloud container node-pools create cpupool \
>   --project=${PROJECT_ID} \
>   --location=${LOCATION} \
>   --node-locations=${LOCATION}-a \
>   --cluster=${CLUSTER_NAME} \
>   --machine-type=c3-standard-8 \
>   --num-nodes=1
Creating node pool cpupool...done.
Created [https://container.googleapis.com/v1/projects/gleb-test-short-003-483115/zones/us-central1/clusters/alloydb-ai-gke/nodePools/cpupool].
NAME     MACHINE_TYPE    DISK_SIZE_GB  NODE_VERSION
cpupool  c3-standard-8  100           1.34.1-gke.3355002
קבלת טוקן של Hugging Face
במדריך הזה נסביר איך לפרוס את מודל EmbeddingGemma מ-Hugging Face. כדי לגשת למשקלים של המודל, צריך ליצור טוקן גישה ל-Hugging Face:
- נכנסים לחשבון ב-Hugging Face או יוצרים חשבון.
- עוברים אל הפרופיל שלך > אסימוני גישה.
- לוחצים על יצירת טוקן חדש.
- מזינים שם לטוקן ובוחרים את התפקיד קריאה.
- לוחצים על Create token (יצירת טוקן) ומעתיקים את ערך הטוקן שנוצר.
- אם עוד לא עשיתם את זה, אתם צריכים לאשר את תנאי המודל בדף המודל EmbeddingGemma.
יוצרים סוד של Kubernetes שמכיל את האסימון של Hugging Face ב-Cloud Shell (מחליפים את placeholder האסימון באסימון שלכם):
export HF_TOKEN=<YOUR_HUGGING_FACE_TOKEN>
kubectl create secret generic hf-secret \
  --from-literal=hf_api_token=$HF_TOKEN \
  --dry-run=client -o yaml | kubectl apply -f -
הכנת מניפסט הפריסה
כדי לפרוס את המודל, משתמשים בחבילת הקונטיינר Text Embeddings Inference (TEI) של Hugging Face. מידע נוסף זמין במאמרי העזרה בנושא Hugging Face GKE TEI.
משכפלים את מאגר הפריסה מ-GitHub:
git clone https://github.com/huggingface/Google-Cloud-Containers
בודקים ומשנים את מניפסט ההגדרות של המעבד:
edit Google-Cloud-Containers/examples/gke/tei-deployment/cpu-config/deployment.yaml
קובץ המניפסט המעודכן לפריסת CPU:
apiVersion: apps/v1
kind: Deployment
metadata:
  name: tei-deployment
spec:
  replicas: 1
  selector:
    matchLabels:
      app: tei-server
  template:
    metadata:
      labels:
        app: tei-server
        hf.co/model: Google--embeddinggemma-300m
        hf.co/task: text-embeddings
    spec:
      containers:
        - name: tei-container
          image: ghcr.io/huggingface/text-embeddings-inference:cpu-latest
          resources:
            requests:
              cpu: "6"
              memory: "24Gi"
            limits:
              cpu: "6"
              memory: "24Gi"
          env:
            - name: MODEL_ID
              value: google/embeddinggemma-300m
            - name: NUM_SHARD
              value: "1"
            - name: PORT
              value: "8080"
            - name: HF_TOKEN
              valueFrom:
                secretKeyRef:
                  name: hf-secret
                  key: hf_api_token
          volumeMounts:
            - mountPath: /tmp
              name: tmp
      volumes:
        - name: tmp
          emptyDir: {}
      nodeSelector:
        cloud.google.com/machine-family: "c3"
מקישים על ctrl+s כדי לשמור את השינויים וחוזרים למסוף.
פריסת המודל
מחילים את המניפסט כדי לפרוס את שרת ה-TEI:
kubectl apply -f Google-Cloud-Containers/examples/gke/tei-deployment/cpu-config
עוקבים אחרי הפריסה עד שהיא מגיעה למצב מוכן:
printf "Waiting for model to load..."; until kubectl logs -l app=tei-server --tail=50 2>/dev/null | grep -q "Ready"; do printf "."; sleep 3; done; printf '\n\033[1;32m========================================\n[SUCCESS] Model is loaded and ready!\nYou can now proceed to the next step.\n========================================\033[0m\n'
בודקים את שירות Kubernetes: tei-service
kubectl get service tei-service
הפלט אמור להיראות כך:
student@cloudshell$ kubectl get service tei-service
NAME          TYPE        CLUSTER-IP      EXTERNAL-IP   PORT(S)    AGE
tei-service   ClusterIP   34.118.233.48   <none>        8080/TCP   10m
השירות CLUSTER-IP מטפל בבקשות באופן פנימי בכתובת http://34.118.233.48:8080/embed.
בודקים את נקודת הקצה של המודל באופן מקומי באמצעות kubectl port-forward:
kubectl port-forward service/tei-service 8080:8080
פותחים כרטיסייה שנייה ב-Cloud Shell על ידי לחיצה על + בחלק העליון של הטרמינל:
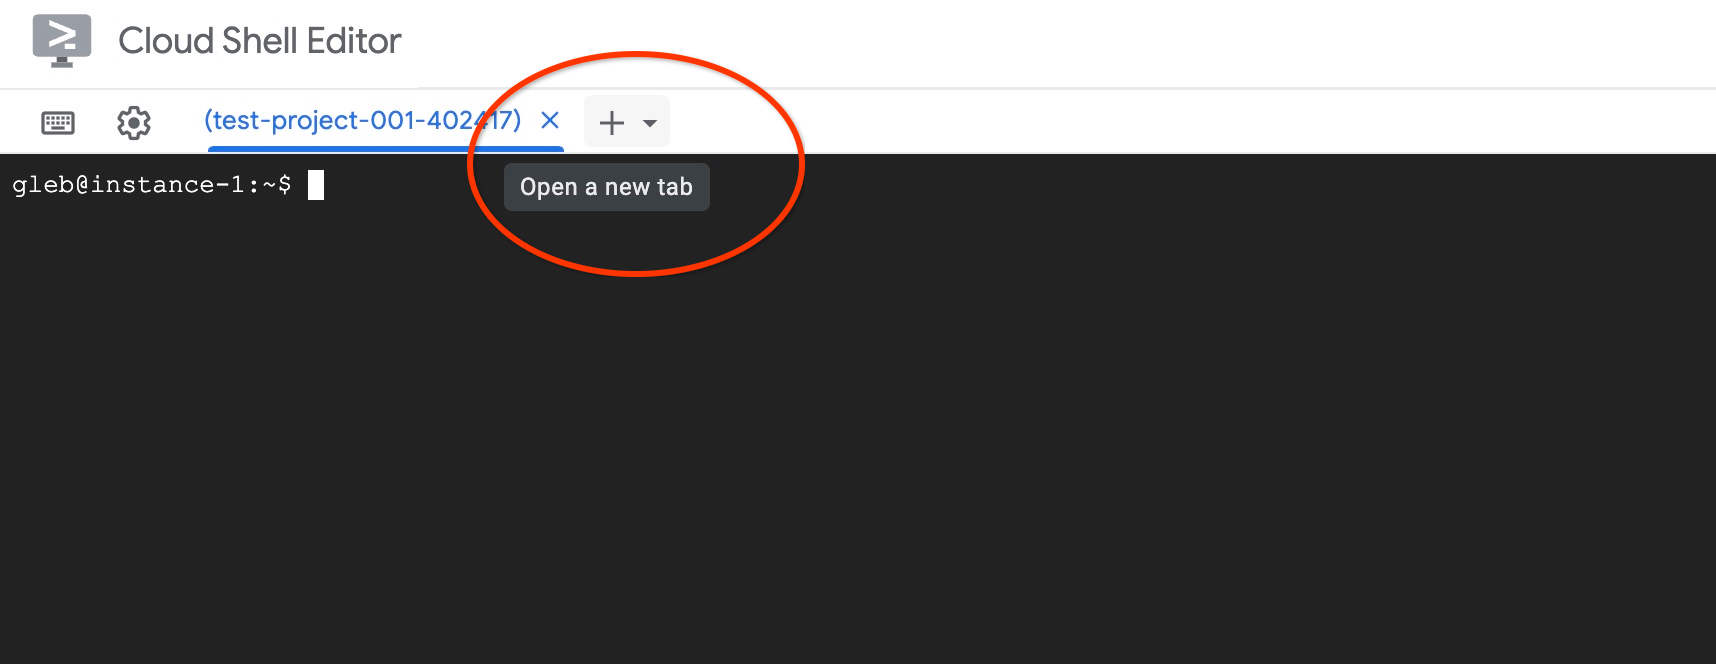
בכרטיסייה החדשה, בודקים את הטמעת הדור עם curl:
curl http://localhost:8080/embed \
  -X POST \
  -d '{"inputs":"Test"}' \
  -H 'Content-Type: application/json'
הפלט הצפוי (מערך וקטורים):
curl http://localhost:8080/embed \
>     -X POST \
>     -d '{"inputs":"Test"}' \
>     -H 'Content-Type: application/json'
[[-0.018975832,0.0071419072,0.06347208,0.022992613,0.014205903
...
-0.03677433,0.01636146,0.06731572]]
עוצרים את העברת הפורטים בכרטיסייה הראשונה בלחיצה על ctrl+c.
6. רישום מודל ההטמעה ב-AlloyDB Omni
כדי להשתמש במודל שנפרס מ-AlloyDB Omni, צריך ליצור מסד נתונים, להגדיר פונקציות טרנספורמציה ולרשום את נקודת הקצה של המודל.
יצירת מכונה וירטואלית של לקוח ומסד נתונים
יוצרים מכונה וירטואלית ב-Compute Engine באותו VPC שתשמש כמארח קפיצה של לקוח:
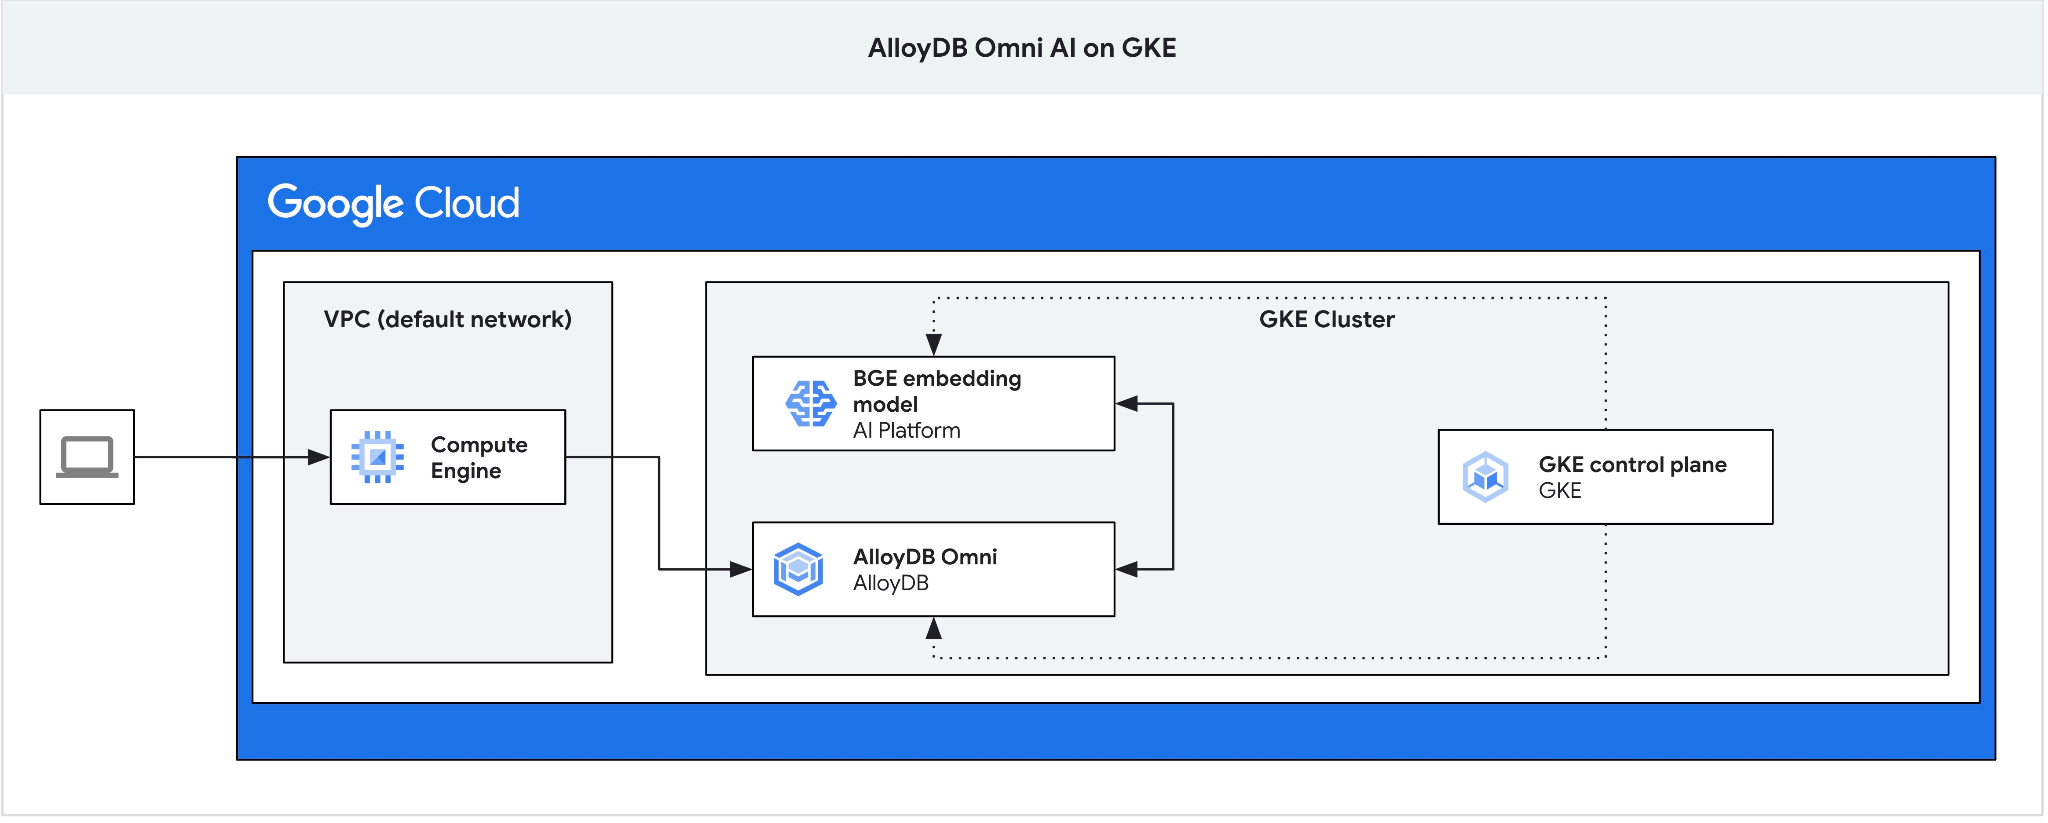
ב-Cloud Shell, יוצרים את המכונה הווירטואלית של הלקוח:
export ZONE=us-central1-a
gcloud compute instances create instance-1 \
  --zone=$ZONE
מאחזרים את כתובת ה-IP של נקודת הקצה של AlloyDB Omni:
echo "INSTANCE_IP=$(kubectl get dbclusters.alloydbomni.dbadmin.goog my-omni -n default -o jsonpath='{.status.primary.endpoint}')"
הפלט אמור להיראות כך:
INSTANCE_IP=10.128.0.33
הערך של INSTANCE_IP הוא כתובת ה-IP של מאזן העומסים הפנימי עבור אשכול AlloyDB Omni. בדוגמה הזו, זה 10.131.0.33.
מתחברים למופע של המכונה הווירטואלית באמצעות SSH:
gcloud compute ssh instance-1 --zone=$ZONE
בסשן ה-SSH ב-instance-1, מתקינים את לקוח PostgreSQL:
sudo apt-get update && sudo apt-get install --yes postgresql-client
מייצאים את כתובת ה-IP של מאזן העומסים של AlloyDB Omni (מחליפים בכתובת ה-IP שלכם PRIMARYENDPOINT):
export INSTANCE_IP=10.131.0.33
מתחברים ל-AlloyDB Omni באמצעות psql (הסיסמה היא VeryStrongPassword):
psql "host=$INSTANCE_IP user=postgres sslmode=require"
בסשן psql, יוצרים את מסד הנתונים demo:
CREATE DATABASE demo;
עוברים למסד הנתונים demo:
\c demo
יצירת פונקציות לשינוי
נקודות קצה מותאמות אישית להטמעה דורשות פונקציות של טרנספורמציה של קלט ופלט כדי להתאים את פורמטי הנתונים בין AlloyDB Omni לבין ה-API של המודל.
יוצרים את פונקציית השינוי של הקלט:
CREATE OR REPLACE FUNCTION tei_text_input_transform(model_id VARCHAR(100), input_text TEXT)
RETURNS JSON
LANGUAGE plpgsql
AS $$
DECLARE
  transformed_input JSON;
BEGIN
  SELECT json_build_object('inputs', input_text, 'truncate', true)::JSON INTO transformed_input;
  RETURN transformed_input;
END;
$$;
הפלט אמור להיראות כך:
demo=# CREATE OR REPLACE FUNCTION tei_text_input_transform(model_id VARCHAR(100), input_text TEXT)
RETURNS JSON
LANGUAGE plpgsql
AS $$
DECLARE
  transformed_input JSON;
BEGIN
  SELECT json_build_object('inputs', input_text, 'truncate', true)::JSON INTO transformed_input;
  RETURN transformed_input;
END;
$$;
CREATE FUNCTION
demo=#
יוצרים את פונקציית השינוי של הפלט כדי לנתח את התגובה של מערך הווקטורים:
CREATE OR REPLACE FUNCTION tei_text_output_transform(model_id VARCHAR(100), response_json JSON)
RETURNS REAL[]
LANGUAGE plpgsql
AS $$
DECLARE
  transformed_output REAL[];
BEGIN
  SELECT ARRAY(SELECT json_array_elements_text(response_json->0)) INTO transformed_output;
  RETURN transformed_output;
END;
$$;
הפלט אמור להיראות כך:
demo=# CREATE OR REPLACE FUNCTION tei_text_output_transform(model_id VARCHAR(100), response_json JSON)
RETURNS REAL[]
LANGUAGE plpgsql
AS $$
DECLARE
  transformed_output REAL[];
BEGIN
  SELECT ARRAY(SELECT json_array_elements_text(response_json->0)) INTO transformed_output;
  RETURN transformed_output;
END;
$$;
CREATE FUNCTION
demo=#
רישום המודל
רושמים את המודל ב-AlloyDB Omni באמצעות ההליך google_ml.create_model. מציינים את http://tei-service:8080/embed בתור model_request_url כדי לנתב בקשות לשירות של אשכול Kubernetes:
CALL
  google_ml.create_model(
    model_id => 'embeddinggemma',
    model_request_url => 'http://tei-service:8080/embed',
    model_provider => 'custom',
    model_type => 'text_embedding',
    model_in_transform_fn => 'tei_text_input_transform',
    model_out_transform_fn => 'tei_text_output_transform');
הפלט אמור להיראות כך:
demo=# CALL
  google_ml.create_model(
    model_id => 'embeddinggemma',
    model_request_url => 'http://tei-service:8080/embed',
    model_provider => 'custom',
    model_type => 'text_embedding',
    model_in_transform_fn => 'tei_text_input_transform',
    model_out_transform_fn => 'tei_text_output_transform');
CALL
demo=#
בודקים את המודל הרשום באמצעות שאילתת SQL לדוגמה:
SELECT google_ml.embedding('embeddinggemma', 'What is AlloyDB Omni?');
הפונקציה מחזירה את הייצוג של מערך המספרים הממשיים שנוצר על ידי מודל EmbeddingGemma המקומי שפועל ב-GKE.
לוחצים על q כדי לחזור להנחיה של סשן psql.
כדי לצאת מהסשן של psql:
\q
7. בדיקת המודל באמצעות נתונים לדוגמה
טעינת נתונים לדוגמה
במדריך הזה נעשה שימוש במערך הנתונים הקמעונאי של Cymbal כדי להדגים חיפוש של דמיון וקטורי. תשתמשו ב-Google Cloud SDK ובלקוח PostgreSQL כדי לייבא נתונים ל-AlloyDB Omni.
בסשן ה-SSH ב-instance-1, מתחברים למסד הנתונים של ההדגמה ומפעילים את התוסף vector:
psql "host=$INSTANCE_IP user=postgres sslmode=require dbname=demo"
בסשן psql:
CREATE EXTENSION IF NOT EXISTS vector;
יוצאים מהסשן של psql:
\q
מורידים את הסכימה ומחילים אותה כדי ליצור טבלאות במסד הנתונים demo:
gcloud storage cat gs://cloud-training/gcc/gcc-tech-004/cymbal_demo_schema.sql |psql "host=$INSTANCE_IP user=postgres dbname=demo"
הפלט אמור להיראות כך:
student@cloudshell:~$ gcloud storage cat gs://cloud-training/gcc/gcc-tech-004/cymbal_demo_schema.sql |psql "host=$INSTANCE_IP user=postgres dbname=demo"
Password for user postgres:
SET
SET
SET
SET
SET
 set_config
------------

(1 row)

SET
SET
SET
SET
SET
SET
CREATE TABLE
ALTER TABLE
CREATE TABLE
ALTER TABLE
CREATE TABLE
ALTER TABLE
CREATE TABLE
ALTER TABLE
CREATE SEQUENCE
ALTER TABLE
ALTER SEQUENCE
ALTER TABLE
ALTER TABLE
ALTER TABLE
student@cloudshell:~$
בודקים את הטבלאות שנוצרו:
psql "host=$INSTANCE_IP user=postgres dbname=demo" -c "\dt+"
הפלט אמור להיראות כך:
student@cloudshell:~$ psql "host=$INSTANCE_IP user=postgres dbname=demo" -c "\dt+"
Password for user postgres:
                                           List of relations
 Schema |       Name       | Type  |  Owner   | Persistence | Access method |    Size    | Description
--------+------------------+-------+----------+-------------+---------------+------------+-------------
 public | cymbal_embedding | table | postgres | permanent   | heap          | 8192 bytes |
 public | cymbal_inventory | table | postgres | permanent   | heap          | 8192 bytes |
 public | cymbal_products  | table | postgres | permanent   | heap          | 8192 bytes |
 public | cymbal_stores    | table | postgres | permanent   | heap          | 8192 bytes |
(4 rows)
טוענים נתונים לטבלה cymbal_products:
gcloud storage cat gs://cloud-training/gcc/gcc-tech-004/cymbal_products.csv |psql "host=$INSTANCE_IP user=postgres dbname=demo" -c "\copy cymbal_products from stdin csv header"
הפלט אמור להיראות כך:
student@cloudshell:~$ gcloud storage cat gs://cloud-training/gcc/gcc-tech-004/cymbal_products.csv |psql "host=$INSTANCE_IP user=postgres dbname=demo" -c "\copy cymbal_products from stdin csv header"
COPY 941
student@cloudshell:~$
הנה דוגמה לכמה שורות מהטבלה cymbal_products.
psql "host=$INSTANCE_IP user=postgres dbname=demo" -c "SELECT uniq_id,left(product_name,30),left(product_description,50),sale_price FROM cymbal_products limit 3"
הפלט אמור להיראות כך:
student@cloudshell:~$ psql "host=$INSTANCE_IP user=postgres dbname=demo" -c "SELECT uniq_id,left(product_name,30),left(product_description,50),sale_price FROM cymbal_products limit 3"
Password for user postgres:
             uniq_id              |              left              |                        left                        | sale_price
----------------------------------+--------------------------------+----------------------------------------------------+------------
 a73d5f754f225ecb9fdc64232a57bc37 | Laundry Tub Strainer Cup       |   Laundry tub strainer cup Chrome For 1-.50, drain |      11.74
 41b8993891aa7d39352f092ace8f3a86 | LED Starry Star Night Light La |  LED Starry Star Night Light Laser Projector 3D Oc |      46.97
 ed4a5c1b02990a1bebec908d416fe801 | Surya Horizon HRZ-1060 Area Ru |  The 100% polypropylene construction of the Surya  |       77.4
(3 rows)
student@cloudshell:~$
טוענים נתונים לטבלה cymbal_inventory:
gcloud storage cat gs://cloud-training/gcc/gcc-tech-004/cymbal_inventory.csv |psql "host=$INSTANCE_IP user=postgres dbname=demo" -c "\copy cymbal_inventory from stdin csv header"
הפלט אמור להיראות כך:
student@cloudshell:~$ gcloud storage cat gs://cloud-training/gcc/gcc-tech-004/cymbal_inventory.csv |psql "host=$INSTANCE_IP user=postgres dbname=demo" -c "\copy cymbal_inventory from stdin csv header"
Password for user postgres:
COPY 263861
student@cloudshell:~$
הנה דוגמה לכמה שורות מהטבלה cymbal_inventory.
psql "host=$INSTANCE_IP user=postgres dbname=demo" -c "SELECT * FROM cymbal_inventory LIMIT 3"
פלט:
student@cloudshell:~$ psql "host=$INSTANCE_IP user=postgres dbname=demo" -c "SELECT * FROM cymbal_inventory LIMIT 3"
Password for user postgres:
 store_id |             uniq_id              | inventory
----------+----------------------------------+-----------
     1583 | adc4964a6138d1148b1d98c557546695 |         5
     1490 | adc4964a6138d1148b1d98c557546695 |         4
     1492 | adc4964a6138d1148b1d98c557546695 |         3
(3 rows)
student@cloudshell:~$
טוענים נתונים לטבלה cymbal_stores:
gcloud storage cat gs://cloud-training/gcc/gcc-tech-004/cymbal_stores.csv |psql "host=$INSTANCE_IP user=postgres dbname=demo" -c "\copy cymbal_stores from stdin csv header"
הפלט הצפוי בקונסולה:
student@cloudshell:~$ gcloud storage cat gs://cloud-training/gcc/gcc-tech-004/cymbal_stores.csv |psql "host=$INSTANCE_IP user=postgres dbname=demo" -c "\copy cymbal_stores from stdin csv header"
Password for user postgres:
COPY 4654
student@cloudshell:~$
הנה דוגמה לכמה שורות מהטבלה cymbal_stores.
psql "host=$INSTANCE_IP user=postgres dbname=demo" -c "SELECT store_id, name, zip_code FROM cymbal_stores limit 3"
פלט:
student@cloudshell:~$ psql "host=$INSTANCE_IP user=postgres dbname=demo" -c "SELECT store_id, name, zip_code FROM cymbal_stores limit 3"
Password for user postgres:
 store_id |       name        | zip_code
----------+-------------------+----------
     1990 | Mayaguez Store    |      680
     2267 | Ware Supercenter  |     1082
     4359 | Ponce Supercenter |      780
(3 rows)
student@cloudshell:~$
יצירת הטמעות
מתחברים למסד הנתונים של ההדגמה באמצעות psql ויוצרים הטמעות למוצרים שמתוארים בטבלה cymbal_products על סמך תיאורי המוצרים.
מתחברים למסד הנתונים של ההדגמה:
psql "host=$INSTANCE_IP user=postgres sslmode=require dbname=demo"
בעמודה embedding מסוג vector מאחסנים את הטמעות הטקסט שנוצרו לתיאורי מוצרים.
הפעלת תזמון שאילתות:
\timing
יוצרים הטבעות לכל תיאור מוצר ומאחסנים אותן בטבלה cymbal_embedding:
INSERT INTO cymbal_embedding (uniq_id, embedding)
SELECT uniq_id, google_ml.embedding('embeddinggemma', product_description)::vector
FROM cymbal_products;
הפלט אמור להיראות כך:
demo=# INSERT INTO cymbal_embedding(uniq_id,embedding)  SELECT uniq_id, google_ml.embedding('embeddinggemma',product_description)::vector FROM cymbal_products;
INSERT 0 941
Time: 497878.136 ms (08:17.878)
demo=#
הרצת שאילתות של חיפוש סמנטי
בסשן psql, מוצאים את חמשת המוצרים המובילים שתואמים לשאלה "What kind of fruit trees grow well here?" באמצעות מרחק קוסינוס (<=>):
SELECT
    cp.product_name,
    left(cp.product_description, 80) AS description,
    cp.sale_price,
    cs.zip_code,
    (ce.embedding <=> google_ml.embedding('embeddinggemma', 'What kind of fruit trees grow well here?')::vector) AS distance
FROM
    cymbal_products cp
JOIN cymbal_embedding ce ON ce.uniq_id = cp.uniq_id
JOIN cymbal_inventory ci ON ci.uniq_id = cp.uniq_id
JOIN cymbal_stores cs ON cs.store_id = ci.store_id
WHERE
    ci.inventory > 0
    AND cs.store_id = 1583
ORDER BY
    distance ASC
LIMIT 5;
הפלט אמור להיראות כך:
demo=# SELECT
        cp.product_name,
        left(cp.product_description,80) as description,
        cp.sale_price,
        cs.zip_code,
        (ce.embedding <=> google_ml.embedding('embeddinggemma','What kind of fruit trees grow well here?')::vector) as distance
FROM
        cymbal_products cp
JOIN cymbal_embedding ce on ce.uniq_id=cp.uniq_id
JOIN cymbal_inventory ci on ci.uniq_id=cp.uniq_id
JOIN cymbal_stores cs on cs.store_id=ci.store_id
WHERE
    ci.inventory > 0
    AND cs.store_id = 1583
ORDER BY
    distance ASC
LIMIT 5;
     product_name      |                                   description                                    | sale_price | zip_code |      distance
-----------------------+----------------------------------------------------------------------------------+------------+----------+--------------------
 Cherry Tree           | This is a beautiful cherry tree that will produce delicious cherries. It is an d |      75.00 |    93230 | 0.5210549378080666
 California Lilac      | This is a beautiful lilac tree that can grow to be over 10 feet tall. It is an d |       5.00 |    93230 | 0.5639421771781971
 Toyon                 | This is a beautiful toyon tree that can grow to be over 20 feet tall. It is an e |      10.00 |    93230 | 0.5670010914504852
 Rose Bush             | This is a beautiful rose bush that will produce fragrant roses. It is a perennia |      50.00 |    93230 | 0.5731542622882957
 California Peppertree | This is a beautiful peppertree that can grow to be over 30 feet tall. It is an e |      25.00 |    93230 | 0.5750934653011995
(5 rows)

Time: 83.610 ms
demo=#
השאילתה רצה במשך 83 אלפיות השנייה והחזירה רשימה של עצים מהטבלה cymbal_products שתואמים לבקשה, ושיש מלאי שלהם בחנות מספר 1583.
יצירת אינדקס של רשת עצבית מלאכותית
אם קבוצת הנתונים קטנה, קל להשתמש בחיפוש מדויק שסורק את כל ההטמעות, אבל ככל שהנתונים גדלים, זמן הטעינה והתגובה מתארכים. כדי לשפר את הביצועים, אפשר ליצור אינדקסים על נתוני ההטמעה. הנה דוגמה כיצד לעשות זאת באמצעות אינדקס Google ScaNN עבור נתוני וקטור.
אם החיבור למסד הנתונים של ההדגמה אבד, צריך להתחבר אליו מחדש:
psql "host=$INSTANCE_IP user=postgres sslmode=require dbname=demo"
מפעילים את התוסף alloydb_scann:
CREATE EXTENSION IF NOT EXISTS alloydb_scann;
יוצרים את אינדקס ScaNN בעמודה embedding:
CREATE INDEX cymbal_products_embeddings_scann ON cymbal_embedding
  USING scann (embedding cosine)
  WITH (num_leaves=10, max_num_levels = 1);
מריצים מחדש את שאילתת החיפוש הסמנטי כדי להשוות את ביצועי ההרצה:
SELECT
    cp.product_name,
    left(cp.product_description, 80) AS description,
    cp.sale_price,
    cs.zip_code,
    (ce.embedding <=> google_ml.embedding('embeddinggemma', 'What kind of fruit trees grow well here?')::vector) AS distance
FROM
    cymbal_products cp
JOIN cymbal_embedding ce ON ce.uniq_id = cp.uniq_id
JOIN cymbal_inventory ci ON ci.uniq_id = cp.uniq_id
JOIN cymbal_stores cs ON cs.store_id = ci.store_id
WHERE
    ci.inventory > 0
    AND cs.store_id = 1583
ORDER BY
    distance ASC
LIMIT 5;
הפלט אמור להיראות כך:
demo=# SELECT
    cp.product_name,
    left(cp.product_description,80) as description,
    cp.sale_price,
    cs.zip_code,
    (ce.embedding <=> google_ml.embedding('embeddinggemma', 'What kind of fruit trees grow well here?')::vector) AS distance
FROM
    cymbal_products cp
JOIN cymbal_embedding ce ON ce.uniq_id = cp.uniq_id
JOIN cymbal_inventory ci ON ci.uniq_id = cp.uniq_id
JOIN cymbal_stores cs ON cs.store_id = ci.store_id
WHERE
    ci.inventory > 0
    AND cs.store_id = 1583
ORDER BY
    distance ASC
LIMIT 5;
     product_name      |                                   description                                    | sale_price | zip_code |      distance
-----------------------+----------------------------------------------------------------------------------+------------+----------+--------------------
 Cherry Tree           | This is a beautiful cherry tree that will produce delicious cherries. It is an d |      75.00 |    93230 | 0.5210549378080666
 California Lilac      | This is a beautiful lilac tree that can grow to be over 10 feet tall. It is an d |       5.00 |    93230 | 0.5639421771781971
 Toyon                 | This is a beautiful toyon tree that can grow to be over 20 feet tall. It is an e |      10.00 |    93230 | 0.5670010914504852
 Rose Bush             | This is a beautiful rose bush that will produce fragrant roses. It is a perennia |      50.00 |    93230 | 0.5731542622882957
 California Peppertree | This is a beautiful peppertree that can grow to be over 30 feet tall. It is an e |      25.00 |    93230 | 0.5750934653011995
(5 rows)

Time: 64.783 ms
זמן ביצוע השאילתה התקצר מעט והרווח יהיה מורגש יותר עם מערכי נתונים גדולים יותר. הנתונים המוחזרים צריכים להיות זהים או דומים מאוד למה שקיבלנו ללא אינדקס.
אפשר לנסות שאילתות אחרות ולקרוא מידע נוסף על אופטימיזציה של אינדקס וקטורי במסמכי התיעוד.
יציאה מסשן psql:
\q
כדי לחזור אל Google Cloud Shell, מתנתקים מהסשן של instance-1 SSH על ידי הקשה על CTRL+D או הקלדה של exit.
8. פריסת Gemma באמצעות vLLM
הוספת מאגר צמתים ל-Gemma
קודם כל, בודקים אילו סוגי צמתים זמינים באזור שלכם:
export LOCATION=us-central1-a
gcloud compute accelerator-types list --filter="zone:${LOCATION}"
תוצג רשימה של סוגי מאיצים זמינים, כולל מאיץ nvidia-l4. עכשיו יוצרים מאגר צמתים עם סוג המאיץ nvidia-l4:
export PROJECT_ID=$(gcloud config get project)
export LOCATION=us-central1
export CLUSTER_NAME=alloydb-ai-gke
gcloud container node-pools create gpupool \
    --accelerator type=nvidia-l4,count=1,gpu-driver-version=latest \
    --project=${PROJECT_ID} \
    --location=${LOCATION} \
    --node-locations=${LOCATION}-a \
    --cluster=${CLUSTER_NAME} \
    --machine-type=g2-standard-8 \
    --num-nodes=1
יוצרים מניפסט פריסה למודל Google Gemini 4 12B באמצעות vLLM:
cat << 'EOF' > gemma-12b-gpu-vllm-deployment.yaml
apiVersion: apps/v1
kind: Deployment
metadata:
  name: gemma-12b-gpu-vllm-deployment
spec:
  replicas: 1
  selector:
    matchLabels:
      app: gemma-12b-gpu-vllm
  template:
    metadata:
      labels:
        app: gemma-12b-gpu-vllm
        ai.gke.io/model: gemma-4-12b-it
        ai.gke.io/inference-server: vllm
        examples.ai.gke.io/source: user-guide
    spec:
      containers:
      - name: inference-server
        image: us-docker.pkg.dev/vertex-ai/vertex-vision-model-garden-dockers/pytorch-vllm-serve:latest
        resources:
          requests:
            cpu: "4"
            memory: "16Gi"
            ephemeral-storage: "30Gi"
            nvidia.com/gpu: "1"
          limits:
            cpu: "8"
            memory: "24Gi"
            ephemeral-storage: "30Gi"
            nvidia.com/gpu: "1"
        command: ["python3", "-m", "vllm.entrypoints.api_server"]
        args:
          - --model=$(MODEL_ID)
          - --host=0.0.0.0
          - --port=8000
          - --tensor-parallel-size=1
          - --enable-log-requests
          - --enable-chunked-prefill
          - --enable-prefix-caching
          - --enable-auto-tool-choice
          - --generation-config=auto
          - --tool-call-parser=gemma4
          - --dtype=bfloat16
          - --max-num-seqs=16
          - --max-model-len=32768
          - --gpu-memory-utilization=0.95
          - --reasoning-parser=gemma4
          - --trust-remote-code
          - --quantization=fp8
        env:
        - name: LD_LIBRARY_PATH
          value: ${LD_LIBRARY_PATH}:/usr/local/nvidia/lib64
        - name: MODEL_ID
          value: google/gemma-4-12b-it
        - name: HF_TOKEN
          valueFrom:
            secretKeyRef:
              name: hf-secret
              key: hf_api_token
        volumeMounts:
        - mountPath: /dev/shm
          name: dshm
      volumes:
      - name: dshm
        emptyDir:
            medium: Memory
      nodeSelector:
        cloud.google.com/gke-accelerator: nvidia-l4
        cloud.google.com/gke-gpu-driver-version: latest
---
apiVersion: v1
kind: Service
metadata:
  name: gemma-12b-gpu-vllm-service
spec:
  selector:
    app: gemma-12b-gpu-vllm
  type: ClusterIP
  ports:
    - protocol: TCP
      port: 8000
      targetPort: 8000
EOF
מחילים את הפריסה gemma-12b-gpu-vllm-deployment.yaml שנשמרה:
kubectl apply -f gemma-12b-gpu-vllm-deployment.yaml
הפלט אמור להיראות כך:
$ kubectl apply -f gemma-12b-gpu-vllm-deployment.yaml
deployment.apps/gemma-12b-gpu-vllm-deployment created
service/gemma-12b-gpu-vllm-service created
מחכים עד שהפריסה תסתיים והמודל ייטען. הפעולה עשויה להימשך כמה דקות.
printf "Waiting for model to load..."; until kubectl logs -l app=gemma-12b-gpu-vllm --tail=50 2>/dev/null | grep -q "Application startup complete"; do printf "."; sleep 3; done; printf '\n\033[1;32m========================================\n[SUCCESS] Model is loaded and ready!\nYou can now proceed to the next step.\n========================================\033[0m\n'
הפלט אמור להיראות כך:
Waiting for model to load...
========================================
[SUCCESS] Model is loaded and ready!
You can now proceed to the next step.
========================================
בודקים את המודל. מפעילים העברת יציאות כדי לגשת למודל:
kubectl port-forward svc/gemma-12b-gpu-vllm-service 8090:8000
בחלון מסוף אחר, משתמשים ב-curl כדי לשלוח פרומפט למודל:
curl http://localhost:8090/v1/chat/completions \
  -H "Content-Type: application/json" \
  -d '{
    "messages": [
      {"role": "system", "content": "You are a helpful assistant running on GKE."},
      {"role": "user", "content": "What is AlloyDB Omni."}
    ],
    "temperature": 0.7
  }' | jq -r '.choices[0].message.content'
הפלט אמור להיראות כך:
  % Total    % Received % Xferd  Average Speed   Time    Time     Time  Current
                                 Dload  Upload   Total   Spent    Left  Speed
100  3957  100  3761  100   196     85      4  0:00:49  0:00:43  0:00:06   830
**AlloyDB Omni** is a fully managed, PostgreSQL-compatible database engine from Google Cloud that can be run **on-premises, in other clouds, or in your own data centers.**

To understand it simply: It allows you to run the high-performance, enterprise-grade capabilities of Google's **AlloyDB** (a cloud-native database) on your own infrastructure.

Here is a breakdown of what makes it significant:

### 1. The "Best of Both Worlds" Architecture
Normally, you have to choose between:
*   **Managed Cloud Databases:** Easy to scale and manage, but you are locked into the cloud provider's infrastructure.
*   **Self-Managed Databases:** You have full control over the hardware/location, but you are responsible for scaling, patching, and high availability.

**AlloyDB Omni** bridges this gap. It provides the advanced features of a cloud-native database (like intelligent indexing, high availability, and massive scalability) while allowing you to run it anywhere.
אם העברת הפורטים עדיין פועלת, לוחצים על Ctrl+C כדי להפסיק אותה במסוף הראשון.
9. רישום מודל Gemma 4 ב-AlloyDB Omni
רושמים את מודל Gemma 12B ב-AlloyDB Omni באמצעות ההליך google_ml.create_model. מציינים את http://gemma-12b-gpu-vllm-service:8000/v1/chat/completions בתור model_request_url כדי לנתב בקשות לשירות של אשכול Kubernetes:
מאחזרים את כתובת ה-IP של נקודת הקצה של AlloyDB Omni:
echo "INSTANCE_IP=$(kubectl get dbclusters.alloydbomni.dbadmin.goog my-omni -n default -o jsonpath='{.status.primary.endpoint}')"
מתחברים למופע של המכונה הווירטואלית באמצעות SSH:
export ZONE=us-central1-a
gcloud compute ssh instance-1 --zone=$ZONE
אחרי שמתחברים ל-VM, מייצאים את המשתנה INSTANCE_IP מהשלב הקודם (הערך 10.128.0.33 ניתן כדוגמה – צריך להחליף אותו בכתובת ה-IP שלכם):
export INSTANCE_IP=10.128.0.33
ייצוא סיסמה של AlloyDB:
export PGPASSWORD=VeryStrongPassword
מתחברים למסד הנתונים של demo:
psql "host=$INSTANCE_IP user=postgres sslmode=require dbname=demo"
בסשן psql, רושמים את המודל:
CALL
  google_ml.create_model(
    model_id => 'gemma-12b-gpu',
    model_request_url => 'http://gemma-12b-gpu-vllm-service:8000/v1/chat/completions',
    model_provider => 'custom',
    model_type => 'llm');
בודקים את המודל באמצעות שאילתת SQL לדוגמה:
SELECT google_ml.predict_row(
  model_id => 'gemma-12b-gpu',
  request_body => json_build_object(
    'messages', json_build_array(
      json_build_object('role', 'user', 'content', 'What is AlloyDB Omni?'))))->'choices'->0->'message'->'content';
מקישים על q כדי לצאת מחלון התוצאות ולחזור להנחיה psql.
שילוב של חיפוש וקטורי עם LLM RAG ב-AlloyDB Omni
משתמשים בחיפוש וקטורי עם בקשת LLM כדי להדגים RAG (יצירה משולבת-אחזור) עם LLM.
מריצים את שאילתת ה-SQL ב-plsql:
WITH trees AS (
SELECT
        cp.product_name,
        cp.product_description AS description,
        cp.sale_price,
        cs.zip_code,
        cp.uniq_id AS product_id
FROM
    cymbal_products cp
JOIN cymbal_embedding ce ON ce.uniq_id = cp.uniq_id
JOIN cymbal_inventory ci ON ci.uniq_id = cp.uniq_id
JOIN cymbal_stores cs ON cs.store_id = ci.store_id
WHERE
        ci.inventory>0
        AND cs.store_id = 1583
ORDER BY
        (ce.embedding <=> embedding('embeddinggemma',
        'What kind of fruit trees grow well here?')::vector) ASC
LIMIT 1),
prompt AS (
SELECT
        'You are a friendly advisor helping to find a product based on the customer''s needs.
Based on the client request we have loaded a list of products closely related to search.
The list in JSON format with list of values like {"product_name":"name","product_description":"some description","sale_price":10}
Here is the list of products:' || json_agg(trees) || 'The customer asked "What kind of fruit trees grow well here?"
You should give information about the product, price and some supplemental information' AS prompt_text
FROM
        trees),
response AS (
SELECT
        google_ml.predict_row(
          model_id =>'gemma-12b-gpu',
          request_body => json_build_object(
            'messages', json_build_array(
              json_build_object('role', 'user', 'content',prompt_text)
            )))->'choices'->0->'message'->'content' AS resp
FROM
        prompt)
SELECT
REPLACE(resp::text, '\n', CHR(10))
FROM
        response;
הפלט אמור להיראות כך:
----------------------------------------------------------------------------------------------------------------------------------------------
 "Hello there! I'd be happy to help you find the perfect tree for your garden.                                                               +
                                                                                                                                             +
 Based on your location, we have a wonderful option that would grow beautifully in your area:                                                +
                                                                                                                                             +
 **Cherry Tree**                                                                                                                             +
 *   **Price:** $75.00                                                                                                                       +
 *   **Description:** This is a stunning deciduous tree that not only provides a beautiful landscape but also produces delicious cherries.   +
 *   **Supplemental Information:**                                                                                                           +
     *   **Growth:** It grows to about 15 feet tall.                                                                                         +
     *   **Appearance:** You can look forward to dark green leaves in the summer that transform into a vibrant red in the fall.              +
     *   **Benefits:** It's a great choice if you're looking for both fruit and extra shade or privacy in your yard.                         +
     *   **Care Tips:** It performs best in a cool, moist climate with sandy soil. Since you are in a suitable zone, it should thrive nicely!+
                                                                                                                                             +
 Would you like more details on how to plant this, or would you like to proceed with an order?"
(1 row)
השאילתה משלימה את הפרומפט ל-LLM באמצעות תוצאות החיפוש הווקטורי.
אפשר לנסות שאילתות אחרות ולהתנסות בדפוסי RAG. היתרון של הארכיטקטורה המוצגת הוא עצמאותה המלאה. הנתונים לא נשלחים מחוץ לאשכול, והוא יכול לפעול בסביבות מבודדות לחלוטין.
יציאה מהסשן של psql:
\q
מתנתקים מסשן ה-SSH למכונה הווירטואלית:
exit
אל תשכחו של-AlloyDB Omni יש עוד תכונות ומעבדות.
10. ניקוי הסביבה
כדי להימנע מחיובים שוטפים בחשבון Google Cloud, צריך למחוק את המשאבים שנוצרו ב-codelab הזה.
מחיקת אשכול GKE
ב-Cloud Shell, מוחקים את אשכול GKE:
export PROJECT_ID=$(gcloud config get-value project)
export LOCATION=us-central1
export CLUSTER_NAME=alloydb-ai-gke
gcloud container clusters delete ${CLUSTER_NAME} \
  --project=${PROJECT_ID} \
  --region=${LOCATION}
הפלט אמור להיראות כך:
student@cloudshell:~$ gcloud container clusters delete ${CLUSTER_NAME} \
>   --project=${PROJECT_ID} \
>   --region=${LOCATION}
The following clusters will be deleted.
 - [alloydb-ai-gke] in [us-central1]

Do you want to continue (Y/n)?  Y

Deleting cluster alloydb-ai-gke...done.
Deleted
מחיקת המכונה הווירטואלית של הלקוח
ב-Cloud Shell, מחק את מופע Compute Engine:
export PROJECT_ID=$(gcloud config get-value project)
export ZONE=us-central1-a
gcloud compute instances delete instance-1 \
  --project=${PROJECT_ID} \
  --zone=${ZONE}
הפלט אמור להיראות כך:
student@cloudshell:~$ export PROJECT_ID=$(gcloud config get project)
export ZONE=us-central1-a
gcloud compute instances delete instance-1 \
  --project=${PROJECT_ID} \
  --zone=${ZONE}
Your active configuration is: [cloudshell-5399]
The following instances will be deleted. Any attached disks configured to be auto-deleted will be deleted unless they are attached to any other instances or the `--keep-disks` flag is given and specifies them for keeping. Deleting a disk
is irreversible and any data on the disk will be lost.
 - [instance-1] in [us-central1-a]

Do you want to continue (Y/n)?  Y

Deleted
אם יצרתם פרויקט חדש עבור מעבדת קוד זו, תוכלו למחוק את הפרויקט כולו ב-Google Cloud Resource Manager.
11. מזל טוב
כל הכבוד, סיימתם את ה-Codelab!
מה כיסיתם
- איך פורסים את AlloyDB Omni באשכול GKE
- איך מתחברים ל-AlloyDB Omni
- איך טוענים נתונים ל-AlloyDB Omni
- איך פורסים מודלים של AI (הטמעה ו-LLM) ב-GKE
- איך רושמים מודלים של AI ב-AlloyDB Omni
- איך ליצור הטמעות לחיפוש סמנטי
- איך מריצים שאילתות של חיפוש סמנטי ב-AlloyDB Omni
- איך יוצרים ומשתמשים באינדקסים וקטוריים ב-AlloyDB Omni
מידע נוסף על עבודה עם AI ב-AlloyDB Omni זמין בתיעוד.
סקר
פלט: