

1. Introduzione
In questo codelab imparerai a eseguire il deployment di AlloyDB Omni su Google Kubernetes Engine (GKE) e a utilizzarlo con modelli aperti come EmbeddingGemma e Gemma 4 per embedding e previsioni. L'esecuzione del database e dei modelli nello stesso cluster riduce la latenza di rete ed evita le dipendenze da servizi di terze parti. Inoltre, contribuisce a soddisfare i requisiti di conformità e residenza dei dati, poiché i dati non escono mai dal tuo ambiente.
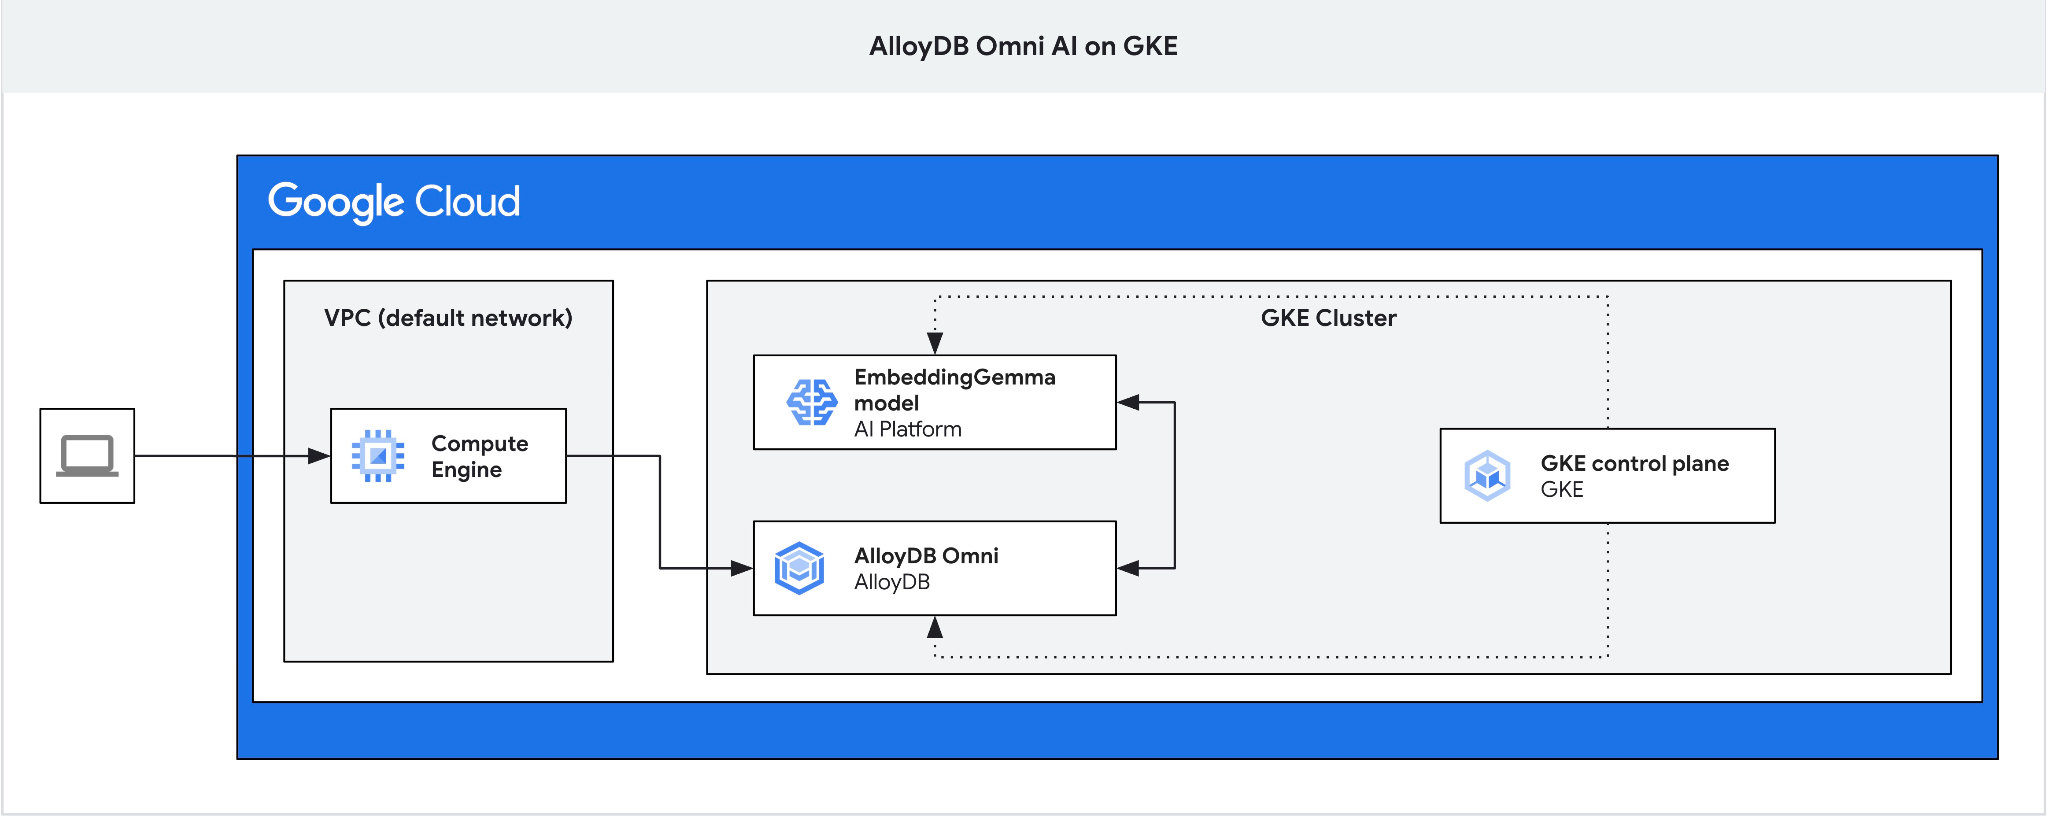
Prerequisiti
- Una conoscenza di base di Google Cloud e della console Google Cloud
- Conoscenza di base di Kubernetes e GKE
- Familiarità con l'interfaccia a riga di comando e Google Cloud Shell
Obiettivi didattici
- Come eseguire il deployment di AlloyDB Omni su un cluster GKE
- Come connettersi ad AlloyDB Omni
- Come caricare dati in AlloyDB Omni
- Come eseguire il deployment di modelli di AI (embedding e LLM) in GKE
- Come registrare modelli di AI in AlloyDB Omni
- Come generare gli embedding per la ricerca semantica
- Come eseguire query di ricerca semantica in AlloyDB Omni
- Come creare e utilizzare gli indici vettoriali in AlloyDB Omni
Che cosa ti serve
- Un account Google Cloud e un progetto Google Cloud
- Un browser web come Chrome
2. Configurazione e requisiti
Configurazione del progetto
- Accedi alla console Google Cloud. Se non hai ancora un account Gmail o Google Workspace, creane uno. Utilizza un account personale anziché un account di lavoro o della scuola.
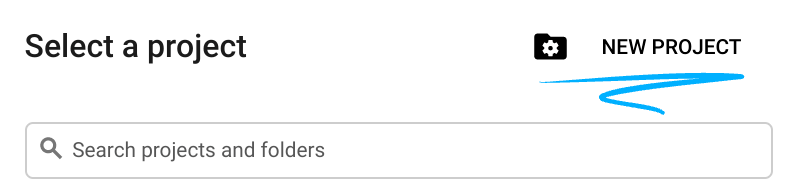
- Crea un nuovo progetto o selezionane uno esistente. Nell'intestazione della console Google Cloud, fai clic su Seleziona un progetto, poi su Nuovo progetto.

Nella finestra Seleziona un progetto, fai clic su Nuovo progetto per aprire la finestra di dialogo di creazione del progetto.
Nella finestra di dialogo, inserisci un nome del progetto e seleziona la tua organizzazione o sede.
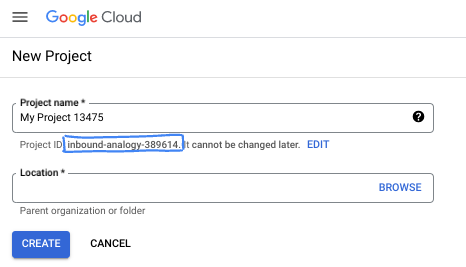
- Il nome del progetto è il nome visualizzato per i partecipanti a questo progetto. Il nome del progetto non viene utilizzato dalle API di Google e puoi modificarlo in qualsiasi momento.
- L'ID progetto è univoco in tutti i progetti Google Cloud ed è immutabile (non puoi modificarlo dopo averlo impostato). La console Google Cloud genera automaticamente un ID univoco oppure puoi fornirne uno tuo. In questo codelab, fai riferimento all'ID progetto con il segnaposto
- Il numero di progetto è un terzo identificatore utilizzato da alcune API. Per saperne di più, consulta la documentazione di Resource Manager.
Abilita fatturazione
Se hai configurato la fatturazione utilizzando i crediti Google Cloud, puoi saltare questo passaggio.
Per configurare un account di fatturazione personale, attiva la fatturazione nella console Google Cloud.
- Il completamento di questo lab costa meno di 5 $in risorse Google Cloud.
- Segui i passaggi di pulizia alla fine di questo lab per eliminare le risorse ed evitare ulteriori addebiti.
- I nuovi utenti hanno diritto alla prova senza costi di 300$.
Avvia Cloud Shell
In questo codelab utilizzerai Google Cloud Shell, un ambiente a riga di comando in esecuzione nel cloud.
Nella console Google Cloud, fai clic sull'icona Attiva Cloud Shell nella barra degli strumenti in alto a destra:

In alternativa, premi G e poi S oppure apri Google Cloud Shell direttamente.
Una volta connesso, Cloud Shell mostra il prompt del terminale:

Cloud Shell include spazio di archiviazione permanente e strumenti per sviluppatori. Puoi eseguire tutti i passaggi di questo codelab dal browser.
3. Abilita API
Per utilizzare Google Kubernetes Engine (GKE) per AlloyDB Omni e i deployment dei modelli, abilita le API Compute Engine e GKE nel tuo progetto Google Cloud.
In Cloud Shell, verifica che l'ID progetto sia configurato:
PROJECT_ID=$(gcloud config get-value project)
echo $PROJECT_ID
Se l'ID progetto non è definito, configuralo:
export PROJECT_ID=<YOUR_PROJECT_ID>
gcloud config set project $PROJECT_ID
Abilita le API richieste:
gcloud services enable compute.googleapis.com
gcloud services enable container.googleapis.com
Output previsto:
student@cloudshell:~ (test-project-001-402417)$ PROJECT_ID=test-project-001-402417
student@cloudshell:~ (test-project-001-402417)$ gcloud config set project test-project-001-402417
Updated property [core/project].
student@cloudshell:~ (test-project-001-402417)$ gcloud services enable compute.googleapis.com
gcloud services enable container.googleapis.com
Operation "operations/acat.p2-4470404856-1f44ebd8-894e-4356-bea7-b84165a57442" finished successfully.
Puoi leggere informazioni su ogni API abilitata nella documentazione.
4. Esegui il deployment di AlloyDB Omni su GKE
Per eseguire il deployment di AlloyDB Omni su GKE, prepara un cluster Kubernetes seguendo i requisiti dell'operatore AlloyDB Omni.
Crea un cluster GKE
Esegui il deployment di un cluster GKE standard con capacità di eseguire AlloyDB Omni, l'operatore e i container di monitoraggio. AlloyDB Omni richiede almeno due CPU e 8 GB di RAM. Questo tutorial utilizza il tipo di macchina n2-standard-4.
Imposta le variabili di ambiente per il deployment:
export PROJECT_ID=$(gcloud config get-value project)
export LOCATION=us-central1
export CLUSTER_NAME=alloydb-ai-gke
export MACHINE_TYPE=n2-standard-4
Crea il cluster GKE standard:
gcloud container clusters create ${CLUSTER_NAME} \
  --project=${PROJECT_ID} \
  --region=${LOCATION} \
  --workload-pool=${PROJECT_ID}.svc.id.goog \
  --release-channel=rapid \
  --machine-type=${MACHINE_TYPE} \
  --num-nodes=1
Output console previsto:
student@cloudshell:~ (test-project-001-402417)$ export PROJECT_ID=$(gcloud config get project)
export LOCATION=us-central1
export CLUSTER_NAME=alloydb-ai-gke
export MACHINE_TYPE=n2-standard-4
Your active configuration is: [test-project-001-402417]
student@cloudshell:~ (test-project-001-402417)$ gcloud container clusters create ${CLUSTER_NAME} \
  --project=${PROJECT_ID} \
  --region=${LOCATION} \
  --workload-pool=${PROJECT_ID}.svc.id.goog \
  --release-channel=rapid \
  --machine-type=${MACHINE_TYPE} \
  --num-nodes=1
Note: Your Pod address range (`--cluster-ipv4-cidr`) can accommodate at most 1008 node(s).
Creating cluster alloydb-ai-gke in us-central1... Cluster is being health-checked (Kubernetes Control Plane is healthy)...done.
Created [https://container.googleapis.com/v1/projects/test-project-001-402417/zones/us-central1/clusters/alloydb-ai-gke].
To inspect the contents of your cluster, go to: https://console.cloud.google.com/kubernetes/workload_/gcloud/us-central1/alloydb-ai-gke?project=test-project-001-402417
kubeconfig entry generated for alloydb-ai-gke.
NAME: alloydb-ai-gke
LOCATION: us-central1
MASTER_VERSION: 1.36.3-gke.1640000
MASTER_IP: 34.121.243.65
MACHINE_TYPE: n2-standard-4
NODE_VERSION: 1.36.3-gke.1640000
NUM_NODES: 3
STATUS: RUNNING
STACK_TYPE: IPV4
Preparare il cluster
Installa i componenti richiesti, come cert-manager, il controller dei certificati nativo per Kubernetes. Per maggiori dettagli, consulta la documentazione sull'installazione di cert-manager.
Cloud Shell include lo strumento a riga di comando Kubernetes kubectl. Ottieni le credenziali del cluster utilizzando gcloud:
gcloud container clusters get-credentials ${CLUSTER_NAME} --region=${LOCATION}
Installa cert-manager utilizzando kubectl:
kubectl apply -f https://github.com/cert-manager/cert-manager/releases/download/v1.21.1/cert-manager.yaml
Output console previsto (dati oscurati):
student@cloudshell:~$ kubectl apply -f https://github.com/cert-manager/cert-manager/releases/download/v1.21.1/cert-manager.yaml
namespace/cert-manager created
customresourcedefinition.apiextensions.k8s.io/certificaterequests.cert-manager.io created
customresourcedefinition.apiextensions.k8s.io/certificates.cert-manager.io created
customresourcedefinition.apiextensions.k8s.io/challenges.acme.cert-manager.io created
customresourcedefinition.apiextensions.k8s.io/clusterissuers.cert-manager.io created
...
validatingwebhookconfiguration.admissionregistration.k8s.io/cert-manager-webhook created
Installa l'operatore AlloyDB Omni
Installa l'operatore AlloyDB Omni utilizzando Helm.
Scarica e installa il grafico dell'operatore AlloyDB Omni:
helm install alloydbomni-operator oci://gcr.io/alloydb-omni/alloydbomni-operator \
--version 1.8.1 \
--create-namespace \
--namespace alloydb-omni-system \
--atomic \
--timeout 5m
Output console previsto (dati oscurati):
student@cloudshell:~$ helm install alloydbomni-operator oci://gcr.io/alloydb-omni/alloydbomni-operator \
> --version 1.8.0 \
> --create-namespace \
> --namespace alloydb-omni-system \
> --atomic \
> --timeout 5m
Flag --atomic has been deprecated, use --rollback-on-failure instead
Pulled: gcr.io/alloydb-omni/alloydbomni-operator:1.8.0
Digest: sha256:f2d98fa7a3b08dfc1e83b811582718b94e5c017b81aade700c83e917c59f0395
NAME: alloydbomni-operator
LAST DEPLOYED: Thu Aug 27 17:57:30 2026
NAMESPACE: alloydb-omni-system
STATUS: deployed
REVISION: 1
DESCRIPTION: Install complete
TEST SUITE: None
Esegui il deployment del cluster di database.
Il seguente manifest configura un cluster di database con googleMLExtension abilitato e un bilanciatore del carico interno:
cat << 'EOF' > my-omni.yaml
apiVersion: v1
kind: Secret
metadata:
  name: db-pw-my-omni
type: Opaque
data:
  my-omni: "VmVyeVN0cm9uZ1Bhc3N3b3Jk"
---
apiVersion: alloydbomni.dbadmin.goog/v1
kind: DBCluster
metadata:
  name: my-omni
spec:
  databaseVersion: "18.3.0"
  primarySpec:
    adminUser:
      passwordRef:
        name: db-pw-my-omni
    features:
      googleMLExtension:
        enabled: true
    resources:
      cpu: 1
      memory: 8Gi
      disks:
      - name: DataDisk
        size: 20Gi
        storageClass: standard
    dbLoadBalancerOptions:
      annotations:
        networking.gke.io/load-balancer-type: "internal"
  allowExternalIncomingTraffic: true
EOF
Il valore del secret della password è la rappresentazione Base64 di VeryStrongPassword. Negli ambienti di produzione, utilizza Google Secret Manager per gestire le password. Per maggiori dettagli, consulta la documentazione di Secret Manager.
Il manifest viene salvato come my-omni.yaml. In Cloud Shell, fai clic su Apri editor nell'angolo in alto a destra della finestra del terminale e leggi il file.
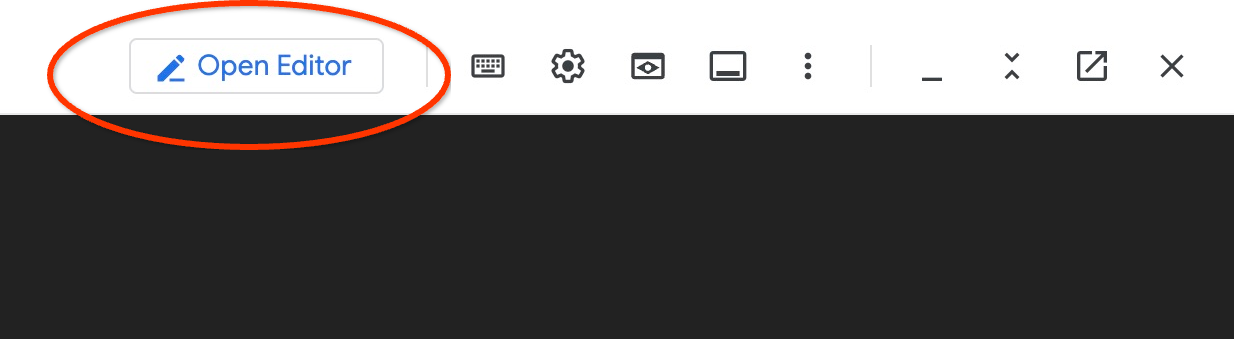
Dopo aver letto il manifest my-omni.yaml, fai clic su Apri terminale per tornare al prompt dei comandi.
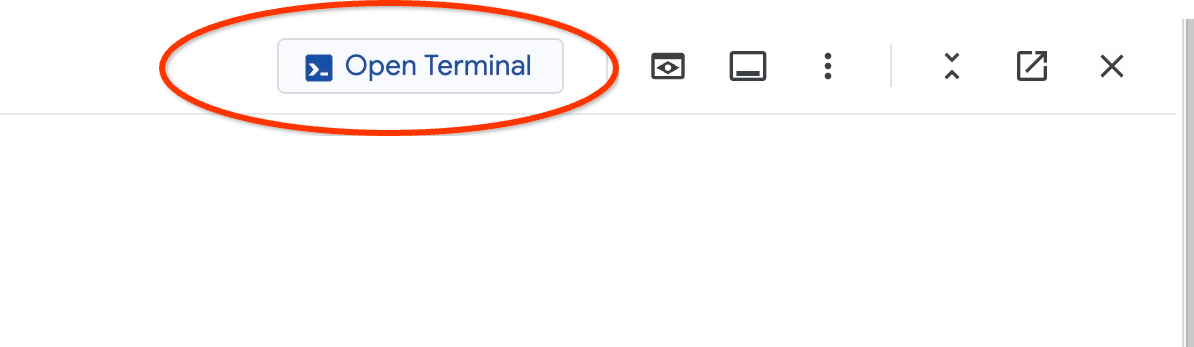
Applica il manifest my-omni.yaml:
kubectl apply -f my-omni.yaml
Output console previsto:
secret/db-pw-my-omni created
dbcluster.alloydbomni.dbadmin.goog/my-omni created
Controlla lo stato del cluster my-omni:
kubectl get dbclusters.alloydbomni.dbadmin.goog my-omni -n default
Durante il deployment, il cluster di database passa attraverso le fasi di configurazione fino a raggiungere lo stato DBClusterReady.
Output console previsto:
$ kubectl get dbclusters.alloydbomni.dbadmin.goog my-omni -n default
NAME      PRIMARYENDPOINT   PRIMARYPHASE   DBCLUSTERPHASE   HAREADYSTATUS   HAREADYREASON
my-omni   10.131.0.33        Ready          DBClusterReady
(Facoltativo) Puoi monitorare il deployment del cluster utilizzando il comando kubectl log:
kubectl logs -l alloydbomni.internal.dbadmin.goog/dbcluster=my-omni --all-containers -f
Connettiti ad AlloyDB Omni
Quando il cluster è pronto, connettiti al pod del database utilizzando il client PostgreSQL (psql). La password è VeryStrongPassword come definito in my-omni.yaml:
DB_CLUSTER_NAME=my-omni
DB_CLUSTER_NAMESPACE=default
DBPOD=`kubectl get pod --selector=alloydbomni.internal.dbadmin.goog/dbcluster=$DB_CLUSTER_NAME,alloydbomni.internal.dbadmin.goog/task-type=database -n $DB_CLUSTER_NAMESPACE -o jsonpath='{.items[0].metadata.name}'`
kubectl exec -ti $DBPOD -n $DB_CLUSTER_NAMESPACE -c database -- psql -h localhost -U postgres
Esempio di output della console:
DB_CLUSTER_NAME=my-omni
DB_CLUSTER_NAMESPACE=default
DBPOD=`kubectl get pod --selector=alloydbomni.internal.dbadmin.goog/dbcluster=$DB_CLUSTER_NAME,alloydbomni.internal.dbadmin.goog/task-type=database -n $DB_CLUSTER_NAMESPACE -o jsonpath='{.items[0].metadata.name}'`
kubectl exec -ti $DBPOD -n $DB_CLUSTER_NAMESPACE -c database -- psql -h localhost -U postgres
Password for user postgres:
psql (18.3)
SSL connection (protocol: TLSv1.3, cipher: TLS_AES_128_GCM_SHA256, compression: off, ALPN: postgresql)
Type "help" for help.

postgres=#
Esci dalla sessione psql digitando \q e premendo Invio:
postgres=# \q
5. Esegui il deployment del modello EmbeddingGemma su GKE
Per testare l'integrazione di AlloyDB Omni AI con i modelli locali, esegui il deployment di un modello di embedding nel cluster GKE. Questo tutorial utilizza il modello EmbeddingGemma di Google.
Crea un node pool per il modello
Per eseguire l'inferenza del modello, prepara un node pool dedicato. Puoi utilizzare un node pool solo CPU o un node pool con accelerazione GPU (ad esempio g2-standard-8 con una GPU NVIDIA L4). Questo tutorial utilizza un node pool basato sulla CPU con tipi di macchina c3-standard-8.
Crea un node pool CPU a un solo nodo:
export PROJECT_ID=$(gcloud config get-value project)
export LOCATION=us-central1
export CLUSTER_NAME=alloydb-ai-gke
gcloud container node-pools create cpupool \
  --project=${PROJECT_ID} \
  --location=${LOCATION} \
  --node-locations=${LOCATION}-a \
  --cluster=${CLUSTER_NAME} \
  --machine-type=c3-standard-8 \
  --num-nodes=1
Output previsto:
student@cloudshell$ export PROJECT_ID=$(gcloud config get project)
Your active configuration is: [pant]
export LOCATION=us-central1
export CLUSTER_NAME=alloydb-ai-gke
student@cloudshell$ gcloud container node-pools create cpupool \
>   --project=${PROJECT_ID} \
>   --location=${LOCATION} \
>   --node-locations=${LOCATION}-a \
>   --cluster=${CLUSTER_NAME} \
>   --machine-type=c3-standard-8 \
>   --num-nodes=1
Creating node pool cpupool...done.
Created [https://container.googleapis.com/v1/projects/gleb-test-short-003-483115/zones/us-central1/clusters/alloydb-ai-gke/nodePools/cpupool].
NAME     MACHINE_TYPE    DISK_SIZE_GB  NODE_VERSION
cpupool  c3-standard-8  100           1.34.1-gke.3355002
Ottenere un token Hugging Face
Questo tutorial esegue il deployment del modello EmbeddingGemma da Hugging Face. Per accedere ai pesi del modello, genera un token di accesso a Hugging Face:
- Accedi o crea un account su Hugging Face.
- Vai a Il tuo profilo > Token di accesso.
- Fai clic su Crea nuovo token.
- Inserisci un nome per il token e seleziona il ruolo Lettura.
- Fai clic su Crea token e copia il valore del token generato.
- Se non l'hai ancora fatto, accetta i termini del modello nella pagina del modello EmbeddingGemma.
Crea un secret Kubernetes contenente il tuo token Hugging Face in Cloud Shell (sostituisci il segnaposto del token con il tuo token):
export HF_TOKEN=<YOUR_HUGGING_FACE_TOKEN>
kubectl create secret generic hf-secret \
  --from-literal=hf_api_token=$HF_TOKEN \
  --dry-run=client -o yaml | kubectl apply -f -
Prepara il manifest di deployment
Per eseguire il deployment del modello, utilizza il pacchetto container Text Embeddings Inference (TEI) di Hugging Face. Per saperne di più, consulta la documentazione di Hugging Face GKE TEI.
Clona il repository di deployment da GitHub:
git clone https://github.com/huggingface/Google-Cloud-Containers
Ispeziona e modifica il manifest della configurazione della CPU:
edit Google-Cloud-Containers/examples/gke/tei-deployment/cpu-config/deployment.yaml
Il manifest aggiornato per il deployment della CPU:
apiVersion: apps/v1
kind: Deployment
metadata:
  name: tei-deployment
spec:
  replicas: 1
  selector:
    matchLabels:
      app: tei-server
  template:
    metadata:
      labels:
        app: tei-server
        hf.co/model: Google--embeddinggemma-300m
        hf.co/task: text-embeddings
    spec:
      containers:
        - name: tei-container
          image: ghcr.io/huggingface/text-embeddings-inference:cpu-latest
          resources:
            requests:
              cpu: "6"
              memory: "24Gi"
            limits:
              cpu: "6"
              memory: "24Gi"
          env:
            - name: MODEL_ID
              value: google/embeddinggemma-300m
            - name: NUM_SHARD
              value: "1"
            - name: PORT
              value: "8080"
            - name: HF_TOKEN
              valueFrom:
                secretKeyRef:
                  name: hf-secret
                  key: hf_api_token
          volumeMounts:
            - mountPath: /tmp
              name: tmp
      volumes:
        - name: tmp
          emptyDir: {}
      nodeSelector:
        cloud.google.com/machine-family: "c3"
Salva le modifiche premendo ctrl+s e torna al terminale.
Esegui il deployment del modello
Applica il manifest per eseguire il deployment del server TEI:
kubectl apply -f Google-Cloud-Containers/examples/gke/tei-deployment/cpu-config
Monitora il deployment finché non è nello stato pronto:
printf "Waiting for model to load..."; until kubectl logs -l app=tei-server --tail=50 2>/dev/null | grep -q "Ready"; do printf "."; sleep 3; done; printf '\n\033[1;32m========================================\n[SUCCESS] Model is loaded and ready!\nYou can now proceed to the next step.\n========================================\033[0m\n'
Controlla il servizio Kubernetes tei-service:
kubectl get service tei-service
Output previsto:
student@cloudshell$ kubectl get service tei-service
NAME          TYPE        CLUSTER-IP      EXTERNAL-IP   PORT(S)    AGE
tei-service   ClusterIP   34.118.233.48   <none>        8080/TCP   10m
Il servizio CLUSTER-IP gestisce le richieste internamente all'indirizzo http://34.118.233.48:8080/embed.
Testa l'endpoint del modello localmente utilizzando kubectl port-forward:
kubectl port-forward service/tei-service 8080:8080
Apri una seconda scheda Cloud Shell facendo clic su + nella parte superiore del terminale:
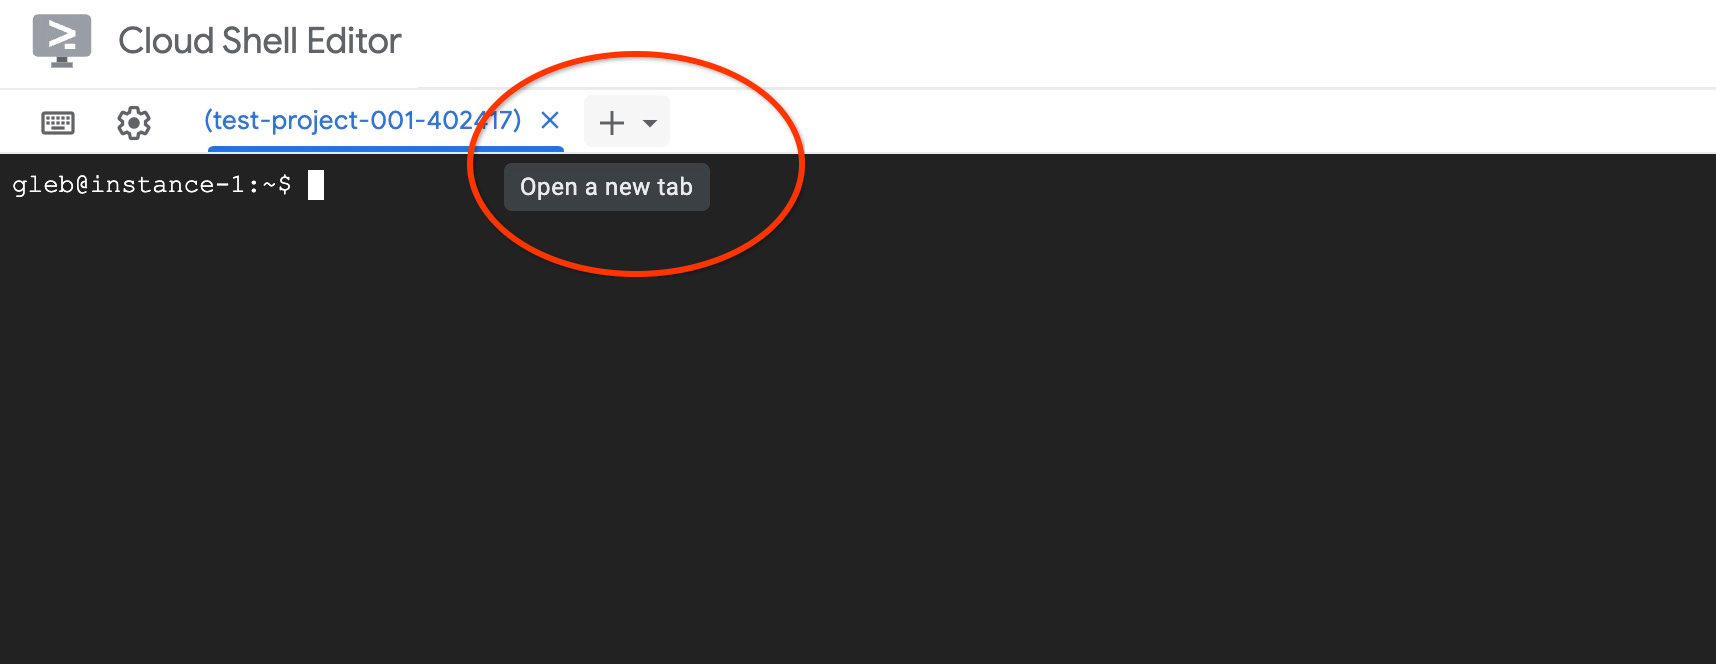
Nella nuova scheda, testa la generazione di embedding con curl:
curl http://localhost:8080/embed \
  -X POST \
  -d '{"inputs":"Test"}' \
  -H 'Content-Type: application/json'
Output previsto (array di vettori):
curl http://localhost:8080/embed \
>     -X POST \
>     -d '{"inputs":"Test"}' \
>     -H 'Content-Type: application/json'
[[-0.018975832,0.0071419072,0.06347208,0.022992613,0.014205903
...
-0.03677433,0.01636146,0.06731572]]
Interrompi l'inoltro delle porte nella prima scheda premendo ctrl+c.
6. Registra il modello di incorporamento in AlloyDB Omni
Per utilizzare il modello di cui è stato eseguito il deployment da AlloyDB Omni, crea un database, definisci le funzioni di trasformazione e registra l'endpoint del modello.
Crea una VM client e un database
Crea un'istanza VM di Compute Engine nello stesso VPC da utilizzare come jump host client:
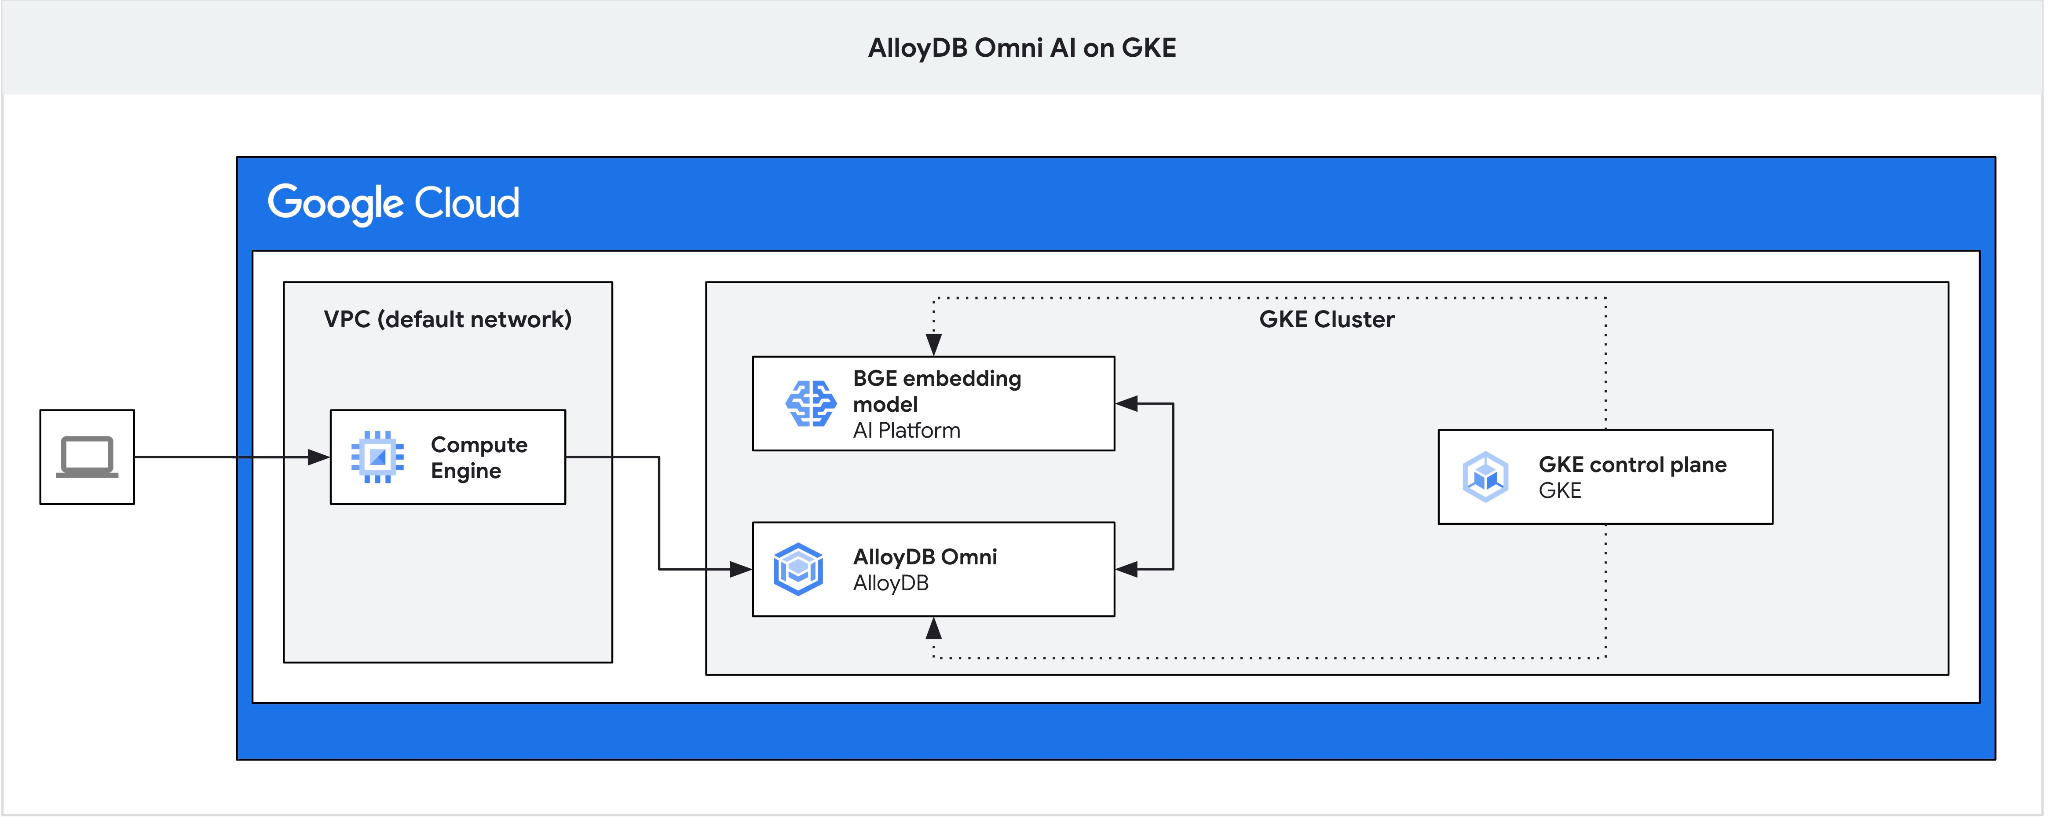
In Cloud Shell, crea la VM client:
export ZONE=us-central1-a
gcloud compute instances create instance-1 \
  --zone=$ZONE
Recupera l'IP dell'endpoint AlloyDB Omni:
echo "INSTANCE_IP=$(kubectl get dbclusters.alloydbomni.dbadmin.goog my-omni -n default -o jsonpath='{.status.primary.endpoint}')"
Output previsto:
INSTANCE_IP=10.128.0.33
Il valore INSTANCE_IP è l'IP del bilanciatore del carico interno per il cluster AlloyDB Omni. In questo esempio è 10.131.0.33.
Connettiti all'istanza VM utilizzando SSH:
gcloud compute ssh instance-1 --zone=$ZONE
Nella sessione SSH su instance-1, installa il client PostgreSQL:
sudo apt-get update && sudo apt-get install --yes postgresql-client
Esporta l'IP del bilanciatore del carico AlloyDB Omni (sostituisci con il tuo IP PRIMARYENDPOINT):
export INSTANCE_IP=10.131.0.33
Connettiti ad AlloyDB Omni utilizzando psql (la password è VeryStrongPassword):
psql "host=$INSTANCE_IP user=postgres sslmode=require"
Nella sessione psql, crea il database demo:
CREATE DATABASE demo;
Passa al database demo:
\c demo
Crea funzioni di trasformazione
Gli endpoint di embedding personalizzati richiedono funzioni di trasformazione di input e output per adattare i formati dei dati tra AlloyDB Omni e l'API del modello.
Crea la funzione di trasformazione dell'input:
CREATE OR REPLACE FUNCTION tei_text_input_transform(model_id VARCHAR(100), input_text TEXT)
RETURNS JSON
LANGUAGE plpgsql
AS $$
DECLARE
  transformed_input JSON;
BEGIN
  SELECT json_build_object('inputs', input_text, 'truncate', true)::JSON INTO transformed_input;
  RETURN transformed_input;
END;
$$;
Output previsto:
demo=# CREATE OR REPLACE FUNCTION tei_text_input_transform(model_id VARCHAR(100), input_text TEXT)
RETURNS JSON
LANGUAGE plpgsql
AS $$
DECLARE
  transformed_input JSON;
BEGIN
  SELECT json_build_object('inputs', input_text, 'truncate', true)::JSON INTO transformed_input;
  RETURN transformed_input;
END;
$$;
CREATE FUNCTION
demo=#
Crea la funzione di trasformazione dell'output per analizzare la risposta dell'array di vettori:
CREATE OR REPLACE FUNCTION tei_text_output_transform(model_id VARCHAR(100), response_json JSON)
RETURNS REAL[]
LANGUAGE plpgsql
AS $$
DECLARE
  transformed_output REAL[];
BEGIN
  SELECT ARRAY(SELECT json_array_elements_text(response_json->0)) INTO transformed_output;
  RETURN transformed_output;
END;
$$;
Output previsto:
demo=# CREATE OR REPLACE FUNCTION tei_text_output_transform(model_id VARCHAR(100), response_json JSON)
RETURNS REAL[]
LANGUAGE plpgsql
AS $$
DECLARE
  transformed_output REAL[];
BEGIN
  SELECT ARRAY(SELECT json_array_elements_text(response_json->0)) INTO transformed_output;
  RETURN transformed_output;
END;
$$;
CREATE FUNCTION
demo=#
Registra il modello
Registra il modello in AlloyDB Omni utilizzando la procedura google_ml.create_model. Specifica http://tei-service:8080/embed come model_request_url per indirizzare le richieste al servizio del cluster Kubernetes:
CALL
  google_ml.create_model(
    model_id => 'embeddinggemma',
    model_request_url => 'http://tei-service:8080/embed',
    model_provider => 'custom',
    model_type => 'text_embedding',
    model_in_transform_fn => 'tei_text_input_transform',
    model_out_transform_fn => 'tei_text_output_transform');
Output previsto:
demo=# CALL
  google_ml.create_model(
    model_id => 'embeddinggemma',
    model_request_url => 'http://tei-service:8080/embed',
    model_provider => 'custom',
    model_type => 'text_embedding',
    model_in_transform_fn => 'tei_text_input_transform',
    model_out_transform_fn => 'tei_text_output_transform');
CALL
demo=#
Testa il modello registrato con una query SQL di esempio:
SELECT google_ml.embedding('embeddinggemma', 'What is AlloyDB Omni?');
La funzione restituisce la rappresentazione dell'array di numeri reali generata dal modello EmbeddingGemma locale in esecuzione su GKE.
Premi q per tornare al prompt della sessione psql.
Esci dalla sessione psql:
\q
7. Testa il modello con dati di esempio
Carica dati di esempio
Questo tutorial utilizza il set di dati di vendita al dettaglio Cymbal per dimostrare la ricerca di similarità vettoriale. Utilizzerai Google Cloud SDK e il client PostgreSQL per importare i dati in AlloyDB Omni.
Nella sessione SSH su instance-1, connettiti al database demo e attiva l'estensione vector:
psql "host=$INSTANCE_IP user=postgres sslmode=require dbname=demo"
Nella sessione psql:
CREATE EXTENSION IF NOT EXISTS vector;
Esci dalla sessione psql:
\q
Scarica e applica lo schema per creare tabelle nel database demo:
gcloud storage cat gs://cloud-training/gcc/gcc-tech-004/cymbal_demo_schema.sql |psql "host=$INSTANCE_IP user=postgres dbname=demo"
Output previsto:
student@cloudshell:~$ gcloud storage cat gs://cloud-training/gcc/gcc-tech-004/cymbal_demo_schema.sql |psql "host=$INSTANCE_IP user=postgres dbname=demo"
Password for user postgres:
SET
SET
SET
SET
SET
 set_config
------------

(1 row)

SET
SET
SET
SET
SET
SET
CREATE TABLE
ALTER TABLE
CREATE TABLE
ALTER TABLE
CREATE TABLE
ALTER TABLE
CREATE TABLE
ALTER TABLE
CREATE SEQUENCE
ALTER TABLE
ALTER SEQUENCE
ALTER TABLE
ALTER TABLE
ALTER TABLE
student@cloudshell:~$
Verifica le tabelle create:
psql "host=$INSTANCE_IP user=postgres dbname=demo" -c "\dt+"
Output previsto:
student@cloudshell:~$ psql "host=$INSTANCE_IP user=postgres dbname=demo" -c "\dt+"
Password for user postgres:
                                           List of relations
 Schema |       Name       | Type  |  Owner   | Persistence | Access method |    Size    | Description
--------+------------------+-------+----------+-------------+---------------+------------+-------------
 public | cymbal_embedding | table | postgres | permanent   | heap          | 8192 bytes |
 public | cymbal_inventory | table | postgres | permanent   | heap          | 8192 bytes |
 public | cymbal_products  | table | postgres | permanent   | heap          | 8192 bytes |
 public | cymbal_stores    | table | postgres | permanent   | heap          | 8192 bytes |
(4 rows)
Carica i dati nella tabella cymbal_products:
gcloud storage cat gs://cloud-training/gcc/gcc-tech-004/cymbal_products.csv |psql "host=$INSTANCE_IP user=postgres dbname=demo" -c "\copy cymbal_products from stdin csv header"
Output previsto:
student@cloudshell:~$ gcloud storage cat gs://cloud-training/gcc/gcc-tech-004/cymbal_products.csv |psql "host=$INSTANCE_IP user=postgres dbname=demo" -c "\copy cymbal_products from stdin csv header"
COPY 941
student@cloudshell:~$
Ecco un esempio di alcune righe della tabella cymbal_products.
psql "host=$INSTANCE_IP user=postgres dbname=demo" -c "SELECT uniq_id,left(product_name,30),left(product_description,50),sale_price FROM cymbal_products limit 3"
Output previsto:
student@cloudshell:~$ psql "host=$INSTANCE_IP user=postgres dbname=demo" -c "SELECT uniq_id,left(product_name,30),left(product_description,50),sale_price FROM cymbal_products limit 3"
Password for user postgres:
             uniq_id              |              left              |                        left                        | sale_price
----------------------------------+--------------------------------+----------------------------------------------------+------------
 a73d5f754f225ecb9fdc64232a57bc37 | Laundry Tub Strainer Cup       |   Laundry tub strainer cup Chrome For 1-.50, drain |      11.74
 41b8993891aa7d39352f092ace8f3a86 | LED Starry Star Night Light La |  LED Starry Star Night Light Laser Projector 3D Oc |      46.97
 ed4a5c1b02990a1bebec908d416fe801 | Surya Horizon HRZ-1060 Area Ru |  The 100% polypropylene construction of the Surya  |       77.4
(3 rows)
student@cloudshell:~$
Carica i dati nella tabella cymbal_inventory:
gcloud storage cat gs://cloud-training/gcc/gcc-tech-004/cymbal_inventory.csv |psql "host=$INSTANCE_IP user=postgres dbname=demo" -c "\copy cymbal_inventory from stdin csv header"
Output previsto:
student@cloudshell:~$ gcloud storage cat gs://cloud-training/gcc/gcc-tech-004/cymbal_inventory.csv |psql "host=$INSTANCE_IP user=postgres dbname=demo" -c "\copy cymbal_inventory from stdin csv header"
Password for user postgres:
COPY 263861
student@cloudshell:~$
Ecco un esempio di alcune righe della tabella cymbal_inventory.
psql "host=$INSTANCE_IP user=postgres dbname=demo" -c "SELECT * FROM cymbal_inventory LIMIT 3"
Output:
student@cloudshell:~$ psql "host=$INSTANCE_IP user=postgres dbname=demo" -c "SELECT * FROM cymbal_inventory LIMIT 3"
Password for user postgres:
 store_id |             uniq_id              | inventory
----------+----------------------------------+-----------
     1583 | adc4964a6138d1148b1d98c557546695 |         5
     1490 | adc4964a6138d1148b1d98c557546695 |         4
     1492 | adc4964a6138d1148b1d98c557546695 |         3
(3 rows)
student@cloudshell:~$
Carica i dati nella tabella cymbal_stores:
gcloud storage cat gs://cloud-training/gcc/gcc-tech-004/cymbal_stores.csv |psql "host=$INSTANCE_IP user=postgres dbname=demo" -c "\copy cymbal_stores from stdin csv header"
Output console previsto:
student@cloudshell:~$ gcloud storage cat gs://cloud-training/gcc/gcc-tech-004/cymbal_stores.csv |psql "host=$INSTANCE_IP user=postgres dbname=demo" -c "\copy cymbal_stores from stdin csv header"
Password for user postgres:
COPY 4654
student@cloudshell:~$
Ecco un esempio di alcune righe della tabella cymbal_stores.
psql "host=$INSTANCE_IP user=postgres dbname=demo" -c "SELECT store_id, name, zip_code FROM cymbal_stores limit 3"
Output:
student@cloudshell:~$ psql "host=$INSTANCE_IP user=postgres dbname=demo" -c "SELECT store_id, name, zip_code FROM cymbal_stores limit 3"
Password for user postgres:
 store_id |       name        | zip_code
----------+-------------------+----------
     1990 | Mayaguez Store    |      680
     2267 | Ware Supercenter  |     1082
     4359 | Ponce Supercenter |      780
(3 rows)
student@cloudshell:~$
Crea incorporamenti
Connettiti al database demo utilizzando psql e crea incorporamenti per i prodotti descritti nella tabella cymbal_products in base alle descrizioni dei prodotti.
Connettiti al database demo:
psql "host=$INSTANCE_IP user=postgres sslmode=require dbname=demo"
Utilizza la colonna embedding di tipo vector per archiviare gli embedding di testo generati per le descrizioni dei prodotti.
Abilita il monitoraggio dei tempi di esecuzione delle query:
\timing
Genera incorporamenti per ogni descrizione del prodotto e archiviali nella tabella cymbal_embedding:
INSERT INTO cymbal_embedding (uniq_id, embedding)
SELECT uniq_id, google_ml.embedding('embeddinggemma', product_description)::vector
FROM cymbal_products;
Output previsto:
demo=# INSERT INTO cymbal_embedding(uniq_id,embedding)  SELECT uniq_id, google_ml.embedding('embeddinggemma',product_description)::vector FROM cymbal_products;
INSERT 0 941
Time: 497878.136 ms (08:17.878)
demo=#
Esegui query di ricerca semantica
Nella sessione psql, trova i primi cinque prodotti che corrispondono alla domanda "What kind of fruit trees grow well here?" utilizzando la distanza coseno (<=>):
SELECT
    cp.product_name,
    left(cp.product_description, 80) AS description,
    cp.sale_price,
    cs.zip_code,
    (ce.embedding <=> google_ml.embedding('embeddinggemma', 'What kind of fruit trees grow well here?')::vector) AS distance
FROM
    cymbal_products cp
JOIN cymbal_embedding ce ON ce.uniq_id = cp.uniq_id
JOIN cymbal_inventory ci ON ci.uniq_id = cp.uniq_id
JOIN cymbal_stores cs ON cs.store_id = ci.store_id
WHERE
    ci.inventory > 0
    AND cs.store_id = 1583
ORDER BY
    distance ASC
LIMIT 5;
Output previsto:
demo=# SELECT
        cp.product_name,
        left(cp.product_description,80) as description,
        cp.sale_price,
        cs.zip_code,
        (ce.embedding <=> google_ml.embedding('embeddinggemma','What kind of fruit trees grow well here?')::vector) as distance
FROM
        cymbal_products cp
JOIN cymbal_embedding ce on ce.uniq_id=cp.uniq_id
JOIN cymbal_inventory ci on ci.uniq_id=cp.uniq_id
JOIN cymbal_stores cs on cs.store_id=ci.store_id
WHERE
    ci.inventory > 0
    AND cs.store_id = 1583
ORDER BY
    distance ASC
LIMIT 5;
     product_name      |                                   description                                    | sale_price | zip_code |      distance
-----------------------+----------------------------------------------------------------------------------+------------+----------+--------------------
 Cherry Tree           | This is a beautiful cherry tree that will produce delicious cherries. It is an d |      75.00 |    93230 | 0.5210549378080666
 California Lilac      | This is a beautiful lilac tree that can grow to be over 10 feet tall. It is an d |       5.00 |    93230 | 0.5639421771781971
 Toyon                 | This is a beautiful toyon tree that can grow to be over 20 feet tall. It is an e |      10.00 |    93230 | 0.5670010914504852
 Rose Bush             | This is a beautiful rose bush that will produce fragrant roses. It is a perennia |      50.00 |    93230 | 0.5731542622882957
 California Peppertree | This is a beautiful peppertree that can grow to be over 30 feet tall. It is an e |      25.00 |    93230 | 0.5750934653011995
(5 rows)

Time: 83.610 ms
demo=#
La query è stata eseguita in 83 ms e ha restituito un elenco di alberi della tabella cymbal_products che corrispondono alla richiesta e con inventario disponibile nel negozio con numero 1583.
Crea indice ANN
Con un piccolo set di dati è facile utilizzare la ricerca esatta per scansionare tutti gli incorporamenti, ma quando i dati aumentano, aumentano anche i tempi di caricamento e risposta. Per migliorare il rendimento, puoi creare indici sui dati di incorporamento. Ecco un esempio di come farlo utilizzando l'indice Google ScaNN per i dati vettoriali.
Riconnettiti al database demo se hai perso la connessione:
psql "host=$INSTANCE_IP user=postgres sslmode=require dbname=demo"
Abilita l'estensione alloydb_scann:
CREATE EXTENSION IF NOT EXISTS alloydb_scann;
Crea l'indice ScaNN sulla colonna embedding:
CREATE INDEX cymbal_products_embeddings_scann ON cymbal_embedding
  USING scann (embedding cosine)
  WITH (num_leaves=10, max_num_levels = 1);
Esegui di nuovo la query di ricerca semantica per confrontare il rendimento dell'esecuzione:
SELECT
    cp.product_name,
    left(cp.product_description, 80) AS description,
    cp.sale_price,
    cs.zip_code,
    (ce.embedding <=> google_ml.embedding('embeddinggemma', 'What kind of fruit trees grow well here?')::vector) AS distance
FROM
    cymbal_products cp
JOIN cymbal_embedding ce ON ce.uniq_id = cp.uniq_id
JOIN cymbal_inventory ci ON ci.uniq_id = cp.uniq_id
JOIN cymbal_stores cs ON cs.store_id = ci.store_id
WHERE
    ci.inventory > 0
    AND cs.store_id = 1583
ORDER BY
    distance ASC
LIMIT 5;
Output previsto:
demo=# SELECT
    cp.product_name,
    left(cp.product_description,80) as description,
    cp.sale_price,
    cs.zip_code,
    (ce.embedding <=> google_ml.embedding('embeddinggemma', 'What kind of fruit trees grow well here?')::vector) AS distance
FROM
    cymbal_products cp
JOIN cymbal_embedding ce ON ce.uniq_id = cp.uniq_id
JOIN cymbal_inventory ci ON ci.uniq_id = cp.uniq_id
JOIN cymbal_stores cs ON cs.store_id = ci.store_id
WHERE
    ci.inventory > 0
    AND cs.store_id = 1583
ORDER BY
    distance ASC
LIMIT 5;
     product_name      |                                   description                                    | sale_price | zip_code |      distance
-----------------------+----------------------------------------------------------------------------------+------------+----------+--------------------
 Cherry Tree           | This is a beautiful cherry tree that will produce delicious cherries. It is an d |      75.00 |    93230 | 0.5210549378080666
 California Lilac      | This is a beautiful lilac tree that can grow to be over 10 feet tall. It is an d |       5.00 |    93230 | 0.5639421771781971
 Toyon                 | This is a beautiful toyon tree that can grow to be over 20 feet tall. It is an e |      10.00 |    93230 | 0.5670010914504852
 Rose Bush             | This is a beautiful rose bush that will produce fragrant roses. It is a perennia |      50.00 |    93230 | 0.5731542622882957
 California Peppertree | This is a beautiful peppertree that can grow to be over 30 feet tall. It is an e |      25.00 |    93230 | 0.5750934653011995
(5 rows)

Time: 64.783 ms
Il tempo di esecuzione della query è leggermente diminuito e il miglioramento sarà più evidente con set di dati più grandi. I dati restituiti devono essere uguali o molto simili a quelli ottenuti senza indice.
Prova altre query e scopri di più sull'ottimizzazione dell'indice vettoriale nella documentazione.
Esci dalla sessione psql:
\q
Torna a Google Cloud Shell disconnettendoti dalla sessione SSH instance-1 premendo CTRL+D o digitando exit.
8. Esegui il deployment di Gemma con vLLM
Aggiungi node pool per Gemma
Innanzitutto, controlla quali tipi di nodi sono disponibili nella tua regione:
export LOCATION=us-central1-a
gcloud compute accelerator-types list --filter="zone:${LOCATION}"
Dovresti visualizzare un elenco dei tipi di acceleratore disponibili, incluso l'acceleratore nvidia-l4. Ora crea un pool di nodi con il tipo di acceleratore nvidia-l4:
export PROJECT_ID=$(gcloud config get project)
export LOCATION=us-central1
export CLUSTER_NAME=alloydb-ai-gke
gcloud container node-pools create gpupool \
    --accelerator type=nvidia-l4,count=1,gpu-driver-version=latest \
    --project=${PROJECT_ID} \
    --location=${LOCATION} \
    --node-locations=${LOCATION}-a \
    --cluster=${CLUSTER_NAME} \
    --machine-type=g2-standard-8 \
    --num-nodes=1
Crea un manifest di deployment per il modello Google Gemini 4 12B utilizzando vLLM:
cat << 'EOF' > gemma-12b-gpu-vllm-deployment.yaml
apiVersion: apps/v1
kind: Deployment
metadata:
  name: gemma-12b-gpu-vllm-deployment
spec:
  replicas: 1
  selector:
    matchLabels:
      app: gemma-12b-gpu-vllm
  template:
    metadata:
      labels:
        app: gemma-12b-gpu-vllm
        ai.gke.io/model: gemma-4-12b-it
        ai.gke.io/inference-server: vllm
        examples.ai.gke.io/source: user-guide
    spec:
      containers:
      - name: inference-server
        image: us-docker.pkg.dev/vertex-ai/vertex-vision-model-garden-dockers/pytorch-vllm-serve:latest
        resources:
          requests:
            cpu: "4"
            memory: "16Gi"
            ephemeral-storage: "30Gi"
            nvidia.com/gpu: "1"
          limits:
            cpu: "8"
            memory: "24Gi"
            ephemeral-storage: "30Gi"
            nvidia.com/gpu: "1"
        command: ["python3", "-m", "vllm.entrypoints.api_server"]
        args:
          - --model=$(MODEL_ID)
          - --host=0.0.0.0
          - --port=8000
          - --tensor-parallel-size=1
          - --enable-log-requests
          - --enable-chunked-prefill
          - --enable-prefix-caching
          - --enable-auto-tool-choice
          - --generation-config=auto
          - --tool-call-parser=gemma4
          - --dtype=bfloat16
          - --max-num-seqs=16
          - --max-model-len=32768
          - --gpu-memory-utilization=0.95
          - --reasoning-parser=gemma4
          - --trust-remote-code
          - --quantization=fp8
        env:
        - name: LD_LIBRARY_PATH
          value: ${LD_LIBRARY_PATH}:/usr/local/nvidia/lib64
        - name: MODEL_ID
          value: google/gemma-4-12b-it
        - name: HF_TOKEN
          valueFrom:
            secretKeyRef:
              name: hf-secret
              key: hf_api_token
        volumeMounts:
        - mountPath: /dev/shm
          name: dshm
      volumes:
      - name: dshm
        emptyDir:
            medium: Memory
      nodeSelector:
        cloud.google.com/gke-accelerator: nvidia-l4
        cloud.google.com/gke-gpu-driver-version: latest
---
apiVersion: v1
kind: Service
metadata:
  name: gemma-12b-gpu-vllm-service
spec:
  selector:
    app: gemma-12b-gpu-vllm
  type: ClusterIP
  ports:
    - protocol: TCP
      port: 8000
      targetPort: 8000
EOF
Applica il deployment gemma-12b-gpu-vllm-deployment.yaml salvato:
kubectl apply -f gemma-12b-gpu-vllm-deployment.yaml
Output previsto:
$ kubectl apply -f gemma-12b-gpu-vllm-deployment.yaml
deployment.apps/gemma-12b-gpu-vllm-deployment created
service/gemma-12b-gpu-vllm-service created
Attendi il completamento del deployment e il caricamento del modello. L'operazione potrebbe richiedere diversi minuti.
printf "Waiting for model to load..."; until kubectl logs -l app=gemma-12b-gpu-vllm --tail=50 2>/dev/null | grep -q "Application startup complete"; do printf "."; sleep 3; done; printf '\n\033[1;32m========================================\n[SUCCESS] Model is loaded and ready!\nYou can now proceed to the next step.\n========================================\033[0m\n'
Output previsto:
Waiting for model to load...
========================================
[SUCCESS] Model is loaded and ready!
You can now proceed to the next step.
========================================
Testare il modello. Abilita il port forwarding per accedere al modello:
kubectl port-forward svc/gemma-12b-gpu-vllm-service 8090:8000
In un'altra finestra del terminale, utilizza curl per inviare un prompt al modello:
curl http://localhost:8090/v1/chat/completions \
  -H "Content-Type: application/json" \
  -d '{
    "messages": [
      {"role": "system", "content": "You are a helpful assistant running on GKE."},
      {"role": "user", "content": "What is AlloyDB Omni."}
    ],
    "temperature": 0.7
  }' | jq -r '.choices[0].message.content'
Output previsto:
  % Total    % Received % Xferd  Average Speed   Time    Time     Time  Current
                                 Dload  Upload   Total   Spent    Left  Speed
100  3957  100  3761  100   196     85      4  0:00:49  0:00:43  0:00:06   830
**AlloyDB Omni** is a fully managed, PostgreSQL-compatible database engine from Google Cloud that can be run **on-premises, in other clouds, or in your own data centers.**

To understand it simply: It allows you to run the high-performance, enterprise-grade capabilities of Google's **AlloyDB** (a cloud-native database) on your own infrastructure.

Here is a breakdown of what makes it significant:

### 1. The "Best of Both Worlds" Architecture
Normally, you have to choose between:
*   **Managed Cloud Databases:** Easy to scale and manage, but you are locked into the cloud provider's infrastructure.
*   **Self-Managed Databases:** You have full control over the hardware/location, but you are responsible for scaling, patching, and high availability.

**AlloyDB Omni** bridges this gap. It provides the advanced features of a cloud-native database (like intelligent indexing, high availability, and massive scalability) while allowing you to run it anywhere.
Interrompi l'inoltro delle porte nel primo terminale (se è ancora in esecuzione) premendo Ctrl+C.
9. Registra il modello Gemma 4 in AlloyDB Omni
Registra il modello Gemma 12B in AlloyDB Omni utilizzando la procedura google_ml.create_model. Specifica http://gemma-12b-gpu-vllm-service:8000/v1/chat/completions come model_request_url per indirizzare le richieste al servizio del cluster Kubernetes:
Recupera l'IP dell'endpoint AlloyDB Omni:
echo "INSTANCE_IP=$(kubectl get dbclusters.alloydbomni.dbadmin.goog my-omni -n default -o jsonpath='{.status.primary.endpoint}')"
Connettiti all'istanza VM utilizzando SSH:
export ZONE=us-central1-a
gcloud compute ssh instance-1 --zone=$ZONE
Dopo aver effettuato la connessione alla VM, esporta la variabile INSTANCE_IP dal passaggio precedente (il valore 10.128.0.33 è fornito come esempio, sostituiscilo con il tuo IP):
export INSTANCE_IP=10.128.0.33
Esporta password AlloyDB:
export PGPASSWORD=VeryStrongPassword
Connettiti al database demo:
psql "host=$INSTANCE_IP user=postgres sslmode=require dbname=demo"
Nella sessione psql, registra il modello:
CALL
  google_ml.create_model(
    model_id => 'gemma-12b-gpu',
    model_request_url => 'http://gemma-12b-gpu-vllm-service:8000/v1/chat/completions',
    model_provider => 'custom',
    model_type => 'llm');
Testa il modello con una query SQL di esempio:
SELECT google_ml.predict_row(
  model_id => 'gemma-12b-gpu',
  request_body => json_build_object(
    'messages', json_build_array(
      json_build_object('role', 'user', 'content', 'What is AlloyDB Omni?'))))->'choices'->0->'message'->'content';
Premi q per uscire dalla finestra dei risultati e tornare al prompt psql.
Combinare la ricerca vettoriale con LLM RAG in AlloyDB Omni
Utilizza la ricerca vettoriale con la richiesta LLM per dimostrare la RAG (Retrieval-Augmented Generation) con l'LLM.
Esegui la query SQL in plsql:
WITH trees AS (
SELECT
        cp.product_name,
        cp.product_description AS description,
        cp.sale_price,
        cs.zip_code,
        cp.uniq_id AS product_id
FROM
    cymbal_products cp
JOIN cymbal_embedding ce ON ce.uniq_id = cp.uniq_id
JOIN cymbal_inventory ci ON ci.uniq_id = cp.uniq_id
JOIN cymbal_stores cs ON cs.store_id = ci.store_id
WHERE
        ci.inventory>0
        AND cs.store_id = 1583
ORDER BY
        (ce.embedding <=> embedding('embeddinggemma',
        'What kind of fruit trees grow well here?')::vector) ASC
LIMIT 1),
prompt AS (
SELECT
        'You are a friendly advisor helping to find a product based on the customer''s needs.
Based on the client request we have loaded a list of products closely related to search.
The list in JSON format with list of values like {"product_name":"name","product_description":"some description","sale_price":10}
Here is the list of products:' || json_agg(trees) || 'The customer asked "What kind of fruit trees grow well here?"
You should give information about the product, price and some supplemental information' AS prompt_text
FROM
        trees),
response AS (
SELECT
        google_ml.predict_row(
          model_id =>'gemma-12b-gpu',
          request_body => json_build_object(
            'messages', json_build_array(
              json_build_object('role', 'user', 'content',prompt_text)
            )))->'choices'->0->'message'->'content' AS resp
FROM
        prompt)
SELECT
REPLACE(resp::text, '\n', CHR(10))
FROM
        response;
Output previsto:
----------------------------------------------------------------------------------------------------------------------------------------------
 "Hello there! I'd be happy to help you find the perfect tree for your garden.                                                               +
                                                                                                                                             +
 Based on your location, we have a wonderful option that would grow beautifully in your area:                                                +
                                                                                                                                             +
 **Cherry Tree**                                                                                                                             +
 *   **Price:** $75.00                                                                                                                       +
 *   **Description:** This is a stunning deciduous tree that not only provides a beautiful landscape but also produces delicious cherries.   +
 *   **Supplemental Information:**                                                                                                           +
     *   **Growth:** It grows to about 15 feet tall.                                                                                         +
     *   **Appearance:** You can look forward to dark green leaves in the summer that transform into a vibrant red in the fall.              +
     *   **Benefits:** It's a great choice if you're looking for both fruit and extra shade or privacy in your yard.                         +
     *   **Care Tips:** It performs best in a cool, moist climate with sandy soil. Since you are in a suitable zone, it should thrive nicely!+
                                                                                                                                             +
 Would you like more details on how to plant this, or would you like to proceed with an order?"
(1 row)
La query integra il prompt all'LLM con i risultati della ricerca vettoriale.
Prova altre query e sperimenta i pattern RAG. Il vantaggio dell'architettura presentata è la sua completa autosufficienza. I dati non vengono inviati al di fuori del cluster e possono essere eseguiti in ambienti completamente isolati.
Esci dalla sessione psql:
\q
Disconnettiti dalla sessione SSH alla VM:
exit
Non dimenticare che AlloyDB Omni offre più funzionalità e lab.
10. Liberare spazio
Per evitare che al tuo account Google Cloud vengano addebitati costi continui, elimina le risorse create in questo codelab.
Elimina il cluster GKE
In Cloud Shell, elimina il cluster GKE:
export PROJECT_ID=$(gcloud config get-value project)
export LOCATION=us-central1
export CLUSTER_NAME=alloydb-ai-gke
gcloud container clusters delete ${CLUSTER_NAME} \
  --project=${PROJECT_ID} \
  --region=${LOCATION}
Output previsto:
student@cloudshell:~$ gcloud container clusters delete ${CLUSTER_NAME} \
>   --project=${PROJECT_ID} \
>   --region=${LOCATION}
The following clusters will be deleted.
 - [alloydb-ai-gke] in [us-central1]

Do you want to continue (Y/n)?  Y

Deleting cluster alloydb-ai-gke...done.
Deleted
Elimina la VM client
In Cloud Shell, elimina l'istanza Compute Engine:
export PROJECT_ID=$(gcloud config get-value project)
export ZONE=us-central1-a
gcloud compute instances delete instance-1 \
  --project=${PROJECT_ID} \
  --zone=${ZONE}
Output previsto:
student@cloudshell:~$ export PROJECT_ID=$(gcloud config get project)
export ZONE=us-central1-a
gcloud compute instances delete instance-1 \
  --project=${PROJECT_ID} \
  --zone=${ZONE}
Your active configuration is: [cloudshell-5399]
The following instances will be deleted. Any attached disks configured to be auto-deleted will be deleted unless they are attached to any other instances or the `--keep-disks` flag is given and specifies them for keeping. Deleting a disk
is irreversible and any data on the disk will be lost.
 - [instance-1] in [us-central1-a]

Do you want to continue (Y/n)?  Y

Deleted
Se hai creato un nuovo progetto per questo codelab, puoi facoltativamente eliminare l'intero progetto in Google Cloud Resource Manager.
11. Complimenti
Congratulazioni per aver completato il codelab.
Argomenti trattati
- Come eseguire il deployment di AlloyDB Omni su un cluster GKE
- Come connettersi ad AlloyDB Omni
- Come caricare dati in AlloyDB Omni
- Come eseguire il deployment di modelli di AI (embedding e LLM) in GKE
- Come registrare modelli di AI in AlloyDB Omni
- Come generare gli embedding per la ricerca semantica
- Come eseguire query di ricerca semantica in AlloyDB Omni
- Come creare e utilizzare gli indici vettoriali in AlloyDB Omni
Per saperne di più sull'utilizzo dell'AI in AlloyDB Omni, consulta la documentazione.
Sondaggio
Output: