

1. はじめに
この Codelab では、Google Kubernetes Engine(GKE)に AlloyDB Omni をデプロイし、エンベディングと予測に EmbeddingGemma や Gemma 4 などのオープンモデルで使用する方法について説明します。データベースとモデルの両方を同じクラスタで実行すると、ネットワーク レイテンシが短縮され、サードパーティ サービスの依存関係を回避できます。また、データが環境から離れることがないため、コンプライアンスとデータ所在地の要件を満たすこともできます。
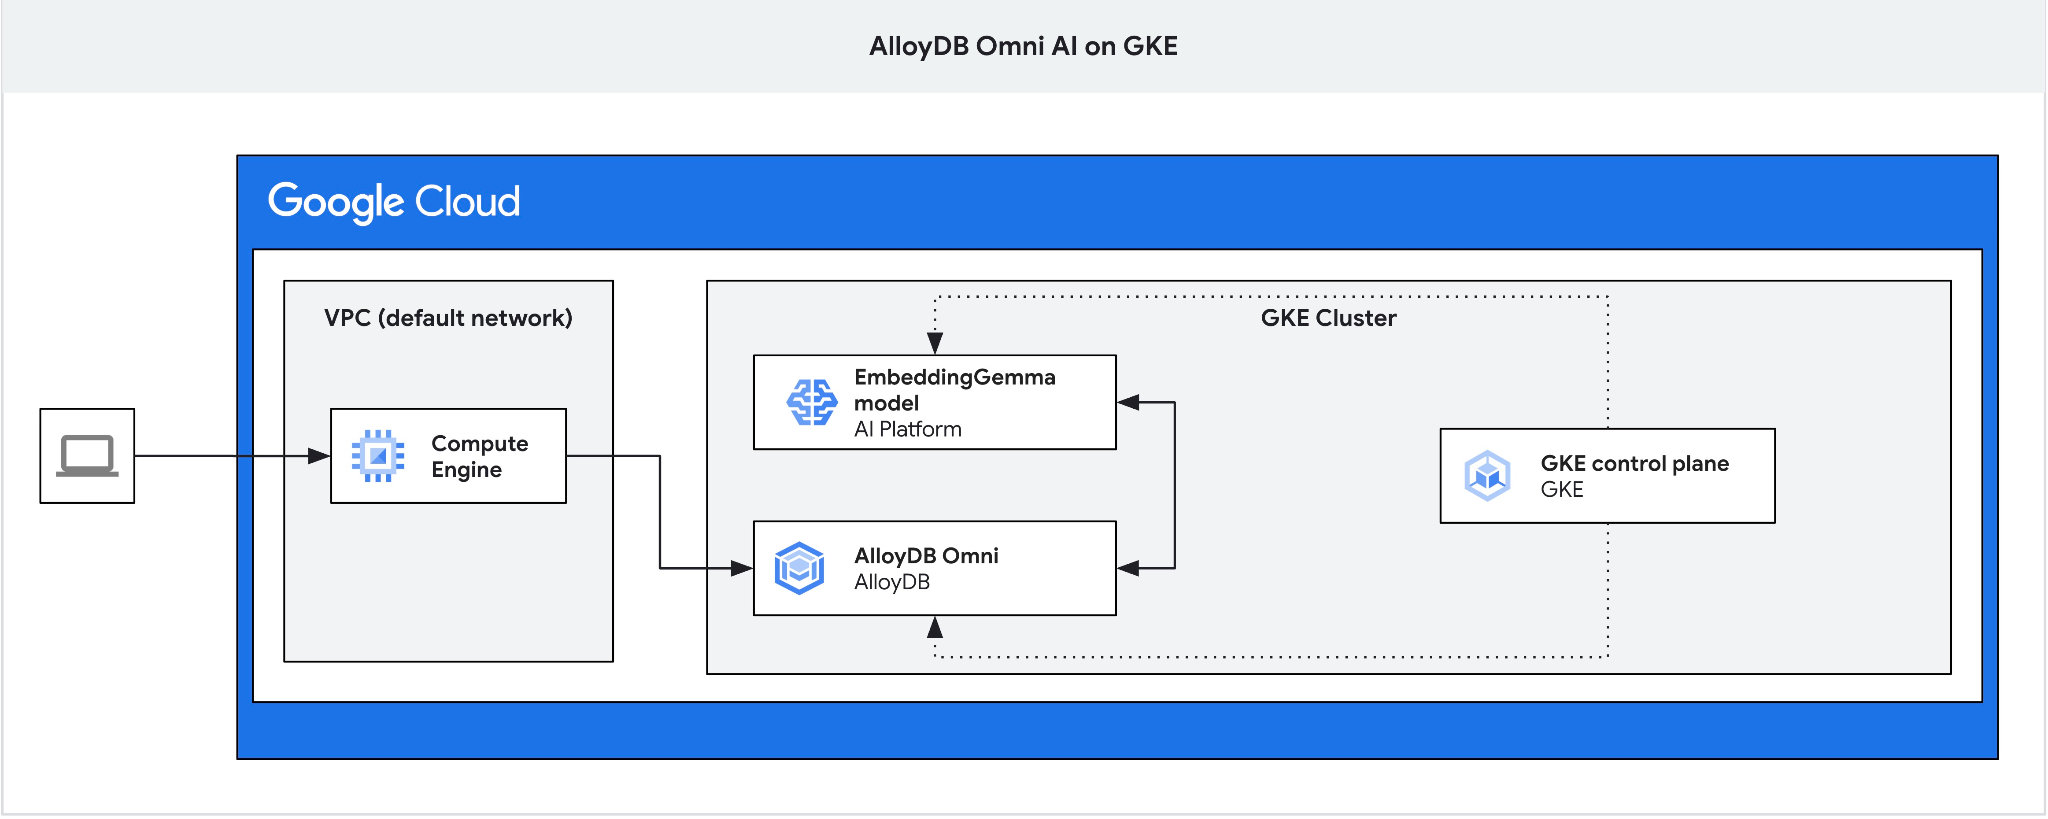
前提条件
- Google Cloud と Google Cloud コンソールの基本的な知識
- Kubernetes と GKE の基礎知識
- コマンドライン インターフェースと Google Cloud Shell を使い慣れている
学習内容
- GKE クラスタに AlloyDB Omni をデプロイする方法
- AlloyDB Omni に接続する方法
- AlloyDB Omni にデータを読み込む方法
- AI モデル(エンベディングと LLM)を GKE にデプロイする方法
- AlloyDB Omni で AI モデルを登録する方法
- セマンティック検索用のエンベディングを生成する方法
- AlloyDB Omni でセマンティック検索クエリを実行する方法
- AlloyDB Omni でベクトル インデックスを作成して使用する方法
必要なもの
- Google Cloud アカウントと Google Cloud プロジェクト
- ウェブブラウザ(Chrome など)
2. 設定と要件
プロジェクトの設定
- Google Cloud コンソールにログインします。Gmail アカウントも Google Workspace アカウントもまだお持ちでない場合は、アカウントを作成してください。仕事用または学校用のアカウントではなく、個人用のアカウントを使用します。
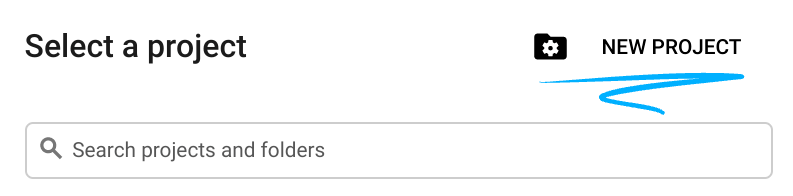
- 新しいプロジェクトを作成するか、既存のプロジェクトを選択します。Google Cloud コンソールのヘッダーで [プロジェクトを選択] をクリックし、[新しいプロジェクト] をクリックします。

[プロジェクトを選択] ウィンドウで、[新しいプロジェクト] をクリックして、プロジェクト作成ダイアログを開きます。
ダイアログで [プロジェクト名] を入力し、組織または場所を選択します。
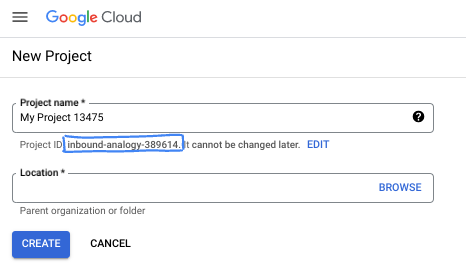
- プロジェクト名は、このプロジェクトの参加者に表示される名称です。プロジェクト名は Google API では使用されません。いつでも変更できます。
- プロジェクト ID は、すべての Google Cloud プロジェクトにおいて一意でなければならず、不変です(設定後は変更できません)。Google Cloud コンソールでは、一意の ID が自動的に生成されます。独自の ID を指定することもできます。この Codelab では、
- プロジェクト番号は、一部の API で使用される 3 つ目の識別子です。詳細については、Resource Manager のドキュメントをご覧ください。
課金を有効にする
Google Cloud クレジットを使用して課金を設定した場合は、この手順をスキップできます。
個人用の請求先アカウントを設定するには、Google Cloud コンソールで課金を有効にします。
- このラボを完了するために必要な Google Cloud リソースの費用は $5 USD 未満です。
- このラボの最後にあるクリーンアップの手順に沿ってリソースを削除し、追加料金が発生しないようにします。
- 新規ユーザーは、300 米ドル分の無料トライアルをご利用いただけます。
Cloud Shell の起動
この Codelab では、クラウドで実行されるコマンドライン環境である Google Cloud Shell を使用します。
Google Cloud コンソールで、右上のツールバーにある [Cloud Shell をアクティブにする] アイコンをクリックします。
![[Cloud Shell をアクティブにする] ボタン](https://codelabs.developers.google.com/static/alloydb-omni-gke-embeddings/img/f36cd6aa5b8a7c86.png?hl=ja)
または、G キー、S キーの順に押すか、Google Cloud Shell を直接開きます。
接続されると、Cloud Shell にターミナル プロンプトが表示されます。

Cloud Shell には、永続ストレージと開発ツールが含まれています。この Codelab のすべての手順は、ブラウザから実行できます。
3. API を有効にする
AlloyDB Omni とモデル デプロイに Google Kubernetes Engine(GKE)を使用するには、Google Cloud プロジェクトで Compute Engine API と GKE API を有効にします。
Cloud Shell で、プロジェクト ID が構成されていることを確認します。
PROJECT_ID=$(gcloud config get-value project)
echo $PROJECT_ID
プロジェクト ID が定義されていない場合は、構成します。
export PROJECT_ID=<YOUR_PROJECT_ID>
gcloud config set project $PROJECT_ID
必要な API を有効にします。
gcloud services enable compute.googleapis.com
gcloud services enable container.googleapis.com
予想される出力:
student@cloudshell:~ (test-project-001-402417)$ PROJECT_ID=test-project-001-402417
student@cloudshell:~ (test-project-001-402417)$ gcloud config set project test-project-001-402417
Updated property [core/project].
student@cloudshell:~ (test-project-001-402417)$ gcloud services enable compute.googleapis.com
gcloud services enable container.googleapis.com
Operation "operations/acat.p2-4470404856-1f44ebd8-894e-4356-bea7-b84165a57442" finished successfully.
有効になっている各 API については、ドキュメントをご覧ください。
4. GKE に AlloyDB Omni をデプロイする
GKE に AlloyDB Omni をデプロイするには、AlloyDB Omni Operator の要件に沿って Kubernetes クラスタを準備します。
GKE クラスタを作成する
AlloyDB Omni、Operator、モニタリング コンテナを実行する容量を備えた標準の GKE クラスタをデプロイします。AlloyDB Omni には、少なくとも 2 つの CPU と 8 GB の RAM が必要です。このチュートリアルでは、n2-standard-4 マシンタイプを使用します。
デプロイの環境変数を設定します。
export PROJECT_ID=$(gcloud config get-value project)
export LOCATION=us-central1
export CLUSTER_NAME=alloydb-ai-gke
export MACHINE_TYPE=n2-standard-4
Standard GKE クラスタを作成します。
gcloud container clusters create ${CLUSTER_NAME} \
  --project=${PROJECT_ID} \
  --region=${LOCATION} \
  --workload-pool=${PROJECT_ID}.svc.id.goog \
  --release-channel=rapid \
  --machine-type=${MACHINE_TYPE} \
  --num-nodes=1
想定されるコンソール出力:
student@cloudshell:~ (test-project-001-402417)$ export PROJECT_ID=$(gcloud config get project)
export LOCATION=us-central1
export CLUSTER_NAME=alloydb-ai-gke
export MACHINE_TYPE=n2-standard-4
Your active configuration is: [test-project-001-402417]
student@cloudshell:~ (test-project-001-402417)$ gcloud container clusters create ${CLUSTER_NAME} \
  --project=${PROJECT_ID} \
  --region=${LOCATION} \
  --workload-pool=${PROJECT_ID}.svc.id.goog \
  --release-channel=rapid \
  --machine-type=${MACHINE_TYPE} \
  --num-nodes=1
Note: Your Pod address range (`--cluster-ipv4-cidr`) can accommodate at most 1008 node(s).
Creating cluster alloydb-ai-gke in us-central1... Cluster is being health-checked (Kubernetes Control Plane is healthy)...done.
Created [https://container.googleapis.com/v1/projects/test-project-001-402417/zones/us-central1/clusters/alloydb-ai-gke].
To inspect the contents of your cluster, go to: https://console.cloud.google.com/kubernetes/workload_/gcloud/us-central1/alloydb-ai-gke?project=test-project-001-402417
kubeconfig entry generated for alloydb-ai-gke.
NAME: alloydb-ai-gke
LOCATION: us-central1
MASTER_VERSION: 1.36.3-gke.1640000
MASTER_IP: 34.121.243.65
MACHINE_TYPE: n2-standard-4
NODE_VERSION: 1.36.3-gke.1640000
NUM_NODES: 3
STATUS: RUNNING
STACK_TYPE: IPV4
クラスタを準備する
Kubernetes のネイティブ証明書コントローラである cert-manager などの必要なコンポーネントをインストールします。詳細については、cert-manager インストール ドキュメントをご覧ください。
Cloud Shell には、Kubernetes コマンドライン ツール kubectl が含まれています。gcloud を使用してクラスタの認証情報を取得します。
gcloud container clusters get-credentials ${CLUSTER_NAME} --region=${LOCATION}
kubectl を使用して cert-manager をインストールします。
kubectl apply -f https://github.com/cert-manager/cert-manager/releases/download/v1.21.1/cert-manager.yaml
想定されるコンソール出力(秘匿化済み):
student@cloudshell:~$ kubectl apply -f https://github.com/cert-manager/cert-manager/releases/download/v1.21.1/cert-manager.yaml
namespace/cert-manager created
customresourcedefinition.apiextensions.k8s.io/certificaterequests.cert-manager.io created
customresourcedefinition.apiextensions.k8s.io/certificates.cert-manager.io created
customresourcedefinition.apiextensions.k8s.io/challenges.acme.cert-manager.io created
customresourcedefinition.apiextensions.k8s.io/clusterissuers.cert-manager.io created
...
validatingwebhookconfiguration.admissionregistration.k8s.io/cert-manager-webhook created
AlloyDB Omni Operator をインストールする
Helm を使用して AlloyDB Omni Operator をインストールします。
AlloyDB Omni Operator チャートをダウンロードしてインストールします。
helm install alloydbomni-operator oci://gcr.io/alloydb-omni/alloydbomni-operator \
--version 1.8.1 \
--create-namespace \
--namespace alloydb-omni-system \
--atomic \
--timeout 5m
想定されるコンソール出力(秘匿化済み):
student@cloudshell:~$ helm install alloydbomni-operator oci://gcr.io/alloydb-omni/alloydbomni-operator \
> --version 1.8.0 \
> --create-namespace \
> --namespace alloydb-omni-system \
> --atomic \
> --timeout 5m
Flag --atomic has been deprecated, use --rollback-on-failure instead
Pulled: gcr.io/alloydb-omni/alloydbomni-operator:1.8.0
Digest: sha256:f2d98fa7a3b08dfc1e83b811582718b94e5c017b81aade700c83e917c59f0395
NAME: alloydbomni-operator
LAST DEPLOYED: Thu Aug 27 17:57:30 2026
NAMESPACE: alloydb-omni-system
STATUS: deployed
REVISION: 1
DESCRIPTION: Install complete
TEST SUITE: None
データベース クラスタをデプロイします。
次のマニフェストは、googleMLExtension が有効で内部ロードバランサを使用するデータベース クラスタを構成します。
cat << 'EOF' > my-omni.yaml
apiVersion: v1
kind: Secret
metadata:
  name: db-pw-my-omni
type: Opaque
data:
  my-omni: "VmVyeVN0cm9uZ1Bhc3N3b3Jk"
---
apiVersion: alloydbomni.dbadmin.goog/v1
kind: DBCluster
metadata:
  name: my-omni
spec:
  databaseVersion: "18.3.0"
  primarySpec:
    adminUser:
      passwordRef:
        name: db-pw-my-omni
    features:
      googleMLExtension:
        enabled: true
    resources:
      cpu: 1
      memory: 8Gi
      disks:
      - name: DataDisk
        size: 20Gi
        storageClass: standard
    dbLoadBalancerOptions:
      annotations:
        networking.gke.io/load-balancer-type: "internal"
  allowExternalIncomingTraffic: true
EOF
パスワード シークレット値は、VeryStrongPassword の Base64 表現です。本番環境では、Google Secret Manager を使用してパスワードを管理します。詳細については、Secret Manager のドキュメントをご覧ください。
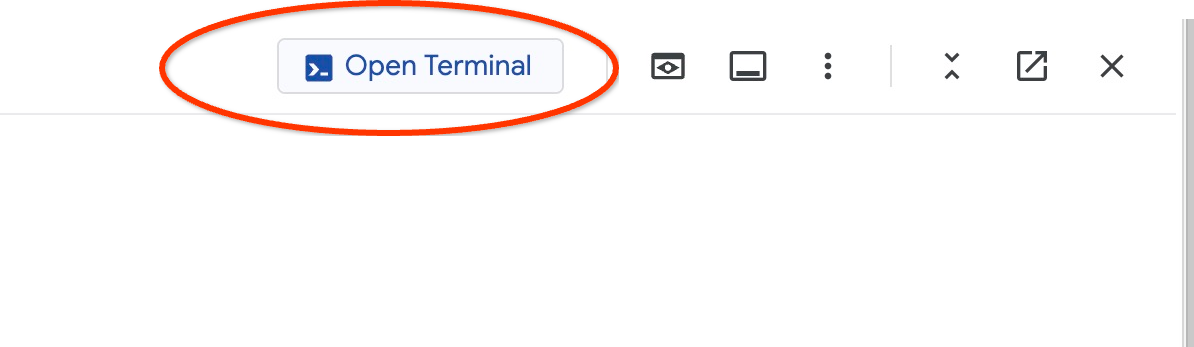
マニフェストは my-omni.yaml として保存されます。Cloud Shell で、ターミナル ウィンドウの右上にある [エディタを開く] をクリックして、ファイルの内容を確認します。
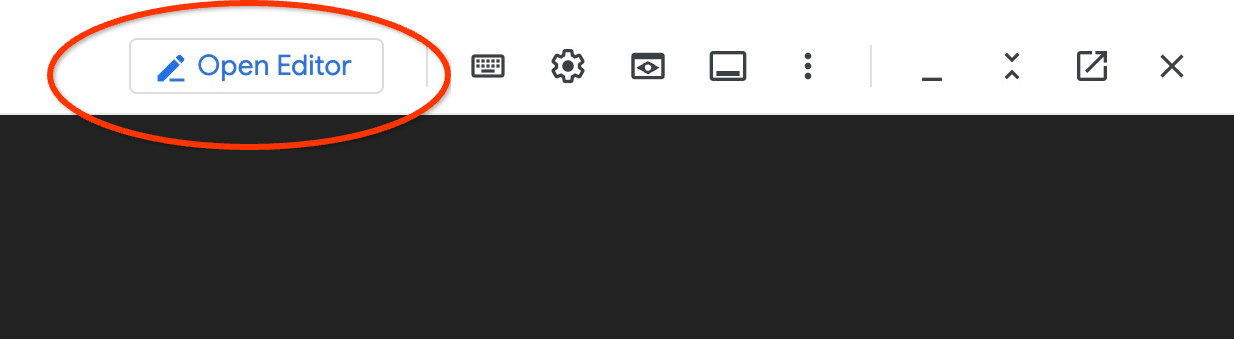
my-omni.yaml マニフェストを読み取ったら、[ターミナルを開く] をクリックしてコマンド プロンプトに戻ります。
my-omni.yaml マニフェストを適用します。
kubectl apply -f my-omni.yaml
想定されるコンソール出力:
secret/db-pw-my-omni created
dbcluster.alloydbomni.dbadmin.goog/my-omni created
my-omni クラスタのステータスを確認します。
kubectl get dbclusters.alloydbomni.dbadmin.goog my-omni -n default
デプロイ中、データベース クラスタは DBClusterReady 状態に達するまで設定フェーズを移行します。
想定されるコンソール出力:
$ kubectl get dbclusters.alloydbomni.dbadmin.goog my-omni -n default
NAME      PRIMARYENDPOINT   PRIMARYPHASE   DBCLUSTERPHASE   HAREADYSTATUS   HAREADYREASON
my-omni   10.131.0.33        Ready          DBClusterReady
必要に応じて、kubectl log コマンドを使用してクラスタのデプロイをモニタリングできます。
kubectl logs -l alloydbomni.internal.dbadmin.goog/dbcluster=my-omni --all-containers -f
AlloyDB Omni に接続する
クラスタの準備ができたら、PostgreSQL クライアント(psql)を使用してデータベース Pod に接続します。パスワードは my-omni.yaml で定義されている VeryStrongPassword です。
DB_CLUSTER_NAME=my-omni
DB_CLUSTER_NAMESPACE=default
DBPOD=`kubectl get pod --selector=alloydbomni.internal.dbadmin.goog/dbcluster=$DB_CLUSTER_NAME,alloydbomni.internal.dbadmin.goog/task-type=database -n $DB_CLUSTER_NAMESPACE -o jsonpath='{.items[0].metadata.name}'`
kubectl exec -ti $DBPOD -n $DB_CLUSTER_NAMESPACE -c database -- psql -h localhost -U postgres
コンソールの出力例:
DB_CLUSTER_NAME=my-omni
DB_CLUSTER_NAMESPACE=default
DBPOD=`kubectl get pod --selector=alloydbomni.internal.dbadmin.goog/dbcluster=$DB_CLUSTER_NAME,alloydbomni.internal.dbadmin.goog/task-type=database -n $DB_CLUSTER_NAMESPACE -o jsonpath='{.items[0].metadata.name}'`
kubectl exec -ti $DBPOD -n $DB_CLUSTER_NAMESPACE -c database -- psql -h localhost -U postgres
Password for user postgres:
psql (18.3)
SSL connection (protocol: TLSv1.3, cipher: TLS_AES_128_GCM_SHA256, compression: off, ALPN: postgresql)
Type "help" for help.

postgres=#
「\q」と入力して Enter キーを押し、psql セッションを終了します。
postgres=# \q
5. GKE に EmbeddingGemma モデルをデプロイする
ローカルモデルとの AlloyDB Omni AI 統合をテストするには、エンベディング モデルを GKE クラスタにデプロイします。このチュートリアルでは、Google の EmbeddingGemma モデルを使用します。
モデルのノードプールを作成する
モデル推論を実行するには、専用のノードプールを準備します。CPU のみのノードプールまたは GPU アクセラレータ ノードプール(NVIDIA L4 GPU を使用する g2-standard-8 など)を使用できます。このチュートリアルでは、c3-standard-8 マシンタイプを使用する CPU ベースのノードプールを使用します。
単一ノードの CPU ノードプールを作成します。
export PROJECT_ID=$(gcloud config get-value project)
export LOCATION=us-central1
export CLUSTER_NAME=alloydb-ai-gke
gcloud container node-pools create cpupool \
  --project=${PROJECT_ID} \
  --location=${LOCATION} \
  --node-locations=${LOCATION}-a \
  --cluster=${CLUSTER_NAME} \
  --machine-type=c3-standard-8 \
  --num-nodes=1
予想される出力:
student@cloudshell$ export PROJECT_ID=$(gcloud config get project)
Your active configuration is: [pant]
export LOCATION=us-central1
export CLUSTER_NAME=alloydb-ai-gke
student@cloudshell$ gcloud container node-pools create cpupool \
>   --project=${PROJECT_ID} \
>   --location=${LOCATION} \
>   --node-locations=${LOCATION}-a \
>   --cluster=${CLUSTER_NAME} \
>   --machine-type=c3-standard-8 \
>   --num-nodes=1
Creating node pool cpupool...done.
Created [https://container.googleapis.com/v1/projects/gleb-test-short-003-483115/zones/us-central1/clusters/alloydb-ai-gke/nodePools/cpupool].
NAME     MACHINE_TYPE    DISK_SIZE_GB  NODE_VERSION
cpupool  c3-standard-8  100           1.34.1-gke.3355002
Hugging Face トークンを取得する
このチュートリアルでは、Hugging Face から EmbeddingGemma モデルをデプロイします。モデルの重みにアクセスするには、Hugging Face アクセス トークンを生成します。
- Hugging Face にログインするか、アカウントを作成します。
- [Your Profile] > [Access Tokens] の順に移動します。
- [Create new token] をクリックします。
- トークンの名前を入力し、[読み取り] ロールを選択します。
- [トークンを作成] をクリックし、生成されたトークン値をコピーします。
- まだ同意していない場合は、EmbeddingGemma モデルページでモデルの利用規約に同意します。
Cloud Shell で Hugging Face トークンを含む Kubernetes Secret を作成します(トークンのプレースホルダは実際のトークンに置き換えます)。
export HF_TOKEN=<YOUR_HUGGING_FACE_TOKEN>
kubectl create secret generic hf-secret \
  --from-literal=hf_api_token=$HF_TOKEN \
  --dry-run=client -o yaml | kubectl apply -f -
デプロイ マニフェストを準備する
モデルをデプロイするには、Hugging Face の Text Embeddings Inference(TEI)コンテナ パッケージを使用します。詳細については、Hugging Face GKE TEI のドキュメントをご覧ください。
GitHub からデプロイ リポジトリのクローンを作成します。
git clone https://github.com/huggingface/Google-Cloud-Containers
CPU 構成マニフェストを調べて変更します。
edit Google-Cloud-Containers/examples/gke/tei-deployment/cpu-config/deployment.yaml
CPU デプロイの更新されたマニフェスト:
apiVersion: apps/v1
kind: Deployment
metadata:
  name: tei-deployment
spec:
  replicas: 1
  selector:
    matchLabels:
      app: tei-server
  template:
    metadata:
      labels:
        app: tei-server
        hf.co/model: Google--embeddinggemma-300m
        hf.co/task: text-embeddings
    spec:
      containers:
        - name: tei-container
          image: ghcr.io/huggingface/text-embeddings-inference:cpu-latest
          resources:
            requests:
              cpu: "6"
              memory: "24Gi"
            limits:
              cpu: "6"
              memory: "24Gi"
          env:
            - name: MODEL_ID
              value: google/embeddinggemma-300m
            - name: NUM_SHARD
              value: "1"
            - name: PORT
              value: "8080"
            - name: HF_TOKEN
              valueFrom:
                secretKeyRef:
                  name: hf-secret
                  key: hf_api_token
          volumeMounts:
            - mountPath: /tmp
              name: tmp
      volumes:
        - name: tmp
          emptyDir: {}
      nodeSelector:
        cloud.google.com/machine-family: "c3"
ctrl+s を押して変更を保存し、ターミナルに戻ります。
モデルをデプロイする
マニフェストを適用して TEI サーバーをデプロイします。
kubectl apply -f Google-Cloud-Containers/examples/gke/tei-deployment/cpu-config
デプロイが準備完了状態になるまでモニタリングします。
printf "Waiting for model to load..."; until kubectl logs -l app=tei-server --tail=50 2>/dev/null | grep -q "Ready"; do printf "."; sleep 3; done; printf '\n\033[1;32m========================================\n[SUCCESS] Model is loaded and ready!\nYou can now proceed to the next step.\n========================================\033[0m\n'
tei-service Kubernetes Service を確認します。
kubectl get service tei-service
予想される出力:
student@cloudshell$ kubectl get service tei-service
NAME          TYPE        CLUSTER-IP      EXTERNAL-IP   PORT(S)    AGE
tei-service   ClusterIP   34.118.233.48   <none>        8080/TCP   10m
サービス CLUSTER-IP は、内部的に http://34.118.233.48:8080/embed でリクエストを処理します。
kubectl port-forward を使用して、モデル エンドポイントをローカルでテストします。
kubectl port-forward service/tei-service 8080:8080
ターミナルの上部にある + をクリックして、2 つ目の Cloud Shell タブを開きます。
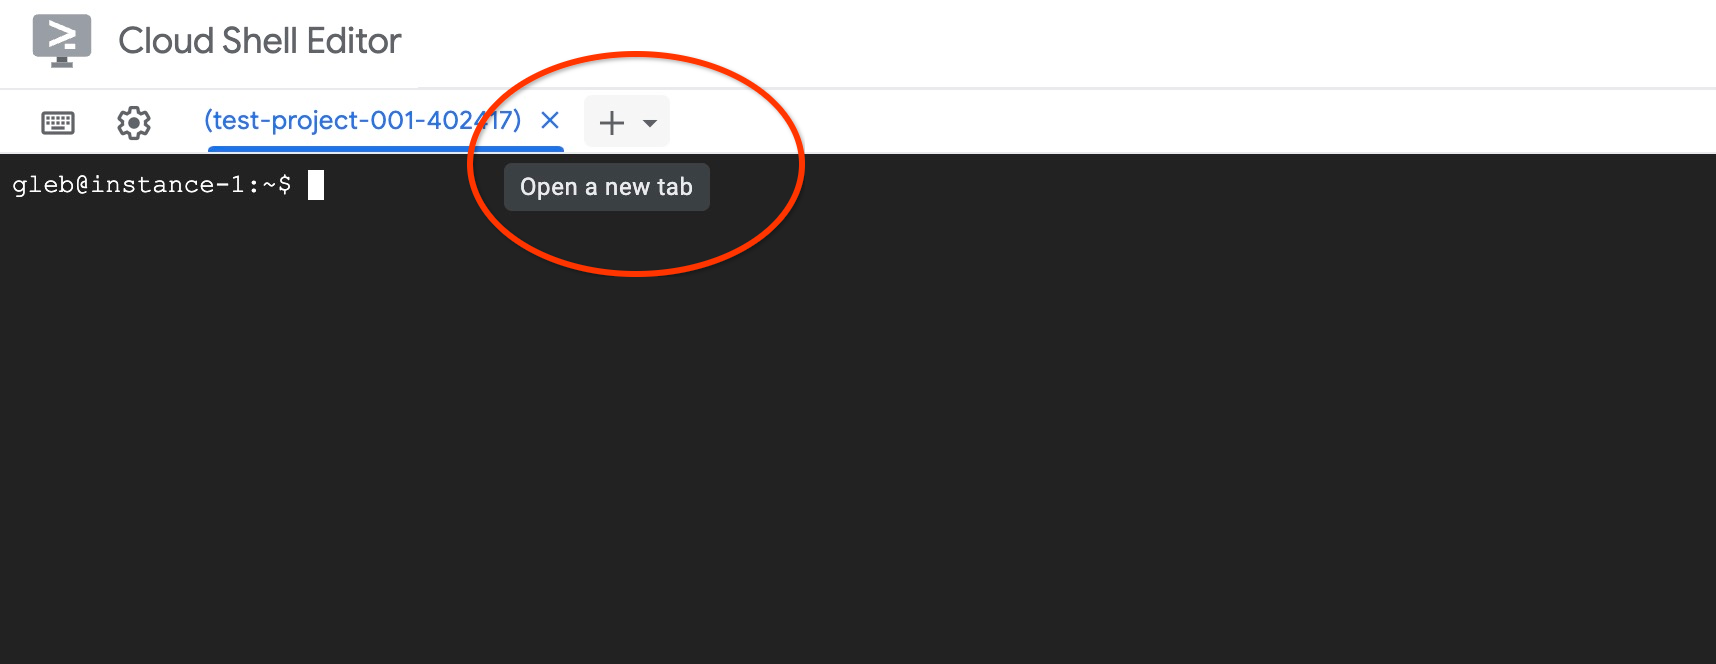
新しいタブで、curl を使用してエンベディング生成をテストします。
curl http://localhost:8080/embed \
  -X POST \
  -d '{"inputs":"Test"}' \
  -H 'Content-Type: application/json'
予想される出力(ベクトル配列):
curl http://localhost:8080/embed \
>     -X POST \
>     -d '{"inputs":"Test"}' \
>     -H 'Content-Type: application/json'
[[-0.018975832,0.0071419072,0.06347208,0.022992613,0.014205903
...
-0.03677433,0.01636146,0.06731572]]
最初のタブで ctrl+c を押して、ポート転送を停止します。
6. AlloyDB Omni にエンベディング モデルを登録する
AlloyDB Omni からデプロイされたモデルを使用するには、データベースを作成し、変換関数を定義して、モデル エンドポイントを登録します。
クライアント VM とデータベースを作成する
同じ VPC にクライアントのジャンプホストとして機能する Compute Engine VM インスタンスを作成します。
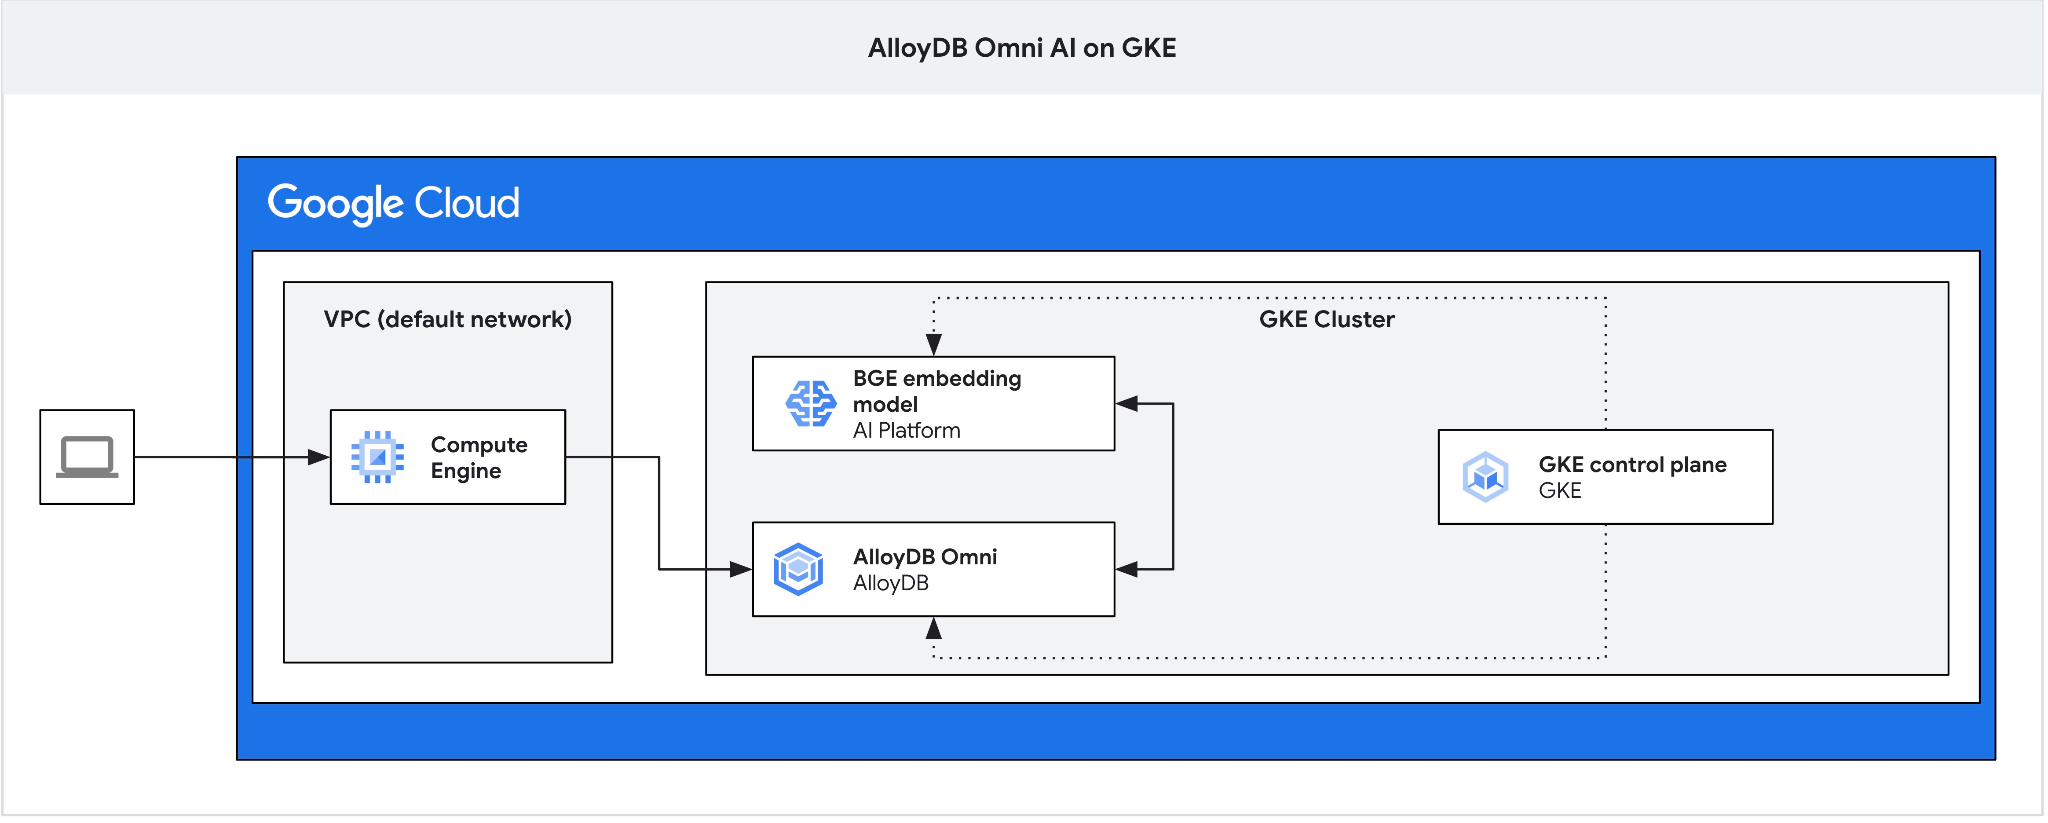
Cloud Shell で、クライアント VM を作成します。
export ZONE=us-central1-a
gcloud compute instances create instance-1 \
  --zone=$ZONE
AlloyDB Omni エンドポイントの IP を取得します。
echo "INSTANCE_IP=$(kubectl get dbclusters.alloydbomni.dbadmin.goog my-omni -n default -o jsonpath='{.status.primary.endpoint}')"
予想される出力:
INSTANCE_IP=10.128.0.33
INSTANCE_IP 値は、AlloyDB Omni クラスタの内部ロードバランサの IP です。この例では 10.131.0.33 です。
SSH を使用して VM インスタンスに接続します。
gcloud compute ssh instance-1 --zone=$ZONE
instance-1 の SSH セッションで、PostgreSQL クライアントをインストールします。
sudo apt-get update && sudo apt-get install --yes postgresql-client
AlloyDB Omni ロードバランサの IP をエクスポートします(PRIMARYENDPOINT IP に置き換えます)。
export INSTANCE_IP=10.131.0.33
psql を使用して AlloyDB Omni に接続します(パスワードは VeryStrongPassword です)。
psql "host=$INSTANCE_IP user=postgres sslmode=require"
psql セッションで、demo データベースを作成します。
CREATE DATABASE demo;
demo データベースに切り替えます。
\c demo
変換関数を作成する
カスタム エンベディング エンドポイントでは、AlloyDB Omni とモデル API の間でデータ形式を適応させるために、入力変換関数と出力変換関数が必要です。
入力変換関数を作成します。
CREATE OR REPLACE FUNCTION tei_text_input_transform(model_id VARCHAR(100), input_text TEXT)
RETURNS JSON
LANGUAGE plpgsql
AS $$
DECLARE
  transformed_input JSON;
BEGIN
  SELECT json_build_object('inputs', input_text, 'truncate', true)::JSON INTO transformed_input;
  RETURN transformed_input;
END;
$$;
予想される出力:
demo=# CREATE OR REPLACE FUNCTION tei_text_input_transform(model_id VARCHAR(100), input_text TEXT)
RETURNS JSON
LANGUAGE plpgsql
AS $$
DECLARE
  transformed_input JSON;
BEGIN
  SELECT json_build_object('inputs', input_text, 'truncate', true)::JSON INTO transformed_input;
  RETURN transformed_input;
END;
$$;
CREATE FUNCTION
demo=#
ベクトル配列のレスポンスを解析する出力変換関数を作成します。
CREATE OR REPLACE FUNCTION tei_text_output_transform(model_id VARCHAR(100), response_json JSON)
RETURNS REAL[]
LANGUAGE plpgsql
AS $$
DECLARE
  transformed_output REAL[];
BEGIN
  SELECT ARRAY(SELECT json_array_elements_text(response_json->0)) INTO transformed_output;
  RETURN transformed_output;
END;
$$;
予想される出力:
demo=# CREATE OR REPLACE FUNCTION tei_text_output_transform(model_id VARCHAR(100), response_json JSON)
RETURNS REAL[]
LANGUAGE plpgsql
AS $$
DECLARE
  transformed_output REAL[];
BEGIN
  SELECT ARRAY(SELECT json_array_elements_text(response_json->0)) INTO transformed_output;
  RETURN transformed_output;
END;
$$;
CREATE FUNCTION
demo=#
モデルを登録する
google_ml.create_model プロシージャを使用して、AlloyDB Omni にモデルを登録します。Kubernetes クラスタ サービスにリクエストを転送する model_request_url として http://tei-service:8080/embed を指定します。
CALL
  google_ml.create_model(
    model_id => 'embeddinggemma',
    model_request_url => 'http://tei-service:8080/embed',
    model_provider => 'custom',
    model_type => 'text_embedding',
    model_in_transform_fn => 'tei_text_input_transform',
    model_out_transform_fn => 'tei_text_output_transform');
予想される出力:
demo=# CALL
  google_ml.create_model(
    model_id => 'embeddinggemma',
    model_request_url => 'http://tei-service:8080/embed',
    model_provider => 'custom',
    model_type => 'text_embedding',
    model_in_transform_fn => 'tei_text_input_transform',
    model_out_transform_fn => 'tei_text_output_transform');
CALL
demo=#
サンプル SQL クエリを使用して、登録済みモデルをテストします。
SELECT google_ml.embedding('embeddinggemma', 'What is AlloyDB Omni?');
この関数は、GKE で実行されているローカル EmbeddingGemma モデルによって生成された実数の配列表現を返します。
q キーを押して psql セッションのプロンプトに戻ります。
psql セッションを終了します。
\q
7. サンプルデータでモデルをテストする
サンプルデータを読み込む
このチュートリアルでは、Cymbal 小売データセットを使用してベクトル類似性検索のデモを行います。Google Cloud SDK と PostgreSQL クライアントを使用して、AlloyDB Omni にデータをインポートします。
instance-1 の SSH セッションで、デモ データベースに接続して vector 拡張機能を有効にします。
psql "host=$INSTANCE_IP user=postgres sslmode=require dbname=demo"
psql セッションで次の操作を行います。
CREATE EXTENSION IF NOT EXISTS vector;
psql セッションを終了します。
\q
スキーマをダウンロードして適用し、demo データベースにテーブルを作成します。
gcloud storage cat gs://cloud-training/gcc/gcc-tech-004/cymbal_demo_schema.sql |psql "host=$INSTANCE_IP user=postgres dbname=demo"
予想される出力:
student@cloudshell:~$ gcloud storage cat gs://cloud-training/gcc/gcc-tech-004/cymbal_demo_schema.sql |psql "host=$INSTANCE_IP user=postgres dbname=demo"
Password for user postgres:
SET
SET
SET
SET
SET
 set_config
------------

(1 row)

SET
SET
SET
SET
SET
SET
CREATE TABLE
ALTER TABLE
CREATE TABLE
ALTER TABLE
CREATE TABLE
ALTER TABLE
CREATE TABLE
ALTER TABLE
CREATE SEQUENCE
ALTER TABLE
ALTER SEQUENCE
ALTER TABLE
ALTER TABLE
ALTER TABLE
student@cloudshell:~$
作成されたテーブルを確認します。
psql "host=$INSTANCE_IP user=postgres dbname=demo" -c "\dt+"
予想される出力:
student@cloudshell:~$ psql "host=$INSTANCE_IP user=postgres dbname=demo" -c "\dt+"
Password for user postgres:
                                           List of relations
 Schema |       Name       | Type  |  Owner   | Persistence | Access method |    Size    | Description
--------+------------------+-------+----------+-------------+---------------+------------+-------------
 public | cymbal_embedding | table | postgres | permanent   | heap          | 8192 bytes |
 public | cymbal_inventory | table | postgres | permanent   | heap          | 8192 bytes |
 public | cymbal_products  | table | postgres | permanent   | heap          | 8192 bytes |
 public | cymbal_stores    | table | postgres | permanent   | heap          | 8192 bytes |
(4 rows)
cymbal_products テーブルにデータを読み込みます。
gcloud storage cat gs://cloud-training/gcc/gcc-tech-004/cymbal_products.csv |psql "host=$INSTANCE_IP user=postgres dbname=demo" -c "\copy cymbal_products from stdin csv header"
予想される出力:
student@cloudshell:~$ gcloud storage cat gs://cloud-training/gcc/gcc-tech-004/cymbal_products.csv |psql "host=$INSTANCE_IP user=postgres dbname=demo" -c "\copy cymbal_products from stdin csv header"
COPY 941
student@cloudshell:~$
cymbal_products テーブルの数行のサンプルを次に示します。
psql "host=$INSTANCE_IP user=postgres dbname=demo" -c "SELECT uniq_id,left(product_name,30),left(product_description,50),sale_price FROM cymbal_products limit 3"
予想される出力:
student@cloudshell:~$ psql "host=$INSTANCE_IP user=postgres dbname=demo" -c "SELECT uniq_id,left(product_name,30),left(product_description,50),sale_price FROM cymbal_products limit 3"
Password for user postgres:
             uniq_id              |              left              |                        left                        | sale_price
----------------------------------+--------------------------------+----------------------------------------------------+------------
 a73d5f754f225ecb9fdc64232a57bc37 | Laundry Tub Strainer Cup       |   Laundry tub strainer cup Chrome For 1-.50, drain |      11.74
 41b8993891aa7d39352f092ace8f3a86 | LED Starry Star Night Light La |  LED Starry Star Night Light Laser Projector 3D Oc |      46.97
 ed4a5c1b02990a1bebec908d416fe801 | Surya Horizon HRZ-1060 Area Ru |  The 100% polypropylene construction of the Surya  |       77.4
(3 rows)
student@cloudshell:~$
cymbal_inventory テーブルにデータを読み込みます。
gcloud storage cat gs://cloud-training/gcc/gcc-tech-004/cymbal_inventory.csv |psql "host=$INSTANCE_IP user=postgres dbname=demo" -c "\copy cymbal_inventory from stdin csv header"
予想される出力:
student@cloudshell:~$ gcloud storage cat gs://cloud-training/gcc/gcc-tech-004/cymbal_inventory.csv |psql "host=$INSTANCE_IP user=postgres dbname=demo" -c "\copy cymbal_inventory from stdin csv header"
Password for user postgres:
COPY 263861
student@cloudshell:~$
cymbal_inventory テーブルの数行のサンプルを次に示します。
psql "host=$INSTANCE_IP user=postgres dbname=demo" -c "SELECT * FROM cymbal_inventory LIMIT 3"
出力:
student@cloudshell:~$ psql "host=$INSTANCE_IP user=postgres dbname=demo" -c "SELECT * FROM cymbal_inventory LIMIT 3"
Password for user postgres:
 store_id |             uniq_id              | inventory
----------+----------------------------------+-----------
     1583 | adc4964a6138d1148b1d98c557546695 |         5
     1490 | adc4964a6138d1148b1d98c557546695 |         4
     1492 | adc4964a6138d1148b1d98c557546695 |         3
(3 rows)
student@cloudshell:~$
cymbal_stores テーブルにデータを読み込みます。
gcloud storage cat gs://cloud-training/gcc/gcc-tech-004/cymbal_stores.csv |psql "host=$INSTANCE_IP user=postgres dbname=demo" -c "\copy cymbal_stores from stdin csv header"
想定されるコンソール出力:
student@cloudshell:~$ gcloud storage cat gs://cloud-training/gcc/gcc-tech-004/cymbal_stores.csv |psql "host=$INSTANCE_IP user=postgres dbname=demo" -c "\copy cymbal_stores from stdin csv header"
Password for user postgres:
COPY 4654
student@cloudshell:~$
cymbal_stores テーブルの数行のサンプルを次に示します。
psql "host=$INSTANCE_IP user=postgres dbname=demo" -c "SELECT store_id, name, zip_code FROM cymbal_stores limit 3"
出力:
student@cloudshell:~$ psql "host=$INSTANCE_IP user=postgres dbname=demo" -c "SELECT store_id, name, zip_code FROM cymbal_stores limit 3"
Password for user postgres:
 store_id |       name        | zip_code
----------+-------------------+----------
     1990 | Mayaguez Store    |      680
     2267 | Ware Supercenter  |     1082
     4359 | Ponce Supercenter |      780
(3 rows)
student@cloudshell:~$
エンベディングを構築する
psql を使用してデモ データベースに接続し、cymbal_products テーブルに記述されている商品の説明に基づいて、商品のエンベディングを構築します。
デモ データベースに接続します。
psql "host=$INSTANCE_IP user=postgres sslmode=require dbname=demo"
vector 型の embedding 列を使用して、商品説明用に生成されたテキスト エンベディングを保存します。
クエリのタイミングを有効にします。
\timing
各商品説明のエンベディングを生成し、cymbal_embedding テーブルに保存します。
INSERT INTO cymbal_embedding (uniq_id, embedding)
SELECT uniq_id, google_ml.embedding('embeddinggemma', product_description)::vector
FROM cymbal_products;
予想される出力:
demo=# INSERT INTO cymbal_embedding(uniq_id,embedding)  SELECT uniq_id, google_ml.embedding('embeddinggemma',product_description)::vector FROM cymbal_products;
INSERT 0 941
Time: 497878.136 ms (08:17.878)
demo=#
セマンティック検索クエリを実行する
psql セッションで、コサイン距離(<=>)を使用して、質問 "What kind of fruit trees grow well here?" に一致する上位 5 つの商品を見つけます。
SELECT
    cp.product_name,
    left(cp.product_description, 80) AS description,
    cp.sale_price,
    cs.zip_code,
    (ce.embedding <=> google_ml.embedding('embeddinggemma', 'What kind of fruit trees grow well here?')::vector) AS distance
FROM
    cymbal_products cp
JOIN cymbal_embedding ce ON ce.uniq_id = cp.uniq_id
JOIN cymbal_inventory ci ON ci.uniq_id = cp.uniq_id
JOIN cymbal_stores cs ON cs.store_id = ci.store_id
WHERE
    ci.inventory > 0
    AND cs.store_id = 1583
ORDER BY
    distance ASC
LIMIT 5;
予想される出力:
demo=# SELECT
        cp.product_name,
        left(cp.product_description,80) as description,
        cp.sale_price,
        cs.zip_code,
        (ce.embedding <=> google_ml.embedding('embeddinggemma','What kind of fruit trees grow well here?')::vector) as distance
FROM
        cymbal_products cp
JOIN cymbal_embedding ce on ce.uniq_id=cp.uniq_id
JOIN cymbal_inventory ci on ci.uniq_id=cp.uniq_id
JOIN cymbal_stores cs on cs.store_id=ci.store_id
WHERE
    ci.inventory > 0
    AND cs.store_id = 1583
ORDER BY
    distance ASC
LIMIT 5;
     product_name      |                                   description                                    | sale_price | zip_code |      distance
-----------------------+----------------------------------------------------------------------------------+------------+----------+--------------------
 Cherry Tree           | This is a beautiful cherry tree that will produce delicious cherries. It is an d |      75.00 |    93230 | 0.5210549378080666
 California Lilac      | This is a beautiful lilac tree that can grow to be over 10 feet tall. It is an d |       5.00 |    93230 | 0.5639421771781971
 Toyon                 | This is a beautiful toyon tree that can grow to be over 20 feet tall. It is an e |      10.00 |    93230 | 0.5670010914504852
 Rose Bush             | This is a beautiful rose bush that will produce fragrant roses. It is a perennia |      50.00 |    93230 | 0.5731542622882957
 California Peppertree | This is a beautiful peppertree that can grow to be over 30 feet tall. It is an e |      25.00 |    93230 | 0.5750934653011995
(5 rows)

Time: 83.610 ms
demo=#
クエリは 83 ミリ秒で実行され、リクエストに一致し、番号 1583 の店舗で在庫がある cymbal_products テーブルのツリーのリストを返しました。
ANN インデックスを構築する
データセットが小さい場合は、すべてのエンベディングをスキャンする完全一致検索を簡単に使用できますが、データが増加すると、読み込み時間と応答時間も増加します。パフォーマンスを向上させるには、エンベディング データにインデックスを作成します。ベクトルデータに Google ScaNN インデックスを使用してこれを行う方法の例を次に示します。
接続が切断された場合は、デモ データベースに再接続します。
psql "host=$INSTANCE_IP user=postgres sslmode=require dbname=demo"
alloydb_scann 拡張機能を有効にします。
CREATE EXTENSION IF NOT EXISTS alloydb_scann;
embedding 列に ScaNN インデックスを作成します。
CREATE INDEX cymbal_products_embeddings_scann ON cymbal_embedding
  USING scann (embedding cosine)
  WITH (num_leaves=10, max_num_levels = 1);
セマンティック検索クエリを再実行して、実行パフォーマンスを比較します。
SELECT
    cp.product_name,
    left(cp.product_description, 80) AS description,
    cp.sale_price,
    cs.zip_code,
    (ce.embedding <=> google_ml.embedding('embeddinggemma', 'What kind of fruit trees grow well here?')::vector) AS distance
FROM
    cymbal_products cp
JOIN cymbal_embedding ce ON ce.uniq_id = cp.uniq_id
JOIN cymbal_inventory ci ON ci.uniq_id = cp.uniq_id
JOIN cymbal_stores cs ON cs.store_id = ci.store_id
WHERE
    ci.inventory > 0
    AND cs.store_id = 1583
ORDER BY
    distance ASC
LIMIT 5;
予想される出力:
demo=# SELECT
    cp.product_name,
    left(cp.product_description,80) as description,
    cp.sale_price,
    cs.zip_code,
    (ce.embedding <=> google_ml.embedding('embeddinggemma', 'What kind of fruit trees grow well here?')::vector) AS distance
FROM
    cymbal_products cp
JOIN cymbal_embedding ce ON ce.uniq_id = cp.uniq_id
JOIN cymbal_inventory ci ON ci.uniq_id = cp.uniq_id
JOIN cymbal_stores cs ON cs.store_id = ci.store_id
WHERE
    ci.inventory > 0
    AND cs.store_id = 1583
ORDER BY
    distance ASC
LIMIT 5;
     product_name      |                                   description                                    | sale_price | zip_code |      distance
-----------------------+----------------------------------------------------------------------------------+------------+----------+--------------------
 Cherry Tree           | This is a beautiful cherry tree that will produce delicious cherries. It is an d |      75.00 |    93230 | 0.5210549378080666
 California Lilac      | This is a beautiful lilac tree that can grow to be over 10 feet tall. It is an d |       5.00 |    93230 | 0.5639421771781971
 Toyon                 | This is a beautiful toyon tree that can grow to be over 20 feet tall. It is an e |      10.00 |    93230 | 0.5670010914504852
 Rose Bush             | This is a beautiful rose bush that will produce fragrant roses. It is a perennia |      50.00 |    93230 | 0.5731542622882957
 California Peppertree | This is a beautiful peppertree that can grow to be over 30 feet tall. It is an e |      25.00 |    93230 | 0.5750934653011995
(5 rows)

Time: 64.783 ms
クエリの実行時間がわずかに短縮されました。この効果は、大規模なデータセットでより顕著になります。返されるデータは、インデックスなしで取得したデータと同じか、非常に類似している必要があります。
他のクエリを試して、ドキュメントでベクトル インデックスの最適化について詳細をご覧ください。
psql セッションを終了します。
\q
instance-1 SSH セッションから切断して、Ctrl+D キーを押すか exit と入力して、Google Cloud Shell に戻ります。
8. vLLM を使用して Gemma をデプロイする
Gemma のノードプールを追加
まず、リージョンで使用可能なノードタイプを確認します。
export LOCATION=us-central1-a
gcloud compute accelerator-types list --filter="zone:${LOCATION}"
nvidia-l4 アクセラレータを含む、使用可能なアクセラレータ タイプのリストが表示されます。nvidia-l4 アクセラレータ タイプを使用してノードプールを作成します。
export PROJECT_ID=$(gcloud config get project)
export LOCATION=us-central1
export CLUSTER_NAME=alloydb-ai-gke
gcloud container node-pools create gpupool \
    --accelerator type=nvidia-l4,count=1,gpu-driver-version=latest \
    --project=${PROJECT_ID} \
    --location=${LOCATION} \
    --node-locations=${LOCATION}-a \
    --cluster=${CLUSTER_NAME} \
    --machine-type=g2-standard-8 \
    --num-nodes=1
vLLM を使用して Google Gemini 4 12B モデルのデプロイ マニフェストを作成します。
cat << 'EOF' > gemma-12b-gpu-vllm-deployment.yaml
apiVersion: apps/v1
kind: Deployment
metadata:
  name: gemma-12b-gpu-vllm-deployment
spec:
  replicas: 1
  selector:
    matchLabels:
      app: gemma-12b-gpu-vllm
  template:
    metadata:
      labels:
        app: gemma-12b-gpu-vllm
        ai.gke.io/model: gemma-4-12b-it
        ai.gke.io/inference-server: vllm
        examples.ai.gke.io/source: user-guide
    spec:
      containers:
      - name: inference-server
        image: us-docker.pkg.dev/vertex-ai/vertex-vision-model-garden-dockers/pytorch-vllm-serve:latest
        resources:
          requests:
            cpu: "4"
            memory: "16Gi"
            ephemeral-storage: "30Gi"
            nvidia.com/gpu: "1"
          limits:
            cpu: "8"
            memory: "24Gi"
            ephemeral-storage: "30Gi"
            nvidia.com/gpu: "1"
        command: ["python3", "-m", "vllm.entrypoints.api_server"]
        args:
          - --model=$(MODEL_ID)
          - --host=0.0.0.0
          - --port=8000
          - --tensor-parallel-size=1
          - --enable-log-requests
          - --enable-chunked-prefill
          - --enable-prefix-caching
          - --enable-auto-tool-choice
          - --generation-config=auto
          - --tool-call-parser=gemma4
          - --dtype=bfloat16
          - --max-num-seqs=16
          - --max-model-len=32768
          - --gpu-memory-utilization=0.95
          - --reasoning-parser=gemma4
          - --trust-remote-code
          - --quantization=fp8
        env:
        - name: LD_LIBRARY_PATH
          value: ${LD_LIBRARY_PATH}:/usr/local/nvidia/lib64
        - name: MODEL_ID
          value: google/gemma-4-12b-it
        - name: HF_TOKEN
          valueFrom:
            secretKeyRef:
              name: hf-secret
              key: hf_api_token
        volumeMounts:
        - mountPath: /dev/shm
          name: dshm
      volumes:
      - name: dshm
        emptyDir:
            medium: Memory
      nodeSelector:
        cloud.google.com/gke-accelerator: nvidia-l4
        cloud.google.com/gke-gpu-driver-version: latest
---
apiVersion: v1
kind: Service
metadata:
  name: gemma-12b-gpu-vllm-service
spec:
  selector:
    app: gemma-12b-gpu-vllm
  type: ClusterIP
  ports:
    - protocol: TCP
      port: 8000
      targetPort: 8000
EOF
保存した gemma-12b-gpu-vllm-deployment.yaml Deployment を適用します。
kubectl apply -f gemma-12b-gpu-vllm-deployment.yaml
予想される出力:
$ kubectl apply -f gemma-12b-gpu-vllm-deployment.yaml
deployment.apps/gemma-12b-gpu-vllm-deployment created
service/gemma-12b-gpu-vllm-service created
デプロイが完了してモデルが読み込まれるまで待ちます。数分かかることがあります。
printf "Waiting for model to load..."; until kubectl logs -l app=gemma-12b-gpu-vllm --tail=50 2>/dev/null | grep -q "Application startup complete"; do printf "."; sleep 3; done; printf '\n\033[1;32m========================================\n[SUCCESS] Model is loaded and ready!\nYou can now proceed to the next step.\n========================================\033[0m\n'
予想される出力:
Waiting for model to load...
========================================
[SUCCESS] Model is loaded and ready!
You can now proceed to the next step.
========================================
モデルをテストします。モデルにアクセスできるようにポート転送を有効にします。
kubectl port-forward svc/gemma-12b-gpu-vllm-service 8090:8000
別のターミナル ウィンドウで、curl を使用してモデルにプロンプトを送信します。
curl http://localhost:8090/v1/chat/completions \
  -H "Content-Type: application/json" \
  -d '{
    "messages": [
      {"role": "system", "content": "You are a helpful assistant running on GKE."},
      {"role": "user", "content": "What is AlloyDB Omni."}
    ],
    "temperature": 0.7
  }' | jq -r '.choices[0].message.content'
予想される出力:
  % Total    % Received % Xferd  Average Speed   Time    Time     Time  Current
                                 Dload  Upload   Total   Spent    Left  Speed
100  3957  100  3761  100   196     85      4  0:00:49  0:00:43  0:00:06   830
**AlloyDB Omni** is a fully managed, PostgreSQL-compatible database engine from Google Cloud that can be run **on-premises, in other clouds, or in your own data centers.**

To understand it simply: It allows you to run the high-performance, enterprise-grade capabilities of Google's **AlloyDB** (a cloud-native database) on your own infrastructure.

Here is a breakdown of what makes it significant:

### 1. The "Best of Both Worlds" Architecture
Normally, you have to choose between:
*   **Managed Cloud Databases:** Easy to scale and manage, but you are locked into the cloud provider's infrastructure.
*   **Self-Managed Databases:** You have full control over the hardware/location, but you are responsible for scaling, patching, and high availability.

**AlloyDB Omni** bridges this gap. It provides the advanced features of a cloud-native database (like intelligent indexing, high availability, and massive scalability) while allowing you to run it anywhere.
最初のターミナルで、Ctrl+C を押してポート転送を停止します(まだ実行中の場合)。
9. AlloyDB Omni に Gemma 4 モデルを登録する
google_ml.create_model プロシージャを使用して、AlloyDB Omni に Gemma 12B モデルを登録します。Kubernetes クラスタ サービスにリクエストを転送する model_request_url として http://gemma-12b-gpu-vllm-service:8000/v1/chat/completions を指定します。
AlloyDB Omni エンドポイントの IP を取得します。
echo "INSTANCE_IP=$(kubectl get dbclusters.alloydbomni.dbadmin.goog my-omni -n default -o jsonpath='{.status.primary.endpoint}')"
SSH を使用して VM インスタンスに接続します。
export ZONE=us-central1-a
gcloud compute ssh instance-1 --zone=$ZONE
VM に接続したら、前の手順で INSTANCE_IP 変数をエクスポートします(10.128.0.33 は例です。実際の IP に置き換えてください)。
export INSTANCE_IP=10.128.0.33
AlloyDB パスワードをエクスポートします。
export PGPASSWORD=VeryStrongPassword
demo データベースに接続します。
psql "host=$INSTANCE_IP user=postgres sslmode=require dbname=demo"
psql セッションでモデルを登録します。
CALL
  google_ml.create_model(
    model_id => 'gemma-12b-gpu',
    model_request_url => 'http://gemma-12b-gpu-vllm-service:8000/v1/chat/completions',
    model_provider => 'custom',
    model_type => 'llm');
サンプル SQL クエリを使用してモデルをテストします。
SELECT google_ml.predict_row(
  model_id => 'gemma-12b-gpu',
  request_body => json_build_object(
    'messages', json_build_array(
      json_build_object('role', 'user', 'content', 'What is AlloyDB Omni?'))))->'choices'->0->'message'->'content';
q を押して、結果ウィンドウから psql プロンプトに戻ります。
AlloyDB Omni でベクトル検索と LLM RAG を組み合わせる
LLM リクエストでベクトル検索を使用して、LLM で RAG(検索拡張生成)をデモンストレートします。
plsql で SQL クエリを実行します。
WITH trees AS (
SELECT
        cp.product_name,
        cp.product_description AS description,
        cp.sale_price,
        cs.zip_code,
        cp.uniq_id AS product_id
FROM
    cymbal_products cp
JOIN cymbal_embedding ce ON ce.uniq_id = cp.uniq_id
JOIN cymbal_inventory ci ON ci.uniq_id = cp.uniq_id
JOIN cymbal_stores cs ON cs.store_id = ci.store_id
WHERE
        ci.inventory>0
        AND cs.store_id = 1583
ORDER BY
        (ce.embedding <=> embedding('embeddinggemma',
        'What kind of fruit trees grow well here?')::vector) ASC
LIMIT 1),
prompt AS (
SELECT
        'You are a friendly advisor helping to find a product based on the customer''s needs.
Based on the client request we have loaded a list of products closely related to search.
The list in JSON format with list of values like {"product_name":"name","product_description":"some description","sale_price":10}
Here is the list of products:' || json_agg(trees) || 'The customer asked "What kind of fruit trees grow well here?"
You should give information about the product, price and some supplemental information' AS prompt_text
FROM
        trees),
response AS (
SELECT
        google_ml.predict_row(
          model_id =>'gemma-12b-gpu',
          request_body => json_build_object(
            'messages', json_build_array(
              json_build_object('role', 'user', 'content',prompt_text)
            )))->'choices'->0->'message'->'content' AS resp
FROM
        prompt)
SELECT
REPLACE(resp::text, '\n', CHR(10))
FROM
        response;
予想される出力:
----------------------------------------------------------------------------------------------------------------------------------------------
 "Hello there! I'd be happy to help you find the perfect tree for your garden.                                                               +
                                                                                                                                             +
 Based on your location, we have a wonderful option that would grow beautifully in your area:                                                +
                                                                                                                                             +
 **Cherry Tree**                                                                                                                             +
 *   **Price:** $75.00                                                                                                                       +
 *   **Description:** This is a stunning deciduous tree that not only provides a beautiful landscape but also produces delicious cherries.   +
 *   **Supplemental Information:**                                                                                                           +
     *   **Growth:** It grows to about 15 feet tall.                                                                                         +
     *   **Appearance:** You can look forward to dark green leaves in the summer that transform into a vibrant red in the fall.              +
     *   **Benefits:** It's a great choice if you're looking for both fruit and extra shade or privacy in your yard.                         +
     *   **Care Tips:** It performs best in a cool, moist climate with sandy soil. Since you are in a suitable zone, it should thrive nicely!+
                                                                                                                                             +
 Would you like more details on how to plant this, or would you like to proceed with an order?"
(1 row)
クエリは、ベクトル検索結果によって LLM へのプロンプトを補完します。
他のクエリを試して、RAG パターンをテストします。このアーキテクチャの利点は、完全な自己完結性です。データはクラスタの外部に送信されず、完全に分離された環境で実行できます。
psql セッションを終了します。
\q
VM への SSH セッションから切断します。
exit
AlloyDB Omni には、他にも多くの機能とラボがあります。
10. 環境をクリーンアップする
Google Cloud アカウントに継続的に課金されないようにするには、この Codelab で作成したリソースを削除します。
GKE クラスタの削除
Cloud Shell で、GKE クラスタを削除します。
export PROJECT_ID=$(gcloud config get-value project)
export LOCATION=us-central1
export CLUSTER_NAME=alloydb-ai-gke
gcloud container clusters delete ${CLUSTER_NAME} \
  --project=${PROJECT_ID} \
  --region=${LOCATION}
予想される出力:
student@cloudshell:~$ gcloud container clusters delete ${CLUSTER_NAME} \
>   --project=${PROJECT_ID} \
>   --region=${LOCATION}
The following clusters will be deleted.
 - [alloydb-ai-gke] in [us-central1]

Do you want to continue (Y/n)?  Y

Deleting cluster alloydb-ai-gke...done.
Deleted
クライアント VM を削除する
Cloud Shell で、Compute Engine インスタンスを削除します。
export PROJECT_ID=$(gcloud config get-value project)
export ZONE=us-central1-a
gcloud compute instances delete instance-1 \
  --project=${PROJECT_ID} \
  --zone=${ZONE}
予想される出力:
student@cloudshell:~$ export PROJECT_ID=$(gcloud config get project)
export ZONE=us-central1-a
gcloud compute instances delete instance-1 \
  --project=${PROJECT_ID} \
  --zone=${ZONE}
Your active configuration is: [cloudshell-5399]
The following instances will be deleted. Any attached disks configured to be auto-deleted will be deleted unless they are attached to any other instances or the `--keep-disks` flag is given and specifies them for keeping. Deleting a disk
is irreversible and any data on the disk will be lost.
 - [instance-1] in [us-central1-a]

Do you want to continue (Y/n)?  Y

Deleted
この Codelab 用に新しいプロジェクトを作成した場合は、必要に応じて Google Cloud Resource Manager でプロジェクト全体を削除できます。
11. 完了
以上で、この Codelab は完了です。
学習した内容
- GKE クラスタに AlloyDB Omni をデプロイする方法
- AlloyDB Omni に接続する方法
- AlloyDB Omni にデータを読み込む方法
- AI モデル(エンベディングと LLM)を GKE にデプロイする方法
- AlloyDB Omni で AI モデルを登録する方法
- セマンティック検索用のエンベディングを生成する方法
- AlloyDB Omni でセマンティック検索クエリを実行する方法
- AlloyDB Omni でベクトル インデックスを作成して使用する方法
AlloyDB Omni での AI の使用について詳しくは、ドキュメントをご覧ください。
アンケート
出力: