
1. 소개
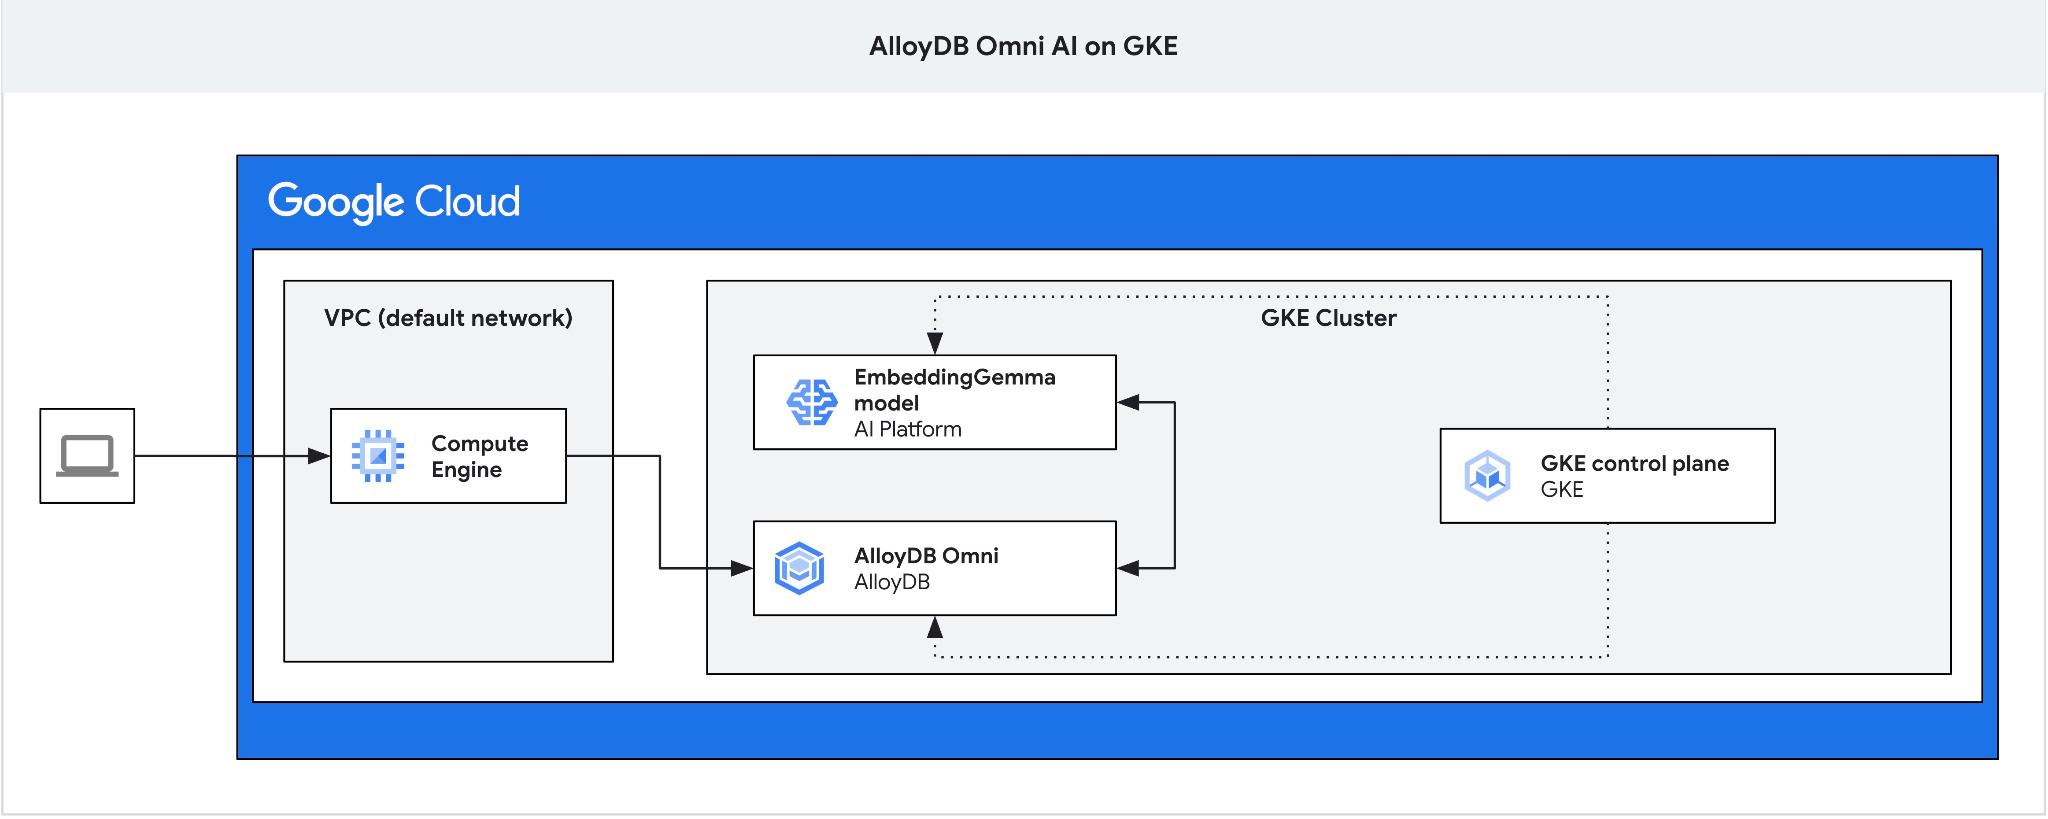
이 Codelab에서는 GKE에 AlloyDB Omni를 배포하고 동일한 Kubernetes 클러스터에 배포된 개방형 임베딩 모델과 함께 사용하는 방법을 알아봅니다. 동일한 GKE 클러스터에서 데이터베이스 인스턴스 옆에 모델을 배포하면 지연 시간과 서드 파티 서비스에 대한 종속성이 줄어듭니다. 또한 데이터가 조직을 벗어나서는 안 되고 서드 파티 서비스 사용이 허용되지 않는 경우 보안 및 규정 준수에서 설정한 요구사항에 따라 로컬 배포가 필요할 수 있습니다.
기본 요건
- Google Cloud, 콘솔에 관한 기본적인 이해
- Kubernetes 및 GKE에 대한 기본 지식
- 명령줄 인터페이스 및 Cloud Shell의 기본 기술
학습할 내용
- Google Kubernetes 클러스터에 AlloyDB Omni를 배포하는 방법
- AlloyDB Omni에 연결하는 방법
- AlloyDB Omni에 데이터를 로드하는 방법
- 오픈 임베딩 모델을 GKE에 배포하는 방법
- AlloyDB Omni에서 임베딩 모델을 등록하는 방법
- 시맨틱 검색을 위한 임베딩을 생성하는 방법
- AlloyDB Omni에서 생성된 임베딩을 시맨틱 검색에 사용하는 방법
- AlloyDB에서 벡터 색인을 만들고 사용하는 방법
필요한 항목
- Google Cloud 계정 및 Google Cloud 프로젝트
- Google Cloud 콘솔 및 Cloud Shell을 지원하는 웹브라우저(예: Chrome)
2. 설정 및 요구사항
프로젝트 설정
- Google Cloud 콘솔에 로그인합니다. 아직 Gmail이나 Google Workspace 계정이 없는 경우 계정을 만들어야 합니다.
직장 또는 학교 계정 대신 개인 계정을 사용하세요.
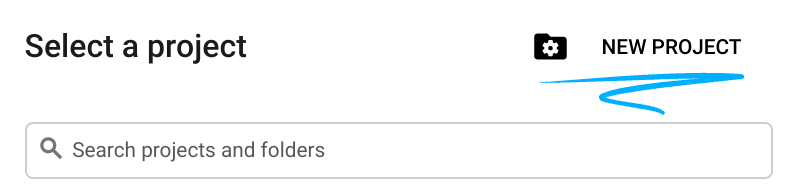
- 새 프로젝트를 만들거나 기존 프로젝트를 재사용합니다. Google Cloud 콘솔에서 새 프로젝트를 만들려면 헤더에서 프로젝트 선택 버튼을 클릭하여 팝업 창을 엽니다.

프로젝트 선택 창에서 새 프로젝트 버튼을 누르면 새 프로젝트 대화상자가 열립니다.
대화상자에서 원하는 프로젝트 이름을 입력하고 위치를 선택합니다.
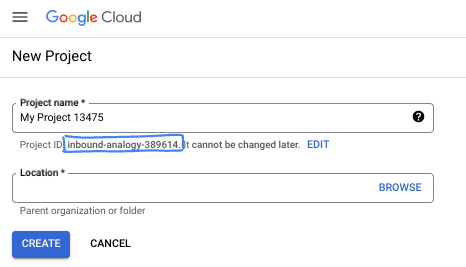
- 프로젝트 이름은 이 프로젝트 참가자의 표시 이름입니다. 프로젝트 이름은 Google API에서 사용되지 않으며 언제든지 변경할 수 있습니다.
- 프로젝트 ID는 모든 Google Cloud 프로젝트에서 고유하며, 변경할 수 없습니다 (설정된 후에는 변경할 수 없음). Google Cloud 콘솔에서 고유 ID를 자동으로 생성하지만 이를 맞춤설정할 수 있습니다. 생성된 ID가 마음에 들지 않으면 다른 무작위 ID를 생성하거나 자체 ID를 제공하여 사용 가능 여부를 확인할 수 있습니다. 대부분의 Codelab에서는 프로젝트 ID를 참조해야 합니다. 프로젝트 ID는 일반적으로 PROJECT_ID 자리표시자로 식별됩니다.
- 참고로 세 번째 값은 일부 API에서 사용하는 프로젝트 번호입니다. 이 세 가지 값에 대한 자세한 내용은 문서를 참고하세요.
결제 사용 설정
개인 결제 계정 설정
Google Cloud 크레딧을 사용하여 결제를 설정한 경우 이 단계를 건너뛸 수 있습니다.
개인 결제 계정을 설정하려면 Cloud 콘솔에서 여기에서 결제를 사용 설정하세요.
참고 사항:
- 이 실습을 완료하는 데 드는 Cloud 리소스 비용은 미화 3달러 미만입니다.
- 이 실습이 끝나면 단계에 따라 리소스를 삭제하여 추가 요금이 발생하지 않도록 할 수 있습니다.
- 신규 사용자는 미화$300 상당의 무료 체험판을 사용할 수 있습니다.
Cloud Shell 시작
Google Cloud를 노트북에서 원격으로 실행할 수 있지만, 이 Codelab에서는 Cloud에서 실행되는 명령줄 환경인 Google Cloud Shell을 사용합니다.
Google Cloud Console의 오른쪽 상단 툴바에 있는 Cloud Shell 아이콘을 클릭합니다.
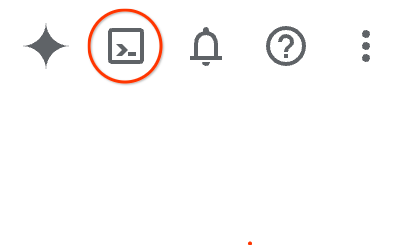
또는 G를 누른 다음 S를 누릅니다. Google Cloud 콘솔에 있거나 이 링크를 사용하는 경우 이 시퀀스를 통해 Cloud Shell이 활성화됩니다.
환경을 프로비저닝하고 연결하는 데 몇 분 정도 소요됩니다. 완료되면 다음과 같이 표시됩니다.

가상 머신에는 필요한 개발 도구가 모두 들어있습니다. 영구적인 5GB 홈 디렉터리를 제공하고 Google Cloud에서 실행되므로 네트워크 성능과 인증이 크게 개선됩니다. 이 Codelab의 모든 작업은 브라우저 내에서 수행할 수 있습니다. 아무것도 설치할 필요가 없습니다.
3. 시작하기 전에
API 사용 설정
결과:
AlloyDB Omni 및 개방형 모델 배포에 Google Kubernetes Engine (GKE)을 사용하려면 Google Cloud 프로젝트에서 각 API를 사용 설정해야 합니다.
Cloud Shell 내에 프로젝트 ID가 설정되어 있는지 확인합니다.
PROJECT_ID=$(gcloud config get-value project)
echo $PROJECT_ID
클라우드 셸 구성에 정의되어 있지 않은 경우 다음 명령어를 사용하여 설정합니다.
export PROJECT_ID=<your project>
gcloud config set project $PROJECT_ID
필요한 모든 서비스를 사용 설정합니다.
gcloud services enable compute.googleapis.com
gcloud services enable container.googleapis.com
예상 출력
student@cloudshell:~ (test-project-001-402417)$ PROJECT_ID=test-project-001-402417
student@cloudshell:~ (test-project-001-402417)$ gcloud config set project test-project-001-402417
Updated property [core/project].
student@cloudshell:~ (test-project-001-402417)$ gcloud services enable compute.googleapis.com
gcloud services enable container.googleapis.com
Operation "operations/acat.p2-4470404856-1f44ebd8-894e-4356-bea7-b84165a57442" finished successfully.
API 소개
- Kubernetes Engine API (
container.googleapis.com)를 사용하면 Google Kubernetes Engine (GKE) 클러스터를 만들고 관리할 수 있습니다. Google 인프라를 사용하여 컨테이너화된 애플리케이션을 배포, 관리, 확장할 수 있는 관리형 환경을 제공합니다. - Compute Engine API (
compute.googleapis.com)를 사용하면 가상 머신 (VM), 영구 디스크, 네트워크 설정을 만들고 관리할 수 있습니다. 워크로드를 실행하고 많은 관리형 서비스의 기본 인프라를 호스팅하는 데 필요한 핵심 Infrastructure-as-a-Service (IaaS) 기반을 제공합니다.
4. GKE에 AlloyDB Omni 배포
GKE에 AlloyDB Omni를 배포하려면 AlloyDB Omni 연산자 요구사항에 나열된 요구사항에 따라 Kubernetes 클러스터를 준비해야 합니다.
GKE 클러스터 만들기
AlloyDB Omni 인스턴스가 포함된 포드를 배포하기에 충분한 풀 구성으로 표준 GKE 클러스터를 배포해야 합니다. AlloyDB Omni의 경우 CPU가 2개 이상이고 RAM이 8GB 이상이어야 하며 연산자 및 모니터링 서비스 컨테이너를 위한 공간이 있어야 합니다. e2-standard-4 VM 유형을 사용합니다.
배포의 환경 변수를 설정합니다.
export PROJECT_ID=$(gcloud config get project)
export LOCATION=us-central1
export CLUSTER_NAME=alloydb-ai-gke
export MACHINE_TYPE=e2-standard-4
그런 다음 gcloud를 사용하여 GKE Standard 클러스터를 만듭니다.
gcloud container clusters create ${CLUSTER_NAME} \
  --project=${PROJECT_ID} \
  --region=${LOCATION} \
  --workload-pool=${PROJECT_ID}.svc.id.goog \
  --release-channel=rapid \
  --machine-type=${MACHINE_TYPE} \
  --num-nodes=1
예상되는 콘솔 출력:
student@cloudshell:~ (gleb-test-short-001-415614)$ export PROJECT_ID=$(gcloud config get project)
export LOCATION=us-central1
export CLUSTER_NAME=alloydb-ai-gke
export MACHINE_TYPE=n2-highmem-2
Your active configuration is: [gleb-test-short-001-415614]
student@cloudshell:~ (gleb-test-short-001-415614)$ gcloud container clusters create ${CLUSTER_NAME} \
  --project=${PROJECT_ID} \
  --region=${LOCATION} \
  --workload-pool=${PROJECT_ID}.svc.id.goog \
  --release-channel=rapid \
  --machine-type=${MACHINE_TYPE} \
  --num-nodes=1
Note: The Kubelet readonly port (10255) is now deprecated. Please update your workloads to use the recommended alternatives. See https://cloud.google.com/kubernetes-engine/docs/how-to/disable-kubelet-readonly-port for ways to check usage and for migration instructions.
Note: Your Pod address range (`--cluster-ipv4-cidr`) can accommodate at most 1008 node(s).
Creating cluster alloydb-ai-gke in us-central1..


NAME: omni01
ZONE: us-central1-a
MACHINE_TYPE: e2-standard-4
PREEMPTIBLE:
INTERNAL_IP: 10.128.0.3
EXTERNAL_IP: 35.232.157.123
STATUS: RUNNING
student@cloudshell:~ (gleb-test-short-001-415614)$
클러스터 준비
cert-manager 서비스(Kubernetes용 네이티브 인증서 관리자)와 같은 필수 구성요소를 설치해야 합니다. cert-manager 설치에 대한 문서의 단계를 따를 수 있습니다.
기본적으로 Cloud Shell에 이미 설치되어 있는 Kubernetes 명령줄 도구인 kubectl을 사용합니다. 유틸리티를 사용하기 전에 클러스터의 사용자 인증 정보를 가져와야 합니다.
gcloud container clusters get-credentials ${CLUSTER_NAME} --region=${LOCATION}
이제 kubectl을 사용하여 cert-manager를 설치할 수 있습니다.
kubectl apply -f https://github.com/cert-manager/cert-manager/releases/download/v1.19.2/cert-manager.yaml
예상되는 콘솔 출력(수정됨):
student@cloudshell:~$ kubectl apply -f https://github.com/cert-manager/cert-manager/releases/download/v1.16.2/cert-manager.yaml
namespace/cert-manager created
customresourcedefinition.apiextensions.k8s.io/certificaterequests.cert-manager.io created
customresourcedefinition.apiextensions.k8s.io/certificates.cert-manager.io created
customresourcedefinition.apiextensions.k8s.io/challenges.acme.cert-manager.io created
customresourcedefinition.apiextensions.k8s.io/clusterissuers.cert-manager.io created
...
validatingwebhookconfiguration.admissionregistration.k8s.io/cert-manager-webhook created
AlloyDB Omni 설치
AlloyDB Omni 오퍼레이터는 Helm 유틸리티를 사용하여 설치할 수 있습니다.
다음 명령어를 실행하여 AlloyDB Omni 연산자를 설치합니다.
export GCS_BUCKET=alloydb-omni-operator
export HELM_PATH=$(gcloud storage cat gs://$GCS_BUCKET/latest)
export OPERATOR_VERSION="${HELM_PATH%%/*}"
gcloud storage cp gs://$GCS_BUCKET/$HELM_PATH ./ --recursive
helm install alloydbomni-operator alloydbomni-operator-${OPERATOR_VERSION}.tgz \
--create-namespace \
--namespace alloydb-omni-system \
--atomic \
--timeout 5m
예상되는 콘솔 출력(수정됨):
student@cloudshell:~$ gcloud storage cp gs://$GCS_BUCKET/$HELM_PATH ./ --recursive
Copying gs://alloydb-omni-operator/1.2.0/alloydbomni-operator-1.2.0.tgz to file://./alloydbomni-operator-1.2.0.tgz
  Completed files 1/1 | 126.5kiB/126.5kiB
student@cloudshell:~$ helm install alloydbomni-operator alloydbomni-operator-${OPERATOR_VERSION}.tgz \
> --create-namespace \
> --namespace alloydb-omni-system \
> --atomic \
> --timeout 5m
NAME: alloydbomni-operator
LAST DEPLOYED: Mon Jan 20 13:13:20 2025
NAMESPACE: alloydb-omni-system
STATUS: deployed
REVISION: 1
TEST SUITE: None
student@cloudshell:~$
AlloyDB Omni 연산자가 설치되면 데이터베이스 클러스터 배포를 후속 조치할 수 있습니다.
다음은 googleMLExtension 매개변수와 내부 (비공개) 부하 분산기가 사용 설정된 배포 매니페스트의 예입니다.
apiVersion: v1
kind: Secret
metadata:
  name: db-pw-my-omni
type: Opaque
data:
  my-omni: "VmVyeVN0cm9uZ1Bhc3N3b3Jk"
---
apiVersion: alloydbomni.dbadmin.goog/v1
kind: DBCluster
metadata:
  name: my-omni
spec:
  databaseVersion: "15.13.0"
  primarySpec:
    adminUser:
      passwordRef:
        name: db-pw-my-omni
    features:
      googleMLExtension:
        enabled: true
    resources:
      cpu: 1
      memory: 8Gi
      disks:
      - name: DataDisk
        size: 20Gi
        storageClass: standard
    dbLoadBalancerOptions:
      annotations:
        networking.gke.io/load-balancer-type: "internal"
  allowExternalIncomingTraffic: true
비밀번호의 보안 비밀 값은 비밀번호 단어 'VeryStrongPassword'의 Base64 표현입니다. 더 안정적인 방법은 Google Secret Manager를 사용하여 비밀번호 값을 저장하는 것입니다. 자세한 내용은 문서를 참고하세요.
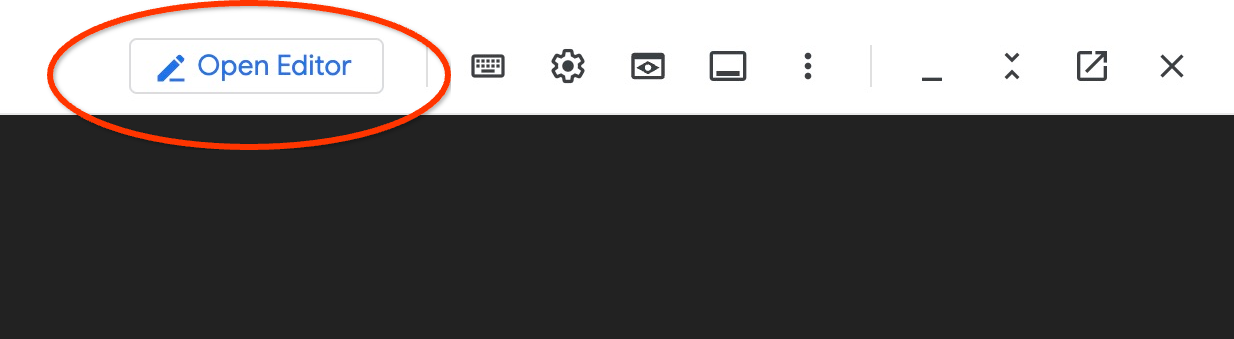
다음 단계에서 적용할 매니페스트를 my-omni.yaml로 저장합니다. Cloud Shell에 있는 경우 터미널 오른쪽 상단의 '편집기 열기' 버튼을 눌러 편집기를 사용하여 이 작업을 수행할 수 있습니다.
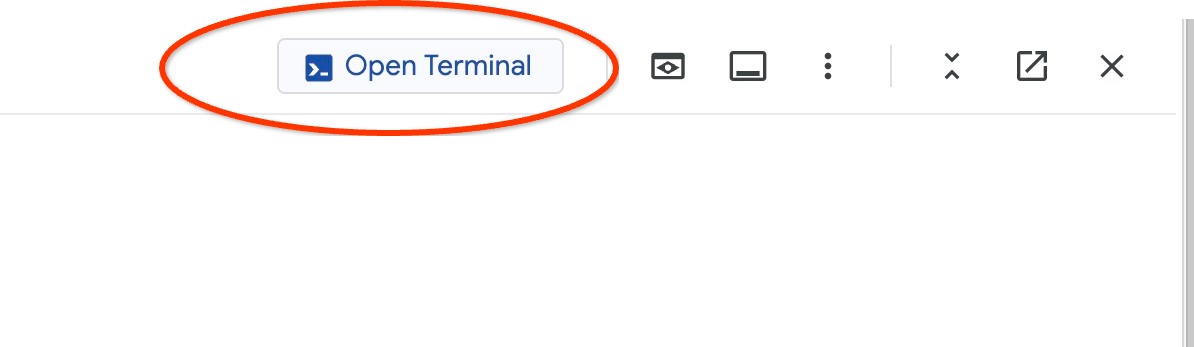
my-omni.yaml이라는 이름으로 파일을 저장한 후 '터미널 열기' 버튼을 눌러 터미널로 돌아갑니다.
kubectl 유틸리티를 사용하여 my-omni.yaml 매니페스트를 클러스터에 적용합니다.
kubectl apply -f my-omni.yaml
예상되는 콘솔 출력:
secret/db-pw-my-omni created
dbcluster.alloydbomni.dbadmin.goog/my-omni created
kubectl 유틸리티를 사용하여 my-omni 클러스터 상태를 확인합니다.
kubectl get dbclusters.alloydbomni.dbadmin.goog my-omni -n default
배포 중에 클러스터는 여러 단계를 거치며 결국 DBClusterReady 상태로 종료됩니다.
예상되는 콘솔 출력:
$ kubectl get dbclusters.alloydbomni.dbadmin.goog my-omni -n default
NAME      PRIMARYENDPOINT   PRIMARYPHASE   DBCLUSTERPHASE   HAREADYSTATUS   HAREADYREASON
my-omni   10.131.0.33        Ready          DBClusterReady
AlloyDB Omni에 연결
Kubernetes 포드를 사용하여 연결
클러스터가 준비되면 AlloyDB Omni 인스턴스 포드에서 PostgreSQL 클라이언트 바이너리를 사용할 수 있습니다. 포드 ID를 찾은 다음 kubectl을 사용하여 포드에 직접 연결하고 클라이언트 소프트웨어를 실행합니다. 비밀번호는 my-omni.yaml 매니페스트의 Kubernetes 보안 비밀을 통해 설정된 VeryStrongPassword입니다.
DB_CLUSTER_NAME=my-omni
DB_CLUSTER_NAMESPACE=default
DBPOD=`kubectl get pod --selector=alloydbomni.internal.dbadmin.goog/dbcluster=$DB_CLUSTER_NAME,alloydbomni.internal.dbadmin.goog/task-type=database -n $DB_CLUSTER_NAMESPACE -o jsonpath='{.items[0].metadata.name}'`
kubectl exec -ti $DBPOD -n $DB_CLUSTER_NAMESPACE -c database -- psql -h localhost -U postgres
샘플 콘솔 출력:
DB_CLUSTER_NAME=my-omni
DB_CLUSTER_NAMESPACE=default
DBPOD=`kubectl get pod --selector=alloydbomni.internal.dbadmin.goog/dbcluster=$DB_CLUSTER_NAME,alloydbomni.internal.dbadmin.goog/task-type=database -n $DB_CLUSTER_NAMESPACE -o jsonpath='{.items[0].metadata.name}'`
kubectl exec -ti $DBPOD -n $DB_CLUSTER_NAMESPACE -c database -- psql -h localhost -U postgres
Password for user postgres:
psql (15.7)
SSL connection (protocol: TLSv1.3, cipher: TLS_AES_128_GCM_SHA256, compression: off)
Type "help" for help.

postgres=#
5. GKE에 AI 모델 배포
로컬 모델과의 AlloyDB Omni AI 통합을 테스트하려면 클러스터에 모델을 배포해야 합니다. Google의 EmbeddingGemma 모델을 사용합니다.
모델의 노드 풀 만들기
모델을 실행하려면 추론을 실행할 노드 풀을 준비해야 합니다. CPU 전용 풀 또는 GPU 가속기가 있는 풀을 사용하여 실행할 수 있습니다. 리소스의 동시성이 높기 때문에 일부 지역에서는 CPU 전용 접근 방식이 더 적합할 수 있습니다. 실험실에서는 CPU 접근 방식을 사용하지만 성능 관점에서 가장 좋은 접근 방식은 L4 Nvidia 가속기가 있는 g2-standard-8과 같은 노드 구성을 사용하는 그래픽 가속기가 있는 풀입니다.
CPU 기반 노드 풀
e2-standard-32 노드로 노드 풀을 만듭니다. 리소스를 절약하기 위해 풀을 하나의 노드로 제한합니다.
export PROJECT_ID=$(gcloud config get project)
export LOCATION=us-central1
export CLUSTER_NAME=alloydb-ai-gke
gcloud container node-pools create cpupool \
  --project=${PROJECT_ID} \
  --location=${LOCATION} \
  --node-locations=${LOCATION}-a \
  --cluster=${CLUSTER_NAME} \
  --machine-type=c3-standard-8 \
  --num-nodes=1
예상 출력
student@cloudshell$ export PROJECT_ID=$(gcloud config get project)
Your active configuration is: [pant]
export LOCATION=us-central1
export CLUSTER_NAME=alloydb-ai-gke
student@cloudshell$ gcloud container node-pools create cpupool \
>   --project=${PROJECT_ID} \
>   --location=${LOCATION} \
>   --node-locations=${LOCATION}-a \
>   --cluster=${CLUSTER_NAME} \
>   --machine-type=c3-standard-8 \
>   --num-nodes=1
Creating node pool cpupool...done.
Created [https://container.googleapis.com/v1/projects/gleb-test-short-003-483115/zones/us-central1/clusters/alloydb-ai-gke/nodePools/cpupool].
NAME     MACHINE_TYPE    DISK_SIZE_GB  NODE_VERSION
cpupool  c3-standard-8  100           1.34.1-gke.3355002
Hugging Face 토큰 가져오기
이 실습에서는 Hugging Face와의 파트너십을 통해 EmbeddingGemma 모델을 배포합니다. 이를 위해 Hugging Face 토큰을 가져와야 합니다.
이전에 토큰이 없었다면 아래 단계에 따라 새 토큰을 생성하세요.
- 오른쪽 상단의 로그인 또는 가입 링크를 사용하여 Hugging Face 사이트에 로그인하거나 가입합니다.
- 내 프로필 -> 액세스 토큰을 클릭합니다.
- 본인 확인
- 새 토큰 만들기를 클릭합니다.
- 토큰 이름 선택
- 토큰의 역할을 선택합니다. 최소한 읽기 권한이 필요합니다.
- 페이지 하단의 토큰 만들기를 클릭합니다.
- 생성된 토큰을 복사하여 나중에 사용할 수 있도록 저장합니다.
또한 https://huggingface.co/google/embeddinggemma-300m 페이지에서 Hugging Face의 EmbeddingGemma와 관련된 파일 및 콘텐츠에 액세스하려면 조건을 수락해야 합니다.
토큰을 사용하여 Kubernetes 보안 비밀 만들기
Cloud Shell 세션에서 다음을 실행합니다 (HF_TOKEN 값을 HF 토큰으로 바꿈).
export HF_TOKEN=hf_QjgW...lfrXF
kubectl create secret generic hf-secret \
    --from-literal=hf_api_token=$HF_TOKEN \
    --dry-run=client -o yaml | kubectl apply -f -
배포 매니페스트 준비
모델을 배포하려면 배포 매니페스트를 준비해야 합니다.
Hugging Face의 Google EmbeddingGemma 모델을 사용하고 있습니다. 모델 카드는 여기에서 확인할 수 있습니다. 모델을 배포하기 위해 Hugging Face의 안내와 GitHub의 배포 패키지를 기반으로 하는 접근 방식을 사용합니다.
GitHub에서 패키지 클론
git clone https://github.com/huggingface/Google-Cloud-Containers
CPU 노드에서 tei (텍스트 임베딩 인터페이스)의 매니페스트를 조정합니다. 모델, 이미지, 올바른 리소스 할당을 비롯한 여러 매개변수를 대체하고 Hugging Face 토큰 시크릿을 구성에 추가해야 합니다.
매니페스트 수정 (사용 가능한 편집기 사용)
vi Google-Cloud-Containers/examples/gke/tei-deployment/cpu-config/deployment.yaml
CPU 기반 풀에 배포하기 위해 수정된 매니페스트는 다음과 같습니다.
apiVersion: apps/v1
kind: Deployment
metadata:
  name: tei-deployment
spec:
  replicas: 1
  selector:
    matchLabels:
      app: tei-server
  template:
    metadata:
      labels:
        app: tei-server
        hf.co/model: Google--embeddinggemma-300m
        hf.co/task: text-embeddings
    spec:
      containers:
        - name: tei-container
          image: ghcr.io/huggingface/text-embeddings-inference:cpu-latest
          #image: us-docker.pkg.dev/deeplearning-platform-release/gcr.io/huggingface-text-embeddings-inference-cpu.1-4:latest
          resources:
            requests:
              cpu: "6"
              memory: "24Gi"
            limits:
              cpu: "6"
              memory: "24Gi"
          env:
            - name: MODEL_ID
              value: google/embeddinggemma-300m
            - name: NUM_SHARD
              value: "1"
            - name: PORT
              value: "8080"
            - name: HF_TOKEN
              valueFrom:
                secretKeyRef:
                  name: hf-secret
                  key: hf_api_token
          volumeMounts:
            - mountPath: /tmp
              name: tmp
      volumes:
        - name: tmp
          emptyDir: {}
      nodeSelector:
        #cloud.google.com/compute-class: "Performance"
        cloud.google.com/machine-family: "c3"
모델 배포
수정된 CPU 배포 매니페스트를 적용하여 모델을 배포합니다.
kubectl apply -f Google-Cloud-Containers/examples/gke/tei-deployment/cpu-config
배포 확인
kubectl get pods
모델 서비스 확인
kubectl get service tei-service
실행 중인 서비스 유형 ClusterIP가 표시되어야 합니다.
샘플 출력:
student@cloudshell$ kubectl get service tei-service
NAME          TYPE        CLUSTER-IP      EXTERNAL-IP   PORT(S)    AGE
tei-service   ClusterIP   34.118.233.48   <none>        8080/TCP   10m
서비스의 CLUSTER-IP가 엔드포인트 주소로 사용됩니다. 모델 삽입은 URI http://34.118.233.48:8080/embed로 응답할 수 있습니다. 나중에 AlloyDB Omni에 모델을 등록할 때 사용됩니다.
kubectl port-forward 명령어를 사용하여 노출하면 테스트할 수 있습니다.
kubectl port-forward service/tei-service 8080:8080
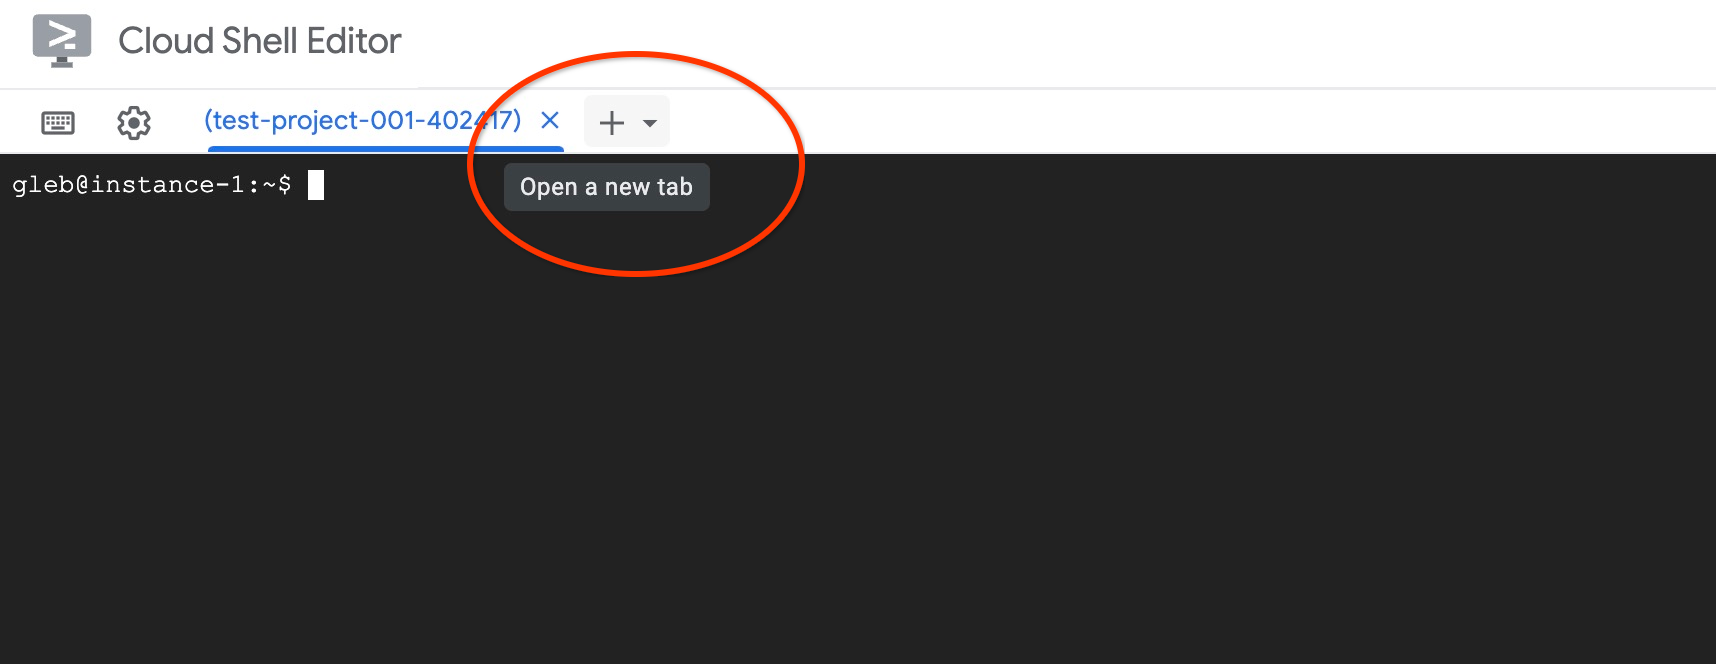
Cloud Shell을 사용하는 경우 포트 포워딩이 한 Cloud Shell 세션에서 실행될 수 있으므로 이를 테스트하려면 다른 세션이 필요합니다.
맨 위에 있는 '+' 기호를 사용하여 다른 Cloud Shell 탭을 엽니다.
새 셸 세션에서 curl 명령어를 실행합니다.
curl http://localhost:8080/embed \
    -X POST \
    -d '{"inputs":"Test"}' \
    -H 'Content-Type: application/json'
다음 샘플 출력 (수정됨)과 같은 벡터 배열이 반환됩니다.
curl http://localhost:8080/embed \
>     -X POST \
>     -d '{"inputs":"Test"}' \
>     -H 'Content-Type: application/json'
[[-0.018975832,0.0071419072,0.06347208,0.022992613,0.014205903
...
-0.03677433,0.01636146,0.06731572]]
숫자가 표시되면 모델 테스트가 완료되었으며 이제 AlloyDB Omni에 등록하여 SQL에서 직접 사용할 수 있습니다.
6. AlloyDB Omni에 모델 등록
배포된 모델에서 AlloyDB Omni가 어떻게 작동하는지 테스트하려면 데이터베이스를 만들고 모델을 등록해야 합니다.
데이터베이스 만들기
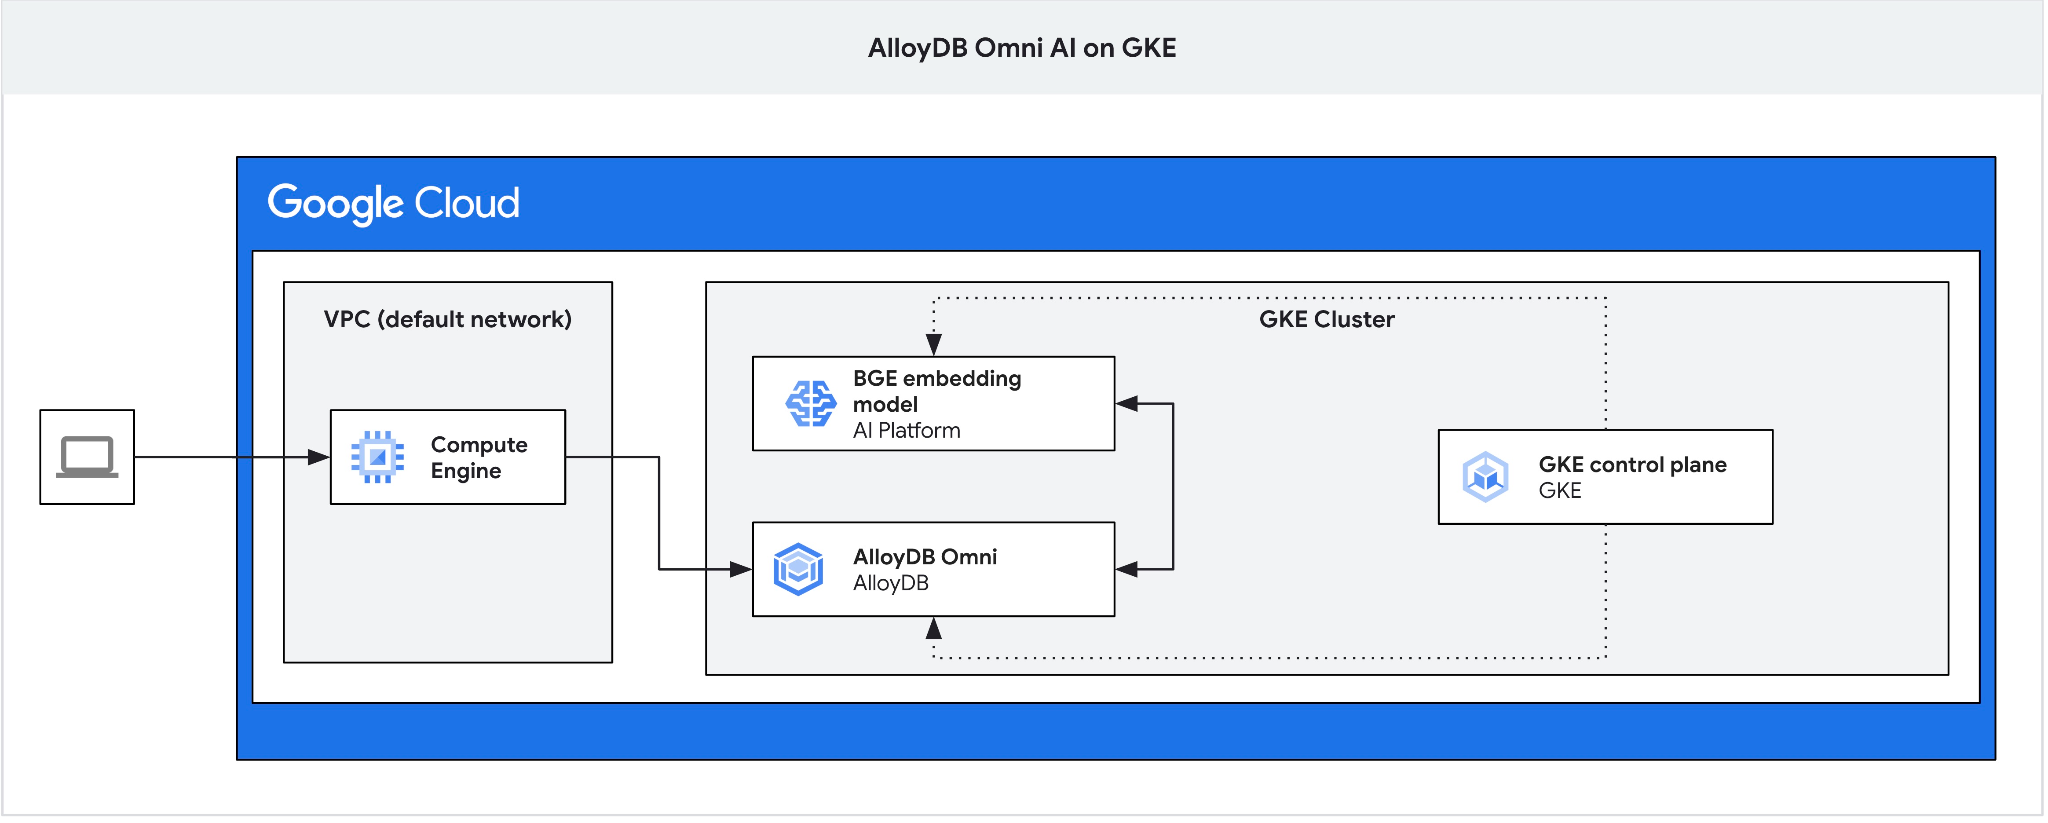
클라이언트 VM에서 AlloyDB Omni에 연결하고 데이터베이스를 만들 점프 박스로 GCE VM을 만듭니다.
Omni용 GKE 외부 부하 분산기는 비공개 IP 주소 지정을 사용하여 VPC에서 액세스할 수 있지만 VPC 외부에서 연결할 수는 없으므로 점프 박스가 필요합니다. 일반적으로 더 안전하며 데이터베이스 인스턴스를 인터넷에 노출하지 않습니다. 다이어그램을 확인하여 명확성을 확인하세요.
Cloud Shell 세션에서 VM을 만들려면 다음을 실행합니다.
export ZONE=us-central1-a
gcloud compute instances create instance-1 \
    --zone=$ZONE
Cloud Shell에서 kubectl을 사용하여 AlloyDB Omni 엔드포인트 IP를 찾습니다.
kubectl get dbclusters.alloydbomni.dbadmin.goog my-omni -n default
PRIMARYENDPOINT를 적어 둡니다.
출력 예시는 다음과 같습니다.
student@cloudshell:~$ kubectl get dbclusters.alloydbomni.dbadmin.goog my-omni -n default
NAME      PRIMARYENDPOINT   PRIMARYPHASE   DBCLUSTERPHASE   HAREADYSTATUS   HAREADYREASON
my-omni   10.131.0.33        Ready          DBClusterReady
student@cloudshell:~$
10.131.0.33은 예시에서 AlloyDB Omni 인스턴스에 연결하는 데 사용할 IP입니다.
gcloud를 사용하여 VM에 연결합니다.
gcloud compute ssh instance-1 --zone=$ZONE
SSH 키 생성 메시지가 표시되면 안내를 따릅니다. SSH 연결에 대한 자세한 내용은 문서를 참고하세요.
VM에 대한 SSH 세션에서 PostgreSQL 클라이언트를 설치합니다.
sudo apt-get update
sudo apt-get install --yes postgresql-client
다음 예시를 사용하여 AlloyDB Omni 부하 분산기 IP 변수를 내보냅니다 (IP를 부하 분산기 IP로 대체).
export INSTANCE_IP=10.131.0.33
AlloyDB Omni에 연결합니다. 비밀번호는 my-omni.yaml의 해시를 통해 설정된 VeryStrongPassword입니다.
psql "host=$INSTANCE_IP user=postgres sslmode=require"
설정된 psql 세션에서 다음을 실행합니다.
create database demo;
세션을 종료하고 데이터베이스 데모에 연결합니다 (또는 동일한 세션에서 \c demo를 실행해도 됨).
psql "host=$INSTANCE_IP user=postgres sslmode=require dbname=demo"
변환 함수 만들기
서드 파티 임베딩 모델의 경우 입력과 출력을 모델과 내부 함수에서 예상하는 형식으로 지정하는 변환 함수를 만들어야 합니다. 이러한 함수는 서로 다른 인터페이스 간에 형식 변환을 수행하는 변환기 역할을 합니다.
다음은 입력을 처리하는 변환 함수입니다.
-- Input Transform Function corresponding to the custom model endpoint
CREATE OR REPLACE FUNCTION tei_text_input_transform(model_id VARCHAR(100), input_text TEXT)
RETURNS JSON
LANGUAGE plpgsql
AS $$
DECLARE
  transformed_input JSON;
  model_qualified_name TEXT;
BEGIN
  SELECT json_build_object('inputs', input_text, 'truncate', true)::JSON INTO transformed_input;
  RETURN transformed_input;
END;
$$;
샘플 출력에 표시된 대로 데모 데이터베이스에 연결된 상태에서 제공된 코드를 실행합니다.
demo=# -- Input Transform Function corresponding to the custom model endpoint
CREATE OR REPLACE FUNCTION tei_text_input_transform(model_id VARCHAR(100), input_text TEXT)
RETURNS JSON
LANGUAGE plpgsql
AS $$
DECLARE
  transformed_input JSON;
  model_qualified_name TEXT;
BEGIN
  SELECT json_build_object('inputs', input_text, 'truncate', true)::JSON INTO transformed_input;
  RETURN transformed_input;
END;
$$;
CREATE FUNCTION
demo=#
다음은 모델의 응답을 실수 배열로 변환하는 출력 함수입니다.
-- Output Transform Function corresponding to the custom model endpoint
CREATE OR REPLACE FUNCTION tei_text_output_transform(model_id VARCHAR(100), response_json JSON)
RETURNS REAL[]
LANGUAGE plpgsql
AS $$
DECLARE
  transformed_output REAL[];
BEGIN
  SELECT ARRAY(SELECT json_array_elements_text(response_json->0)) INTO transformed_output;
  RETURN transformed_output;
END;
$$;
동일한 세션에서 실행합니다.
demo=# -- Output Transform Function corresponding to the custom model endpoint
CREATE OR REPLACE FUNCTION tei_text_output_transform(model_id VARCHAR(100), response_json JSON)
RETURNS REAL[]
LANGUAGE plpgsql
AS $$
DECLARE
  transformed_output REAL[];
BEGIN
  SELECT ARRAY(SELECT json_array_elements_text(response_json->0)) INTO transformed_output;
  RETURN transformed_output;
END;
$$;
CREATE FUNCTION
demo=#
모델 등록
이제 데이터베이스에 모델을 등록할 수 있습니다.
다음은 이름이 embeddinggemma인 모델을 등록하는 프로시저 호출입니다. 모델을 등록할 때 model_request_url 매개변수에 tei-service 서비스 이름을 사용합니다. 이는 내부 Kubernetes 클러스터 서비스 이름이며 GKE 클러스터의 내부 IP로 변환됩니다.
CALL
  google_ml.create_model(
    model_id => 'embeddinggemma',
    model_request_url => 'http://tei-service:8080/embed',
    model_provider => 'custom',
    model_type => 'text_embedding',
    model_in_transform_fn => 'tei_text_input_transform',
    model_out_transform_fn => 'tei_text_output_transform');
데모 데이터베이스에 연결된 상태에서 제공된 코드를 실행합니다.
demo=# CALL
  google_ml.create_model(
    model_id => 'embeddinggemma',
    model_request_url => 'http://tei-service:8080/embed',
    model_provider => 'custom',
    model_type => 'text_embedding',
    model_in_transform_fn => 'tei_text_input_transform',
    model_out_transform_fn => 'tei_text_output_transform');
CALL
demo=#
실수 배열을 반환해야 하는 다음 테스트 쿼리를 사용하여 등록 모델을 테스트할 수 있습니다.
select google_ml.embedding('embeddinggemma','What is AlloyDB Omni?');
벡터 데이터를 다시 가져오기 전에 지연이 길어질 수 있습니다. 이 테스트에서는 CPU 기반 노드 풀을 사용하여 임베딩 모델을 호스팅하며 GPU가 있는 노드에서 훨씬 빠르게 작동합니다.
7. AlloyDB Omni에서 모델 테스트
데이터 로드
배포된 모델에서 AlloyDB Omni가 어떻게 작동하는지 테스트하려면 데이터를 로드해야 합니다. AlloyDB의 벡터 검색을 위한 다른 Codelab과 동일한 데이터를 사용했습니다.
데이터를 로드하는 한 가지 방법은 Google Cloud SDK와 PostgreSQL 클라이언트 소프트웨어를 사용하는 것입니다. 동일한 클라이언트 VM을 사용할 수 있습니다. VM 이미지의 기본값을 사용한 경우 Google Cloud SDK가 이미 설치되어 있어야 합니다. 하지만 Google SDK 없이 맞춤 이미지를 사용한 경우 문서에 따라 추가할 수 있습니다.
다음 예와 같이 AlloyDB Omni 부하 분산기 IP를 내보냅니다 (IP를 부하 분산기 IP로 대체).
export INSTANCE_IP=10.131.0.33
데이터베이스에 연결하고 pgvector 확장 프로그램을 사용 설정합니다.
psql "host=$INSTANCE_IP user=postgres sslmode=require dbname=demo"
psql 세션에서 다음을 실행합니다.
CREATE EXTENSION IF NOT EXISTS vector;
psql 세션을 종료하고 명령줄 세션에서 데모 데이터베이스에 데이터를 로드하는 명령어를 실행합니다.
표를 만듭니다. 다음 명령어를 사용하면 cymbal_demo_schema.sql 파일을 가져오고 데모 데이터베이스의 모든 테이블 정의를 사용하여 SQL을 실행합니다.
gcloud storage cat gs://cloud-training/gcc/gcc-tech-004/cymbal_demo_schema.sql |psql "host=$INSTANCE_IP user=postgres dbname=demo"
예상되는 콘솔 출력:
student@cloudshell:~$ gcloud storage cat gs://cloud-training/gcc/gcc-tech-004/cymbal_demo_schema.sql |psql "host=$INSTANCE_IP user=postgres dbname=demo"
Password for user postgres:
SET
SET
SET
SET
SET
 set_config
------------

(1 row)

SET
SET
SET
SET
SET
SET
CREATE TABLE
ALTER TABLE
CREATE TABLE
ALTER TABLE
CREATE TABLE
ALTER TABLE
CREATE TABLE
ALTER TABLE
CREATE SEQUENCE
ALTER TABLE
ALTER SEQUENCE
ALTER TABLE
ALTER TABLE
ALTER TABLE
student@cloudshell:~$
생성된 테이블 목록은 다음과 같습니다.
psql "host=$INSTANCE_IP user=postgres dbname=demo" -c "\dt+"
출력:
student@cloudshell:~$ psql "host=$INSTANCE_IP user=postgres dbname=demo" -c "\dt+"
Password for user postgres:
                                           List of relations
 Schema |       Name       | Type  |  Owner   | Persistence | Access method |    Size    | Description
--------+------------------+-------+----------+-------------+---------------+------------+-------------
 public | cymbal_embedding | table | postgres | permanent   | heap          | 8192 bytes |
 public | cymbal_inventory | table | postgres | permanent   | heap          | 8192 bytes |
 public | cymbal_products  | table | postgres | permanent   | heap          | 8192 bytes |
 public | cymbal_stores    | table | postgres | permanent   | heap          | 8192 bytes |
(4 rows)
student@cloudshell:~$
cymbal_products 테이블에 데이터를 로드합니다.
gcloud storage cat gs://cloud-training/gcc/gcc-tech-004/cymbal_products.csv |psql "host=$INSTANCE_IP user=postgres dbname=demo" -c "\copy cymbal_products from stdin csv header"
예상되는 콘솔 출력:
student@cloudshell:~$ gcloud storage cat gs://cloud-training/gcc/gcc-tech-004/cymbal_products.csv |psql "host=$INSTANCE_IP user=postgres dbname=demo" -c "\copy cymbal_products from stdin csv header"
COPY 941
student@cloudshell:~$
다음은 cymbal_products 테이블의 몇 개 행 샘플입니다.
psql "host=$INSTANCE_IP user=postgres dbname=demo" -c "SELECT uniq_id,left(product_name,30),left(product_description,50),sale_price FROM cymbal_products limit 3"
출력:
student@cloudshell:~$ psql "host=$INSTANCE_IP user=postgres dbname=demo" -c "SELECT uniq_id,left(product_name,30),left(product_description,50),sale_price FROM cymbal_products limit 3"
Password for user postgres:
             uniq_id              |              left              |                        left                        | sale_price
----------------------------------+--------------------------------+----------------------------------------------------+------------
 a73d5f754f225ecb9fdc64232a57bc37 | Laundry Tub Strainer Cup       |   Laundry tub strainer cup Chrome For 1-.50, drain |      11.74
 41b8993891aa7d39352f092ace8f3a86 | LED Starry Star Night Light La |  LED Starry Star Night Light Laser Projector 3D Oc |      46.97
 ed4a5c1b02990a1bebec908d416fe801 | Surya Horizon HRZ-1060 Area Ru |  The 100% polypropylene construction of the Surya  |       77.4
(3 rows)
student@cloudshell:~$
cymbal_inventory 테이블에 데이터를 로드합니다.
gcloud storage cat gs://cloud-training/gcc/gcc-tech-004/cymbal_inventory.csv |psql "host=$INSTANCE_IP user=postgres dbname=demo" -c "\copy cymbal_inventory from stdin csv header"
예상되는 콘솔 출력:
student@cloudshell:~$ gcloud storage cat gs://cloud-training/gcc/gcc-tech-004/cymbal_inventory.csv |psql "host=$INSTANCE_IP user=postgres dbname=demo" -c "\copy cymbal_inventory from stdin csv header"
Password for user postgres:
COPY 263861
student@cloudshell:~$
다음은 cymbal_inventory 테이블의 몇 개 행 샘플입니다.
psql "host=$INSTANCE_IP user=postgres dbname=demo" -c "SELECT * FROM cymbal_inventory LIMIT 3"
출력:
student@cloudshell:~$ psql "host=$INSTANCE_IP user=postgres dbname=demo" -c "SELECT * FROM cymbal_inventory LIMIT 3"
Password for user postgres:
 store_id |             uniq_id              | inventory
----------+----------------------------------+-----------
     1583 | adc4964a6138d1148b1d98c557546695 |         5
     1490 | adc4964a6138d1148b1d98c557546695 |         4
     1492 | adc4964a6138d1148b1d98c557546695 |         3
(3 rows)
student@cloudshell:~$
cymbal_stores 테이블에 데이터를 로드합니다.
gcloud storage cat gs://cloud-training/gcc/gcc-tech-004/cymbal_stores.csv |psql "host=$INSTANCE_IP user=postgres dbname=demo" -c "\copy cymbal_stores from stdin csv header"
예상되는 콘솔 출력:
student@cloudshell:~$ gcloud storage cat gs://cloud-training/gcc/gcc-tech-004/cymbal_stores.csv |psql "host=$INSTANCE_IP user=postgres dbname=demo" -c "\copy cymbal_stores from stdin csv header"
Password for user postgres:
COPY 4654
student@cloudshell:~$
다음은 cymbal_stores 테이블의 몇 개 행 샘플입니다.
psql "host=$INSTANCE_IP user=postgres dbname=demo" -c "SELECT store_id, name, zip_code FROM cymbal_stores limit 3"
출력:
student@cloudshell:~$ psql "host=$INSTANCE_IP user=postgres dbname=demo" -c "SELECT store_id, name, zip_code FROM cymbal_stores limit 3"
Password for user postgres:
 store_id |       name        | zip_code
----------+-------------------+----------
     1990 | Mayaguez Store    |      680
     2267 | Ware Supercenter  |     1082
     4359 | Ponce Supercenter |      780
(3 rows)
student@cloudshell:~$
임베딩 빌드
psql을 사용하여 데모 데이터베이스에 연결하고 제품 설명을 기반으로 cymbal_products 테이블에 설명된 제품의 임베딩을 빌드합니다.
데모 데이터베이스에 연결합니다.
psql "host=$INSTANCE_IP user=postgres sslmode=require dbname=demo"
임베딩을 저장하기 위해 열 임베딩이 있는 cymbal_embedding 테이블을 사용하고 제품 설명을 함수의 텍스트 입력으로 사용합니다.
나중에 원격 모델과 비교할 수 있도록 쿼리의 타이밍을 사용 설정합니다.
\timing
쿼리를 실행하여 임베딩을 빌드합니다.
INSERT INTO cymbal_embedding(uniq_id,embedding) SELECT uniq_id, google_ml.embedding('embeddinggemma',product_description)::vector FROM cymbal_products;
예상되는 콘솔 출력:
demo=# INSERT INTO cymbal_embedding(uniq_id,embedding)  SELECT uniq_id, google_ml.embedding('embeddinggemma',product_description)::vector FROM cymbal_products;
INSERT 0 941
Time: 497878.136 ms (08:17.878)
demo=#
이 예에서는 임베딩을 빌드하는 데 약 8분이 걸렸습니다. CPU 기반 노드 풀에서는 이 동작이 예상됩니다. GPU 가속기가 있는 풀의 경우 GPU 유형에 따라 훨씬 더 빠를 수 있습니다.
테스트 쿼리 실행
psql을 사용하여 데모 데이터베이스에 연결하고 임베딩을 빌드할 때와 마찬가지로 쿼리의 실행 시간을 측정하기 위해 타이밍을 사용 설정합니다.
코사인 거리를 벡터 검색 알고리즘으로 사용하여 '여기에서 잘 자라는 과일 나무는 무엇인가요?'와 같은 요청과 일치하는 상위 5개 제품을 찾아보겠습니다.
psql 세션에서 다음을 실행합니다.
SELECT
        cp.product_name,
        left(cp.product_description,80) as description,
        cp.sale_price,
        cs.zip_code,
        (ce.embedding <=> google_ml.embedding('embeddinggemma','What kind of fruit trees grow well here?')::vector) as distance
FROM
        cymbal_products cp
JOIN cymbal_embedding ce on
        ce.uniq_id=cp.uniq_id
JOIN cymbal_inventory ci on
        ci.uniq_id=cp.uniq_id
JOIN cymbal_stores cs on
        cs.store_id=ci.store_id
        AND ci.inventory>0
        AND cs.store_id = 1583
ORDER BY
        distance ASC
LIMIT 5;
예상되는 콘솔 출력:
demo=# SELECT
        cp.product_name,
        left(cp.product_description,80) as description,
        cp.sale_price,
        cs.zip_code,
        (ce.embedding <=> google_ml.embedding('embeddinggemma','What kind of fruit trees grow well here?')::vector) as distance
FROM
        cymbal_products cp
JOIN cymbal_embedding ce on
        ce.uniq_id=cp.uniq_id
JOIN cymbal_inventory ci on
        ci.uniq_id=cp.uniq_id
JOIN cymbal_stores cs on
        cs.store_id=ci.store_id
        AND ci.inventory>0
        AND cs.store_id = 1583
ORDER BY
        distance ASC
LIMIT 5;
     product_name      |                                   description                                    | sale_price | zip_code |      distance
-----------------------+----------------------------------------------------------------------------------+------------+----------+--------------------
 Cherry Tree           | This is a beautiful cherry tree that will produce delicious cherries. It is an d |      75.00 |    93230 | 0.5210549378080666
 California Lilac      | This is a beautiful lilac tree that can grow to be over 10 feet tall. It is an d |       5.00 |    93230 | 0.5639421771781971
 Toyon                 | This is a beautiful toyon tree that can grow to be over 20 feet tall. It is an e |      10.00 |    93230 | 0.5670010914504852
 Rose Bush             | This is a beautiful rose bush that will produce fragrant roses. It is a perennia |      50.00 |    93230 | 0.5731542622882957
 California Peppertree | This is a beautiful peppertree that can grow to be over 30 feet tall. It is an e |      25.00 |    93230 | 0.5750934653011995
(5 rows)

Time: 83.610 ms
demo=#
쿼리가 83ms 동안 실행되었으며 요청과 일치하고 1583번 매장에서 인벤토리가 있는 cymbal_products 테이블의 트리 목록을 반환했습니다.
ANN 색인 빌드
데이터 세트가 작은 경우 모든 삽입을 검색하는 정확한 검색을 사용하기 쉽지만 데이터가 증가하면 로드 및 응답 시간도 증가합니다. 성능을 개선하려면 임베딩 데이터에 색인을 빌드하면 됩니다. 벡터 데이터에 Google ScaNN 색인을 사용하여 이를 수행하는 방법의 예는 다음과 같습니다.
연결이 끊어진 경우 데모 데이터베이스에 다시 연결합니다.
psql "host=$INSTANCE_IP user=postgres sslmode=require dbname=demo"
alloydb_scann 확장 프로그램을 사용 설정합니다.
CREATE EXTENSION IF NOT EXISTS alloydb_scann;
색인을 빌드합니다.
CREATE INDEX cymbal_embedding_scann ON cymbal_embedding USING scann (embedding cosine);
이전과 동일한 쿼리를 시도하고 결과를 비교합니다.
demo=# SELECT
        cp.product_name,
        left(cp.product_description,80) as description,
        cp.sale_price,
        cs.zip_code,
        (ce.embedding <=> google_ml.embedding('embeddinggemma','What kind of fruit trees grow well here?')::vector) as distance
FROM
        cymbal_products cp
JOIN cymbal_embedding ce on
        ce.uniq_id=cp.uniq_id
JOIN cymbal_inventory ci on
        ci.uniq_id=cp.uniq_id
JOIN cymbal_stores cs on
        cs.store_id=ci.store_id
        AND ci.inventory>0
        AND cs.store_id = 1583
ORDER BY
        distance ASC
LIMIT 5;
     product_name      |                                   description                                    | sale_price | zip_code |      distance
-----------------------+----------------------------------------------------------------------------------+------------+----------+--------------------
 Cherry Tree           | This is a beautiful cherry tree that will produce delicious cherries. It is an d |      75.00 |    93230 | 0.5210549378080666
 California Lilac      | This is a beautiful lilac tree that can grow to be over 10 feet tall. It is an d |       5.00 |    93230 | 0.5639421771781971
 Toyon                 | This is a beautiful toyon tree that can grow to be over 20 feet tall. It is an e |      10.00 |    93230 | 0.5670010914504852
 Rose Bush             | This is a beautiful rose bush that will produce fragrant roses. It is a perennia |      50.00 |    93230 | 0.5731542622882957
 California Peppertree | This is a beautiful peppertree that can grow to be over 30 feet tall. It is an e |      25.00 |    93230 | 0.5750934653011995
(5 rows)

Time: 64.783 ms
쿼리 실행 시간이 약간 줄었으며 데이터 세트가 클수록 이 이점이 더 두드러집니다. 결과는 매우 유사하며 결과에서 상위 5개 트리가 동일합니다.
다른 쿼리를 시도하고 문서에서 벡터 색인 선택에 관해 자세히 알아보세요.
AlloyDB Omni에는 더 많은 기능과 실습이 있습니다.
8. 환경 정리
이제 AlloyDB Omni 및 AI 모델을 사용하여 GKE 클러스터를 삭제할 수 있습니다.
GKE 클러스터 삭제하기
Cloud Shell에서 다음을 실행합니다.
export PROJECT_ID=$(gcloud config get project)
export LOCATION=us-central1
export CLUSTER_NAME=alloydb-ai-gke
gcloud container clusters delete ${CLUSTER_NAME} \
  --project=${PROJECT_ID} \
  --region=${LOCATION}
예상되는 콘솔 출력:
student@cloudshell:~$ gcloud container clusters delete ${CLUSTER_NAME} \
>   --project=${PROJECT_ID} \
>   --region=${LOCATION}
The following clusters will be deleted.
 - [alloydb-ai-gke] in [us-central1]

Do you want to continue (Y/n)?  Y

Deleting cluster alloydb-ai-gke...done.
Deleted
VM 삭제
Cloud Shell에서 다음을 실행합니다.
export PROJECT_ID=$(gcloud config get project)
export ZONE=us-central1-a
gcloud compute instances delete instance-1 \
  --project=${PROJECT_ID} \
  --zone=${ZONE}
예상되는 콘솔 출력:
student@cloudshell:~$ export PROJECT_ID=$(gcloud config get project)
export ZONE=us-central1-a
gcloud compute instances delete instance-1 \
  --project=${PROJECT_ID} \
  --zone=${ZONE}
Your active configuration is: [cloudshell-5399]
The following instances will be deleted. Any attached disks configured to be auto-deleted will be deleted unless they are attached to any other instances or the `--keep-disks` flag is given and specifies them for keeping. Deleting a disk
is irreversible and any data on the disk will be lost.
 - [instance-1] in [us-central1-a]

Do you want to continue (Y/n)?  Y

Deleted
이 Codelab을 위해 새 프로젝트를 만든 경우 대신 전체 프로젝트를 삭제할 수 있습니다(https://console.cloud.google.com/cloud-resource-manager).
9. 축하합니다
축하합니다. Codelab을 완료했습니다.
학습한 내용
- Google Kubernetes 클러스터에 AlloyDB Omni를 배포하는 방법
- AlloyDB Omni에 연결하는 방법
- AlloyDB Omni에 데이터를 로드하는 방법
- 오픈 임베딩 모델을 GKE에 배포하는 방법
- AlloyDB Omni에서 임베딩 모델을 등록하는 방법
- 시맨틱 검색을 위한 임베딩을 생성하는 방법
- AlloyDB Omni에서 생성된 임베딩을 시맨틱 검색에 사용하는 방법
- AlloyDB에서 벡터 색인을 만들고 사용하는 방법
AlloyDB Omni에서 AI를 사용하는 방법에 관한 자세한 내용은 문서를 참고하세요.
10. 설문조사
결과: