

1. บทนำ
ใน Codelab นี้ คุณจะได้เรียนรู้วิธีติดตั้งใช้งาน AlloyDB Omni ใน Google Kubernetes Engine (GKE) และใช้กับโมเดลแบบเปิด เช่น EmbeddingGemma และ Gemma 4 สำหรับการฝังและการคาดการณ์ การเรียกใช้ทั้งฐานข้อมูลและโมเดลในคลัสเตอร์เดียวกันจะช่วยลดเวลาในการตอบสนองของเครือข่ายและหลีกเลี่ยงการพึ่งพาบริการของบุคคลที่สาม นอกจากนี้ยังช่วยให้เป็นไปตามข้อกำหนดด้านการปฏิบัติตามข้อกำหนดและการจัดเก็บข้อมูล เนื่องจากข้อมูลของคุณจะไม่ออกจากสภาพแวดล้อมของคุณ
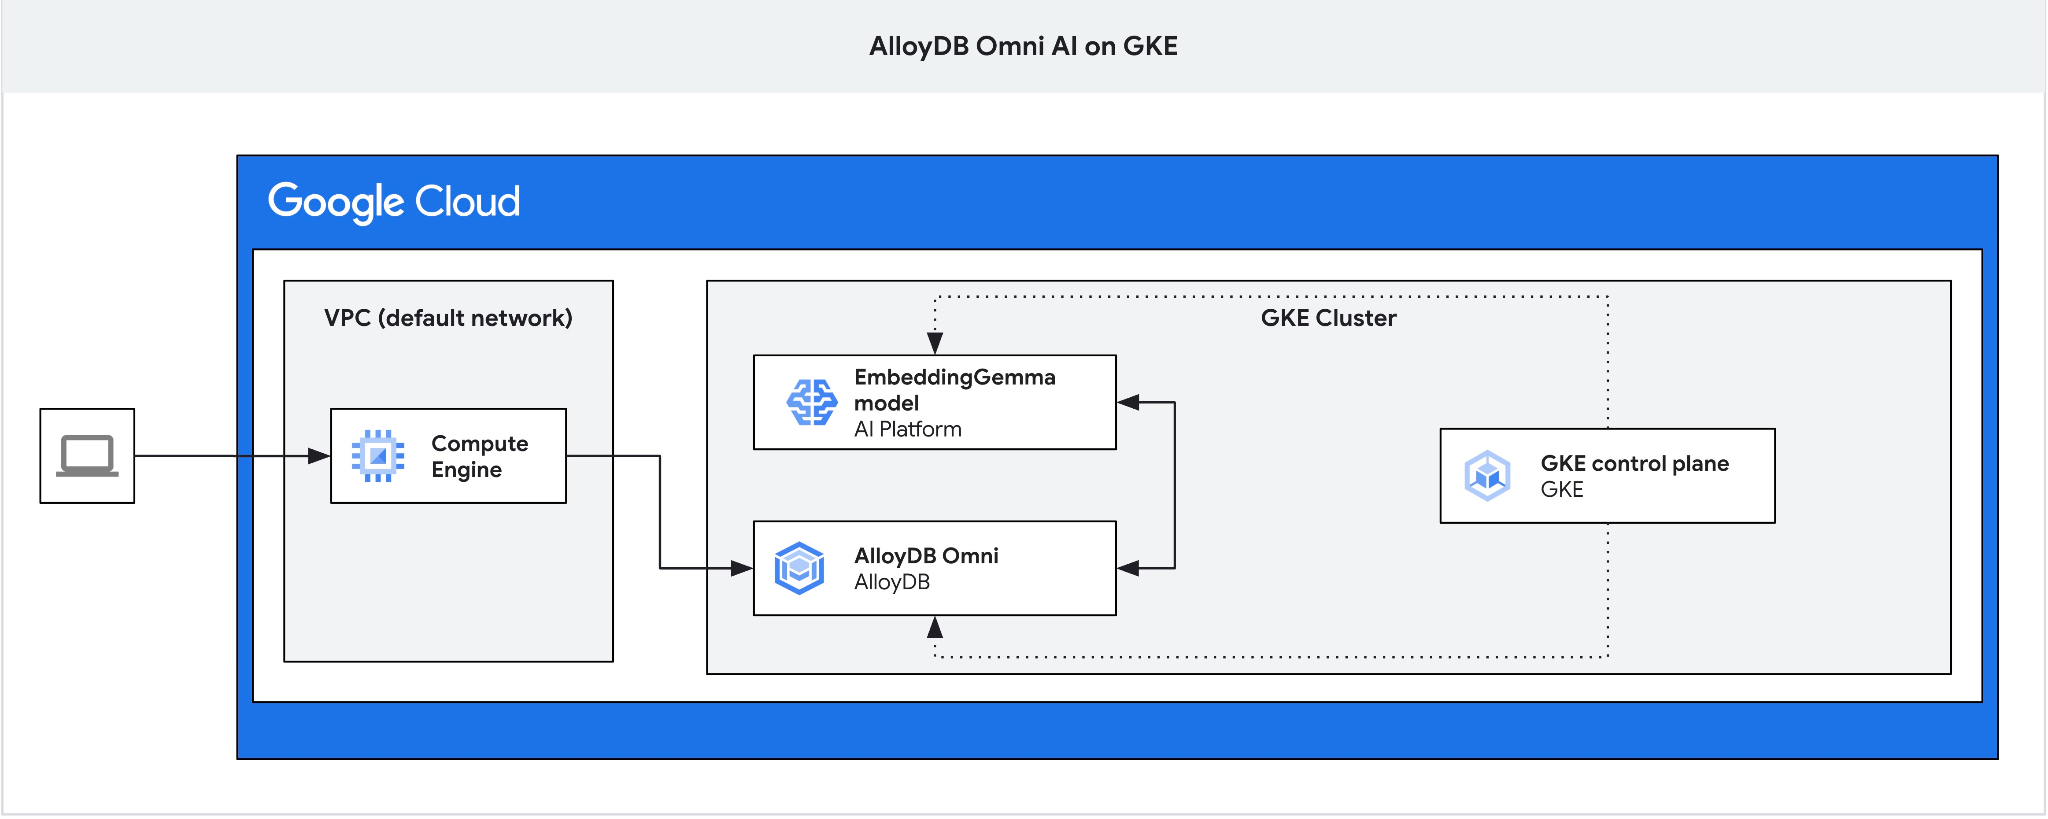
ข้อกำหนดเบื้องต้น
- ความเข้าใจพื้นฐานเกี่ยวกับ Google Cloud และคอนโซล Google Cloud
- มีความรู้พื้นฐานเกี่ยวกับ Kubernetes และ GKE
- ความคุ้นเคยกับอินเทอร์เฟซบรรทัดคำสั่งและ Google Cloud Shell
สิ่งที่คุณจะได้เรียนรู้
- วิธีติดตั้งใช้งาน AlloyDB Omni ในคลัสเตอร์ GKE
- วิธีเชื่อมต่อกับ AlloyDB Omni
- วิธีโหลดข้อมูลลงใน AlloyDB Omni
- วิธีติดตั้งใช้งานโมเดล AI (การฝังและ LLM) ใน GKE
- วิธีลงทะเบียนโมเดล AI ใน AlloyDB Omni
- วิธีสร้างการฝังสำหรับการค้นหาเชิงความหมาย
- วิธีเรียกใช้คำค้นหาแบบ Semantic Search ใน AlloyDB Omni
- วิธีสร้างและใช้ดัชนีเวกเตอร์ใน AlloyDB Omni
สิ่งที่คุณต้องมี
- บัญชี Google Cloud และโปรเจ็กต์ Google Cloud
- เว็บเบราว์เซอร์ เช่น Chrome
2. การตั้งค่าและข้อกำหนด
การตั้งค่าโปรเจ็กต์
- ลงชื่อเข้าใช้คอนโซล Google Cloud หากยังไม่มีบัญชี Gmail หรือ Google Workspace ให้สร้างบัญชี โปรดใช้บัญชีส่วนตัวแทนบัญชีงานหรือบัญชีโรงเรียน
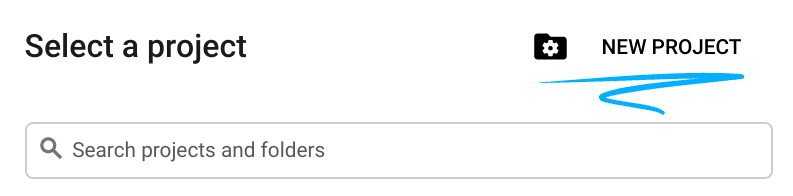
- สร้างโปรเจ็กต์ใหม่หรือเลือกโปรเจ็กต์ที่มีอยู่ ในส่วนหัวของคอนโซล Google Cloud ให้คลิกเลือกโปรเจ็กต์ แล้วคลิกโปรเจ็กต์ใหม่

ในหน้าต่างเลือกโปรเจ็กต์ ให้คลิกโปรเจ็กต์ใหม่เพื่อเปิดกล่องโต้ตอบการสร้างโปรเจ็กต์
ในกล่องโต้ตอบ ให้ป้อนชื่อโปรเจ็กต์ แล้วเลือกองค์กรหรือสถานที่ตั้ง
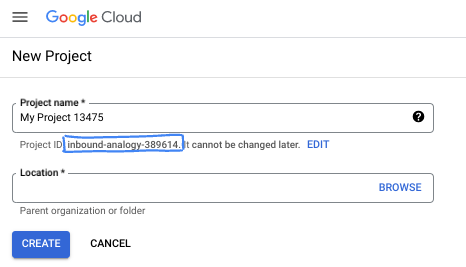
- ชื่อโปรเจ็กต์คือชื่อที่แสดงสำหรับผู้เข้าร่วมโปรเจ็กต์นี้ Google API จะไม่ใช้ชื่อโปรเจ็กต์ และคุณสามารถเปลี่ยนชื่อได้ทุกเมื่อ
- รหัสโปรเจ็กต์จะไม่ซ้ำกันในโปรเจ็กต์ Google Cloud ทั้งหมดและเปลี่ยนแปลงไม่ได้ (คุณจะเปลี่ยนรหัสหลังจากตั้งค่าแล้วไม่ได้) คอนโซล Google Cloud จะสร้างรหัสที่ไม่ซ้ำกันโดยอัตโนมัติ หรือคุณจะระบุรหัสของคุณเองก็ได้ ในโค้ดแล็บนี้ คุณจะอ้างอิงรหัสโปรเจ็กต์ด้วยตัวยึดตำแหน่ง
- หมายเลขโปรเจ็กต์คือตัวระบุที่สามที่ API บางตัวใช้ ดูข้อมูลเพิ่มเติมได้ในเอกสารประกอบของ Resource Manager
เปิดใช้การเรียกเก็บเงิน
หากตั้งค่าการเรียกเก็บเงินโดยใช้เครดิต Google Cloud คุณจะข้ามขั้นตอนนี้ได้
หากต้องการตั้งค่าบัญชีสำหรับการเรียกเก็บเงินส่วนบุคคล ให้เปิดใช้การเรียกเก็บเงินในคอนโซล Google Cloud
- การทำ Lab นี้ให้เสร็จสมบูรณ์จะใช้ทรัพยากร Google Cloud น้อยกว่า $5 USD
- ทำตามขั้นตอนการล้างข้อมูลที่ส่วนท้ายของแล็บนี้เพื่อลบทรัพยากรและหลีกเลี่ยงการเรียกเก็บเงินเพิ่มเติม
- ผู้ใช้ใหม่มีสิทธิ์ใช้ช่วงทดลองใช้ฟรีมูลค่า$300 USD
เริ่มต้น Cloud Shell
ใน Codelab นี้ คุณจะได้ใช้ Google Cloud Shell ซึ่งเป็นสภาพแวดล้อมบรรทัดคำสั่งที่ทำงานในระบบคลาวด์
จากคอนโซล Google Cloud ให้คลิกไอคอนเปิดใช้งาน Cloud Shell ในแถบเครื่องมือด้านบนขวา

หรือกด G แล้วตามด้วย S หรือเปิด Google Cloud Shell โดยตรง
เมื่อเชื่อมต่อแล้ว Cloud Shell จะแสดงพรอมต์ของเทอร์มินัลดังนี้

Cloud Shell มีพื้นที่เก็บข้อมูลถาวรและเครื่องมือพัฒนา คุณเรียกใช้ทุกขั้นตอนใน Codelab นี้ได้จากเบราว์เซอร์
3. เปิดใช้ API
หากต้องการใช้ Google Kubernetes Engine (GKE) สำหรับ AlloyDB Omni และการติดตั้งใช้งานโมเดล ให้เปิดใช้ Compute Engine และ GKE API ในโปรเจ็กต์ที่อยู่ในระบบคลาวด์ของ Google
ใน Cloud Shell ให้ตรวจสอบว่าได้กำหนดค่ารหัสโปรเจ็กต์แล้ว
PROJECT_ID=$(gcloud config get-value project)
echo $PROJECT_ID
หากไม่ได้กำหนดรหัสโปรเจ็กต์ ให้กำหนดค่าโดยทำดังนี้
export PROJECT_ID=<YOUR_PROJECT_ID>
gcloud config set project $PROJECT_ID
เปิดใช้ API ที่จำเป็น
gcloud services enable compute.googleapis.com
gcloud services enable container.googleapis.com
ผลลัพธ์ที่คาดไว้
student@cloudshell:~ (test-project-001-402417)$ PROJECT_ID=test-project-001-402417
student@cloudshell:~ (test-project-001-402417)$ gcloud config set project test-project-001-402417
Updated property [core/project].
student@cloudshell:~ (test-project-001-402417)$ gcloud services enable compute.googleapis.com
gcloud services enable container.googleapis.com
Operation "operations/acat.p2-4470404856-1f44ebd8-894e-4356-bea7-b84165a57442" finished successfully.
คุณอ่านเกี่ยวกับ API ที่เปิดใช้แต่ละรายการได้ในเอกสารประกอบ
4. ทําให้ AlloyDB Omni ใช้งานได้ใน GKE
หากต้องการติดตั้งใช้งาน AlloyDB Omni ใน GKE ให้เตรียมคลัสเตอร์ Kubernetes ตามข้อกำหนดของโอเปอเรเตอร์ AlloyDB Omni
สร้างคลัสเตอร์ GKE
ติดตั้งใช้งานคลัสเตอร์ GKE มาตรฐานที่มีความจุในการเรียกใช้ AlloyDB Omni, โอเปอเรเตอร์ และคอนเทนเนอร์การตรวจสอบ AlloyDB Omni ต้องใช้ CPU อย่างน้อย 2 ตัวและ RAM 8 GB บทแนะนำนี้ใช้ประเภทเครื่อง n2-standard-4
ตั้งค่าตัวแปรสภาพแวดล้อมสำหรับการติดตั้งใช้งาน
export PROJECT_ID=$(gcloud config get-value project)
export LOCATION=us-central1
export CLUSTER_NAME=alloydb-ai-gke
export MACHINE_TYPE=n2-standard-4
สร้างคลัสเตอร์ GKE มาตรฐาน
gcloud container clusters create ${CLUSTER_NAME} \
  --project=${PROJECT_ID} \
  --region=${LOCATION} \
  --workload-pool=${PROJECT_ID}.svc.id.goog \
  --release-channel=rapid \
  --machine-type=${MACHINE_TYPE} \
  --num-nodes=1
เอาต์พุตคอนโซลที่คาดไว้
student@cloudshell:~ (test-project-001-402417)$ export PROJECT_ID=$(gcloud config get project)
export LOCATION=us-central1
export CLUSTER_NAME=alloydb-ai-gke
export MACHINE_TYPE=n2-standard-4
Your active configuration is: [test-project-001-402417]
student@cloudshell:~ (test-project-001-402417)$ gcloud container clusters create ${CLUSTER_NAME} \
  --project=${PROJECT_ID} \
  --region=${LOCATION} \
  --workload-pool=${PROJECT_ID}.svc.id.goog \
  --release-channel=rapid \
  --machine-type=${MACHINE_TYPE} \
  --num-nodes=1
Note: Your Pod address range (`--cluster-ipv4-cidr`) can accommodate at most 1008 node(s).
Creating cluster alloydb-ai-gke in us-central1... Cluster is being health-checked (Kubernetes Control Plane is healthy)...done.
Created [https://container.googleapis.com/v1/projects/test-project-001-402417/zones/us-central1/clusters/alloydb-ai-gke].
To inspect the contents of your cluster, go to: https://console.cloud.google.com/kubernetes/workload_/gcloud/us-central1/alloydb-ai-gke?project=test-project-001-402417
kubeconfig entry generated for alloydb-ai-gke.
NAME: alloydb-ai-gke
LOCATION: us-central1
MASTER_VERSION: 1.36.3-gke.1640000
MASTER_IP: 34.121.243.65
MACHINE_TYPE: n2-standard-4
NODE_VERSION: 1.36.3-gke.1640000
NUM_NODES: 3
STATUS: RUNNING
STACK_TYPE: IPV4
เตรียมคลัสเตอร์
ติดตั้งคอมโพเนนต์ที่จำเป็น เช่น cert-manager ซึ่งเป็นตัวควบคุมใบรับรองดั้งเดิมสำหรับ Kubernetes โปรดดูรายละเอียดในเอกสารประกอบการติดตั้ง cert-manager
Cloud Shell มีเครื่องมือบรรทัดคำสั่ง Kubernetes kubectl รับข้อมูลเข้าสู่ระบบของคลัสเตอร์โดยใช้ gcloud ดังนี้
gcloud container clusters get-credentials ${CLUSTER_NAME} --region=${LOCATION}
ติดตั้ง cert-manager โดยใช้ kubectl
kubectl apply -f https://github.com/cert-manager/cert-manager/releases/download/v1.21.1/cert-manager.yaml
เอาต์พุตคอนโซลที่คาดไว้ (แก้ไขบางส่วน):
student@cloudshell:~$ kubectl apply -f https://github.com/cert-manager/cert-manager/releases/download/v1.21.1/cert-manager.yaml
namespace/cert-manager created
customresourcedefinition.apiextensions.k8s.io/certificaterequests.cert-manager.io created
customresourcedefinition.apiextensions.k8s.io/certificates.cert-manager.io created
customresourcedefinition.apiextensions.k8s.io/challenges.acme.cert-manager.io created
customresourcedefinition.apiextensions.k8s.io/clusterissuers.cert-manager.io created
...
validatingwebhookconfiguration.admissionregistration.k8s.io/cert-manager-webhook created
ติดตั้งโอเปอเรเตอร์ AlloyDB Omni
ติดตั้งโอเปอเรเตอร์ AlloyDB Omni โดยใช้ Helm
ดาวน์โหลดและติดตั้งแผนภูมิโอเปอเรเตอร์ AlloyDB Omni โดยทำดังนี้
helm install alloydbomni-operator oci://gcr.io/alloydb-omni/alloydbomni-operator \
--version 1.8.1 \
--create-namespace \
--namespace alloydb-omni-system \
--atomic \
--timeout 5m
เอาต์พุตคอนโซลที่คาดไว้ (แก้ไขบางส่วน):
student@cloudshell:~$ helm install alloydbomni-operator oci://gcr.io/alloydb-omni/alloydbomni-operator \
> --version 1.8.0 \
> --create-namespace \
> --namespace alloydb-omni-system \
> --atomic \
> --timeout 5m
Flag --atomic has been deprecated, use --rollback-on-failure instead
Pulled: gcr.io/alloydb-omni/alloydbomni-operator:1.8.0
Digest: sha256:f2d98fa7a3b08dfc1e83b811582718b94e5c017b81aade700c83e917c59f0395
NAME: alloydbomni-operator
LAST DEPLOYED: Thu Aug 27 17:57:30 2026
NAMESPACE: alloydb-omni-system
STATUS: deployed
REVISION: 1
DESCRIPTION: Install complete
TEST SUITE: None
ติดตั้งใช้งานคลัสเตอร์ฐานข้อมูล
ไฟล์ Manifest ต่อไปนี้กำหนดค่าคลัสเตอร์ฐานข้อมูลโดยเปิดใช้ googleMLExtension และตัวจัดสรรภาระงานภายใน
cat << 'EOF' > my-omni.yaml
apiVersion: v1
kind: Secret
metadata:
  name: db-pw-my-omni
type: Opaque
data:
  my-omni: "VmVyeVN0cm9uZ1Bhc3N3b3Jk"
---
apiVersion: alloydbomni.dbadmin.goog/v1
kind: DBCluster
metadata:
  name: my-omni
spec:
  databaseVersion: "18.3.0"
  primarySpec:
    adminUser:
      passwordRef:
        name: db-pw-my-omni
    features:
      googleMLExtension:
        enabled: true
    resources:
      cpu: 1
      memory: 8Gi
      disks:
      - name: DataDisk
        size: 20Gi
        storageClass: standard
    dbLoadBalancerOptions:
      annotations:
        networking.gke.io/load-balancer-type: "internal"
  allowExternalIncomingTraffic: true
EOF
ค่าข้อมูลลับของรหัสผ่านคือการแสดง Base64 ของ VeryStrongPassword ในสภาพแวดล้อมการใช้งานจริง ให้ใช้ Google Secret Manager เพื่อจัดการรหัสผ่าน โปรดดูรายละเอียดในเอกสารประกอบของ Secret Manager
ระบบจะบันทึกไฟล์ Manifest เป็น my-omni.yaml ใน Cloud Shell ให้คลิกเปิดเครื่องมือแก้ไขที่มุมขวาบนของหน้าต่างเทอร์มินัล แล้วอ่านไฟล์
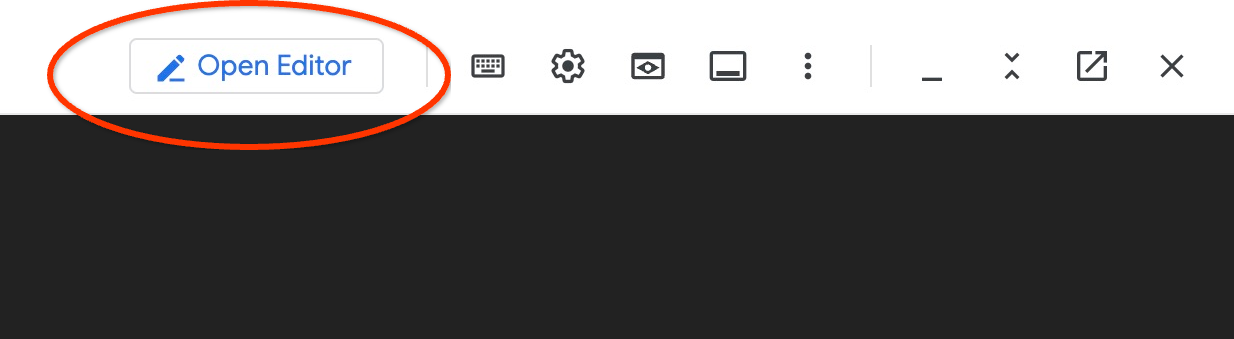
หลังจากอ่านmy-omni.yamlไฟล์ Manifest แล้ว ให้คลิกเปิดเทอร์มินัลเพื่อกลับไปที่ Command Prompt
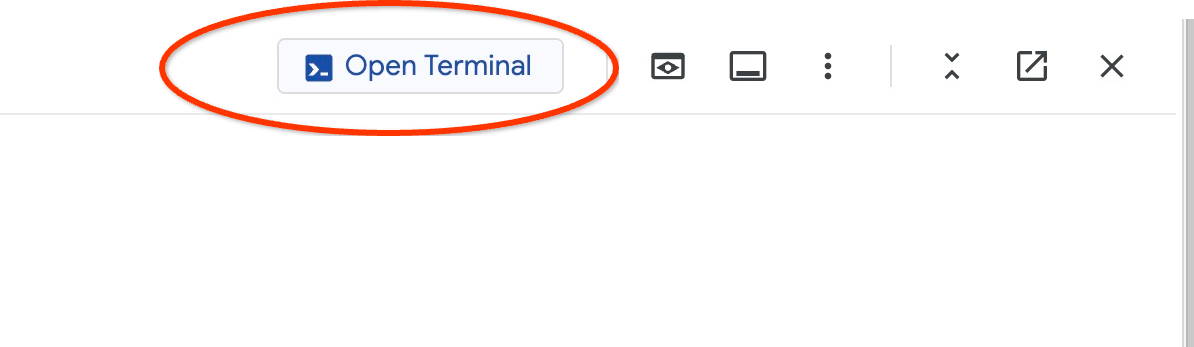
ใช้ไฟล์ Manifest my-omni.yaml ดังนี้
kubectl apply -f my-omni.yaml
เอาต์พุตคอนโซลที่คาดไว้
secret/db-pw-my-omni created
dbcluster.alloydbomni.dbadmin.goog/my-omni created
ตรวจสอบสถานะของคลัสเตอร์ my-omni
kubectl get dbclusters.alloydbomni.dbadmin.goog my-omni -n default
ในระหว่างการติดตั้งใช้งาน คลัสเตอร์ฐานข้อมูลจะเปลี่ยนผ่านขั้นตอนการตั้งค่าจนกว่าจะถึงสถานะ DBClusterReady
เอาต์พุตคอนโซลที่คาดไว้
$ kubectl get dbclusters.alloydbomni.dbadmin.goog my-omni -n default
NAME      PRIMARYENDPOINT   PRIMARYPHASE   DBCLUSTERPHASE   HAREADYSTATUS   HAREADYREASON
my-omni   10.131.0.33        Ready          DBClusterReady
คุณสามารถตรวจสอบการติดตั้งใช้งานคลัสเตอร์ได้โดยใช้คำสั่ง kubectl log (ไม่บังคับ)
kubectl logs -l alloydbomni.internal.dbadmin.goog/dbcluster=my-omni --all-containers -f
เชื่อมต่อกับ AlloyDB Omni
เมื่อคลัสเตอร์พร้อมแล้ว ให้เชื่อมต่อกับพ็อดฐานข้อมูลโดยใช้ไคลเอ็นต์ PostgreSQL (psql) รหัสผ่านคือ VeryStrongPassword ตามที่กำหนดไว้ใน my-omni.yaml
DB_CLUSTER_NAME=my-omni
DB_CLUSTER_NAMESPACE=default
DBPOD=`kubectl get pod --selector=alloydbomni.internal.dbadmin.goog/dbcluster=$DB_CLUSTER_NAME,alloydbomni.internal.dbadmin.goog/task-type=database -n $DB_CLUSTER_NAMESPACE -o jsonpath='{.items[0].metadata.name}'`
kubectl exec -ti $DBPOD -n $DB_CLUSTER_NAMESPACE -c database -- psql -h localhost -U postgres
ตัวอย่างเอาต์พุตคอนโซล
DB_CLUSTER_NAME=my-omni
DB_CLUSTER_NAMESPACE=default
DBPOD=`kubectl get pod --selector=alloydbomni.internal.dbadmin.goog/dbcluster=$DB_CLUSTER_NAME,alloydbomni.internal.dbadmin.goog/task-type=database -n $DB_CLUSTER_NAMESPACE -o jsonpath='{.items[0].metadata.name}'`
kubectl exec -ti $DBPOD -n $DB_CLUSTER_NAMESPACE -c database -- psql -h localhost -U postgres
Password for user postgres:
psql (18.3)
SSL connection (protocol: TLSv1.3, cipher: TLS_AES_128_GCM_SHA256, compression: off, ALPN: postgresql)
Type "help" for help.

postgres=#
ออกจากเซสชัน psql โดยพิมพ์ \q แล้วกด Enter
postgres=# \q
5. ทำให้โมเดล EmbeddingGemma ใช้งานได้ใน GKE
หากต้องการทดสอบการผสานรวม AI ของ AlloyDB Omni กับโมเดลในเครื่อง ให้ติดตั้งใช้งานโมเดลการฝังในคลัสเตอร์ GKE บทแนะนำนี้ใช้โมเดล EmbeddingGemma ของ Google
สร้าง Node Pool สำหรับโมเดล
หากต้องการเรียกใช้การอนุมานโมเดล ให้เตรียม Node Pool เฉพาะ คุณสามารถใช้ Node Pool ที่มีเฉพาะ CPU หรือ Node Pool ที่เร่งความเร็วด้วย GPU (เช่น g2-standard-8 ที่มี GPU รุ่น L4 ของ NVIDIA) บทแนะนำนี้ใช้ Node Pool ที่ใช้ CPU ที่มีประเภทเครื่อง c3-standard-8
สร้าง Node Pool ของ CPU แบบโหนดเดียว
export PROJECT_ID=$(gcloud config get-value project)
export LOCATION=us-central1
export CLUSTER_NAME=alloydb-ai-gke
gcloud container node-pools create cpupool \
  --project=${PROJECT_ID} \
  --location=${LOCATION} \
  --node-locations=${LOCATION}-a \
  --cluster=${CLUSTER_NAME} \
  --machine-type=c3-standard-8 \
  --num-nodes=1
ผลลัพธ์ที่คาดไว้
student@cloudshell$ export PROJECT_ID=$(gcloud config get project)
Your active configuration is: [pant]
export LOCATION=us-central1
export CLUSTER_NAME=alloydb-ai-gke
student@cloudshell$ gcloud container node-pools create cpupool \
>   --project=${PROJECT_ID} \
>   --location=${LOCATION} \
>   --node-locations=${LOCATION}-a \
>   --cluster=${CLUSTER_NAME} \
>   --machine-type=c3-standard-8 \
>   --num-nodes=1
Creating node pool cpupool...done.
Created [https://container.googleapis.com/v1/projects/gleb-test-short-003-483115/zones/us-central1/clusters/alloydb-ai-gke/nodePools/cpupool].
NAME     MACHINE_TYPE    DISK_SIZE_GB  NODE_VERSION
cpupool  c3-standard-8  100           1.34.1-gke.3355002
รับโทเค็น Hugging Face
บทแนะนำนี้จะทำให้โมเดล EmbeddingGemma ใช้งานได้จาก Hugging Face หากต้องการเข้าถึงน้ำหนักของโมเดล ให้สร้างโทเค็นเพื่อการเข้าถึง Hugging Face โดยทำดังนี้
- ลงชื่อเข้าใช้หรือสร้างบัญชีใน Hugging Face
- ไปที่โปรไฟล์ของคุณ > โทเค็นการเข้าถึง
- คลิก Create new token
- ป้อนชื่อโทเค็นและเลือกบทบาทอ่าน
- คลิกสร้างโทเค็น แล้วคัดลอกค่าโทเค็นที่สร้างขึ้น
- ยอมรับข้อกำหนดของโมเดลในหน้าโมเดล EmbeddingGemma หากยังไม่เคยดำเนินการ
สร้างข้อมูลลับของ Kubernetes ที่มีโทเค็น Hugging Face ใน Cloud Shell (แทนที่ตัวยึดตำแหน่งโทเค็นด้วยโทเค็นของคุณ)
export HF_TOKEN=<YOUR_HUGGING_FACE_TOKEN>
kubectl create secret generic hf-secret \
  --from-literal=hf_api_token=$HF_TOKEN \
  --dry-run=client -o yaml | kubectl apply -f -
เตรียมไฟล์ Manifest ของการติดตั้งใช้งาน
หากต้องการติดตั้งใช้งานโมเดล ให้ใช้แพ็กเกจคอนเทนเนอร์ Text Embeddings Inference (TEI) ของ Hugging Face ดูข้อมูลเพิ่มเติมได้ที่เอกสารประกอบเกี่ยวกับ TEI ของ Hugging Face GKE
โคลนที่เก็บการติดตั้งใช้งานจาก GitHub
git clone https://github.com/huggingface/Google-Cloud-Containers
ตรวจสอบและแก้ไขไฟล์ Manifest การกำหนดค่า CPU โดยทำดังนี้
edit Google-Cloud-Containers/examples/gke/tei-deployment/cpu-config/deployment.yaml
ไฟล์ Manifest ที่อัปเดตแล้วสำหรับการติดตั้งใช้งาน CPU
apiVersion: apps/v1
kind: Deployment
metadata:
  name: tei-deployment
spec:
  replicas: 1
  selector:
    matchLabels:
      app: tei-server
  template:
    metadata:
      labels:
        app: tei-server
        hf.co/model: Google--embeddinggemma-300m
        hf.co/task: text-embeddings
    spec:
      containers:
        - name: tei-container
          image: ghcr.io/huggingface/text-embeddings-inference:cpu-latest
          resources:
            requests:
              cpu: "6"
              memory: "24Gi"
            limits:
              cpu: "6"
              memory: "24Gi"
          env:
            - name: MODEL_ID
              value: google/embeddinggemma-300m
            - name: NUM_SHARD
              value: "1"
            - name: PORT
              value: "8080"
            - name: HF_TOKEN
              valueFrom:
                secretKeyRef:
                  name: hf-secret
                  key: hf_api_token
          volumeMounts:
            - mountPath: /tmp
              name: tmp
      volumes:
        - name: tmp
          emptyDir: {}
      nodeSelector:
        cloud.google.com/machine-family: "c3"
บันทึกการเปลี่ยนแปลงโดยกด ctrl+s แล้วกลับไปที่เทอร์มินัล
ทำให้โมเดลใช้งานได้
ใช้ไฟล์ Manifest เพื่อติดตั้งใช้งานเซิร์ฟเวอร์ TEI โดยทำดังนี้
kubectl apply -f Google-Cloud-Containers/examples/gke/tei-deployment/cpu-config
ตรวจสอบการติดตั้งใช้งานจนกว่าจะอยู่ในสถานะพร้อมใช้งาน
printf "Waiting for model to load..."; until kubectl logs -l app=tei-server --tail=50 2>/dev/null | grep -q "Ready"; do printf "."; sleep 3; done; printf '\n\033[1;32m========================================\n[SUCCESS] Model is loaded and ready!\nYou can now proceed to the next step.\n========================================\033[0m\n'
ตรวจสอบtei-serviceบริการ Kubernetes ดังนี้
kubectl get service tei-service
ผลลัพธ์ที่คาดไว้
student@cloudshell$ kubectl get service tei-service
NAME          TYPE        CLUSTER-IP      EXTERNAL-IP   PORT(S)    AGE
tei-service   ClusterIP   34.118.233.48   <none>        8080/TCP   10m
บริการ CLUSTER-IP จะให้บริการคำขอภายในที่ http://34.118.233.48:8080/embed
ทดสอบปลายทางของโมเดลในเครื่องโดยใช้ kubectl port-forward ดังนี้
kubectl port-forward service/tei-service 8080:8080
เปิดแท็บ Cloud Shell ที่ 2 โดยคลิก + ที่ด้านบนของเทอร์มินัล
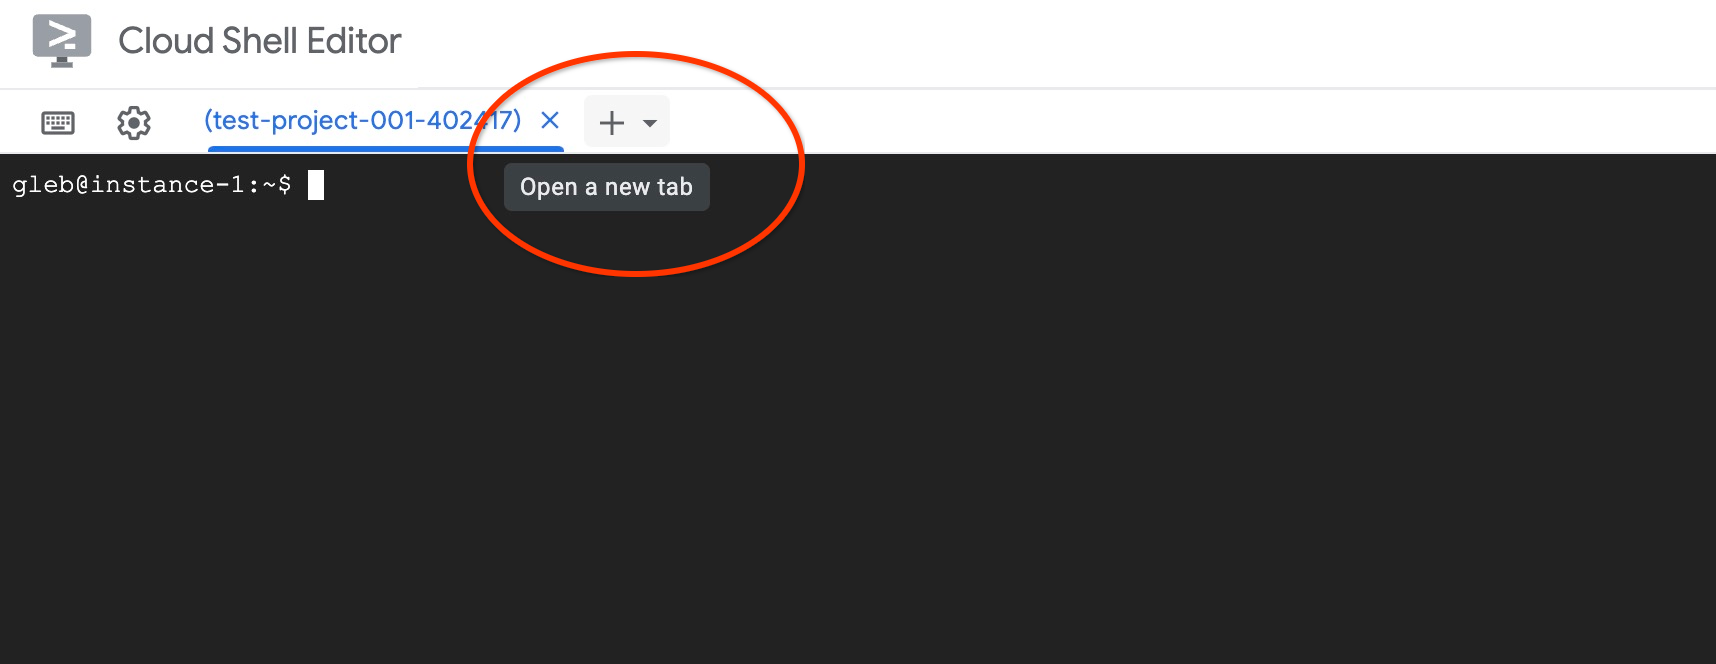
ในแท็บใหม่ ให้ทดสอบการฝังการสร้างด้วย curl โดยทำดังนี้
curl http://localhost:8080/embed \
  -X POST \
  -d '{"inputs":"Test"}' \
  -H 'Content-Type: application/json'
เอาต์พุตที่คาดหวัง (อาร์เรย์เวกเตอร์)
curl http://localhost:8080/embed \
>     -X POST \
>     -d '{"inputs":"Test"}' \
>     -H 'Content-Type: application/json'
[[-0.018975832,0.0071419072,0.06347208,0.022992613,0.014205903
...
-0.03677433,0.01636146,0.06731572]]
หยุดการส่งต่อพอร์ตในแท็บแรกโดยกด ctrl+c
6. ลงทะเบียนโมเดลการฝังใน AlloyDB Omni
หากต้องการใช้โมเดลที่ติดตั้งใช้งานจาก AlloyDB Omni ให้สร้างฐานข้อมูล กำหนดฟังก์ชันการแปลง และลงทะเบียนปลายทางของโมเดล
สร้าง VM และฐานข้อมูลไคลเอ็นต์
สร้างอินสแตนซ์ VM ของ Compute Engine ใน VPC เดียวกันเพื่อทำหน้าที่เป็นโฮสต์การข้ามของไคลเอ็นต์
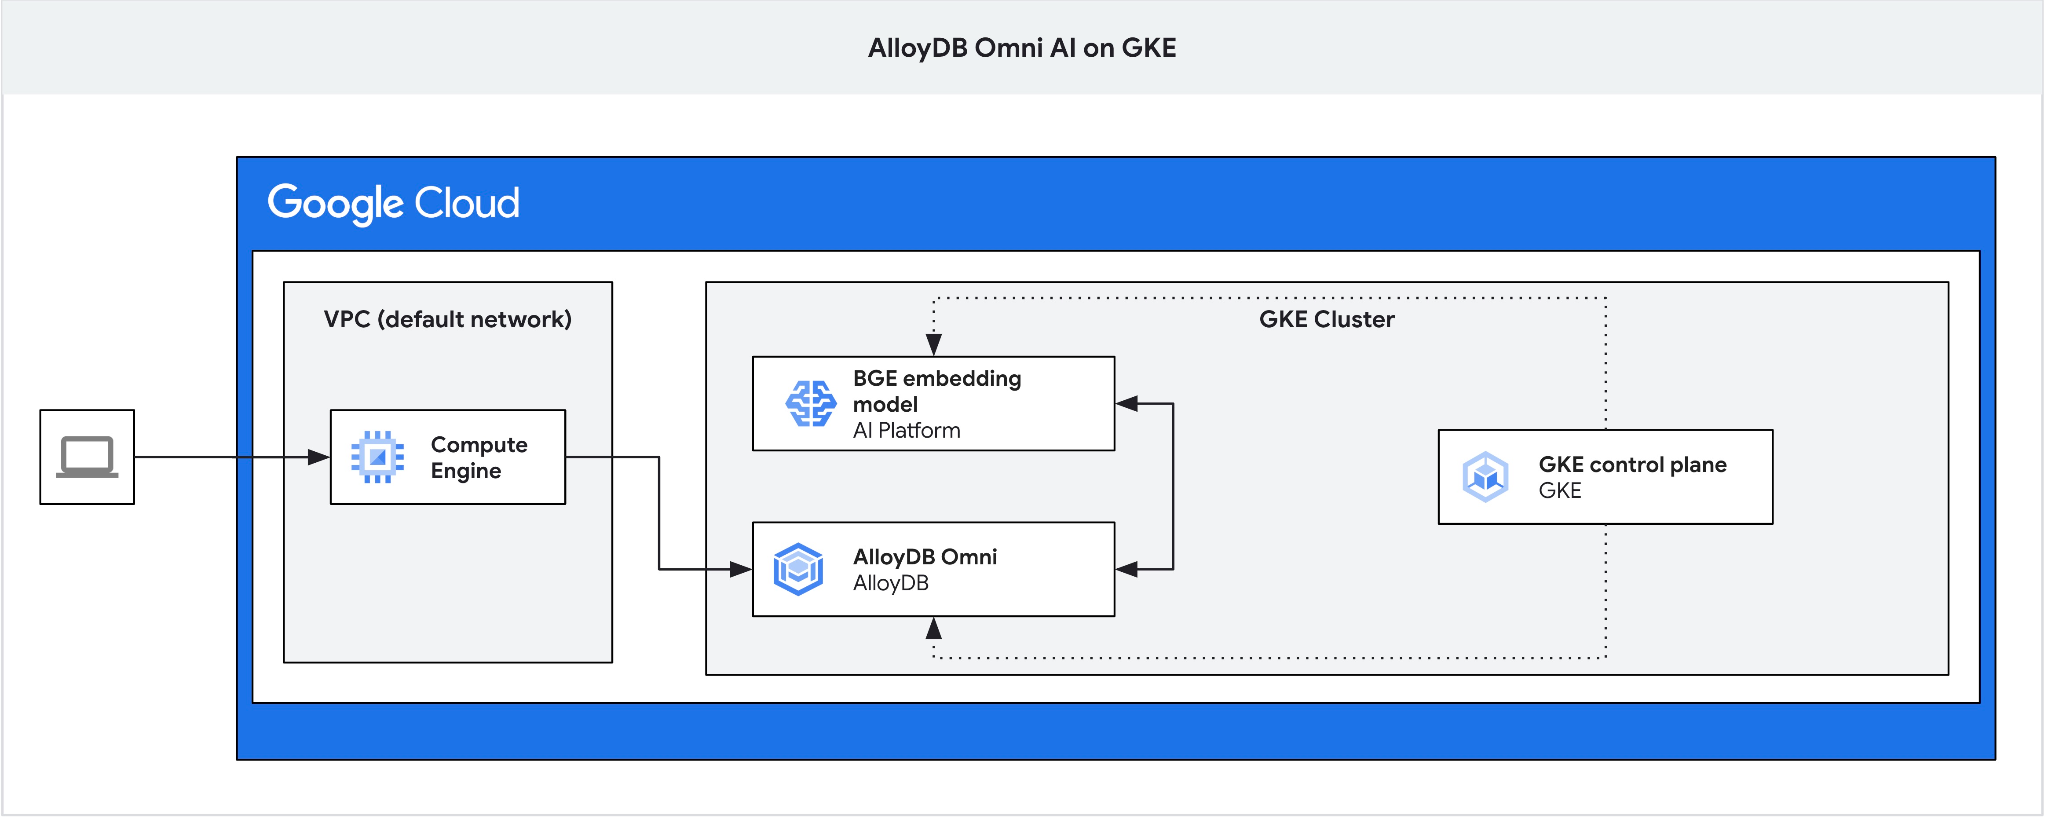
สร้าง VM ไคลเอ็นต์ใน Cloud Shell โดยทำดังนี้
export ZONE=us-central1-a
gcloud compute instances create instance-1 \
  --zone=$ZONE
ดึงข้อมูล IP ของปลายทาง AlloyDB Omni โดยทำดังนี้
echo "INSTANCE_IP=$(kubectl get dbclusters.alloydbomni.dbadmin.goog my-omni -n default -o jsonpath='{.status.primary.endpoint}')"
ผลลัพธ์ที่คาดไว้
INSTANCE_IP=10.128.0.33
ค่า INSTANCE_IP คือ IP ของตัวจัดสรรภาระงานภายในสำหรับคลัสเตอร์ AlloyDB Omni ในตัวอย่างนี้คือ 10.131.0.33
เชื่อมต่อกับอินสแตนซ์ VM โดยใช้ SSH
gcloud compute ssh instance-1 --zone=$ZONE
ในเซสชัน SSH บน instance-1 ให้ติดตั้งไคลเอ็นต์ PostgreSQL โดยทำดังนี้
sudo apt-get update && sudo apt-get install --yes postgresql-client
ส่งออก IP ของตัวจัดสรรภาระงาน AlloyDB Omni (แทนที่ด้วย IP ของ PRIMARYENDPOINT):
export INSTANCE_IP=10.131.0.33
เชื่อมต่อกับ AlloyDB Omni โดยใช้ psql (รหัสผ่านคือ VeryStrongPassword)
psql "host=$INSTANCE_IP user=postgres sslmode=require"
ในpsqlเซสชัน ให้สร้างฐานข้อมูล demo ดังนี้
CREATE DATABASE demo;
เปลี่ยนไปใช้ฐานข้อมูล demo โดยทำดังนี้
\c demo
สร้างฟังก์ชันการเปลี่ยนรูปแบบ
ปลายทางการฝังที่กำหนดเองต้องมีฟังก์ชันการแปลงอินพุตและเอาต์พุตเพื่อปรับรูปแบบข้อมูลระหว่าง AlloyDB Omni กับ API ของโมเดล
สร้างฟังก์ชันการเปลี่ยนรูปแบบอินพุต
CREATE OR REPLACE FUNCTION tei_text_input_transform(model_id VARCHAR(100), input_text TEXT)
RETURNS JSON
LANGUAGE plpgsql
AS $$
DECLARE
  transformed_input JSON;
BEGIN
  SELECT json_build_object('inputs', input_text, 'truncate', true)::JSON INTO transformed_input;
  RETURN transformed_input;
END;
$$;
ผลลัพธ์ที่คาดไว้
demo=# CREATE OR REPLACE FUNCTION tei_text_input_transform(model_id VARCHAR(100), input_text TEXT)
RETURNS JSON
LANGUAGE plpgsql
AS $$
DECLARE
  transformed_input JSON;
BEGIN
  SELECT json_build_object('inputs', input_text, 'truncate', true)::JSON INTO transformed_input;
  RETURN transformed_input;
END;
$$;
CREATE FUNCTION
demo=#
สร้างฟังก์ชันการเปลี่ยนรูปแบบเอาต์พุตเพื่อแยกวิเคราะห์การตอบกลับอาร์เรย์เวกเตอร์
CREATE OR REPLACE FUNCTION tei_text_output_transform(model_id VARCHAR(100), response_json JSON)
RETURNS REAL[]
LANGUAGE plpgsql
AS $$
DECLARE
  transformed_output REAL[];
BEGIN
  SELECT ARRAY(SELECT json_array_elements_text(response_json->0)) INTO transformed_output;
  RETURN transformed_output;
END;
$$;
ผลลัพธ์ที่คาดไว้
demo=# CREATE OR REPLACE FUNCTION tei_text_output_transform(model_id VARCHAR(100), response_json JSON)
RETURNS REAL[]
LANGUAGE plpgsql
AS $$
DECLARE
  transformed_output REAL[];
BEGIN
  SELECT ARRAY(SELECT json_array_elements_text(response_json->0)) INTO transformed_output;
  RETURN transformed_output;
END;
$$;
CREATE FUNCTION
demo=#
ลงทะเบียนโมเดล
ลงทะเบียนโมเดลใน AlloyDB Omni โดยใช้google_ml.create_modelขั้นตอน ระบุ http://tei-service:8080/embed เป็น model_request_url เพื่อกำหนดเส้นทางคำขอไปยังบริการคลัสเตอร์ Kubernetes
CALL
  google_ml.create_model(
    model_id => 'embeddinggemma',
    model_request_url => 'http://tei-service:8080/embed',
    model_provider => 'custom',
    model_type => 'text_embedding',
    model_in_transform_fn => 'tei_text_input_transform',
    model_out_transform_fn => 'tei_text_output_transform');
ผลลัพธ์ที่คาดไว้
demo=# CALL
  google_ml.create_model(
    model_id => 'embeddinggemma',
    model_request_url => 'http://tei-service:8080/embed',
    model_provider => 'custom',
    model_type => 'text_embedding',
    model_in_transform_fn => 'tei_text_input_transform',
    model_out_transform_fn => 'tei_text_output_transform');
CALL
demo=#
ทดสอบโมเดลที่ลงทะเบียนด้วยการค้นหา SQL ตัวอย่าง
SELECT google_ml.embedding('embeddinggemma', 'What is AlloyDB Omni?');
ฟังก์ชันจะแสดงผลการแสดงอาร์เรย์ของจำนวนจริงที่สร้างโดยโมเดล EmbeddingGemma ในเครื่องที่ทำงานบน GKE
กด q เพื่อกลับไปที่พรอมต์เซสชัน psql
ออกจากเซสชัน psql โดยทำดังนี้
\q
7. ทดสอบโมเดลด้วยข้อมูลตัวอย่าง
โหลดข้อมูลตัวอย่าง
บทแนะนำนี้ใช้ชุดข้อมูลการค้าปลีก Cymbal เพื่อสาธิตการค้นหาความคล้ายคลึงของเวกเตอร์ คุณจะใช้ Google Cloud SDK และไคลเอ็นต์ PostgreSQL เพื่อนำเข้าข้อมูลไปยัง AlloyDB Omni
ในเซสชัน SSH บน instance-1 ให้เชื่อมต่อกับฐานข้อมูลเดโมและเปิดใช้ส่วนขยาย vector โดยใช้คำสั่งต่อไปนี้
psql "host=$INSTANCE_IP user=postgres sslmode=require dbname=demo"
ในเซสชัน psql ให้ทำดังนี้
CREATE EXTENSION IF NOT EXISTS vector;
ออกจากเซสชัน psql โดยใช้คำสั่งต่อไปนี้
\q
ดาวน์โหลดและใช้สคีมาเพื่อสร้างตารางในฐานข้อมูล demo
gcloud storage cat gs://cloud-training/gcc/gcc-tech-004/cymbal_demo_schema.sql |psql "host=$INSTANCE_IP user=postgres dbname=demo"
ผลลัพธ์ที่คาดไว้
student@cloudshell:~$ gcloud storage cat gs://cloud-training/gcc/gcc-tech-004/cymbal_demo_schema.sql |psql "host=$INSTANCE_IP user=postgres dbname=demo"
Password for user postgres:
SET
SET
SET
SET
SET
 set_config
------------

(1 row)

SET
SET
SET
SET
SET
SET
CREATE TABLE
ALTER TABLE
CREATE TABLE
ALTER TABLE
CREATE TABLE
ALTER TABLE
CREATE TABLE
ALTER TABLE
CREATE SEQUENCE
ALTER TABLE
ALTER SEQUENCE
ALTER TABLE
ALTER TABLE
ALTER TABLE
student@cloudshell:~$
ยืนยันตารางที่สร้างขึ้น
psql "host=$INSTANCE_IP user=postgres dbname=demo" -c "\dt+"
ผลลัพธ์ที่คาดไว้
student@cloudshell:~$ psql "host=$INSTANCE_IP user=postgres dbname=demo" -c "\dt+"
Password for user postgres:
                                           List of relations
 Schema |       Name       | Type  |  Owner   | Persistence | Access method |    Size    | Description
--------+------------------+-------+----------+-------------+---------------+------------+-------------
 public | cymbal_embedding | table | postgres | permanent   | heap          | 8192 bytes |
 public | cymbal_inventory | table | postgres | permanent   | heap          | 8192 bytes |
 public | cymbal_products  | table | postgres | permanent   | heap          | 8192 bytes |
 public | cymbal_stores    | table | postgres | permanent   | heap          | 8192 bytes |
(4 rows)
โหลดข้อมูลลงในตาราง cymbal_products โดยทำดังนี้
gcloud storage cat gs://cloud-training/gcc/gcc-tech-004/cymbal_products.csv |psql "host=$INSTANCE_IP user=postgres dbname=demo" -c "\copy cymbal_products from stdin csv header"
ผลลัพธ์ที่คาดไว้
student@cloudshell:~$ gcloud storage cat gs://cloud-training/gcc/gcc-tech-004/cymbal_products.csv |psql "host=$INSTANCE_IP user=postgres dbname=demo" -c "\copy cymbal_products from stdin csv header"
COPY 941
student@cloudshell:~$
นี่คือตัวอย่างแถวบางส่วนจากตาราง cymbal_products
psql "host=$INSTANCE_IP user=postgres dbname=demo" -c "SELECT uniq_id,left(product_name,30),left(product_description,50),sale_price FROM cymbal_products limit 3"
ผลลัพธ์ที่คาดไว้
student@cloudshell:~$ psql "host=$INSTANCE_IP user=postgres dbname=demo" -c "SELECT uniq_id,left(product_name,30),left(product_description,50),sale_price FROM cymbal_products limit 3"
Password for user postgres:
             uniq_id              |              left              |                        left                        | sale_price
----------------------------------+--------------------------------+----------------------------------------------------+------------
 a73d5f754f225ecb9fdc64232a57bc37 | Laundry Tub Strainer Cup       |   Laundry tub strainer cup Chrome For 1-.50, drain |      11.74
 41b8993891aa7d39352f092ace8f3a86 | LED Starry Star Night Light La |  LED Starry Star Night Light Laser Projector 3D Oc |      46.97
 ed4a5c1b02990a1bebec908d416fe801 | Surya Horizon HRZ-1060 Area Ru |  The 100% polypropylene construction of the Surya  |       77.4
(3 rows)
student@cloudshell:~$
โหลดข้อมูลลงในตาราง cymbal_inventory โดยทำดังนี้
gcloud storage cat gs://cloud-training/gcc/gcc-tech-004/cymbal_inventory.csv |psql "host=$INSTANCE_IP user=postgres dbname=demo" -c "\copy cymbal_inventory from stdin csv header"
ผลลัพธ์ที่คาดไว้
student@cloudshell:~$ gcloud storage cat gs://cloud-training/gcc/gcc-tech-004/cymbal_inventory.csv |psql "host=$INSTANCE_IP user=postgres dbname=demo" -c "\copy cymbal_inventory from stdin csv header"
Password for user postgres:
COPY 263861
student@cloudshell:~$
นี่คือตัวอย่างแถวบางส่วนจากตาราง cymbal_inventory
psql "host=$INSTANCE_IP user=postgres dbname=demo" -c "SELECT * FROM cymbal_inventory LIMIT 3"
เอาต์พุต:
student@cloudshell:~$ psql "host=$INSTANCE_IP user=postgres dbname=demo" -c "SELECT * FROM cymbal_inventory LIMIT 3"
Password for user postgres:
 store_id |             uniq_id              | inventory
----------+----------------------------------+-----------
     1583 | adc4964a6138d1148b1d98c557546695 |         5
     1490 | adc4964a6138d1148b1d98c557546695 |         4
     1492 | adc4964a6138d1148b1d98c557546695 |         3
(3 rows)
student@cloudshell:~$
โหลดข้อมูลลงในตาราง cymbal_stores โดยทำดังนี้
gcloud storage cat gs://cloud-training/gcc/gcc-tech-004/cymbal_stores.csv |psql "host=$INSTANCE_IP user=postgres dbname=demo" -c "\copy cymbal_stores from stdin csv header"
เอาต์พุตคอนโซลที่คาดไว้
student@cloudshell:~$ gcloud storage cat gs://cloud-training/gcc/gcc-tech-004/cymbal_stores.csv |psql "host=$INSTANCE_IP user=postgres dbname=demo" -c "\copy cymbal_stores from stdin csv header"
Password for user postgres:
COPY 4654
student@cloudshell:~$
นี่คือตัวอย่างแถวบางส่วนจากตาราง cymbal_stores
psql "host=$INSTANCE_IP user=postgres dbname=demo" -c "SELECT store_id, name, zip_code FROM cymbal_stores limit 3"
เอาต์พุต:
student@cloudshell:~$ psql "host=$INSTANCE_IP user=postgres dbname=demo" -c "SELECT store_id, name, zip_code FROM cymbal_stores limit 3"
Password for user postgres:
 store_id |       name        | zip_code
----------+-------------------+----------
     1990 | Mayaguez Store    |      680
     2267 | Ware Supercenter  |     1082
     4359 | Ponce Supercenter |      780
(3 rows)
student@cloudshell:~$
สร้างการฝัง
เชื่อมต่อกับฐานข้อมูลเดโมโดยใช้ psql และสร้างการฝังสำหรับผลิตภัณฑ์ที่อธิบายไว้ในตาราง cymbal_products โดยอิงตามคำอธิบายผลิตภัณฑ์
เชื่อมต่อกับฐานข้อมูลสาธิต
psql "host=$INSTANCE_IP user=postgres sslmode=require dbname=demo"
ใช้คอลัมน์ embedding ประเภท vector เพื่อจัดเก็บการฝังข้อความที่สร้างขึ้นสำหรับคำอธิบายผลิตภัณฑ์
เปิดใช้การจับเวลาการค้นหา
\timing
สร้างการฝังสำหรับรายละเอียดผลิตภัณฑ์แต่ละรายการและจัดเก็บไว้ในcymbal_embeddingตาราง
INSERT INTO cymbal_embedding (uniq_id, embedding)
SELECT uniq_id, google_ml.embedding('embeddinggemma', product_description)::vector
FROM cymbal_products;
ผลลัพธ์ที่คาดไว้
demo=# INSERT INTO cymbal_embedding(uniq_id,embedding)  SELECT uniq_id, google_ml.embedding('embeddinggemma',product_description)::vector FROM cymbal_products;
INSERT 0 941
Time: 497878.136 ms (08:17.878)
demo=#
เรียกใช้คำค้นหาแบบ Semantic Search
ในเซสชัน psql ให้ค้นหาผลิตภัณฑ์ 5 อันดับแรกที่ตรงกับคำถาม "What kind of fruit trees grow well here?" โดยใช้ระยะทางโคไซน์ (<=>)
SELECT
    cp.product_name,
    left(cp.product_description, 80) AS description,
    cp.sale_price,
    cs.zip_code,
    (ce.embedding <=> google_ml.embedding('embeddinggemma', 'What kind of fruit trees grow well here?')::vector) AS distance
FROM
    cymbal_products cp
JOIN cymbal_embedding ce ON ce.uniq_id = cp.uniq_id
JOIN cymbal_inventory ci ON ci.uniq_id = cp.uniq_id
JOIN cymbal_stores cs ON cs.store_id = ci.store_id
WHERE
    ci.inventory > 0
    AND cs.store_id = 1583
ORDER BY
    distance ASC
LIMIT 5;
ผลลัพธ์ที่คาดไว้
demo=# SELECT
        cp.product_name,
        left(cp.product_description,80) as description,
        cp.sale_price,
        cs.zip_code,
        (ce.embedding <=> google_ml.embedding('embeddinggemma','What kind of fruit trees grow well here?')::vector) as distance
FROM
        cymbal_products cp
JOIN cymbal_embedding ce on ce.uniq_id=cp.uniq_id
JOIN cymbal_inventory ci on ci.uniq_id=cp.uniq_id
JOIN cymbal_stores cs on cs.store_id=ci.store_id
WHERE
    ci.inventory > 0
    AND cs.store_id = 1583
ORDER BY
    distance ASC
LIMIT 5;
     product_name      |                                   description                                    | sale_price | zip_code |      distance
-----------------------+----------------------------------------------------------------------------------+------------+----------+--------------------
 Cherry Tree           | This is a beautiful cherry tree that will produce delicious cherries. It is an d |      75.00 |    93230 | 0.5210549378080666
 California Lilac      | This is a beautiful lilac tree that can grow to be over 10 feet tall. It is an d |       5.00 |    93230 | 0.5639421771781971
 Toyon                 | This is a beautiful toyon tree that can grow to be over 20 feet tall. It is an e |      10.00 |    93230 | 0.5670010914504852
 Rose Bush             | This is a beautiful rose bush that will produce fragrant roses. It is a perennia |      50.00 |    93230 | 0.5731542622882957
 California Peppertree | This is a beautiful peppertree that can grow to be over 30 feet tall. It is an e |      25.00 |    93230 | 0.5750934653011995
(5 rows)

Time: 83.610 ms
demo=#
คําค้นหาทํางาน 83 มิลลิวินาทีและแสดงรายการต้นไม้จากตาราง cymbal_products ที่ตรงกับคําขอและมีสินค้าคงคลังในร้านค้าหมายเลข 1583
สร้างดัชนี ANN
เมื่อมีชุดข้อมูลขนาดเล็ก คุณจะใช้การสแกนการค้นหาที่ตรงกันทุกการฝังได้ง่าย แต่เมื่อข้อมูลเพิ่มขึ้น เวลาในการโหลดและการตอบสนองก็จะเพิ่มขึ้นด้วย คุณสร้างดัชนีในข้อมูลการฝังเพื่อปรับปรุงประสิทธิภาพได้ ต่อไปนี้คือตัวอย่างวิธีดำเนินการโดยใช้ดัชนี ScaNN ของ Google สำหรับข้อมูลเวกเตอร์
หากการเชื่อมต่อขาดหายไป ให้เชื่อมต่อฐานข้อมูลเดโมอีกครั้งโดยทำดังนี้
psql "host=$INSTANCE_IP user=postgres sslmode=require dbname=demo"
เปิดใช้ส่วนขยาย alloydb_scann โดยทำดังนี้
CREATE EXTENSION IF NOT EXISTS alloydb_scann;
สร้างดัชนี ScaNN ในคอลัมน์ embedding
CREATE INDEX cymbal_products_embeddings_scann ON cymbal_embedding
  USING scann (embedding cosine)
  WITH (num_leaves=10, max_num_levels = 1);
เรียกใช้คำค้นหาเชิงความหมายอีกครั้งเพื่อเปรียบเทียบประสิทธิภาพการดำเนินการ
SELECT
    cp.product_name,
    left(cp.product_description, 80) AS description,
    cp.sale_price,
    cs.zip_code,
    (ce.embedding <=> google_ml.embedding('embeddinggemma', 'What kind of fruit trees grow well here?')::vector) AS distance
FROM
    cymbal_products cp
JOIN cymbal_embedding ce ON ce.uniq_id = cp.uniq_id
JOIN cymbal_inventory ci ON ci.uniq_id = cp.uniq_id
JOIN cymbal_stores cs ON cs.store_id = ci.store_id
WHERE
    ci.inventory > 0
    AND cs.store_id = 1583
ORDER BY
    distance ASC
LIMIT 5;
ผลลัพธ์ที่คาดไว้
demo=# SELECT
    cp.product_name,
    left(cp.product_description,80) as description,
    cp.sale_price,
    cs.zip_code,
    (ce.embedding <=> google_ml.embedding('embeddinggemma', 'What kind of fruit trees grow well here?')::vector) AS distance
FROM
    cymbal_products cp
JOIN cymbal_embedding ce ON ce.uniq_id = cp.uniq_id
JOIN cymbal_inventory ci ON ci.uniq_id = cp.uniq_id
JOIN cymbal_stores cs ON cs.store_id = ci.store_id
WHERE
    ci.inventory > 0
    AND cs.store_id = 1583
ORDER BY
    distance ASC
LIMIT 5;
     product_name      |                                   description                                    | sale_price | zip_code |      distance
-----------------------+----------------------------------------------------------------------------------+------------+----------+--------------------
 Cherry Tree           | This is a beautiful cherry tree that will produce delicious cherries. It is an d |      75.00 |    93230 | 0.5210549378080666
 California Lilac      | This is a beautiful lilac tree that can grow to be over 10 feet tall. It is an d |       5.00 |    93230 | 0.5639421771781971
 Toyon                 | This is a beautiful toyon tree that can grow to be over 20 feet tall. It is an e |      10.00 |    93230 | 0.5670010914504852
 Rose Bush             | This is a beautiful rose bush that will produce fragrant roses. It is a perennia |      50.00 |    93230 | 0.5731542622882957
 California Peppertree | This is a beautiful peppertree that can grow to be over 30 feet tall. It is an e |      25.00 |    93230 | 0.5750934653011995
(5 rows)

Time: 64.783 ms
เวลาในการเรียกใช้คําค้นหาลดลงเล็กน้อย และการปรับปรุงจะเห็นได้ชัดเจนมากขึ้นเมื่อใช้ชุดข้อมูลขนาดใหญ่ ข้อมูลที่แสดงควรเหมือนกันหรือคล้ายกันมากกับข้อมูลที่เราได้รับโดยไม่มีดัชนี
ลองใช้คำค้นหาอื่นๆ และอ่านเพิ่มเติมเกี่ยวกับการเพิ่มประสิทธิภาพดัชนีเวกเตอร์ในเอกสารประกอบ
ออกจากเซสชัน psql
\q
กลับไปที่ Google Cloud Shell โดยยกเลิกการเชื่อมต่อจากinstance-1เซสชัน SSH โดยกด CTRL+D หรือพิมพ์ exit
8. ติดตั้งใช้งาน Gemma ด้วย vLLM
เพิ่ม Node Pool สำหรับ Gemma
ก่อนอื่น ให้ตรวจสอบประเภทโหนดที่พร้อมให้บริการในภูมิภาคของคุณ
export LOCATION=us-central1-a
gcloud compute accelerator-types list --filter="zone:${LOCATION}"
คุณควรเห็นรายการประเภท Accelerator ที่พร้อมใช้งาน รวมถึง Accelerator nvidia-l4 ตอนนี้ให้สร้าง Node Pool ที่มีประเภทตัวเร่งความเร็ว nvidia-l4 ดังนี้
export PROJECT_ID=$(gcloud config get project)
export LOCATION=us-central1
export CLUSTER_NAME=alloydb-ai-gke
gcloud container node-pools create gpupool \
    --accelerator type=nvidia-l4,count=1,gpu-driver-version=latest \
    --project=${PROJECT_ID} \
    --location=${LOCATION} \
    --node-locations=${LOCATION}-a \
    --cluster=${CLUSTER_NAME} \
    --machine-type=g2-standard-8 \
    --num-nodes=1
สร้างไฟล์ Manifest การติดตั้งใช้งานสำหรับโมเดล Google Gemini 4 12B โดยใช้ vLLM ดังนี้
cat << 'EOF' > gemma-12b-gpu-vllm-deployment.yaml
apiVersion: apps/v1
kind: Deployment
metadata:
  name: gemma-12b-gpu-vllm-deployment
spec:
  replicas: 1
  selector:
    matchLabels:
      app: gemma-12b-gpu-vllm
  template:
    metadata:
      labels:
        app: gemma-12b-gpu-vllm
        ai.gke.io/model: gemma-4-12b-it
        ai.gke.io/inference-server: vllm
        examples.ai.gke.io/source: user-guide
    spec:
      containers:
      - name: inference-server
        image: us-docker.pkg.dev/vertex-ai/vertex-vision-model-garden-dockers/pytorch-vllm-serve:latest
        resources:
          requests:
            cpu: "4"
            memory: "16Gi"
            ephemeral-storage: "30Gi"
            nvidia.com/gpu: "1"
          limits:
            cpu: "8"
            memory: "24Gi"
            ephemeral-storage: "30Gi"
            nvidia.com/gpu: "1"
        command: ["python3", "-m", "vllm.entrypoints.api_server"]
        args:
          - --model=$(MODEL_ID)
          - --host=0.0.0.0
          - --port=8000
          - --tensor-parallel-size=1
          - --enable-log-requests
          - --enable-chunked-prefill
          - --enable-prefix-caching
          - --enable-auto-tool-choice
          - --generation-config=auto
          - --tool-call-parser=gemma4
          - --dtype=bfloat16
          - --max-num-seqs=16
          - --max-model-len=32768
          - --gpu-memory-utilization=0.95
          - --reasoning-parser=gemma4
          - --trust-remote-code
          - --quantization=fp8
        env:
        - name: LD_LIBRARY_PATH
          value: ${LD_LIBRARY_PATH}:/usr/local/nvidia/lib64
        - name: MODEL_ID
          value: google/gemma-4-12b-it
        - name: HF_TOKEN
          valueFrom:
            secretKeyRef:
              name: hf-secret
              key: hf_api_token
        volumeMounts:
        - mountPath: /dev/shm
          name: dshm
      volumes:
      - name: dshm
        emptyDir:
            medium: Memory
      nodeSelector:
        cloud.google.com/gke-accelerator: nvidia-l4
        cloud.google.com/gke-gpu-driver-version: latest
---
apiVersion: v1
kind: Service
metadata:
  name: gemma-12b-gpu-vllm-service
spec:
  selector:
    app: gemma-12b-gpu-vllm
  type: ClusterIP
  ports:
    - protocol: TCP
      port: 8000
      targetPort: 8000
EOF
ใช้gemma-12b-gpu-vllm-deployment.yamlการติดตั้งใช้งานที่บันทึกไว้
kubectl apply -f gemma-12b-gpu-vllm-deployment.yaml
ผลลัพธ์ที่คาดไว้
$ kubectl apply -f gemma-12b-gpu-vllm-deployment.yaml
deployment.apps/gemma-12b-gpu-vllm-deployment created
service/gemma-12b-gpu-vllm-service created
รอจนกว่าการติดตั้งใช้งานจะเสร็จสมบูรณ์และระบบจะโหลดโมเดล ซึ่งอาจใช้เวลาหลายนาที
printf "Waiting for model to load..."; until kubectl logs -l app=gemma-12b-gpu-vllm --tail=50 2>/dev/null | grep -q "Application startup complete"; do printf "."; sleep 3; done; printf '\n\033[1;32m========================================\n[SUCCESS] Model is loaded and ready!\nYou can now proceed to the next step.\n========================================\033[0m\n'
ผลลัพธ์ที่คาดไว้
Waiting for model to load...
========================================
[SUCCESS] Model is loaded and ready!
You can now proceed to the next step.
========================================
ทดสอบโมเดล เปิดใช้การส่งต่อพอร์ตเพื่อเข้าถึงโมเดลโดยทำดังนี้
kubectl port-forward svc/gemma-12b-gpu-vllm-service 8090:8000
ในหน้าต่างเทอร์มินัลอีกหน้าต่าง ให้ใช้ curl เพื่อส่งพรอมต์ไปยังโมเดล
curl http://localhost:8090/v1/chat/completions \
  -H "Content-Type: application/json" \
  -d '{
    "messages": [
      {"role": "system", "content": "You are a helpful assistant running on GKE."},
      {"role": "user", "content": "What is AlloyDB Omni."}
    ],
    "temperature": 0.7
  }' | jq -r '.choices[0].message.content'
ผลลัพธ์ที่คาดไว้
  % Total    % Received % Xferd  Average Speed   Time    Time     Time  Current
                                 Dload  Upload   Total   Spent    Left  Speed
100  3957  100  3761  100   196     85      4  0:00:49  0:00:43  0:00:06   830
**AlloyDB Omni** is a fully managed, PostgreSQL-compatible database engine from Google Cloud that can be run **on-premises, in other clouds, or in your own data centers.**

To understand it simply: It allows you to run the high-performance, enterprise-grade capabilities of Google's **AlloyDB** (a cloud-native database) on your own infrastructure.

Here is a breakdown of what makes it significant:

### 1. The "Best of Both Worlds" Architecture
Normally, you have to choose between:
*   **Managed Cloud Databases:** Easy to scale and manage, but you are locked into the cloud provider's infrastructure.
*   **Self-Managed Databases:** You have full control over the hardware/location, but you are responsible for scaling, patching, and high availability.

**AlloyDB Omni** bridges this gap. It provides the advanced features of a cloud-native database (like intelligent indexing, high availability, and massive scalability) while allowing you to run it anywhere.
หยุดการส่งต่อพอร์ตในเทอร์มินัลแรก (หากยังทำงานอยู่) โดยกด Ctrl+C
9. ลงทะเบียนโมเดล Gemma 4 ใน AlloyDB Omni
ลงทะเบียนโมเดล Gemma 12B ใน AlloyDB Omni โดยใช้google_ml.create_modelขั้นตอน ระบุ http://gemma-12b-gpu-vllm-service:8000/v1/chat/completions เป็น model_request_url เพื่อกำหนดเส้นทางคำขอไปยังบริการคลัสเตอร์ Kubernetes
ดึงข้อมูล IP ของปลายทาง AlloyDB Omni โดยทำดังนี้
echo "INSTANCE_IP=$(kubectl get dbclusters.alloydbomni.dbadmin.goog my-omni -n default -o jsonpath='{.status.primary.endpoint}')"
เชื่อมต่อกับอินสแตนซ์ VM โดยใช้ SSH
export ZONE=us-central1-a
gcloud compute ssh instance-1 --zone=$ZONE
หลังจากเชื่อมต่อกับ VM ให้ส่งออกตัวแปร INSTANCE_IP จากขั้นตอนก่อนหน้า (ค่า 10.128.0.33 เป็นตัวอย่าง - แทนที่ด้วย IP ของคุณ):
export INSTANCE_IP=10.128.0.33
ส่งออกรหัสผ่าน AlloyDB
export PGPASSWORD=VeryStrongPassword
เชื่อมต่อกับฐานข้อมูล demo
psql "host=$INSTANCE_IP user=postgres sslmode=require dbname=demo"
ลงทะเบียนโมเดลในเซสชัน psql โดยทำดังนี้
CALL
  google_ml.create_model(
    model_id => 'gemma-12b-gpu',
    model_request_url => 'http://gemma-12b-gpu-vllm-service:8000/v1/chat/completions',
    model_provider => 'custom',
    model_type => 'llm');
ทดสอบโมเดลด้วยการค้นหา SQL ตัวอย่าง
SELECT google_ml.predict_row(
  model_id => 'gemma-12b-gpu',
  request_body => json_build_object(
    'messages', json_build_array(
      json_build_object('role', 'user', 'content', 'What is AlloyDB Omni?'))))->'choices'->0->'message'->'content';
กด q เพื่อออกจากหน้าต่างผลลัพธ์กลับไปที่พรอมต์ psql
รวม Vector Search กับ LLM RAG ใน AlloyDB Omni
ใช้การค้นหาเวกเตอร์กับคำขอ LLM เพื่อสาธิต RAG (Retrieval-Augmented Generation) ด้วย LLM
เรียกใช้การค้นหา SQL ใน plsql โดยทำดังนี้
WITH trees AS (
SELECT
        cp.product_name,
        cp.product_description AS description,
        cp.sale_price,
        cs.zip_code,
        cp.uniq_id AS product_id
FROM
    cymbal_products cp
JOIN cymbal_embedding ce ON ce.uniq_id = cp.uniq_id
JOIN cymbal_inventory ci ON ci.uniq_id = cp.uniq_id
JOIN cymbal_stores cs ON cs.store_id = ci.store_id
WHERE
        ci.inventory>0
        AND cs.store_id = 1583
ORDER BY
        (ce.embedding <=> embedding('embeddinggemma',
        'What kind of fruit trees grow well here?')::vector) ASC
LIMIT 1),
prompt AS (
SELECT
        'You are a friendly advisor helping to find a product based on the customer''s needs.
Based on the client request we have loaded a list of products closely related to search.
The list in JSON format with list of values like {"product_name":"name","product_description":"some description","sale_price":10}
Here is the list of products:' || json_agg(trees) || 'The customer asked "What kind of fruit trees grow well here?"
You should give information about the product, price and some supplemental information' AS prompt_text
FROM
        trees),
response AS (
SELECT
        google_ml.predict_row(
          model_id =>'gemma-12b-gpu',
          request_body => json_build_object(
            'messages', json_build_array(
              json_build_object('role', 'user', 'content',prompt_text)
            )))->'choices'->0->'message'->'content' AS resp
FROM
        prompt)
SELECT
REPLACE(resp::text, '\n', CHR(10))
FROM
        response;
ผลลัพธ์ที่คาดไว้
----------------------------------------------------------------------------------------------------------------------------------------------
 "Hello there! I'd be happy to help you find the perfect tree for your garden.                                                               +
                                                                                                                                             +
 Based on your location, we have a wonderful option that would grow beautifully in your area:                                                +
                                                                                                                                             +
 **Cherry Tree**                                                                                                                             +
 *   **Price:** $75.00                                                                                                                       +
 *   **Description:** This is a stunning deciduous tree that not only provides a beautiful landscape but also produces delicious cherries.   +
 *   **Supplemental Information:**                                                                                                           +
     *   **Growth:** It grows to about 15 feet tall.                                                                                         +
     *   **Appearance:** You can look forward to dark green leaves in the summer that transform into a vibrant red in the fall.              +
     *   **Benefits:** It's a great choice if you're looking for both fruit and extra shade or privacy in your yard.                         +
     *   **Care Tips:** It performs best in a cool, moist climate with sandy soil. Since you are in a suitable zone, it should thrive nicely!+
                                                                                                                                             +
 Would you like more details on how to plant this, or would you like to proceed with an order?"
(1 row)
การค้นหาจะเสริมพรอมต์ไปยัง LLM ด้วยผลการค้นหาเวกเตอร์
ลองใช้คำค้นหาอื่นๆ และทดลองใช้รูปแบบ RAG ข้อดีของสถาปัตยกรรมที่นำเสนอคือความสามารถในการพึ่งพาตนเองได้อย่างเต็มที่ ระบบจะไม่ส่งข้อมูลออกนอกคลัสเตอร์ และสามารถเรียกใช้ในสภาพแวดล้อมที่แยกจากกันโดยสมบูรณ์
ออกจากเซสชัน psql โดยทำดังนี้
\q
ยกเลิกการเชื่อมต่อจากเซสชัน SSH ไปยัง VM โดยใช้คำสั่งต่อไปนี้
exit
อย่าลืมว่า AlloyDB Omni มีฟีเจอร์และ Labs เพิ่มเติม
10. ล้างสภาพแวดล้อม
โปรดลบทรัพยากรที่สร้างขึ้นใน Codelab นี้เพื่อหลีกเลี่ยงการเรียกเก็บเงินอย่างต่อเนื่องในบัญชี Google Cloud
ลบคลัสเตอร์ GKE
ใน Cloud Shell ให้ลบคลัสเตอร์ GKE โดยใช้คำสั่งต่อไปนี้
export PROJECT_ID=$(gcloud config get-value project)
export LOCATION=us-central1
export CLUSTER_NAME=alloydb-ai-gke
gcloud container clusters delete ${CLUSTER_NAME} \
  --project=${PROJECT_ID} \
  --region=${LOCATION}
ผลลัพธ์ที่คาดไว้
student@cloudshell:~$ gcloud container clusters delete ${CLUSTER_NAME} \
>   --project=${PROJECT_ID} \
>   --region=${LOCATION}
The following clusters will be deleted.
 - [alloydb-ai-gke] in [us-central1]

Do you want to continue (Y/n)?  Y

Deleting cluster alloydb-ai-gke...done.
Deleted
ลบ VM ไคลเอ็นต์
ใน Cloud Shell ให้ลบอินสแตนซ์ Compute Engine โดยใช้คำสั่งต่อไปนี้
export PROJECT_ID=$(gcloud config get-value project)
export ZONE=us-central1-a
gcloud compute instances delete instance-1 \
  --project=${PROJECT_ID} \
  --zone=${ZONE}
ผลลัพธ์ที่คาดไว้
student@cloudshell:~$ export PROJECT_ID=$(gcloud config get project)
export ZONE=us-central1-a
gcloud compute instances delete instance-1 \
  --project=${PROJECT_ID} \
  --zone=${ZONE}
Your active configuration is: [cloudshell-5399]
The following instances will be deleted. Any attached disks configured to be auto-deleted will be deleted unless they are attached to any other instances or the `--keep-disks` flag is given and specifies them for keeping. Deleting a disk
is irreversible and any data on the disk will be lost.
 - [instance-1] in [us-central1-a]

Do you want to continue (Y/n)?  Y

Deleted
หากสร้างโปรเจ็กต์ใหม่สำหรับ Codelab นี้ คุณจะลบทั้งโปรเจ็กต์ใน Google Cloud Resource Manager ก็ได้ (ไม่บังคับ)
11. ขอแสดงความยินดี
ขอแสดงความยินดีที่ทำ Codelab เสร็จสมบูรณ์
สิ่งที่คุณครอบคลุม
- วิธีติดตั้งใช้งาน AlloyDB Omni ในคลัสเตอร์ GKE
- วิธีเชื่อมต่อกับ AlloyDB Omni
- วิธีโหลดข้อมูลลงใน AlloyDB Omni
- วิธีติดตั้งใช้งานโมเดล AI (การฝังและ LLM) ใน GKE
- วิธีลงทะเบียนโมเดล AI ใน AlloyDB Omni
- วิธีสร้างการฝังสำหรับการค้นหาเชิงความหมาย
- วิธีเรียกใช้คำค้นหาแบบ Semantic Search ใน AlloyDB Omni
- วิธีสร้างและใช้ดัชนีเวกเตอร์ใน AlloyDB Omni
อ่านเพิ่มเติมเกี่ยวกับการทำงานกับ AI ใน AlloyDB Omni ได้ในเอกสารประกอบ
แบบสำรวจ
เอาต์พุต: