
1. Introduction
In this codelab you will learn how to perform hybrid search in AlloyDB using pgvector and a Scalable Nearest Neighbor (ScaNN) index, combined with full-text search capability from Apache Solr via a Foreign Data Wrapper (FDW). This lab is part of a lab collection dedicated to AlloyDB AI features. You can read more on the AlloyDB AI page in documentation.
Apache Solr is an open-source enterprise search platform built on Apache Lucene, designed for fast, scalable, and highly available full-text search capability. Integrating Solr with AlloyDB via a Foreign Data Wrapper (FDW) allows users to query Solr indexes directly from PostgreSQL alongside structured database tables. To learn more, visit the Apache Solr documentation.
Prerequisites
- A basic understanding of the Google Cloud, Console
- Basic skills in command line interface and google shell
What you'll learn
- How to deploy AlloyDB cluster and primary instance
- How to connect to AlloyDB from Google Compute Engine VM
- How to create database and enable AlloyDB AI
- How to load data to the database
- How to use AlloyDB Studio
- Generate embeddings with Vertex AI
- How to create a ScaNN vector index to boost vector search
- How to create a Foreign Data Wrapper (FDW) for Apache Solr
- Perform hybrid search by combining semantic search in AlloyDB with full text search in Solr.
What you'll need
- A Google Cloud Account and Google Cloud Project
- A web browser such as Chrome
2. Setup and Requirements
Project Setup
Sign-in to the Google Cloud Console. If you don't already have a Gmail or Google Workspace account, you must create one.
Use a personal account instead of a work or school account.
- In the Google Cloud Console, on the project selector page, select or create a Google Cloud project.
- Make sure that billing is enabled for your Cloud project. Learn how to check if billing is enabled on a project.
Enable Billing
To enable billing, you have two options. You can either use your personal billing account or you can redeem credits with the following steps.
Set up a personal billing account
If you set up billing using Google Cloud credits, you can skip this step.
To set up a personal billing account, go here to enable billing in the Cloud Console.
Some Notes:
- Completing this lab should cost less than $3 USD in Cloud resources.
- You can follow the steps at the end of this lab to delete resources to avoid further charges.
- New users are eligible for the $300 USD Free Trial.
Start Cloud Shell
While Google Cloud can be operated remotely from your laptop, in this codelab you will be using Google Cloud Shell, a command line environment running in the Cloud.
Cloud Shell is a command-line environment running in Google Cloud that comes preloaded with necessary tools.
- Click Activate Cloud Shell at the top of the Google Cloud console.
- Once connected to Cloud Shell, verify your authentication:
gcloud auth list - Confirm your project is configured:
gcloud config get project - If your project is not set as expected, set it:
export PROJECT_ID=<YOUR_PROJECT_ID>
gcloud config set project $PROJECT_ID
This virtual machine is loaded with all the development tools you'll need. It offers a persistent 5GB home directory, and runs on Google Cloud, greatly enhancing network performance and authentication. All of your work in this codelab can be done within a browser. You do not need to install anything.
3. Before you begin
Enable API
Output:
To use AlloyDB, Compute Engine, Networking services, and Vertex AI, you need to enable their respective APIs in your Google Cloud project.
Enabling the APIs
Inside Cloud Shell in the terminal, make sure that your project ID is setup:
gcloud config set project [YOUR-PROJECT-ID]
Set environment variable PROJECT_ID:
PROJECT_ID=$(gcloud config get-value project)
Enable all necessary APIs:
gcloud services enable alloydb.googleapis.com \
                       compute.googleapis.com \
                       cloudresourcemanager.googleapis.com \
                       servicenetworking.googleapis.com \
                       aiplatform.googleapis.com \
                       secretmanager.googleapis.com
Expected output
student@cloudshell:~ (alloydb-hybrid-search)$ gcloud config set project alloydb-hybrid-search
[environment: untagged] Read more to tag: g.co/cloud/project-env-tag.
Updated property [core/project].
student@cloudshell:~ (alloydb-hybrid-search)$ PROJECT_ID=$(gcloud config get-value project)
Your active configuration is: [cloudshell-32544]
student@cloudshell:~ (alloydb-hybrid-search)$ gcloud services enable alloydb.googleapis.com \
                       compute.googleapis.com \
                       cloudresourcemanager.googleapis.com \
                       servicenetworking.googleapis.com \
                       aiplatform.googleapis.com \
                       secretmanager.googleapis.com
Operation "operations/acat.p2-350113473377-5ffc2f22-caa9-4857-b2f4-018657d8bf6e" finished successfully.
Introducing the APIs
- AlloyDB API (
alloydb.googleapis.com) allows you to create, manage, and scale AlloyDB for PostgreSQL clusters. It provides a fully managed, PostgreSQL-compatible database service designed for demanding enterprise transactional and analytical workloads. - Compute Engine API (
compute.googleapis.com) allows you to create and manage virtual machines (VMs), persistent disks, and network settings. It provides the core Infrastructure-as-a-Service (IaaS) foundation required to run your workloads and host the underlying infrastructure for many managed services. - Cloud Resource Manager API (
cloudresourcemanager.googleapis.com) allows you to programmatically manage the metadata and configuration of your Google Cloud project. It enables you to organize resources, handle Identity and Access Management (IAM) policies, and validate permissions across the project hierarchy. - Service Networking API (
servicenetworking.googleapis.com) allows you to automate the setup of private connectivity between your Virtual Private Cloud (VPC) network and Google's managed services. It is specifically required to establish private IP access for services like AlloyDB so they can communicate securely with your other resources. - Vertex AI API (
aiplatform.googleapis.com) enables your applications to build, deploy, and scale machine learning models. It provides the unified interface for all of Google Cloud's AI services, including access to Generative AI models (like Gemini) and custom model training. - Secret Manager API (
secretmanager.googleapis.com) is a secrets and credential management service that lets you store and manage sensitive data such as API keys, usernames, passwords, certificates, and more.
Optionally you can configure your default region to use the Vertex AI embedding models. Read more about available locations for Vertex AI. In the example we are using the us-central1 region.
gcloud config set compute/region us-central1
4. Deploy AlloyDB
Before creating an AlloyDB cluster we need an available private IP range in our VPC to be used by the future AlloyDB instance. If we don't have it then we need to create it, assign it to be used by internal Google services and after that we will be able to create the cluster and instance.
Create private IP range
We need to configure Private Service Access configuration in our VPC for AlloyDB. The assumption here is that we have the "default" VPC network in the project and it is going to be used for all actions.
Create the private IP range:
gcloud compute addresses create psa-range \
    --global \
    --purpose=VPC_PEERING \
    --prefix-length=24 \
    --description="VPC private service access" \
    --network=default
Create private connection using the allocated IP range:
gcloud services vpc-peerings connect \
    --service=servicenetworking.googleapis.com \
    --ranges=psa-range \
    --network=default
Once connected, update the peering to export custom routes:
gcloud compute networks peerings update servicenetworking-googleapis-com \
    --network=default \
    --export-custom-routes
Expected console output:
student@cloudshell:~ (alloydb-hybrid-search)$ gcloud compute addresses create psa-range \
    --global \
    --purpose=VPC_PEERING \
    --prefix-length=24 \
    --description="VPC private service access" \
    --network=default
Created [https://www.googleapis.com/compute/v1/projects/alloydb-hybrid-search/global/addresses/psa-range].

student@cloudshell:~ (alloydb-hybrid-search)$ gcloud services vpc-peerings connect \
    --service=servicenetworking.googleapis.com \
    --ranges=psa-range \
    --network=default
Operation "operations/pssn.p24-350113473377-fadad49e-7e14-472a-8888-26951e40a1f7" finished successfully.

student@cloudshell:~ (alloydb-hybrid-search)$ gcloud compute networks peerings update servicenetworking-googleapis-com \
    --network=default \
    --export-custom-routes
Updated [https://www.googleapis.com/compute/v1/projects/alloydb-hybrid-search/global/networks/default].
Create AlloyDB Cluster
In this section we are creating an AlloyDB cluster in the us-central1 region.
Define password for the postgres user. You can define your own password or use a random function to generate one
export PGPASSWORD=`openssl rand -hex 12`
Expected console output:
student@cloudshell:~ (alloydb-hybrid-search)$ export PGPASSWORD=`openssl rand -hex 12`
Note the PostgreSQL password for future use.
echo $PGPASSWORD
You will need that password in the future to connect to the instance as the postgres user. I suggest copying it to a secure location (i.e. password manager).
Expected console output:
student@cloudshell:~ (alloydb-hybrid-search)$ echo $PGPASSWORD
<generated password>
Create AlloyDB Cluster
Define region and AlloyDB cluster name. We are going to use us-central1 region and alloydb-hybrid-search as a cluster name:
export REGION=us-central1
export ADBCLUSTER=alloydb-hybrid-search
Run command to create the cluster:
gcloud alloydb clusters create $ADBCLUSTER \
    --password=$PGPASSWORD \
    --network=default \
    --region=$REGION \
    --database-version=POSTGRES_17
Expected console output:
student@cloudshell:~ (alloydb-hybrid-search)$ export REGION=us-central1
export ADBCLUSTER=alloydb-hybrid-search
student@cloudshell:~ (alloydb-hybrid-search)$ gcloud alloydb clusters create $ADBCLUSTER \
    --password=$PGPASSWORD \
    --network=default \
    --region=$REGION \
    --database-version=POSTGRES_17
Creating cluster...done.
Create an AlloyDB primary instance for our cluster in the same cloud shell session. If you are disconnected you will need to define the region and cluster name environment variables again.
gcloud alloydb instances create $ADBCLUSTER-pr \
    --instance-type=PRIMARY \
    --cpu-count=2 \
    --region=$REGION \
    --cluster=$ADBCLUSTER
Expected console output:
admin_@cloudshell:~ (my-project-93954-gke)$ gcloud alloydb instances create $ADBCLUSTER-pr \
    --instance-type=PRIMARY \
    --cpu-count=2 \
    --region=$REGION \
    --availability-type ZONAL \
    --cluster=$ADBCLUSTER
Operation ID: operation-1784244706986-656c2d7f3c8f2-59a9e52a-1e7b1b01
Creating instance...done.
5. Connect to AlloyDB
AlloyDB is deployed using a private-only connection, so we need a VM with PostgreSQL client installed to work with the database. We will also use this VM to run an Apache Solr instance.
Deploy GCE VM
Create a GCE VM in the same region and VPC as the AlloyDB cluster, ensure that the boot disk is large enough to run Solr. Here we specify a 20GB boot disk in the --create-disk flag.
In Cloud Shell execute:
export ZONE=us-central1-a
gcloud compute instances create instance-1 \
    --zone=$ZONE \
    --create-disk=auto-delete=yes,boot=yes,size=20,image=projects/debian-cloud/global/images/$(gcloud compute images list --filter="family=debian-12 AND family!=debian-12-arm64" --format="value(name)") \
    --scopes=https://www.googleapis.com/auth/cloud-platform
Expected console output:
student@cloudshell:~ (alloydb-hybrid-search)$ export ZONE=us-central1-a
gcloud compute instances create instance-1 \
    --zone=$ZONE \
    --network=default \
    --create-disk=auto-delete=yes,boot=yes,image=projects/debian-cloud/global/images/$(gcloud compute images list --filter="family=debian-12 AND family!=debian-12-arm64" --format="value(name)") \
    --scopes=https://www.googleapis.com/auth/cloud-platform

Created [https://www.googleapis.com/compute/v1/projects/test-project-402417/zones/us-central1-a/instances/instance-1].
NAME: instance-1
ZONE: us-central1-a
MACHINE_TYPE: n1-standard-1
PREEMPTIBLE:
INTERNAL_IP: X.X.X.X
EXTERNAL_IP: X.X.X.X
STATUS: RUNNING
Install Postgres Client
Install the PostgreSQL client software on the deployed VM
Connect to the VM:
gcloud compute ssh instance-1 --zone=us-central1-a
Expected console output:
admin_@cloudshell:~ (my-project-93954-gke)$ gcloud compute ssh instance-1 --zone=us-central1-a
Updating project ssh metadata...working..Updated [https://www.googleapis.com/compute/v1/projects/alloydb-hybrid-search].
Updating project ssh metadata...done.
Waiting for SSH key to propagate.
Warning: Permanently added 'compute.5110295539541121102' (ECDSA) to the list of known hosts.
Linux instance-1.us-central1-a.c.gleb-test-short-001-418811.internal 6.1.0-18-cloud-amd64 #1 SMP PREEMPT_DYNAMIC Debian 6.1.76-1 (2024-02-01) x86_64

The programs included with the Debian GNU/Linux system are free software;
the exact distribution terms for each program are described in the
individual files in /usr/share/doc/*/copyright.

Debian GNU/Linux comes with ABSOLUTELY NO WARRANTY, to the extent
permitted by applicable law.
Install the software running command inside the VM:
sudo apt-get update
sudo apt-get install --yes postgresql-client
Expected console output:
student@instance-1:~$ sudo apt-get update
sudo apt-get install --yes postgresql-client
Get:1 https://packages.cloud.google.com/apt google-compute-engine-bullseye-stable InRelease [5146 B]
Get:2 https://packages.cloud.google.com/apt cloud-sdk-bullseye InRelease [6406 B]
Hit:3 https://deb.debian.org/debian bullseye InRelease
Get:4 https://deb.debian.org/debian-security bullseye-security InRelease [48.4 kB]
Get:5 https://packages.cloud.google.com/apt google-compute-engine-bullseye-stable/main amd64 Packages [1930 B]
Get:6 https://deb.debian.org/debian bullseye-updates InRelease [44.1 kB]
Get:7 https://deb.debian.org/debian bullseye-backports InRelease [49.0 kB]
...redacted...
Setting up postgresql-client (15+248+deb12u1) ...
Processing triggers for man-db (2.11.2-2) ...
Processing triggers for libc-bin (2.36-9+deb12u14) ...
Connect to the Instance
Connect to the primary instance from the VM using psql.
In the same Cloud Shell tab with the opened SSH session to your instance-1 VM.
Use the noted AlloyDB password (PGPASSWORD) value and the AlloyDB cluster id to connect to AlloyDB from the GCE VM:
export PGPASSWORD=<Noted password>
export PROJECT_ID=$(gcloud config get-value project)
export REGION=us-central1
export ADBCLUSTER=alloydb-hybrid-search
export INSTANCE_IP=$(gcloud alloydb instances describe $ADBCLUSTER-pr --cluster=$ADBCLUSTER --region=$REGION --format="value(ipAddress)")
psql "host=$INSTANCE_IP user=postgres sslmode=require"
Expected console output:
student@instance-1:~$ export PROJECT_ID=$(gcloud config get-value project)
export REGION=us-central1
export ADBCLUSTER=alloydb-hybrid-search
export INSTANCE_IP=$(gcloud alloydb instances describe $ADBCLUSTER-pr --cluster=$ADBCLUSTER --region=$REGION --format="value(ipAddress)")
psql "host=$INSTANCE_IP user=postgres sslmode=require"
psql (15.18 (Debian 15.18-0+deb12u1), server 17.9)
WARNING: psql major version 15, server major version 17.
         Some psql features might not work.
SSL connection (protocol: TLSv1.3, cipher: TLS_AES_256_GCM_SHA384, compression: off)
Type "help" for help.

postgres=>
Close the psql session:
exit
6. Prepare Database
We need to create a database, enable Vertex AI integration, create database objects, and import the data.
Grant Necessary Permissions to AlloyDB
Add Vertex AI permissions to the AlloyDB service agent.
Open another Cloud Shell tab using the sign "+" at the top.
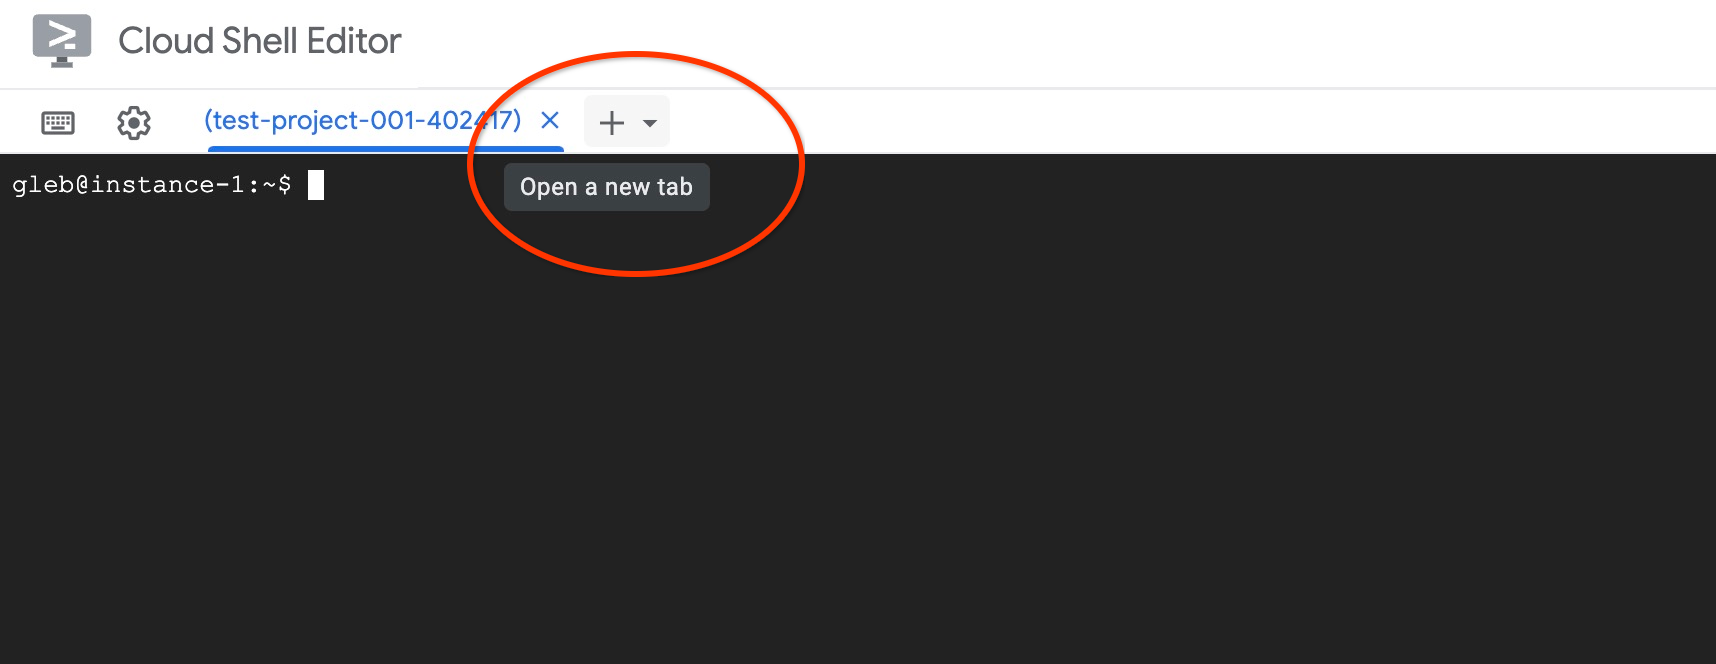
In the new cloud shell tab execute:
PROJECT_ID=$(gcloud config get-value project)
gcloud projects add-iam-policy-binding $PROJECT_ID \
  --member="serviceAccount:service-$(gcloud projects describe $PROJECT_ID --format="value(projectNumber)")@gcp-sa-alloydb.iam.gserviceaccount.com" \
  --role="roles/aiplatform.user"
Expected console output:
admin_@cloudshell:~ (my-project-93954-gke)$ PROJECT_ID=$(gcloud config get-value project)
gcloud projects add-iam-policy-binding $PROJECT_ID \
  --member="serviceAccount:service-$(gcloud projects describe $PROJECT_ID --format="value(projectNumber)")@gcp-sa-alloydb.iam.gserviceaccount.com" \
  --role="roles/aiplatform.user"
Your active configuration is: [cloudshell-30137]

Updated IAM policy for project [my-project-93954-gke].
bindings:
- members:
<redacted>
version: 1
Close the tab by either clicking "X" or executing the command:
exit
Create Database
Create a database named quickstart.
In the GCE VM session execute:
Create database:
psql "host=$INSTANCE_IP user=postgres" -c "CREATE DATABASE quickstart_db"
Expected console output:
student@instance-1:~$ psql "host=$INSTANCE_IP user=postgres" -c "CREATE DATABASE quickstart_db"
CREATE DATABASE
Enable Vertex AI Integration
Enable Vertex AI integration and the pgvector extensions in the database.
In the GCE VM execute:
psql "host=$INSTANCE_IP user=postgres dbname=quickstart_db" -c "CREATE EXTENSION IF NOT EXISTS google_ml_integration CASCADE"
psql "host=$INSTANCE_IP user=postgres dbname=quickstart_db" -c "CREATE EXTENSION IF NOT EXISTS vector"
Expected console output:
student@instance-1:~$ psql "host=$INSTANCE_IP user=postgres dbname=quickstart_db" -c "CREATE EXTENSION IF NOT EXISTS google_ml_integration CASCADE"
psql "host=$INSTANCE_IP user=postgres dbname=quickstart_db" -c "CREATE EXTENSION IF NOT EXISTS vector"
NOTICE:  extension "google_ml_integration" already exists, skipping
CREATE EXTENSION
CREATE EXTENSION
Import Data
Download the prepared data and import it into the new database.
In the GCE VM execute:
gcloud storage cat gs://cloud-training/gcc/gcc-tech-004/cymbal_demo_schema.sql |psql "host=$INSTANCE_IP user=postgres dbname=quickstart_db"
gcloud storage cat gs://cloud-training/gcc/gcc-tech-004/cymbal_products.csv |psql "host=$INSTANCE_IP user=postgres dbname=quickstart_db" -c "\copy cymbal_products from stdin csv header"
gcloud storage cat gs://cloud-training/gcc/gcc-tech-004/cymbal_inventory.csv |psql "host=$INSTANCE_IP user=postgres dbname=quickstart_db" -c "\copy cymbal_inventory from stdin csv header"
gcloud storage cat gs://cloud-training/gcc/gcc-tech-004/cymbal_stores.csv |psql "host=$INSTANCE_IP user=postgres dbname=quickstart_db" -c "\copy cymbal_stores from stdin csv header"
Expected console output:
student@instance-1:~$ gcloud storage cat gs://cloud-training/gcc/gcc-tech-004/cymbal_demo_schema.sql |psql "host=$INSTANCE_IP user=postgres dbname=quickstart_db"
gcloud storage cat gs://cloud-training/gcc/gcc-tech-004/cymbal_products.csv |psql "host=$INSTANCE_IP user=postgres dbname=quickstart_db" -c "\copy cymbal_products from stdin csv header"
gcloud storage cat gs://cloud-training/gcc/gcc-tech-004/cymbal_inventory.csv |psql "host=$INSTANCE_IP user=postgres dbname=quickstart_db" -c "\copy cymbal_inventory from stdin csv header"
gcloud storage cat gs://cloud-training/gcc/gcc-tech-004/cymbal_stores.csv |psql "host=$INSTANCE_IP user=postgres dbname=quickstart_db" -c "\copy cymbal_stores from stdin csv header"
SET
SET
SET
SET
SET
 set_config
------------

(1 row)

SET
SET
SET
SET
SET
SET
CREATE TABLE
ALTER TABLE
CREATE TABLE
ALTER TABLE
CREATE TABLE
ALTER TABLE
CREATE TABLE
ALTER TABLE
CREATE SEQUENCE
ALTER TABLE
ALTER SEQUENCE
ALTER TABLE
ALTER TABLE
ALTER TABLE
COPY 941
COPY 263861
COPY 4654
Next, let's set the necessary database flags. You can use the web console and manage flags in the primary instance or use the gcloud command as follows:
export PROJECT_ID=$(gcloud config get-value project)
export REGION=us-central1
export ADBCLUSTER=alloydb-hybrid-search
gcloud beta alloydb instances update $ADBCLUSTER-pr \
   --database-flags google_ml_integration.enable_faster_embedding_generation=on,scann.enable_preview_features=on,google_ml_integration.enable_preview_ai_functions=on,google_ml_integration.enable_ai_query_engine=on \
   --region=$REGION \
   --cluster=$ADBCLUSTER \
   --project=$PROJECT_ID \
   --update-mode=FORCE_APPLY
Expected console output
student@cloudshell:~ (alloydb-hybrid-search)$ export PROJECT_ID=$(gcloud config get-value project)
export REGION=us-central1
export ADBCLUSTER=alloydb-hybrid-search
gcloud beta alloydb instances update $ADBCLUSTER-pr \
   --database-flags google_ml_integration.enable_faster_embedding_generation=on,scann.enable_preview_features=on,google_ml_integration.enable_preview_ai_functions=on,google_ml_integration.enable_ai_query_engine=on \
   --region=$REGION \
   --cluster=$ADBCLUSTER \
   --project=$PROJECT_ID \
   --update-mode=FORCE_APPLY
Your active configuration is: [cloudshell-30137]
Operation ID: operation-1784245853151-656c31c44e12b-6084eb8b-d6611419
Enabling database flags requires an instance restart and will take a few minutes. Once completed, the AlloyDB instance status will say "Ready".
7. Generate Vector Embeddings
After importing the data, we have the following tables: cymbal_products which stores information about products, cymbal_inventory which tracks item stock in each store, and, and cymbal_stores which is a list of stores. To perform semantic search over our products, we need to generate vector embeddings of our product descriptions with the initialize_embeddings function. We'll use the Vertex AI integration to calculate vector data based on our product descriptions and add it to the table. You can read more about the used technology in the documentation.
To use the integration, connect to the database with AlloyDB studio or using psql from your VM using the AlloyDB instance IP and postgres password:
psql "host=$INSTANCE_IP user=postgres dbname=quickstart_db"
Verify the version of the google_ml_integration extension.
SELECT extversion FROM pg_extension WHERE extname = 'google_ml_integration';
The version should be 1.5.2 or higher. Here is example of the output:
quickstart_db=> SELECT extversion FROM pg_extension WHERE extname = 'google_ml_integration';
 extversion
------------
 1.5.9
(1 row)
The default version should be 1.5.2 or higher but if your instance shows an older version it probably needs to be updated. Check if maintenance was disabled for the instance.
Install the vector extension and create a new column to store embeddings in cymbal_products
CREATE EXTENSION IF NOT EXISTS vector;
ALTER TABLE cymbal_products ADD COLUMN product_embedding vector(768);
Expected console output:
quickstart_db=> CREATE EXTENSION IF NOT EXISTS vector;
ALTER TABLE cymbal_products ADD COLUMN product_embedding vector(768);
NOTICE:  extension "vector" already exists, skipping
CREATE EXTENSION
ALTER TABLE
We'll use batch embedding generation to improve efficiency. You can read more about different embedding generation options and techniques in the guide. We've previously enabled the google_ml_integration.enable_faster_embedding_generation flag which allows us to batch embedding generation.
Lastly, we also want embeddings to refresh as column values are altered by including the incremental_refresh_mode argument in the function call. This introduces overhead to our database but it is a trade-off we make to automatically keep embeddings in sync with content. If you would like to manually update embeddings, you can find the instructions in the documentation.
Now putting it all together and generating embeddings, we use the initialize_embeddings function and pass batch_size of 50 as the batch hint and set incremental_refresh_mode to transactional
CALL ai.initialize_embeddings(
    model_id => 'text-embedding-005',
    table_name => 'cymbal_products',
    content_column => 'product_description',
    embedding_column => 'product_embedding',
    batch_size => 50,
    incremental_refresh_mode => 'transactional'
);
And now if we insert a new row to the table with NULL value for the product_embedding column
INSERT INTO "cymbal_products" ("uniq_id", "crawl_timestamp", "product_url", "product_name", "product_description", "list_price", "sale_price", "brand", "item_number", "gtin", "package_size", "category", "postal_code", "available", "product_embedding") VALUES ('fd604542e04b470f9e6348e640cff794', NOW(), 'https://example.com/new_product', 'New Cymbal Product', 'This is a new cymbal product description.', 199.99, 149.99, 'Example Brand', 'EB123', '1234567890', 'Single', 'Cymbals', '12345', TRUE, NULL);
Now when we query the row we just inserted, we'll see that the product_embedding column is automatically updated.
SELECT uniq_id, (product_embedding::real[])[1:5] as product_embedding FROM cymbal_products WHERE uniq_id='fd604542e04b470f9e6348e640cff794';
The output should look like the following:
quickstart_db=> SELECT uniq_id,(product_embedding::real[])[1:5] as product_embedding  FROM cymbal_products WHERE uniq_id='fd604542e04b470f9e6348e640cff794';
             uniq_id              |                      product_embedding
----------------------------------+---------------------------------------------------------------
 fd604542e04b470f9e6348e640cff794 | {0.015003494,-0.005349732,-0.059790313,-0.0087091,-0.0271452}
(1 row)
8. Create a Vector Index
To improve vector search performance, we'll add a ScaNN index.
Create ScaNN index
To build the SCANN index we need to enable one more extension. The extension alloydb_scann provides an interface to work with the ANN type vector index using Google's ScaNN algorithm.
CREATE EXTENSION IF NOT EXISTS alloydb_scann;
Expected output:
quickstart_db=> CREATE EXTENSION IF NOT EXISTS alloydb_scann;
CREATE EXTENSION
The index can be created in MANUAL or AUTO mode. The MANUAL mode is enabled by default and you can create an index and maintain it as any other index. But if you enable AUTO mode then you are able to create the index which doesn't require any maintenance from your side. You can read in detail about all options in the documentation. In our case we don't have enough rows to create the index in AUTO mode - so we will create it as MANUAL and include tuning parameters. You can read about tuning index parameters in the documentation.
CREATE INDEX cymbal_products_embeddings_scann ON cymbal_products
  USING scann (product_embedding cosine)
  WITH (mode='MANUAL', num_leaves=31, max_num_levels = 2);
Expected output:
quickstart_db=> CREATE INDEX cymbal_products_embeddings_scann ON cymbal_products
  USING scann (product_embedding cosine)
  WITH (num_leaves=31, max_num_levels = 2);
CREATE INDEX
quickstart_db=>
Inspect index use
Now we can run the vector search query in EXPLAIN mode and verify if the index is being used.
EXPLAIN (analyze)
WITH trees as (
SELECT
        cp.product_name,
        left(cp.product_description,80) as description,
        cp.sale_price,
        cs.zip_code,
        cp.uniq_id as product_id
FROM
        cymbal_products cp
JOIN cymbal_inventory ci on
        ci.uniq_id=cp.uniq_id
JOIN cymbal_stores cs on
        cs.store_id=ci.store_id
        AND ci.inventory>0
        AND cs.store_id = 1583
ORDER BY
        (cp.product_embedding <=> embedding('text-embedding-005','What kind of fruit trees grow well here?')::vector) ASC
LIMIT 1)
SELECT json_agg(trees) FROM trees;
Expected output (redacted for clarity):
...
Aggregate (cost=16.59..16.60 rows=1 width=32) (actual time=2.875..2.877 rows=1 loops=1)
-> Subquery Scan on trees (cost=8.42..16.59 rows=1 width=142) (actual time=2.860..2.862 rows=1 loops=1)
-> Limit (cost=8.42..16.58 rows=1 width=158) (actual time=2.855..2.856 rows=1 loops=1)
-> Nested Loop (cost=8.42..6489.19 rows=794 width=158) (actual time=2.854..2.855 rows=1 loops=1)
-> Nested Loop (cost=8.13..6466.99 rows=794 width=938) (actual time=2.742..2.743 rows=1 loops=1)
-> Index Scan using cymbal_products_embeddings_scann on cymbal_products cp (cost=7.71..111.99 rows=876 width=934) (actual time=2.724..2.724 rows=1 loops=1)
Order By: (embedding <=> '[0.008864171,0.03693164,-0.024245683,-0.00355923,0.0055611245,0.015985578,...<redacted>...5685,-0.03914233,-0.018452475,0.00826032,-0.07372604]'::vector)
...
From the output we can clearly see that the query was using "Index Scan using cymbal_products_embeddings_scann on cymbal_products".
9. Creating a Solr Instance
We'll be using Apache Solr for the full text search (FTS) part of the hybrid search. In this step, you will deploy a standalone Solr instance in the VM you created earlier.
To secure access to Solr, we will enable Basic Authentication. We'll do this by providing a security.json configuration file, mounting it, and starting the Solr docker container.
SSH into the VM and install Docker:
sudo apt-get update
sudo apt-get install -y ca-certificates curl gnupg
sudo install -m 0755 -d /etc/apt/keyrings
curl -fsSL https://download.docker.com/linux/debian/gpg | sudo gpg --dearmor -o /etc/apt/keyrings/docker.gpg
sudo chmod a+r /etc/apt/keyrings/docker.gpg

echo \
  "deb [arch="$(dpkg --print-architecture)" signed-by=/etc/apt/keyrings/docker.gpg] https://download.docker.com/linux/debian \
  "$(. /etc/os-release && echo "$VERSION_CODENAME")" stable" | \
  sudo tee /etc/apt/sources.list.d/docker.list > /dev/null
sudo apt-get update
sudo apt-get install -y docker-ce docker-ce-cli containerd.io docker-buildx-plugin docker-compose-plugin
Now you can modify the docker command to be run by your user:
sudo usermod -aG docker $USER
newgrp docker
Now, create the security.json file to enable Basic Authentication with the username solr and password SolrRocks.
nano security.json
In the file paste the following JSON:
{
  "authentication": {
    "blockUnknown": true,
    "class": "solr.BasicAuthPlugin",
    "credentials": {
      "solr": "IV0EHq1OnNrj6gvRCwvFwTrZ1+z1oBbnQdiVC3otuq0= Ndd7LKvVBAaZIF0QAVi1ekCfAJXr1GGfLtRUXhgrF8c="
    }
  },
  "authorization": {
    "class": "solr.RuleBasedAuthorizationPlugin",
    "permissions": [
      { "name": "security-edit", "role": "admin" }
    ],
    "user-role": { "solr": "admin" }
  }
}
Save and exit out of nano (Ctrl + O, Enter, Ctrl + X).
Start the Solr docker container using docker run and mount the security.json file to the container:
docker run -d -p 8983:8983 --name solr --user root -v "$(pwd)/security.json:/var/solr/data/security.json" solr:9 -c -force
Verify that the container is running:
docker ps
Expected output:
student@instance-1:~$ docker ps
CONTAINER ID   IMAGE     COMMAND                  CREATED         STATUS         PORTS                                         NAMES
90db3c73835e   solr:9    "docker-entrypoint.s..."   7 seconds ago   Up 3 seconds   0.0.0.0:8983->8983/tcp, [::]:8983->8983/tcp   solr
Give Solr a few seconds to initialize, then create a new collection named solrindexdemo by hitting the Solr API with your Basic Auth credentials:
curl --user solr:SolrRocks -X POST "http://localhost:8983/solr/admin/collections?action=CREATE&name=solrindexdemo&numShards=1&replicationFactor=1"
Expected output:
student@instance-1:~$ curl --user solr:SolrRocks -X POST "http://localhost:8983/solr/admin/collections?action=CREATE&name=solrindexdemo&numShards=1&replicationFactor=1"
{
  "responseHeader":{
    "status":0,
    "QTime":3586
  },
  "success":{
    "172.17.0.2:8983_solr":{
      "responseHeader":{
        "status":0,
        "QTime":2405
      },
      "core":"solrindexdemo_shard1_replica_n1"
    }
  },
  "warning":"Using _default configset. Data driven schema functionality is enabled by default, which is NOT RECOMMENDED for production use. To turn it off: curl http://{host:port}/solr/solrindexdemo/config -d '{\"set-user-property\": {\"update.autoCreateFields\":\"false\"}}'"
Now, we'll populate the Solr instance with product descriptions and names. Copy the products CSV from cloud storage to the VM.
gcloud storage cp gs://cloud-training/gcc/gcc-tech-004/cymbal_products.csv .
Now create a python script to extract the CSV and format the data into a JSON list for the bulk update.
nano convert.py
In the file paste the following:
import csv
import json

# Configuration
input_file = 'cymbal_products.csv'
output_file = 'products.json'

def convert():
    try:
        with open(input_file, mode='r', encoding='utf-8') as f_in, \
             open(output_file, mode='w', encoding='utf-8') as f_out:

            reader = csv.DictReader(f_in)

            products = []
            for row in reader:
                products.append({
                    "id": row['uniq_id'].strip(),
                    "product_name": row['product_name'].strip(),
                    "product_description": row['product_description'].strip()
                })

            json.dump(products, f_out, indent=2)
            print(f"Success: Processed {len(products)} products.")
            print(f"Output saved to: {output_file}")

    except Exception as e:
        print(f"An error occurred: {e}")

if __name__ == "__main__":
    convert()
Save the file and run it:
python3 convert.py
Expected output:
admin_gopalbhutada_altostrat_com@instance-1:~$ python3 convert.py
Success: Processed 941 products.
Output saved to: products.json
Now send the JSON data to Apache Solr using the update handler:
curl --user solr:SolrRocks -X POST -H 'Content-Type: application/json' \
  'http://localhost:8983/solr/solrindexdemo/update?commit=true' \
  --data-binary "@products.json"
Expected output:
admin_gopalbhutada_altostrat_com@instance-1:~$ curl --user solr:SolrRocks -X POST -H 'Content-Type: application/json' \
  'http://localhost:8983/solr/solrindexdemo/update?commit=true' \
  --data-binary "@products.json"
{
  "responseHeader":{
    "rf":1,
    "status":0,
    "QTime":3220
  }
}
Now, we need to create a secret in Secret Manager storing our Solr credentials. Since AlloyDB links to external search FDW using base64-encoded username:password values for Basic authentication, let's first get the base64-encoded string for solr:SolrRocks:
echo -n "solr:SolrRocks" | base64
Output:
admin_gopalbhutada_altostrat_com@instance-1:~$ echo -n "solr:SolrRocks" | base64
c29scjpTb2xyUm9ja3M=
Create a secret in Google Secret Manager using this base64-encoded credential. In Cloud Shell, run the following:
echo -n "c29scjpTb2xyUm9ja3M=" | \
gcloud secrets create solr-credentials \
    --replication-policy="automatic" \
    --data-file=-
10. Creating a Foreign Data Wrapper in AlloyDB
Duration 10:00
To query data stored in Apache Solr from AlloyDB, we must create a Foreign Data Wrapper (FDW) for Solr and a foreign table. Previously you stored the Solr credentials in Secret Manager. For AlloyDB to access the secret, grant the service account the required permission.
In Cloudshell, grant the service account access to the solr-credentials secret:
gcloud secrets add-iam-policy-binding solr-credentials \
    --member="serviceAccount:service-$(gcloud projects describe $(gcloud config get-value project) --format='value(projectNumber)')@gcp-sa-alloydb.iam.gserviceaccount.com" \
    --role="roles/secretmanager.secretAccessor"
Expected output:
admin_@cloudshell:~ (my-project-93954-gke)$ gcloud secrets add-iam-policy-binding solr-credentials \
    --member="serviceAccount:service-$(gcloud projects describe $(gcloud config get-value project) --format='value(projectNumber)')@gcp-sa-alloydb.iam.gserviceaccount.com" \
    --role="roles/secretmanager.secretAccessor"
Your active configuration is: [cloudshell-13031]
Updated IAM policy for secret [solr-credentials].
bindings:
- members:
  - serviceAccount:service-350113473377@gcp-sa-alloydb.iam.gserviceaccount.com
  role: roles/secretmanager.secretAccessor
etag: BwZWyKlkx6Q=
version: 1
Connect to the database with AlloyDB Studio (or using psql to connect from the VM). Login to quickstart_db as the postgres user.
Enable the FDW extension:
CREATE EXTENSION IF NOT EXISTS external_search_fdw;
Expected output:
CREATE EXTENSION
Get Connection Parameters
Before configuring the foreign data server in AlloyDB, you need the VM's internal IP address (where Solr is running) and the secret path.
To print the VM's internal IP, run the following in Cloud Shell:
gcloud compute instances describe instance-1 \
    --zone=us-central1-a \
    --format="value(networkInterfaces[0].networkIP)"
Expected output:
10.X.X.X
To print the secret resource path in Secret Manager, run:
gcloud secrets describe solr-credentials --format="value(name)"
Expected output:
projects/<project_id>/secrets/solr-credentials
To reach Apache Solr, create a foreign data server. Replace /versions/latest to your secret path to grab the most recent version of the secret:
CREATE SERVER solr_demo_server
FOREIGN DATA WRAPPER external_search_fdw
OPTIONS(
    server 'http://<VM_INTERNAL_IP_ADDRESS>:8983',
    search_provider 'solr',
    auth_mode 'secret_manager',
    auth_method 'Basic',
    secret_path '<SECRET_PATH>/versions/latest'
);
Expected output:
CREATE SERVER
Next, define the foreign table. After the metadata, provide the Solr field schema definition to match the previously loaded data. In the remote table specify the name of the Solr collection.
CREATE FOREIGN TABLE solrindexdemo (
    metadata external_search_fdw_schema.OpaqueMetadata,
    id TEXT,
    product_name TEXT,
    product_description TEXT
)
SERVER solr_demo_server
OPTIONS(
    remote_table_name 'solrindexdemo'
);
Create a user mapping for the server:
CREATE USER MAPPING FOR CURRENT_USER SERVER solr_demo_server;
Now you can test the foreign table:
SELECT id, product_name
FROM solrindexdemo
ORDER BY metadata <@> 'product_description:cherry' DESC
limit 10;
Expected output:
"id","product_name"
"d536e9e823296a2eba198e52dd23e712","Cherry Tree"
"390cf08feac229e7b752709fd1f943b3","Woven Round Placemat, Set of Twelve, Grass"
"2c9aa7ac98c30abf78dd9c62a68a34e6","48 Scented Wax Melts Wax Cubes: Jelly Belly Jelly Beans Candy Bulk Soy Wax Melts For Candle Warmer, Wax Warmers, Wax Melt Warmers In 8 Pack Set"
11. Using Hybrid Search
Duration 10:00
Now that everything is set up, we can use the ai.hybrid_search() function to combine vector search and full text search. You can read more about hybrid search in the documentation. When using hybrid search, by default the query results use the Reciprocal Rank Fusion algorithm to order rank results from multiple queries. First, let's try vector search and hybrid search independently to analyze their differences.
The following query performs vector search to find products that are similar to cherry. The array provides a list of searches to perform. In this case, we only use vector search but later we'll provide both vector and FTS.
SELECT id, score, cymbal_products.product_name, cymbal_products.product_description
FROM ai.hybrid_search(
  ARRAY[
      '{
        "data_type": "vector",
        "table_name": "cymbal_products",
        "key_column": "uniq_id",
        "vec_column": "product_embedding",
        "distance_operator": "public.<=>",
        "limit": 3,
        "query_vector": "ai.embedding(''text-embedding-005'', ''cherry'')::vector"
      }'::JSONB
  ]
) JOIN cymbal_products ON id = cymbal_products.uniq_id;
In the output, cherry tree is the first result but notice that the next two are also fruit trees. This is because when we use vector search in the product_description column, we find semantic matches to our search condition.
"id","score","product_name","product_description"
"d536e9e823296a2eba198e52dd23e712","0.01639344262295082","Cherry Tree","This is a beautiful cherry tree that will produce delicious cherries. It is an deciduous tree that grows to be about 15 feet tall. The leaves are dark green in the summer and turn a beautiful red in the fall. Cherry trees are known for their beauty and their ability to provide shade and privacy. Cherry trees prefer a cool, moist climate and sandy soil. They are best suited for USDA zones 4-9."
"b70c44b1a38c0a2329fa583c9109a80f","0.016129032258064516","Peach Tree","This is a beautiful peach tree that will produce delicious peaches. It is an evergreen tree that grows to be about 20 feet tall. The leaves are dark green in the summer and turn a beautiful yellow in the fall. Peach trees are known for their beauty and their ability to provide shade and privacy. Peach trees prefer a cool, moist climate and sandy soil. They are best suited for USDA zones 2-9."
"23e41a71d63d8bbc9bdfa1d118cfddc5","0.015873015873015872","Apple Tree","This is a beautiful apple tree that will produce delicious apples. It is a deciduous tree that grows to be about 30 feet tall. The leaves are dark green in the summer and turn a beautiful red, orange, and yellow in the fall. Apple trees are known for their strength and durability. They are also a popular choice for shade trees. Apple trees prefer a cool, moist climate and loamy soil. They are best suited for USDA zones 4-8."
To perform full text search using Apache Solr FDW, run the following query:
SELECT id, score, cymbal_products.product_name, cymbal_products.product_description
FROM ai.hybrid_search(
  ARRAY[
      '{
        "limit": 3,
        "data_type": "external_search_fdw",
        "table_name": "solrindexdemo",
        "key_column": "id",
        "query_text_input": "product_description:cherry"
      }'::JSONB
  ]
) JOIN cymbal_products ON id = cymbal_products.uniq_id;
Notice in the results since full-text search uses token matching, the results return anything that contains the word "cherry" in the product description.
"id","score","product_name","product_description"
"d536e9e823296a2eba198e52dd23e712","0.01639344262295082","Cherry Tree","This is a beautiful cherry tree that will produce delicious cherries. It is an deciduous tree that grows to be about 15 feet tall. The leaves are dark green in the summer and turn a beautiful red in the fall. Cherry trees are known for their beauty and their ability to provide shade and privacy. Cherry trees prefer a cool, moist climate and sandy soil. They are best suited for USDA zones 4-9."
"390cf08feac229e7b752709fd1f943b3","0.016129032258064516","Woven Round Placemat, Set of Twelve, Grass","...These placemats are great for special occasions and holidays, but are also perfect to accessorize your everyday place settings.|Measurements. 15-inch round diameter is the perfect size for most table sizes and shapes.|Pop Colors. Choose from 7 pop woven color placemats including: Black, Cherry, Grass, Taupe, Navy, Sun and Graphite."
"2c9aa7ac98c30abf78dd9c62a68a34e6","0.015873015873015872","48 Scented Wax Melts Wax Cubes: Jelly Belly Jelly Beans Candy Bulk Soy Wax Melts For Candle Warmer, Wax Warmers, Wax Melt Warmers In 8 Pack Set","...From These Flavors: Lemon Drop, Mixed Berry Smoothie, Sizzling Cinnamon, Crushed Pineapple, Juicy Pear, Cotton Candy, Toasted Marshmallow, French Vanilla, Watermelon, Red Apple, Very Cherry, Buttered Popcorn..."
Now you can combine both semantic search and FTS to get more meaningful results. Let's say we want to search for a tree that can grow taller than a house, and we want it to come from California. We split the query to leverage semantic intent versus literal matching. The vector search handles the descriptive part: "tree that can grow taller than a house" because it understands the concept of scale without needing exact keywords. Meanwhile, the full-text search handles "California" as a strict filter to ensure we get an exact geographical match rather than just something conceptually similar.
SELECT id, score, cymbal_products.product_name, cymbal_products.product_description
FROM ai.hybrid_search(
  ARRAY[
    '{
        "data_type": "vector",
        "table_name": "cymbal_products",
        "key_column": "uniq_id",
        "vec_column": "product_embedding",
        "distance_operator": "public.<=>",
        "limit": 3,
        "query_vector": "ai.embedding(''text-embedding-005'', ''tree that can grow taller than a house'')::vector"
      }'::JSONB,
      '{
        "limit": 3,
        "data_type": "external_search_fdw",
        "table_name": "solrindexdemo",
        "key_column": "id",
        "query_text_input": "product_description:California"
      }'::JSONB
  ]
) JOIN cymbal_products ON id = cymbal_products.uniq_id;
Expected results:
"id","score","product_name","product_description"
"a589fd36a8a20fd9472d2403d6ed692a","0.00819672631147241","California Redwood","This is a beautiful redwood tree that can grow to be over 300 feet tall. It is an evergreen tree that grows in the coastal forests of California. Redwoods are known for their beauty and their strength. They are best suited for USDA zones 7-10."
"ef9432802da24041594c2cf368dfb4d2","0.008064521129029258","Madrone","This is a beautiful madrona tree that can grow to be over 80 feet tall. It is an evergreen tree that grows in the coastal forests of California. Madronas are known for their beauty and their bark. They are best suited for USDA zones 7-10."
"1360d8642bc218e4ea28e9c32b2e1721","0.007936512936504936","California Sycamore","This is a beautiful sycamore tree that can grow to be over 100 feet tall. It is an deciduous tree that grows in the valleys and foothills of California. California sycamores are known for their beauty and their shade. They are best suited for USDA zones 7-10."
12. Clean up environment
Destroy the AlloyDB instances and cluster when you are done with the lab.
Delete AlloyDB cluster and all instances
If you've used the trial version of AlloyDB. Do not delete the trial cluster if you have plans to test other labs and resources using the trial cluster. You will not be able to create another trial cluster in the same project.
The cluster is destroyed with option force which also deletes all the instances belonging to the cluster.
In the cloud shell define the project and environment variables if you've been disconnected and all the previous settings are lost:
gcloud config set project <your project id>
export REGION=us-central1
export ADBCLUSTER=alloydb-hybrid-search
export PROJECT_ID=$(gcloud config get-value project)
Delete the cluster:
gcloud alloydb clusters delete $ADBCLUSTER --region=$REGION --force
Expected console output:
admin_@cloudshell:~ (my-project-93954-gke)$ gcloud alloydb clusters delete $ADBCLUSTER --region=$REGION --force
All of the cluster data will be lost when the cluster is deleted.

Do you want to continue (Y/n)?  Y

Operation ID: operation-1784270790060-656c8ea9fea06-1b93001f-846543e0
Deleting cluster...done.
Delete AlloyDB Backups
Delete all AlloyDB backups for the cluster:
for i in $(gcloud alloydb backups list --filter="CLUSTER_NAME: projects/$PROJECT_ID/locations/$REGION/clusters/$ADBCLUSTER" --format="value(name)" --sort-by=~createTime) ; do gcloud alloydb backups delete $(basename $i) --region $REGION --quiet; done
Expected console output:
admin_@cloudshell:~ (my-project-93954-gke)$ for i in $(gcloud alloydb backups list --filter="CLUSTER_NAME: projects/$PROJECT_ID/locations/$REGION/clusters/$ADBCLUSTER" --format="value(name)" --sort-by=~createTime) ; do gcloud alloydb backups delete $(basename $i) --region $REGION --quiet; done
Operation ID: operation-1784271231983-656c904f71e05-1389a145-f101ceee
Deleting backup...done.
Now we can destroy our VM
Delete GCE VM
In Cloud Shell execute:
export GCEVM=instance-1
export ZONE=us-central1-a
gcloud compute instances delete $GCEVM \
    --zone=$ZONE \
    --quiet
Expected console output:
admin_@cloudshell:~ (my-project-93954-gke)$ export GCEVM=instance-1
export ZONE=us-central1-a
gcloud compute instances delete $GCEVM \
    --zone=$ZONE \
    --quiet
Deleted
13. Congratulations
Congratulations for completing the codelab!
What we've covered
- How to deploy AlloyDB cluster and primary instance
- How to connect to AlloyDB from Google Compute Engine VM
- How to create database and enable AlloyDB AI
- How to load data to the database
- How to use AlloyDB Studio
- Generate embeddings with Vertex AI
- How to create a ScaNN vector index to boost vector search
- How to create a Foreign Data Wrapper (FDW) for Apache Solr
- Perform hybrid search by combining semantic search in AlloyDB with full text search in Solr.
Next Steps
You can explore more AlloyDB codelabs on the official codelab site.postgresql).