

1. 소개
이 Codelab에서는 pgvector와 확장 가능한 최근접 이웃 (ScaNN) 색인을 사용하여 AlloyDB에서 하이브리드 검색을 수행하는 방법을 알아봅니다. 이 방법은 외부 데이터 래퍼 (FDW)를 통해 Apache Solr의 전체 텍스트 검색 기능과 결합됩니다. 이 실습은 AlloyDB AI 기능을 위한 실습 모음의 일부입니다. 자세한 내용은 문서의 AlloyDB AI 페이지를 참고하세요.
Apache Solr는 Apache Lucene을 기반으로 빌드된 오픈소스 엔터프라이즈 검색 플랫폼으로, 빠르고 확장 가능하며 가용성이 높은 전체 텍스트 검색 기능을 위해 설계되었습니다. 외부 데이터 래퍼 (FDW)를 통해 Solr를 AlloyDB와 통합하면 사용자가 구조화된 데이터베이스 테이블과 함께 PostgreSQL에서 직접 Solr 색인을 쿼리할 수 있습니다. 자세한 내용은 Apache Solr 문서를 참고하세요.
기본 요건
- Google Cloud 콘솔에 관한 기본적인 이해
- 명령줄 인터페이스 및 Google Shell의 기본 기술
학습할 내용
- AlloyDB 클러스터 및 기본 인스턴스를 배포하는 방법
- Google Compute Engine VM에서 AlloyDB에 연결하는 방법
- 데이터베이스를 만들고 AlloyDB AI를 사용 설정하는 방법
- 데이터베이스에 데이터를 로드하는 방법
- AlloyDB Studio 사용 방법
- Vertex AI로 임베딩 생성
- 벡터 검색을 강화하기 위해 ScaNN 벡터 색인을 만드는 방법
- Apache Solr용 외부 데이터 래퍼 (FDW)를 만드는 방법
- AlloyDB의 시맨틱 검색과 Solr의 전체 텍스트 검색을 결합하여 하이브리드 검색을 실행합니다.
필요한 항목
- Google Cloud 계정 및 Google Cloud 프로젝트
- 웹브라우저(예: Chrome)
2. 설정 및 요구사항
프로젝트 설정
Google Cloud 콘솔에 로그인합니다. 아직 Gmail이나 Google Workspace 계정이 없는 경우 계정을 만들어야 합니다.
직장 또는 학교 계정 대신 개인 계정을 사용하세요.
- Google Cloud 콘솔의 프로젝트 선택기 페이지에서 Google Cloud 프로젝트를 선택하거나 만듭니다.
- Cloud 프로젝트에 결제가 사용 설정되어 있는지 확인합니다. 프로젝트에 결제가 사용 설정되어 있는지 확인하는 방법을 알아보세요.
결제 사용 설정
결제를 사용 설정하는 방법에는 두 가지가 있습니다. 개인 결제 계정을 사용하거나 다음 단계에 따라 크레딧을 사용할 수 있습니다.
개인 결제 계정 설정
Google Cloud 크레딧을 사용하여 결제를 설정한 경우 이 단계를 건너뛸 수 있습니다.
개인 결제 계정을 설정하려면 Cloud 콘솔에서 여기에서 결제를 사용 설정하세요.
참고 사항:
- 이 실습을 완료하는 데 드는 Cloud 리소스 비용은 미화 3달러 미만입니다.
- 이 실습이 끝나면 단계에 따라 리소스를 삭제하여 추가 요금이 발생하지 않도록 할 수 있습니다.
- 신규 사용자는 미화$300 상당의 무료 체험판을 이용할 수 있습니다.
Cloud Shell 시작
Google Cloud를 노트북에서 원격으로 실행할 수 있지만, 이 Codelab에서는 Cloud에서 실행되는 명령줄 환경인 Google Cloud Shell을 사용합니다.
Cloud Shell은 Google Cloud에서 실행되는 명령줄 환경으로, 필요한 도구가 미리 로드되어 제공됩니다.
- Google Cloud 콘솔 상단에서 Cloud Shell 활성화를 클릭합니다.
- Cloud Shell에 연결되면 인증을 확인합니다.
gcloud auth list - 프로젝트가 구성되어 있는지 확인합니다.
gcloud config get project - 프로젝트가 예상대로 설정되지 않은 경우 설정합니다.
export PROJECT_ID=<YOUR_PROJECT_ID>
gcloud config set project $PROJECT_ID
가상 머신에는 필요한 개발 도구가 모두 들어있습니다. 영구적인 5GB 홈 디렉터리를 제공하고 Google Cloud에서 실행되므로 네트워크 성능과 인증이 크게 개선됩니다. 이 Codelab의 모든 작업은 브라우저 내에서 수행할 수 있습니다. 아무것도 설치할 필요가 없습니다.
3. 시작하기 전에
API 사용 설정
출력:
AlloyDB, Compute Engine, 네트워킹 서비스, Vertex AI를 사용하려면 Google Cloud 프로젝트에서 각 API를 사용 설정해야 합니다.
API 사용 설정
터미널의 Cloud Shell 내에 프로젝트 ID가 설정되어 있는지 확인합니다.
gcloud config set project [YOUR-PROJECT-ID]
환경 변수 PROJECT_ID를 설정합니다.
PROJECT_ID=$(gcloud config get-value project)
필요한 모든 API를 사용 설정합니다.
gcloud services enable alloydb.googleapis.com \
                       compute.googleapis.com \
                       cloudresourcemanager.googleapis.com \
                       servicenetworking.googleapis.com \
                       aiplatform.googleapis.com \
                       secretmanager.googleapis.com
예상 출력
student@cloudshell:~ (alloydb-hybrid-search)$ gcloud config set project alloydb-hybrid-search
[environment: untagged] Read more to tag: g.co/cloud/project-env-tag.
Updated property [core/project].
student@cloudshell:~ (alloydb-hybrid-search)$ PROJECT_ID=$(gcloud config get-value project)
Your active configuration is: [cloudshell-32544]
student@cloudshell:~ (alloydb-hybrid-search)$ gcloud services enable alloydb.googleapis.com \
                       compute.googleapis.com \
                       cloudresourcemanager.googleapis.com \
                       servicenetworking.googleapis.com \
                       aiplatform.googleapis.com \
                       secretmanager.googleapis.com
Operation "operations/acat.p2-350113473377-5ffc2f22-caa9-4857-b2f4-018657d8bf6e" finished successfully.
API 소개
- AlloyDB API (
alloydb.googleapis.com)를 사용하면 PostgreSQL용 AlloyDB 클러스터를 만들고, 관리하고, 확장할 수 있습니다. 까다로운 엔터프라이즈 트랜잭션 및 분석 워크로드를 위해 설계된 완전 관리형 PostgreSQL 호환 데이터베이스 서비스를 제공합니다. - Compute Engine API (
compute.googleapis.com)를 사용하면 가상 머신 (VM), 영구 디스크, 네트워크 설정을 만들고 관리할 수 있습니다. 워크로드를 실행하고 여러 관리형 서비스의 기본 인프라를 호스팅하는 데 필요한 핵심 서비스로서의 인프라 (IaaS) 기반을 제공합니다. - Cloud Resource Manager API (
cloudresourcemanager.googleapis.com)를 사용하면 Google Cloud 프로젝트의 메타데이터와 구성을 프로그래매틱 방식으로 관리할 수 있습니다. 이를 통해 리소스를 구성하고, ID 및 액세스 관리 (IAM) 정책을 처리하고, 프로젝트 계층 구조 전반에서 권한을 검증할 수 있습니다. - Service Networking API (
servicenetworking.googleapis.com)를 사용하면 가상 프라이빗 클라우드 (VPC) 네트워크와 Google의 관리형 서비스 간의 비공개 연결 설정을 자동화할 수 있습니다. AlloyDB와 같은 서비스가 다른 리소스와 안전하게 통신할 수 있도록 비공개 IP 액세스를 설정해야 합니다. - Vertex AI API (
aiplatform.googleapis.com)를 사용하면 애플리케이션에서 머신러닝 모델을 빌드, 배포, 확장할 수 있습니다. 생성형 AI 모델 (예: Gemini) 및 맞춤 모델 학습에 대한 액세스를 비롯한 모든 Google Cloud AI 서비스의 통합 인터페이스를 제공합니다. - Secret Manager API (
secretmanager.googleapis.com)는 API 키, 사용자 이름, 비밀번호, 인증서와 같은 민감한 정보를 저장하고 관리할 수 있는 보안 비밀 및 사용자 인증 정보 관리 서비스입니다.
선택적으로 Vertex AI 임베딩 모델을 사용하도록 기본 리전을 구성할 수 있습니다. Vertex AI 사용 가능 위치에 대해 자세히 알아보세요. 이 예에서는 us-central1 리전을 사용합니다.
gcloud config set compute/region us-central1
4. AlloyDB 배포
AlloyDB 클러스터를 만들기 전에 향후 AlloyDB 인스턴스에서 사용할 수 있는 비공개 IP 범위가 VPC에 있어야 합니다. 이 계정이 없으면 계정을 만들어 내부 Google 서비스에서 사용하도록 할당해야 클러스터와 인스턴스를 만들 수 있습니다.
비공개 IP 범위 만들기
VPC에서 AlloyDB용 비공개 서비스 액세스 구성을 설정해야 합니다. 여기서는 프로젝트에 '기본' VPC 네트워크가 있고 이 네트워크가 모든 작업에 사용된다고 가정합니다.
비공개 IP 범위를 만듭니다.
gcloud compute addresses create psa-range \
    --global \
    --purpose=VPC_PEERING \
    --prefix-length=24 \
    --description="VPC private service access" \
    --network=default
할당된 IP 범위를 사용하여 비공개 연결을 만듭니다.
gcloud services vpc-peerings connect \
    --service=servicenetworking.googleapis.com \
    --ranges=psa-range \
    --network=default
연결되면 피어링을 업데이트하여 커스텀 경로를 내보냅니다.
gcloud compute networks peerings update servicenetworking-googleapis-com \
    --network=default \
    --export-custom-routes
예상되는 콘솔 출력:
student@cloudshell:~ (alloydb-hybrid-search)$ gcloud compute addresses create psa-range \
    --global \
    --purpose=VPC_PEERING \
    --prefix-length=24 \
    --description="VPC private service access" \
    --network=default
Created [https://www.googleapis.com/compute/v1/projects/alloydb-hybrid-search/global/addresses/psa-range].

student@cloudshell:~ (alloydb-hybrid-search)$ gcloud services vpc-peerings connect \
    --service=servicenetworking.googleapis.com \
    --ranges=psa-range \
    --network=default
Operation "operations/pssn.p24-350113473377-fadad49e-7e14-472a-8888-26951e40a1f7" finished successfully.

student@cloudshell:~ (alloydb-hybrid-search)$ gcloud compute networks peerings update servicenetworking-googleapis-com \
    --network=default \
    --export-custom-routes
Updated [https://www.googleapis.com/compute/v1/projects/alloydb-hybrid-search/global/networks/default].
AlloyDB 클러스터 만들기
이 섹션에서는 us-central1 리전에 AlloyDB 클러스터를 만듭니다.
postgres 사용자의 비밀번호를 정의합니다. 비밀번호를 직접 정의하거나 무작위 함수를 사용하여 생성할 수 있습니다.
export PGPASSWORD=`openssl rand -hex 12`
예상되는 콘솔 출력:
student@cloudshell:~ (alloydb-hybrid-search)$ export PGPASSWORD=`openssl rand -hex 12`
나중에 사용할 수 있도록 PostgreSQL 비밀번호를 기록해 둡니다.
echo $PGPASSWORD
나중에 postgres 사용자로 인스턴스에 연결하려면 이 비밀번호가 필요합니다. 안전한 위치 (예: 비밀번호 관리자)에 복사하는 것이 좋습니다.
예상되는 콘솔 출력:
student@cloudshell:~ (alloydb-hybrid-search)$ echo $PGPASSWORD
<generated password>
AlloyDB 클러스터 만들기
리전과 AlloyDB 클러스터 이름을 정의합니다. us-central1 리전과 alloydb-hybrid-search를 클러스터 이름으로 사용합니다.
export REGION=us-central1
export ADBCLUSTER=alloydb-hybrid-search
명령어를 실행하여 클러스터를 만듭니다.
gcloud alloydb clusters create $ADBCLUSTER \
    --password=$PGPASSWORD \
    --network=default \
    --region=$REGION \
    --database-version=POSTGRES_17
예상되는 콘솔 출력:
student@cloudshell:~ (alloydb-hybrid-search)$ export REGION=us-central1
export ADBCLUSTER=alloydb-hybrid-search
student@cloudshell:~ (alloydb-hybrid-search)$ gcloud alloydb clusters create $ADBCLUSTER \
    --password=$PGPASSWORD \
    --network=default \
    --region=$REGION \
    --database-version=POSTGRES_17
Creating cluster...done.
동일한 Cloud Shell 세션에서 클러스터의 AlloyDB 기본 인스턴스를 만듭니다. 연결이 해제되면 리전 및 클러스터 이름 환경 변수를 다시 정의해야 합니다.
gcloud alloydb instances create $ADBCLUSTER-pr \
    --instance-type=PRIMARY \
    --cpu-count=2 \
    --region=$REGION \
    --cluster=$ADBCLUSTER
예상되는 콘솔 출력:
admin_@cloudshell:~ (my-project-93954-gke)$ gcloud alloydb instances create $ADBCLUSTER-pr \
    --instance-type=PRIMARY \
    --cpu-count=2 \
    --region=$REGION \
    --availability-type ZONAL \
    --cluster=$ADBCLUSTER
Operation ID: operation-1784244706986-656c2d7f3c8f2-59a9e52a-1e7b1b01
Creating instance...done.
5. AlloyDB에 연결
AlloyDB는 비공개 전용 연결을 사용하여 배포되므로 데이터베이스와 함께 작동하려면 PostgreSQL 클라이언트가 설치된 VM이 필요합니다. 이 VM을 사용하여 Apache Solr 인스턴스도 실행합니다.
GCE VM 배포
AlloyDB 클러스터와 동일한 리전 및 VPC에 GCE VM을 만들고 부팅 디스크가 Solr를 실행할 수 있을 만큼 큰지 확인합니다. 여기서는 --create-disk 플래그에 20GB 부팅 디스크를 지정합니다.
Cloud Shell에서 다음을 실행합니다.
export ZONE=us-central1-a
gcloud compute instances create instance-1 \
    --zone=$ZONE \
    --create-disk=auto-delete=yes,boot=yes,size=20,image=projects/debian-cloud/global/images/$(gcloud compute images list --filter="family=debian-12 AND family!=debian-12-arm64" --format="value(name)") \
    --scopes=https://www.googleapis.com/auth/cloud-platform
예상되는 콘솔 출력:
student@cloudshell:~ (alloydb-hybrid-search)$ export ZONE=us-central1-a
gcloud compute instances create instance-1 \
    --zone=$ZONE \
    --network=default \
    --create-disk=auto-delete=yes,boot=yes,image=projects/debian-cloud/global/images/$(gcloud compute images list --filter="family=debian-12 AND family!=debian-12-arm64" --format="value(name)") \
    --scopes=https://www.googleapis.com/auth/cloud-platform

Created [https://www.googleapis.com/compute/v1/projects/test-project-402417/zones/us-central1-a/instances/instance-1].
NAME: instance-1
ZONE: us-central1-a
MACHINE_TYPE: n1-standard-1
PREEMPTIBLE:
INTERNAL_IP: X.X.X.X
EXTERNAL_IP: X.X.X.X
STATUS: RUNNING
Postgres 클라이언트 설치
배포된 VM에 PostgreSQL 클라이언트 소프트웨어 설치
VM에 연결합니다.
gcloud compute ssh instance-1 --zone=us-central1-a
예상되는 콘솔 출력:
admin_@cloudshell:~ (my-project-93954-gke)$ gcloud compute ssh instance-1 --zone=us-central1-a
Updating project ssh metadata...working..Updated [https://www.googleapis.com/compute/v1/projects/alloydb-hybrid-search].
Updating project ssh metadata...done.
Waiting for SSH key to propagate.
Warning: Permanently added 'compute.5110295539541121102' (ECDSA) to the list of known hosts.
Linux instance-1.us-central1-a.c.gleb-test-short-001-418811.internal 6.1.0-18-cloud-amd64 #1 SMP PREEMPT_DYNAMIC Debian 6.1.76-1 (2024-02-01) x86_64

The programs included with the Debian GNU/Linux system are free software;
the exact distribution terms for each program are described in the
individual files in /usr/share/doc/*/copyright.

Debian GNU/Linux comes with ABSOLUTELY NO WARRANTY, to the extent
permitted by applicable law.
VM 내에 명령어를 실행할 소프트웨어를 설치합니다.
sudo apt-get update
sudo apt-get install --yes postgresql-client
예상되는 콘솔 출력:
student@instance-1:~$ sudo apt-get update
sudo apt-get install --yes postgresql-client
Get:1 https://packages.cloud.google.com/apt google-compute-engine-bullseye-stable InRelease [5146 B]
Get:2 https://packages.cloud.google.com/apt cloud-sdk-bullseye InRelease [6406 B]
Hit:3 https://deb.debian.org/debian bullseye InRelease
Get:4 https://deb.debian.org/debian-security bullseye-security InRelease [48.4 kB]
Get:5 https://packages.cloud.google.com/apt google-compute-engine-bullseye-stable/main amd64 Packages [1930 B]
Get:6 https://deb.debian.org/debian bullseye-updates InRelease [44.1 kB]
Get:7 https://deb.debian.org/debian bullseye-backports InRelease [49.0 kB]
...redacted...
Setting up postgresql-client (15+248+deb12u1) ...
Processing triggers for man-db (2.11.2-2) ...
Processing triggers for libc-bin (2.36-9+deb12u14) ...
인스턴스에 연결
psql을 사용하여 VM에서 기본 인스턴스에 연결합니다.
instance-1 VM에 대해 SSH 세션이 열린 동일한 Cloud Shell 탭
언급된 AlloyDB 비밀번호 (PGPASSWORD) 값과 AlloyDB 클러스터 ID를 사용하여 GCE VM에서 AlloyDB에 연결합니다.
export PGPASSWORD=<Noted password>
export PROJECT_ID=$(gcloud config get-value project)
export REGION=us-central1
export ADBCLUSTER=alloydb-hybrid-search
export INSTANCE_IP=$(gcloud alloydb instances describe $ADBCLUSTER-pr --cluster=$ADBCLUSTER --region=$REGION --format="value(ipAddress)")
psql "host=$INSTANCE_IP user=postgres sslmode=require"
예상되는 콘솔 출력:
student@instance-1:~$ export PROJECT_ID=$(gcloud config get-value project)
export REGION=us-central1
export ADBCLUSTER=alloydb-hybrid-search
export INSTANCE_IP=$(gcloud alloydb instances describe $ADBCLUSTER-pr --cluster=$ADBCLUSTER --region=$REGION --format="value(ipAddress)")
psql "host=$INSTANCE_IP user=postgres sslmode=require"
psql (15.18 (Debian 15.18-0+deb12u1), server 17.9)
WARNING: psql major version 15, server major version 17.
         Some psql features might not work.
SSL connection (protocol: TLSv1.3, cipher: TLS_AES_256_GCM_SHA384, compression: off)
Type "help" for help.

postgres=>
psql 세션을 닫습니다.
exit
6. 데이터베이스 준비
데이터베이스를 만들고, Vertex AI 통합을 사용 설정하고, 데이터베이스 객체를 만들고, 데이터를 가져와야 합니다.
AlloyDB에 필요한 권한 부여
AlloyDB 서비스 에이전트에 Vertex AI 권한을 추가합니다.
맨 위에 있는 '+' 기호를 사용하여 다른 Cloud Shell 탭을 엽니다.
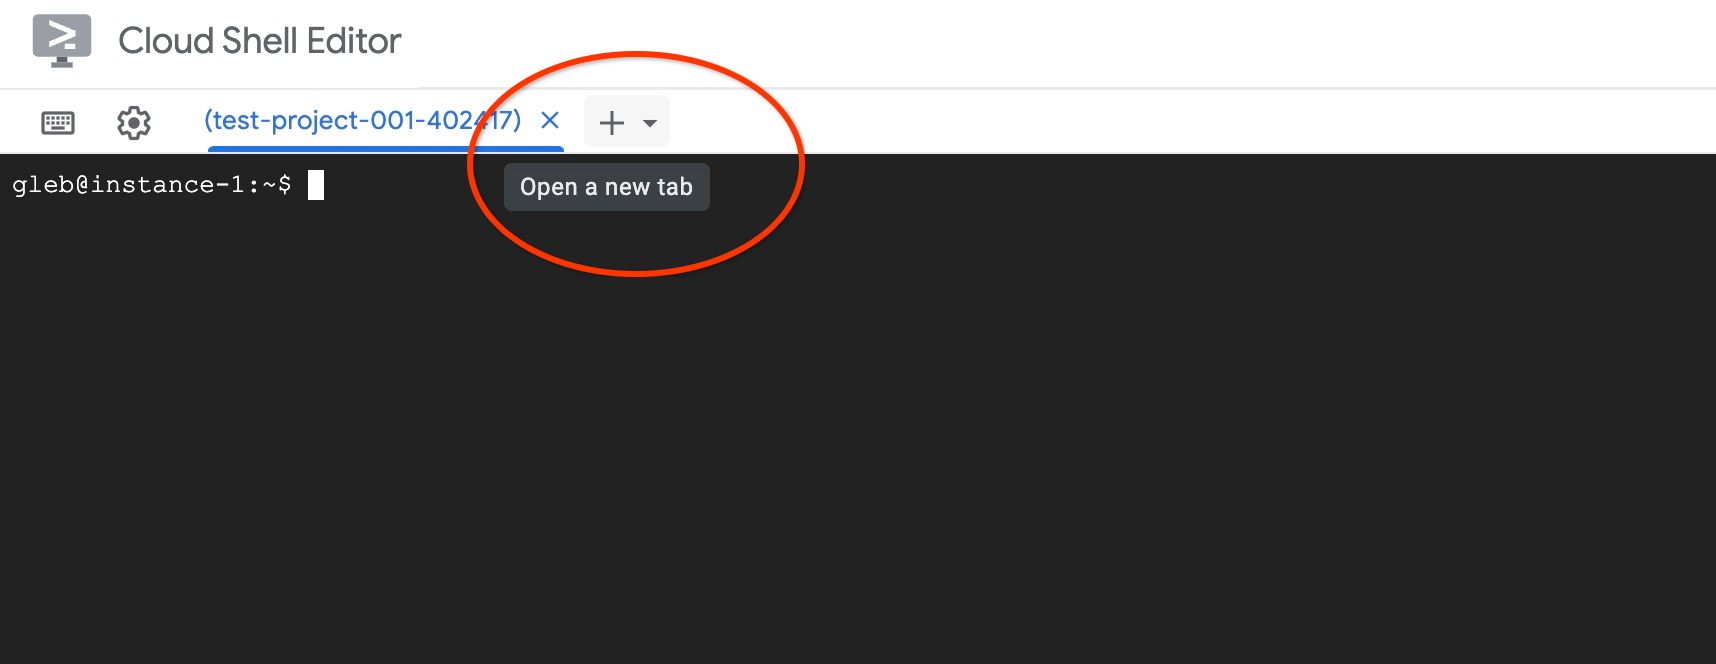
새 Cloud Shell 탭에서 다음을 실행합니다.
PROJECT_ID=$(gcloud config get-value project)
gcloud projects add-iam-policy-binding $PROJECT_ID \
  --member="serviceAccount:service-$(gcloud projects describe $PROJECT_ID --format="value(projectNumber)")@gcp-sa-alloydb.iam.gserviceaccount.com" \
  --role="roles/aiplatform.user"
예상되는 콘솔 출력:
admin_@cloudshell:~ (my-project-93954-gke)$ PROJECT_ID=$(gcloud config get-value project)
gcloud projects add-iam-policy-binding $PROJECT_ID \
  --member="serviceAccount:service-$(gcloud projects describe $PROJECT_ID --format="value(projectNumber)")@gcp-sa-alloydb.iam.gserviceaccount.com" \
  --role="roles/aiplatform.user"
Your active configuration is: [cloudshell-30137]

Updated IAM policy for project [my-project-93954-gke].
bindings:
- members:
<redacted>
version: 1
'X'를 클릭하거나 다음 명령어를 실행하여 탭을 닫습니다.
exit
데이터베이스 만들기
quickstart라는 데이터베이스를 만듭니다.
GCE VM 세션에서 다음을 실행합니다.
데이터베이스를 만듭니다.
psql "host=$INSTANCE_IP user=postgres" -c "CREATE DATABASE quickstart_db"
예상되는 콘솔 출력:
student@instance-1:~$ psql "host=$INSTANCE_IP user=postgres" -c "CREATE DATABASE quickstart_db"
CREATE DATABASE
Vertex AI 통합 사용 설정
데이터베이스에서 Vertex AI 통합 및 pgvector 확장 프로그램을 사용 설정합니다.
GCE VM에서 다음을 실행합니다.
psql "host=$INSTANCE_IP user=postgres dbname=quickstart_db" -c "CREATE EXTENSION IF NOT EXISTS google_ml_integration CASCADE"
psql "host=$INSTANCE_IP user=postgres dbname=quickstart_db" -c "CREATE EXTENSION IF NOT EXISTS vector"
예상되는 콘솔 출력:
student@instance-1:~$ psql "host=$INSTANCE_IP user=postgres dbname=quickstart_db" -c "CREATE EXTENSION IF NOT EXISTS google_ml_integration CASCADE"
psql "host=$INSTANCE_IP user=postgres dbname=quickstart_db" -c "CREATE EXTENSION IF NOT EXISTS vector"
NOTICE:  extension "google_ml_integration" already exists, skipping
CREATE EXTENSION
CREATE EXTENSION
데이터 가져오기
준비된 데이터를 다운로드하고 새 데이터베이스로 가져옵니다.
GCE VM에서 다음을 실행합니다.
gcloud storage cat gs://cloud-training/gcc/gcc-tech-004/cymbal_demo_schema.sql |psql "host=$INSTANCE_IP user=postgres dbname=quickstart_db"
gcloud storage cat gs://cloud-training/gcc/gcc-tech-004/cymbal_products.csv |psql "host=$INSTANCE_IP user=postgres dbname=quickstart_db" -c "\copy cymbal_products from stdin csv header"
gcloud storage cat gs://cloud-training/gcc/gcc-tech-004/cymbal_inventory.csv |psql "host=$INSTANCE_IP user=postgres dbname=quickstart_db" -c "\copy cymbal_inventory from stdin csv header"
gcloud storage cat gs://cloud-training/gcc/gcc-tech-004/cymbal_stores.csv |psql "host=$INSTANCE_IP user=postgres dbname=quickstart_db" -c "\copy cymbal_stores from stdin csv header"
예상되는 콘솔 출력:
student@instance-1:~$ gcloud storage cat gs://cloud-training/gcc/gcc-tech-004/cymbal_demo_schema.sql |psql "host=$INSTANCE_IP user=postgres dbname=quickstart_db"
gcloud storage cat gs://cloud-training/gcc/gcc-tech-004/cymbal_products.csv |psql "host=$INSTANCE_IP user=postgres dbname=quickstart_db" -c "\copy cymbal_products from stdin csv header"
gcloud storage cat gs://cloud-training/gcc/gcc-tech-004/cymbal_inventory.csv |psql "host=$INSTANCE_IP user=postgres dbname=quickstart_db" -c "\copy cymbal_inventory from stdin csv header"
gcloud storage cat gs://cloud-training/gcc/gcc-tech-004/cymbal_stores.csv |psql "host=$INSTANCE_IP user=postgres dbname=quickstart_db" -c "\copy cymbal_stores from stdin csv header"
SET
SET
SET
SET
SET
 set_config
------------

(1 row)

SET
SET
SET
SET
SET
SET
CREATE TABLE
ALTER TABLE
CREATE TABLE
ALTER TABLE
CREATE TABLE
ALTER TABLE
CREATE TABLE
ALTER TABLE
CREATE SEQUENCE
ALTER TABLE
ALTER SEQUENCE
ALTER TABLE
ALTER TABLE
ALTER TABLE
COPY 941
COPY 263861
COPY 4654
이제 필요한 데이터베이스 플래그를 설정해 보겠습니다. 웹 콘솔을 사용하여 기본 인스턴스에서 플래그를 관리하거나 다음과 같이 gcloud 명령어를 사용할 수 있습니다.
export PROJECT_ID=$(gcloud config get-value project)
export REGION=us-central1
export ADBCLUSTER=alloydb-hybrid-search
gcloud beta alloydb instances update $ADBCLUSTER-pr \
   --database-flags google_ml_integration.enable_faster_embedding_generation=on,scann.enable_preview_features=on,google_ml_integration.enable_preview_ai_functions=on,google_ml_integration.enable_ai_query_engine=on \
   --region=$REGION \
   --cluster=$ADBCLUSTER \
   --project=$PROJECT_ID \
   --update-mode=FORCE_APPLY
예상되는 콘솔 출력
student@cloudshell:~ (alloydb-hybrid-search)$ export PROJECT_ID=$(gcloud config get-value project)
export REGION=us-central1
export ADBCLUSTER=alloydb-hybrid-search
gcloud beta alloydb instances update $ADBCLUSTER-pr \
   --database-flags google_ml_integration.enable_faster_embedding_generation=on,scann.enable_preview_features=on,google_ml_integration.enable_preview_ai_functions=on,google_ml_integration.enable_ai_query_engine=on \
   --region=$REGION \
   --cluster=$ADBCLUSTER \
   --project=$PROJECT_ID \
   --update-mode=FORCE_APPLY
Your active configuration is: [cloudshell-30137]
Operation ID: operation-1784245853151-656c31c44e12b-6084eb8b-d6611419
데이터베이스 플래그를 사용 설정하려면 인스턴스를 다시 시작해야 하며 몇 분 정도 걸립니다. 완료되면 AlloyDB 인스턴스 상태가 'Ready'(준비됨)로 표시됩니다.
7. 벡터 임베딩 생성
데이터를 가져온 후에는 제품에 관한 정보를 저장하는 cymbal_products, 각 매장의 상품 재고를 추적하는 cymbal_inventory, 매장 목록인 cymbal_stores 테이블이 있습니다. 제품에 대한 시맨틱 검색을 수행하려면 initialize_embeddings 함수를 사용하여 제품 설명의 벡터 임베딩을 생성해야 합니다. Vertex AI 통합을 사용하여 제품 설명을 기반으로 벡터 데이터를 계산하고 표에 추가합니다. 사용된 기술에 대한 자세한 내용은 문서를 참고하세요.
통합을 사용하려면 AlloyDB 인스턴스 IP와 postgres 비밀번호를 사용하여 AlloyDB Studio로 또는 VM에서 psql을 사용하여 데이터베이스에 연결하세요.
psql "host=$INSTANCE_IP user=postgres dbname=quickstart_db"
google_ml_integration 확장 프로그램의 버전을 확인합니다.
SELECT extversion FROM pg_extension WHERE extname = 'google_ml_integration';
버전은 1.5.2 이상이어야 합니다. 출력 예시는 다음과 같습니다.
quickstart_db=> SELECT extversion FROM pg_extension WHERE extname = 'google_ml_integration';
 extversion
------------
 1.5.9
(1 row)
기본 버전은 1.5.2 이상이어야 하지만 인스턴스에 이전 버전이 표시되면 업데이트해야 할 수 있습니다. 인스턴스에 유지보수가 사용 중지되었는지 확인합니다.
벡터 확장 프로그램을 설치하고 cymbal_products에 임베딩을 저장할 새 열을 만듭니다.
CREATE EXTENSION IF NOT EXISTS vector;
ALTER TABLE cymbal_products ADD COLUMN product_embedding vector(768);
예상되는 콘솔 출력:
quickstart_db=> CREATE EXTENSION IF NOT EXISTS vector;
ALTER TABLE cymbal_products ADD COLUMN product_embedding vector(768);
NOTICE:  extension "vector" already exists, skipping
CREATE EXTENSION
ALTER TABLE
효율성을 높이기 위해 일괄 임베딩 생성이 사용됩니다. 다양한 삽입 생성 옵션과 기법에 대한 자세한 내용은 가이드를 참고하세요. 이전에 삽입 생성 일괄 처리를 허용하는 google_ml_integration.enable_faster_embedding_generation 플래그를 사용 설정했습니다.
마지막으로 함수 호출에 incremental_refresh_mode 인수를 포함하여 열 값이 변경될 때마다 임베딩이 새로고침되도록 합니다. 이렇게 하면 데이터베이스에 오버헤드가 발생하지만 콘텐츠와 임베딩을 자동으로 동기화하기 위한 절충안입니다. 직접 삽입을 업데이트하려면 문서에서 안내를 확인하세요.
이제 모든 것을 합쳐 임베딩을 생성합니다. initialize_embeddings 함수를 사용하고 50의 batch_size을 배치 힌트로 전달하고 incremental_refresh_mode을 transactional로 설정합니다.
CALL ai.initialize_embeddings(
    model_id => 'text-embedding-005',
    table_name => 'cymbal_products',
    content_column => 'product_description',
    embedding_column => 'product_embedding',
    batch_size => 50,
    incremental_refresh_mode => 'transactional'
);
이제 product_embedding 열에 NULL 값을 사용하여 테이블에 새 행을 삽입하면
INSERT INTO "cymbal_products" ("uniq_id", "crawl_timestamp", "product_url", "product_name", "product_description", "list_price", "sale_price", "brand", "item_number", "gtin", "package_size", "category", "postal_code", "available", "product_embedding") VALUES ('fd604542e04b470f9e6348e640cff794', NOW(), 'https://example.com/new_product', 'New Cymbal Product', 'This is a new cymbal product description.', 199.99, 149.99, 'Example Brand', 'EB123', '1234567890', 'Single', 'Cymbals', '12345', TRUE, NULL);
이제 방금 삽입한 행을 쿼리하면 product_embedding 열이 자동으로 업데이트된 것을 확인할 수 있습니다.
SELECT uniq_id, (product_embedding::real[])[1:5] as product_embedding FROM cymbal_products WHERE uniq_id='fd604542e04b470f9e6348e640cff794';
다음과 유사하게 출력됩니다.
quickstart_db=> SELECT uniq_id,(product_embedding::real[])[1:5] as product_embedding  FROM cymbal_products WHERE uniq_id='fd604542e04b470f9e6348e640cff794';
             uniq_id              |                      product_embedding
----------------------------------+---------------------------------------------------------------
 fd604542e04b470f9e6348e640cff794 | {0.015003494,-0.005349732,-0.059790313,-0.0087091,-0.0271452}
(1 row)
8. 벡터 색인 만들기
벡터 검색 성능을 개선하기 위해 ScaNN 색인을 추가합니다.
ScaNN 색인 만들기
SCANN 색인을 빌드하려면 확장 프로그램을 하나 더 사용 설정해야 합니다. alloydb_scann 확장 프로그램은 Google의 ScaNN 알고리즘을 사용하여 ANN 유형 벡터 색인으로 작업하는 인터페이스를 제공합니다.
CREATE EXTENSION IF NOT EXISTS alloydb_scann;
예상 출력:
quickstart_db=> CREATE EXTENSION IF NOT EXISTS alloydb_scann;
CREATE EXTENSION
색인은 MANUAL 또는 AUTO 모드로 만들 수 있습니다. MANUAL 모드는 기본적으로 사용 설정되어 있으며 다른 색인과 마찬가지로 색인을 생성하고 유지관리할 수 있습니다. 하지만 AUTO 모드를 사용 설정하면 유지보수가 필요하지 않은 색인을 만들 수 있습니다. 모든 옵션에 대한 자세한 내용은 문서를 참고하세요. 이 경우 AUTO 모드에서 색인을 만들기에 충분한 행이 없으므로 MANUAL로 만들고 조정 매개변수를 포함합니다. 문서에서 색인 매개변수 조정에 대해 자세히 알아볼 수 있습니다.
CREATE INDEX cymbal_products_embeddings_scann ON cymbal_products
  USING scann (product_embedding cosine)
  WITH (mode='MANUAL', num_leaves=31, max_num_levels = 2);
예상 출력:
quickstart_db=> CREATE INDEX cymbal_products_embeddings_scann ON cymbal_products
  USING scann (product_embedding cosine)
  WITH (num_leaves=31, max_num_levels = 2);
CREATE INDEX
quickstart_db=>
색인 사용 검사
이제 EXPLAIN 모드에서 벡터 검색 쿼리를 실행하고 색인이 사용되고 있는지 확인할 수 있습니다.
EXPLAIN (analyze)
WITH trees as (
SELECT
        cp.product_name,
        left(cp.product_description,80) as description,
        cp.sale_price,
        cs.zip_code,
        cp.uniq_id as product_id
FROM
        cymbal_products cp
JOIN cymbal_inventory ci on
        ci.uniq_id=cp.uniq_id
JOIN cymbal_stores cs on
        cs.store_id=ci.store_id
        AND ci.inventory>0
        AND cs.store_id = 1583
ORDER BY
        (cp.product_embedding <=> embedding('text-embedding-005','What kind of fruit trees grow well here?')::vector) ASC
LIMIT 1)
SELECT json_agg(trees) FROM trees;
예상 출력 (명확히 하자면):
...
Aggregate (cost=16.59..16.60 rows=1 width=32) (actual time=2.875..2.877 rows=1 loops=1)
-> Subquery Scan on trees (cost=8.42..16.59 rows=1 width=142) (actual time=2.860..2.862 rows=1 loops=1)
-> Limit (cost=8.42..16.58 rows=1 width=158) (actual time=2.855..2.856 rows=1 loops=1)
-> Nested Loop (cost=8.42..6489.19 rows=794 width=158) (actual time=2.854..2.855 rows=1 loops=1)
-> Nested Loop (cost=8.13..6466.99 rows=794 width=938) (actual time=2.742..2.743 rows=1 loops=1)
-> Index Scan using cymbal_products_embeddings_scann on cymbal_products cp (cost=7.71..111.99 rows=876 width=934) (actual time=2.724..2.724 rows=1 loops=1)
Order By: (embedding <=> '[0.008864171,0.03693164,-0.024245683,-0.00355923,0.0055611245,0.015985578,...<redacted>...5685,-0.03914233,-0.018452475,0.00826032,-0.07372604]'::vector)
...
출력에서 쿼리가 'cymbal_products에서 cymbal_products_embeddings_scann을 사용하는 색인 스캔'을 사용하고 있음을 명확하게 확인할 수 있습니다.
9. Solr 인스턴스 만들기
하이브리드 검색의 전체 텍스트 검색 (FTS) 부분에는 Apache Solr가 사용됩니다. 이 단계에서는 앞에서 만든 VM에 독립형 Solr 인스턴스를 배포합니다.
Solr에 대한 액세스를 보호하기 위해 기본 인증을 사용 설정합니다. security.json 구성 파일을 제공하고, 마운트하고, Solr Docker 컨테이너를 시작하여 이 작업을 실행합니다.
VM에 SSH로 연결하고 Docker를 설치합니다.
sudo apt-get update
sudo apt-get install -y ca-certificates curl gnupg
sudo install -m 0755 -d /etc/apt/keyrings
curl -fsSL https://download.docker.com/linux/debian/gpg | sudo gpg --dearmor -o /etc/apt/keyrings/docker.gpg
sudo chmod a+r /etc/apt/keyrings/docker.gpg

echo \
  "deb [arch="$(dpkg --print-architecture)" signed-by=/etc/apt/keyrings/docker.gpg] https://download.docker.com/linux/debian \
  "$(. /etc/os-release && echo "$VERSION_CODENAME")" stable" | \
  sudo tee /etc/apt/sources.list.d/docker.list > /dev/null
sudo apt-get update
sudo apt-get install -y docker-ce docker-ce-cli containerd.io docker-buildx-plugin docker-compose-plugin
이제 사용자가 실행할 Docker 명령어를 수정할 수 있습니다.
sudo usermod -aG docker $USER
newgrp docker
이제 사용자 이름 solr 및 비밀번호 SolrRocks로 기본 인증을 사용 설정하는 security.json 파일을 만듭니다.
nano security.json
파일에 다음 JSON을 붙여넣습니다.
{
  "authentication": {
    "blockUnknown": true,
    "class": "solr.BasicAuthPlugin",
    "credentials": {
      "solr": "IV0EHq1OnNrj6gvRCwvFwTrZ1+z1oBbnQdiVC3otuq0= Ndd7LKvVBAaZIF0QAVi1ekCfAJXr1GGfLtRUXhgrF8c="
    }
  },
  "authorization": {
    "class": "solr.RuleBasedAuthorizationPlugin",
    "permissions": [
      { "name": "security-edit", "role": "admin" }
    ],
    "user-role": { "solr": "admin" }
  }
}
nano를 저장하고 종료합니다 (Ctrl + O, Enter, Ctrl + X).
docker run를 사용하여 Solr Docker 컨테이너를 시작하고 security.json 파일을 컨테이너에 마운트합니다.
docker run -d -p 8983:8983 --name solr --user root -v "$(pwd)/security.json:/var/solr/data/security.json" solr:9 -c -force
컨테이너가 실행 중인지 확인합니다.
docker ps
예상 출력:
student@instance-1:~$ docker ps
CONTAINER ID   IMAGE     COMMAND                  CREATED         STATUS         PORTS                                         NAMES
90db3c73835e   solr:9    "docker-entrypoint.s..."   7 seconds ago   Up 3 seconds   0.0.0.0:8983->8983/tcp, [::]:8983->8983/tcp   solr
Solr가 초기화될 때까지 몇 초간 기다린 다음 기본 인증 사용자 인증 정보로 Solr API를 호출하여 solrindexdemo이라는 새 컬렉션을 만듭니다.
curl --user solr:SolrRocks -X POST "http://localhost:8983/solr/admin/collections?action=CREATE&name=solrindexdemo&numShards=1&replicationFactor=1"
예상 출력:
student@instance-1:~$ curl --user solr:SolrRocks -X POST "http://localhost:8983/solr/admin/collections?action=CREATE&name=solrindexdemo&numShards=1&replicationFactor=1"
{
  "responseHeader":{
    "status":0,
    "QTime":3586
  },
  "success":{
    "172.17.0.2:8983_solr":{
      "responseHeader":{
        "status":0,
        "QTime":2405
      },
      "core":"solrindexdemo_shard1_replica_n1"
    }
  },
  "warning":"Using _default configset. Data driven schema functionality is enabled by default, which is NOT RECOMMENDED for production use. To turn it off: curl http://{host:port}/solr/solrindexdemo/config -d '{\"set-user-property\": {\"update.autoCreateFields\":\"false\"}}'"
이제 제품 설명과 이름으로 Solr 인스턴스를 채웁니다. Cloud Storage에서 VM으로 제품 CSV를 복사합니다.
gcloud storage cp gs://cloud-training/gcc/gcc-tech-004/cymbal_products.csv .
이제 CSV를 추출하고 대량 업데이트를 위해 데이터를 JSON 목록으로 포맷하는 Python 스크립트를 만듭니다.
nano convert.py
파일에 다음을 붙여넣습니다.
import csv
import json

# Configuration
input_file = 'cymbal_products.csv'
output_file = 'products.json'

def convert():
    try:
        with open(input_file, mode='r', encoding='utf-8') as f_in, \
             open(output_file, mode='w', encoding='utf-8') as f_out:

            reader = csv.DictReader(f_in)

            products = []
            for row in reader:
                products.append({
                    "id": row['uniq_id'].strip(),
                    "product_name": row['product_name'].strip(),
                    "product_description": row['product_description'].strip()
                })

            json.dump(products, f_out, indent=2)
            print(f"Success: Processed {len(products)} products.")
            print(f"Output saved to: {output_file}")

    except Exception as e:
        print(f"An error occurred: {e}")

if __name__ == "__main__":
    convert()
파일을 저장하고 실행합니다.
python3 convert.py
예상 출력:
admin_gopalbhutada_altostrat_com@instance-1:~$ python3 convert.py
Success: Processed 941 products.
Output saved to: products.json
이제 업데이트 핸들러를 사용하여 JSON 데이터를 Apache Solr에 전송합니다.
curl --user solr:SolrRocks -X POST -H 'Content-Type: application/json' \
  'http://localhost:8983/solr/solrindexdemo/update?commit=true' \
  --data-binary "@products.json"
예상 출력:
admin_gopalbhutada_altostrat_com@instance-1:~$ curl --user solr:SolrRocks -X POST -H 'Content-Type: application/json' \
  'http://localhost:8983/solr/solrindexdemo/update?commit=true' \
  --data-binary "@products.json"
{
  "responseHeader":{
    "rf":1,
    "status":0,
    "QTime":3220
  }
}
이제 Secret Manager에서 Solr 사용자 인증 정보를 저장하는 보안 비밀을 만들어야 합니다. AlloyDB는 기본 인증을 위해 base64로 인코딩된 username:password 값을 사용하여 외부 검색 FDW에 연결되므로 먼저 solr:SolrRocks의 base64로 인코딩된 문자열을 가져옵니다.
echo -n "solr:SolrRocks" | base64
출력:
admin_gopalbhutada_altostrat_com@instance-1:~$ echo -n "solr:SolrRocks" | base64
c29scjpTb2xyUm9ja3M=
이 base64 인코딩된 사용자 인증 정보를 사용하여 Google Secret Manager에서 보안 비밀을 만듭니다. Cloud Shell에서 다음을 실행합니다.
echo -n "c29scjpTb2xyUm9ja3M=" | \
gcloud secrets create solr-credentials \
    --replication-policy="automatic" \
    --data-file=-
10. AlloyDB에서 외부 데이터 래퍼 만들기
Duration 10:00
AlloyDB에서 Apache Solr에 저장된 데이터를 쿼리하려면 Solr용 외부 데이터 래퍼 (FDW)와 외부 테이블을 만들어야 합니다. 이전에는 Secret Manager에 Solr 사용자 인증 정보를 저장했습니다. AlloyDB가 보안 비밀에 액세스하려면 서비스 계정에 필요한 권한을 부여하세요.
Cloud Shell에서 서비스 계정에 solr-credentials 보안 비밀에 대한 액세스 권한을 부여합니다.
gcloud secrets add-iam-policy-binding solr-credentials \
    --member="serviceAccount:service-$(gcloud projects describe $(gcloud config get-value project) --format='value(projectNumber)')@gcp-sa-alloydb.iam.gserviceaccount.com" \
    --role="roles/secretmanager.secretAccessor"
예상 출력:
admin_@cloudshell:~ (my-project-93954-gke)$ gcloud secrets add-iam-policy-binding solr-credentials \
    --member="serviceAccount:service-$(gcloud projects describe $(gcloud config get-value project) --format='value(projectNumber)')@gcp-sa-alloydb.iam.gserviceaccount.com" \
    --role="roles/secretmanager.secretAccessor"
Your active configuration is: [cloudshell-13031]
Updated IAM policy for secret [solr-credentials].
bindings:
- members:
  - serviceAccount:service-350113473377@gcp-sa-alloydb.iam.gserviceaccount.com
  role: roles/secretmanager.secretAccessor
etag: BwZWyKlkx6Q=
version: 1
AlloyDB Studio를 사용하여 데이터베이스에 연결합니다 (또는 psql을 사용하여 VM에서 연결). postgres 사용자로 quickstart_db에 로그인합니다.
FDW 확장 프로그램을 사용 설정합니다.
CREATE EXTENSION IF NOT EXISTS external_search_fdw;
예상 출력:
CREATE EXTENSION
연결 매개변수 가져오기
AlloyDB에서 외부 데이터 서버를 구성하려면 VM의 내부 IP 주소 (Solr가 실행되는 위치)와 비밀 경로가 필요합니다.
VM의 내부 IP를 출력하려면 Cloud Shell에서 다음을 실행합니다.
gcloud compute instances describe instance-1 \
    --zone=us-central1-a \
    --format="value(networkInterfaces[0].networkIP)"
예상 출력:
10.X.X.X
Secret Manager에서 보안 비밀 리소스 경로를 출력하려면 다음을 실행하세요.
gcloud secrets describe solr-credentials --format="value(name)"
예상 출력:
projects/<project_id>/secrets/solr-credentials
Apache Solr에 액세스하려면 외래 데이터 서버를 만드세요. 아래 쿼리에서 /versions/latest를 추가해야 합니다.
CREATE SERVER solr_demo_server
FOREIGN DATA WRAPPER external_search_fdw
OPTIONS(
    server 'http://<VM_INTERNAL_IP_ADDRESS>:8983',
    search_provider 'solr',
    auth_mode 'secret_manager',
    auth_method 'Basic',
    secret_path '<SECRET_PATH>/versions/latest'
);
예상 출력:
CREATE SERVER
다음으로 외부 테이블을 정의합니다. 메타데이터 뒤에 이전에 로드된 데이터와 일치하는 Solr 필드 스키마 정의를 제공합니다. 원격 테이블에서 Solr 컬렉션의 이름을 지정합니다.
CREATE FOREIGN TABLE solrindexdemo (
    metadata external_search_fdw_schema.OpaqueMetadata,
    id TEXT,
    product_name TEXT,
    product_description TEXT
)
SERVER solr_demo_server
OPTIONS(
    remote_table_name 'solrindexdemo'
);
서버의 사용자 매핑을 만듭니다.
CREATE USER MAPPING FOR CURRENT_USER SERVER solr_demo_server;
이제 외부 테이블을 테스트할 수 있습니다.
SELECT id, product_name
FROM solrindexdemo
ORDER BY metadata <@> 'product_description:cherry' DESC
limit 10;
예상 출력:
"id","product_name"
"d536e9e823296a2eba198e52dd23e712","Cherry Tree"
"390cf08feac229e7b752709fd1f943b3","Woven Round Placemat, Set of Twelve, Grass"
"2c9aa7ac98c30abf78dd9c62a68a34e6","48 Scented Wax Melts Wax Cubes: Jelly Belly Jelly Beans Candy Bulk Soy Wax Melts For Candle Warmer, Wax Warmers, Wax Melt Warmers In 8 Pack Set"
11. 하이브리드 검색 사용
Duration 10:00
이제 모든 설정이 완료되었으므로 ai.hybrid_search() 함수를 사용하여 벡터 검색과 전체 텍스트 검색을 결합할 수 있습니다. 하이브리드 검색에 대한 자세한 내용은 문서를 참고하세요. 하이브리드 검색을 사용할 때 기본적으로 쿼리 결과는 상호 순위 융합 알고리즘을 사용하여 여러 쿼리의 순위 결과를 정렬합니다. 먼저 벡터 검색과 하이브리드 검색을 독립적으로 시도하여 차이점을 분석해 보겠습니다.
다음 쿼리는 벡터 검색을 실행하여 체리와 유사한 제품을 찾습니다. 배열은 실행할 검색 목록을 제공합니다. 이 경우 벡터 검색만 사용하지만 나중에 벡터와 FTS를 모두 제공합니다.
SELECT id, score, cymbal_products.product_name, cymbal_products.product_description
FROM ai.hybrid_search(
  ARRAY[
      '{
        "data_type": "vector",
        "table_name": "cymbal_products",
        "key_column": "uniq_id",
        "vec_column": "product_embedding",
        "distance_operator": "public.<=>",
        "limit": 3,
        "query_vector": "ai.embedding(''text-embedding-005'', ''cherry'')::vector"
      }'::JSONB
  ]
) JOIN cymbal_products ON id = cymbal_products.uniq_id;
출력에서 체리 나무가 첫 번째 결과이지만 다음 두 개도 과일 나무입니다. product_description 열에서 벡터 검색을 사용하면 검색 조건과 시맨틱 일치하는 항목을 찾을 수 있기 때문입니다.
"id","score","product_name","product_description"
"d536e9e823296a2eba198e52dd23e712","0.01639344262295082","Cherry Tree","This is a beautiful cherry tree that will produce delicious cherries. It is an deciduous tree that grows to be about 15 feet tall. The leaves are dark green in the summer and turn a beautiful red in the fall. Cherry trees are known for their beauty and their ability to provide shade and privacy. Cherry trees prefer a cool, moist climate and sandy soil. They are best suited for USDA zones 4-9."
"b70c44b1a38c0a2329fa583c9109a80f","0.016129032258064516","Peach Tree","This is a beautiful peach tree that will produce delicious peaches. It is an evergreen tree that grows to be about 20 feet tall. The leaves are dark green in the summer and turn a beautiful yellow in the fall. Peach trees are known for their beauty and their ability to provide shade and privacy. Peach trees prefer a cool, moist climate and sandy soil. They are best suited for USDA zones 2-9."
"23e41a71d63d8bbc9bdfa1d118cfddc5","0.015873015873015872","Apple Tree","This is a beautiful apple tree that will produce delicious apples. It is a deciduous tree that grows to be about 30 feet tall. The leaves are dark green in the summer and turn a beautiful red, orange, and yellow in the fall. Apple trees are known for their strength and durability. They are also a popular choice for shade trees. Apple trees prefer a cool, moist climate and loamy soil. They are best suited for USDA zones 4-8."
Apache Solr FDW를 사용하여 전체 텍스트 검색을 실행하려면 다음 쿼리를 실행합니다.
SELECT id, score, cymbal_products.product_name, cymbal_products.product_description
FROM ai.hybrid_search(
  ARRAY[
      '{
        "limit": 3,
        "data_type": "external_search_fdw",
        "table_name": "solrindexdemo",
        "key_column": "id",
        "query_text_input": "product_description:cherry"
      }'::JSONB
  ]
) JOIN cymbal_products ON id = cymbal_products.uniq_id;
전체 텍스트 검색은 토큰 일치를 사용하므로 제품 설명에 'cherry'라는 단어가 포함된 항목이 결과로 반환됩니다.
"id","score","product_name","product_description"
"d536e9e823296a2eba198e52dd23e712","0.01639344262295082","Cherry Tree","This is a beautiful cherry tree that will produce delicious cherries. It is an deciduous tree that grows to be about 15 feet tall. The leaves are dark green in the summer and turn a beautiful red in the fall. Cherry trees are known for their beauty and their ability to provide shade and privacy. Cherry trees prefer a cool, moist climate and sandy soil. They are best suited for USDA zones 4-9."
"390cf08feac229e7b752709fd1f943b3","0.016129032258064516","Woven Round Placemat, Set of Twelve, Grass","...These placemats are great for special occasions and holidays, but are also perfect to accessorize your everyday place settings.|Measurements. 15-inch round diameter is the perfect size for most table sizes and shapes.|Pop Colors. Choose from 7 pop woven color placemats including: Black, Cherry, Grass, Taupe, Navy, Sun and Graphite."
"2c9aa7ac98c30abf78dd9c62a68a34e6","0.015873015873015872","48 Scented Wax Melts Wax Cubes: Jelly Belly Jelly Beans Candy Bulk Soy Wax Melts For Candle Warmer, Wax Warmers, Wax Melt Warmers In 8 Pack Set","...From These Flavors: Lemon Drop, Mixed Berry Smoothie, Sizzling Cinnamon, Crushed Pineapple, Juicy Pear, Cotton Candy, Toasted Marshmallow, French Vanilla, Watermelon, Red Apple, Very Cherry, Buttered Popcorn..."
이제 시맨틱 검색과 FTS를 결합하여 더 의미 있는 결과를 얻을 수 있습니다. 집보다 더 크게 자랄 수 있고 캘리포니아에서 자라는 나무를 검색한다고 가정해 보겠습니다. 의미론적 의도와 리터럴 일치를 활용하기 위해 쿼리를 분할합니다. 벡터 검색은 정확한 키워드가 없어도 크기 개념을 이해하므로 '집보다 더 크게 자랄 수 있는 나무'와 같은 설명 부분을 처리합니다. 한편, 전체 텍스트 검색은 '캘리포니아'를 엄격한 필터로 처리하여 개념적으로 유사한 항목이 아닌 정확한 지리적 일치 항목을 가져옵니다.
SELECT id, score, cymbal_products.product_name, cymbal_products.product_description
FROM ai.hybrid_search(
  ARRAY[
    '{
        "data_type": "vector",
        "table_name": "cymbal_products",
        "key_column": "uniq_id",
        "vec_column": "product_embedding",
        "distance_operator": "public.<=>",
        "limit": 3,
        "query_vector": "ai.embedding(''text-embedding-005'', ''tree that can grow taller than a house'')::vector"
      }'::JSONB,
      '{
        "limit": 3,
        "data_type": "external_search_fdw",
        "table_name": "solrindexdemo",
        "key_column": "id",
        "query_text_input": "product_description:California"
      }'::JSONB
  ]
) JOIN cymbal_products ON id = cymbal_products.uniq_id;
예상 결과는 다음과 같습니다.
"id","score","product_name","product_description"
"a589fd36a8a20fd9472d2403d6ed692a","0.00819672631147241","California Redwood","This is a beautiful redwood tree that can grow to be over 300 feet tall. It is an evergreen tree that grows in the coastal forests of California. Redwoods are known for their beauty and their strength. They are best suited for USDA zones 7-10."
"ef9432802da24041594c2cf368dfb4d2","0.008064521129029258","Madrone","This is a beautiful madrona tree that can grow to be over 80 feet tall. It is an evergreen tree that grows in the coastal forests of California. Madronas are known for their beauty and their bark. They are best suited for USDA zones 7-10."
"1360d8642bc218e4ea28e9c32b2e1721","0.007936512936504936","California Sycamore","This is a beautiful sycamore tree that can grow to be over 100 feet tall. It is an deciduous tree that grows in the valleys and foothills of California. California sycamores are known for their beauty and their shade. They are best suited for USDA zones 7-10."
12. 환경 정리
실습을 마치면 AlloyDB 인스턴스와 클러스터를 폐기합니다.
AlloyDB 클러스터 및 모든 인스턴스 삭제
AlloyDB 무료 체험판을 사용한 경우 체험 클러스터를 사용하여 다른 실습과 리소스를 테스트할 계획이 있다면 체험 클러스터를 삭제하지 마세요. 동일한 프로젝트에서 다른 체험 클러스터를 만들 수 없습니다.
클러스터는 옵션 강제로 폐기되며, 클러스터에 속한 모든 인스턴스도 삭제됩니다.
연결이 끊어지고 이전 설정이 모두 손실된 경우 Cloud Shell에서 프로젝트와 환경 변수를 정의합니다.
gcloud config set project <your project id>
export REGION=us-central1
export ADBCLUSTER=alloydb-hybrid-search
export PROJECT_ID=$(gcloud config get-value project)
다음과 같이 클러스터를 삭제합니다.
gcloud alloydb clusters delete $ADBCLUSTER --region=$REGION --force
예상되는 콘솔 출력:
admin_@cloudshell:~ (my-project-93954-gke)$ gcloud alloydb clusters delete $ADBCLUSTER --region=$REGION --force
All of the cluster data will be lost when the cluster is deleted.

Do you want to continue (Y/n)?  Y

Operation ID: operation-1784270790060-656c8ea9fea06-1b93001f-846543e0
Deleting cluster...done.
AlloyDB 백업 삭제
클러스터의 모든 AlloyDB 백업을 삭제합니다.
for i in $(gcloud alloydb backups list --filter="CLUSTER_NAME: projects/$PROJECT_ID/locations/$REGION/clusters/$ADBCLUSTER" --format="value(name)" --sort-by=~createTime) ; do gcloud alloydb backups delete $(basename $i) --region $REGION --quiet; done
예상되는 콘솔 출력:
admin_@cloudshell:~ (my-project-93954-gke)$ for i in $(gcloud alloydb backups list --filter="CLUSTER_NAME: projects/$PROJECT_ID/locations/$REGION/clusters/$ADBCLUSTER" --format="value(name)" --sort-by=~createTime) ; do gcloud alloydb backups delete $(basename $i) --region $REGION --quiet; done
Operation ID: operation-1784271231983-656c904f71e05-1389a145-f101ceee
Deleting backup...done.
이제 VM을 폐기할 수 있습니다.
GCE VM 삭제
Cloud Shell에서 다음을 실행합니다.
export GCEVM=instance-1
export ZONE=us-central1-a
gcloud compute instances delete $GCEVM \
    --zone=$ZONE \
    --quiet
예상되는 콘솔 출력:
admin_@cloudshell:~ (my-project-93954-gke)$ export GCEVM=instance-1
export ZONE=us-central1-a
gcloud compute instances delete $GCEVM \
    --zone=$ZONE \
    --quiet
Deleted
13. 축하합니다
축하합니다. Codelab을 완료했습니다.
학습한 내용
- AlloyDB 클러스터 및 기본 인스턴스를 배포하는 방법
- Google Compute Engine VM에서 AlloyDB에 연결하는 방법
- 데이터베이스를 만들고 AlloyDB AI를 사용 설정하는 방법
- 데이터베이스에 데이터를 로드하는 방법
- AlloyDB Studio 사용 방법
- Vertex AI로 임베딩 생성
- 벡터 검색을 강화하기 위해 ScaNN 벡터 색인을 만드는 방법
- Apache Solr용 외부 데이터 래퍼 (FDW)를 만드는 방법
- AlloyDB의 시맨틱 검색과 Solr의 전체 텍스트 검색을 결합하여 하이브리드 검색을 실행합니다.
다음 단계
공식 Codelab 사이트에서 PostgreSQL용 AlloyDB Codelab을 자세히 살펴볼 수 있습니다.