

1. 簡介
在本程式碼研究室中,您將瞭解如何使用 pgvector 和可擴充的最鄰近項目 (ScaNN) 索引,在 AlloyDB 中執行混合搜尋,並透過外部資料包裝函式 (FDW),結合 Apache Solr 的全文搜尋功能。本實驗室是 AlloyDB AI 功能專屬實驗室系列的一部分。詳情請參閱說明文件中的 AlloyDB AI 頁面。
Apache Solr 是以 Apache Lucene 為基礎的開放原始碼企業搜尋平台,可提供快速、可擴充且高可用性的全文搜尋功能。透過外部資料包裝函式 (FDW) 將 Solr 與 AlloyDB 整合後,使用者就能直接從 PostgreSQL 查詢 Solr 索引,以及結構化資料庫表格。詳情請參閱 Apache Solr 說明文件。
必要條件
- 對 Google Cloud 控制台有基本瞭解
- 指令列介面和 Google Shell 的基本技能
課程內容
- 如何部署 AlloyDB 叢集和主要執行個體
- 如何從 Google Compute Engine VM 連線至 AlloyDB
- 如何建立資料庫並啟用 AlloyDB AI
- 如何將資料載入資料庫
- 如何使用 AlloyDB Studio
- 使用 Vertex AI 生成嵌入
- 如何建立 ScaNN 向量索引,提升向量搜尋效果
- 如何為 Apache Solr 建立外部資料包裝函式 (FDW)
- 結合 AlloyDB 的語意搜尋和 Solr 的全文搜尋,執行混合型搜尋。
軟硬體需求
- Google Cloud 帳戶和 Google Cloud 專案
- 網路瀏覽器,例如 Chrome
2. 設定和需求條件
專案設定
登入 Google Cloud 控制台。如果沒有 Gmail 或 Google Workspace 帳戶,請先建立帳戶。
請改用個人帳戶,而非公司或學校帳戶。
- 在 Google Cloud 控制台的專案選取器頁面中,選取或建立 Google Cloud 專案。
- 確認 Cloud 專案已啟用計費功能。瞭解如何檢查專案是否已啟用計費功能。
啟用計費功能
如要啟用計費功能,有兩種方法。你可以使用個人帳單帳戶,也可以按照下列步驟兌換抵免額。
設定個人帳單帳戶
如果使用 Google Cloud 抵免額設定計費,則可略過此步驟。
如要設定個人帳單帳戶,請前往這裡在 Cloud 控制台中啟用帳單。
注意事項:
- 完成本實驗室的雲端資源費用應不到 $3 美元。
- 您可以按照本實驗室結尾的步驟刪除資源,以免產生後續費用。
- 新使用者可獲得價值 $300 美元的免費試用期。
啟動 Cloud Shell
雖然可以透過筆電遠端操作 Google Cloud,但在本程式碼研究室中,您將使用 Google Cloud Shell,這是可在雲端執行的指令列環境。
Cloud Shell 是在 Google Cloud 中運作的指令列環境,已預先載入必要工具。
- 按一下 Google Cloud 控制台頂端的「啟用 Cloud Shell」。
- 連至 Cloud Shell 後,請驗證您的驗證:
gcloud auth list - 確認專案已設定完成:
gcloud config get project - 如果專案未如預期設定,請設定專案:
export PROJECT_ID=<YOUR_PROJECT_ID>
gcloud config set project $PROJECT_ID
這部虛擬機器搭載各種您需要的開發工具,並提供永久的 5GB 主目錄,而且可在 Google Cloud 運作,大幅提升網路效能並強化驗證功能。您可以在瀏覽器中完成本程式碼研究室的所有作業。您不需要安裝任何軟體。
3. 事前準備
啟用 API
輸出內容:
如要使用 AlloyDB、Compute Engine、Networking 服務和 Vertex AI,您需要在 Google Cloud 雲端專案中啟用各自的 API。
啟用 API
在終端機的 Cloud Shell 中,確認專案 ID 已設定完畢:
gcloud config set project [YOUR-PROJECT-ID]
設定環境變數 PROJECT_ID:
PROJECT_ID=$(gcloud config get-value project)
啟用所有必要的 API:
gcloud services enable alloydb.googleapis.com \
                       compute.googleapis.com \
                       cloudresourcemanager.googleapis.com \
                       servicenetworking.googleapis.com \
                       aiplatform.googleapis.com \
                       secretmanager.googleapis.com
預期的輸出內容:
student@cloudshell:~ (alloydb-hybrid-search)$ gcloud config set project alloydb-hybrid-search
[environment: untagged] Read more to tag: g.co/cloud/project-env-tag.
Updated property [core/project].
student@cloudshell:~ (alloydb-hybrid-search)$ PROJECT_ID=$(gcloud config get-value project)
Your active configuration is: [cloudshell-32544]
student@cloudshell:~ (alloydb-hybrid-search)$ gcloud services enable alloydb.googleapis.com \
                       compute.googleapis.com \
                       cloudresourcemanager.googleapis.com \
                       servicenetworking.googleapis.com \
                       aiplatform.googleapis.com \
                       secretmanager.googleapis.com
Operation "operations/acat.p2-350113473377-5ffc2f22-caa9-4857-b2f4-018657d8bf6e" finished successfully.
API 簡介
- AlloyDB API (
alloydb.googleapis.com) 可讓您建立、管理及擴充 AlloyDB for PostgreSQL 叢集。這項服務提供與 PostgreSQL 相容的全代管資料庫服務,專為要求嚴苛的企業交易和分析工作負載而設計。 - Compute Engine API (
compute.googleapis.com) 可讓您建立及管理虛擬機器 (VM)、永久磁碟和網路設定。這個服務提供執行工作負載所需的基礎架構即服務 (IaaS) 基礎,以及許多代管服務的基礎架構。 - Cloud Resource Manager API (
cloudresourcemanager.googleapis.com) 可讓您以程式輔助方式管理 Google Cloud 雲端專案的中繼資料和設定。您可以在專案階層中整理資源、處理 Identity and Access Management (IAM) 政策,以及驗證權限。 - Service Networking API (
servicenetworking.googleapis.com) 可讓您自動設定虛擬私有雲 (VPC) 網路與 Google 管理服務之間的私密連線。您必須啟用這項功能,才能為 AlloyDB 等服務建立私人 IP 存取權,確保服務能與其他資源安全通訊。 - Vertex AI API (
aiplatform.googleapis.com) 可讓應用程式建構、部署及擴充機器學習模型。這個平台提供統一的介面,方便您使用所有 Google Cloud AI 服務,包括存取生成式 AI 模型 (如 Gemini) 和模型訓練。 - Secret Manager API (
secretmanager.googleapis.com) 是一項密鑰和憑證管理服務,可讓您儲存及管理 API 金鑰、使用者名稱、密碼、憑證等機密資料。
您也可以選擇設定預設區域,使用 Vertex AI 嵌入模型。進一步瞭解 Vertex AI 支援的地區。本範例使用 us-central1 區域。
gcloud config set compute/region us-central1
4. 部署 AlloyDB
建立 AlloyDB 叢集前,我們需要虛擬私有雲中可用的私人 IP 範圍,供日後的 AlloyDB 執行個體使用。如果沒有,我們需要建立該帳戶,並指派給內部 Google 服務使用,之後才能建立叢集和執行個體。
建立私人 IP 範圍
我們需要在虛擬私有雲中為 AlloyDB 設定私人服務存取權。這裡的假設是專案中有「預設」虛擬私有雲網路,且所有動作都會使用這個網路。
建立私人 IP 範圍:
gcloud compute addresses create psa-range \
    --global \
    --purpose=VPC_PEERING \
    --prefix-length=24 \
    --description="VPC private service access" \
    --network=default
使用分配的 IP 範圍建立私人連線:
gcloud services vpc-peerings connect \
    --service=servicenetworking.googleapis.com \
    --ranges=psa-range \
    --network=default
連線後,請更新對等互連連線,匯出自訂路徑:
gcloud compute networks peerings update servicenetworking-googleapis-com \
    --network=default \
    --export-custom-routes
預期的控制台輸出內容:
student@cloudshell:~ (alloydb-hybrid-search)$ gcloud compute addresses create psa-range \
    --global \
    --purpose=VPC_PEERING \
    --prefix-length=24 \
    --description="VPC private service access" \
    --network=default
Created [https://www.googleapis.com/compute/v1/projects/alloydb-hybrid-search/global/addresses/psa-range].

student@cloudshell:~ (alloydb-hybrid-search)$ gcloud services vpc-peerings connect \
    --service=servicenetworking.googleapis.com \
    --ranges=psa-range \
    --network=default
Operation "operations/pssn.p24-350113473377-fadad49e-7e14-472a-8888-26951e40a1f7" finished successfully.

student@cloudshell:~ (alloydb-hybrid-search)$ gcloud compute networks peerings update servicenetworking-googleapis-com \
    --network=default \
    --export-custom-routes
Updated [https://www.googleapis.com/compute/v1/projects/alloydb-hybrid-search/global/networks/default].
建立 AlloyDB 叢集
在本節中,我們將在 us-central1 區域建立 AlloyDB 叢集。
定義 postgres 使用者的密碼。您可以自行定義密碼,也可以使用隨機函式產生密碼
export PGPASSWORD=`openssl rand -hex 12`
預期的控制台輸出內容:
student@cloudshell:~ (alloydb-hybrid-search)$ export PGPASSWORD=`openssl rand -hex 12`
請記下 PostgreSQL 密碼,以供日後使用。
echo $PGPASSWORD
日後以 postgres 使用者身分連線至執行個體時,需要使用該密碼。建議您將密碼複製到安全的位置 (例如密碼管理工具)。
預期的控制台輸出內容:
student@cloudshell:~ (alloydb-hybrid-search)$ echo $PGPASSWORD
<generated password>
建立 AlloyDB 叢集
定義區域和 AlloyDB 叢集名稱。我們將使用 us-central1 區域,並以 alloydb-hybrid-search 做為叢集名稱:
export REGION=us-central1
export ADBCLUSTER=alloydb-hybrid-search
執行指令來建立叢集:
gcloud alloydb clusters create $ADBCLUSTER \
    --password=$PGPASSWORD \
    --network=default \
    --region=$REGION \
    --database-version=POSTGRES_17
預期的控制台輸出內容:
student@cloudshell:~ (alloydb-hybrid-search)$ export REGION=us-central1
export ADBCLUSTER=alloydb-hybrid-search
student@cloudshell:~ (alloydb-hybrid-search)$ gcloud alloydb clusters create $ADBCLUSTER \
    --password=$PGPASSWORD \
    --network=default \
    --region=$REGION \
    --database-version=POSTGRES_17
Creating cluster...done.
在同一個 Cloud Shell 工作階段中,為叢集建立 AlloyDB 主要執行個體。如果連線中斷,您需要再次定義區域和叢集名稱環境變數。
gcloud alloydb instances create $ADBCLUSTER-pr \
    --instance-type=PRIMARY \
    --cpu-count=2 \
    --region=$REGION \
    --cluster=$ADBCLUSTER
預期的控制台輸出內容:
admin_@cloudshell:~ (my-project-93954-gke)$ gcloud alloydb instances create $ADBCLUSTER-pr \
    --instance-type=PRIMARY \
    --cpu-count=2 \
    --region=$REGION \
    --availability-type ZONAL \
    --cluster=$ADBCLUSTER
Operation ID: operation-1784244706986-656c2d7f3c8f2-59a9e52a-1e7b1b01
Creating instance...done.
5. 連線至 AlloyDB
AlloyDB 是透過僅限私人的連線部署,因此我們需要安裝 PostgreSQL 用戶端的虛擬機器,才能使用資料庫。我們也會使用這個 VM 執行 Apache Solr 執行個體。
部署 GCE VM
在與 AlloyDB 叢集相同的區域和 VPC 中建立 GCE VM,並確保開機磁碟夠大,可執行 Solr。這裡我們在 --create-disk 旗標中指定 20 GB 的開機磁碟。
在 Cloud Shell 中執行下列指令:
export ZONE=us-central1-a
gcloud compute instances create instance-1 \
    --zone=$ZONE \
    --create-disk=auto-delete=yes,boot=yes,size=20,image=projects/debian-cloud/global/images/$(gcloud compute images list --filter="family=debian-12 AND family!=debian-12-arm64" --format="value(name)") \
    --scopes=https://www.googleapis.com/auth/cloud-platform
預期的控制台輸出內容:
student@cloudshell:~ (alloydb-hybrid-search)$ export ZONE=us-central1-a
gcloud compute instances create instance-1 \
    --zone=$ZONE \
    --network=default \
    --create-disk=auto-delete=yes,boot=yes,image=projects/debian-cloud/global/images/$(gcloud compute images list --filter="family=debian-12 AND family!=debian-12-arm64" --format="value(name)") \
    --scopes=https://www.googleapis.com/auth/cloud-platform

Created [https://www.googleapis.com/compute/v1/projects/test-project-402417/zones/us-central1-a/instances/instance-1].
NAME: instance-1
ZONE: us-central1-a
MACHINE_TYPE: n1-standard-1
PREEMPTIBLE:
INTERNAL_IP: X.X.X.X
EXTERNAL_IP: X.X.X.X
STATUS: RUNNING
安裝 Postgres 用戶端
在已部署的 VM 上安裝 PostgreSQL 用戶端軟體
連線至 VM:
gcloud compute ssh instance-1 --zone=us-central1-a
預期的控制台輸出內容:
admin_@cloudshell:~ (my-project-93954-gke)$ gcloud compute ssh instance-1 --zone=us-central1-a
Updating project ssh metadata...working..Updated [https://www.googleapis.com/compute/v1/projects/alloydb-hybrid-search].
Updating project ssh metadata...done.
Waiting for SSH key to propagate.
Warning: Permanently added 'compute.5110295539541121102' (ECDSA) to the list of known hosts.
Linux instance-1.us-central1-a.c.gleb-test-short-001-418811.internal 6.1.0-18-cloud-amd64 #1 SMP PREEMPT_DYNAMIC Debian 6.1.76-1 (2024-02-01) x86_64

The programs included with the Debian GNU/Linux system are free software;
the exact distribution terms for each program are described in the
individual files in /usr/share/doc/*/copyright.

Debian GNU/Linux comes with ABSOLUTELY NO WARRANTY, to the extent
permitted by applicable law.
在 VM 內執行下列指令,安裝軟體:
sudo apt-get update
sudo apt-get install --yes postgresql-client
預期的控制台輸出內容:
student@instance-1:~$ sudo apt-get update
sudo apt-get install --yes postgresql-client
Get:1 https://packages.cloud.google.com/apt google-compute-engine-bullseye-stable InRelease [5146 B]
Get:2 https://packages.cloud.google.com/apt cloud-sdk-bullseye InRelease [6406 B]
Hit:3 https://deb.debian.org/debian bullseye InRelease
Get:4 https://deb.debian.org/debian-security bullseye-security InRelease [48.4 kB]
Get:5 https://packages.cloud.google.com/apt google-compute-engine-bullseye-stable/main amd64 Packages [1930 B]
Get:6 https://deb.debian.org/debian bullseye-updates InRelease [44.1 kB]
Get:7 https://deb.debian.org/debian bullseye-backports InRelease [49.0 kB]
...redacted...
Setting up postgresql-client (15+248+deb12u1) ...
Processing triggers for man-db (2.11.2-2) ...
Processing triggers for libc-bin (2.36-9+deb12u14) ...
連線至執行個體
使用 psql 從 VM 連線至主要執行個體。
在同一個 Cloud Shell 分頁中,開啟連往 instance-1 VM 的 SSH 工作階段。
使用記下的 AlloyDB 密碼 (PGPASSWORD) 值和 AlloyDB 叢集 ID,從 GCE VM 連線至 AlloyDB:
export PGPASSWORD=<Noted password>
export PROJECT_ID=$(gcloud config get-value project)
export REGION=us-central1
export ADBCLUSTER=alloydb-hybrid-search
export INSTANCE_IP=$(gcloud alloydb instances describe $ADBCLUSTER-pr --cluster=$ADBCLUSTER --region=$REGION --format="value(ipAddress)")
psql "host=$INSTANCE_IP user=postgres sslmode=require"
預期的控制台輸出內容:
student@instance-1:~$ export PROJECT_ID=$(gcloud config get-value project)
export REGION=us-central1
export ADBCLUSTER=alloydb-hybrid-search
export INSTANCE_IP=$(gcloud alloydb instances describe $ADBCLUSTER-pr --cluster=$ADBCLUSTER --region=$REGION --format="value(ipAddress)")
psql "host=$INSTANCE_IP user=postgres sslmode=require"
psql (15.18 (Debian 15.18-0+deb12u1), server 17.9)
WARNING: psql major version 15, server major version 17.
         Some psql features might not work.
SSL connection (protocol: TLSv1.3, cipher: TLS_AES_256_GCM_SHA384, compression: off)
Type "help" for help.

postgres=>
關閉 psql 工作階段:
exit
6. 準備資料庫
我們需要建立資料庫、啟用 Vertex AI 整合功能、建立資料庫物件,以及匯入資料。
授予 AlloyDB 必要權限
為 AlloyDB 服務代理新增 Vertex AI 權限。
使用頂端的「+」符號開啟另一個 Cloud Shell 分頁。
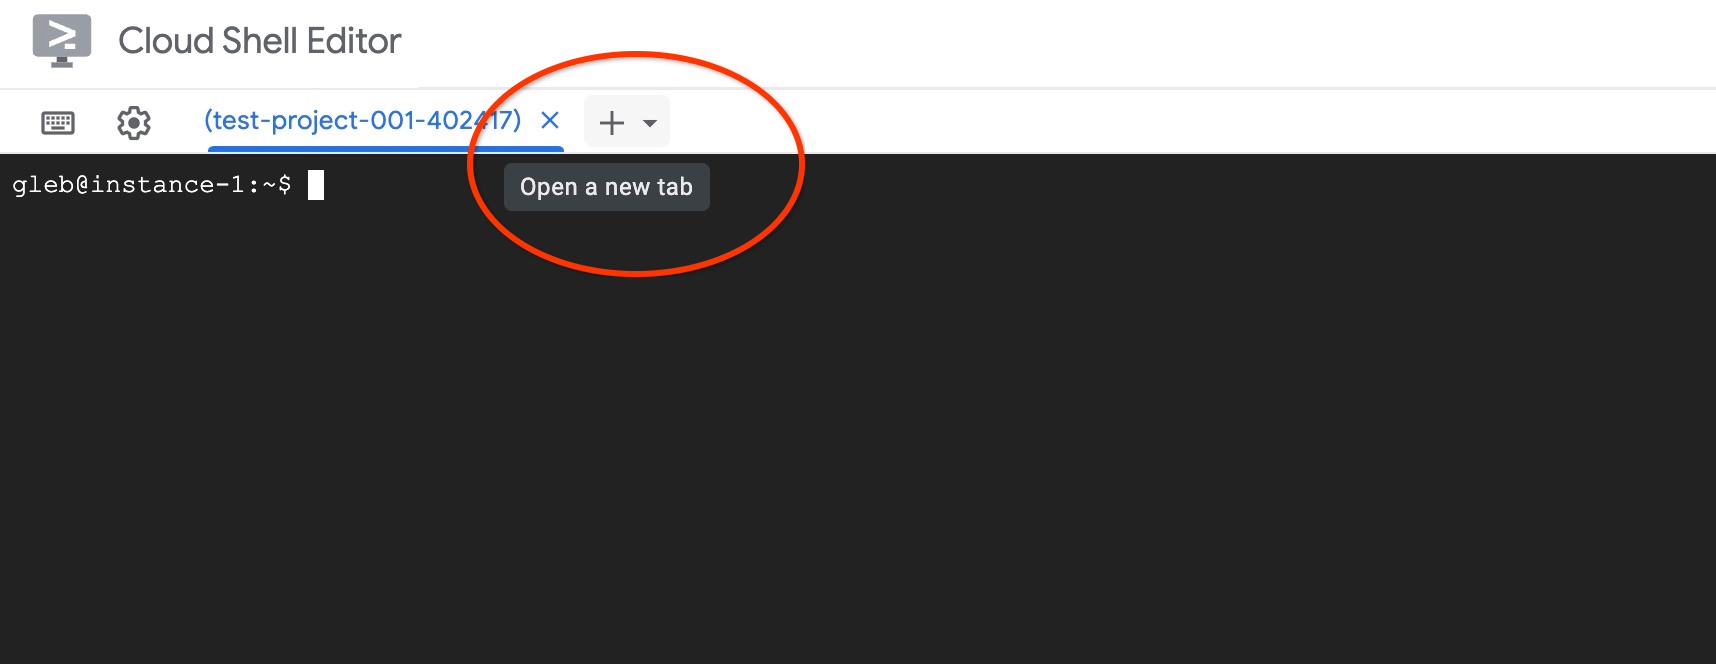
在新開啟的 Cloud Shell 分頁中執行下列指令:
PROJECT_ID=$(gcloud config get-value project)
gcloud projects add-iam-policy-binding $PROJECT_ID \
  --member="serviceAccount:service-$(gcloud projects describe $PROJECT_ID --format="value(projectNumber)")@gcp-sa-alloydb.iam.gserviceaccount.com" \
  --role="roles/aiplatform.user"
預期的控制台輸出內容:
admin_@cloudshell:~ (my-project-93954-gke)$ PROJECT_ID=$(gcloud config get-value project)
gcloud projects add-iam-policy-binding $PROJECT_ID \
  --member="serviceAccount:service-$(gcloud projects describe $PROJECT_ID --format="value(projectNumber)")@gcp-sa-alloydb.iam.gserviceaccount.com" \
  --role="roles/aiplatform.user"
Your active configuration is: [cloudshell-30137]

Updated IAM policy for project [my-project-93954-gke].
bindings:
- members:
<redacted>
version: 1
按一下「X」或執行下列指令,即可關閉分頁:
exit
建立資料庫
建立名為 quickstart 的資料庫。
在 GCE VM 工作階段中執行下列指令:
建立資料庫:
psql "host=$INSTANCE_IP user=postgres" -c "CREATE DATABASE quickstart_db"
預期的控制台輸出內容:
student@instance-1:~$ psql "host=$INSTANCE_IP user=postgres" -c "CREATE DATABASE quickstart_db"
CREATE DATABASE
啟用 Vertex AI 整合功能
在資料庫中啟用 Vertex AI 整合功能和 pgvector 擴充功能。
在 GCE VM 中執行下列指令:
psql "host=$INSTANCE_IP user=postgres dbname=quickstart_db" -c "CREATE EXTENSION IF NOT EXISTS google_ml_integration CASCADE"
psql "host=$INSTANCE_IP user=postgres dbname=quickstart_db" -c "CREATE EXTENSION IF NOT EXISTS vector"
預期的控制台輸出內容:
student@instance-1:~$ psql "host=$INSTANCE_IP user=postgres dbname=quickstart_db" -c "CREATE EXTENSION IF NOT EXISTS google_ml_integration CASCADE"
psql "host=$INSTANCE_IP user=postgres dbname=quickstart_db" -c "CREATE EXTENSION IF NOT EXISTS vector"
NOTICE:  extension "google_ml_integration" already exists, skipping
CREATE EXTENSION
CREATE EXTENSION
匯入資料
下載準備好的資料,然後匯入新資料庫。
在 GCE VM 中執行下列指令:
gcloud storage cat gs://cloud-training/gcc/gcc-tech-004/cymbal_demo_schema.sql |psql "host=$INSTANCE_IP user=postgres dbname=quickstart_db"
gcloud storage cat gs://cloud-training/gcc/gcc-tech-004/cymbal_products.csv |psql "host=$INSTANCE_IP user=postgres dbname=quickstart_db" -c "\copy cymbal_products from stdin csv header"
gcloud storage cat gs://cloud-training/gcc/gcc-tech-004/cymbal_inventory.csv |psql "host=$INSTANCE_IP user=postgres dbname=quickstart_db" -c "\copy cymbal_inventory from stdin csv header"
gcloud storage cat gs://cloud-training/gcc/gcc-tech-004/cymbal_stores.csv |psql "host=$INSTANCE_IP user=postgres dbname=quickstart_db" -c "\copy cymbal_stores from stdin csv header"
預期的控制台輸出內容:
student@instance-1:~$ gcloud storage cat gs://cloud-training/gcc/gcc-tech-004/cymbal_demo_schema.sql |psql "host=$INSTANCE_IP user=postgres dbname=quickstart_db"
gcloud storage cat gs://cloud-training/gcc/gcc-tech-004/cymbal_products.csv |psql "host=$INSTANCE_IP user=postgres dbname=quickstart_db" -c "\copy cymbal_products from stdin csv header"
gcloud storage cat gs://cloud-training/gcc/gcc-tech-004/cymbal_inventory.csv |psql "host=$INSTANCE_IP user=postgres dbname=quickstart_db" -c "\copy cymbal_inventory from stdin csv header"
gcloud storage cat gs://cloud-training/gcc/gcc-tech-004/cymbal_stores.csv |psql "host=$INSTANCE_IP user=postgres dbname=quickstart_db" -c "\copy cymbal_stores from stdin csv header"
SET
SET
SET
SET
SET
 set_config
------------

(1 row)

SET
SET
SET
SET
SET
SET
CREATE TABLE
ALTER TABLE
CREATE TABLE
ALTER TABLE
CREATE TABLE
ALTER TABLE
CREATE TABLE
ALTER TABLE
CREATE SEQUENCE
ALTER TABLE
ALTER SEQUENCE
ALTER TABLE
ALTER TABLE
ALTER TABLE
COPY 941
COPY 263861
COPY 4654
接著,請設定必要的資料庫標記。您可以使用網頁控制台,在主要執行個體中管理旗標,也可以使用 gcloud 指令,如下所示:
export PROJECT_ID=$(gcloud config get-value project)
export REGION=us-central1
export ADBCLUSTER=alloydb-hybrid-search
gcloud beta alloydb instances update $ADBCLUSTER-pr \
   --database-flags google_ml_integration.enable_faster_embedding_generation=on,scann.enable_preview_features=on,google_ml_integration.enable_preview_ai_functions=on,google_ml_integration.enable_ai_query_engine=on \
   --region=$REGION \
   --cluster=$ADBCLUSTER \
   --project=$PROJECT_ID \
   --update-mode=FORCE_APPLY
預期的控制台輸出內容
student@cloudshell:~ (alloydb-hybrid-search)$ export PROJECT_ID=$(gcloud config get-value project)
export REGION=us-central1
export ADBCLUSTER=alloydb-hybrid-search
gcloud beta alloydb instances update $ADBCLUSTER-pr \
   --database-flags google_ml_integration.enable_faster_embedding_generation=on,scann.enable_preview_features=on,google_ml_integration.enable_preview_ai_functions=on,google_ml_integration.enable_ai_query_engine=on \
   --region=$REGION \
   --cluster=$ADBCLUSTER \
   --project=$PROJECT_ID \
   --update-mode=FORCE_APPLY
Your active configuration is: [cloudshell-30137]
Operation ID: operation-1784245853151-656c31c44e12b-6084eb8b-d6611419
啟用資料庫旗標需要重新啟動執行個體,這項作業需要幾分鐘的時間。完成後,AlloyDB 執行個體狀態會顯示「就緒」。
7. 生成向量嵌入
匯入資料後,我們會有以下資料表:cymbal_products 儲存產品資訊、cymbal_inventory 追蹤各商店的商品庫存,以及 cymbal_stores 商店清單。如要對產品執行語意搜尋,我們需要使用 initialize_embeddings 函式生成產品說明的向量嵌入。我們會使用 Vertex AI 整合功能,根據產品說明計算向量資料,並將資料新增至表格。如要進一步瞭解使用的技術,請參閱說明文件。
如要使用整合功能,請透過 AlloyDB Studio 連線至資料庫,或使用 VM 的 psql,並透過 AlloyDB 執行個體 IP 和 postgres 密碼連線:
psql "host=$INSTANCE_IP user=postgres dbname=quickstart_db"
確認 google_ml_integration 擴充功能版本。
SELECT extversion FROM pg_extension WHERE extname = 'google_ml_integration';
版本必須為 1.5.2 以上。以下是輸出內容範例:
quickstart_db=> SELECT extversion FROM pg_extension WHERE extname = 'google_ml_integration';
 extversion
------------
 1.5.9
(1 row)
預設版本應為 1.5.2 以上,但如果執行個體顯示較舊的版本,可能需要更新。檢查執行個體是否已停用維護作業。
安裝向量擴充功能,並建立新資料欄,在 cymbal_products 中儲存嵌入內容
CREATE EXTENSION IF NOT EXISTS vector;
ALTER TABLE cymbal_products ADD COLUMN product_embedding vector(768);
預期的控制台輸出內容:
quickstart_db=> CREATE EXTENSION IF NOT EXISTS vector;
ALTER TABLE cymbal_products ADD COLUMN product_embedding vector(768);
NOTICE:  extension "vector" already exists, skipping
CREATE EXTENSION
ALTER TABLE
我們會使用批次嵌入生成功能來提高效率。如要進一步瞭解不同的嵌入生成選項和技術,請參閱指南。我們先前已啟用 google_ml_integration.enable_faster_embedding_generation 標記,可批次生成嵌入。
最後,我們也希望在函式呼叫中加入 incremental_refresh_mode 引數,以便在資料欄值變更時重新整理嵌入。這會增加資料庫的負擔,但為了自動讓嵌入項目與內容保持同步,我們必須做出取捨。如要手動更新嵌入內容,請參閱說明文件中的操作說明。
現在將所有內容放在一起並產生嵌入,我們使用 initialize_embeddings 函式,並傳遞 50 做為批次提示,以及將 incremental_refresh_mode 設為 transactionalbatch_size
CALL ai.initialize_embeddings(
    model_id => 'text-embedding-005',
    table_name => 'cymbal_products',
    content_column => 'product_description',
    embedding_column => 'product_embedding',
    batch_size => 50,
    incremental_refresh_mode => 'transactional'
);
現在,如果我們在資料表中插入 product_embedding 資料欄的 NULL 值,
INSERT INTO "cymbal_products" ("uniq_id", "crawl_timestamp", "product_url", "product_name", "product_description", "list_price", "sale_price", "brand", "item_number", "gtin", "package_size", "category", "postal_code", "available", "product_embedding") VALUES ('fd604542e04b470f9e6348e640cff794', NOW(), 'https://example.com/new_product', 'New Cymbal Product', 'This is a new cymbal product description.', 199.99, 149.99, 'Example Brand', 'EB123', '1234567890', 'Single', 'Cymbals', '12345', TRUE, NULL);
現在查詢剛插入的資料列時,會發現 product_embedding 欄已自動更新。
SELECT uniq_id, (product_embedding::real[])[1:5] as product_embedding FROM cymbal_products WHERE uniq_id='fd604542e04b470f9e6348e640cff794';
輸出內容應如下所示:
quickstart_db=> SELECT uniq_id,(product_embedding::real[])[1:5] as product_embedding  FROM cymbal_products WHERE uniq_id='fd604542e04b470f9e6348e640cff794';
             uniq_id              |                      product_embedding
----------------------------------+---------------------------------------------------------------
 fd604542e04b470f9e6348e640cff794 | {0.015003494,-0.005349732,-0.059790313,-0.0087091,-0.0271452}
(1 row)
8. 建立向量索引
為提升向量搜尋效能,我們將新增 ScaNN 索引。
建立 ScaNN 索引
如要建構 SCANN 索引,我們需要再啟用一個擴充功能。擴充功能 alloydb_scann 提供介面,可使用 Google 的 ScaNN 演算法處理 ANN 類型的向量索引。
CREATE EXTENSION IF NOT EXISTS alloydb_scann;
預期輸出內容:
quickstart_db=> CREATE EXTENSION IF NOT EXISTS alloydb_scann;
CREATE EXTENSION
索引可以在 MANUAL 或 AUTO 模式下建立。系統預設會啟用 MANUAL 模式,您可以建立及維護索引,就像其他索引一樣。但如果啟用「自動」模式,您就能建立索引,不需要自行維護。如要詳細瞭解所有選項,請參閱說明文件。在本例中,我們沒有足夠的資料列,無法在 AUTO 模式下建立索引,因此我們將以 MANUAL 模式建立索引,並加入微調參數。如要瞭解如何調整索引參數,請參閱說明文件。
CREATE INDEX cymbal_products_embeddings_scann ON cymbal_products
  USING scann (product_embedding cosine)
  WITH (mode='MANUAL', num_leaves=31, max_num_levels = 2);
預期輸出內容:
quickstart_db=> CREATE INDEX cymbal_products_embeddings_scann ON cymbal_products
  USING scann (product_embedding cosine)
  WITH (num_leaves=31, max_num_levels = 2);
CREATE INDEX
quickstart_db=>
檢查索引使用情形
現在我們可以在 EXPLAIN 模式下執行向量搜尋查詢,並驗證是否正在使用索引。
EXPLAIN (analyze)
WITH trees as (
SELECT
        cp.product_name,
        left(cp.product_description,80) as description,
        cp.sale_price,
        cs.zip_code,
        cp.uniq_id as product_id
FROM
        cymbal_products cp
JOIN cymbal_inventory ci on
        ci.uniq_id=cp.uniq_id
JOIN cymbal_stores cs on
        cs.store_id=ci.store_id
        AND ci.inventory>0
        AND cs.store_id = 1583
ORDER BY
        (cp.product_embedding <=> embedding('text-embedding-005','What kind of fruit trees grow well here?')::vector) ASC
LIMIT 1)
SELECT json_agg(trees) FROM trees;
預期輸出內容 (為求明確而經過編輯):
...
Aggregate (cost=16.59..16.60 rows=1 width=32) (actual time=2.875..2.877 rows=1 loops=1)
-> Subquery Scan on trees (cost=8.42..16.59 rows=1 width=142) (actual time=2.860..2.862 rows=1 loops=1)
-> Limit (cost=8.42..16.58 rows=1 width=158) (actual time=2.855..2.856 rows=1 loops=1)
-> Nested Loop (cost=8.42..6489.19 rows=794 width=158) (actual time=2.854..2.855 rows=1 loops=1)
-> Nested Loop (cost=8.13..6466.99 rows=794 width=938) (actual time=2.742..2.743 rows=1 loops=1)
-> Index Scan using cymbal_products_embeddings_scann on cymbal_products cp (cost=7.71..111.99 rows=876 width=934) (actual time=2.724..2.724 rows=1 loops=1)
Order By: (embedding <=> '[0.008864171,0.03693164,-0.024245683,-0.00355923,0.0055611245,0.015985578,...<redacted>...5685,-0.03914233,-0.018452475,0.00826032,-0.07372604]'::vector)
...
從輸出內容中,我們可清楚看出查詢是使用「Index Scan using cymbal_products_embeddings_scann on cymbal_products」。
9. 建立 Solr 執行個體
我們將使用 Apache Solr 進行混合搜尋的全文搜尋 (FTS) 部分。在這個步驟中,您會在先前建立的 VM 中部署獨立的 Solr 執行個體。
為確保 Solr 的存取安全,我們將啟用基本驗證。我們會提供 security.json 設定檔、掛接該檔案,然後啟動 Solr Docker 容器,藉此完成這項作業。
透過 SSH 連線至 VM 並安裝 Docker:
sudo apt-get update
sudo apt-get install -y ca-certificates curl gnupg
sudo install -m 0755 -d /etc/apt/keyrings
curl -fsSL https://download.docker.com/linux/debian/gpg | sudo gpg --dearmor -o /etc/apt/keyrings/docker.gpg
sudo chmod a+r /etc/apt/keyrings/docker.gpg

echo \
  "deb [arch="$(dpkg --print-architecture)" signed-by=/etc/apt/keyrings/docker.gpg] https://download.docker.com/linux/debian \
  "$(. /etc/os-release && echo "$VERSION_CODENAME")" stable" | \
  sudo tee /etc/apt/sources.list.d/docker.list > /dev/null
sudo apt-get update
sudo apt-get install -y docker-ce docker-ce-cli containerd.io docker-buildx-plugin docker-compose-plugin
現在您可以修改要由使用者執行的 Docker 指令:
sudo usermod -aG docker $USER
newgrp docker
現在,請建立 security.json 檔案,以啟用基本驗證,並使用使用者名稱 solr 和密碼 SolrRocks。
nano security.json
在檔案中貼上下列 JSON:
{
  "authentication": {
    "blockUnknown": true,
    "class": "solr.BasicAuthPlugin",
    "credentials": {
      "solr": "IV0EHq1OnNrj6gvRCwvFwTrZ1+z1oBbnQdiVC3otuq0= Ndd7LKvVBAaZIF0QAVi1ekCfAJXr1GGfLtRUXhgrF8c="
    }
  },
  "authorization": {
    "class": "solr.RuleBasedAuthorizationPlugin",
    "permissions": [
      { "name": "security-edit", "role": "admin" }
    ],
    "user-role": { "solr": "admin" }
  }
}
依序按下 Ctrl + O 鍵和 Enter 鍵儲存檔案,然後按下 Ctrl + X 鍵退出 nano 編輯器。
使用 docker run 啟動 Solr Docker 容器,並將 security.json 檔案掛接至容器:
docker run -d -p 8983:8983 --name solr --user root -v "$(pwd)/security.json:/var/solr/data/security.json" solr:9 -c -force
請確認容器是否正在執行:
docker ps
預期輸出內容:
student@instance-1:~$ docker ps
CONTAINER ID   IMAGE     COMMAND                  CREATED         STATUS         PORTS                                         NAMES
90db3c73835e   solr:9    "docker-entrypoint.s..."   7 seconds ago   Up 3 seconds   0.0.0.0:8983->8983/tcp, [::]:8983->8983/tcp   solr
請稍待幾秒,讓 Solr 初始化,然後使用基本驗證憑證點選 Solr API,建立名為 solrindexdemo 的新集合:
curl --user solr:SolrRocks -X POST "http://localhost:8983/solr/admin/collections?action=CREATE&name=solrindexdemo&numShards=1&replicationFactor=1"
預期輸出內容:
student@instance-1:~$ curl --user solr:SolrRocks -X POST "http://localhost:8983/solr/admin/collections?action=CREATE&name=solrindexdemo&numShards=1&replicationFactor=1"
{
  "responseHeader":{
    "status":0,
    "QTime":3586
  },
  "success":{
    "172.17.0.2:8983_solr":{
      "responseHeader":{
        "status":0,
        "QTime":2405
      },
      "core":"solrindexdemo_shard1_replica_n1"
    }
  },
  "warning":"Using _default configset. Data driven schema functionality is enabled by default, which is NOT RECOMMENDED for production use. To turn it off: curl http://{host:port}/solr/solrindexdemo/config -d '{\"set-user-property\": {\"update.autoCreateFields\":\"false\"}}'"
現在,我們要將產品說明和名稱填入 Solr 執行個體。將產品 CSV 從雲端儲存空間複製到 VM。
gcloud storage cp gs://cloud-training/gcc/gcc-tech-004/cymbal_products.csv .
現在請建立 Python 指令碼,擷取 CSV 並將資料格式化為 JSON 清單,以進行大量更新。
nano convert.py
在檔案中貼上下列內容:
import csv
import json

# Configuration
input_file = 'cymbal_products.csv'
output_file = 'products.json'

def convert():
    try:
        with open(input_file, mode='r', encoding='utf-8') as f_in, \
             open(output_file, mode='w', encoding='utf-8') as f_out:

            reader = csv.DictReader(f_in)

            products = []
            for row in reader:
                products.append({
                    "id": row['uniq_id'].strip(),
                    "product_name": row['product_name'].strip(),
                    "product_description": row['product_description'].strip()
                })

            json.dump(products, f_out, indent=2)
            print(f"Success: Processed {len(products)} products.")
            print(f"Output saved to: {output_file}")

    except Exception as e:
        print(f"An error occurred: {e}")

if __name__ == "__main__":
    convert()
儲存檔案並執行:
python3 convert.py
預期輸出內容:
admin_gopalbhutada_altostrat_com@instance-1:~$ python3 convert.py
Success: Processed 941 products.
Output saved to: products.json
現在,請使用更新處理常式將 JSON 資料傳送至 Apache Solr:
curl --user solr:SolrRocks -X POST -H 'Content-Type: application/json' \
  'http://localhost:8983/solr/solrindexdemo/update?commit=true' \
  --data-binary "@products.json"
預期輸出內容:
admin_gopalbhutada_altostrat_com@instance-1:~$ curl --user solr:SolrRocks -X POST -H 'Content-Type: application/json' \
  'http://localhost:8983/solr/solrindexdemo/update?commit=true' \
  --data-binary "@products.json"
{
  "responseHeader":{
    "rf":1,
    "status":0,
    "QTime":3220
  }
}
現在,我們需要在 Secret Manager 中建立密鑰,儲存 Solr 憑證。由於 AlloyDB 會使用 Base64 編碼的 username:password 值,連結至外部搜尋 FDW 以進行基本驗證,因此請先取得 solr:SolrRocks 的 Base64 編碼字串:
echo -n "solr:SolrRocks" | base64
輸出內容:
admin_gopalbhutada_altostrat_com@instance-1:~$ echo -n "solr:SolrRocks" | base64
c29scjpTb2xyUm9ja3M=
使用這個 Base64 編碼的憑證,在 Google Secret Manager 中建立密鑰。在 Cloud Shell 中執行下列指令:
echo -n "c29scjpTb2xyUm9ja3M=" | \
gcloud secrets create solr-credentials \
    --replication-policy="automatic" \
    --data-file=-
10. 在 AlloyDB 中建立外部資料包裝函式
時間長度 10:00
如要從 AlloyDB 查詢 Apache Solr 中儲存的資料,我們必須為 Solr 建立外部資料包裝函式 (FDW) 和外部資料表。您先前已將 Solr 憑證儲存在 Secret Manager 中。如要讓 AlloyDB 存取密鑰,請授予服務帳戶必要權限。
在 Cloud Shell 中,授予服務帳戶 solr-credentials 密鑰的存取權:
gcloud secrets add-iam-policy-binding solr-credentials \
    --member="serviceAccount:service-$(gcloud projects describe $(gcloud config get-value project) --format='value(projectNumber)')@gcp-sa-alloydb.iam.gserviceaccount.com" \
    --role="roles/secretmanager.secretAccessor"
預期輸出內容:
admin_@cloudshell:~ (my-project-93954-gke)$ gcloud secrets add-iam-policy-binding solr-credentials \
    --member="serviceAccount:service-$(gcloud projects describe $(gcloud config get-value project) --format='value(projectNumber)')@gcp-sa-alloydb.iam.gserviceaccount.com" \
    --role="roles/secretmanager.secretAccessor"
Your active configuration is: [cloudshell-13031]
Updated IAM policy for secret [solr-credentials].
bindings:
- members:
  - serviceAccount:service-350113473377@gcp-sa-alloydb.iam.gserviceaccount.com
  role: roles/secretmanager.secretAccessor
etag: BwZWyKlkx6Q=
version: 1
使用 AlloyDB Studio 連線至資料庫 (或使用 psql 從 VM 連線)。以 postgres 使用者身分登入 quickstart_db。
啟用 FDW 擴充功能:
CREATE EXTENSION IF NOT EXISTS external_search_fdw;
預期輸出內容:
CREATE EXTENSION
取得連線參數
在 AlloyDB 中設定外部資料伺服器之前,您需要 VM 的內部 IP 位址 (Solr 執行所在位置) 和密碼路徑。
如要列印 VM 的內部 IP,請在 Cloud Shell 中執行下列指令:
gcloud compute instances describe instance-1 \
    --zone=us-central1-a \
    --format="value(networkInterfaces[0].networkIP)"
預期輸出內容:
10.X.X.X
如要列印 Secret Manager 中的密鑰資源路徑,請執行下列指令:
gcloud secrets describe solr-credentials --format="value(name)"
預期輸出內容:
projects/<project_id>/secrets/solr-credentials
如要連上 Apache Solr,請建立外部資料伺服器。將下列查詢中的 /versions/latest,以便擷取最新版本的密碼:
CREATE SERVER solr_demo_server
FOREIGN DATA WRAPPER external_search_fdw
OPTIONS(
    server 'http://<VM_INTERNAL_IP_ADDRESS>:8983',
    search_provider 'solr',
    auth_mode 'secret_manager',
    auth_method 'Basic',
    secret_path '<SECRET_PATH>/versions/latest'
);
預期輸出內容:
CREATE SERVER
接著定義外部資料表,中繼資料之後,請提供 Solr 欄位結構定義,以符合先前載入的資料。在遠端資料表中,指定 Solr 集合的名稱。
CREATE FOREIGN TABLE solrindexdemo (
    metadata external_search_fdw_schema.OpaqueMetadata,
    id TEXT,
    product_name TEXT,
    product_description TEXT
)
SERVER solr_demo_server
OPTIONS(
    remote_table_name 'solrindexdemo'
);
為伺服器建立使用者對應:
CREATE USER MAPPING FOR CURRENT_USER SERVER solr_demo_server;
現在可以測試外部資料表:
SELECT id, product_name
FROM solrindexdemo
ORDER BY metadata <@> 'product_description:cherry' DESC
limit 10;
預期輸出內容:
"id","product_name"
"d536e9e823296a2eba198e52dd23e712","Cherry Tree"
"390cf08feac229e7b752709fd1f943b3","Woven Round Placemat, Set of Twelve, Grass"
"2c9aa7ac98c30abf78dd9c62a68a34e6","48 Scented Wax Melts Wax Cubes: Jelly Belly Jelly Beans Candy Bulk Soy Wax Melts For Candle Warmer, Wax Warmers, Wax Melt Warmers In 8 Pack Set"
11. 使用混合型搜尋
時間長度 10:00
一切設定完成後,我們可以使用 ai.hybrid_search() 函式,結合向量搜尋和全文搜尋。如要進一步瞭解混合型搜尋,請參閱說明文件。使用混合搜尋時,查詢結果預設會採用倒數排名融合演算法,依據多項查詢的排名結果排序。首先,我們分別試試向量搜尋和混合搜尋,分析兩者差異。
下列查詢會執行向量搜尋,找出與櫻桃相似的產品。陣列會提供要執行的搜尋清單。在本例中,我們只使用向量搜尋,但稍後會提供向量和 FTS。
SELECT id, score, cymbal_products.product_name, cymbal_products.product_description
FROM ai.hybrid_search(
  ARRAY[
      '{
        "data_type": "vector",
        "table_name": "cymbal_products",
        "key_column": "uniq_id",
        "vec_column": "product_embedding",
        "distance_operator": "public.<=>",
        "limit": 3,
        "query_vector": "ai.embedding(''text-embedding-005'', ''cherry'')::vector"
      }'::JSONB
  ]
) JOIN cymbal_products ON id = cymbal_products.uniq_id;
在輸出內容中,櫻桃樹是第一個結果,但請注意,接下來兩個也是果樹。這是因為在 product_description 欄中使用向量搜尋時,我們會找到符合搜尋條件的語意。
"id","score","product_name","product_description"
"d536e9e823296a2eba198e52dd23e712","0.01639344262295082","Cherry Tree","This is a beautiful cherry tree that will produce delicious cherries. It is an deciduous tree that grows to be about 15 feet tall. The leaves are dark green in the summer and turn a beautiful red in the fall. Cherry trees are known for their beauty and their ability to provide shade and privacy. Cherry trees prefer a cool, moist climate and sandy soil. They are best suited for USDA zones 4-9."
"b70c44b1a38c0a2329fa583c9109a80f","0.016129032258064516","Peach Tree","This is a beautiful peach tree that will produce delicious peaches. It is an evergreen tree that grows to be about 20 feet tall. The leaves are dark green in the summer and turn a beautiful yellow in the fall. Peach trees are known for their beauty and their ability to provide shade and privacy. Peach trees prefer a cool, moist climate and sandy soil. They are best suited for USDA zones 2-9."
"23e41a71d63d8bbc9bdfa1d118cfddc5","0.015873015873015872","Apple Tree","This is a beautiful apple tree that will produce delicious apples. It is a deciduous tree that grows to be about 30 feet tall. The leaves are dark green in the summer and turn a beautiful red, orange, and yellow in the fall. Apple trees are known for their strength and durability. They are also a popular choice for shade trees. Apple trees prefer a cool, moist climate and loamy soil. They are best suited for USDA zones 4-8."
如要使用 Apache Solr FDW 執行全文搜尋,請執行下列查詢:
SELECT id, score, cymbal_products.product_name, cymbal_products.product_description
FROM ai.hybrid_search(
  ARRAY[
      '{
        "limit": 3,
        "data_type": "external_search_fdw",
        "table_name": "solrindexdemo",
        "key_column": "id",
        "query_text_input": "product_description:cherry"
      }'::JSONB
  ]
) JOIN cymbal_products ON id = cymbal_products.uniq_id;
請注意,由於全文搜尋會使用符記比對,因此結果會傳回產品說明中包含「cherry」一詞的任何內容。
"id","score","product_name","product_description"
"d536e9e823296a2eba198e52dd23e712","0.01639344262295082","Cherry Tree","This is a beautiful cherry tree that will produce delicious cherries. It is an deciduous tree that grows to be about 15 feet tall. The leaves are dark green in the summer and turn a beautiful red in the fall. Cherry trees are known for their beauty and their ability to provide shade and privacy. Cherry trees prefer a cool, moist climate and sandy soil. They are best suited for USDA zones 4-9."
"390cf08feac229e7b752709fd1f943b3","0.016129032258064516","Woven Round Placemat, Set of Twelve, Grass","...These placemats are great for special occasions and holidays, but are also perfect to accessorize your everyday place settings.|Measurements. 15-inch round diameter is the perfect size for most table sizes and shapes.|Pop Colors. Choose from 7 pop woven color placemats including: Black, Cherry, Grass, Taupe, Navy, Sun and Graphite."
"2c9aa7ac98c30abf78dd9c62a68a34e6","0.015873015873015872","48 Scented Wax Melts Wax Cubes: Jelly Belly Jelly Beans Candy Bulk Soy Wax Melts For Candle Warmer, Wax Warmers, Wax Melt Warmers In 8 Pack Set","...From These Flavors: Lemon Drop, Mixed Berry Smoothie, Sizzling Cinnamon, Crushed Pineapple, Juicy Pear, Cotton Candy, Toasted Marshmallow, French Vanilla, Watermelon, Red Apple, Very Cherry, Buttered Popcorn..."
現在您可以結合語意搜尋和 FTS,取得更有意義的結果。假設我們要搜尋比房子高的樹,而且樹木必須來自加州。我們將查詢拆開,以便利用語意意圖與字面比對。向量搜尋會處理描述性部分:「比房子還高的樹」,因為它瞭解規模的概念,不需要確切的關鍵字。同時,全文搜尋會將「加州」視為嚴格的篩選條件,確保我們取得完全相符的地理位置,而非只是概念上相似的內容。
SELECT id, score, cymbal_products.product_name, cymbal_products.product_description
FROM ai.hybrid_search(
  ARRAY[
    '{
        "data_type": "vector",
        "table_name": "cymbal_products",
        "key_column": "uniq_id",
        "vec_column": "product_embedding",
        "distance_operator": "public.<=>",
        "limit": 3,
        "query_vector": "ai.embedding(''text-embedding-005'', ''tree that can grow taller than a house'')::vector"
      }'::JSONB,
      '{
        "limit": 3,
        "data_type": "external_search_fdw",
        "table_name": "solrindexdemo",
        "key_column": "id",
        "query_text_input": "product_description:California"
      }'::JSONB
  ]
) JOIN cymbal_products ON id = cymbal_products.uniq_id;
預期結果:
"id","score","product_name","product_description"
"a589fd36a8a20fd9472d2403d6ed692a","0.00819672631147241","California Redwood","This is a beautiful redwood tree that can grow to be over 300 feet tall. It is an evergreen tree that grows in the coastal forests of California. Redwoods are known for their beauty and their strength. They are best suited for USDA zones 7-10."
"ef9432802da24041594c2cf368dfb4d2","0.008064521129029258","Madrone","This is a beautiful madrona tree that can grow to be over 80 feet tall. It is an evergreen tree that grows in the coastal forests of California. Madronas are known for their beauty and their bark. They are best suited for USDA zones 7-10."
"1360d8642bc218e4ea28e9c32b2e1721","0.007936512936504936","California Sycamore","This is a beautiful sycamore tree that can grow to be over 100 feet tall. It is an deciduous tree that grows in the valleys and foothills of California. California sycamores are known for their beauty and their shade. They are best suited for USDA zones 7-10."
12. 清理環境
完成實驗室後,請終止 AlloyDB 執行個體和叢集。
刪除 AlloyDB 叢集和所有執行個體
如果您使用過 AlloyDB 試用版,如果您打算使用試用叢集測試其他實驗室和資源,請勿刪除試用叢集。您無法在同一個專案中建立其他試用叢集。
使用 force 選項終止叢集,這也會刪除叢集中的所有執行個體。
如果連線中斷,且所有先前的設定都遺失,請在 Cloud Shell 中定義專案和環境變數:
gcloud config set project <your project id>
export REGION=us-central1
export ADBCLUSTER=alloydb-hybrid-search
export PROJECT_ID=$(gcloud config get-value project)
刪除叢集:
gcloud alloydb clusters delete $ADBCLUSTER --region=$REGION --force
預期的控制台輸出內容:
admin_@cloudshell:~ (my-project-93954-gke)$ gcloud alloydb clusters delete $ADBCLUSTER --region=$REGION --force
All of the cluster data will be lost when the cluster is deleted.

Do you want to continue (Y/n)?  Y

Operation ID: operation-1784270790060-656c8ea9fea06-1b93001f-846543e0
Deleting cluster...done.
刪除 AlloyDB 備份
刪除叢集的所有 AlloyDB 備份:
for i in $(gcloud alloydb backups list --filter="CLUSTER_NAME: projects/$PROJECT_ID/locations/$REGION/clusters/$ADBCLUSTER" --format="value(name)" --sort-by=~createTime) ; do gcloud alloydb backups delete $(basename $i) --region $REGION --quiet; done
預期的控制台輸出內容:
admin_@cloudshell:~ (my-project-93954-gke)$ for i in $(gcloud alloydb backups list --filter="CLUSTER_NAME: projects/$PROJECT_ID/locations/$REGION/clusters/$ADBCLUSTER" --format="value(name)" --sort-by=~createTime) ; do gcloud alloydb backups delete $(basename $i) --region $REGION --quiet; done
Operation ID: operation-1784271231983-656c904f71e05-1389a145-f101ceee
Deleting backup...done.
現在可以刪除 VM
刪除 GCE VM
在 Cloud Shell 中執行下列指令:
export GCEVM=instance-1
export ZONE=us-central1-a
gcloud compute instances delete $GCEVM \
    --zone=$ZONE \
    --quiet
預期的控制台輸出內容:
admin_@cloudshell:~ (my-project-93954-gke)$ export GCEVM=instance-1
export ZONE=us-central1-a
gcloud compute instances delete $GCEVM \
    --zone=$ZONE \
    --quiet
Deleted
13. 恭喜
恭喜您完成本程式碼研究室!
涵蓋內容
- 如何部署 AlloyDB 叢集和主要執行個體
- 如何從 Google Compute Engine VM 連線至 AlloyDB
- 如何建立資料庫並啟用 AlloyDB AI
- 如何將資料載入資料庫
- 如何使用 AlloyDB Studio
- 使用 Vertex AI 生成嵌入
- 如何建立 ScaNN 向量索引,提升向量搜尋效果
- 如何為 Apache Solr 建立外部資料包裝函式 (FDW)
- 結合 AlloyDB 的語意搜尋和 Solr 的全文搜尋,執行混合型搜尋。
後續步驟
您可以在官方程式碼研究室網站上,探索更多 AlloyDB 程式碼研究室。