
1. Introduction
To give AI agents—such as the Antigravity CLI—secure, structured access to your database, you can integrate AlloyDB Omni with MCP Toolbox for Databases.
AlloyDB Omni is a downloadable, containerized edition of AlloyDB for PostgreSQL designed to run anywhere—on-premises, on developer workstations, at the edge, or in the cloud—while delivering enterprise-grade PostgreSQL performance and compatibility.
MCP Toolbox for Databases is an open-source server from Google that implements the Model Context Protocol (MCP) to make it easier, faster, and more secure to build generative AI tools that interact with databases. It sits between your agent's orchestration framework and your database and provides the following capabilities:
- Simplified development: Prebuilt or custom database tools that connect to your agent with minimal configuration and can be reused across multiple agents or frameworks.
- Better performance: Built-in best practices such as connection pooling and lifecycle management.
- Enhanced security: Centralized credential and authentication management so agents don't require raw database credentials.
- End-to-end observability: Out-of-the-box metrics and tracing with built-in support for OpenTelemetry.
By the end of this codelab, you have a running AlloyDB Omni container populated with sample ecommerce data, an MCP Toolbox server exposing 31 prebuilt AlloyDB Omni administration and query tools, and a configured Antigravity CLI (agy) agent capable of inspecting schemas, running SQL queries, analyzing query plans, and diagnosing database health by using natural language prompts.

Prerequisites
- Access to a Google Cloud project and Cloud Shell from the Google Cloud console, or a Linux workstation.
- Docker installed and running.
- The
psqlPostgreSQL client installed. curlandjqinstalled to set up the Antigravity CLI and MCP Toolbox.
What you'll learn
- How to deploy and run an AlloyDB Omni database server container by using Docker.
- How to create sample tables, data, and indexes in AlloyDB Omni.
- How to download, configure, and start MCP Toolbox for Databases with the prebuilt
alloydb-omnitoolset. - How to configure the Antigravity CLI as an MCP client to connect to the MCP Toolbox server.
- How to use natural language prompts in the Antigravity CLI to inspect database health, explore schemas, run SQL queries, analyze query plans, and perform maintenance diagnostics.
What you'll need
- A working terminal environment with Docker,
psql,curl, andjq. You can use Google Cloud Shell, which comes pre-installed with these tools.
2. Setup and requirements
Project setup
Create a Google Cloud project
- In the Google Cloud console, on the project selector page, select or create a Google Cloud project.
- Verify that billing is enabled for your Google Cloud project. Learn how to check if billing is enabled on a project.
Start Cloud Shell
Although you can run AlloyDB Omni and MCP Toolbox locally on your laptop, in this codelab you can use Google Cloud Shell, a command-line environment running in the cloud that comes pre-installed with Docker, psql, curl, and jq.
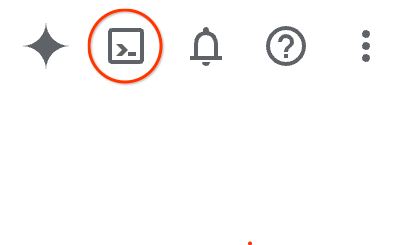
- Open the Google Cloud console and click Activate Cloud Shell in the top-right toolbar.You can also open Cloud Shell in one of the following ways:
- If you're using the Google Cloud console, press
Gand thenS. - Open Cloud Shell directly.
- If you're using the Google Cloud console, press
It typically takes a few moments to provision and connect to the environment. When this operation completes, you see something similar to the following:

3. Prepare and run the AlloyDB Omni database server
In this section, you pull and run the AlloyDB Omni Docker container and populate it with sample ecommerce data for testing.
Start the AlloyDB Omni database server
- Define environment variables for your AlloyDB Omni host, port, database, user, and a generated password:
export ALLOYDB_OMNI_HOST="127.0.0.1" export ALLOYDB_OMNI_PORT="5432" export ALLOYDB_OMNI_DATABASE="postgres" export ALLOYDB_OMNI_USER="postgres" export ALLOYDB_OMNI_PASSWORD="$(openssl rand -hex 8)@1aA" echo "Your generated AlloyDB Omni postgres password is: $ALLOYDB_OMNI_PASSWORD" - Start the AlloyDB Omni container in detached mode by using Docker:
docker run --name alloydbomni \ -e POSTGRES_PASSWORD=$ALLOYDB_OMNI_PASSWORD \ -p $ALLOYDB_OMNI_PORT:$ALLOYDB_OMNI_PORT \ -d google/alloydbomni:latest - Verify that the container is running and that you can connect to the AlloyDB Omni server by using
psql:docker ps -a until docker exec alloydbomni pg_isready -U "$ALLOYDB_OMNI_USER" -d "$ALLOYDB_OMNI_DATABASE"; do sleep 2; done PGPASSWORD=$ALLOYDB_OMNI_PASSWORD psql -h $ALLOYDB_OMNI_HOST -p $ALLOYDB_OMNI_PORT -U $ALLOYDB_OMNI_USER -d $ALLOYDB_OMNI_DATABASE -c "SELECT 1;"
Create sample data for testing
Create sample categories, products, customers, and orders tables, insert test records, and create indexes so you can test schema inspection, SQL queries, and query execution plans through MCP Toolbox:
PGPASSWORD="$ALLOYDB_OMNI_PASSWORD" psql -h $ALLOYDB_OMNI_HOST -p $ALLOYDB_OMNI_PORT -U $ALLOYDB_OMNI_USER -d $ALLOYDB_OMNI_DATABASE << 'EOF'
CREATE TABLE IF NOT EXISTS categories (
    category_id SERIAL PRIMARY KEY,
    name VARCHAR(50) UNIQUE NOT NULL
);

CREATE TABLE IF NOT EXISTS products (
    product_id SERIAL PRIMARY KEY,
    product_name VARCHAR(100) UNIQUE NOT NULL,
    category VARCHAR(50) NOT NULL,
    price NUMERIC(10, 2) NOT NULL,
    stock INT DEFAULT 0
);

CREATE TABLE IF NOT EXISTS customers (
    customer_id SERIAL PRIMARY KEY,
    first_name VARCHAR(50),
    last_name VARCHAR(50),
    email VARCHAR(100) UNIQUE,
    created_at TIMESTAMP DEFAULT CURRENT_TIMESTAMP
);

CREATE TABLE IF NOT EXISTS orders (
    order_id SERIAL PRIMARY KEY,
    customer_id INT REFERENCES customers(customer_id),
    order_date TIMESTAMP DEFAULT CURRENT_TIMESTAMP,
    total_amount NUMERIC(10, 2)
);

-- Insert sample rows
INSERT INTO categories (name) VALUES
('Smartphones'),
('Laptops'),
('Audio')
ON CONFLICT DO NOTHING;

INSERT INTO products (product_name, category, price, stock) VALUES
('Pixel 9 Pro', 'Smartphones', 999.00, 50),
('MacBook Pro M3', 'Laptops', 1999.00, 20),
('ThinkPad X1 Carbon', 'Laptops', 1450.00, 35),
('Dell XPS 15', 'Laptops', 1700.00, 15),
('Bose QuietComfort', 'Audio', 349.00, 100)
ON CONFLICT DO NOTHING;

INSERT INTO customers (first_name, last_name, email) VALUES
('Ada', 'Lovelace', 'ada@example.com'),
('Alan', 'Turing', 'alan@example.com'),
('Grace', 'Hopper', 'grace@example.com')
ON CONFLICT DO NOTHING;

INSERT INTO orders (order_id, customer_id, total_amount, order_date) VALUES
(1, 1, 999.00, pg_catalog.now() - INTERVAL '7 months'),
(2, 2, 349.00, pg_catalog.now() - INTERVAL '1 month')
ON CONFLICT DO NOTHING;

CREATE INDEX IF NOT EXISTS idx_products_category ON products(category);
CREATE INDEX IF NOT EXISTS idx_orders_customer ON orders(customer_id);
EOF
4. Start the MCP Toolbox server
In this section, you download the MCP Toolbox binary, configure the prebuilt AlloyDB Omni tool definitions, and start the MCP Toolbox server.
Download MCP Toolbox
- Create a directory for MCP Toolbox and download the
toolboxbinary:mkdir -p ~/mcp/tools cd ~/mcp curl -L -O https://storage.googleapis.com/genai-toolbox/v0.31.0/linux/amd64/toolbox chmod +x toolbox ./toolbox --version
Configure and start the MCP Toolbox server
- Download the prebuilt
alloydb-omni.yamltools configuration and start the MCP Toolbox server on port5000(using theALLOYDB_OMNI_*environment variables exported earlier):curl -sL --create-dirs -o "tools/alloydb-omni.yaml" "https://raw.githubusercontent.com/googleapis/mcp-toolbox/v0.31.0/internal/prebuiltconfigs/tools/alloydb-omni.yaml" # Remove the trailing group definition block and YAML document separator for --config-folder compatibility sed -i '/^kind: group/,$d' tools/alloydb-omni.yaml sed -i '${/---/d;}' tools/alloydb-omni.yaml ./toolbox --config-folder ./tools/ --port 5000 --address 127.0.0.1alloydb-omni.yamlconfiguration provides 31 prebuilt tools, including the key tools demonstrated in this codelab:execute_sqlget_query_plandatabase_overviewlist_active_querieslist_tables,list_indexes,list_views,list_triggerslist_top_bloated_tables,list_locks,list_autovacuum_configurations,list_invalid_indexes
alloydb-omni.yamlon GitHub. - In a new terminal tab, verify that the MCP Toolbox server is running and exposes your tools over the JSON-RPC
/mcpendpoint:curl -X POST http://localhost:5000/mcp \ -H "Content-Type: application/json" \ -d '{"jsonrpc": "2.0", "id": 1, "method": "tools/list", "params": {}}'
5. Configure the MCP client (Antigravity CLI)
In this section, you install the Antigravity CLI (agy) and configure it to connect to your MCP Toolbox server.
Install the Antigravity CLI
- If it is not already installed, download and run the Antigravity CLI (
agy) installer and verify the version:curl -fsSL https://antigravity.google/cli/install.sh -o /tmp/install.sh bash /tmp/install.sh rm -f /tmp/install.sh # If prompted by the installer, add ~/.local/bin to your PATH: export PATH="$HOME/.local/bin:$PATH" # Verify the installation agy --version
Configure the Antigravity CLI
Add the MCP Toolbox server entry to your client's MCP configuration file (such as ~/.gemini/config/mcp_config.json for the Antigravity CLI, .cursor/mcp.json, .vscode/mcp.json, claude_desktop_config.json, or .mcp.json for Claude Code).
- To connect the Antigravity CLI to the running MCP Toolbox HTTP server on port
5000, runagy mcp addand verify the entry withagy mcp list:export MCP_SERVER="127.0.0.1" export MCP_PORT="5000" agy mcp add alloydb-omni "http://${MCP_SERVER}:${MCP_PORT}/mcp" agy mcp listalloydb-omniserver configuration to~/.gemini/config/mcp_config.json:{ "mcpServers": { "alloydb-omni": { "url": "http://127.0.0.1:5000/mcp" } } }
Verify configuration
- Start the Antigravity CLI:
agyagy, follow the on-screen prompts to sign in (with Google OAuth or a Google Cloud project) and select Yes, I trust this folder when asked whether to trust the current directory. - At the Antigravity CLI prompt, enter
/mcpto open the MCP Servers panel and verify thatalloydb-omniis connected:/mcpMCP Servers Configured (~/.gemini/config/mcp_config.json) > ✓ alloydb-omni Tools: database_overview, execute_sql, get_column_cardinality, get_query_plan, list_active_queries, +26 more Keyboard: ↑/↓ Navigate enter Actions
- Press
Escto close the MCP Servers panel and return to the Antigravity CLI prompt.
6. Test using queries for AlloyDB Omni
Now that the Antigravity CLI is connected to your AlloyDB Omni instance through MCP Toolbox, you can interact with your database by using natural language prompts.
Run a database overview query
- At the Antigravity CLI prompt, ask for an overview of the current database:
Give me an overview of the current database.> Give me an overview of the current database. ● alloydb-omni/database_overview(Database overview check) (ctrl+o to expand) Here is an overview of the current AlloyDB Omni database instance: ### Database Overview • Instance / Engine: PostgreSQL 17.9 (AlloyDB Omni) • Role: Primary (is_replica: false) • Uptime: ~7 hours, 57 minutes • Connected Database: postgres • Connected User: postgres • Connections: 11 current / 100 max (1 active, 11% used) ### Databases in Instance • postgres • alloydbadmin (~15.74 MB) • alloydbmetadata (~14.82 MB)
Test examples by category
Prompt the Antigravity CLI with the following natural language requests. The agent automatically maps each request to the corresponding tool in your AlloyDB Omni MCP toolset:
1. Database overview and health
Test goal | Natural language prompt | Tool invoked |
System check |
|
|
Active connections |
|
|
Installed extensions |
|
|
Available extensions |
|
|
2. Schema and catalog exploration
Test goal | Natural language prompt | Tool invoked |
List tables |
|
|
Inspect indexes |
|
|
Explore views |
|
|
Check table triggers |
|
|
3. Data querying and filtering (execute_sql)
Test goal | Natural language prompt | Tool invoked |
Aggregate query |
|
|
Join query |
|
|
Unmatched records |
|
|
4. Query performance and explain plans (get_query_plan)
Test goal | Natural language prompt | Tool invoked |
Explain plan |
|
|
Index verification |
|
|
5. Database maintenance and diagnostics
Test goal | Natural language prompt | Tool invoked |
Table bloat |
|
|
Lock contention |
|
|
Autovacuum settings |
|
|
Invalid indexes |
|
|
7. Clean up
After you finish the codelab, clean up the local container and processes you started.
- Exit the Antigravity CLI by typing
/quit(or pressingCtrl+Dtwice). - Switch to the terminal tab running the MCP Toolbox server and press
Ctrl+Cto stop it. - Stop and remove the AlloyDB Omni Docker container:
docker stop alloydbomni
docker rm alloydbomni
8. Congratulations
Congratulations on completing the codelab! You successfully deployed AlloyDB Omni in a container, configured MCP Toolbox for Databases with the prebuilt AlloyDB Omni toolset, and integrated it with the Antigravity CLI to query and manage your database by using natural language.
What you've covered
- How to deploy and verify an AlloyDB Omni container by using Docker.
- How to populate sample tables and indexes for testing agent workflows.
- How to configure and run MCP Toolbox for Databases with the prebuilt
alloydb-omnitools configuration. - How to connect the Antigravity CLI to MCP Toolbox and run natural language prompts for schema discovery, SQL querying, query plan analysis, and database diagnostics.
For more information, see the following resources: