
1. Introduction
This codelab demonstrates how to configure and enable Transparent Data Encryption (TDE) on AlloyDB Omni using RPM packages. TDE encrypts data files, write-ahead logs (WAL), and temporary data files at rest, providing data protection against unauthorized access to underlying physical storage media.
In this codelab, you will learn how to provision storage volumes, initialize and run a TDE-enabled AlloyDB Omni cluster using File KMS, and verify data-at-rest encryption on disk files.
Prerequisites
- Access to a Google Cloud Project and Cloud Shell from the Google Cloud console.
- Google Cloud SDK (
gcloud) installed and configured. For details on installing gcloud, refer to gcloud-install
What you'll learn
- How to create a Compute Engine VM with dedicated database, backup, and swap disks.
- How to format storage volumes (XFS), configure
/etc/fstab, and prepare data paths. - How to generate and manage Key Encryption Keys (KEK) using File KMS.
- How to install AlloyDB Omni RPM packages and PostgreSQL client utilities.
- How to bootstrap a TDE-enabled AlloyDB Omni cluster using RPM setup tools (
alloydbomni18-setup) and--tde-kek-url. - How to verify on-disk encryption using raw file inspection (
grep).
What you'll need
- Obtain a URL link to AlloyDB Omni RPMs by completing the AlloyDB Omni RPM Signup Form or by referring to the AlloyDB Omni on Linux Overview. The repository URL will be sent to your registered email address.
- A working terminal with access to Google Cloud (Cloud Shell recommended).
2. Setup and Requirements
Project setup
Create a Google Cloud Project
- In the Google Cloud console, on the project selector page, select or create a Google Cloud project.
- Make sure that billing is enabled for your Cloud project. Learn how to check if billing is enabled on a project.
Start Cloud Shell
Although you can operate Google Cloud remotely from your laptop, in this codelab you use the Google Cloud Shell, a command-line environment running in the cloud.
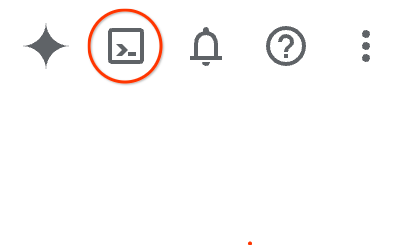
- Open the Google Cloud console and click the Cloud Shell icon on the top right toolbar. You can also open Cloud Shell by pressing
Gand thenSin the console, or by visiting shell.cloud.google.com. - It typically takes a few moments to provision and connect to the environment. When completed, you will see a terminal prompt ready for input.

3. Create the Compute Engine VM
In this section, you create a Compute Engine (GCE) virtual machine (VM) running Rocky Linux 9 with dedicated persistent disks for database data (/data1), backups/observability (/obs), and swap space.
- Define environment variables for your project ID, VM name, zone, and region.
export PROJECT="your-project-id" export INSTANCE_NAME="alloydb-omni-tde-vm" export ZONE="us-central1-c" export REGION="us-central1" - Configure your default project.
gcloud config set project $PROJECT - Create network firewall rules for SSH traffic.
gcloud compute firewall-rules create allow-ssh-alloydb-omni-tde \ --project=$PROJECT \ --direction=INGRESS \ --action=allow \ --rules=tcp:22 \ --source-ranges="0.0.0.0/0" - Since the VM is created without a public IP address, configure a Cloud Router and Cloud NAT gateway to provide outbound internet access for downloading RPM packages. If a Cloud NAT already exists in your project region, you can proceed.
gcloud compute routers create alloydb-omni-tde-router \ --project=$PROJECT \ --network=default \ --region=$REGION 2>/dev/null || true gcloud compute routers nats create alloydb-omni-tde-nat \ --project=$PROJECT \ --router=alloydb-omni-tde-router \ --region=$REGION \ --nat-all-subnet-ip-ranges \ --auto-allocate-nat-external-ips 2>/dev/null || true - Create additional persistent disks for database data, backups, and swap space.
gcloud compute disks create $INSTANCE_NAME-data \ --project=$PROJECT --zone=$ZONE --size=50GB --type=pd-balanced gcloud compute disks create $INSTANCE_NAME-obs \ --project=$PROJECT --zone=$ZONE --size=50GB --type=pd-balanced gcloud compute disks create $INSTANCE_NAME-swap \ --project=$PROJECT --zone=$ZONE --size=10GB --type=pd-balanced - Provision the Rocky Linux 9 VM instance with the attached storage volumes.
gcloud compute instances create $INSTANCE_NAME \
    --project=$PROJECT \
    --zone=$ZONE \
    --machine-type=n2-highmem-16 \
    --image-family=rocky-linux-9 \
    --image-project=rocky-linux-cloud \
    --boot-disk-size=30GB \
    --boot-disk-type=pd-balanced \
    --disk=name=$INSTANCE_NAME-data,device-name=db-data,mode=rw \
    --disk=name=$INSTANCE_NAME-obs,device-name=obs,mode=rw \
    --disk=name=$INSTANCE_NAME-swap,device-name=swap,mode=rw \
    --no-address
4. Prepare Disks, System Tuning, and File KMS Key
In this section, you connect to the VM, format and mount the persistent storage volumes, configure swap, tune SELinux, and generate the TDE Key Encryption Key (KEK) using File KMS.
- SSH into the VM via Identity-Aware Proxy (IAP).
gcloud compute ssh $INSTANCE_NAME --zone=$ZONE --project=$PROJECT --tunnel-through-iap - Format and mount the data volume (
/data1) and observability/backup volume (/obs).sudo mkdir -p /data1 /obs sudo parted /dev/disk/by-id/google-db-data mklabel gpt sudo parted /dev/disk/by-id/google-db-data mkpart primary 0% 100% sudo parted /dev/disk/by-id/google-obs mklabel gpt sudo parted /dev/disk/by-id/google-obs mkpart primary 0% 100% sleep 3 sudo mkfs.xfs -L data /dev/disk/by-id/google-db-data-part1 sudo mkfs.xfs -L obs /dev/disk/by-id/google-obs-part1 echo -e "LABEL=data\t/data1\txfs\tdefaults\t0 0" | sudo tee -a /etc/fstab echo -e "LABEL=obs\t/obs\txfs\tdefaults\t0 0" | sudo tee -a /etc/fstab sudo systemctl daemon-reload sudo mount /data1 sudo mount /obs - Create and enable swap space on the dedicated swap disk.
SWAP_UUID=$(sudo mkswap /dev/disk/by-id/google-swap 2>/dev/null | awk '$0 ~ "UUID" {print $NF}') echo -e "${SWAP_UUID}\tswap\tswap\tdefaults\t0 0" | sudo tee -a /etc/fstab sudo swapon -a - Define environment variables for the database directory and File KMS key file.
export PGDATA="/data1/18" export KMS_DIR="/data1/kms" export KEK_FILE="$KMS_DIR/tde_key" export ALLOYDB_OMNI_REPOSITORY_URL="<your-repository-url>" - Create storage directories for the database and File KMS key storage.
sudo mkdir -p $PGDATA sudo mkdir -p $KMS_DIR - Generate a 32-byte cryptographically secure Key Encryption Key (KEK) using OpenSSL for File KMS.
sudo openssl rand -base64 32 | sudo tee $KEK_FILE sudo chmod 700 $KMS_DIR sudo chmod 600 $KEK_FILE - Install required SELinux management utilities.
sudo dnf install -y policycoreutils-python-utils
5. Install AlloyDB Omni RPM Packages
Configure package repositories and install the AlloyDB Omni database server alongside standard PostgreSQL 18 tools.
Note: Replace $ALLOYDB_OMNI_REPOSITORY_URL with the repository URL received via email after completing the AlloyDB Omni RPM Signup Form. For more information, see the AlloyDB Omni on Linux Overview.
- Create the YUM repository configuration file for AlloyDB Omni.
sudo tee /etc/yum.repos.d/alloydbomni.repo << EOF [alloydbomni] name=alloydbomni baseurl=$ALLOYDB_OMNI_REPOSITORY_URL enabled=1 repo_gpgcheck=0 gpgcheck=1 gpgkey=https://dl.google.com/linux/linux_signing_key.pub EOF - Update YUM repository cache and install AlloyDB Omni 18 server RPM packages.
sudo yum makecache sudo dnf install -y alloydbomni18 - Install the Official PostgreSQL PGDG RPM repository and install the standard PostgreSQL 18 client package (
psql).sudo dnf install -y https://download.postgresql.org/pub/repos/yum/reporpms/EL-9-x86_64/pgdg-redhat-repo-latest.noarch.rpm sudo dnf install -y postgresql18 - Assign ownership of
/data1and the KMS key directory to thepostgresuser.sudo chown -R postgres:postgres /data1 $KMS_DIR sudo chmod 755 /data1 $PGDATA
6. Bootstrap a TDE-Enabled Cluster
Configure resource quotas, open host firewall ports, and initialize the AlloyDB Omni cluster with Transparent Data Encryption enabled via the File KMS key (POSTGRES_INITDB_ARGS="--tde-kek-url=file://$KEK_FILE").
- Set SELinux to permissive mode and configure host firewall rules for PostgreSQL.
sudo setenforce 0 sudo firewall-cmd --add-port=5432/tcp --permanent sudo firewall-cmd --reload - Configure systemd service override parameters to assign memory and CPU resource limits.
sudo mkdir -p /etc/systemd/system/alloydbomni18.service.d sudo tee /etc/systemd/system/alloydbomni18.service.d/override.conf << EOF [Service] CPUQuota=90% MemoryMax=80% EOF sudo chown root:root /etc/systemd/system/alloydbomni18.service.d/override.conf sudo chmod 644 /etc/systemd/system/alloydbomni18.service.d/override.conf sudo systemctl daemon-reload - Set administrator environment variables and initialize the TDE database cluster using
alloydbomni18-setup initdb.export PGPASSWORD="YourStrongPassword123!" export POSTGRES_INITDB_ARGS="--tde-kek-url=file://$KEK_FILE" sudo POSTGRES_INITDB_ARGS="$POSTGRES_INITDB_ARGS" PGPASSWORD="$PGPASSWORD" PGDATA="$PGDATA" \ /usr/lib/postgresql/18/bin/alloydbomni18-setup initdb - Configure server port 5432 in
postgresql.conf.sudo sed -i "s/^#*[[:space:]]*port[[:space:]]*=[[:space:]]*[0-9]*/port = 5432/" $PGDATA/postgresql.conf - Prepare system catalogs and extensions using
alloydbomni18-setup preparedb.sudo PGPORT=5432 PGPASSWORD="$PGPASSWORD" PGDATA="$PGDATA" \ /usr/lib/postgresql/18/bin/alloydbomni18-setup preparedb - Enable and launch the
alloydbomni18systemd service.sudo systemctl enable alloydbomni18 sudo systemctl start alloydbomni18 sudo systemctl status alloydbomni18Active: active (running).
7. Database Operations & TDE Disk Encryption Verification
Connect to the TDE database, insert sample records, execute a CHECKPOINT to force data writing to disk, and run direct disk scans (grep) to prove data encryption at rest.
- Connect to the
alloydbadmindatabase usingpsql.PGPASSWORD="YourStrongPassword123!" /usr/lib/postgresql/18/bin/psql -h localhost -p 5432 -U postgres -d alloydbadmin - Create a test table, insert a confidential string, and trigger a checkpoint to write dirty buffers to storage.
CREATE TABLE customer_credentials ( id SERIAL PRIMARY KEY, username TEXT, secret_passcode TEXT ); INSERT INTO customer_credentials (username, secret_passcode) VALUES ('alice_user', 'UNENCRYPTED_DEMO_SECRET_98765'); CHECKPOINT; - Query the internal AlloyDB TDE statistics view
pgsnap.g$tde_statsto verify active encryption status, KEK location, and block metrics.SELECT is_tde_enabled, tde_kek_url, tde_data_blocks_encrypted, tde_wal_blocks_encrypted FROM pgsnap.g$tde_stats;is_tde_enabled = t), KEK file path, and encrypted block counters:is_tde_enabled | tde_kek_url | tde_data_blocks_encrypted | tde_wal_blocks_encrypted ----------------+---------------------------+---------------------------+-------------------------- t | file:///data1/kms/tde_key | 2023 | 2717 (1 row) - Exit
psql.\q - Search raw database storage files under
/data1/18/base/for the passcode string to verify TDE on-disk protection.sudo grep -a -rn "UNENCRYPTED_DEMO_SECRET_98765" /data1/18/base/
Key Verification Takeaway:
- On a Non-TDE database instance, running
grepagainst table relation files displays the plain-text string on disk. - On a TDE-Enabled database instance,
grepreturns zero matches because all data files, indexes, write-ahead logs (WAL), and temporary data are fully encrypted with AES block ciphers at rest.
8. Cleanup
After completing the exercises, clean up resources to prevent unwanted compute charges.
- Disconnect from your VM SSH session.
exit - Remove GCE Virtual Machine and attached persistent disks.
gcloud compute instances delete $INSTANCE_NAME --zone=$ZONE --project=$PROJECT --quiet gcloud compute disks delete $INSTANCE_NAME-data $INSTANCE_NAME-obs $INSTANCE_NAME-swap --zone=$ZONE --project=$PROJECT --quiet - Delete firewall rules and Cloud NAT gateway resources.
gcloud compute firewall-rules delete allow-ssh-alloydb-omni-tde --project=$PROJECT --quiet
gcloud compute routers nats delete alloydb-omni-tde-nat --router=alloydb-omni-tde-router --region=$REGION --project=$PROJECT --quiet
gcloud compute routers delete alloydb-omni-tde-router --region=$REGION --project=$PROJECT --quiet
9. Congratulations
Congratulations! You have successfully completed the TDE on AlloyDB Omni RPM codelab.
What we've covered
- How to provision storage disks (
/data1,/obs), setup swap, and format XFS file systems. - How to generate and manage Key Encryption Keys using File KMS.
- How to initialize and start a TDE-enabled AlloyDB Omni cluster using RPM tools.
- How to verify data encryption at rest using direct raw disk inspection (
grep).
For further information, refer to the AlloyDB Omni Documentation.