
1. 소개
오늘날 빠르게 변화하는 데이터 환경에서 정보에 입각한 결정을 내리려면 실시간 통계가 중요합니다. 이 Codelab에서는 실시간 평가 파이프라인을 빌드하는 방법을 안내합니다. 일괄 데이터와 스트리밍 데이터 모두에 통합 프로그래밍 모델을 제공하는 Apache Beam 프레임워크를 활용하여 시작합니다. 이렇게 하면 처음부터 빌드해야 하는 복잡한 분산 컴퓨팅 로직을 추상화하여 파이프라인 개발이 크게 간소화됩니다. Beam을 사용하여 파이프라인을 정의한 후에는 데이터 처리 요구사항에 맞는 뛰어난 확장성과 성능을 제공하는 완전 관리형 서비스인 Google Cloud Dataflow에서 원활하게 실행할 수 있습니다.
이 Codelab에서는 머신러닝 추론을 위한 확장 가능한 Apache Beam 파이프라인을 설계하고, Vertex AI의 Gemini 모델을 통합하는 맞춤 ModelHandler를 개발하고, 데이터 스트림에서 지능형 텍스트 분류를 위해 프롬프트 엔지니어링을 활용하고, Google Cloud Dataflow에 이 스트리밍 ML 추론 파이프라인을 배포하고 운영하는 방법을 알아봅니다. 이 과정을 마치면 엔지니어링 워크플로에서 실시간 데이터 이해 및 지속적인 평가를 위해 머신러닝을 적용하는 방법에 관한 유용한 통계를 얻게 됩니다. 특히 강력하고 사용자 중심적인 대화형 AI를 유지하는 데 도움이 됩니다.
시나리오
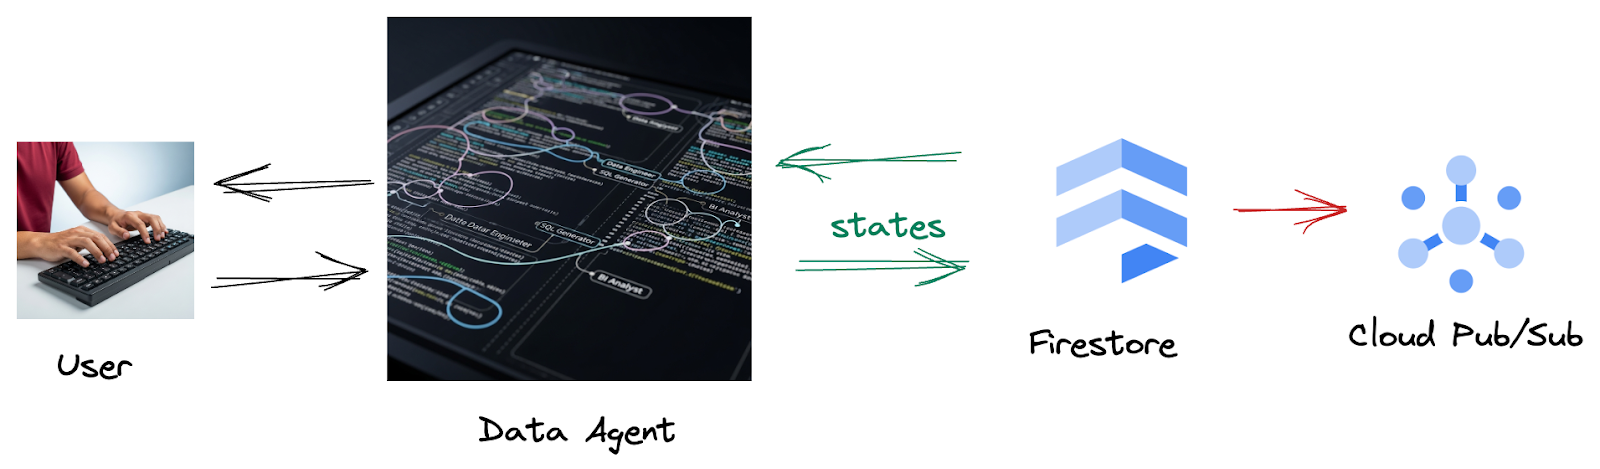
회사가 데이터 에이전트를 빌드했습니다. 에이전트 개발 키트 (ADK)로 빌드된 데이터 에이전트에는 데이터 관련 작업을 지원하는 다양한 전문 기능이 탑재되어 있습니다. BI 분석가로서 유용한 보고서를 생성하는 것부터, 강력한 데이터 파이프라인을 구축하는 데 도움을 주는 데이터 엔지니어, 정확한 SQL 문을 작성하는 SQL 생성기 등 다양한 요청을 처리할 수 있는 다재다능한 데이터 어시스턴트라고 생각하면 됩니다. 이 에이전트의 모든 상호작용과 생성된 모든 대답은 Firestore에 자동으로 저장됩니다. 하지만 여기에서 파이프라인이 필요한 이유는 무엇일까요?
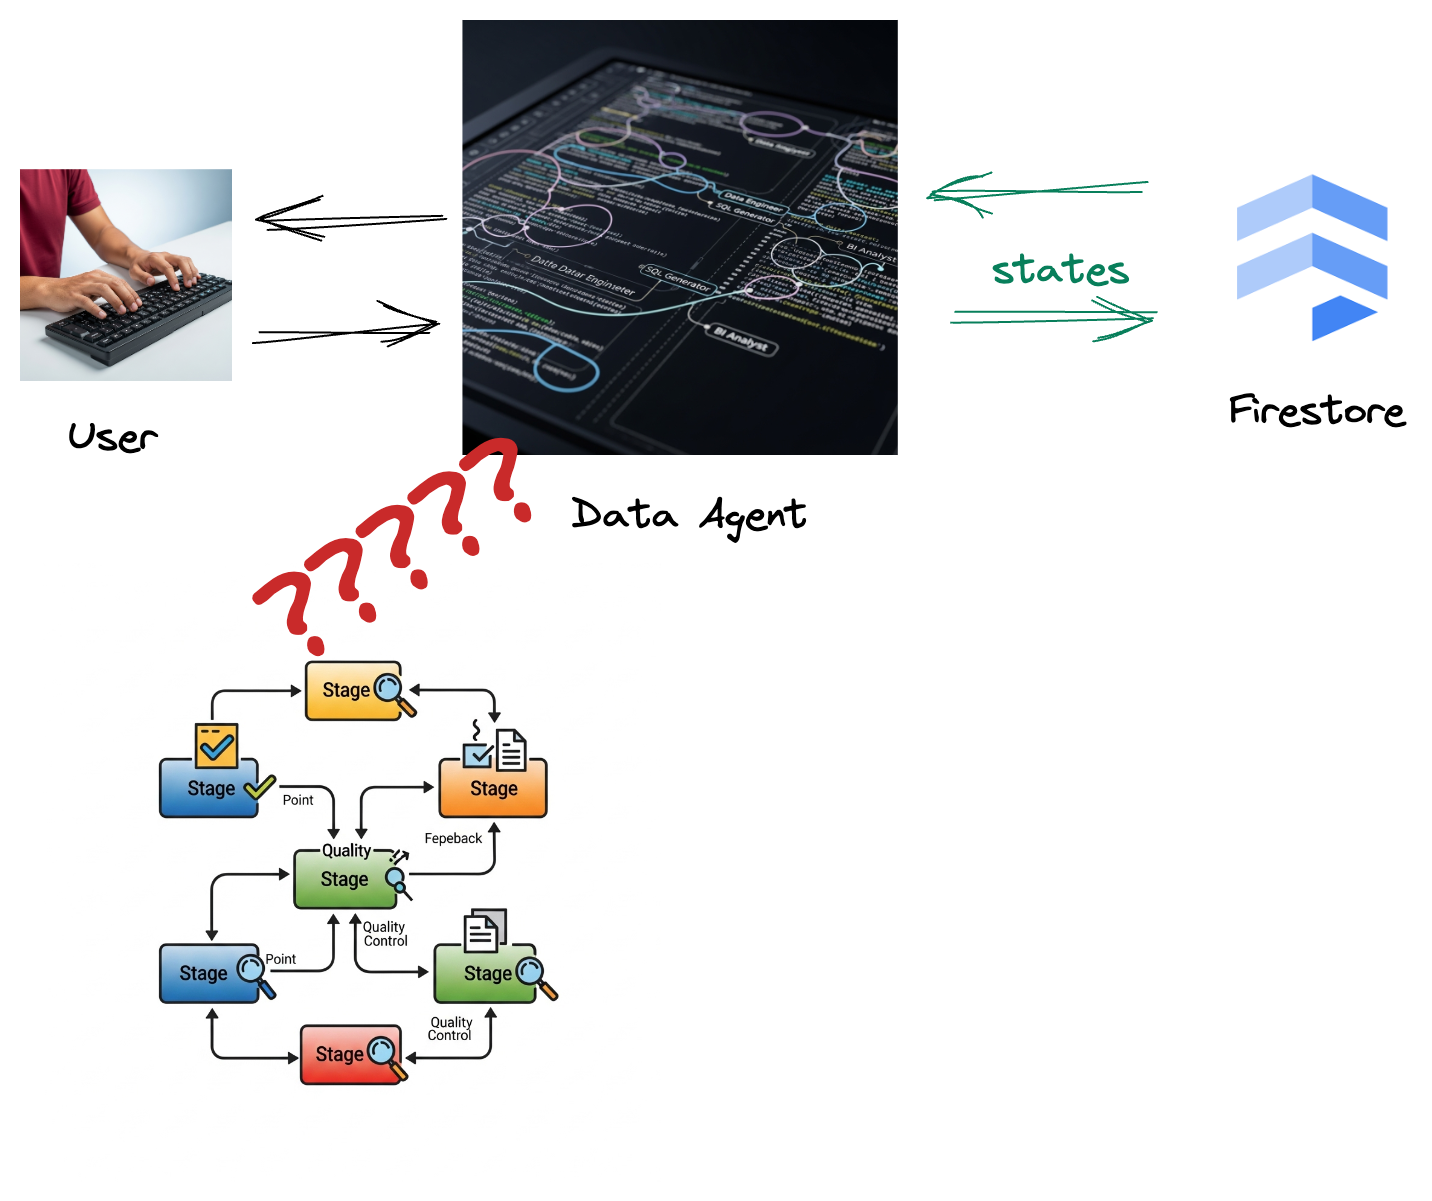
Firestore에서 트리거가 이 상호작용 데이터를 Pub/Sub로 원활하게 전송하므로 이러한 중요한 대화를 즉시 실시간으로 처리하고 분석할 수 있습니다.
2. 시작하기 전에
프로젝트 만들기
- Google Cloud 콘솔의 프로젝트 선택기 페이지에서 Google Cloud 프로젝트를 선택하거나 만듭니다.
- Cloud 프로젝트에 결제가 사용 설정되어 있어야 하므로 프로젝트에 결제가 사용 설정되어 있는지 확인하는 방법을 알아보세요.
- 이 링크를 클릭하여 Cloud Shell을 활성화합니다. Cloud Shell에서 해당 버튼을 클릭하여 Cloud Shell 터미널 (클라우드 명령어 실행)과 편집기 (프로젝트 빌드) 간에 전환할 수 있습니다.
- Cloud Shell에 연결되면 다음 명령어를 사용하여 이미 인증되었는지, 프로젝트가 프로젝트 ID로 설정되었는지 확인합니다.
gcloud auth list
- Cloud Shell에서 다음 명령어를 실행하여 gcloud 명령어가 프로젝트를 알고 있는지 확인합니다.
gcloud config list project
- 프로젝트가 설정되지 않은 경우 다음 명령어를 사용하여 설정합니다.
export PROJECT_ID=<YOUR_PROJECT_ID>
gcloud config set project $PROJECT_ID
- 아래에 표시된 명령어를 통해 필수 API를 사용 설정합니다. 몇 분 정도 걸릴 수 있으니 잠시 기다려 주세요.
gcloud services enable \
    dataflow.googleapis.com \
    pubsub.googleapis.com \
    aiplatform.googleapis.com \
    compute.googleapis.com
- Python 3.10 이상이 있어야 합니다.
- Python 패키지 설치
Cloud Shell 환경에 Apache Beam, Google Cloud Vertex AI, Google 생성형 AI에 필요한 Python 라이브러리를 설치합니다.
pip install apache-beam[gcp] google-genai
- GitHub 저장소를 클론하고 데모 디렉터리로 전환합니다.
git clone https://github.com/GoogleCloudPlatform/devrel-demos
cd devrel-demos/data-analytics/beam_as_eval
gcloud 명령어 및 사용법은 문서를 참고하세요.
3. 제공된 GitHub 저장소를 사용하는 방법
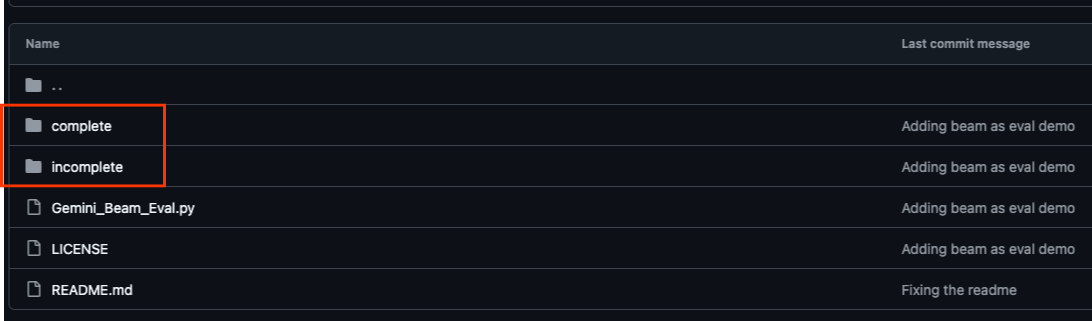
이 Codelab과 연결된 GitHub 저장소(https://github.com/GoogleCloudPlatform/devrel-demos/tree/main/data-analytics/beam_as_eval)는 가이드 학습 환경을 용이하게 하도록 구성되어 있습니다. 여기에는 Codelab의 각 개별 부분과 일치하는 스켈레톤 코드가 포함되어 있어 자료를 명확하게 진행할 수 있습니다.
저장소에는 'complete'와 'incomplete'라는 두 개의 기본 폴더가 있습니다. 'complete' 폴더에는 각 단계의 완전한 기능 코드가 있어 의도한 출력을 실행하고 관찰할 수 있습니다. 반대로 'incomplete' 폴더는 이전 단계의 코드를 제공하므로 연습의 일부로 완료할 수 있도록 특정 섹션이 ##### START STEP <NUMBER> #####와 ##### END STEP <NUMBER> ##### 사이에 표시됩니다. 이 구조를 통해 코딩 챌린지에 적극적으로 참여하면서 이전 지식을 바탕으로 학습할 수 있습니다.
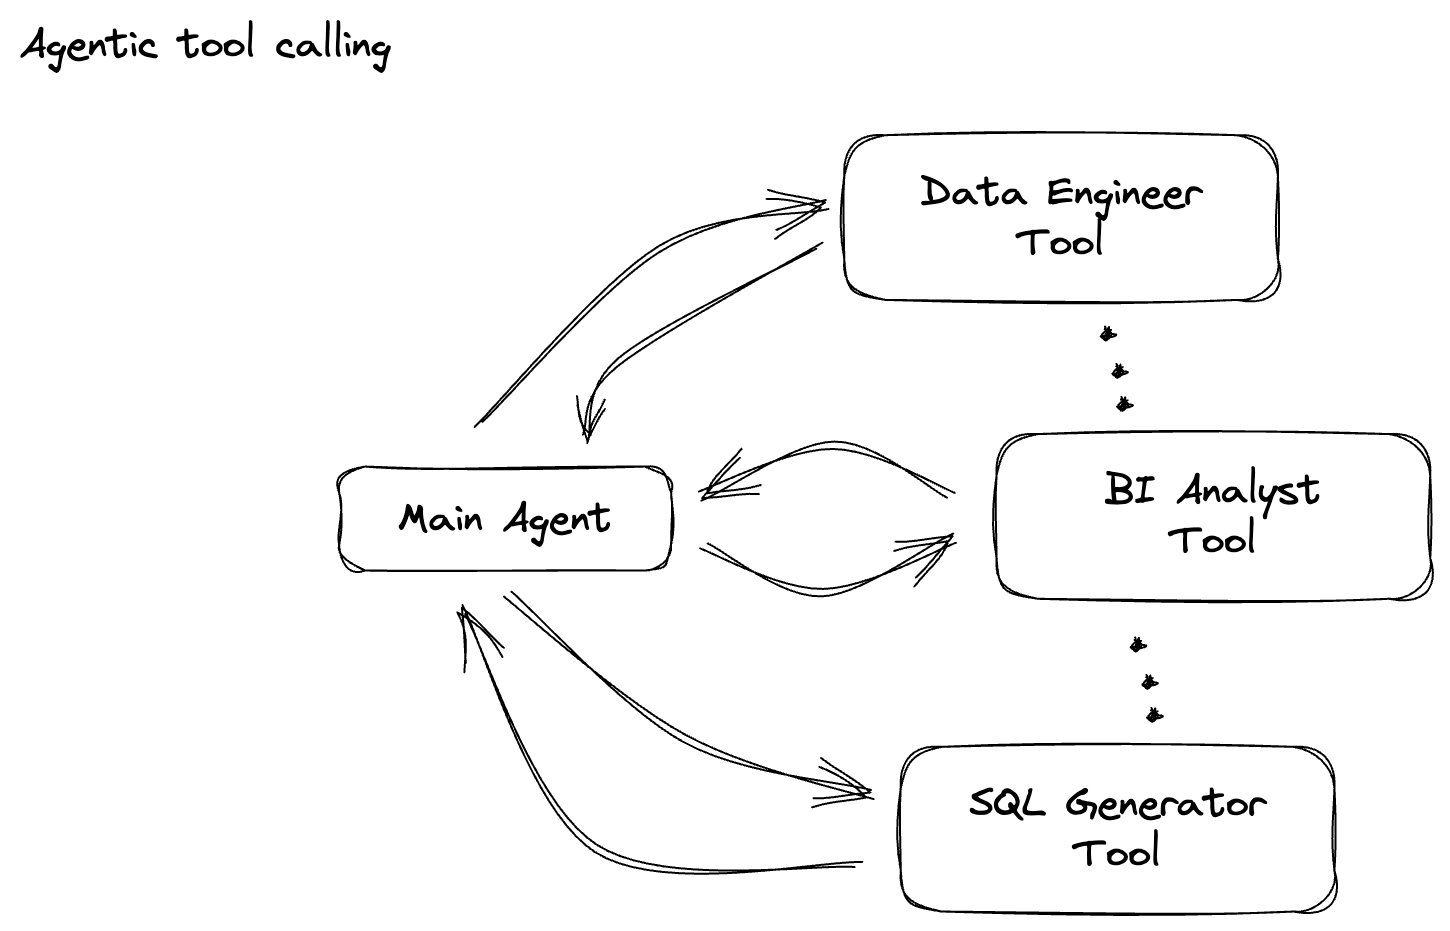
4. 아키텍처 개요
Google의 파이프라인은 데이터 스트림에 ML 추론을 통합하기 위한 강력하고 확장 가능한 패턴을 제공합니다. 다음은 요소가 서로 연결되는 방식입니다.
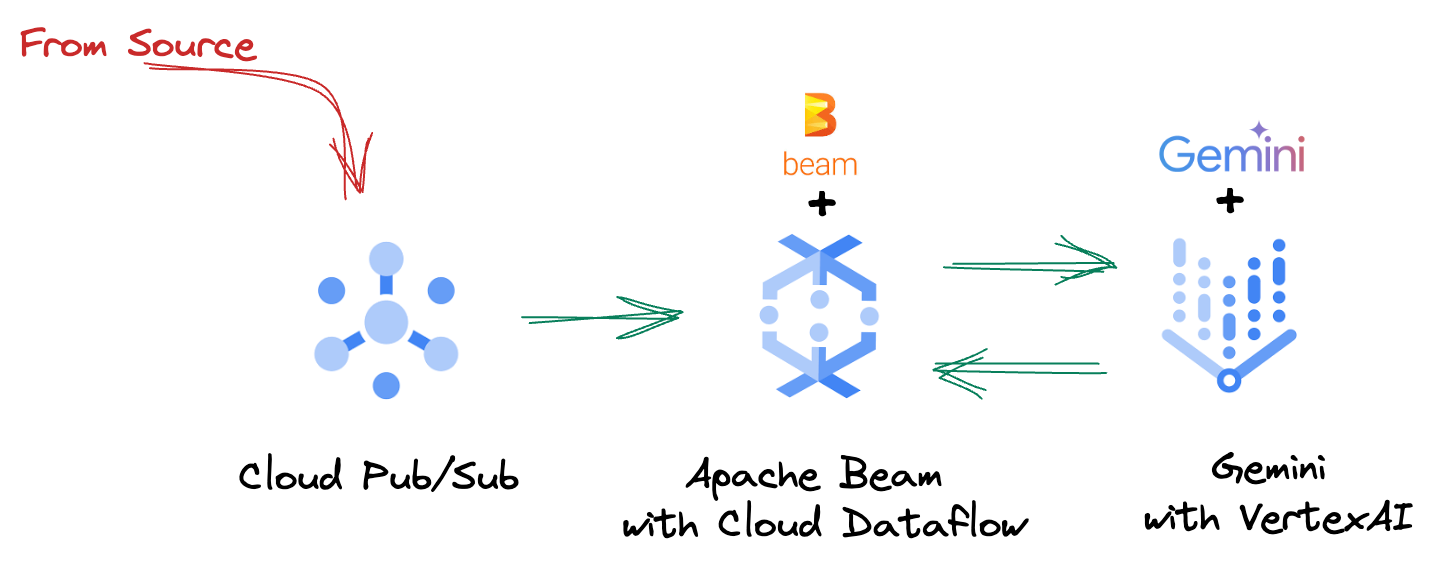
Beam 파이프라인에서 여러 입력을 조건부로 코딩한 다음 RunInference 턴키 변환으로 맞춤 모델을 로드합니다. 이 예에서는 Vertex AI와 함께 Gemini를 사용하지만, 보유한 모델 수에 맞게 여러 ModelHandler를 만드는 방법을 보여줍니다. 마지막으로 상태 저장 DoFn을 사용하여 이벤트를 추적하고 제어된 방식으로 내보냅니다.

5. 데이터 수집
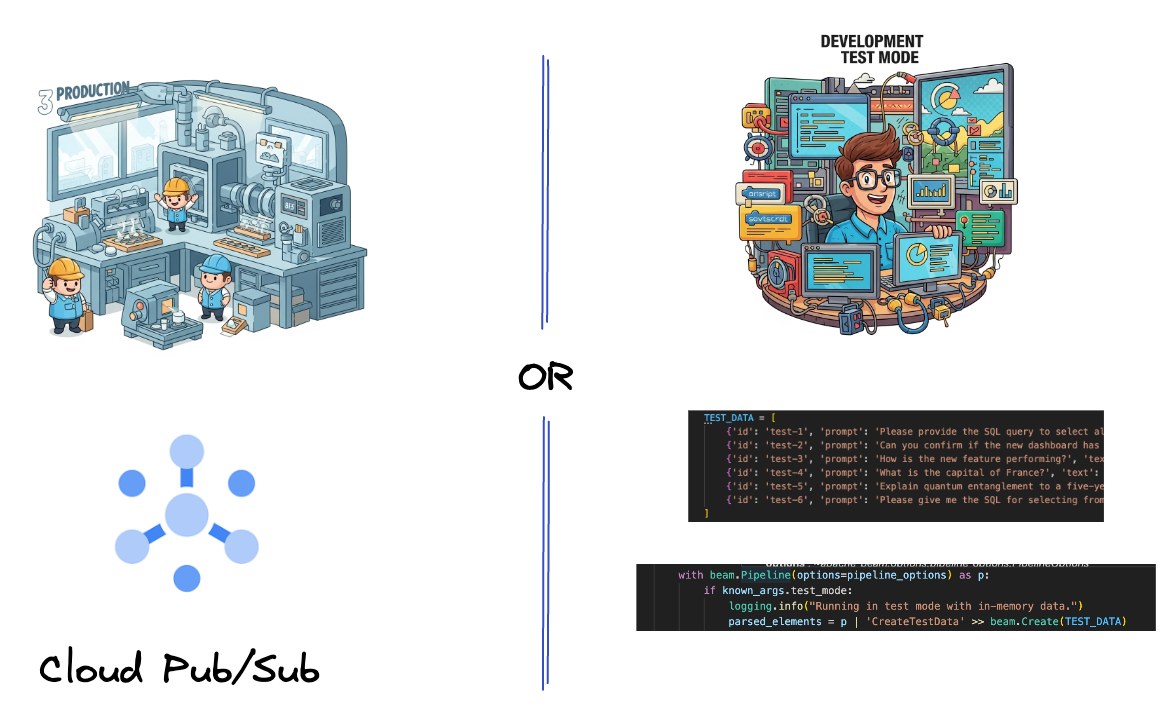
먼저 데이터를 수집하도록 파이프라인을 설정합니다. 실시간 스트리밍에는 Pub/Sub를 사용하지만 개발을 더 쉽게 하기 위해 테스트 모드도 만듭니다. 이 test_mode를 사용하면 미리 정의된 샘플 데이터를 사용하여 파이프라인을 로컬로 실행할 수 있으므로 파이프라인이 작동하는지 확인하기 위해 실시간 Pub/Sub 스트림이 필요하지 않습니다.
이 섹션에서는 gemini_beam_pipeline_step1.py를 사용합니다.
- 제공된 파이프라인 객체 p를 사용하여 Pub/Sub 입력을 코딩하고 출력을 pCollection으로 작성합니다.
- 또한 플래그를 사용하여 TEST_MODE가 설정되었는지 확인합니다.
- TEST_MODE가 설정된 경우 TEST_DATA 배열을 입력으로 파싱하도록 전환합니다.
필수는 아니지만 이 단계를 거치면 프로세스를 단축하여 이 단계에서 Pub/Sub를 사용하지 않아도 됩니다.
다음은 코드의 예입니다.
        # Step 1
        # Ingesting Data
        # Write your data ingestion step here.
        ############## BEGIN STEP 1 ##############
        if known_args.test_mode:
            logging.info("Running in test mode with in-memory data.")
            parsed_elements = p | 'CreateTestData' >> beam.Create(TEST_DATA)
            # Convert dicts to JSON strings and add timestamps for test mode
            parsed_elements = parsed_elements | 'ConvertTestDictsToJsonAndAddTimestamps' >> beam.Map(
                lambda x: beam.window.TimestampedValue(json.dumps(x), x['timestamp'])
            )
        else:
            logging.info(f"Reading from Pub/Sub topic: {known_args.input_topic}")
            parsed_elements = (
                p
                | 'ReadFromPubSub' >> beam.io.ReadFromPubSub(
                    topic=known_args.input_topic
                    ).with_output_types(bytes)
                | 'DecodeBytes' >> beam.Map(lambda b: b.decode('utf-8')) # Output is JSON string
                # Extract timestamp from JSON string for Pub/Sub messages
                | 'AddTimestampsFromParsedJson' >> beam.Map(lambda s: beam.window.TimestampedValue(s, json.loads(s)['timestamp']))
            )
        ############## END STEP 1 ##############
다음을 실행하여 이 코드를 테스트합니다.
python gemini_beam_pipeline_step1.py --project $PROJECT_ID --runner DirectRunner --test_mode
이 단계에서는 모든 레코드를 내보내고 stdout에 로깅해야 합니다.
다음과 같은 출력이 표시됩니다.
INFO:root:Running in test mode with in-memory data.
INFO:apache_beam.runners.worker.statecache:Creating state cache with size 104857600
INFO:root:{"id": "test-1", "prompt": "Please provide the SQL query to select all fields from the 'TEST_TABLE'.", "text": "Sure here is the SQL: SELECT * FROM TEST_TABLE;", "timestamp": 1751052405.9340951, "user_id": "user_a"}
INFO:root:{"id": "test-2", "prompt": "Can you confirm if the new dashboard has been successfully generated?", "text": "I have gone ahead and generated a new dashboard for you.", "timestamp": 1751052410.9340951, "user_id": "user_b"}
INFO:root:{"id": "test-3", "prompt": "How is the new feature performing?", "text": "It works as expected.", "timestamp": 1751052415.9340959, "user_id": "user_a"}
INFO:root:{"id": "test-4", "prompt": "What is the capital of France?", "text": "The square root of a banana is purple.", "timestamp": 1751052430.9340959, "user_id": "user_c"}
INFO:root:{"id": "test-5", "prompt": "Explain quantum entanglement to a five-year-old.", "text": "A flock of geese wearing tiny hats danced the tango on the moon.", "timestamp": 1751052435.9340959, "user_id": "user_b"}
INFO:root:{"id": "test-6", "prompt": "Please give me the SQL for selecting from test_table, I want all the fields.", "text": "absolutely, here's a picture of a cat", "timestamp": 1751052440.9340959, "user_id": "user_c"}
6. LLM 프롬프트 분류를 위한 PTransform 빌드
다음으로 프롬프트를 분류하는 PTransform을 빌드합니다. 여기에는 Vertex AI의 Gemini 모델을 사용하여 수신되는 텍스트를 분류하는 작업이 포함됩니다. Gemini 모델을 로드한 다음 텍스트를 '데이터 엔지니어', 'BI 분석가', 'SQL 생성기'와 같은 카테고리로 분류하는 방법을 모델에 안내하는 맞춤 GeminiModelHandler를 정의합니다.
로그의 실제 도구 호출과 비교하여 이를 사용합니다. 이 Codelab에서는 다루지 않지만 다운스트림으로 전송하여 비교할 수 있습니다. 모호한 질문도 있을 수 있으므로 이는 에이전트가 올바른 도구를 호출하는지 확인하는 데 유용한 추가 데이터 포인트가 됩니다.
이 섹션에서는 gemini_beam_pipeline_step2.py를 사용합니다.
- 커스텀 ModelHandler를 빌드합니다. 하지만 load_model에서 모델 객체를 반환하는 대신 genai.Client를 반환합니다.
- 맞춤 ModelHandler의 run_inference 함수를 만드는 데 필요한 코드입니다. 샘플 프롬프트가 제공되었습니다.
프롬프트는 다음과 같을 수 있습니다.
prompt =f"""
            The input is a response from another agent.
            The agent has multiple tools, each having their own responsibilities.
            You are to analyze the input and then classify it into one and only one.
            Use the best one if it seems like it is ambiguous. Choose only one.

            Finally, always provide a paragraph on why you think it is in one of the categories.

            Classify the text into one of these categories:
            DATA ENGINEER
            BI ANALYST
            SQL GENERATOR
            HELPER
            OTHER
            Respond with only the one single classification tag.
            Your response should be in a tuple (classification_tag, reason)

            Text: "{text_to_classify}"
            """
- 결과를 다음 pTransform의 pCollection으로 생성합니다.
다음은 코드의 예입니다.
    ############## BEGIN STEP 2 ##############
    # load_model is called once per worker process to initialize the LLM client.
    # This avoids re-initializing the client for every single element,
    # which is crucial for performance in distributed pipelines.
    def load_model(self) -> genai.Client:
        """Loads and initializes a model for processing."""
        client = genai.Client(
            vertexai=True,
            project=self._project,
            location=self._location,
        )
        return client

    # run_inference is called for each batch of elements. Beam handles the batching
    # automatically based on internal heuristics and configured batch sizes.
    # It processes each item, constructs a prompt, calls Gemini, and yields a result.
    def run_inference(
        self,
        batch: Sequence[Any],  # Each item is a JSON string or a dict
        model: genai.Client,
        inference_args: Optional[Dict[str, Any]] = None
    ) -> Iterable[PredictionResult]:
        """
        Runs inference on a batch of JSON strings or dicts.
        Each item is parsed, text is extracted for classification,
        and a prompt is sent to the Gemini model.
        """
        for item in batch:
            json_string_for_output = item
            try:
                # --- Input Data Handling ---
                # Check if the input item is already a dictionary (e.g., from TEST_DATA)
                # or a JSON string (e.g., from Pub/Sub).
                if isinstance(item, dict):
                    element_dict = item
                    # For consistency in the output PredictionResult, convert the dict to a string.
                    # This ensures pr.example always contains the original JSON string.
                    json_string_for_output = json.dumps(item)
                else:
                    element_dict = json.loads(item)

                # Extract the 'text' field from the parsed dictionary.
                text_to_classify = element_dict.get('text','')

                if not text_to_classify:
                    logging.warning(f"Input JSON missing 'text' key or text is empty: {json_string_for_output}")
                    yield PredictionResult(example=json_string_for_output, inference="ERROR_NO_TEXT")
                    continue

                prompt =f"""
                The input is a response from another agent.
                The agent has multiple tools, each having their own responsibilites.
                You are to analyze the input and then classify it into one and only one.
                Use the best one if it seems like it is ambigiuous. Choose only one.

                Finally always provide a paragraph on why you think it is in one of the categories.

                Classify the text into one of these categories:
                DATA ENGINEER
                BI ANALYST
                SQL GENERATOR
                HELPER
                OTHER
                Respond with only the one single classification tag.
                Your response should be in a tuple (classification_tag, reason)

                Text: "{text_to_classify}"
                """

                contents = [
                    types.Content( # This is the actual content for the LLM
                    role="user",
                    parts=[
                        types.Part.from_text(text=prompt)
                    ]
                    )
                ]


                gemini_response = model.models.generate_content_stream(
                    model=self._model_name, contents=contents, config=self._model_kwargs
                )
                classification_tag = ""
                for chunk in gemini_response:
                    if chunk.text is not None:
                        classification_tag+=chunk.text

                yield PredictionResult(example=json_string_for_output, inference=classification_tag)

            except json.JSONDecodeError as e:
                logging.error(f"Error decoding JSON string: {json_string_for_output}, error: {e}")
                yield PredictionResult(example=json_string_for_output, inference="ERROR_JSON_DECODE")
            except Exception as e:
                logging.error(f"Error during Gemini inference for input {json_string_for_output}: {e}")
                yield PredictionResult(example=json_string_for_output, inference="ERROR_INFERENCE")
    ############## END STEP 2 ##############
다음을 실행하여 이 코드를 테스트합니다.
python gemini_beam_pipeline_step2.py --project $PROJECT_ID --runner DirectRunner --test_mode
이 단계에서는 Gemini의 추론을 반환해야 합니다. 프롬프트에서 요청한 대로 결과를 분류합니다.
다음과 같은 출력이 표시됩니다.
INFO:root:PredictionResult(example='{"id": "test-6", "prompt": "Please give me the SQL for selecting from test_table, I want all the fields.", "text": "absolutely, here\'s a picture of a cat", "timestamp": 1751052592.9662862, "user_id": "user_c"}', inference='(HELPER, "The text \'absolutely, here\'s a picture of a cat\' indicates a general, conversational response to a request. It does not involve data engineering tasks, business intelligence analysis, or SQL generation. Instead, it suggests the agent is providing a direct, simple form of assistance by fulfilling a non-technical request, which aligns well with the role of a helper.")', model_id=None)
7. LLM을 심판으로 빌드하기
프롬프트를 분류한 후 모델의 대답 정확성을 평가합니다. 여기에는 Gemini 모델에 대한 또 다른 호출이 포함되지만 이번에는 0.0~1.0의 척도로 '텍스트'가 원래 '프롬프트'를 얼마나 잘 충족하는지 평가하도록 프롬프트를 표시합니다. 이를 통해 AI 출력의 품질을 파악할 수 있습니다. 이 작업에 대해 별도의 GeminiAccuracyModelHandler를 만듭니다.

이 섹션에서는 gemini_beam_pipeline_step3.py를 사용합니다.
- 커스텀 ModelHandler를 빌드합니다. 하지만 load_model에서 모델 객체를 반환하는 대신 위에서와 같이 genai.Client를 반환합니다.
- 맞춤 ModelHandler의 run_inference 함수를 만드는 데 필요한 코드입니다. 샘플 프롬프트가 제공되었습니다.
            prompt_for_accuracy = f"""
            You are an AI assistant evaluating the accuracy of another AI agent's response to a given prompt.
            Score the accuracy of the 'text' in fulfilling the 'prompt' from 0.0 to 1.0 (float).
            0.0 is very bad, 1.0 is excellent.

            Example of very bad, score of 0:
            prompt: Give me the SQL for test_Table
            text: SUre, here's a picture of a dog

            Example of very good score of 1:
            prompt: generate a sql statement to select all fields from test_table
            text: SELECT * from test_table;

            Your response should be ONLY the float score, followed by a brief explanation of why.
            For example: "0.8 - The response was mostly accurate but missed a minor detail."

            Prompt: "{original_prompt}"
            Text: "{original_text}"
            Score and Explanation:
            """
여기서 한 가지 주의할 점은 동일한 파이프라인에서 두 가지 다른 모델을 만들었다는 것입니다. 이 특정 예에서는 VertexAI와 함께 Gemini 호출도 사용하지만 동일한 개념에서 다른 모델을 사용하고 로드할 수도 있습니다. 이렇게 하면 모델 관리가 간소화되고 동일한 Beam 파이프라인 내에서 여러 모델을 사용할 수 있습니다.
- 결과를 다음 pTransform의 pCollection으로 생성합니다.
다음은 코드의 예입니다.
    ############## BEGIN STEP 3 ##############
    def load_model(self) -> genai.Client:
        """Loads and initializes a model for processing."""
        client = genai.Client(
            vertexai=True,
            project=self._project,
            location=self._location,
        )
        return client

    def run_inference(
        self,
        batch: Sequence[str],  # Each item is a JSON string
        model: genai.Client,
        inference_args: Optional[Dict[str, Any]] = None
    ) -> Iterable[PredictionResult]:
        """Runs inference on a batch of JSON strings to verify accuracy."""
        for json_string in batch:
            try:
                element_dict = json.loads(json_string)
                original_prompt = element_dict.get('original_prompt', '')
                original_text = element_dict.get('original_text', '')

                if not original_prompt or not original_text:
                    logging.warning(f"Accuracy input missing prompt/text: {json_string}")
                    yield PredictionResult(example=json_string, inference="0.0 - ERROR_ACCURACY_INPUT")
                    continue

                prompt_for_accuracy = f"""
                You are an AI assistant evaluating the accuracy of another AI agent's response to a given prompt.
                Score the accuracy of the 'text' in fulfilling the 'prompt' from 0.0 to 1.0 (float).
                0.0 is very bad, 1.0 is excellent.

                Example of very bad, score of 0:
                prompt: Give me the SQL for test_Table
                text: SUre, here's a picture of a dog

                Example of very good score of 1:
                prompt: generate a sql statement to select all fields from test_table
                text: SELECT * from test_table;

                Your response should be ONLY the float score, followed by a brief explanation of why.
                For example: "0.8 - The response was mostly accurate but missed a minor detail."

                Prompt: "{original_prompt}"
                Text: "{original_text}"
                Score and Explanation:
                """
                gemini_response = model.models.generate_content_stream(model=self._model_name, contents=[prompt_for_accuracy], config=self._model_kwargs)

                gemini_response_text = ""
                for chunk in gemini_response:
                    if chunk.text is not None:
                        gemini_response_text+=chunk.text

                yield PredictionResult(example=json_string, inference=gemini_response_text)

            except Exception as e:
                logging.error(f"Error during Gemini accuracy inference for input {json_string}: {e}")
                yield PredictionResult(example=json_string, inference="0.0 - ERROR_INFERENCE")
    ############## END STEP 3 ##############
다음을 실행하여 이 코드를 테스트합니다.
python gemini_beam_pipeline_step3.py --project $PROJECT_ID --runner DirectRunner --test_mode
이 단계에서는 추론도 반환해야 합니다. Gemini가 도구의 응답이 얼마나 정확하다고 생각하는지에 대한 점수를 댓글로 달고 반환해야 합니다.
다음과 같은 출력이 표시됩니다.
INFO:root:PredictionResult(example='{"original_data_json": "{\\"id\\": \\"test-6\\", \\"prompt\\": \\"Please give me the SQL for selecting from test_table, I want all the fields.\\", \\"text\\": \\"absolutely, here\'s a picture of a cat\\", \\"timestamp\\": 1751052770.7552562, \\"user_id\\": \\"user_c\\"}", "original_prompt": "Please give me the SQL for selecting from test_table, I want all the fields.", "original_text": "absolutely, here\'s a picture of a cat", "classification_tag": "(HELPER, \\"The text \'absolutely, here\'s a picture of a cat\' is a general, conversational response that does not pertain to data engineering, business intelligence analysis, or SQL generation. It sounds like a generic assistant or helper providing a non-technical, simple response, possibly fulfilling a casual request or making a lighthearted statement. Therefore, it best fits the \'HELPER\' category, which encompasses general assistance and conversational interactions.\\")"}', inference='0.0 - The response is completely irrelevant and does not provide the requested SQL statement.', model_id=None)
8. 결과 창 표시 및 분석
이제 결과를 윈도우화하여 특정 시간 간격으로 분석합니다. 고정 윈도우를 사용하여 데이터를 그룹화하면 집계된 유용한 정보를 얻을 수 있습니다. 윈도우화 후 Gemini의 원시 출력을 원본 데이터, 분류 태그, 정확도 점수, 설명 등 더 구조화된 형식으로 파싱합니다.
이 섹션에서는 gemini_beam_pipeline_step4.py를 사용합니다.
- 모든 데이터가 60초 윈도우 내에 배치되도록 60초의 고정 시간 윈도우를 추가합니다.
다음은 코드의 예입니다.
            ############## BEGIN STEP 4 ##############
            | 'WindowIntoFixedWindows' >> beam.WindowInto(beam.window.FixedWindows(60))
            ############## END STEP 4 ##############
다음을 실행하여 이 코드를 테스트합니다.
python gemini_beam_pipeline_step4.py --project $PROJECT_ID --runner DirectRunner --test_mode
이 단계는 정보 제공용이며, 창을 찾고 있습니다. 이는 윈도우 중지/시작 타임스탬프로 표시됩니다.
다음과 같은 출력이 표시됩니다.
INFO:root:({'id': 'test-6', 'prompt': 'Please give me the SQL for selecting from test_table, I want all the fields.', 'text': "absolutely, here's a picture of a cat", 'timestamp': 1751052901.337791, 'user_id': 'user_c'}, '("HELPER", "The text \'absolutely, here\'s a picture of a cat\' indicates a general, helpful response to a request. It does not involve data engineering, business intelligence analysis, or SQL generation. Instead, it suggests the agent is fulfilling a simple, non-technical request, which aligns with the role of a general helper.")', 0.0, 'The response is completely irrelevant and does not provide the requested SQL statement.', [1751052900.0, 1751052960.0))
9. 상태 저장 처리로 좋은 결과와 나쁜 결과 계산하기
마지막으로 상태 저장 DoFn을 사용하여 각 윈도우 내에서 'good' 및 'bad' 결과를 집계합니다. '좋은' 결과는 정확도 점수가 높은 상호작용일 수 있고 '나쁜' 결과는 점수가 낮은 상호작용을 나타냅니다. 이 상태 저장 처리 기능을 사용하면 시간이 지남에 따라 카운트를 유지하고 '나쁜' 상호작용의 예시를 수집할 수 있습니다. 이는 챗봇의 상태와 성능을 실시간으로 모니터링하는 데 매우 중요합니다.
이 섹션에서는 gemini_beam_pipeline_step5.py를 사용합니다.
- 상태 저장 함수를 만듭니다. (1) 잘못된 개수를 추적하고 (2) 잘못된 레코드를 표시하기 위해 두 가지 상태가 필요합니다. 시스템이 성능을 발휘할 수 있도록 적절한 코더를 사용하세요.
- 잘못된 추론의 값을 볼 때마다 두 값을 모두 추적하고 창이 끝날 때 값을 내보내야 합니다. 내보낸 후에는 상태를 재설정해야 합니다. 후자는 설명 목적으로만 제공되므로 실제 환경에서 이 모든 것을 메모리에 유지하려고 하지 마세요.
다음은 코드의 예입니다.
    ############## BEGIN STEP 5 ##############
    # Define a state specification for a combining value.
    # This will store the running sum for each key.
    # The coder is specified for efficiency.
    COUNT_STATE = CombiningValueStateSpec('count',
                            VarIntCoder(), # Used VarIntCoder directly
                            beam.transforms.combiners.CountCombineFn())

    # New state to store the (prompt, text) tuples for bad classifications
    # BagStateSpec allows accumulating multiple items per key.
    BAD_PROMPTS_STATE = beam.transforms.userstate.BagStateSpec(
        'bad_prompts', coder=beam.coders.TupleCoder([beam.coders.StrUtf8Coder(), beam.coders.StrUtf8Coder()])
    )

    # Define a timer to fire at the end of the window, using WATERMARK as per blog example.
    WINDOW_TIMER = TimerSpec('window_timer', TimeDomain.WATERMARK)

    def process(
        self,
        element: Tuple[str, Tuple[int, Tuple[str, str]]], # (key, (count_val, (prompt, text)))
        key=beam.DoFn.KeyParam,
        count_state=beam.DoFn.StateParam(COUNT_STATE),
        bad_prompts_state=beam.DoFn.StateParam(BAD_PROMPTS_STATE), # New state param
        window_timer=beam.DoFn.TimerParam(WINDOW_TIMER),
        window=beam.DoFn.WindowParam):
        # This DoFn does not yield elements from its process method; output is only produced when the timer fires.
        if key == 'bad': # Only count 'bad' elements
            count_state.add(element[1][0]) # Add the count (which is 1)
            bad_prompts_state.add(element[1][1]) # Add the (prompt, text) tuple
            window_timer.set(window.end) # Set timer to fire at window end

    @on_timer(WINDOW_TIMER)
    def on_window_timer(self, key=beam.DoFn.KeyParam, count_state=beam.DoFn.StateParam(COUNT_STATE), bad_prompts_state=beam.DoFn.StateParam(BAD_PROMPTS_STATE)):
        final_count = count_state.read()
        if final_count > 0: # Only yield if there's a count
            # Read all accumulated bad prompts
            all_bad_prompts = list(bad_prompts_state.read())
            # Clear the state for the next window to avoid carrying over data.
            count_state.clear()
            bad_prompts_state.clear()
            yield (key, final_count, all_bad_prompts) # Yield count and list of prompts
    ############## END STEP 5 ##############
다음을 실행하여 이 코드를 테스트합니다.
python gemini_beam_pipeline_step5.py --project $PROJECT_ID --runner DirectRunner --test_mode
이 단계에서는 모든 개수가 출력되어야 합니다. 창 크기를 조정하면 배치도 달라집니다. 기본 창은 1분 이내에 맞게 설정되므로 30초 또는 다른 시간 프레임을 사용해 보면 배치와 개수가 달라지는 것을 확인할 수 있습니다.
다음과 같은 출력이 표시됩니다.
INFO:root:Window: [1751052960.0, 1751053020.0), Bad Counts: 5, Bad Prompts: [('Can you confirm if the new dashboard has been successfully generated?', 'I have gone ahead and generated a new dashboard for you.'), ('How is the new feature performing?', 'It works as expected.'), ('What is the capital of France?', 'The square root of a banana is purple.'), ('Explain quantum entanglement to a five-year-old.', 'A flock of geese wearing tiny hats danced the tango on the moon.'), ('Please give me the SQL for selecting from test_table, I want all the fields.', "absolutely, here's a picture of a cat")]
10. 삭제
- Google Cloud 프로젝트 삭제 (선택사항, 코드랩에 권장): 이 프로젝트가 이 코드랩 전용으로 생성되었으며 더 이상 필요하지 않은 경우 전체 프로젝트를 삭제하는 것이 모든 리소스를 삭제하는 가장 확실한 방법입니다.
- Google Cloud 콘솔에서 리소스 관리 페이지로 이동합니다.
- 프로젝트를 선택합니다.
- 프로젝트 삭제를 클릭하고 화면에 표시된 안내를 따릅니다.
11. 축하합니다.
축하합니다. Codelab을 완료했습니다. Dataflow에서 Apache Beam과 Gemini를 사용하여 실시간 ML 추론 파이프라인을 성공적으로 빌드했습니다. 생성형 AI의 기능을 데이터 스트림에 적용하여 더 지능적이고 자동화된 데이터 엔지니어링을 위한 유용한 인사이트를 추출하는 방법을 알아봤습니다.