

1. 简介
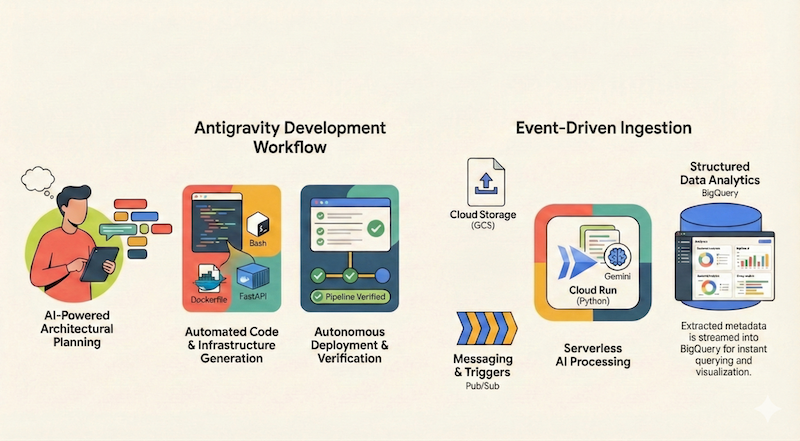
在此 Codelab 中,您将学习如何使用 Google Antigravity 设计、构建无服务器应用并将其部署到 Google Cloud。我们将构建一个无服务器且由事件驱动的文档流水线,该流水线会从 Google Cloud Storage (GCS) 提取文件,使用 Cloud Run 和 Gemini 处理这些文件,并将其元数据流式传输到 BigQuery。
学习内容
- 如何使用 Antigravity 进行架构规划和设计。
- 使用 AI 智能体生成基础设施即代码(Shell 脚本)。
- 构建和部署基于 Python 的 Cloud Run 服务。
- 在 Vertex AI 上集成 Gemini,以进行多模态文档分析。
- 使用 Antigravity 的 Walkthrough 制品验证端到端流水线。
所需条件
- 已安装 Google Antigravity。
- 启用了结算功能的 Google Cloud 项目。
- gcloud CLI 已安装并通过身份验证。
2. 应用概览
在我们开始使用 Antigravity 设计和实现应用之前,先来简要介绍一下我们想要构建的应用。
我们想要构建一个无服务器且由事件驱动的文档流水线,该流水线会从 Google Cloud Storage (GCS) 提取文件,使用 Cloud Run 和 Gemini 处理这些文件,并将其元数据流式传输到 BigQuery。
此应用的高级架构图可能如下所示:
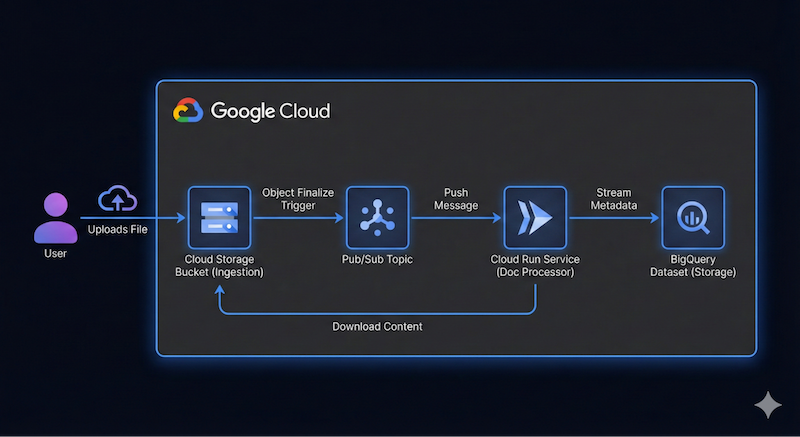
这不一定要非常精确。Antigravity 可以帮助我们逐步了解架构详细信息。不过,最好先了解自己想要构建的内容。您提供的详细信息越多,Antigravity 在架构和代码方面给出的结果就越好。
3. 规划架构
我们已准备好开始使用 Antigravity 规划架构详细信息!
Antigravity 擅长规划复杂的系统。我们可以先定义高级架构,而不是立即编写代码,并使用其中一项功能帮助 Antigravity 评估我们的请求、向我们提出后续问题,然后继续进行规划和实现。
假设您已启动 Antigravity,我们将为此 Codelab 创建一个新项目。
点击 Projects 标签旁边的“新建项目”图标,然后点击 New Project ,如下图所示:

系统会显示 Add Folder 选项,如下图所示:
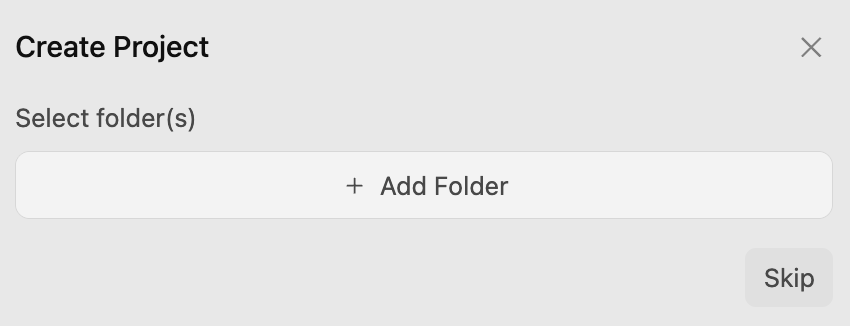
点击 Add Folder 按钮,将文件夹添加到您的项目。在我的机器上,我创建了一个 google-cloud-serverless-app 文件夹,并将其添加到了此项目中。
这会在 google-cloud-serverless-app 项目中打开对话。
点击屏幕左下角的主设置图标 ⚙️,然后前往“项目专用设置”。如果您没有看到列出的 google-cloud-serverless-app 项目,只需进行一次对话,然后返回到“项目设置”即可。
将 Agent Settings / Security Preset 设置为 Default ,并将 Agent Behaviour / Artifact Review Policy 设置为 Always Ask ,如下图所示:
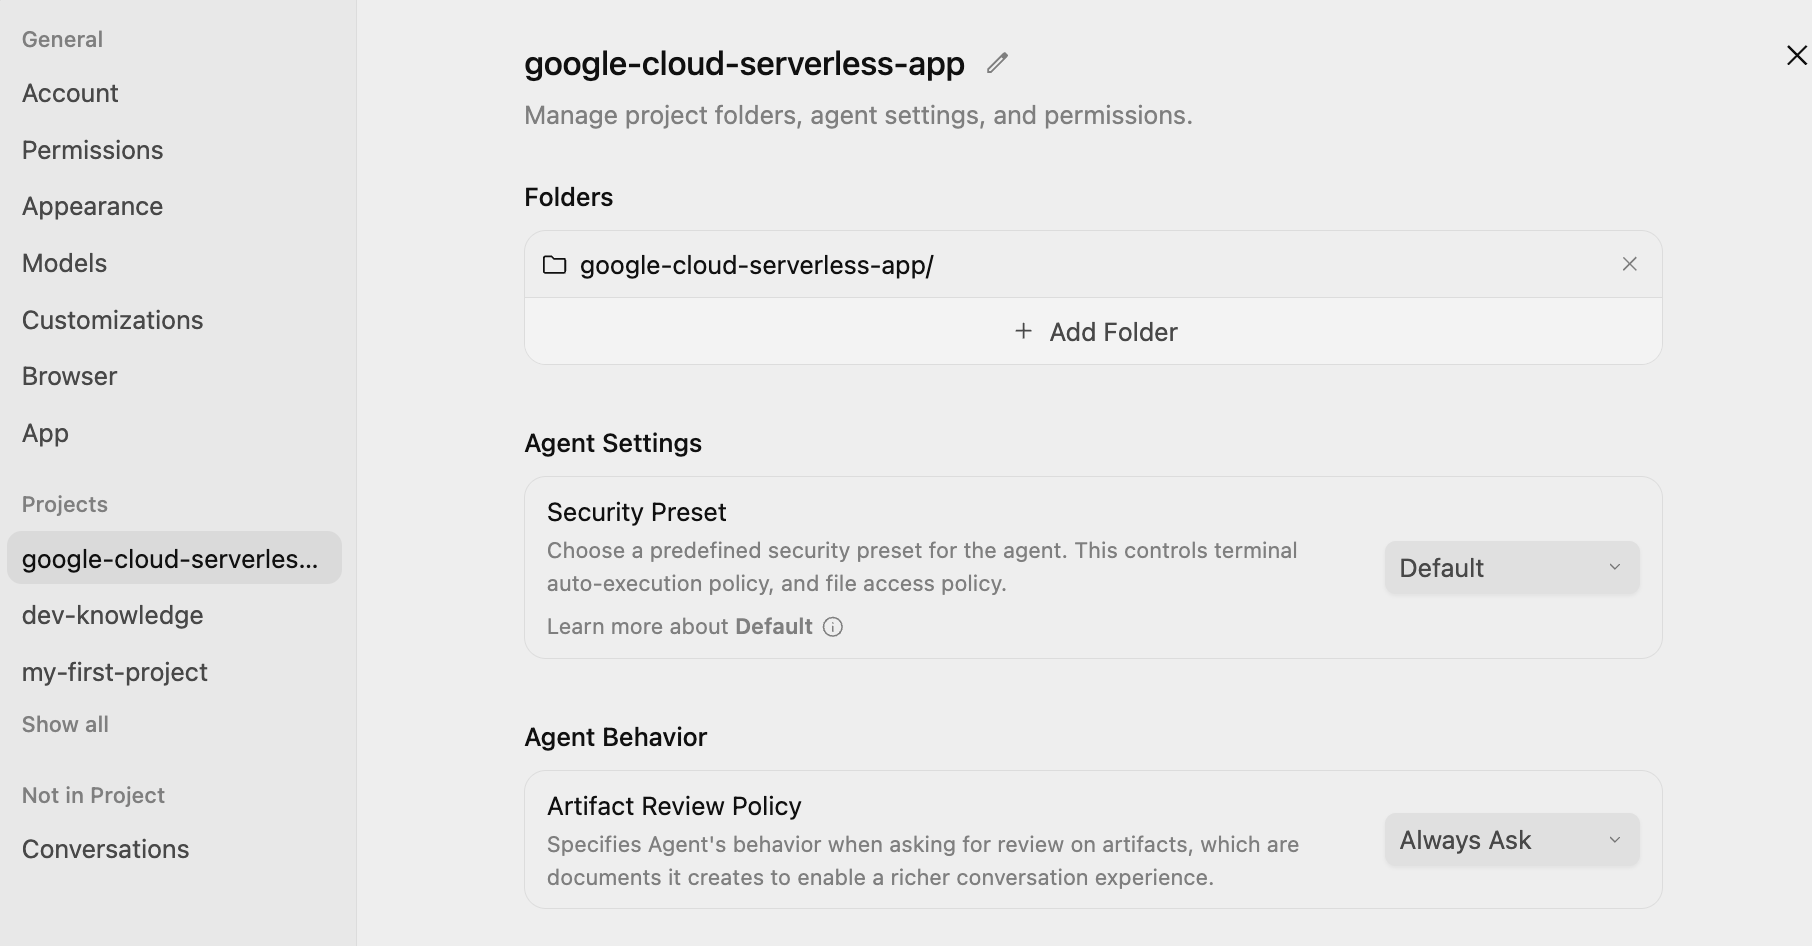
这样可确保您在每个步骤中都能查看并批准计划,然后智能体才会执行。
提示
现在,我们已准备好向 Antigravity 提供第一个提示。我们将使用斜杠命令 /grill-me 来评估我们的请求。
输入 /grill-me,然后输入以下提示,并点击“提交”按钮:
/grill-me

I want to build a serverless event-driven document processing pipeline on Google Cloud.
Architecture:
- Ingestion: Users upload files to a Cloud Storage bucket.
- Trigger: File uploads trigger a Pub/Sub message.
- Processor: A Python-based Cloud Run service receives the message, processes the file (simulated OCR), and extracts metadata.
- Storage: Stream the metadata (filename, date, tags, word_count) into a BigQuery dataset.
/grill-me 命令会提出一些后续问题,您可以尽自己所能回答这些问题。它还会建议推荐答案 ,您可以根据需要选择这些答案。
下面展示了我的 /grill-me 命令的运行示例:
How would you like the Cloud Run service to receive events from Cloud Storage and Pub/Sub?
(Recommended) Cloud Storage Pub/Sub Notification with a Pub/Sub Push Subscription (HTTP POST to Cloud Run)

How should access to the Cloud Run service endpoint be secured for Pub/Sub push requests?
Publicly accessible Cloud Run service without authentication (for prototyping/quick testing only)

How should the Python processor handle file inspection and the simulated OCR logic?
(Recommended) Download file from GCS: if plain text/utf-8, extract actual words and tags; if binary/image/PDF, simulate OCR processing (mock latency, generate synthetic text & tags, count words)

How should the processor write metadata to BigQuery and handle table/schema provisioning?
(Recommended) Use BigQuery Streaming Inserts (`insert_rows_json`) with auto-creation of the dataset and table if they do not exist

How should the Cloud Run service handle processing failures and retries from Pub/Sub?
(Recommended) Return HTTP 500 on transient errors for Pub/Sub automatic retry; return HTTP 200/204 on non-retryable errors (e.g., file not found, bad event format) to avoid poison pill loops

Which web framework would you prefer for the Python Cloud Run service?
Flask with Gunicorn: minimal, classic lightweight standard for GCP microservices

How would you like the cloud infrastructure (Bucket, Pub/Sub, Cloud Run, BigQuery) to be provisioned and deployed?
(Recommended) Provide both: automated `gcloud` CLI setup/deploy scripts for quick manual rollout AND Terraform manifests for reproducible IaC

How would you like to handle local testing and development before deploying to Google Cloud?
(Recommended) Include a local mock test suite and script (`test_local.py`) that can simulate Pub/Sub push envelopes and test processing with both mocked GCP clients and actual files
请注意,我要求 Antigravity 采用以下方式:
- 使用简单的 gcloud CLI 脚本来预配资源
- 使用原生 Cloud Storage Pub/Sub 通知 + Pub/Sub 推送订阅到 Cloud Run
- 使用 Flask(搭配 Gunicorn)作为框架
- 仅使用本地模拟(使用文本文件作为数据),而不是使用实时 OCR 数据
- 使用 BigQuery table.insert_rows() 将行插入 BigQuery
- 未经身份验证的 Cloud Run 部署
以及其他推荐选项。
实现计划和任务列表
Antigravity 现在将开始工作并生成实现计划 。它会向您显示类似以下消息,以便您查看:
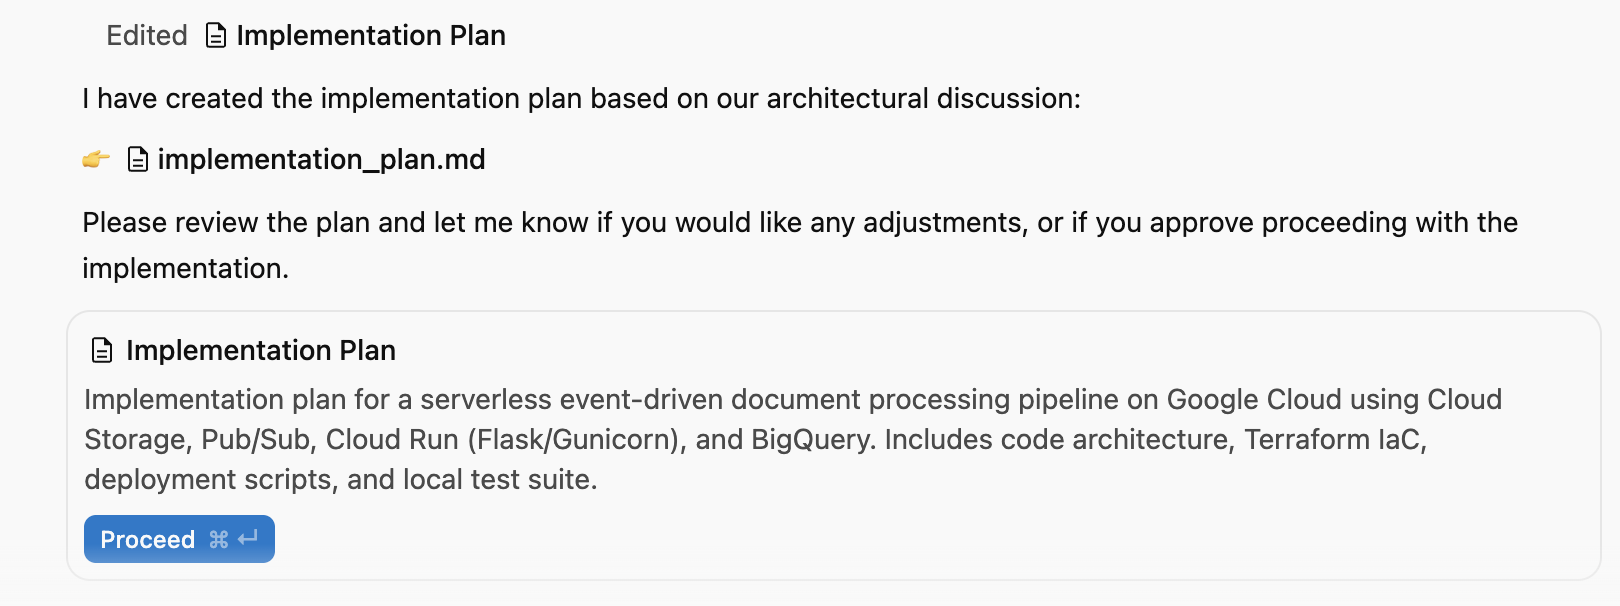
您可以点击右上角窗口中的“辅助窗格”切换开关,查看生成的制品,此时仅为实现计划 。
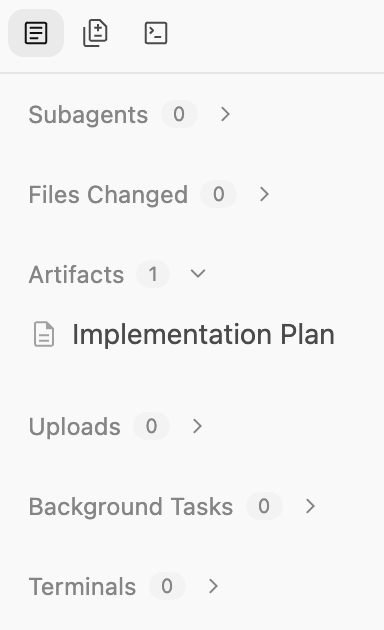
此计划概述了以下内容:
- 基础架构:GCS 存储分区、Pub/Sub 主题、BigQuery 数据集。
- 处理器:Python/Flask 应用、Dockerfile、要求。
- 集成:GCS 通知 → Pub/Sub → Cloud Run。
您应该会看到类似以下内容。下面展示了我们机器上实现计划的部分列表:
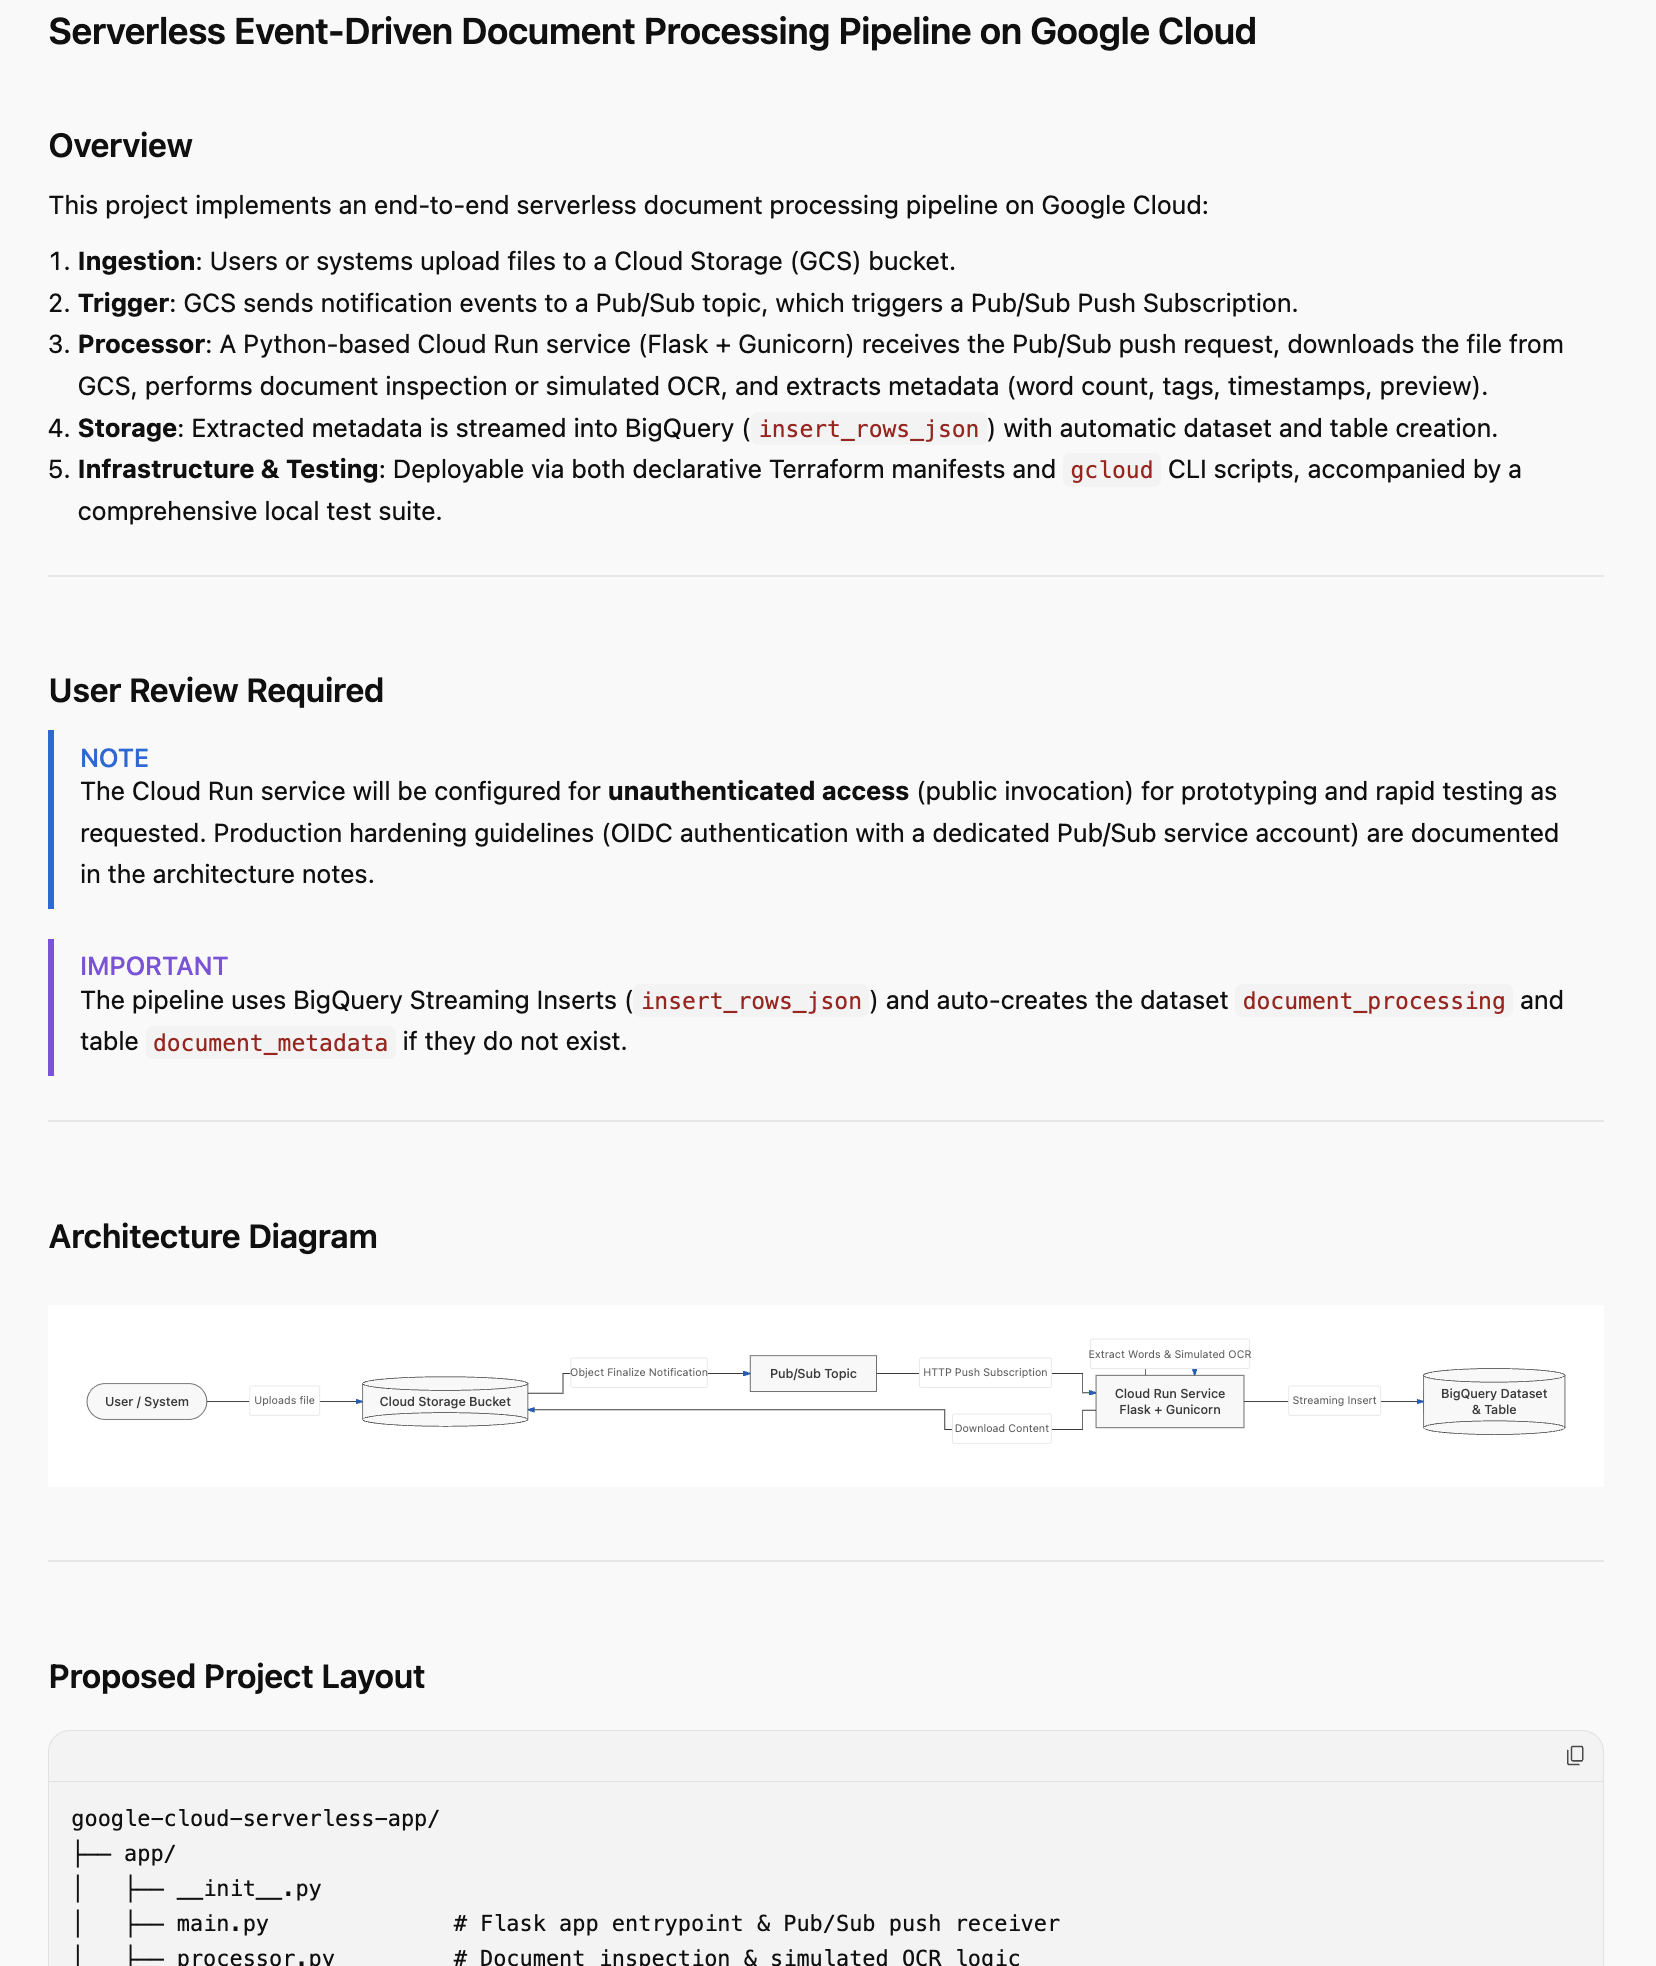
请仔细阅读。这是您提供实现反馈的机会。您可以点击实现计划的任何部分并添加评论。添加一些评论后,请务必提交您希望看到的任何更改以供审核,尤其是在命名、Google Cloud 项目 ID、区域等方面。
一切看起来正常后,点击 Proceed 按钮,授予智能体继续执行实现计划的权限。
4. 生成应用
计划获得批准后,Antigravity 会开始生成应用所需的文件,从预配脚本到应用代码。
Antigravity 将创建一个文件夹,并开始创建项目所需的文件。如果您查看制品,会注意到正在生成多个文件(源代码、脚本文件等)。
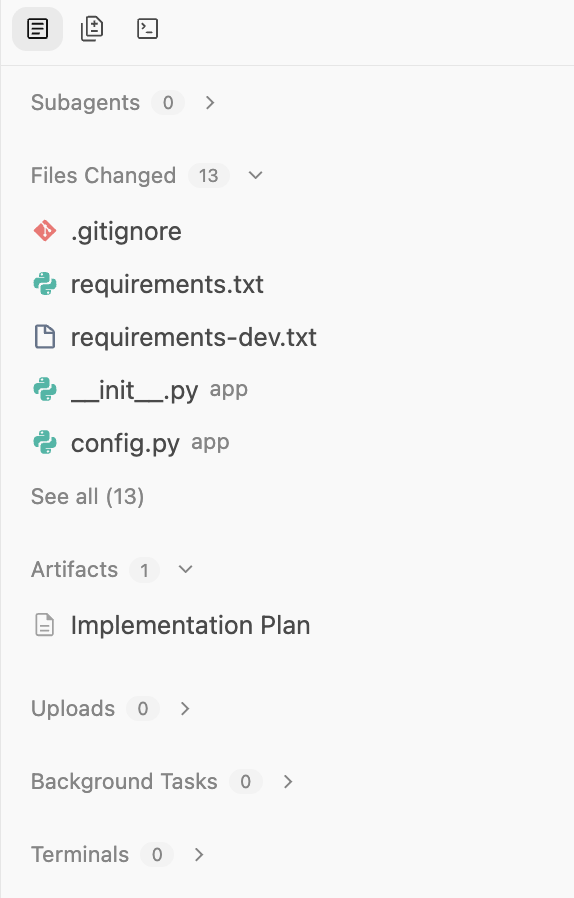
完成工作后,它会提及这一点,并创建一个 Walkthrough 文档供您查看。输出示例如下所示:
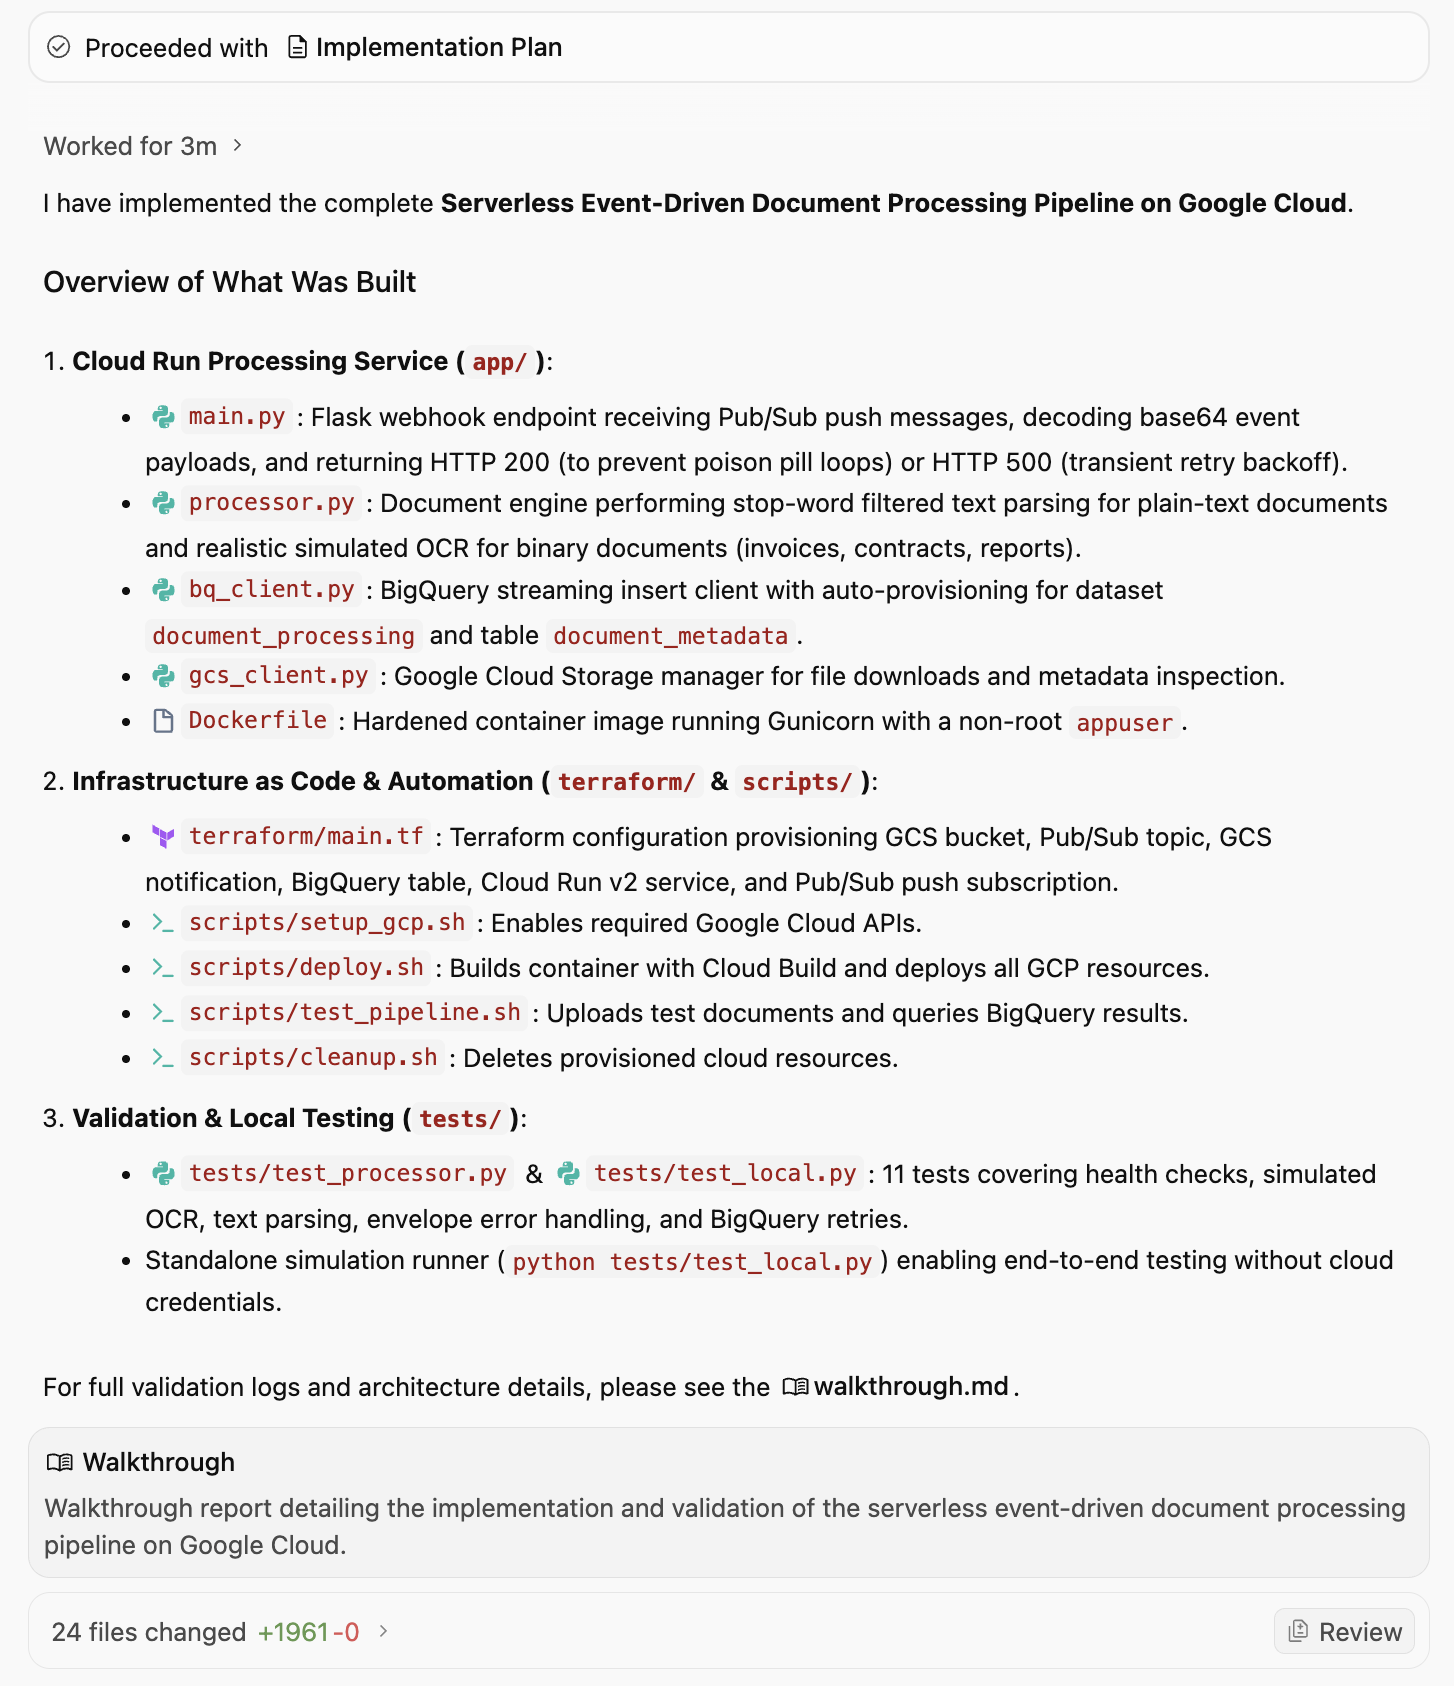
Walkthrough 文档会提及已实现的内容、生成的脚本,最重要的是已完成的验证。下面展示了 Walkthrough 文档的部分输出,其中包括验证:
3. Verification & Validation
Test Suite Execution
We ran the automated test suite using pytest:
bash
.venv/bin/pytest tests/ -v
tests/test_local.py::test_health_check PASSED                            [  9%]
tests/test_local.py::test_invalid_pubsub_envelope PASSED                 [ 18%]
tests/test_local.py::test_ignore_delete_events PASSED                    [ 27%]
tests/test_local.py::test_gcs_file_not_found PASSED                      [ 36%]
tests/test_local.py::test_successful_contract_processing PASSED          [ 45%]
tests/test_local.py::test_successful_pdf_ocr_processing PASSED           [ 54%]
tests/test_local.py::test_transient_bq_error_triggers_500_retry PASSED   [ 63%]
tests/test_processor.py::test_tag_extraction_filters_stopwords PASSED    [ 72%]
tests/test_processor.py::test_process_plain_text_document PASSED         [ 81%]
tests/test_processor.py::test_process_binary_pdf_simulated_ocr PASSED    [ 90%]
tests/test_processor.py::test_process_empty_text_document PASSED         [100%]
============================== 11 passed in 2.37s ==============================
Standalone End-to-End Simulation
We executed the standalone simulation script:
bash
.venv/bin/python tests/test_local.py
Sample Output:
=================================================================
Running Serverless Document Processing Local Simulation
=================================================================
[1] Health Check: Status=200, Payload={'service': 'document-processor', 'status': 'healthy'}
[2] Simulating GCS Event: Object Finalized 'sample_contract.txt' in 'finance-bucket'
   Response: Status=200, Body={'file_name': 'sample_contract.txt', 'ocr_status': 'EXTRACTED_TEXT', 'status': 'success', 'tags': ['provider', 'cloud', 'client', 'agreement', 'shall'], 'word_count': 181}
[3] Simulating GCS Event: Object Finalized 'sample_invoice.pdf' in 'invoices-bucket'
   Response: Status=200, Body={'file_name': 'sample_invoice.pdf', 'ocr_status': 'SIMULATED_OCR', 'status': 'success', 'tags': ['invoice', 'finance', 'billing', 'acme', 'pdf'], 'word_count': 62}
=================================================================
BigQuery Streamed Table Inspection (Mock Table)
=================================================================
Row #1:
 File:       sample_contract.txt (gs://finance-bucket)
 Status:     EXTRACTED_TEXT
 Words:      181
 Tags:       ['provider', 'cloud', 'client', 'agreement', 'shall']
 Processed:  2026-09-08T02:50:37.436225+00:00
Row #2:
 File:       sample_invoice.pdf (gs://invoices-bucket)
 Status:     SIMULATED_OCR
 Words:      62
 Tags:       ['invoice', 'finance', 'billing', 'acme', 'pdf']
 Processed:  2026-09-08T02:50:37.641931+00:00
我们可以询问 Antigravity 如何将此应用部署到 Google Cloud?它会返回完整详细信息,如下所示。总而言之,它要求我们确保安装了 Google Cloud SDK 并设置了 Google Cloud 项目。完成此操作后,
第 1 步:启用所需的 GCP API
运行 setup_gcp.sh 以启用 Cloud Run、Pub/Sub、Cloud Storage、BigQuery 和 Cloud Build API:./scripts/setup_gcp.sh
第 2 步:部署整个流水线
运行 deploy.sh:
export GCP_PROJECT="<YOUR_PROJECT_ID>"
export GCP_REGION="us-central1"               # or your region
./scripts/deploy.sh
此脚本在后台执行的操作:
- 使用 Google Cloud Build 构建容器映像,并将其推送到 Container/Artifact Registry。
- 使用适当的环境变量(
GCP_PROJECT、BQ_DATASET_ID、BQ_TABLE_ID)将服务部署到 Cloud Run。 - 创建 Cloud Storage 提取存储分区 (
gs://<PROJECT_ID>-document-ingest)。 - 创建 Pub/Sub 主题 (
document-upload-events) 并授予 GCS 向其发布的权限。 - 在存储分区上配置 GCS 通知 (
OBJECT_FINALIZE)。 - 创建以 Cloud Run 服务网址为目标的 Pub/Sub 推送订阅,并自动重试退避。
它还建议如何测试流水线。
运行 test_pipeline.sh: ./scripts/test_pipeline.sh
这会将 samples/sample_contract.txt 和 samples/sample_invoice.pdf 上传到您的存储分区,等待处理,并运行 BigQuery SQL 查询,显示提取的元数据、字数和标签。
5. 部署应用
我们来部署应用,如上所述。我们可以要求 Antigravity 为我们运行此操作,但在执行此操作之前,请确保 gcloud CLI 存在并已针对 Google Cloud 项目进行配置。
我们可以向 Antigravity 提供提示“为我部署应用”。系统会提示您提供各种权限,然后它会继续执行脚本文件。
它会以后台任务的形式启动该进程,如下面的消息所述:
I have initiated the deployment of the document processing pipeline to Google Cloud project PROJECT_ID in REGION.The deployment process is currently executing in the background:
Building and publishing the container image via Cloud Build.
Configuring service account IAM permissions and deploying the Cloud Run service.
Provisioning the Cloud Storage bucket (gs://PROJECT_ID-document-ingest).
Setting up the Pub/Sub topic, GCS notification, and push subscription.
I will notify you as soon as the deployment finishes!
6. 验证应用
流水线部署完毕后,Antigravity 会继续验证应用是否正常运行。它会询问我们是否可以运行 test_pipeline.sh 文件。我们可以继续并授予其权限。
它最终会告诉我们以下内容:
🚀 Deployment Successful & Verified on Google Cloud!

The application has been deployed to Google Cloud project PROJECT_ID in REGION and end-to-end event-driven processing has been verified.
它还更新了 Walkthrough 制品以查看结果(部分列表如下所示):
部署摘要
- GCP 项目:PROJECT_ID
- 区域:REGION
- Cloud Run 服务:document-processor
- Cloud Run 端点:SERVICE_网址
- Cloud Storage 存储分区:gs://PROJECT_ID-document-ingest
- Pub/Sub 主题:document-upload-events
- Pub/Sub 推送订阅:document-upload-events-push-sub
- BigQuery 目标:PROJECT_ID.document_processing.document_metadata
实时流水线验证
我们针对实时 Google Cloud 环境执行了 scripts/test_pipeline.sh:
- 将 sample_contract.txt 和 sample_invoice.pdf 上传到 Cloud Storage 存储分区。
- GCS 生成 OBJECT_FINALIZE 事件到 Pub/Sub。
- Pub/Sub 将信封推送到 Cloud Run 微服务。
- Cloud Run 提取了元数据,处理了模拟 OCR,并将记录流式传输到 BigQuery。
实时 BigQuery 查询输出
+------------------------------+------------+----------------+---------------------------------------------------+---------------------+
|          file_name           | word_count |   ocr_status   |                       tags                        |    processed_at     |
+------------------------------+------------+----------------+---------------------------------------------------+---------------------+
| test_invoice_1788840194.pdf  |         62 | SIMULATED_OCR  | ["invoice","finance","billing","acme","pdf"]      | 2026-09-08 04:03:27 |
| test_contract_1788840194.txt |        181 | EXTRACTED_TEXT | ["provider","cloud","client","agreement","shall"] | 2026-09-08 04:03:22 |
+------------------------------+------------+----------------+---------------------------------------------------+---------------------+
所有流水线组件在生产环境中均处于活跃、正常且已验证状态。
可选:手动验证
即使 Antigravity 已经验证了应用,您也可以按照以下步骤在 Google Cloud 控制台中手动检查是否已创建所有资源。
Cloud Storage
目标:验证存储分区是否存在并检查上传的文件。
- 前往 Cloud Storage > 存储分区 。
- 找到名为
PROJECT_ID-document-processing的存储分区。 - 点击存储分区名称以浏览文件。
- 验证:您应该会看到上传的文件(例如
sample_contract.txt)。
Pub/Sub
目标:确认主题存在并且具有推送订阅。
- 前往 Pub/Sub > 主题 。
- 找到 document-uploads-events 。
- 点击主题 ID 。
- 向下滚动到订阅 标签页。
- 验证:确保列出了 doc-uploads-events-push-sub 。
Cloud Run
目标:检查服务状态和日志。
- 前往 Cloud Run 。
- 点击服务 document-processor 。
- 验证:
- 健康状况:绿色对勾标记表示服务处于活跃状态。
- 日志:点击“日志”标签页。查找类似“Processing document: gs://...”和“Successfully streamed metadata...”的条目。
BigQuery
目标:验证数据是否实际存储。
- 前往 BigQuery > SQL 工作区 。
- 在探索器窗格中,展开您的项目 > document_processing 数据集。
- 点击 document_metadata 表。
- 点击查询 标签页,并通过 SELECT * 语句检索表中的所有行。
- 验证:您应该会看到包含 file_name、process_at、tags 和 word_count 的行。
7. 探索应用
此时,您已预配并运行基本应用。在深入了解如何进一步扩展此应用之前,请花点时间探索代码。您可以查看制品,它应该会向您显示生成的代码文件。
下面简要介绍了您可能会看到的一些文件:
deploy.sh:用于预配所有 Google Cloud 资源并启用所需 API 的主脚本。main.py:流水线的主要入口点。此 Python 应用会创建一个 Web 服务器,该服务器接收 Pub/Sub 推送消息,从 GCS 下载文件,对其进行“处理”(模拟 OCR),并将元数据流式传输到 BigQuery。Dockerfile:定义如何将应用打包到容器映像中。requirements.txt:列出 Python 依赖项。
您可能还会看到测试和验证所需的其他脚本和文本文件。
8. 扩展应用
现在您已经有了一个正常运行的基本应用,可以继续迭代和扩展该应用。以下是一些建议。
添加前端
构建一个简单的 Web 界面来查看已处理的文档。
请尝试以下提示:Create a simple Streamlit or Flask web application that connects to BigQuery. It should display a table of the processed documents (filename, upload_date, tags, word_count) and allow me to filter the results by tag
与真实 AI/机器学习集成
使用 Gemini 模型提取、分类和翻译,而不是模拟 OCR 处理。
- 替换虚拟 OCR 逻辑。将图片/PDF 发送给 Gemini 以提取实际文本和数据。分析提取的文本以对文档类型(发票、合同、简历)进行分类,或提取实体(日期、名称、位置)。
- 自动检测文档的语言,并将其翻译成英文,然后再存储。您也可以使用任何其他语言。
增强存储和分析
您可以为存储分区配置生命周期规则,将旧文件移至“Coldline”或“Archive”存储空间,以节省费用。
稳健性和安全性
您可以使应用更稳健、更安全,例如:
- 死信队列 (DLQ):更新 Pub/Sub 订阅以处理失败。如果 Cloud Run 服务处理文件失败 5 次,则将消息发送到单独的“死信”主题/存储分区以供人工检查。
- Secret Manager:如果您的应用需要 API 密钥或敏感配置,请将其存储在 Secret Manager 中,并从 Cloud Run 安全地访问它们,而不是对字符串进行硬编码。
- Eventarc:从直接 Pub/Sub 升级到 Eventarc,以实现更灵活的事件路由,让您可以根据复杂的审核日志或其他 GCP 服务事件触发。
当然,您可以提出自己的想法,并使用 Antigravity 帮助您实现这些想法!
9. 总结
您已使用 Google Antigravity 在几分钟内成功构建了一个可扩缩的无服务器 AI 驱动型文档流水线。您学习了如何:
- 使用 AI 规划架构。
- 在 Antigravity 从代码生成到部署和验证的过程中,指导和管理 Antigravity。
- 使用 Walkthrough 验证部署和验证。