
1. Overview
Have you ever wanted to build an Android app but didn't know where to start? Or maybe you have a great idea but don't want to spend weeks learning to code first?
Welcome to the future of development! In this codelab, you'll use Google AI Studio to design, build, and run an Android app in record time. No coding experience required. You'll go from an idea to a working app running right in AI Studio. Then, you can even learn how to load it on your phone or publish it to the Google Play Store so you can share it with your friends.
Let's get building!
What you'll learn
In this codelab, you learn how to:
- Plan your Android application in Google AI Studio Playground.
- Build your app in Google AI Studio using Build mode.
- Test the app in your browser.
- (optional) Install the app directly on an Android phone.
- (optional) Publish the app to the Google Play Store for testing.
Prerequisites
- Access to Google AI Studio.
- (optional) An Android device and a USB cable (for testing on your Android phone).
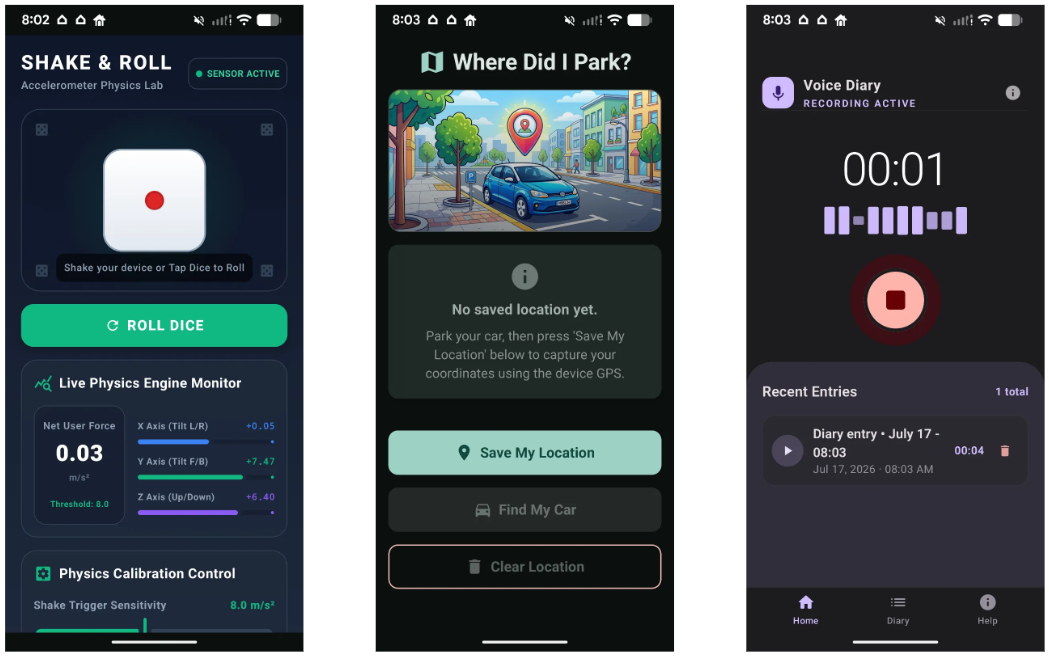
2. Plan out your app
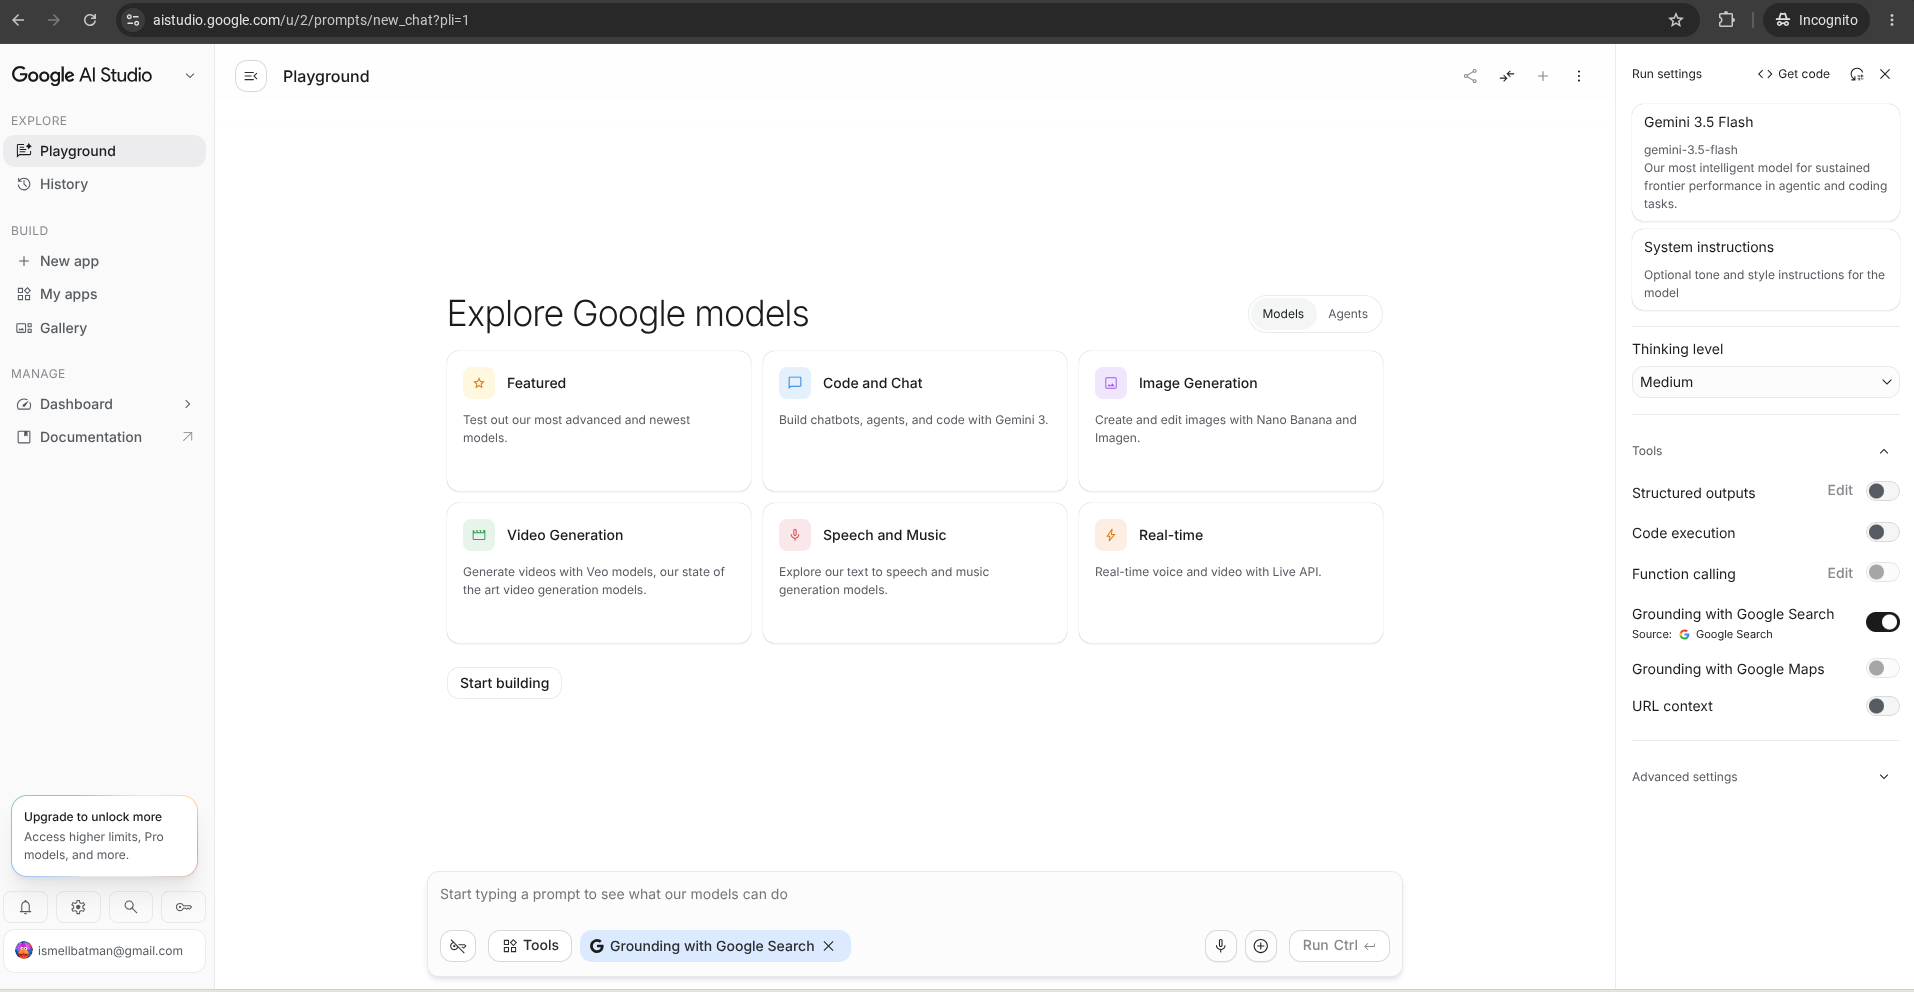
The first step to a great app is a great plan. A great "AI hack" is to use an LLM to help you plan and upgrade your initial idea before you start building.
You can do this inside the Playground in Google AI Studio.
The app idea: Shake-to-Roll Dice
For this codelab, you will build a Shake-to-Roll Dice app. This is a great project for a first app because it uses your phone's accelerometer (motion sensor) to trigger an action in the app.
When you shake your physical phone, the app will roll digital dice and display the result. If you inspect your code later, you can learn more about how to read sensor data (movement along the X, Y, and Z axes) and use it to trigger a code function.
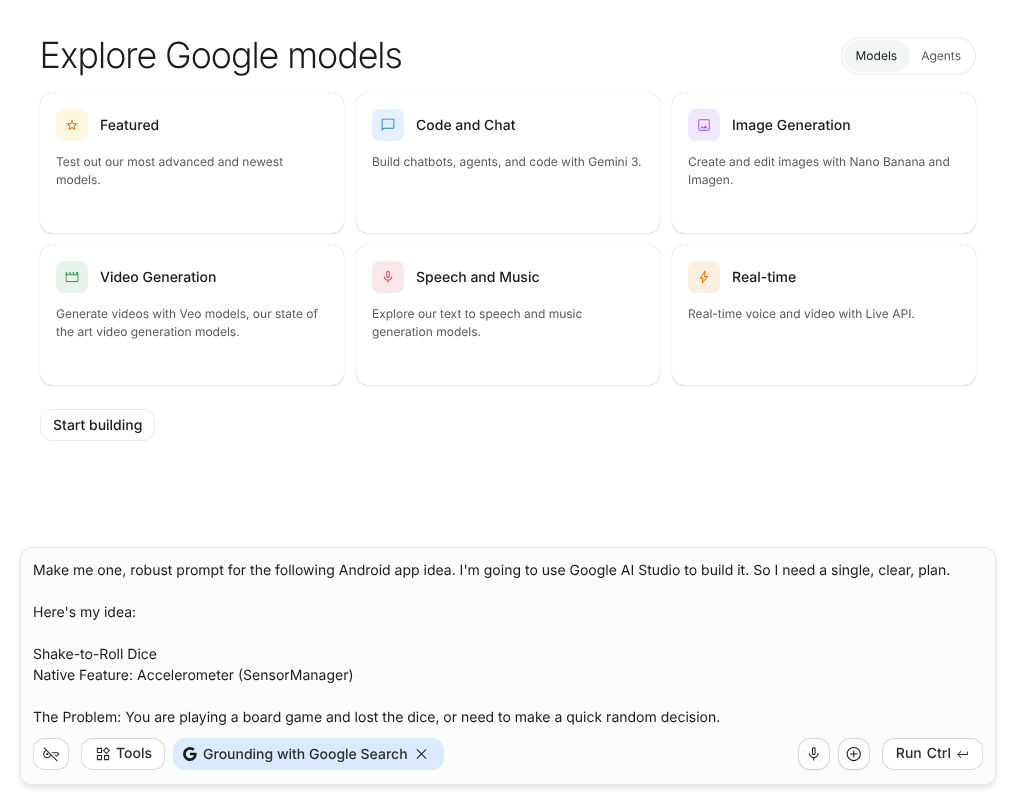
Copy the following prompt to get started.
Make me one, robust prompt for the following Android app idea.
I'm going to use Google AI Studio to build it.
So I need a single, clear, plan.

Here's my idea:

Shake-to-Roll Dice
Integration with a feature that lets me
detect phone motion (tell me which integration can do that)

The Problem: You are playing a board game and lost the dice,
or need to make a quick random decision.
Alternatively, you can click here to open Google AI Studio with this prompt pre-filled.
Paste the prompt into the prompt box and click Run to start generating your app plan.
(Optional) Review your plan
The model will generate a detailed build plan.
Review the plan to make sure it matches what you want. If you want to change anything (for example, "make the UI blue" or "add a reset button"), type your request in the chat and run it again.
Now you're ready to build. Keep your plan open. You're going to copy it and use it in the next step.
3. Build in Google AI Studio
Now that you have a plan, use Google AI Studio's Build mode to generate the app.
- Copy your finalized app plan from the previous step. (Pro tip: Use the Make a copy option in the triple-dot menu.)
- Click the + New App button.
- Click the Build an Android app button below the prompt window. This adds a "Build an Android app" chip to your prompt box (clicking it again will remove it).
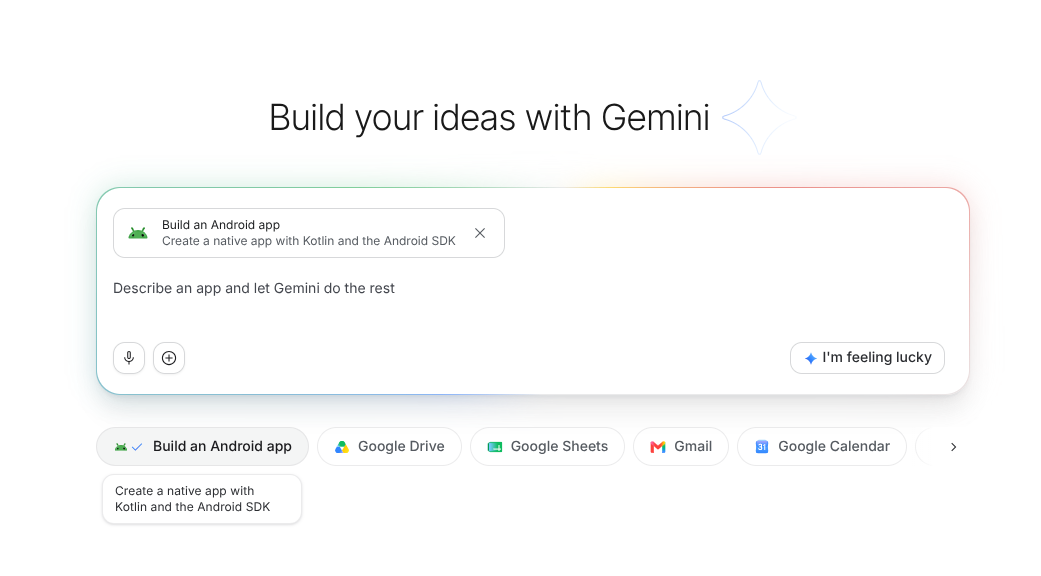
- Paste your plan into the prompt box and click Build to start the build.
Shortly after you start your build, you will be prompted to select a style for your app.
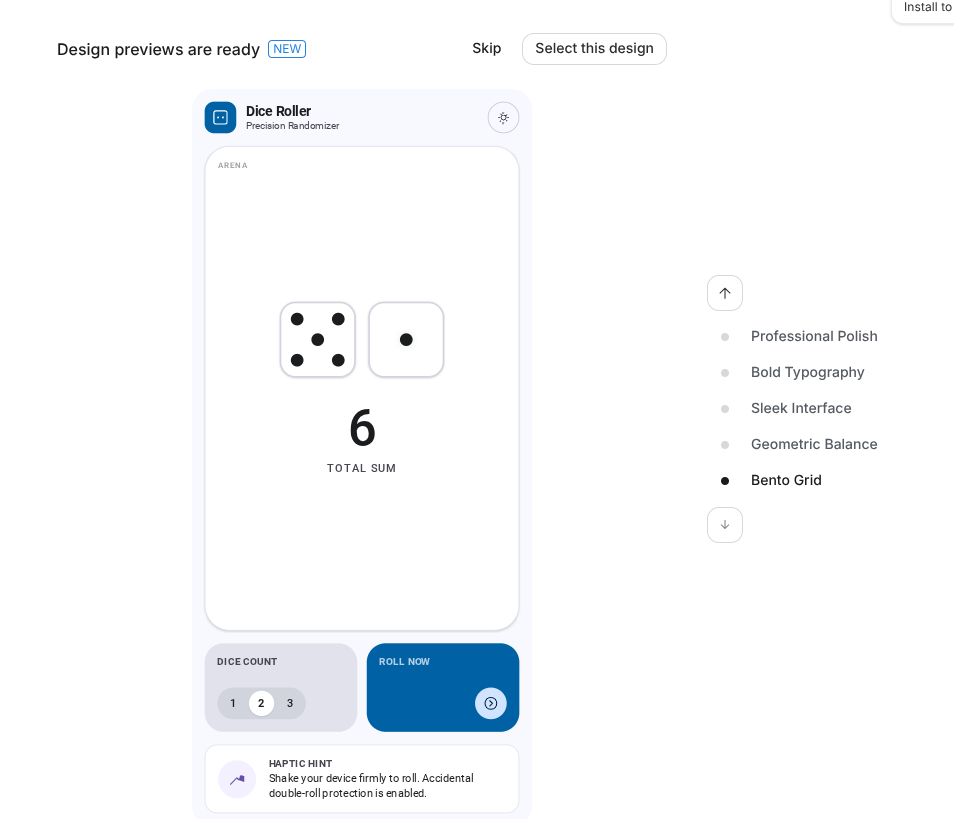
Choose your favorite style and click Select this design to continue your app build.
The Google AI Studio agent will begin to build your app. This might take 5 minutes. Time to grab a tea, or get a quick workout in.
4. Test and iterate
Once the build is complete, AI Studio automatically launches your app inside a browser-based Android emulator.
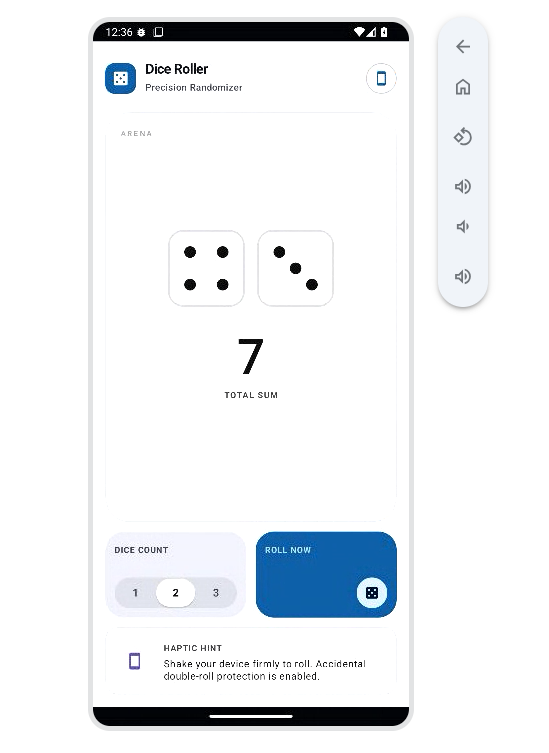
Test out your app and pay attention to the following items.
- Make sure the app runs. Sometimes the agent can introduce errors when coding. If this happens, a ‘Fix errors' button will appear in chat. You can see more details about the error by clicking the arrow in the bottom right corner of your screen.
- Test the core features. An app may look good, but if it doesn't work it won't be useful.
- Review the code. Even if you don't plan on learning to code, it helps you to have some idea about the files created to make your app. (Pro-tip: ask Android studio about anything in the code you're wondering about. It's a great way to learn.)
Find a change you want to make to your app, and ask the agent to make it.
The agent will make the change. Once you're happy with the results, it's time to celebrate!
Success!
Congratulations, you have built and tested your app in the emulator! If you are happy with how it works, you've successfully completed the core project.
If you have an Android phone and want to keep going, proceed to the optional sections on how to add your app to your phone, or how to publish your app to the Google Play Store.
5. (Optional) Install directly on your phone
Want to see your app running in the real world? You don't need to wait for the Google Play Store. You can install your app directly from Google AI Studio onto your physical Android phone using a USB cable. (Many users find this is an easier and more convenient way to test your app.)
- Prepare your phone:
- On your Android phone, go to Settings > About Phone.
- Tap Build Number 7 times until you see "You are now a developer!".
- Go back to Settings > System > Developer Options (or search Developer Options in settings) and enable USB Debugging.
- Connect your device: Connect your phone to your computer using a USB cable.
- Install from AI Studio:
- In the preview panel of Google AI Studio, click the Install button.
- Review the onscreen instructions. Then click Install via USB.
- On your physical phone, look for a pop up asking to "Allow USB debugging" and accept it.
- Run the app: AI Studio will transfer the app. It will launch automatically on your phone, and you can use it anytime without needing your computer.
As you continue to modify and build out your app, you can repeat these instructions to install your latest versions.
6. (Optional) Publish to the Google Play Store
If you want to share your app with friends, family, or public users, you can publish it to the Google Play Store directly from Google AI Studio.
First, visit the Google Play Console and follow the instructions to set up your developer account.
Once your Play Store Developer account is set up, follow these steps to deploy and share your app:
- Log in: Make sure you are logged into Google AI Studio with the same Google Account you use for your Google Play Developer Account.
- Publish:
- In Google AI Studio click Publish.
- Select Publish to Play Store.
- Follow the onscreen instructions to send your app to the Play Store.
- Set up Testers: Google AI Studio will automatically sign your app and publish it to the Internal Testing track. You can enter the email addresses of the people you want to test your app.
- Share: Once published, AI Studio will display a shareable link and a QR code. Send this link to your friends, or have them scan the QR code. They will be directed to install your app from the Google Play Store.
7. Other app ideas
Ready to build something else? Here are a few more ideas that are great for beginners because they use built-in Android features:
- Where did I park? (GPS/Location Services): Save your parking coordinates and open them in Google Maps. This teaches you how to retrieve the device's current latitude and longitude and use Intents to interact with other apps. Prompt:
Make me one, robust prompt for the following Android app idea. I'm going to use Google AI Studio to build it. So I need a single, clear, plan. Here's my idea: Where did I park? Built-in Feature: GPS / Location Services The Problem: Wandering around a massive mall parking lot looking for your car. - Voice Diary (Microphone): Record audio notes and save them to your device. This teaches you how to manage file storage on the device, capture audio streams, and build a simple playback interface. Prompt:
Make me one, robust prompt for the following Android app idea. I'm going to use Google AI Studio to build it. So I need a single, clear, plan. Here's my idea: Voice Diary Built-in Feature: Microphone (MediaRecorder) The Problem: You have a brilliant idea while walking or driving, and typing it out on a keyboard is too slow or dangerous. - Flashlight SOS (Camera/Flashlight): Toggle the phone's flashlight, or make it blink in an SOS Morse code pattern. This teaches you how to access the
CameraManagerand control hardware features. Prompt:Make me one, robust prompt for the following Android app idea. I'm going to use Google AI Studio to build it. So I need a single, clear, plan. Here's my idea: Flashlight SOS Built-in Feature: Camera/Flashlight (CameraManager) The Problem: You are in the dark and need to signal for help, or just need a quick light source. - Level Meter (Gyroscope/Gravity Sensor): Use the phone's tilt sensors to display a bubble level UI, showing if a surface is flat. This teaches you how to read rotation vectors. Prompt:
Make me one, robust prompt for the following Android app idea. I'm going to use Google AI Studio to build it. So I need a single, clear, plan. Here's my idea: Level Meter Built-in Feature: Gyroscope/Gravity Sensor (SensorManager) The Problem: Hanging a picture frame and wanting to make sure it's perfectly straight. - Step Counter (Step Counter Sensor): Read the hardware step counter sensor to track daily steps and save the history. This teaches you how to use fitness sensors and persistent storage. Prompt:
Make me one, robust prompt for the following Android app idea.
I'm going to use Google AI Studio to build it.
So I need a single, clear, plan.
Here's my idea:
Step Counter
Built-in Feature: Step Counter Sensor (Sensor.TYPE_STEP_COUNTER)
The Problem: Tracking your daily activity to stay healthy.
When writing prompts for Google AI Studio, try to structure them like these examples: define the core idea, specify which built-in Android features or sensors to use, and describe the problem you want to solve. The more specific you are, the better the plan and app build will be.
8. Next steps
Congratulations! You planned an app, generated it in AI Studio, tested it in the browser, and (maybe!) got it running on your device.
Visit this link to claim the Completed Builder Journey badge!
To continue your journey, head to goo.gle/builders for your next lab.