

۱. مقدمه
در این آزمایشگاه کد، شما با Google Antigravity ، یک پلتفرم توسعه عاملگرا که برای کمک به شما در توسعه در این عصر عاملها طراحی شده است، آشنا خواهید شد. Antigravity به عنوان مرکز فرماندهی عاملهای هوش مصنوعی شما عمل میکند و یک پلتفرم یکپارچه برای راهاندازی، نظارت و هماهنگسازی فعالیتهای آنها فراهم میکند.
در این آزمایشگاه کد، ما از Antigravity برای ساخت برنامههای واقعی استفاده خواهیم کرد. ما از تحقیقات ساده وب به سمت تولید برنامههای کاربردی کامل و تستهای واحد در سطح سازمانی حرکت خواهیم کرد.
پیشنیازها:
- آنتیگراویتی و IDE آنتیگراویتی نصب و پیکربندی شدهاند.
- آشنایی اولیه با Google Antigravity. توصیه میشود Codelab: شروع کار با Google Antigravity را تکمیل کنید.
۲. درباره موارد استفاده
از آنجایی که شما درک اولیهای از Antigravity دارید، بیایید به چند مورد استفاده بپردازیم تا آن را در عمل ببینیم. توجه داشته باشید که Antigravity یک پلتفرم مبتنی بر Agent است. این بدان معناست که در بیشتر موارد، ما به سادگی به Agent دستور میدهیم و Agent سپس به تنهایی شروع به کار میکند، وظیفه خود را انجام میدهد، در صورت نیاز درخواست مجوز میکند، مصنوعات را تولید میکند و سپس در صورت انجام وظیفه به ما اطلاع میدهد. در نتیجه، ما نمیتوانیم هر خروجی مکالمه Agent را در هر یک از موارد استفاده زیر تولید کنیم. ما دستورالعملها و چند تصویر لازم از نتایج مورد انتظار را به اشتراک خواهیم گذاشت، اما نتایج شما ممکن است کمی متفاوت باشد.
موارد استفادهای که پوشش خواهیم داد، از خودکارسازی چند وظیفه با سایتهای خارجی گرفته تا تولید و تأیید موارد تست واحد برای یک پروژه و توسعه کامل یک وبسایت را شامل میشود. بیایید شروع کنیم.
۳. اخبار مهم
این یک مورد استفاده ساده است، اما میتواند مبنایی باشد که از طریق آن میتوانید از مرورگر وب برای بازدید از وبسایتها، استخراج اطلاعات، انجام برخی اقدامات و سپس بازگرداندن دادهها به کاربر استفاده کنید.
در این مورد، ما قصد داریم از سایت اخبار گوگل بازدید کنیم و اطلاعاتی را از آنجا استخراج کنیم. اما شما میتوانید به راحتی با سایتی به انتخاب خود آزمایش کنید و ببینید که چگونه پیش میرود.
فرض میکنیم که یک پوشه ریشه داریم که در آن پروژههای مختلفی را که در این آزمایشگاه کد خواهیم دید، ایجاد خواهیم کرد. این پوشه ریشه در دستگاه ما agy2-pprojects نام دارد.
ابتدا، برای شروع، پوشهای با نام news-highlights در پوشهی بالا ایجاد کنید.
Antigravity را اجرا کنید و یک پروژه جدید ایجاد کنید. پوشه news-highlights را به آن اضافه کنید.
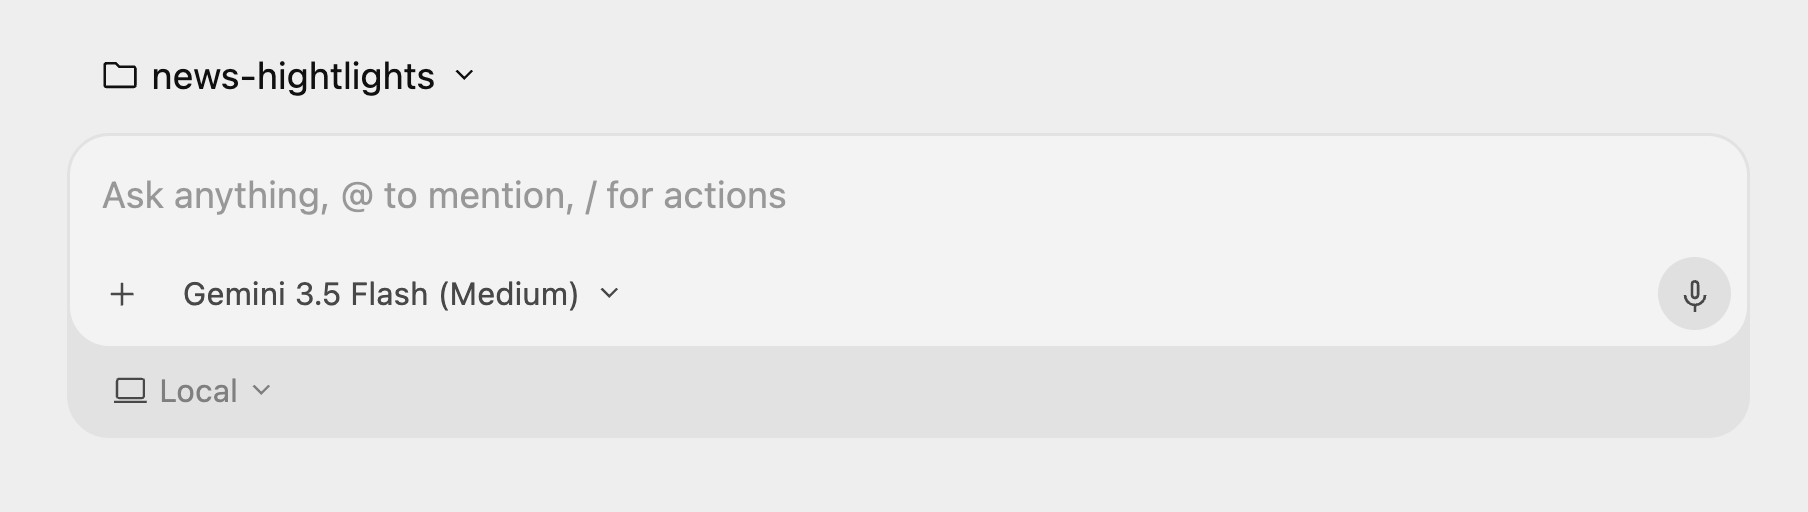
یک مکالمه جدید را در فضای کاری تازه وارد شده news-highlights شروع کنید:
سپس دستور زیر را بدهید: « به news.google.com مراجعه کنید و مهمترین اخبار لحظهای را برای من نمایش دهید. »
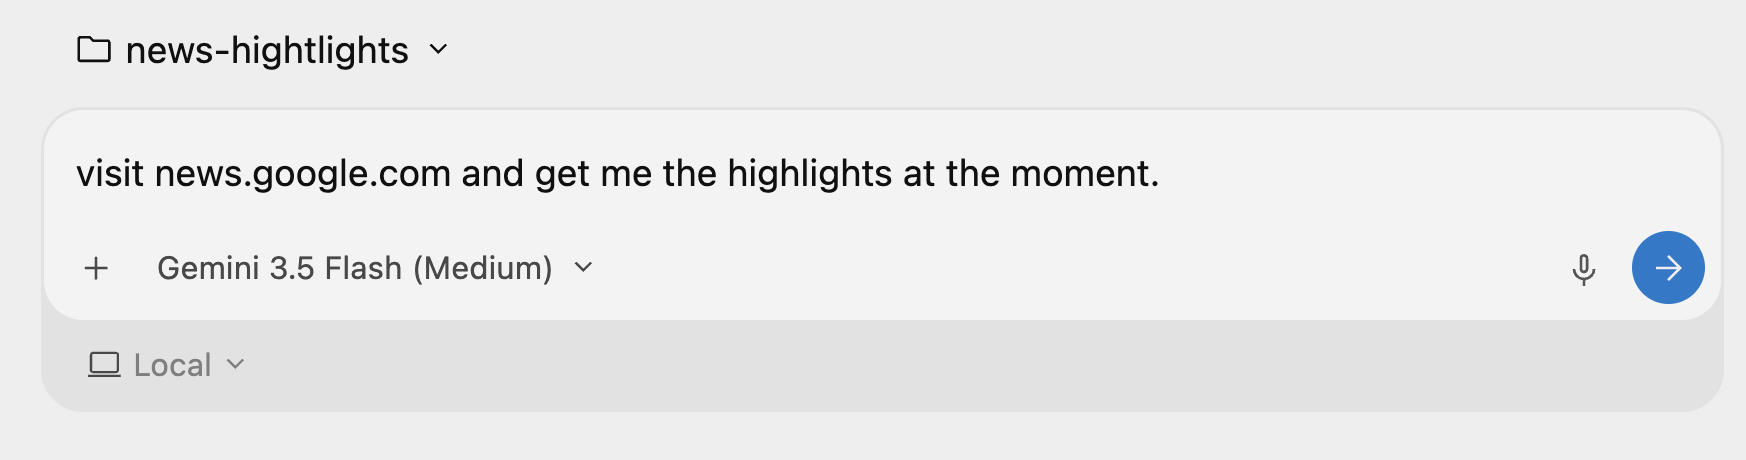
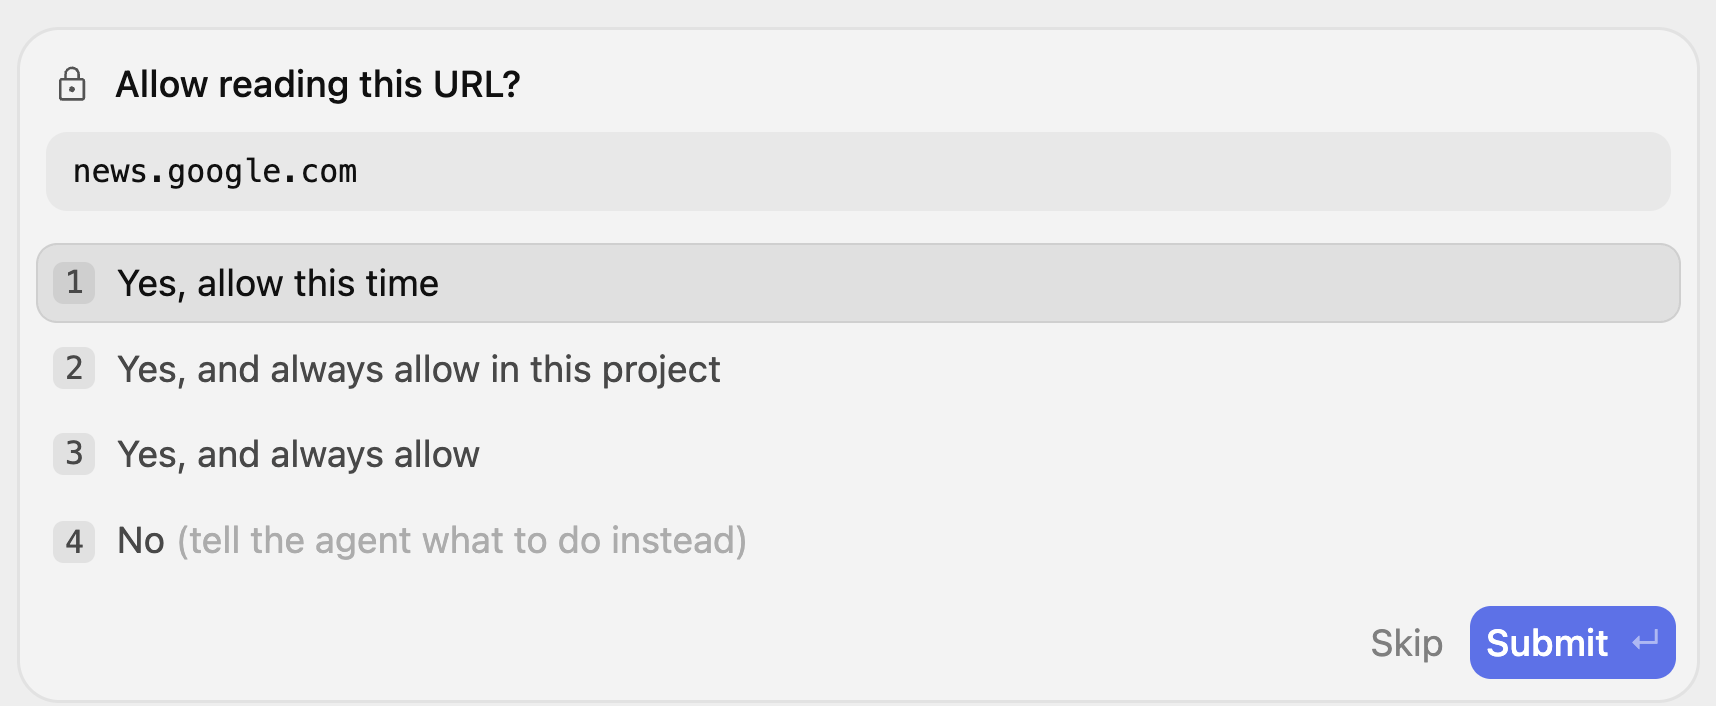
این کار فرآیند Agent را آغاز میکند و مشخص میکند که باید از سایت news.google.com بازدید کند و از شما اجازه بگیرد. ممکن است چندین بار از شما درخواست خواندن URLها را داشته باشد و شما میتوانید انتخاب کنید که به آن برای این پروژه و غیره اجازه دهید.
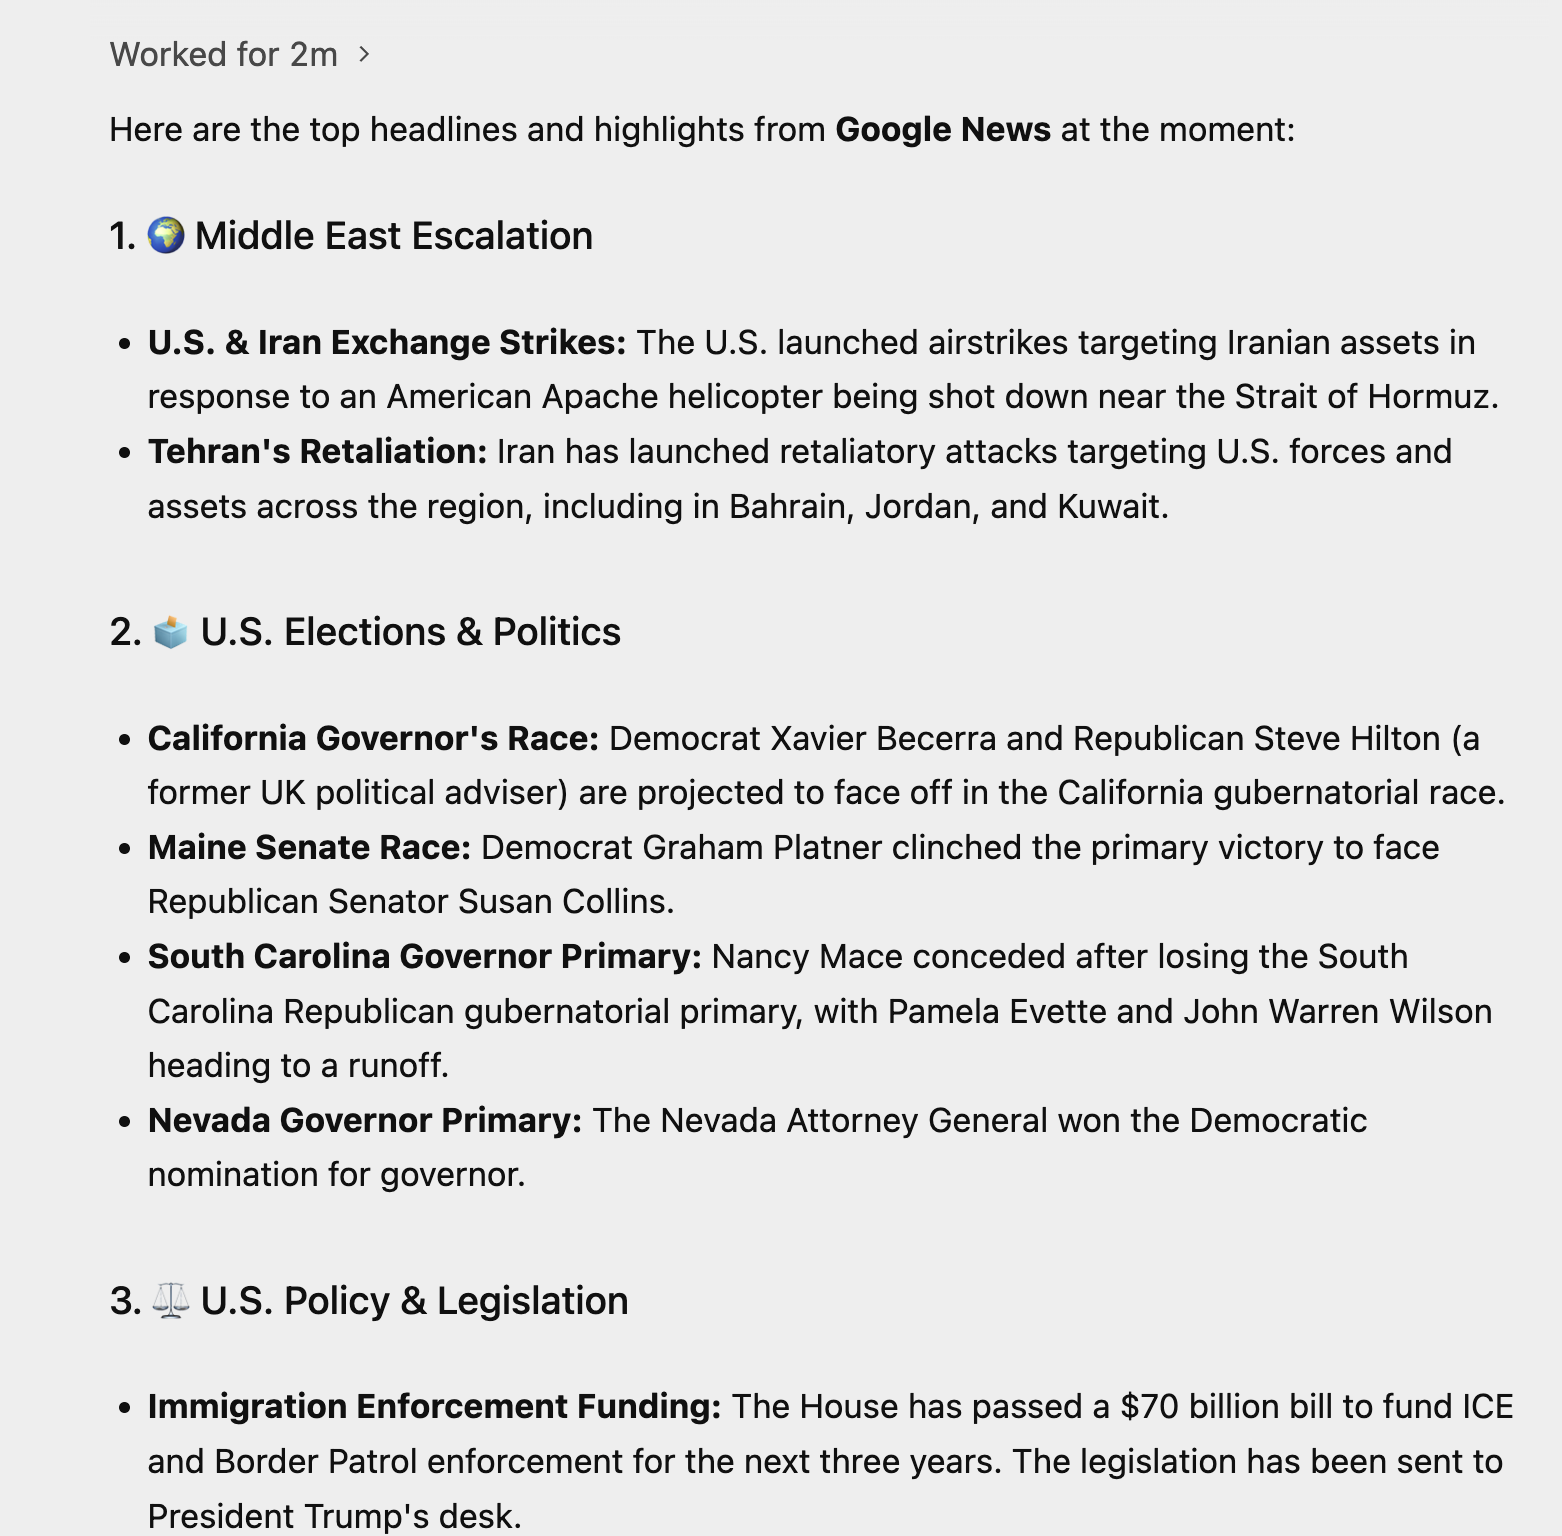
شما باید به فرآیند تفکر توجه دقیقی داشته باشید و ببینید که عامل چگونه کار خود را انجام میدهد. نمونهای از اجرای عامل در زیر نشان داده شده است:
چیزهایی که باید امتحان کنید
- وقتی این را فهمیدید، وبسایتی را انتخاب کنید که در دسترس است و میخواهید نماینده به آن مراجعه کند و برخی دادهها را از آن دریافت/خلاصه کند. وبسایتی را در نظر بگیرید که میدانید داشبورد و نمودار دارد و از آن بخواهید چند مقدار را انتخاب کند.
- دستور زیر را امتحان کنید:
Visit https://docs.cloud.google.com/release-notes and get me a summary of the release notes, categorized by product.
۴. ایجاد یک وبسایت پویا با پایتون + فلاسک
حالا بیایید یک برنامه وب کامل ایجاد کنیم. برنامه وب که قرار است ایجاد کنیم، سایتی است که اطلاعات مربوط به یک رویداد فنی یک روزه را ارائه میدهد، که در طول روز توسط چندین سخنران صحبت میشود.
یک بار دیگر، یک پوشه جدید به نام conference-website ایجاد کنید. مطمئن شوید که یک پروژه جدید در رابط Antigravity Agent ایجاد کرده و پوشه conference-website به آن اضافه کردهاید.
میتوانید مکالمه را با دادن سوالی که در زیر نشان داده شده است شروع کنید:
I would like to generate a website that is a 1-day technical conference informational site.

The website should have the following functionality:
        1. A home page that shows the current date, location, schedule and time table.
        2. The 1-day event is a list of 8 talks in total.
        3. Each talk has 1 or 2 max. speakers.
        4. A talk has an ID, Title, Speakers, Category (1 or 2), Description and time of the talk.
        5. Each speaker has a First Name, Last Name and LinkedIn url.
        6. Allow for users to search by category, speaker, title.
        7. Give a lunch break of 60 minutes.
        8. Use dummy data for events and speakers, come up with a schedule, the event is about Google Cloud Technologies.
        9. Tech Stack: Python and Flask framework on server side. Front-end is basic HTML, CSS and JavaScript.
        10. Test out the site on your own for all functionality and provide a detailed README on how to setup, run and make any further changes.
11. Launch the web application for me to review.
آنتیگراویتی درخواست را تجزیه و تحلیل میکند و ابتدا یک طرح پیادهسازی ارائه میدهد. این یک مصنوع کلیدی به نام implementation_plan.md ایجاد میکند تا شما بتوانید آن را از نظر نحوه برنامهریزی برای ایجاد و برآورده کردن الزاماتی که در اعلان مشخص کردهاید، بررسی کنید. یک نمونه خروجی در زیر نشان داده شده است:
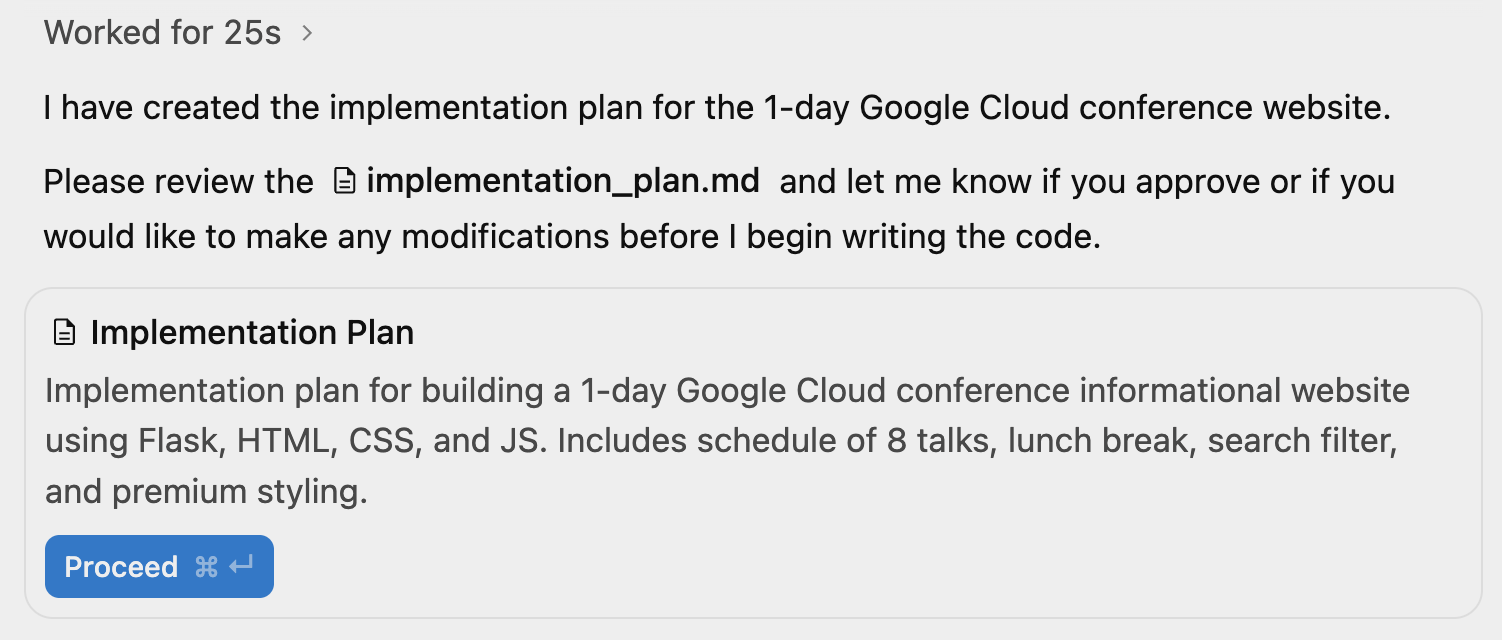
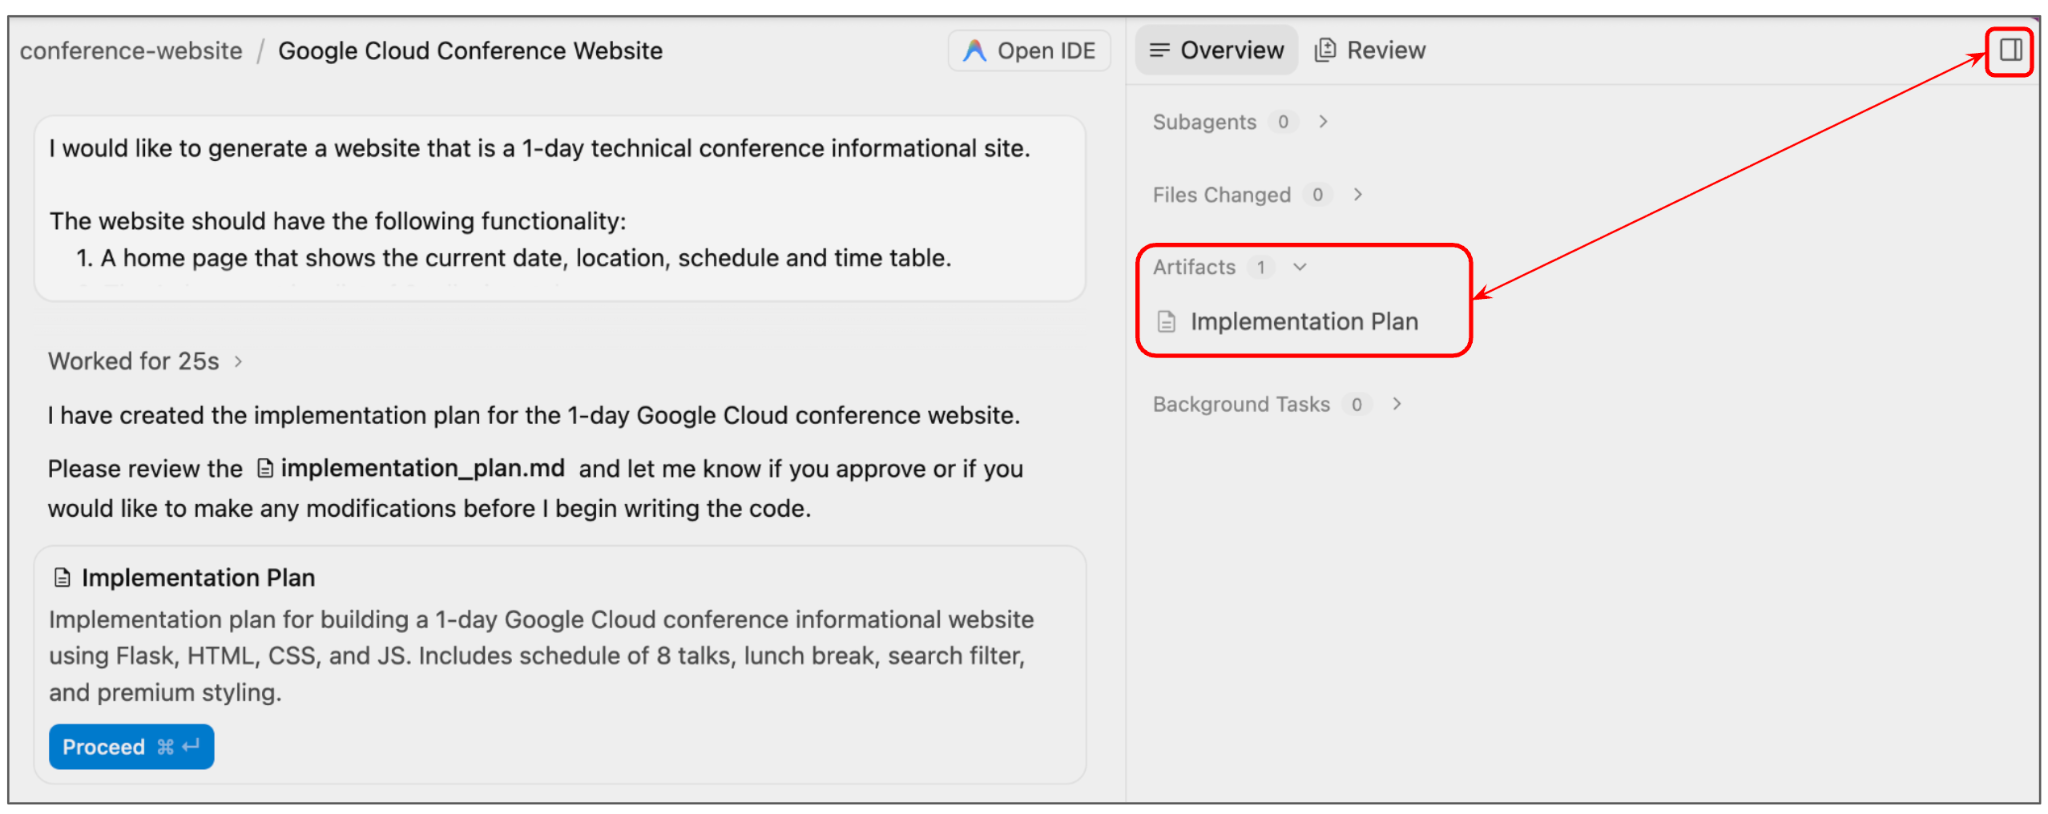
قبل از کلیک روی «ادامه»، نگاهی به طرح پیادهسازی بیندازید. میتوانید روی لینک فایل implementation_plan.md در بالا کلیک کنید یا با فعال/غیرفعال کردن پنل کمکی در بالا سمت راست، آن را مشاهده کنید. این کار نمای مصنوعات را به شما نشان میدهد و در حال حاضر میتوانید ببینید که طرح پیادهسازی برای بررسی شما آماده است.
یک نمونه طرح اجرایی که برای اجرای ما ایجاد شده است در زیر نشان داده شده است:
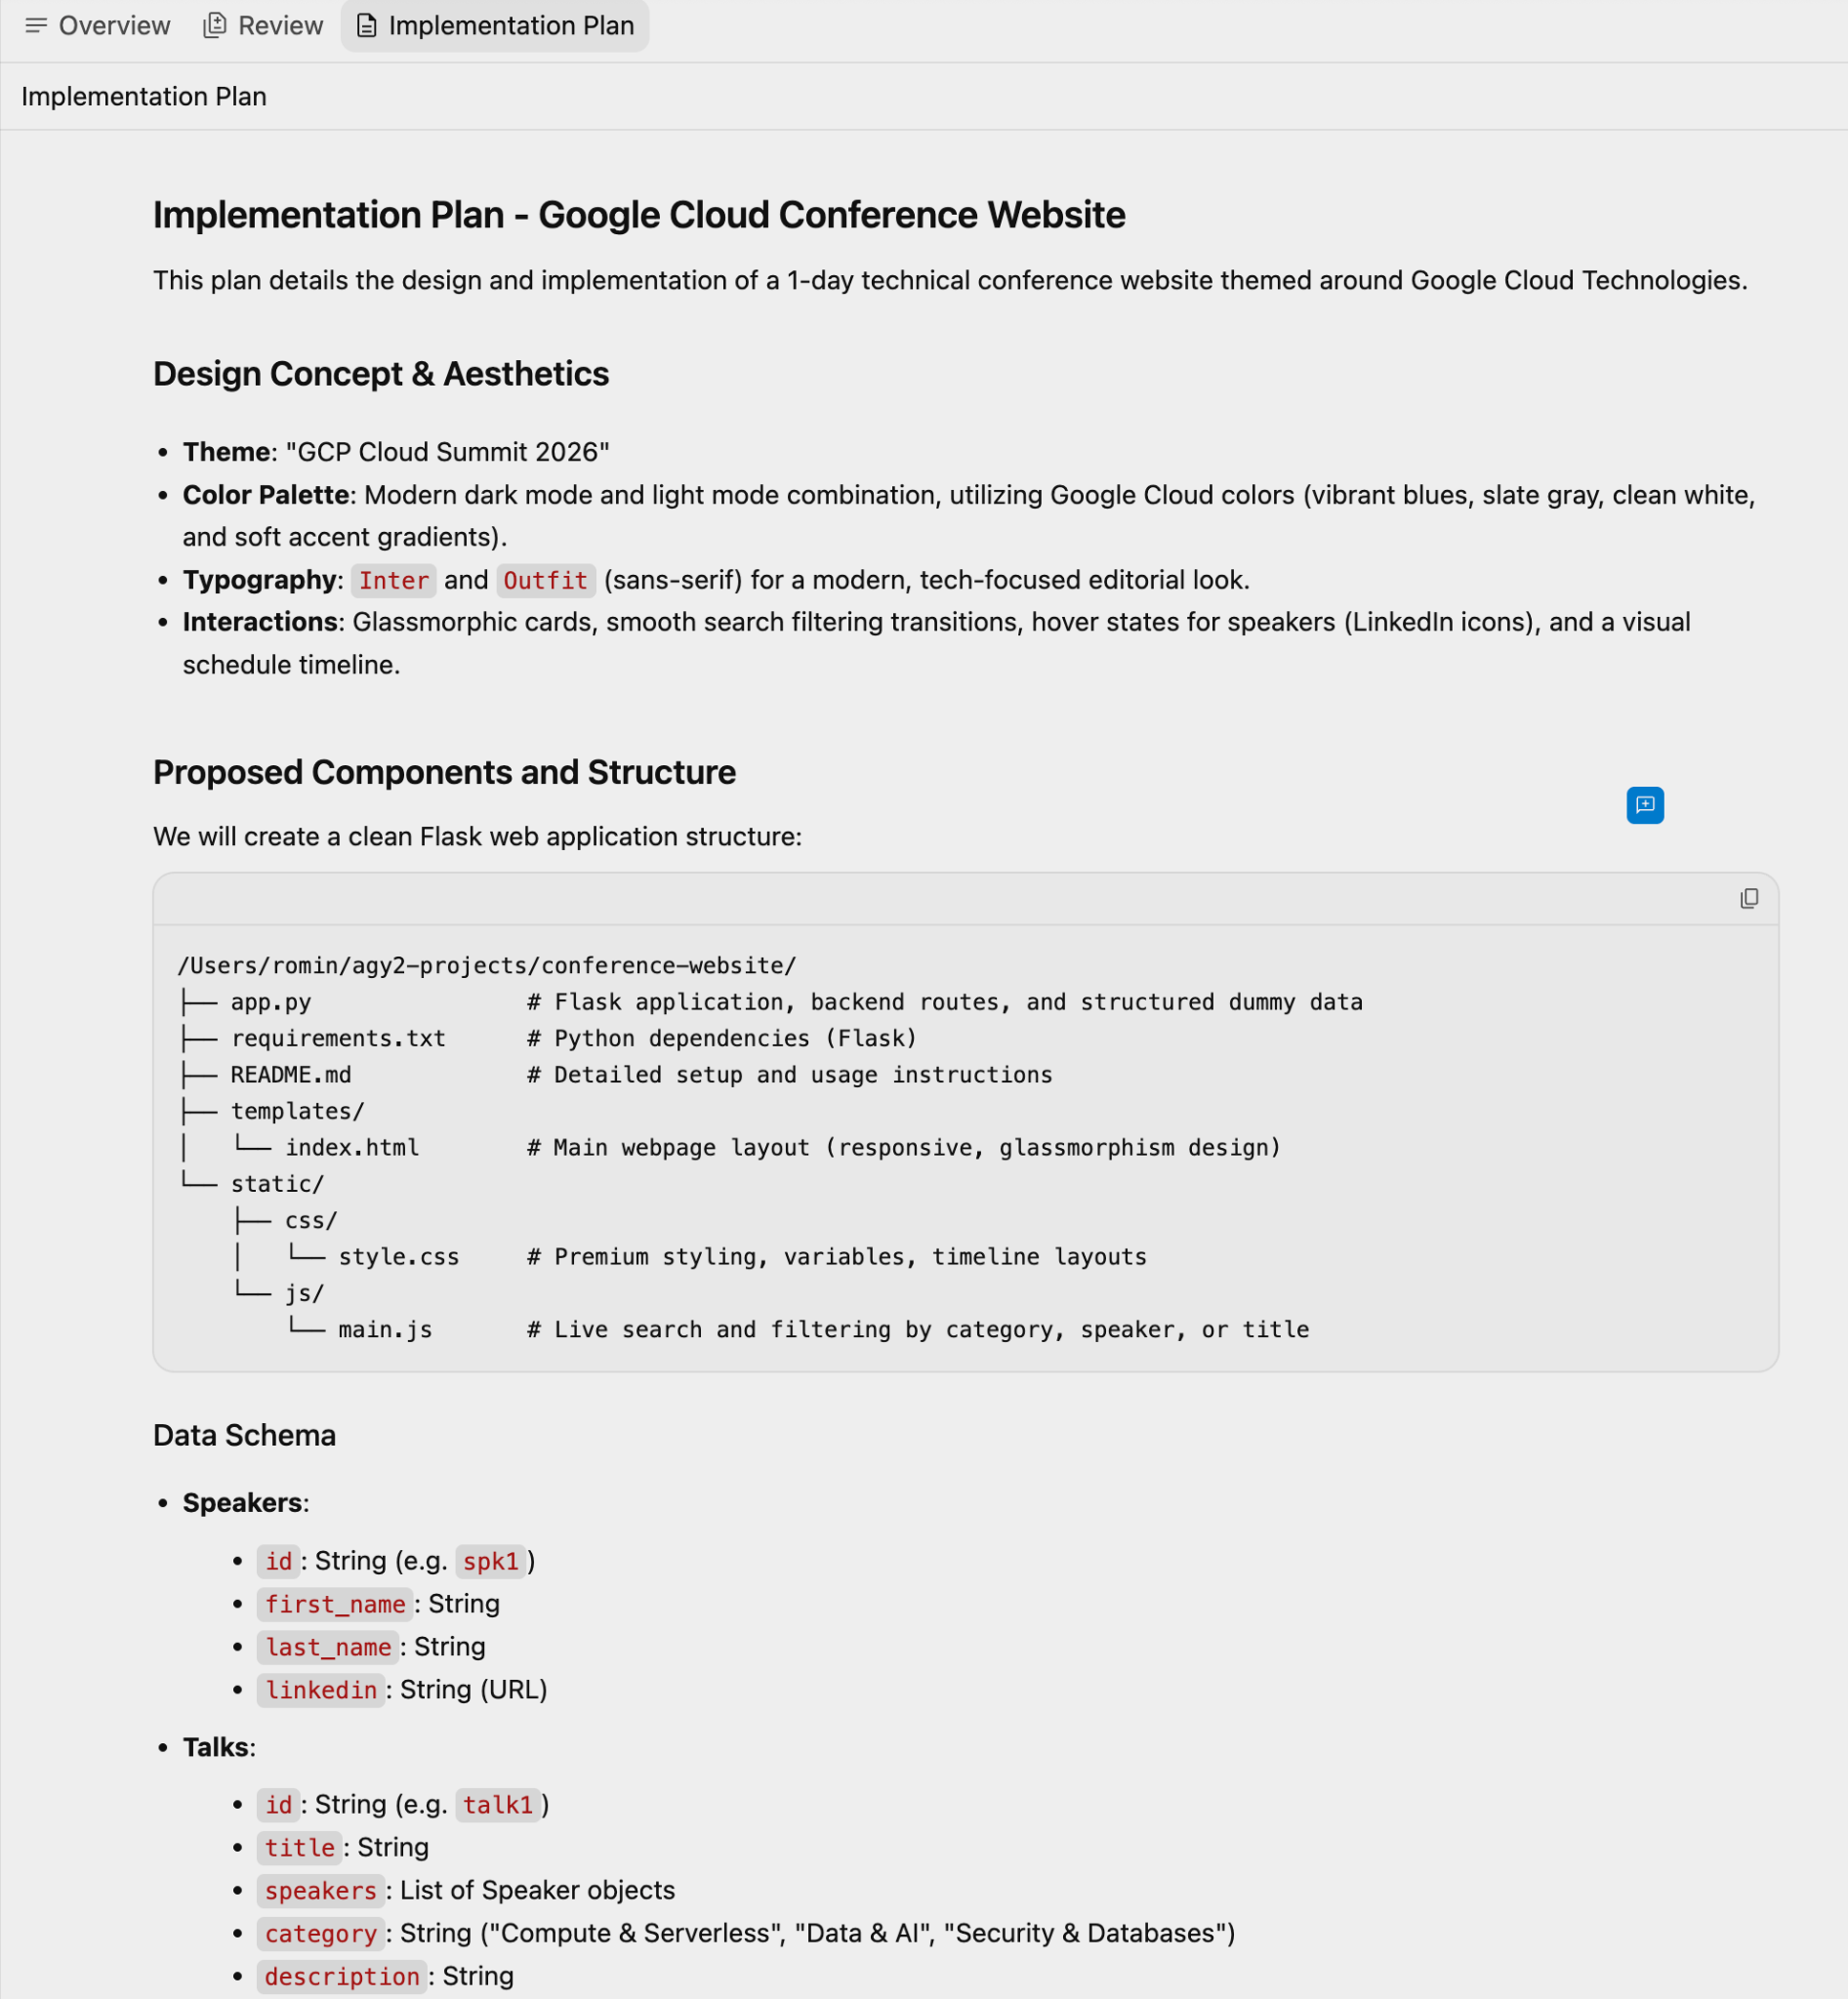
شما میتوانید نظرات خود را در طرح ارائه دهید و دوباره از نماینده بخواهید یا فعلاً میتوانیم طرح پیادهسازی را به همین شکل فعلی بپذیریم و با کلیک بر روی دکمه «ادامه» در رابط مکالمه، به کار خود ادامه دهیم.
عامل با تولید فایلهای کد منبع پیش میرود و همچنین متوجه خواهید شد که یک مصنوع دیگر به نام وظیفه (Task) را بهروزرسانی میکند. این فهرستی از اقدامات یا وظایفی است که برای دستیابی به نتیجه نهایی شناسایی کرده است.
شما میتوانید هر زمان که خواستید روی وظیفه کلیک کنید یا حتی برای مشاهده وظایف به لیست مصنوعات مراجعه کنید. یک نمونه از لیست وظایف در زیر نشان داده شده است:
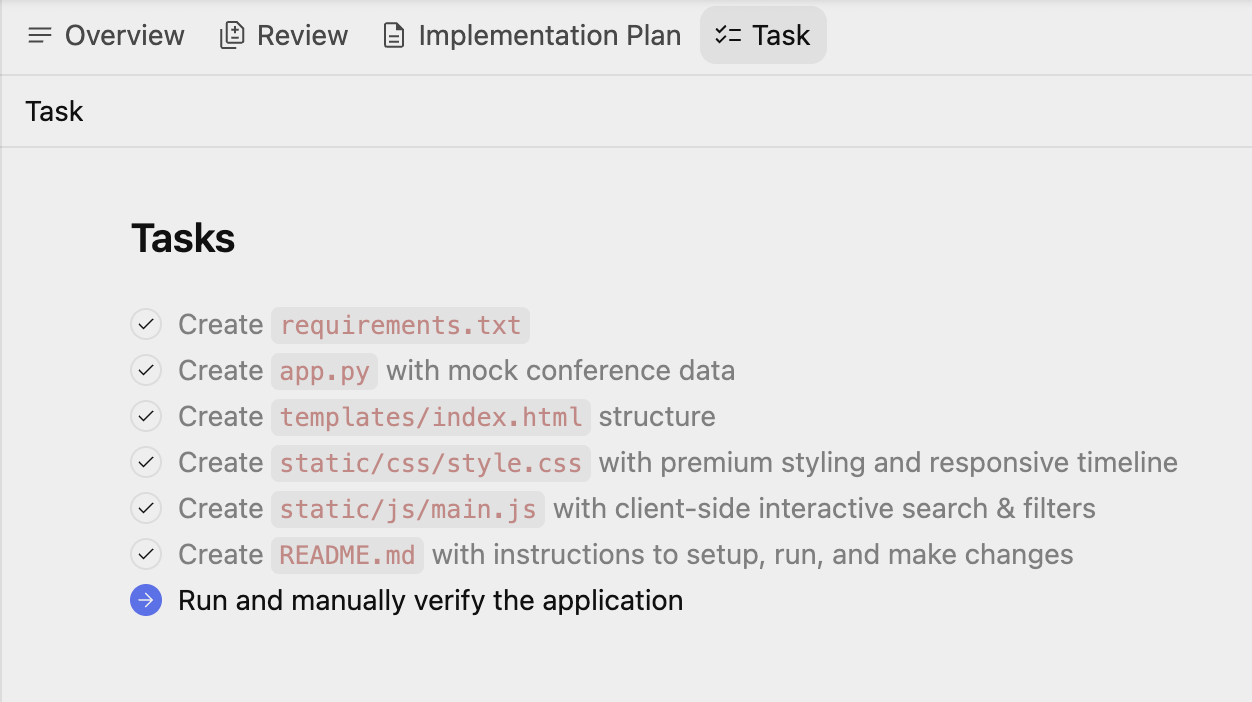
در مرحلهای از کار نهایی، جایی که سعی میکند برنامه را اجرا و تأیید کند، Antigravity یک محیط پایتون راهاندازی میکند و برای راهاندازی محیط، نصب وابستگیها و موارد دیگر به اجازه شما نیاز دارد. در صورت نیاز، مجوزها را بدهید.
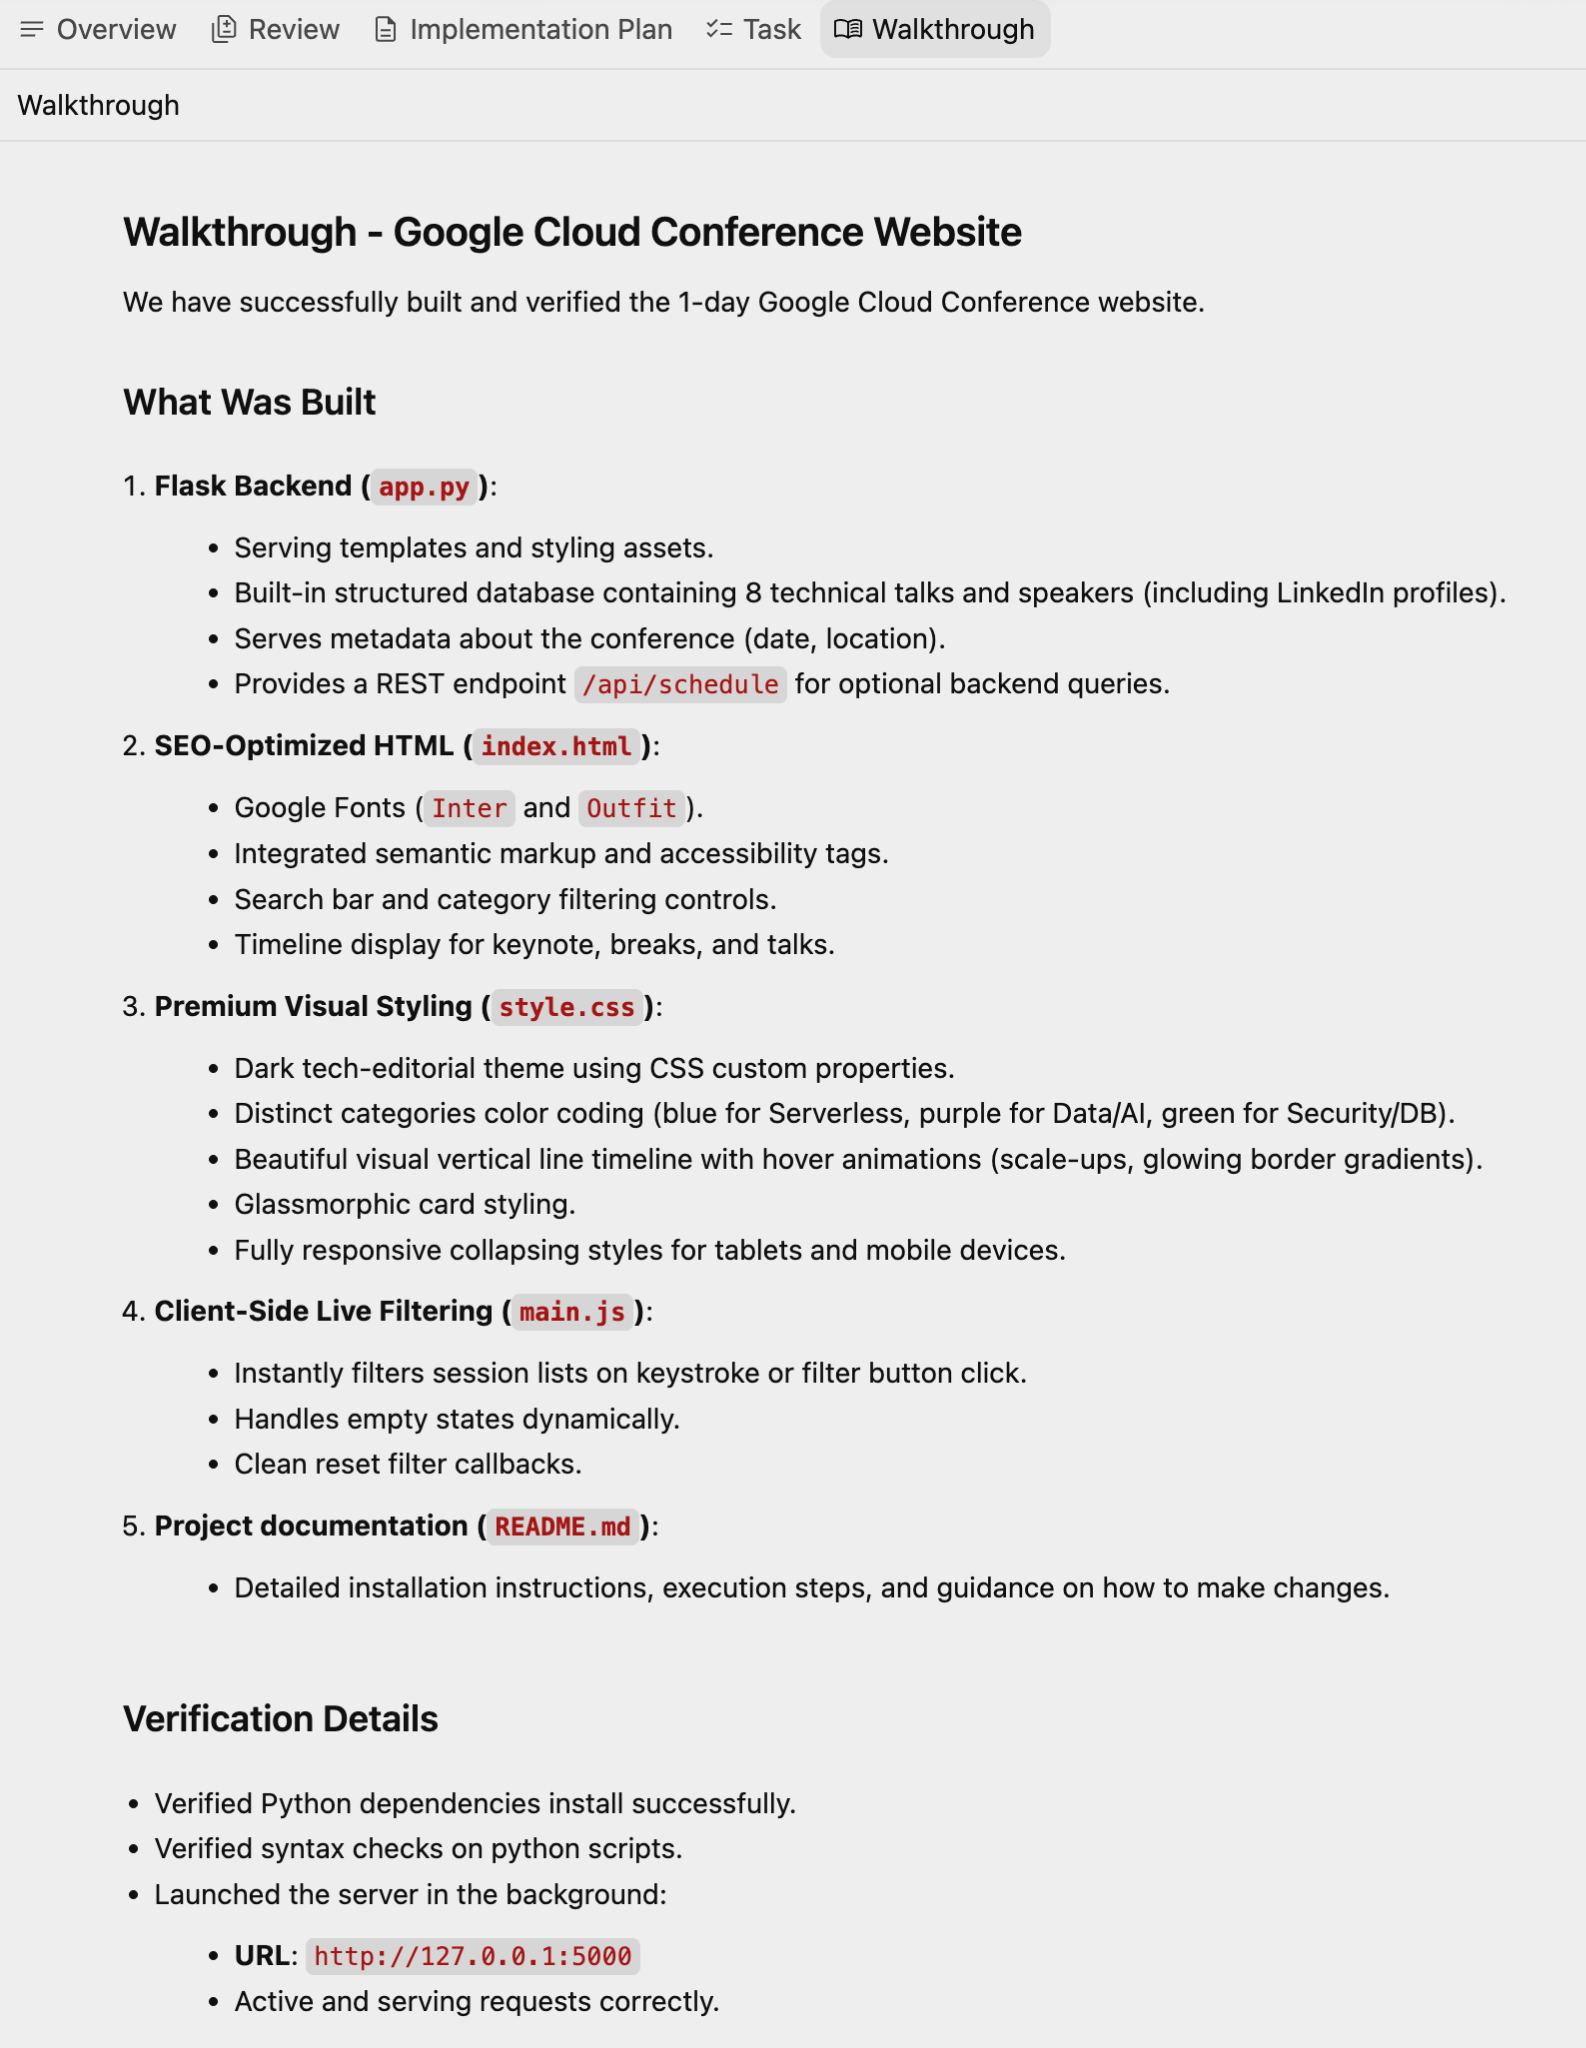
پس از موفقیتآمیز بودن تأیید، جزئیات به همراه یک مصنوع دیگر، Walkthrough، که جزئیات ویژگیهای تکمیلشده، پشته فناوری، نتایج اعتبارسنجی و دستورالعملها را شرح میدهد، برجسته خواهد شد.
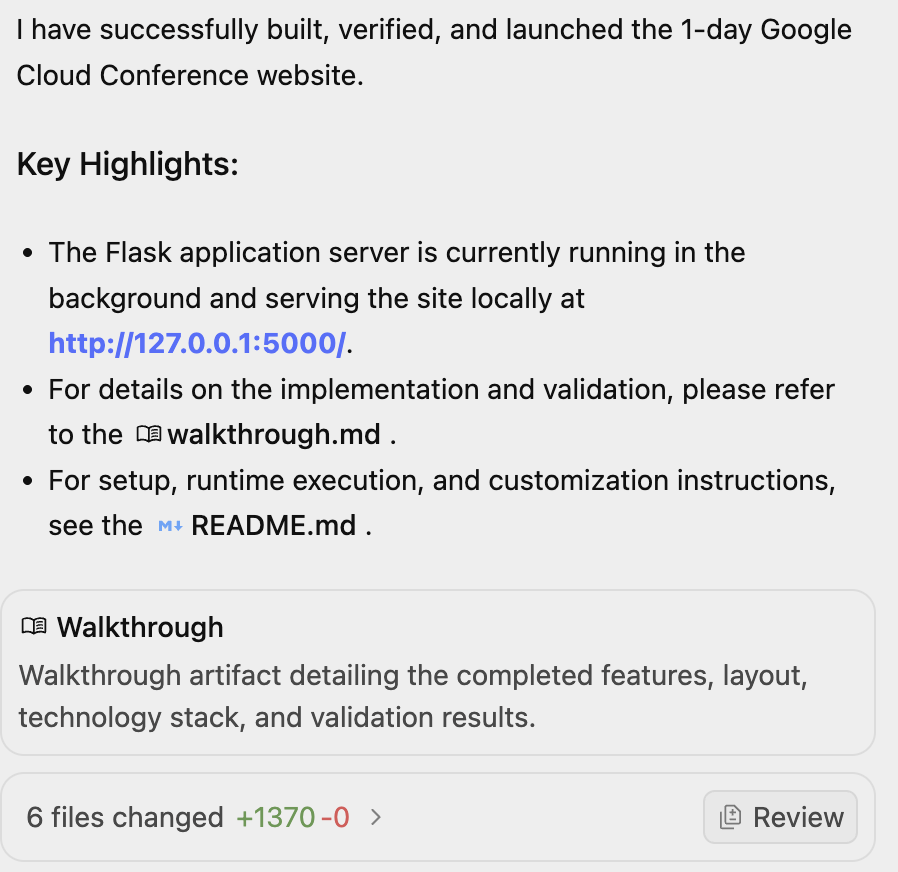
یک نمونه Walkthrough در زیر نشان داده شده است:
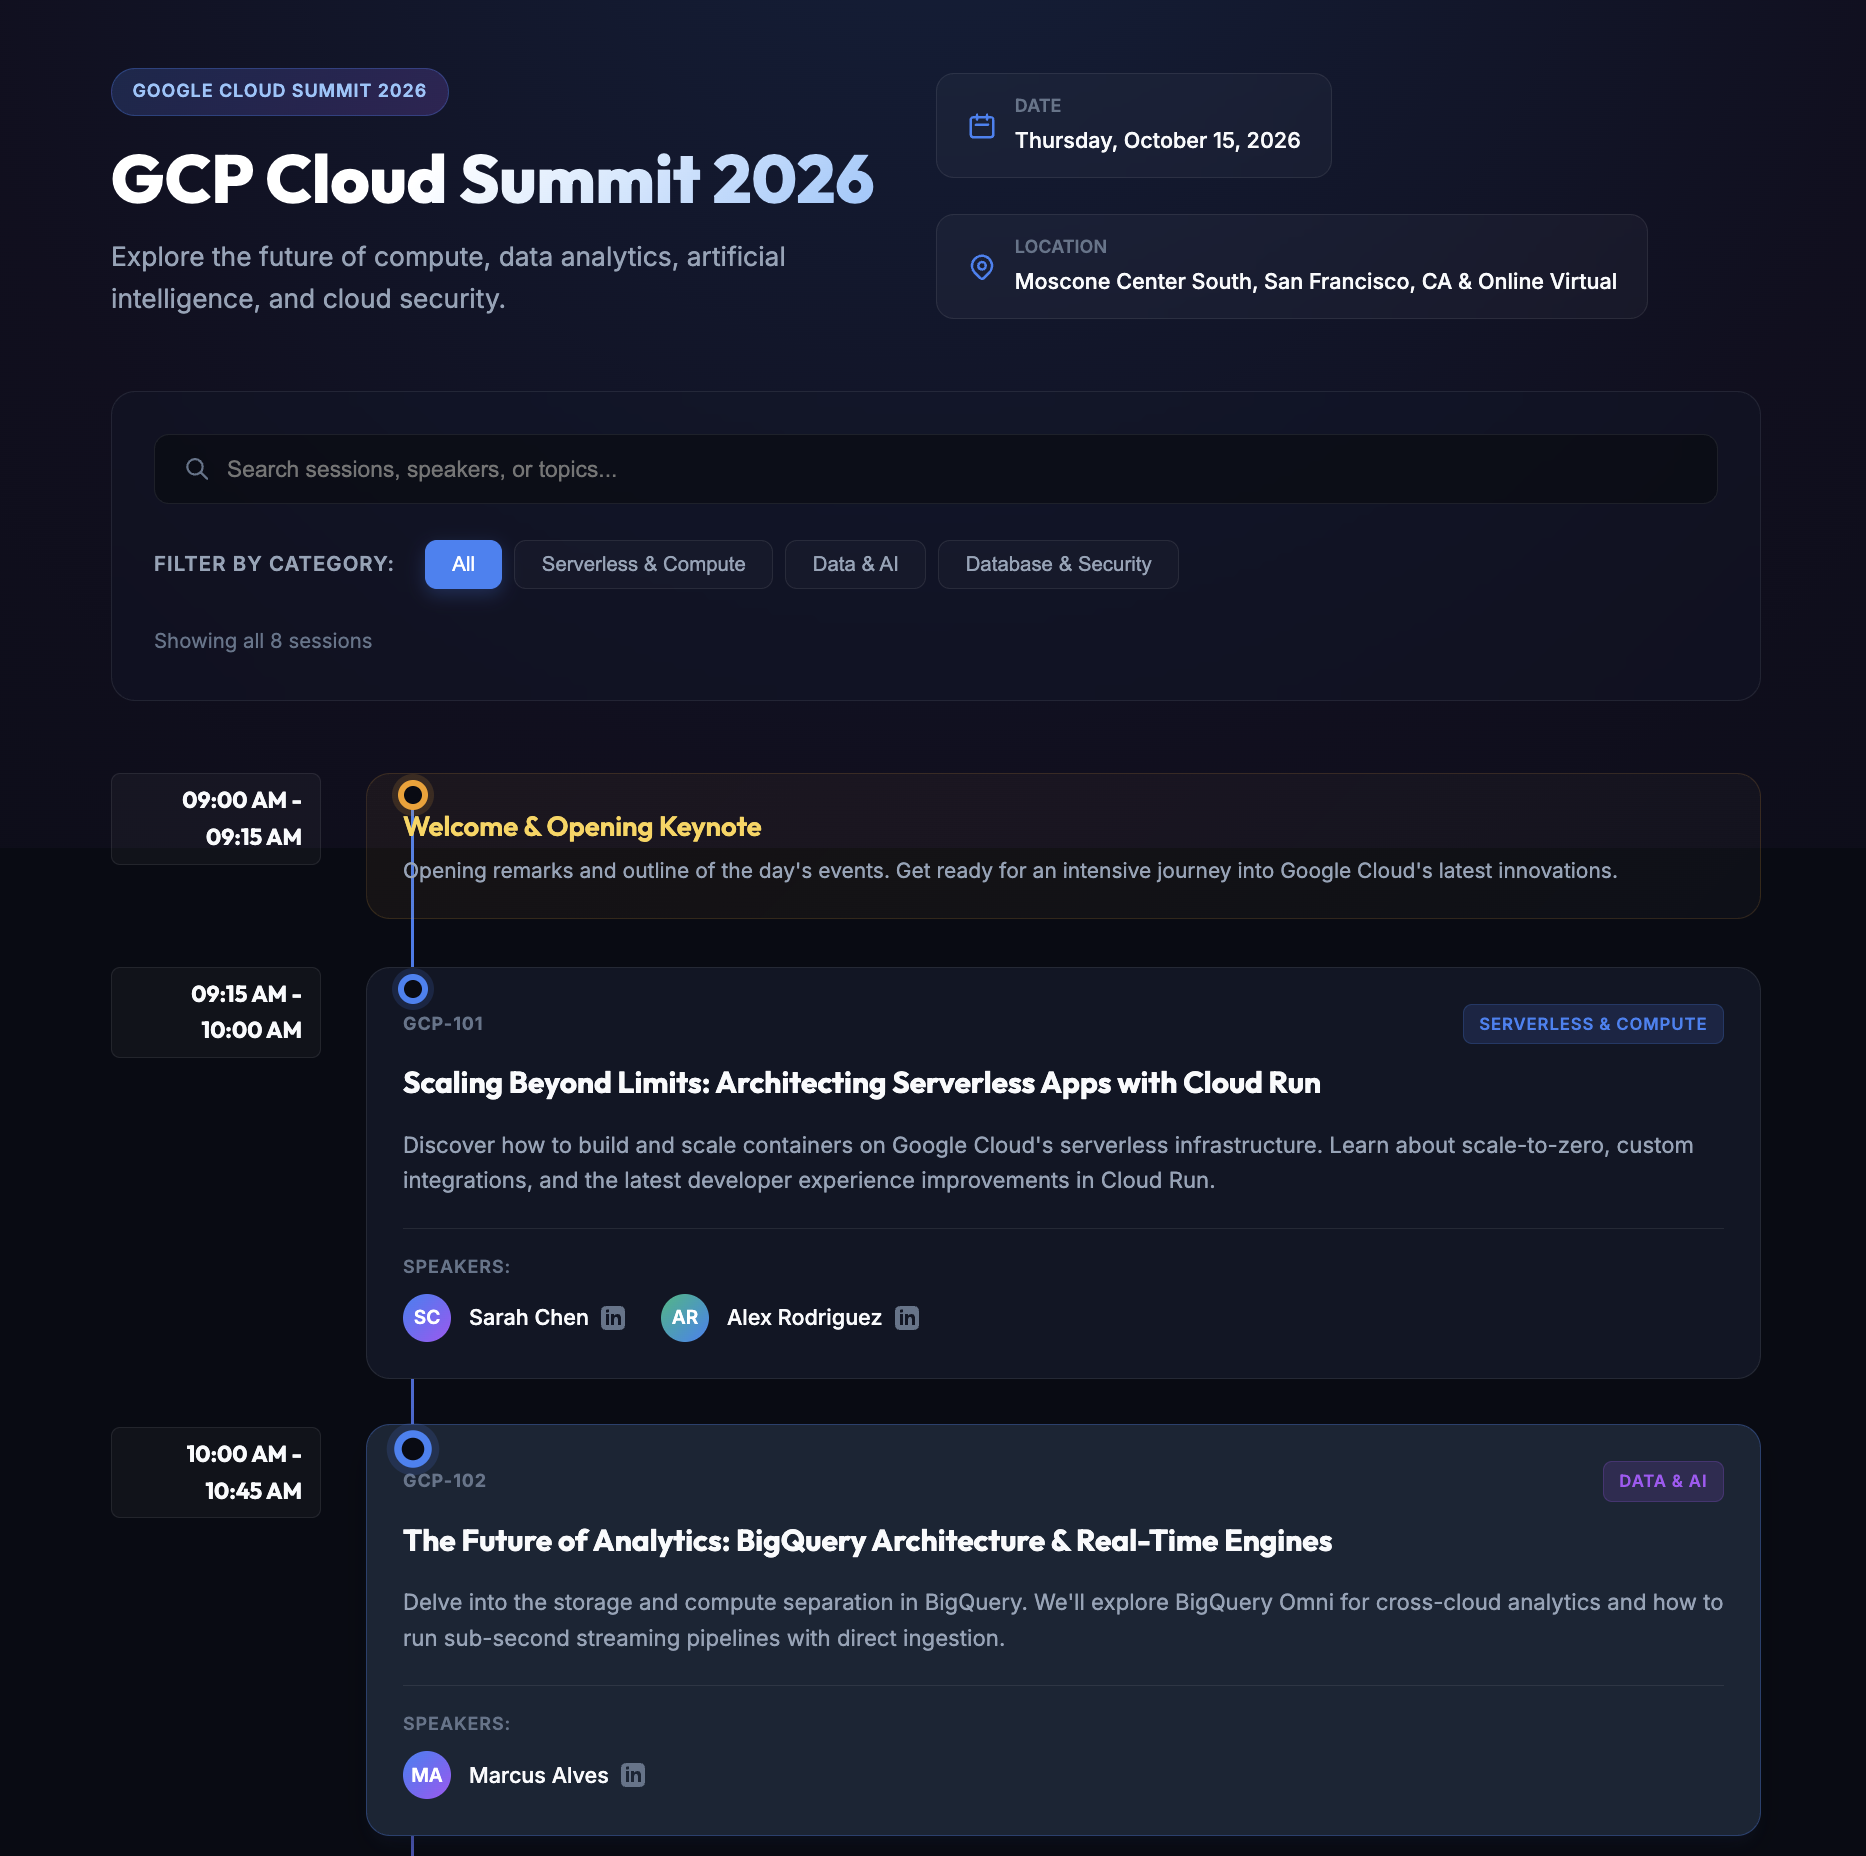
وبسایت نهایی هنگام بازدید از URL در زیر نشان داده شده است:
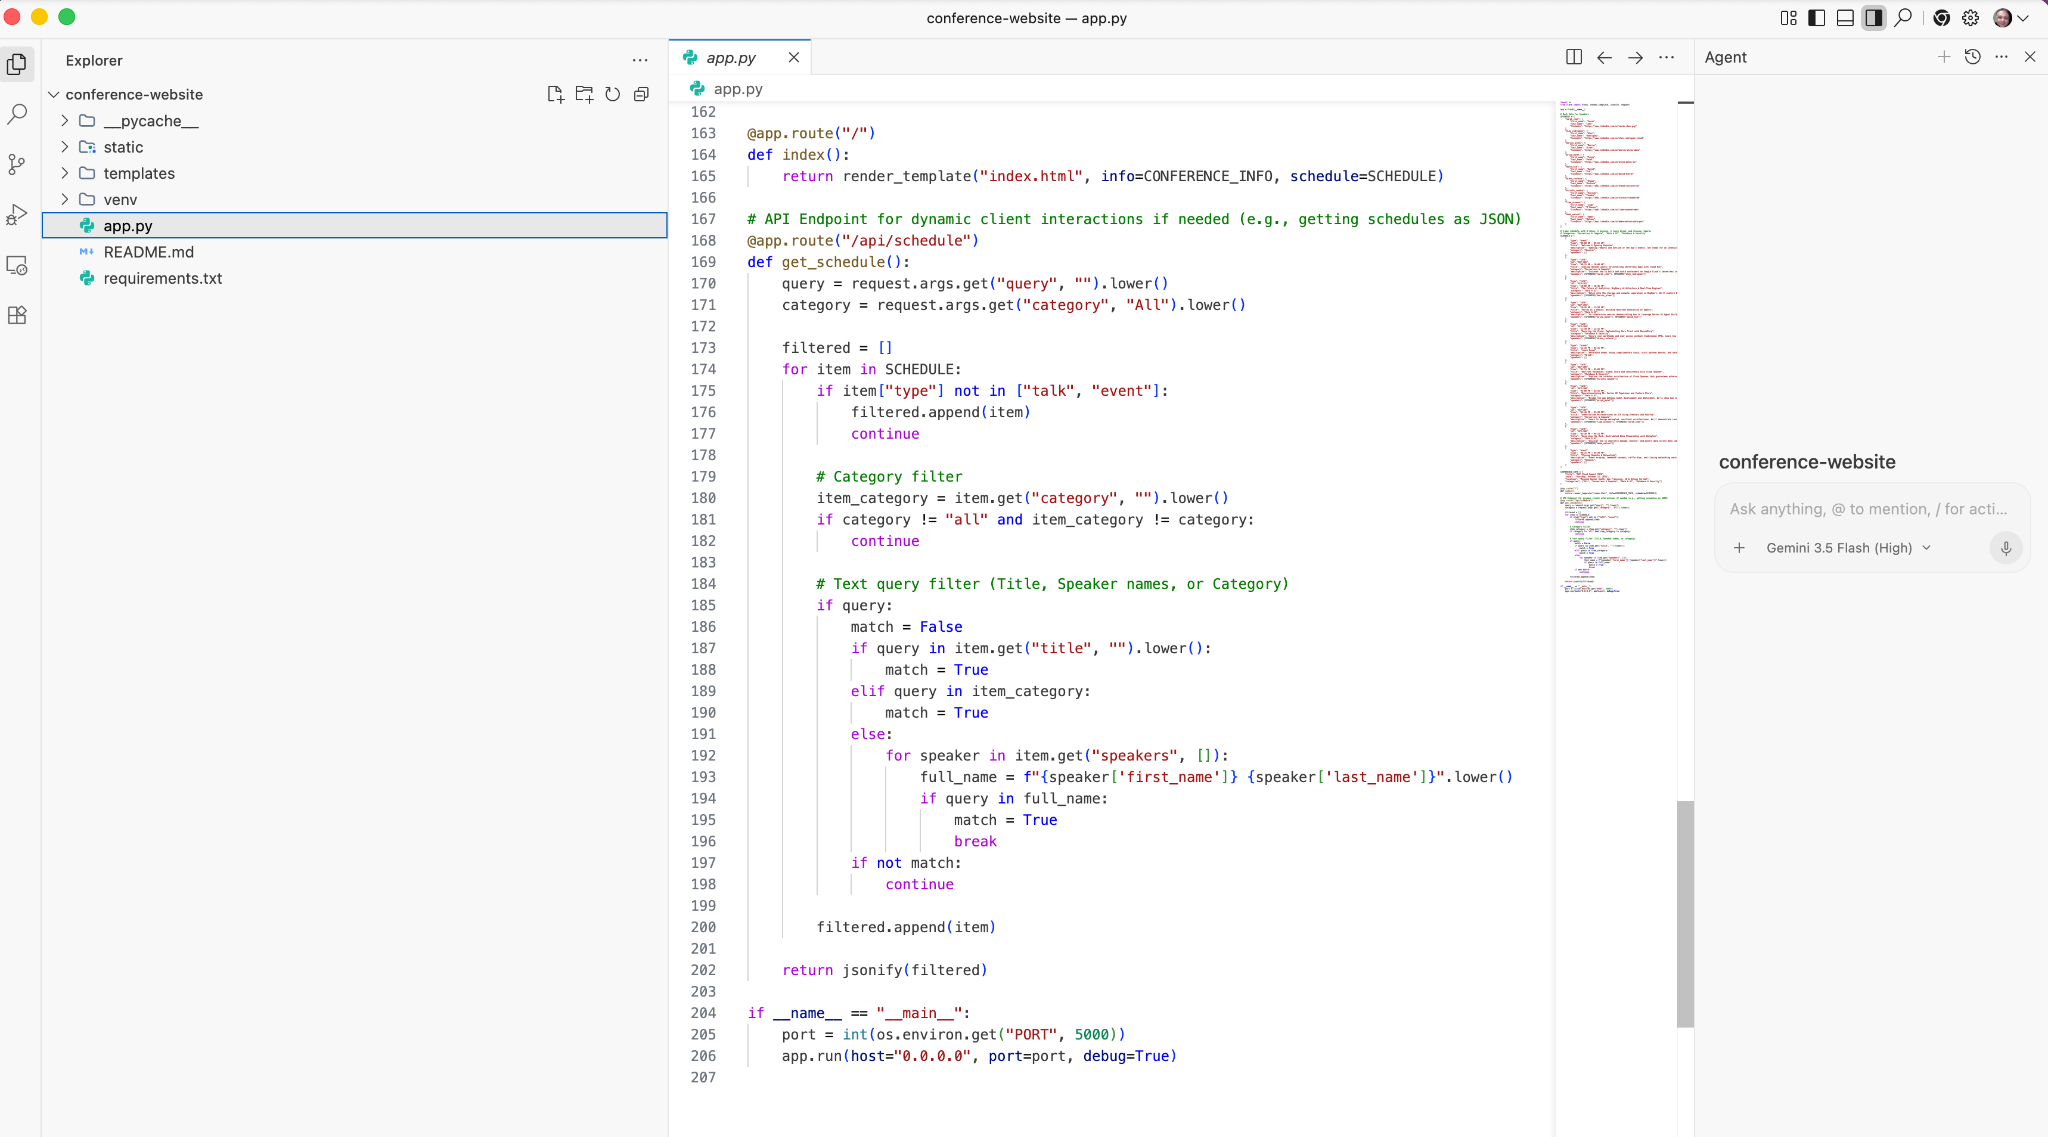
اگر میخواهید کد تولید شده را ببینید، میتوانید روی Open IDE در گوشه بالا سمت راست کلیک کنید. با این کار Antigravity IDE باز میشود که میتوانید از آن برای مشاهده کد تولید شده استفاده کنید. یک نمونه تصویر در زیر نشان داده شده است:
چیزهایی که باید امتحان کنید
- قابلیتهای اضافی مورد نظر خود را به برنامه اضافه کنید. جزئیات را به عامل ارائه دهید و توجه کنید که چگونه با تغییر لیست وظایف، سپس طرح پیادهسازی و غیره، وظایف خود را انجام میدهد.
- دادههای اضافی را به برنامه رویداد اضافه کنید. برای مثال،
Add two more talks to the schedule. - از نماینده بخواهید که یک README یا مستندات بیشتری برای برنامه ایجاد کند.
۵. یک اپلیکیشن بهرهوری ساده ایجاد کنید
اکنون قصد داریم یک برنامه وب تایمر پومودورو ساده ایجاد کنیم.
یک پوشه pomodoro-timer ایجاد کنید. مطمئن شوید که در Agent Manager هستید، فضای کاری pomodoro-timer را وارد و انتخاب کردهاید. با این دستور شروع کنید:
Create a productivity app that features a Pomodoro timer. Give a calm and aesthetic look to the application.
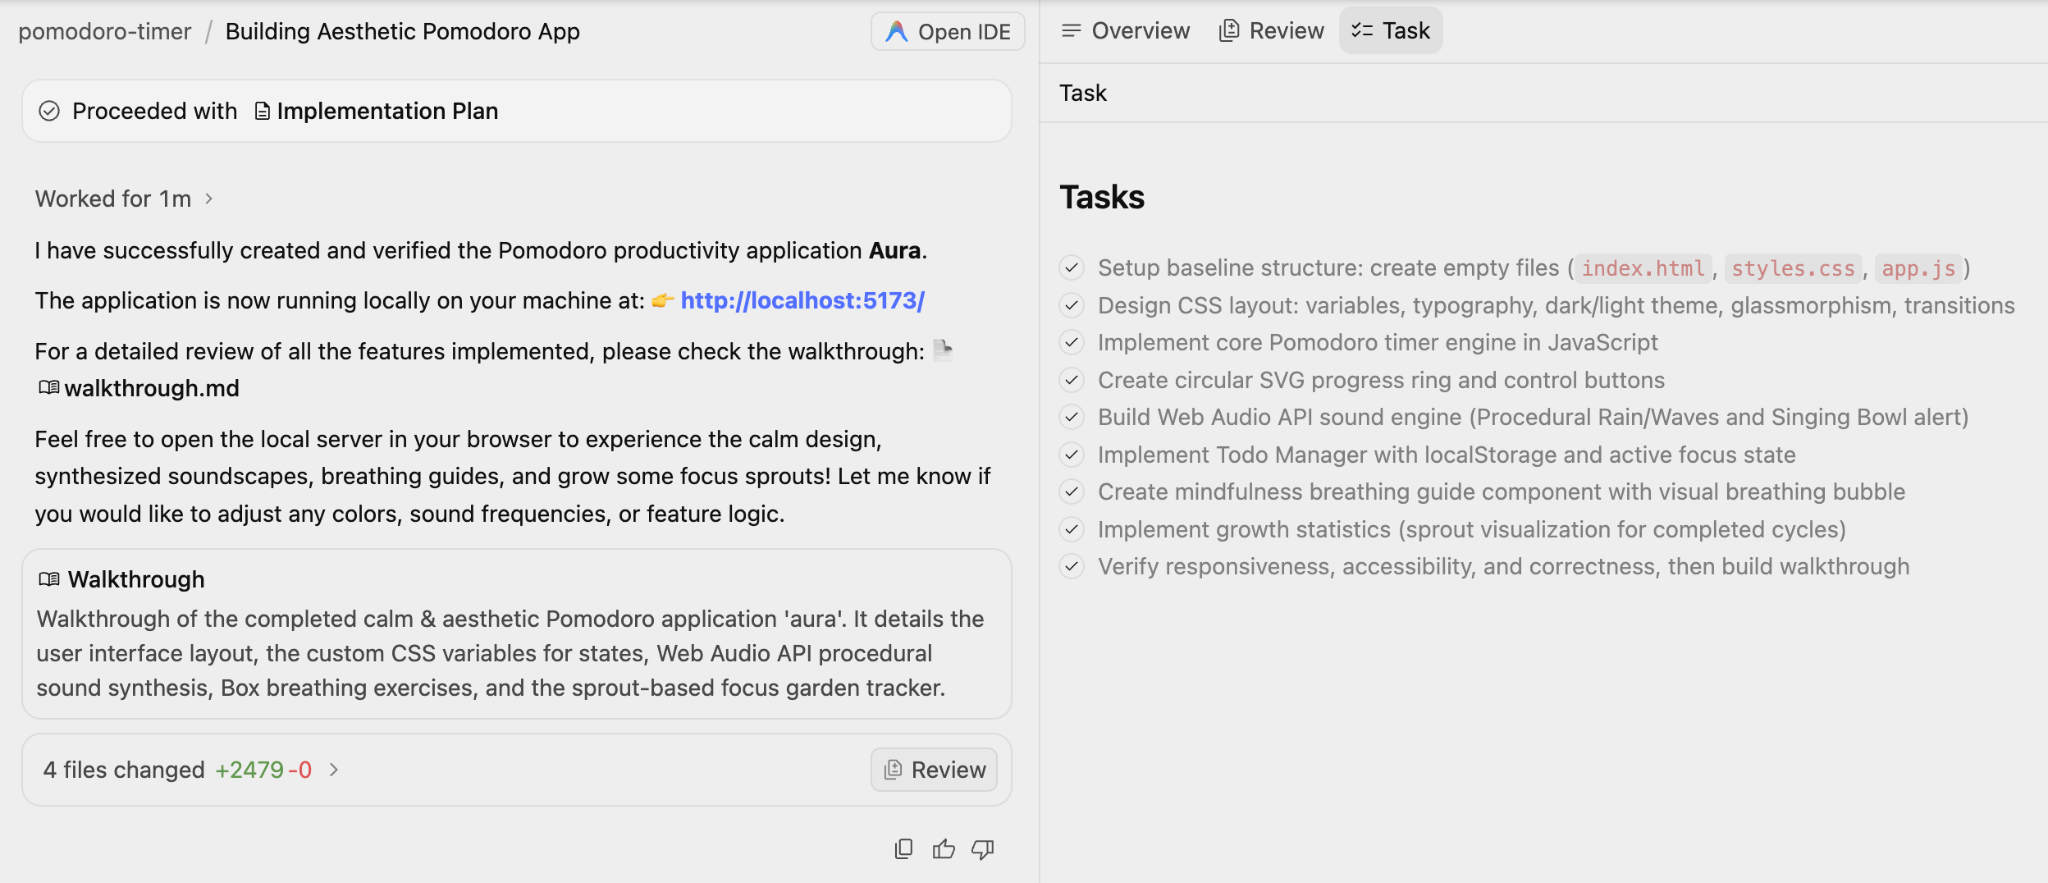
توجه کنید که چگونه برنامه اجرایی، فهرست وظایف و سپس ادامه آن ایجاد میشود. به جریان کار توجه کنید، ممکن است موقعیتهایی وجود داشته باشد که از شما بخواهد آن را بررسی کنید.
نمونهای از اجرا با پیام Walkthrough و Tasks در زیر نشان داده شده است:
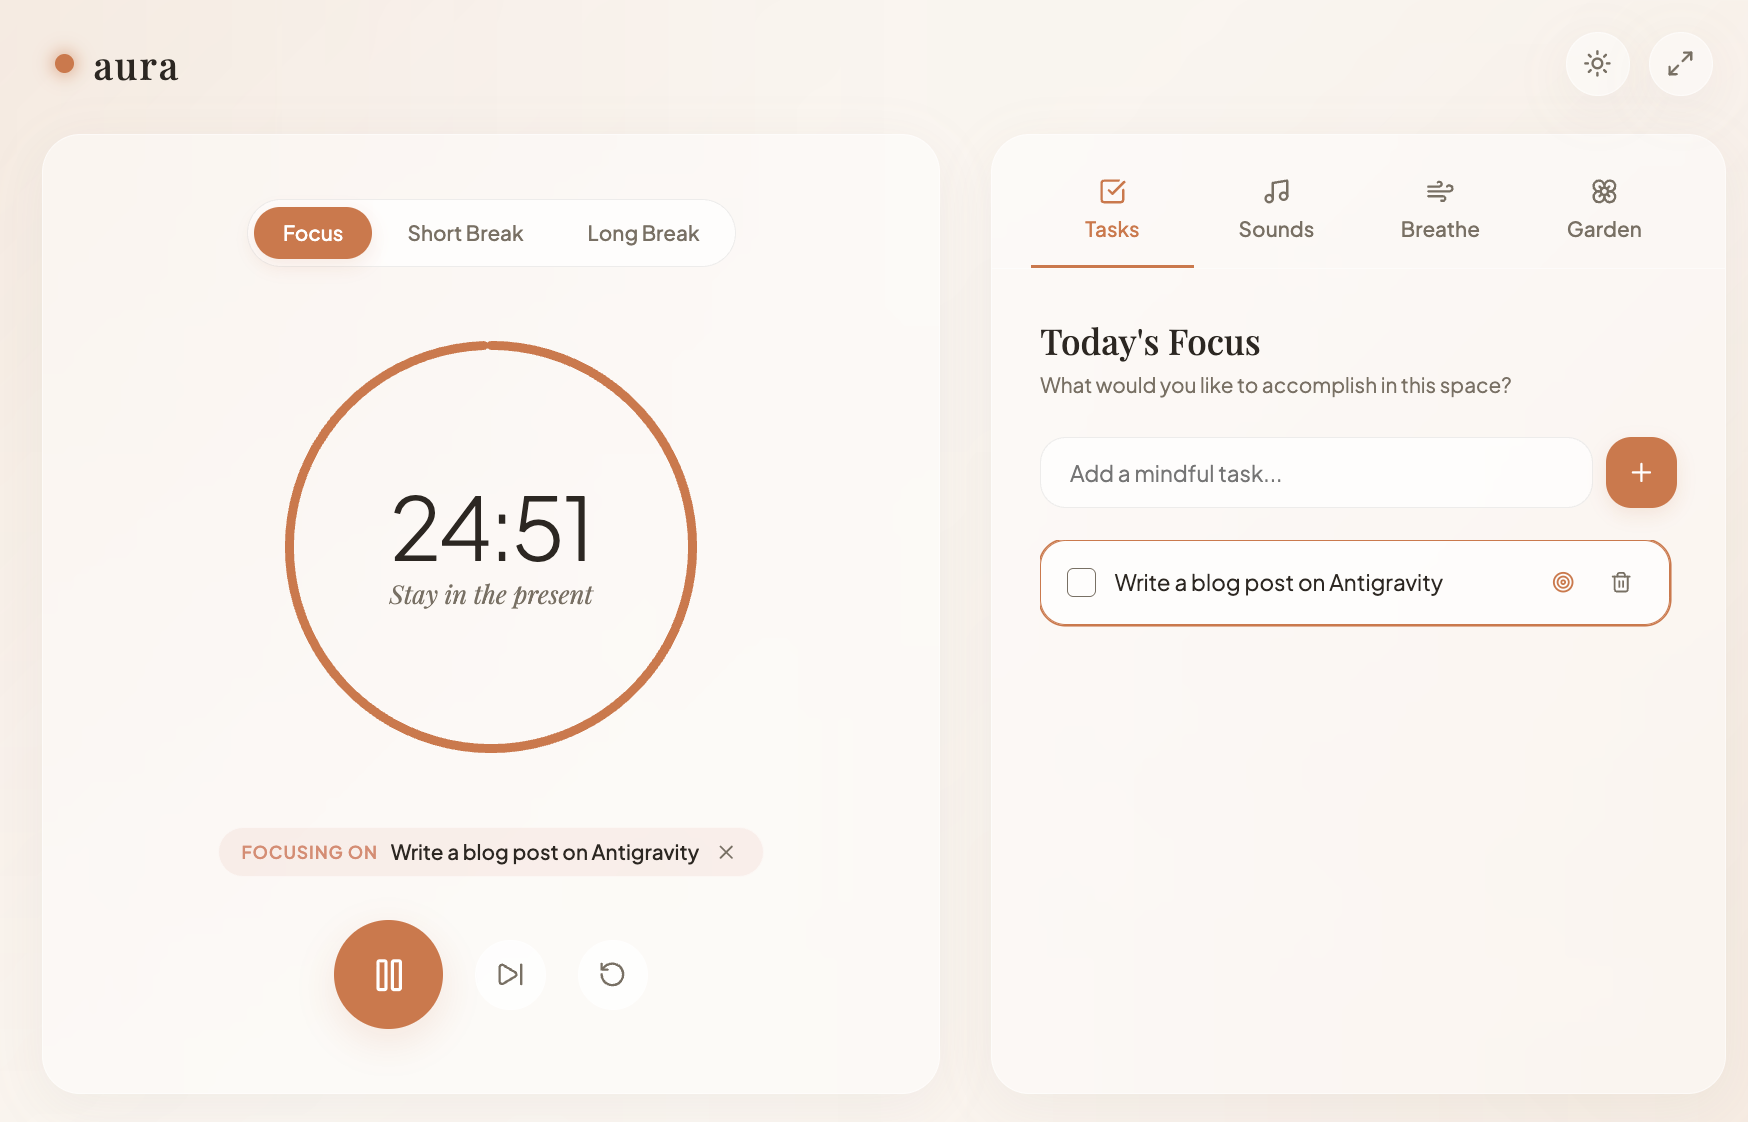
برنامه نهایی شبیه به برنامه زیر بود و ظاهر بسیار خوبی دارد.
چیزهایی که باید امتحان کنید
- چند تصویر به برنامه اضافه کنید. برای مثال، یک تصویر تایمر به برنامه اضافه کنید.
- چند نمونه از هر برنامهای که میخواهید تولید کنید را امتحان کنید. با سبکها، تصاویر بازی کنید، درخواست تغییرات کنید و غیره.
۶. ایجاد تستهای واحد، نمونههای آزمایشی (Mock Stubs) و اعتبارسنجی تستها
مورد استفاده نهایی که در اینجا امتحان خواهیم کرد، تولید تستهای واحد برای یک فایل کد خاص است که داریم و اینکه عامل نیز تستها را اجرا و آنها را اعتبارسنجی کند.
برای این کار، ما یک فضای کاری خواهیم داشت که یک فایل پایتون واحد دارد، همانطور که در زیر نشان داده شده است:
from typing import Dict

# --- Custom Exceptions ---
class InventoryShortageError(Exception):
    """Raised when there is not enough item stock."""
    pass

class PaymentFailedError(Exception):
    """Raised when the payment gateway rejects the transaction."""
    pass

class InvalidOrderError(Exception):
    """Raised when the order violates business rules."""
    pass

# --- External Service Interfaces (To be Mocked) ---
class InventoryService:
    def get_stock(self, product_id: str) -> int:
        """Connects to DB to check stock."""
        raise NotImplementedError("Real connection required")

    def decrement_stock(self, product_id: str, quantity: int):
        """Connects to DB to reduce stock."""
        raise NotImplementedError("Real connection required")

class PaymentGateway:
    def charge(self, amount: float, currency: str) -> bool:
        """Connects to Stripe/PayPal."""
        raise NotImplementedError("Real connection required")

# --- Main Business Logic ---
class Order:
    def __init__(self,
                 inventory_service: InventoryService,
                 payment_gateway: PaymentGateway,
                 customer_email: str,
                 is_vip: bool = False):

        self.inventory = inventory_service
        self.payment = payment_gateway
        self.customer_email = customer_email
        self.is_vip = is_vip
        self.items: Dict[str, Dict] = {} # {product_id: {'price': float, 'qty': int}}
        self.is_paid = False
        self.status = "DRAFT"

    def add_item(self, product_id: str, price: float, quantity: int = 1):
        """Adds items to the cart. Rejects invalid prices or quantities."""
        if price < 0:
            raise ValueError("Price cannot be negative")
        if quantity <= 0:
            raise ValueError("Quantity must be greater than zero")

        if product_id in self.items:
            self.items[product_id]['qty'] += quantity
        else:
            self.items[product_id] = {'price': price, 'qty': quantity}

    def remove_item(self, product_id: str):
        """Removes an item entirely from the cart."""
        if product_id in self.items:
            del self.items[product_id]

    @property
    def total_price(self) -> float:
        """Calculates raw total before discounts."""
        return sum(item['price'] * item['qty'] for item in self.items.values())

    def apply_discount(self) -> float:
        """
        Applies business logic:
        1. VIPs get flat 20% off.
        2. Regulars get 10% off if total > 100.
        3. No discount otherwise.
        """
        total = self.total_price

        if self.is_vip:
            return round(total * 0.8, 2)
        elif total > 100:
            return round(total * 0.9, 2)

        return round(total, 2)

    def checkout(self):
        """
        Orchestrates the checkout process:
        1. Validates cart is not empty.
        2. Checks stock for all items.
        3. Calculates final price.
        4. Charges payment.
        5. Updates inventory.
        """
        if not self.items:
            raise InvalidOrderError("Cannot checkout an empty cart")

        # 1. Check Inventory Logic
        for product_id, data in self.items.items():
            available_stock = self.inventory.get_stock(product_id)
            if available_stock < data['qty']:
                raise InventoryShortageError(f"Not enough stock for {product_id}")

        # 2. Calculate Final Price
        final_amount = self.apply_discount()

        # 3. Process Payment
        try:
            success = self.payment.charge(final_amount, "USD")
            if not success:
                raise PaymentFailedError("Transaction declined by gateway")
        except Exception as e:
            # Catching generic network errors from the gateway
            raise PaymentFailedError(f"Payment gateway error: {str(e)}")

        # 4. Decrement Stock (Only occurs if payment succeeded)
        for product_id, data in self.items.items():
            self.inventory.decrement_stock(product_id, data['qty'])

        self.is_paid = True
        self.status = "COMPLETED"

        return {"status": "success", "charged_amount": final_amount}
مطمئن شوید که فایل پایتون فوق ( order_service.py ) را به صورت محلی در یک پوشه جدید در دسترس دارید و آن پروژه را برای گفتگو در Antigravity باز کردهاید.
این یک سرویس سفارش ساده است که قابلیتهای کلیدی زیر را در بخش checkout دارد:
- اعتبارسنجی میکند که سبد خرید خالی نیست.
- موجودی همه اقلام را بررسی کنید.
- قیمت نهایی را محاسبه میکند.
- هزینهها را پرداخت میکند.
- موجودی را بهروزرسانی میکند.
ما قصد داریم وظیفه تولید موارد تست واحد، ارائه پیادهسازیهای Mock و اجرای تستها را برای اطمینان از موفقیت آنها به Agent واگذار کنیم.
ما پوشه فضای کاری خاص خود را باز خواهیم کرد و متوجه خواهید شد که اکنون میتوانیم از نماد @ نیز برای ارجاع به فایل استفاده کنیم. برای مثال، میتوانیم شروع به تایپ @order کنیم و باید فایل order_service.py را نشان دهد.
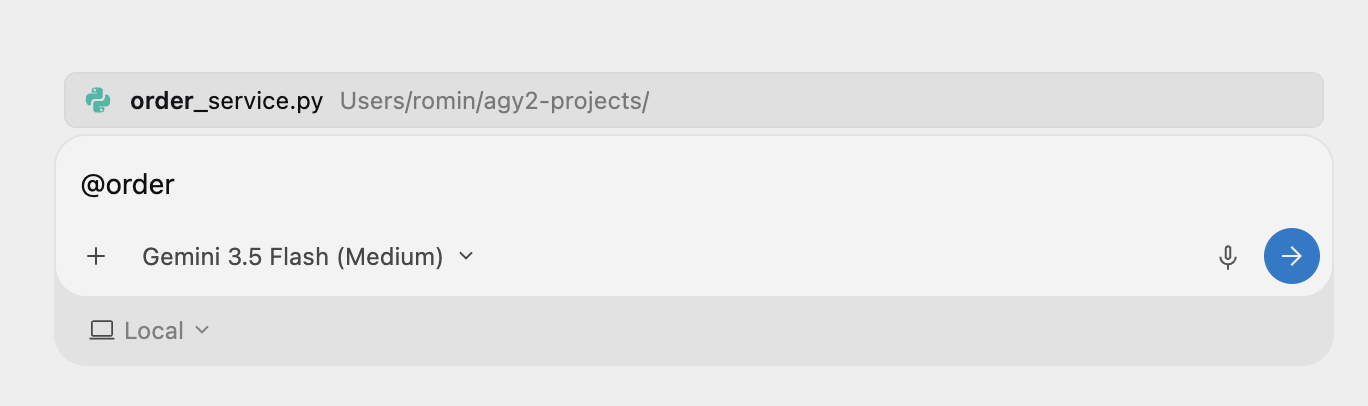
میتوانیم وظیفهای ارائه دهیم که به ما در درک این فایل کمک کند. دستور زیر را اجرا کنید:
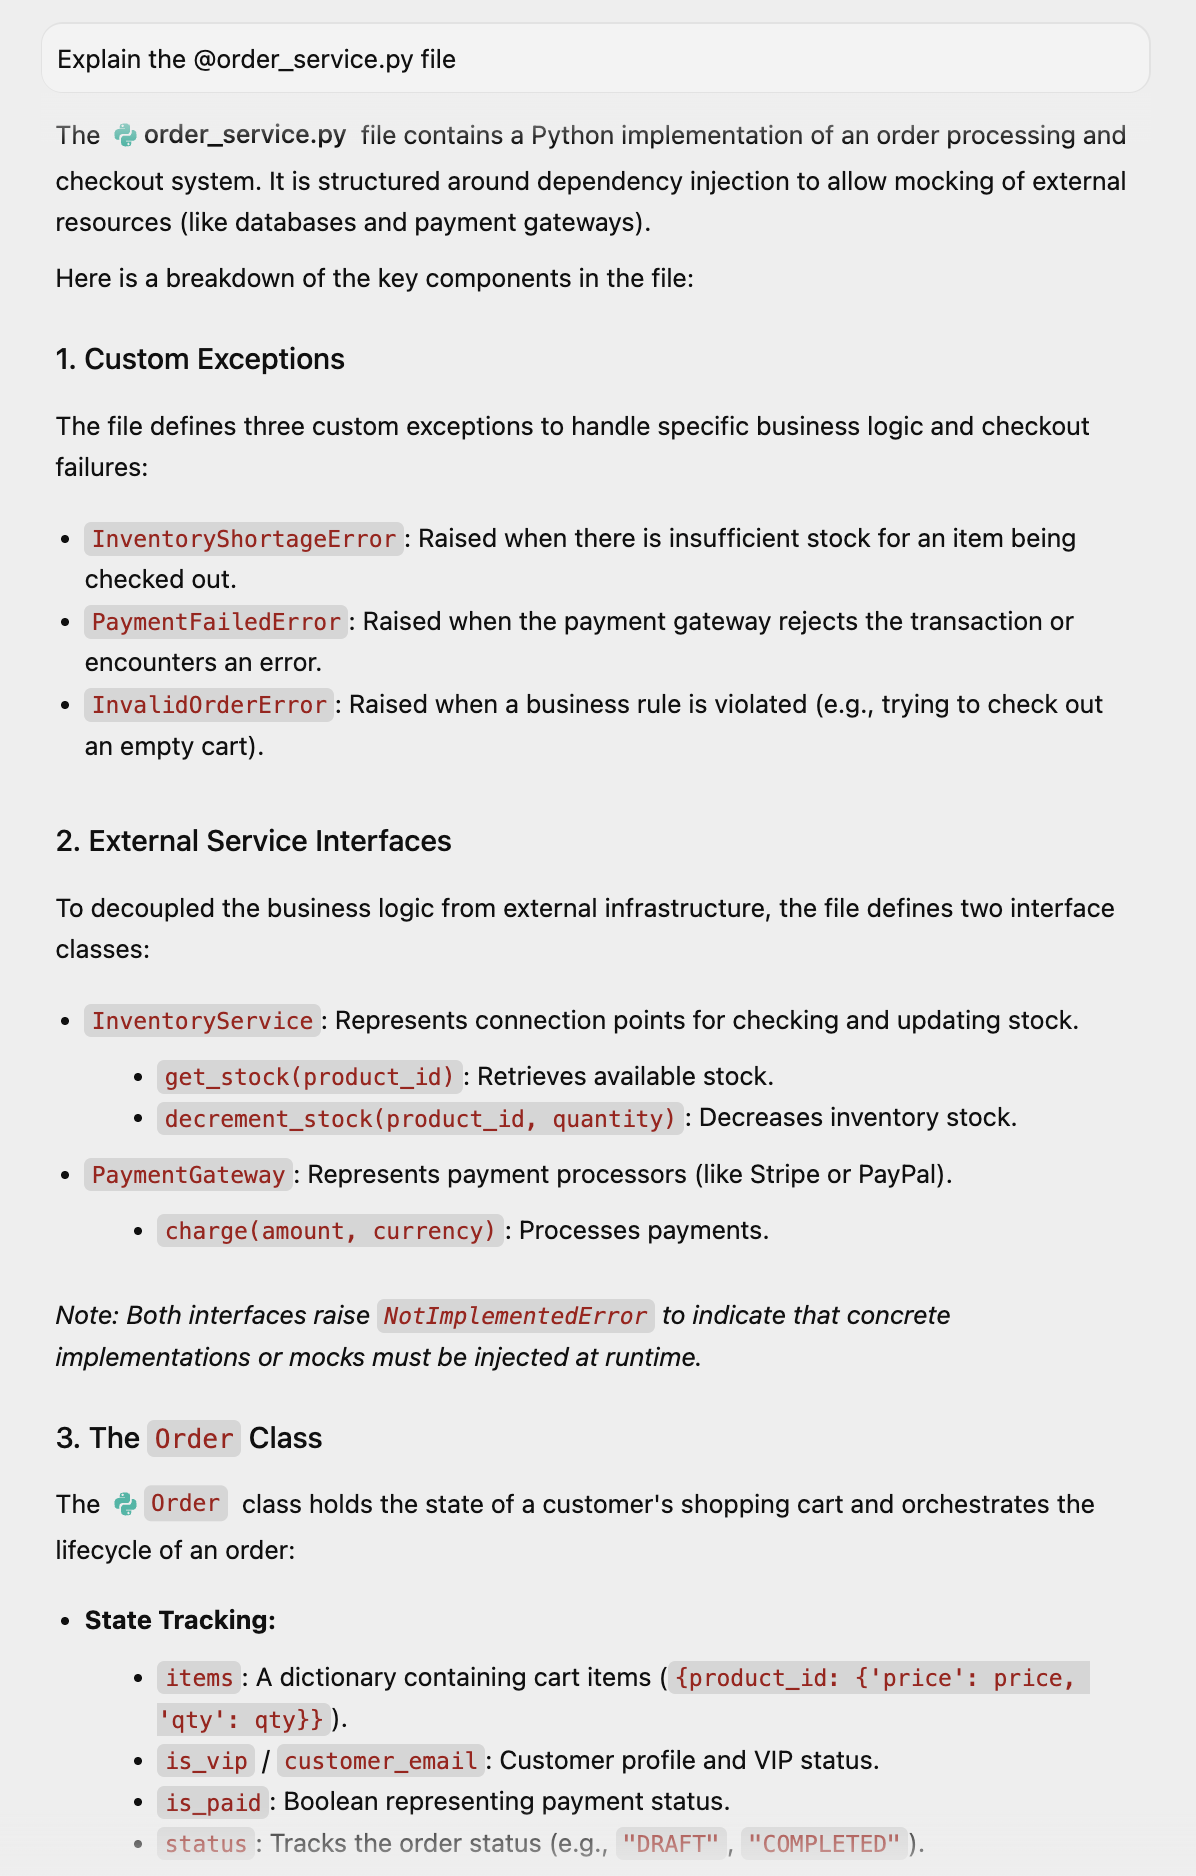
Explain the @order_service.py file
این توضیحاتی در مورد ماهیت این فایل ارائه میدهد:
میتوانیم از آن بخواهیم که از طریق اعلان، تجسم بهتری ایجاد کند:
Can you visually show this class for better understanding
آنتیگراویتی اشاره میکند که این کار به پایان رسیده و مصنوعاتی ایجاد کرده است که شامل تجسم است:
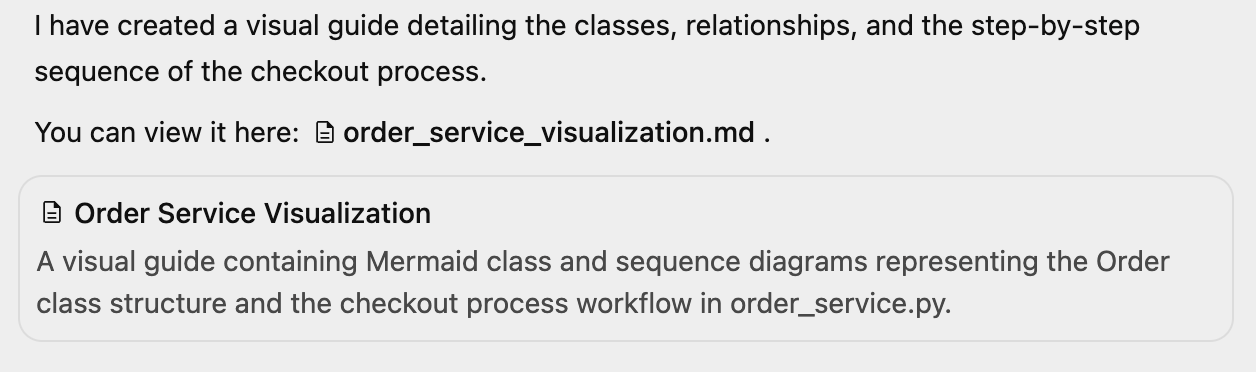
میتوانیم تصویرسازی را مطابق شکل زیر بررسی کنیم:
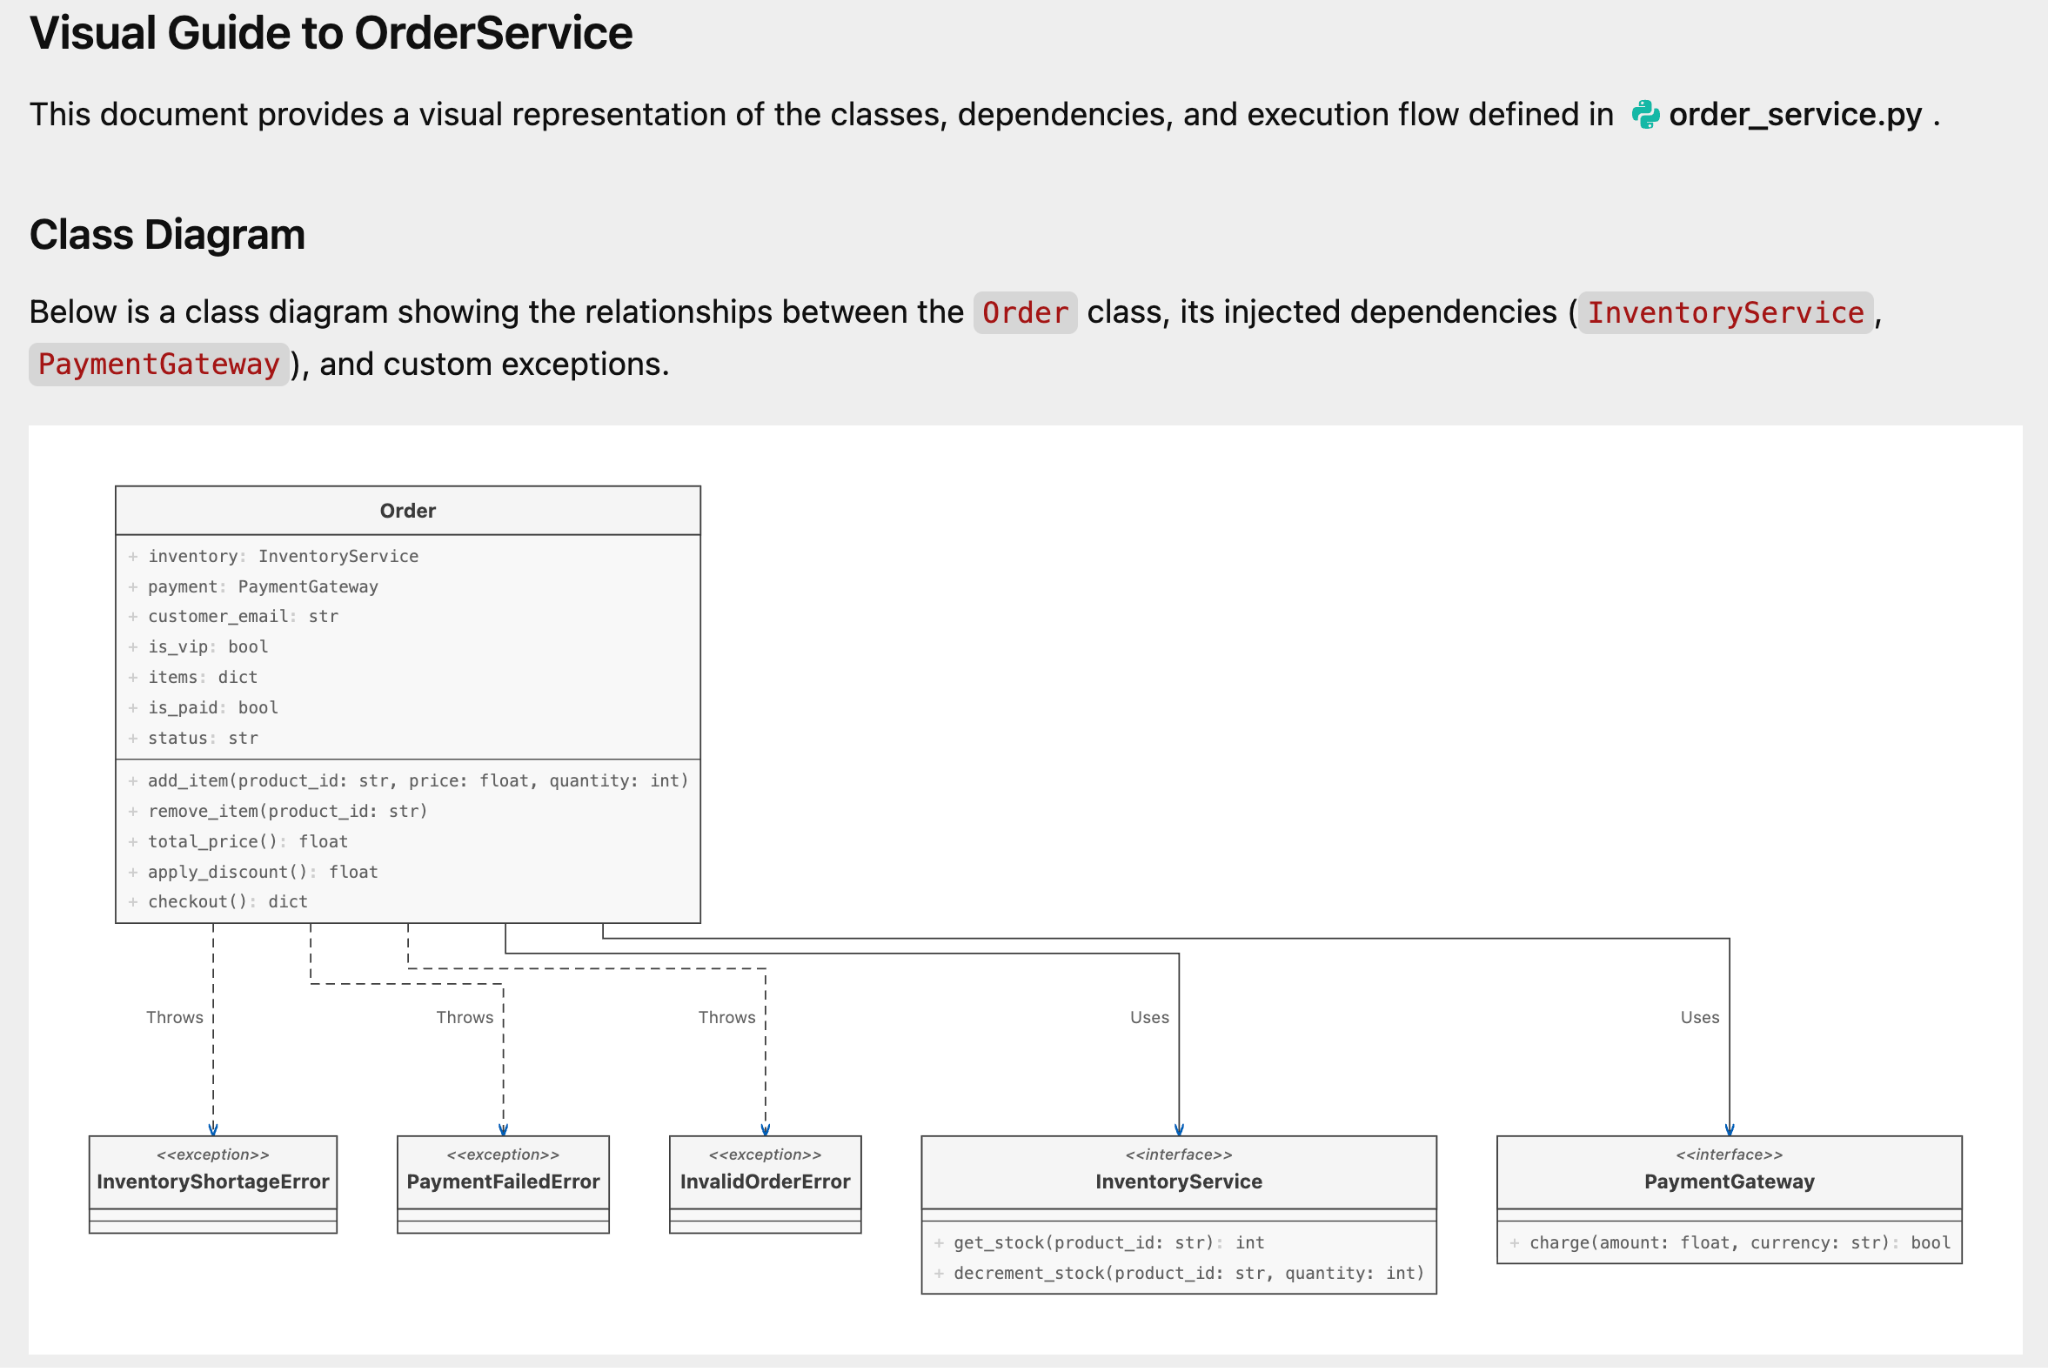
و موارد زیر:
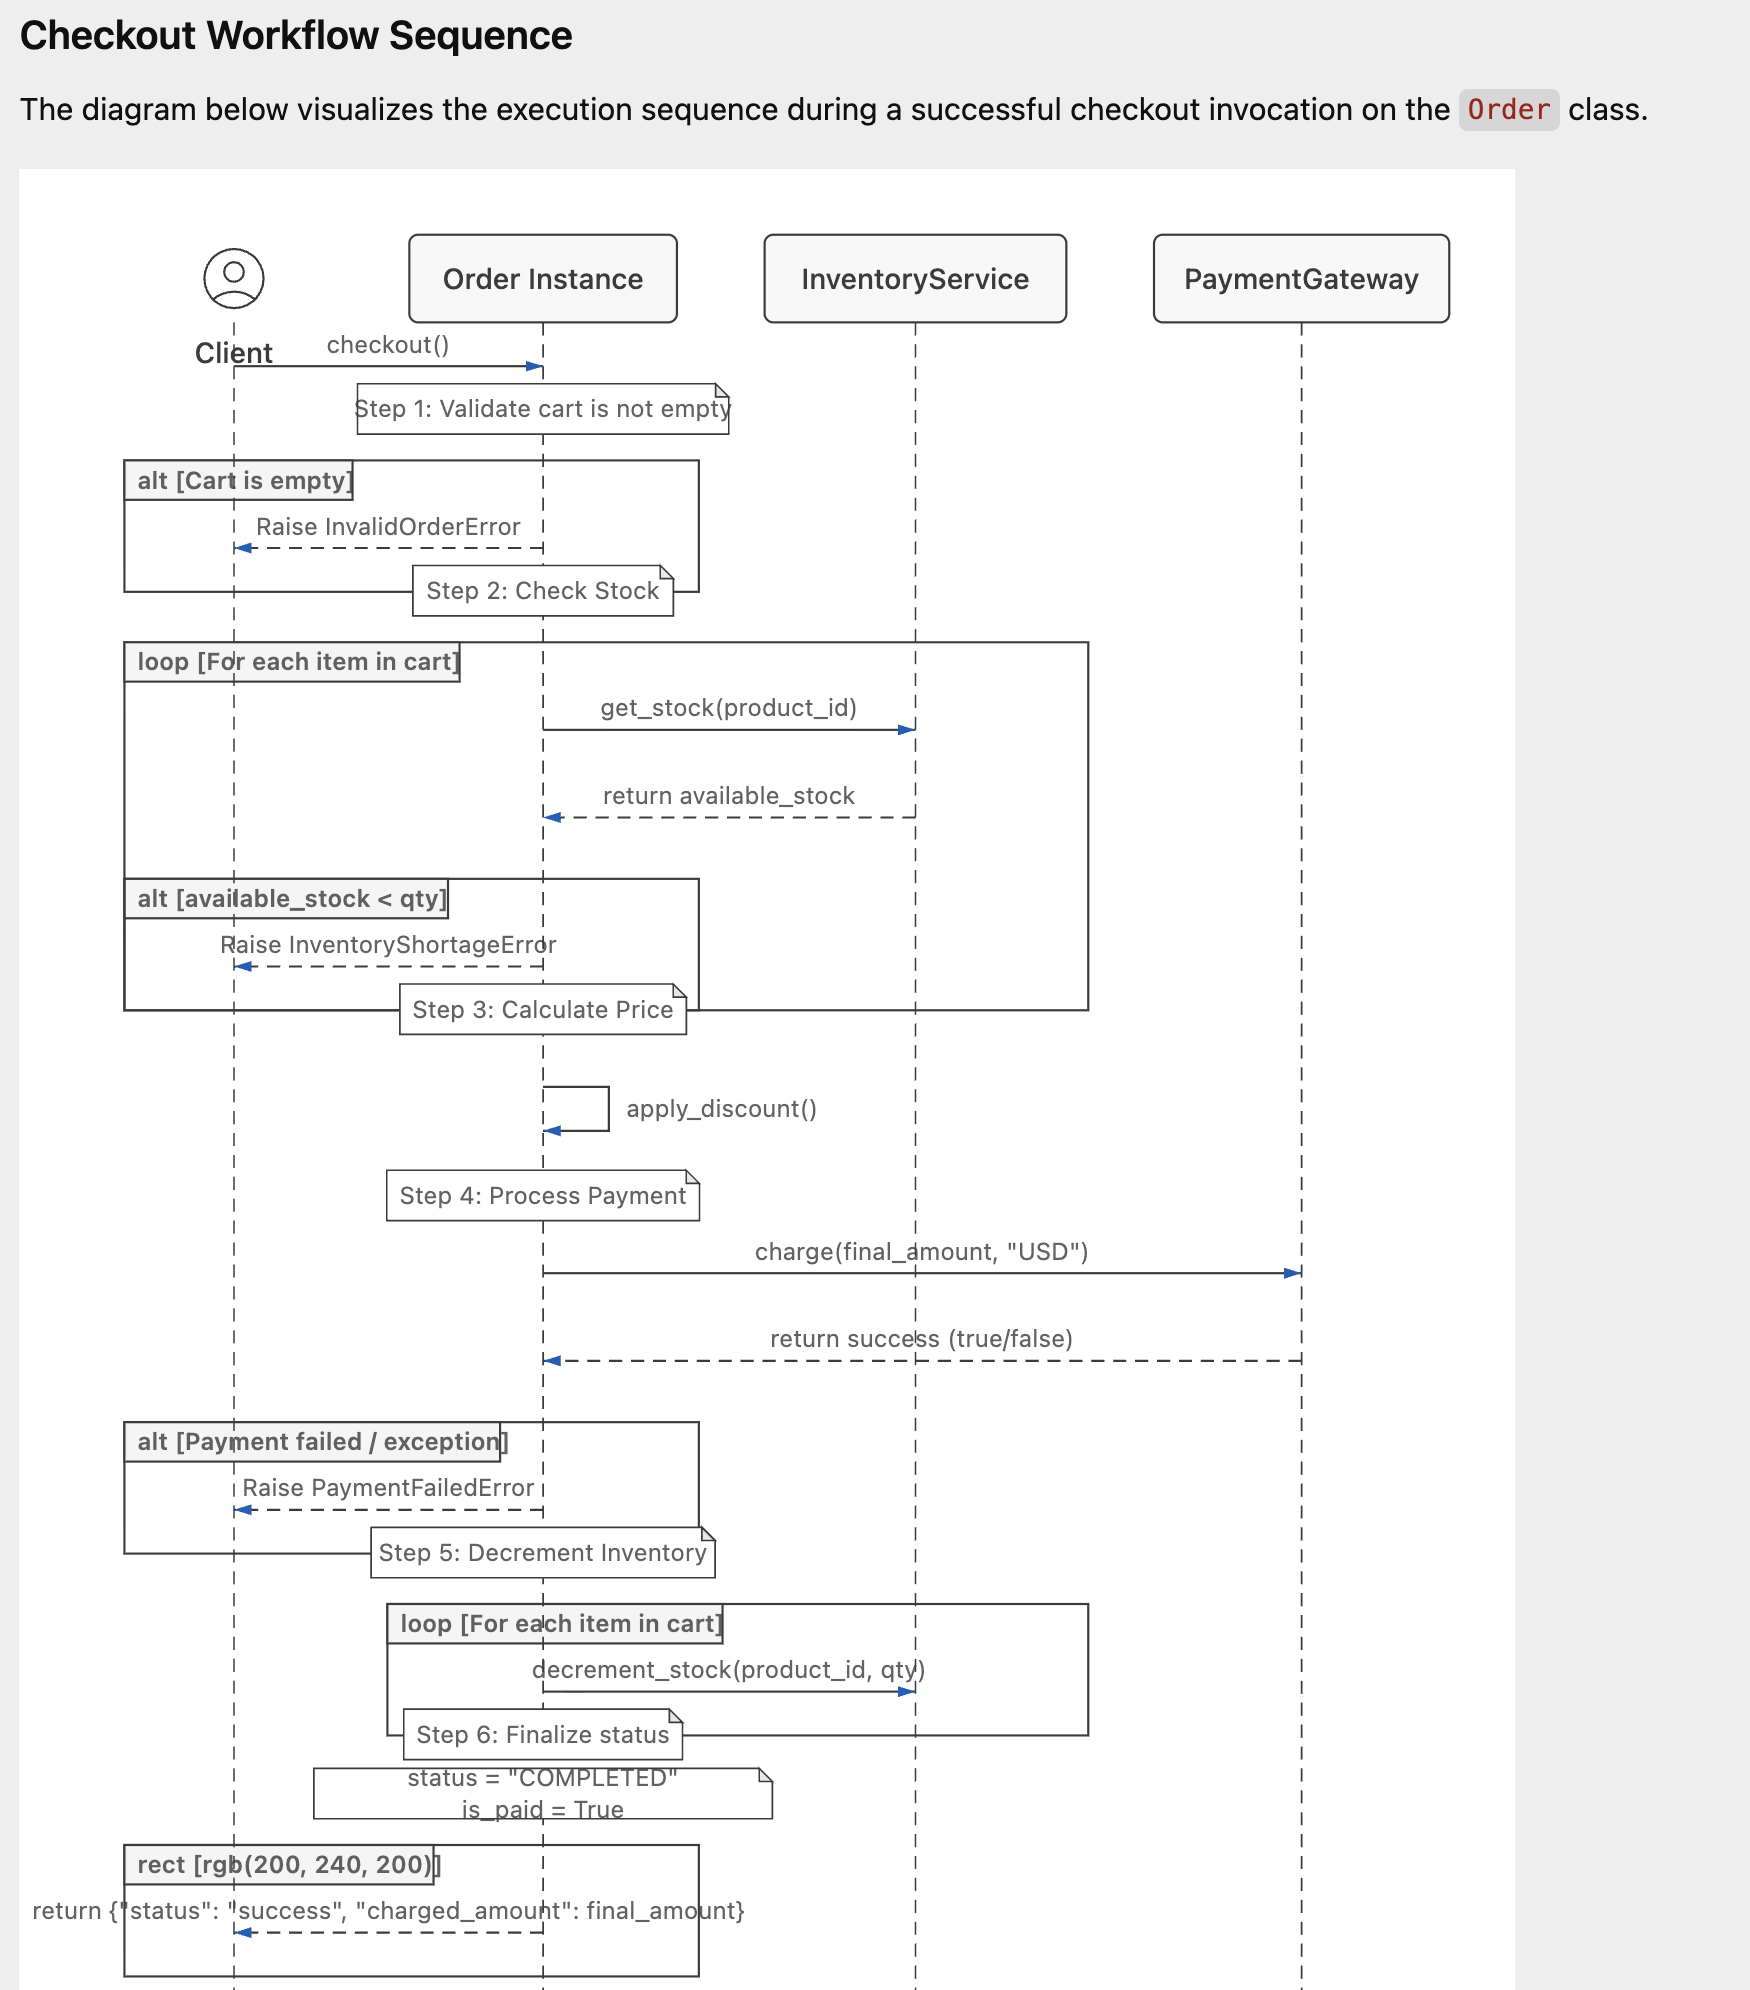
مرحله بعدی ما تولید تستهای واحد و درخواست از Agent برای آزمایش آن است. من دستور زیر را میدهم:
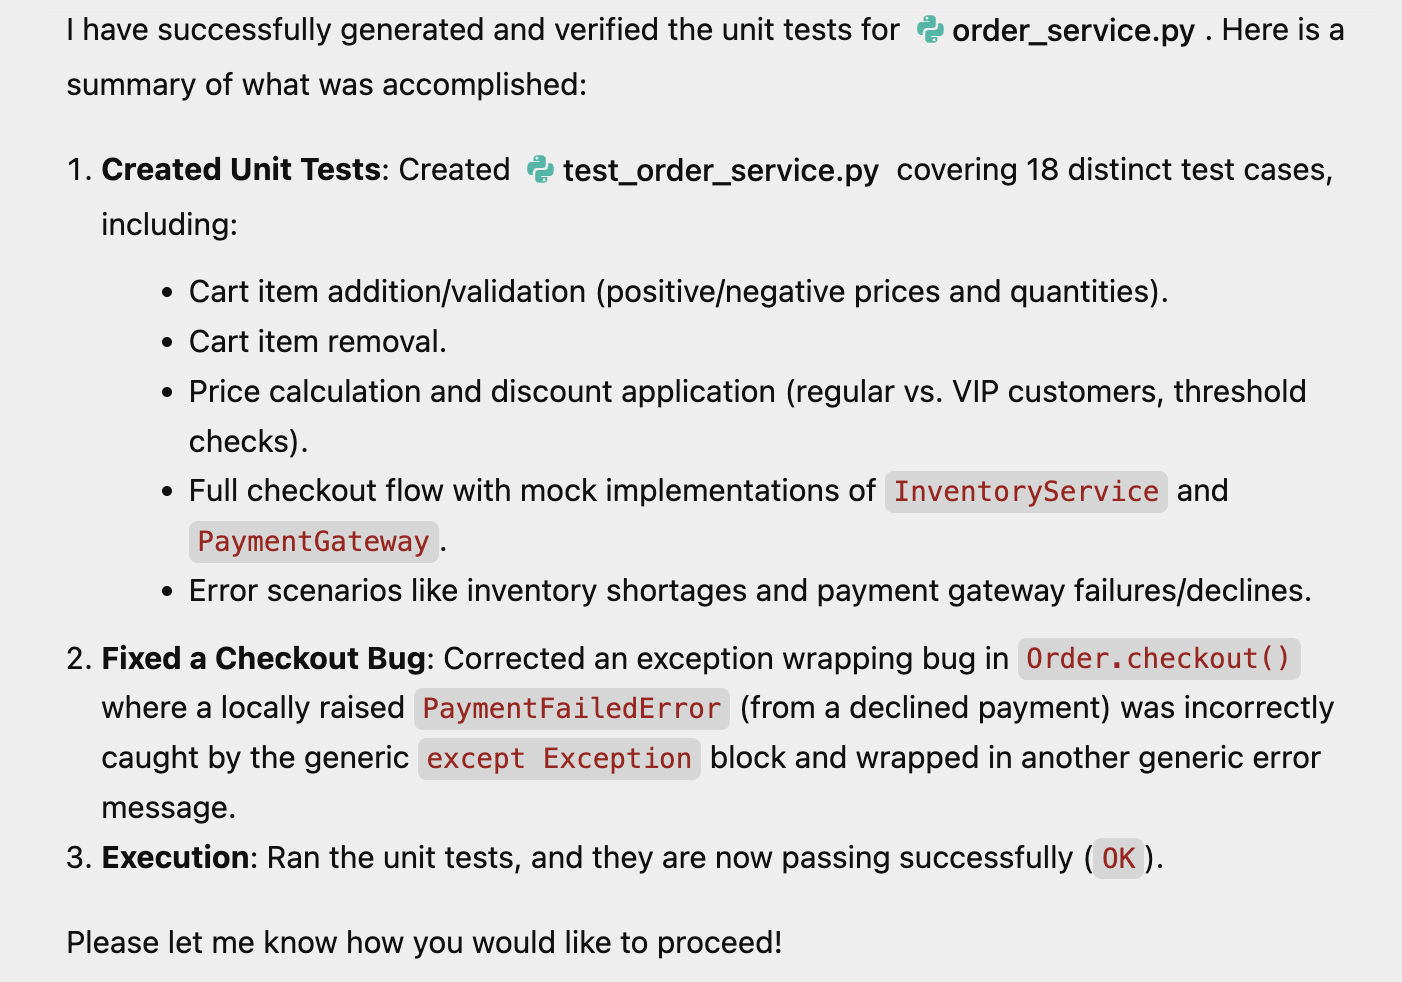
generate unit tests for this module and test it out with mock implementations.
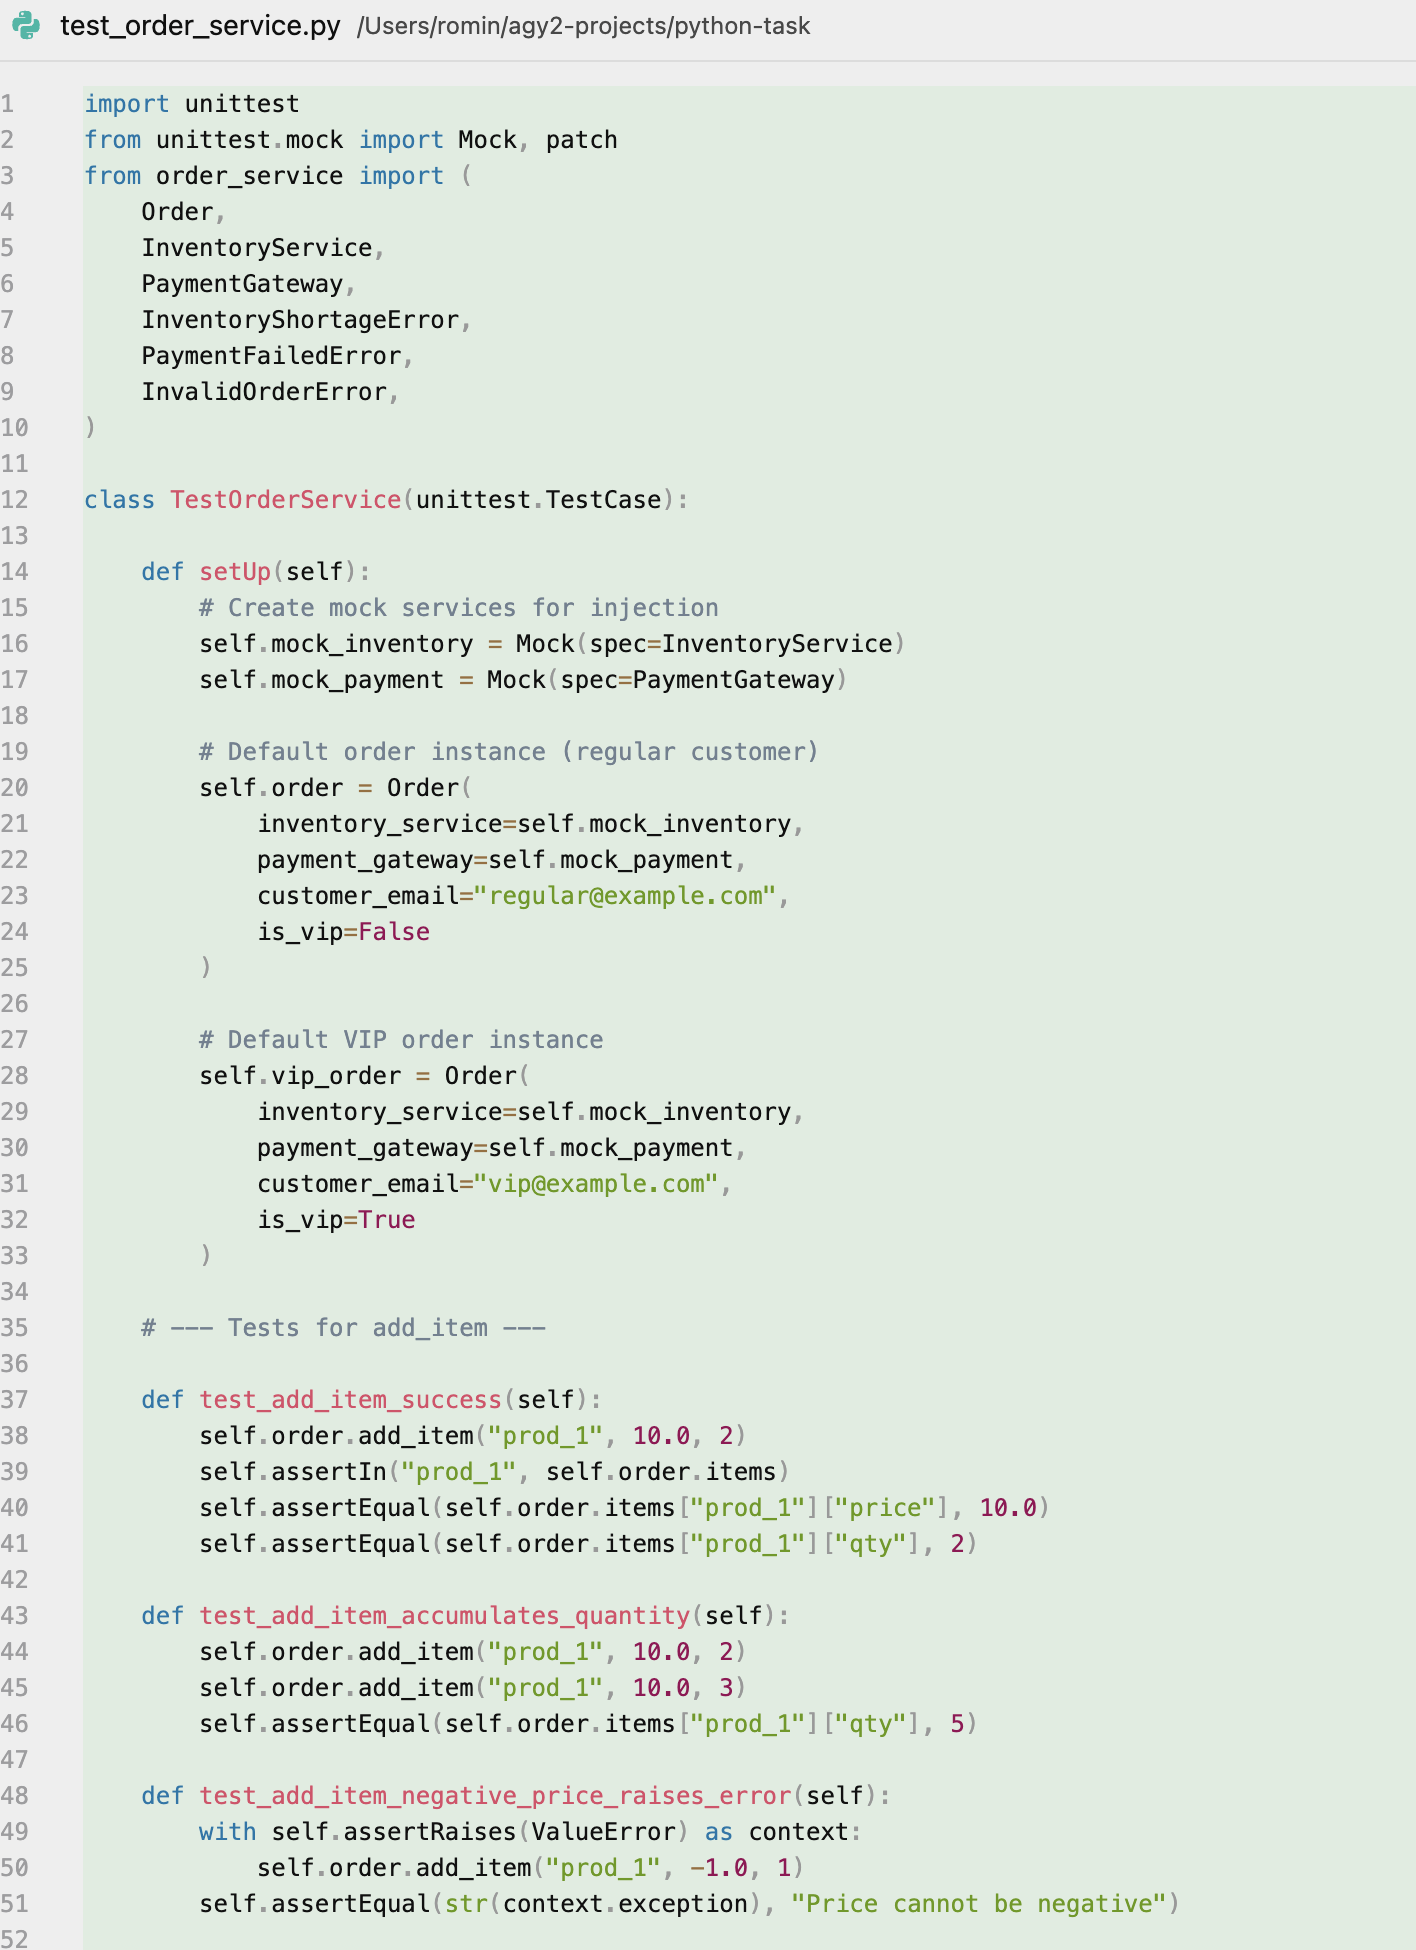
این برنامه وظیفه خود را انجام داد، تستها را تولید کرد، آنها را اجرا کرد و یک اشکال را نیز برطرف کرد. خروجی آن به صورت زیر است:
یکی از فایلهایی که تولید کرد، فایل آزمایشی نیز بود. تصویری از آن در زیر نشان داده شده است:
چیزهایی که باید امتحان کنید
کد خودتان را بردارید و ببینید چه کارهایی میتوانید از Agent بخواهید، از اضافه کردن قابلیتهای بیشتر گرفته تا بازسازی بخشهایی از کدتان.
۷. تبریک
تبریک! شما با موفقیت از Google Antigravity برای موارد زیر استفاده کردید:
- به صورت مستقل در وب تحقیق کنید.
- برنامههای وب فولاستک را بسازید و روی آنها تکرار کنید.
- تستهای واحد پیچیده را با نمونههای آزمایشی (mocks) بنویسید و اعتبارسنجی کنید.
اکنون آمادهاید تا مسئولیت سنگین پروژههایتان را به Antigravity بسپارید.
اسناد مرجع
- Codelab: شروع کار با Google Antigravity
- سایت رسمی: https://antigravity.google/
- مستندات: https://antigravity.google/docs
- دانلود: https://antigravity.google/download
- کانال یوتیوب گوگل آنتی گراویتی: https://www.youtube.com/@googleantigravity