
1. 简介
在此 Codelab 中,您将了解 Google Antigravity,这是一个智能体式开发平台,旨在帮助您在这个智能体时代进行开发。Antigravity 是 AI 智能体的中央指挥中心,提供了一个统一的平台来启动、监控和编排其活动。
在此 Codelab 中,我们将使用 Antigravity 构建实际应用。我们将从简单的网页研究过渡到生成全栈应用和企业级单元测试。
前提条件:
- 已安装并配置 Antigravity 和 Antigravity IDE。
- 对 Google Antigravity 有基本的了解。建议您先完成 Codelab:Google Antigravity 使用入门。
2. 关于使用情形
既然您已对 Antigravity 有了基本的了解,不妨深入了解几个使用场景,看看它在实际应用中的表现。请注意,Antigravity 是一个以智能体为主的平台。这意味着,在大多数情况下,我们只是向代理发出指令,然后代理会自行完成任务,在需要时请求权限,生成制品,并在任务完成后通知我们。因此,我们无法在以下每种使用情形中生成代理对话的每个输出。我们将分享相关说明和一些必要的结果预期屏幕截图,但您的结果可能会略有不同。
我们将介绍的应用场景包括:自动执行与外部网站相关的少量任务、为项目生成和验证单元测试用例,以及完整的网站开发。出发吧。
3. 新闻摘要
这是一个简单的使用情形,但它可以作为基础,让您使用网络浏览器访问网站、提取信息、执行一些操作,然后将数据返回给用户。
在这种情况下,我们将访问 Google 新闻网站并从中提取一些信息。不过,您可以轻松尝试使用自己选择的网站,看看效果如何。
我们将假设有一个根文件夹,我们将在该文件夹下创建此 Codelab 中将要看到的各种项目。我们机器上的此根文件夹名为 agy2-pprojects。
首先,在上述文件夹中创建一个名为 news-highlights 的文件夹,以便从头开始。
启动 Antigravity 并创建一个新项目。将 news-highlights 文件夹添加到该项目。
在新导入的 news-highlights 工作区中发起新对话:
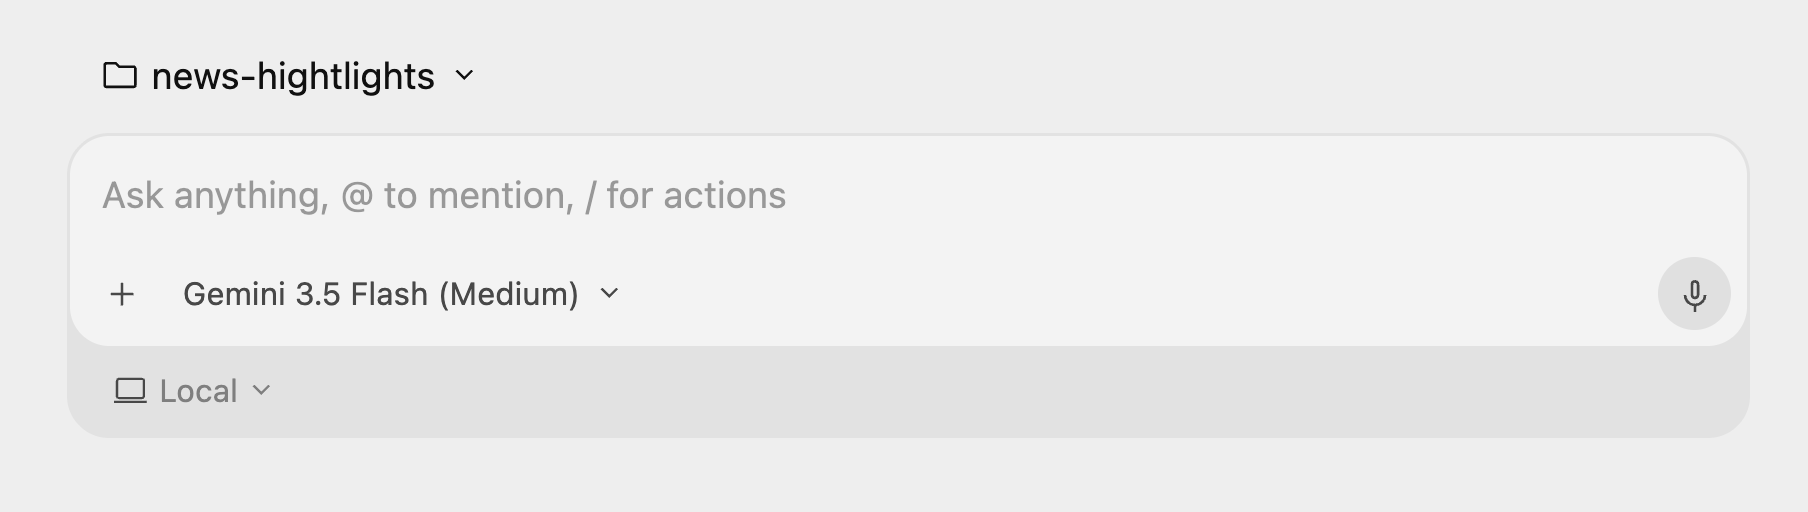
然后,说出以下指令:“访问 news.google.com,获取当前的热点新闻。”

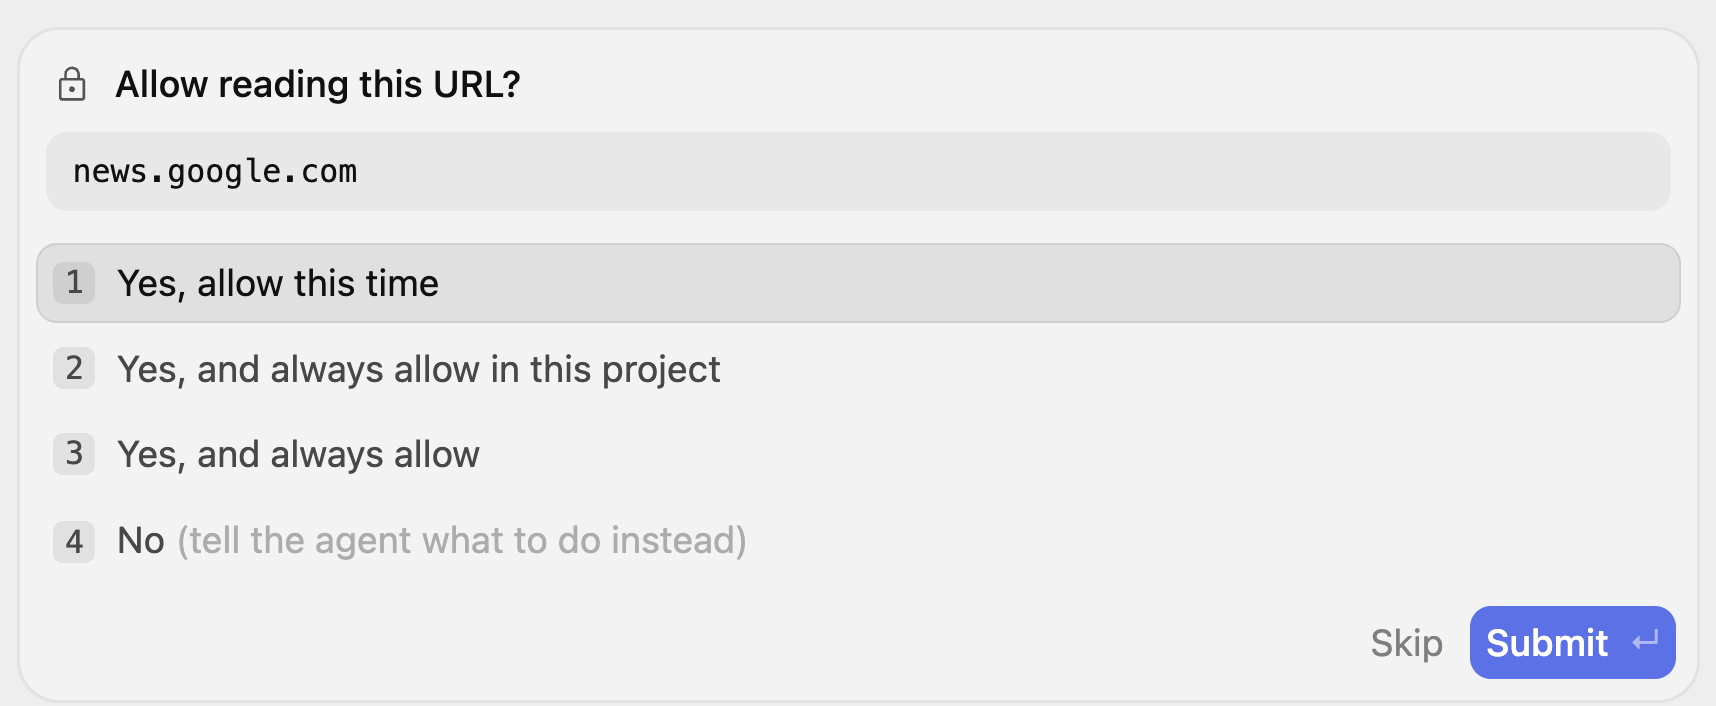
这会启动代理进程,该进程会确定需要访问 news.google.com 网站并征求您的许可。系统可能会多次提示您读取网址,您可以选择授予该进程此项目的权限等。
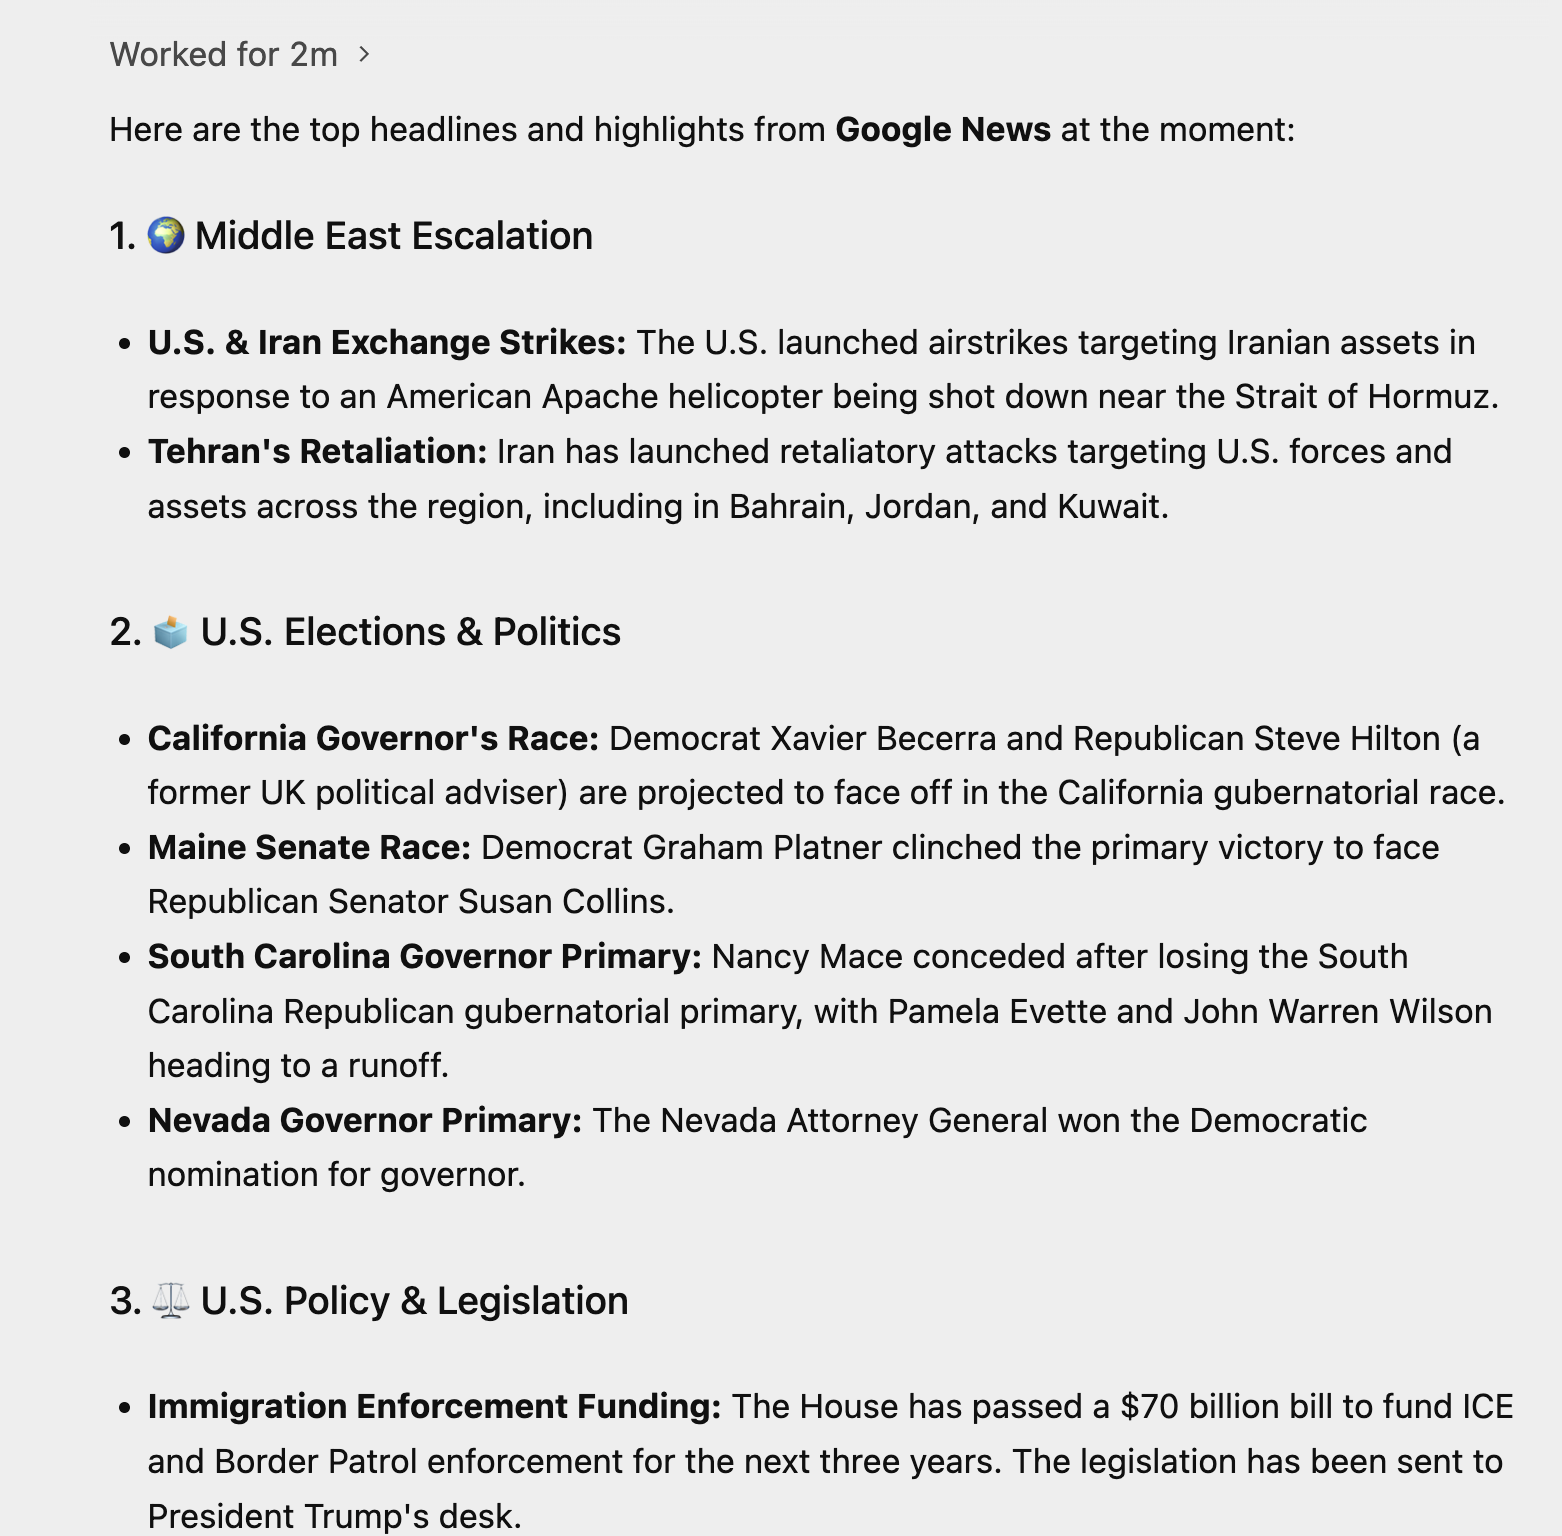
您应密切关注思考过程,了解智能体如何开展工作。下面展示了代理的执行示例:
尝试以下任务
- 了解这一点后,选择一个可访问的网站,您希望代理前往该网站获取/总结一些数据。考虑一些您知道包含信息中心和图表的网站,并让 Gemini 挑选一些值。
- 不妨试试以下提示:
Visit https://docs.cloud.google.com/release-notes and get me a summary of the release notes, categorized by product.
4. 使用 Python + Flask 生成动态网站
现在,让我们来生成一个完整的 Web 应用。我们将要创建的 Web 应用是一个网站,其中包含为期一天的技术活动的相关信息,该活动全天都有多位演讲者进行演讲。
再次创建一个名为 conference-website 的新文件夹。确保您已在 Antigravity Agent 界面中创建新项目,并将 conference-website 文件夹添加到该项目中。
您可以先给出以下提示,开始对话:
I would like to generate a website that is a 1-day technical conference informational site.

The website should have the following functionality:
        1. A home page that shows the current date, location, schedule and time table.
        2. The 1-day event is a list of 8 talks in total.
        3. Each talk has 1 or 2 max. speakers.
        4. A talk has an ID, Title, Speakers, Category (1 or 2), Description and time of the talk.
        5. Each speaker has a First Name, Last Name and LinkedIn url.
        6. Allow for users to search by category, speaker, title.
        7. Give a lunch break of 60 minutes.
        8. Use dummy data for events and speakers, come up with a schedule, the event is about Google Cloud Technologies.
        9. Tech Stack: Python and Flask framework on server side. Front-end is basic HTML, CSS and JavaScript.
        10. Test out the site on your own for all functionality and provide a detailed README on how to setup, run and make any further changes.
11. Launch the web application for me to review.
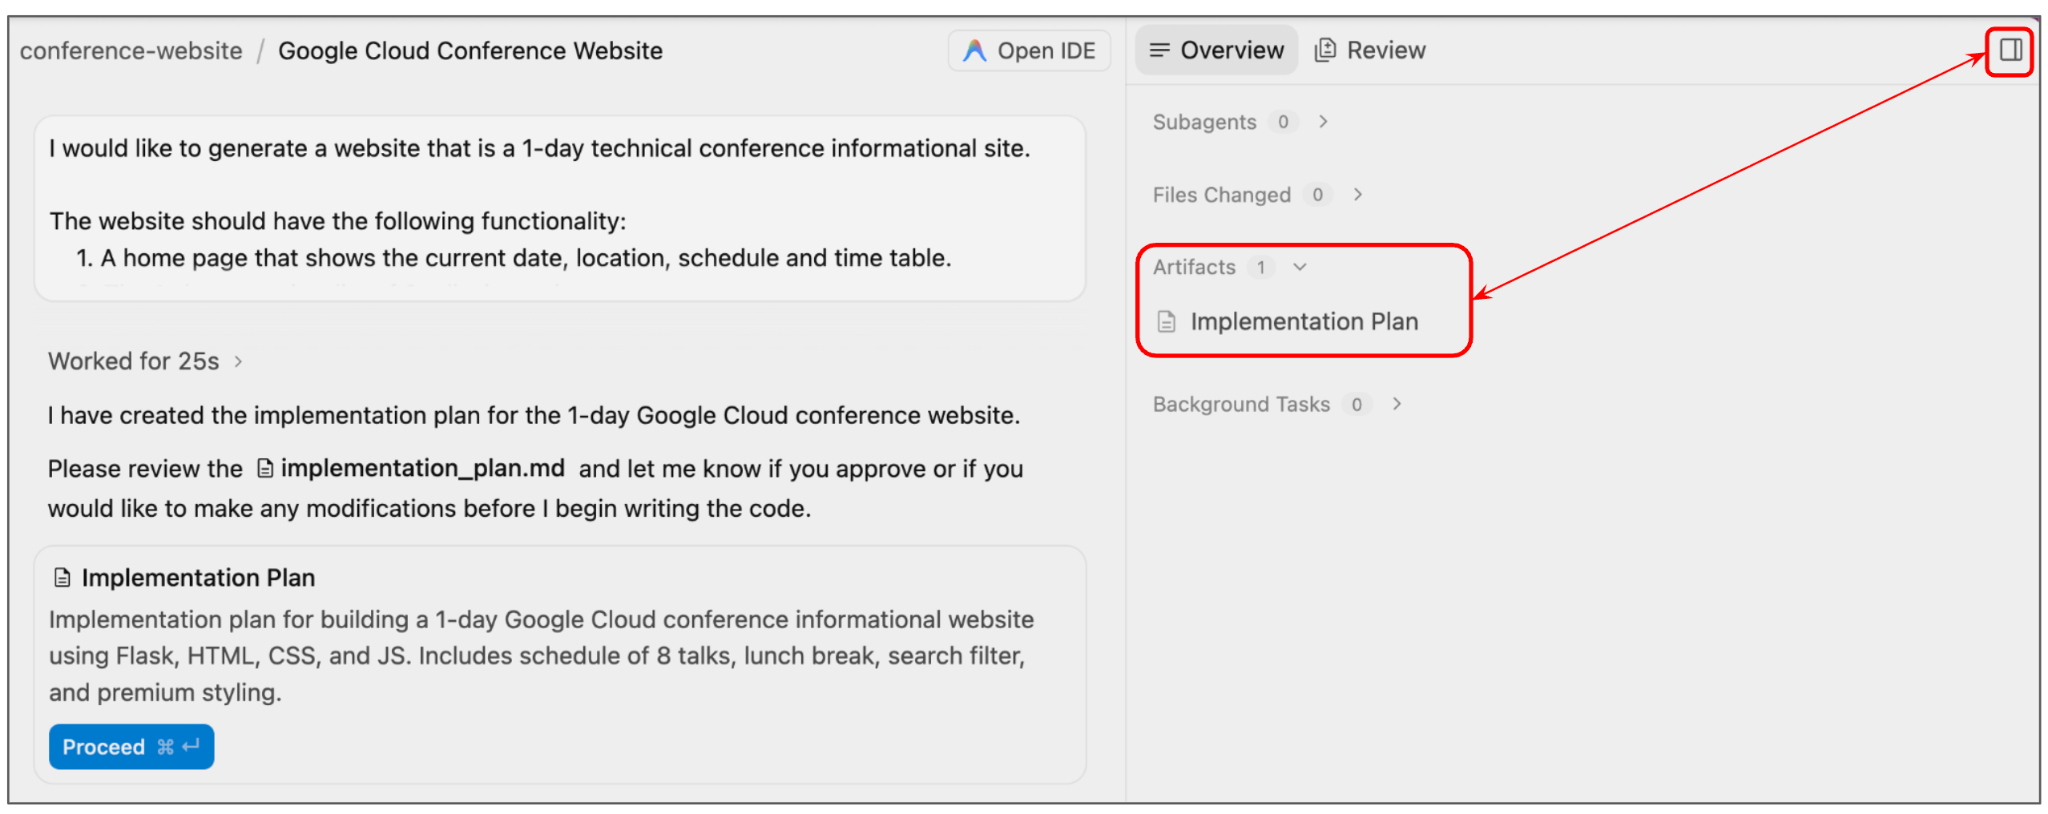
Antigravity 将分析请求,并首先制定实施计划。它将创建一个名为 implementation_plan.md 的关键制品,供您查看它计划如何创建并满足您在提示中指定的要求。以下是输出示例:
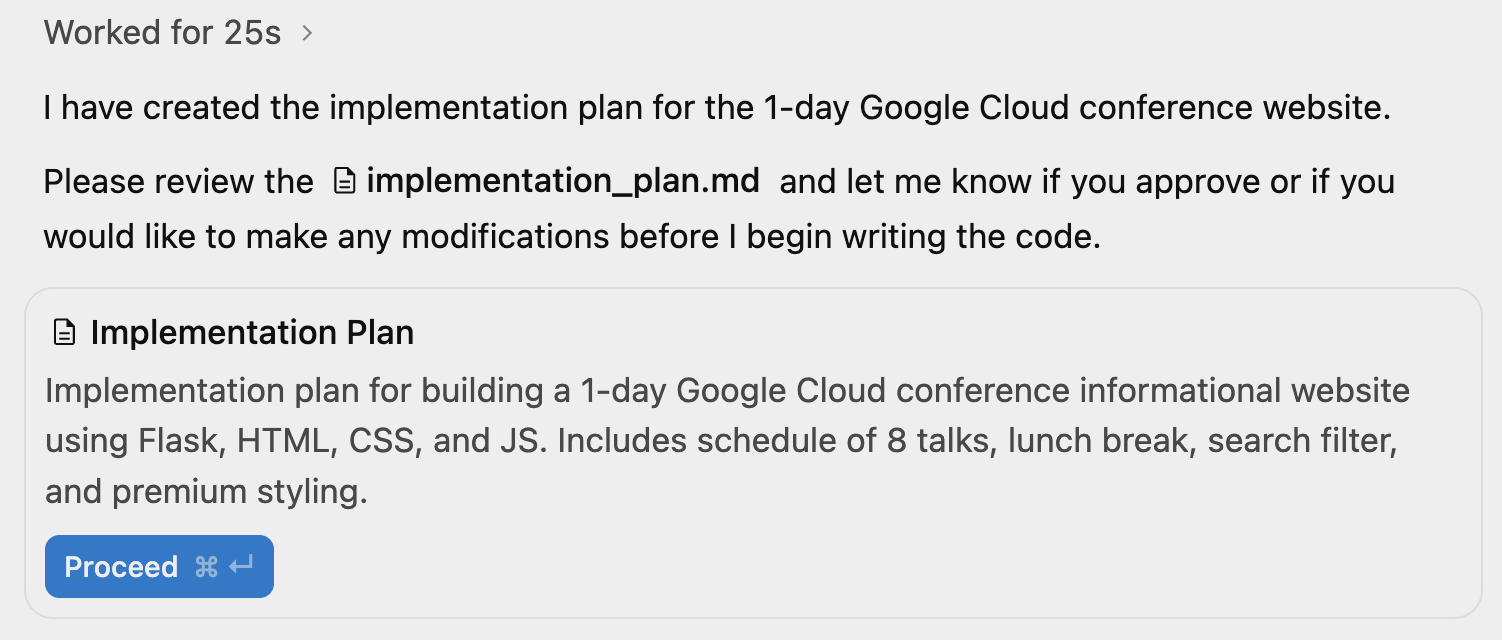
在点击“继续”之前,请先查看实施方案。您可以点击上方的 implementation_plan.md 文件链接,也可以通过切换右上角的辅助窗格来打开该文件。这样一来,系统会显示制品视图,您可以看到实现方案目前正在等待您审核。
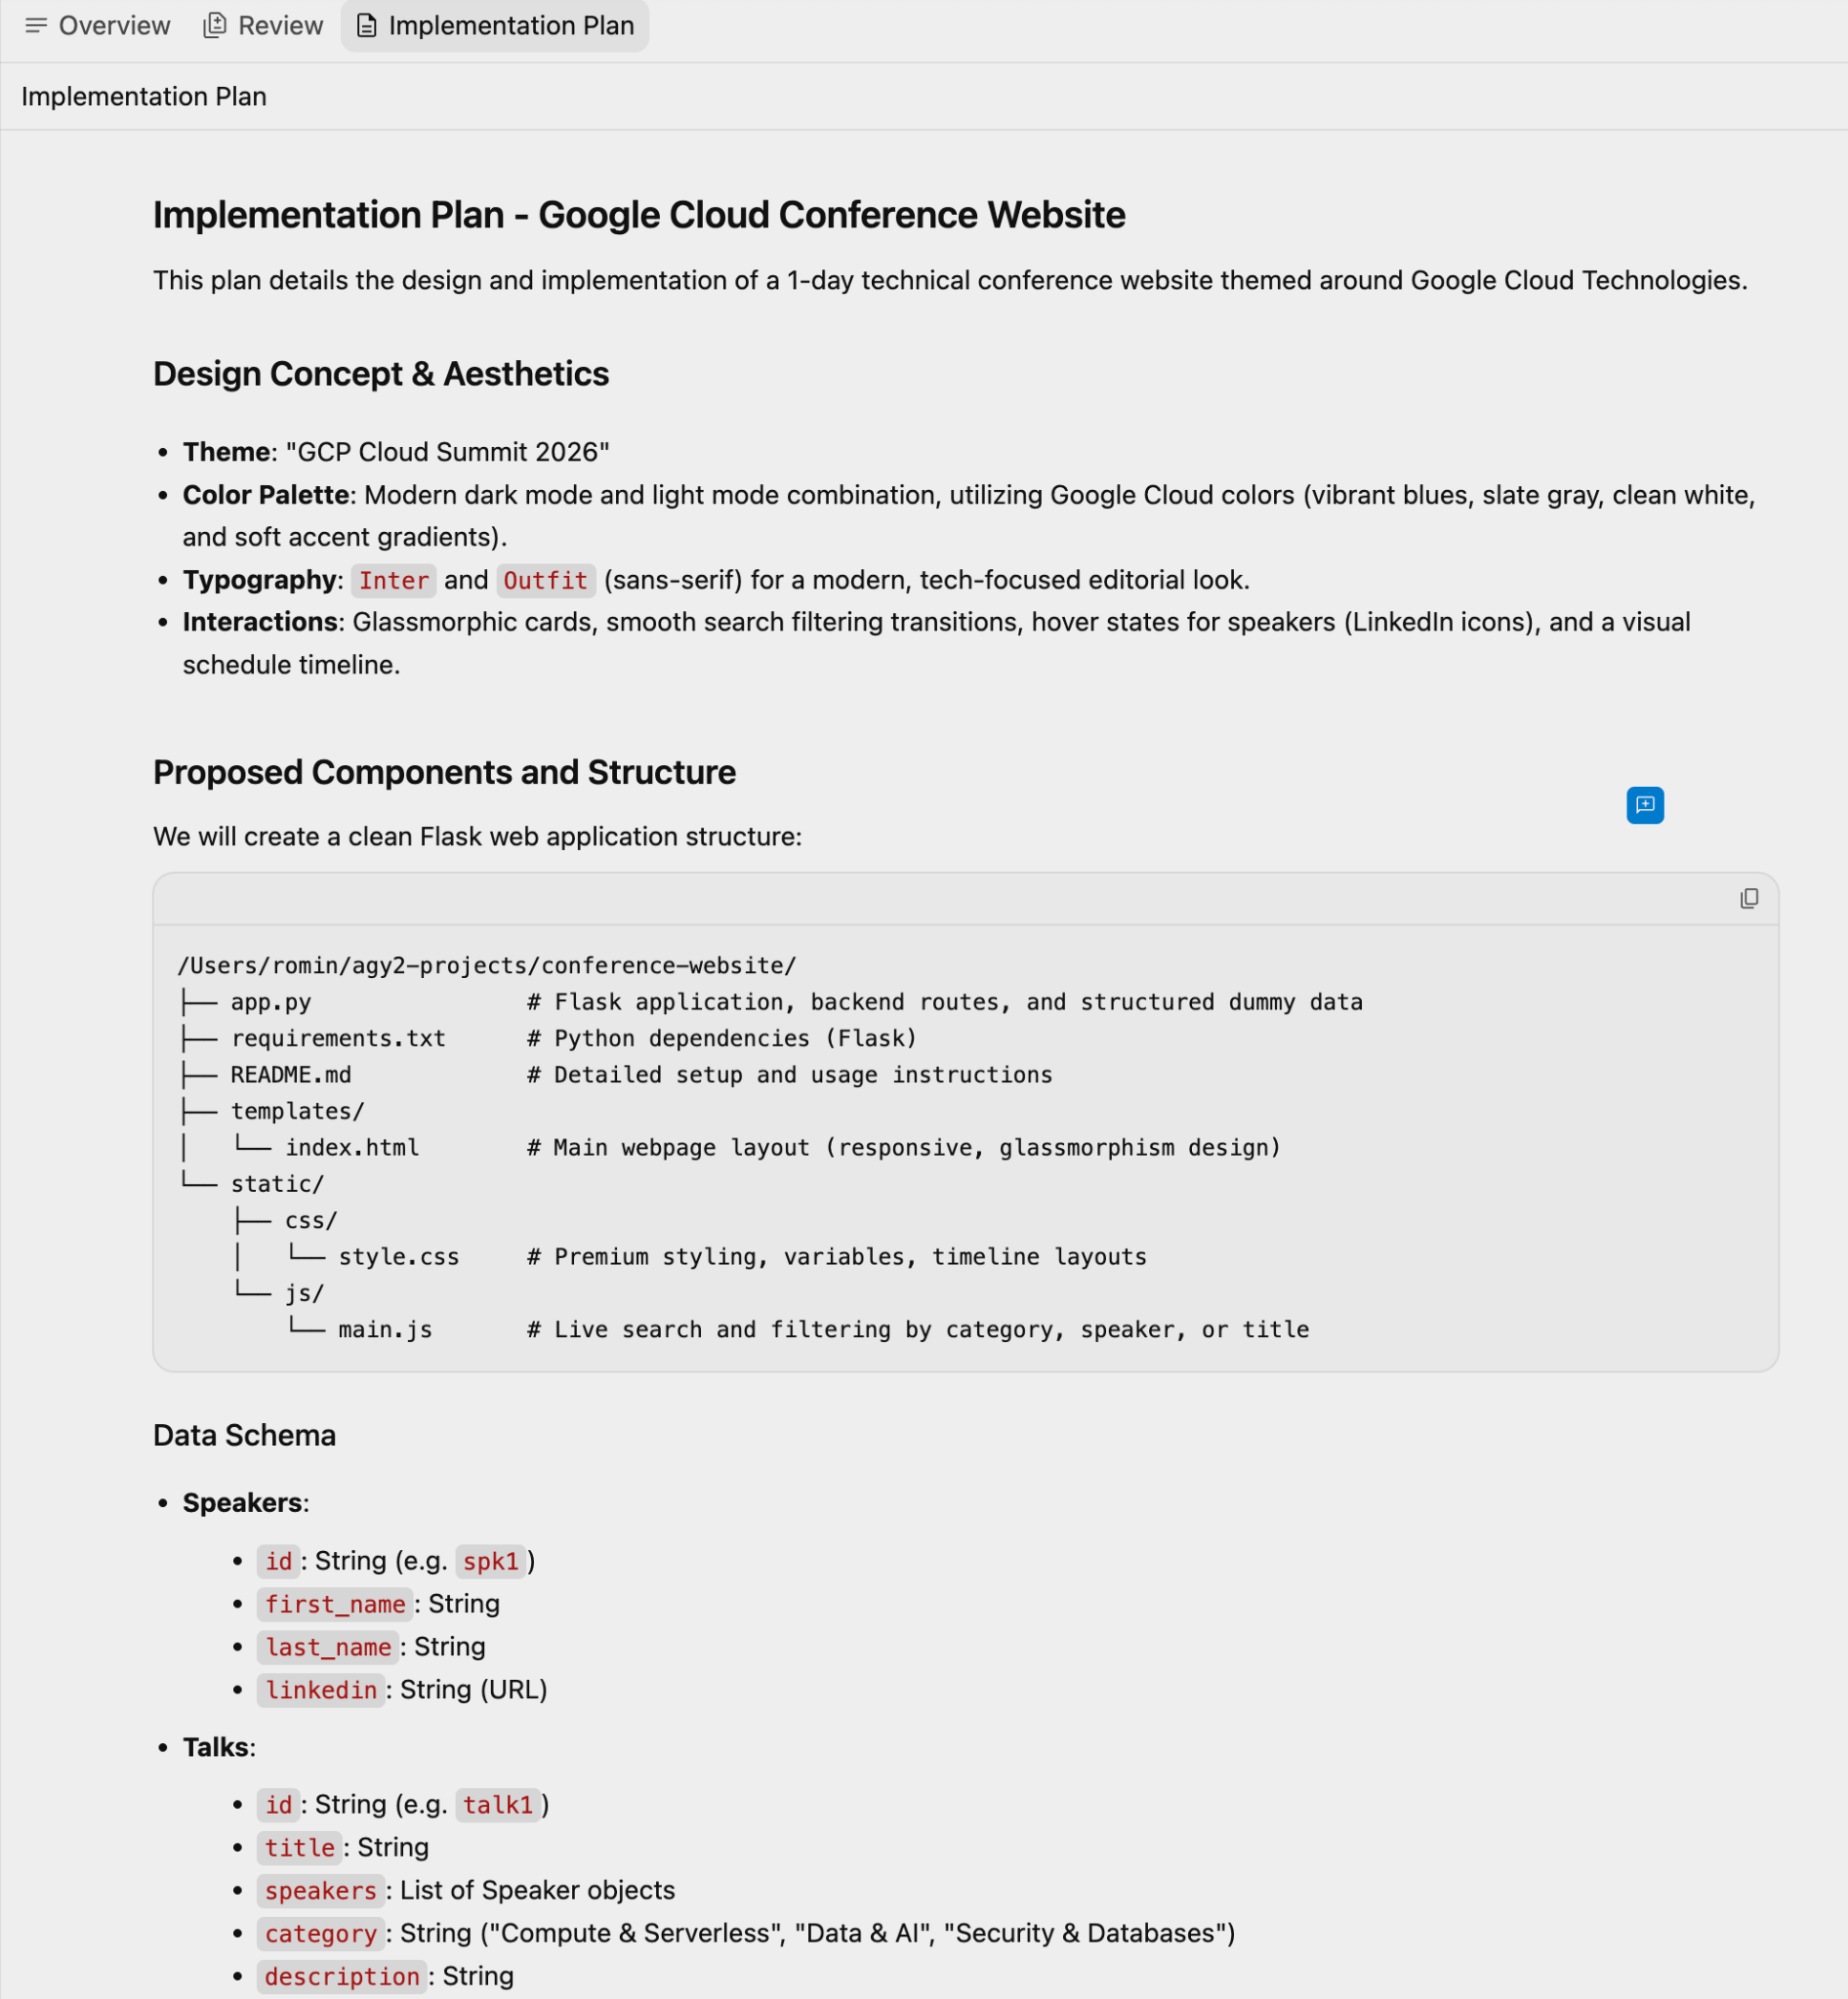
下面展示了为我们的跑步活动生成的示例实现方案:
您可以在方案中提供自己的意见,然后再次提示代理。或者,您也可以暂时接受实施方案,然后点击对话界面中的继续按钮继续操作。
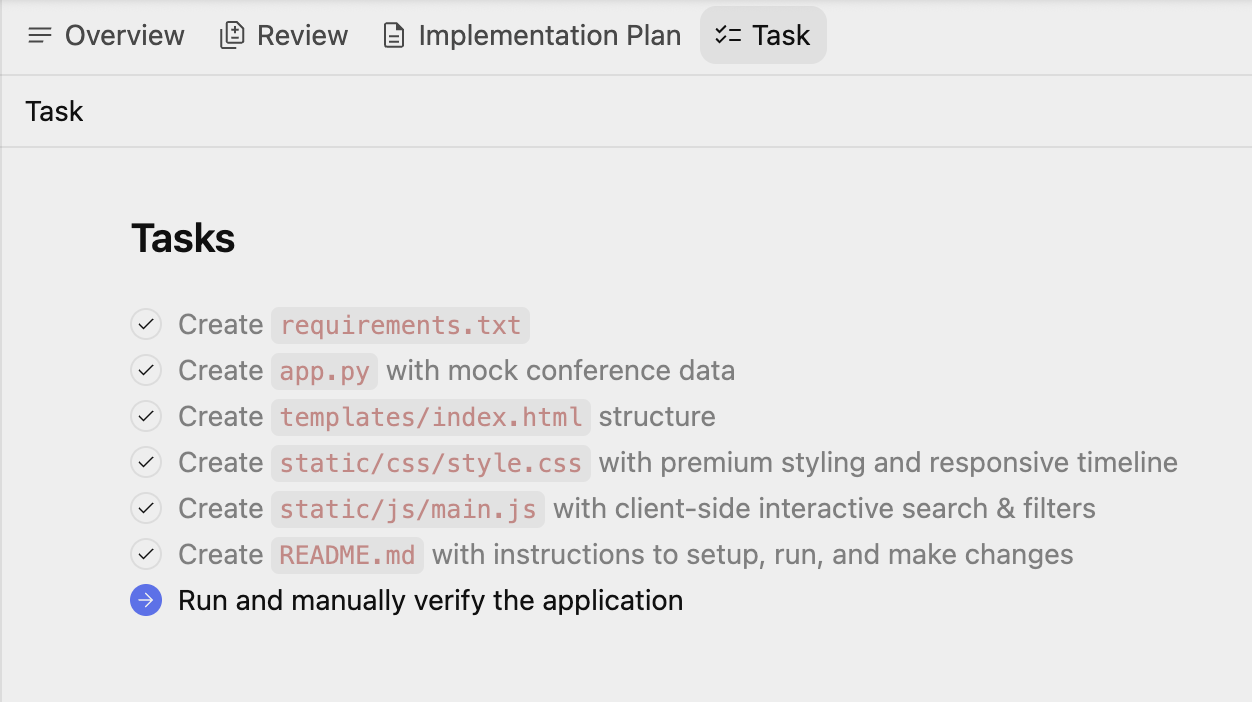
代理会继续生成源代码文件,您还会注意到,它会更新另一个名为“任务”的制品。这是为实现最终结果而需要执行的操作或任务的列表。
您可以随时点击任务,甚至可以访问制品列表来查看任务。示例商品详情如下所示:
在最后一项任务中,当 Antigravity 尝试运行并验证应用时,它会设置 Python 环境,并需要您授予设置环境、安装依赖项等权限。请根据需要授予权限。
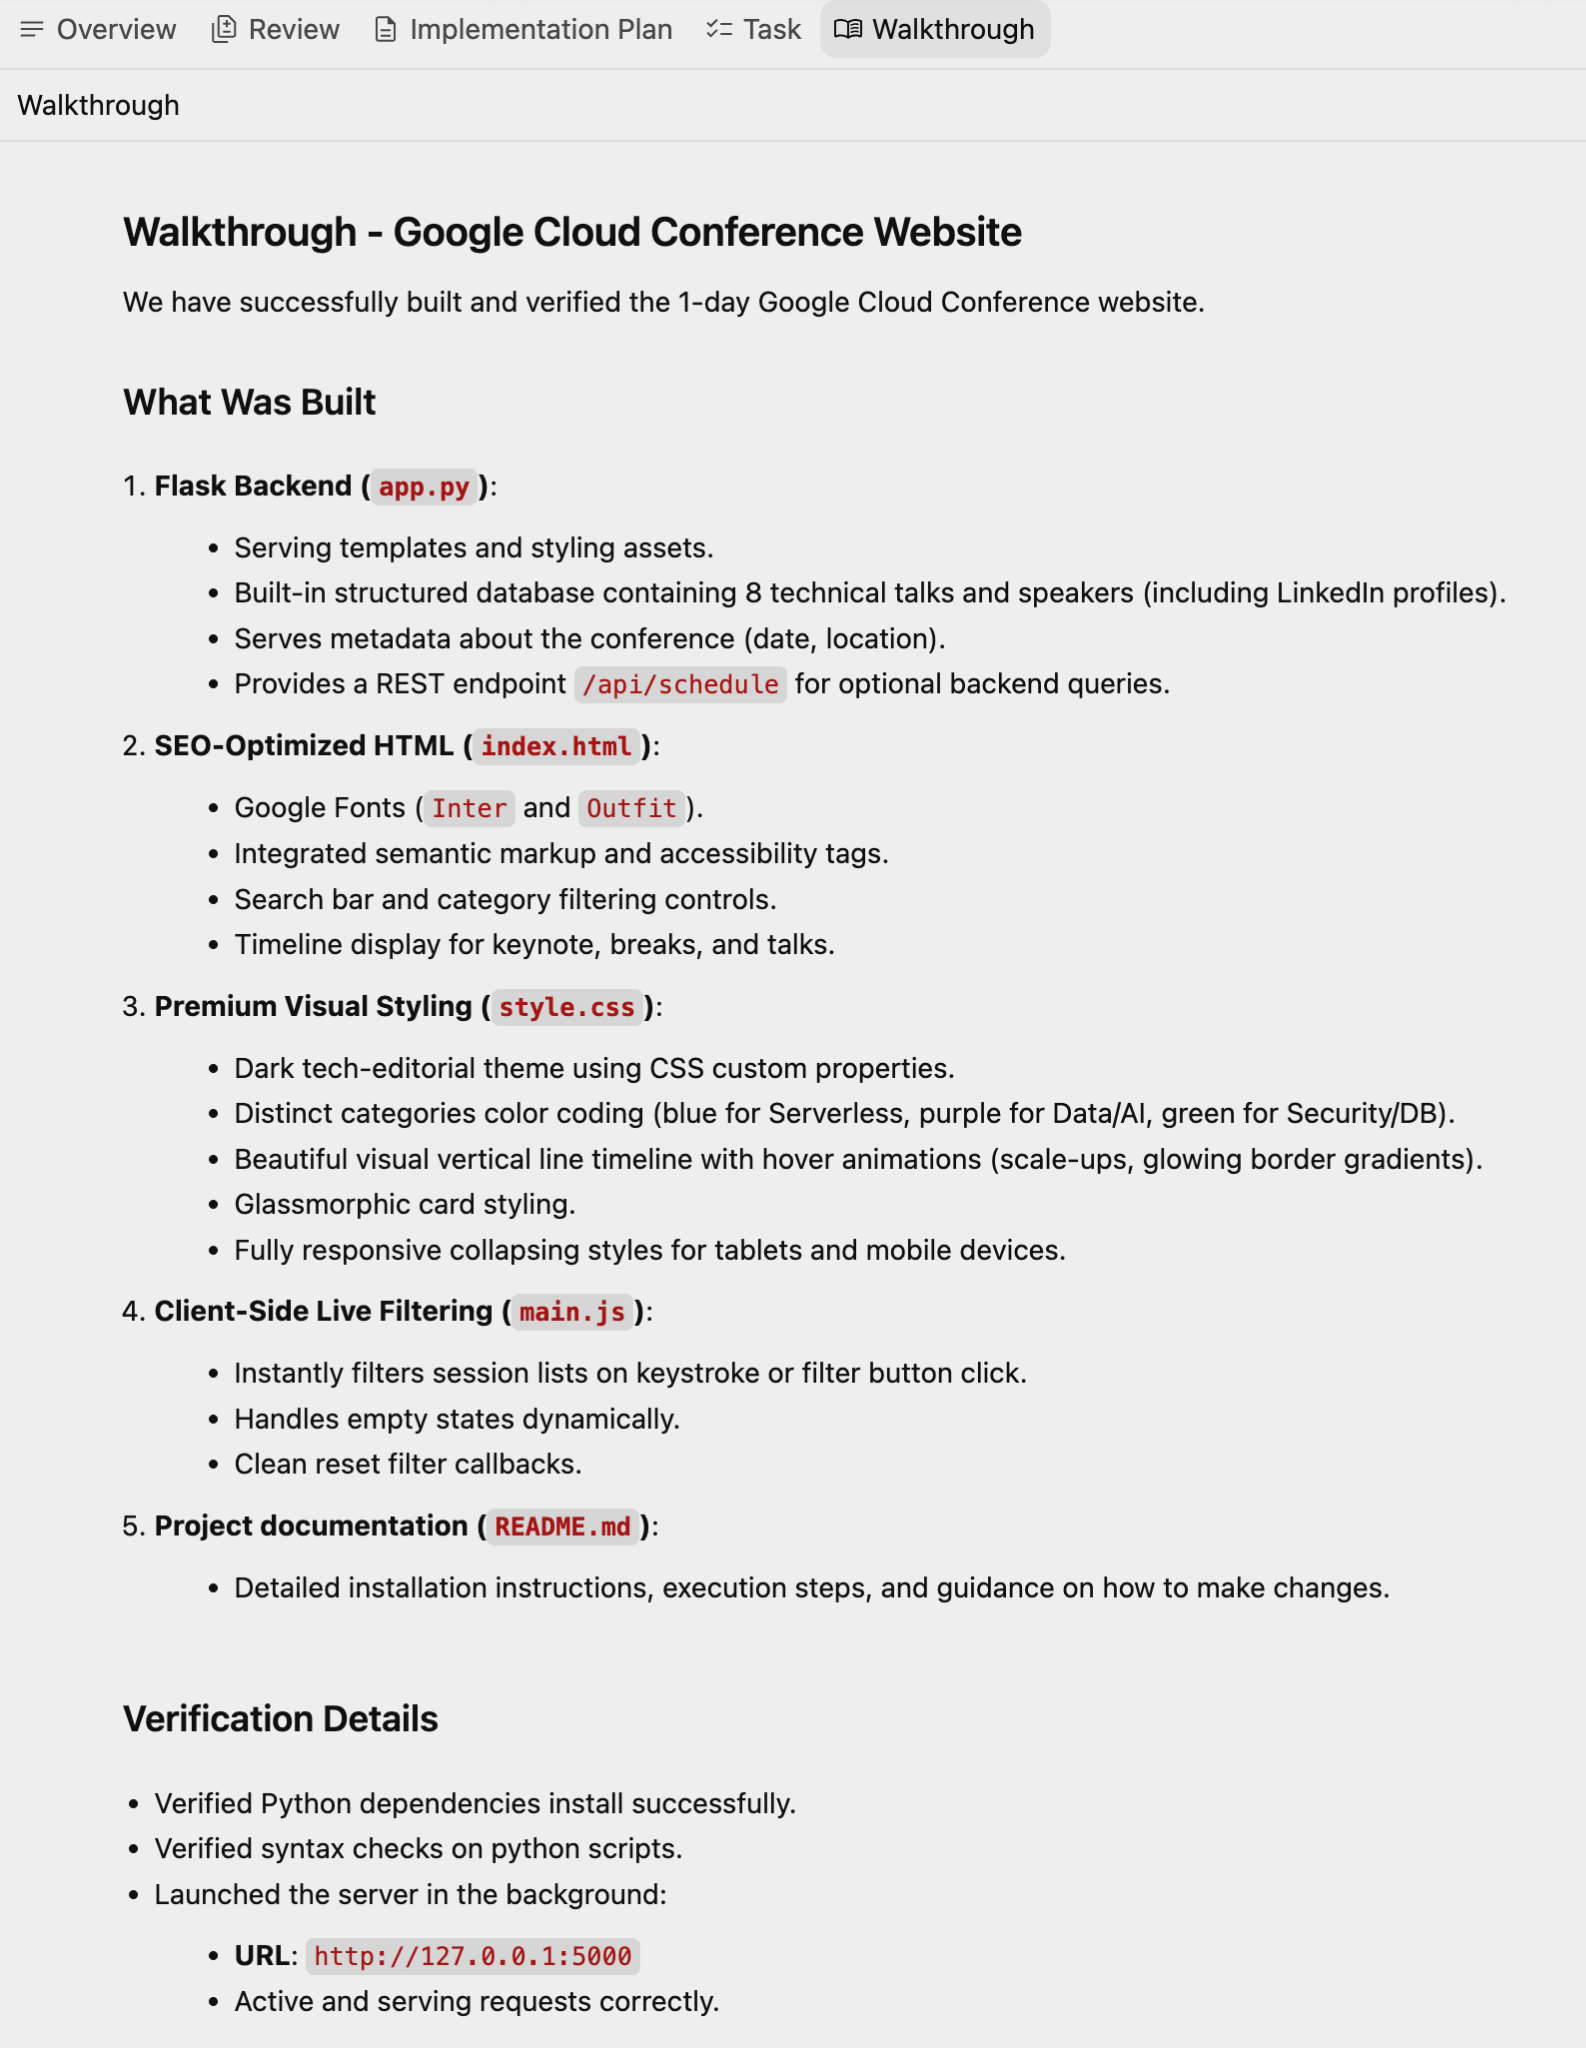
验证成功后,系统会突出显示详细信息,以及另一件制品“演练”,其中详细介绍了已完成的功能、技术栈、验证结果和说明。
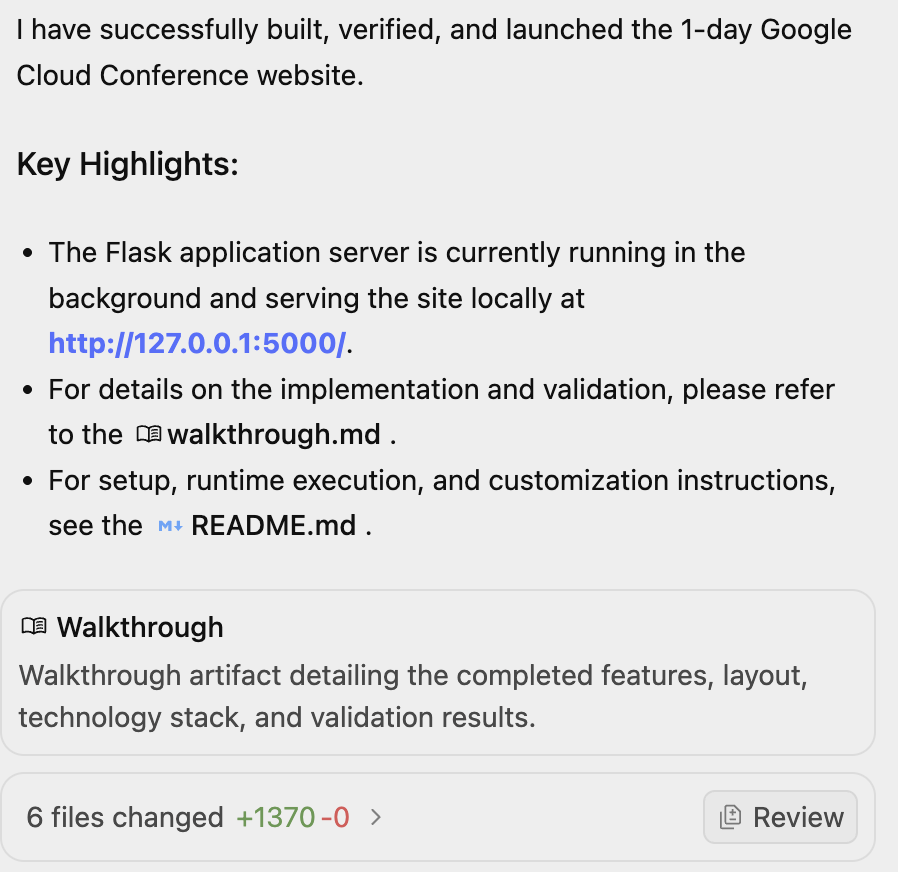
下面展示了一个 Walkthrough 示例:
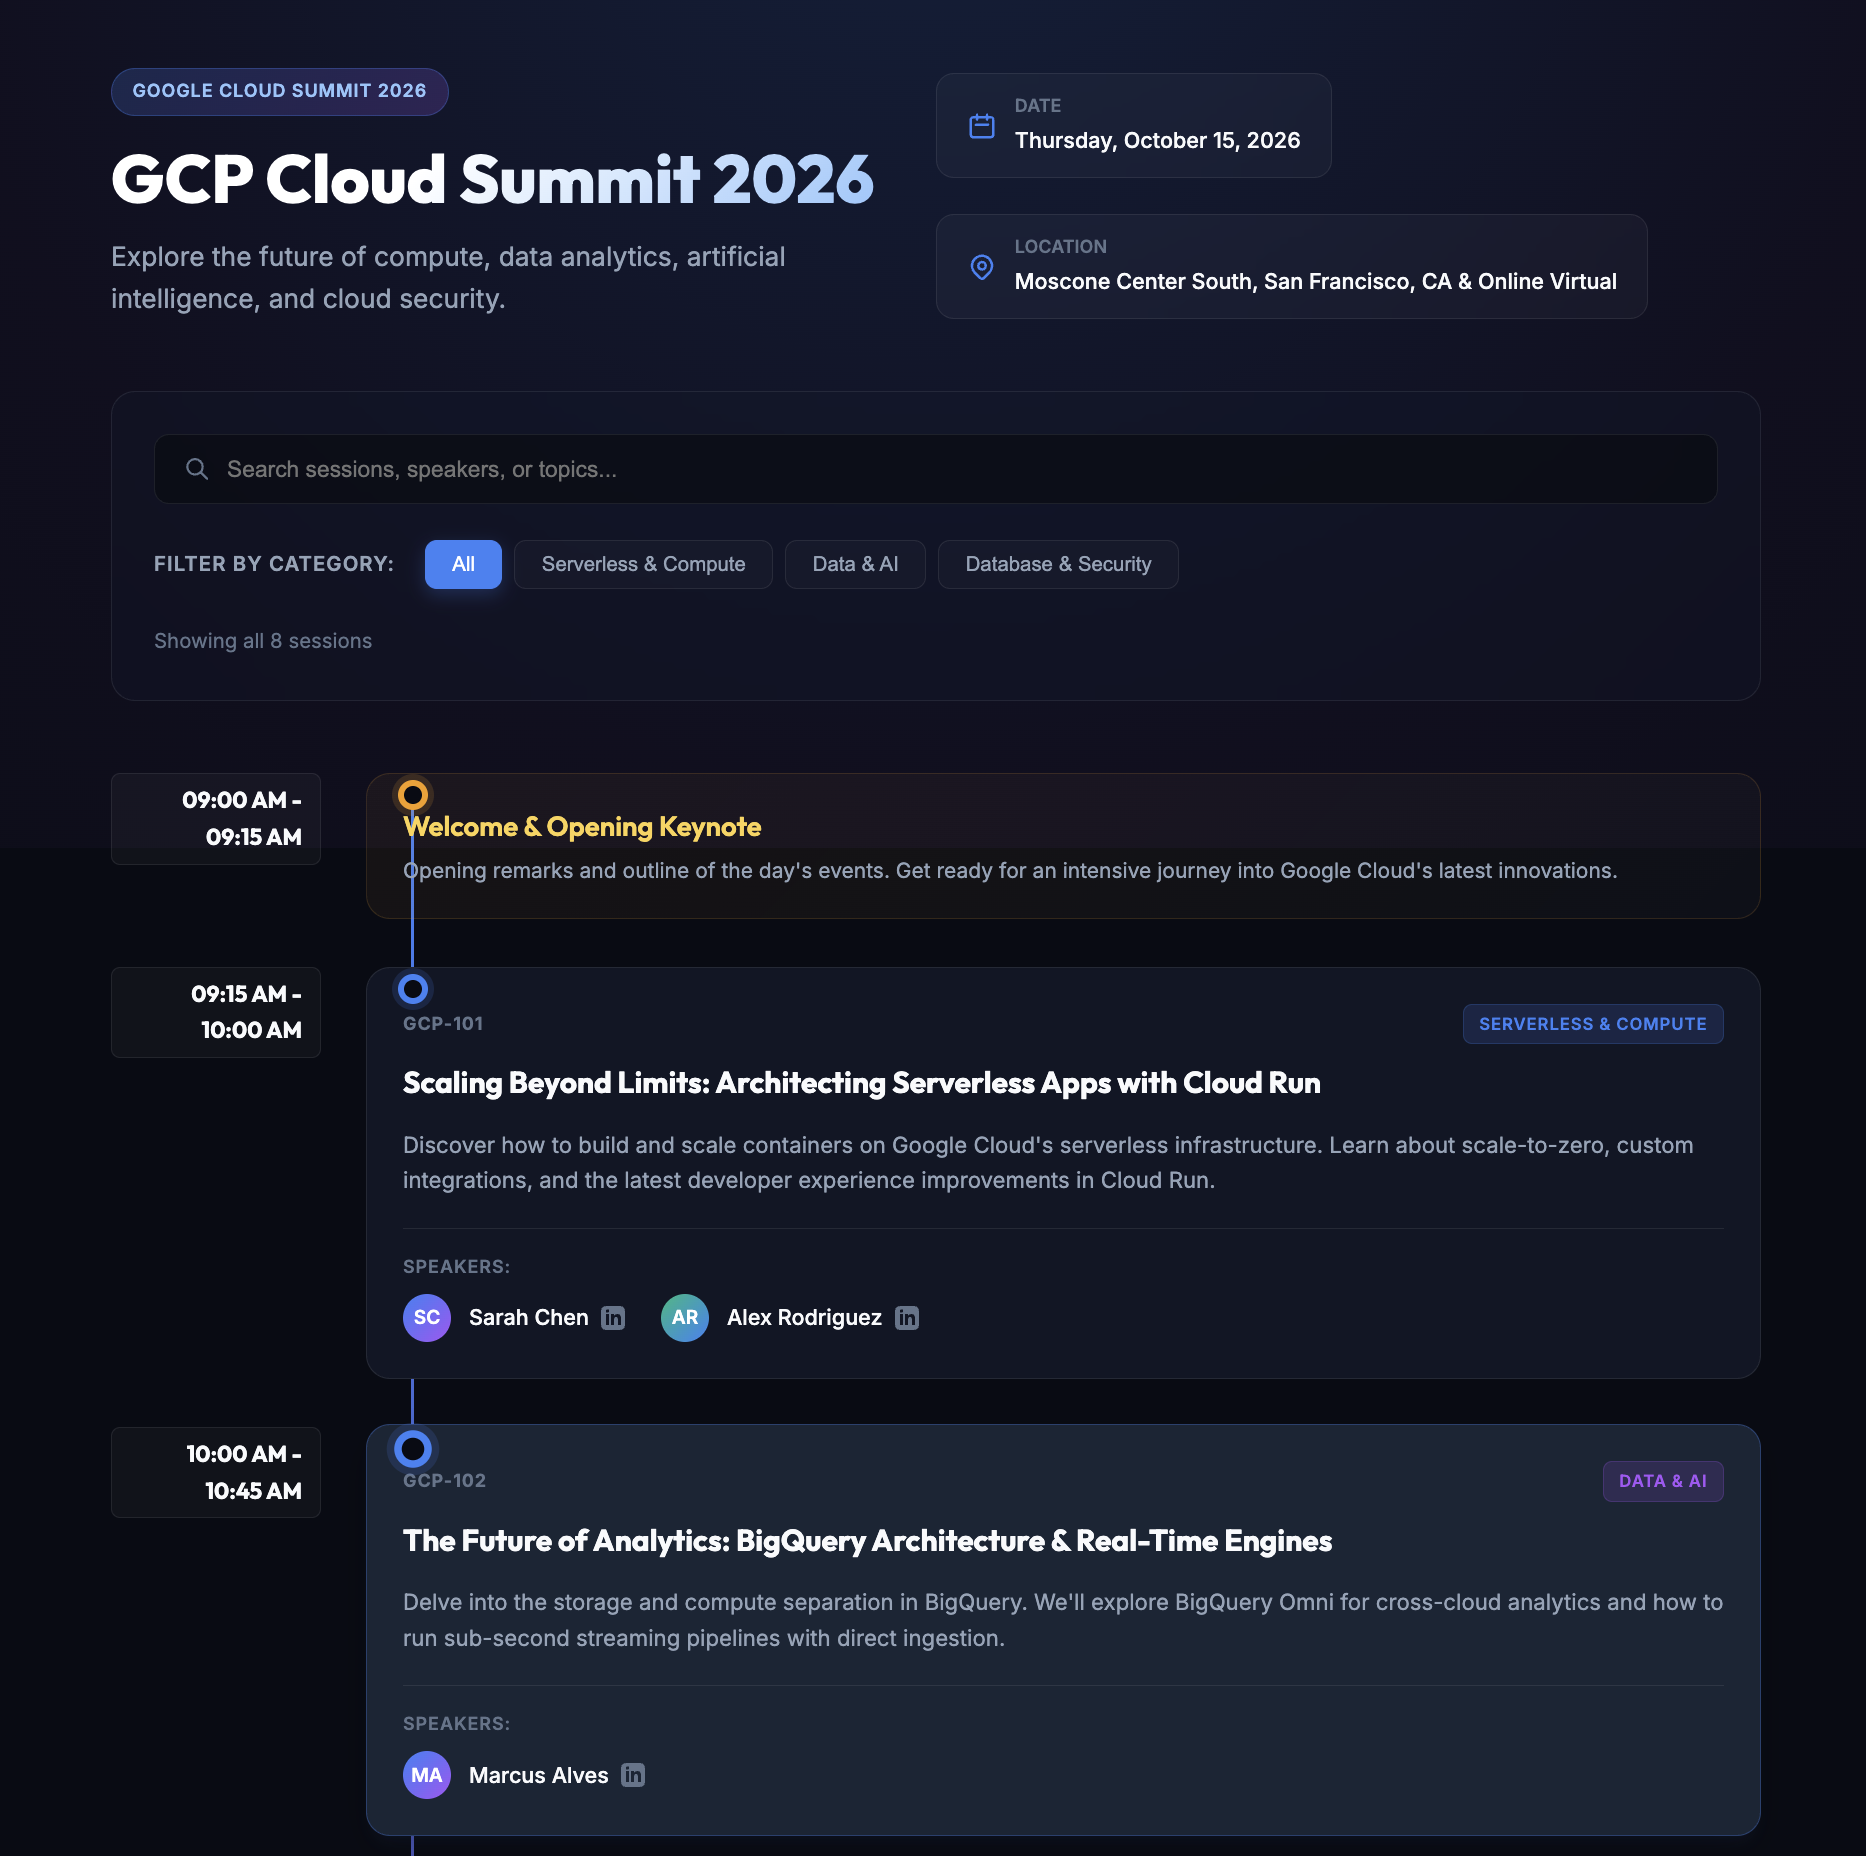
访问该网址时显示的最终网站如下所示:
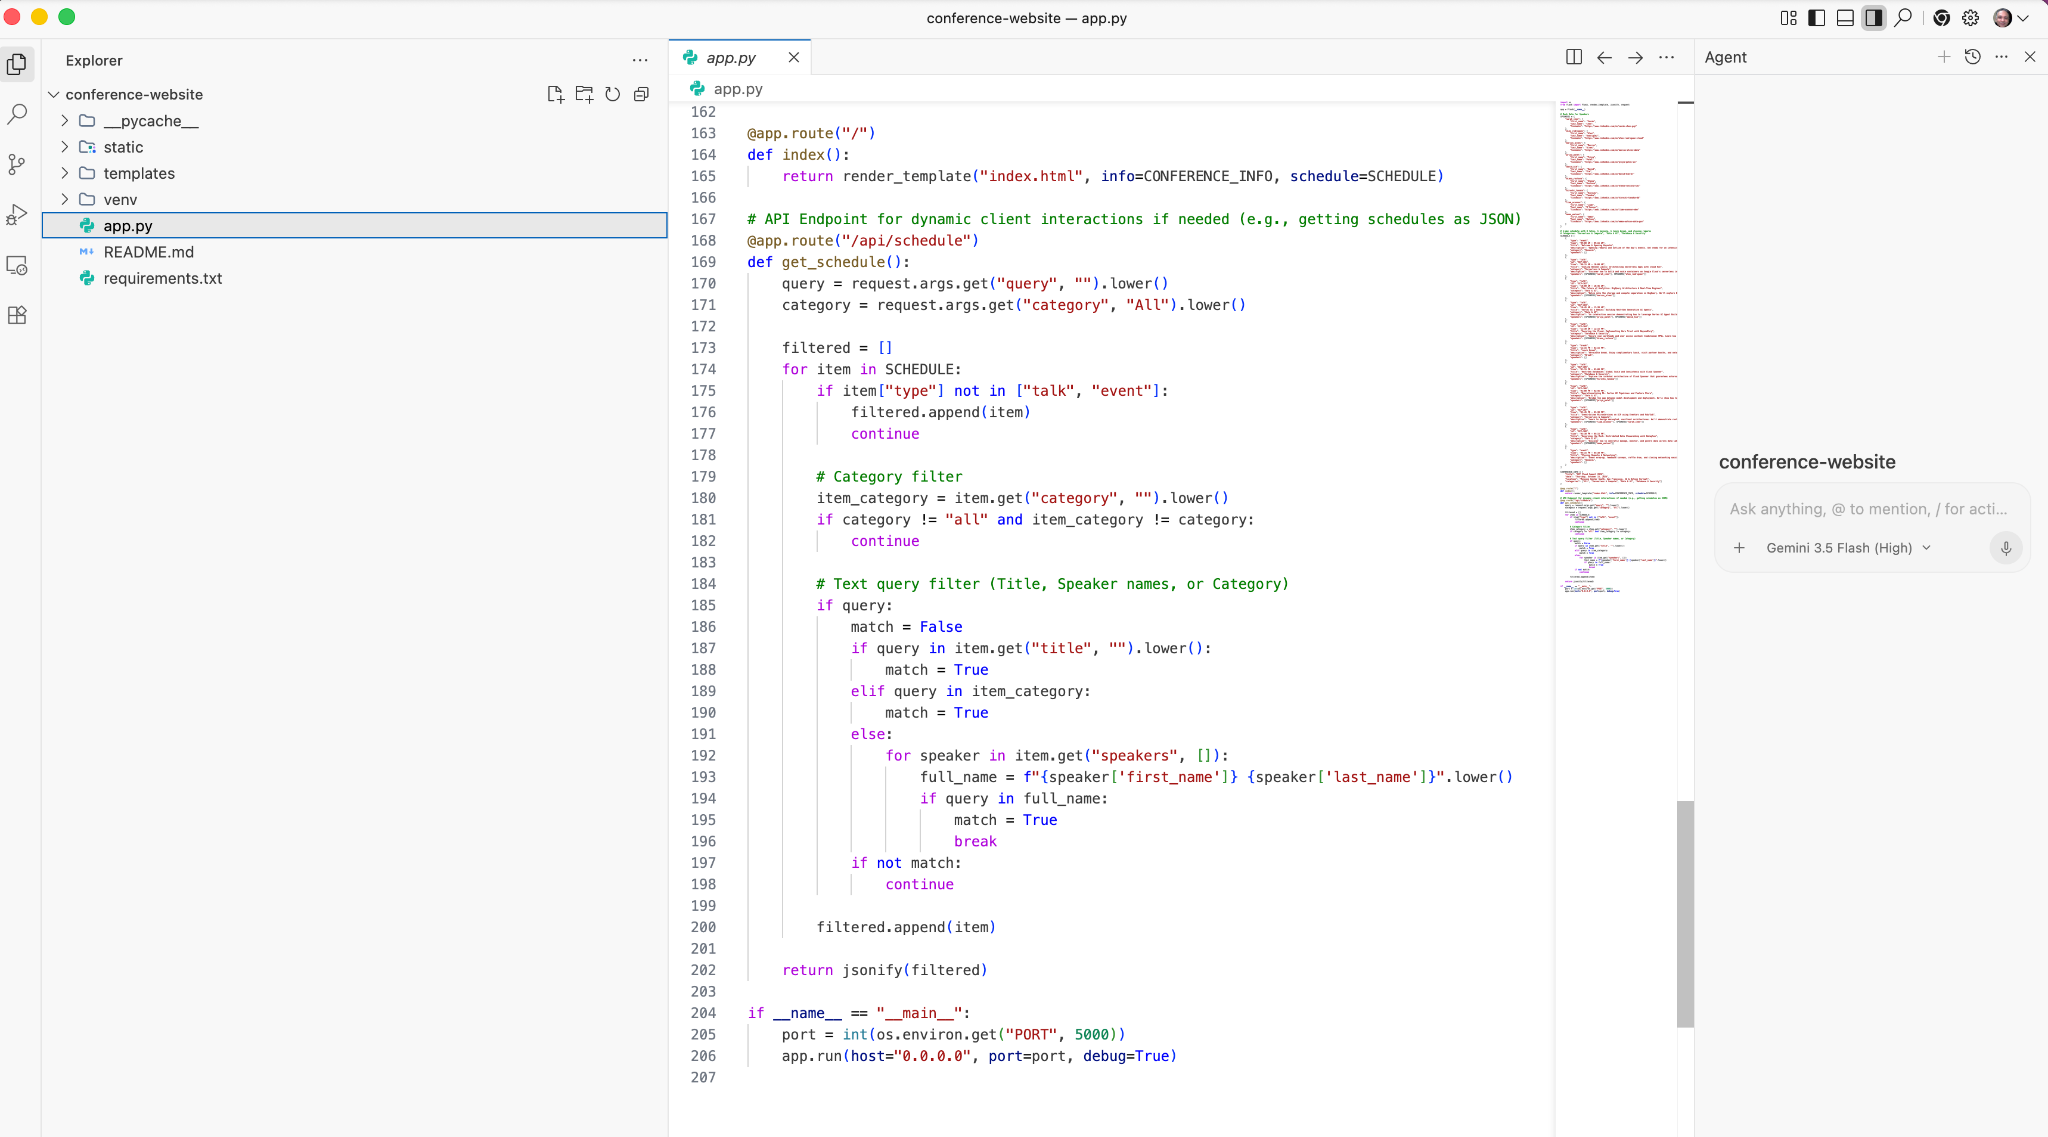
如果您想查看生成的代码,可以点击右上角的 Open IDE。这会打开 Antigravity IDE,您可以使用该 IDE 查看生成的代码。以下是示例屏幕截图:
尝试以下任务
- 向应用添加您需要的其他功能。向代理提供详细信息,并注意它是如何完成任务的,首先修改任务列表,然后修改实施方案,依此类推。
- 向活动时间表添加其他数据。例如
Add two more talks to the schedule。 - 让代理为应用生成 README 或更多文档。
5. 生成简单的效率提升应用
现在,我们将生成一个简单的番茄工作法计时器 Web 应用。
创建 pomodoro-timer 文件夹确保您位于 Agent Manager 中,并且已导入并选择 pomodoro-timer 工作区。从以下提示开始:
Create a productivity app that features a Pomodoro timer. Give a calm and aesthetic look to the application.
请注意,它会先创建实施计划和任务列表,然后再执行这些计划和任务。请密切关注整个流程,在某些情况下,它可能会提示您进行审核。
下面显示了包含演练消息和任务的运行示例:
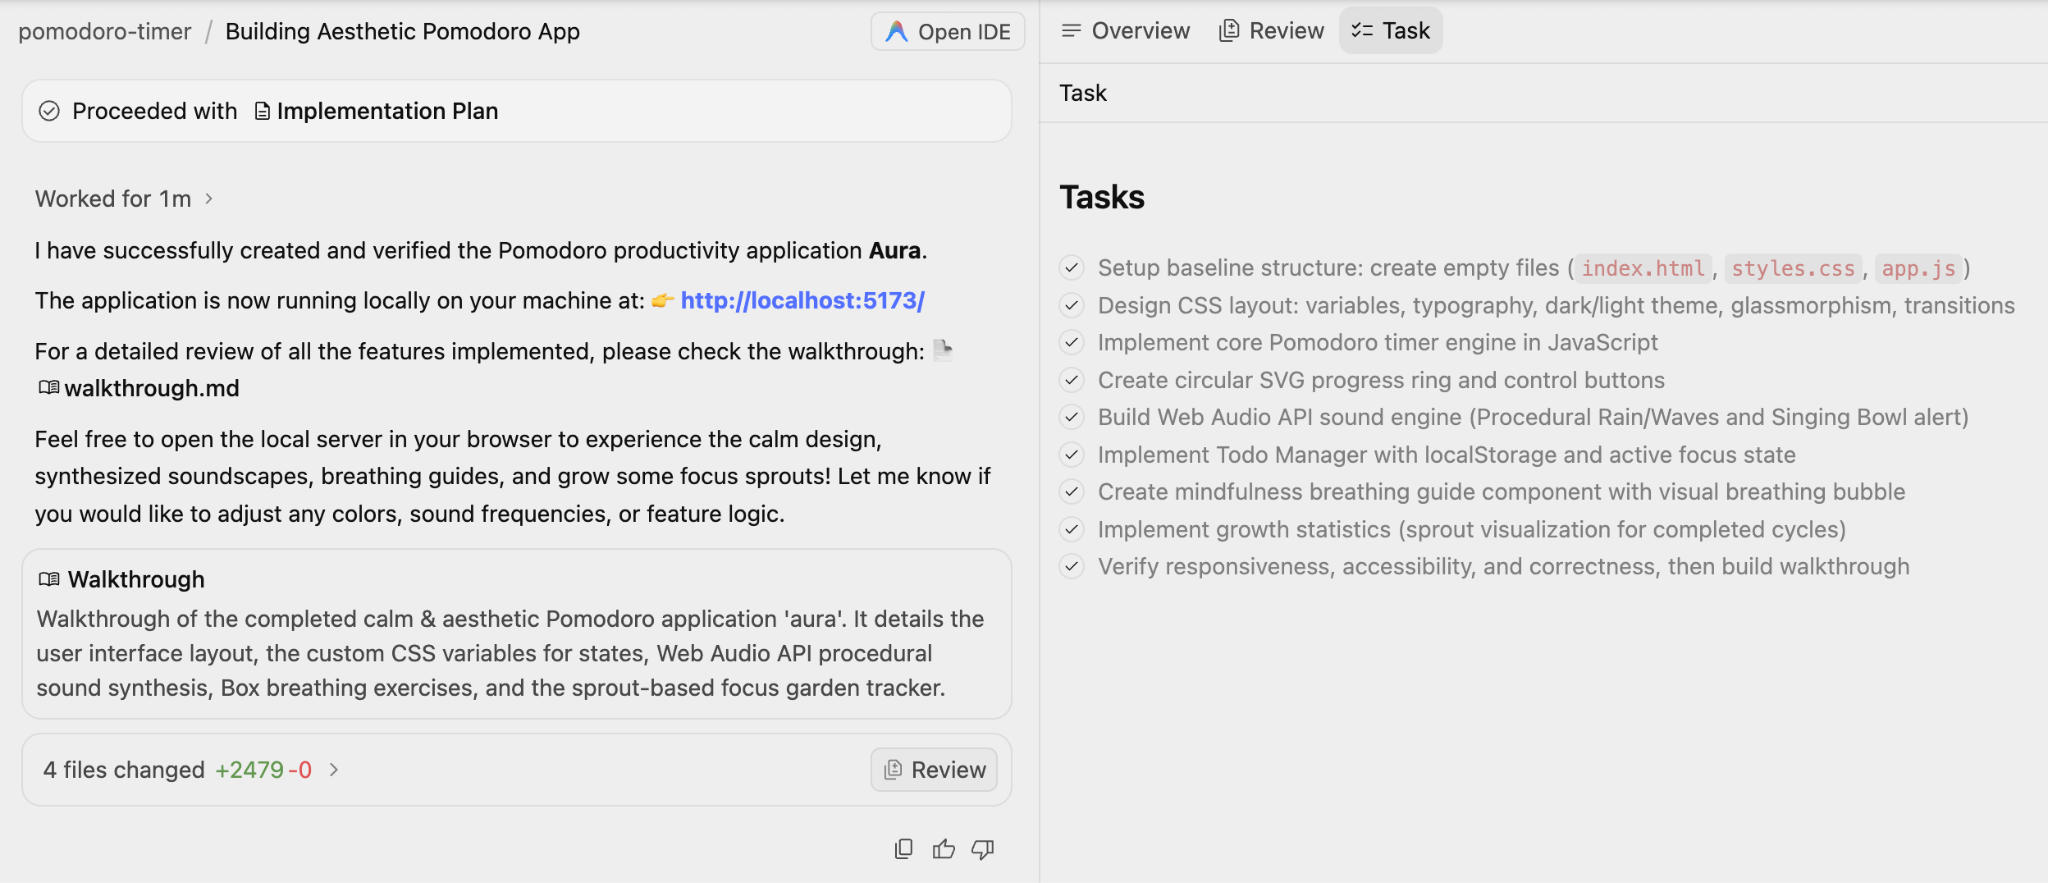
最终的应用如下图所示,效果相当不错。

尝试以下任务
- 向应用添加一些图片。例如,向应用添加计时器图片。
- 尝试生成您想要的任何申请的几种变体。尝试不同的样式和图片,要求进行更改等。
6. 生成单元测试、模拟桩和验证测试
我们将在此处尝试的最后一个使用情形是,为我们拥有的特定代码文件生成单元测试,并让代理执行这些测试并验证它们。
为此,我们将创建一个包含单个 Python 文件的工作区,如下所示:
from typing import Dict

# --- Custom Exceptions ---
class InventoryShortageError(Exception):
    """Raised when there is not enough item stock."""
    pass

class PaymentFailedError(Exception):
    """Raised when the payment gateway rejects the transaction."""
    pass

class InvalidOrderError(Exception):
    """Raised when the order violates business rules."""
    pass

# --- External Service Interfaces (To be Mocked) ---
class InventoryService:
    def get_stock(self, product_id: str) -> int:
        """Connects to DB to check stock."""
        raise NotImplementedError("Real connection required")

    def decrement_stock(self, product_id: str, quantity: int):
        """Connects to DB to reduce stock."""
        raise NotImplementedError("Real connection required")

class PaymentGateway:
    def charge(self, amount: float, currency: str) -> bool:
        """Connects to Stripe/PayPal."""
        raise NotImplementedError("Real connection required")

# --- Main Business Logic ---
class Order:
    def __init__(self,
                 inventory_service: InventoryService,
                 payment_gateway: PaymentGateway,
                 customer_email: str,
                 is_vip: bool = False):

        self.inventory = inventory_service
        self.payment = payment_gateway
        self.customer_email = customer_email
        self.is_vip = is_vip
        self.items: Dict[str, Dict] = {} # {product_id: {'price': float, 'qty': int}}
        self.is_paid = False
        self.status = "DRAFT"

    def add_item(self, product_id: str, price: float, quantity: int = 1):
        """Adds items to the cart. Rejects invalid prices or quantities."""
        if price < 0:
            raise ValueError("Price cannot be negative")
        if quantity <= 0:
            raise ValueError("Quantity must be greater than zero")

        if product_id in self.items:
            self.items[product_id]['qty'] += quantity
        else:
            self.items[product_id] = {'price': price, 'qty': quantity}

    def remove_item(self, product_id: str):
        """Removes an item entirely from the cart."""
        if product_id in self.items:
            del self.items[product_id]

    @property
    def total_price(self) -> float:
        """Calculates raw total before discounts."""
        return sum(item['price'] * item['qty'] for item in self.items.values())

    def apply_discount(self) -> float:
        """
        Applies business logic:
        1. VIPs get flat 20% off.
        2. Regulars get 10% off if total > 100.
        3. No discount otherwise.
        """
        total = self.total_price

        if self.is_vip:
            return round(total * 0.8, 2)
        elif total > 100:
            return round(total * 0.9, 2)

        return round(total, 2)

    def checkout(self):
        """
        Orchestrates the checkout process:
        1. Validates cart is not empty.
        2. Checks stock for all items.
        3. Calculates final price.
        4. Charges payment.
        5. Updates inventory.
        """
        if not self.items:
            raise InvalidOrderError("Cannot checkout an empty cart")

        # 1. Check Inventory Logic
        for product_id, data in self.items.items():
            available_stock = self.inventory.get_stock(product_id)
            if available_stock < data['qty']:
                raise InventoryShortageError(f"Not enough stock for {product_id}")

        # 2. Calculate Final Price
        final_amount = self.apply_discount()

        # 3. Process Payment
        try:
            success = self.payment.charge(final_amount, "USD")
            if not success:
                raise PaymentFailedError("Transaction declined by gateway")
        except Exception as e:
            # Catching generic network errors from the gateway
            raise PaymentFailedError(f"Payment gateway error: {str(e)}")

        # 4. Decrement Stock (Only occurs if payment succeeded)
        for product_id, data in self.items.items():
            self.inventory.decrement_stock(product_id, data['qty'])

        self.is_paid = True
        self.status = "COMPLETED"

        return {"status": "success", "charged_amount": final_amount}
确保您已在本地的新文件夹中准备好上述 Python 文件 (order_service.py),并且已在 Antigravity 中打开该项目以进行对话。
这是一个简单的 Order 服务,在 checkout 函数中具有以下关键功能:
- 验证购物车是否不为空。
- 检查所有商品的库存。
- 计算最终价格。
- 收取付款。
- 更新商品目录。
我们将为代理分配生成单元测试用例、提供模拟实现和执行测试的任务,以确保测试成功。
我们将打开特定的工作区文件夹,您会注意到,我们现在还可以使用 @ 符号来引用文件。例如,我们可以开始输入 @order,系统应该会显示 order_service.py 文件。
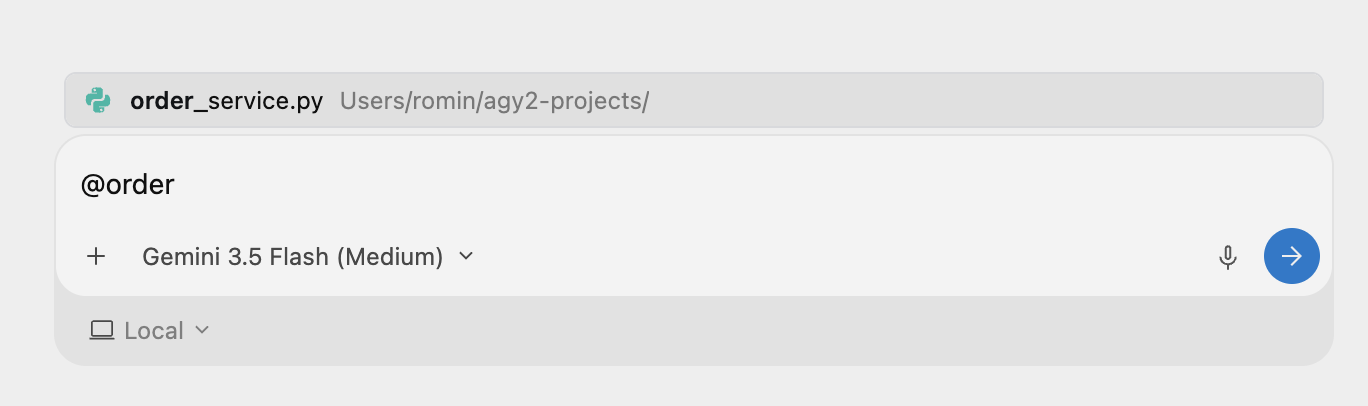
我们可以布置一项任务,帮助我们了解此文件。输入以下提示:
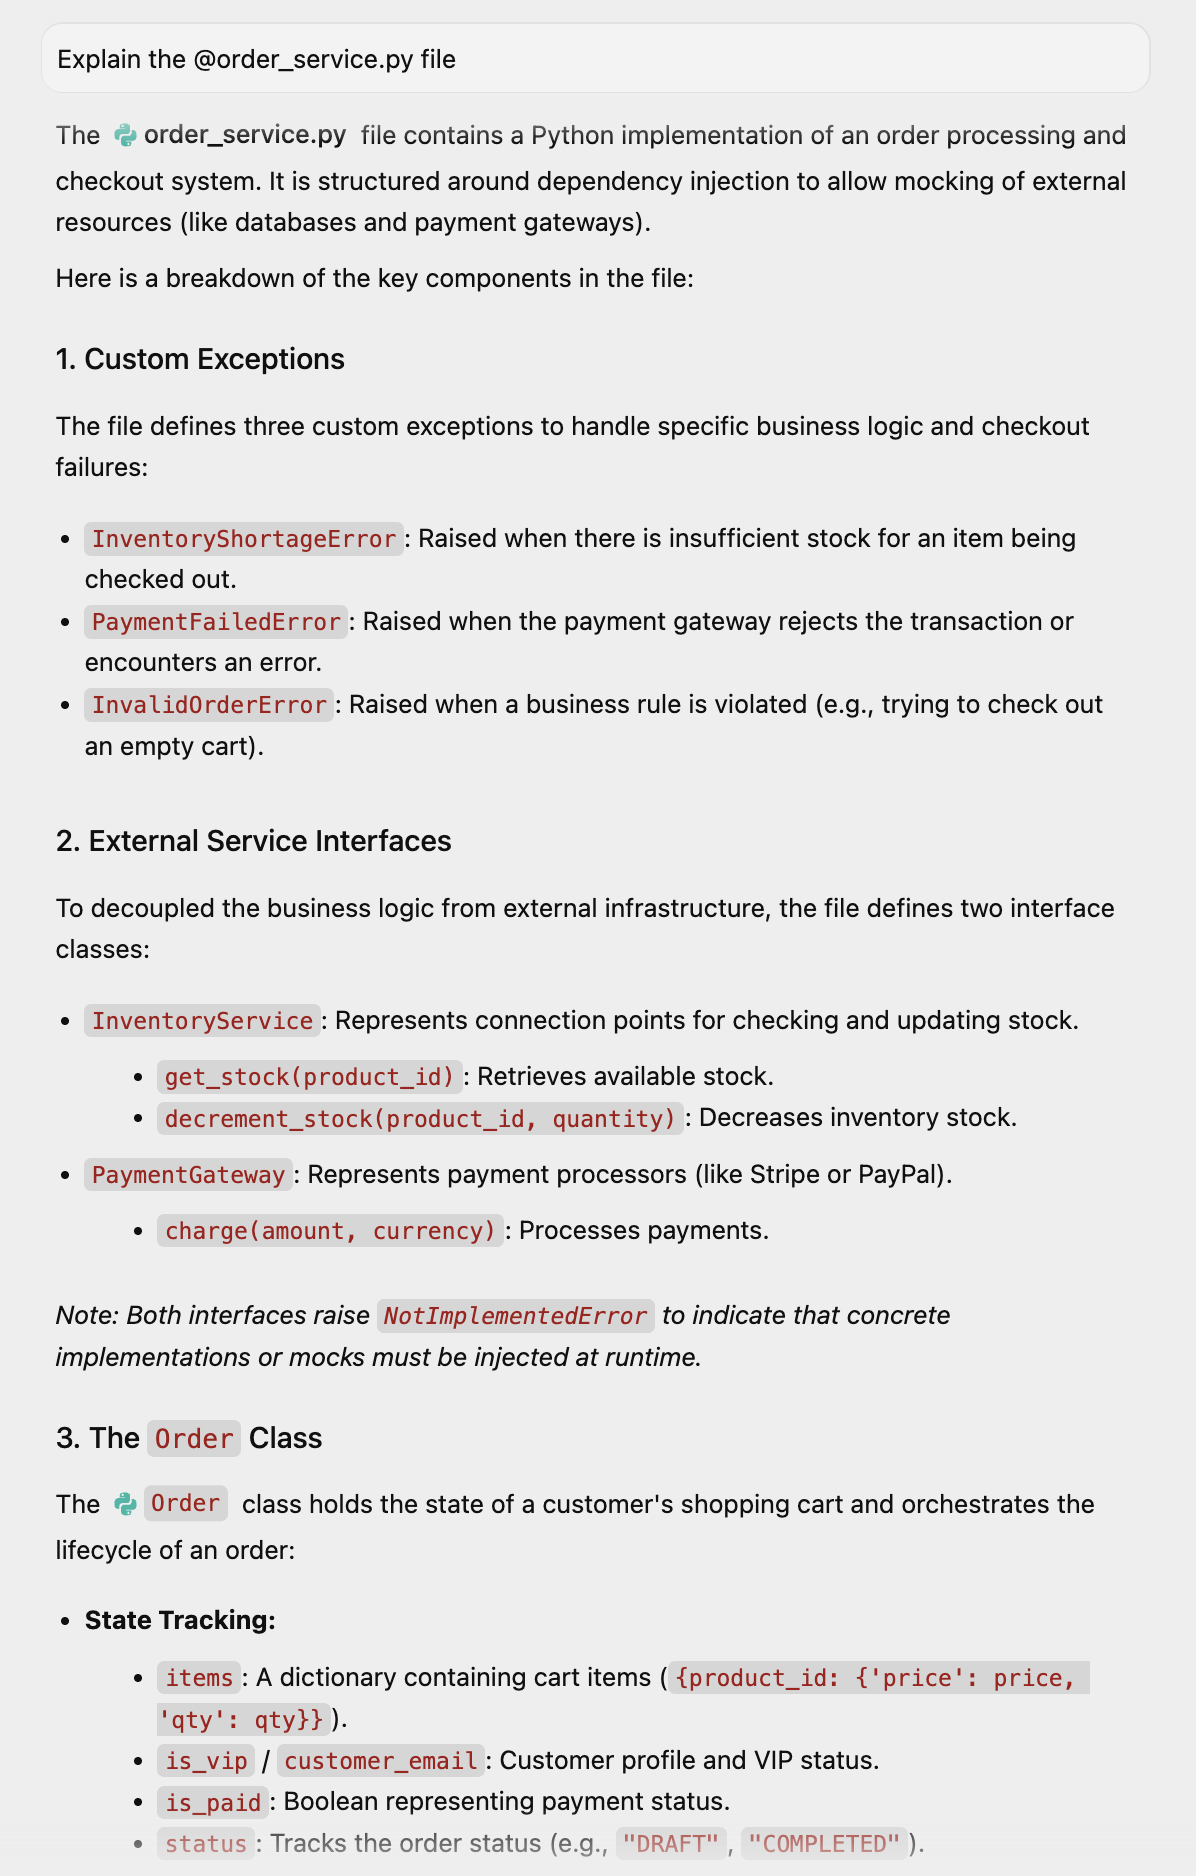
Explain the @order_service.py file
系统会显示一些有关此文件的说明:
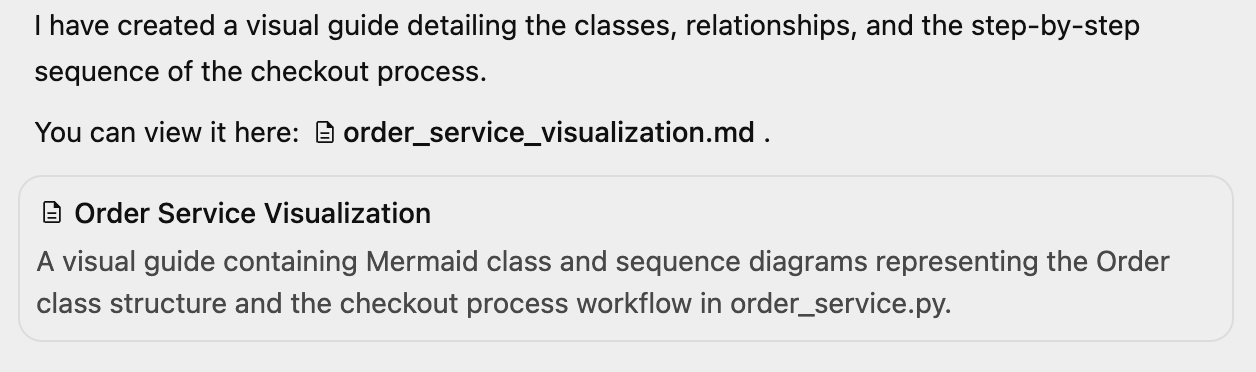
我们可以通过提示让它生成更好的可视化图表:
Can you visually show this class for better understanding
Antigravity 会提及任务已完成,并已生成包含可视化的制品:
我们可以查看可视化图表,如下所示:
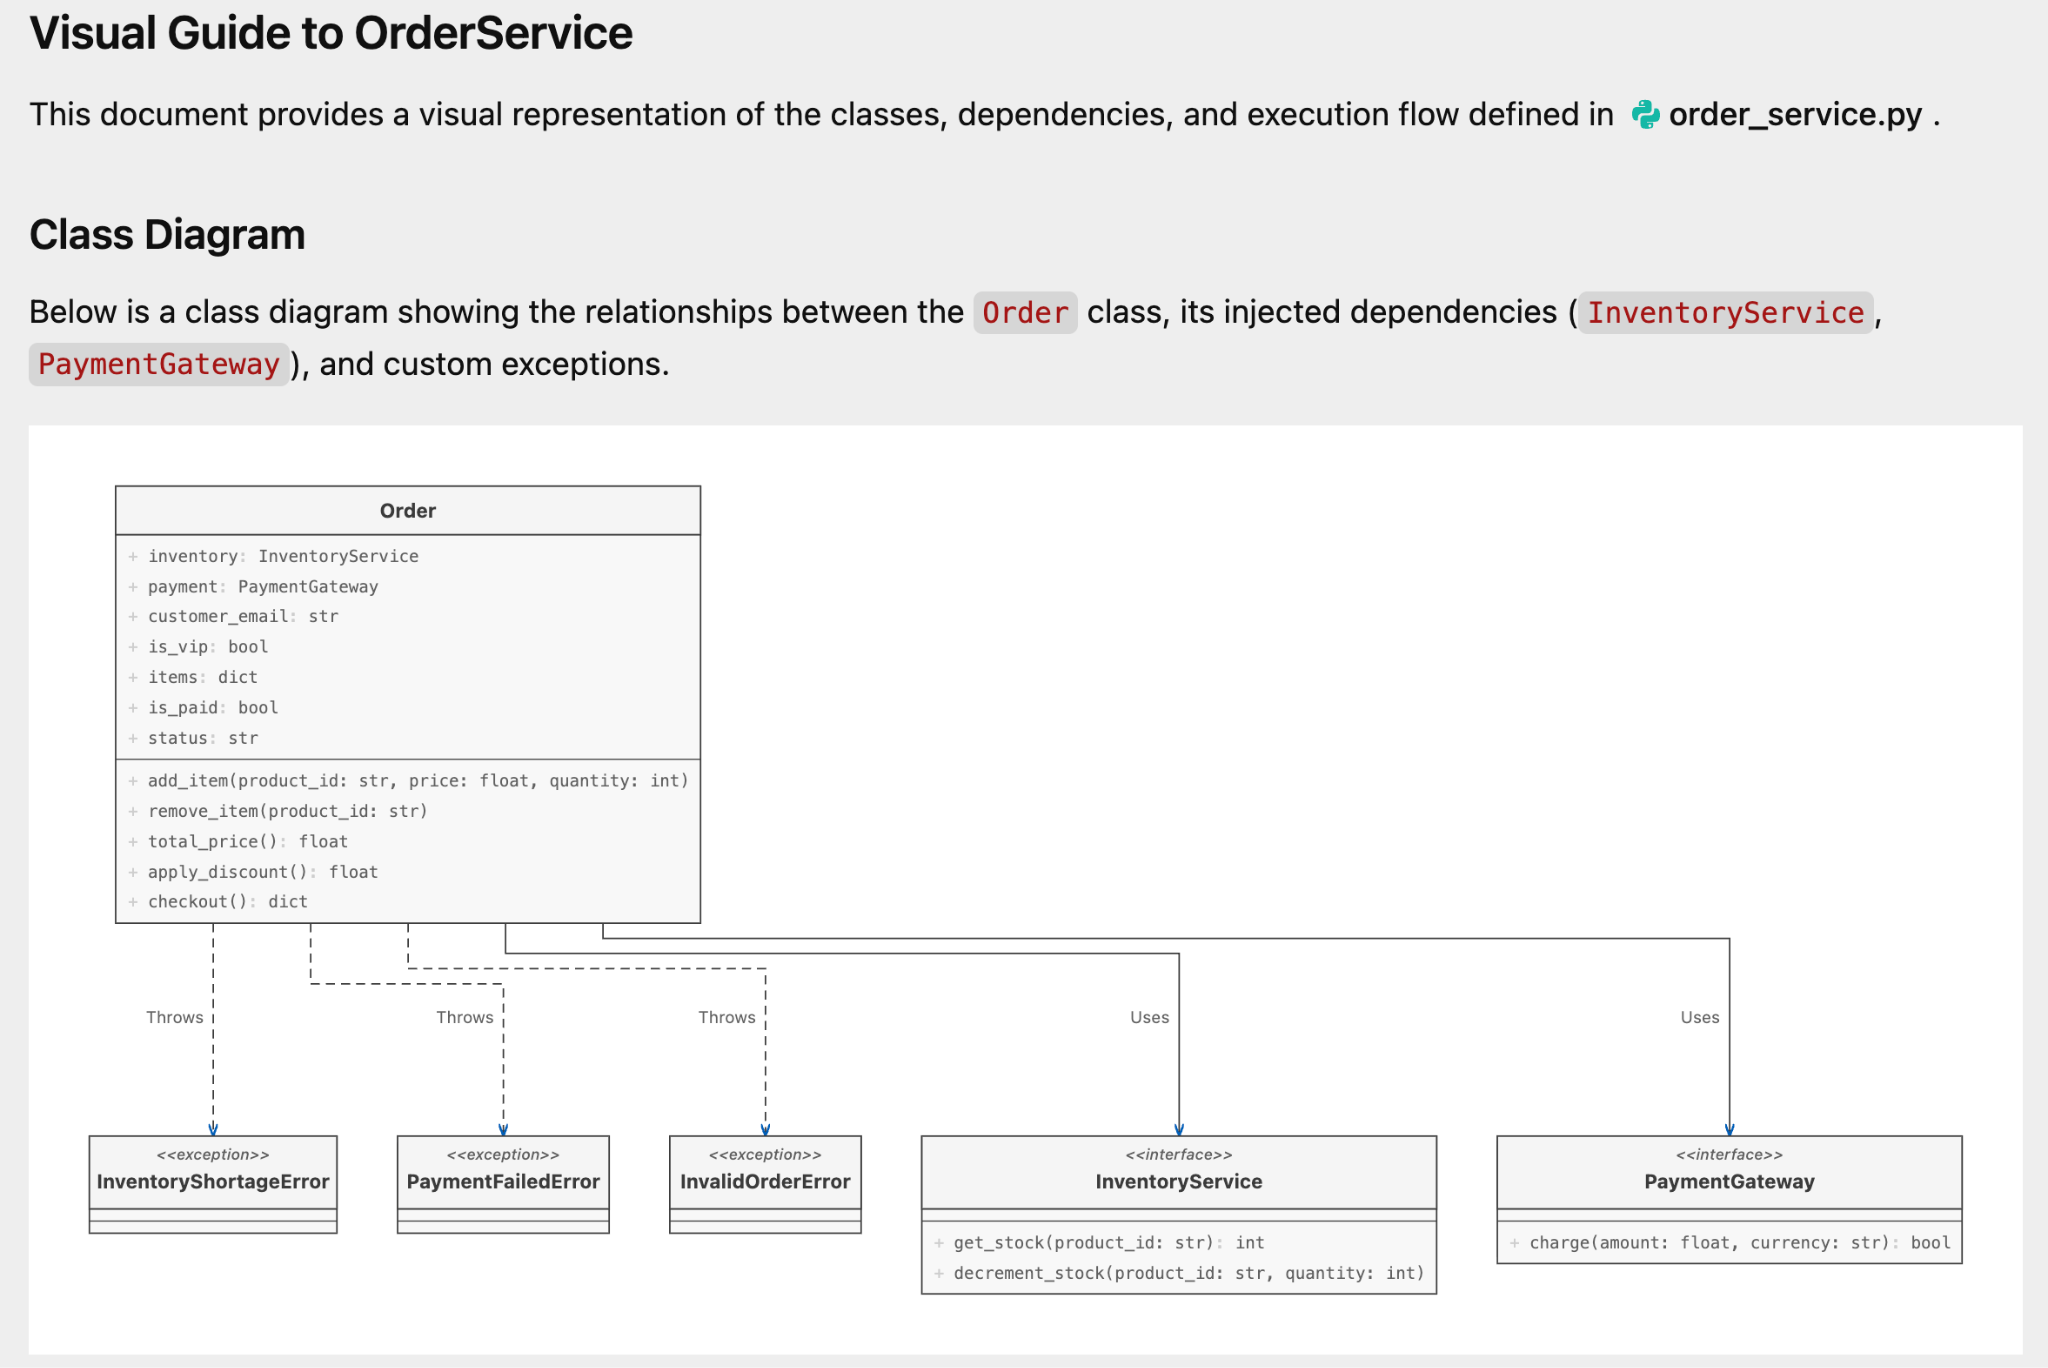
以及以下内容:

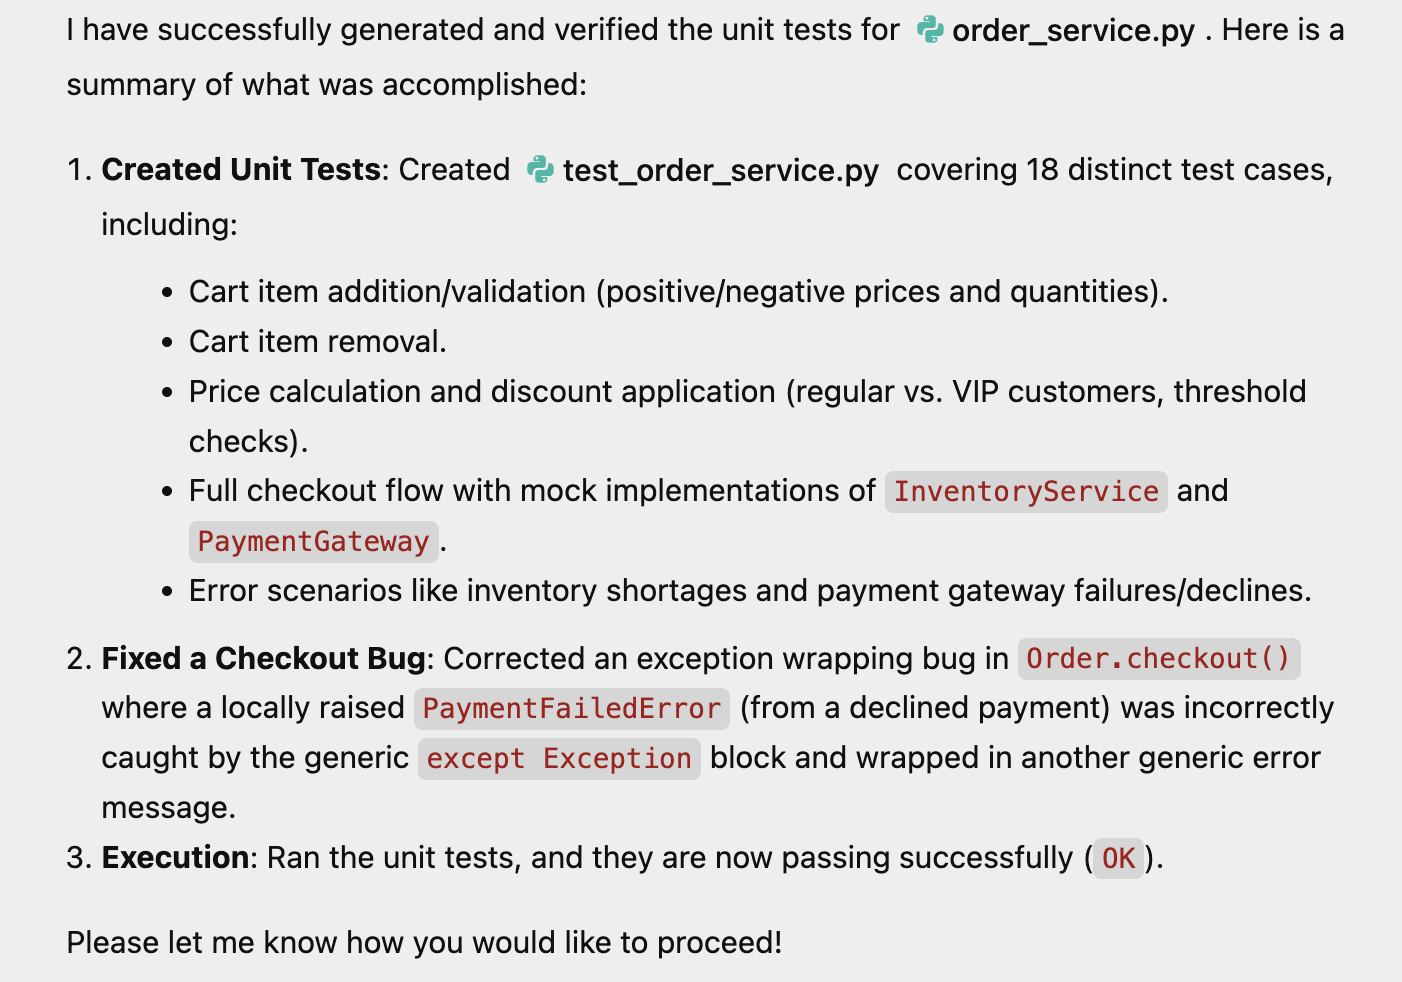
下一步是生成单元测试,并让代理进行测试。我输入了以下提示:
generate unit tests for this module and test it out with mock implementations.
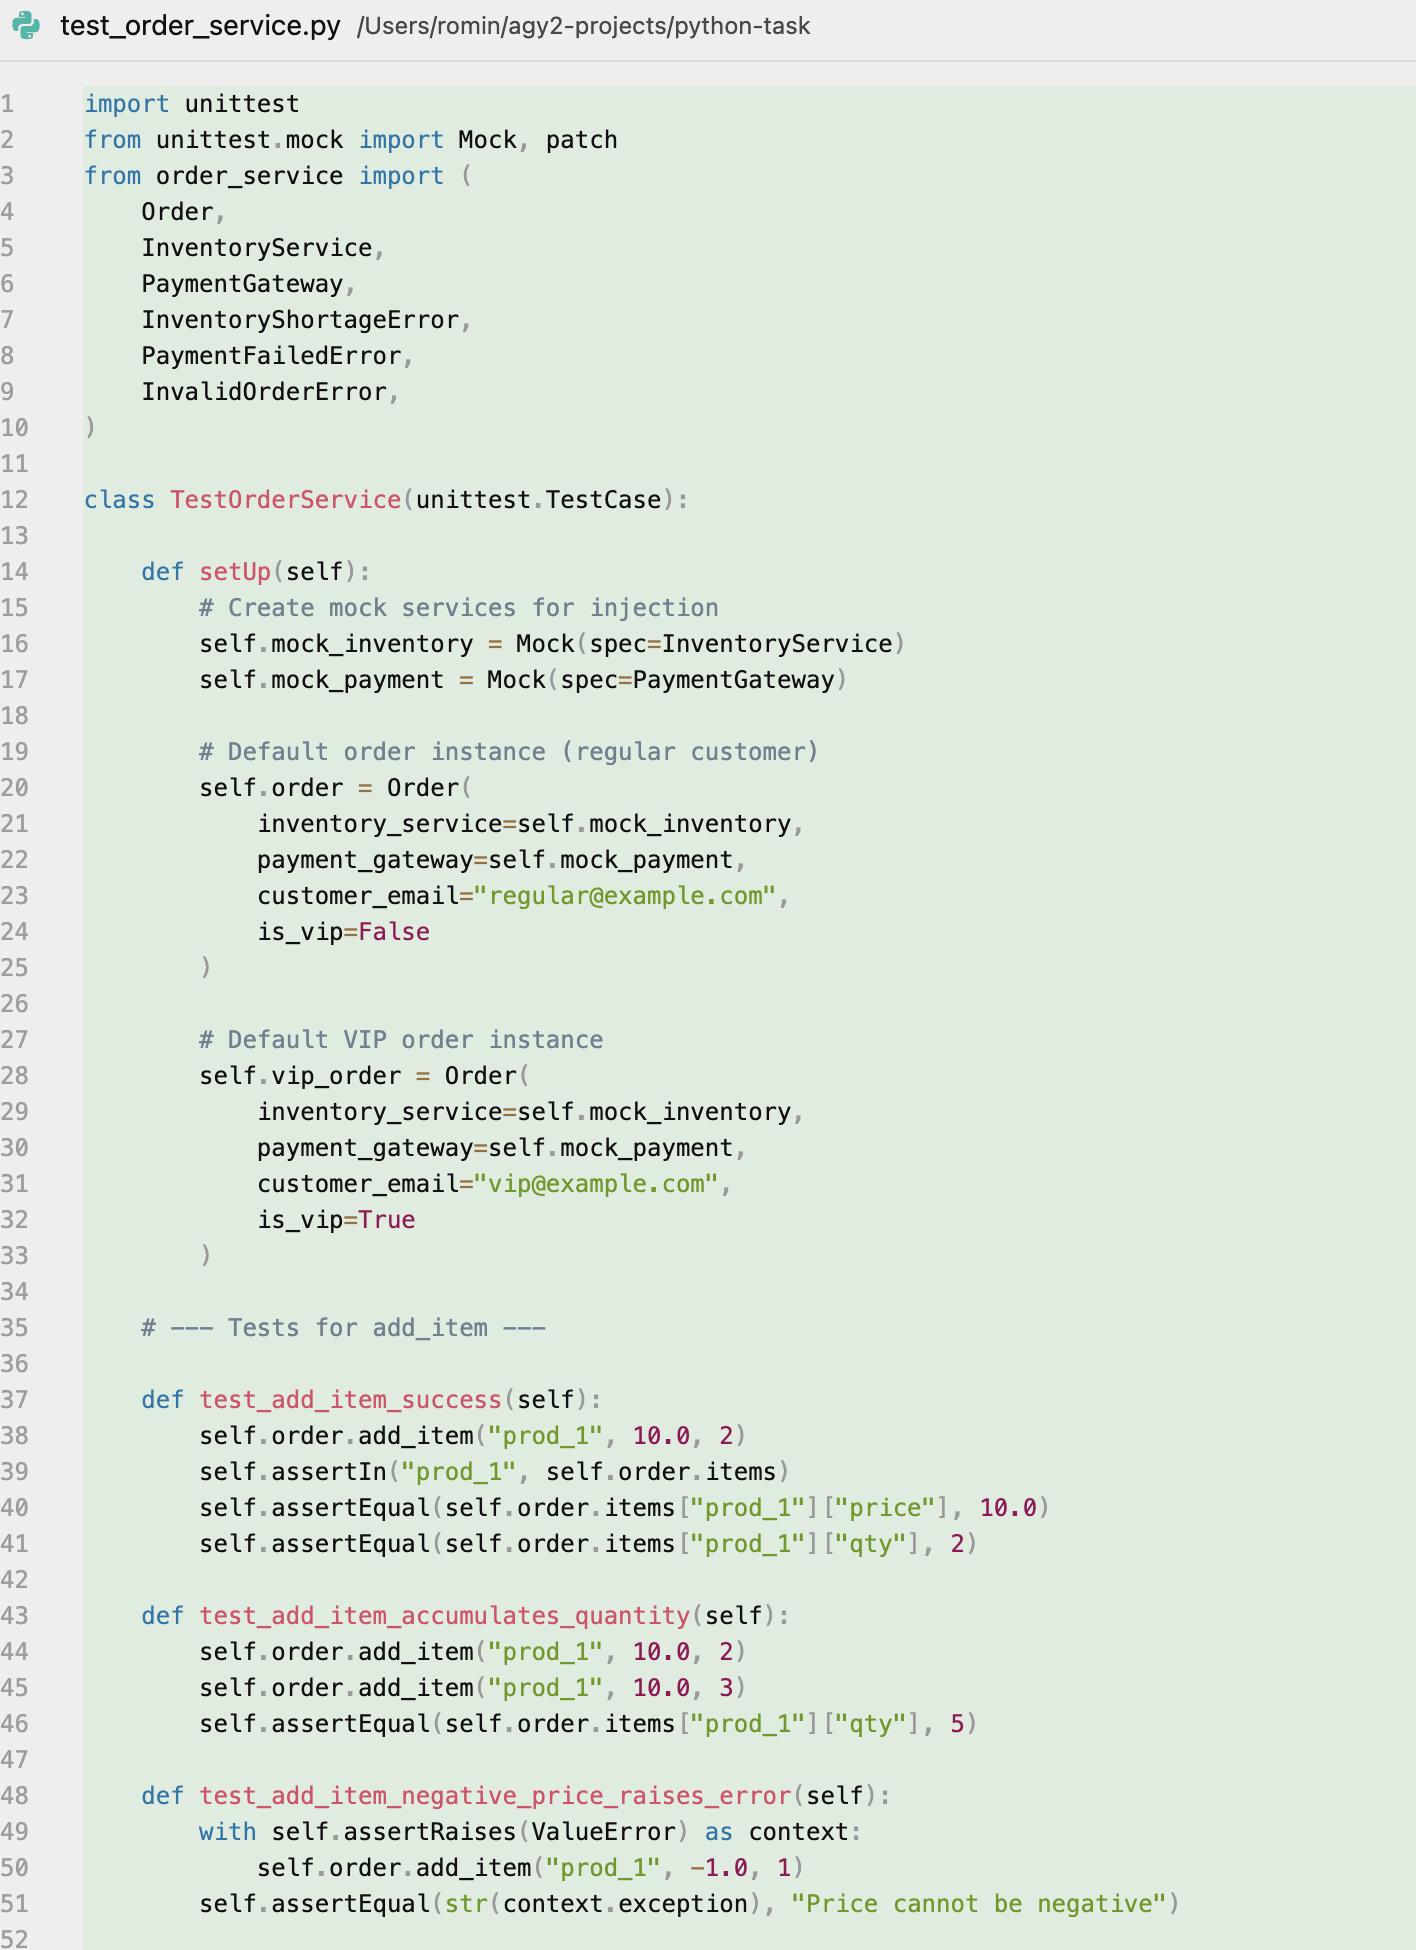
它完成了任务,生成了测试,运行了测试,还修复了一个 bug。以下是它的输出:
它生成的文件之一也是测试文件。其屏幕截图如下所示:
尝试以下任务
使用您自己的代码,看看您可以让代理执行哪些操作,从添加更多功能到重构部分代码,应有尽有。
7. 恭喜
恭喜!您已成功使用 Google Antigravity 完成以下操作:
- 自主研究网络。
- 构建和迭代全栈 Web 应用。
- 使用模拟对象编写和验证复杂的单元测试。
现在,您可以让 Antigravity 在您自己的项目中承担繁重的工作了。
参考文档
- Codelab:Google Antigravity 使用入门
- 官方网站:https://antigravity.google/
- 文档:https://antigravity.google/docs
- 下载地址:https://antigravity.google/download
- Google Antigravity YouTube 频道:https://www.youtube.com/@googleantigravity