
1. مقدمة
في هذا الدرس التطبيقي حول الترميز، ستتعرّف على كيفية إنشاء وكيل ذكاء اصطناعي متطوّر باستخدام "حزمة تطوير الوكلاء" (ADK) من Google. سنتبع مسارًا تطوريًا طبيعيًا، بدءًا من وكيل حواري أساسي ثم إضافة إمكانات متخصصة بشكل تدريجي.
المساعد الذي ننشئه هو مساعد تنفيذي مصمّم لمساعدتك في المهام اليومية، مثل إدارة تقويمك وتذكيرك بالمهام وإجراء الأبحاث وتجميع الملاحظات، وكل ذلك تم إنشاؤه من البداية باستخدام "حزمة تطوير التطبيقات" وGemini وVertex AI.
في نهاية هذا الدرس التطبيقي، سيكون لديك وكيل يعمل بكامل طاقته والمعرفة اللازمة لتوسيع نطاقه ليناسب احتياجاتك.
المتطلبات الأساسية
- معرفة أساسية بلغة البرمجة Python
- معرفة أساسية بوحدة تحكّم Google Cloud لإدارة موارد السحابة الإلكترونية
أهداف الدورة التعليمية
- توفير بنية Google Cloud التحتية لوكلاء الذكاء الاصطناعي
- تنفيذ ذاكرة طويلة المدى ثابتة باستخدام Vertex AI Memory Bank
- إنشاء تسلسل هرمي من الوكلاء الفرعيين المتخصّصين
- دمج قواعد البيانات الخارجية ومنظومة Google Workspace المتكاملة
المتطلبات
يمكن إجراء ورشة العمل هذه بالكامل ضمن Google Cloud Shell، الذي يتضمّن جميع التبعيات اللازمة (gcloud CLI، وأداة تعديل الرموز، وGo، وGemini CLI) مثبّتة مسبقًا.
بدلاً من ذلك، إذا كنت تفضّل العمل على جهازك الخاص، ستحتاج إلى ما يلي:
- Python (الإصدار 3.12 أو إصدار أحدث)
- أداة تعديل الرموز أو بيئة تطوير متكاملة (IDE) (مثل VS Code أو
vim). - وحدة طرفية لتنفيذ أوامر Python و
gcloud - ننصحك باستخدام: وكيل ترميز، مثل Gemini CLI أو Antigravity
التقنيات الرئيسية
يمكنك هنا العثور على مزيد من المعلومات حول التكنولوجيات التي سنستخدمها:
2. إعداد البيئة
اختَر أحد الخيارَين التاليَين: إعداد بيئة ذاتية السرعة إذا كنت تريد تشغيل هذا الدرس التطبيقي حول الترميز على جهازك الخاص، أو بدء Cloud Shell إذا كنت تريد تشغيل هذا الدرس التطبيقي حول الترميز بالكامل على السحابة الإلكترونية.
إعداد البيئة بالسرعة التي تناسبك
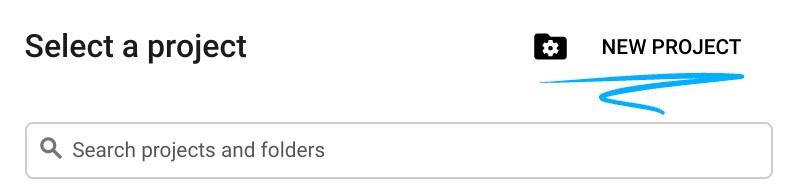
- سجِّل الدخول إلى Google Cloud Console وأنشِئ مشروعًا جديدًا أو أعِد استخدام مشروع حالي. إذا لم يكن لديك حساب على Gmail أو Google Workspace، عليك إنشاء حساب.

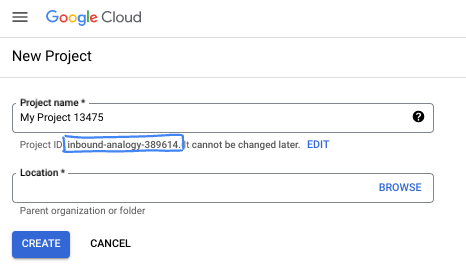
- اسم المشروع هو الاسم المعروض للمشاركين في هذا المشروع. وهي سلسلة أحرف لا تستخدمها Google APIs. ويمكنك تعديلها في أي وقت.
- رقم تعريف المشروع هو معرّف فريد في جميع مشاريع Google Cloud ولا يمكن تغييره بعد ضبطه. تنشئ Cloud Console تلقائيًا سلسلة فريدة، ولا يهمّك عادةً ما هي. في معظم دروس البرمجة، عليك الرجوع إلى رقم تعريف مشروعك (يُشار إليه عادةً باسم
PROJECT_ID). إذا لم يعجبك رقم التعريف الذي تم إنشاؤه، يمكنك إنشاء رقم تعريف عشوائي آخر. يمكنك بدلاً من ذلك تجربة اسم من اختيارك ومعرفة ما إذا كان متاحًا. لا يمكن تغيير هذا الخيار بعد هذه الخطوة وسيظل ساريًا طوال مدة المشروع. - للعلم، هناك قيمة ثالثة، وهي رقم المشروع، تستخدمها بعض واجهات برمجة التطبيقات. يمكنك الاطّلاع على مزيد من المعلومات عن كل هذه القيم الثلاث في المستندات.
- بعد ذلك، عليك تفعيل الفوترة في Cloud Console لاستخدام موارد/واجهات برمجة تطبيقات Cloud. لن تكلفك تجربة هذا الدرس التطبيقي حول الترميز الكثير، إن وُجدت أي تكلفة على الإطلاق. لإيقاف الموارد وتجنُّب تحمّل تكاليف فوترة تتجاوز هذا البرنامج التعليمي، يمكنك حذف الموارد التي أنشأتها أو حذف المشروع. يمكن لمستخدمي Google Cloud الجدد الاستفادة من برنامج الفترة التجريبية المجانية بقيمة 300 دولار أمريكي.
بدء Cloud Shell
على الرغم من إمكانية تشغيل Google Cloud عن بُعد من الكمبيوتر المحمول، ستستخدم في هذا الدرس التطبيقي حول الترميز Google Cloud Shell، وهي بيئة سطر أوامر تعمل في السحابة الإلكترونية.
من Google Cloud Console، انقر على رمز Cloud Shell في شريط الأدوات أعلى يسار الصفحة:

لن يستغرق توفير البيئة والاتصال بها سوى بضع لحظات. عند الانتهاء، من المفترض أن يظهر لك ما يلي:

يتم تحميل هذه الآلة الافتراضية مزوّدة بكل أدوات التطوير التي ستحتاج إليها. توفّر هذه الخدمة دليلًا منزليًا ثابتًا بسعة 5 غيغابايت، وتعمل على Google Cloud، ما يؤدي إلى تحسين أداء الشبكة والمصادقة بشكل كبير. يمكن إكمال جميع المهام في هذا الدرس العملي ضمن المتصفّح. لست بحاجة إلى تثبيت أي تطبيق.
3- إعداد المشروع
قبل كتابة الرمز، يجب توفير البنية الأساسية والأذونات اللازمة في Google Cloud.
ضبط متغيرات البيئة
افتح الوحدة الطرفية واضبط متغيرات البيئة التالية:
export PROJECT_ID=`gcloud config get project`
export LOCATION=us-central1
تفعيل واجهات برمجة التطبيقات المطلوبة
يحتاج برنامجك إلى الوصول إلى العديد من خدمات Google Cloud. شغِّل الأمر التالي لتفعيلها:
gcloud services enable \
    aiplatform.googleapis.com \
    calendar-json.googleapis.com \
    sqladmin.googleapis.com
المصادقة باستخدام "بيانات الاعتماد التلقائية للتطبيق"
علينا المصادقة باستخدام "بيانات الاعتماد التلقائية للتطبيق" (ADC) للتواصل مع خدمات Google Cloud من بيئتك.
نفِّذ الأمر التالي للتأكّد من أنّ "بيانات الاعتماد التلقائية للتطبيق" نشطة ومحدّثة:
gcloud auth application-default login
4. إنشاء الوكيل الأساسي
الآن، علينا تهيئة الدليل الذي سنخزّن فيه الرمز المصدر للمشروع:
# setup project directory
mkdir -p adk_ea_codelab && cd adk_ea_codelab
# prepare virtual environment
uv init
# install dependencies
uv add google-adk google-api-python-client tzlocal python-dotenv
uv add cloud-sql-python-connector[pg8000] sqlalchemy
نبدأ بتحديد هوية الوكيل وإمكاناته الأساسية في المحادثة. في حزمة تطوير التطبيقات (ADK)، يحدّد صف Agent شخصية الوكيل وتعليماته.
هذا هو الوقت الذي قد تحتاج فيه إلى التفكير في اسم وكيل. أفضّل أن يكون لدى وكلائي أسماء مناسبة، مثل "عايدة" أو "شارون"، لأنّني أعتقد أنّ ذلك يساعد في إضفاء بعض "الشخصية" عليهم، ولكن يمكنك أيضًا ببساطة تسمية الوكيل حسب وظيفته، مثل "مساعد_تنفيذي" أو "وكيل_سفر" أو "منفّذ_التعليمات_البرمجية".
نفِّذ الأمر adk create لتشغيل وكيل نموذج:
# replace with your desired agent name
uv run adk create executive_assistant
يُرجى اختيار gemini-2.5-flash كنموذج، وVertex AI كخادم خلفي. تحقَّق جيدًا من أنّ رقم تعريف المشروع المقترَح هو الرقم الذي أنشأته لهذا المختبر، ثم اضغط على Enter للتأكيد. بالنسبة إلى منطقة Google Cloud، يمكنك قبول الإعداد التلقائي (us-central1). ستبدو نافذة الجهاز الطرفي مشابهة لما يلي:
daniela_petruzalek@cloudshell:~/adk_ea_codelab (your-project-id)$ uv run adk create executive_assistant
Choose a model for the root agent:
1. gemini-2.5-flash
2. Other models (fill later)
Choose model (1, 2): 1
1. Google AI
2. Vertex AI
Choose a backend (1, 2): 2

You need an existing Google Cloud account and project, check out this link for details:
https://google.github.io/adk-docs/get-started/quickstart/#gemini---google-cloud-vertex-ai

Enter Google Cloud project ID [your-project-id]:
Enter Google Cloud region [us-central1]:

Agent created in /home/daniela_petruzalek/adk_ea_codelab/executive_assistant:
- .env
- __init__.py
- agent.py

daniela_petruzalek@cloudshell:~/adk_ea_codelab (your-project-id)$
بعد الانتهاء، سينشئ الأمر السابق مجلدًا باسم الوكيل (مثل executive_assistant) مع بعض الملفات، بما في ذلك ملف agent.py يتضمّن تعريف الوكيل الأساسي:
from google.adk.agents.llm_agent import Agent

root_agent = Agent(
    model='gemini-2.5-flash',
    name='root_agent',
    description='A helpful assistant for user questions.',
    instruction='Answer user questions to the best of your knowledge',
)
إذا أردت التفاعل مع هذا الوكيل، يمكنك إجراء ذلك من خلال تنفيذ uv run adk web على سطر الأوامر وفتح واجهة مستخدم التطوير على المتصفّح. سيظهر لك ما يلي:
$ uv run adk web
...
INFO:     Started server process [1244]
INFO:     Waiting for application startup.

+-----------------------------------------------------------------------------+
| ADK Web Server started                                                      |
|                                                                             |
| For local testing, access at http://127.0.0.1:8000.                         |
+-----------------------------------------------------------------------------+

INFO:     Application startup complete.
INFO:     Uvicorn running on http://127.0.0.1:8000 (Press CTRL+C to quit)
حتى إذا كان هذا الوكيل بسيطًا جدًا، من المفيد إجراء ذلك مرة واحدة على الأقل للتأكّد من أنّ عملية الإعداد تعمل بشكلٍ صحيح قبل البدء في تعديل الوكيل. تعرض لقطة الشاشة أدناه تفاعلاً بسيطًا باستخدام واجهة مستخدم التطوير:

لنعدّل الآن تعريف الوكيل باستخدام شخصية المساعد التنفيذي. انسخ الرمز أدناه واستبدِل محتوى agent.py به. تكييف اسم الوكيل وشخصيته مع تفضيلاتك
from google.adk.agents.llm_agent import Agent

root_agent = Agent(
    model='gemini-2.5-flash',
    name='executive_assistant',
    description='A professional AI Executive Assistant',
    instruction='''
    You are an elite, warm, and highly efficient AI partner.
    Your primary goal is to help the user manage their tasks, schedule, and research.
    Always be direct, concise, and high-signal.
    ''',
)
يُرجى العِلم أنّ سمة الاسم تحدّد الاسم الداخلي للوكيل، بينما يمكنك أيضًا منحه اسمًا أسهل في التعليمات كجزء من شخصيته للتفاعلات مع المستخدم النهائي. يُستخدم الاسم الداخلي في الغالب لأغراض إمكانية تتبّع البيانات وعمليات التسليم في الأنظمة المتعددة الوكلاء التي تستخدم أداة transfer_to_agent. لن تتعامل مع هذه الأداة بنفسك، بل ستسجّلها حزمة تطوير البرامج (ADK) تلقائيًا عند تعريف وكيل فرعي واحد أو أكثر.
لتشغيل الوكيل الذي أنشأناه للتو، استخدِم adk web:
uv run adk web
افتح واجهة مستخدم ADK على المتصفّح ورحِّب بمساعدك الجديد.
5- إضافة ذاكرة مستمرة باستخدام Vertex AI Memory Bank
يجب أن يتذكّر المساعد الحقيقي الإعدادات المفضّلة والتفاعلات السابقة لتقديم تجربة سلسة ومخصّصة. في هذه الخطوة، سنربط "بنك الذاكرة" في Vertex AI Agent Engine، وهو إحدى ميزات Vertex AI التي تنشئ بشكل ديناميكي ذكريات طويلة الأمد استنادًا إلى محادثات المستخدمين.
تتيح "ذاكرة التخزين" للوكيل إنشاء معلومات مخصّصة يمكن الوصول إليها على مستوى جلسات متعدّدة، ما يضمن استمرار المحادثة بين الجلسات. وراء الكواليس، يدير هذا النظام التسلسل الزمني للرسائل في الجلسة ويمكنه استخدام استرجاع البحث عن التشابه لتزويد الوكيل بالذكريات الأكثر صلة بالسياق الحالي.
بدء خدمة Memory
تستخدم حزمة تطوير التطبيقات (ADK) منصة Vertex AI لتخزين الذكريات الطويلة المدى واسترجاعها. يجب إعداد "محرك ذاكرة" في مشروعك. وهو في الأساس مثيل من "محرك الاستدلال" تم إعداده ليعمل كمخزن للذاكرة.
أنشئ النص البرمجي التالي باسم setup_memory.py:
setup_memory.py
import vertexai
import os

PROJECT_ID=os.getenv("PROJECT_ID")
LOCATION=os.getenv("LOCATION")

client = vertexai.Client(project=PROJECT_ID, location=LOCATION)

# Create Reasoning Engine for Memory Bank
agent_engine = client.agent_engines.create()

# You will need this resource name to give it to ADK
print(agent_engine.api_resource.name)
الآن، شغِّل setup_memory.py لتوفير محرك الاستدلال لبنك الذاكرة:
uv run python setup_memory.py
يجب أن تبدو مخرجاتك مشابهة لما يلي:
$ uv run python setup.py
projects/1234567890/locations/us-central1/reasoningEngines/1234567890
احفظ اسم مورد المحرّك في متغيّر بيئة:
export ENGINE_ID="<insert the resource name above>"
الآن، علينا تعديل الرمز البرمجي لاستخدام الذاكرة الثابتة. استبدِل محتوى agent.py بما يلي:
agent.py
from google.adk.agents.llm_agent import Agent
from google.adk.tools.preload_memory_tool import PreloadMemoryTool
from google.adk.tools.load_memory_tool import load_memory_tool

async def auto_save_session_to_memory_callback(callback_context):
    await callback_context._invocation_context.memory_service.add_session_to_memory(
        callback_context._invocation_context.session)

# Update root_agent with memory tools and callback
root_agent = Agent(
    model='gemini-2.5-flash',
    name='executive_assistant',
    description='Executive Assistant with Persistent Memory',
    instruction='''
    You are an elite AI partner with long-term memory.
    Use load_memory to find context about the user when needed.
    Always be direct, concise, and high-signal.
    ''',
    tools=[PreloadMemoryTool(), load_memory_tool],
    after_agent_callback=auto_save_session_to_memory_callback,
)
تُدرج أداة PreloadMemoryTool تلقائيًا سياقًا ذا صلة من المحادثات السابقة في كل طلب (باستخدام استرجاع البحث عن التشابه)، بينما تسمح أداة load_memory_tool للنموذج بالبحث بشكل صريح في "بنك الذاكرة" عن الحقائق عند الحاجة. يمنح هذا المزيج الوكيل سياقًا عميقًا وثابتًا.
الآن، لتشغيل الوكيل مع إمكانية تذكُّر المحادثات السابقة، عليك تمرير memory_service_uri عند تشغيل adk web:
uv run adk web --memory_service_uri="agentengine://$ENGINE_ID"
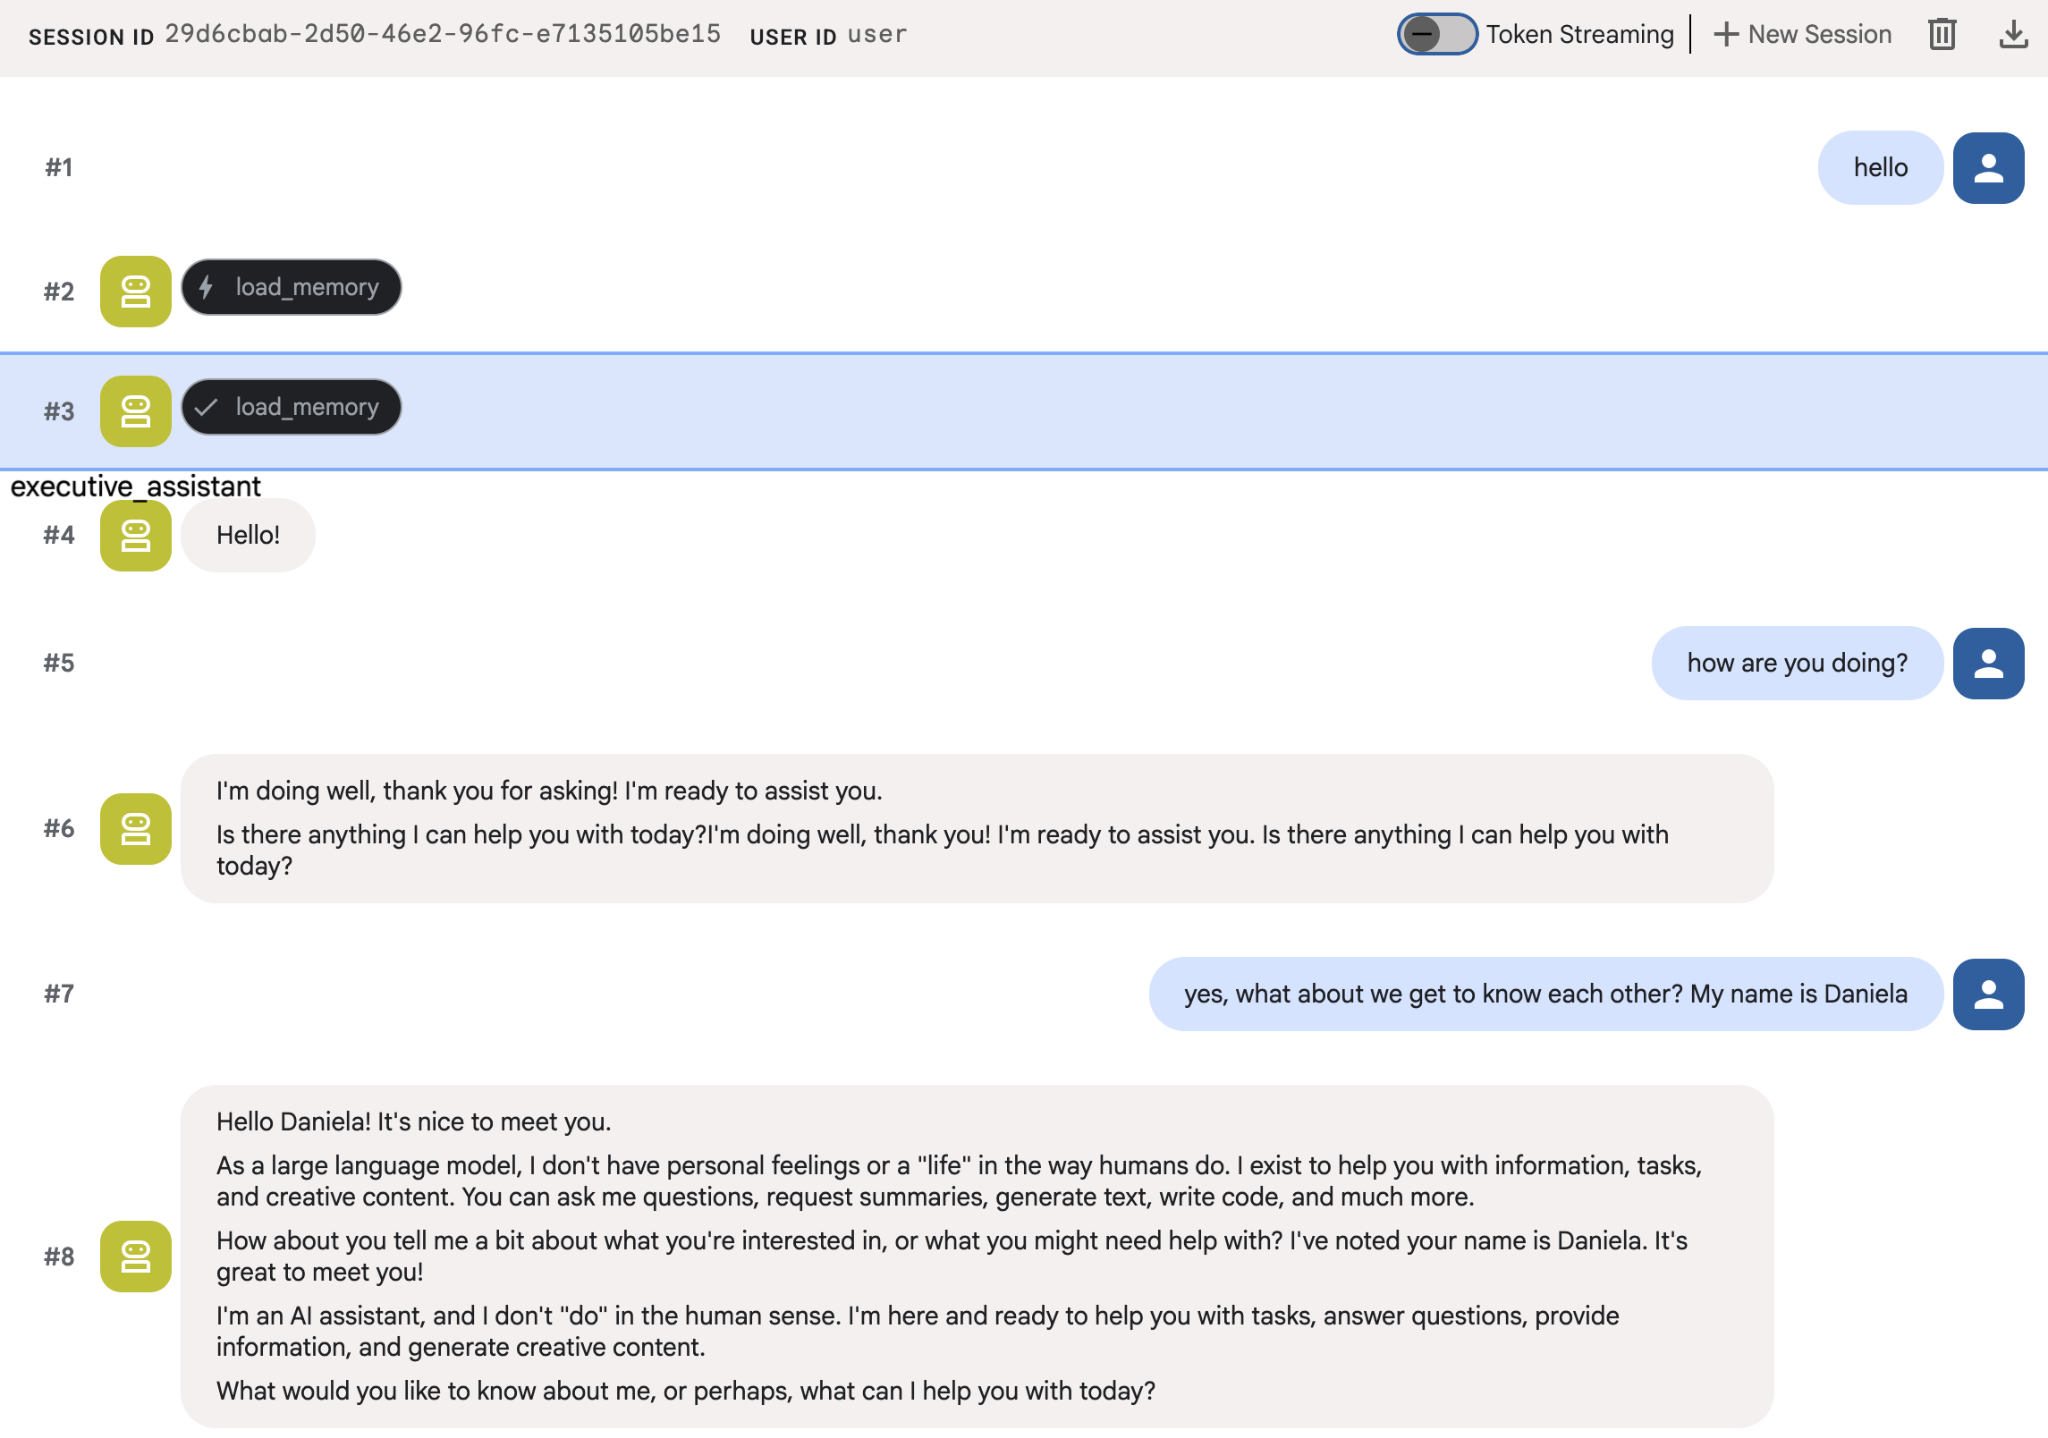
جرِّب تقديم بعض الحقائق عن نفسك للوكلاء، ثم ابدأ جلسة مختلفة لطرح أسئلة حول هذه الحقائق. على سبيل المثال، أخبره باسمك:
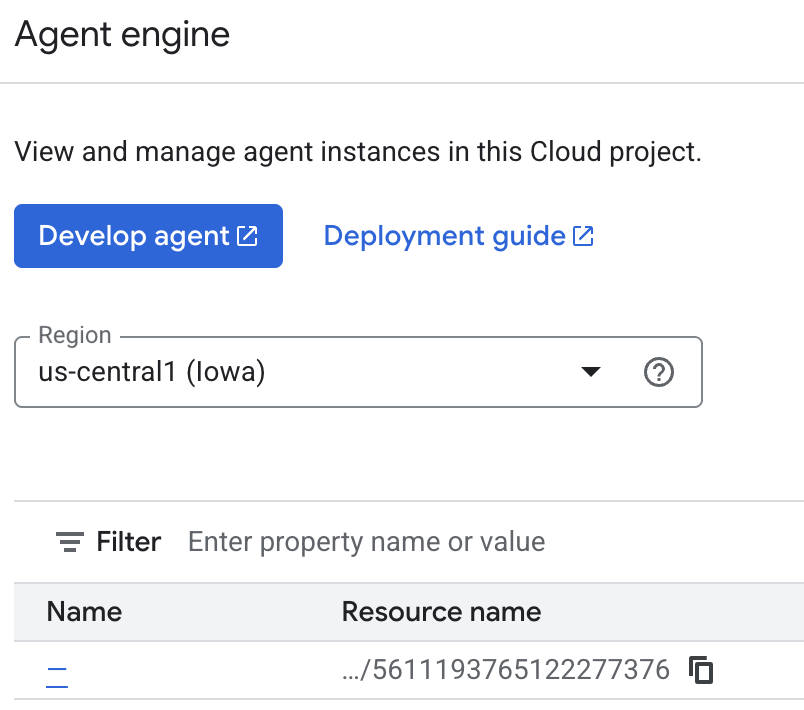
يمكنك فحص الذكريات التي يحفظها الوكيل على وحدة تحكّم السحابة الإلكترونية. انتقِل إلى صفحة المنتج "Agent Engine" (استخدِم شريط البحث).

بعد ذلك، انقر على اسم محرّك وكيلك (تأكَّد من اختيار المنطقة الصحيحة):
ثم انتقِل إلى علامة التبويب "الذكريات":
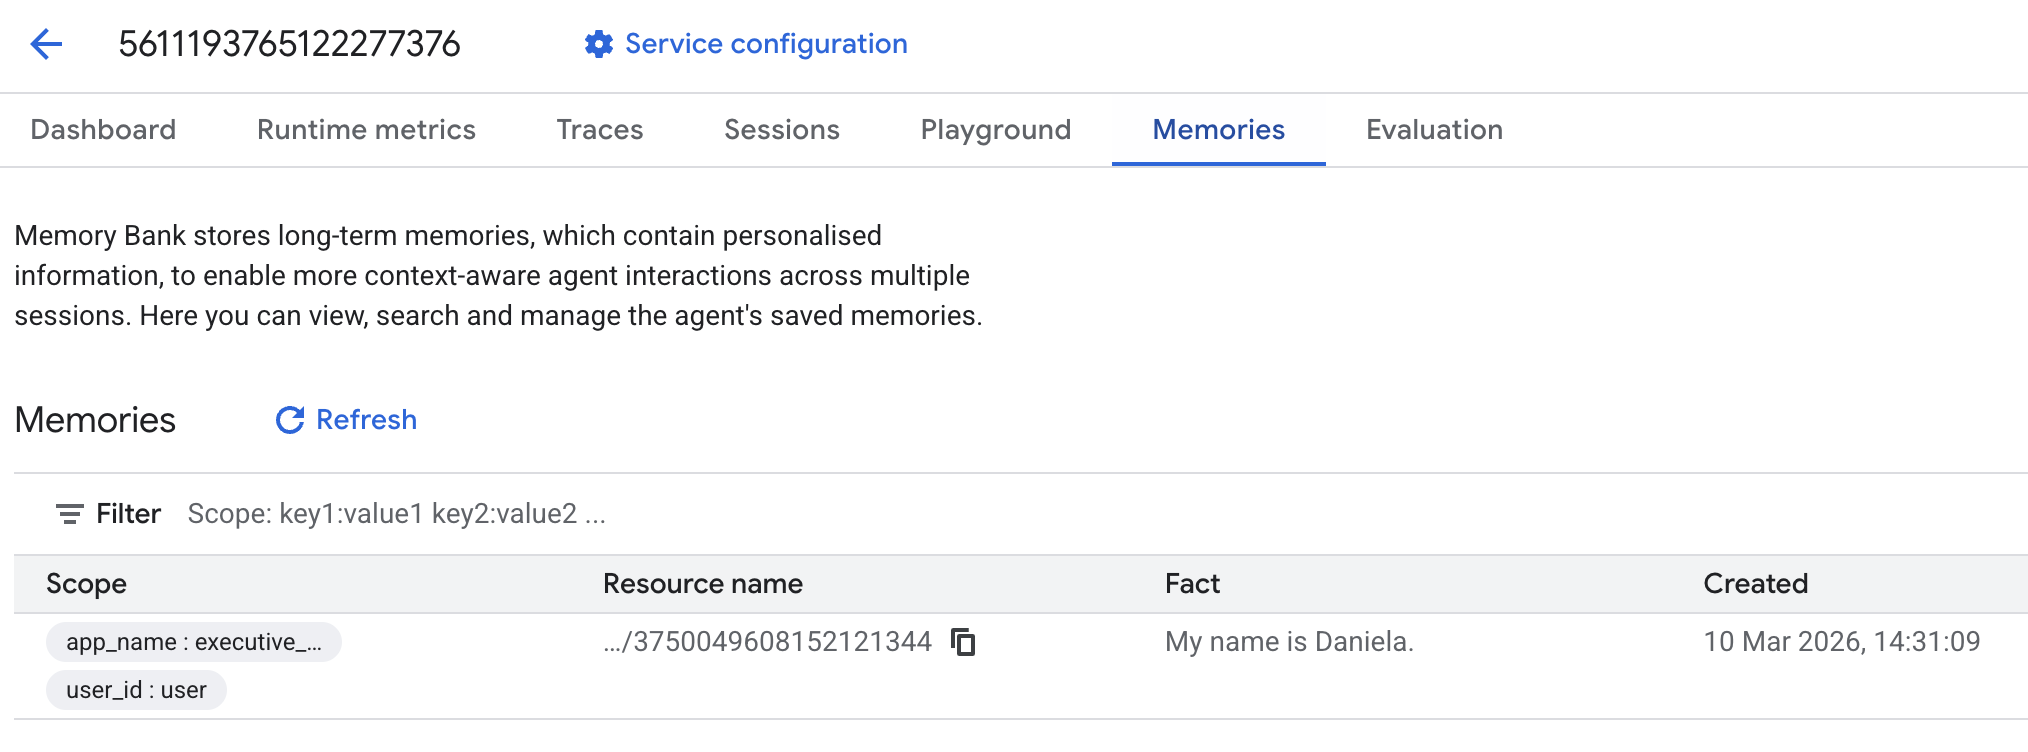
ستظهر لك بعض الذكريات التي تمت إضافتها.
6. إضافة إمكانات البحث على الويب
لتقديم معلومات عالية الجودة، يجب أن يجري الوكيل تحقيقات معمّقة تتجاوز طلب بحث واحدًا. من خلال تفويض البحث إلى وكيل فرعي متخصص، نحافظ على استجابة الشخصية الرئيسية بينما يتعامل الباحث مع عملية جمع البيانات المعقدة في الخلفية.
في هذه الخطوة، ننفّذ LoopAgent لتحقيق "عمق البحث"، ما يسمح للوكيل بالبحث بشكل متكرّر وتقييم النتائج وتحسين طلباته إلى أن يحصل على صورة كاملة. نفرض أيضًا دقة فنية من خلال اشتراط تضمين اقتباسات مضمّنة لجميع النتائج، ما يضمن استناد كل ادّعاء إلى رابط مصدر.
إنشاء أداة "أخصائي البحث" (research.py)
نحدّد هنا وكيلًا أساسيًا مزوّدًا بأداة "بحث Google" ونضمّنه في LoopAgent. تعمل المَعلمة max_iterations كعنصر تحكّم، ما يضمن تكرار البحث 3 مرات كحد أقصى إذا بقيت ثغرات في فهم الوكيل.
research.py
from google.adk.agents.llm_agent import Agent
from google.adk.agents.loop_agent import LoopAgent
from google.adk.tools.google_search_tool import GoogleSearchTool
from google.adk.tools.tool_context import ToolContext

def exit_loop(tool_context: ToolContext):
    """Call this function ONLY when no further research is needed, signaling the iterative process should end."""
    print(f"  [Tool Call] exit_loop triggered by {tool_context.agent_name}")
    tool_context.actions.escalate = True
    # Return empty dict as tools should typically return JSON-serializable output
    return {}

# --- RESEARCH LOGIC ---
_research_worker = Agent(
    model='gemini-2.5-flash',
    name='research_worker',
    description='Worker agent that performs a single research step.',
    instruction='''
    Use google_search to find facts and synthesize them for the user.
    Critically evaluate your findings. If the data is incomplete or you need more context, prepare to search again in the next iteration.
    You must include the links you found as references in your response, formatting them like citations in a research paper (e.g., [1], [2]).
    Use the exit_loop tool to terminate the research early if no further research is needed.
    If you need to ask the user for clarifications, call the exit_loop function early to interrupt the research cycle.
    ''',
    tools=[GoogleSearchTool(bypass_multi_tools_limit=True), exit_loop],
)

# The LoopAgent iterates the worker up to 3 times for deeper research
research_agent = LoopAgent(
    name='research_specialist',
    description='Deep web research specialist.',
    sub_agents=[_research_worker],
    max_iterations=3,
)
تعديل الوكيل الرئيسي (agent.py)
استورِد research_agent وأضِفه كأداة إلى Sharon:
agent.py
from google.adk.agents.llm_agent import Agent
from google.adk.tools.preload_memory_tool import PreloadMemoryTool
from google.adk.tools.load_memory_tool import load_memory_tool

# Import our new sub agent
from .research import research_agent

async def auto_save_session_to_memory_callback(callback_context):
    await callback_context._invocation_context.memory_service.add_session_to_memory(
        callback_context._invocation_context.session)

# Update root_agent with memory tools and callback
root_agent = Agent(
    model='gemini-2.5-flash',
    name='executive_assistant',
    description='Executive Assistant with persistent memory and research capabilities',
    instruction='''
    You are an elite AI partner with long-term memory.
    1. Use load_memory to recall facts.
    2. Delegate research tasks to the research_specialist.
    Always be direct, concise, and high-signal.
    ''',
    tools=[PreloadMemoryTool(), load_memory_tool],
    sub_agents=[research_agent],
    after_agent_callback=auto_save_session_to_memory_callback,
)
أعِد تشغيل adk web لاختبار وكيل البحث.
uv run adk web --memory_service_uri="agentengine://$ENGINE_ID"
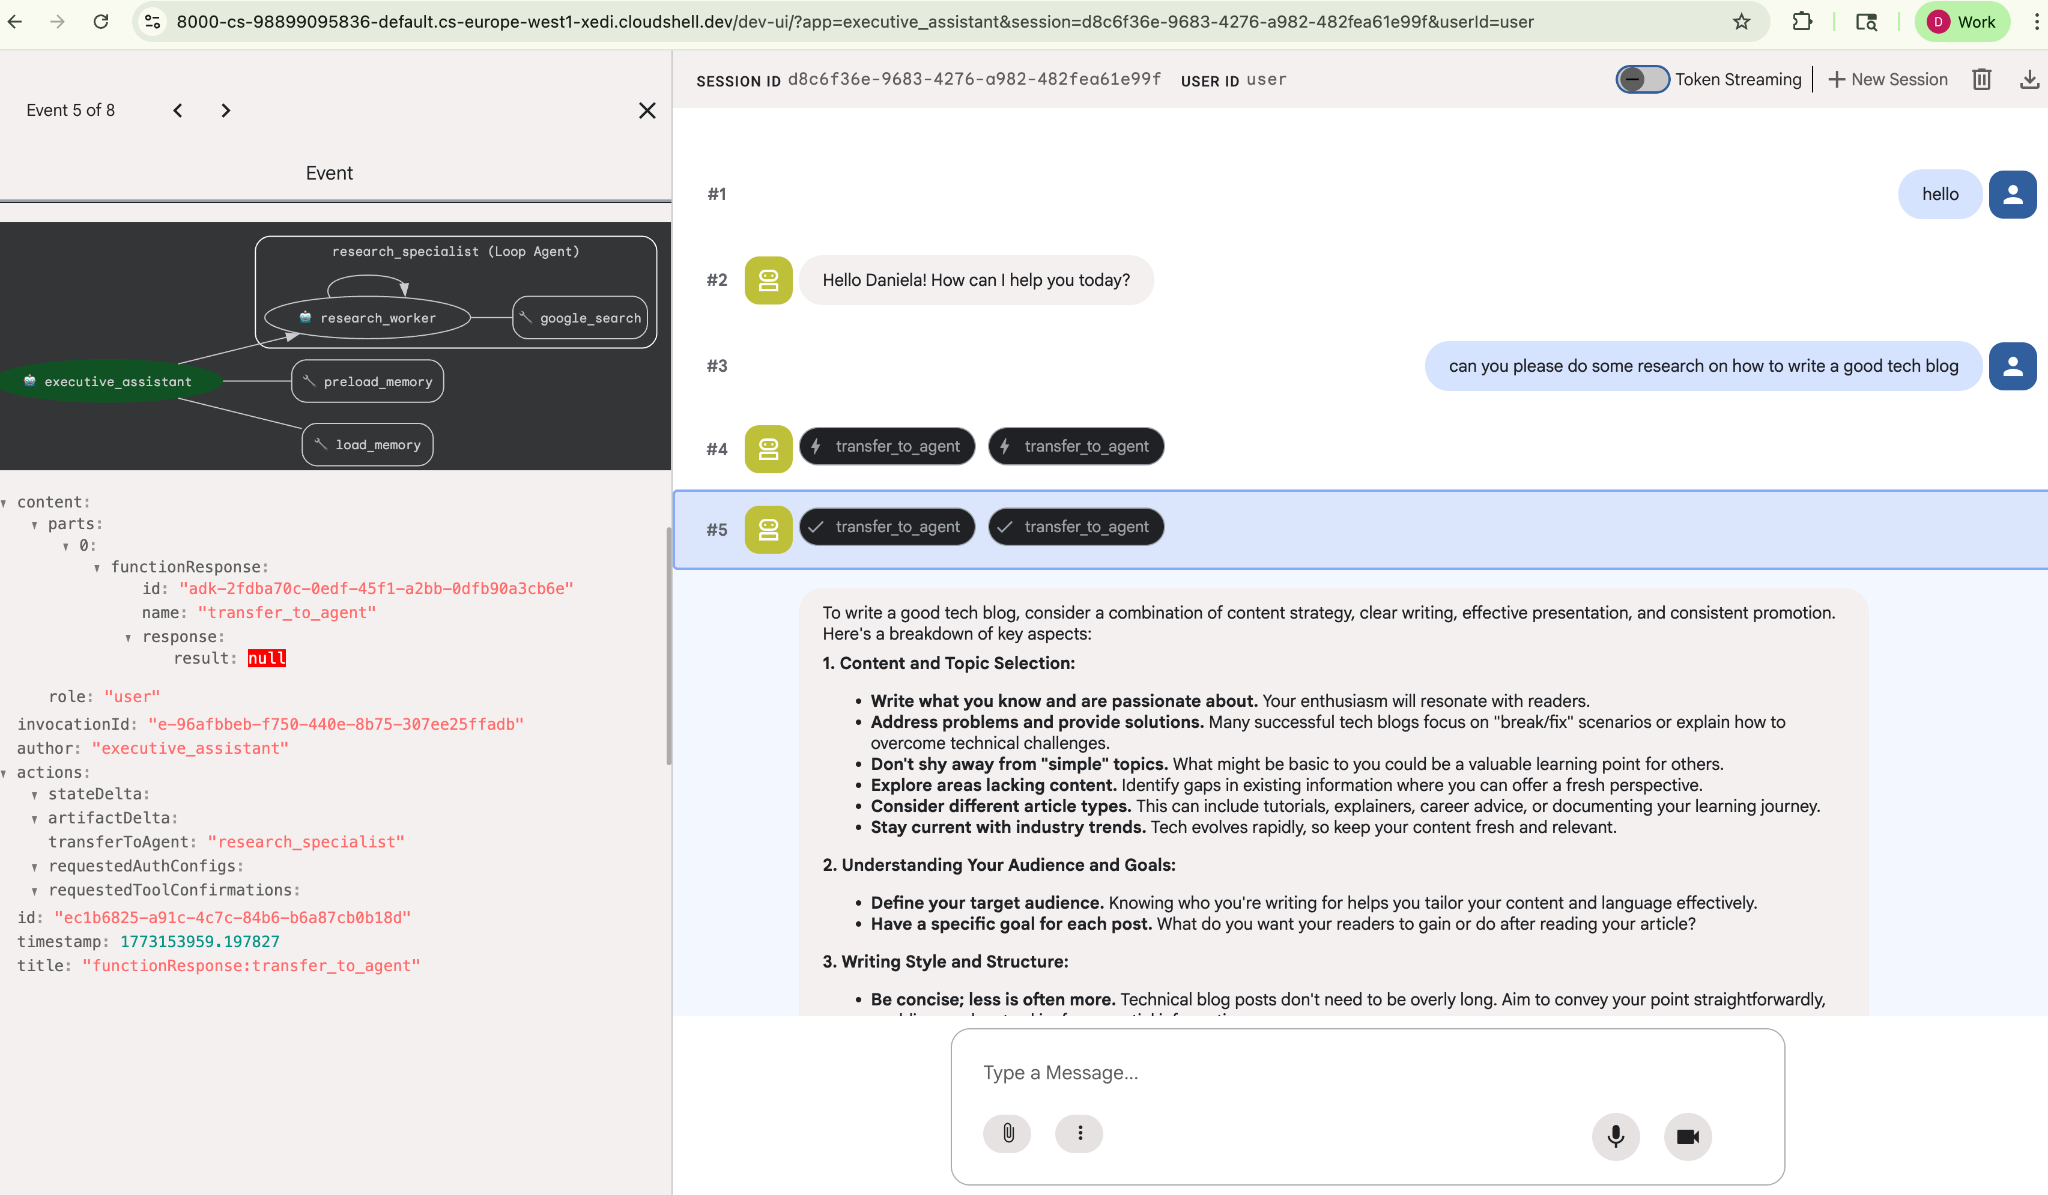
امنحها مهمة بحث بسيطة، مثل "كيفية كتابة مدوّنة تقنية جيدة؟"
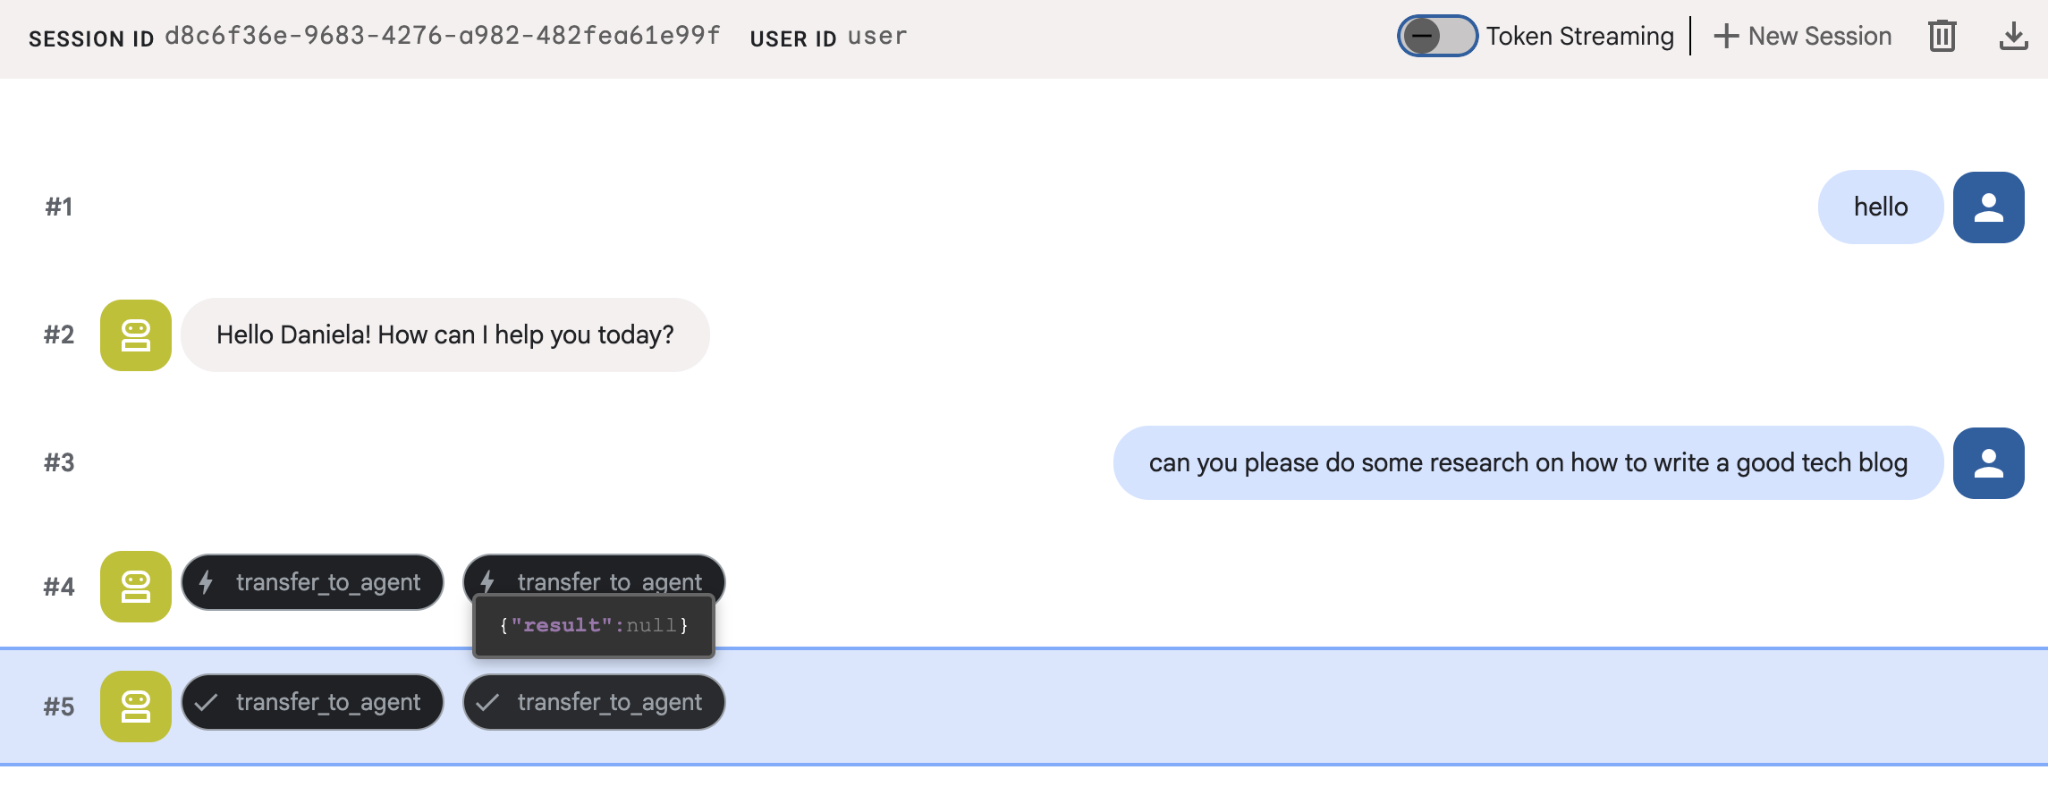
ربما لاحظت أنّ المساعد تذكّر اسمي على الرغم من أنّ هذه جلسة جديدة. يُرجى أيضًا الانتباه إلى استدعاء الأداة "transfer_to_agent": هذه هي الأداة التي تنقل المهمة إلى وكيل البحث الجديد.
لننتقل الآن إلى إدارة المهام.
7. إضافة إدارة المهام باستخدام Cloud SQL
على الرغم من أنّ للوكيل ذاكرة طويلة الأمد، إلا أنّه غير مناسب للبيانات المنظَّمة والدقيقة، مثل قائمة المهام. بالنسبة إلى المهام، نستخدم قاعدة بيانات ارتباطية تقليدية. سنستخدم SQLAlchemy وقاعدة بيانات Google Cloud SQL (PostgreSQL). قبل أن نتمكّن من كتابة التعليمات البرمجية، يجب أن نجهّز البنية الأساسية.
توفير البنية الأساسية
نفِّذ هذه الأوامر لإنشاء قاعدة البيانات. ملاحظة: يستغرق إنشاء الجهاز الافتراضي من 5 إلى 10 دقائق تقريبًا. يمكنك الانتقال إلى الخطوة التالية أثناء تشغيل هذه العملية في الخلفية.
# 1. Define instance variables
export INSTANCE_NAME="assistant-db"
export USER_EMAIL=$(gcloud config get-value account)

# 2. Create the Cloud SQL instance
gcloud sql instances create $INSTANCE_NAME \
    --database-version=POSTGRES_18 \
    --tier=db-f1-micro \
    --region=us-central1 \
    --edition=ENTERPRISE

# 3. Create the database for our tasks
gcloud sql databases create tasks --instance=$INSTANCE_NAME
سيستغرق توفير مثيل قاعدة البيانات بضع دقائق. قد يكون هذا الوقت مناسبًا لتناول فنجان من القهوة أو الشاي، أو تعديل الرمز أثناء انتظار انتهاء العملية، ولكن لا تنسَ العودة وإكمال عملية التحكّم في الوصول.
ضبط التحكّم في الوصول
الآن، علينا ضبط إعدادات حساب المستخدم ليتمكّن من الوصول إلى قاعدة البيانات. نفِّذ الأوامر التالية في الوحدة الطرفية:
# change this to your favorite password
export DB_PASS="correct-horse-battery-staple"

# Create a regular database user
gcloud sql users create assistant_user \
    --instance=$INSTANCE_NAME \
    --password=$DB_PASS
تعديل إعدادات البيئة
تحمّل حزمة تطوير التطبيقات إعدادات الضبط من ملف .env في وقت التشغيل. عدِّل بيئة الوكيل باستخدام تفاصيل الاتصال بقاعدة البيانات.
# Retrieve the unique connection name
export DB_CONN=$(gcloud sql instances describe $INSTANCE_NAME --format='value(connectionName)')

# Append configuration to your .env file
cat <<EOF >> executive_assistant/.env
DB_CONNECTION_NAME=$DB_CONN
DB_USER=assistant_user
DB_PASSWORD=$DB_PASS
DB_NAME=tasks
EOF
لننتقل الآن إلى إجراء تغييرات على الرمز.
إنشاء أداة "متخصّص في المهام" (todo.py)
على غرار وكيل البحث، لننشئ وكيل المهام في ملف منفصل. إنشاء todo.py:
todo.py
import os
import uuid
import sqlalchemy
from datetime import datetime
from typing import Optional, List

from sqlalchemy import (
    Column,
    String,
    DateTime,
    Enum,
    select,
    delete,
    update,
)
from sqlalchemy.orm import declarative_base, Session
from google.cloud.sql.connector import Connector
from google.adk.agents.llm_agent import Agent

# --- DATABASE LOGIC ---
Base = declarative_base()
connector = Connector()

def getconn():
    db_connection_name = os.environ.get("DB_CONNECTION_NAME")
    db_user = os.environ.get("DB_USER")
    db_password = os.environ.get("DB_PASSWORD")
    db_name = os.environ.get("DB_NAME", "tasks")

    return connector.connect(
        db_connection_name,
        "pg8000",
        user=db_user,
        password=db_password,
        db=db_name,
    )

engine = sqlalchemy.create_engine(
    "postgresql+pg8000://",
    creator=getconn,
)

class Todo(Base):
    __tablename__ = "todos"
    id = Column(String(36), primary_key=True, default=lambda: str(uuid.uuid4()))
    title = Column(String(255), nullable=False)
    priority = Column(
        Enum("high", "medium", "low", name="priority_levels"), nullable=False, default="medium"
    )
    due_date = Column(DateTime, nullable=True)
    status = Column(Enum("pending", "done", name="status_levels"), default="pending")
    created_at = Column(DateTime, default=datetime.utcnow)

def init_db():
    """Builds the table if it's missing."""
    Base.metadata.create_all(bind=engine)

def add_todo(
    title: str, priority: str = "medium", due_date: Optional[str] = None
) -> dict:
    """
    Adds a new task to the list.

    Args:
        title (str): The description of the task.
        priority (str): The urgency level. Must be one of: 'high', 'medium', 'low'.
        due_date (str, optional): The due date in ISO format (YYYY-MM-DD or YYYY-MM-DDTHH:MM:SS).

    Returns:
        dict: A dictionary containing the new task's ID and a status message.
    """
    init_db()
    with Session(engine) as session:
        due = datetime.fromisoformat(due_date) if due_date else None
        item = Todo(
            title=title,
            priority=priority.lower(),
            due_date=due,
        )
        session.add(item)
        session.commit()
        return {"id": item.id, "status": f"Task added ✅"}

def list_todos(status: str = "pending") -> list:
    """
    Lists tasks from the database, optionally filtering by status.

    Args:
        status (str, optional): The status to filter by. 'pending', 'done', or 'all'.
    """
    init_db()
    with Session(engine) as session:
        query = select(Todo)

        s_lower = status.lower()
        if s_lower != "all":
            query = query.where(Todo.status == s_lower)

        query = query.order_by(Todo.priority, Todo.created_at)

        results = session.execute(query).scalars().all()
        return [
            {
                "id": t.id,
                "task": t.title,
                "priority": t.priority,
                "status": t.status,
            }
            for t in results
        ]

def complete_todo(task_id: str) -> str:
    """Marks a specific task as 'done'."""
    init_db()
    with Session(engine) as session:
        session.execute(update(Todo).where(Todo.id == task_id).values(status="done"))
        session.commit()
        return f"Task {task_id} marked as done."

def delete_todo(task_id: str) -> str:
    """Permanently removes a task from the database."""
    init_db()
    with Session(engine) as session:
        session.execute(delete(Todo).where(Todo.id == task_id))
        session.commit()
        return f"Task {task_id} deleted."

# --- TODO SPECIALIST AGENT ---
todo_agent = Agent(
    model='gemini-2.5-flash',
    name='todo_specialist',
    description='A specialist agent that manages a structured SQL task list.',
    instruction='''
    You manage the user's task list using a PostgreSQL database.
    - Use add_todo when the user wants to remember something. If no priority is mentioned, mark it as 'medium'.
    - Use list_todos to show tasks.
    - Use complete_todo to mark a task as finished.
    - Use delete_todo to remove a task entirely.

    When marking a task as complete or deleting it, if the user doesn't provide the ID,
    use list_todos first to find the correct ID for the task they described.
    ''',
    tools=[add_todo, list_todos, complete_todo, delete_todo],
)
إنّ الرمز البرمجي أعلاه مسؤول عن أمرين رئيسيين: الاتصال بقاعدة بيانات Cloud SQL وتوفير قائمة بأدوات جميع عمليات قائمة المهام الشائعة، بما في ذلك إضافة المهام وإزالتها ووضع علامة اكتمال عليها.
بما أنّ هذه المنطقية خاصة جدًا بمساعد المهام، ولا يهمّنا بالضرورة هذه الإدارة الدقيقة من وجهة نظر المساعد التنفيذي (الوكيل الرئيسي)، سنصنّف هذا الوكيل على أنّه "AgentTool" بدلاً من وكيل فرعي.
للمساعدة في تحديد ما إذا كان يجب استخدام AgentTool أو وكيل فرعي، يجب مراعاة ما إذا كان يجب مشاركة السياق أم لا:
- استخدام AgentTool عندما لا يحتاج الوكيل إلى مشاركة السياق مع الوكيل الأساسي
- استخدام وكيل فرعي عندما تريد أن يشارك وكيلك السياق مع الوكيل الرئيسي
في حالة وكيل البحث، يمكن أن تكون مشاركة السياق مفيدة، ولكن بالنسبة إلى وكيل بسيط للمهام، لا توجد فائدة كبيرة من ذلك.
لننفّذ AgentTool في agent.py.
تعديل الوكيل الرئيسي (agent.py)
الآن، استورِد todo_agent إلى ملفك الرئيسي وأرفِقه كأداة:
agent.py
import os
from datetime import datetime
from google.adk.agents.llm_agent import Agent
from google.adk.tools.agent_tool import AgentTool
from google.adk.tools.preload_memory_tool import PreloadMemoryTool
from google.adk.tools.load_memory_tool import load_memory_tool

# Import our specialized sub-agents
from .research import research_agent
from .todo import todo_agent

# Callback for persistent memory storage
async def auto_save_session_to_memory_callback(callback_context):
    await callback_context._invocation_context.memory_service.add_session_to_memory(
        callback_context._invocation_context.session)

# --- ROOT AGENT DEFINITION ---
root_agent = Agent(
    model='gemini-2.5-flash',
    name='executive_assistant',
    description='A professional AI Executive Assistant with memory and specialized tools.',
    instruction='''
    You are an elite, high-signal AI Executive Assistant.
    Your goal is to help the user manage their knowledge, tasks, and research.

    ## Your Capabilities:
    1. Memory: Use load_memory to recall personal facts or past context about the user.
    2. Research: Delegate complex web-based investigations to the research_specialist.
    3. Tasks: Delegate all to-do list management (adding, listing, or completing tasks) to the todo_specialist.

    Always be direct and professional. If a task is successful, provide a brief confirmation.
    ''',
    tools=[
        PreloadMemoryTool(),
        load_memory_tool,
        AgentTool(todo_agent) # Exposes the Todo Specialist as a tool
    ],
    sub_agents=[research_agent], # Exposes the Research Specialist for direct handover
    after_agent_callback=auto_save_session_to_memory_callback,
)
نفِّذ الأمر adk web مرة أخرى لاختبار الميزة الجديدة:
uv run adk web --memory_service_uri="agentengine://$ENGINE_ID"
جرِّب إنشاء مهمة:

8. إضافة إدارة التقويم
أخيرًا، سنعمل على دمج الأداة مع "تقويم Google" ليتمكّن الوكيل من إدارة المواعيد. في هذا الدرس العملي، بدلاً من منح الوكيل إذن الوصول إلى تقويمك الشخصي، وهو ما قد يكون خطيرًا إذا لم يتم تنفيذه بالطريقة الصحيحة، سننشئ تقويمًا مستقلاً ليديره الوكيل.
أولاً، سننشئ حساب خدمة مخصّصًا ليكون بمثابة هوية الوكيل. بعد ذلك، سننشئ تقويم الوكيل آليًا باستخدام حساب الخدمة.
توفير حساب الخدمة
افتح الوحدة الطرفية ونفِّذ الأوامر التالية لإنشاء الهوية ومنح حسابك الشخصي إذنًا بانتحالها:
export SA_NAME="ea-agent"
export SA_EMAIL="${SA_NAME}@${PROJECT_ID}.iam.gserviceaccount.com"

# Create the service account
gcloud iam service-accounts create $SA_NAME \
    --display-name="Executive Assistant Agent"

# Allow your local user to impersonate it
gcloud iam service-accounts add-iam-policy-binding $SA_EMAIL \
    --member="user:$(gcloud config get-value account)" \
    --role="roles/iam.serviceAccountTokenCreator"

# Save it to the agent's environment
echo "SERVICE_ACCOUNT_EMAIL=$SA_EMAIL" >> executive_assistant/.env
إنشاء التقويم آليًا
لنكتب نصًا برمجيًا لإخبار حساب الخدمة بإنشاء التقويم. أنشئ ملفًا جديدًا باسم setup_calendar.py في الجذر الخاص بمشروعك (بجانب setup_memory.py):
setup_calendar.py
import os
import google.auth
from googleapiclient.discovery import build
from google.auth.transport.requests import Request
from google.auth import impersonated_credentials
from dotenv import load_dotenv

load_dotenv('executive_assistant/.env')
SA_EMAIL = os.environ.get("SERVICE_ACCOUNT_EMAIL")

def setup_sa_calendar():
    print(f"Authenticating to impersonate {SA_EMAIL}...")

    # 1. Base credentials
    creds, _ = google.auth.default(scopes=["https://www.googleapis.com/auth/cloud-platform"])
    creds.refresh(Request())

    # 2. Impersonate the Service Account
    impersonated = impersonated_credentials.Credentials(
        source_credentials=creds,
        target_principal=SA_EMAIL,
        target_scopes=["https://www.googleapis.com/auth/calendar"],
    )
    service = build("calendar", "v3", credentials=impersonated)

    # 3. Create the calendar
    print("Creating independent Service Account calendar...")
    calendar = service.calendars().insert(body={
        "summary": "AI Assistant (SA Owned)",
        "description": "An independent calendar managed purely by the AI."
    }).execute()

    calendar_id = calendar['id']

    # 4. Save the ID
    with open("executive_assistant/.env", "a") as f:
        f.write(f"\nCALENDAR_ID={calendar_id}\n")
    print(f"Setup complete! CALENDAR_ID {calendar_id} added to .env")

if __name__ == "__main__":
    setup_sa_calendar()
شغِّل النص البرمجي من الوحدة الطرفية:
uv run python setup_calendar.py
إنشاء أداة "اختصاصي التقويم" (calendar.py)
لنركّز الآن على الموظف المتخصص في التقويم. سنزوّد هذا الوكيل بمجموعة كاملة من أدوات التقويم، مثل إدراج الأحداث وإنشائها وتعديلها وحذفها، وحتى ميزة "الإضافة السريعة" التي تفهم اللغة الطبيعية.
انسخ الرمز أدناه إلى calendar.py.
calendar.py
import os
from datetime import datetime, timedelta, timezone

import google.auth
from googleapiclient.discovery import build
from googleapiclient.errors import HttpError
from google.adk.agents.llm_agent import Agent

def _get_calendar_service():
    """Build the Google Calendar API service using Service Account Impersonation."""
    from google.auth.transport.requests import Request
    from google.auth import impersonated_credentials

    target_principal = os.environ.get("SERVICE_ACCOUNT_EMAIL")
    if not target_principal:
        raise ValueError("SERVICE_ACCOUNT_EMAIL environment variable is missing.")

    base_scopes = ["https://www.googleapis.com/auth/cloud-platform"]
    creds, _ = google.auth.default(scopes=base_scopes)
    creds.refresh(Request())

    target_scopes = ["https://www.googleapis.com/auth/calendar"]
    impersonated = impersonated_credentials.Credentials(
        source_credentials=creds,
        target_principal=target_principal,
        target_scopes=target_scopes,
    )

    return build("calendar", "v3", credentials=impersonated)

def _format_event(event: dict) -> dict:
    """Format a raw Calendar API event into a clean dict for the LLM."""
    start = event.get("start", {})
    end = event.get("end", {})
    return {
        "id": event.get("id"),
        "title": event.get("summary", "(No title)"),
        "start": start.get("dateTime", start.get("date")),
        "end": end.get("dateTime", end.get("date")),
        "location": event.get("location", ""),
        "description": event.get("description", ""),
        "attendees": [
            {"email": a["email"], "status": a.get("responseStatus", "unknown")}
            for a in event.get("attendees", [])
        ],
        "link": event.get("htmlLink", ""),
        "conference_link": (
            event.get("conferenceData", {}).get("entryPoints", [{}])[0].get("uri", "")
            if event.get("conferenceData")
            else ""
        ),
        "status": event.get("status", ""),
    }

def list_events(days_ahead: int = 7) -> dict:
    """List upcoming calendar events."""
    calendar_id = os.environ.get("CALENDAR_ID")
    try:
        service = _get_calendar_service()
        now = datetime.now(timezone.utc).isoformat()
        end = (datetime.now(timezone.utc) + timedelta(days=days_ahead)).isoformat()

        events_result = service.events().list(
            calendarId=calendar_id, timeMin=now, timeMax=end,
            maxResults=50, singleEvents=True, orderBy="startTime"
        ).execute()

        events = events_result.get("items", [])
        if not events:
            return {"status": "success", "count": 0, "events": []}

        return {"status": "success", "count": len(events), "events": [_format_event(e) for e in events]}
    except HttpError as e:
        return {"status": "error", "message": f"Calendar API error: {e}"}

def create_event(title: str, start_time: str, end_time: str, description: str = "", location: str = "", attendees: str = "", add_google_meet: bool = False) -> dict:
    """Create a new calendar event."""
    calendar_id = os.environ.get("CALENDAR_ID")
    try:
        service = _get_calendar_service()
        event_body = {
            "summary": title,
            "start": {"dateTime": start_time},
            "end": {"dateTime": end_time},
        }
        if description: event_body["description"] = description
        if location: event_body["location"] = location
        if attendees:
            email_list = [e.strip() for e in attendees.split(",") if e.strip()]
            event_body["attendees"] = [{"email": e} for e in email_list]

        conference_version = 0
        if add_google_meet:
            event_body["conferenceData"] = {
                "createRequest": {"requestId": f"event-{datetime.now().strftime('%Y%m%d%H%M%S')}", "conferenceSolutionKey": {"type": "hangoutsMeet"}}
            }
            conference_version = 1

        event = service.events().insert(calendarId=calendar_id, body=event_body, conferenceDataVersion=conference_version).execute()
        return {"status": "success", "message": f"Event created ✅", "event": _format_event(event)}
    except HttpError as e:
        return {"status": "error", "message": f"Calendar API error: {e}"}

def update_event(event_id: str, title: str = "", start_time: str = "", end_time: str = "", description: str = "") -> dict:
    """Update an existing calendar event."""
    calendar_id = os.environ.get("CALENDAR_ID")
    try:
        service = _get_calendar_service()
        patch_body = {}
        if title: patch_body["summary"] = title
        if start_time: patch_body["start"] = {"dateTime": start_time}
        if end_time: patch_body["end"] = {"dateTime": end_time}
        if description: patch_body["description"] = description
        if not patch_body: return {"status": "error", "message": "No fields to update."}

        event = service.events().patch(calendarId=calendar_id, eventId=event_id, body=patch_body).execute()
        return {"status": "success", "message": "Event updated ✅", "event": _format_event(event)}
    except HttpError as e:
        return {"status": "error", "message": f"Calendar API error: {e}"}

def delete_event(event_id: str) -> dict:
    """Delete a calendar event by its ID."""
    calendar_id = os.environ.get("CALENDAR_ID")
    try:
        service = _get_calendar_service()
        service.events().delete(calendarId=calendar_id, eventId=event_id).execute()
        return {"status": "success", "message": f"Event '{event_id}' deleted ✅"}
    except HttpError as e:
        return {"status": "error", "message": f"Calendar API error: {e}"}

def quick_add_event(text: str) -> dict:
    """Create an event using natural language (e.g. 'Lunch with Sarah next Monday noon')."""
    calendar_id = os.environ.get("CALENDAR_ID")
    try:
        service = _get_calendar_service()
        event = service.events().quickAdd(calendarId=calendar_id, text=text).execute()
        return {"status": "success", "message": "Event created from text ✅", "event": _format_event(event)}
    except HttpError as e:
        return {"status": "error", "message": f"Calendar API error: {e}"}

calendar_agent = Agent(
    model='gemini-2.5-flash',
    name='calendar_specialist',
    description='Manages the user schedule and calendar events.',
    instruction='''
    You manage the user's Google Calendar.
    - Use list_events to check the schedule.
    - Use quick_add_event for simple, conversational scheduling requests (e.g., "Lunch tomorrow at noon").
    - Use create_event for complex meetings that require attendees, specific durations, or Google Meet links.
    - Use update_event to change details of an existing event.
    - Use delete_event to cancel or remove an event.

    CRITICAL: For update_event and delete_event, you must provide the exact `event_id`.
    If the user does not provide the ID, you MUST call list_events first to find the correct `event_id` before attempting the update or deletion.

    Always use the current date/time context provided by the root agent to resolve relative dates like "tomorrow".
    ''',
    tools=[list_events, create_event, update_event, delete_event, quick_add_event],
)
إنهاء الوكيل الرئيسي (agent.py)
عدِّل ملف agent.py باستخدام الرمز أدناه:
agent.py
import os
from datetime import datetime
from zoneinfo import ZoneInfo
from google.adk.agents.llm_agent import Agent
from google.adk.tools.agent_tool import AgentTool
from google.adk.tools.preload_memory_tool import PreloadMemoryTool
from google.adk.tools.load_memory_tool import load_memory_tool

# Import all our specialized sub-agents
from .research import research_agent
from .todo import todo_agent
from .calendar import calendar_agent
import tzlocal

# Automatically detect the local system timezone
TIMEZONE = tzlocal.get_localzone_name()

# Callback for persistent memory storage
async def auto_save_session_to_memory_callback(callback_context):
    await callback_context._invocation_context.memory_service.add_session_to_memory(
        callback_context._invocation_context.session)

# Callback to inject the current time into the prompt
async def setup_agent_context(callback_context, **kwargs):
    now = datetime.now(ZoneInfo(TIMEZONE))
    callback_context.state["current_time"] = now.strftime("%A, %Y-%m-%d %I:%M %p")
    callback_context.state["timezone"] = TIMEZONE

# --- ROOT AGENT DEFINITION ---
root_agent = Agent(
    model='gemini-2.5-flash',
    name='executive_assistant',
    description='A professional AI Executive Assistant with memory and specialized tools.',
    instruction='''
    You are an elite, high-signal AI Executive Assistant.
    Your goal is to help the user manage their knowledge, tasks, research, and schedule.

    ## Your Capabilities:
    1. Memory: Use load_memory to recall personal facts.
    2. Research: Delegate complex web investigations to the research_specialist.
    3. Tasks: Delegate all to-do list management to the todo_specialist.
    4. Scheduling: Delegate all calendar queries to the calendar_specialist.

    ## 🕒 Current State
    - Time: {current_time?}
    - Timezone: {timezone?}

    Always be direct and professional.
    ''',
    tools=[
        PreloadMemoryTool(),
        load_memory_tool,
        AgentTool(todo_agent),
        AgentTool(calendar_agent)
    ],
    sub_agents=[research_agent],
    before_agent_callback=[setup_agent_context],
    after_agent_callback=[auto_save_session_to_memory_callback],
)
يُرجى العِلم أنّه بالإضافة إلى أداة التقويم، أضفنا أيضًا وظيفة جديدة قبل معاودة الاتصال من قِبل موظّف الدعم: setup_agent_context. تمنح هذه الوظيفة الوكيل إمكانية التعرّف على التاريخ والوقت والمنطقة الزمنية الحالية حتى يتمكّن من استخدام التقويم بكفاءة أكبر. تعمل هذه الميزة من خلال ضبط متغيرات حالة الجلسة، وهو نوع مختلف من ذاكرة الوكيل مصمَّم للاحتفاظ بالبيانات على المدى القصير.
نفِّذ adk web لآخر مرة لاختبار الوكيل الكامل.
uv run adk web --memory_service_uri="agentengine://$ENGINE_ID"
يمكنك فحص حالة الجلسة في علامة التبويب "الحالة" في واجهة مستخدم المطوّر:
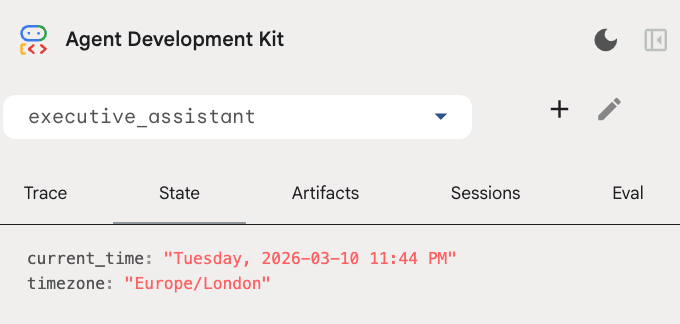
أصبح لديك الآن وكيل يمكنه تتبُّع أحداث التقويم وقوائم المهام وإجراء الأبحاث ولديه ذاكرة طويلة الأمد.
التنظيف بعد انتهاء التجربة
9- الخاتمة
تهانينا! لقد نجحت في تصميم مساعد تنفيذي متعدد الوظائف مستند إلى الذكاء الاصطناعي من خلال 5 مراحل تطورية.
المواضيع التي تناولناها
- توفير البنية التحتية لوكلاء الذكاء الاصطناعي
- تنفيذ الذاكرة الدائمة والوكلاء الفرعيين المتخصّصين باستخدام أدوات ADK المضمّنة
- دمج قواعد البيانات الخارجية وواجهات برمجة التطبيقات الخاصة بأدوات الإنتاجية
الخطوات التالية
يمكنك مواصلة رحلة التعلّم من خلال استكشاف دروس تطبيقية حول الترميز أخرى في هذه المنصة، أو إجراء تحسينات على المساعد التنفيذي بنفسك.
إذا كنت بحاجة إلى بعض الأفكار لتحسين الأداء، يمكنك تجربة ما يلي:
- استخدِم ميزة "ضغط الأحداث" لتحسين الأداء في المحادثات الطويلة.
- إضافة خدمة أداة للسماح للوكيل بتدوين الملاحظات نيابةً عنك وحفظها كملفات
- يمكنك نشر الوكيل كخدمة خلفية باستخدام Google Cloud Run.
بعد الانتهاء من الاختبار، تذكَّر تنظيف البيئة لتجنُّب تحمّل رسوم غير متوقّعة في حساب الفوترة.
نتمنّى لك التوفيق في الترميز.