
1. מבוא
בשיעור Codelab הזה נסביר איך ליצור סוכן AI מתוחכם באמצעות הערכה לפיתוח סוכנים (ADK) של Google. אנחנו נלך בנתיב התפתחות טבעי, החל מסוכן שיחות בסיסי ועד להוספה הדרגתית של יכולות מיוחדות.
הסוכן שאנחנו יוצרים הוא עוזר אישי, שנועד לעזור לכם במשימות יומיומיות כמו ניהול היומן, תזכור משימות, ביצוע מחקר וליקוט הערות. הוא נוצר מאפס באמצעות ADK, Gemini ו-Vertex AI.
בסוף שיעור ה-Lab הזה יהיה לכם סוכן שעובד באופן מלא, ויהיה לכם את הידע הנדרש כדי להרחיב אותו בהתאם לצרכים שלכם.
דרישות מוקדמות
- ידע בסיסי בשפת התכנות Python
- ידע בסיסי במסוף Google Cloud לניהול משאבי ענן
מה תלמדו
- הקצאת תשתית ענן של Google Cloud לסוכני AI.
- הטמעה של זיכרון לטווח ארוך ומתמשך באמצעות Vertex AI Memory Bank.
- בניית היררכיה של סוכני משנה מיוחדים.
- שילוב של מסדי נתונים חיצוניים עם מערכת Google Workspace.
הדרישות
אפשר להשתתף בסדנה הזו באופן מלא ב-Google Cloud Shell, שבו כל התלויות הנדרשות (ה-CLI של gcloud, עורך קוד, Go, Gemini CLI) מותקנות מראש.
לחלופין, אם אתם מעדיפים לעבוד על המחשב שלכם, תצטרכו את הדברים הבאים:
- Python (גרסה 3.12 ואילך)
- עורך קוד או סביבת פיתוח משולבת (IDE) (כמו VS Code או
vim). - טרמינל להרצת פקודות Python ו-
gcloud. - מומלץ: סוכן לכתיבת קוד כמו Gemini CLI או Antigravity
טכנולוגיות מרכזיות
כאן אפשר למצוא מידע נוסף על הטכנולוגיות שבהן נשתמש:
2. הגדרת הסביבה
בוחרים באחת מהאפשרויות הבאות: הגדרה של סביבה בקצב אישי אם רוצים להריץ את ה-codelab הזה במחשב שלכם, או הפעלה של Cloud Shell אם רוצים להריץ את ה-codelab הזה כולו בענן.
הגדרת סביבה בקצב אישי
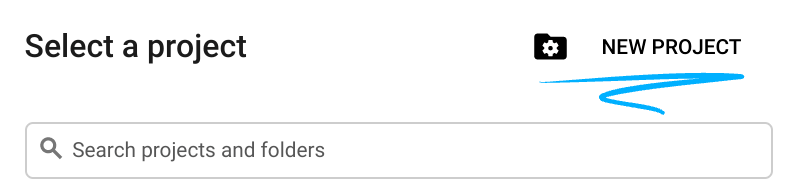
- נכנסים ל-מסוף Google Cloud ויוצרים פרויקט חדש או משתמשים בפרויקט קיים. אם עדיין אין לכם חשבון Gmail או Google Workspace, אתם צריכים ליצור חשבון.

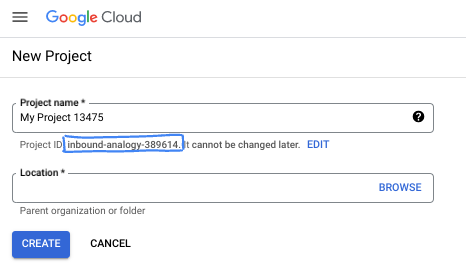
- שם הפרויקט הוא השם המוצג של הפרויקט הזה למשתתפים. זו מחרוזת תווים שלא נמצאת בשימוש ב-Google APIs. תמיד אפשר לעדכן את המיקום.
- מזהה הפרויקט הוא ייחודי לכל הפרויקטים ב-Google Cloud, והוא קבוע (אי אפשר לשנות אותו אחרי שהוא מוגדר). מסוף Cloud יוצר באופן אוטומטי מחרוזת ייחודית, ובדרך כלל לא צריך לדעת מה היא. ברוב ה-Codelabs, תצטרכו להפנות למזהה הפרויקט (בדרך כלל מסומן כ-
PROJECT_ID). אם אתם לא אוהבים את המזהה שנוצר, אתם יכולים ליצור מזהה אקראי אחר. אפשר גם לנסות שם משתמש משלכם ולבדוק אם הוא זמין. אי אפשר לשנות את ההגדרה הזו אחרי השלב הזה, והיא תישאר לאורך הפרויקט. - לידיעתכם, יש ערך שלישי, מספר פרויקט, שחלק מממשקי ה-API משתמשים בו. במאמרי העזרה מפורט מידע נוסף על שלושת הערכים האלה.
- בשלב הבא, תצטרכו להפעיל את החיוב במסוף Cloud כדי להשתמש במשאבי Cloud או בממשקי API של Cloud. השלמת ה-codelab הזה לא תעלה לכם הרבה, אם בכלל. כדי להשבית את המשאבים ולמנוע חיובים נוספים אחרי שתסיימו את המדריך הזה, תוכלו למחוק את המשאבים שיצרתם או למחוק את הפרויקט. משתמשים חדשים ב-Google Cloud זכאים לתוכנית תקופת ניסיון בחינם בשווי 300$.
מפעילים את Cloud Shell
אפשר להפעיל את Google Cloud מרחוק מהמחשב הנייד, אבל ב-Codelab הזה נשתמש ב-Google Cloud Shell, סביבת שורת פקודה שפועלת בענן.
ב-מסוף Google Cloud, לוחצים על סמל Cloud Shell בסרגל הכלים שבפינה הימנית העליונה:

יחלפו כמה רגעים עד שההקצאה והחיבור לסביבת העבודה יושלמו. בסיום התהליך, אמור להופיע משהו כזה:

המכונה הווירטואלית הזו כוללת את כל הכלים שדרושים למפתחים. יש בה ספריית בית בנפח מתמיד של 5GB והיא פועלת ב-Google Cloud, מה שמשפר מאוד את הביצועים והאימות ברשת. אפשר לבצע את כל העבודה ב-codelab הזה בדפדפן. לא צריך להתקין שום דבר.
3. הגדרת הפרויקט
לפני שכותבים קוד, צריך להקצות את התשתית וההרשאות הנדרשות ב-Google Cloud.
הגדרה של משתני סביבה
פותחים את הטרמינל ומגדירים את משתני הסביבה הבאים:
export PROJECT_ID=`gcloud config get project`
export LOCATION=us-central1
הפעלת ממשקי ה-API הנדרשים
הסוכן שלכם צריך גישה לכמה שירותים של Google Cloud. מריצים את הפקודה הבאה כדי להפעיל אותם:
gcloud services enable \
    aiplatform.googleapis.com \
    calendar-json.googleapis.com \
    sqladmin.googleapis.com
אימות באמצעות Application Default Credentials
כדי לתקשר עם שירותי Google Cloud מהסביבה שלכם, אנחנו צריכים לבצע אימות באמצעות Application Default Credentials (ADC).
מריצים את הפקודה הבאה כדי לוודא ש-Application Default Credentials פעילים ומעודכנים:
gcloud auth application-default login
4. יצירת סוכן הבסיס
עכשיו צריך לאתחל את הספרייה שבה נאחסן את קוד המקור של הפרויקט:
# setup project directory
mkdir -p adk_ea_codelab && cd adk_ea_codelab
# prepare virtual environment
uv init
# install dependencies
uv add google-adk google-api-python-client tzlocal python-dotenv
uv add cloud-sql-python-connector[pg8000] sqlalchemy
אנחנו מתחילים בהגדרת הזהות של הסוכן והיכולות הבסיסיות שלו לנהל שיחה. ב-ADK, מחלקת הסוכנים מגדירה את אישיות הסוכן וההוראות שלו.
זה הזמן לחשוב על שם לסוכן. אני מעדיף לתת לסוכנים שלי שמות כמו עאידה או שרון, כי אני חושב שזה עוזר להם לקבל 'אישיות', אבל אפשר גם פשוט לקרוא לסוכן לפי מה שהוא עושה, כמו executive_assistant, travel_agent או code_executor.
מריצים את הפקודה adk create כדי להתחיל הרצה של סוכן boilerplate:
# replace with your desired agent name
uv run adk create executive_assistant
בוחרים באפשרות gemini-2.5-flash בתור המודל, וב-Vertex AI בתור ה-Backend. בודקים שמזהה הפרויקט המוצע הוא זה שיצרתם לשיעור ה-Lab הזה, ומקישים על Enter כדי לאשר. באזור Google Cloud, אפשר לאשר את ברירת המחדל (us-central1). המסוף ייראה בערך כך:
daniela_petruzalek@cloudshell:~/adk_ea_codelab (your-project-id)$ uv run adk create executive_assistant
Choose a model for the root agent:
1. gemini-2.5-flash
2. Other models (fill later)
Choose model (1, 2): 1
1. Google AI
2. Vertex AI
Choose a backend (1, 2): 2

You need an existing Google Cloud account and project, check out this link for details:
https://google.github.io/adk-docs/get-started/quickstart/#gemini---google-cloud-vertex-ai

Enter Google Cloud project ID [your-project-id]:
Enter Google Cloud region [us-central1]:

Agent created in /home/daniela_petruzalek/adk_ea_codelab/executive_assistant:
- .env
- __init__.py
- agent.py

daniela_petruzalek@cloudshell:~/adk_ea_codelab (your-project-id)$
בסיום, הפקודה הקודמת תיצור תיקייה עם שם הסוכן (לדוגמה, executive_assistant) עם כמה קבצים, כולל קובץ agent.py עם ההגדרה הבסיסית של הסוכן:
from google.adk.agents.llm_agent import Agent

root_agent = Agent(
    model='gemini-2.5-flash',
    name='root_agent',
    description='A helpful assistant for user questions.',
    instruction='Answer user questions to the best of your knowledge',
)
כדי ליצור אינטראקציה עם הסוכן הזה, אפשר להריץ את הפקודה uv run adk web בשורת הפקודה ולפתוח את ממשק המשתמש לפיתוח בדפדפן. יוצג לכם משהו כזה:
$ uv run adk web
...
INFO:     Started server process [1244]
INFO:     Waiting for application startup.

+-----------------------------------------------------------------------------+
| ADK Web Server started                                                      |
|                                                                             |
| For local testing, access at http://127.0.0.1:8000.                         |
+-----------------------------------------------------------------------------+

INFO:     Application startup complete.
INFO:     Uvicorn running on http://127.0.0.1:8000 (Press CTRL+C to quit)
גם אם הסוכן הזה הוא די בסיסי, כדאי לעשות את זה לפחות פעם אחת כדי לוודא שההגדרה פועלת כמו שצריך לפני שמתחילים לערוך את הסוכן. צילום המסך שלמטה מציג אינטראקציה פשוטה באמצעות ממשק המשתמש של הפיתוח:

עכשיו נשנה את הגדרת הסוכן בהתאם לדמות של העוזר הניהולי. מעתיקים את הקוד שבהמשך ומחליפים את התוכן של agent.py. לשנות את השם והאישיות של הסוכן לפי ההעדפות שלכם.
from google.adk.agents.llm_agent import Agent

root_agent = Agent(
    model='gemini-2.5-flash',
    name='executive_assistant',
    description='A professional AI Executive Assistant',
    instruction='''
    You are an elite, warm, and highly efficient AI partner.
    Your primary goal is to help the user manage their tasks, schedule, and research.
    Always be direct, concise, and high-signal.
    ''',
)
שימו לב שהמאפיין name מגדיר את השם הפנימי של הסוכן, אבל בהוראות אפשר גם לתת לו שם ידידותי יותר כחלק מהפרסונה שלו לאינטראקציות עם משתמש הקצה. השם הפנימי משמש בעיקר לצורך יכולת צפייה והעברות במערכות מרובות סוכנים באמצעות הכלי transfer_to_agent. לא תצטרכו להתעסק עם הכלי הזה בעצמכם, כי ADK רושם אותו אוטומטית כשמצהירים על סוכן משנה אחד או יותר.
כדי להריץ את הסוכן שיצרנו, משתמשים בפקודה adk web:
uv run adk web
פותחים את ממשק המשתמש של ADK בדפדפן ואומרים שלום לעוזר הדיגיטלי החדש.
5. הוספת זיכרון קבוע באמצעות Vertex AI Memory Bank
עוזר אמיתי צריך לזכור את ההעדפות והאינטראקציות הקודמות שלכם כדי לספק חוויה חלקה ומותאמת אישית. בשלב הזה נשלב את Vertex AI Agent Engine Memory Bank, תכונה של Vertex AI שיוצרת באופן דינמי זיכרונות לטווח ארוך על סמך שיחות עם משתמשים.
Memory Bank מאפשר ל-agent ליצור מידע בהתאמה אישית שאפשר לגשת אליו בכמה סשנים, וכך ליצור רצף בין סשנים. מאחורי הקלעים, הוא מנהל את הרצף הכרונולוגי של ההודעות בסשן, ויכול להשתמש באחזור של חיפוש דמיון כדי לספק לסוכן את הזיכרונות הרלוונטיים ביותר להקשר הנוכחי.
הפעלת שירות הזיכרון
ה-ADK משתמש ב-Vertex AI כדי לאחסן ולשלוף זיכרונות לטווח ארוך. צריך לאתחל 'מנוע זיכרון' בפרויקט. זו בעצם מכונה של Reasoning Engine שהוגדרה לפעול כ-Memory Bank.
תכין לי את הסקריפט הבא בתור setup_memory.py:
setup_memory.py
import vertexai
import os

PROJECT_ID=os.getenv("PROJECT_ID")
LOCATION=os.getenv("LOCATION")

client = vertexai.Client(project=PROJECT_ID, location=LOCATION)

# Create Reasoning Engine for Memory Bank
agent_engine = client.agent_engines.create()

# You will need this resource name to give it to ADK
print(agent_engine.api_resource.name)
עכשיו מריצים את הפקודה setup_memory.py כדי להקצות את מנוע הנימוקים ל-Memory Bank:
uv run python setup_memory.py
הפלט אמור להיראות כך:
$ uv run python setup.py
projects/1234567890/locations/us-central1/reasoningEngines/1234567890
שומרים את שם משאב המנוע במשתנה סביבה:
export ENGINE_ID="<insert the resource name above>"
עכשיו צריך לעדכן את הקוד כדי להשתמש בזיכרון הקבוע. מחליפים את התוכן של agent.py בתוכן הבא:
agent.py
from google.adk.agents.llm_agent import Agent
from google.adk.tools.preload_memory_tool import PreloadMemoryTool
from google.adk.tools.load_memory_tool import load_memory_tool

async def auto_save_session_to_memory_callback(callback_context):
    await callback_context._invocation_context.memory_service.add_session_to_memory(
        callback_context._invocation_context.session)

# Update root_agent with memory tools and callback
root_agent = Agent(
    model='gemini-2.5-flash',
    name='executive_assistant',
    description='Executive Assistant with Persistent Memory',
    instruction='''
    You are an elite AI partner with long-term memory.
    Use load_memory to find context about the user when needed.
    Always be direct, concise, and high-signal.
    ''',
    tools=[PreloadMemoryTool(), load_memory_tool],
    after_agent_callback=auto_save_session_to_memory_callback,
)
PreloadMemoryTool מחדיר באופן אוטומטי הקשר רלוונטי משיחות קודמות לכל בקשה (באמצעות אחזור של חיפוש דמיון), בעוד ש-load_memory_tool מאפשר למודל לשאול במפורש את Memory Bank לגבי עובדות כשצריך. השילוב הזה מספק לנציג הקשר עמוק ומתמשך.
כדי להפעיל את הסוכן עם תמיכה בזיכרון, צריך להעביר לו את memory_service_uri כשמריצים את adk web:
uv run adk web --memory_service_uri="agentengine://$ENGINE_ID"
אפשר לנסות לספק לסוכנים כמה עובדות על עצמכם, ואז לחזור בסשן אחר ולשאול עליהן. לדוגמה, אפשר להגיד לה את השם שלכם:

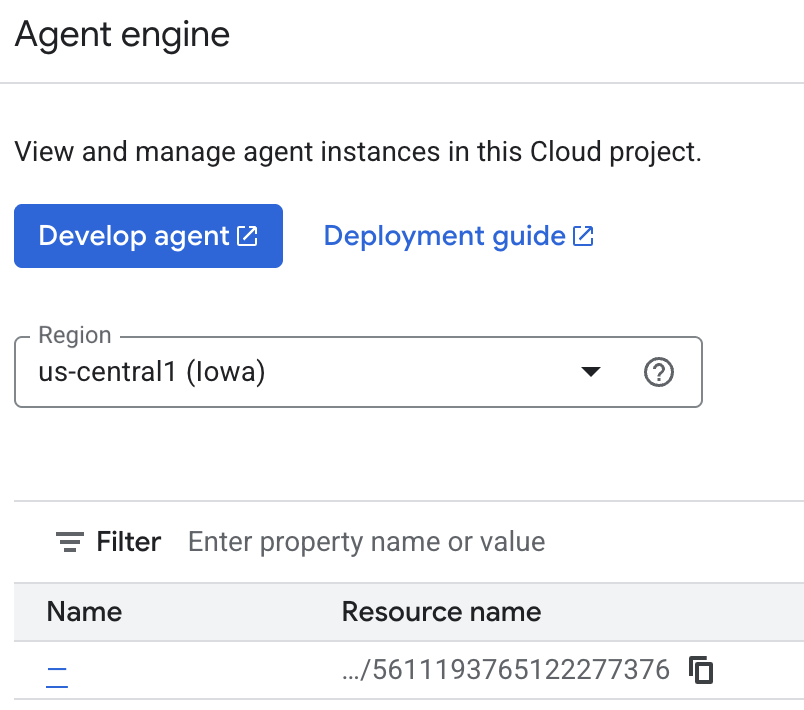
אתם יכולים לבדוק את הזיכרונות שהסוכן שומר במסוף Cloud. עוברים לדף המוצר Agent Engine (משתמשים בסרגל החיפוש)

לאחר מכן לוחצים על שם מנוע הסוכן (חשוב לבחור את האזור הנכון):
ואז עוברים לכרטיסייה 'זיכרונות':
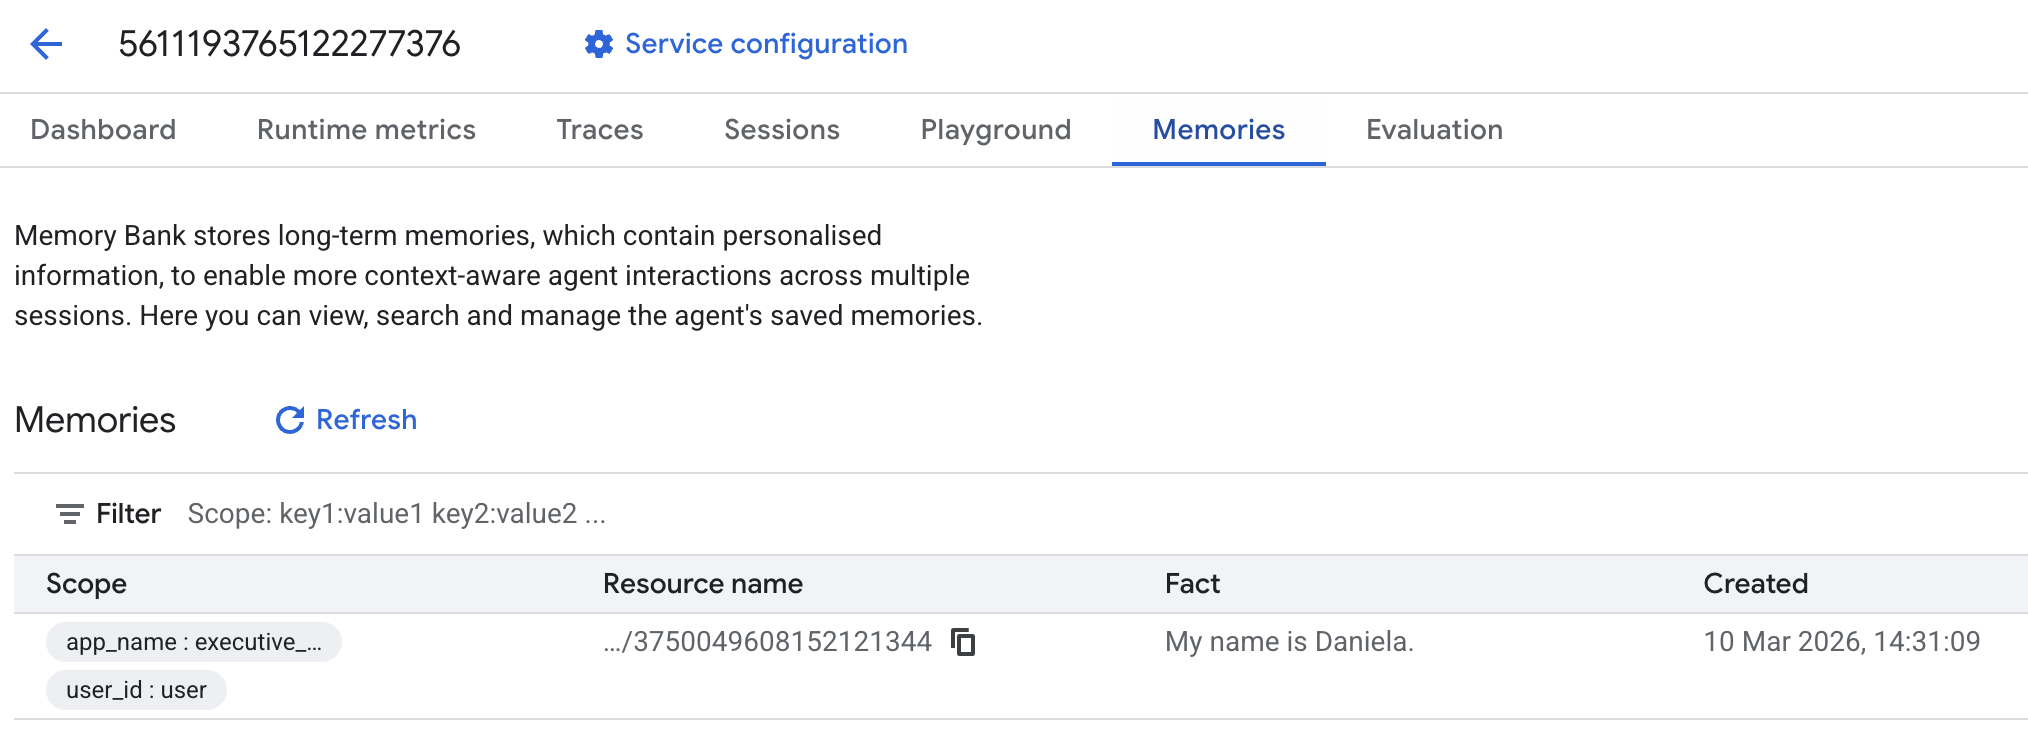
אמורים להופיע כמה זיכרונות חדשים.
6. הוספת יכולות מחקר באינטרנט
כדי לספק מידע איכותי, הסוכן שלנו צריך לבצע חקירות מעמיקות שחורגות משאילתת חיפוש אחת. ההאצלה של המחקר לסוכן משנה מיוחד מאפשרת לנו לשמור על היענות הדמות הראשית, בזמן שהחוקר מטפל באיסוף נתונים מורכב ברקע.
בשלב הזה, אנחנו מטמיעים LoopAgent כדי להשיג "עומק מחקר" – כך הסוכן יכול לבצע חיפוש באופן איטרטיבי, להעריך את הממצאים ולשפר את השאילתות שלו עד שהוא מקבל תמונה מלאה. אנחנו גם מקפידים על דיוק טכני בכך שאנחנו דורשים ציטוטים מוטמעים לכל הממצאים, כדי לוודא שכל טענה מגובה בקישור למקור.
יצירת מומחה מחקר (research.py)
בשלב הזה אנחנו מגדירים סוכן בסיסי שמצויד בכלי חיפוש Google ועוטפים אותו ב-LoopAgent. הפרמטר max_iterations פועל כמנגנון בקרה, ומבטיח שהסוכן יחזור על החיפוש עד 3 פעמים אם יישארו פערים בהבנה שלו.
research.py
from google.adk.agents.llm_agent import Agent
from google.adk.agents.loop_agent import LoopAgent
from google.adk.tools.google_search_tool import GoogleSearchTool
from google.adk.tools.tool_context import ToolContext

def exit_loop(tool_context: ToolContext):
    """Call this function ONLY when no further research is needed, signaling the iterative process should end."""
    print(f"  [Tool Call] exit_loop triggered by {tool_context.agent_name}")
    tool_context.actions.escalate = True
    # Return empty dict as tools should typically return JSON-serializable output
    return {}

# --- RESEARCH LOGIC ---
_research_worker = Agent(
    model='gemini-2.5-flash',
    name='research_worker',
    description='Worker agent that performs a single research step.',
    instruction='''
    Use google_search to find facts and synthesize them for the user.
    Critically evaluate your findings. If the data is incomplete or you need more context, prepare to search again in the next iteration.
    You must include the links you found as references in your response, formatting them like citations in a research paper (e.g., [1], [2]).
    Use the exit_loop tool to terminate the research early if no further research is needed.
    If you need to ask the user for clarifications, call the exit_loop function early to interrupt the research cycle.
    ''',
    tools=[GoogleSearchTool(bypass_multi_tools_limit=True), exit_loop],
)

# The LoopAgent iterates the worker up to 3 times for deeper research
research_agent = LoopAgent(
    name='research_specialist',
    description='Deep web research specialist.',
    sub_agents=[_research_worker],
    max_iterations=3,
)
עדכון הסוכן הראשי (agent.py)
מייבאים את research_agent ומוסיפים אותו ככלי לשרון:
agent.py
from google.adk.agents.llm_agent import Agent
from google.adk.tools.preload_memory_tool import PreloadMemoryTool
from google.adk.tools.load_memory_tool import load_memory_tool

# Import our new sub agent
from .research import research_agent

async def auto_save_session_to_memory_callback(callback_context):
    await callback_context._invocation_context.memory_service.add_session_to_memory(
        callback_context._invocation_context.session)

# Update root_agent with memory tools and callback
root_agent = Agent(
    model='gemini-2.5-flash',
    name='executive_assistant',
    description='Executive Assistant with persistent memory and research capabilities',
    instruction='''
    You are an elite AI partner with long-term memory.
    1. Use load_memory to recall facts.
    2. Delegate research tasks to the research_specialist.
    Always be direct, concise, and high-signal.
    ''',
    tools=[PreloadMemoryTool(), load_memory_tool],
    sub_agents=[research_agent],
    after_agent_callback=auto_save_session_to_memory_callback,
)
מפעילים שוב את adk web כדי לבדוק את סוכן המחקר.
uv run adk web --memory_service_uri="agentengine://$ENGINE_ID"
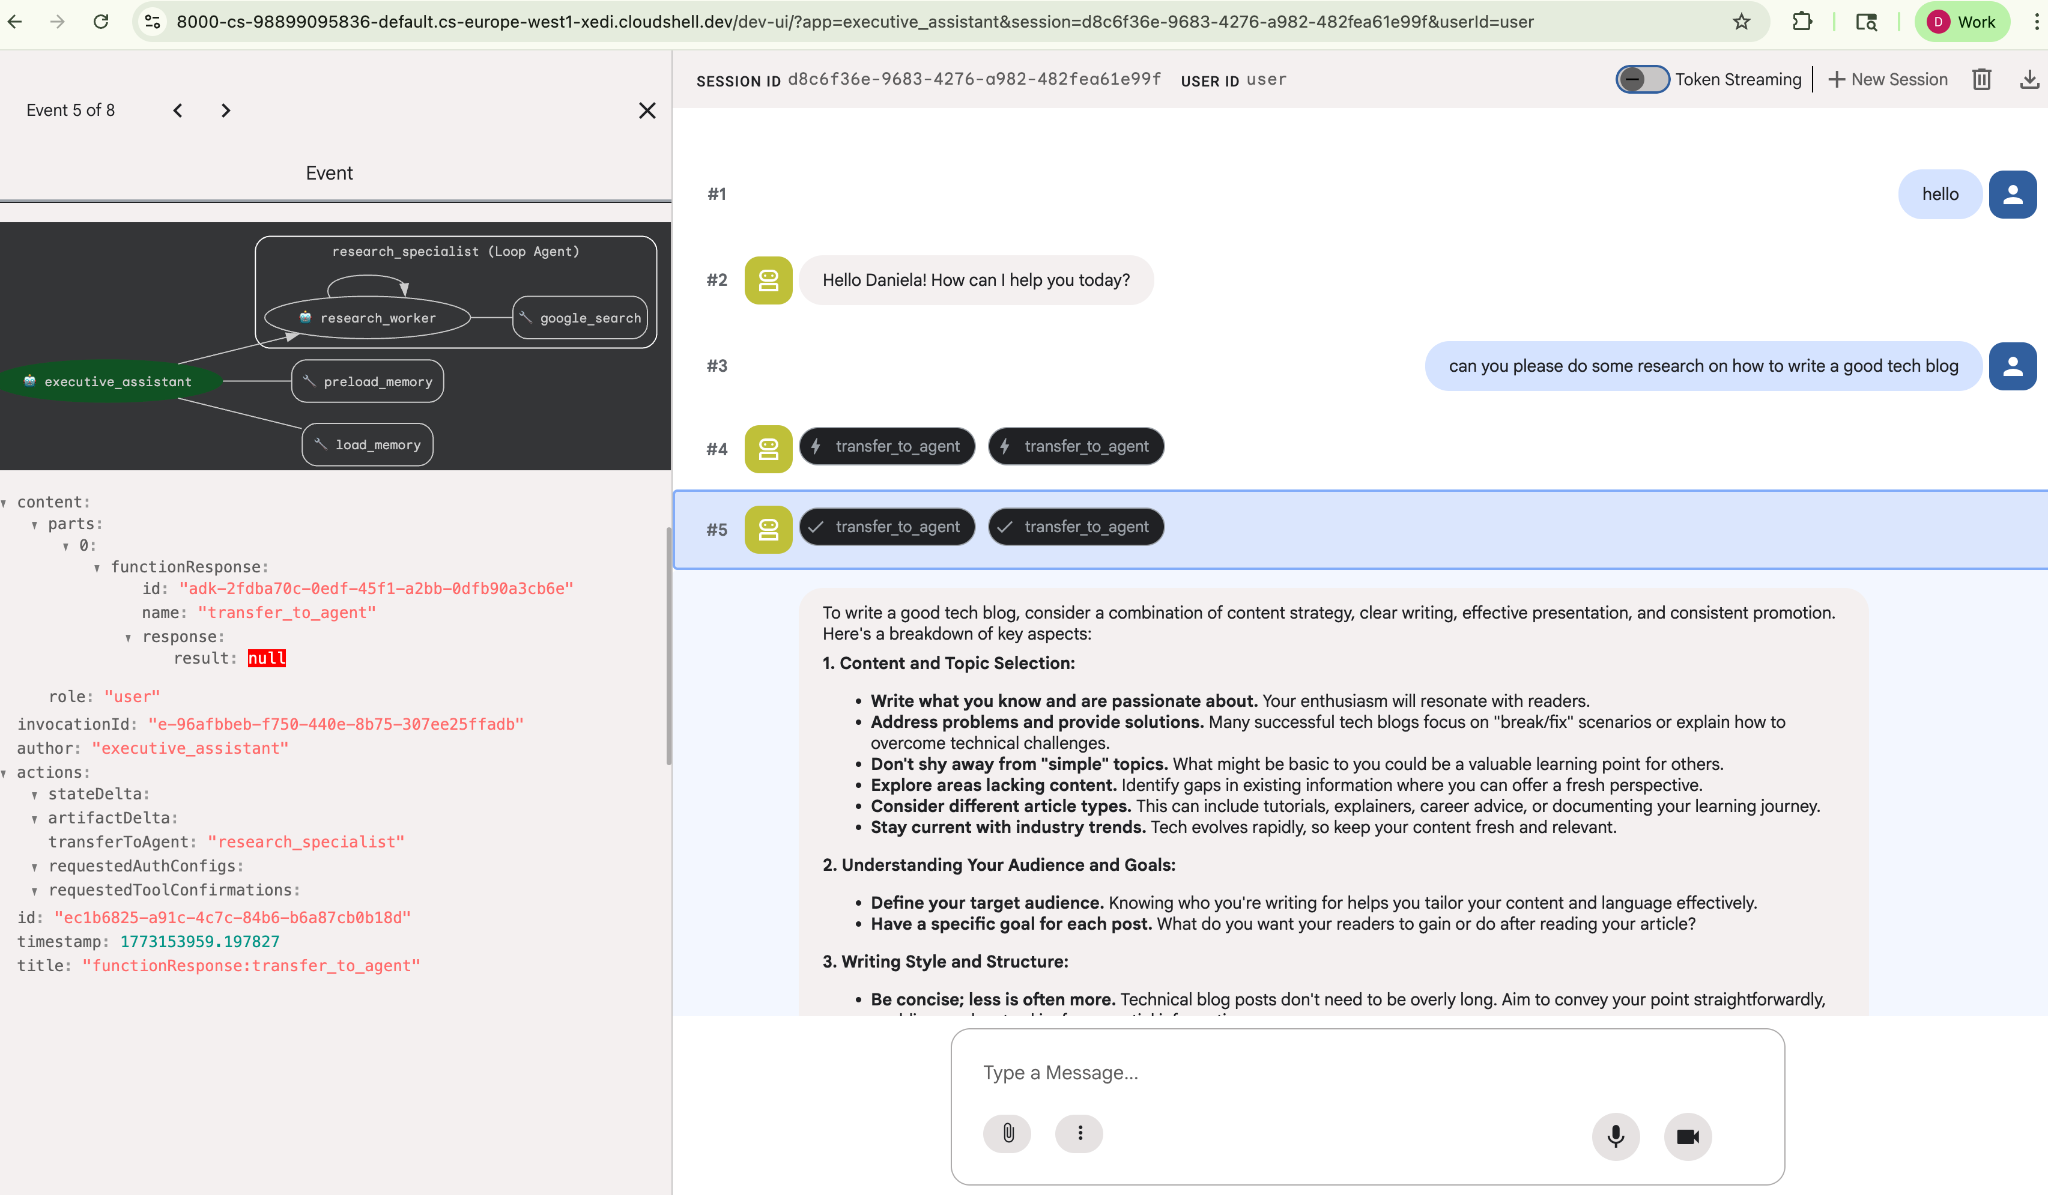
אפשר לתת לו משימת מחקר פשוטה, למשל, "איך כותבים בלוג טכנולוגי טוב?"
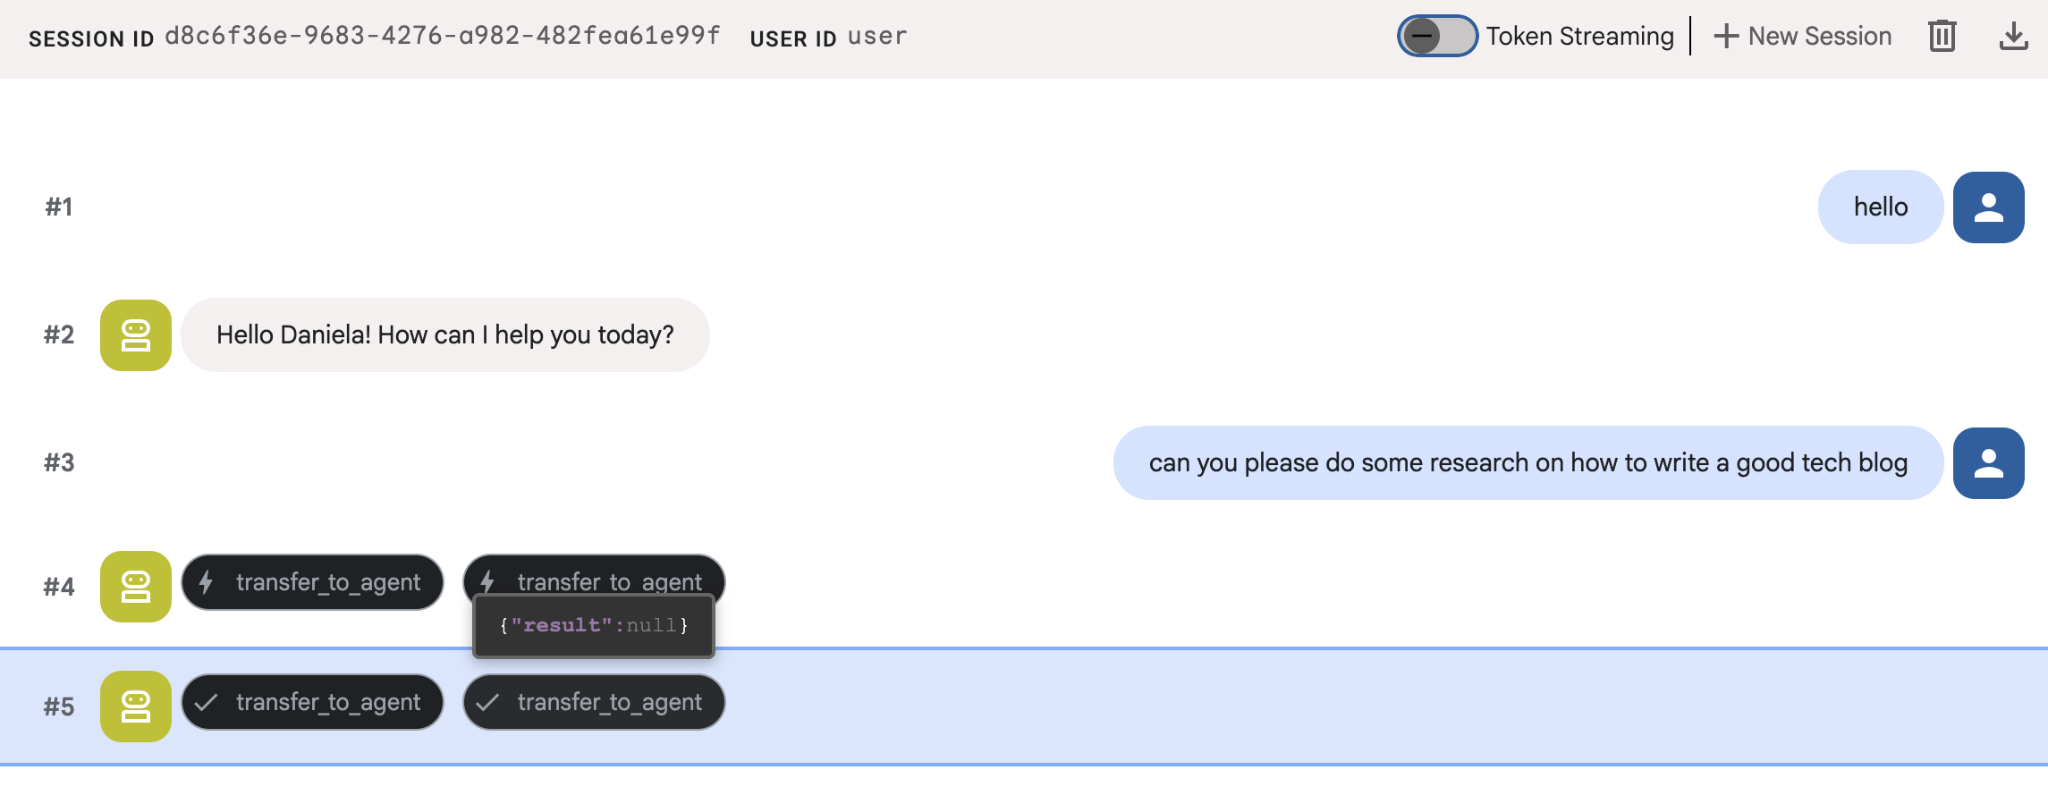
יכול להיות ששמת לב שהסוכן זכר את השם שלי למרות שזו שיחה חדשה. חשוב גם לשים לב לקריאה לכלי 'transfer_to_agent': זה הכלי שמעביר את המשימה לסוכן המחקר החדש שלנו.
עכשיו נמשיך לניהול משימות.
7. הוספת ניהול משימות באמצעות Cloud SQL
לסוכן יש זיכרון לטווח ארוך, אבל הוא לא מתאים לנתונים מובְנים ומפורטים כמו רשימת מטלות. למשימות, אנחנו משתמשים במסד נתונים רלציוני מסורתי. נשתמש ב-SQLAlchemy ובמסד נתונים של Google Cloud SQL (PostgreSQL). לפני שכותבים את הקוד, צריך להקצות את התשתית.
הקצאת התשתית
מריצים את הפקודות הבאות כדי ליצור את מסד הנתונים. הערה: יצירת המכונה נמשכת כ-5 עד 10 דקות. אפשר להמשיך לשלב הבא בזמן שהפעולה הזו מתבצעת ברקע.
# 1. Define instance variables
export INSTANCE_NAME="assistant-db"
export USER_EMAIL=$(gcloud config get-value account)

# 2. Create the Cloud SQL instance
gcloud sql instances create $INSTANCE_NAME \
    --database-version=POSTGRES_18 \
    --tier=db-f1-micro \
    --region=us-central1 \
    --edition=ENTERPRISE

# 3. Create the database for our tasks
gcloud sql databases create tasks --instance=$INSTANCE_NAME
הקצאת המכונה של מסד הנתונים תימשך כמה דקות. זה זמן טוב לשתות קפה או תה, או לעדכן את הקוד בזמן שמחכים לסיום הפעולה. רק אל תשכחו לחזור ולסיים את בקרת הגישה.
הגדרת בקרת הגישה
עכשיו צריך להגדיר את חשבון המשתמש כך שתהיה לו גישה למסד הנתונים. מריצים את הפקודות הבאות בטרמינל:
# change this to your favorite password
export DB_PASS="correct-horse-battery-staple"

# Create a regular database user
gcloud sql users create assistant_user \
    --instance=$INSTANCE_NAME \
    --password=$DB_PASS
עדכון הגדרות הסביבה
ה-ADK טוען את ההגדרות מקובץ .env בזמן הריצה. מעדכנים את סביבת הסוכן עם פרטי החיבור למסד הנתונים.
# Retrieve the unique connection name
export DB_CONN=$(gcloud sql instances describe $INSTANCE_NAME --format='value(connectionName)')

# Append configuration to your .env file
cat <<EOF >> executive_assistant/.env
DB_CONNECTION_NAME=$DB_CONN
DB_USER=assistant_user
DB_PASSWORD=$DB_PASS
DB_NAME=tasks
EOF
עכשיו נמשיך לביצוע השינויים בקוד.
יצירת מומחה לרשימת מטלות (todo.py)
בדומה לסוכן המחקר, ניצור את סוכן המשימות בקובץ משלו. יצירת todo.py:
todo.py
import os
import uuid
import sqlalchemy
from datetime import datetime
from typing import Optional, List

from sqlalchemy import (
    Column,
    String,
    DateTime,
    Enum,
    select,
    delete,
    update,
)
from sqlalchemy.orm import declarative_base, Session
from google.cloud.sql.connector import Connector
from google.adk.agents.llm_agent import Agent

# --- DATABASE LOGIC ---
Base = declarative_base()
connector = Connector()

def getconn():
    db_connection_name = os.environ.get("DB_CONNECTION_NAME")
    db_user = os.environ.get("DB_USER")
    db_password = os.environ.get("DB_PASSWORD")
    db_name = os.environ.get("DB_NAME", "tasks")

    return connector.connect(
        db_connection_name,
        "pg8000",
        user=db_user,
        password=db_password,
        db=db_name,
    )

engine = sqlalchemy.create_engine(
    "postgresql+pg8000://",
    creator=getconn,
)

class Todo(Base):
    __tablename__ = "todos"
    id = Column(String(36), primary_key=True, default=lambda: str(uuid.uuid4()))
    title = Column(String(255), nullable=False)
    priority = Column(
        Enum("high", "medium", "low", name="priority_levels"), nullable=False, default="medium"
    )
    due_date = Column(DateTime, nullable=True)
    status = Column(Enum("pending", "done", name="status_levels"), default="pending")
    created_at = Column(DateTime, default=datetime.utcnow)

def init_db():
    """Builds the table if it's missing."""
    Base.metadata.create_all(bind=engine)

def add_todo(
    title: str, priority: str = "medium", due_date: Optional[str] = None
) -> dict:
    """
    Adds a new task to the list.

    Args:
        title (str): The description of the task.
        priority (str): The urgency level. Must be one of: 'high', 'medium', 'low'.
        due_date (str, optional): The due date in ISO format (YYYY-MM-DD or YYYY-MM-DDTHH:MM:SS).

    Returns:
        dict: A dictionary containing the new task's ID and a status message.
    """
    init_db()
    with Session(engine) as session:
        due = datetime.fromisoformat(due_date) if due_date else None
        item = Todo(
            title=title,
            priority=priority.lower(),
            due_date=due,
        )
        session.add(item)
        session.commit()
        return {"id": item.id, "status": f"Task added ✅"}

def list_todos(status: str = "pending") -> list:
    """
    Lists tasks from the database, optionally filtering by status.

    Args:
        status (str, optional): The status to filter by. 'pending', 'done', or 'all'.
    """
    init_db()
    with Session(engine) as session:
        query = select(Todo)

        s_lower = status.lower()
        if s_lower != "all":
            query = query.where(Todo.status == s_lower)

        query = query.order_by(Todo.priority, Todo.created_at)

        results = session.execute(query).scalars().all()
        return [
            {
                "id": t.id,
                "task": t.title,
                "priority": t.priority,
                "status": t.status,
            }
            for t in results
        ]

def complete_todo(task_id: str) -> str:
    """Marks a specific task as 'done'."""
    init_db()
    with Session(engine) as session:
        session.execute(update(Todo).where(Todo.id == task_id).values(status="done"))
        session.commit()
        return f"Task {task_id} marked as done."

def delete_todo(task_id: str) -> str:
    """Permanently removes a task from the database."""
    init_db()
    with Session(engine) as session:
        session.execute(delete(Todo).where(Todo.id == task_id))
        session.commit()
        return f"Task {task_id} deleted."

# --- TODO SPECIALIST AGENT ---
todo_agent = Agent(
    model='gemini-2.5-flash',
    name='todo_specialist',
    description='A specialist agent that manages a structured SQL task list.',
    instruction='''
    You manage the user's task list using a PostgreSQL database.
    - Use add_todo when the user wants to remember something. If no priority is mentioned, mark it as 'medium'.
    - Use list_todos to show tasks.
    - Use complete_todo to mark a task as finished.
    - Use delete_todo to remove a task entirely.

    When marking a task as complete or deleting it, if the user doesn't provide the ID,
    use list_todos first to find the correct ID for the task they described.
    ''',
    tools=[add_todo, list_todos, complete_todo, delete_todo],
)
הקוד שלמעלה אחראי על שני דברים עיקריים: התחברות למסד הנתונים של Cloud SQL ומתן רשימה של כלים לכל הפעולות הנפוצות ברשימת המשימות, כולל הוספה, הסרה וסימון של משימות כהושלמו.
הלוגיקה הזו ספציפית מאוד לסוכן לניהול משימות, ולא בהכרח מעניינת אותנו מנקודת המבט של העוזרת האישית (סוכן הבסיס), ולכן נארוז את הסוכן הזה כ"AgentTool" במקום כסוכן משנה.
כדי להחליט אם להשתמש ב-AgentTool או בסוכן משנה, צריך לשקול אם הם צריכים לשתף הקשר או לא:
- להשתמש ב-AgentTool כשהנציג לא צריך לשתף הקשר עם נציג הבסיס
- שימוש בסוכן משנה כשרוצים שהסוכן ישתף הקשר עם סוכן הבסיס
במקרה של סוכן מחקר, שיתוף ההקשר יכול להיות שימושי, אבל בסוכן פשוט של רשימת מטלות אין הרבה תועלת בשיתוף ההקשר.
עכשיו נטמיע את AgentTool ב-agent.py.
עדכון הסוכן הראשי (agent.py)
עכשיו מייבאים את todo_agent לקובץ הראשי ומצרפים אותו ככלי:
agent.py
import os
from datetime import datetime
from google.adk.agents.llm_agent import Agent
from google.adk.tools.agent_tool import AgentTool
from google.adk.tools.preload_memory_tool import PreloadMemoryTool
from google.adk.tools.load_memory_tool import load_memory_tool

# Import our specialized sub-agents
from .research import research_agent
from .todo import todo_agent

# Callback for persistent memory storage
async def auto_save_session_to_memory_callback(callback_context):
    await callback_context._invocation_context.memory_service.add_session_to_memory(
        callback_context._invocation_context.session)

# --- ROOT AGENT DEFINITION ---
root_agent = Agent(
    model='gemini-2.5-flash',
    name='executive_assistant',
    description='A professional AI Executive Assistant with memory and specialized tools.',
    instruction='''
    You are an elite, high-signal AI Executive Assistant.
    Your goal is to help the user manage their knowledge, tasks, and research.

    ## Your Capabilities:
    1. Memory: Use load_memory to recall personal facts or past context about the user.
    2. Research: Delegate complex web-based investigations to the research_specialist.
    3. Tasks: Delegate all to-do list management (adding, listing, or completing tasks) to the todo_specialist.

    Always be direct and professional. If a task is successful, provide a brief confirmation.
    ''',
    tools=[
        PreloadMemoryTool(),
        load_memory_tool,
        AgentTool(todo_agent) # Exposes the Todo Specialist as a tool
    ],
    sub_agents=[research_agent], # Exposes the Research Specialist for direct handover
    after_agent_callback=auto_save_session_to_memory_callback,
)
מריצים שוב את adk web כדי לבדוק את התכונה החדשה:
uv run adk web --memory_service_uri="agentengine://$ENGINE_ID"
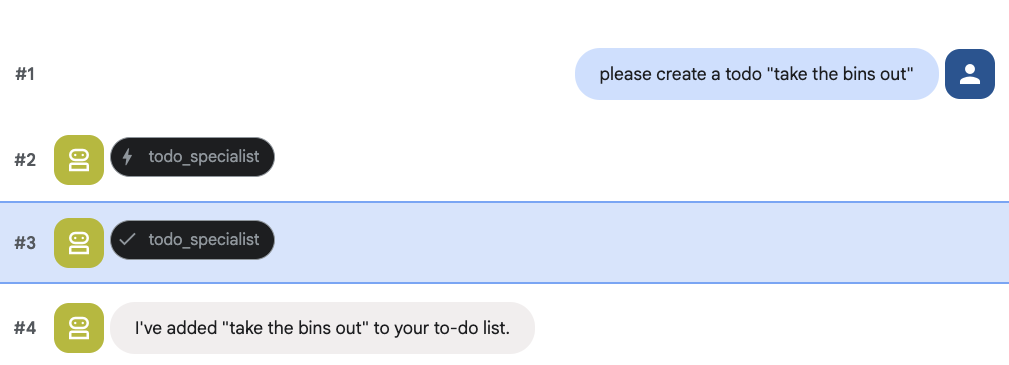
אפשר גם לנסות ליצור משימה:
8. הוספת ניהול יומנים
בסוף, נשלב את הסוכן עם יומן Google כדי שהוא יוכל לנהל פגישות. לצורך ה-codelab הזה, במקום לתת לסוכן גישה ליומן האישי שלכם, מה שעלול להיות מסוכן אם לא עושים את זה בצורה הנכונה, אנחנו ניצור יומן עצמאי שהסוכן יוכל לנהל.
קודם כל, ניצור חשבון שירות ייעודי שישמש כזהות של הסוכן. לאחר מכן, ניצור את היומן של הסוכן באופן פרוגרמטי באמצעות חשבון השירות.
הקצאת הרשאות לחשבון השירות
פותחים את הטרמינל ומריצים את הפקודות הבאות כדי ליצור את הזהות ולהעניק לחשבון לשימוש אישי הרשאה להתחזות לה:
export SA_NAME="ea-agent"
export SA_EMAIL="${SA_NAME}@${PROJECT_ID}.iam.gserviceaccount.com"

# Create the service account
gcloud iam service-accounts create $SA_NAME \
    --display-name="Executive Assistant Agent"

# Allow your local user to impersonate it
gcloud iam service-accounts add-iam-policy-binding $SA_EMAIL \
    --member="user:$(gcloud config get-value account)" \
    --role="roles/iam.serviceAccountTokenCreator"

# Save it to the agent's environment
echo "SERVICE_ACCOUNT_EMAIL=$SA_EMAIL" >> executive_assistant/.env
יצירת היומן באופן פרוגרמטי
בוא נכתוב סקריפט שיורה לחשבון השירות ליצור את היומן. יוצרים קובץ חדש בשם setup_calendar.py בשורש של הפרויקט (לצד setup_memory.py):
setup_calendar.py
import os
import google.auth
from googleapiclient.discovery import build
from google.auth.transport.requests import Request
from google.auth import impersonated_credentials
from dotenv import load_dotenv

load_dotenv('executive_assistant/.env')
SA_EMAIL = os.environ.get("SERVICE_ACCOUNT_EMAIL")

def setup_sa_calendar():
    print(f"Authenticating to impersonate {SA_EMAIL}...")

    # 1. Base credentials
    creds, _ = google.auth.default(scopes=["https://www.googleapis.com/auth/cloud-platform"])
    creds.refresh(Request())

    # 2. Impersonate the Service Account
    impersonated = impersonated_credentials.Credentials(
        source_credentials=creds,
        target_principal=SA_EMAIL,
        target_scopes=["https://www.googleapis.com/auth/calendar"],
    )
    service = build("calendar", "v3", credentials=impersonated)

    # 3. Create the calendar
    print("Creating independent Service Account calendar...")
    calendar = service.calendars().insert(body={
        "summary": "AI Assistant (SA Owned)",
        "description": "An independent calendar managed purely by the AI."
    }).execute()

    calendar_id = calendar['id']

    # 4. Save the ID
    with open("executive_assistant/.env", "a") as f:
        f.write(f"\nCALENDAR_ID={calendar_id}\n")
    print(f"Setup complete! CALENDAR_ID {calendar_id} added to .env")

if __name__ == "__main__":
    setup_sa_calendar()
מריצים את הסקריפט מהטרמינל:
uv run python setup_calendar.py
יצירת מומחה ליומן (calendar.py)
עכשיו נתמקד במומחה ליומן. נצייד את הסוכן הזה בחבילה מלאה של כלים ליומן: רישום, יצירה, עדכון, מחיקה ואפילו תכונה של 'הוספה מהירה' שמבינה שפה טבעית.
מעתיקים את הקוד שבהמשך אל calendar.py.
calendar.py
import os
from datetime import datetime, timedelta, timezone

import google.auth
from googleapiclient.discovery import build
from googleapiclient.errors import HttpError
from google.adk.agents.llm_agent import Agent

def _get_calendar_service():
    """Build the Google Calendar API service using Service Account Impersonation."""
    from google.auth.transport.requests import Request
    from google.auth import impersonated_credentials

    target_principal = os.environ.get("SERVICE_ACCOUNT_EMAIL")
    if not target_principal:
        raise ValueError("SERVICE_ACCOUNT_EMAIL environment variable is missing.")

    base_scopes = ["https://www.googleapis.com/auth/cloud-platform"]
    creds, _ = google.auth.default(scopes=base_scopes)
    creds.refresh(Request())

    target_scopes = ["https://www.googleapis.com/auth/calendar"]
    impersonated = impersonated_credentials.Credentials(
        source_credentials=creds,
        target_principal=target_principal,
        target_scopes=target_scopes,
    )

    return build("calendar", "v3", credentials=impersonated)

def _format_event(event: dict) -> dict:
    """Format a raw Calendar API event into a clean dict for the LLM."""
    start = event.get("start", {})
    end = event.get("end", {})
    return {
        "id": event.get("id"),
        "title": event.get("summary", "(No title)"),
        "start": start.get("dateTime", start.get("date")),
        "end": end.get("dateTime", end.get("date")),
        "location": event.get("location", ""),
        "description": event.get("description", ""),
        "attendees": [
            {"email": a["email"], "status": a.get("responseStatus", "unknown")}
            for a in event.get("attendees", [])
        ],
        "link": event.get("htmlLink", ""),
        "conference_link": (
            event.get("conferenceData", {}).get("entryPoints", [{}])[0].get("uri", "")
            if event.get("conferenceData")
            else ""
        ),
        "status": event.get("status", ""),
    }

def list_events(days_ahead: int = 7) -> dict:
    """List upcoming calendar events."""
    calendar_id = os.environ.get("CALENDAR_ID")
    try:
        service = _get_calendar_service()
        now = datetime.now(timezone.utc).isoformat()
        end = (datetime.now(timezone.utc) + timedelta(days=days_ahead)).isoformat()

        events_result = service.events().list(
            calendarId=calendar_id, timeMin=now, timeMax=end,
            maxResults=50, singleEvents=True, orderBy="startTime"
        ).execute()

        events = events_result.get("items", [])
        if not events:
            return {"status": "success", "count": 0, "events": []}

        return {"status": "success", "count": len(events), "events": [_format_event(e) for e in events]}
    except HttpError as e:
        return {"status": "error", "message": f"Calendar API error: {e}"}

def create_event(title: str, start_time: str, end_time: str, description: str = "", location: str = "", attendees: str = "", add_google_meet: bool = False) -> dict:
    """Create a new calendar event."""
    calendar_id = os.environ.get("CALENDAR_ID")
    try:
        service = _get_calendar_service()
        event_body = {
            "summary": title,
            "start": {"dateTime": start_time},
            "end": {"dateTime": end_time},
        }
        if description: event_body["description"] = description
        if location: event_body["location"] = location
        if attendees:
            email_list = [e.strip() for e in attendees.split(",") if e.strip()]
            event_body["attendees"] = [{"email": e} for e in email_list]

        conference_version = 0
        if add_google_meet:
            event_body["conferenceData"] = {
                "createRequest": {"requestId": f"event-{datetime.now().strftime('%Y%m%d%H%M%S')}", "conferenceSolutionKey": {"type": "hangoutsMeet"}}
            }
            conference_version = 1

        event = service.events().insert(calendarId=calendar_id, body=event_body, conferenceDataVersion=conference_version).execute()
        return {"status": "success", "message": f"Event created ✅", "event": _format_event(event)}
    except HttpError as e:
        return {"status": "error", "message": f"Calendar API error: {e}"}

def update_event(event_id: str, title: str = "", start_time: str = "", end_time: str = "", description: str = "") -> dict:
    """Update an existing calendar event."""
    calendar_id = os.environ.get("CALENDAR_ID")
    try:
        service = _get_calendar_service()
        patch_body = {}
        if title: patch_body["summary"] = title
        if start_time: patch_body["start"] = {"dateTime": start_time}
        if end_time: patch_body["end"] = {"dateTime": end_time}
        if description: patch_body["description"] = description
        if not patch_body: return {"status": "error", "message": "No fields to update."}

        event = service.events().patch(calendarId=calendar_id, eventId=event_id, body=patch_body).execute()
        return {"status": "success", "message": "Event updated ✅", "event": _format_event(event)}
    except HttpError as e:
        return {"status": "error", "message": f"Calendar API error: {e}"}

def delete_event(event_id: str) -> dict:
    """Delete a calendar event by its ID."""
    calendar_id = os.environ.get("CALENDAR_ID")
    try:
        service = _get_calendar_service()
        service.events().delete(calendarId=calendar_id, eventId=event_id).execute()
        return {"status": "success", "message": f"Event '{event_id}' deleted ✅"}
    except HttpError as e:
        return {"status": "error", "message": f"Calendar API error: {e}"}

def quick_add_event(text: str) -> dict:
    """Create an event using natural language (e.g. 'Lunch with Sarah next Monday noon')."""
    calendar_id = os.environ.get("CALENDAR_ID")
    try:
        service = _get_calendar_service()
        event = service.events().quickAdd(calendarId=calendar_id, text=text).execute()
        return {"status": "success", "message": "Event created from text ✅", "event": _format_event(event)}
    except HttpError as e:
        return {"status": "error", "message": f"Calendar API error: {e}"}

calendar_agent = Agent(
    model='gemini-2.5-flash',
    name='calendar_specialist',
    description='Manages the user schedule and calendar events.',
    instruction='''
    You manage the user's Google Calendar.
    - Use list_events to check the schedule.
    - Use quick_add_event for simple, conversational scheduling requests (e.g., "Lunch tomorrow at noon").
    - Use create_event for complex meetings that require attendees, specific durations, or Google Meet links.
    - Use update_event to change details of an existing event.
    - Use delete_event to cancel or remove an event.

    CRITICAL: For update_event and delete_event, you must provide the exact `event_id`.
    If the user does not provide the ID, you MUST call list_events first to find the correct `event_id` before attempting the update or deletion.

    Always use the current date/time context provided by the root agent to resolve relative dates like "tomorrow".
    ''',
    tools=[list_events, create_event, update_event, delete_event, quick_add_event],
)
השלמת ההגדרה של סוכן הבסיס (agent.py)
מעדכנים את הקובץ agent.py באמצעות הקוד הבא:
agent.py
import os
from datetime import datetime
from zoneinfo import ZoneInfo
from google.adk.agents.llm_agent import Agent
from google.adk.tools.agent_tool import AgentTool
from google.adk.tools.preload_memory_tool import PreloadMemoryTool
from google.adk.tools.load_memory_tool import load_memory_tool

# Import all our specialized sub-agents
from .research import research_agent
from .todo import todo_agent
from .calendar import calendar_agent
import tzlocal

# Automatically detect the local system timezone
TIMEZONE = tzlocal.get_localzone_name()

# Callback for persistent memory storage
async def auto_save_session_to_memory_callback(callback_context):
    await callback_context._invocation_context.memory_service.add_session_to_memory(
        callback_context._invocation_context.session)

# Callback to inject the current time into the prompt
async def setup_agent_context(callback_context, **kwargs):
    now = datetime.now(ZoneInfo(TIMEZONE))
    callback_context.state["current_time"] = now.strftime("%A, %Y-%m-%d %I:%M %p")
    callback_context.state["timezone"] = TIMEZONE

# --- ROOT AGENT DEFINITION ---
root_agent = Agent(
    model='gemini-2.5-flash',
    name='executive_assistant',
    description='A professional AI Executive Assistant with memory and specialized tools.',
    instruction='''
    You are an elite, high-signal AI Executive Assistant.
    Your goal is to help the user manage their knowledge, tasks, research, and schedule.

    ## Your Capabilities:
    1. Memory: Use load_memory to recall personal facts.
    2. Research: Delegate complex web investigations to the research_specialist.
    3. Tasks: Delegate all to-do list management to the todo_specialist.
    4. Scheduling: Delegate all calendar queries to the calendar_specialist.

    ## 🕒 Current State
    - Time: {current_time?}
    - Timezone: {timezone?}

    Always be direct and professional.
    ''',
    tools=[
        PreloadMemoryTool(),
        load_memory_tool,
        AgentTool(todo_agent),
        AgentTool(calendar_agent)
    ],
    sub_agents=[research_agent],
    before_agent_callback=[setup_agent_context],
    after_agent_callback=[auto_save_session_to_memory_callback],
)
חשוב לדעת: בנוסף לכלי היומן, הוספנו גם פונקציה חדשה של לפני החזרת שיחה מסוכן: setup_agent_context. הפונקציה הזו מאפשרת לסוכן לדעת מה התאריך, השעה ואזור הזמן הנוכחיים, כדי שהוא יוכל להשתמש ביומן בצורה יעילה יותר. היא פועלת על ידי הגדרת משתני מצב של סשן, סוג אחר של זיכרון סוכן שנועד להתמדה לטווח קצר.
מריצים את adk web בפעם האחרונה כדי לבדוק את הסוכן המלא.
uv run adk web --memory_service_uri="agentengine://$ENGINE_ID"
אפשר לבדוק את מצב הסשן בכרטיסיית המצב בממשק המשתמש למפתחים:
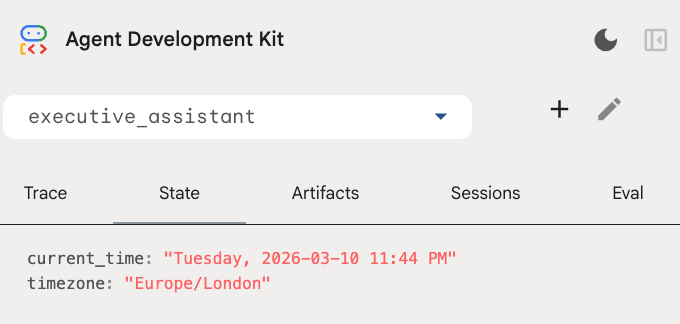
עכשיו יש לכם סוכן שיכול לעקוב אחרי אירועים ביומן, רשימות מטלות, לבצע מחקר ויש לו זיכרון לטווח ארוך.
ניקוי אחרי השיעור
9. סיכום
מעולה! הצלחתם לתכנן עוזר אישי מבוסס-AI עם מגוון פונקציות, באמצעות 5 שלבים של התפתחות.
מה כיסינו
- הקצאת תשתית לסוכני AI.
- הטמעה של זיכרון מתמיד וסוכני משנה ייעודיים באמצעות רכיבים מובנים ב-ADK.
- שילוב של מסדי נתונים חיצוניים וממשקי API של פרודוקטיביות.
השלבים הבאים
אתם יכולים להמשיך את תהליך הלמידה ולעיין ב-Codelabs נוספים בפלטפורמה הזו, או לשפר את העוזר הניהולי בעצמכם.
אם אתם רוצים לקבל רעיונות לשיפורים, אתם יכולים לנסות:
- כדאי להטמיע דחיסה של אירועים כדי לשפר את הביצועים בשיחות ארוכות.
- הוספת שירות ארטיפקטים כדי לאפשר לסוכן לרשום הערות בשבילכם ולשמור אותן כקבצים
- פורסים את הסוכן כשירות קצה עורפי באמצעות Google Cloud Run.
אחרי שתסיימו את הבדיקה, חשוב לנקות את הסביבה כדי למנוע חיובים לא צפויים בחשבון לחיוב.
שיהיה בהצלחה!