
1. はじめに
この Codelab では、Google Agent Development Kit(ADK)を使用して高度な AI エージェントを構築する方法について学習します。基本的な会話エージェントから始めて、専門的な機能を段階的に追加していくという、自然な進化の道筋をたどります。
構築するエージェントはエグゼクティブ アシスタントです。カレンダーの管理、タスクのリマインダー、調査、メモの作成などの日常業務をサポートするように設計されています。これらはすべて、ADK、Gemini、Vertex AI を使用してゼロから構築されます。
このラボの最後には、完全に機能するエージェントと、ニーズに合わせて拡張するために必要な知識が身に付きます。
前提条件
- Python プログラミング言語の基本的な知識
- Google Cloud コンソールを使用してクラウドリソースを管理するための基本的な知識
学習内容
- AI エージェント用の Google Cloud インフラストラクチャのプロビジョニング。
- Vertex AI Memory Bank を利用した永続的な長期記憶の実装。
- 専門的なサブエージェントの階層の構築。
- 外部データベースと Google Workspace エコシステムの統合。
必要なもの
このワークショップは、必要なすべての依存関係(gcloud CLI、コードエディタ、Go、Gemini CLI)がプリインストール されている Google Cloud Shell 内ですべて行うことができます。
または、ご自身のマシンで作業する場合は、次のものが必要です。
- Python(バージョン 3.12 以降)
- コードエディタまたは IDE(VS Code、
vimなど)。 - Python と
gcloudコマンドを実行するターミナル。 - 推奨: Gemini CLI や Antigravity などのコーディング エージェント
主要なテクノロジー
使用するテクノロジーの詳細については、以下をご覧ください。
2. 環境設定
次のいずれかのオプションを選択します。この Codelab を自分のマシンで実行する場合は、セルフペース型の環境設定 を選択します。この Codelab をクラウドですべて実行する場合は、Cloud Shell を起動する を選択します。
セルフペース型の環境設定
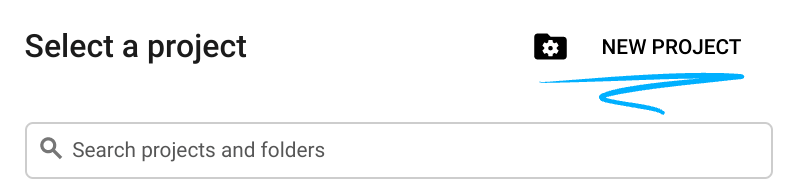
- Google Cloud Console にログインして、プロジェクトを新規作成するか、既存のプロジェクトを再利用します。Gmail アカウントも Google Workspace アカウントもまだお持ちでない場合は、アカウントを作成してください。

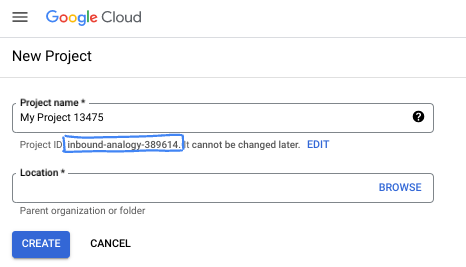
- プロジェクト名 は、このプロジェクトの参加者に表示される名称です。Google API では使用されない文字列です。いつでも更新できます。
- プロジェクト ID は、すべての Google Cloud プロジェクトにおいて一意でなければならず、不変です(設定後は変更できません)。Cloud コンソールでは一意の文字列が自動生成されます。通常は、この内容を意識する必要はありません。ほとんどの Codelab では、プロジェクト ID(通常は
PROJECT_IDと識別されます)を参照する必要があります。生成された ID が好みではない場合は、ランダムに別の ID を生成できます。または、ご自身で試して、利用可能かどうかを確認することもできます。このステップ以降は変更できず、プロジェクトを通して同じ ID になります。 - なお、3 つ目の値として、一部の API が使用するプロジェクト番号があります。これら 3 つの値について詳しくは、こちらのドキュメントをご覧ください。
- 次に、Cloud のリソースや API を使用するために、Cloud コンソールで課金を有効にする必要があります。この Codelab の操作をすべて行って、費用が生じたとしても、少額です。このチュートリアルの終了後に請求が発生しないようにリソースをシャットダウンするには、作成したリソースを削除するか、プロジェクトを削除します。Google Cloud の新規ユーザーは、300 米ドル分の無料トライアル プログラムをご利用いただけます。
Cloud Shell を起動する
Google Cloud はノートパソコンからリモートで操作できますが、この Codelab では、Google Cloud Shell(Cloud 上で動作するコマンドライン環境)を使用します。
Google Cloud コンソール で、右上のツールバーにある Cloud Shell アイコンをクリックします。

プロビジョニングと環境への接続にはそれほど時間はかかりません。完了すると、次のように表示されます。

この仮想マシンには、必要な開発ツールがすべて用意されています。永続的なホーム ディレクトリが 5 GB 用意されており、Google Cloud で稼働します。そのため、ネットワークのパフォーマンスと認証機能が大幅に向上しています。この Codelab での作業はすべて、ブラウザ内から実行できます。インストールは不要です。
3. プロジェクトのセットアップ
コードを記述する前に、Google Cloud で必要なインフラストラクチャと権限をプロビジョニングする必要があります。
環境変数の設定
ターミナルを開き、次の環境変数を設定します。
export PROJECT_ID=`gcloud config get project`
export LOCATION=us-central1
必要な API の有効化
エージェントは、複数の Google Cloud サービスにアクセスする必要があります。そのためには、次のコマンドを実行します。
gcloud services enable \
    aiplatform.googleapis.com \
    calendar-json.googleapis.com \
    sqladmin.googleapis.com
アプリケーションのデフォルト認証情報による認証
環境から Google Cloud サービスと通信するには、アプリケーションのデフォルト認証情報(ADC)で認証する必要があります。
次のコマンドを実行して、アプリケーションのデフォルト認証情報が有効で最新であることを確認します。
gcloud auth application-default login
4. 基本エージェントを作成する
次に、プロジェクトのソースコードを保存するディレクトリを初期化する必要があります。
# setup project directory
mkdir -p adk_ea_codelab && cd adk_ea_codelab
# prepare virtual environment
uv init
# install dependencies
uv add google-adk google-api-python-client tzlocal python-dotenv
uv add cloud-sql-python-connector[pg8000] sqlalchemy
まず、エージェントの ID と基本的な会話機能を確立します。ADK では、Agent クラスでエージェントのペルソナとその指示を定義します。
エージェントの名前を検討することをおすすめします。エージェントに「個性」を与えるために、Aida や Sharon のような適切な名前を付けることをおすすめしますが、「executive_assistant」、「travel_agent」、「code_executor」のように、エージェントの機能で名前を付けることもできます。
adk create コマンドを実行して、ボイラープレート エージェントをスピンアップします。
# replace with your desired agent name
uv run adk create executive_assistant
モデルとして gemini-2.5-flash を選択し、バックエンドとして Vertex AI を選択してください。提案されたプロジェクト ID がこのラボ用に作成した ID であることを確認し、Enter キーを押して確定します。Google Cloud
リージョンには、デフォルト(us-central1)を使用できます。ターミナルは次のようになります。
daniela_petruzalek@cloudshell:~/adk_ea_codelab (your-project-id)$ uv run adk create executive_assistant
Choose a model for the root agent:
1. gemini-2.5-flash
2. Other models (fill later)
Choose model (1, 2): 1
1. Google AI
2. Vertex AI
Choose a backend (1, 2): 2

You need an existing Google Cloud account and project, check out this link for details:
https://google.github.io/adk-docs/get-started/quickstart/#gemini---google-cloud-vertex-ai

Enter Google Cloud project ID [your-project-id]:
Enter Google Cloud region [us-central1]:

Agent created in /home/daniela_petruzalek/adk_ea_codelab/executive_assistant:
- .env
- __init__.py
- agent.py

daniela_petruzalek@cloudshell:~/adk_ea_codelab (your-project-id)$
完了すると、前のコマンドでエージェント名(executive_assistant など)のフォルダが作成され、その中にいくつかのファイルが作成されます。これには、基本的なエージェント定義を含む
agent.py ファイルが含まれます。
from google.adk.agents.llm_agent import Agent

root_agent = Agent(
    model='gemini-2.5-flash',
    name='root_agent',
    description='A helpful assistant for user questions.',
    instruction='Answer user questions to the best of your knowledge',
)
このエージェントとやり取りするには、コマンドラインで uv run adk web を実行し、ブラウザで開発 UI を開きます。次のような出力が表示されます。
$ uv run adk web
...
INFO:     Started server process [1244]
INFO:     Waiting for application startup.

+-----------------------------------------------------------------------------+
| ADK Web Server started                                                      |
|                                                                             |
| For local testing, access at http://127.0.0.1:8000.                         |
+-----------------------------------------------------------------------------+

INFO:     Application startup complete.
INFO:     Uvicorn running on http://127.0.0.1:8000 (Press CTRL+C to quit)
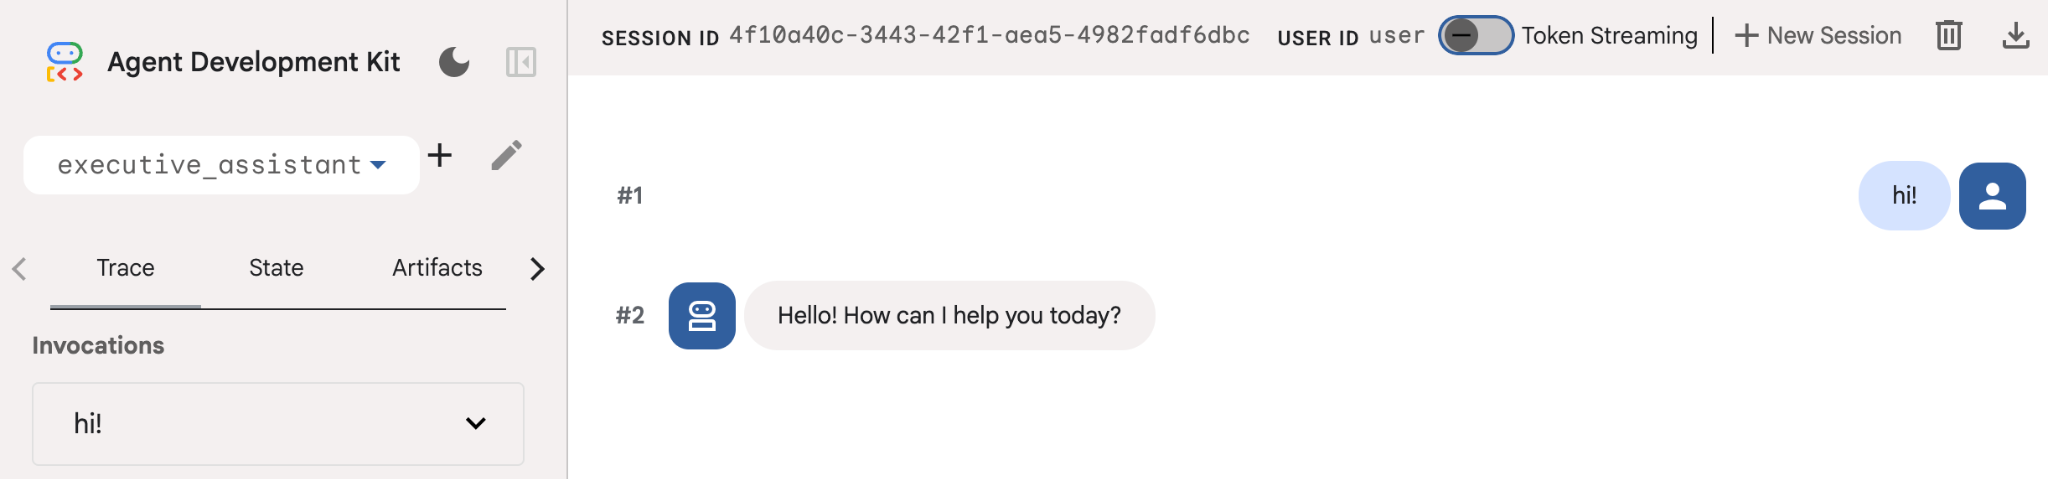
このエージェントは非常に基本的なものですが、エージェントの編集を開始する前に、セットアップが正しく機能していることを確認するために、少なくとも一度は実行することをおすすめします。次のスクリーンショットは、開発 UI を使用した簡単なやり取りを示しています。
次に、エグゼクティブ アシスタントのペルソナを使用してエージェント定義を変更します。次のコードをコピーして、agent.py
の内容を置き換えます。エージェントの名前とペルソナを好みに合わせて調整します。
from google.adk.agents.llm_agent import Agent

root_agent = Agent(
    model='gemini-2.5-flash',
    name='executive_assistant',
    description='A professional AI Executive Assistant',
    instruction='''
    You are an elite, warm, and highly efficient AI partner.
    Your primary goal is to help the user manage their tasks, schedule, and research.
    Always be direct, concise, and high-signal.
    ''',
)
name プロパティはエージェントの内部名を定義します。また、手順では、エンドユーザーとのやり取りのために、ペルソナの一部としてわかりやすい名前を付けることもできます。内部名は主に、transfer_to_agent
ツールを使用するマルチエージェント システムでのオブザーバビリティとハンドオーバーに使用されます。このツールを自分で操作する必要はありません。1
つ以上のサブエージェントを宣言すると、ADK によって自動的に登録されます。
作成したエージェントを実行するには、adk web を使用します。
uv run adk web
ブラウザで ADK UI を開き、新しいアシスタントに挨拶しましょう。
5. Vertex AI Memory Bank を使用して永続メモリを追加する
真のアシスタントは、シームレスでパーソナライズされたエクスペリエンスを提供するために、好みや過去のやり取りを記憶する必要があります。このステップでは、ユーザーの会話に基づいて長期記憶を動的に生成する Vertex AI 機能である Vertex AI Agent Engine メモリバンクを統合します。
メモリバンクを使用すると、エージェントは複数のセッションでアクセスできるパーソナライズされた情報を作成し、セッション間の継続性を確立できます。バックグラウンドでは、セッション内のメッセージの時系列順序を管理し、類似性検索による取得を使用して、現在のコンテキストに最も関連性の高い記憶をエージェントに提供できます。
メモリサービスを初期化する
ADK は Vertex AI を使用して長期記憶を保存および取得します。プロジェクトで「Memory Engine」を初期化する必要があります。これは、メモリバンクとして機能するように構成された Reasoning Engine インスタンスです。
次のスクリプトを setup_memory.py として作成します。
setup_memory.py
import vertexai
import os

PROJECT_ID=os.getenv("PROJECT_ID")
LOCATION=os.getenv("LOCATION")

client = vertexai.Client(project=PROJECT_ID, location=LOCATION)

# Create Reasoning Engine for Memory Bank
agent_engine = client.agent_engines.create()

# You will need this resource name to give it to ADK
print(agent_engine.api_resource.name)
setup_memory.py を実行して、Memory Bank の推論エンジンをプロビジョニングします。
uv run python setup_memory.py
出力は次のようになります。
$ uv run python setup.py
projects/1234567890/locations/us-central1/reasoningEngines/1234567890
エンジン リソース名を環境変数に保存します。
export ENGINE_ID="<insert the resource name above>"
次に、永続メモリを使用するようにコードを更新する必要があります。agent.py のコンテンツを次のように置き換えます。
agent.py
from google.adk.agents.llm_agent import Agent
from google.adk.tools.preload_memory_tool import PreloadMemoryTool
from google.adk.tools.load_memory_tool import load_memory_tool

async def auto_save_session_to_memory_callback(callback_context):
    await callback_context._invocation_context.memory_service.add_session_to_memory(
        callback_context._invocation_context.session)

# Update root_agent with memory tools and callback
root_agent = Agent(
    model='gemini-2.5-flash',
    name='executive_assistant',
    description='Executive Assistant with Persistent Memory',
    instruction='''
    You are an elite AI partner with long-term memory.
    Use load_memory to find context about the user when needed.
    Always be direct, concise, and high-signal.
    ''',
    tools=[PreloadMemoryTool(), load_memory_tool],
    after_agent_callback=auto_save_session_to_memory_callback,
)
PreloadMemoryTool は、過去の会話から関連するコンテキストを各リクエストに自動的に挿入します(類似性検索による取得を使用)。一方、load_memory_tool を使用すると、モデルは必要に応じてメモリバンクに事実を明示的にクエリできます。この組み合わせにより、エージェントは永続的な深いコンテキストを取得できます。
メモリサポートを使用してエージェントを起動するには、adk web の実行時に memory_service_uri を渡す必要があります。
uv run adk web --memory_service_uri="agentengine://$ENGINE_ID"
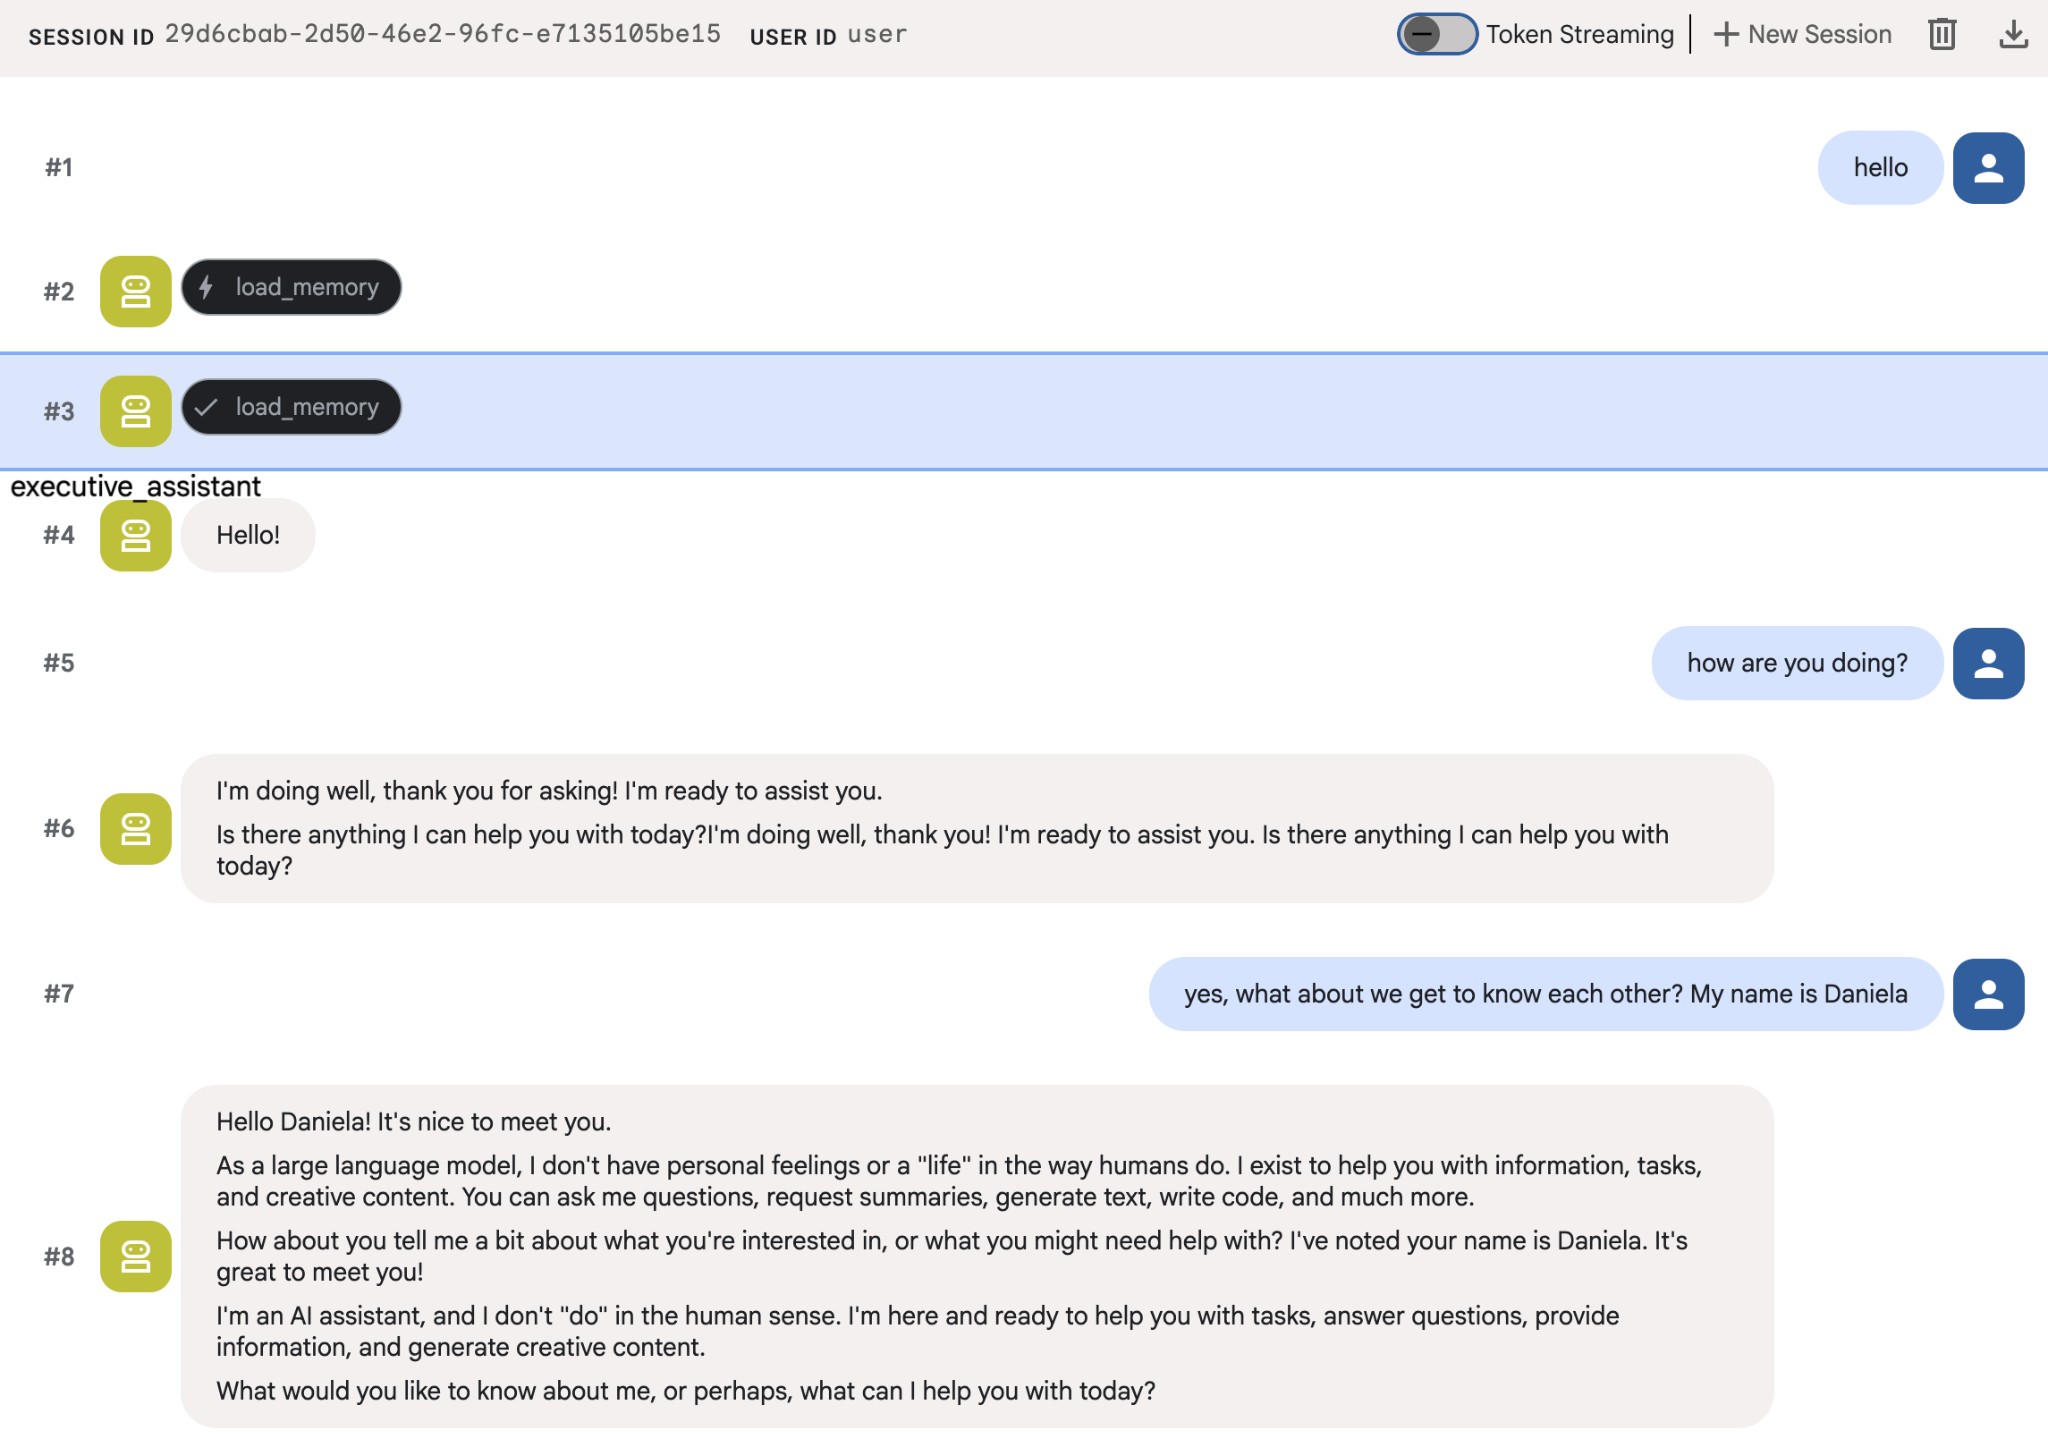
エージェントに自分の情報をいくつか伝えてから、別のセッションで戻って質問してみてください。たとえば、名前を伝えます。
エージェントが保存しているメモリは、Cloud Console で確認できます。[Agent Engine] の商品ページに移動します(検索バーを使用)。

次に、Agent Engine の名前をクリックします(正しいリージョンを選択していることを確認してください)。
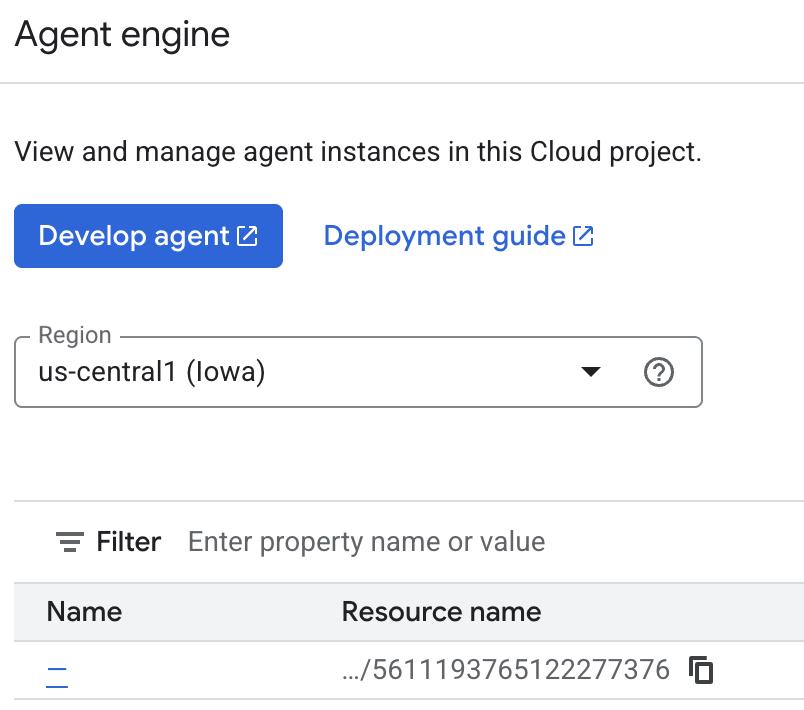
[メモリ] タブに移動します。
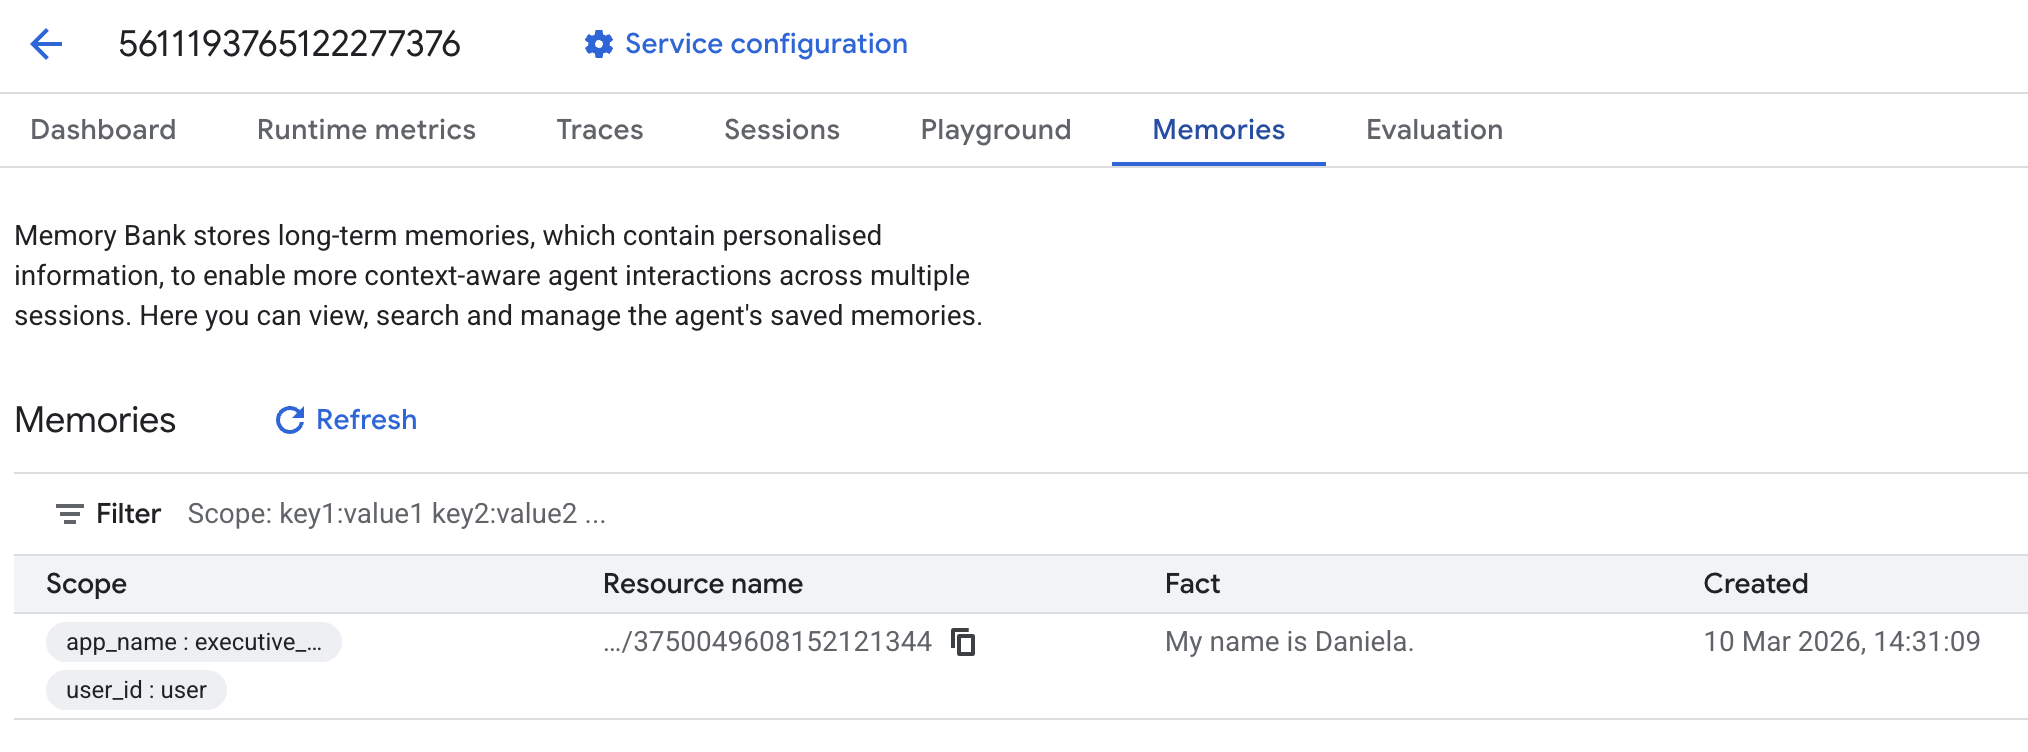
メモリが追加されていることを確認します。
6. ウェブ検索機能を追加する
質の高い情報を提供するには、エージェントは単一の検索クエリを超えた詳細な調査を行う必要があります。調査を専門のサブエージェントに委任することで、メインのペルソナの応答性を維持しながら、リサーチャーがバックグラウンドで複雑なデータ収集を処理します。
このステップでは、LoopAgent を実装して「調査の深さ」を実現します。これにより、エージェントは完全な全体像を把握するまで、検索、調査結果の評価、クエリの絞り込みを繰り返し行うことができます。また、すべての調査結果にインライン引用を必須にすることで、技術的な厳密さを確保し、すべての主張がソースリンクによって裏付けられるようにします。
リサーチ スペシャリストを作成する(research.py)
ここでは、Google 検索ツールを備えた基本エージェントを定義し、LoopAgent でラップします。max_iterations パラメータはガバナーとして機能し、理解にギャップが残っている場合は、エージェントが検索を最大 3 回繰り返すようにします。
research.py
from google.adk.agents.llm_agent import Agent
from google.adk.agents.loop_agent import LoopAgent
from google.adk.tools.google_search_tool import GoogleSearchTool
from google.adk.tools.tool_context import ToolContext

def exit_loop(tool_context: ToolContext):
    """Call this function ONLY when no further research is needed, signaling the iterative process should end."""
    print(f"  [Tool Call] exit_loop triggered by {tool_context.agent_name}")
    tool_context.actions.escalate = True
    # Return empty dict as tools should typically return JSON-serializable output
    return {}

# --- RESEARCH LOGIC ---
_research_worker = Agent(
    model='gemini-2.5-flash',
    name='research_worker',
    description='Worker agent that performs a single research step.',
    instruction='''
    Use google_search to find facts and synthesize them for the user.
    Critically evaluate your findings. If the data is incomplete or you need more context, prepare to search again in the next iteration.
    You must include the links you found as references in your response, formatting them like citations in a research paper (e.g., [1], [2]).
    Use the exit_loop tool to terminate the research early if no further research is needed.
    If you need to ask the user for clarifications, call the exit_loop function early to interrupt the research cycle.
    ''',
    tools=[GoogleSearchTool(bypass_multi_tools_limit=True), exit_loop],
)

# The LoopAgent iterates the worker up to 3 times for deeper research
research_agent = LoopAgent(
    name='research_specialist',
    description='Deep web research specialist.',
    sub_agents=[_research_worker],
    max_iterations=3,
)
ルート エージェントを更新する(agent.py)
research_agent をインポートして、Sharon にツールとして追加します。
agent.py
from google.adk.agents.llm_agent import Agent
from google.adk.tools.preload_memory_tool import PreloadMemoryTool
from google.adk.tools.load_memory_tool import load_memory_tool

# Import our new sub agent
from .research import research_agent

async def auto_save_session_to_memory_callback(callback_context):
    await callback_context._invocation_context.memory_service.add_session_to_memory(
        callback_context._invocation_context.session)

# Update root_agent with memory tools and callback
root_agent = Agent(
    model='gemini-2.5-flash',
    name='executive_assistant',
    description='Executive Assistant with persistent memory and research capabilities',
    instruction='''
    You are an elite AI partner with long-term memory.
    1. Use load_memory to recall facts.
    2. Delegate research tasks to the research_specialist.
    Always be direct, concise, and high-signal.
    ''',
    tools=[PreloadMemoryTool(), load_memory_tool],
    sub_agents=[research_agent],
    after_agent_callback=auto_save_session_to_memory_callback,
)
adk web を再度起動して、リサーチ エージェントをテストします。
uv run adk web --memory_service_uri="agentengine://$ENGINE_ID"
簡単な調査タスク(「優れた技術ブログの書き方」など)を依頼します。
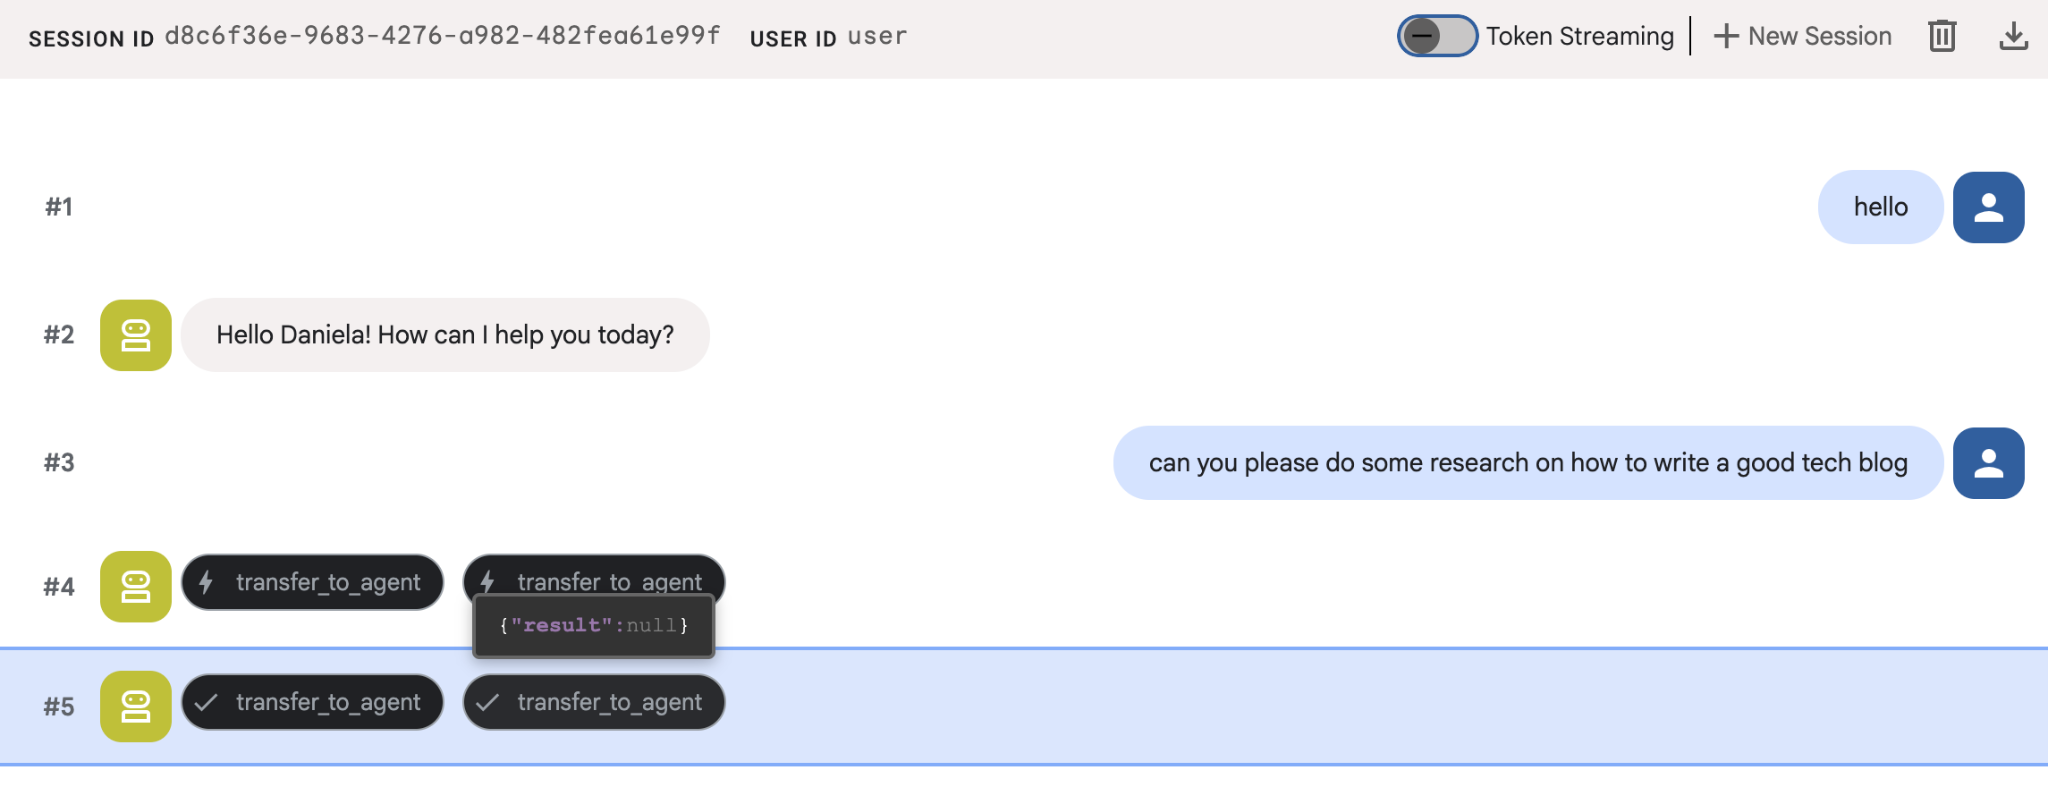
これは新しいセッションですが、エージェントが私の名前を覚えていることに気づいたかもしれません。また、「transfer_to_agent」ツール呼び出しにも注意してください。これは、新しいリサーチ エージェントにタスクを渡すツールです。
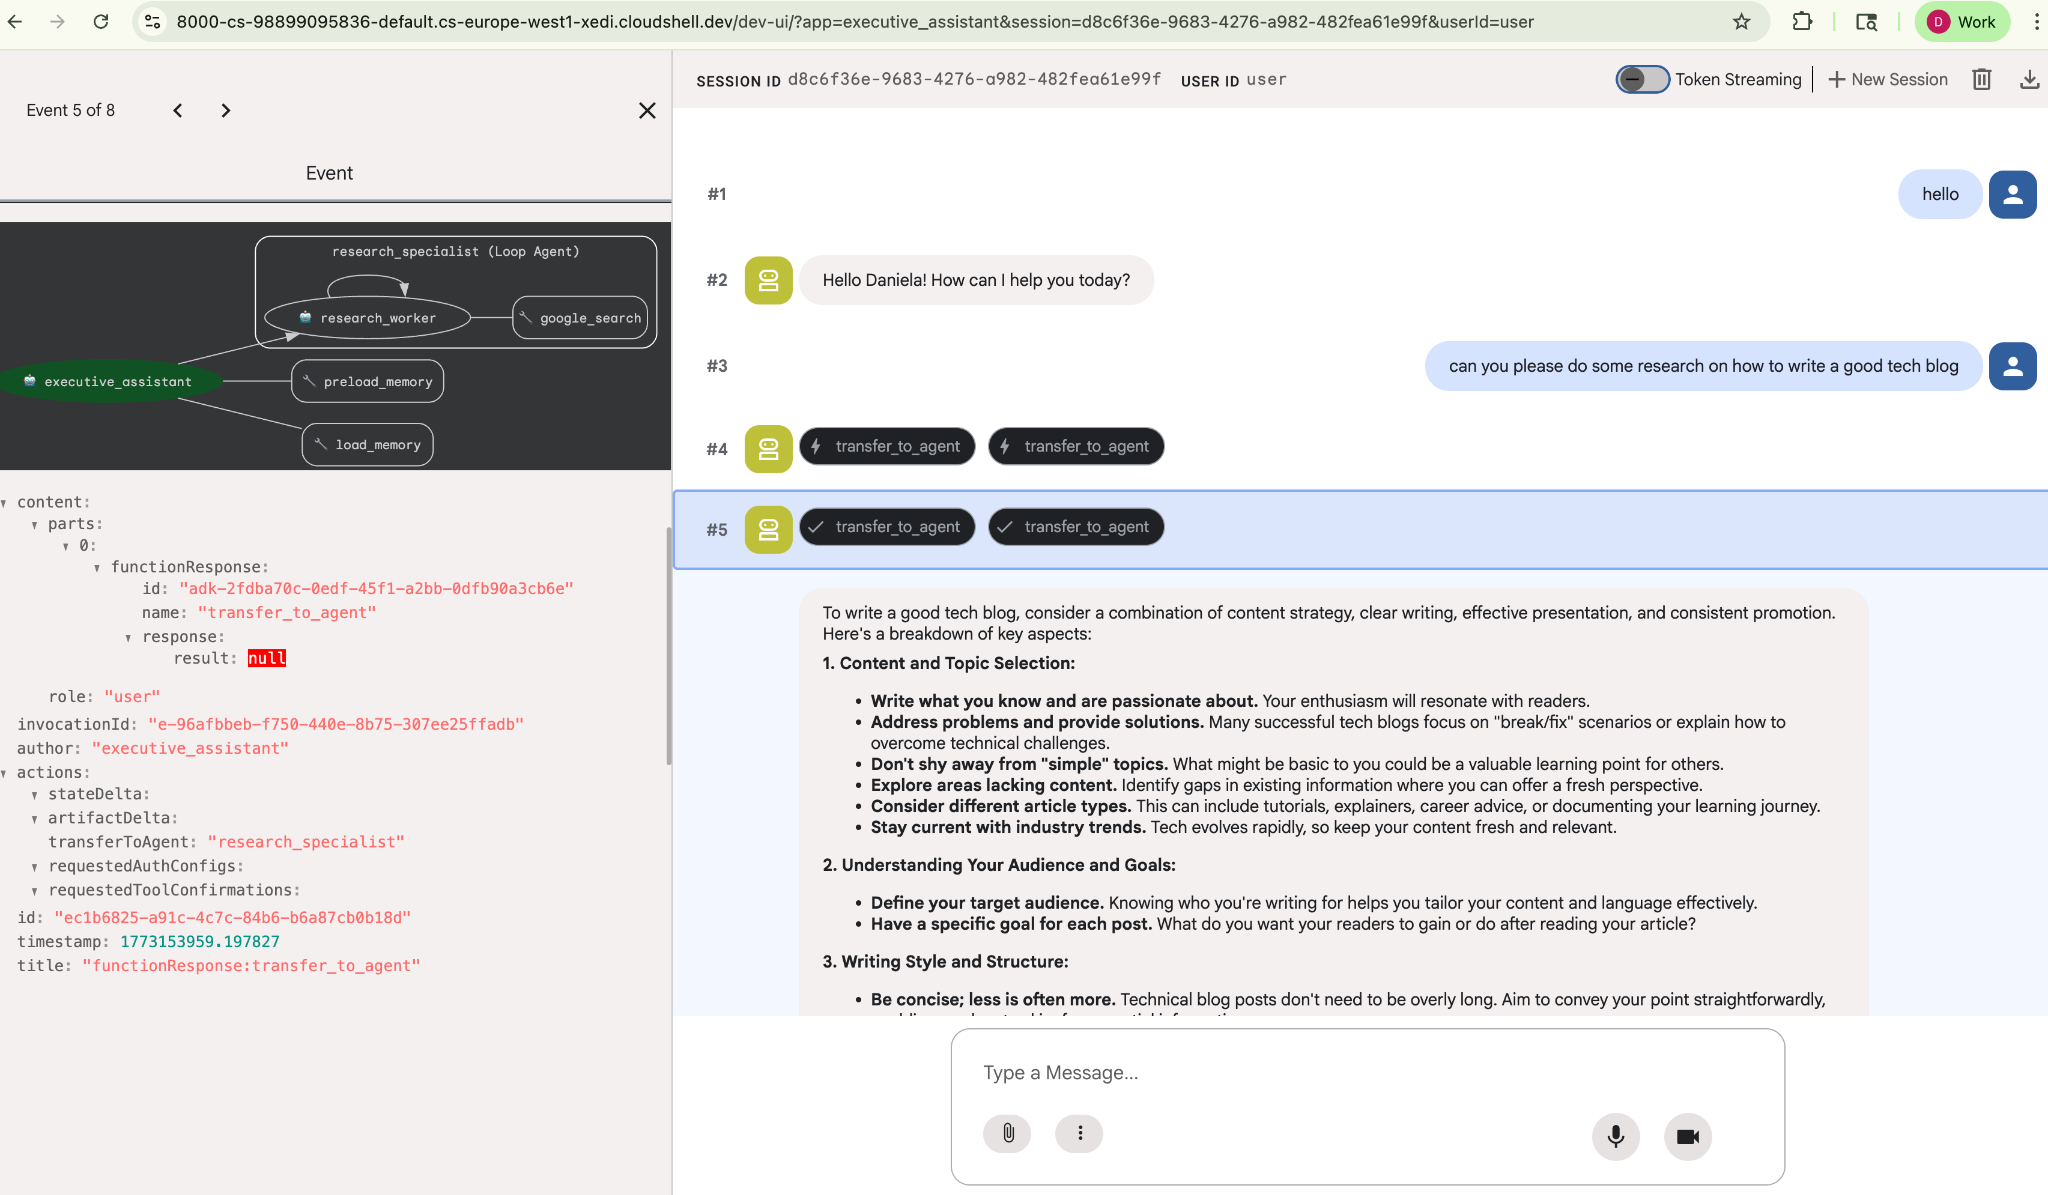
それでは、タスク管理に進みましょう。
7. Cloud SQL を使用してタスク管理を追加する
エージェントには長期記憶がありますが、To-Do リストのような詳細な構造化データには適していません。タスクには、従来のリレーショナル データベースを使用します。SQLAlchemy と Google Cloud SQL(PostgreSQL)データベースを使用します。コードを記述する前に、インフラストラクチャをプロビジョニングする必要があります。
インフラストラクチャをプロビジョニングする
次のコマンドを実行してデータベースを作成します。注: インスタンスの作成には 5 ~ 10 分ほどかかります。バックグラウンドで実行している間に、次のステップに進むことができます。
# 1. Define instance variables
export INSTANCE_NAME="assistant-db"
export USER_EMAIL=$(gcloud config get-value account)

# 2. Create the Cloud SQL instance
gcloud sql instances create $INSTANCE_NAME \
    --database-version=POSTGRES_18 \
    --tier=db-f1-micro \
    --region=us-central1 \
    --edition=ENTERPRISE

# 3. Create the database for our tasks
gcloud sql databases create tasks --instance=$INSTANCE_NAME
データベース インスタンスのプロビジョニングには数分かかります。完了するまでコーヒーや紅茶を飲んだり、コードを更新したりするのもよいでしょう。ただし、必ず戻ってアクセス制御を完了してください。
アクセス制御を構成する
次に、データベースにアクセスできるようにユーザー アカウントを構成する必要があります。ターミナルで次のコマンドを実行します。
# change this to your favorite password
export DB_PASS="correct-horse-battery-staple"

# Create a regular database user
gcloud sql users create assistant_user \
    --instance=$INSTANCE_NAME \
    --password=$DB_PASS
環境構成を更新する
ADK は実行時に .env ファイルから構成を読み込みます。データベース接続の詳細を使用して、エージェントの環境を更新します。
# Retrieve the unique connection name
export DB_CONN=$(gcloud sql instances describe $INSTANCE_NAME --format='value(connectionName)')

# Append configuration to your .env file
cat <<EOF >> executive_assistant/.env
DB_CONNECTION_NAME=$DB_CONN
DB_USER=assistant_user
DB_PASSWORD=$DB_PASS
DB_NAME=tasks
EOF
それでは、コードを変更しましょう。
Todo スペシャリストを作成する(todo.py)
リサーチ エージェントと同様に、To-Do スペシャリストを独自のファイルに作成しましょう。todo.py を作成します。
todo.py
import os
import uuid
import sqlalchemy
from datetime import datetime
from typing import Optional, List

from sqlalchemy import (
    Column,
    String,
    DateTime,
    Enum,
    select,
    delete,
    update,
)
from sqlalchemy.orm import declarative_base, Session
from google.cloud.sql.connector import Connector
from google.adk.agents.llm_agent import Agent

# --- DATABASE LOGIC ---
Base = declarative_base()
connector = Connector()

def getconn():
    db_connection_name = os.environ.get("DB_CONNECTION_NAME")
    db_user = os.environ.get("DB_USER")
    db_password = os.environ.get("DB_PASSWORD")
    db_name = os.environ.get("DB_NAME", "tasks")

    return connector.connect(
        db_connection_name,
        "pg8000",
        user=db_user,
        password=db_password,
        db=db_name,
    )

engine = sqlalchemy.create_engine(
    "postgresql+pg8000://",
    creator=getconn,
)

class Todo(Base):
    __tablename__ = "todos"
    id = Column(String(36), primary_key=True, default=lambda: str(uuid.uuid4()))
    title = Column(String(255), nullable=False)
    priority = Column(
        Enum("high", "medium", "low", name="priority_levels"), nullable=False, default="medium"
    )
    due_date = Column(DateTime, nullable=True)
    status = Column(Enum("pending", "done", name="status_levels"), default="pending")
    created_at = Column(DateTime, default=datetime.utcnow)

def init_db():
    """Builds the table if it's missing."""
    Base.metadata.create_all(bind=engine)

def add_todo(
    title: str, priority: str = "medium", due_date: Optional[str] = None
) -> dict:
    """
    Adds a new task to the list.

    Args:
        title (str): The description of the task.
        priority (str): The urgency level. Must be one of: 'high', 'medium', 'low'.
        due_date (str, optional): The due date in ISO format (YYYY-MM-DD or YYYY-MM-DDTHH:MM:SS).

    Returns:
        dict: A dictionary containing the new task's ID and a status message.
    """
    init_db()
    with Session(engine) as session:
        due = datetime.fromisoformat(due_date) if due_date else None
        item = Todo(
            title=title,
            priority=priority.lower(),
            due_date=due,
        )
        session.add(item)
        session.commit()
        return {"id": item.id, "status": f"Task added ✅"}

def list_todos(status: str = "pending") -> list:
    """
    Lists tasks from the database, optionally filtering by status.

    Args:
        status (str, optional): The status to filter by. 'pending', 'done', or 'all'.
    """
    init_db()
    with Session(engine) as session:
        query = select(Todo)

        s_lower = status.lower()
        if s_lower != "all":
            query = query.where(Todo.status == s_lower)

        query = query.order_by(Todo.priority, Todo.created_at)

        results = session.execute(query).scalars().all()
        return [
            {
                "id": t.id,
                "task": t.title,
                "priority": t.priority,
                "status": t.status,
            }
            for t in results
        ]

def complete_todo(task_id: str) -> str:
    """Marks a specific task as 'done'."""
    init_db()
    with Session(engine) as session:
        session.execute(update(Todo).where(Todo.id == task_id).values(status="done"))
        session.commit()
        return f"Task {task_id} marked as done."

def delete_todo(task_id: str) -> str:
    """Permanently removes a task from the database."""
    init_db()
    with Session(engine) as session:
        session.execute(delete(Todo).where(Todo.id == task_id))
        session.commit()
        return f"Task {task_id} deleted."

# --- TODO SPECIALIST AGENT ---
todo_agent = Agent(
    model='gemini-2.5-flash',
    name='todo_specialist',
    description='A specialist agent that manages a structured SQL task list.',
    instruction='''
    You manage the user's task list using a PostgreSQL database.
    - Use add_todo when the user wants to remember something. If no priority is mentioned, mark it as 'medium'.
    - Use list_todos to show tasks.
    - Use complete_todo to mark a task as finished.
    - Use delete_todo to remove a task entirely.

    When marking a task as complete or deleting it, if the user doesn't provide the ID,
    use list_todos first to find the correct ID for the task they described.
    ''',
    tools=[add_todo, list_todos, complete_todo, delete_todo],
)
上記のコードは、Cloud SQL データベースへの接続と、追加、削除、完了のマークなど、一般的な To-Do リストの操作のツールリストの提供という、2 つの主な役割を果たします。
このロジックは To-Do エージェントに固有のものであり、エグゼクティブ アシスタント(ルート エージェント)の観点からは、この詳細な管理は必ずしも必要ではないため、このエージェントをサブエージェントではなく「AgentTool」としてパッケージ化します。
AgentTool とサブエージェントのどちらを使用するかを決定するには、コンテキストを共有する必要があるかどうかを検討します。
- エージェントがルート エージェントとコンテキストを共有する必要がない場合は、AgentTool を使用します。
- エージェントがルート エージェントとコンテキストを共有する場合は、サブエージェントを使用します。
リサーチ エージェントの場合、コンテキストの共有は便利ですが、シンプルな To-Do エージェントでは、それほどメリットはありません。
agent.py に AgentTool を実装しましょう。
ルート エージェントを更新する(agent.py)
次に、todo_agent をメインファイルにインポートし、ツールとして接続します。
agent.py
import os
from datetime import datetime
from google.adk.agents.llm_agent import Agent
from google.adk.tools.agent_tool import AgentTool
from google.adk.tools.preload_memory_tool import PreloadMemoryTool
from google.adk.tools.load_memory_tool import load_memory_tool

# Import our specialized sub-agents
from .research import research_agent
from .todo import todo_agent

# Callback for persistent memory storage
async def auto_save_session_to_memory_callback(callback_context):
    await callback_context._invocation_context.memory_service.add_session_to_memory(
        callback_context._invocation_context.session)

# --- ROOT AGENT DEFINITION ---
root_agent = Agent(
    model='gemini-2.5-flash',
    name='executive_assistant',
    description='A professional AI Executive Assistant with memory and specialized tools.',
    instruction='''
    You are an elite, high-signal AI Executive Assistant.
    Your goal is to help the user manage their knowledge, tasks, and research.

    ## Your Capabilities:
    1. Memory: Use load_memory to recall personal facts or past context about the user.
    2. Research: Delegate complex web-based investigations to the research_specialist.
    3. Tasks: Delegate all to-do list management (adding, listing, or completing tasks) to the todo_specialist.

    Always be direct and professional. If a task is successful, provide a brief confirmation.
    ''',
    tools=[
        PreloadMemoryTool(),
        load_memory_tool,
        AgentTool(todo_agent) # Exposes the Todo Specialist as a tool
    ],
    sub_agents=[research_agent], # Exposes the Research Specialist for direct handover
    after_agent_callback=auto_save_session_to_memory_callback,
)
adk web を再度実行して、新しい機能をテストします。
uv run adk web --memory_service_uri="agentengine://$ENGINE_ID"
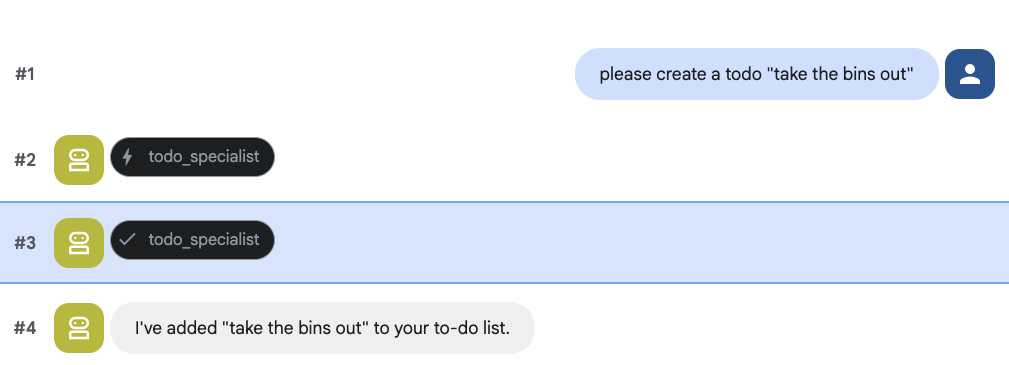
To-Do を作成してみましょう。
8. カレンダー管理を追加する
最後に、エージェントが予定を管理できるように Google カレンダーと統合します。この Codelab では、エージェントに個人のカレンダーへのアクセス権を付与するのではなく、エージェントが管理する独立したカレンダーを作成します。
まず、エージェントの ID として機能する専用のサービス アカウント を作成します。次に、サービス アカウントを使用して、エージェントのカレンダーをプログラムで作成します。
サービス アカウントをプロビジョニングする
ターミナルを開き、次のコマンドを実行して ID を作成し、個人アカウントに ID の偽装権限を付与します。
export SA_NAME="ea-agent"
export SA_EMAIL="${SA_NAME}@${PROJECT_ID}.iam.gserviceaccount.com"

# Create the service account
gcloud iam service-accounts create $SA_NAME \
    --display-name="Executive Assistant Agent"

# Allow your local user to impersonate it
gcloud iam service-accounts add-iam-policy-binding $SA_EMAIL \
    --member="user:$(gcloud config get-value account)" \
    --role="roles/iam.serviceAccountTokenCreator"

# Save it to the agent's environment
echo "SERVICE_ACCOUNT_EMAIL=$SA_EMAIL" >> executive_assistant/.env
カレンダーをプログラムで作成する
サービス アカウントにカレンダーを作成するように指示するスクリプトを作成しましょう。プロジェクトのルート に setup_calendar.py という名前の新しいファイルを作成します(setup_memory.py の横)。
setup_calendar.py
import os
import google.auth
from googleapiclient.discovery import build
from google.auth.transport.requests import Request
from google.auth import impersonated_credentials
from dotenv import load_dotenv

load_dotenv('executive_assistant/.env')
SA_EMAIL = os.environ.get("SERVICE_ACCOUNT_EMAIL")

def setup_sa_calendar():
    print(f"Authenticating to impersonate {SA_EMAIL}...")

    # 1. Base credentials
    creds, _ = google.auth.default(scopes=["https://www.googleapis.com/auth/cloud-platform"])
    creds.refresh(Request())

    # 2. Impersonate the Service Account
    impersonated = impersonated_credentials.Credentials(
        source_credentials=creds,
        target_principal=SA_EMAIL,
        target_scopes=["https://www.googleapis.com/auth/calendar"],
    )
    service = build("calendar", "v3", credentials=impersonated)

    # 3. Create the calendar
    print("Creating independent Service Account calendar...")
    calendar = service.calendars().insert(body={
        "summary": "AI Assistant (SA Owned)",
        "description": "An independent calendar managed purely by the AI."
    }).execute()

    calendar_id = calendar['id']

    # 4. Save the ID
    with open("executive_assistant/.env", "a") as f:
        f.write(f"\nCALENDAR_ID={calendar_id}\n")
    print(f"Setup complete! CALENDAR_ID {calendar_id} added to .env")

if __name__ == "__main__":
    setup_sa_calendar()
ターミナルからスクリプトを実行します。
uv run python setup_calendar.py
カレンダー スペシャリストを作成する(calendar.py)
それでは、カレンダー スペシャリストに焦点を当てましょう。このエージェントには、カレンダーのリスト表示、作成、更新、削除、自然言語を理解する「クイック追加」機能など、カレンダーツールのフルパッケージを搭載します。
次のコードを calendar.py にコピーします。
calendar.py
import os
from datetime import datetime, timedelta, timezone

import google.auth
from googleapiclient.discovery import build
from googleapiclient.errors import HttpError
from google.adk.agents.llm_agent import Agent

def _get_calendar_service():
    """Build the Google Calendar API service using Service Account Impersonation."""
    from google.auth.transport.requests import Request
    from google.auth import impersonated_credentials

    target_principal = os.environ.get("SERVICE_ACCOUNT_EMAIL")
    if not target_principal:
        raise ValueError("SERVICE_ACCOUNT_EMAIL environment variable is missing.")

    base_scopes = ["https://www.googleapis.com/auth/cloud-platform"]
    creds, _ = google.auth.default(scopes=base_scopes)
    creds.refresh(Request())

    target_scopes = ["https://www.googleapis.com/auth/calendar"]
    impersonated = impersonated_credentials.Credentials(
        source_credentials=creds,
        target_principal=target_principal,
        target_scopes=target_scopes,
    )

    return build("calendar", "v3", credentials=impersonated)

def _format_event(event: dict) -> dict:
    """Format a raw Calendar API event into a clean dict for the LLM."""
    start = event.get("start", {})
    end = event.get("end", {})
    return {
        "id": event.get("id"),
        "title": event.get("summary", "(No title)"),
        "start": start.get("dateTime", start.get("date")),
        "end": end.get("dateTime", end.get("date")),
        "location": event.get("location", ""),
        "description": event.get("description", ""),
        "attendees": [
            {"email": a["email"], "status": a.get("responseStatus", "unknown")}
            for a in event.get("attendees", [])
        ],
        "link": event.get("htmlLink", ""),
        "conference_link": (
            event.get("conferenceData", {}).get("entryPoints", [{}])[0].get("uri", "")
            if event.get("conferenceData")
            else ""
        ),
        "status": event.get("status", ""),
    }

def list_events(days_ahead: int = 7) -> dict:
    """List upcoming calendar events."""
    calendar_id = os.environ.get("CALENDAR_ID")
    try:
        service = _get_calendar_service()
        now = datetime.now(timezone.utc).isoformat()
        end = (datetime.now(timezone.utc) + timedelta(days=days_ahead)).isoformat()

        events_result = service.events().list(
            calendarId=calendar_id, timeMin=now, timeMax=end,
            maxResults=50, singleEvents=True, orderBy="startTime"
        ).execute()

        events = events_result.get("items", [])
        if not events:
            return {"status": "success", "count": 0, "events": []}

        return {"status": "success", "count": len(events), "events": [_format_event(e) for e in events]}
    except HttpError as e:
        return {"status": "error", "message": f"Calendar API error: {e}"}

def create_event(title: str, start_time: str, end_time: str, description: str = "", location: str = "", attendees: str = "", add_google_meet: bool = False) -> dict:
    """Create a new calendar event."""
    calendar_id = os.environ.get("CALENDAR_ID")
    try:
        service = _get_calendar_service()
        event_body = {
            "summary": title,
            "start": {"dateTime": start_time},
            "end": {"dateTime": end_time},
        }
        if description: event_body["description"] = description
        if location: event_body["location"] = location
        if attendees:
            email_list = [e.strip() for e in attendees.split(",") if e.strip()]
            event_body["attendees"] = [{"email": e} for e in email_list]

        conference_version = 0
        if add_google_meet:
            event_body["conferenceData"] = {
                "createRequest": {"requestId": f"event-{datetime.now().strftime('%Y%m%d%H%M%S')}", "conferenceSolutionKey": {"type": "hangoutsMeet"}}
            }
            conference_version = 1

        event = service.events().insert(calendarId=calendar_id, body=event_body, conferenceDataVersion=conference_version).execute()
        return {"status": "success", "message": f"Event created ✅", "event": _format_event(event)}
    except HttpError as e:
        return {"status": "error", "message": f"Calendar API error: {e}"}

def update_event(event_id: str, title: str = "", start_time: str = "", end_time: str = "", description: str = "") -> dict:
    """Update an existing calendar event."""
    calendar_id = os.environ.get("CALENDAR_ID")
    try:
        service = _get_calendar_service()
        patch_body = {}
        if title: patch_body["summary"] = title
        if start_time: patch_body["start"] = {"dateTime": start_time}
        if end_time: patch_body["end"] = {"dateTime": end_time}
        if description: patch_body["description"] = description
        if not patch_body: return {"status": "error", "message": "No fields to update."}

        event = service.events().patch(calendarId=calendar_id, eventId=event_id, body=patch_body).execute()
        return {"status": "success", "message": "Event updated ✅", "event": _format_event(event)}
    except HttpError as e:
        return {"status": "error", "message": f"Calendar API error: {e}"}

def delete_event(event_id: str) -> dict:
    """Delete a calendar event by its ID."""
    calendar_id = os.environ.get("CALENDAR_ID")
    try:
        service = _get_calendar_service()
        service.events().delete(calendarId=calendar_id, eventId=event_id).execute()
        return {"status": "success", "message": f"Event '{event_id}' deleted ✅"}
    except HttpError as e:
        return {"status": "error", "message": f"Calendar API error: {e}"}

def quick_add_event(text: str) -> dict:
    """Create an event using natural language (e.g. 'Lunch with Sarah next Monday noon')."""
    calendar_id = os.environ.get("CALENDAR_ID")
    try:
        service = _get_calendar_service()
        event = service.events().quickAdd(calendarId=calendar_id, text=text).execute()
        return {"status": "success", "message": "Event created from text ✅", "event": _format_event(event)}
    except HttpError as e:
        return {"status": "error", "message": f"Calendar API error: {e}"}

calendar_agent = Agent(
    model='gemini-2.5-flash',
    name='calendar_specialist',
    description='Manages the user schedule and calendar events.',
    instruction='''
    You manage the user's Google Calendar.
    - Use list_events to check the schedule.
    - Use quick_add_event for simple, conversational scheduling requests (e.g., "Lunch tomorrow at noon").
    - Use create_event for complex meetings that require attendees, specific durations, or Google Meet links.
    - Use update_event to change details of an existing event.
    - Use delete_event to cancel or remove an event.

    CRITICAL: For update_event and delete_event, you must provide the exact `event_id`.
    If the user does not provide the ID, you MUST call list_events first to find the correct `event_id` before attempting the update or deletion.

    Always use the current date/time context provided by the root agent to resolve relative dates like "tomorrow".
    ''',
    tools=[list_events, create_event, update_event, delete_event, quick_add_event],
)
ルート エージェントを完成させる(agent.py)
次のコードを使用して agent.py ファイルを更新します。
agent.py
import os
from datetime import datetime
from zoneinfo import ZoneInfo
from google.adk.agents.llm_agent import Agent
from google.adk.tools.agent_tool import AgentTool
from google.adk.tools.preload_memory_tool import PreloadMemoryTool
from google.adk.tools.load_memory_tool import load_memory_tool

# Import all our specialized sub-agents
from .research import research_agent
from .todo import todo_agent
from .calendar import calendar_agent
import tzlocal

# Automatically detect the local system timezone
TIMEZONE = tzlocal.get_localzone_name()

# Callback for persistent memory storage
async def auto_save_session_to_memory_callback(callback_context):
    await callback_context._invocation_context.memory_service.add_session_to_memory(
        callback_context._invocation_context.session)

# Callback to inject the current time into the prompt
async def setup_agent_context(callback_context, **kwargs):
    now = datetime.now(ZoneInfo(TIMEZONE))
    callback_context.state["current_time"] = now.strftime("%A, %Y-%m-%d %I:%M %p")
    callback_context.state["timezone"] = TIMEZONE

# --- ROOT AGENT DEFINITION ---
root_agent = Agent(
    model='gemini-2.5-flash',
    name='executive_assistant',
    description='A professional AI Executive Assistant with memory and specialized tools.',
    instruction='''
    You are an elite, high-signal AI Executive Assistant.
    Your goal is to help the user manage their knowledge, tasks, research, and schedule.

    ## Your Capabilities:
    1. Memory: Use load_memory to recall personal facts.
    2. Research: Delegate complex web investigations to the research_specialist.
    3. Tasks: Delegate all to-do list management to the todo_specialist.
    4. Scheduling: Delegate all calendar queries to the calendar_specialist.

    ## 🕒 Current State
    - Time: {current_time?}
    - Timezone: {timezone?}

    Always be direct and professional.
    ''',
    tools=[
        PreloadMemoryTool(),
        load_memory_tool,
        AgentTool(todo_agent),
        AgentTool(calendar_agent)
    ],
    sub_agents=[research_agent],
    before_agent_callback=[setup_agent_context],
    after_agent_callback=[auto_save_session_to_memory_callback],
)
カレンダー ツールに加えて、新しいエージェント コールバック前 関数 setup_agent_context
も追加しました。この関数により、エージェントは現在の日付、時刻、タイムゾーンを認識できるため、カレンダーをより効率的に使用できます。これは、セッション状態変数(短期的な永続性を実現するように設計された別の種類のエージェント
メモリ)を設定することで機能します。
adk web をもう一度実行して、完全なエージェントをテストします。
uv run adk web --memory_service_uri="agentengine://$ENGINE_ID"
デベロッパー UI の [状態] タブでセッションの状態を確認できます。
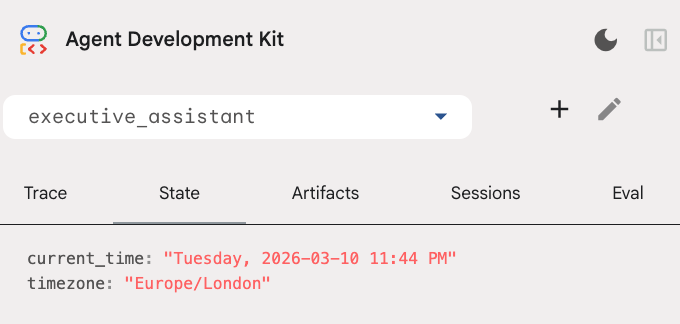
これで、カレンダーの予定、To-Do リストの追跡、調査、長期記憶を行うことができるエージェントが完成しました。
ラボ後のクリーンアップ
9. まとめ
おめでとうございます。5 つの進化段階を経て、多機能な AI エグゼクティブ アシスタントを構築できました。
本日扱った内容
- AI エージェント用のインフラストラクチャのプロビジョニング。
- ADK の組み込み機能を使用した永続メモリと専門的なサブエージェントの実装。
- 外部データベースと生産性向上 API の統合。
次のステップ
このプラットフォームの他の Codelab を試したり、エグゼクティブ アシスタントを自分で改善したりして、学習を続けることができます。
改善のアイデアが必要な場合は、次のことを試してください。
- イベントの圧縮を実装して、長い会話のパフォーマンスを最適化します。
- アーティファクト サービスを追加して、エージェントがメモを取り、ファイルとして保存できるようにします。
- Google Cloud Run を使用して、エージェントをバックエンド サービスとしてデプロイします。
テストが完了したら、請求先アカウントに予期しない料金が発生しないように、環境をクリーンアップしてください。
ぜひコーディングにお役立てください。