
1. 소개
이 Codelab에서는 Google 에이전트 개발 키트 (ADK)를 사용하여 정교한 AI 에이전트를 빌드하는 방법을 알아봅니다. 기본적인 대화형 에이전트부터 시작하여 전문 기능을 점진적으로 추가하는 자연스러운 진화 경로를 따릅니다.
빌드할 에이전트는 Gemini와 Vertex AI, ADK를 사용하여 처음부터 빌드된 비서로, 캘린더 관리, 작업 알림, 조사, 메모 정리와 같은 일상적인 작업을 지원하도록 설계되었습니다.
이 실습을 마치면 완전히 작동하는 에이전트와 이를 자신의 필요에 맞게 확장하는 데 필요한 지식을 갖추게 됩니다.
기본 요건
- Python 프로그래밍 언어에 관한 기본 지식
- 클라우드 리소스를 관리하기 위한 Google Cloud 콘솔에 관한 기본 지식
학습할 내용
- AI 에이전트를 위한 Google Cloud 인프라 프로비저닝
- Vertex AI 메모리 뱅크를 활용하여 지속적인 장기 메모리 구현
- 전문 하위 에이전트의 계층 구조를 구성합니다.
- 외부 데이터베이스와 Google Workspace 생태계 통합
필요한 항목
이 워크숍은 필요한 모든 종속 항목 (gcloud CLI, 코드 편집기, Go, Gemini CLI)이 사전 설치된 Google Cloud Shell 내에서 전부 실행할 수 있습니다.
또는 자체 머신에서 작업하려면 다음이 필요합니다.
- Python (버전 3.12 이상)
- 코드 편집기 또는 IDE (예: VS Code 또는
vim) - Python 및
gcloud명령어를 실행하는 터미널 - 권장: Gemini CLI 또는 Antigravity와 같은 코딩 에이전트
주요 기술
여기에서 활용할 기술에 대한 자세한 내용을 확인할 수 있습니다.
2. 환경 설정
자체 머신에서 이 Codelab을 실행하려면 자체 속도 환경 설정을 선택하고, 클라우드에서 이 Codelab을 완전히 실행하려면 Cloud Shell 시작을 선택합니다.
자습형 환경 설정
- Google Cloud Console에 로그인하여 새 프로젝트를 만들거나 기존 프로젝트를 재사용합니다. 아직 Gmail이나 Google Workspace 계정이 없는 경우 계정을 만들어야 합니다.

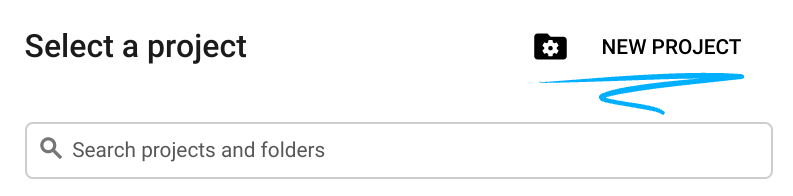
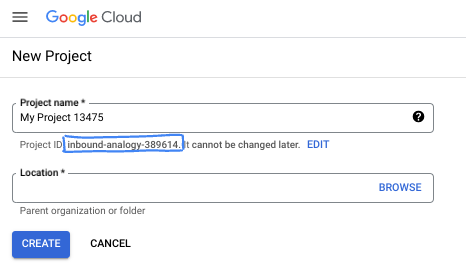
- 프로젝트 이름은 이 프로젝트 참가자의 표시 이름입니다. 이는 Google API에서 사용하지 않는 문자열이며 언제든지 업데이트할 수 있습니다.
- 프로젝트 ID는 모든 Google Cloud 프로젝트에서 고유하며, 변경할 수 없습니다(설정된 후에는 변경할 수 없음). Cloud 콘솔은 고유한 문자열을 자동으로 생성합니다. 일반적으로는 신경 쓰지 않아도 됩니다. 대부분의 Codelab에서는 프로젝트 ID (일반적으로
PROJECT_ID로 식별됨)를 참조해야 합니다. 생성된 ID가 마음에 들지 않으면 다른 임의 ID를 생성할 수 있습니다. 또는 직접 시도해 보고 사용 가능한지 확인할 수도 있습니다. 이 단계 이후에는 변경할 수 없으며 프로젝트 기간 동안 유지됩니다. - 참고로 세 번째 값은 일부 API에서 사용하는 프로젝트 번호입니다. 이 세 가지 값에 대한 자세한 내용은 문서를 참고하세요.
- 다음으로 Cloud 리소스/API를 사용하려면 Cloud 콘솔에서 결제를 사용 설정해야 합니다. 이 Codelab 실행에는 많은 비용이 들지 않습니다. 이 튜토리얼이 끝난 후에 요금이 청구되지 않도록 리소스를 종료하려면 만든 리소스 또는 프로젝트를 삭제하면 됩니다. Google Cloud 신규 사용자는 300달러(USD) 상당의 무료 체험판 프로그램에 참여할 수 있습니다.
Cloud Shell 시작
Google Cloud를 노트북에서 원격으로 실행할 수 있지만, 이 Codelab에서는 Cloud에서 실행되는 명령줄 환경인 Google Cloud Shell을 사용합니다.
Google Cloud Console의 오른쪽 상단 툴바에 있는 Cloud Shell 아이콘을 클릭합니다.

환경을 프로비저닝하고 연결하는 데 몇 분 정도 소요됩니다. 완료되면 다음과 같이 표시됩니다.

가상 머신에는 필요한 개발 도구가 모두 들어있습니다. 영구적인 5GB 홈 디렉터리를 제공하고 Google Cloud에서 실행되므로 네트워크 성능과 인증이 크게 개선됩니다. 이 Codelab의 모든 작업은 브라우저 내에서 수행할 수 있습니다. 아무것도 설치할 필요가 없습니다.
3. 프로젝트 설정
코드를 작성하기 전에 Google Cloud에서 필요한 인프라와 권한을 프로비저닝해야 합니다.
환경 변수 설정
터미널을 열고 다음 환경 변수를 설정합니다.
export PROJECT_ID=`gcloud config get project`
export LOCATION=us-central1
필수 API 사용 설정
에이전트가 여러 Google Cloud 서비스에 액세스해야 합니다. 다음 명령어를 실행하여 사용 설정합니다.
gcloud services enable \
    aiplatform.googleapis.com \
    calendar-json.googleapis.com \
    sqladmin.googleapis.com
애플리케이션 기본 사용자 인증 정보로 인증
환경에서 Google Cloud 서비스와 통신하려면 애플리케이션 기본 사용자 인증 정보 (ADC)로 인증해야 합니다.
다음 명령어를 실행하여 애플리케이션 기본 사용자 인증 정보가 활성 상태이고 최신 상태인지 확인합니다.
gcloud auth application-default login
4. 기본 에이전트 만들기
이제 프로젝트 소스 코드를 저장할 디렉터리를 초기화해야 합니다.
# setup project directory
mkdir -p adk_ea_codelab && cd adk_ea_codelab
# prepare virtual environment
uv init
# install dependencies
uv add google-adk google-api-python-client tzlocal python-dotenv
uv add cloud-sql-python-connector[pg8000] sqlalchemy
먼저 에이전트의 ID와 기본적인 대화 기능을 설정합니다. ADK에서 에이전트 클래스는 에이전트 페르소나와 요청 사항을 정의합니다.
이때 에이전트 이름을 생각해 보는 것이 좋습니다. 상담사에게 Aida 또는 Sharon과 같은 적절한 이름을 지정하는 것이 '개성'을 부여하는 데 도움이 된다고 생각하지만, 'executive_assistant', 'travel_agent', 'code_executor'와 같이 상담사의 역할을 이름으로 지정해도 됩니다.
adk create 명령어를 실행하여 보일러플레이트 에이전트를 스핀업합니다.
# replace with your desired agent name
uv run adk create executive_assistant
모델로 gemini-2.5-flash를 선택하고 백엔드로 Vertex AI를 선택하세요. 추천된 프로젝트 ID가 이 실습을 위해 생성한 ID인지 다시 확인하고 Enter 키를 눌러 확인합니다. Google Cloud 리전의 경우 기본값 (us-central1)을 수락하면 됩니다. 터미널은 다음과 같이 표시됩니다.
daniela_petruzalek@cloudshell:~/adk_ea_codelab (your-project-id)$ uv run adk create executive_assistant
Choose a model for the root agent:
1. gemini-2.5-flash
2. Other models (fill later)
Choose model (1, 2): 1
1. Google AI
2. Vertex AI
Choose a backend (1, 2): 2

You need an existing Google Cloud account and project, check out this link for details:
https://google.github.io/adk-docs/get-started/quickstart/#gemini---google-cloud-vertex-ai

Enter Google Cloud project ID [your-project-id]:
Enter Google Cloud region [us-central1]:

Agent created in /home/daniela_petruzalek/adk_ea_codelab/executive_assistant:
- .env
- __init__.py
- agent.py

daniela_petruzalek@cloudshell:~/adk_ea_codelab (your-project-id)$
완료되면 이전 명령어는 기본 에이전트 정의가 포함된 agent.py 파일을 비롯한 몇 개의 파일이 있는 에이전트 이름 (예: executive_assistant)의 폴더를 만듭니다.
from google.adk.agents.llm_agent import Agent

root_agent = Agent(
    model='gemini-2.5-flash',
    name='root_agent',
    description='A helpful assistant for user questions.',
    instruction='Answer user questions to the best of your knowledge',
)
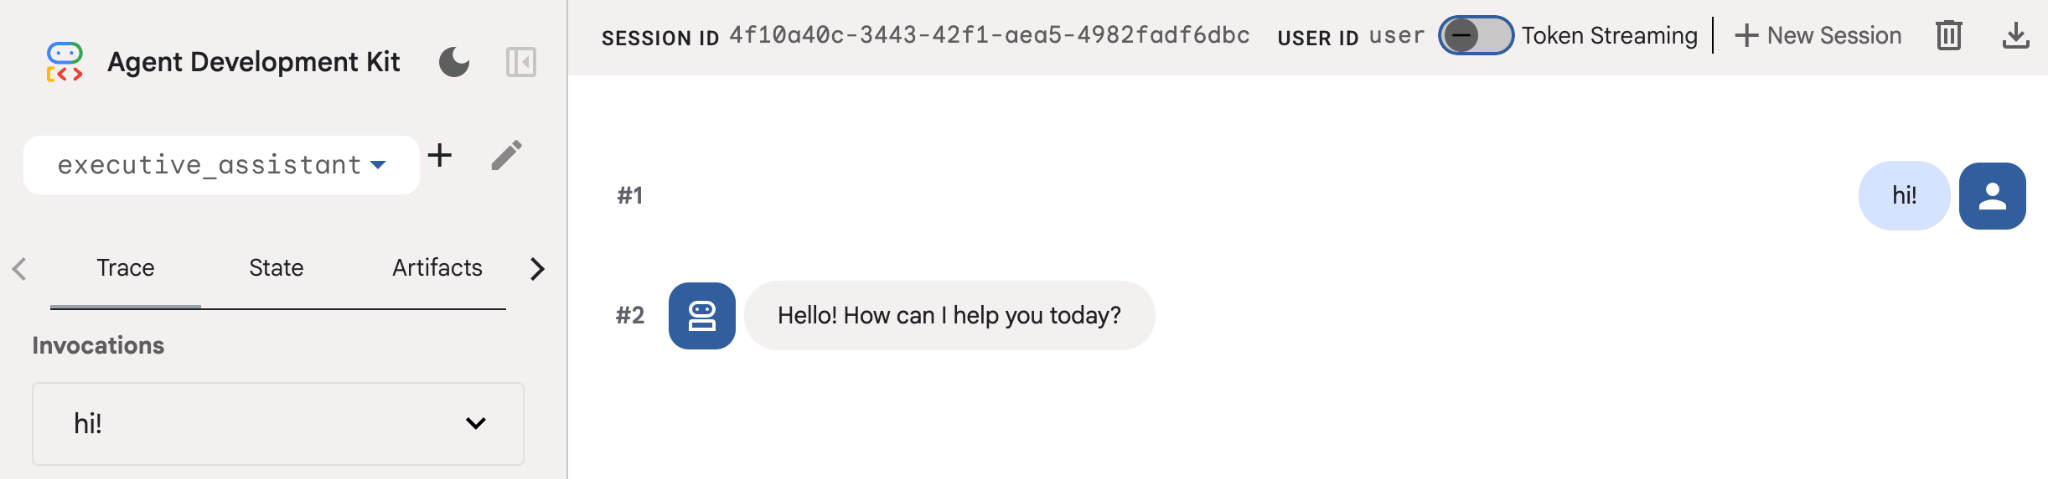
이 에이전트와 상호작용하려면 명령줄에서 uv run adk web를 실행하고 브라우저에서 개발 UI를 열면 됩니다. 다음과 같은 화면을 볼 수 있습니다.
$ uv run adk web
...
INFO:     Started server process [1244]
INFO:     Waiting for application startup.

+-----------------------------------------------------------------------------+
| ADK Web Server started                                                      |
|                                                                             |
| For local testing, access at http://127.0.0.1:8000.                         |
+-----------------------------------------------------------------------------+

INFO:     Application startup complete.
INFO:     Uvicorn running on http://127.0.0.1:8000 (Press CTRL+C to quit)
이 에이전트는 매우 기본적인 에이전트이지만, 에이전트 수정 전에 설정이 제대로 작동하는지 확인하기 위해 한 번 이상 실행하는 것이 좋습니다. 아래 스크린샷은 개발 UI를 사용한 간단한 상호작용을 보여줍니다.
이제 비서 페르소나를 사용하여 에이전트 정의를 수정해 보겠습니다. 아래 코드를 복사하여 agent.py의 내용을 바꿉니다. 선호하는 대로 에이전트 이름과 페르소나를 조정합니다.
from google.adk.agents.llm_agent import Agent

root_agent = Agent(
    model='gemini-2.5-flash',
    name='executive_assistant',
    description='A professional AI Executive Assistant',
    instruction='''
    You are an elite, warm, and highly efficient AI partner.
    Your primary goal is to help the user manage their tasks, schedule, and research.
    Always be direct, concise, and high-signal.
    ''',
)
이름 속성은 에이전트의 내부 이름을 정의하는 반면, 요청 사항에서는 최종 사용자와의 상호작용을 위한 페르소나의 일부로 더 친근한 이름을 지정할 수도 있습니다. 내부 이름은 주로 transfer_to_agent 도구를 사용하는 멀티 에이전트 시스템에서 모니터링 및 핸드오버에 사용됩니다. 이 도구는 직접 다루지 않아도 됩니다. 하나 이상의 하위 에이전트를 선언하면 ADK에서 자동으로 등록합니다.
방금 만든 에이전트를 실행하려면 adk web을 사용하세요.
uv run adk web
브라우저에서 ADK UI를 열고 새 어시스턴트에게 인사하세요.
5. Vertex AI 메모리 뱅크로 지속적 메모리 추가
진정한 어시스턴트는 원활하고 개인화된 경험을 제공하기 위해 환경설정과 과거 상호작용을 기억해야 합니다. 이 단계에서는 사용자 대화를 기반으로 장기 메모리를 동적으로 생성하는 Vertex AI 기능인 Vertex AI Agent Engine 메모리 뱅크를 통합합니다.
메모리 뱅크를 사용하면 에이전트가 여러 세션에서 액세스할 수 있는 맞춤설정된 정보를 만들어 세션 간 연속성을 설정할 수 있습니다. 백엔드에서 세션의 메시지 시간순서를 관리하고 유사성 검색을 사용하여 현재 컨텍스트와 가장 관련성이 높은 메모리를 에이전트에게 제공할 수 있습니다.
메모리 서비스 초기화
ADK는 Vertex AI를 사용하여 장기 메모리를 저장하고 검색합니다. 프로젝트에서 'Memory Engine'을 초기화해야 합니다. 이는 기본적으로 메모리 뱅크 역할을 하도록 구성된 Reasoning Engine 인스턴스입니다.
다음 스크립트를 setup_memory.py로 만듭니다.
setup_memory.py
import vertexai
import os

PROJECT_ID=os.getenv("PROJECT_ID")
LOCATION=os.getenv("LOCATION")

client = vertexai.Client(project=PROJECT_ID, location=LOCATION)

# Create Reasoning Engine for Memory Bank
agent_engine = client.agent_engines.create()

# You will need this resource name to give it to ADK
print(agent_engine.api_resource.name)
이제 setup_memory.py를 실행하여 메모리 뱅크의 추론 엔진을 프로비저닝합니다.
uv run python setup_memory.py
출력은 다음과 비슷하게 표시됩니다.
$ uv run python setup.py
projects/1234567890/locations/us-central1/reasoningEngines/1234567890
엔진 리소스 이름을 환경 변수에 저장합니다.
export ENGINE_ID="<insert the resource name above>"
이제 영구 메모리를 사용하도록 코드를 업데이트해야 합니다. agent.py의 내용을 다음으로 바꿉니다.
agent.py
from google.adk.agents.llm_agent import Agent
from google.adk.tools.preload_memory_tool import PreloadMemoryTool
from google.adk.tools.load_memory_tool import load_memory_tool

async def auto_save_session_to_memory_callback(callback_context):
    await callback_context._invocation_context.memory_service.add_session_to_memory(
        callback_context._invocation_context.session)

# Update root_agent with memory tools and callback
root_agent = Agent(
    model='gemini-2.5-flash',
    name='executive_assistant',
    description='Executive Assistant with Persistent Memory',
    instruction='''
    You are an elite AI partner with long-term memory.
    Use load_memory to find context about the user when needed.
    Always be direct, concise, and high-signal.
    ''',
    tools=[PreloadMemoryTool(), load_memory_tool],
    after_agent_callback=auto_save_session_to_memory_callback,
)
PreloadMemoryTool는 유사성 검색 검색을 사용하여 이전 대화의 관련 컨텍스트를 각 요청에 자동으로 삽입하는 반면, load_memory_tool를 사용하면 필요할 때 모델이 메모리 뱅크에 사실을 명시적으로 쿼리할 수 있습니다. 이 조합을 사용하면 에이전트에게 깊고 지속적인 컨텍스트를 제공할 수 있습니다.
이제 메모리 지원으로 에이전트를 실행하려면 adk web을 실행할 때 memory_service_uri를 전달해야 합니다.
uv run adk web --memory_service_uri="agentengine://$ENGINE_ID"
에이전트에게 나에 관한 몇 가지 사실을 알려준 다음 다른 세션으로 돌아와서 이에 관해 질문해 보세요. 예를 들어 이름을 말합니다.

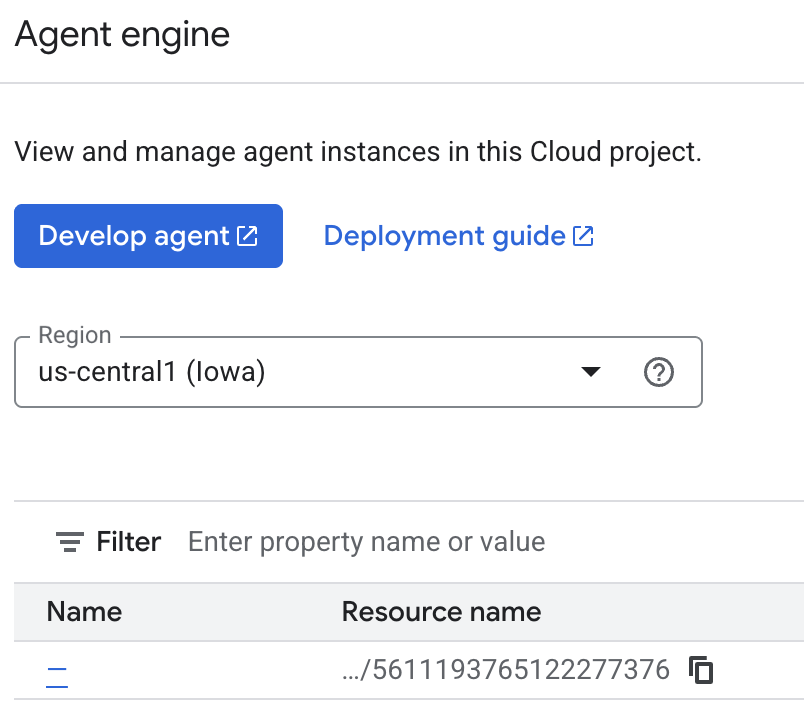
에이전트가 저장하는 메모리를 클라우드 콘솔에서 검사할 수 있습니다. 'Agent Engine' 제품 페이지로 이동합니다(검색창 사용).

그런 다음 에이전트 엔진 이름을 클릭합니다 (올바른 지역을 선택해야 함).
그런 다음 추억 탭으로 이동합니다.
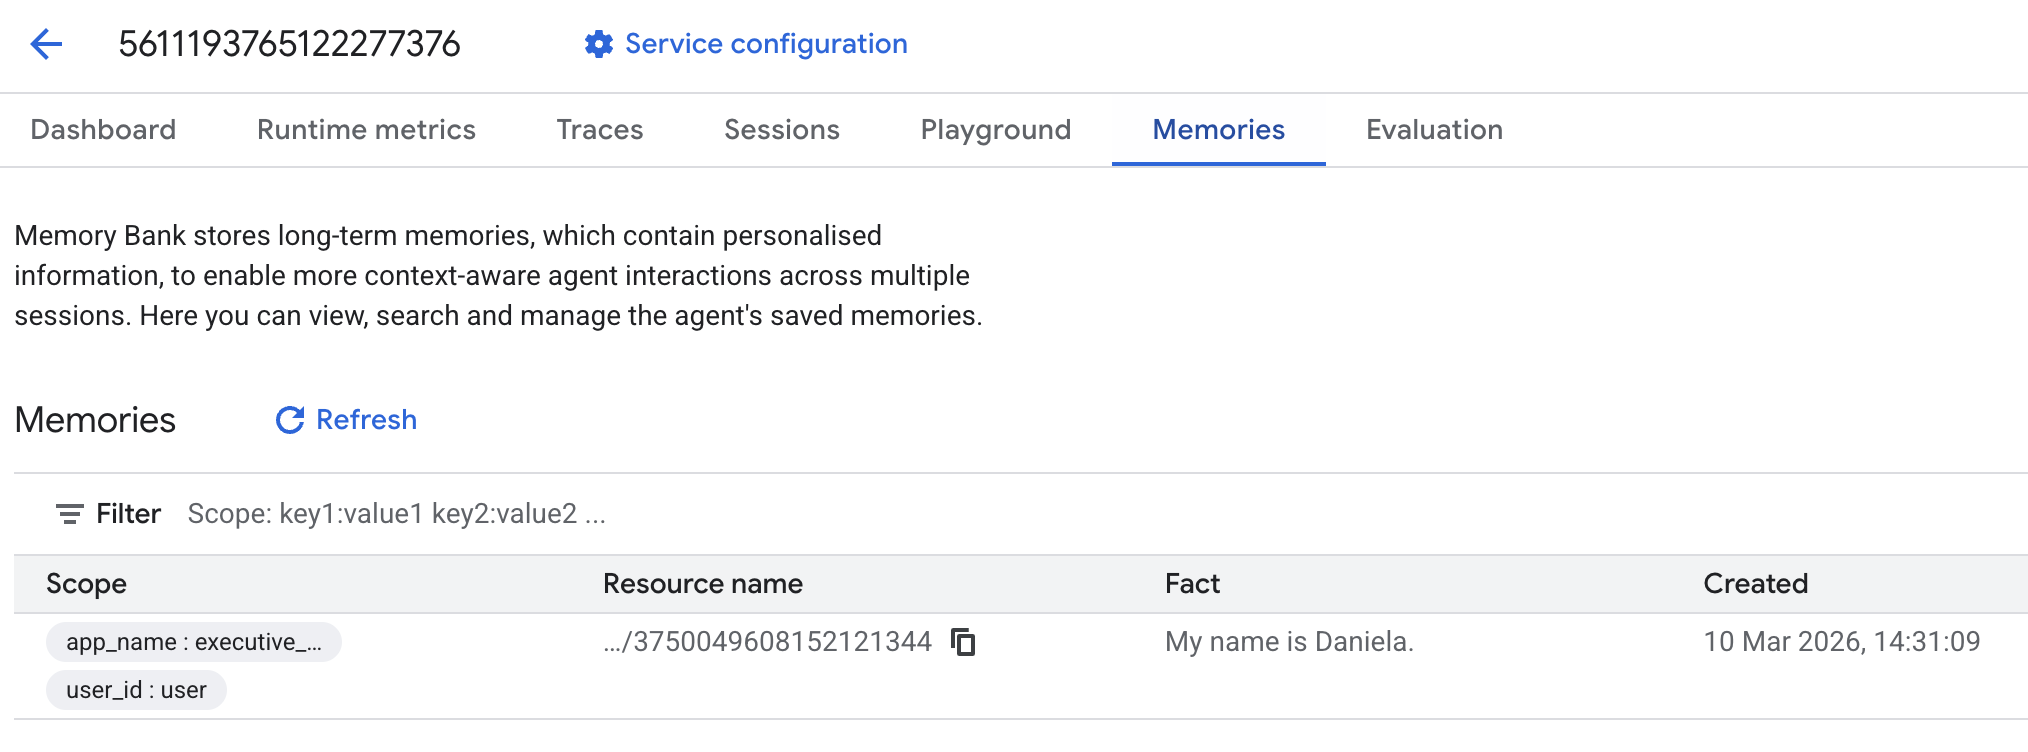
추억이 추가된 것을 확인할 수 있습니다.
6. 웹 검색 기능 추가
고품질 정보를 제공하려면 상담사가 단일 검색어를 넘어 심층 조사를 수행해야 합니다. 전문 하위 에이전트에게 연구를 위임함으로써 연구자가 백그라운드에서 복잡한 데이터 수집을 처리하는 동안 기본 페르소나의 응답성을 유지합니다.
이 단계에서는 '조사 심층성'을 달성하기 위해 LoopAgent를 구현합니다. 이를 통해 에이전트는 완전한 그림을 얻을 때까지 반복적으로 검색하고, 결과를 평가하고, 질문을 개선할 수 있습니다. 또한 모든 결과에 인라인 인용을 요구하여 기술적 엄격성을 적용하고 모든 주장이 출처 링크로 뒷받침되도록 합니다.
조사 전문가 만들기 (research.py)
여기서는 Google 검색 도구가 장착된 기본 에이전트를 정의하고 이를 LoopAgent로 래핑합니다. max_iterations 매개변수는 이해에 격차가 남아 있는 경우 에이전트가 검색을 최대 3회 반복하도록 보장하는 관리자 역할을 합니다.
research.py
from google.adk.agents.llm_agent import Agent
from google.adk.agents.loop_agent import LoopAgent
from google.adk.tools.google_search_tool import GoogleSearchTool
from google.adk.tools.tool_context import ToolContext

def exit_loop(tool_context: ToolContext):
    """Call this function ONLY when no further research is needed, signaling the iterative process should end."""
    print(f"  [Tool Call] exit_loop triggered by {tool_context.agent_name}")
    tool_context.actions.escalate = True
    # Return empty dict as tools should typically return JSON-serializable output
    return {}

# --- RESEARCH LOGIC ---
_research_worker = Agent(
    model='gemini-2.5-flash',
    name='research_worker',
    description='Worker agent that performs a single research step.',
    instruction='''
    Use google_search to find facts and synthesize them for the user.
    Critically evaluate your findings. If the data is incomplete or you need more context, prepare to search again in the next iteration.
    You must include the links you found as references in your response, formatting them like citations in a research paper (e.g., [1], [2]).
    Use the exit_loop tool to terminate the research early if no further research is needed.
    If you need to ask the user for clarifications, call the exit_loop function early to interrupt the research cycle.
    ''',
    tools=[GoogleSearchTool(bypass_multi_tools_limit=True), exit_loop],
)

# The LoopAgent iterates the worker up to 3 times for deeper research
research_agent = LoopAgent(
    name='research_specialist',
    description='Deep web research specialist.',
    sub_agents=[_research_worker],
    max_iterations=3,
)
루트 에이전트 (agent.py) 업데이트
research_agent를 가져와 Sharon에 도구로 추가합니다.
agent.py
from google.adk.agents.llm_agent import Agent
from google.adk.tools.preload_memory_tool import PreloadMemoryTool
from google.adk.tools.load_memory_tool import load_memory_tool

# Import our new sub agent
from .research import research_agent

async def auto_save_session_to_memory_callback(callback_context):
    await callback_context._invocation_context.memory_service.add_session_to_memory(
        callback_context._invocation_context.session)

# Update root_agent with memory tools and callback
root_agent = Agent(
    model='gemini-2.5-flash',
    name='executive_assistant',
    description='Executive Assistant with persistent memory and research capabilities',
    instruction='''
    You are an elite AI partner with long-term memory.
    1. Use load_memory to recall facts.
    2. Delegate research tasks to the research_specialist.
    Always be direct, concise, and high-signal.
    ''',
    tools=[PreloadMemoryTool(), load_memory_tool],
    sub_agents=[research_agent],
    after_agent_callback=auto_save_session_to_memory_callback,
)
adk 웹을 다시 실행하여 연구 에이전트를 테스트합니다.
uv run adk web --memory_service_uri="agentengine://$ENGINE_ID"
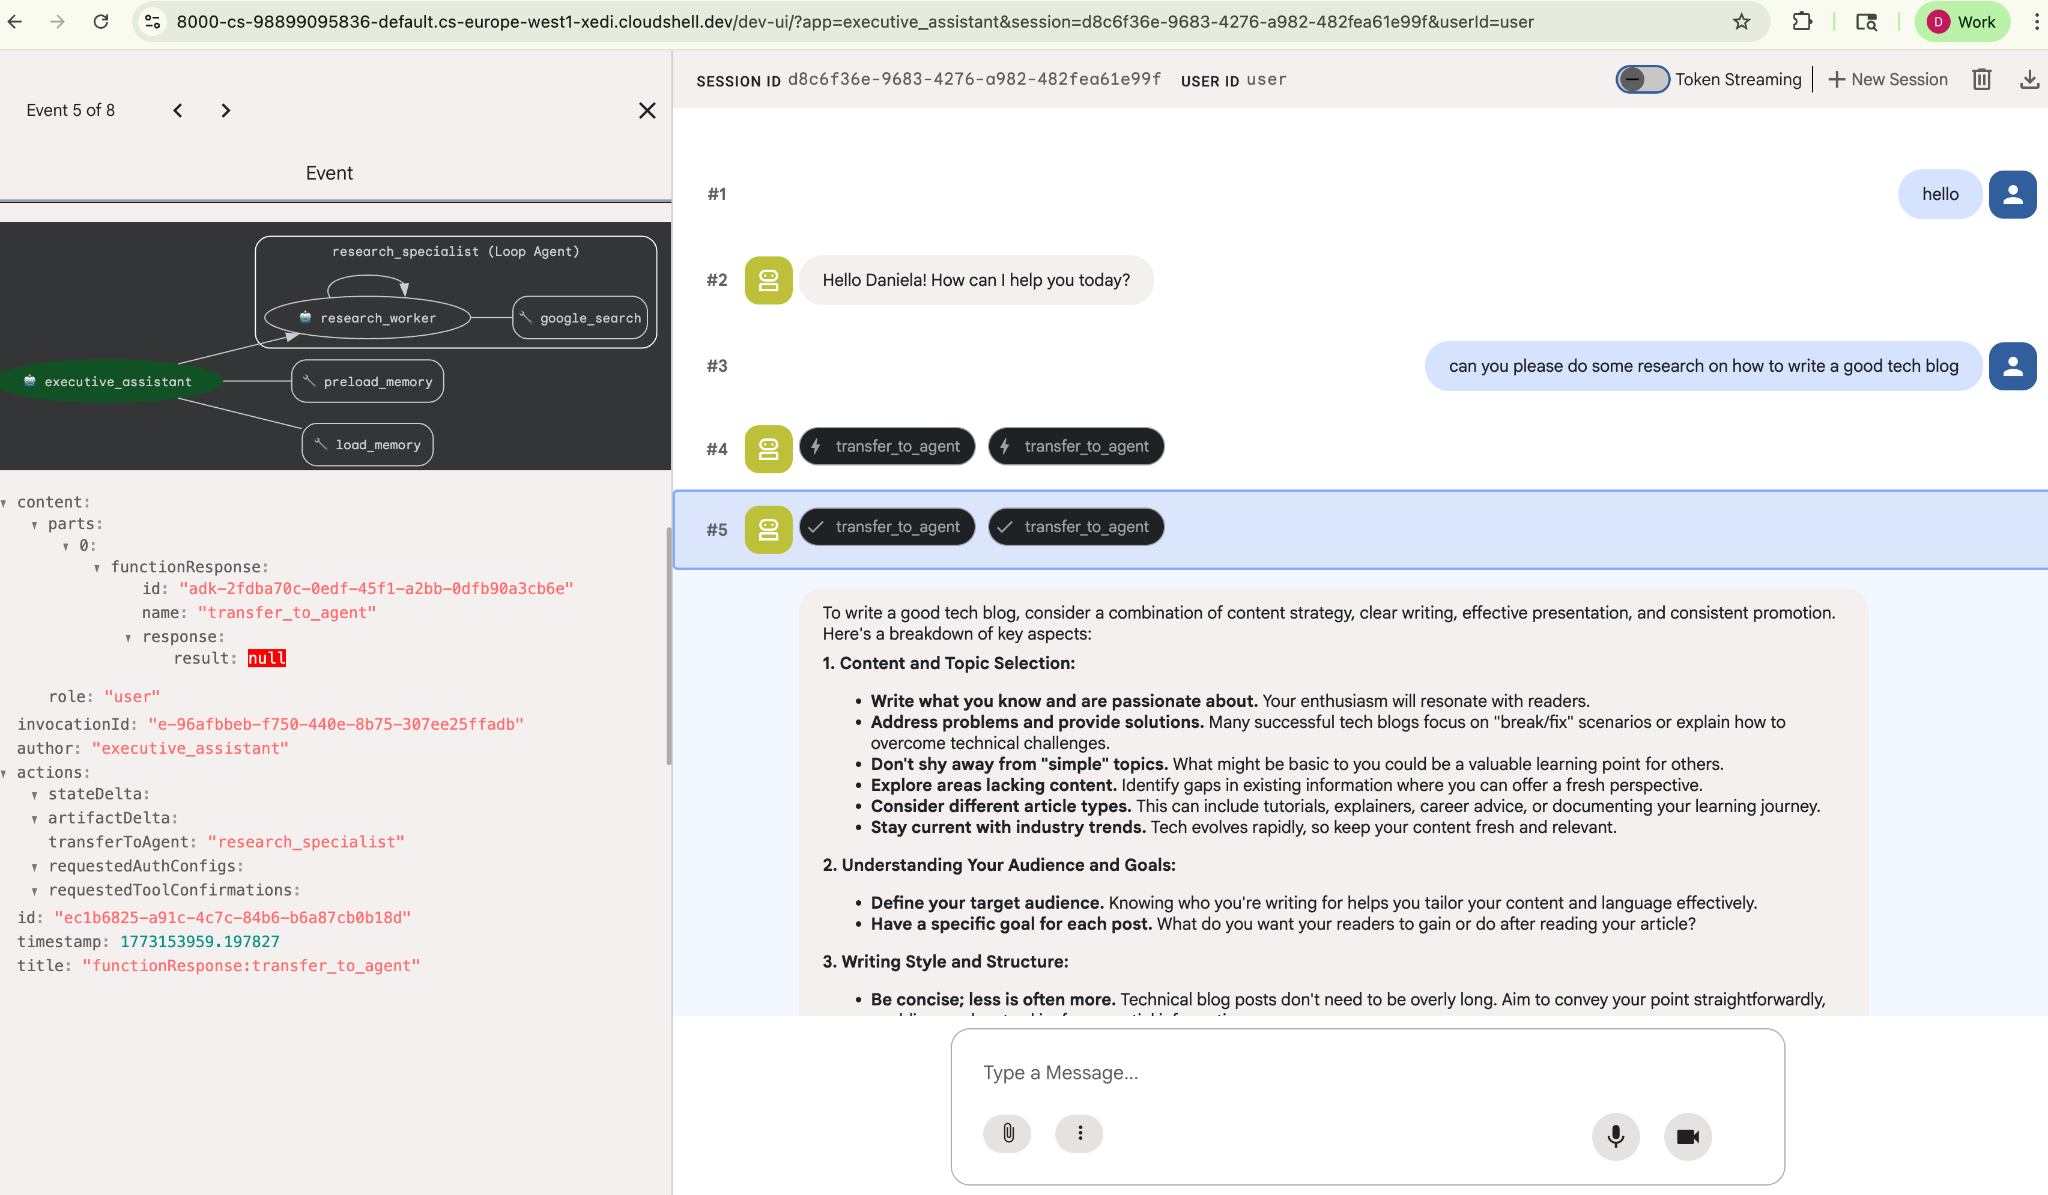
'좋은 기술 블로그를 작성하는 방법'과 같은 간단한 조사 작업을 요청합니다.
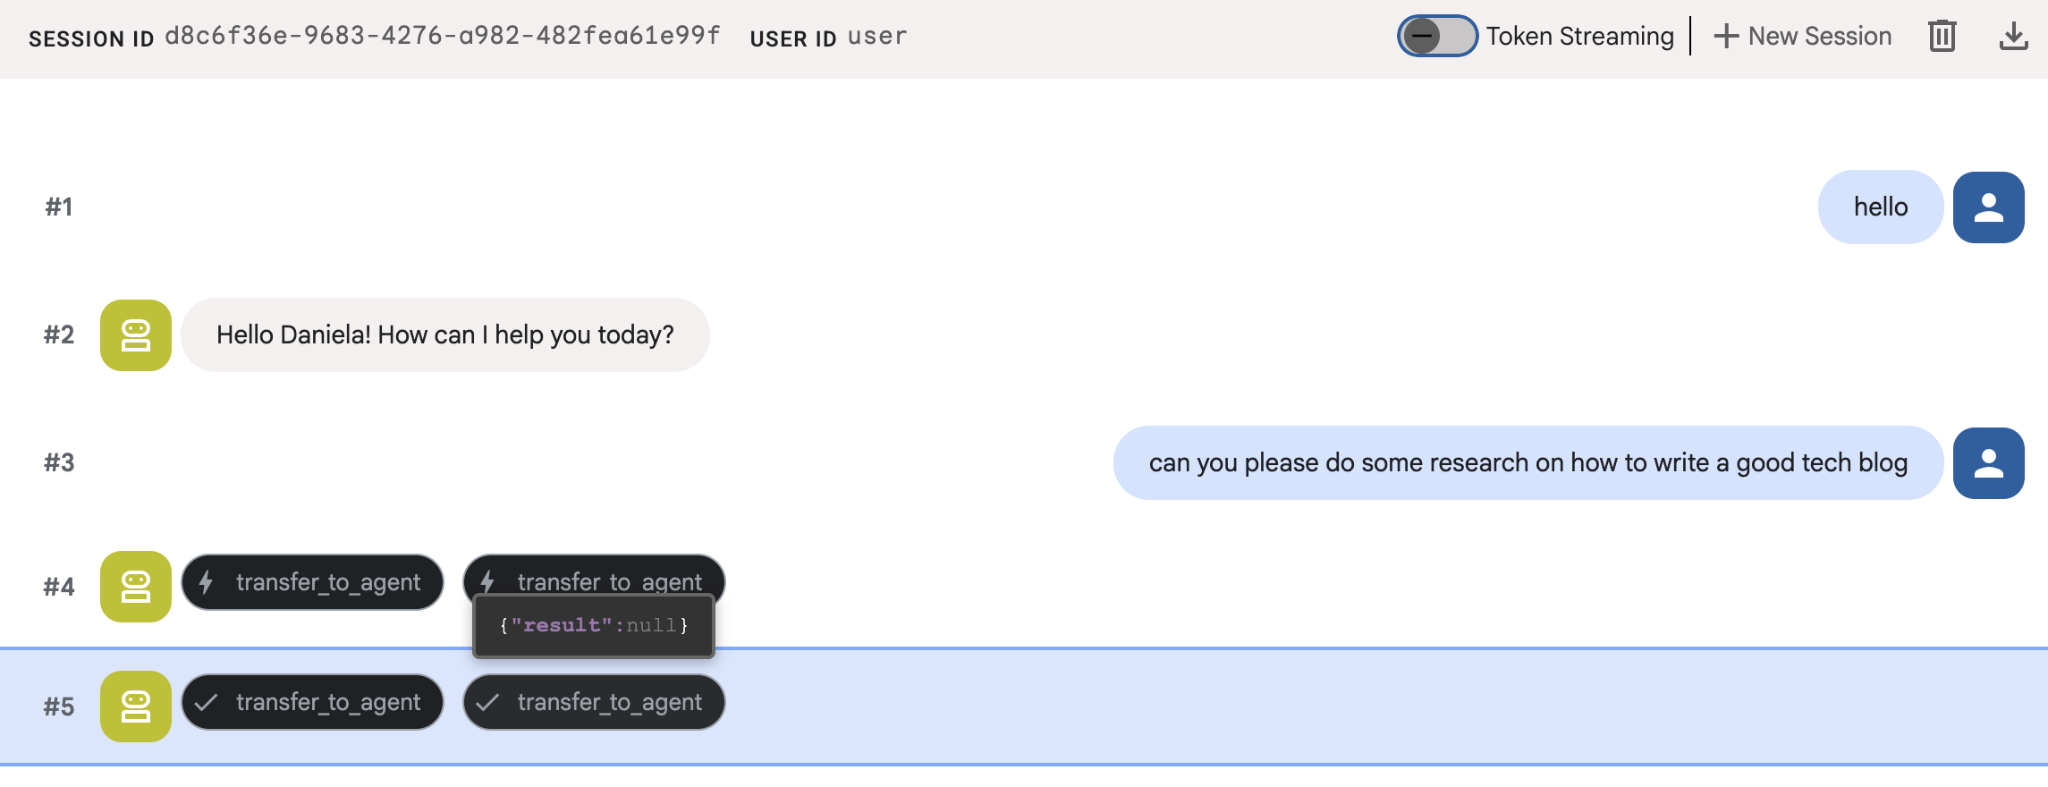
새 세션인데도 에이전트가 내 이름을 기억하는 것을 알 수 있습니다. 'transfer_to_agent' 도구 호출도 참고하세요. 이 도구는 새로운 리서치 에이전트에게 작업을 넘겨줍니다.
이제 작업 관리로 넘어가겠습니다.
7. Cloud SQL로 작업 관리 추가
에이전트에는 장기 메모리가 있지만 할 일 목록과 같은 세부적인 구조화된 데이터에는 적합하지 않습니다. 작업에는 기존 관계형 데이터베이스를 사용합니다. SQLAlchemy와 Google Cloud SQL (PostgreSQL) 데이터베이스를 사용합니다. 코드를 작성하기 전에 인프라를 프로비저닝해야 합니다.
인프라 프로비저닝
다음 명령어를 실행하여 데이터베이스를 만듭니다. 참고: 인스턴스를 만드는 데 5~10분 정도 걸립니다. 이 명령어가 백그라운드에서 실행되는 동안 다음 단계로 진행할 수 있습니다.
# 1. Define instance variables
export INSTANCE_NAME="assistant-db"
export USER_EMAIL=$(gcloud config get-value account)

# 2. Create the Cloud SQL instance
gcloud sql instances create $INSTANCE_NAME \
    --database-version=POSTGRES_18 \
    --tier=db-f1-micro \
    --region=us-central1 \
    --edition=ENTERPRISE

# 3. Create the database for our tasks
gcloud sql databases create tasks --instance=$INSTANCE_NAME
데이터베이스 인스턴스를 프로비저닝하는 데 몇 분 정도 걸립니다. 이때 커피나 차를 마시거나 완료될 때까지 기다리는 동안 코드를 업데이트하는 것이 좋습니다. 하지만 돌아와서 액세스 제어를 완료하는 것을 잊지 마세요.
액세스 제어 구성
이제 데이터베이스에 액세스할 수 있도록 사용자 계정을 구성해야 합니다. 터미널에서 다음 명령어를 실행합니다.
# change this to your favorite password
export DB_PASS="correct-horse-battery-staple"

# Create a regular database user
gcloud sql users create assistant_user \
    --instance=$INSTANCE_NAME \
    --password=$DB_PASS
환경 구성 업데이트
ADK는 런타임에 .env 파일에서 구성을 로드합니다. 데이터베이스 연결 세부정보를 사용하여 에이전트의 환경을 업데이트합니다.
# Retrieve the unique connection name
export DB_CONN=$(gcloud sql instances describe $INSTANCE_NAME --format='value(connectionName)')

# Append configuration to your .env file
cat <<EOF >> executive_assistant/.env
DB_CONNECTION_NAME=$DB_CONN
DB_USER=assistant_user
DB_PASSWORD=$DB_PASS
DB_NAME=tasks
EOF
이제 코드 변경을 진행하겠습니다.
할 일 전문가 만들기 (todo.py)
조사 에이전트와 마찬가지로 할 일 전문가를 자체 파일에 만들어 보겠습니다. todo.py 만들기:
todo.py
import os
import uuid
import sqlalchemy
from datetime import datetime
from typing import Optional, List

from sqlalchemy import (
    Column,
    String,
    DateTime,
    Enum,
    select,
    delete,
    update,
)
from sqlalchemy.orm import declarative_base, Session
from google.cloud.sql.connector import Connector
from google.adk.agents.llm_agent import Agent

# --- DATABASE LOGIC ---
Base = declarative_base()
connector = Connector()

def getconn():
    db_connection_name = os.environ.get("DB_CONNECTION_NAME")
    db_user = os.environ.get("DB_USER")
    db_password = os.environ.get("DB_PASSWORD")
    db_name = os.environ.get("DB_NAME", "tasks")

    return connector.connect(
        db_connection_name,
        "pg8000",
        user=db_user,
        password=db_password,
        db=db_name,
    )

engine = sqlalchemy.create_engine(
    "postgresql+pg8000://",
    creator=getconn,
)

class Todo(Base):
    __tablename__ = "todos"
    id = Column(String(36), primary_key=True, default=lambda: str(uuid.uuid4()))
    title = Column(String(255), nullable=False)
    priority = Column(
        Enum("high", "medium", "low", name="priority_levels"), nullable=False, default="medium"
    )
    due_date = Column(DateTime, nullable=True)
    status = Column(Enum("pending", "done", name="status_levels"), default="pending")
    created_at = Column(DateTime, default=datetime.utcnow)

def init_db():
    """Builds the table if it's missing."""
    Base.metadata.create_all(bind=engine)

def add_todo(
    title: str, priority: str = "medium", due_date: Optional[str] = None
) -> dict:
    """
    Adds a new task to the list.

    Args:
        title (str): The description of the task.
        priority (str): The urgency level. Must be one of: 'high', 'medium', 'low'.
        due_date (str, optional): The due date in ISO format (YYYY-MM-DD or YYYY-MM-DDTHH:MM:SS).

    Returns:
        dict: A dictionary containing the new task's ID and a status message.
    """
    init_db()
    with Session(engine) as session:
        due = datetime.fromisoformat(due_date) if due_date else None
        item = Todo(
            title=title,
            priority=priority.lower(),
            due_date=due,
        )
        session.add(item)
        session.commit()
        return {"id": item.id, "status": f"Task added ✅"}

def list_todos(status: str = "pending") -> list:
    """
    Lists tasks from the database, optionally filtering by status.

    Args:
        status (str, optional): The status to filter by. 'pending', 'done', or 'all'.
    """
    init_db()
    with Session(engine) as session:
        query = select(Todo)

        s_lower = status.lower()
        if s_lower != "all":
            query = query.where(Todo.status == s_lower)

        query = query.order_by(Todo.priority, Todo.created_at)

        results = session.execute(query).scalars().all()
        return [
            {
                "id": t.id,
                "task": t.title,
                "priority": t.priority,
                "status": t.status,
            }
            for t in results
        ]

def complete_todo(task_id: str) -> str:
    """Marks a specific task as 'done'."""
    init_db()
    with Session(engine) as session:
        session.execute(update(Todo).where(Todo.id == task_id).values(status="done"))
        session.commit()
        return f"Task {task_id} marked as done."

def delete_todo(task_id: str) -> str:
    """Permanently removes a task from the database."""
    init_db()
    with Session(engine) as session:
        session.execute(delete(Todo).where(Todo.id == task_id))
        session.commit()
        return f"Task {task_id} deleted."

# --- TODO SPECIALIST AGENT ---
todo_agent = Agent(
    model='gemini-2.5-flash',
    name='todo_specialist',
    description='A specialist agent that manages a structured SQL task list.',
    instruction='''
    You manage the user's task list using a PostgreSQL database.
    - Use add_todo when the user wants to remember something. If no priority is mentioned, mark it as 'medium'.
    - Use list_todos to show tasks.
    - Use complete_todo to mark a task as finished.
    - Use delete_todo to remove a task entirely.

    When marking a task as complete or deleting it, if the user doesn't provide the ID,
    use list_todos first to find the correct ID for the task they described.
    ''',
    tools=[add_todo, list_todos, complete_todo, delete_todo],
)
위 코드는 Cloud SQL 데이터베이스와 연결하고 추가, 삭제, 완료 표시 등 모든 일반적인 할 일 목록 작업을 위한 도구 목록을 제공하는 두 가지 주요 작업을 담당합니다.
이 로직은 할 일 에이전트에 매우 구체적이며, 비서 (루트 에이전트) 관점에서 이 세부적인 관리는 반드시 필요하지 않으므로 이 에이전트를 하위 에이전트가 아닌 'AgentTool'로 패키징합니다.
AgentTool 또는 하위 에이전트 사용 여부를 결정하려면 컨텍스트를 공유해야 하는지 여부를 고려하세요.
- 에이전트가 루트 에이전트와 컨텍스트를 공유할 필요가 없는 경우 AgentTool 사용
- 에이전트가 루트 에이전트와 컨텍스트를 공유하도록 하려면 하위 에이전트를 사용합니다.
리서치 에이전트의 경우 컨텍스트를 공유하는 것이 유용할 수 있지만 간단한 할 일 에이전트의 경우 컨텍스트를 공유하는 것이 큰 이점이 없습니다.
agent.py에서 AgentTool를 구현해 보겠습니다.
루트 에이전트 (agent.py) 업데이트
이제 todo_agent를 기본 파일로 가져와 도구로 연결합니다.
agent.py
import os
from datetime import datetime
from google.adk.agents.llm_agent import Agent
from google.adk.tools.agent_tool import AgentTool
from google.adk.tools.preload_memory_tool import PreloadMemoryTool
from google.adk.tools.load_memory_tool import load_memory_tool

# Import our specialized sub-agents
from .research import research_agent
from .todo import todo_agent

# Callback for persistent memory storage
async def auto_save_session_to_memory_callback(callback_context):
    await callback_context._invocation_context.memory_service.add_session_to_memory(
        callback_context._invocation_context.session)

# --- ROOT AGENT DEFINITION ---
root_agent = Agent(
    model='gemini-2.5-flash',
    name='executive_assistant',
    description='A professional AI Executive Assistant with memory and specialized tools.',
    instruction='''
    You are an elite, high-signal AI Executive Assistant.
    Your goal is to help the user manage their knowledge, tasks, and research.

    ## Your Capabilities:
    1. Memory: Use load_memory to recall personal facts or past context about the user.
    2. Research: Delegate complex web-based investigations to the research_specialist.
    3. Tasks: Delegate all to-do list management (adding, listing, or completing tasks) to the todo_specialist.

    Always be direct and professional. If a task is successful, provide a brief confirmation.
    ''',
    tools=[
        PreloadMemoryTool(),
        load_memory_tool,
        AgentTool(todo_agent) # Exposes the Todo Specialist as a tool
    ],
    sub_agents=[research_agent], # Exposes the Research Specialist for direct handover
    after_agent_callback=auto_save_session_to_memory_callback,
)
adk web을 다시 실행하여 새 기능을 테스트합니다.
uv run adk web --memory_service_uri="agentengine://$ENGINE_ID"
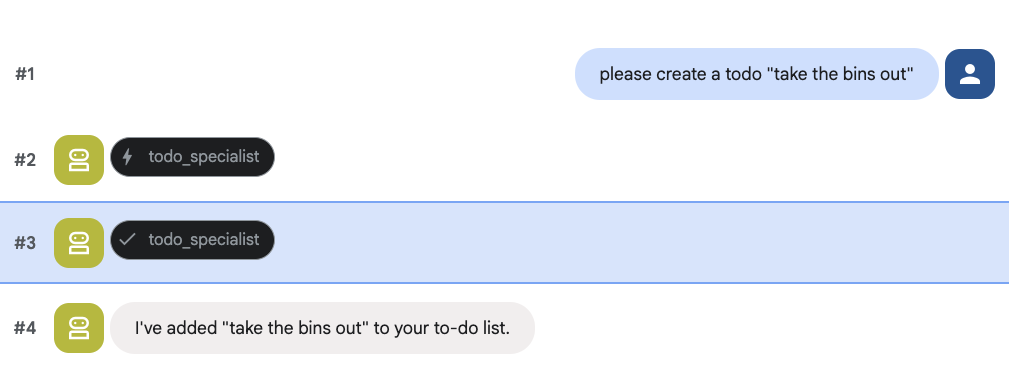
할 일을 만들어 보세요.
8. 일정 관리 추가
마지막으로 에이전트가 약속을 관리할 수 있도록 Google Calendar와 통합합니다. 이 Codelab에서는 올바른 방식으로 실행되지 않을 경우 잠재적으로 위험할 수 있는 개인 캘린더에 에이전트가 액세스하도록 허용하는 대신 에이전트가 관리할 독립적인 캘린더를 만듭니다.
먼저 에이전트의 ID 역할을 하는 전용 서비스 계정을 만듭니다. 그런 다음 서비스 계정을 사용하여 에이전트의 일정을 프로그래매틱 방식으로 만듭니다.
서비스 계정 프로비저닝
터미널을 열고 다음 명령어를 실행하여 ID를 만들고 개인 계정에 ID를 가장할 수 있는 권한을 부여합니다.
export SA_NAME="ea-agent"
export SA_EMAIL="${SA_NAME}@${PROJECT_ID}.iam.gserviceaccount.com"

# Create the service account
gcloud iam service-accounts create $SA_NAME \
    --display-name="Executive Assistant Agent"

# Allow your local user to impersonate it
gcloud iam service-accounts add-iam-policy-binding $SA_EMAIL \
    --member="user:$(gcloud config get-value account)" \
    --role="roles/iam.serviceAccountTokenCreator"

# Save it to the agent's environment
echo "SERVICE_ACCOUNT_EMAIL=$SA_EMAIL" >> executive_assistant/.env
프로그래매틱 방식으로 캘린더 만들기
서비스 계정에 캘린더를 만들도록 지시하는 스크립트를 작성해 보겠습니다. 프로젝트의 루트에 setup_calendar.py라는 새 파일을 만듭니다 (setup_memory.py과 함께).
setup_calendar.py
import os
import google.auth
from googleapiclient.discovery import build
from google.auth.transport.requests import Request
from google.auth import impersonated_credentials
from dotenv import load_dotenv

load_dotenv('executive_assistant/.env')
SA_EMAIL = os.environ.get("SERVICE_ACCOUNT_EMAIL")

def setup_sa_calendar():
    print(f"Authenticating to impersonate {SA_EMAIL}...")

    # 1. Base credentials
    creds, _ = google.auth.default(scopes=["https://www.googleapis.com/auth/cloud-platform"])
    creds.refresh(Request())

    # 2. Impersonate the Service Account
    impersonated = impersonated_credentials.Credentials(
        source_credentials=creds,
        target_principal=SA_EMAIL,
        target_scopes=["https://www.googleapis.com/auth/calendar"],
    )
    service = build("calendar", "v3", credentials=impersonated)

    # 3. Create the calendar
    print("Creating independent Service Account calendar...")
    calendar = service.calendars().insert(body={
        "summary": "AI Assistant (SA Owned)",
        "description": "An independent calendar managed purely by the AI."
    }).execute()

    calendar_id = calendar['id']

    # 4. Save the ID
    with open("executive_assistant/.env", "a") as f:
        f.write(f"\nCALENDAR_ID={calendar_id}\n")
    print(f"Setup complete! CALENDAR_ID {calendar_id} added to .env")

if __name__ == "__main__":
    setup_sa_calendar()
터미널에서 스크립트를 실행합니다.
uv run python setup_calendar.py
Calendar Specialist 만들기 (calendar.py)
이제 캘린더 전문가에 집중해 보겠습니다. 이 에이전트에는 일정 나열, 생성, 업데이트, 삭제는 물론 자연어를 이해하는 '빠른 추가' 기능까지 모든 일정 도구가 탑재됩니다.
아래 코드를 calendar.py에 복사합니다.
calendar.py
import os
from datetime import datetime, timedelta, timezone

import google.auth
from googleapiclient.discovery import build
from googleapiclient.errors import HttpError
from google.adk.agents.llm_agent import Agent

def _get_calendar_service():
    """Build the Google Calendar API service using Service Account Impersonation."""
    from google.auth.transport.requests import Request
    from google.auth import impersonated_credentials

    target_principal = os.environ.get("SERVICE_ACCOUNT_EMAIL")
    if not target_principal:
        raise ValueError("SERVICE_ACCOUNT_EMAIL environment variable is missing.")

    base_scopes = ["https://www.googleapis.com/auth/cloud-platform"]
    creds, _ = google.auth.default(scopes=base_scopes)
    creds.refresh(Request())

    target_scopes = ["https://www.googleapis.com/auth/calendar"]
    impersonated = impersonated_credentials.Credentials(
        source_credentials=creds,
        target_principal=target_principal,
        target_scopes=target_scopes,
    )

    return build("calendar", "v3", credentials=impersonated)

def _format_event(event: dict) -> dict:
    """Format a raw Calendar API event into a clean dict for the LLM."""
    start = event.get("start", {})
    end = event.get("end", {})
    return {
        "id": event.get("id"),
        "title": event.get("summary", "(No title)"),
        "start": start.get("dateTime", start.get("date")),
        "end": end.get("dateTime", end.get("date")),
        "location": event.get("location", ""),
        "description": event.get("description", ""),
        "attendees": [
            {"email": a["email"], "status": a.get("responseStatus", "unknown")}
            for a in event.get("attendees", [])
        ],
        "link": event.get("htmlLink", ""),
        "conference_link": (
            event.get("conferenceData", {}).get("entryPoints", [{}])[0].get("uri", "")
            if event.get("conferenceData")
            else ""
        ),
        "status": event.get("status", ""),
    }

def list_events(days_ahead: int = 7) -> dict:
    """List upcoming calendar events."""
    calendar_id = os.environ.get("CALENDAR_ID")
    try:
        service = _get_calendar_service()
        now = datetime.now(timezone.utc).isoformat()
        end = (datetime.now(timezone.utc) + timedelta(days=days_ahead)).isoformat()

        events_result = service.events().list(
            calendarId=calendar_id, timeMin=now, timeMax=end,
            maxResults=50, singleEvents=True, orderBy="startTime"
        ).execute()

        events = events_result.get("items", [])
        if not events:
            return {"status": "success", "count": 0, "events": []}

        return {"status": "success", "count": len(events), "events": [_format_event(e) for e in events]}
    except HttpError as e:
        return {"status": "error", "message": f"Calendar API error: {e}"}

def create_event(title: str, start_time: str, end_time: str, description: str = "", location: str = "", attendees: str = "", add_google_meet: bool = False) -> dict:
    """Create a new calendar event."""
    calendar_id = os.environ.get("CALENDAR_ID")
    try:
        service = _get_calendar_service()
        event_body = {
            "summary": title,
            "start": {"dateTime": start_time},
            "end": {"dateTime": end_time},
        }
        if description: event_body["description"] = description
        if location: event_body["location"] = location
        if attendees:
            email_list = [e.strip() for e in attendees.split(",") if e.strip()]
            event_body["attendees"] = [{"email": e} for e in email_list]

        conference_version = 0
        if add_google_meet:
            event_body["conferenceData"] = {
                "createRequest": {"requestId": f"event-{datetime.now().strftime('%Y%m%d%H%M%S')}", "conferenceSolutionKey": {"type": "hangoutsMeet"}}
            }
            conference_version = 1

        event = service.events().insert(calendarId=calendar_id, body=event_body, conferenceDataVersion=conference_version).execute()
        return {"status": "success", "message": f"Event created ✅", "event": _format_event(event)}
    except HttpError as e:
        return {"status": "error", "message": f"Calendar API error: {e}"}

def update_event(event_id: str, title: str = "", start_time: str = "", end_time: str = "", description: str = "") -> dict:
    """Update an existing calendar event."""
    calendar_id = os.environ.get("CALENDAR_ID")
    try:
        service = _get_calendar_service()
        patch_body = {}
        if title: patch_body["summary"] = title
        if start_time: patch_body["start"] = {"dateTime": start_time}
        if end_time: patch_body["end"] = {"dateTime": end_time}
        if description: patch_body["description"] = description
        if not patch_body: return {"status": "error", "message": "No fields to update."}

        event = service.events().patch(calendarId=calendar_id, eventId=event_id, body=patch_body).execute()
        return {"status": "success", "message": "Event updated ✅", "event": _format_event(event)}
    except HttpError as e:
        return {"status": "error", "message": f"Calendar API error: {e}"}

def delete_event(event_id: str) -> dict:
    """Delete a calendar event by its ID."""
    calendar_id = os.environ.get("CALENDAR_ID")
    try:
        service = _get_calendar_service()
        service.events().delete(calendarId=calendar_id, eventId=event_id).execute()
        return {"status": "success", "message": f"Event '{event_id}' deleted ✅"}
    except HttpError as e:
        return {"status": "error", "message": f"Calendar API error: {e}"}

def quick_add_event(text: str) -> dict:
    """Create an event using natural language (e.g. 'Lunch with Sarah next Monday noon')."""
    calendar_id = os.environ.get("CALENDAR_ID")
    try:
        service = _get_calendar_service()
        event = service.events().quickAdd(calendarId=calendar_id, text=text).execute()
        return {"status": "success", "message": "Event created from text ✅", "event": _format_event(event)}
    except HttpError as e:
        return {"status": "error", "message": f"Calendar API error: {e}"}

calendar_agent = Agent(
    model='gemini-2.5-flash',
    name='calendar_specialist',
    description='Manages the user schedule and calendar events.',
    instruction='''
    You manage the user's Google Calendar.
    - Use list_events to check the schedule.
    - Use quick_add_event for simple, conversational scheduling requests (e.g., "Lunch tomorrow at noon").
    - Use create_event for complex meetings that require attendees, specific durations, or Google Meet links.
    - Use update_event to change details of an existing event.
    - Use delete_event to cancel or remove an event.

    CRITICAL: For update_event and delete_event, you must provide the exact `event_id`.
    If the user does not provide the ID, you MUST call list_events first to find the correct `event_id` before attempting the update or deletion.

    Always use the current date/time context provided by the root agent to resolve relative dates like "tomorrow".
    ''',
    tools=[list_events, create_event, update_event, delete_event, quick_add_event],
)
루트 에이전트 (agent.py) 완료
아래 코드를 사용하여 agent.py 파일을 업데이트합니다.
agent.py
import os
from datetime import datetime
from zoneinfo import ZoneInfo
from google.adk.agents.llm_agent import Agent
from google.adk.tools.agent_tool import AgentTool
from google.adk.tools.preload_memory_tool import PreloadMemoryTool
from google.adk.tools.load_memory_tool import load_memory_tool

# Import all our specialized sub-agents
from .research import research_agent
from .todo import todo_agent
from .calendar import calendar_agent
import tzlocal

# Automatically detect the local system timezone
TIMEZONE = tzlocal.get_localzone_name()

# Callback for persistent memory storage
async def auto_save_session_to_memory_callback(callback_context):
    await callback_context._invocation_context.memory_service.add_session_to_memory(
        callback_context._invocation_context.session)

# Callback to inject the current time into the prompt
async def setup_agent_context(callback_context, **kwargs):
    now = datetime.now(ZoneInfo(TIMEZONE))
    callback_context.state["current_time"] = now.strftime("%A, %Y-%m-%d %I:%M %p")
    callback_context.state["timezone"] = TIMEZONE

# --- ROOT AGENT DEFINITION ---
root_agent = Agent(
    model='gemini-2.5-flash',
    name='executive_assistant',
    description='A professional AI Executive Assistant with memory and specialized tools.',
    instruction='''
    You are an elite, high-signal AI Executive Assistant.
    Your goal is to help the user manage their knowledge, tasks, research, and schedule.

    ## Your Capabilities:
    1. Memory: Use load_memory to recall personal facts.
    2. Research: Delegate complex web investigations to the research_specialist.
    3. Tasks: Delegate all to-do list management to the todo_specialist.
    4. Scheduling: Delegate all calendar queries to the calendar_specialist.

    ## 🕒 Current State
    - Time: {current_time?}
    - Timezone: {timezone?}

    Always be direct and professional.
    ''',
    tools=[
        PreloadMemoryTool(),
        load_memory_tool,
        AgentTool(todo_agent),
        AgentTool(calendar_agent)
    ],
    sub_agents=[research_agent],
    before_agent_callback=[setup_agent_context],
    after_agent_callback=[auto_save_session_to_memory_callback],
)
캘린더 도구 외에도 새로운 상담사 전 콜백 함수(setup_agent_context)가 추가되었습니다. 이 함수는 상담사가 현재 날짜, 시간, 시간대를 인식하여 캘린더를 더 효율적으로 사용할 수 있도록 지원합니다. 이 기능은 단기 지속성을 위해 설계된 다른 종류의 에이전트 메모리인 세션 상태 변수를 설정하여 작동합니다.
마지막으로 adk web을 실행하여 완전한 에이전트를 테스트합니다.
uv run adk web --memory_service_uri="agentengine://$ENGINE_ID"
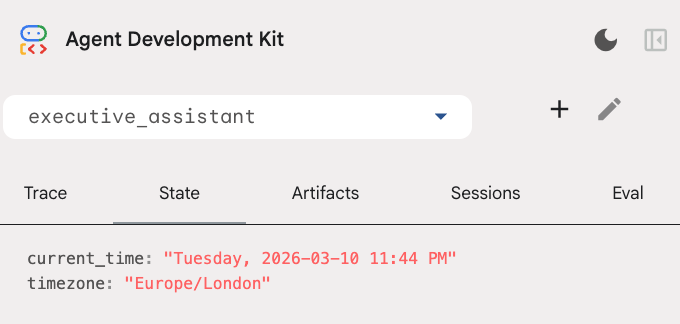
개발자 UI의 상태 탭에서 세션 상태를 검사할 수 있습니다.
이제 캘린더 일정, 할 일 목록을 추적하고, 조사를 수행하고, 장기 기억을 갖춘 에이전트가 있습니다.
실습 후 정리
9. 결론
축하합니다. 5단계의 진화 단계를 거쳐 다기능 AI 비서의 아키텍처를 성공적으로 설계했습니다.
학습한 내용
- AI 에이전트를 위한 인프라 프로비저닝
- ADK 내장 기능을 사용하여 지속적 메모리 및 전문 하위 에이전트 구현
- 외부 데이터베이스 및 생산성 API 통합
다음 단계
이 플랫폼에서 다른 Codelab을 살펴보거나 직접 비서 기능을 개선하여 학습 여정을 계속할 수 있습니다.
개선 아이디어가 필요하다면 다음을 시도해 보세요.
- 이벤트 압축을 구현하여 긴 대화의 성능을 최적화합니다.
- 에이전트가 메모를 작성하고 파일로 저장할 수 있도록 아티팩트 서비스를 추가합니다.
- Google Cloud Run을 사용하여 에이전트를 백엔드 서비스로 배포합니다.
테스트를 완료한 후에는 결제 계정에 예기치 않은 요금이 청구되지 않도록 환경을 정리해야 합니다.
즐겁게 코딩해 보세요!