
1. Giới thiệu
Trong lớp học lập trình này, bạn sẽ tìm hiểu cách xây dựng một tác nhân AI phức tạp bằng Bộ công cụ phát triển tác nhân (ADK) của Google. Chúng tôi sẽ đi theo một lộ trình phát triển tự nhiên, bắt đầu từ một tác nhân đàm thoại cơ bản và dần dần bổ sung các chức năng chuyên biệt.
Tác nhân mà chúng ta đang xây dựng là một trợ lý điều hành, được thiết kế để giúp bạn thực hiện các công việc hằng ngày như quản lý lịch, nhắc nhở bạn về các việc cần làm, nghiên cứu và biên soạn ghi chú, tất cả đều được xây dựng từ đầu bằng ADK, Gemini và Vertex AI.
Khi kết thúc bài thực hành này, bạn sẽ có một tác nhân hoạt động đầy đủ và kiến thức cần thiết để mở rộng tác nhân đó cho phù hợp với nhu cầu của riêng bạn.
Điều kiện tiên quyết
- Kiến thức cơ bản về ngôn ngữ lập trình Python
- Kiến thức cơ bản về bảng điều khiển Google Cloud để quản lý tài nguyên trên đám mây
Kiến thức bạn sẽ học được
- Cung cấp cơ sở hạ tầng Google Cloud cho các Đặc vụ AI.
- Triển khai bộ nhớ dài hạn liên tục bằng cách sử dụng Vertex AI Memory Bank.
- Xây dựng một hệ thống phân cấp các tác nhân phụ chuyên biệt.
- Tích hợp cơ sở dữ liệu bên ngoài và hệ sinh thái Google Workspace.
Bạn cần có
Bạn có thể thực hiện toàn bộ hội thảo này trong Google Cloud Shell. Công cụ này đi kèm với tất cả các phần phụ thuộc cần thiết (gcloud CLI, trình soạn thảo mã, Go, Gemini CLI) được cài đặt sẵn.
Ngoài ra, nếu muốn làm việc trên máy của riêng mình, bạn sẽ cần những thứ sau:
- Python (phiên bản 3.12 trở lên)
- Trình soạn thảo mã hoặc IDE (chẳng hạn như VS Code hoặc
vim). - Một thiết bị đầu cuối để thực thi các lệnh Python và
gcloud. - Nên dùng: một tác nhân lập trình như Gemini CLI hoặc Antigravity
Công nghệ chính
Tại đây, bạn có thể tìm thêm thông tin về các công nghệ mà chúng tôi sẽ sử dụng:
2. Thiết lập môi trường
Chọn một trong các lựa chọn sau: Thiết lập môi trường tự học nếu bạn muốn chạy lớp học lập trình này trên máy của riêng mình; hoặc Bắt đầu Cloud Shell nếu bạn muốn chạy hoàn toàn lớp học lập trình này trên đám mây.
Thiết lập môi trường theo tốc độ của riêng bạn
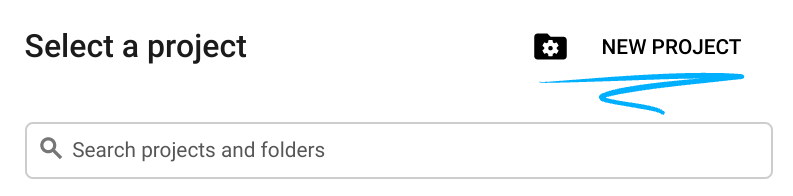
- Đăng nhập vào Google Cloud Console rồi tạo một dự án mới hoặc sử dụng lại một dự án hiện có. Nếu chưa có tài khoản Gmail hoặc Google Workspace, bạn phải tạo một tài khoản.

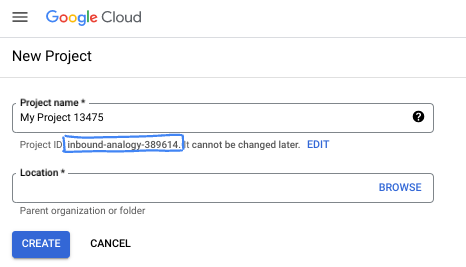
- Tên dự án là tên hiển thị của những người tham gia dự án này. Đây là một chuỗi ký tự mà các API của Google không sử dụng. Bạn luôn có thể cập nhật thông tin này.
- Mã dự án là mã duy nhất trên tất cả các dự án trên Google Cloud và không thể thay đổi (bạn không thể thay đổi mã này sau khi đã đặt). Cloud Console sẽ tự động tạo một chuỗi duy nhất; thường thì bạn không cần quan tâm đến chuỗi này. Trong hầu hết các lớp học lập trình, bạn sẽ cần tham chiếu đến Mã dự án (thường được xác định là
PROJECT_ID). Nếu không thích mã nhận dạng được tạo, bạn có thể tạo một mã nhận dạng ngẫu nhiên khác. Hoặc bạn có thể thử tên người dùng của riêng mình để xem tên đó có được chấp nhận hay không. Bạn không thể thay đổi tên này sau bước này và tên này sẽ tồn tại trong suốt thời gian của dự án. - Để bạn nắm được thông tin, có một giá trị thứ ba là Số dự án mà một số API sử dụng. Tìm hiểu thêm về cả 3 giá trị này trong tài liệu.
- Tiếp theo, bạn cần bật tính năng thanh toán trong Cloud Console để sử dụng các tài nguyên/API trên Cloud. Việc thực hiện lớp học lập trình này sẽ không tốn nhiều chi phí, nếu có. Để tắt các tài nguyên nhằm tránh bị tính phí ngoài phạm vi hướng dẫn này, bạn có thể xoá các tài nguyên đã tạo hoặc xoá dự án. Người dùng mới của Google Cloud đủ điều kiện tham gia chương trình Dùng thử miễn phí trị giá 300 USD.
Khởi động Cloud Shell
Mặc dù có thể vận hành Google Cloud từ xa trên máy tính xách tay, nhưng trong lớp học lập trình này, bạn sẽ sử dụng Google Cloud Shell, một môi trường dòng lệnh chạy trên Cloud.
Trên Bảng điều khiển Google Cloud, hãy nhấp vào biểu tượng Cloud Shell trên thanh công cụ ở trên cùng bên phải:

Quá trình này chỉ mất vài phút để cung cấp và kết nối với môi trường. Khi quá trình này kết thúc, bạn sẽ thấy như sau:

Máy ảo này được trang bị tất cả các công cụ phát triển mà bạn cần. Nền tảng này cung cấp một thư mục chính có dung lượng 5 GB và chạy trên Google Cloud, giúp tăng cường đáng kể hiệu suất mạng và hoạt động xác thực. Bạn có thể thực hiện mọi thao tác trong lớp học lập trình này trong trình duyệt. Bạn không cần cài đặt bất cứ thứ gì.
3. Thiết lập dự án
Trước khi viết mã, chúng ta phải cung cấp cơ sở hạ tầng và các quyền cần thiết trong Google Cloud.
Đặt các biến môi trường
Mở cửa sổ dòng lệnh rồi thiết lập các biến môi trường sau:
export PROJECT_ID=`gcloud config get project`
export LOCATION=us-central1
Bật các API bắt buộc
Trợ lý ảo của bạn cần có quyền truy cập vào một số dịch vụ của Google Cloud. Chạy lệnh sau để bật các tính năng này:
gcloud services enable \
    aiplatform.googleapis.com \
    calendar-json.googleapis.com \
    sqladmin.googleapis.com
Xác thực bằng Thông tin xác thực mặc định của ứng dụng
Chúng ta cần xác thực bằng Thông tin xác thực mặc định của ứng dụng (ADC) để giao tiếp với các dịch vụ Google Cloud từ môi trường của bạn.
Chạy lệnh sau để đảm bảo Thông tin xác thực mặc định của ứng dụng đang hoạt động và luôn mới nhất:
gcloud auth application-default login
4. Tạo tác nhân cơ sở
Bây giờ, chúng ta cần khởi tạo thư mục nơi chúng ta sẽ lưu trữ mã nguồn dự án:
# setup project directory
mkdir -p adk_ea_codelab && cd adk_ea_codelab
# prepare virtual environment
uv init
# install dependencies
uv add google-adk google-api-python-client tzlocal python-dotenv
uv add cloud-sql-python-connector[pg8000] sqlalchemy
Chúng ta bắt đầu bằng cách thiết lập danh tính và các khả năng trò chuyện cơ bản của trợ lý ảo. Trong ADK, lớp Agent xác định tính cách của tác nhân và hướng dẫn của tác nhân.
Đây là thời điểm bạn nên nghĩ về tên của trợ lý ảo. Tôi muốn các tác nhân của mình có tên riêng phù hợp như Aida hoặc Sharon, vì tôi nghĩ điều này sẽ giúp tác nhân có "cá tính" riêng. Tuy nhiên, bạn cũng có thể chỉ cần gọi tác nhân theo chức năng của tác nhân đó, chẳng hạn như "trợ lý_điều_hành", "đại_lý_du_lịch" hoặc "trình_thực_thi_mã".
Chạy lệnh adk create để tạo một tác nhân mẫu:
# replace with your desired agent name
uv run adk create executive_assistant
Vui lòng chọn gemini-2.5-flash làm mô hình và Vertex AI làm phần phụ trợ. Kiểm tra kỹ để đảm bảo mã dự án được đề xuất là mã bạn đã tạo cho phòng thí nghiệm này, rồi nhấn phím Enter để xác nhận. Đối với khu vực Google Cloud, bạn có thể chấp nhận giá trị mặc định (us-central1). Thiết bị đầu cuối của bạn sẽ có dạng như sau:
daniela_petruzalek@cloudshell:~/adk_ea_codelab (your-project-id)$ uv run adk create executive_assistant
Choose a model for the root agent:
1. gemini-2.5-flash
2. Other models (fill later)
Choose model (1, 2): 1
1. Google AI
2. Vertex AI
Choose a backend (1, 2): 2

You need an existing Google Cloud account and project, check out this link for details:
https://google.github.io/adk-docs/get-started/quickstart/#gemini---google-cloud-vertex-ai

Enter Google Cloud project ID [your-project-id]:
Enter Google Cloud region [us-central1]:

Agent created in /home/daniela_petruzalek/adk_ea_codelab/executive_assistant:
- .env
- __init__.py
- agent.py

daniela_petruzalek@cloudshell:~/adk_ea_codelab (your-project-id)$
Sau khi hoàn tất, lệnh trước đó sẽ tạo một thư mục có tên tác nhân (ví dụ: executive_assistant) với một số tệp trong đó, bao gồm cả tệp agent.py có định nghĩa cơ bản về tác nhân:
from google.adk.agents.llm_agent import Agent

root_agent = Agent(
    model='gemini-2.5-flash',
    name='root_agent',
    description='A helpful assistant for user questions.',
    instruction='Answer user questions to the best of your knowledge',
)
Nếu muốn tương tác với tác nhân này, bạn có thể chạy uv run adk web trên dòng lệnh và mở giao diện người dùng phát triển trên trình duyệt. Bạn sẽ thấy nội dung như sau:
$ uv run adk web
...
INFO:     Started server process [1244]
INFO:     Waiting for application startup.

+-----------------------------------------------------------------------------+
| ADK Web Server started                                                      |
|                                                                             |
| For local testing, access at http://127.0.0.1:8000.                         |
+-----------------------------------------------------------------------------+

INFO:     Application startup complete.
INFO:     Uvicorn running on http://127.0.0.1:8000 (Press CTRL+C to quit)
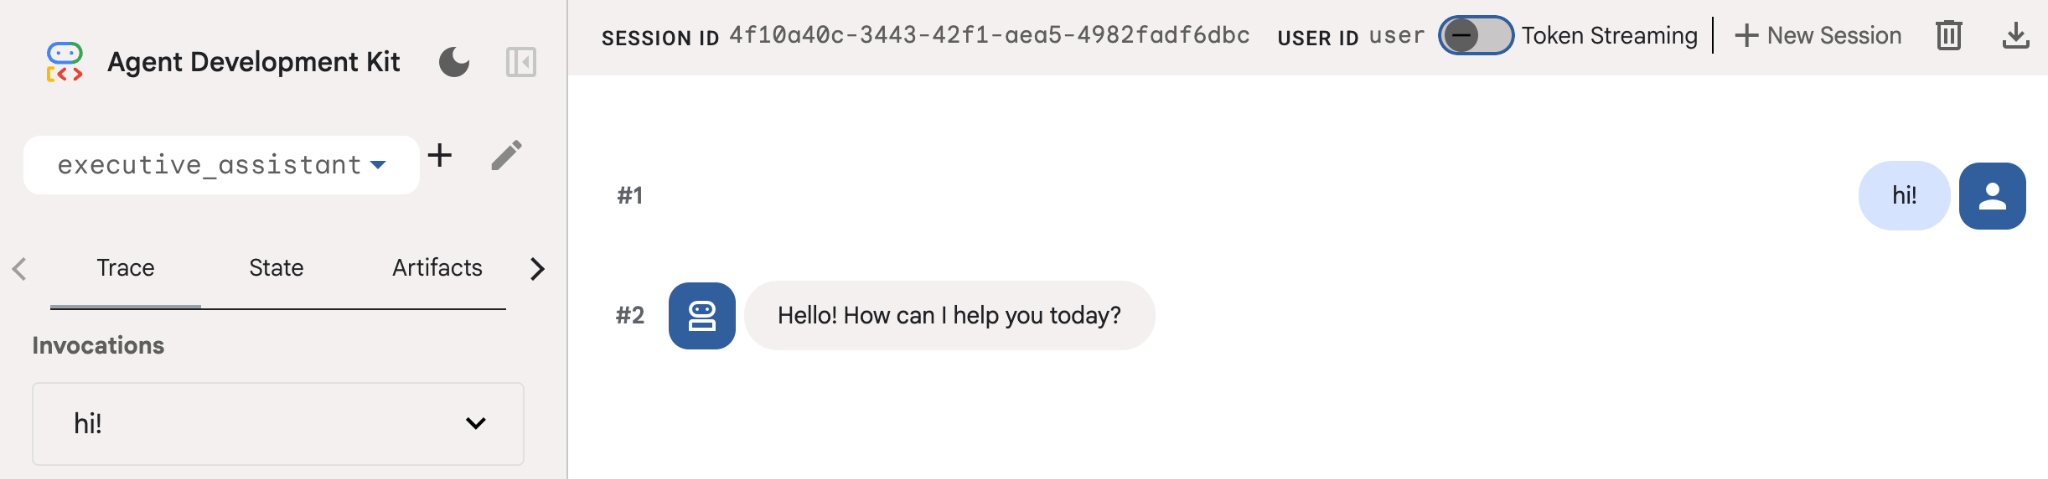
Ngay cả khi nhân viên hỗ trợ này khá cơ bản, bạn vẫn nên thực hiện việc này ít nhất một lần để đảm bảo chế độ thiết lập hoạt động đúng cách trước khi bắt đầu chỉnh sửa nhân viên hỗ trợ. Ảnh chụp màn hình bên dưới cho thấy một hoạt động tương tác đơn giản bằng giao diện người dùng phát triển:
Bây giờ, hãy sửa đổi định nghĩa về tác nhân bằng tính cách trợ lý điều hành của chúng ta. Sao chép mã bên dưới và thay thế nội dung của agent.py. Điều chỉnh tên và tính cách của tác nhân theo sở thích của bạn.
from google.adk.agents.llm_agent import Agent

root_agent = Agent(
    model='gemini-2.5-flash',
    name='executive_assistant',
    description='A professional AI Executive Assistant',
    instruction='''
    You are an elite, warm, and highly efficient AI partner.
    Your primary goal is to help the user manage their tasks, schedule, and research.
    Always be direct, concise, and high-signal.
    ''',
)
Xin lưu ý rằng thuộc tính name xác định tên nội bộ của tác nhân, trong khi trong hướng dẫn, bạn cũng có thể đặt cho tác nhân một tên thân thiện hơn trong vai trò của tác nhân để tương tác với người dùng cuối. Tên nội bộ chủ yếu được dùng để quan sát và bàn giao trong các hệ thống có nhiều tác nhân bằng cách sử dụng công cụ transfer_to_agent. Bạn sẽ không tự xử lý công cụ này, ADK sẽ tự động đăng ký công cụ này khi bạn khai báo một hoặc nhiều tác nhân phụ.
Để chạy tác nhân mà chúng ta vừa tạo, hãy sử dụng adk web:
uv run adk web
Mở giao diện người dùng ADK trên trình duyệt và chào trợ lý mới của bạn!
5. Thêm bộ nhớ liên tục bằng Vertex AI Memory Bank
Một trợ lý thực thụ phải ghi nhớ các lựa chọn ưu tiên và hoạt động tương tác trước đây để mang đến trải nghiệm liền mạch và phù hợp với từng người dùng. Trong bước này, chúng ta sẽ tích hợp Vertex AI Agent Engine Memory Bank, một tính năng của Vertex AI giúp tạo động các thông tin ghi nhớ dài hạn dựa trên các cuộc trò chuyện của người dùng.
Memory Bank cho phép tác nhân tạo thông tin được cá nhân hoá mà bạn có thể truy cập trong nhiều phiên, thiết lập tính liên tục giữa các phiên. Ở chế độ nền, tính năng này quản lý trình tự thời gian của các tin nhắn trong một phiên và có thể sử dụng tính năng truy xuất tìm kiếm tương tự để cung cấp cho tác nhân những thông tin phù hợp nhất cho ngữ cảnh hiện tại.
Khởi động Dịch vụ bộ nhớ
ADK sử dụng Vertex AI để lưu trữ và truy xuất những ký ức dài hạn. Bạn phải khởi chạy "Memory Engine" trong dự án của mình. Về cơ bản, đây là một phiên bản Reasoning Engine được định cấu hình để hoạt động như một Memory Bank.
Tạo tập lệnh sau đây dưới dạng setup_memory.py:
setup_memory.py
import vertexai
import os

PROJECT_ID=os.getenv("PROJECT_ID")
LOCATION=os.getenv("LOCATION")

client = vertexai.Client(project=PROJECT_ID, location=LOCATION)

# Create Reasoning Engine for Memory Bank
agent_engine = client.agent_engines.create()

# You will need this resource name to give it to ADK
print(agent_engine.api_resource.name)
Bây giờ, hãy chạy setup_memory.py để cung cấp công cụ suy luận cho bộ nhớ:
uv run python setup_memory.py
Kết quả đầu ra sẽ có dạng như sau:
$ uv run python setup.py
projects/1234567890/locations/us-central1/reasoningEngines/1234567890
Lưu tên tài nguyên công cụ trong một biến môi trường:
export ENGINE_ID="<insert the resource name above>"
Bây giờ, chúng ta cần cập nhật mã để sử dụng bộ nhớ liên tục. Thay thế nội dung của agent.py bằng nội dung sau:
agent.py
from google.adk.agents.llm_agent import Agent
from google.adk.tools.preload_memory_tool import PreloadMemoryTool
from google.adk.tools.load_memory_tool import load_memory_tool

async def auto_save_session_to_memory_callback(callback_context):
    await callback_context._invocation_context.memory_service.add_session_to_memory(
        callback_context._invocation_context.session)

# Update root_agent with memory tools and callback
root_agent = Agent(
    model='gemini-2.5-flash',
    name='executive_assistant',
    description='Executive Assistant with Persistent Memory',
    instruction='''
    You are an elite AI partner with long-term memory.
    Use load_memory to find context about the user when needed.
    Always be direct, concise, and high-signal.
    ''',
    tools=[PreloadMemoryTool(), load_memory_tool],
    after_agent_callback=auto_save_session_to_memory_callback,
)
PreloadMemoryTool tự động chèn ngữ cảnh phù hợp từ các cuộc trò chuyện trước đây vào từng yêu cầu (bằng cách sử dụng tính năng truy xuất tìm kiếm tương tự), trong khi load_memory_tool cho phép mô hình truy vấn rõ ràng Ngân hàng bộ nhớ để biết thông tin thực tế khi cần. Sự kết hợp này giúp tác nhân của bạn có được ngữ cảnh sâu sắc và bền bỉ!
Giờ đây, để chạy tác nhân có hỗ trợ bộ nhớ, bạn cần truyền memory_service_uri khi chạy adk web:
uv run adk web --memory_service_uri="agentengine://$ENGINE_ID"
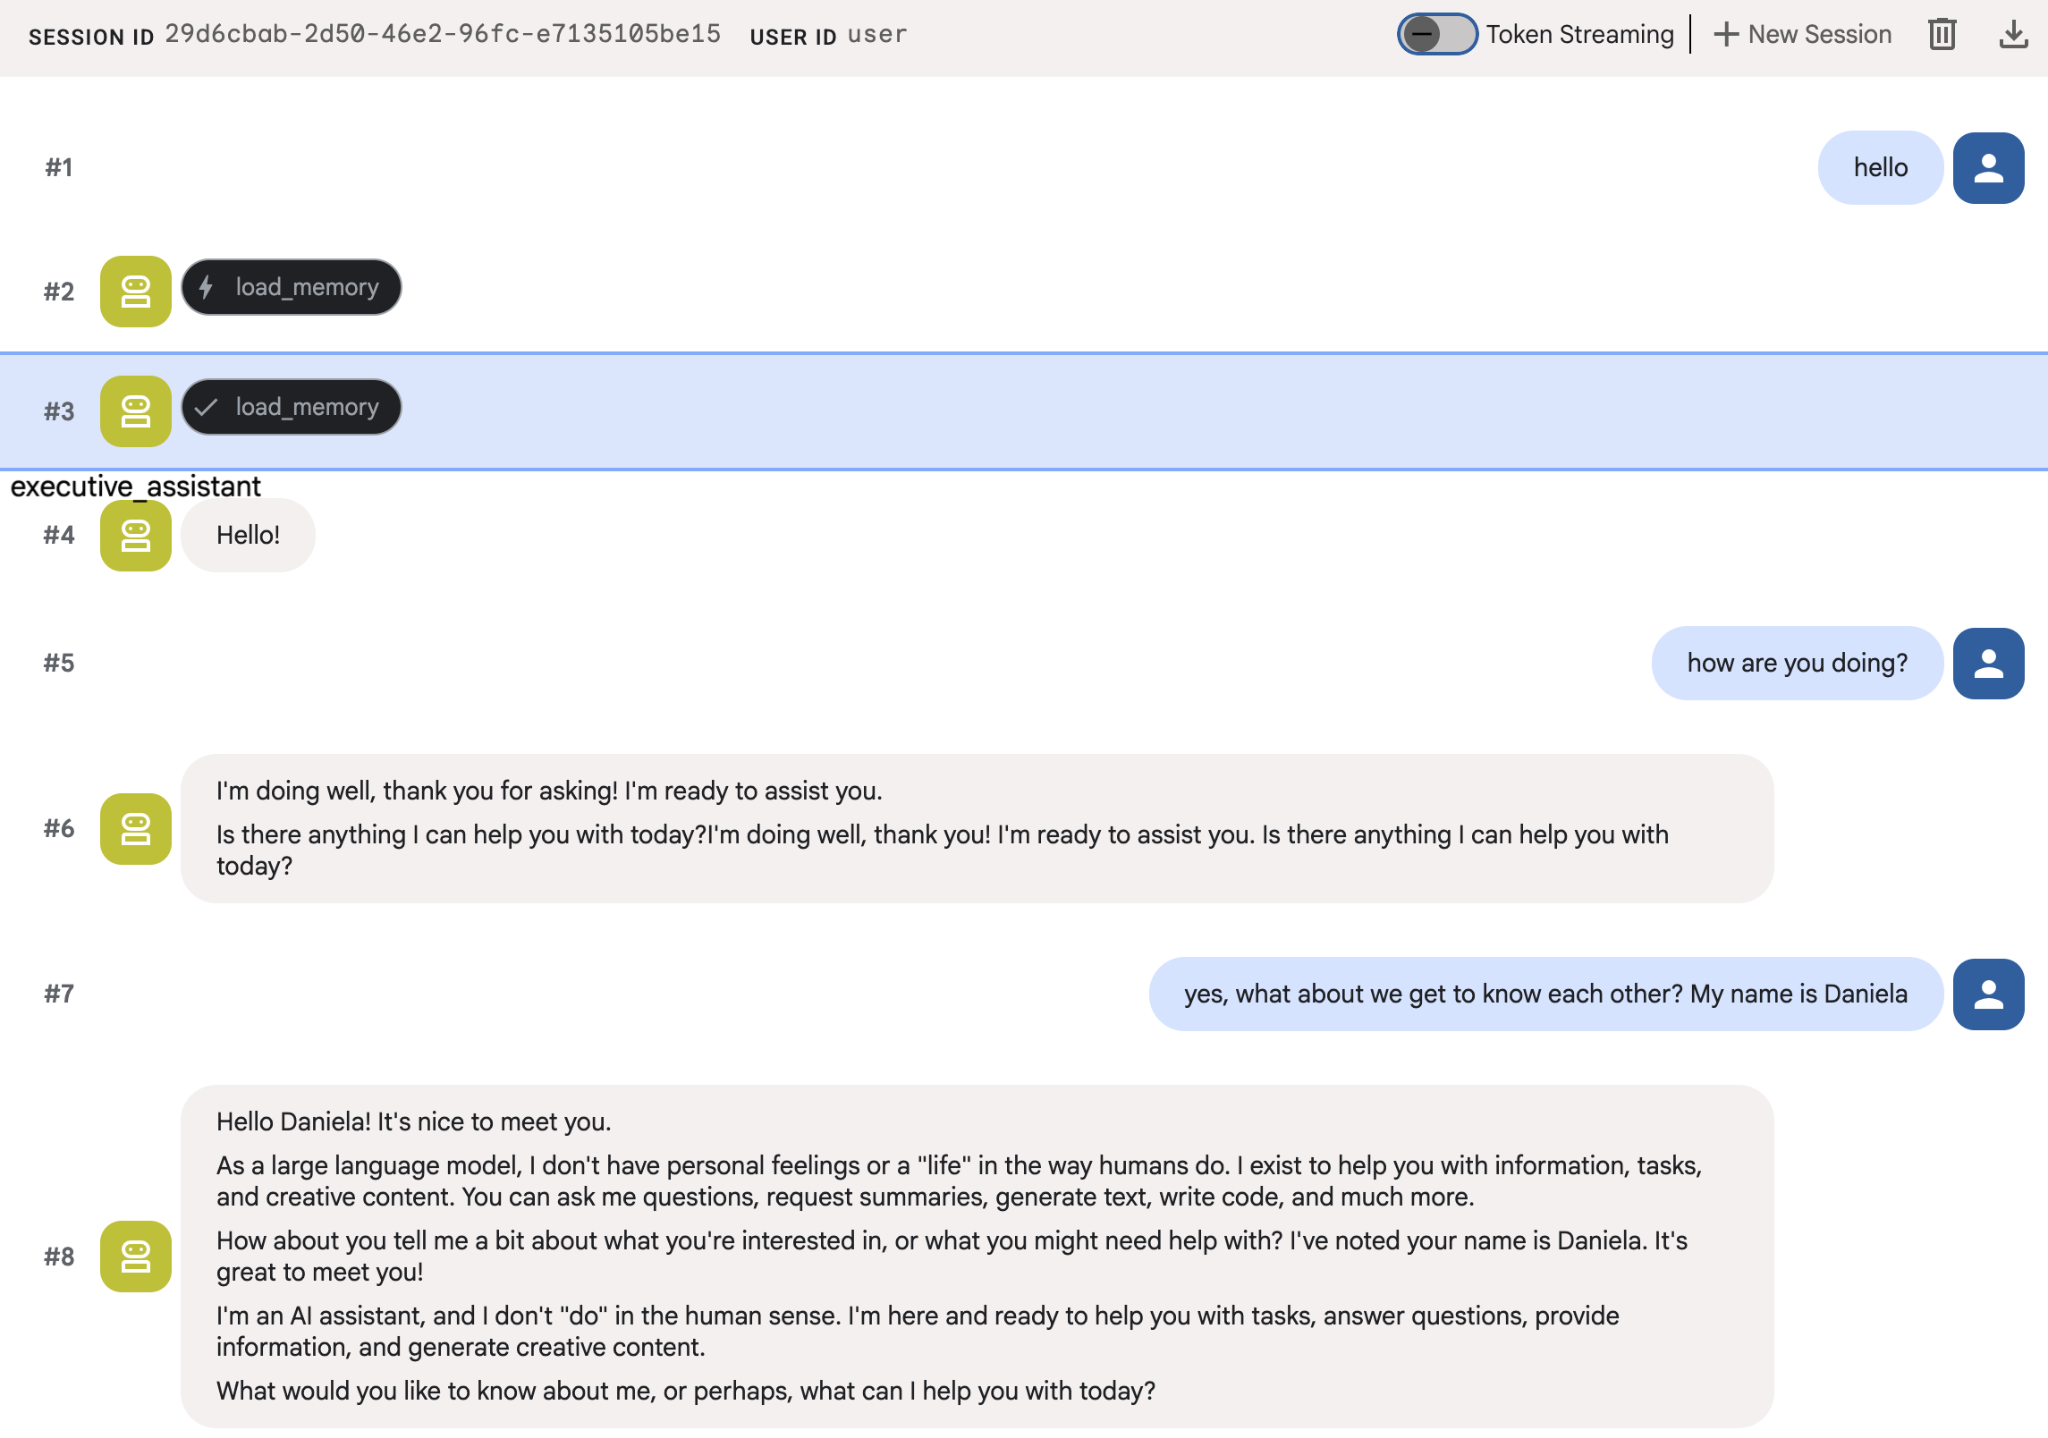
Hãy thử cung cấp cho các đặc vụ một vài thông tin về bản thân, sau đó quay lại trong một phiên trò chuyện khác để hỏi về những thông tin đó. Ví dụ: nói tên của bạn cho thiết bị:
Bạn có thể kiểm tra những kỷ niệm mà tác nhân đang lưu trên bảng điều khiển đám mây. Truy cập vào trang sản phẩm "Agent Engine" (dùng thanh tìm kiếm)

Sau đó, hãy nhấp vào tên công cụ của trợ lý (hãy nhớ chọn đúng khu vực):

Sau đó, hãy chuyển đến thẻ kỷ niệm:
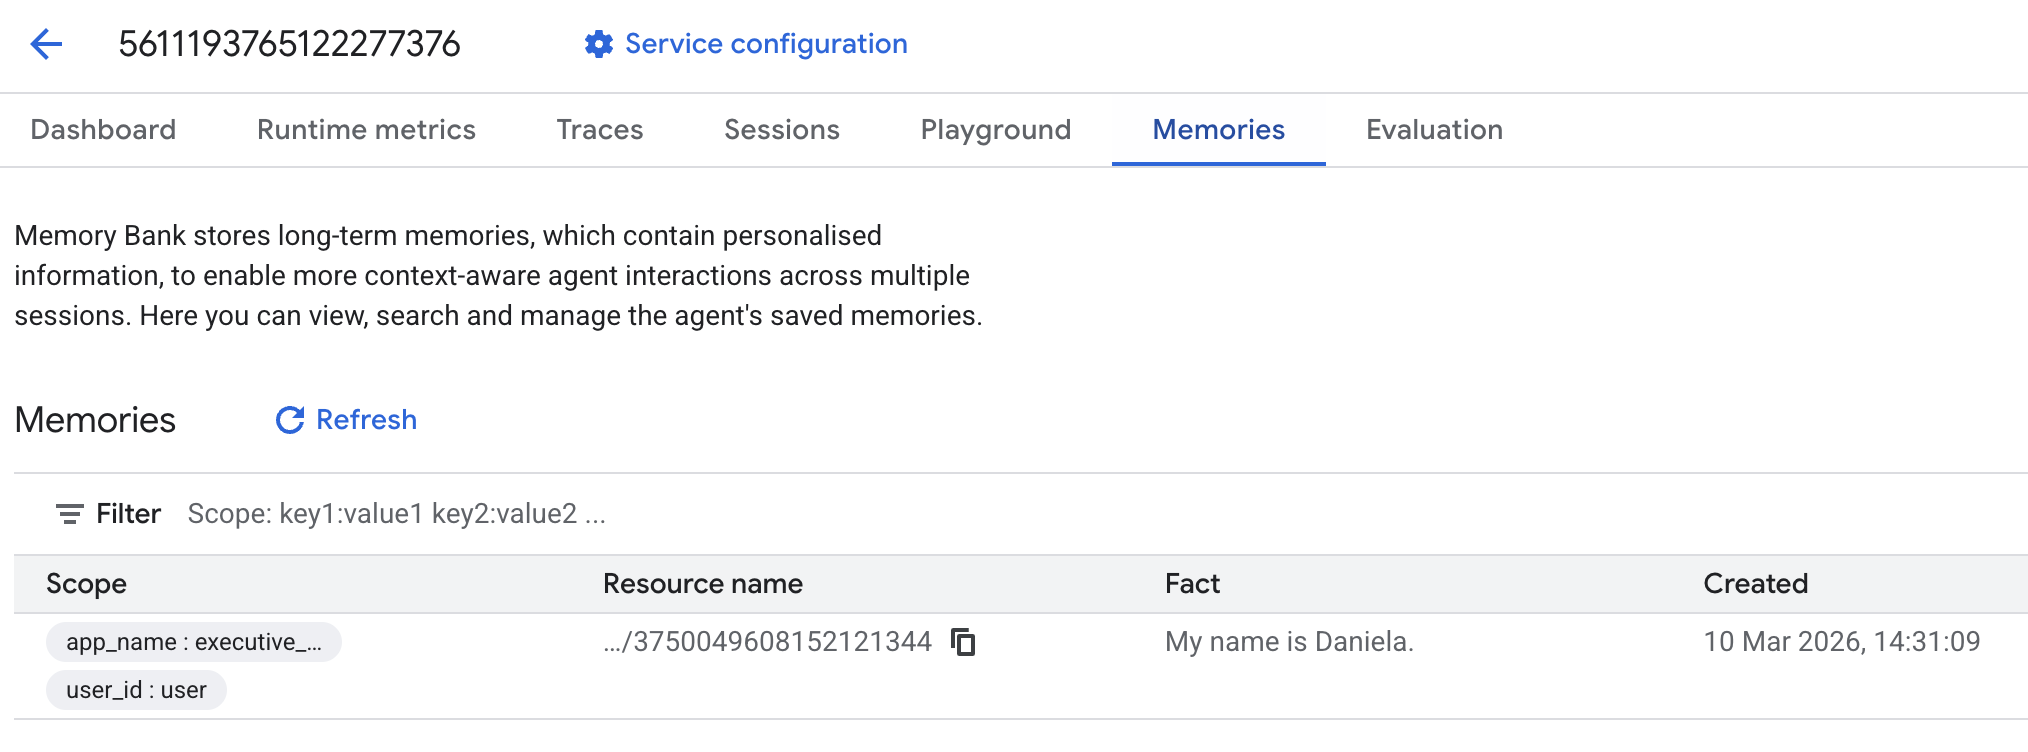
Bạn sẽ thấy một số kỷ niệm được thêm vào.
6. Thêm chức năng nghiên cứu trên web
Để cung cấp thông tin chất lượng cao, tác nhân của chúng tôi phải tiến hành điều tra kỹ lưỡng, không chỉ dựa vào một cụm từ tìm kiếm duy nhất. Bằng cách uỷ quyền nghiên cứu cho một tác nhân phụ chuyên biệt, chúng tôi duy trì khả năng phản hồi của nhân vật chính trong khi nhà nghiên cứu xử lý việc thu thập dữ liệu phức tạp ở chế độ nền.
Trong bước này, chúng ta triển khai LoopAgent để đạt được "độ sâu nghiên cứu" – cho phép tác nhân lặp lại quá trình tìm kiếm, đánh giá kết quả và tinh chỉnh các truy vấn cho đến khi có được bức tranh hoàn chỉnh. Chúng tôi cũng thực thi tính chặt chẽ về kỹ thuật bằng cách yêu cầu trích dẫn cùng dòng cho tất cả các phát hiện, đảm bảo mọi tuyên bố đều có đường liên kết đến nguồn.
Tạo Chuyên gia nghiên cứu (research.py)
Ở đây, chúng ta xác định một Agent cơ sở được trang bị công cụ Google Tìm kiếm và gói công cụ này trong một LoopAgent. Tham số max_iterations đóng vai trò là một cơ chế kiểm soát, đảm bảo rằng tác nhân lặp lại quá trình tìm kiếm tối đa 3 lần nếu vẫn còn những điểm thiếu sót trong quá trình hiểu.
research.py
from google.adk.agents.llm_agent import Agent
from google.adk.agents.loop_agent import LoopAgent
from google.adk.tools.google_search_tool import GoogleSearchTool
from google.adk.tools.tool_context import ToolContext

def exit_loop(tool_context: ToolContext):
    """Call this function ONLY when no further research is needed, signaling the iterative process should end."""
    print(f"  [Tool Call] exit_loop triggered by {tool_context.agent_name}")
    tool_context.actions.escalate = True
    # Return empty dict as tools should typically return JSON-serializable output
    return {}

# --- RESEARCH LOGIC ---
_research_worker = Agent(
    model='gemini-2.5-flash',
    name='research_worker',
    description='Worker agent that performs a single research step.',
    instruction='''
    Use google_search to find facts and synthesize them for the user.
    Critically evaluate your findings. If the data is incomplete or you need more context, prepare to search again in the next iteration.
    You must include the links you found as references in your response, formatting them like citations in a research paper (e.g., [1], [2]).
    Use the exit_loop tool to terminate the research early if no further research is needed.
    If you need to ask the user for clarifications, call the exit_loop function early to interrupt the research cycle.
    ''',
    tools=[GoogleSearchTool(bypass_multi_tools_limit=True), exit_loop],
)

# The LoopAgent iterates the worker up to 3 times for deeper research
research_agent = LoopAgent(
    name='research_specialist',
    description='Deep web research specialist.',
    sub_agents=[_research_worker],
    max_iterations=3,
)
Cập nhật Root Agent (agent.py)
Nhập research_agent và thêm đối tượng này làm công cụ cho Sharon:
agent.py
from google.adk.agents.llm_agent import Agent
from google.adk.tools.preload_memory_tool import PreloadMemoryTool
from google.adk.tools.load_memory_tool import load_memory_tool

# Import our new sub agent
from .research import research_agent

async def auto_save_session_to_memory_callback(callback_context):
    await callback_context._invocation_context.memory_service.add_session_to_memory(
        callback_context._invocation_context.session)

# Update root_agent with memory tools and callback
root_agent = Agent(
    model='gemini-2.5-flash',
    name='executive_assistant',
    description='Executive Assistant with persistent memory and research capabilities',
    instruction='''
    You are an elite AI partner with long-term memory.
    1. Use load_memory to recall facts.
    2. Delegate research tasks to the research_specialist.
    Always be direct, concise, and high-signal.
    ''',
    tools=[PreloadMemoryTool(), load_memory_tool],
    sub_agents=[research_agent],
    after_agent_callback=auto_save_session_to_memory_callback,
)
Khởi chạy lại adk web để kiểm thử tác nhân nghiên cứu.
uv run adk web --memory_service_uri="agentengine://$ENGINE_ID"
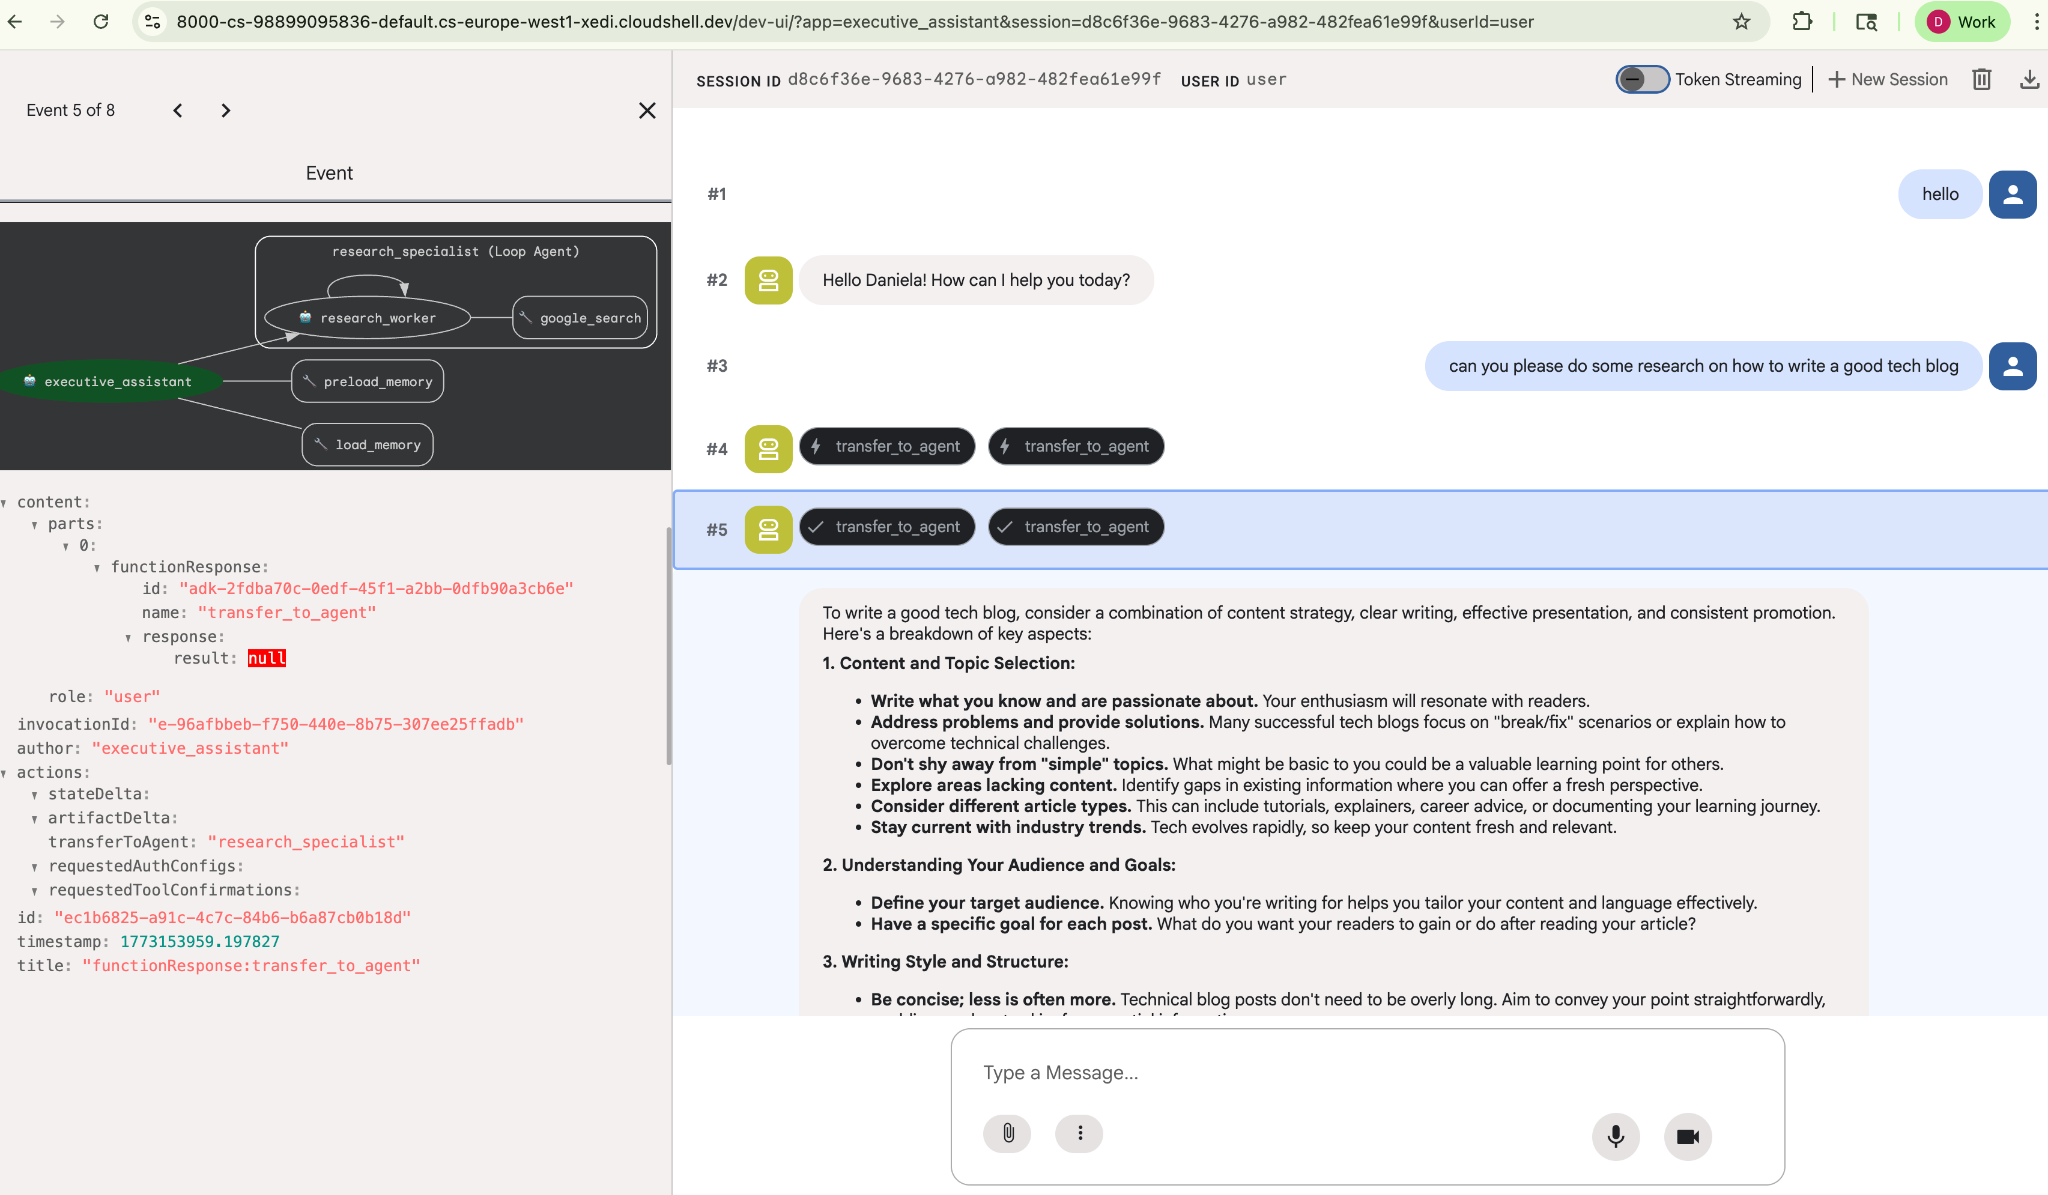
Giao cho AI một nhiệm vụ nghiên cứu đơn giản, chẳng hạn như "cách viết một blog hay về công nghệ".
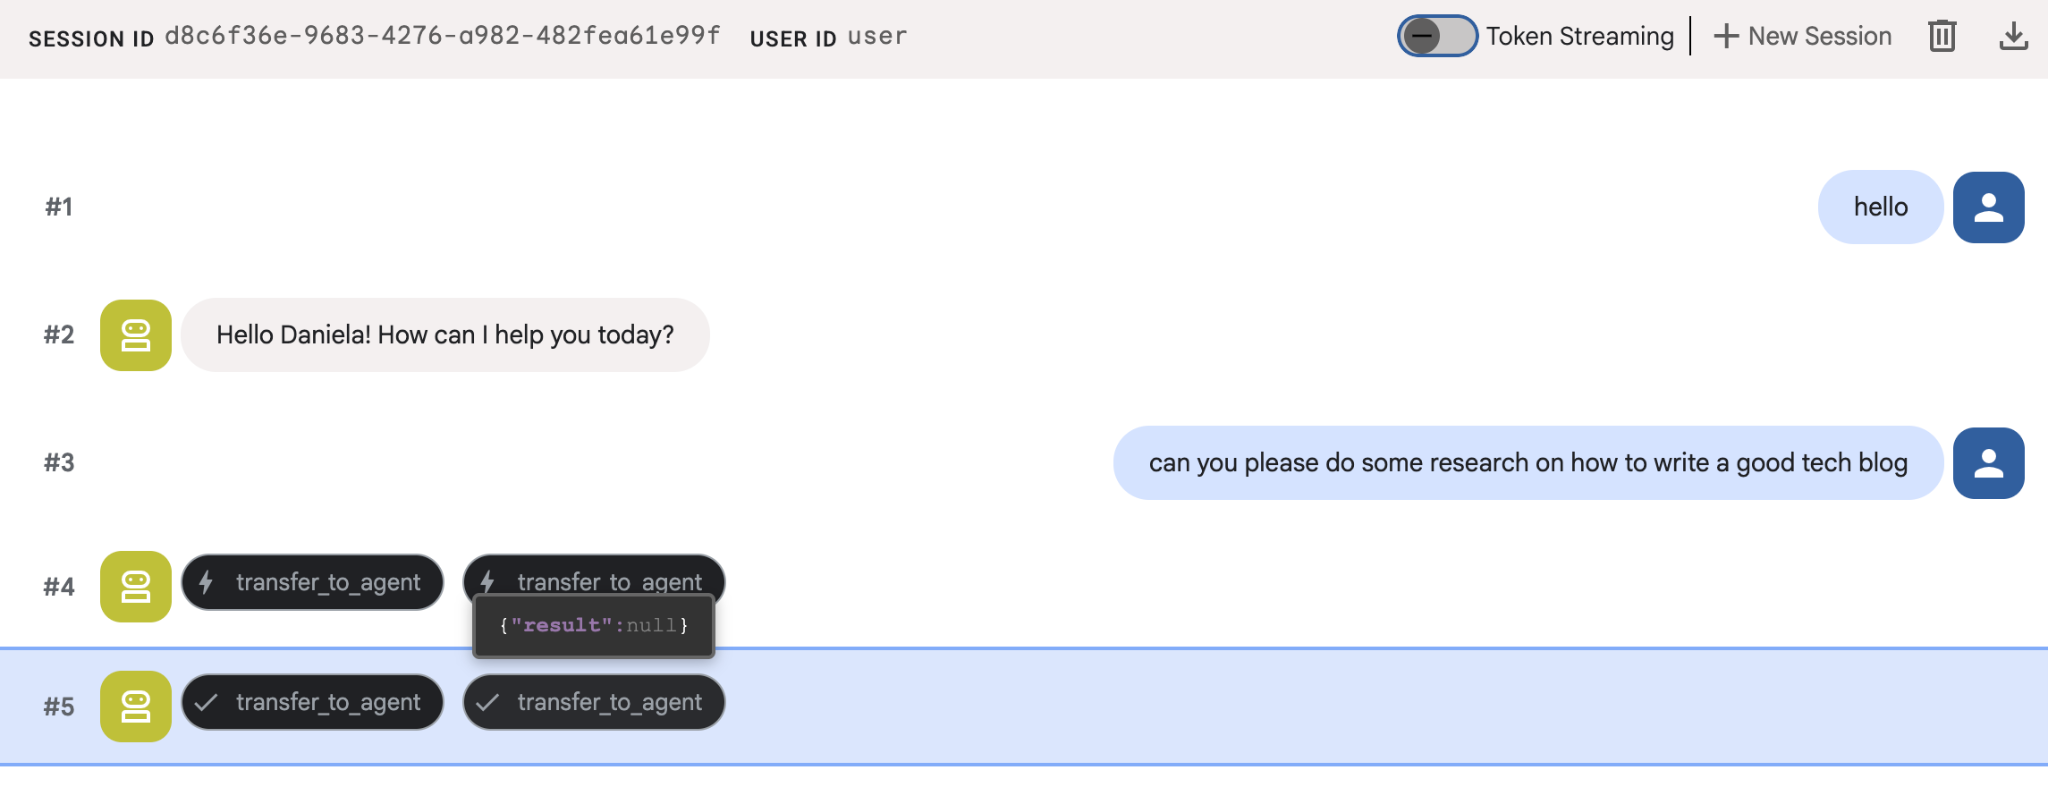
Có thể bạn đã nhận thấy rằng trợ lý nhớ tên tôi mặc dù đây là một phiên mới. Ngoài ra, hãy lưu ý đến lệnh gọi công cụ "transfer_to_agent": đây là công cụ chuyển giao nhiệm vụ cho tác nhân nghiên cứu mới của chúng tôi.
Bây giờ, hãy bắt đầu quản lý công việc.
7. Thêm tính năng quản lý công việc bằng Cloud SQL
Mặc dù có bộ nhớ dài hạn, nhưng tác nhân này không phù hợp với dữ liệu có cấu trúc, chi tiết như Danh sách việc cần làm. Đối với các tác vụ, chúng tôi sử dụng cơ sở dữ liệu quan hệ truyền thống. Chúng ta sẽ sử dụng SQLAlchemy và cơ sở dữ liệu Google Cloud SQL (PostgreSQL). Trước khi viết mã, chúng ta phải cung cấp cơ sở hạ tầng.
Cung cấp cơ sở hạ tầng
Chạy các lệnh này để tạo cơ sở dữ liệu. Lưu ý: Quá trình tạo thực thể mất khoảng 5 đến 10 phút. Bạn có thể chuyển sang bước tiếp theo trong khi quá trình này chạy ở chế độ nền.
# 1. Define instance variables
export INSTANCE_NAME="assistant-db"
export USER_EMAIL=$(gcloud config get-value account)

# 2. Create the Cloud SQL instance
gcloud sql instances create $INSTANCE_NAME \
    --database-version=POSTGRES_18 \
    --tier=db-f1-micro \
    --region=us-central1 \
    --edition=ENTERPRISE

# 3. Create the database for our tasks
gcloud sql databases create tasks --instance=$INSTANCE_NAME
Quá trình cấp phép phiên bản cơ sở dữ liệu sẽ mất vài phút. Đây có thể là thời điểm thích hợp để bạn thưởng thức một tách cà phê hoặc trà, hoặc cập nhật mã trong khi chờ quá trình này hoàn tất. Tuy nhiên, đừng quên quay lại và hoàn tất quy trình kiểm soát quyền truy cập!
Định cấu hình tính năng kiểm soát quyền truy cập
Bây giờ, chúng ta cần định cấu hình tài khoản người dùng của bạn để có quyền truy cập vào cơ sở dữ liệu. Chạy các lệnh sau trên thiết bị đầu cuối:
# change this to your favorite password
export DB_PASS="correct-horse-battery-staple"

# Create a regular database user
gcloud sql users create assistant_user \
    --instance=$INSTANCE_NAME \
    --password=$DB_PASS
Cập nhật cấu hình môi trường
ADK tải cấu hình từ tệp .env trong thời gian chạy. Cập nhật môi trường của tác nhân bằng thông tin chi tiết về kết nối cơ sở dữ liệu.
# Retrieve the unique connection name
export DB_CONN=$(gcloud sql instances describe $INSTANCE_NAME --format='value(connectionName)')

# Append configuration to your .env file
cat <<EOF >> executive_assistant/.env
DB_CONNECTION_NAME=$DB_CONN
DB_USER=assistant_user
DB_PASSWORD=$DB_PASS
DB_NAME=tasks
EOF
Bây giờ, hãy tiến hành sửa đổi mã.
Tạo Chuyên gia về việc cần làm (todo.py)
Tương tự như tác nhân nghiên cứu, hãy tạo chuyên gia về việc cần làm trong tệp riêng. Tạo todo.py:
todo.py
import os
import uuid
import sqlalchemy
from datetime import datetime
from typing import Optional, List

from sqlalchemy import (
    Column,
    String,
    DateTime,
    Enum,
    select,
    delete,
    update,
)
from sqlalchemy.orm import declarative_base, Session
from google.cloud.sql.connector import Connector
from google.adk.agents.llm_agent import Agent

# --- DATABASE LOGIC ---
Base = declarative_base()
connector = Connector()

def getconn():
    db_connection_name = os.environ.get("DB_CONNECTION_NAME")
    db_user = os.environ.get("DB_USER")
    db_password = os.environ.get("DB_PASSWORD")
    db_name = os.environ.get("DB_NAME", "tasks")

    return connector.connect(
        db_connection_name,
        "pg8000",
        user=db_user,
        password=db_password,
        db=db_name,
    )

engine = sqlalchemy.create_engine(
    "postgresql+pg8000://",
    creator=getconn,
)

class Todo(Base):
    __tablename__ = "todos"
    id = Column(String(36), primary_key=True, default=lambda: str(uuid.uuid4()))
    title = Column(String(255), nullable=False)
    priority = Column(
        Enum("high", "medium", "low", name="priority_levels"), nullable=False, default="medium"
    )
    due_date = Column(DateTime, nullable=True)
    status = Column(Enum("pending", "done", name="status_levels"), default="pending")
    created_at = Column(DateTime, default=datetime.utcnow)

def init_db():
    """Builds the table if it's missing."""
    Base.metadata.create_all(bind=engine)

def add_todo(
    title: str, priority: str = "medium", due_date: Optional[str] = None
) -> dict:
    """
    Adds a new task to the list.

    Args:
        title (str): The description of the task.
        priority (str): The urgency level. Must be one of: 'high', 'medium', 'low'.
        due_date (str, optional): The due date in ISO format (YYYY-MM-DD or YYYY-MM-DDTHH:MM:SS).

    Returns:
        dict: A dictionary containing the new task's ID and a status message.
    """
    init_db()
    with Session(engine) as session:
        due = datetime.fromisoformat(due_date) if due_date else None
        item = Todo(
            title=title,
            priority=priority.lower(),
            due_date=due,
        )
        session.add(item)
        session.commit()
        return {"id": item.id, "status": f"Task added ✅"}

def list_todos(status: str = "pending") -> list:
    """
    Lists tasks from the database, optionally filtering by status.

    Args:
        status (str, optional): The status to filter by. 'pending', 'done', or 'all'.
    """
    init_db()
    with Session(engine) as session:
        query = select(Todo)

        s_lower = status.lower()
        if s_lower != "all":
            query = query.where(Todo.status == s_lower)

        query = query.order_by(Todo.priority, Todo.created_at)

        results = session.execute(query).scalars().all()
        return [
            {
                "id": t.id,
                "task": t.title,
                "priority": t.priority,
                "status": t.status,
            }
            for t in results
        ]

def complete_todo(task_id: str) -> str:
    """Marks a specific task as 'done'."""
    init_db()
    with Session(engine) as session:
        session.execute(update(Todo).where(Todo.id == task_id).values(status="done"))
        session.commit()
        return f"Task {task_id} marked as done."

def delete_todo(task_id: str) -> str:
    """Permanently removes a task from the database."""
    init_db()
    with Session(engine) as session:
        session.execute(delete(Todo).where(Todo.id == task_id))
        session.commit()
        return f"Task {task_id} deleted."

# --- TODO SPECIALIST AGENT ---
todo_agent = Agent(
    model='gemini-2.5-flash',
    name='todo_specialist',
    description='A specialist agent that manages a structured SQL task list.',
    instruction='''
    You manage the user's task list using a PostgreSQL database.
    - Use add_todo when the user wants to remember something. If no priority is mentioned, mark it as 'medium'.
    - Use list_todos to show tasks.
    - Use complete_todo to mark a task as finished.
    - Use delete_todo to remove a task entirely.

    When marking a task as complete or deleting it, if the user doesn't provide the ID,
    use list_todos first to find the correct ID for the task they described.
    ''',
    tools=[add_todo, list_todos, complete_todo, delete_todo],
)
Đoạn mã trên chịu trách nhiệm cho 2 việc chính: kết nối với cơ sở dữ liệu Cloud SQL và cung cấp danh sách các công cụ cho tất cả các thao tác phổ biến trong danh sách việc cần làm, bao gồm cả việc thêm, xoá và đánh dấu là đã hoàn thành.
Vì logic này rất cụ thể đối với tác nhân việc cần làm và chúng ta không nhất thiết phải quan tâm đến việc quản lý chi tiết này theo quan điểm của trợ lý điều hành (tác nhân gốc), nên chúng ta sẽ đóng gói tác nhân này dưới dạng "AgentTool" thay vì tác nhân phụ.
Để quyết định xem có nên dùng AgentTool hay tác nhân phụ, hãy cân nhắc xem chúng có cần chia sẻ bối cảnh hay không:
- sử dụng AgentTool khi nhân viên hỗ trợ của bạn không cần chia sẻ bối cảnh với nhân viên hỗ trợ gốc
- sử dụng một tác nhân phụ khi bạn muốn tác nhân của mình chia sẻ ngữ cảnh với tác nhân gốc
Trong trường hợp tác nhân nghiên cứu, việc chia sẻ bối cảnh có thể hữu ích, nhưng đối với một tác nhân việc cần làm đơn giản thì việc này không mang lại nhiều lợi ích.
Hãy triển khai AgentTool trong agent.py.
Cập nhật Root Agent (agent.py)
Bây giờ, hãy nhập todo_agent vào tệp chính và đính kèm tệp này dưới dạng một công cụ:
agent.py
import os
from datetime import datetime
from google.adk.agents.llm_agent import Agent
from google.adk.tools.agent_tool import AgentTool
from google.adk.tools.preload_memory_tool import PreloadMemoryTool
from google.adk.tools.load_memory_tool import load_memory_tool

# Import our specialized sub-agents
from .research import research_agent
from .todo import todo_agent

# Callback for persistent memory storage
async def auto_save_session_to_memory_callback(callback_context):
    await callback_context._invocation_context.memory_service.add_session_to_memory(
        callback_context._invocation_context.session)

# --- ROOT AGENT DEFINITION ---
root_agent = Agent(
    model='gemini-2.5-flash',
    name='executive_assistant',
    description='A professional AI Executive Assistant with memory and specialized tools.',
    instruction='''
    You are an elite, high-signal AI Executive Assistant.
    Your goal is to help the user manage their knowledge, tasks, and research.

    ## Your Capabilities:
    1. Memory: Use load_memory to recall personal facts or past context about the user.
    2. Research: Delegate complex web-based investigations to the research_specialist.
    3. Tasks: Delegate all to-do list management (adding, listing, or completing tasks) to the todo_specialist.

    Always be direct and professional. If a task is successful, provide a brief confirmation.
    ''',
    tools=[
        PreloadMemoryTool(),
        load_memory_tool,
        AgentTool(todo_agent) # Exposes the Todo Specialist as a tool
    ],
    sub_agents=[research_agent], # Exposes the Research Specialist for direct handover
    after_agent_callback=auto_save_session_to_memory_callback,
)
Chạy lại adk web để kiểm thử tính năng mới:
uv run adk web --memory_service_uri="agentengine://$ENGINE_ID"
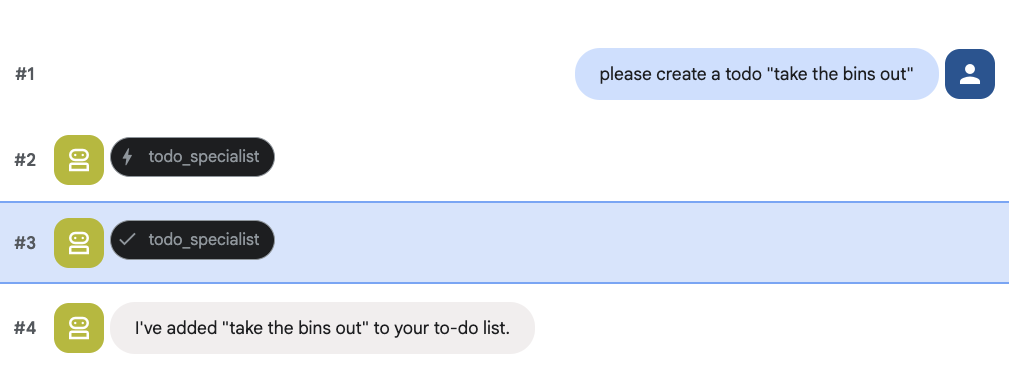
Và hãy thử tạo một việc cần làm:
8. Thêm tính năng quản lý lịch
Cuối cùng, chúng ta sẽ tích hợp với Lịch Google để tác nhân có thể quản lý các cuộc hẹn. Trong lớp học lập trình này, thay vì cấp cho tác nhân quyền truy cập vào lịch cá nhân của bạn (có thể gây nguy hiểm nếu không thực hiện đúng cách), chúng ta sẽ tạo một lịch độc lập để tác nhân quản lý.
Trước tiên, chúng ta sẽ tạo một Tài khoản dịch vụ chuyên dụng để đóng vai trò là danh tính của tác nhân. Sau đó, chúng ta sẽ tạo lịch của tác nhân theo phương thức lập trình bằng tài khoản dịch vụ.
Cung cấp tài khoản dịch vụ
Mở thiết bị đầu cuối và chạy các lệnh sau để tạo danh tính và cấp cho tài khoản cá nhân của bạn quyền mạo danh danh tính đó:
export SA_NAME="ea-agent"
export SA_EMAIL="${SA_NAME}@${PROJECT_ID}.iam.gserviceaccount.com"

# Create the service account
gcloud iam service-accounts create $SA_NAME \
    --display-name="Executive Assistant Agent"

# Allow your local user to impersonate it
gcloud iam service-accounts add-iam-policy-binding $SA_EMAIL \
    --member="user:$(gcloud config get-value account)" \
    --role="roles/iam.serviceAccountTokenCreator"

# Save it to the agent's environment
echo "SERVICE_ACCOUNT_EMAIL=$SA_EMAIL" >> executive_assistant/.env
Tạo lịch theo phương thức lập trình
Hãy viết một tập lệnh để yêu cầu Tài khoản dịch vụ tạo lịch. Tạo một tệp mới có tên setup_calendar.py trong thư mục gốc của dự án (cùng với setup_memory.py):
setup_calendar.py
import os
import google.auth
from googleapiclient.discovery import build
from google.auth.transport.requests import Request
from google.auth import impersonated_credentials
from dotenv import load_dotenv

load_dotenv('executive_assistant/.env')
SA_EMAIL = os.environ.get("SERVICE_ACCOUNT_EMAIL")

def setup_sa_calendar():
    print(f"Authenticating to impersonate {SA_EMAIL}...")

    # 1. Base credentials
    creds, _ = google.auth.default(scopes=["https://www.googleapis.com/auth/cloud-platform"])
    creds.refresh(Request())

    # 2. Impersonate the Service Account
    impersonated = impersonated_credentials.Credentials(
        source_credentials=creds,
        target_principal=SA_EMAIL,
        target_scopes=["https://www.googleapis.com/auth/calendar"],
    )
    service = build("calendar", "v3", credentials=impersonated)

    # 3. Create the calendar
    print("Creating independent Service Account calendar...")
    calendar = service.calendars().insert(body={
        "summary": "AI Assistant (SA Owned)",
        "description": "An independent calendar managed purely by the AI."
    }).execute()

    calendar_id = calendar['id']

    # 4. Save the ID
    with open("executive_assistant/.env", "a") as f:
        f.write(f"\nCALENDAR_ID={calendar_id}\n")
    print(f"Setup complete! CALENDAR_ID {calendar_id} added to .env")

if __name__ == "__main__":
    setup_sa_calendar()
Chạy tập lệnh từ thiết bị đầu cuối:
uv run python setup_calendar.py
Tạo Chuyên gia về lịch (calendar.py)
Bây giờ, hãy tập trung vào chuyên gia về lịch. Chúng tôi sẽ trang bị cho tác nhân này một đủ bộ công cụ lịch: liệt kê, tạo, cập nhật, xoá và thậm chí cả tính năng "thêm nhanh" có thể hiểu được ngôn ngữ tự nhiên.
Sao chép mã bên dưới vào calendar.py.
calendar.py
import os
from datetime import datetime, timedelta, timezone

import google.auth
from googleapiclient.discovery import build
from googleapiclient.errors import HttpError
from google.adk.agents.llm_agent import Agent

def _get_calendar_service():
    """Build the Google Calendar API service using Service Account Impersonation."""
    from google.auth.transport.requests import Request
    from google.auth import impersonated_credentials

    target_principal = os.environ.get("SERVICE_ACCOUNT_EMAIL")
    if not target_principal:
        raise ValueError("SERVICE_ACCOUNT_EMAIL environment variable is missing.")

    base_scopes = ["https://www.googleapis.com/auth/cloud-platform"]
    creds, _ = google.auth.default(scopes=base_scopes)
    creds.refresh(Request())

    target_scopes = ["https://www.googleapis.com/auth/calendar"]
    impersonated = impersonated_credentials.Credentials(
        source_credentials=creds,
        target_principal=target_principal,
        target_scopes=target_scopes,
    )

    return build("calendar", "v3", credentials=impersonated)

def _format_event(event: dict) -> dict:
    """Format a raw Calendar API event into a clean dict for the LLM."""
    start = event.get("start", {})
    end = event.get("end", {})
    return {
        "id": event.get("id"),
        "title": event.get("summary", "(No title)"),
        "start": start.get("dateTime", start.get("date")),
        "end": end.get("dateTime", end.get("date")),
        "location": event.get("location", ""),
        "description": event.get("description", ""),
        "attendees": [
            {"email": a["email"], "status": a.get("responseStatus", "unknown")}
            for a in event.get("attendees", [])
        ],
        "link": event.get("htmlLink", ""),
        "conference_link": (
            event.get("conferenceData", {}).get("entryPoints", [{}])[0].get("uri", "")
            if event.get("conferenceData")
            else ""
        ),
        "status": event.get("status", ""),
    }

def list_events(days_ahead: int = 7) -> dict:
    """List upcoming calendar events."""
    calendar_id = os.environ.get("CALENDAR_ID")
    try:
        service = _get_calendar_service()
        now = datetime.now(timezone.utc).isoformat()
        end = (datetime.now(timezone.utc) + timedelta(days=days_ahead)).isoformat()

        events_result = service.events().list(
            calendarId=calendar_id, timeMin=now, timeMax=end,
            maxResults=50, singleEvents=True, orderBy="startTime"
        ).execute()

        events = events_result.get("items", [])
        if not events:
            return {"status": "success", "count": 0, "events": []}

        return {"status": "success", "count": len(events), "events": [_format_event(e) for e in events]}
    except HttpError as e:
        return {"status": "error", "message": f"Calendar API error: {e}"}

def create_event(title: str, start_time: str, end_time: str, description: str = "", location: str = "", attendees: str = "", add_google_meet: bool = False) -> dict:
    """Create a new calendar event."""
    calendar_id = os.environ.get("CALENDAR_ID")
    try:
        service = _get_calendar_service()
        event_body = {
            "summary": title,
            "start": {"dateTime": start_time},
            "end": {"dateTime": end_time},
        }
        if description: event_body["description"] = description
        if location: event_body["location"] = location
        if attendees:
            email_list = [e.strip() for e in attendees.split(",") if e.strip()]
            event_body["attendees"] = [{"email": e} for e in email_list]

        conference_version = 0
        if add_google_meet:
            event_body["conferenceData"] = {
                "createRequest": {"requestId": f"event-{datetime.now().strftime('%Y%m%d%H%M%S')}", "conferenceSolutionKey": {"type": "hangoutsMeet"}}
            }
            conference_version = 1

        event = service.events().insert(calendarId=calendar_id, body=event_body, conferenceDataVersion=conference_version).execute()
        return {"status": "success", "message": f"Event created ✅", "event": _format_event(event)}
    except HttpError as e:
        return {"status": "error", "message": f"Calendar API error: {e}"}

def update_event(event_id: str, title: str = "", start_time: str = "", end_time: str = "", description: str = "") -> dict:
    """Update an existing calendar event."""
    calendar_id = os.environ.get("CALENDAR_ID")
    try:
        service = _get_calendar_service()
        patch_body = {}
        if title: patch_body["summary"] = title
        if start_time: patch_body["start"] = {"dateTime": start_time}
        if end_time: patch_body["end"] = {"dateTime": end_time}
        if description: patch_body["description"] = description
        if not patch_body: return {"status": "error", "message": "No fields to update."}

        event = service.events().patch(calendarId=calendar_id, eventId=event_id, body=patch_body).execute()
        return {"status": "success", "message": "Event updated ✅", "event": _format_event(event)}
    except HttpError as e:
        return {"status": "error", "message": f"Calendar API error: {e}"}

def delete_event(event_id: str) -> dict:
    """Delete a calendar event by its ID."""
    calendar_id = os.environ.get("CALENDAR_ID")
    try:
        service = _get_calendar_service()
        service.events().delete(calendarId=calendar_id, eventId=event_id).execute()
        return {"status": "success", "message": f"Event '{event_id}' deleted ✅"}
    except HttpError as e:
        return {"status": "error", "message": f"Calendar API error: {e}"}

def quick_add_event(text: str) -> dict:
    """Create an event using natural language (e.g. 'Lunch with Sarah next Monday noon')."""
    calendar_id = os.environ.get("CALENDAR_ID")
    try:
        service = _get_calendar_service()
        event = service.events().quickAdd(calendarId=calendar_id, text=text).execute()
        return {"status": "success", "message": "Event created from text ✅", "event": _format_event(event)}
    except HttpError as e:
        return {"status": "error", "message": f"Calendar API error: {e}"}

calendar_agent = Agent(
    model='gemini-2.5-flash',
    name='calendar_specialist',
    description='Manages the user schedule and calendar events.',
    instruction='''
    You manage the user's Google Calendar.
    - Use list_events to check the schedule.
    - Use quick_add_event for simple, conversational scheduling requests (e.g., "Lunch tomorrow at noon").
    - Use create_event for complex meetings that require attendees, specific durations, or Google Meet links.
    - Use update_event to change details of an existing event.
    - Use delete_event to cancel or remove an event.

    CRITICAL: For update_event and delete_event, you must provide the exact `event_id`.
    If the user does not provide the ID, you MUST call list_events first to find the correct `event_id` before attempting the update or deletion.

    Always use the current date/time context provided by the root agent to resolve relative dates like "tomorrow".
    ''',
    tools=[list_events, create_event, update_event, delete_event, quick_add_event],
)
Hoàn thiện Root Agent (agent.py)
Cập nhật tệp agent.py bằng mã bên dưới:
agent.py
import os
from datetime import datetime
from zoneinfo import ZoneInfo
from google.adk.agents.llm_agent import Agent
from google.adk.tools.agent_tool import AgentTool
from google.adk.tools.preload_memory_tool import PreloadMemoryTool
from google.adk.tools.load_memory_tool import load_memory_tool

# Import all our specialized sub-agents
from .research import research_agent
from .todo import todo_agent
from .calendar import calendar_agent
import tzlocal

# Automatically detect the local system timezone
TIMEZONE = tzlocal.get_localzone_name()

# Callback for persistent memory storage
async def auto_save_session_to_memory_callback(callback_context):
    await callback_context._invocation_context.memory_service.add_session_to_memory(
        callback_context._invocation_context.session)

# Callback to inject the current time into the prompt
async def setup_agent_context(callback_context, **kwargs):
    now = datetime.now(ZoneInfo(TIMEZONE))
    callback_context.state["current_time"] = now.strftime("%A, %Y-%m-%d %I:%M %p")
    callback_context.state["timezone"] = TIMEZONE

# --- ROOT AGENT DEFINITION ---
root_agent = Agent(
    model='gemini-2.5-flash',
    name='executive_assistant',
    description='A professional AI Executive Assistant with memory and specialized tools.',
    instruction='''
    You are an elite, high-signal AI Executive Assistant.
    Your goal is to help the user manage their knowledge, tasks, research, and schedule.

    ## Your Capabilities:
    1. Memory: Use load_memory to recall personal facts.
    2. Research: Delegate complex web investigations to the research_specialist.
    3. Tasks: Delegate all to-do list management to the todo_specialist.
    4. Scheduling: Delegate all calendar queries to the calendar_specialist.

    ## 🕒 Current State
    - Time: {current_time?}
    - Timezone: {timezone?}

    Always be direct and professional.
    ''',
    tools=[
        PreloadMemoryTool(),
        load_memory_tool,
        AgentTool(todo_agent),
        AgentTool(calendar_agent)
    ],
    sub_agents=[research_agent],
    before_agent_callback=[setup_agent_context],
    after_agent_callback=[auto_save_session_to_memory_callback],
)
Xin lưu ý rằng ngoài công cụ lịch, chúng tôi cũng đã thêm một hàm lệnh gọi lại trước khi có nhân viên hỗ trợ mới: setup_agent_context. Chức năng này giúp tác nhân nhận biết được ngày, giờ và múi giờ hiện tại để có thể sử dụng lịch một cách hiệu quả hơn. Tính năng này hoạt động bằng cách thiết lập các biến trạng thái phiên, một loại bộ nhớ tác nhân khác được thiết kế để duy trì trong thời gian ngắn.
Chạy adk web thêm một lần nữa để kiểm thử tác nhân hoàn chỉnh!
uv run adk web --memory_service_uri="agentengine://$ENGINE_ID"
Bạn có thể kiểm tra trạng thái phiên trong thẻ trạng thái trong giao diện người dùng dành cho nhà phát triển:
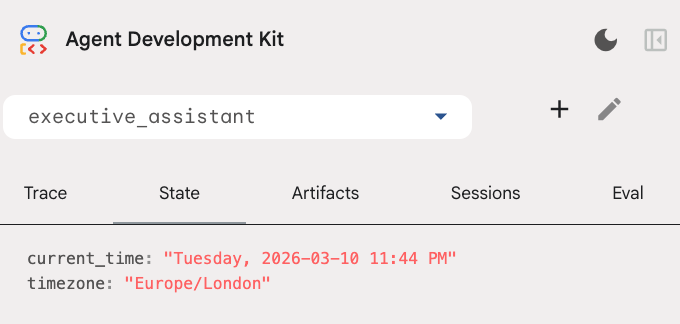
Giờ đây, bạn đã có một trợ lý có thể theo dõi các sự kiện trên lịch, danh sách việc cần làm, nghiên cứu và có bộ nhớ dài hạn!
Dọn dẹp sau khi kết thúc phòng thí nghiệm
9. Kết luận
Xin chúc mừng! Bạn đã thiết kế thành công một trợ lý điều hành đa chức năng dựa trên AI thông qua 5 giai đoạn phát triển.
Nội dung đã đề cập
- Cung cấp cơ sở hạ tầng cho các Tác nhân AI.
- Triển khai bộ nhớ liên tục và các tác nhân phụ chuyên biệt bằng cách sử dụng các thành phần tích hợp của ADK.
- Tích hợp cơ sở dữ liệu bên ngoài và API cải thiện hiệu suất.
Các bước tiếp theo
Bạn có thể tiếp tục hành trình học tập bằng cách khám phá các lớp học lập trình khác trên nền tảng này hoặc tự mình cải thiện trợ lý điều hành.
Nếu cần một số ý tưởng để cải thiện, bạn có thể thử:
- Triển khai tính năng nén sự kiện để tối ưu hoá hiệu suất cho các cuộc trò chuyện dài.
- Thêm một dịch vụ tạo tác để cho phép tác nhân ghi chú cho bạn và lưu dưới dạng tệp
- Triển khai tác nhân của bạn dưới dạng một dịch vụ phụ trợ bằng Google Cloud Run.
Sau khi hoàn tất kiểm thử, hãy nhớ dọn dẹp môi trường để không phát sinh các khoản phí không mong muốn cho tài khoản thanh toán của bạn.
Chúc bạn lập trình vui vẻ!