
1. Introduzione
Private Service Connect per le API di Google (PSC) è una funzionalità di networking di Google Cloud che consente agli utenti di configurare l'accesso privato tramite un endpoint globale IP privato all'interno di un VPC. Per gli utenti che eseguono codice o applicazioni lato client in un ambiente ibrido connesso a Google Cloud tramite una VPN o Interconnect, PSC viene utilizzato per risolvere le API di Google tramite questa connessione ibrida privata.
PSC per le API di Google può risolvere molti domini diversi, l'elenco completo è disponibile qui. Il dominio utilizzato dalla maggior parte delle API di Google è <API>.googleapis.com. Oltre a questo dominio, PSC fornisce agli utenti anche una versione di googleapis.com che è <API>-<PSC-ENDPOINT-NAME>.**p.**googleapis.com. Utilizzando questo dominio, gli utenti possono configurare le applicazioni per utilizzare endpoint PSC specifici. Il caso d'uso più comune consente agli utenti di scegliere quali applicazioni utilizzano l'endpoint PSC per instradare il traffico delle API di Google tramite la connessione ibrida, consentendo ad altre applicazioni di continuare a instradare il traffico all'endpoint API pubblico.
Gemini fa parte della suite di prodotti Vertex AI di Google Cloud ed è incluso nell'elenco delle API di Google che possono essere risolte con PSC per le API di Google.
In questo codelab creerai un ambiente ibrido simulato, ospiterai un'istanza Workbench on-premise ed eseguirai codice Python Gemini che accede all'API Gemini in modo privato tramite una VPN ad alta disponibilità, connettendosi a un endpoint PSC per le API di Google.
Cosa imparerai a fare
- Crea un hub NCC.
- Configura gli spoke VPC in un hub NCC.
- Crea una VPN ad alta disponibilità Cloud.
- Configura gli spoke ibridi in un hub NCC.
- Crea un endpoint PSC per le API di Google.
- Configura una route personalizzata tramite la VPN ad alta disponibilità.
- Configura una zona di peering DNS.
- Configura un'istanza di Vertex AI Workbench
- Configura il codice Python di Gemini per utilizzare un PSC per l'endpoint API delle API di Google.
Che cosa ti serve
- Un progetto Google Cloud con autorizzazioni "Proprietario" o "Editor" complete.
2. Topologia del codelab
Per questo codelab, utilizzerai Google Cloud per simulare un ambiente ibrido. In questo codelab sono presenti passaggi specifici per Google Cloud e diversi se configurati da un ambiente on-premise. Questi passaggi verranno evidenziati.
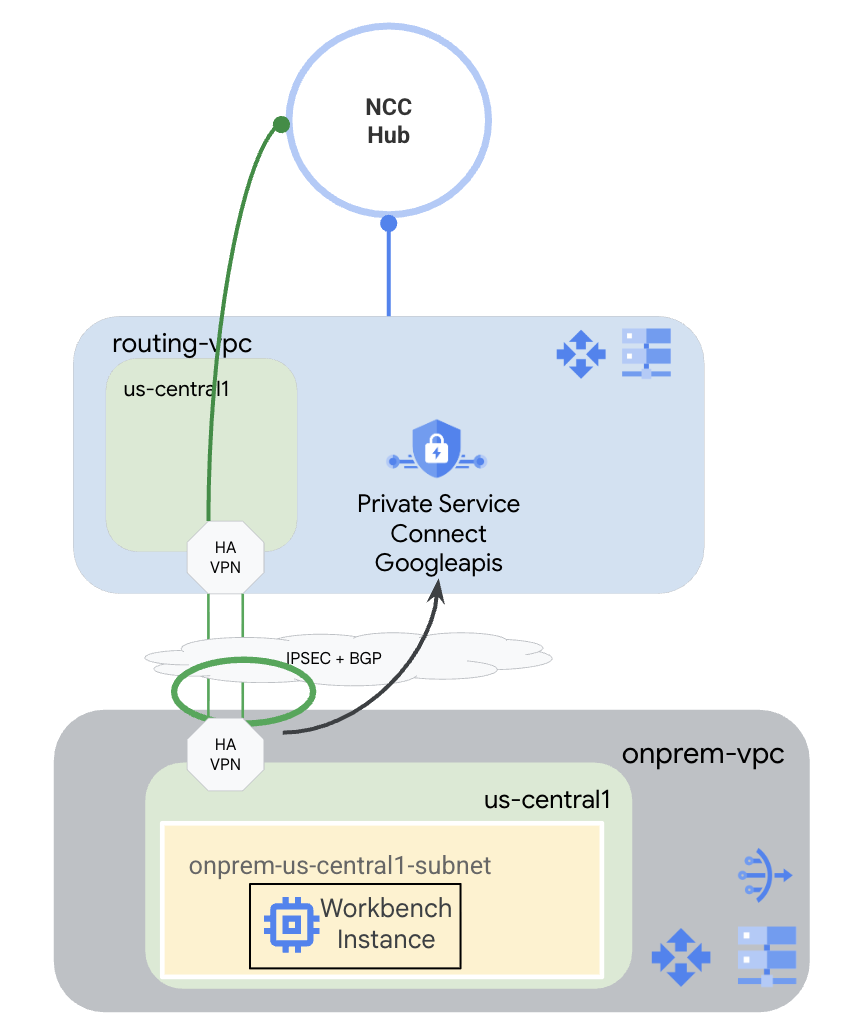
Creerai un hub NCC con un VPC di routing come spoke VPC. In questo VPC verrà configurata una VPN ad alta disponibilità per il VPC on-prem, che simula un ambiente on-premise. La VPN ad alta disponibilità verrà configurata come spoke ibrido nell'hub NCC. Nel VPC on-premise, creerai una subnet in cui verrà ospitata un'istanza Workbench. Creerai anche una Cloud NAT da utilizzare per scaricare i pacchetti sull'istanza Workbench.
Infine, creerai una zona di peering DNS per il VPC on-premise per poter utilizzare la zona privata di Service Directory per p.googleapis.com creata automaticamente da PSC per le API di Google.
3. Configurazione e requisiti
Configurazione dell'ambiente autonomo
- Accedi alla console Google Cloud e crea un nuovo progetto o riutilizzane uno esistente. Se non hai ancora un account Gmail o Google Workspace, devi crearne uno.

- Il nome del progetto è il nome visualizzato per i partecipanti a questo progetto. È una stringa di caratteri non utilizzata dalle API di Google. Puoi sempre aggiornarlo.
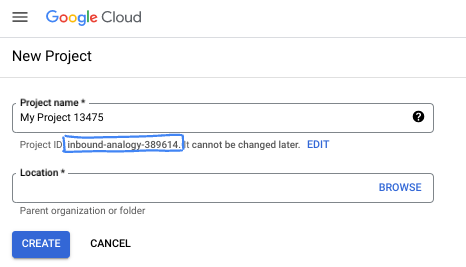
- L'ID progetto è univoco in tutti i progetti Google Cloud ed è immutabile (non può essere modificato dopo l'impostazione). La console Cloud genera automaticamente una stringa univoca, di solito non ti interessa di cosa si tratta. Nella maggior parte dei codelab, dovrai fare riferimento all'ID progetto (in genere identificato come
PROJECT_ID). Se l'ID generato non ti piace, puoi generarne un altro casuale. In alternativa, puoi provare a crearne uno e vedere se è disponibile. Non può essere modificato dopo questo passaggio e rimane per tutta la durata del progetto. - Per tua informazione, esiste un terzo valore, un numero di progetto, utilizzato da alcune API. Scopri di più su tutti e tre questi valori nella documentazione.
- Successivamente, devi abilitare la fatturazione in Cloud Console per utilizzare le risorse/API Cloud. Completare questo codelab non costa molto, se non nulla. Per arrestare le risorse ed evitare addebiti oltre a quelli previsti in questo tutorial, puoi eliminare le risorse che hai creato o il progetto. I nuovi utenti di Google Cloud possono beneficiare del programma prova senza costi di 300$.
Avvia Cloud Shell
Sebbene Google Cloud possa essere gestito da remoto dal tuo laptop, in questo codelab utilizzerai Google Cloud Shell, un ambiente a riga di comando in esecuzione nel cloud.
Nella console Google Cloud, fai clic sull'icona di Cloud Shell nella barra degli strumenti in alto a destra:

Bastano pochi istanti per eseguire il provisioning e connettersi all'ambiente. Al termine, dovresti vedere un risultato simile a questo:

Questa macchina virtuale è caricata con tutti gli strumenti per sviluppatori di cui avrai bisogno. Offre una home directory permanente da 5 GB e viene eseguita su Google Cloud, migliorando notevolmente le prestazioni e l'autenticazione della rete. Tutto il lavoro in questo codelab può essere svolto all'interno di un browser. Non devi installare nulla.
4. Prima di iniziare
Abilita API
In Cloud Shell, assicurati che il progetto sia configurato correttamente e imposta le variabili di ambiente.
Da Cloud Shell
gcloud config list project
gcloud config set project <project-id>
export project=$(gcloud config get-value project)
export region=us-central1
export zone=$region-a
echo $project
echo $region
echo $zone
Abilita tutte le API di Google necessarie nel progetto.
Da Cloud Shell
gcloud services enable compute.googleapis.com
gcloud services enable networkconnectivity.googleapis.com
gcloud services enable dns.googleapis.com
gcloud services enable notebooks.googleapis.com
gcloud services enable servicedirectory.googleapis.com
gcloud services enable aiplatform.googleapis.com
5. Crea VPC e subnet
Creare reti
Da Cloud Shell
gcloud compute networks create routing-vpc \
    --subnet-mode=custom
Da Cloud Shell
gcloud compute networks create onprem-vpc \
    --subnet-mode=custom

gcloud compute networks subnets create onprem-$region-subnet \
    --network=onprem-vpc \
    --range=10.0.0.0/24 \
    --region=$region
    --enable-private-ip-google-access
Crea router Cloud e Cloud NAT
Crea un Cloud Router che verrà utilizzato insieme alla VPN ad alta disponibilità in routing-vpc.
Da Cloud Shell
gcloud compute routers create routing-$region-cr \
    --network=routing-vpc \
    --region=$region \
    --asn=64512
Crea un router Cloud che verrà utilizzato insieme alla VPN ad alta disponibilità in onprem-vpc.
Da Cloud Shell
gcloud compute routers create onprem-$region-cr \
    --network=onprem-vpc \
    --region=$region \
    --asn=64513
Crea un router Cloud che verrà utilizzato insieme a Cloud NAT in onprem-vpc.
Da Cloud Shell
gcloud compute routers create onprem-$region-cr-4nat \
    --network=onprem-vpc \
    --region=$region
Cloud NAT in onprem-vpc verrà utilizzato per scaricare i pacchetti nell'istanza Vertex AI Workbench che verrà configurata in un passaggio successivo.
Da Cloud Shell
gcloud compute routers nats create onprem-$region-nat \
    --router=onprem-$region-cr-4nat \
    --region=$region \
    --nat-all-subnet-ip-ranges \
    --auto-allocate-nat-external-ips
6. Crea VPN ad alta disponibilità Cloud
Crea i gateway VPN.
Da Cloud Shell
gcloud compute vpn-gateways create routing-gateway \
   --network=routing-vpc \
   --region=$region \
   --stack-type=IPV4_ONLY
Da Cloud Shell
gcloud compute vpn-gateways create onprem-gateway \
   --network=onprem-vpc \
   --region=$region \
   --stack-type=IPV4_ONLY
Crea i tunnel VPN che hanno origine da routing-vpc.
Da Cloud Shell
gcloud compute vpn-tunnels create routing-to-onprem-tunnel0 \
    --peer-gcp-gateway=onprem-gateway \
    --region=$region \
    --ike-version=2 \
    --shared-secret=mysecret \
    --router=routing-$region-cr \
    --vpn-gateway=routing-gateway \
    --interface=0

gcloud compute vpn-tunnels create routing-to-onprem-tunnel1 \
    --peer-gcp-gateway=onprem-gateway \
    --region=$region \
    --ike-version=2 \
    --shared-secret=mysecret \
    --router=routing-$region-cr \
    --vpn-gateway=routing-gateway \
    --interface=1
Crea i tunnel VPN che hanno origine da onprem-vpc.
Da Cloud Shell
gcloud compute vpn-tunnels create onprem-to-routing-tunnel0 \
    --peer-gcp-gateway=routing-gateway \
    --region=$region \
    --ike-version=2 \
    --shared-secret=mysecret \
    --router=onprem-$region-cr \
    --vpn-gateway=onprem-gateway \
    --interface=0

    gcloud compute vpn-tunnels create onprem-to-routing-tunnel1 \
    --peer-gcp-gateway=routing-gateway \
    --region=$region \
    --ike-version=2 \
    --shared-secret=mysecret \
    --router=onprem-$region-cr \
    --vpn-gateway=onprem-gateway \
    --interface=1
Configura le sessioni BGP per i due tunnel che hanno origine da routing-vpc.
Da Cloud Shell
gcloud compute routers add-interface routing-$region-cr \
    --interface-name=routing-interface0 \
    --ip-address=169.254.0.1 \
    --mask-length=30 \
    --vpn-tunnel=routing-to-onprem-tunnel0 \
    --region=$region

gcloud compute routers add-bgp-peer routing-$region-cr \
    --peer-name=routingtoonprem-bgp0 \
    --interface=routing-interface0 \
    --peer-ip-address=169.254.0.2 \
    --peer-asn=64513 \
    --region=$region

gcloud compute routers add-interface routing-$region-cr \
  --interface-name=routing-interface1 \
  --ip-address=169.254.1.1 \
  --mask-length=30 \
  --vpn-tunnel=routing-to-onprem-tunnel1 \
  --region=$region

gcloud compute routers add-bgp-peer routing-$region-cr \
    --peer-name=routingtoonprem-bgp1 \
    --interface=routing-interface1 \
    --peer-ip-address=169.254.1.2 \
    --peer-asn=64513 \
    --region=$region
Configura le sessioni BGP per i due tunnel che hanno origine da onprem-vpc.
Da Cloud Shell
gcloud compute routers add-interface onprem-$region-cr \
    --interface-name=onprem-interface0 \
    --ip-address=169.254.0.2 \
    --mask-length=30 \
    --vpn-tunnel=onprem-to-routing-tunnel0 \
    --region=$region

gcloud compute routers add-bgp-peer onprem-$region-cr \
    --peer-name=onpremtorouting-bgp0 \
    --interface=onprem-interface0 \
    --peer-ip-address=169.254.0.1 \
    --peer-asn=64512 \
    --region=$region

gcloud compute routers add-interface onprem-$region-cr \
  --interface-name=onprem-interface1 \
  --ip-address=169.254.1.2 \
  --mask-length=30 \
  --vpn-tunnel=onprem-to-routing-tunnel1 \
  --region=$region

gcloud compute routers add-bgp-peer onprem-$region-cr \
    --peer-name=onpremtorouting-bgp1 \
    --interface=onprem-interface1 \
    --peer-ip-address=169.254.1.1 \
    --peer-asn=64512 \
    --region=$region
Vai alla pagina Connettività di rete > VPN nella console e assicurati che i tunnel VPN ad alta disponibilità e le sessioni BGP siano configurati correttamente.
7. Configura hub e spoke NCC
Creare un hub NCC
Da Cloud Shell
gcloud network-connectivity hubs create ncc-hub \
    --project="$project" \
    --preset-topology="mesh"
Creare Spoke NCC
gcloud NCC richiede che tutti gli spoke siano configurati con nomi di percorso completi o URI.
Da Cloud Shell
gcloud compute networks describe routing-vpc
Prendi nota del percorso completo (URI) di routing-vpc per il comando seguente.
Output di esempio
autoCreateSubnetworks: false
creationTimestamp: '2025-08-20T11:13:42.233-07:00'
id: 'xxx'
kind: compute#network
name: routing-vpc
networkFirewallPolicyEnforcementOrder: AFTER_CLASSIC_FIREWALL
routingConfig:
  bgpBestPathSelectionMode: LEGACY
  routingMode: REGIONAL
selfLink: https://www.googleapis.com/compute/v1/projects/$project/global/networks/routing-vpc
selfLinkWithId: https://www.googleapis.com/compute/v1/projects/$project/global/networks/355666541188722361
x_gcloud_bgp_routing_mode: REGIONAL
x_gcloud_subnet_mode: CUSTOM
Configura lo spoke VPC di routing
Da Cloud Shell
gcloud network-connectivity spokes linked-vpc-network create routing-vpc \
    --hub=ncc-hub \
    --vpc-network=projects/$project/global/networks/routing-vpc \
    --global
Da Cloud Shell
gcloud compute vpn-tunnels describe routing-to-onprem-tunnel0 --region=$region
gcloud compute vpn-tunnels describe routing-to-onprem-tunnel1 --region=$region
Prendi nota dei percorsi completi (URI) per i tunnel VPN che hanno origine da routing-vpc.
Output di esempio
creationTimestamp: '2025-08-20T11:33:37.494-07:00'
description: ''
detailedStatus: Tunnel is up and running.
id: 'xxx'
ikeVersion: 2
kind: compute#vpnTunnel
labelFingerprint: xxx
localTrafficSelector:
- 0.0.0.0/0
name: routing-to-onprem-tunnel0
peerGcpGateway: https://www.googleapis.com/compute/v1/projects/$project/regions/us-central1/vpnGateways/onprem-gateway
peerIp: 34.153.54.166
region: https://www.googleapis.com/compute/v1/projects/$project/regions/us-central1
remoteTrafficSelector:
- 0.0.0.0/0
router: https://www.googleapis.com/compute/v1/projects/$project/regions/us-central1/routers/routing-us-central1-cr
selfLink: https://www.googleapis.com/compute/v1/projects/$project/regions/us-central1/vpnTunnels/routing-to-onprem-tunnel0
sharedSecret: '*************'
sharedSecretHash: xxx
status: ESTABLISHED
vpnGateway: https://www.googleapis.com/compute/v1/projects/$project/regions/us-central1/vpnGateways/routing-gateway

vpnGatewayInterface: 0
creationTimestamp: '2025-08-20T11:33:41.829-07:00'
description: ''
detailedStatus: Tunnel is up and running.
id: 'xxx'
ikeVersion: 2
kind: compute#vpnTunnel
labelFingerprint: xxx
localTrafficSelector:
- 0.0.0.0/0
name: routing-to-onprem-tunnel1
peerGcpGateway: https://www.googleapis.com/compute/v1/projects/$project/regions/us-central1/vpnGateways/onprem-gateway
peerIp: 34.153.246.117
region: https://www.googleapis.com/compute/v1/projects/$project/regions/us-central1
remoteTrafficSelector:
- 0.0.0.0/0
router: https://www.googleapis.com/compute/v1/projects/$project/regions/us-central1/routers/routing-us-central1-cr
selfLink: https://www.googleapis.com/compute/v1/projects/$project/regions/us-central1/vpnTunnels/routing-to-onprem-tunnel1
sharedSecret: '*************'
sharedSecretHash: xxx
status: ESTABLISHED
vpnGateway: https://www.googleapis.com/compute/v1/projects/$project/regions/us-central1/vpnGateways/routing-gateway
vpnGatewayInterface: 1
Da Cloud Shell
gcloud network-connectivity spokes linked-vpn-tunnels create $region-vpn-spoke \
    --hub=ncc-hub \
  --vpn-tunnels=projects/$project/regions/$region/vpnTunnels/routing-to-onprem-tunnel0,projects/$project/regions/$region/vpnTunnels/routing-to-onprem-tunnel1 \
    --region=$region
Prima di procedere, verifica che tutti gli spoke siano configurati correttamente.
Da Cloud Shell
gcloud network-connectivity hubs list-spokes ncc-hub
Output di esempio
NAME: routing-vpc
GROUP: default
PROJECT: $project
LOCATION: global
TYPE: VPC_NETWORK
STATE: ACTIVE
STATE REASON:
ETAG: 2

NAME: us-central1-vpn-spoke
GROUP: default
PROJECT: $project
LOCATION: us-central1
TYPE: VPN_TUNNEL
STATE: ACTIVE
STATE REASON:
ETAG:
8. Configura Private Service Connect per le API di Google
Gli endpoint PSC per le API di Google vengono creati da indirizzi IP globali che non si trovano in una subnet VPC regionale. L'indirizzo IP globale deve essere riservato specificamente per lo scopo PRIVATE_SERVICE_CONNECT.
Da Cloud Shell
gcloud compute addresses create psc-ip \
  --global \
  --purpose=PRIVATE_SERVICE_CONNECT \
  --addresses=10.100.100.0 \
  --network=routing-vpc
Da Cloud Shell
gcloud compute forwarding-rules create psc4googep \
  --global \
  --network=routing-vpc \
  --address=psc-ip \
  --target-google-apis-bundle=all-apis \
  --service-directory-registration=projects/$project/locations/$region
Da Cloud Shell
gcloud compute routers update routing-$region-cr \
   --project=$project \
   --region=$region \
   --advertisement-mode custom \
   --set-advertisement-groups=ALL_SUBNETS \
   --set-advertisement-ranges=10.100.100.0/32
Da Cloud Shell
gcloud dns managed-zones create peeringzone \
    --description="dns peer onprem to routing" \
    --dns-name=p.googleapis.com \
    --networks=onprem-vpc \
    --target-network=routing-vpc \
    --target-project=$project \
    --visibility=private
9. Configura l'istanza di Vertex Workbench
Crea un service account da utilizzare per l'identità dell'istanza di Workbench.
Da Cloud Shell
gcloud iam service-accounts create workbench-sa \
    --display-name="workbench-sa"
Prendi nota del nome completo del service account e concedigli l'autorizzazione aiplatform.admin per eseguire chiamate a Vertex AI/Gemini.
Da Cloud Shell
gcloud iam service-accounts list
Output di esempio
DISPLAY NAME: Compute Engine default service account
EMAIL: xxx-compute@developer.gserviceaccount.com
DISABLED: False

DISPLAY NAME: workbench-sa
EMAIL: workbench-sa@$project.iam.gserviceaccount.com
DISABLED: False
Assicurati di sostituire <your-project-id> con il tuo ID progetto effettivo. Non possiamo utilizzare la variabile $project qui a causa delle virgolette richieste.
Da Cloud Shell
gcloud projects add-iam-policy-binding $project --member='serviceAccount:workbench-sa@<your-project-id>.iam.gserviceaccount.com' --role='roles/aiplatform.admin' --condition=None
Da Cloud Shell
gcloud workbench instances create workbench-$region --vm-image-project=cloud-notebooks-managed --vm-image-family=workbench-instances --location=$region-a --network=projects/$project/global/networks/onprem-vpc --subnet=projects/$project/regions/$region/subnetworks/onprem-$region-subnet --subnet-region=$region --disable-public-ip --service-account-email=workbench-sa@$project.iam.gserviceaccount.com
Il provisioning dell'istanza Workbench potrebbe richiedere più tempo dell'esecuzione del comando gcloud.
10. Testare Gemini Code
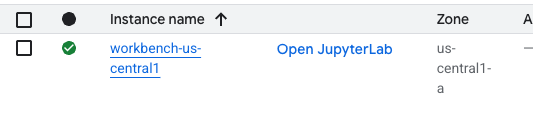
Nell'interfaccia utente, fai clic su "Apri JupyterLab".
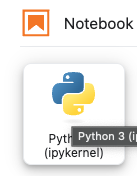
Una volta in JupyterLab, apri un nuovo notebook Python 3.
Esegui questo codice nel notebook. Assicurati di aggiornare il codice in modo che includa le informazioni specifiche sul progetto e sulla regione.
Da JupyterLab Notebook
pip install --upgrade google-genai
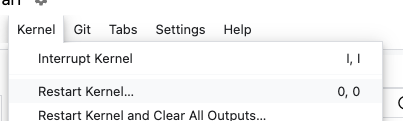
Riavvia il kernel del notebook.
Prendi nota dell'endpoint API. Qui utilizziamo l'endpoint API <YOUR_REGION>-aiplatform.googleapis.com. Questo è l'endpoint API standard per Vertex AI.
Da JupyterLab Notebook
PROJECT_ID="YOUR_PROJECT_ID" # Google Cloud Project ID
LOCATION_ID="YOUR_REGION" # Enter Vertex AI Gemini region such a s us-central1
API_ENDPOINT="https://<YOUR_REGION>-aiplatform.googleapis.com" # API Endpoint
MODEL_ID="gemini-2.0-flash" # Gemini Model ID

from google import genai
from google.genai.types import (
    GenerateContentConfig,
    HarmBlockThreshold,
    HarmCategory,
    Part,
    SafetySetting,
)
Da JupyterLab Notebook
from google import genai

client= genai.Client(vertexai=True, project=PROJECT_ID, location=LOCATION_ID, http_options={'base_url': API_ENDPOINT})

prompt = "what weighs more, 1kg of feathers or 1kg of stones"

safety_settings = [
    SafetySetting(
        category=HarmCategory.HARM_CATEGORY_DANGEROUS_CONTENT,
        threshold=HarmBlockThreshold.BLOCK_LOW_AND_ABOVE,
    ),
    SafetySetting(
        category=HarmCategory.HARM_CATEGORY_HARASSMENT,
        threshold=HarmBlockThreshold.BLOCK_LOW_AND_ABOVE,
    ),
    SafetySetting(
        category=HarmCategory.HARM_CATEGORY_HATE_SPEECH,
        threshold=HarmBlockThreshold.BLOCK_LOW_AND_ABOVE,
    ),
    SafetySetting(
        category=HarmCategory.HARM_CATEGORY_SEXUALLY_EXPLICIT,
        threshold=HarmBlockThreshold.BLOCK_LOW_AND_ABOVE,
    ),
]

response = client.models.generate_content(
    model=MODEL_ID,
    contents=prompt,
    config=GenerateContentConfig(
        safety_settings=safety_settings,
    ),
)

# Response will be `None` if it is blocked.
print(response.text)
Esempio di risposta
This is a classic trick question! They both weigh the same: 1 kilogram. The difference is in the volume they occupy and the density of the materials.
Prendi nota del nome dell'API che hai utilizzato quando hai eseguito il codice. YOUR_REGION-aiplatform.googleapis.com è il nome API predefinito per Vertex AI. Dobbiamo modificare il nome dell'API ed eseguire di nuovo il codice. Possiamo assicurarci che il codice utilizzi l'endpoint PSC eseguendo un TCPdump in un terminale nell'istanza Workbench.
Eseguire un TCPdump in un terminale
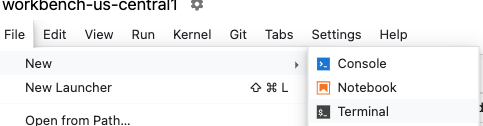
Apri un terminale sul workbench facendo clic su File > Nuovo > Terminale.
Se hai problemi a visualizzare l'output di testo nel terminale, devi aggiornare il tema del terminale. Per farlo, vai a Impostazioni > Tema terminale > Chiaro O Scuro.
Dal terminal
sudo tcpdump host 10.100.100.0
Aggiornare il codice Gemini
Torna al notebook, aggiorna l'endpoint API ed esegui di nuovo il codice. Tieni presente che abbiamo modificato l'endpoint API in <YOUR_REGION>-aiplatform**-psc4googep.p**.googleapis.com. Questo è in linea con il formato API specifico di PSC <service>-<endpointname>.p.googleapis.com.
Da JupyterLab Notebook
API_ENDPOINT="https://<YOUR_REGION>-aiplatform-psc4googep.p.googleapis.com" # API Endpoint
Da JupyterLab Notebook
from google import genai
from google.genai.types import (
    GenerateContentConfig,
    HarmBlockThreshold,
    HarmCategory,
    Part,
    SafetySetting,
)
Da JupyterLab Notebook
from google import genai

client= genai.Client(vertexai=True, project=PROJECT_ID, location=LOCATION_ID, http_options={'base_url': API_ENDPOINT})

prompt = "what weighs more, 1kg of feathers or 1kg of stones"

safety_settings = [
    SafetySetting(
        category=HarmCategory.HARM_CATEGORY_DANGEROUS_CONTENT,
        threshold=HarmBlockThreshold.BLOCK_LOW_AND_ABOVE,
    ),
    SafetySetting(
        category=HarmCategory.HARM_CATEGORY_HARASSMENT,
        threshold=HarmBlockThreshold.BLOCK_LOW_AND_ABOVE,
    ),
    SafetySetting(
        category=HarmCategory.HARM_CATEGORY_HATE_SPEECH,
        threshold=HarmBlockThreshold.BLOCK_LOW_AND_ABOVE,
    ),
    SafetySetting(
        category=HarmCategory.HARM_CATEGORY_SEXUALLY_EXPLICIT,
        threshold=HarmBlockThreshold.BLOCK_LOW_AND_ABOVE,
    ),
]

response = client.models.generate_content(
    model=MODEL_ID,
    contents=prompt,
    config=GenerateContentConfig(
        safety_settings=safety_settings,
    ),
)

# Response will be `None` if it is blocked.
print(response.text)
Esempio di risposta
They weigh the same. 1 kg is 1 kg, regardless of what it's made of.
Controlla TCPdump
Torna al terminale e cerca le chiamate all'endpoint PSC (10.100.100.0). Termina TCPdump (Ctrl+C)
Esempio di output
listening on ens4, link-type EN10MB (Ethernet), snapshot length 262144 bytes
19:12:01.473886 IP workbench-us-central1.us-central1-a.c.xxx.internal.41886 > 10.100.100.0.https: Flags [S], seq 3367930834, win 65320, options [mss 1420,sackOK,TS val 2933602967 ecr 0,nop,wscale 7], length 0
19:12:01.476561 IP 10.100.100.0.https > workbench-us-central1.us-central1-a.c.xxx.internal.41886: Flags [S.], seq 1863301110, ack 3367930835, win 65535, options [mss 1366,sackOK,TS val 3004118895 ecr 2933602967,nop,wscale 8], length 0
19:12:01.476602 IP workbench-us-central1.us-central1-a.c.xxx.internal.41886 > 10.100.100.0.https: Flags [.], ack 1, win 511, options [nop,nop,TS val 2933602969 ecr 3004118895], length 0
19:12:01.477283 IP workbench-us-central1.us-central1-a.c.xxx.internal.41886 > 10.100.100.0.https: Flags [P.], seq 1:1573, ack 1, win 511, options [nop,nop,TS val 2933602970 ecr 3004118895], length 1572
19:12:01.478836 IP 10.100.100.0.https > workbench-us-central1.us-central1-a.c.xxx.internal.41886: Flags [.], ack 1573, win 1045, options [nop,nop,TS val 3004118898 ecr 2933602970], length 0
19:12:01.480181 IP 10.100.100.0.https > workbench-us-central1.us-central1-a.c.xxx.internal.41886: Flags [P.], seq 1:6041, ack 1573, win 1045, options [nop,nop,TS val 3004118899 ecr 2933602970], length 6040
19:12:01.480183 IP 10.100.100.0.https > workbench-us-central1.us-central1-a.c.xxx.internal.41886: Flags [P.], seq 6041:8378, ack 1573, win 1045, options [nop,nop,TS val 3004118899 ecr 2933602970], length 2337
19:12:01.480215 IP workbench-us-central1.us-central1-a.c.xxx.internal.41886 > 10.100.100.0.https: Flags [.], ack 6041, win 485, options [nop,nop,TS val 2933602973 ecr 3004118899], length 0
19:12:01.480225 IP workbench-us-central1.us-central1-a.c.xxx.internal.41886 > 10.100.100.0.https: Flags [.], ack 8378, win 473, options [nop,nop,TS val 2933602973 ecr 3004118899], length 0
19:12:01.482580 IP workbench-us-central1.us-central1-a.c.xxx.internal.41886 > 10.100.100.0.https: Flags [P.], seq 1573:1653, ack 8378, win 501, options [nop,nop,TS val 2933602975 ecr 3004118899], length 80
OPERAZIONE RIUSCITA.
11. Procedura di pulizia
Chiudi il notebook JupyterLab e torna a Cloud Shell. Assicurati che Cloud Shell non sia scaduto. Se sì, reimposta le variabili.
Da Cloud Shell
gcloud config list project
gcloud config set project <project-id>
export project=$(gcloud config get-value project)
export region=us-central1
export zone=$region-a
echo $project
echo $region
echo $zone
Elimina tutte le risorse.
Da Cloud Shell
gcloud workbench instances delete workbench-$region --location=$zone -q

gcloud iam service-accounts delete workbench-sa@$project.iam.gserviceaccount.com -q

gcloud dns managed-zones delete peeringzone -q

gcloud compute forwarding-rules delete psc4googep --global -q

gcloud compute addresses delete psc-ip --global -q

gcloud network-connectivity spokes delete $region-vpn-spoke --region=$region -q

gcloud network-connectivity spokes delete routing-vpc --global -q

gcloud network-connectivity hubs delete ncc-hub -q

gcloud compute vpn-tunnels delete onprem-to-routing-tunnel1 --region=$region --project=$project -q

gcloud compute vpn-tunnels delete onprem-to-routing-tunnel0 --region=$region --project=$project -q

gcloud compute vpn-tunnels delete routing-to-onprem-tunnel1 --region=$region --project=$project -q

gcloud compute vpn-tunnels delete routing-to-onprem-tunnel0 --region=$region --project=$project -q

gcloud compute vpn-gateways delete onprem-gateway --region=$region --project=$project -q

gcloud compute vpn-gateways delete routing-gateway --region=$region --project=$project -q

gcloud compute routers nats delete onprem-$region-nat --router=onprem-$region-cr-4nat --region=$region -q

gcloud compute routers delete onprem-$region-cr-4nat --region=$region -q

gcloud compute routers delete onprem-$region-cr --region=$region -q

gcloud compute routers delete routing-$region-cr --region=$region -q

gcloud compute networks subnets delete onprem-$region-subnet --region=$region -q

gcloud compute networks delete onprem-vpc -q

gcloud compute networks delete routing-vpc -q
12. Complimenti!
Congratulazioni per aver completato il codelab.
Argomenti trattati
- Crea un hub NCC.
- Configura gli spoke VPC in un hub NCC.
- Crea una VPN ad alta disponibilità Cloud.
- Configura gli spoke ibridi in un hub NCC.
- Crea un endpoint PSC per le API di Google.
- Configura una route personalizzata tramite la VPN ad alta disponibilità.
- Configura una zona di peering DNS.
- Configura un'istanza di Vertex AI Workbench
- Configura il codice Python di Gemini per utilizzare un PSC per l'endpoint API delle API di Google.