
1. บทนำ
Private Service Connect สำหรับ Google APIs (PSC) คือความสามารถด้านเครือข่ายของ Google Cloud ที่ช่วยให้ผู้ใช้กำหนดค่าการเข้าถึงแบบส่วนตัวผ่านปลายทางส่วนกลางของ IP ส่วนตัวภายใน VPC ได้ สำหรับผู้ใช้ที่เรียกใช้โค้ดหรือแอปพลิเคชันฝั่งไคลเอ็นต์ในสภาพแวดล้อมแบบไฮบริดที่เชื่อมต่อกับ Google Cloud ด้วย VPN หรือ Interconnect ระบบจะใช้ PSC เพื่อแก้ไข Google APIs ผ่านการเชื่อมต่อแบบไฮบริดส่วนตัวนั้น
PSC สำหรับ Google APIs สามารถแก้ไขโดเมนต่างๆ ได้มากมาย ดูรายการทั้งหมดได้ที่นี่ โดเมนที่ Google API ส่วนใหญ่ใช้คือ <API>.googleapis.com นอกจากโดเมนนี้แล้ว PSC ยังมี googleapis.com เวอร์ชัน <API>-<PSC-ENDPOINT-NAME>.**p.**googleapis.com ให้ผู้ใช้ด้วย ผู้ใช้สามารถใช้โดเมนนี้เพื่อกำหนดค่าแอปพลิเคชันให้ใช้ปลายทาง PSC ที่เฉพาะเจาะจงได้ Use Case ที่พบบ่อยที่สุดช่วยให้ผู้ใช้เลือกได้ว่าจะให้แอปพลิเคชันใดใช้ปลายทาง PSC เพื่อกำหนดเส้นทางการเข้าชม Google API ผ่านการเชื่อมต่อแบบไฮบริด ในขณะที่อนุญาตให้แอปพลิเคชันอื่นๆ กำหนดเส้นทางการเข้าชมไปยังปลายทาง API สาธารณะต่อไป
Gemini อยู่ในชุดผลิตภัณฑ์ Vertex AI ของ Google Cloud และรวมอยู่ในรายการ Google API ที่สามารถแก้ไขได้ด้วย PSC สำหรับ Google API
ในโค้ดแล็บนี้ คุณจะได้สร้างสภาพแวดล้อมแบบไฮบริดจำลอง โดยโฮสต์อินสแตนซ์ Workbench ในองค์กร และเรียกใช้โค้ด Python ของ Gemini ที่เข้าถึง Gemini API แบบส่วนตัวผ่าน HA VPN ซึ่งเชื่อมต่อกับ PSC สำหรับปลายทาง Google APIs
สิ่งที่คุณจะได้เรียนรู้
- สร้าง NCC Hub
- กำหนดค่า Spoke ของ VPC ในฮับ NCC
- สร้าง Cloud HA VPN
- กำหนดค่า Hybrid Spokes ใน NCC Hub
- สร้าง PSC สำหรับปลายทาง Google APIs
- กำหนดค่าเส้นทางที่กำหนดเองผ่าน HA-VPN
- กำหนดค่าโซนการเพียร์ DNS
- กำหนดค่าอินสแตนซ์ Vertex Workbench
- กำหนดค่าโค้ด Python ของ Gemini ให้ใช้ PSC สำหรับปลายทาง API ของ Google APIs
สิ่งที่คุณต้องมี
- โปรเจ็กต์ Google Cloud ที่มีสิทธิ์ "เจ้าของ" หรือ "ผู้แก้ไข" แบบเต็ม
2. โทโพโลยี Codelab
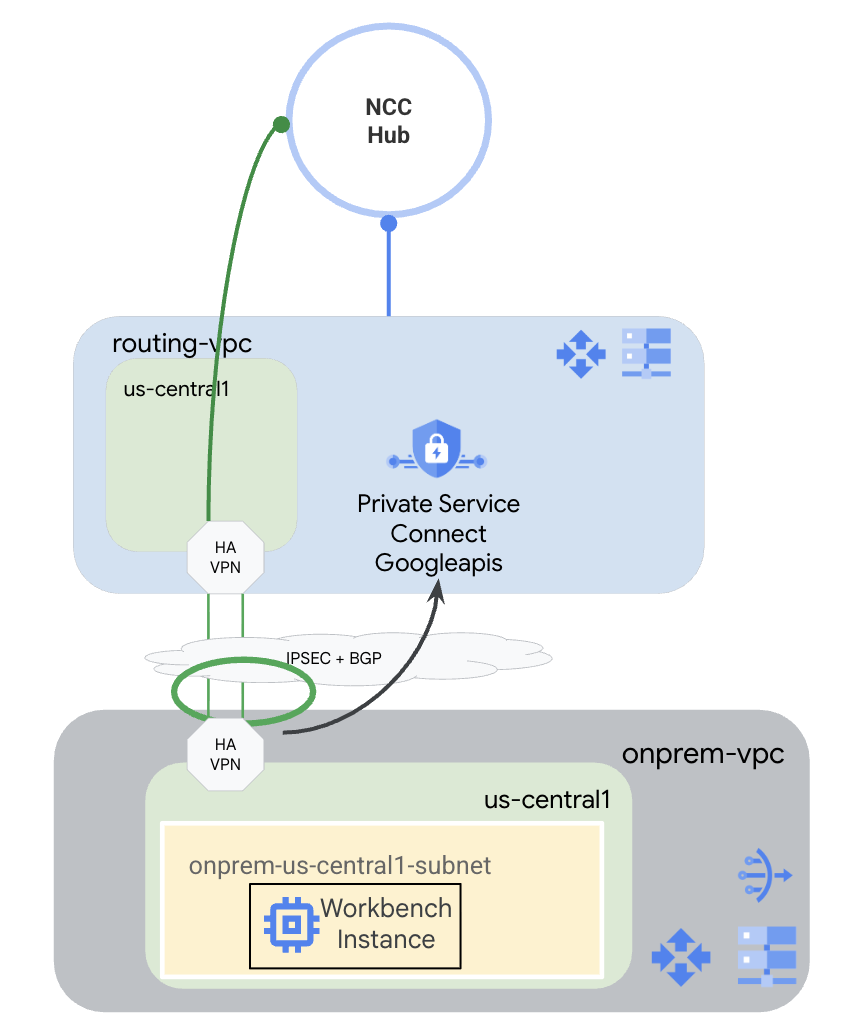
สำหรับ Codelab นี้ คุณจะใช้ Google Cloud เพื่อจำลองสภาพแวดล้อมแบบไฮบริด ใน Codelab นี้จะมีขั้นตอนที่เฉพาะเจาะจงสำหรับ Google Cloud และจะแตกต่างออกไปหากกำหนดค่าจากสภาพแวดล้อมภายในองค์กรจริง เราจะระบุขั้นตอนเหล่านั้น
คุณจะสร้าง NCC Hub ที่มี routing-vpc เป็น VPC Spoke ใน VPC นั้น ระบบจะกำหนดค่า HA-VPN ให้กับ VPC ภายในองค์กร ซึ่งจำลองสภาพแวดล้อมภายในองค์กร ระบบจะกำหนดค่า HA-VPN เป็น Spoke แบบไฮบริดในฮับ NCC ใน VPC ในองค์กร คุณจะสร้างซับเน็ตที่จะโฮสต์อินสแตนซ์ Workbench นอกจากนี้ คุณยังสร้าง Cloud NAT เพื่อใช้ในการดาวน์โหลดแพ็กเกจในอินสแตนซ์ Workbench ได้ด้วย
สุดท้าย คุณจะสร้างโซนการรับส่งข้อมูล DNS แบบเพียร์สำหรับ VPC ในองค์กรเพื่อให้ใช้โซนส่วนตัวของ Service Directory สำหรับ p.googleapis.com ที่ PSC สำหรับ Google API สร้างขึ้นโดยอัตโนมัติได้
3. การตั้งค่าและข้อกำหนด
การตั้งค่าสภาพแวดล้อมแบบเรียนรู้ด้วยตนเอง
- ลงชื่อเข้าใช้ Google Cloud Console แล้วสร้างโปรเจ็กต์ใหม่หรือใช้โปรเจ็กต์ที่มีอยู่ซ้ำ หากยังไม่มีบัญชี Gmail หรือ Google Workspace คุณต้องสร้างบัญชี

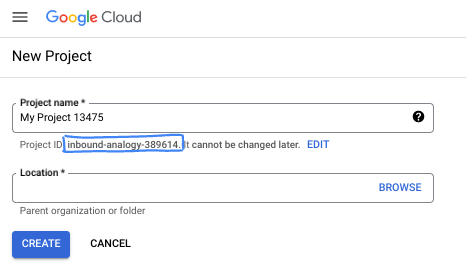
- ชื่อโปรเจ็กต์คือชื่อที่แสดงสำหรับผู้เข้าร่วมโปรเจ็กต์นี้ ซึ่งเป็นสตริงอักขระที่ Google APIs ไม่ได้ใช้ คุณอัปเดตได้ทุกเมื่อ
- รหัสโปรเจ็กต์จะไม่ซ้ำกันในโปรเจ็กต์ Google Cloud ทั้งหมดและเปลี่ยนแปลงไม่ได้ (เปลี่ยนไม่ได้หลังจากตั้งค่าแล้ว) Cloud Console จะสร้างสตริงที่ไม่ซ้ำกันโดยอัตโนมัติ ซึ่งโดยปกติแล้วคุณไม่จำเป็นต้องสนใจว่าสตริงนั้นคืออะไร ใน Codelab ส่วนใหญ่ คุณจะต้องอ้างอิงรหัสโปรเจ็กต์ (โดยทั่วไปจะระบุเป็น
PROJECT_ID) หากไม่ชอบรหัสที่สร้างขึ้น คุณอาจสร้างรหัสแบบสุ่มอีกรหัสหนึ่งได้ หรือคุณอาจลองใช้ชื่อของคุณเองและดูว่ามีชื่อนั้นหรือไม่ คุณจะเปลี่ยนแปลงรหัสนี้หลังจากขั้นตอนนี้ไม่ได้ และรหัสจะคงอยู่ตลอดระยะเวลาของโปรเจ็กต์ - โปรดทราบว่ายังมีค่าที่ 3 ซึ่งคือหมายเลขโปรเจ็กต์ที่ API บางตัวใช้ ดูข้อมูลเพิ่มเติมเกี่ยวกับค่าทั้ง 3 นี้ได้ในเอกสารประกอบ
- จากนั้นคุณจะต้องเปิดใช้การเรียกเก็บเงินใน Cloud Console เพื่อใช้ทรัพยากร/API ของ Cloud การทำตาม Codelab นี้จะไม่มีค่าใช้จ่ายมากนัก หรืออาจไม่มีค่าใช้จ่ายเลย หากต้องการปิดทรัพยากรเพื่อหลีกเลี่ยงการเรียกเก็บเงินนอกเหนือจากบทแนะนำนี้ คุณสามารถลบทรัพยากรที่สร้างขึ้นหรือลบโปรเจ็กต์ได้ ผู้ใช้ Google Cloud รายใหม่มีสิทธิ์เข้าร่วมโปรแกรมช่วงทดลองใช้ฟรีมูลค่า$300 USD
เริ่มต้น Cloud Shell
แม้ว่าคุณจะใช้งาน Google Cloud จากระยะไกลจากแล็ปท็อปได้ แต่ใน Codelab นี้คุณจะใช้ Google Cloud Shell ซึ่งเป็นสภาพแวดล้อมบรรทัดคำสั่งที่ทำงานในระบบคลาวด์
จาก Google Cloud Console ให้คลิกไอคอน Cloud Shell ในแถบเครื่องมือด้านขวาบน

การจัดสรรและเชื่อมต่อกับสภาพแวดล้อมจะใช้เวลาเพียงไม่กี่นาที เมื่อเสร็จแล้ว คุณควรเห็นข้อความคล้ายกับตัวอย่างต่อไปนี้

เครื่องเสมือนนี้มาพร้อมเครื่องมือพัฒนาซอฟต์แวร์ทั้งหมดที่คุณต้องการ โดยมีไดเรกทอรีหลักแบบถาวรขนาด 5 GB และทำงานบน Google Cloud ซึ่งช่วยเพิ่มประสิทธิภาพเครือข่ายและการตรวจสอบสิทธิ์ได้อย่างมาก คุณสามารถทำงานทั้งหมดใน Codelab นี้ได้ภายในเบราว์เซอร์ คุณไม่จำเป็นต้องติดตั้งอะไร
4. ก่อนเริ่มต้น
เปิดใช้ API
ใน Cloud Shell ให้ตรวจสอบว่าได้กำหนดค่าโปรเจ็กต์อย่างถูกต้องและตั้งค่าตัวแปรสภาพแวดล้อมแล้ว
จาก Cloud Shell
gcloud config list project
gcloud config set project <project-id>
export project=$(gcloud config get-value project)
export region=us-central1
export zone=$region-a
echo $project
echo $region
echo $zone
เปิดใช้ Google API ที่จำเป็นทั้งหมดในโปรเจ็กต์
จาก Cloud Shell
gcloud services enable compute.googleapis.com
gcloud services enable networkconnectivity.googleapis.com
gcloud services enable dns.googleapis.com
gcloud services enable notebooks.googleapis.com
gcloud services enable servicedirectory.googleapis.com
gcloud services enable aiplatform.googleapis.com
5. สร้าง VPC และเครือข่ายย่อย
สร้างเครือข่าย
จาก Cloud Shell
gcloud compute networks create routing-vpc \
    --subnet-mode=custom
จาก Cloud Shell
gcloud compute networks create onprem-vpc \
    --subnet-mode=custom

gcloud compute networks subnets create onprem-$region-subnet \
    --network=onprem-vpc \
    --range=10.0.0.0/24 \
    --region=$region
    --enable-private-ip-google-access
สร้าง Cloud Router และ Cloud NAT
สร้าง Cloud Router ที่จะใช้ร่วมกับ HA VPN ใน routing-vpc
จาก Cloud Shell
gcloud compute routers create routing-$region-cr \
    --network=routing-vpc \
    --region=$region \
    --asn=64512
สร้าง Cloud Router ที่จะใช้ร่วมกับ HA VPN ใน onprem-vpc
จาก Cloud Shell
gcloud compute routers create onprem-$region-cr \
    --network=onprem-vpc \
    --region=$region \
    --asn=64513
สร้าง Cloud Router ที่จะใช้ร่วมกับ Cloud NAT ใน onprem-vpc
จาก Cloud Shell
gcloud compute routers create onprem-$region-cr-4nat \
    --network=onprem-vpc \
    --region=$region
ระบบจะใช้ Cloud NAT ใน onprem-vpc เพื่อดาวน์โหลดแพ็กเกจไปยังอินสแตนซ์ Vertex AI Workbench ซึ่งจะกำหนดค่าในขั้นตอนถัดไป
จาก Cloud Shell
gcloud compute routers nats create onprem-$region-nat \
    --router=onprem-$region-cr-4nat \
    --region=$region \
    --nat-all-subnet-ip-ranges \
    --auto-allocate-nat-external-ips
6. สร้าง HA-VPN ใน Cloud
สร้างเกตเวย์ VPN
จาก Cloud Shell
gcloud compute vpn-gateways create routing-gateway \
   --network=routing-vpc \
   --region=$region \
   --stack-type=IPV4_ONLY
จาก Cloud Shell
gcloud compute vpn-gateways create onprem-gateway \
   --network=onprem-vpc \
   --region=$region \
   --stack-type=IPV4_ONLY
สร้างอุโมงค์ข้อมูล VPN ที่มาจาก routing-vpc
จาก Cloud Shell
gcloud compute vpn-tunnels create routing-to-onprem-tunnel0 \
    --peer-gcp-gateway=onprem-gateway \
    --region=$region \
    --ike-version=2 \
    --shared-secret=mysecret \
    --router=routing-$region-cr \
    --vpn-gateway=routing-gateway \
    --interface=0

gcloud compute vpn-tunnels create routing-to-onprem-tunnel1 \
    --peer-gcp-gateway=onprem-gateway \
    --region=$region \
    --ike-version=2 \
    --shared-secret=mysecret \
    --router=routing-$region-cr \
    --vpn-gateway=routing-gateway \
    --interface=1
สร้างอุโมงค์ข้อมูล VPN ที่มาจาก onprem-vpc
จาก Cloud Shell
gcloud compute vpn-tunnels create onprem-to-routing-tunnel0 \
    --peer-gcp-gateway=routing-gateway \
    --region=$region \
    --ike-version=2 \
    --shared-secret=mysecret \
    --router=onprem-$region-cr \
    --vpn-gateway=onprem-gateway \
    --interface=0

    gcloud compute vpn-tunnels create onprem-to-routing-tunnel1 \
    --peer-gcp-gateway=routing-gateway \
    --region=$region \
    --ike-version=2 \
    --shared-secret=mysecret \
    --router=onprem-$region-cr \
    --vpn-gateway=onprem-gateway \
    --interface=1
ตั้งค่าเซสชัน BGP สำหรับ 2 อุโมงค์ที่มาจาก routing-vpc
จาก Cloud Shell
gcloud compute routers add-interface routing-$region-cr \
    --interface-name=routing-interface0 \
    --ip-address=169.254.0.1 \
    --mask-length=30 \
    --vpn-tunnel=routing-to-onprem-tunnel0 \
    --region=$region

gcloud compute routers add-bgp-peer routing-$region-cr \
    --peer-name=routingtoonprem-bgp0 \
    --interface=routing-interface0 \
    --peer-ip-address=169.254.0.2 \
    --peer-asn=64513 \
    --region=$region

gcloud compute routers add-interface routing-$region-cr \
  --interface-name=routing-interface1 \
  --ip-address=169.254.1.1 \
  --mask-length=30 \
  --vpn-tunnel=routing-to-onprem-tunnel1 \
  --region=$region

gcloud compute routers add-bgp-peer routing-$region-cr \
    --peer-name=routingtoonprem-bgp1 \
    --interface=routing-interface1 \
    --peer-ip-address=169.254.1.2 \
    --peer-asn=64513 \
    --region=$region
ตั้งค่าเซสชัน BGP สำหรับ 2 อุโมงค์ที่มาจาก onprem-vpc
จาก Cloud Shell
gcloud compute routers add-interface onprem-$region-cr \
    --interface-name=onprem-interface0 \
    --ip-address=169.254.0.2 \
    --mask-length=30 \
    --vpn-tunnel=onprem-to-routing-tunnel0 \
    --region=$region

gcloud compute routers add-bgp-peer onprem-$region-cr \
    --peer-name=onpremtorouting-bgp0 \
    --interface=onprem-interface0 \
    --peer-ip-address=169.254.0.1 \
    --peer-asn=64512 \
    --region=$region

gcloud compute routers add-interface onprem-$region-cr \
  --interface-name=onprem-interface1 \
  --ip-address=169.254.1.2 \
  --mask-length=30 \
  --vpn-tunnel=onprem-to-routing-tunnel1 \
  --region=$region

gcloud compute routers add-bgp-peer onprem-$region-cr \
    --peer-name=onpremtorouting-bgp1 \
    --interface=onprem-interface1 \
    --peer-ip-address=169.254.1.1 \
    --peer-asn=64512 \
    --region=$region
ไปที่หน้าการเชื่อมต่อเครือข่าย > VPN ในคอนโซล แล้วตรวจสอบว่าได้กำหนดค่าอุโมงค์ HA-VPN และเซสชัน BGP อย่างถูกต้องแล้ว
7. กำหนดค่าฮับและ Spoke ของ NCC
สร้าง NCC Hub
จาก Cloud Shell
gcloud network-connectivity hubs create ncc-hub \
    --project="$project" \
    --preset-topology="mesh"
สร้าง NCC Spokes
gcloud ของ NCC กำหนดให้กำหนดค่า Spoke ทั้งหมดด้วยชื่อเส้นทางแบบเต็มหรือ URI
จาก Cloud Shell
gcloud compute networks describe routing-vpc
จดเส้นทางแบบเต็ม (URI) ของ routing-vpc สำหรับคำสั่งต่อไปนี้
ตัวอย่างเอาต์พุต
autoCreateSubnetworks: false
creationTimestamp: '2025-08-20T11:13:42.233-07:00'
id: 'xxx'
kind: compute#network
name: routing-vpc
networkFirewallPolicyEnforcementOrder: AFTER_CLASSIC_FIREWALL
routingConfig:
  bgpBestPathSelectionMode: LEGACY
  routingMode: REGIONAL
selfLink: https://www.googleapis.com/compute/v1/projects/$project/global/networks/routing-vpc
selfLinkWithId: https://www.googleapis.com/compute/v1/projects/$project/global/networks/355666541188722361
x_gcloud_bgp_routing_mode: REGIONAL
x_gcloud_subnet_mode: CUSTOM
กำหนดค่า Spoke ของ VPC การกำหนดเส้นทาง
จาก Cloud Shell
gcloud network-connectivity spokes linked-vpc-network create routing-vpc \
    --hub=ncc-hub \
    --vpc-network=projects/$project/global/networks/routing-vpc \
    --global
จาก Cloud Shell
gcloud compute vpn-tunnels describe routing-to-onprem-tunnel0 --region=$region
gcloud compute vpn-tunnels describe routing-to-onprem-tunnel1 --region=$region
จดเส้นทางแบบเต็ม (URI) สำหรับอุโมงค์ข้อมูล VPN ที่มาจาก routing-vpc
ตัวอย่างเอาต์พุต
creationTimestamp: '2025-08-20T11:33:37.494-07:00'
description: ''
detailedStatus: Tunnel is up and running.
id: 'xxx'
ikeVersion: 2
kind: compute#vpnTunnel
labelFingerprint: xxx
localTrafficSelector:
- 0.0.0.0/0
name: routing-to-onprem-tunnel0
peerGcpGateway: https://www.googleapis.com/compute/v1/projects/$project/regions/us-central1/vpnGateways/onprem-gateway
peerIp: 34.153.54.166
region: https://www.googleapis.com/compute/v1/projects/$project/regions/us-central1
remoteTrafficSelector:
- 0.0.0.0/0
router: https://www.googleapis.com/compute/v1/projects/$project/regions/us-central1/routers/routing-us-central1-cr
selfLink: https://www.googleapis.com/compute/v1/projects/$project/regions/us-central1/vpnTunnels/routing-to-onprem-tunnel0
sharedSecret: '*************'
sharedSecretHash: xxx
status: ESTABLISHED
vpnGateway: https://www.googleapis.com/compute/v1/projects/$project/regions/us-central1/vpnGateways/routing-gateway

vpnGatewayInterface: 0
creationTimestamp: '2025-08-20T11:33:41.829-07:00'
description: ''
detailedStatus: Tunnel is up and running.
id: 'xxx'
ikeVersion: 2
kind: compute#vpnTunnel
labelFingerprint: xxx
localTrafficSelector:
- 0.0.0.0/0
name: routing-to-onprem-tunnel1
peerGcpGateway: https://www.googleapis.com/compute/v1/projects/$project/regions/us-central1/vpnGateways/onprem-gateway
peerIp: 34.153.246.117
region: https://www.googleapis.com/compute/v1/projects/$project/regions/us-central1
remoteTrafficSelector:
- 0.0.0.0/0
router: https://www.googleapis.com/compute/v1/projects/$project/regions/us-central1/routers/routing-us-central1-cr
selfLink: https://www.googleapis.com/compute/v1/projects/$project/regions/us-central1/vpnTunnels/routing-to-onprem-tunnel1
sharedSecret: '*************'
sharedSecretHash: xxx
status: ESTABLISHED
vpnGateway: https://www.googleapis.com/compute/v1/projects/$project/regions/us-central1/vpnGateways/routing-gateway
vpnGatewayInterface: 1
จาก Cloud Shell
gcloud network-connectivity spokes linked-vpn-tunnels create $region-vpn-spoke \
    --hub=ncc-hub \
  --vpn-tunnels=projects/$project/regions/$region/vpnTunnels/routing-to-onprem-tunnel0,projects/$project/regions/$region/vpnTunnels/routing-to-onprem-tunnel1 \
    --region=$region
ตรวจสอบว่าได้กำหนดค่า Spoke ทั้งหมดอย่างถูกต้องก่อนดำเนินการต่อ
จาก Cloud Shell
gcloud network-connectivity hubs list-spokes ncc-hub
ตัวอย่างเอาต์พุต
NAME: routing-vpc
GROUP: default
PROJECT: $project
LOCATION: global
TYPE: VPC_NETWORK
STATE: ACTIVE
STATE REASON:
ETAG: 2

NAME: us-central1-vpn-spoke
GROUP: default
PROJECT: $project
LOCATION: us-central1
TYPE: VPN_TUNNEL
STATE: ACTIVE
STATE REASON:
ETAG:
8. ตั้งค่า Private Service Connect สำหรับ Google APIs
ระบบจะสร้าง PSC สำหรับปลายทางของ Google APIs จากที่อยู่ IP ทั่วโลกที่ไม่ได้อยู่ในซับเน็ต VPC ระดับภูมิภาค ต้องจองที่อยู่ IP ทั่วโลกโดยเฉพาะเพื่อวัตถุประสงค์ของ PRIVATE_SERVICE_CONNECT
จาก Cloud Shell
gcloud compute addresses create psc-ip \
  --global \
  --purpose=PRIVATE_SERVICE_CONNECT \
  --addresses=10.100.100.0 \
  --network=routing-vpc
จาก Cloud Shell
gcloud compute forwarding-rules create psc4googep \
  --global \
  --network=routing-vpc \
  --address=psc-ip \
  --target-google-apis-bundle=all-apis \
  --service-directory-registration=projects/$project/locations/$region
จาก Cloud Shell
gcloud compute routers update routing-$region-cr \
   --project=$project \
   --region=$region \
   --advertisement-mode custom \
   --set-advertisement-groups=ALL_SUBNETS \
   --set-advertisement-ranges=10.100.100.0/32
จาก Cloud Shell
gcloud dns managed-zones create peeringzone \
    --description="dns peer onprem to routing" \
    --dns-name=p.googleapis.com \
    --networks=onprem-vpc \
    --target-network=routing-vpc \
    --target-project=$project \
    --visibility=private
9. ตั้งค่าอินสแตนซ์ Vertex Workbench
สร้างบัญชีบริการที่จะใช้สำหรับข้อมูลประจำตัวของอินสแตนซ์ Workbench
จาก Cloud Shell
gcloud iam service-accounts create workbench-sa \
    --display-name="workbench-sa"
จดชื่อเต็มของบัญชีบริการและให้สิทธิ์ aiplatform.admin เพื่อดำเนินการเรียกไปยัง Vertex AI/Gemini
จาก Cloud Shell
gcloud iam service-accounts list
ตัวอย่างเอาต์พุต
DISPLAY NAME: Compute Engine default service account
EMAIL: xxx-compute@developer.gserviceaccount.com
DISABLED: False

DISPLAY NAME: workbench-sa
EMAIL: workbench-sa@$project.iam.gserviceaccount.com
DISABLED: False
อย่าลืมแทนที่ <your-project-id> ด้วยรหัสโปรเจ็กต์จริง เราไม่สามารถใช้ตัวแปร $project ที่นี่ได้เนื่องจากต้องมีเครื่องหมายคำพูด
จาก Cloud Shell
gcloud projects add-iam-policy-binding $project --member='serviceAccount:workbench-sa@<your-project-id>.iam.gserviceaccount.com' --role='roles/aiplatform.admin' --condition=None
จาก Cloud Shell
gcloud workbench instances create workbench-$region --vm-image-project=cloud-notebooks-managed --vm-image-family=workbench-instances --location=$region-a --network=projects/$project/global/networks/onprem-vpc --subnet=projects/$project/regions/$region/subnetworks/onprem-$region-subnet --subnet-region=$region --disable-public-ip --service-account-email=workbench-sa@$project.iam.gserviceaccount.com
การจัดสรรอินสแตนซ์ Workbench อาจใช้เวลานานกว่าการเรียกใช้คำสั่ง gcloud
10. ทดสอบ Gemini Code
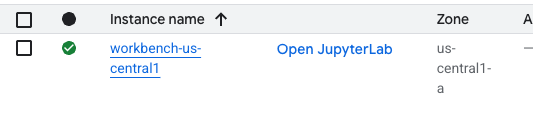
ใน UI ให้คลิก "เปิด JupyterLab"
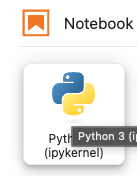
เมื่ออยู่ใน JupyterLab แล้ว ให้เปิด Notebook Python 3 ใหม่
เรียกใช้โค้ดต่อไปนี้ใน Notebook โปรดอัปเดตรหัสให้มีข้อมูลโปรเจ็กต์และภูมิภาคที่เฉพาะเจาะจง
จากสมุดบันทึก JupyterLab
pip install --upgrade google-genai
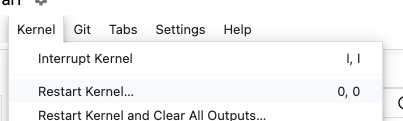
รีสตาร์ทเคอร์เนลของ Notebook
จดปลายทาง API ในที่นี้ เราใช้ปลายทาง API <YOUR_REGION>-aiplatform.googleapis.com ซึ่งเป็นปลายทาง API มาตรฐานสำหรับ Vertex AI
จากสมุดบันทึก JupyterLab
PROJECT_ID="YOUR_PROJECT_ID" # Google Cloud Project ID
LOCATION_ID="YOUR_REGION" # Enter Vertex AI Gemini region such a s us-central1
API_ENDPOINT="https://<YOUR_REGION>-aiplatform.googleapis.com" # API Endpoint
MODEL_ID="gemini-2.0-flash" # Gemini Model ID

from google import genai
from google.genai.types import (
    GenerateContentConfig,
    HarmBlockThreshold,
    HarmCategory,
    Part,
    SafetySetting,
)
จากสมุดบันทึก JupyterLab
from google import genai

client= genai.Client(vertexai=True, project=PROJECT_ID, location=LOCATION_ID, http_options={'base_url': API_ENDPOINT})

prompt = "what weighs more, 1kg of feathers or 1kg of stones"

safety_settings = [
    SafetySetting(
        category=HarmCategory.HARM_CATEGORY_DANGEROUS_CONTENT,
        threshold=HarmBlockThreshold.BLOCK_LOW_AND_ABOVE,
    ),
    SafetySetting(
        category=HarmCategory.HARM_CATEGORY_HARASSMENT,
        threshold=HarmBlockThreshold.BLOCK_LOW_AND_ABOVE,
    ),
    SafetySetting(
        category=HarmCategory.HARM_CATEGORY_HATE_SPEECH,
        threshold=HarmBlockThreshold.BLOCK_LOW_AND_ABOVE,
    ),
    SafetySetting(
        category=HarmCategory.HARM_CATEGORY_SEXUALLY_EXPLICIT,
        threshold=HarmBlockThreshold.BLOCK_LOW_AND_ABOVE,
    ),
]

response = client.models.generate_content(
    model=MODEL_ID,
    contents=prompt,
    config=GenerateContentConfig(
        safety_settings=safety_settings,
    ),
)

# Response will be `None` if it is blocked.
print(response.text)
ตัวอย่างการตอบกลับ
This is a classic trick question! They both weigh the same: 1 kilogram. The difference is in the volume they occupy and the density of the materials.
จดชื่อ API ที่คุณใช้เมื่อเรียกใช้โค้ด YOUR_REGION-aiplatform.googleapis.com คือชื่อ API เริ่มต้นสำหรับ Vertex AI เราต้องเปลี่ยนชื่อ API และเรียกใช้โค้ดอีกครั้ง เราสามารถตรวจสอบว่าโค้ดใช้ปลายทาง PSC โดยการเรียกใช้ TCPdump ในเทอร์มินัลบนอินสแตนซ์ Workbench
เรียกใช้ TCPdump ในเทอร์มินัล
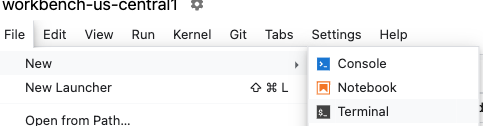
เปิดเทอร์มินัลใน Workbench โดยคลิก File > New > Terminal
หากพบปัญหาเกี่ยวกับการดูเอาต์พุตข้อความในเทอร์มินัล คุณจะต้องอัปเดตธีมเทอร์มินัล โดยไปที่การตั้งค่า > ธีมเทอร์มินัล > สว่างหรือมืด
จากเทอร์มินัล
sudo tcpdump host 10.100.100.0
อัปเดต Gemini Code
กลับไปที่ Notebook อัปเดตปลายทางของ API แล้วเรียกใช้โค้ดอีกครั้ง โปรดทราบว่าเราได้เปลี่ยนปลายทาง API เป็น <YOUR_REGION>-aiplatform**-psc4googep.p**.googleapis.com ซึ่งสอดคล้องกับรูปแบบ API เฉพาะของ PSC <service>-<endpointname>.p.googleapis.com
จากสมุดบันทึก JupyterLab
API_ENDPOINT="https://<YOUR_REGION>-aiplatform-psc4googep.p.googleapis.com" # API Endpoint
จากสมุดบันทึก JupyterLab
from google import genai
from google.genai.types import (
    GenerateContentConfig,
    HarmBlockThreshold,
    HarmCategory,
    Part,
    SafetySetting,
)
จากสมุดบันทึก JupyterLab
from google import genai

client= genai.Client(vertexai=True, project=PROJECT_ID, location=LOCATION_ID, http_options={'base_url': API_ENDPOINT})

prompt = "what weighs more, 1kg of feathers or 1kg of stones"

safety_settings = [
    SafetySetting(
        category=HarmCategory.HARM_CATEGORY_DANGEROUS_CONTENT,
        threshold=HarmBlockThreshold.BLOCK_LOW_AND_ABOVE,
    ),
    SafetySetting(
        category=HarmCategory.HARM_CATEGORY_HARASSMENT,
        threshold=HarmBlockThreshold.BLOCK_LOW_AND_ABOVE,
    ),
    SafetySetting(
        category=HarmCategory.HARM_CATEGORY_HATE_SPEECH,
        threshold=HarmBlockThreshold.BLOCK_LOW_AND_ABOVE,
    ),
    SafetySetting(
        category=HarmCategory.HARM_CATEGORY_SEXUALLY_EXPLICIT,
        threshold=HarmBlockThreshold.BLOCK_LOW_AND_ABOVE,
    ),
]

response = client.models.generate_content(
    model=MODEL_ID,
    contents=prompt,
    config=GenerateContentConfig(
        safety_settings=safety_settings,
    ),
)

# Response will be `None` if it is blocked.
print(response.text)
ตัวอย่างการตอบกลับ
They weigh the same. 1 kg is 1 kg, regardless of what it's made of.
ตรวจสอบ TCPdump
สลับกลับไปที่เทอร์มินัลและมองหาการเรียกไปยังปลายทาง PSC (10.100.100.0) สิ้นสุด TCPdump (control+c)
เอาต์พุตตัวอย่าง
listening on ens4, link-type EN10MB (Ethernet), snapshot length 262144 bytes
19:12:01.473886 IP workbench-us-central1.us-central1-a.c.xxx.internal.41886 > 10.100.100.0.https: Flags [S], seq 3367930834, win 65320, options [mss 1420,sackOK,TS val 2933602967 ecr 0,nop,wscale 7], length 0
19:12:01.476561 IP 10.100.100.0.https > workbench-us-central1.us-central1-a.c.xxx.internal.41886: Flags [S.], seq 1863301110, ack 3367930835, win 65535, options [mss 1366,sackOK,TS val 3004118895 ecr 2933602967,nop,wscale 8], length 0
19:12:01.476602 IP workbench-us-central1.us-central1-a.c.xxx.internal.41886 > 10.100.100.0.https: Flags [.], ack 1, win 511, options [nop,nop,TS val 2933602969 ecr 3004118895], length 0
19:12:01.477283 IP workbench-us-central1.us-central1-a.c.xxx.internal.41886 > 10.100.100.0.https: Flags [P.], seq 1:1573, ack 1, win 511, options [nop,nop,TS val 2933602970 ecr 3004118895], length 1572
19:12:01.478836 IP 10.100.100.0.https > workbench-us-central1.us-central1-a.c.xxx.internal.41886: Flags [.], ack 1573, win 1045, options [nop,nop,TS val 3004118898 ecr 2933602970], length 0
19:12:01.480181 IP 10.100.100.0.https > workbench-us-central1.us-central1-a.c.xxx.internal.41886: Flags [P.], seq 1:6041, ack 1573, win 1045, options [nop,nop,TS val 3004118899 ecr 2933602970], length 6040
19:12:01.480183 IP 10.100.100.0.https > workbench-us-central1.us-central1-a.c.xxx.internal.41886: Flags [P.], seq 6041:8378, ack 1573, win 1045, options [nop,nop,TS val 3004118899 ecr 2933602970], length 2337
19:12:01.480215 IP workbench-us-central1.us-central1-a.c.xxx.internal.41886 > 10.100.100.0.https: Flags [.], ack 6041, win 485, options [nop,nop,TS val 2933602973 ecr 3004118899], length 0
19:12:01.480225 IP workbench-us-central1.us-central1-a.c.xxx.internal.41886 > 10.100.100.0.https: Flags [.], ack 8378, win 473, options [nop,nop,TS val 2933602973 ecr 3004118899], length 0
19:12:01.482580 IP workbench-us-central1.us-central1-a.c.xxx.internal.41886 > 10.100.100.0.https: Flags [P.], seq 1573:1653, ack 8378, win 501, options [nop,nop,TS val 2933602975 ecr 3004118899], length 80
สำเร็จ!
11. ขั้นตอนการล้างข้อมูล
ปิด Notebook ของ JupyterLab แล้วกลับไปที่ Cloud Shell ตรวจสอบว่า Cloud Shell ยังไม่หมดเวลา หากมีการเปลี่ยนแปลง ให้รีเซ็ตตัวแปร
จาก Cloud Shell
gcloud config list project
gcloud config set project <project-id>
export project=$(gcloud config get-value project)
export region=us-central1
export zone=$region-a
echo $project
echo $region
echo $zone
ลบทรัพยากรทั้งหมด
จาก Cloud Shell
gcloud workbench instances delete workbench-$region --location=$zone -q

gcloud iam service-accounts delete workbench-sa@$project.iam.gserviceaccount.com -q

gcloud dns managed-zones delete peeringzone -q

gcloud compute forwarding-rules delete psc4googep --global -q

gcloud compute addresses delete psc-ip --global -q

gcloud network-connectivity spokes delete $region-vpn-spoke --region=$region -q

gcloud network-connectivity spokes delete routing-vpc --global -q

gcloud network-connectivity hubs delete ncc-hub -q

gcloud compute vpn-tunnels delete onprem-to-routing-tunnel1 --region=$region --project=$project -q

gcloud compute vpn-tunnels delete onprem-to-routing-tunnel0 --region=$region --project=$project -q

gcloud compute vpn-tunnels delete routing-to-onprem-tunnel1 --region=$region --project=$project -q

gcloud compute vpn-tunnels delete routing-to-onprem-tunnel0 --region=$region --project=$project -q

gcloud compute vpn-gateways delete onprem-gateway --region=$region --project=$project -q

gcloud compute vpn-gateways delete routing-gateway --region=$region --project=$project -q

gcloud compute routers nats delete onprem-$region-nat --router=onprem-$region-cr-4nat --region=$region -q

gcloud compute routers delete onprem-$region-cr-4nat --region=$region -q

gcloud compute routers delete onprem-$region-cr --region=$region -q

gcloud compute routers delete routing-$region-cr --region=$region -q

gcloud compute networks subnets delete onprem-$region-subnet --region=$region -q

gcloud compute networks delete onprem-vpc -q

gcloud compute networks delete routing-vpc -q
12. ยินดีด้วย
ขอแสดงความยินดีที่ทำ Codelab เสร็จสมบูรณ์
สิ่งที่เราได้พูดถึง
- สร้าง NCC Hub
- กำหนดค่า Spoke ของ VPC ในฮับ NCC
- สร้าง Cloud HA VPN
- กำหนดค่า Hybrid Spokes ใน NCC Hub
- สร้าง PSC สำหรับปลายทาง Google APIs
- กำหนดค่าเส้นทางที่กำหนดเองผ่าน HA-VPN
- กำหนดค่าโซนการเพียร์ DNS
- กำหนดค่าอินสแตนซ์ Vertex Workbench
- กำหนดค่าโค้ด Python ของ Gemini ให้ใช้ PSC สำหรับปลายทาง API ของ Google APIs