

1. परिचय
"गोल्डफ़िश" की समस्या
मान लें कि आपने टोक्यो में अपनी ड्रीम वेकेशन प्लान करने के लिए, एक ट्रैवल एजेंट को हायर किया है. "The Goldfish Problem" को ऐक्शन में देखने के लिए, Session Agent का इस्तेमाल करें.
आप उनके ऑफ़िस में जाकर कहते हैं:
"नमस्ते! मुझे टोक्यो की दो दिन की यात्रा का प्लान बनाना है. मुझे ऐतिहासिक जगहों और सुशी में दिलचस्पी है."
एजेंट उत्साह के साथ जवाब देता है:
"बहुत बढ़िया! मैंने इंपीरियल पैलेस घूमने और सुकियाबाशी जिरो में सुशी खाने का प्लान बनाया है."
आप मुस्कुराते हुए कहती हैं:
"यह तो बहुत बढ़िया है! क्या मुझे यात्रा की योजना मिल सकती है?"
एजेंट आपको देखता है और पूछता है:
"नमस्ते! आज मैं यात्रा प्लान करने में आपकी मदद कैसे करूँ?"
इसे "गोल्डफ़िश प्रॉब्लम" कहते हैं. जानकारी याद रखने की सुविधा के बिना, हर इंटरैक्शन एक ब्लैंक स्लेट की तरह होता है. एजेंट के पास इंटेलिजेंस है और उसे यात्राओं का प्लान बनाना आता है. हालांकि, वह लगातार काम नहीं कर सकता. एआई एजेंट को वाकई मददगार बनाने के लिए, यह ज़रूरी है कि वह जानकारी को याद रखे.
आज का आपका मिशन
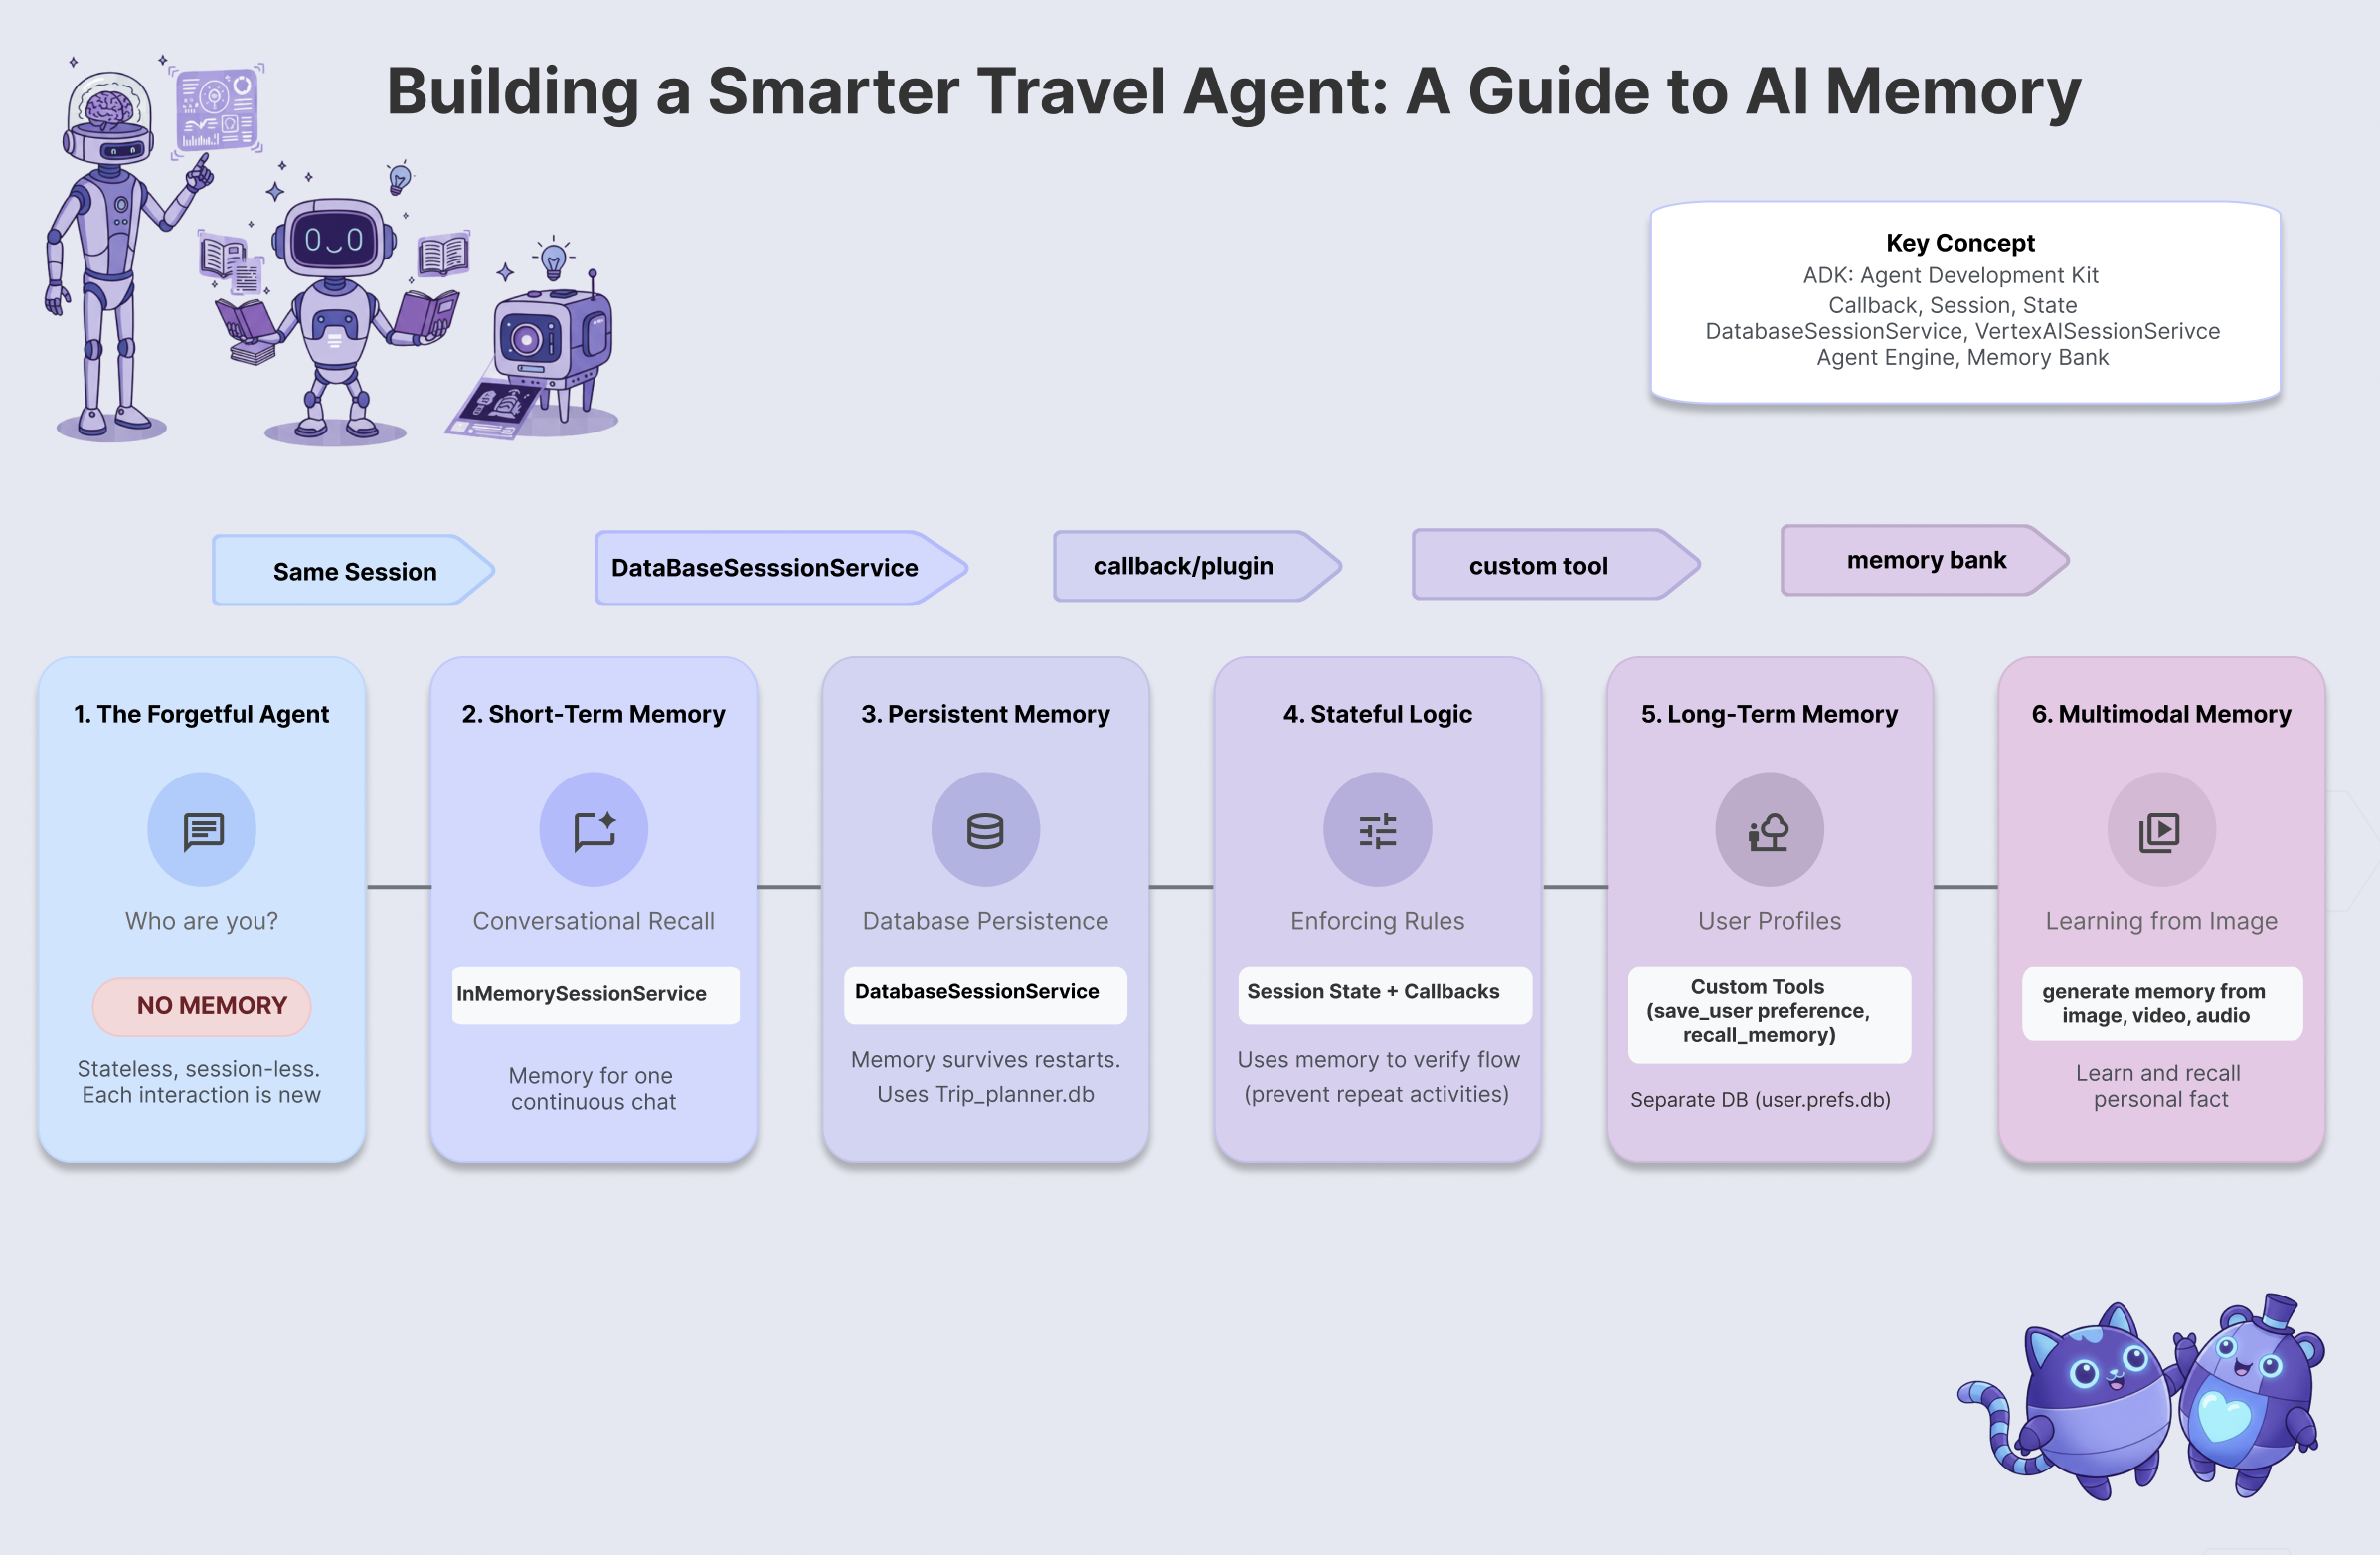
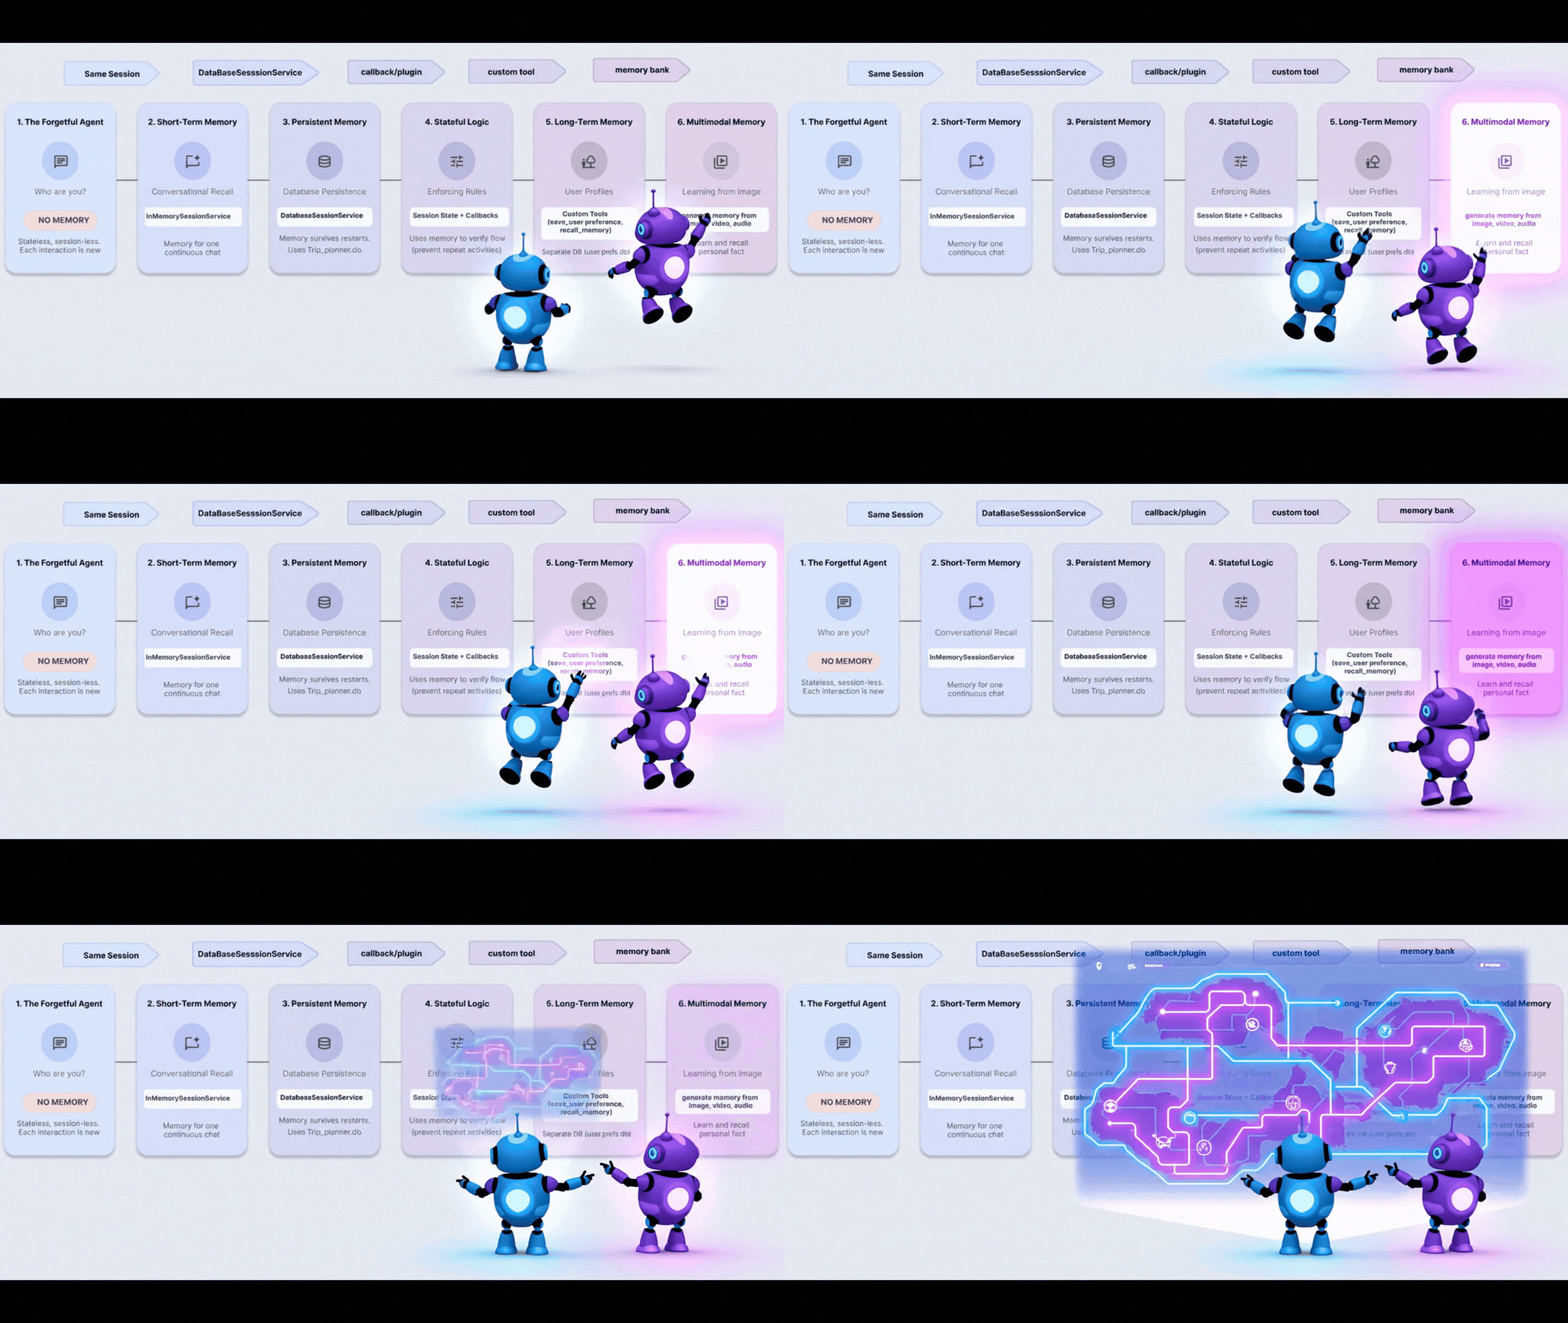
इस वर्कशॉप में, आपको गोल्डफ़िश की समस्या को हल करने का तरीका बताया जाएगा. इसके लिए, आपको एक ऐसा ट्रैवल एजेंट बनाना होगा जो चीज़ों को याद रख सके, सीख सके, और उनके हिसाब से काम कर सके. आपको एजेंट की मेमोरी के छह लेवल मिलेंगे. इससे एक ऐसा सिस्टम तैयार होगा जो चैटबॉट के बजाय, एक समर्पित निजी असिस्टेंट की तरह काम करेगा.
लेवल | सिद्धांत | "सुपरपावर" |
लेवल 1 | सेशन और स्टेट | बातचीत को याद रखना |
लेवल 2 | मल्टी-एजेंट स्टेट | टीम के सदस्यों के बीच नोट शेयर करना |
तीसरा लेवल | लगातार बने रहना | सिस्टम को रीबूट करने के बाद भी, आपकी जानकारी को याद रखना |
चौथा लेवल | कॉलबैक | मेमोरी को पूरी तरह से अपने-आप अपडेट करना |
लेवल 5 | कस्टम टूल | उपयोगकर्ता की प्रोफ़ाइल को स्ट्रक्चर्ड तरीके से पढ़ना और लिखना |
लेवल 6 | मल्टीमोडल मेमोरी | फ़ोटो और वीडियो को "देखना" और याद रखना |
ADK मेमोरी स्टैक
कोड लिखने से पहले, आइए उन टूल के बारे में जानें जिनका हम इस्तेमाल कर रहे हैं. Google Agent Development Kit (ADK), मेमोरी को मैनेज करने का एक व्यवस्थित तरीका उपलब्ध कराता है:
- सेशन: बातचीत का कंटेनर. इसमें, बातचीत का इतिहास सेव रहता है.
- State: सेशन से जुड़ा एक की-वैल्यू "स्क्रैचपैड". एजेंट इसका इस्तेमाल, तथ्यों को सेव करने के लिए करते हैं. जैसे,
destination="Tokyo". - MemoryService: लंबे समय तक डेटा सेव रखने के लिए स्टोरेज. यहां हम उपयोगकर्ता की पसंद या विश्लेषण किए गए दस्तावेज़ों जैसी चीज़ों को हमेशा के लिए सेव रखते हैं.
2. सेट करें
एआई एजेंट को चालू करने के लिए, हमें दो चीज़ों की ज़रूरत होती है: पहला, Google Cloud प्रोजेक्ट, जो बुनियादी ढांचा उपलब्ध कराता है.
पहला हिस्सा: बिलिंग खाता चालू करना
इस कोडलैब को चलाने के लिए, आपके पास कुछ क्रेडिट वाला बिलिंग खाता होना चाहिए. शुरू करने के लिए, इस कोडलैब के सबसे ऊपर मौजूद बैनर में दिए गए क्रेडिट का इस्तेमाल करें. अगर आप पहले से ही किसी बिलिंग खाते से जुड़े हैं, तो इस चरण को छोड़ा जा सकता है.
दूसरा भाग: ओपन एनवायरमेंट
- 👉 सीधे Cloud Shell Editor पर जाने के लिए, इस लिंक पर क्लिक करें
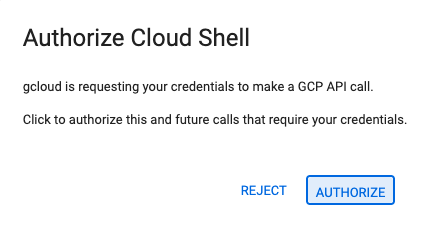
- 👉 अगर आज आपको कभी भी अनुमति देने के लिए कहा जाए, तो जारी रखने के लिए अनुमति दें पर क्लिक करें.
- 👉 अगर टर्मिनल स्क्रीन पर सबसे नीचे नहीं दिखता है, तो उसे खोलें:
- देखें पर क्लिक करें
- Terminal
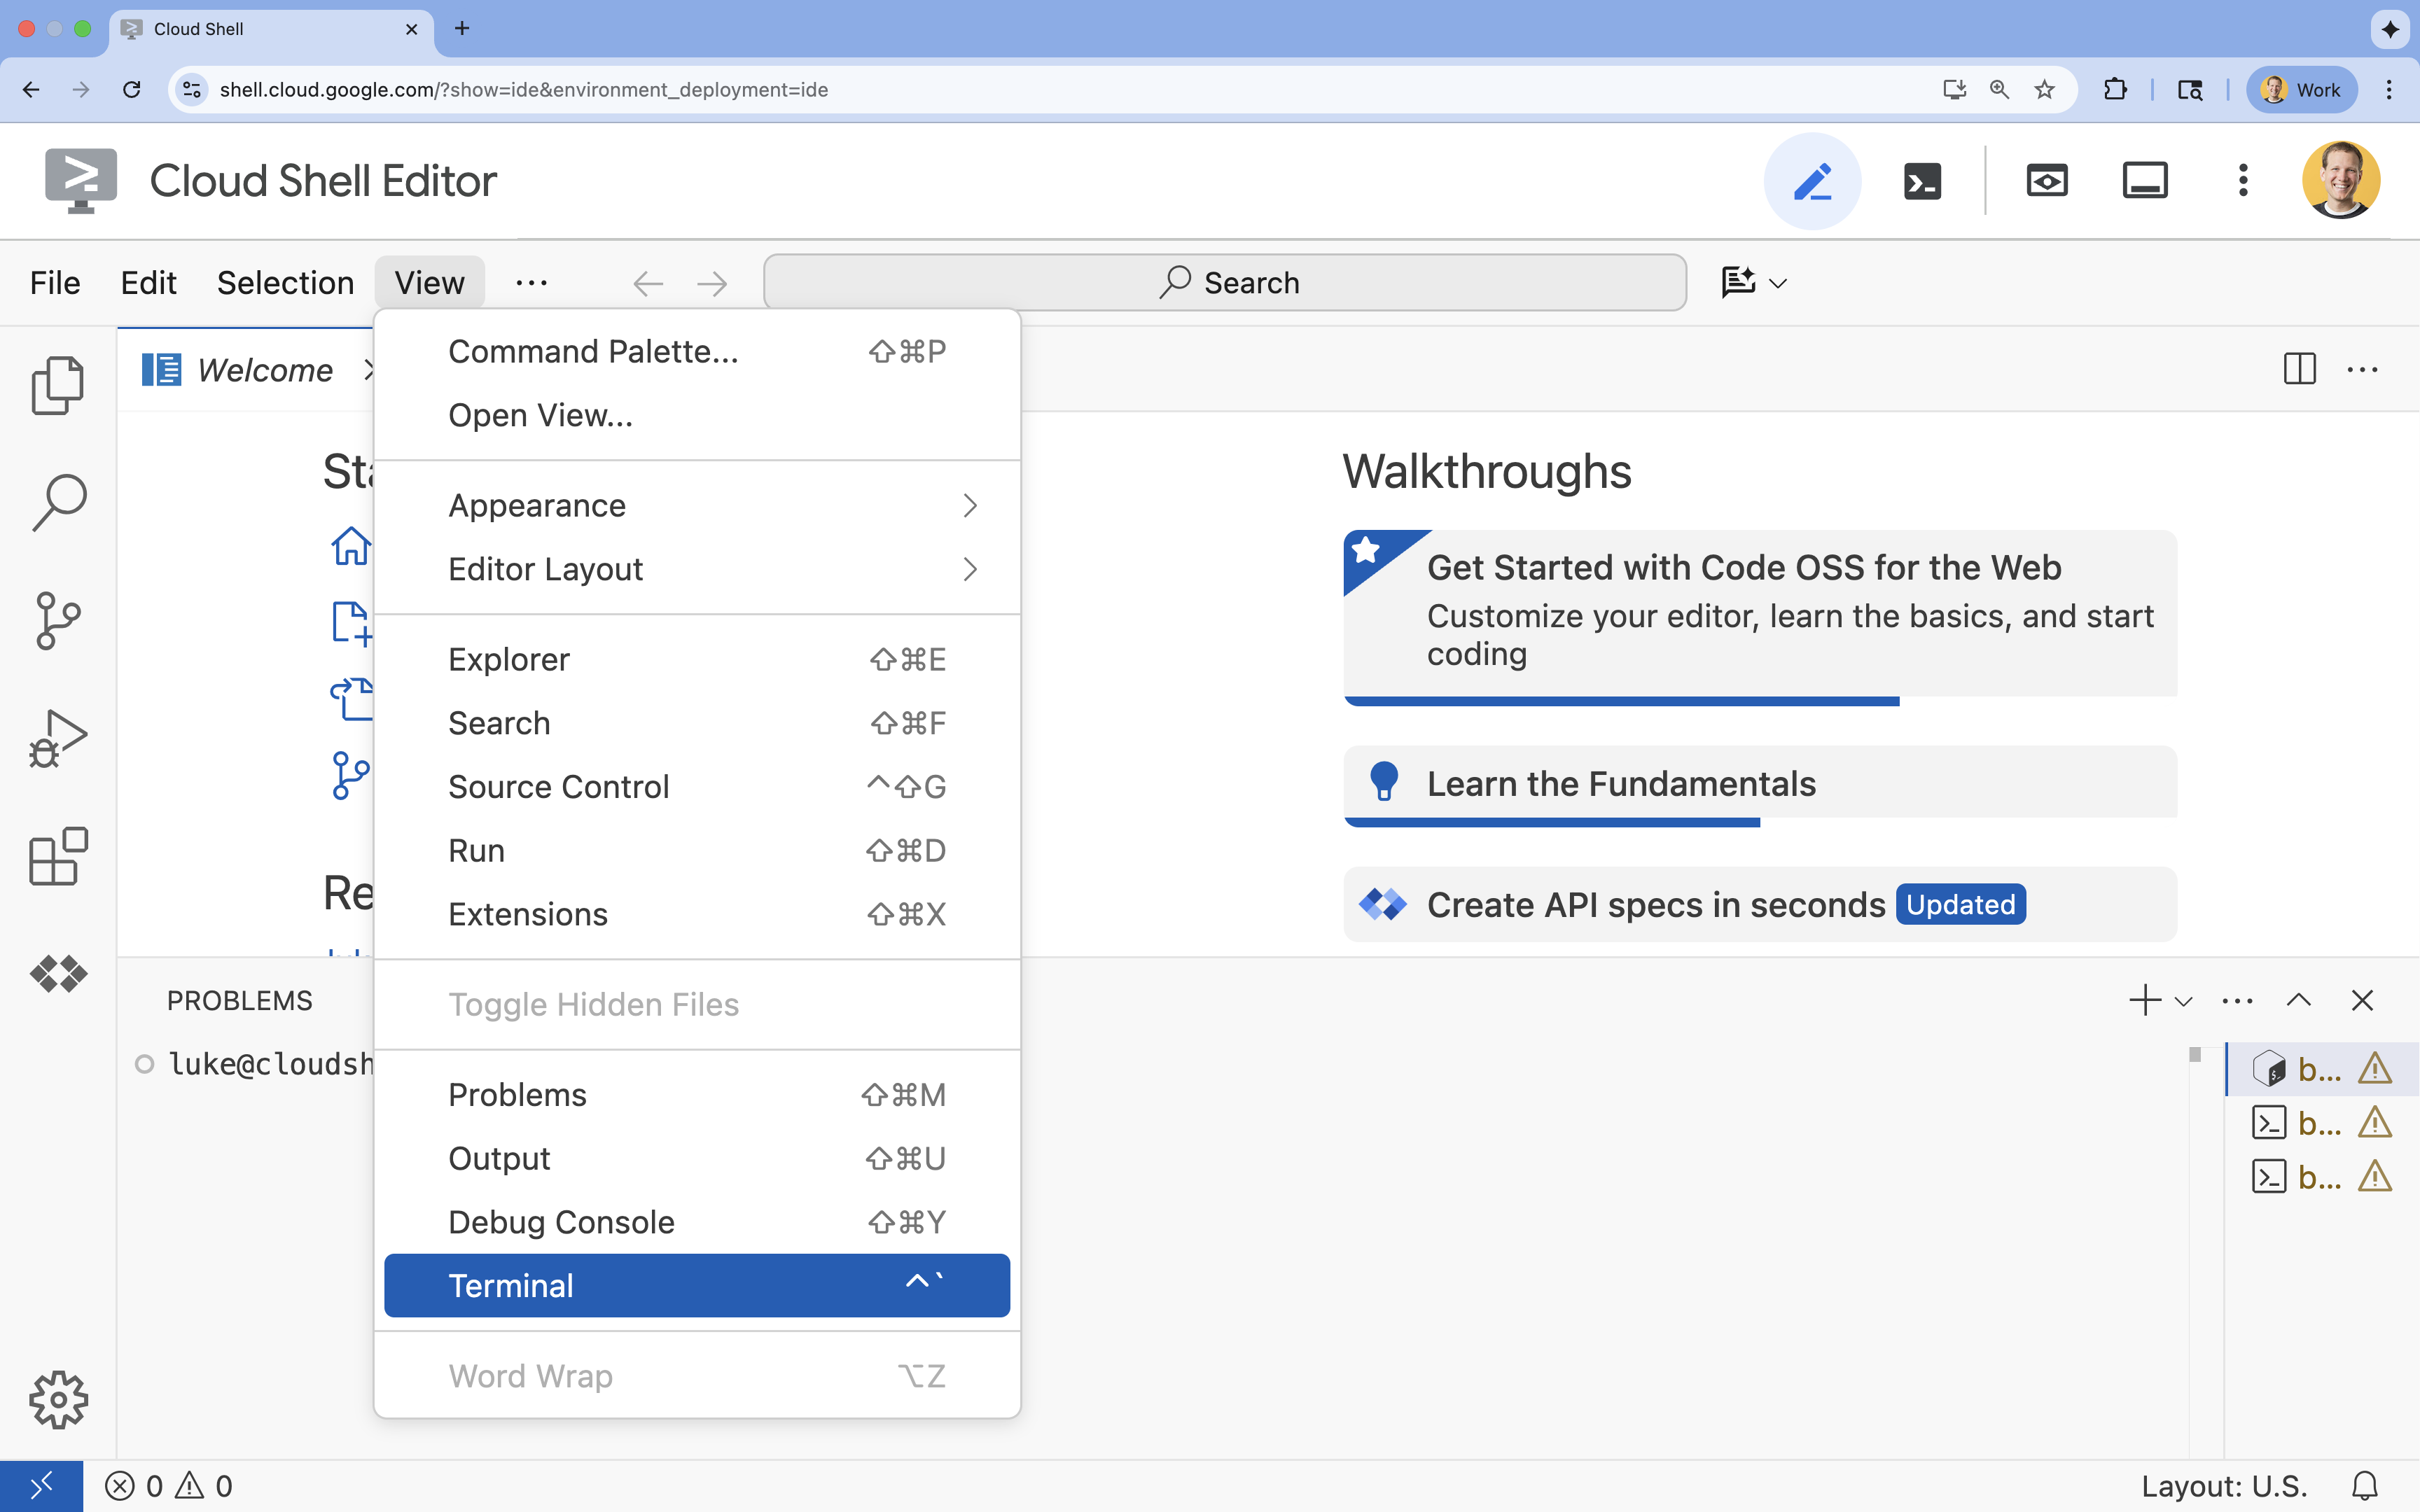 पर क्लिक करें
- 👉💻 टर्मिनल में, पुष्टि करें कि आपकी पहले ही पुष्टि हो चुकी है. साथ ही, यह भी पक्का करें कि प्रोजेक्ट को आपके प्रोजेक्ट आईडी पर सेट किया गया हो. इसके लिए, इस निर्देश का इस्तेमाल करें:
gcloud auth list - 👉💻 GitHub से बूटस्ट्रैप प्रोजेक्ट को क्लोन करें:
git clone https://github.com/cuppibla/memory_agent_starter - 👉💻 प्रोजेक्ट डायरेक्ट्री से सेटअप स्क्रिप्ट चलाएं.
cd ~/memory_agent_starter ./init.sh - 👉💻 ज़रूरी प्रोजेक्ट आईडी सेट करें:
gcloud config set project $(cat ~/project_id.txt) --quiet
तीसरा भाग: अनुमति सेट अप करना
- 👉💻 इस कमांड का इस्तेमाल करके, ज़रूरी एपीआई चालू करें. इसमें कुछ मिनट लग सकते हैं.
gcloud services enable \ cloudresourcemanager.googleapis.com \ servicenetworking.googleapis.com \ run.googleapis.com \ aiplatform.googleapis.com \ compute.googleapis.com - 👉💻 टर्मिनल में ये कमांड चलाकर, ज़रूरी अनुमतियां दें:
. ~/memory_agent_starter/set_env.sh
ध्यान दें कि आपके लिए एक .env फ़ाइल बनाई गई है. इसमें आपके प्रोजेक्ट की जानकारी दिखती है.
3. The Foundation - Session & State
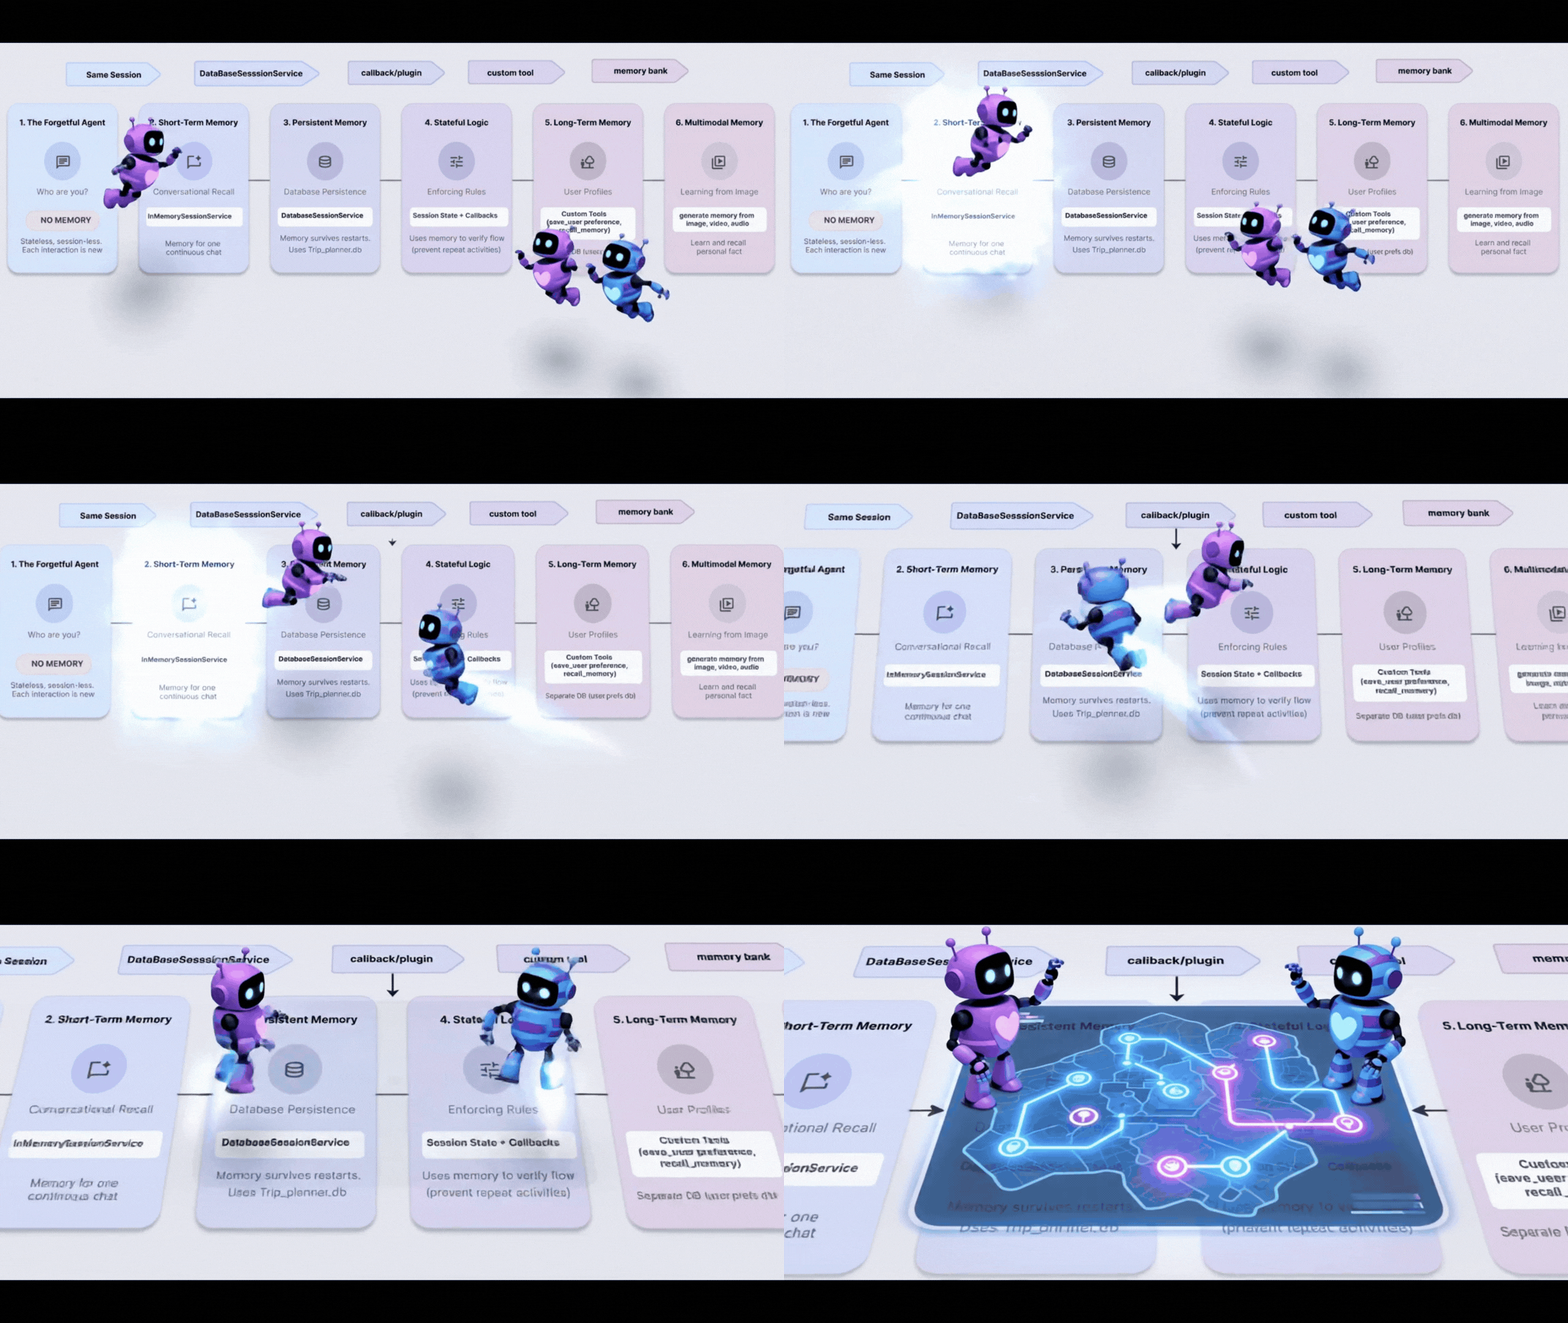
कॉन्सेप्ट: कॉन्टेक्स्ट सबसे ज़रूरी है
जानकारी याद रखने की सुविधा का सबसे बुनियादी फ़ॉर्मैट, सेशन मेमोरी है. इससे एजेंट को यह पता चलता है कि "मुझे यह खरीदना है" वाक्य में "यह" का मतलब उस जूते से है जिसके बारे में आपने 10 सेकंड पहले बात की थी.
एडीके में, हम इसे Session ऑब्जेक्ट की मदद से मैनेज करते हैं.
- स्टेटलेस अप्रोच: हर मैसेज के लिए एक नया सेशन बनाना.
- स्टेटफ़ुल अप्रोच: एक सेशन बनाना और पूरी बातचीत के लिए उसका फिर से इस्तेमाल करना.
पहला चरण: एजेंट की जांच करना
👉💻 अपने Cloud Shell टर्मिनल में, Cloud Shell एडिटर में फ़ाइल खोलने के लिए, यह कमांड चलाएं:
cloudshell edit ~/memory_agent_starter/01_session_agent/agent.py
~/memory_agent_starter/01_session_agent/agent.py खोलें.
👉 agent.py फ़ंक्शन में, # TODO: Create a root agent टिप्पणी ढूंढें.
इस पूरी लाइन को इस कोड से बदलें:
root_agent = LlmAgent(
    name="multi_day_trip_agent",
    model="gemini-2.5-flash",
    description="Agent that progressively plans a multi-day trip, remembering previous days and adapting to user feedback.",
    instruction="""
    You are the "Adaptive Trip Planner" 🗺️ - an AI assistant that builds multi-day travel itineraries step-by-step.

    Your Defining Feature:
    You have short-term memory. You MUST refer back to our conversation to understand the trip's context, what has already been planned, and the user's preferences. If the user asks for a change, you must adapt the plan while keeping the unchanged parts consistent.

    Your Mission:
    1.  **Initiate**: Start by asking for the destination, trip duration, and interests.
    2.  **Plan Progressively**: Plan ONLY ONE DAY at a time. After presenting a plan, ask for confirmation.
    3.  **Handle Feedback**: If a user dislikes a suggestion (e.g., "I don't like museums"), acknowledge their feedback, and provide a *new, alternative* suggestion for that time slot that still fits the overall theme.
    4.  **Maintain Context**: For each new day, ensure the activities are unique and build logically on the previous days. Do not suggest the same things repeatedly.
    5.  **Final Output**: Return each day's itinerary in MARKDOWN format.
    """,
    tools=[google_search]
)
निर्देश, एलएलएम को जानकारी याद रखने के लिए कहता है. हालांकि, कोड में जानकारी याद रखने की सुविधा होनी चाहिए.
दूसरा चरण: दो स्थितियां
~/memory_agent_starter/01_session_agent/main.py खोलें.
👉 अपने Cloud Shell टर्मिनल में, Cloud Shell एडिटर में फ़ाइल खोलने के लिए, यह कमांड चलाएं:
cloudshell edit ~/memory_agent_starter/01_session_agent/main.py
~/memory_agent_starter/01_session_agent/main.py खोलें. इसके बाद, main.py फ़ंक्शन में टिप्पणी # TODO: Create a runner with in memorysession service ढूंढें.
इस पूरी लाइन को इस कोड से बदलें:
    runner = Runner(
        agent=agent,
        session_service=session_service,
        app_name=agent.name
    )
👉 main.py फ़ंक्शन में, # TODO: create a different session to test टिप्पणी ढूंढें.
इस पूरी लाइन को इस कोड से बदलें:
    tokyo_session_2 = await session_service.create_session(
        app_name=multi_day_agent.name,
        user_id=user_id
    )
इसे आज़माएं
हमारे पास दो फ़ंक्शन हैं, जो "गोल्डफ़िश" और "एलिफ़ेंट" मेमोरी के बीच का अंतर दिखाते हैं.
पहला विकल्प: स्टेटफ़ुल (शेयर किया गया सेशन)
async def run_trip_same_session_scenario(session_service, user_id):
    # 1. Create ONE session
    trip_session = await session_service.create_session(...)

    # 2. Turn 1
    await run_agent_query(..., trip_session, ...)

    # 3. Turn 2 - REUSING the same session!
    # The agent can "see" Turn 1 because it's in the session history.
    await run_agent_query(..., trip_session, ...)
दूसरा विकल्प: स्टेटलेस (हर बार नया सेशन)
async def run_trip_different_session_scenario(session_service, user_id):
    # Turn 1
    tokyo_session = await session_service.create_session(...)
    await run_agent_query(..., tokyo_session, ...)

    # Turn 2 - Creating a FREASH session
    # The agent has NO IDEA what happened in Turn 1.
    tokyo_session_2 = await session_service.create_session(...)
    await run_agent_query(..., tokyo_session_2, ...)
तीसरा चरण: एजेंट को चलाएं
आइए, देखते हैं कि दोनों में क्या अंतर है. स्क्रिप्ट चलाएं:
👉💻 कमांड लाइन में, यह कमांड लाइन चलाएं:
cd ~/memory_agent_starter
uv run python ~/memory_agent_starter/01_session_agent/main.py
पहली स्थिति देखें: एजेंट को पहले मैसेज से आपकी प्राथमिकताएं याद रहती हैं और वह दूसरे मैसेज में प्लान को उसी हिसाब से अडजस्ट करता है.
दूसरी स्थिति देखें: दूसरी बार ("क्या आपको याद है कि मुझे खाने में क्या पसंद आया था?"), एजेंट जवाब नहीं दे पाता, क्योंकि यह एक नया सेशन है. इसका मतलब है, "मुझे नहीं पता कि आप किस बारे में बात कर रहे हैं."
खास जानकारी
जानकारी याद रखने की सुविधा का पहला नियम: बातचीत के कॉन्टेक्स्ट को बनाए रखने के लिए, हमेशा session.id का फिर से इस्तेमाल करें. Session ऑब्जेक्ट, आपके एजेंट का शॉर्ट-टर्म मेमोरी बफ़र होता है.
4. टीम - मल्टी-एजेंट स्टेट

कॉन्सेप्ट: "द टेलीफ़ोन गेम"
जब कई एजेंट एक साथ काम करते हैं, तो वे एक-दूसरे को फ़ाइल फ़ोल्डर पास करने वाले सहकर्मियों की तरह होते हैं. अगर कोई एजेंट फ़ोल्डर में कोई नोट लिखता है, तो अगला एजेंट उसे पढ़ सकता है.
एडीके में, इस "फ़ोल्डर" को स्टेट कहा जाता है.
- State एक डिक्शनरी (
{"key": "value"}) है, जो सेशन में मौजूद होती है. - सेशन में मौजूद कोई भी एजेंट, इसमें मौजूद डेटा को पढ़ सकता है या इसमें डेटा सेव कर सकता है.
पहला चरण: वर्कफ़्लो की जांच करना
👉💻 अपने Cloud Shell टर्मिनल में, Cloud Shell एडिटर में फ़ाइल खोलने के लिए, यह कमांड चलाएं:
cloudshell edit ~/memory_agent_starter/02_multi_agent/agent.py
👉~/memory_agent_starter/02_multi_agent/agent.py फ़ाइल में, # TODO: foodie agent टिप्पणी ढूंढें.
इस पूरी लाइन को इस कोड से बदलें:
foodie_agent = LlmAgent(
    name="foodie_agent",
    model="gemini-2.5-flash",
    tools=[google_search],
    instruction="""You are an expert food critic. Your goal is to find the best restaurant based on a user's request.

    When you recommend a place, you must output *only* the name of the establishment and nothing else.
    For example, if the best sushi is at 'Jin Sho', you should output only: Jin Sho
    """,
    output_key="destination"  # ADK will save the agent's final response to state['destination']
)
👉 agent.py फ़ंक्शन में, # TODO: transportation agent टिप्पणी ढूंढें.
इस पूरी लाइन को इस कोड से बदलें:
transportation_agent = LlmAgent(
    name="transportation_agent",
    model="gemini-2.5-flash",
    tools=[google_search],
    instruction="""You are a navigation assistant. Given a destination, provide clear directions.
    The user wants to go to: {destination}.

    Analyze the user's full original query to find their starting point.
    Then, provide clear directions from that starting point to {destination}.
    """,
)
👉 agent.py फ़ंक्शन में, # TODO: root_agent टिप्पणी ढूंढें.
इस पूरी लाइन को इस कोड से बदलें:
root_agent = SequentialAgent(
    name="find_and_navigate_agent",
    sub_agents=[foodie_agent, transportation_agent],
    description="A workflow that first finds a location and then provides directions to it."
)
अब हमारे पास दो एजेंट हैं, जो एक क्रम में काम करते हैं:
- फ़ूडी एजेंट: रेस्टोरेंट ढूँढता है.
- ट्रांसपोर्टेशन एजेंट: उस रेस्टोरेंट तक पहुंचने के निर्देश देता है.
मैजिक हैंड-ऑफ़: ध्यान दें कि foodie_agent, transportation_agent को बैटन कैसे पास करता है.
foodie_agent = LlmAgent(
    # ...
    # CRITICAL: This tells ADK to save the agent's output to state['destination']
    output_key="destination"
)

transportation_agent = LlmAgent(
    # ...
    # CRITICAL: This injects state['destination'] into the prompt
    instruction="""
    The user wants to go to: {destination}.
    Provide clear directions...
    """,
)
output_key="destination": फ़ूडी एजेंट का जवाब सेव हो गया है.{destination}: ट्रांसपोर्टेशन एजेंट, उस जवाब को अपने-आप पढ़ता है.
(कोई कार्रवाई ज़रूरी नहीं है) दूसरा चरण: ऑर्केस्ट्रेटर
02_multi_agent/main.py खोलें.
हम उन्हें क्रम से चलाने के लिए, SequentialAgent का इस्तेमाल करते हैं.
# 1. Create a single session for the sequential agent
session = await session_service.create_session(...)

# 2. Run the query
# The SequentialAgent manages the state flow:
# Query -> Foodie -> state['destination'] -> Transportation -> Final Answer
await run_agent_query(root_agent, query, ...)
उपयोगकर्ता एक प्रॉम्प्ट भेजता है:
"Find best sushi in Palo Alto and then tell me how to get there."
एजेंट, जवाब देने के लिए मिलकर काम करते हैं.
तीसरा चरण: टीम को मैनेज करना
👉💻 Cloud Shell टर्मिनल में, मल्टी-एजेंट वर्कफ़्लो को चलाएं:
cd ~/memory_agent_starter
uv run python ~/memory_agent_starter/02_multi_agent/main.py
इस दिन क्या होगा?
- फ़ूडी एजेंट: "जिन शो" (या इससे मिलता-जुलता) रेस्टोरेंट ढूंढता है.
- ADK: "जिन शो" को
state['destination']में सेव करता है. - ट्रांसपोर्टेशन एजेंट: इसे निर्देश में "जिन शो" मिलता है.
- नतीजा: "कैलट्रेन स्टेशन से जिन शो तक जाने के लिए, यूनिवर्सिटी एवेन्यू से नीचे की ओर जाएं..."
खास जानकारी
जानकारी याद रखने की सुविधा का दूसरा नियम: एजेंट के बीच स्ट्रक्चर्ड जानकारी शेयर करने के लिए, स्टेट का इस्तेमाल करें. लिखने के लिए output_key और पढ़ने के लिए {placeholders} का इस्तेमाल करें.
5. The Reboot - Persistence
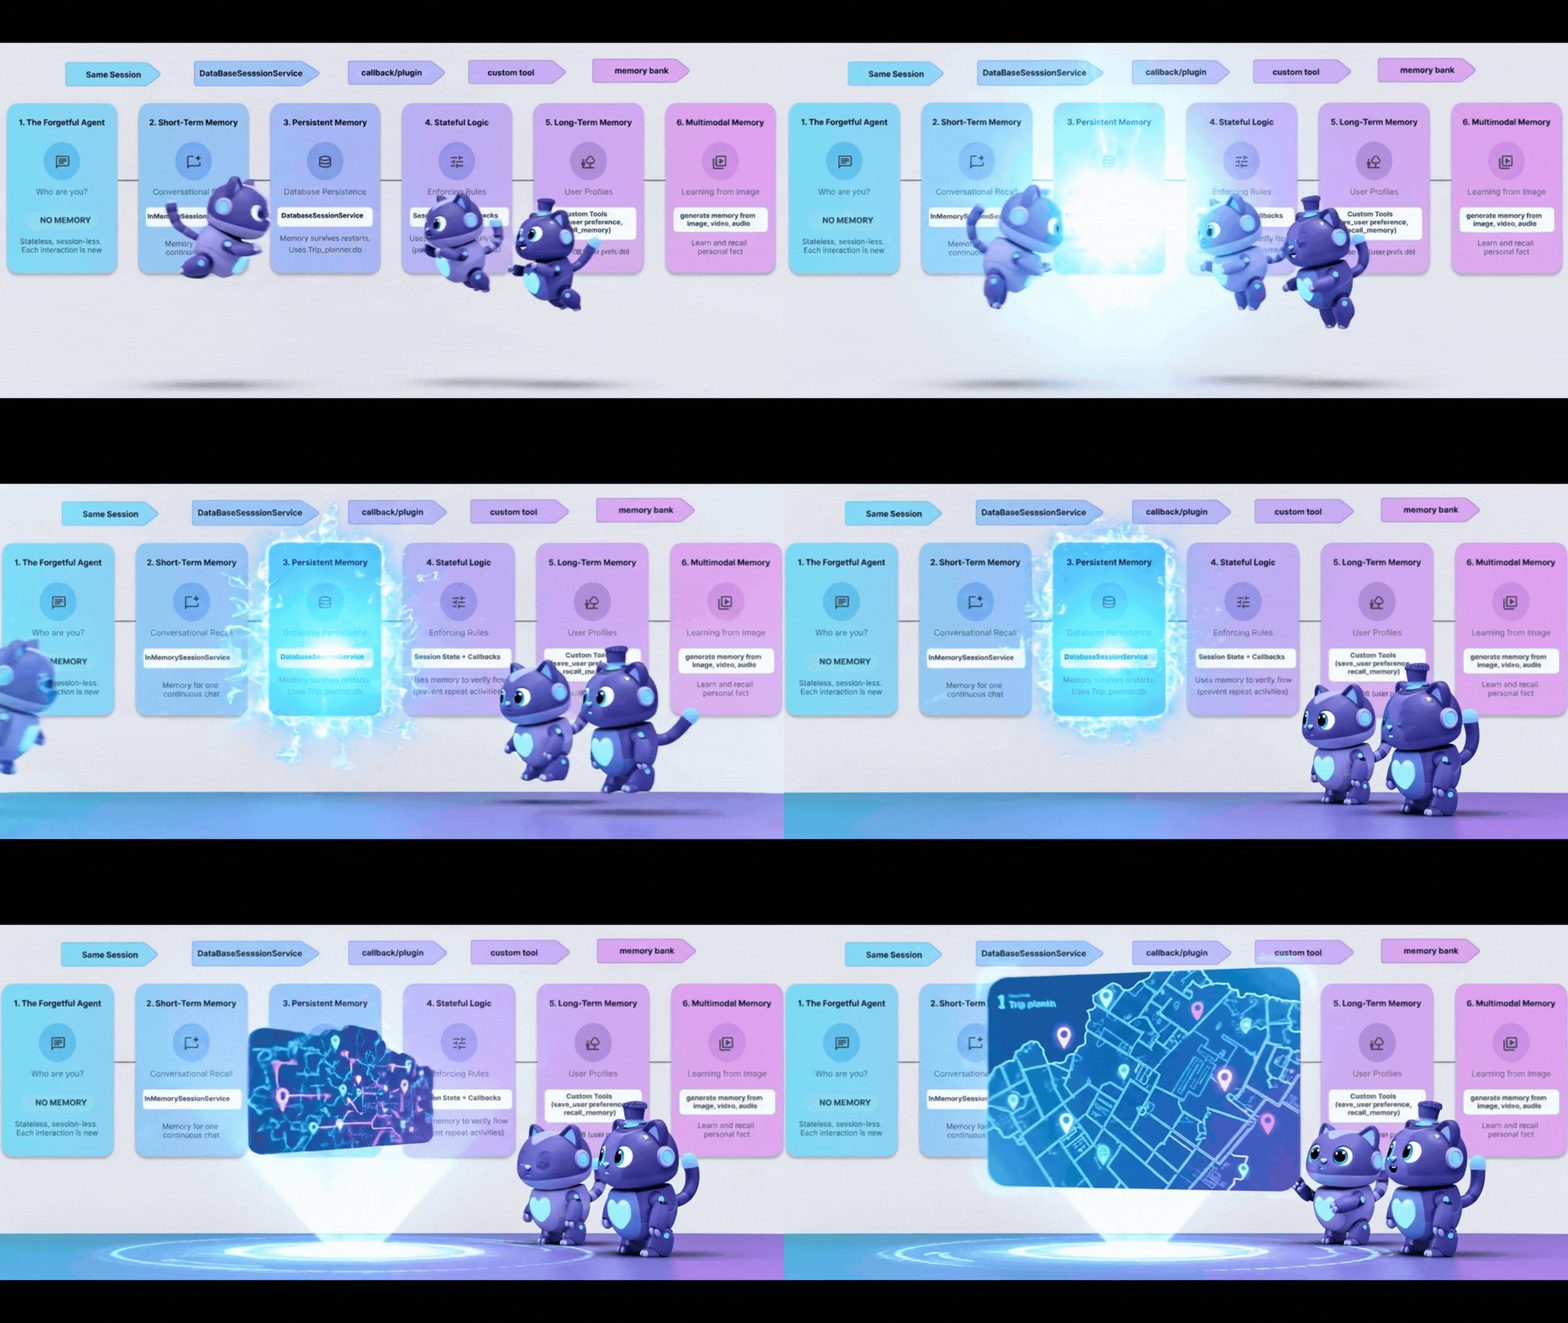
कॉन्सेप्ट: "रीबूट की समस्या"
अब तक, हमारी यादें InMemory रही हैं. अगर स्क्रिप्ट को रोककर फिर से शुरू किया जाता है, तो एजेंट को कुछ भी याद नहीं रहता. यह एक ऐसे कंप्यूटर की तरह है जो बंद होने पर अपनी हार्ड ड्राइव को वाइप कर देता है.
इसे ठीक करने के लिए, हमें दृढ़ता की ज़रूरत है. हम InMemorySessionService को DatabaseSessionService से बदल देते हैं.
पहला चरण: डेटाबेस स्विच करना
👉💻 अपने Cloud Shell टर्मिनल में, Cloud Shell एडिटर में फ़ाइल खोलने के लिए, यह कमांड चलाएं:
cloudshell edit ~/memory_agent_starter/03_persistent_agent/main.py
👉 ~/memory_agent_starter/03_persistent_agent/main.py फ़ाइल में, # TODO: Configuration for Persistent Sessions टिप्पणी ढूंढें.
इस पूरी लाइन को इस कोड से बदलें:
SESSIONS_DIR = Path(os.path.expanduser("~")) / ".adk_codelab" / "sessions"
os.makedirs(SESSIONS_DIR, exist_ok=True)
SESSION_DB_FILE = SESSIONS_DIR / "trip_planner.db"
SESSION_URL = f"sqlite:///{SESSION_DB_FILE}"
अब हर सेशन और इवेंट को SQLite फ़ाइल में सेव किया जाता है.
दूसरा चरण: क्रॉस-सेशन रिट्रीवल
पर्सिस्टेंस की सुविधा से, न सिर्फ़ बातचीत को फिर से शुरू किया जा सकता है, बल्कि पिछली बातचीत से सीखा भी जा सकता है.
उसी फ़ाइल ~/memory_agent_starter/03_persistent_agent/main.py में, टेस्ट केस 3: क्रॉस-सेशन रीट्रिवल देखें.
# TODO: retrieve the previous session manually 👉 टिप्पणी ढूंढें
इस पूरी लाइन को इस कोड से बदलें:
    old_session = await session_service.get_session(
        app_name=root_agent.name, user_id="user_01", session_id=session_id
    )
👉 main.py फ़ंक्शन में, # TODO: Extract content from the OLD session टिप्पणी ढूंढें.
इस पूरी लाइन को इस कोड से बदलें:
previous_context += f"- {role}: {text}\n"
👉 main.py फ़ंक्शन में, # TODO: Manually inject the context to the query टिप्पणी ढूंढें.
इस पूरी लाइन को इस कोड से बदलें:
    query_3 = f"""
    {previous_context}

    I'm planning a new trip to Osaka this time.
    Based on my previous preferences (above), what should I eat?
    """
इससे यह पता चलता है कि कोई उपयोगकर्ता कुछ महीनों बाद वापस आया है. सिर्फ़ डेटाबेस की मदद से ही, पुराना इतिहास वापस पाया जा सकता है.
तीसरा चरण: रीबूट के बाद भी मैलवेयर का बने रहना
👉💻 टर्मिनल में, स्क्रिप्ट चलाएं:
cd ~/memory_agent_starter
uv run python ~/memory_agent_starter/03_persistent_agent/main.py
यह ~/memory_agent_starter/trip_planner.db फ़ाइल बनाता है. यह तरीका आज़माएं: स्क्रिप्ट को दो बार चलाएं.
- दूसरी बार चलाने पर, "Resumed existing session" देखें.
- एजेंट को पहली बार चलाए गए टास्क का कॉन्टेक्स्ट याद रहेगा, क्योंकि यह डेटाबेस फ़ाइल से लोड होता है!
खास जानकारी
मेमोरी का तीसरा नियम: प्रोडक्शन के लिए DatabaseSessionService का इस्तेमाल करें. इससे यह पक्का होता है कि सर्वर रीस्टार्ट होने पर भी उपयोगकर्ताओं की बातचीत का डेटा सेव रहे. साथ ही, लंबे समय तक इतिहास का विश्लेषण किया जा सके.
6. The Spy - कॉलबैक
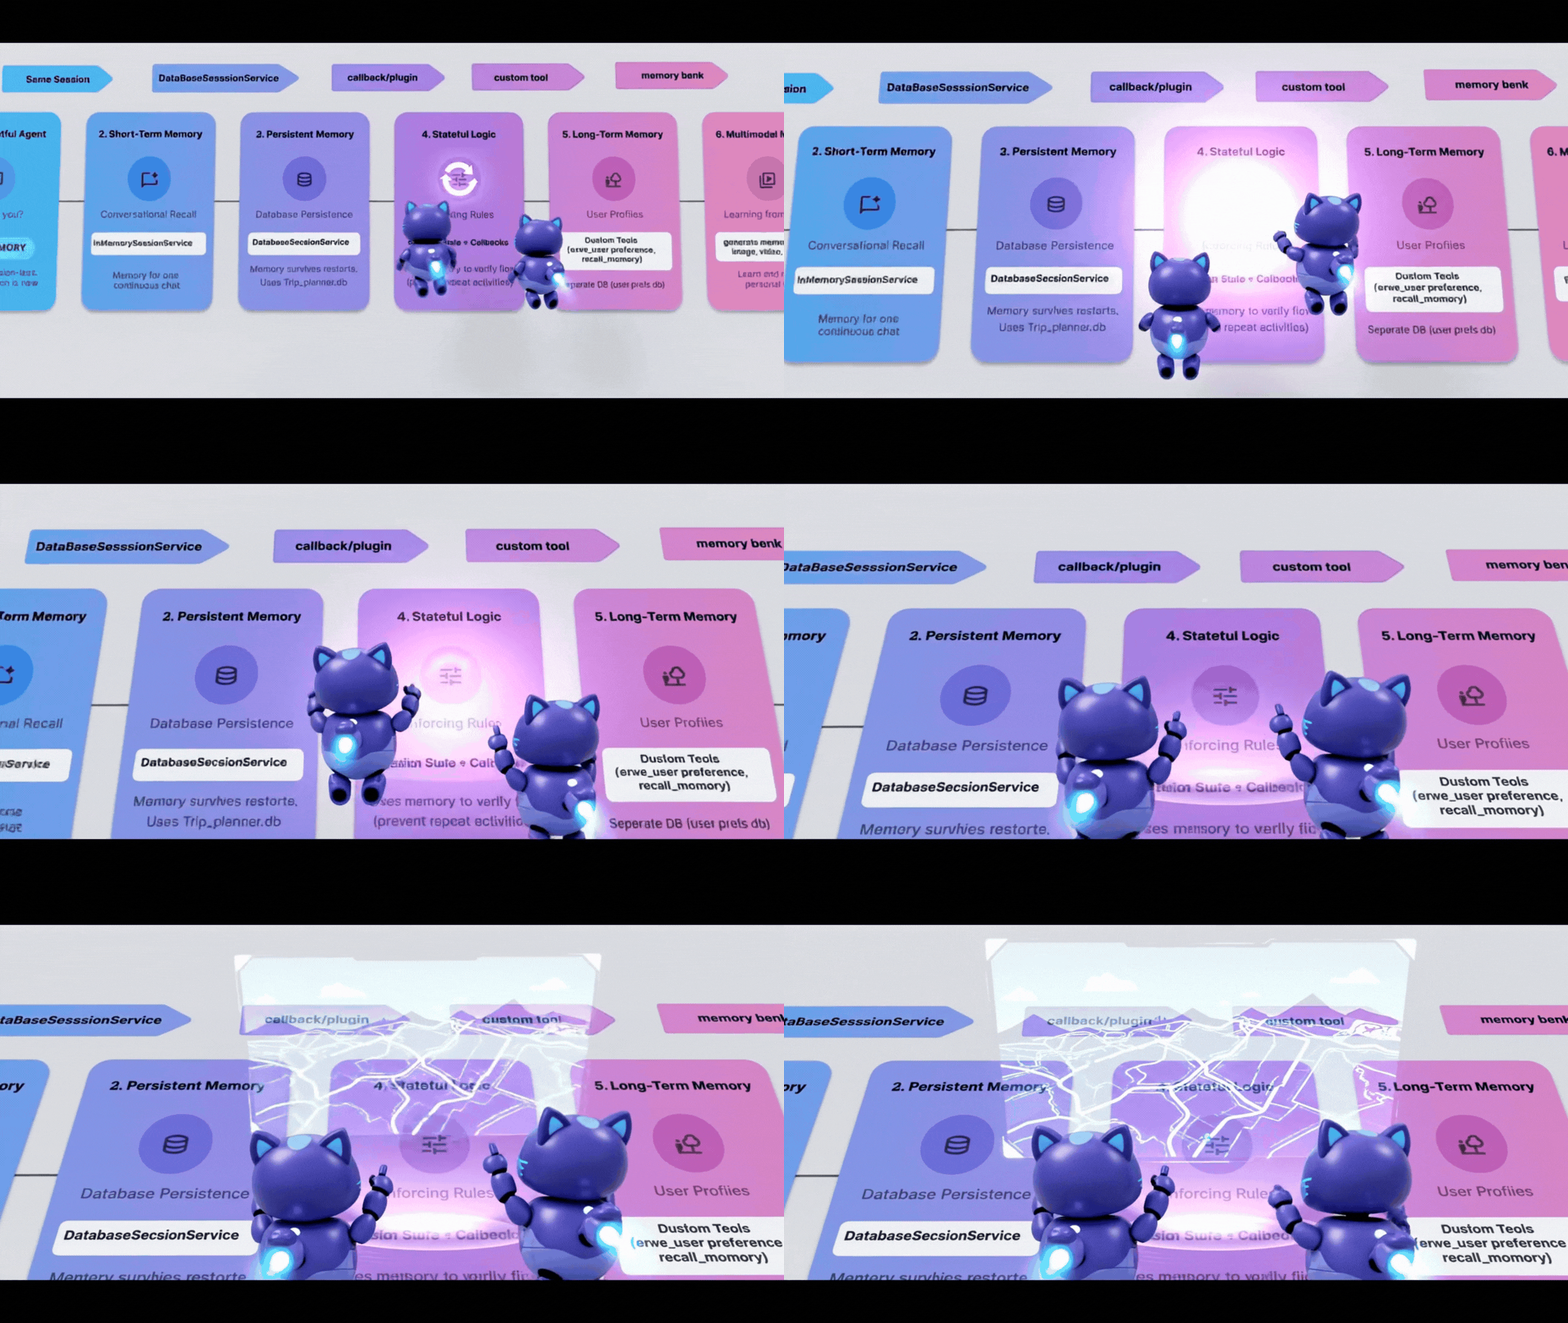
कभी-कभी, आपको एजेंट की मेमोरी को अपने-आप अपडेट करने की ज़रूरत पड़ सकती है. ऐसा एजेंट की बातों के आधार पर नहीं, बल्कि उसकी कार्रवाइयों के आधार पर किया जाता है. आपको एक ऐसा "स्पाई" चाहिए जो एजेंट पर नज़र रखे और नोट बनाए.
एडीके में, इस स्पाई को कॉलबैक कहा जाता है. 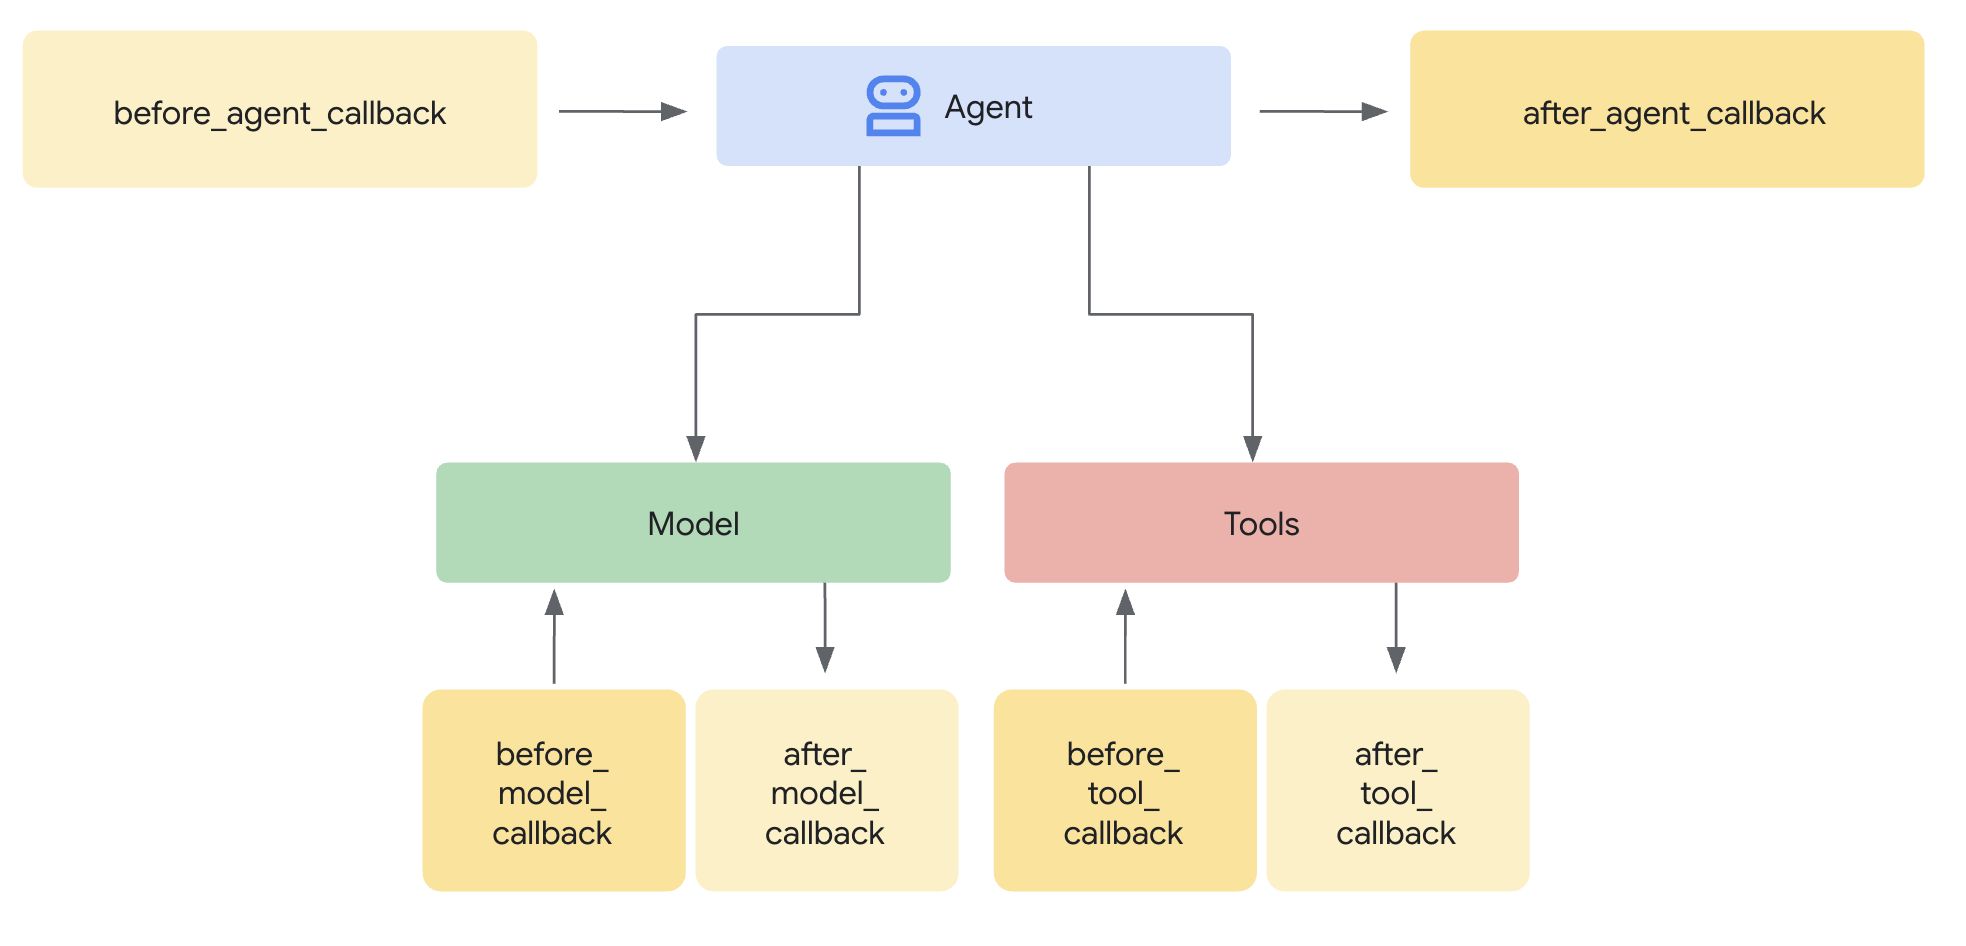
after_tool_callback: यह फ़ंक्शन, एजेंट के काम करने पर हर बार चलता है.ToolContext: उस फ़ंक्शन के अंदर से स्टेट में लिखने का तरीका.
पहला चरण: लॉजिक
👉💻 अपने Cloud Shell टर्मिनल में, Cloud Shell एडिटर में फ़ाइल खोलने के लिए, यह कमांड चलाएं:
cloudshell edit ~/memory_agent_starter/04_stateful_agent/agent.py
~/memory_agent_starter/04_stateful_agent/agent.py फ़ाइल में, # TODO: Implement call back logic टिप्पणी ढूंढें
इस पूरी लाइन को इस कोड से बदलें:
def save_activity_type_callback(
    tool,
    args: Dict[str, Any],
    tool_context: ToolContext,
    tool_response: Dict[str, Any],
) -> Optional[Dict[str, Any]]:
    """
    Callback to save the TYPE of activity just planned into the session state.
    """
    # 1. Get the actual agent name.
    if tool.name == "transfer_to_agent":
         agent_name = args.get("agent_name")
    else:
         agent_name = tool.name

    activity_type = "unknown"

    # 2. Determine the type based on which agent was actually used
    if agent_name == "museum_expert":
        activity_type = "CULTURAL"
    elif agent_name == "restaurant_expert":
        activity_type = "FOOD"
    elif agent_name == "outdoor_expert":
        activity_type = "OUTDOOR"

    print(f"\n🔔 [CALLBACK] The planner transferred to '{agent_name}'.")

    # 3. Update the state directly
    tool_context.state["last_activity_type"] = activity_type
    print(f"💾 [STATE UPDATE] 'last_activity_type' is now set to: {activity_type}\n")

    return tool_response
👉 उसी फ़ाइल में, 04_stateful_agent/agent.py फ़ंक्शन के अंदर # TODO: add callback to root agent टिप्पणी ढूंढें.
इस पूरी लाइन को इस कोड से बदलें:
after_tool_callback=save_activity_type_callback,
डाइनैमिक निर्देश: एजेंट का निर्देश अब एक फ़ंक्शन है, न कि स्ट्रिंग. यह राज्य के हिसाब से बदलता है!
def get_planner_instruction(context):
    last_activity = context.state.get("last_activity_type", "None")

    return f"""
    The last activity was: {last_activity}

    If last_activity is 'CULTURAL' -> `museum_expert` is BANNED.
    """
तीसरा चरण: स्पाई की जांच करना
👉💻 टर्मिनल में, यहां दिए गए कमांड को कॉपी करके चिपकाएं और स्क्रिप्ट चलाएं:
cd ~/memory_agent_starter
uv run python ~/memory_agent_starter/04_stateful_agent/main.py
इस एजेंट को चलाने पर, आपको एक लूप दिखेगा.
- पहला टर्न: आपने किसी म्यूज़ियम के बारे में पूछा. स्पाई सेट
last_activity="CULTURAL". - दूसरा टर्न: आपने किसी दूसरे म्यूज़ियम के बारे में पूछा.
- एजेंट के लिए दिए गए निर्देशों में अपडेट: "सांस्कृतिक कॉन्टेंट पर पाबंदी है".
- एजेंट ने कहा: "मैं किसी और म्यूज़ियम में नहीं जा सकता. पार्क कैसा रहेगा?"
[CALLBACK] और [STATE UPDATE] के लिए कंसोल लॉग देखें. एजेंट के काम करने के दौरान, रीयल-टाइम में मेमोरी में बदलाव होते हुए देखा जा सकता है.
खास जानकारी
मेमोरी का चौथा नियम: स्टेट मैनेजमेंट को ऑटोमेट करने के लिए, कॉलबैक का इस्तेमाल करें. आपका एजेंट अपना काम करके, खुद ही कॉन्टेक्स्ट बनाता है.
7. फ़ाइल कैबिनेट - कस्टम टूल
कॉन्सेप्ट: "स्ट्रक्चर्ड मेमोरी"
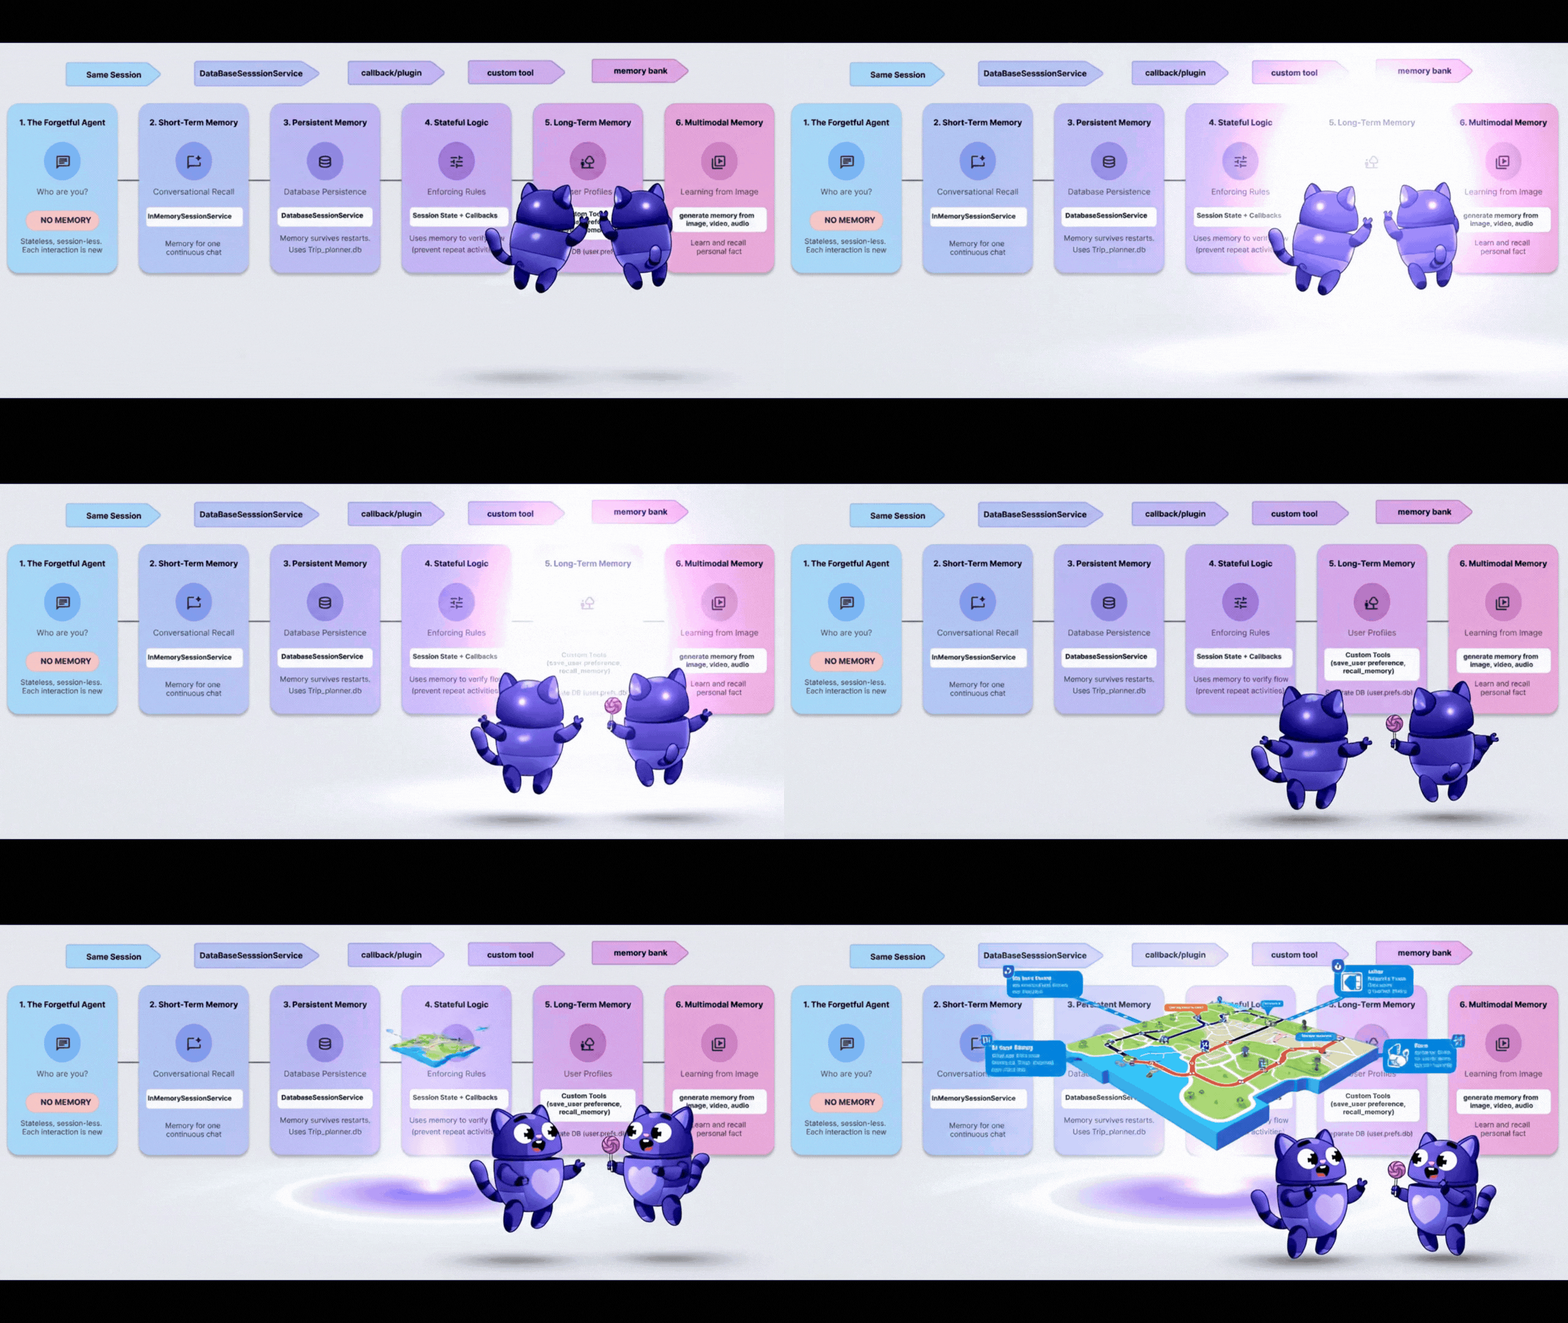
अब तक, "यादें" सुविधा का इस्तेमाल चैट लॉग या आसान की-वैल्यू पेयर के तौर पर किया जाता था. हालांकि, अगर आपको उपयोगकर्ता की कोई मुश्किल प्रोफ़ाइल याद रखनी हो, तो क्या होगा? जैसे, diet: vegan, budget: high, pets: [cat, dog].
इसके लिए, हम जानकारी याद रखने की सुविधा को एक टूल के तौर पर इस्तेमाल करते हैं. एजेंट साफ़ तौर पर तय करता है कि फ़ाइल कैबिनेट को कब खोलना है (पढ़ना) और रिपोर्ट कब दर्ज करनी है (लिखना). 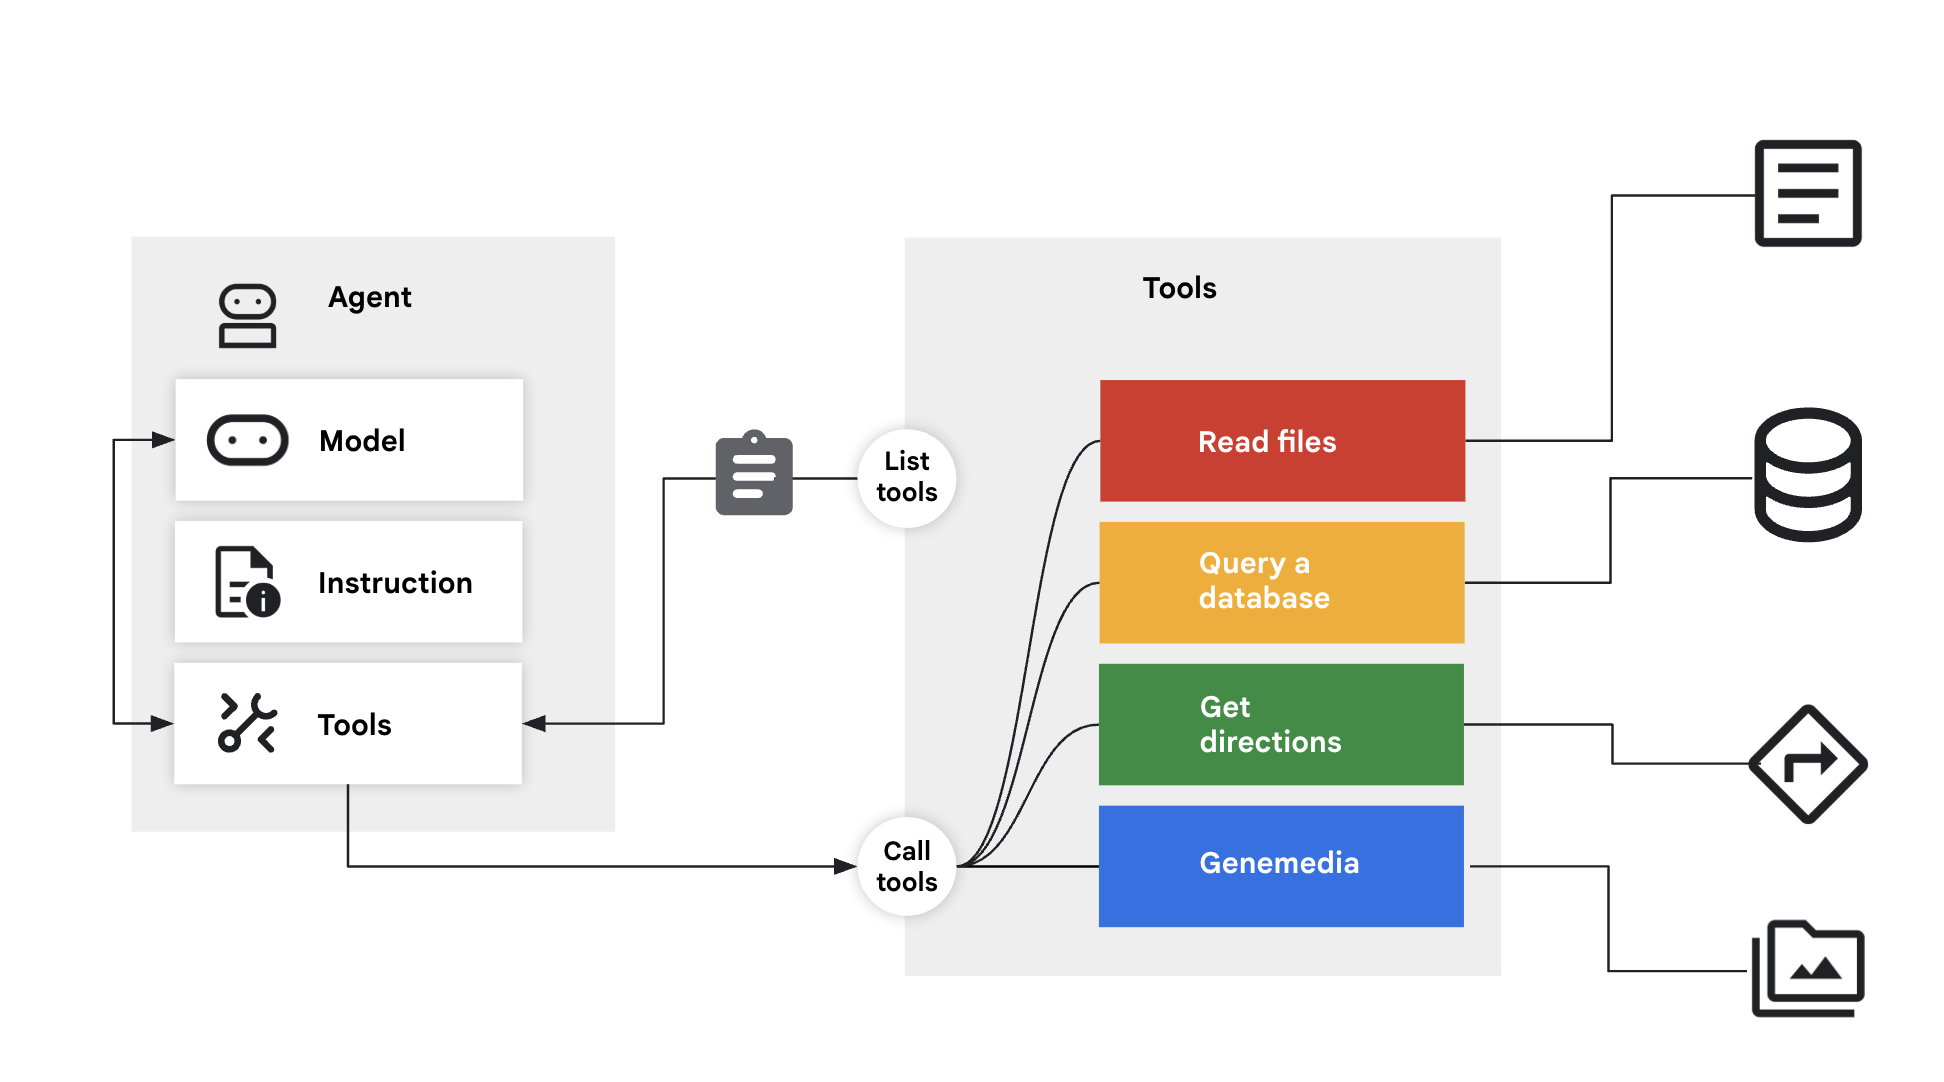
पहला चरण: टूल
👉💻 अपने Cloud Shell टर्मिनल में, Cloud Shell एडिटर में फ़ाइल खोलने के लिए, यह कमांड चलाएं:
cloudshell edit ~/memory_agent_starter/05_profile_agent/tools.py
👉 इस फ़ाइल में: ~/memory_agent_starter/05_profile_agent/tools.py.
हमें इन दो टूल को लागू करना होगा:
save_user_preferences: डेटाबेस में डेटा सेव करता है.recall_user_preferences: डेटाबेस से डेटा को रीड करता है.
~/memory_agent_starter/05_profile_agent/tools.py फ़ंक्शन में, # TODO: implement save_user_preferences tools टिप्पणी ढूंढें.
इस पूरी लाइन को इस कोड से बदलें:
def save_user_preferences(tool_context: ToolContext, new_preferences: Dict[str, Any]) -> str:
    user_id = tool_context.session.user_id
    with sqlite3.connect(USER_DB_FILE) as conn:
        for key, value in new_preferences.items():
            conn.execute("INSERT INTO user_preferences (user_id, pref_key, pref_value) VALUES (?, ?, ?) ON CONFLICT(user_id, pref_key) DO UPDATE SET pref_value = excluded.pref_value;",
                         (user_id, key, json.dumps(value)))
    return f"Preferences updated: {list(new_preferences.keys())}"
👉 05/tools.py फ़ंक्शन में, # TODO: implement recall_user_preferences tools टिप्पणी ढूंढें.
इस पूरी लाइन को इस कोड से बदलें:
def recall_user_preferences(tool_context: ToolContext) -> Dict[str, Any]:
    user_id = tool_context.session.user_id
    preferences = {}
    with sqlite3.connect(USER_DB_FILE) as conn:
        rows = conn.execute("SELECT pref_key, pref_value FROM user_preferences WHERE user_id = ?", (user_id,)).fetchall()
        if not rows: return {"message": "No preferences found."}
        for key, value_str in rows: preferences[key] = json.loads(value_str)
    return preferences
निर्देश में किसी वर्कफ़्लो को लागू करने के लिए कहा गया हो:
instruction="""
1. RECALL FIRST: First action MUST be `recall_user_preferences`.
3. LEARN: If a user states a new preference, use `save_user_preferences`.
"""
दूसरा चरण: वीडियो बनाना
👉💻 अपने Cloud Shell टर्मिनल में, Cloud Shell एडिटर में फ़ाइल खोलने के लिए, यह कमांड चलाएं:
cloudshell edit ~/memory_agent_starter/05_profile_agent/main.py
~/memory_agent_starter/05_profile_agent/main.py खोलें.
पिछले मॉड्यूल में, ADK अपने-आप स्टेट को मैनेज करता था. हालांकि, इस मॉड्यूल में एजेंट के पास कंट्रोल होता है.
- यह शुरुआत में
recall_user_preferencesको कॉल करने का विकल्प चुनता है. - "मैं वीगन हूं" कहने पर, यह
save_user_preferencesको कॉल करने का विकल्प चुनता है.
तीसरा चरण: प्रोफ़ाइल बनाना
👉💻 स्क्रिप्ट चलाएं:
cd ~/memory_agent_starter
uv run python ~/memory_agent_starter/05_profile_agent/main.py
बातचीत का यह फ़्लो आज़माएं:
- "नमस्ते, डिनर प्लान करो." -> एजेंट, डेटाबेस की जांच करता है और उसे कुछ नहीं मिलता. प्राथमिकताएं पूछना.
- "मैं वीगन हूं." -> एजेंट, "शाकाहारी" को डीबी में सेव करता है.
- स्क्रिप्ट को रीस्टार्ट करें.
- "नमस्ते, डिनर प्लान करो." -> एजेंट, डेटाबेस की जांच करता है और "वीगन" देखता है. इसके बाद, वह तुरंत वीगन रेस्टोरेंट का सुझाव देता है.
खास जानकारी
जानकारी याद रखने की सुविधा का पांचवां नियम: जटिल और स्ट्रक्चर्ड डेटा के लिए, अपने एजेंट को पढ़ने/लिखने वाले टूल दें. एलएलएम को अपना लॉन्ग-टर्म स्टोरेज खुद मैनेज करने दें.
8. The Brain - मल्टीमोडल मेमोरी
कॉन्सेप्ट: "The Human Experience"
इंसान टेक्स्ट से ज़्यादा विज़ुअल याद रखते हैं. हमें किसी फ़ोटो की वाइब, किसी आवाज़ की ध्वनि, और किसी वीडियो की भावना याद रहती है.
Vertex AI Memory Bank की मदद से, आपका एजेंट मल्टीमोडल मेमोरी को मैनेज कर सकता है. यह इमेज, वीडियो, और ऑडियो को प्रोसेस कर सकता है, उन्हें "समझ" सकता है, और बाद में उन्हें वापस ला सकता है.
पहला चरण: कॉन्फ़िगरेशन
👉💻 अपने Cloud Shell टर्मिनल में, Cloud Shell एडिटर में फ़ाइल खोलने के लिए, यह कमांड चलाएं:
cloudshell edit ~/memory_agent_starter/06_multimodal_agent/main.py
06_multimodal_agent/main.py खोलें. टिप्पणी # TODO: Configure Memory Bank Topic ढूंढें.
इस पूरी लाइन को इस कोड से बदलें:
travel_topics = [
    MemoryTopic(
        managed_memory_topic=ManagedMemoryTopic(
            managed_topic_enum=ManagedTopicEnum.USER_PREFERENCES
        )
    ),
    MemoryTopic(
        managed_memory_topic=ManagedMemoryTopic(
            managed_topic_enum=ManagedTopicEnum.USER_PERSONAL_INFO
        )
    ),
    MemoryTopic(
        custom_memory_topic=CustomMemoryTopic(
            label="travel_experiences",
            description="""Memorable travel experiences including:
                - Places visited and impressions
                - Favorite restaurants, cafes, and food experiences
                - Preferred accommodation types and locations
                - Activities enjoyed (museums, hiking, beaches, etc.)
                - Travel companions and social preferences
                - Photos and videos from trips with location context""",
        )
    ),
    MemoryTopic(
        custom_memory_topic=CustomMemoryTopic(
            label="travel_preferences",
            description="""Travel style and preferences:
                - Budget preferences (luxury, mid-range, budget)
                - Transportation preferences (flying, trains, driving)
                - Trip duration preferences
                - Season and weather preferences
                - Cultural interests and language abilities
                - Dietary restrictions and food preferences""",
        )
    ),
    MemoryTopic(
        custom_memory_topic=CustomMemoryTopic(
            label="travel_logistics",
            description="""Practical travel information:
                - Passport and visa information
                - Frequent flyer numbers and hotel loyalty programs
                - Emergency contacts
                - Medical considerations and insurance
                - Packing preferences and essentials
                - Time zone preferences and jet lag strategies""",
        )
    ),
]
टिप्पणी # TODO: Configure Memory Bank Customization ढूंढें
इस पूरी लाइन को इस कोड से बदलें:
memory_bank_config = {
    "customization_configs": [
        {
            "memory_topics": travel_topics,
        }
    ],
    "similarity_search_config": {
        "embedding_model": f"projects/{PROJECT_ID}/locations/{LOCATION}/publishers/google/models/gemini-embedding-001"
    },
    "generation_config": {
        "model": f"projects/{PROJECT_ID}/locations/{LOCATION}/publishers/google/models/gemini-2.5-flash"
    },
}
दूसरा चरण: दुनिया भर की जानकारी को इकट्ठा करना
test_trip_planner में, हम ये भेजते हैं:
- टेक्स्ट मैसेज ("नमस्ते")
- इमेज (लैंडमार्क)
- वीडियो (भूमध्य सागर)
- ऑडियो क्लिप (गेटा के बारे में वॉइस नोट)
6_multimodal_agent/main.py फ़ंक्शन में, # TODO create session service and memory service टिप्पणी ढूंढें.
इस पूरी लाइन को इस कोड से बदलें:
session_service = VertexAiSessionService(
    project=PROJECT_ID, location=LOCATION, agent_engine_id=agent_engine_id
)
memory_service = VertexAiMemoryBankService(
    project=PROJECT_ID, location=LOCATION, agent_engine_id=agent_engine_id
)
👉 उसी फ़ाइल 06_multimodal_agent/main.py में, टिप्पणी # TODO: create memory from session ढूंढें
इस पूरी लाइन को इस कोड से बदलें:
await memory_service.add_session_to_memory(final_session_state)
यह मैजिक लाइन है. यह इस रिच मीडिया को Vertex AI पर भेजता है. इसके बाद, Vertex AI इसे प्रोसेस और इंडेक्स करता है.
तीसरा चरण: डेटा वापस पाना
👉💻 अपने Cloud Shell टर्मिनल में, Cloud Shell एडिटर में फ़ाइल खोलने के लिए, यह कमांड चलाएं:
cloudshell edit ~/memory_agent_starter/06_multimodal_agent/agent.py
एजेंट के पास PreloadMemoryTool है.
tools=[PreloadMemoryTool(), budget_tool]
जब कोई नया सेशन शुरू होता है, तो यह टूल मेमोरी बैंक में मौजूद काम के पिछले अनुभवों को अपने-आप खोजता है और उन्हें कॉन्टेक्स्ट में शामिल करता है.
चौथा चरण: Brain को चलाएं
👉💻 अपने Cloud Shell टर्मिनल में, स्क्रिप्ट चलाएं (ध्यान दें: इसके लिए, Vertex AI की सुविधा वाले Google Cloud प्रोजेक्ट की ज़रूरत होती है):
cd ~/memory_agent_starter
uv run python ~/memory_agent_starter/06_multimodal_agent/main.py
पुष्टि करने का आखिरी चरण देखें:
"मैंने पहले जो फ़ोटो, वीडियो, और ऑडियो शेयर किया था उसके आधार पर..."
एजेंट यह जवाब देगा:
"आपको गाएटा जाना चाहिए! तुमने मुझे मेडिटरेनियन सी का एक वीडियो दिखाया था. साथ ही, एक ऑडियो क्लिप सुनाई थी, जिसमें तुमने कहा था कि तुम्हें गाएटा पसंद है."
इसने अलग-अलग तरह के मीडिया को आपस में जोड़ा.
खास जानकारी
जानकारी याद रखने की सुविधा का छठा नियम: जानकारी याद रखने की सुविधा का बेहतरीन अनुभव पाने के लिए, Vertex AI Memory Bank का इस्तेमाल करें. यह टेक्स्ट, इमेज, और वीडियो को एक ही जगह पर इकट्ठा करता है, ताकि उन्हें आसानी से खोजा जा सके.
9. नतीजा
आपने भूलने वाली गोल्डफ़िश से लेकर, मल्टीमॉडल एलिफ़ेंट तक का सफ़र तय किया है.
आपने बनाया | सुविधा |
Session Agent | कम समय के लिए चैट मेमोरी |
मल्टी-एजेंट | टीम के साथ शेयर की गई यादें |
Persistent Agent | लंबे समय का इतिहास |
स्टेटफ़ुल एजेंट | अपने-आप अपडेट होने वाली डाइनैमिक मेमोरी |
Profile Agent | स्ट्रक्चर्ड डेटा मेमोरी |
मल्टीमोडल एजेंट | इंसान की तरह सेंसरी मेमोरी |
भरोसा, यादों से बनता है. इन पैटर्न को लागू करके, ऐसे एजेंट बनाए जा सकते हैं जो उपयोगकर्ता के समय और इतिहास का ध्यान रखते हैं. इससे, ज़्यादा बेहतर और असरदार इंटरैक्शन होते हैं.
आज ही अपनी पसंद के मुताबिक एजेंट बनाना शुरू करें!