

1. บทนำ
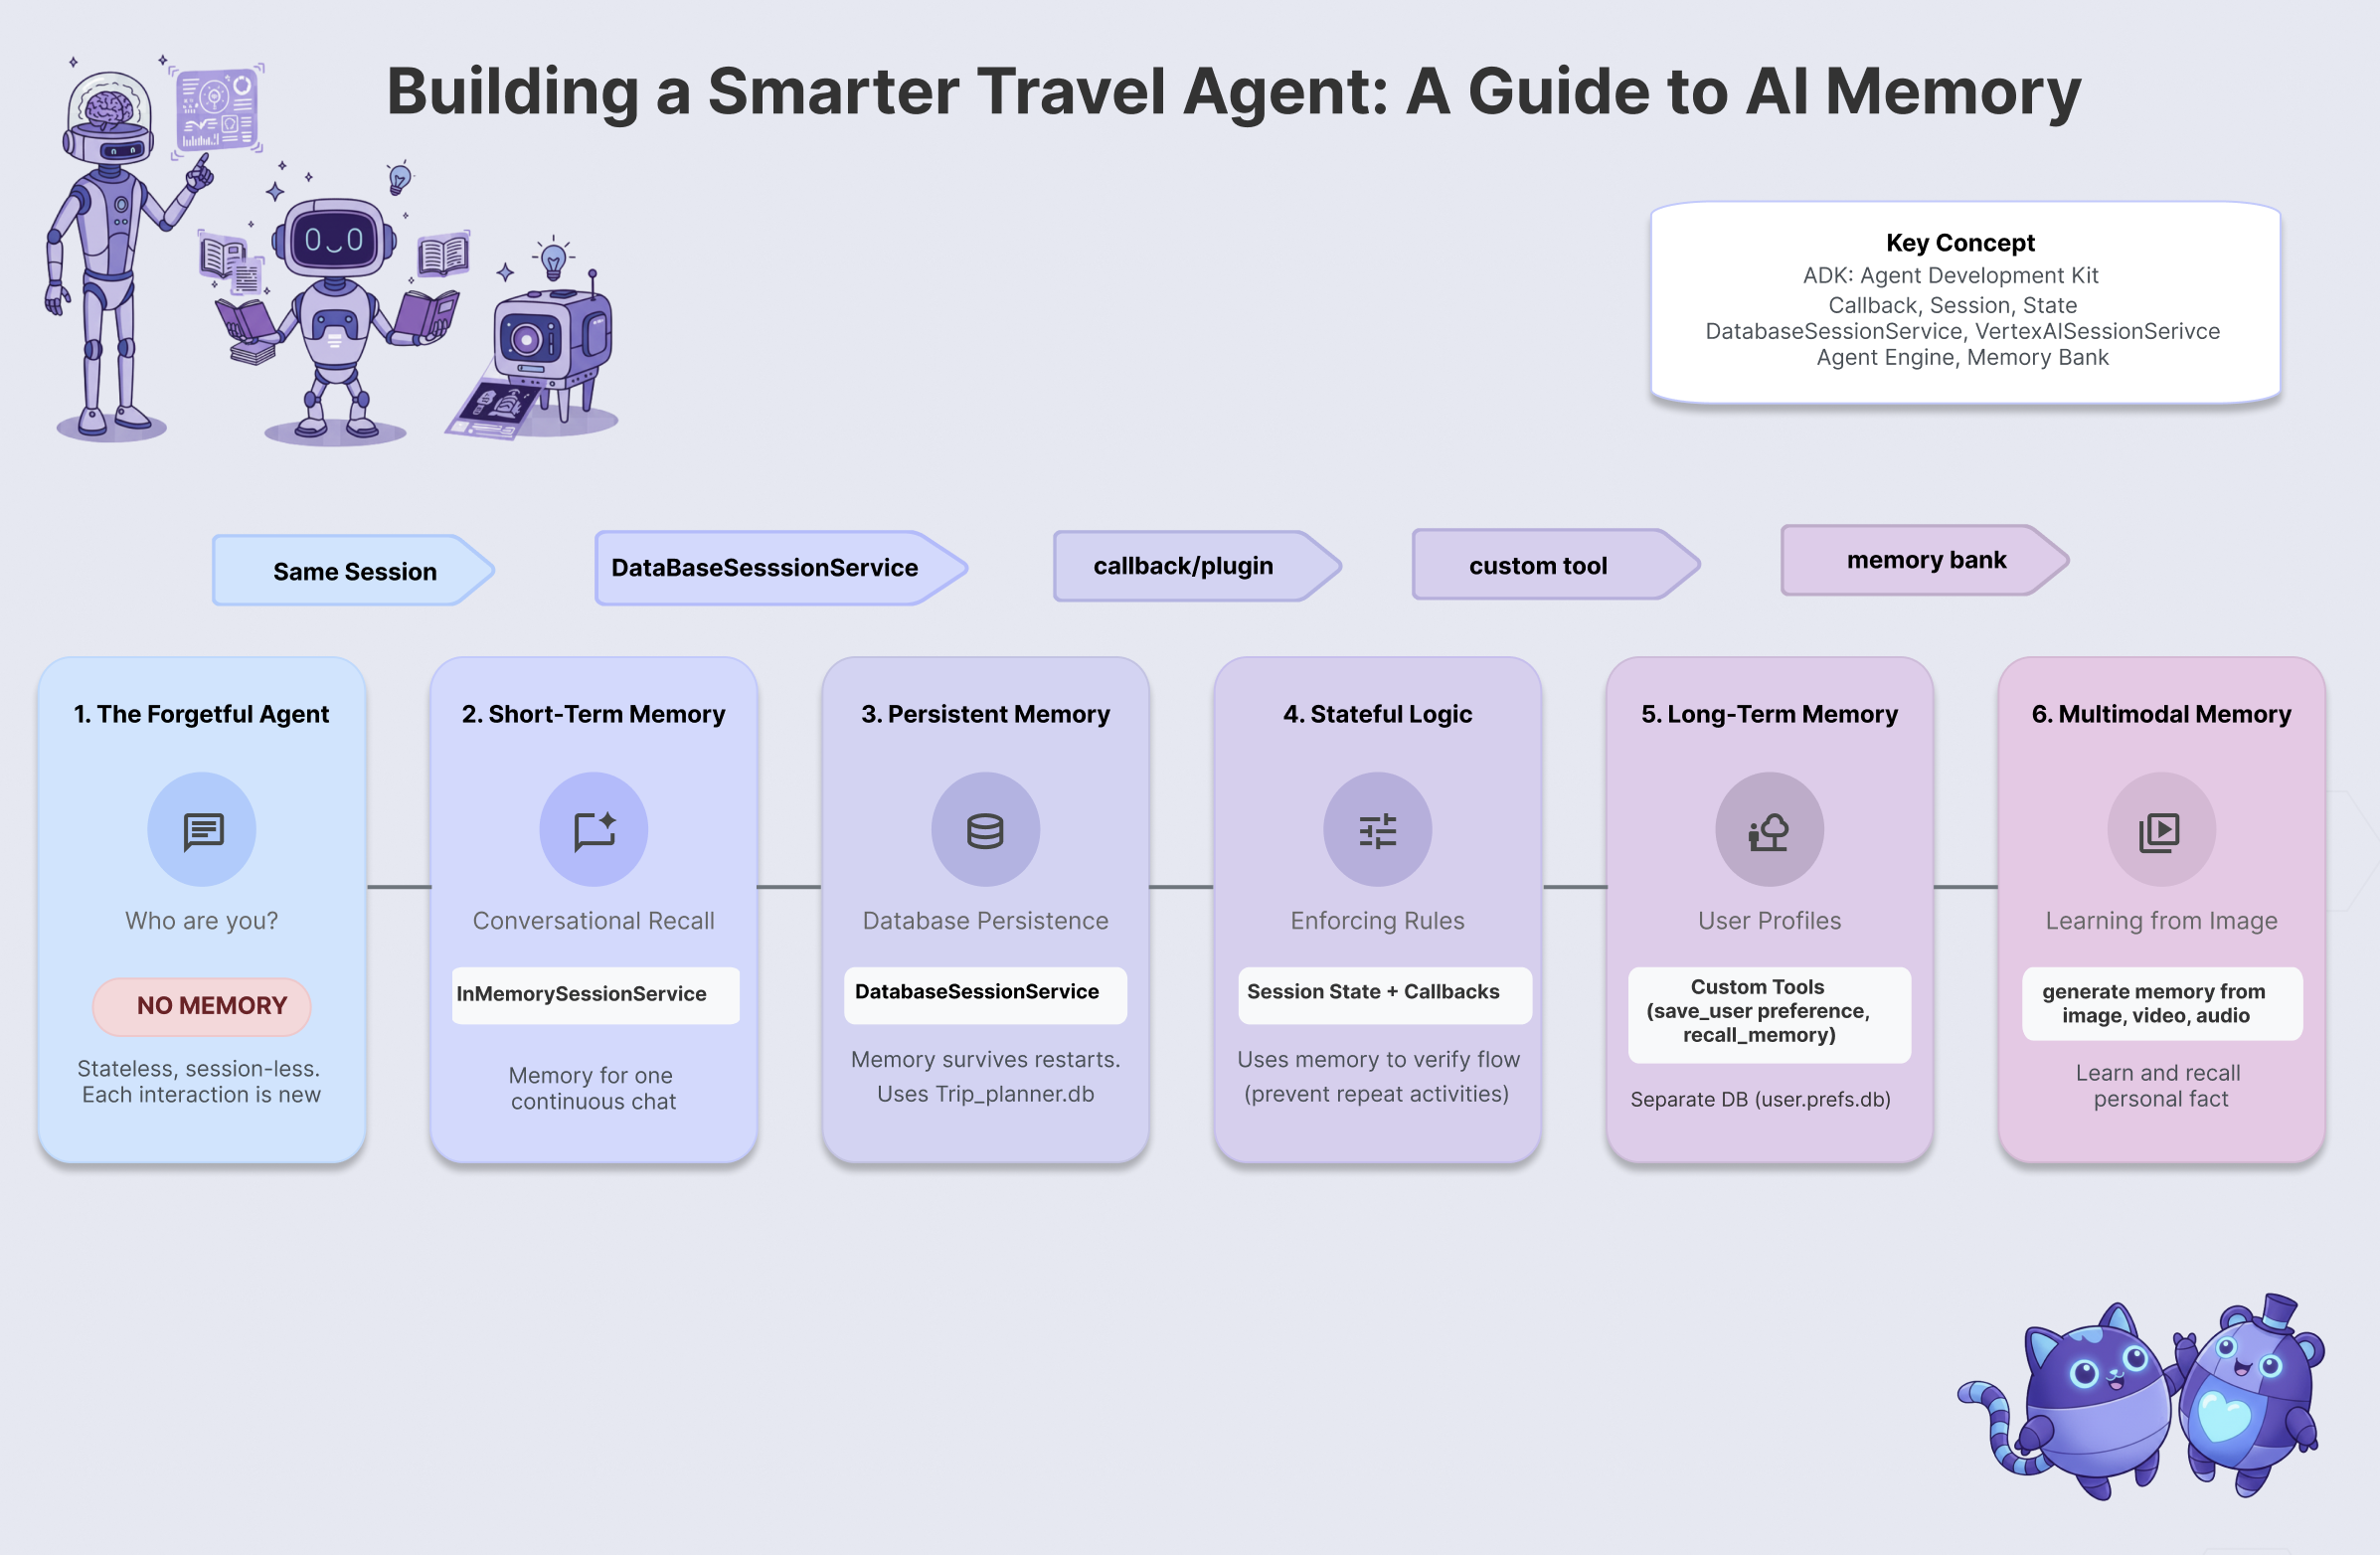
ปัญหา "ปลาทอง"
ลองนึกภาพว่าคุณจ้างตัวแทนท่องเที่ยวเพื่อวางแผนทริปพักผ่อนในฝันที่โตเกียว ใช้ Session Agent เพื่อดูการทำงานของ "ปัญหาปลาทอง"
คุณเดินเข้าไปในออฟฟิศของเพื่อนร่วมงานและพูดว่า
"สวัสดี ฉันอยากวางแผนทริป 2 วันไปโตเกียว ฉันสนใจสถานที่ทางประวัติศาสตร์และซูชิ"
ตัวแทนตอบกลับอย่างกระตือรือร้นว่า
"เยี่ยมเลย ฉันวางแผนไปเที่ยวพระราชวังอิมพีเรียลและทานซูชิมื้อค่ำที่ร้าน Sukiyabashi Jiro"
คุณยิ้มและพูดว่า
"ฟังดูดีมากเลย ช่วยส่งแผนการเดินทางให้ฉันหน่อยได้ไหม"
ตัวแทนมองคุณด้วยความงุนงงและถามว่า
"สวัสดี วันนี้จะให้ฉันช่วยวางแผนการเดินทางเรื่องอะไรบ้าง"
นี่คือ "ปัญหาปลาทอง" หากไม่มีความทรงจำ การโต้ตอบทุกครั้งจะเหมือนการเริ่มต้นใหม่ ความชาญฉลาดมีอยู่แล้ว ตัวแทนรู้วิธีวางแผนการเดินทาง แต่ขาดความต่อเนื่อง AI Agent จะมีประโยชน์อย่างแท้จริงได้ก็ต่อเมื่อสามารถจดจำข้อมูลได้
ภารกิจของคุณวันนี้
ในเวิร์กช็อปนี้ คุณจะได้แก้ปัญหา "ปลาทอง" ด้วยการสร้างตัวแทนท่องเที่ยวที่จดจำ เรียนรู้ และปรับตัวได้ คุณจะได้เรียนรู้หน่วยความจำของ Agent ทั้ง 6 ระดับ เพื่อสร้างระบบที่ทำงานได้เหมือนผู้ช่วยส่วนตัวที่ทุ่มเท ไม่ใช่แค่แชทบ็อตธรรมดา
ระดับ | แนวคิด | "พลังพิเศษ" |
ระดับ 1 | เซสชันและสถานะ | สนทนาได้โดยไม่ลืม |
ระดับ 2 | สถานะ Multi-Agent | การแชร์โน้ตระหว่างสมาชิกในทีม |
ระดับ 3 | ความต่อเนื่อง | จดจำคุณแม้หลังจากรีบูตระบบ |
ระดับ 4 | Callbacks | กำลังอัปเดตความทรงจำโดยอัตโนมัติทั้งหมด |
ระดับ 5 | เครื่องมือที่กำหนดเอง | การอ่านและการเขียนโปรไฟล์ผู้ใช้ที่มีโครงสร้าง |
ระดับ 6 | ความทรงจำแบบหลายโมดัล | การ "เห็น" และจดจำรูปภาพและวิดีโอ |
สแต็กหน่วยความจำของ ADK
ก่อนที่จะเขียนโค้ด เรามาทำความเข้าใจเครื่องมือที่เราใช้กันก่อน Google Agent Development Kit (ADK) มีวิธีที่มีโครงสร้างในการจัดการหน่วยความจำ ดังนี้
- เซสชัน: คอนเทนเนอร์สําหรับการสนทนา ซึ่งจะเก็บประวัติของสิ่งที่พูดไว้
- สถานะ: "Scratchpad" ของคีย์-ค่าที่แนบมากับเซสชัน Agent จะใช้หน่วยความจำนี้เพื่อจัดเก็บข้อเท็จจริงที่เฉพาะเจาะจง (เช่น
destination="Tokyo") - MemoryService: พื้นที่เก็บข้อมูลระยะยาว ซึ่งเป็นที่ที่เราเก็บข้อมูลต่างๆ ไว้ตลอดไป เช่น ค่ากำหนดของผู้ใช้หรือเอกสารที่วิเคราะห์แล้ว
2. ตั้งค่า
เราต้องมี 2 สิ่งเพื่อขับเคลื่อน AI Agent ได้แก่ โปรเจ็กต์ที่อยู่ในระบบคลาวด์ของ Google เพื่อเป็นรากฐาน
ส่วนที่ 1: เปิดใช้บัญชีสำหรับการเรียกเก็บเงิน
หากต้องการเรียกใช้ Codelab นี้ คุณต้องมีบัญชีสำหรับการเรียกเก็บเงินที่มีเครดิตอยู่บ้าง ใช้เครดิตจากแบนเนอร์ที่ด้านบนของ Codelab นี้เพื่อเริ่มต้นใช้งาน หากเชื่อมต่อกับบัญชีสำหรับการเรียกเก็บเงินอยู่แล้ว คุณสามารถข้ามขั้นตอนนี้ได้
ส่วนที่ 2: สภาพแวดล้อมแบบเปิด
- 👉 คลิกที่ลิงก์นี้เพื่อไปยังเครื่องมือแก้ไข Cloud Shell โดยตรง
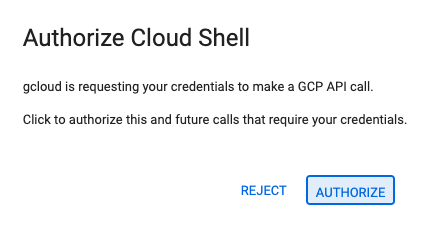
- 👉 หากระบบแจ้งให้คุณให้สิทธิ์ในขั้นตอนใดก็ตามในวันนี้ ให้คลิกให้สิทธิ์เพื่อดำเนินการต่อ
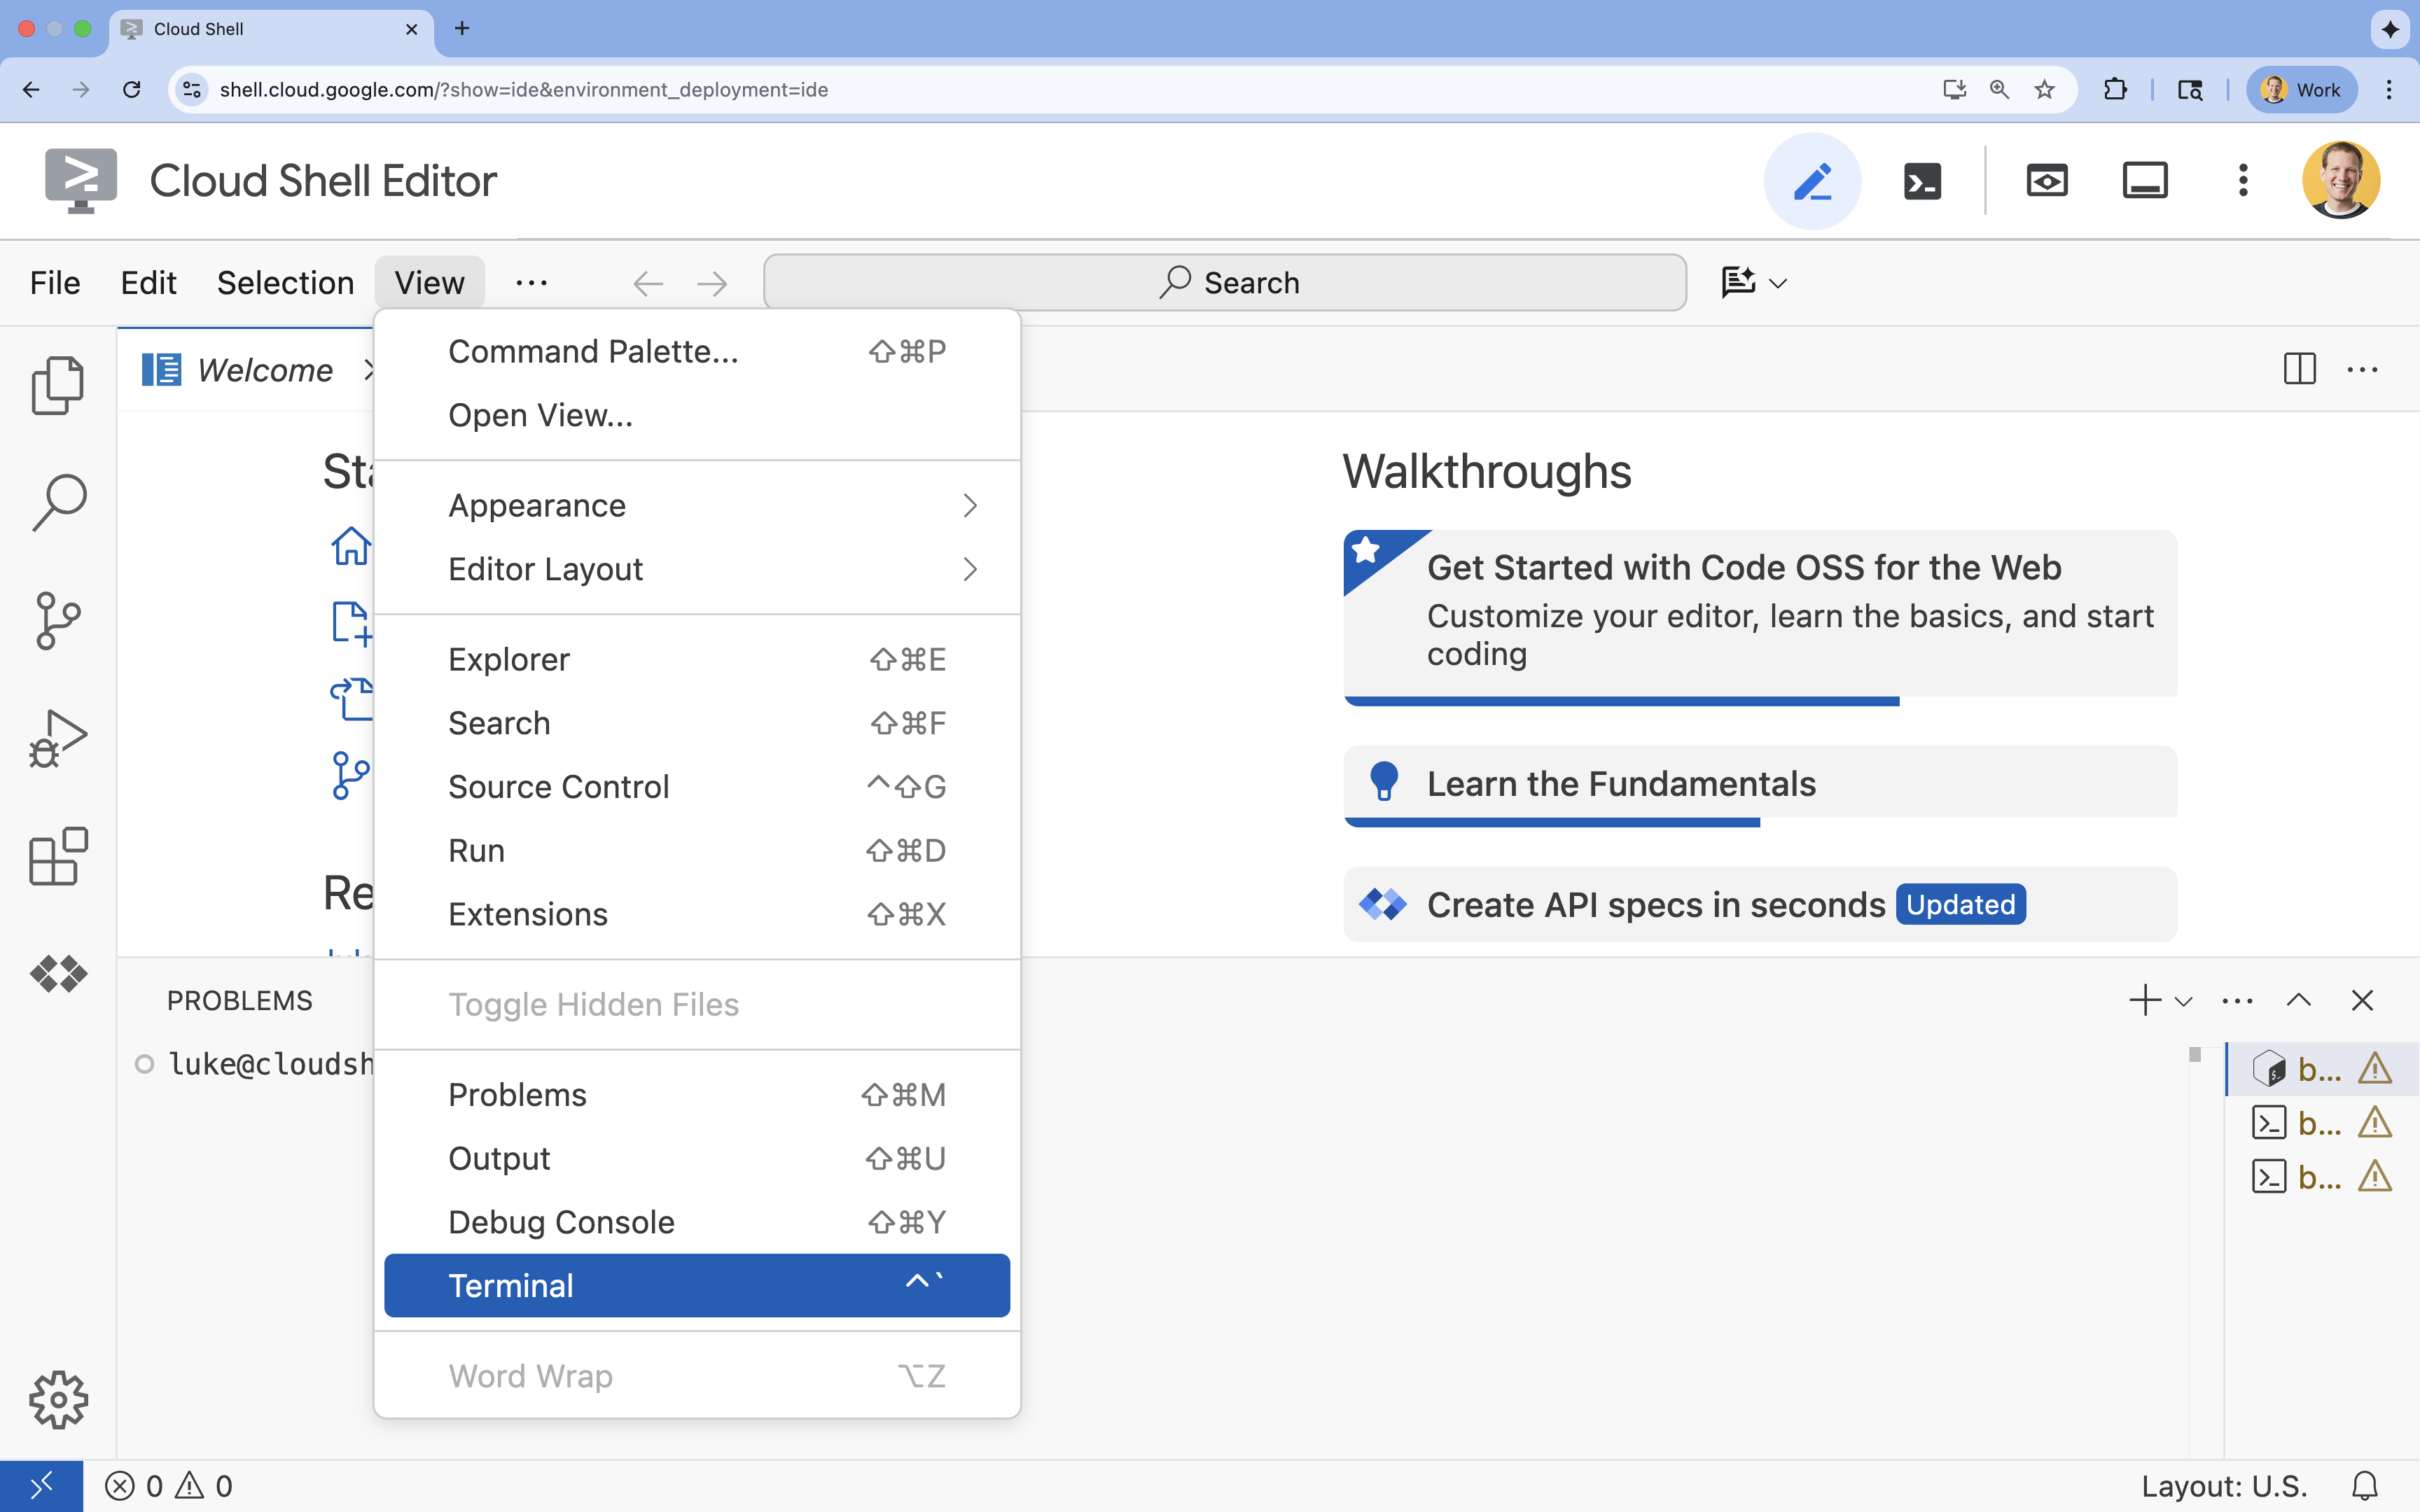
- 👉 หากเทอร์มินัลไม่ปรากฏที่ด้านล่างของหน้าจอ ให้เปิดเทอร์มินัลโดยทำดังนี้
- คลิกดู
- คลิก Terminal
- 👉💻 ในเทอร์มินัล ให้ยืนยันว่าคุณได้รับการตรวจสอบสิทธิ์แล้ว และโปรเจ็กต์ตั้งค่าเป็นรหัสโปรเจ็กต์ของคุณโดยใช้คำสั่งต่อไปนี้
gcloud auth list - 👉💻 โคลนโปรเจ็กต์ Bootstrap จาก GitHub โดยทำดังนี้
git clone https://github.com/cuppibla/memory_agent_starter - 👉💻 เรียกใช้สคริปต์การตั้งค่าจากไดเรกทอรีโปรเจ็กต์
cd ~/memory_agent_starter ./init.sh - 👉💻 ตั้งค่ารหัสโปรเจ็กต์ที่จำเป็น:
gcloud config set project $(cat ~/project_id.txt) --quiet
ส่วนที่ 3: การตั้งค่าสิทธิ์
- 👉💻 เปิดใช้ API ที่จำเป็นโดยใช้คำสั่งต่อไปนี้ การดำเนินการนี้อาจใช้เวลาสักครู่
gcloud services enable \ cloudresourcemanager.googleapis.com \ servicenetworking.googleapis.com \ run.googleapis.com \ aiplatform.googleapis.com \ compute.googleapis.com - 👉💻 ให้สิทธิ์ที่จำเป็นโดยเรียกใช้คำสั่งต่อไปนี้ในเทอร์มินัล
. ~/memory_agent_starter/set_env.sh
โปรดทราบว่าระบบจะสร้างไฟล์ .env ให้คุณ ซึ่งจะแสดงข้อมูลโปรเจ็กต์ของคุณ
3. พื้นฐาน - เซสชันและสถานะ
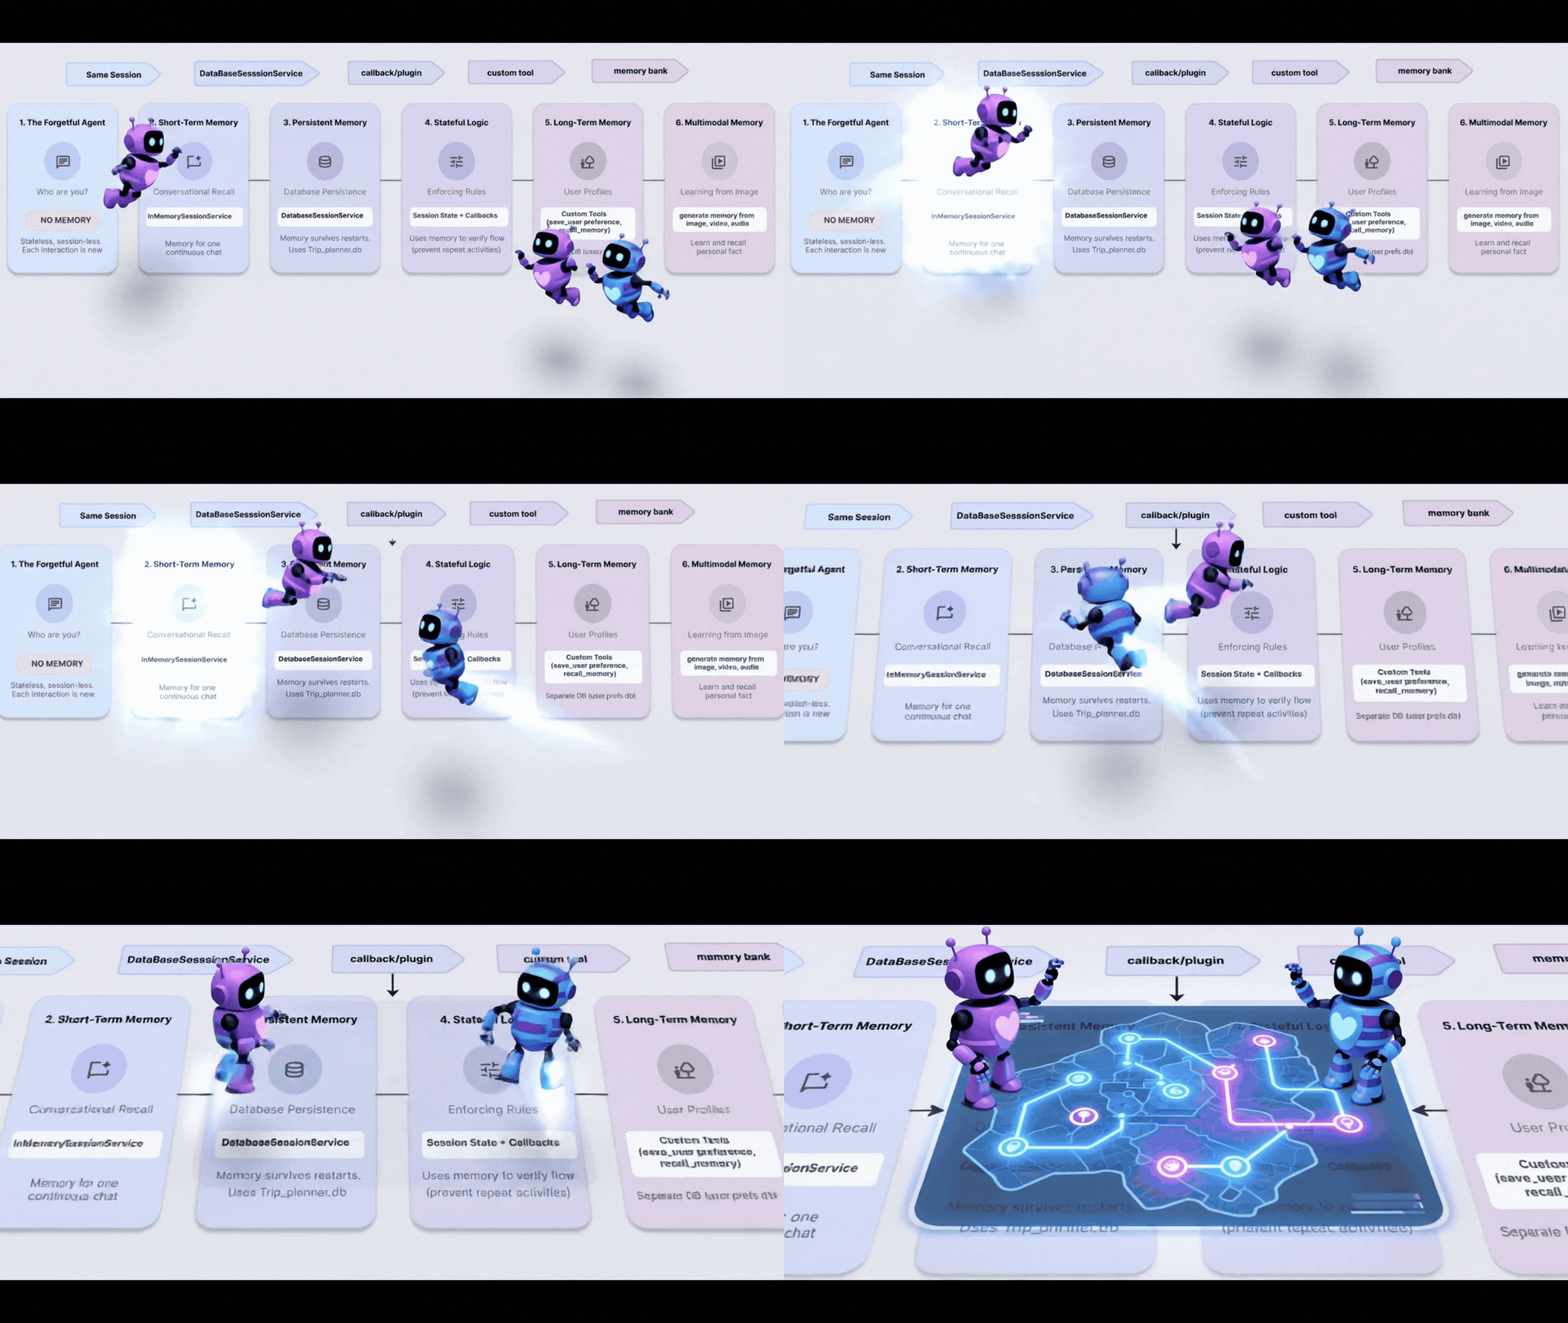
แนวคิด: บริบทคือสิ่งสำคัญที่สุด
รูปแบบความทรงจำที่พื้นฐานที่สุดคือความทรงจำของเซสชัน ซึ่งช่วยให้ Agent ทราบว่า "มัน" ในประโยค "ฉันอยากซื้อมัน" หมายถึงรองเท้าที่คุณพูดถึงเมื่อ 10 วินาทีก่อน
ใน ADK เราจะจัดการเรื่องนี้ด้วยออบเจ็กต์ Session
- แนวทางแบบไม่เก็บสถานะ: สร้างเซสชันใหม่สำหรับทุกข้อความ
- แนวทางแบบเก็บสถานะ: สร้างเซสชันเดียวและนำกลับมาใช้ซ้ำตลอดการสนทนา
ขั้นตอนที่ 1: ตรวจสอบ Agent
👉💻 ในเทอร์มินัล Cloud Shell ให้เปิดไฟล์ในเครื่องมือแก้ไข Cloud Shell โดยเรียกใช้คำสั่งต่อไปนี้
cloudshell edit ~/memory_agent_starter/01_session_agent/agent.py
เปิด ~/memory_agent_starter/01_session_agent/agent.py
👉 ค้นหาความคิดเห็น # TODO: Create a root agent ภายในฟังก์ชัน agent.py
แทนที่ทั้งบรรทัดนี้ด้วยโค้ดต่อไปนี้
root_agent = LlmAgent(
    name="multi_day_trip_agent",
    model="gemini-2.5-flash",
    description="Agent that progressively plans a multi-day trip, remembering previous days and adapting to user feedback.",
    instruction="""
    You are the "Adaptive Trip Planner" 🗺️ - an AI assistant that builds multi-day travel itineraries step-by-step.

    Your Defining Feature:
    You have short-term memory. You MUST refer back to our conversation to understand the trip's context, what has already been planned, and the user's preferences. If the user asks for a change, you must adapt the plan while keeping the unchanged parts consistent.

    Your Mission:
    1.  **Initiate**: Start by asking for the destination, trip duration, and interests.
    2.  **Plan Progressively**: Plan ONLY ONE DAY at a time. After presenting a plan, ask for confirmation.
    3.  **Handle Feedback**: If a user dislikes a suggestion (e.g., "I don't like museums"), acknowledge their feedback, and provide a *new, alternative* suggestion for that time slot that still fits the overall theme.
    4.  **Maintain Context**: For each new day, ensure the activities are unique and build logically on the previous days. Do not suggest the same things repeatedly.
    5.  **Final Output**: Return each day's itinerary in MARKDOWN format.
    """,
    tools=[google_search]
)
คำสั่งจะบอกให้ LLM จดจำ แต่โค้ดต้องให้ความสามารถในการจดจำ
ขั้นตอนที่ 2: 2 สถานการณ์
เปิด ~/memory_agent_starter/01_session_agent/main.py
👉 ในเทอร์มินัล Cloud Shell ให้เปิดไฟล์ในเครื่องมือแก้ไข Cloud Shell โดยเรียกใช้คำสั่งต่อไปนี้
cloudshell edit ~/memory_agent_starter/01_session_agent/main.py
เปิด ~/memory_agent_starter/01_session_agent/main.py ค้นหาความคิดเห็น # TODO: Create a runner with in memorysession service ภายในฟังก์ชัน main.py
แทนที่ทั้งบรรทัดนี้ด้วยโค้ดต่อไปนี้
    runner = Runner(
        agent=agent,
        session_service=session_service,
        app_name=agent.name
    )
👉 ค้นหาความคิดเห็น # TODO: create a different session to test ภายในฟังก์ชัน main.py
แทนที่ทั้งบรรทัดนี้ด้วยโค้ดต่อไปนี้
    tokyo_session_2 = await session_service.create_session(
        app_name=multi_day_agent.name,
        user_id=user_id
    )
ทดสอบ
เรามี 2 ฟังก์ชันที่แสดงให้เห็นความแตกต่างระหว่างความทรงจำแบบ "ปลาทอง" และ "ช้าง"
สถานการณ์ที่ 1: มีการเก็บสถานะ (เซสชันที่ใช้ร่วมกัน)
async def run_trip_same_session_scenario(session_service, user_id):
    # 1. Create ONE session
    trip_session = await session_service.create_session(...)

    # 2. Turn 1
    await run_agent_query(..., trip_session, ...)

    # 3. Turn 2 - REUSING the same session!
    # The agent can "see" Turn 1 because it's in the session history.
    await run_agent_query(..., trip_session, ...)
สถานการณ์ที่ 2: แบบไม่เก็บสถานะ (เซสชันใหม่ทุกครั้ง)
async def run_trip_different_session_scenario(session_service, user_id):
    # Turn 1
    tokyo_session = await session_service.create_session(...)
    await run_agent_query(..., tokyo_session, ...)

    # Turn 2 - Creating a FREASH session
    # The agent has NO IDEA what happened in Turn 1.
    tokyo_session_2 = await session_service.create_session(...)
    await run_agent_query(..., tokyo_session_2, ...)
ขั้นตอนที่ 3: เรียกใช้ Agent
มาดูความแตกต่างในการใช้งานจริงกัน เรียกใช้สคริปต์:
👉💻 ในบรรทัดคำสั่ง ให้เรียกใช้บรรทัดคำสั่งด้านล่าง
cd ~/memory_agent_starter
uv run python ~/memory_agent_starter/01_session_agent/main.py
สังเกตสถานการณ์ที่ 1: Agent จะจดจำค่ากำหนดของคุณจากข้อความแรกและปรับแผนในข้อความที่ 2
สังเกตสถานการณ์ที่ 2: ในเทิร์นที่ 2 ("คุณจำได้ไหมว่าฉันชอบอะไรเกี่ยวกับอาหาร") Agent จะดำเนินการไม่สำเร็จเลยเนื่องจากเป็นเซสชันใหม่ ซึ่งหมายความว่า "ฉันไม่รู้ว่าคุณกำลังพูดถึงอะไร"
ประเด็นสำคัญ
กฎข้อที่ 1 ของความทรงจำ: นำ session.id กลับมาใช้ซ้ำเสมอเพื่อรักษาบริบทการสนทนา ออบเจ็กต์ Session คือบัฟเฟอร์หน่วยความจำระยะสั้นของ Agent
4. ทีม - สถานะ Multi-Agent

คอนเซ็ปต์: "เกมกระซิบ"
เมื่อ Agent หลายตัวทำงานร่วมกัน ก็จะเหมือนกับเพื่อนร่วมงานที่ส่งโฟลเดอร์ไฟล์ไปมา หากตัวแทนคนหนึ่งเขียนบันทึกในโฟลเดอร์ ตัวแทนคนถัดไปควรจะอ่านบันทึกนั้นได้
ใน ADK "โฟลเดอร์" นี้คือสถานะ
- State คือพจนานุกรม (
{"key": "value"}) ที่อยู่ในเซสชัน - ตัวแทนทุกคนในเซสชันจะอ่านหรือเขียนลงในเซสชันได้
ขั้นตอนที่ 1: ตรวจสอบเวิร์กโฟลว์
👉💻 ในเทอร์มินัล Cloud Shell ให้เปิดไฟล์ในเครื่องมือแก้ไข Cloud Shell โดยเรียกใช้คำสั่งต่อไปนี้
cloudshell edit ~/memory_agent_starter/02_multi_agent/agent.py
👉ในไฟล์ ~/memory_agent_starter/02_multi_agent/agent.py ให้ค้นหาความคิดเห็น # TODO: foodie agent
แทนที่ทั้งบรรทัดนี้ด้วยโค้ดต่อไปนี้
foodie_agent = LlmAgent(
    name="foodie_agent",
    model="gemini-2.5-flash",
    tools=[google_search],
    instruction="""You are an expert food critic. Your goal is to find the best restaurant based on a user's request.

    When you recommend a place, you must output *only* the name of the establishment and nothing else.
    For example, if the best sushi is at 'Jin Sho', you should output only: Jin Sho
    """,
    output_key="destination"  # ADK will save the agent's final response to state['destination']
)
👉 ค้นหาความคิดเห็น # TODO: transportation agent ภายในฟังก์ชัน agent.py
แทนที่ทั้งบรรทัดนี้ด้วยโค้ดต่อไปนี้
transportation_agent = LlmAgent(
    name="transportation_agent",
    model="gemini-2.5-flash",
    tools=[google_search],
    instruction="""You are a navigation assistant. Given a destination, provide clear directions.
    The user wants to go to: {destination}.

    Analyze the user's full original query to find their starting point.
    Then, provide clear directions from that starting point to {destination}.
    """,
)
👉 ค้นหาความคิดเห็น # TODO: root_agent ภายในฟังก์ชัน agent.py
แทนที่ทั้งบรรทัดนี้ด้วยโค้ดต่อไปนี้
root_agent = SequentialAgent(
    name="find_and_navigate_agent",
    sub_agents=[foodie_agent, transportation_agent],
    description="A workflow that first finds a location and then provides directions to it."
)
ตอนนี้เรามี Agent 2 รายที่ทำงานตามลำดับ ดังนี้
- Foodie Agent: ค้นหาร้านอาหาร
- ตัวแทนด้านการขนส่ง: ให้เส้นทางไปยังร้านอาหารนั้น
การส่งต่อที่ราบรื่น: สังเกตวิธีที่ foodie_agent ส่งต่อให้ transportation_agent
foodie_agent = LlmAgent(
    # ...
    # CRITICAL: This tells ADK to save the agent's output to state['destination']
    output_key="destination"
)

transportation_agent = LlmAgent(
    # ...
    # CRITICAL: This injects state['destination'] into the prompt
    instruction="""
    The user wants to go to: {destination}.
    Provide clear directions...
    """,
)
output_key="destination": ระบบจะบันทึกคำตอบของ Foodie Agent อย่างมีประสิทธิภาพ{destination}: ตัวแทนด้านการขนส่งจะอ่านคำตอบนั้นโดยอัตโนมัติ
(ไม่ต้องดำเนินการใดๆ) ขั้นตอนที่ 2: Orchestrator
เปิด 02_multi_agent/main.py
เราใช้ SequentialAgent เพื่อเรียกใช้ตามลำดับ
# 1. Create a single session for the sequential agent
session = await session_service.create_session(...)

# 2. Run the query
# The SequentialAgent manages the state flow:
# Query -> Foodie -> state['destination'] -> Transportation -> Final Answer
await run_agent_query(root_agent, query, ...)
ผู้ใช้ส่งพรอมต์เดียว:
"Find best sushi in Palo Alto and then tell me how to get there."
Agent จะทำงานร่วมกันเพื่อตอบคำถาม
ขั้นตอนที่ 3: บริหารทีม
👉💻 ในเทอร์มินัล Cloud Shell ให้เรียกใช้เวิร์กโฟลว์แบบหลาย Agent โดยทำดังนี้
cd ~/memory_agent_starter
uv run python ~/memory_agent_starter/02_multi_agent/main.py
สิ่งที่เกิดขึ้น
- ตัวแทนด้านอาหาร: ค้นหา "Jin Sho" (หรือที่คล้ายกัน)
- ADK: บันทึก "Jin Sho" ไปยัง
state['destination'] - Agent ด้านการขนส่ง: ได้รับ "Jin Sho" ในคำสั่ง
- ผลลัพธ์: "หากต้องการไปที่ Jin Sho จากสถานี Caltrain ให้เดินไปตามถนน University Ave..."
ประเด็นสำคัญ
กฎข้อที่ 2 ของหน่วยความจำ: ใช้สถานะเพื่อส่งข้อมูลที่มีโครงสร้างระหว่าง Agent ใช้ output_key เพื่อเขียนและ {placeholders} เพื่ออ่าน
5. The Reboot - ความต่อเนื่อง
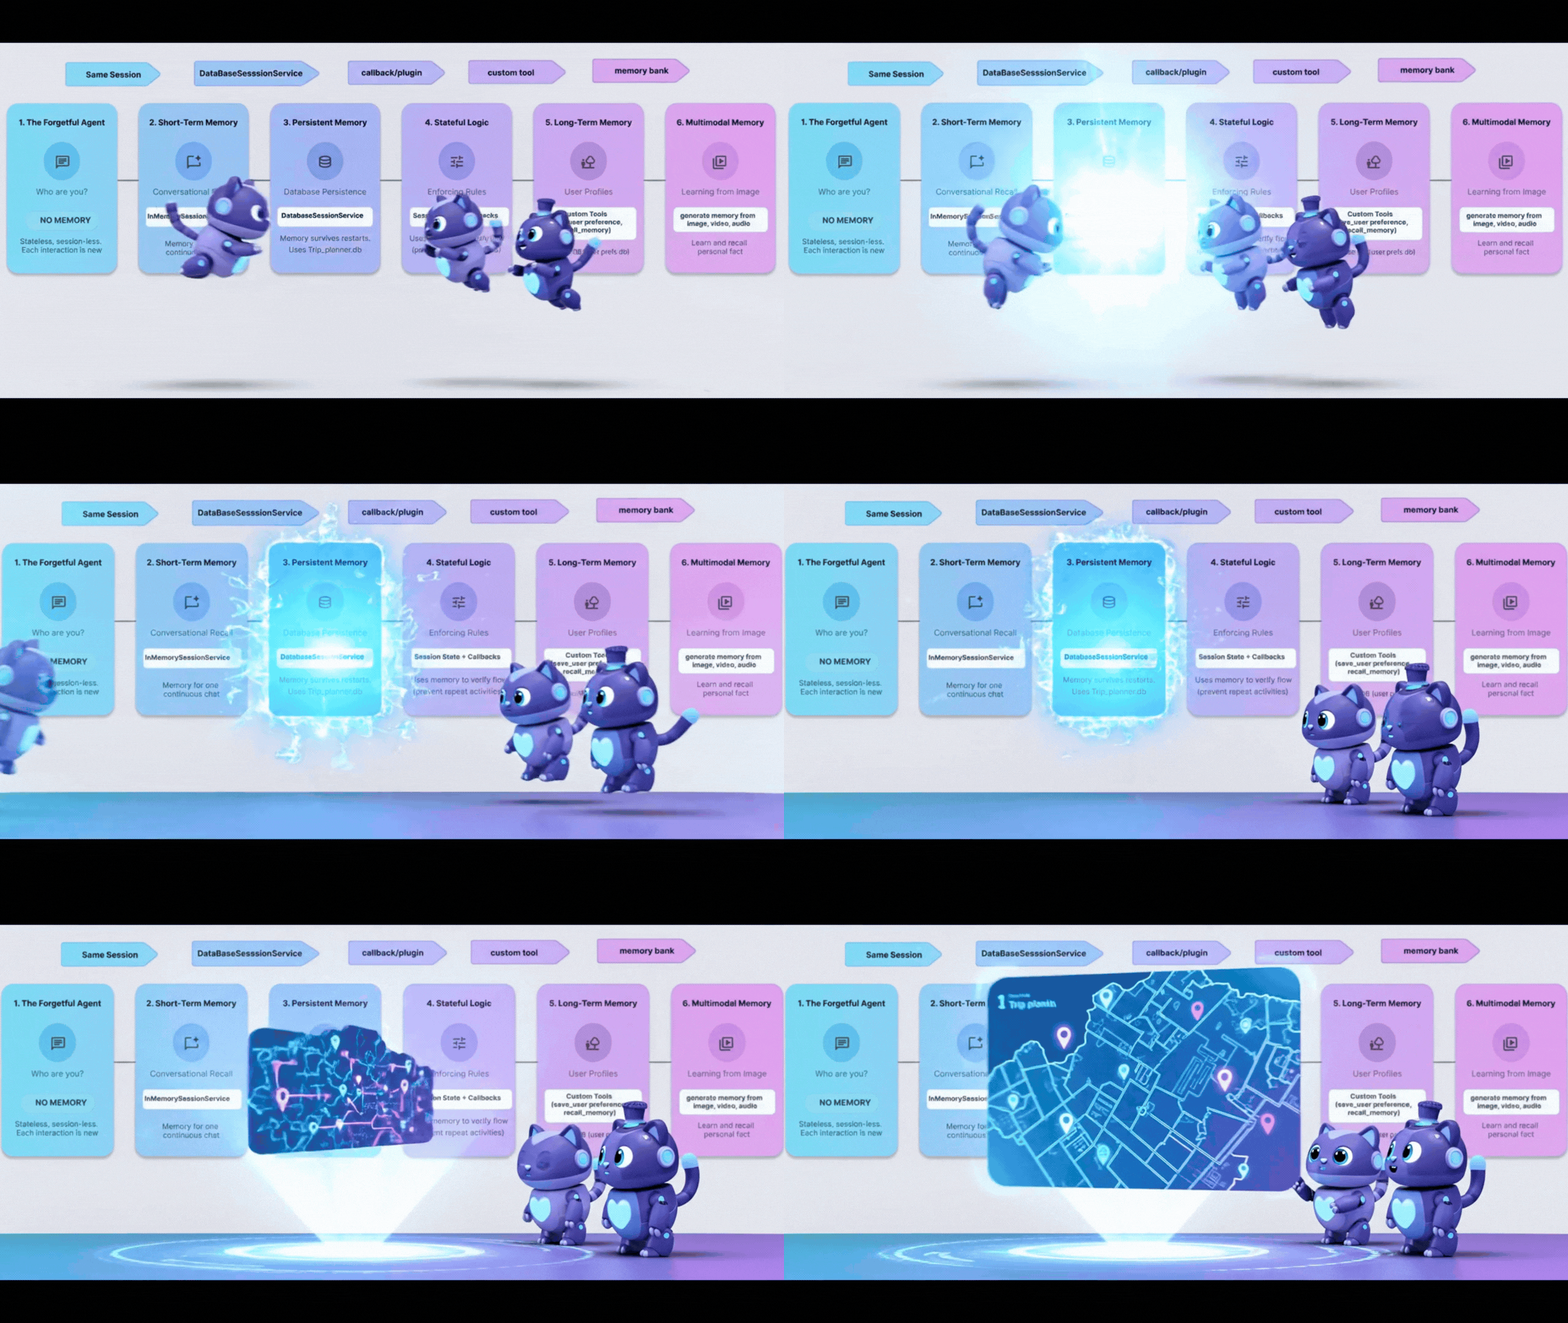
แนวคิด: "ปัญหาการรีบูต"
จนถึงตอนนี้ ความทรงจำของเราคือInMemory หากคุณหยุดสคริปต์และเริ่มสคริปต์อีกครั้ง Agent จะลืมทุกอย่าง ซึ่งคล้ายกับคอมพิวเตอร์ที่ล้างฮาร์ดไดรฟ์ทุกครั้งที่คุณปิดเครื่อง
เราต้องมีความพากเพียรเพื่อแก้ไขปัญหานี้ เราจะเปลี่ยน InMemorySessionService เป็น DatabaseSessionService
ขั้นตอนที่ 1: การเปลี่ยนฐานข้อมูล
👉💻 ในเทอร์มินัล Cloud Shell ให้เปิดไฟล์ในเครื่องมือแก้ไข Cloud Shell โดยเรียกใช้คำสั่งต่อไปนี้
cloudshell edit ~/memory_agent_starter/03_persistent_agent/main.py
👉 ในไฟล์ ~/memory_agent_starter/03_persistent_agent/main.py ให้ค้นหาความคิดเห็น # TODO: Configuration for Persistent Sessions
แทนที่ทั้งบรรทัดนี้ด้วยโค้ดต่อไปนี้
SESSIONS_DIR = Path(os.path.expanduser("~")) / ".adk_codelab" / "sessions"
os.makedirs(SESSIONS_DIR, exist_ok=True)
SESSION_DB_FILE = SESSIONS_DIR / "trip_planner.db"
SESSION_URL = f"sqlite:///{SESSION_DB_FILE}"
ตอนนี้ระบบจะบันทึกทุกเซสชันและเหตุการณ์ลงในไฟล์ SQLite
ขั้นตอนที่ 2: การดึงข้อมูลข้ามเซสชัน
ความต่อเนื่องไม่เพียงช่วยให้สนทนาต่อได้เท่านั้น แต่ยังช่วยให้เรียนรู้จากการสนทนาที่ผ่านมาได้ด้วย
ในไฟล์เดียวกัน ~/memory_agent_starter/03_persistent_agent/main.py ให้ดูกรอบการทดสอบที่ 3: การดึงข้อมูลข้ามเซสชัน
👉 ค้นหาความคิดเห็น # TODO: retrieve the previous session manually
แทนที่ทั้งบรรทัดนี้ด้วยโค้ดต่อไปนี้
    old_session = await session_service.get_session(
        app_name=root_agent.name, user_id="user_01", session_id=session_id
    )
👉 ค้นหาความคิดเห็น # TODO: Extract content from the OLD session ภายในฟังก์ชัน main.py
แทนที่ทั้งบรรทัดนี้ด้วยโค้ดต่อไปนี้
previous_context += f"- {role}: {text}\n"
👉 ค้นหาความคิดเห็น # TODO: Manually inject the context to the query ภายในฟังก์ชัน main.py
แทนที่ทั้งบรรทัดนี้ด้วยโค้ดต่อไปนี้
    query_3 = f"""
    {previous_context}

    I'm planning a new trip to Osaka this time.
    Based on my previous preferences (above), what should I eat?
    """
ซึ่งเป็นการจำลองผู้ใช้ที่กลับมาในอีกหลายเดือนต่อมา คุณจะเรียกดูประวัติเก่าได้ก็ต่อเมื่อมีฐานข้อมูลเท่านั้น
ขั้นตอนที่ 3: การอยู่รอดหลังการรีบูต
👉💻 เรียกใช้สคริปต์ในเทอร์มินัลโดยทำดังนี้
cd ~/memory_agent_starter
uv run python ~/memory_agent_starter/03_persistent_agent/main.py
โดยจะสร้างไฟล์ ~/memory_agent_starter/trip_planner.db ลองทำดังนี้: เรียกใช้สคริปต์ 2 ครั้ง
- ในการเรียกใช้ครั้งที่ 2 ให้มองหา "เซสชันที่มีอยู่ซึ่งกลับมาทำงานอีกครั้ง"
- Agent จะจดจำบริบทจากการเรียกใช้ครั้งแรกได้เนื่องจากโหลดจากไฟล์ฐานข้อมูล
ประเด็นสำคัญ
กฎข้อที่ 3 ของหน่วยความจำ: ใช้ DatabaseSessionService สำหรับเวอร์ชันที่ใช้งานจริง ซึ่งจะช่วยให้การสนทนาของผู้ใช้ยังคงอยู่แม้จะรีสตาร์ทเซิร์ฟเวอร์ และช่วยให้วิเคราะห์ประวัติในระยะยาวได้
6. สายลับ - การติดต่อกลับ
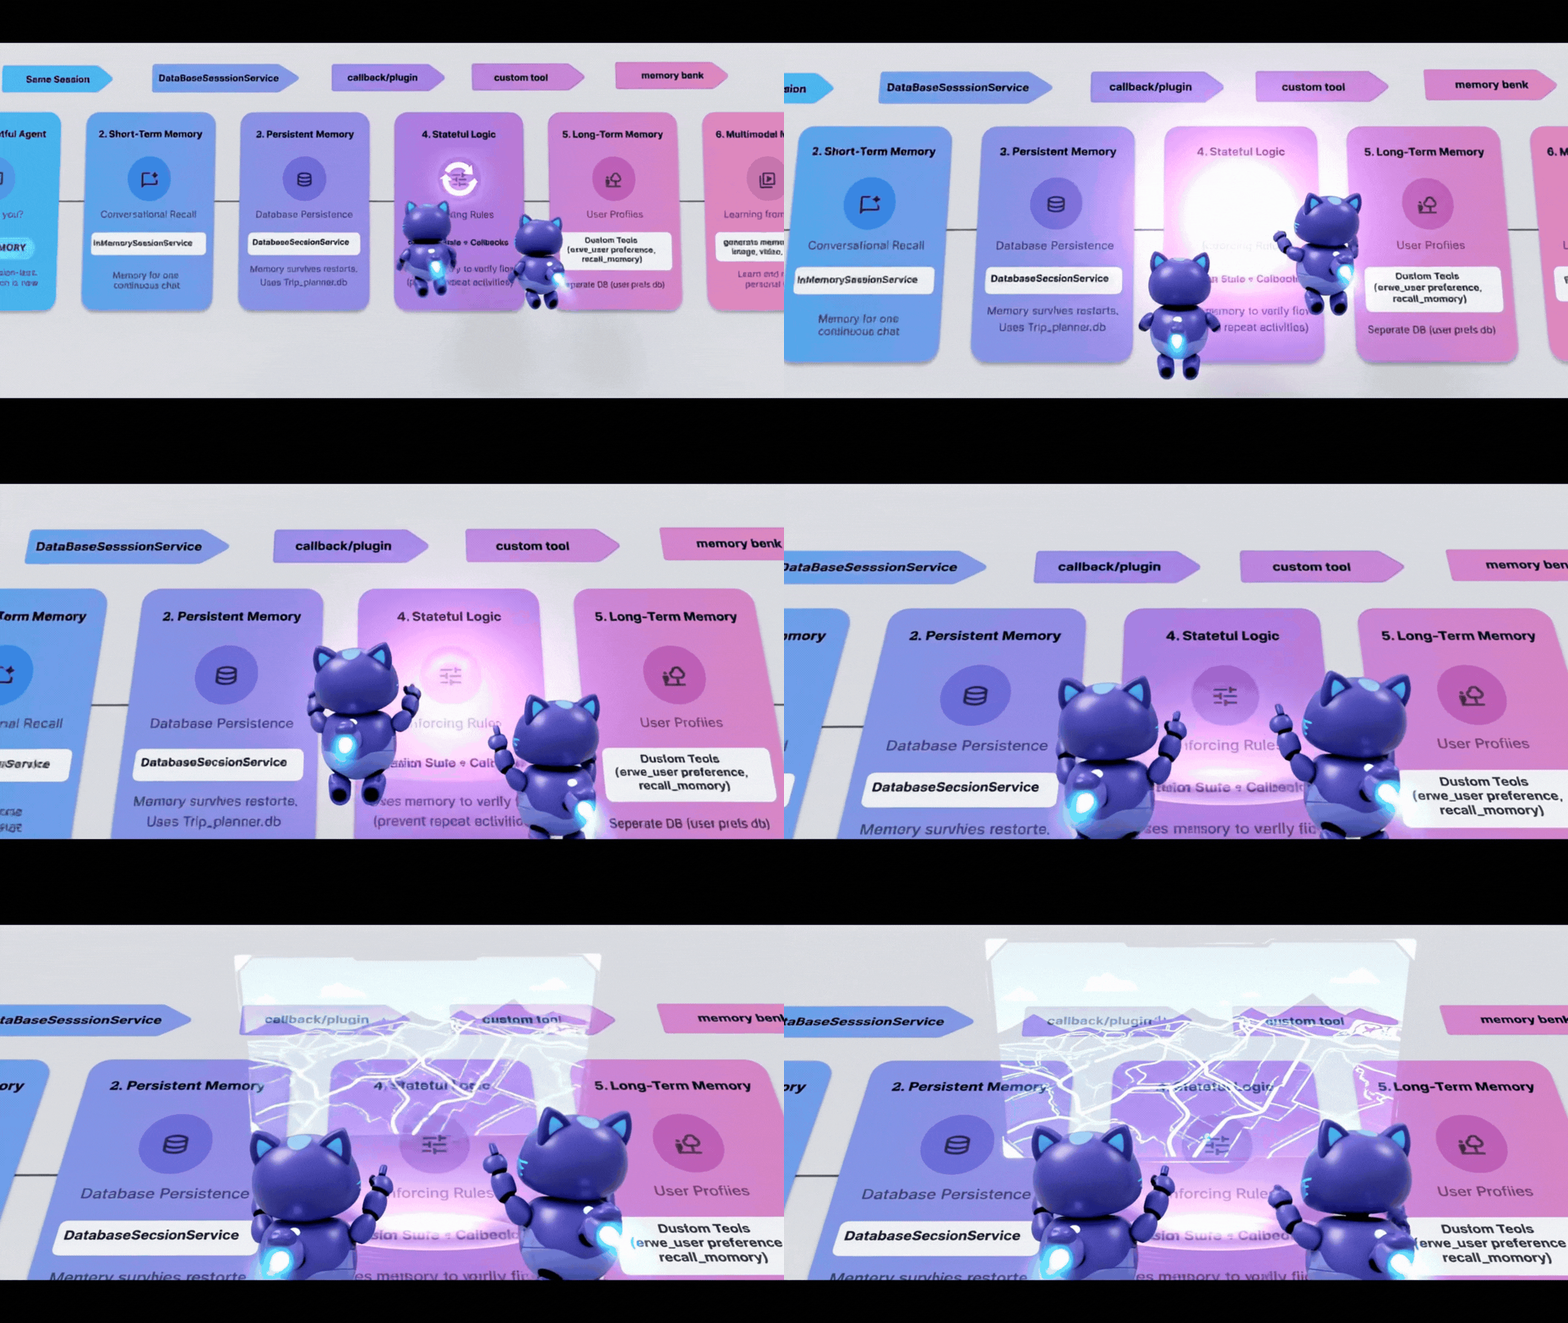
บางครั้งคุณอาจต้องอัปเดตความทรงจำโดยอัตโนมัติตามสิ่งที่ Agent ทำ ไม่ใช่แค่สิ่งที่ Agent พูด คุณต้องการ "สายลับ" ที่คอยจับตาดูตัวแทนและจดบันทึก
ใน ADK สปายนี้คือ Callback 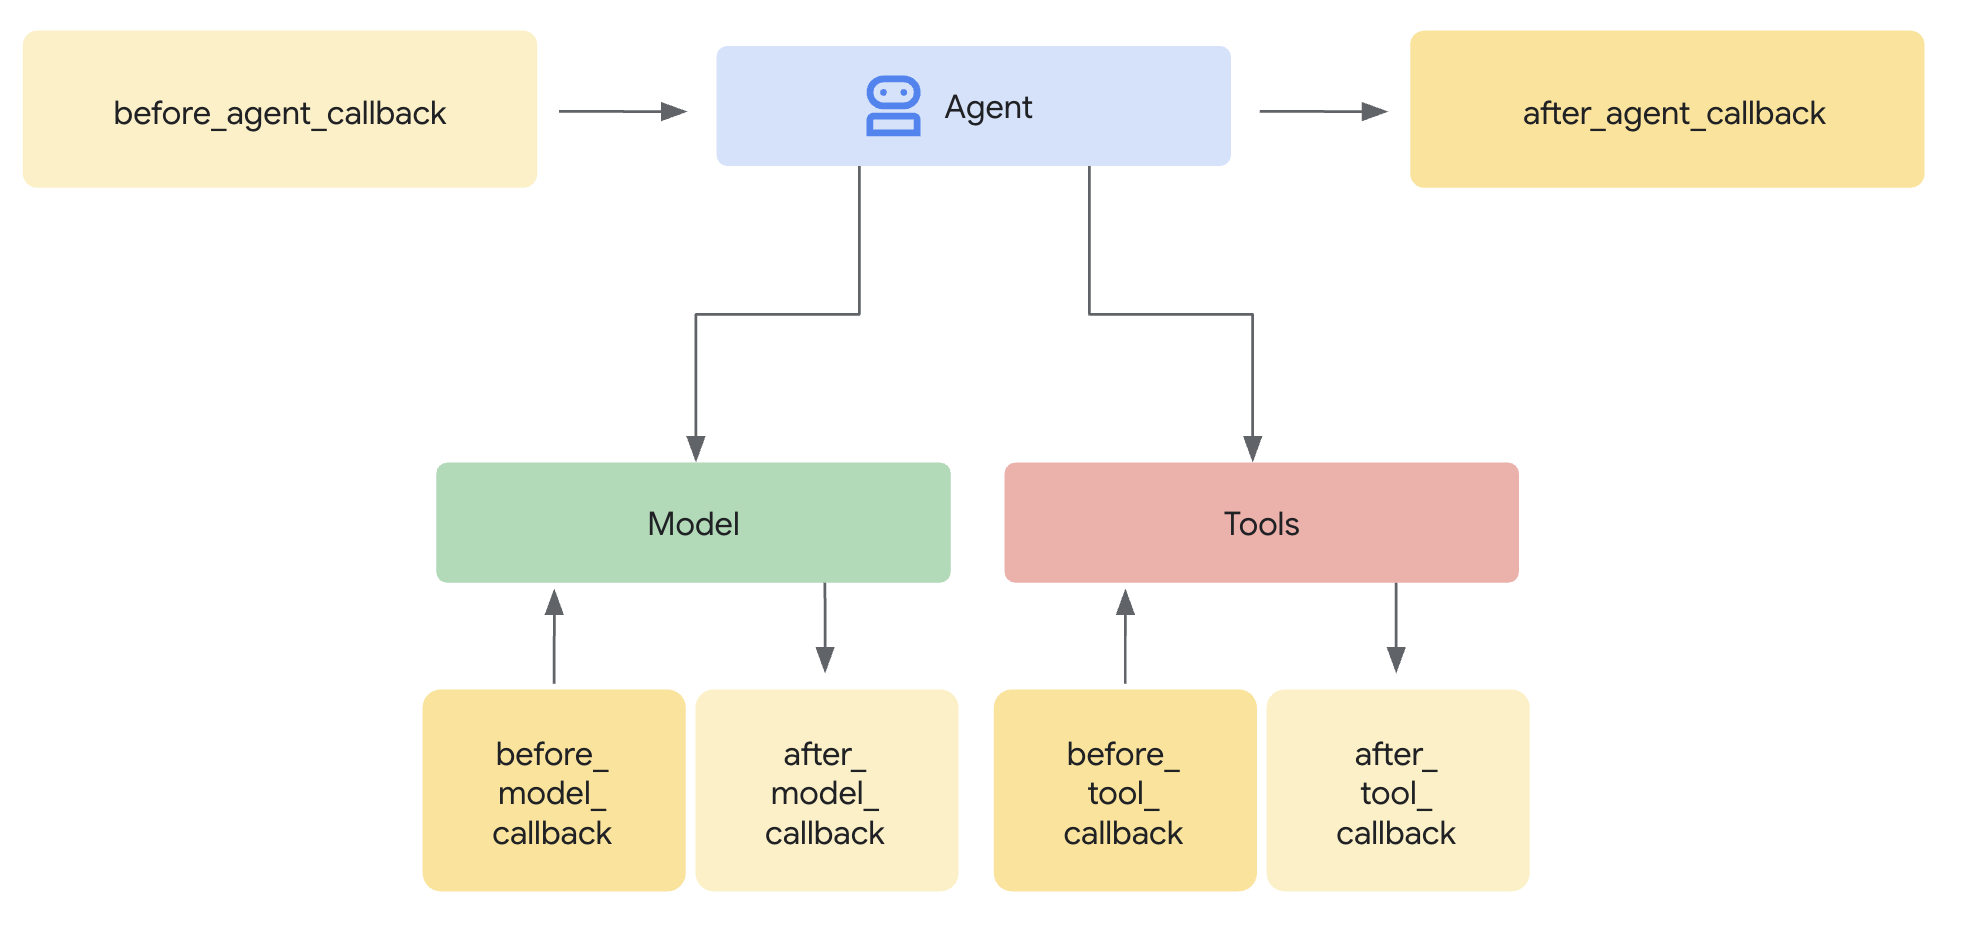
after_tool_callback: ฟังก์ชันที่ทำงานทุกครั้งที่ Agent ทำงานToolContext: วิธีเขียนลงใน State จากภายในฟังก์ชันนั้น
ขั้นตอนที่ 1: หลักการทำงาน
👉💻 ในเทอร์มินัล Cloud Shell ให้เปิดไฟล์ในเครื่องมือแก้ไข Cloud Shell โดยเรียกใช้คำสั่งต่อไปนี้
cloudshell edit ~/memory_agent_starter/04_stateful_agent/agent.py
👉 ในไฟล์ ~/memory_agent_starter/04_stateful_agent/agent.py ให้ค้นหาความคิดเห็น # TODO: Implement call back logic
แทนที่ทั้งบรรทัดนี้ด้วยโค้ดต่อไปนี้
def save_activity_type_callback(
    tool,
    args: Dict[str, Any],
    tool_context: ToolContext,
    tool_response: Dict[str, Any],
) -> Optional[Dict[str, Any]]:
    """
    Callback to save the TYPE of activity just planned into the session state.
    """
    # 1. Get the actual agent name.
    if tool.name == "transfer_to_agent":
         agent_name = args.get("agent_name")
    else:
         agent_name = tool.name

    activity_type = "unknown"

    # 2. Determine the type based on which agent was actually used
    if agent_name == "museum_expert":
        activity_type = "CULTURAL"
    elif agent_name == "restaurant_expert":
        activity_type = "FOOD"
    elif agent_name == "outdoor_expert":
        activity_type = "OUTDOOR"

    print(f"\n🔔 [CALLBACK] The planner transferred to '{agent_name}'.")

    # 3. Update the state directly
    tool_context.state["last_activity_type"] = activity_type
    print(f"💾 [STATE UPDATE] 'last_activity_type' is now set to: {activity_type}\n")

    return tool_response
👉 ในไฟล์เดียวกัน ให้ค้นหาความคิดเห็น # TODO: add callback to root agent ภายในฟังก์ชัน 04_stateful_agent/agent.py
แทนที่ทั้งบรรทัดนี้ด้วยโค้ดต่อไปนี้
after_tool_callback=save_activity_type_callback,
คำสั่งแบบไดนามิก: ตอนนี้คำสั่งของ Agent เป็นฟังก์ชัน ไม่ใช่สตริง ซึ่งจะเปลี่ยนไปตามสถานะ
def get_planner_instruction(context):
    last_activity = context.state.get("last_activity_type", "None")

    return f"""
    The last activity was: {last_activity}

    If last_activity is 'CULTURAL' -> `museum_expert` is BANNED.
    """
ขั้นตอนที่ 3: ทดสอบ Spy
👉💻 ในเทอร์มินัล ให้เรียกใช้สคริปต์โดยคัดลอกและวางคำสั่งด้านล่าง
cd ~/memory_agent_starter
uv run python ~/memory_agent_starter/04_stateful_agent/main.py
เมื่อเรียกใช้ Agent นี้ คุณจะเห็นลูป
- เทิร์นที่ 1: คุณถามหาพิพิธภัณฑ์ สายลับตั้งค่า
last_activity="CULTURAL" - เทิร์นที่ 2: คุณขอให้แนะนำพิพิธภัณฑ์อื่น
- ข้อมูลอัปเดตเกี่ยวกับคำสั่ง Agent: "ห้ามใช้คำว่า CULTURAL"
- ตัวแทนพูดว่า "ฉันไปพิพิธภัณฑ์อีกแห่งไม่ได้แล้ว แล้วสวนสาธารณะล่ะ"
ดูบันทึกคอนโซลสำหรับ [CALLBACK] และ [STATE UPDATE] คุณจะเห็นความทรงจำเปลี่ยนแปลงแบบเรียลไทม์ขณะที่ Agent ทำงาน
ประเด็นสำคัญ
กฎข้อที่ 4 ของหน่วยความจำ: ใช้การเรียกกลับเพื่อจัดการสถานะโดยอัตโนมัติ Agent จะสร้างบริบทของตัวเองได้ง่ายๆ เพียงแค่ทำงานของตนเอง
7. หน้าจัดการไฟล์ - เครื่องมือผลิตตามสั่ง
แนวคิด: "ความทรงจำที่มีโครงสร้าง"
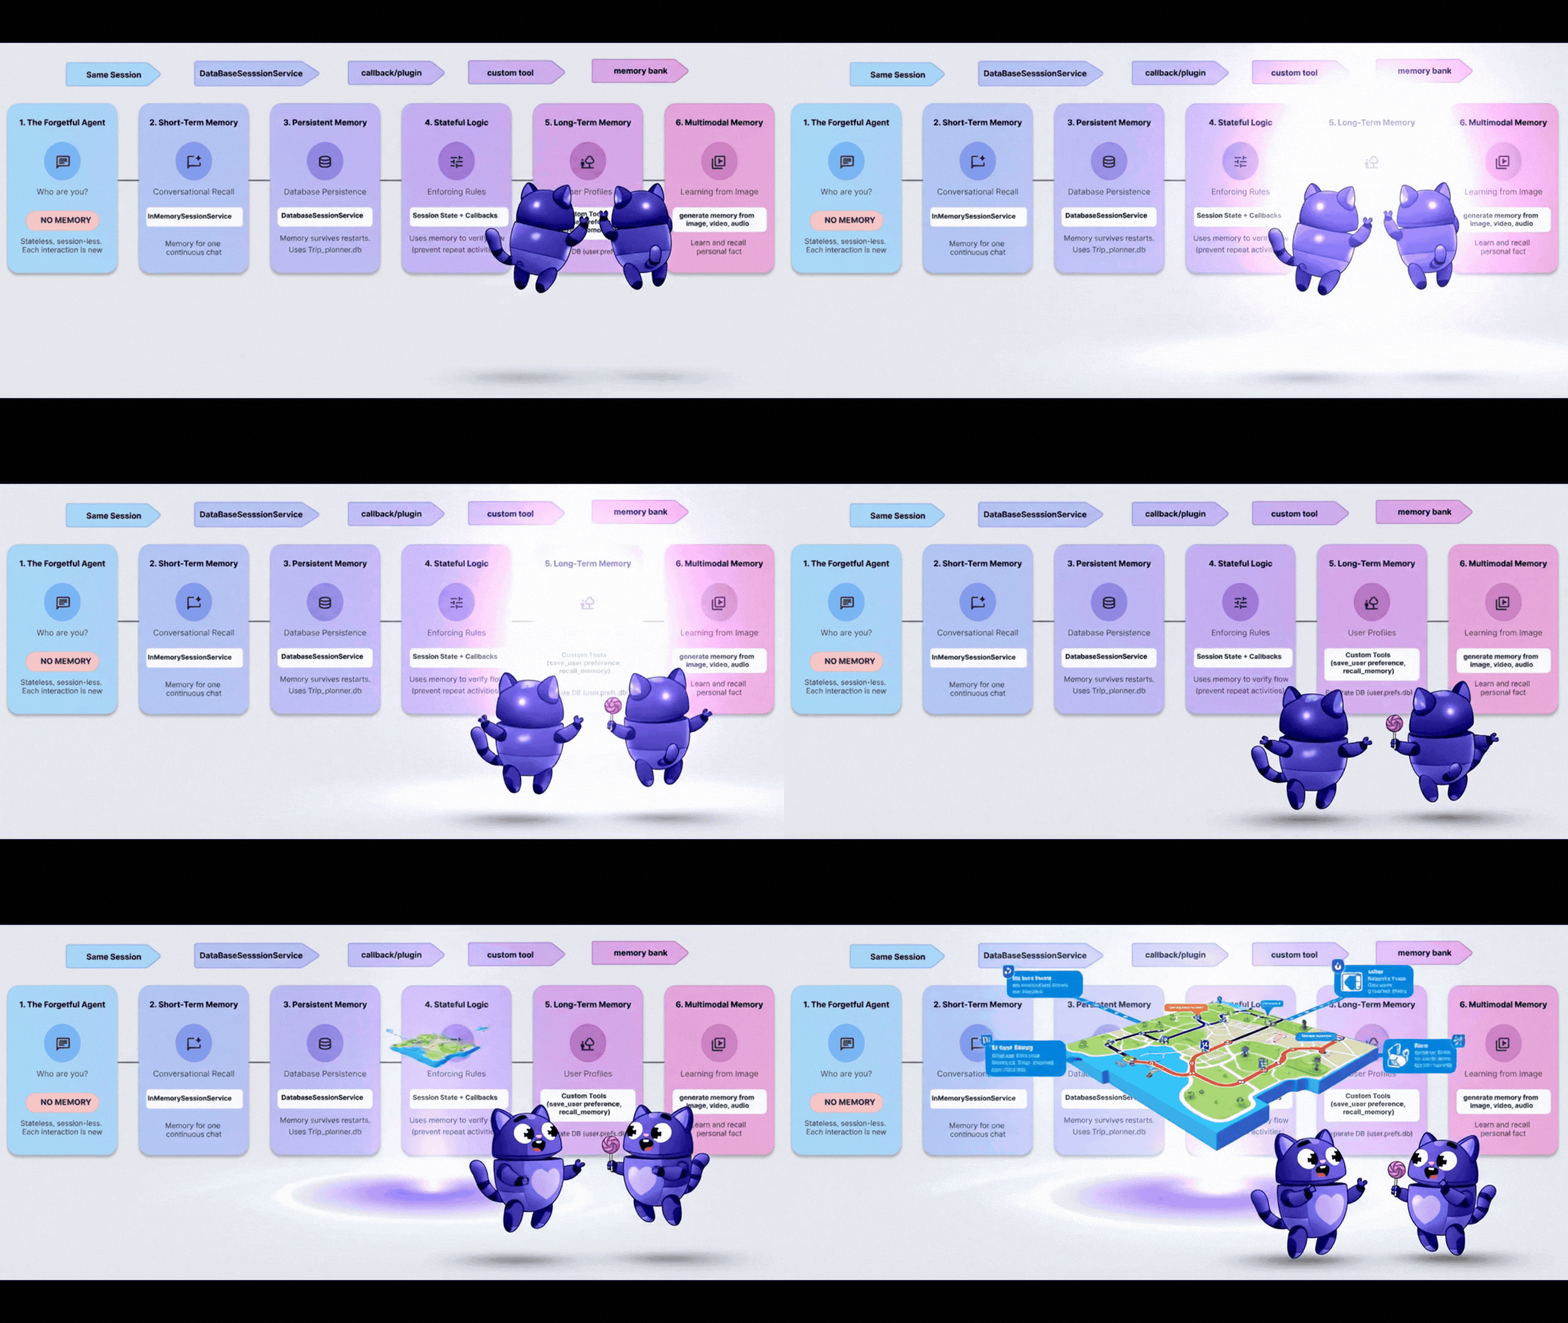
จนถึงตอนนี้ "ความทรงจำ" เป็นบันทึกการแชทหรือคู่คีย์-ค่าแบบง่ายๆ แต่จะทำอย่างไรหากคุณต้องจำโปรไฟล์ผู้ใช้ที่ซับซ้อน เช่น diet: vegan, budget: high, pets: [cat, dog]
ด้วยเหตุนี้ เราจึงถือว่าความทรงจำเป็นเครื่องมือ Agent จะตัดสินใจอย่างชัดเจนว่าจะเปิดหน้าจัดการไฟล์ (อ่าน) เมื่อใด และจะยื่นรายงาน (เขียน) เมื่อใด 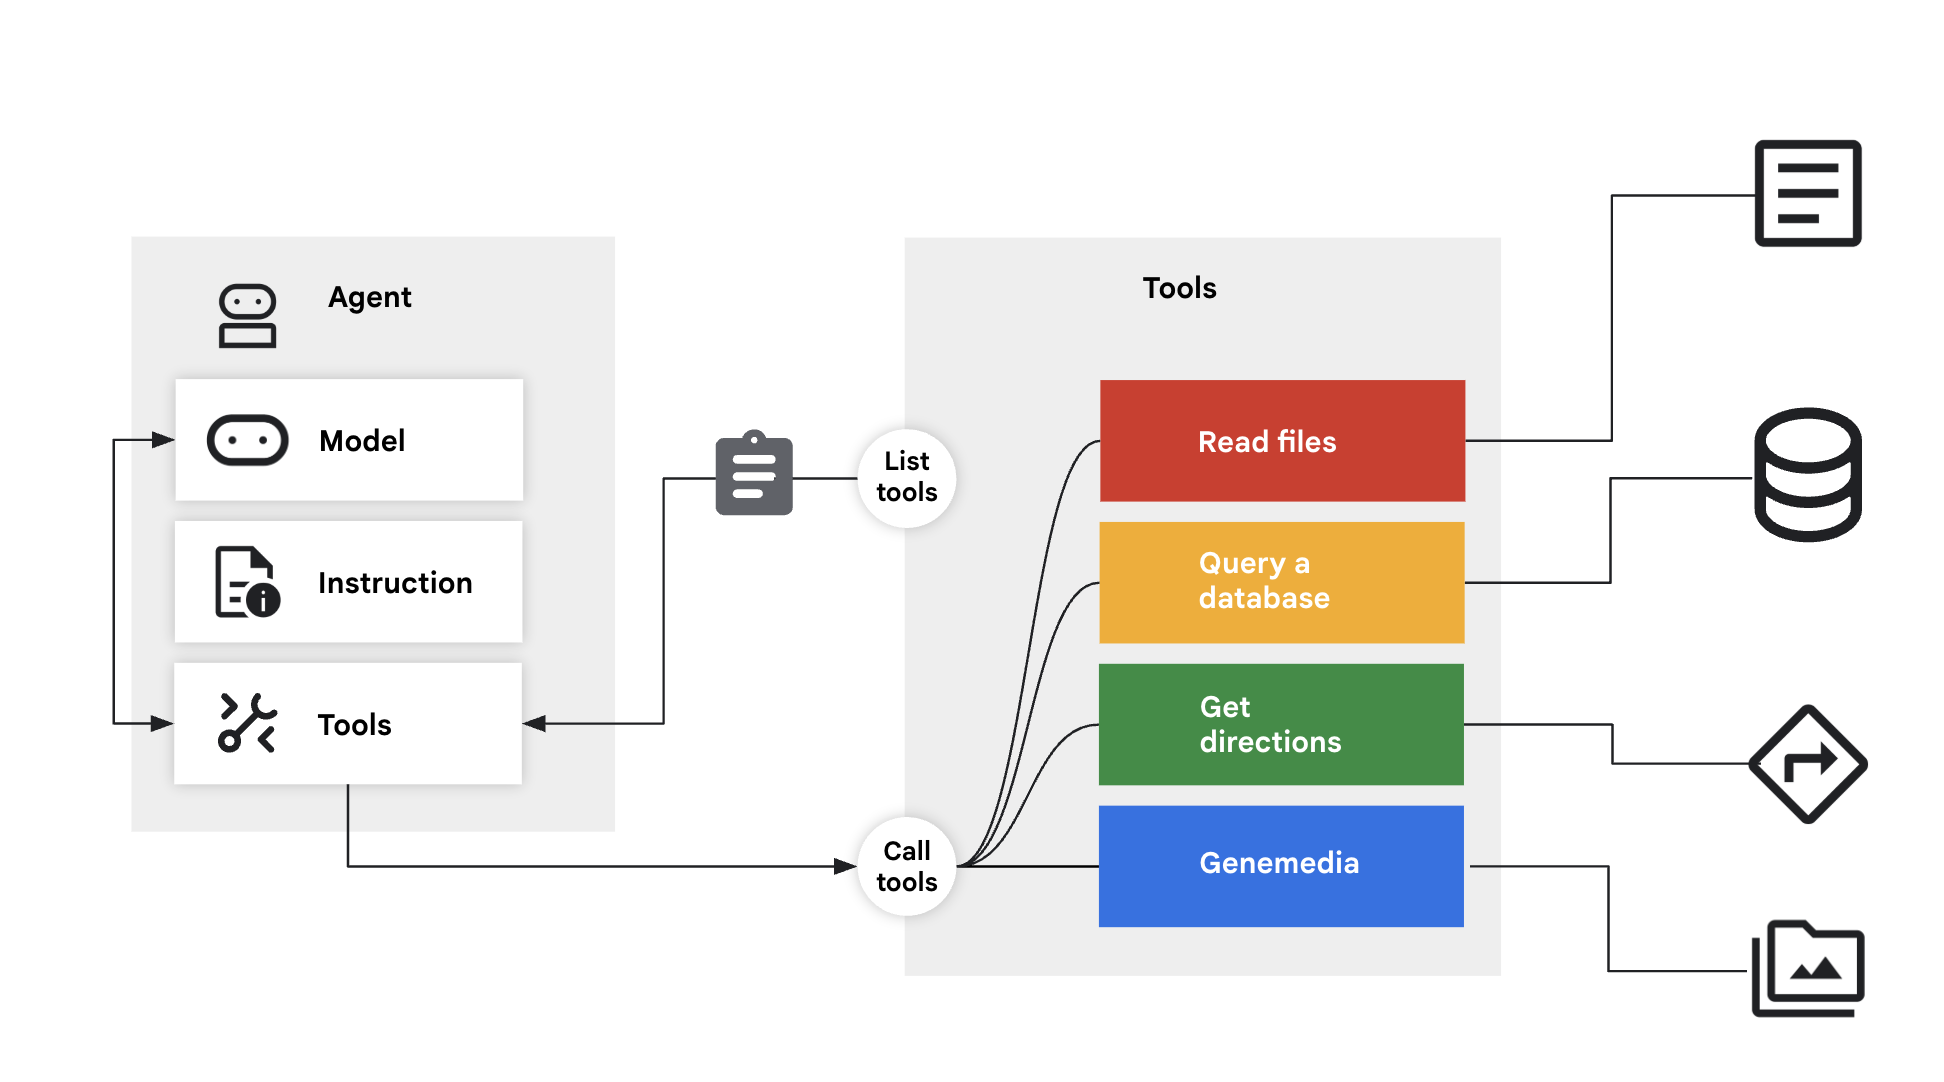
ขั้นตอนที่ 1: เครื่องมือ
👉💻 ในเทอร์มินัล Cloud Shell ให้เปิดไฟล์ในเครื่องมือแก้ไข Cloud Shell โดยเรียกใช้คำสั่งต่อไปนี้
cloudshell edit ~/memory_agent_starter/05_profile_agent/tools.py
👉 ในไฟล์นี้: ~/memory_agent_starter/05_profile_agent/tools.py
เราจำเป็นต้องใช้เครื่องมือ 2 อย่างต่อไปนี้
save_user_preferences: เขียนลงในฐานข้อมูลrecall_user_preferences: อ่านจากฐานข้อมูล
ค้นหาความคิดเห็น # TODO: implement save_user_preferences tools ภายในฟังก์ชัน ~/memory_agent_starter/05_profile_agent/tools.py
แทนที่ทั้งบรรทัดนี้ด้วยโค้ดต่อไปนี้
def save_user_preferences(tool_context: ToolContext, new_preferences: Dict[str, Any]) -> str:
    user_id = tool_context.session.user_id
    with sqlite3.connect(USER_DB_FILE) as conn:
        for key, value in new_preferences.items():
            conn.execute("INSERT INTO user_preferences (user_id, pref_key, pref_value) VALUES (?, ?, ?) ON CONFLICT(user_id, pref_key) DO UPDATE SET pref_value = excluded.pref_value;",
                         (user_id, key, json.dumps(value)))
    return f"Preferences updated: {list(new_preferences.keys())}"
👉 ค้นหาความคิดเห็น # TODO: implement recall_user_preferences tools ภายในฟังก์ชัน 05/tools.py
แทนที่ทั้งบรรทัดนี้ด้วยโค้ดต่อไปนี้
def recall_user_preferences(tool_context: ToolContext) -> Dict[str, Any]:
    user_id = tool_context.session.user_id
    preferences = {}
    with sqlite3.connect(USER_DB_FILE) as conn:
        rows = conn.execute("SELECT pref_key, pref_value FROM user_preferences WHERE user_id = ?", (user_id,)).fetchall()
        if not rows: return {"message": "No preferences found."}
        for key, value_str in rows: preferences[key] = json.loads(value_str)
    return preferences
คำสั่งนี้จะบังคับให้เกิดเวิร์กโฟลว์ดังนี้
instruction="""
1. RECALL FIRST: First action MUST be `recall_user_preferences`.
3. LEARN: If a user states a new preference, use `save_user_preferences`.
"""
ขั้นตอนที่ 2: การดำเนินการ
👉💻 ในเทอร์มินัล Cloud Shell ให้เปิดไฟล์ในเครื่องมือแก้ไข Cloud Shell โดยเรียกใช้คำสั่งต่อไปนี้
cloudshell edit ~/memory_agent_starter/05_profile_agent/main.py
เปิด ~/memory_agent_starter/05_profile_agent/main.py
Agent จะเป็นผู้ควบคุม ซึ่งแตกต่างจากโมดูลก่อนหน้าที่ ADK จะจัดการสถานะโดยอัตโนมัติ
- โดยจะเลือกโทรหา
recall_user_preferencesในตอนเริ่มต้น - โดยเลือกที่จะโทรหา
save_user_preferencesเมื่อคุณพูดว่า "ฉันเป็นวีแกน"
ขั้นตอนที่ 3: สร้างโปรไฟล์
👉💻 เรียกใช้สคริปต์
cd ~/memory_agent_starter
uv run python ~/memory_agent_starter/05_profile_agent/main.py
ลองใช้ขั้นตอนการสนทนาต่อไปนี้
- "สวัสดี ช่วยวางแผนมื้อค่ำหน่อย" -> ตัวแทนตรวจสอบฐานข้อมูลแต่ไม่พบอะไรเลย ถามถึงค่ากำหนด
- "ฉันเป็นวีแกน" -> Agent บันทึก "มังสวิรัติ" ลงในฐานข้อมูล
- รีสตาร์ทสคริปต์
- "สวัสดี วางแผนมื้อค่ำให้หน่อย" -> ตัวแทนตรวจสอบฐานข้อมูล เห็นคำว่า "วีแกน" และแนะนำร้านอาหารวีแกนทันที
ประเด็นสำคัญ
กฎข้อที่ 5 ของความทรงจำ: สำหรับข้อมูลที่มีโครงสร้างและซับซ้อน ให้ใช้เครื่องมืออ่าน/เขียนกับ Agent ให้ LLM จัดการพื้นที่เก็บข้อมูลระยะยาวของตนเอง
8. สมอง - ความทรงจำแบบหลายรูปแบบ
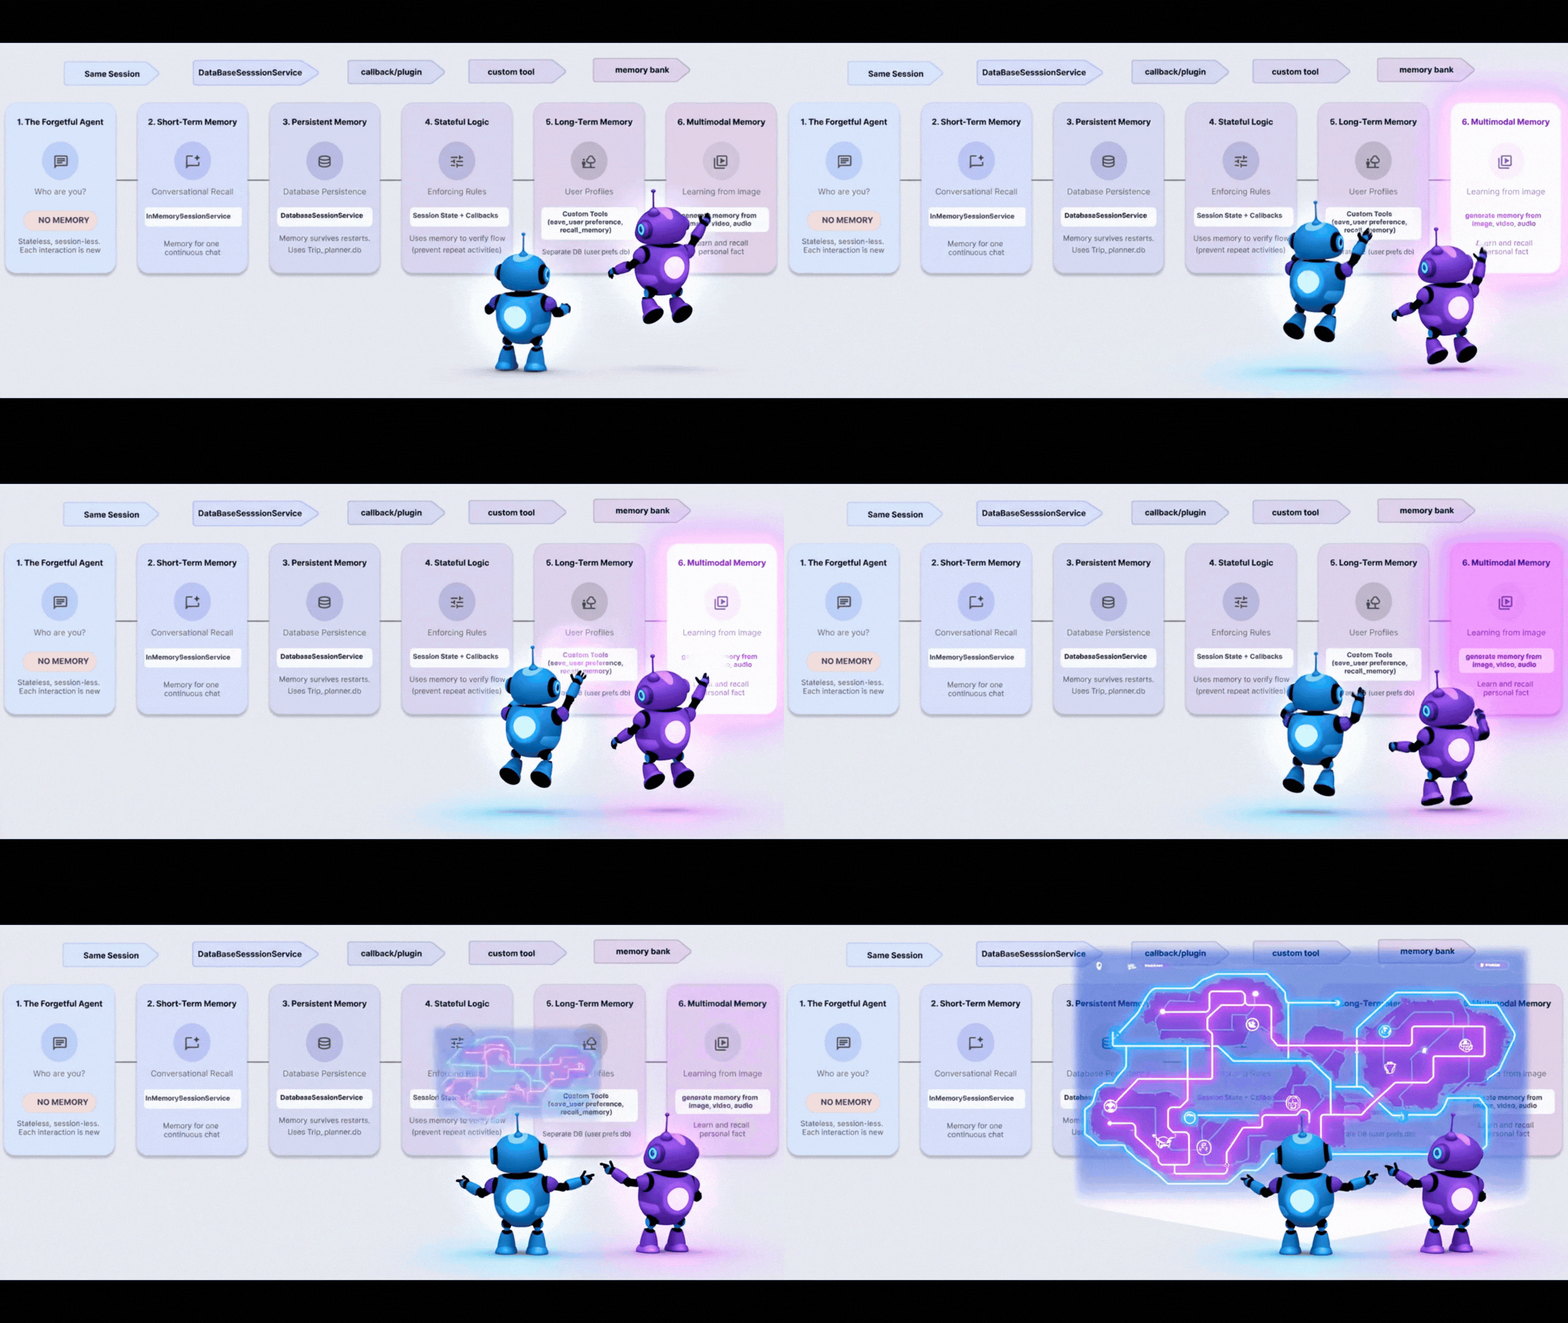
แนวคิด: "ประสบการณ์ของมนุษย์"
มนุษย์จดจำสิ่งต่างๆ ได้มากกว่าข้อความ เราจดจำบรรยากาศของรูปภาพ เสียงของเสียงพูด และความรู้สึกของวิดีโอ
Vertex AI Memory Bank ช่วยให้ Agent จัดการหน่วยความจำแบบหลายโมดัลได้ โดยสามารถนำเข้ารูปภาพ วิดีโอ และเสียง "ทำความเข้าใจ" และเรียกข้อมูลเหล่านั้นมาใช้ในภายหลังได้
ขั้นตอนที่ 1: การกำหนดค่า
👉💻 ในเทอร์มินัล Cloud Shell ให้เปิดไฟล์ในเครื่องมือแก้ไข Cloud Shell โดยเรียกใช้คำสั่งต่อไปนี้
cloudshell edit ~/memory_agent_starter/06_multimodal_agent/main.py
👉 เปิด 06_multimodal_agent/main.py ค้นหาความคิดเห็น # TODO: Configure Memory Bank Topic
แทนที่ทั้งบรรทัดนี้ด้วยโค้ดต่อไปนี้
travel_topics = [
    MemoryTopic(
        managed_memory_topic=ManagedMemoryTopic(
            managed_topic_enum=ManagedTopicEnum.USER_PREFERENCES
        )
    ),
    MemoryTopic(
        managed_memory_topic=ManagedMemoryTopic(
            managed_topic_enum=ManagedTopicEnum.USER_PERSONAL_INFO
        )
    ),
    MemoryTopic(
        custom_memory_topic=CustomMemoryTopic(
            label="travel_experiences",
            description="""Memorable travel experiences including:
                - Places visited and impressions
                - Favorite restaurants, cafes, and food experiences
                - Preferred accommodation types and locations
                - Activities enjoyed (museums, hiking, beaches, etc.)
                - Travel companions and social preferences
                - Photos and videos from trips with location context""",
        )
    ),
    MemoryTopic(
        custom_memory_topic=CustomMemoryTopic(
            label="travel_preferences",
            description="""Travel style and preferences:
                - Budget preferences (luxury, mid-range, budget)
                - Transportation preferences (flying, trains, driving)
                - Trip duration preferences
                - Season and weather preferences
                - Cultural interests and language abilities
                - Dietary restrictions and food preferences""",
        )
    ),
    MemoryTopic(
        custom_memory_topic=CustomMemoryTopic(
            label="travel_logistics",
            description="""Practical travel information:
                - Passport and visa information
                - Frequent flyer numbers and hotel loyalty programs
                - Emergency contacts
                - Medical considerations and insurance
                - Packing preferences and essentials
                - Time zone preferences and jet lag strategies""",
        )
    ),
]
ค้นหาความคิดเห็น # TODO: Configure Memory Bank Customization
แทนที่ทั้งบรรทัดนี้ด้วยโค้ดต่อไปนี้
memory_bank_config = {
    "customization_configs": [
        {
            "memory_topics": travel_topics,
        }
    ],
    "similarity_search_config": {
        "embedding_model": f"projects/{PROJECT_ID}/locations/{LOCATION}/publishers/google/models/gemini-embedding-001"
    },
    "generation_config": {
        "model": f"projects/{PROJECT_ID}/locations/{LOCATION}/publishers/google/models/gemini-2.5-flash"
    },
}
ขั้นตอนที่ 2: การนำเข้าข้อมูลโลก
ใน test_trip_planner เราจะส่งข้อมูลต่อไปนี้
- ข้อความ ("สวัสดี")
- รูปภาพ (จุดสังเกต)
- วิดีโอ (ทะเลเมดิเตอร์เรเนียน)
- คลิปเสียง (บันทึกเสียงเกี่ยวกับเมืองเกตา)
ค้นหาความคิดเห็น # TODO create session service and memory service ภายในฟังก์ชัน 6_multimodal_agent/main.py
แทนที่ทั้งบรรทัดนี้ด้วยโค้ดต่อไปนี้
session_service = VertexAiSessionService(
    project=PROJECT_ID, location=LOCATION, agent_engine_id=agent_engine_id
)
memory_service = VertexAiMemoryBankService(
    project=PROJECT_ID, location=LOCATION, agent_engine_id=agent_engine_id
)
👉 ในไฟล์ 06_multimodal_agent/main.py เดียวกัน ให้ค้นหาความคิดเห็น # TODO: create memory from session
แทนที่ทั้งบรรทัดนี้ด้วยโค้ดต่อไปนี้
await memory_service.add_session_to_memory(final_session_state)
นี่คือเส้นมหัศจรรย์ โดยจะส่งริชมีเดียทั้งหมดไปยัง Vertex AI ซึ่งจะประมวลผลและจัดทำดัชนี
ขั้นตอนที่ 3: การดึงข้อมูล
👉💻 ในเทอร์มินัล Cloud Shell ให้เปิดไฟล์ในเครื่องมือแก้ไข Cloud Shell โดยเรียกใช้คำสั่งต่อไปนี้
cloudshell edit ~/memory_agent_starter/06_multimodal_agent/agent.py
ตัวแทนมี PreloadMemoryTool
tools=[PreloadMemoryTool(), budget_tool]
เมื่อเซสชันใหม่เริ่มต้นขึ้น เครื่องมือนี้จะค้นหาประสบการณ์ที่เกี่ยวข้องในอดีตจากคลังความทรงจำโดยอัตโนมัติและแทรกประสบการณ์เหล่านั้นลงในบริบท
ขั้นตอนที่ 4: เรียกใช้ Brain
👉💻 เรียกใช้สคริปต์ในเทอร์มินัล Cloud Shell (หมายเหตุ: ต้องมีโปรเจ็กต์ที่อยู่ในระบบคลาวด์ของ Google Cloud ที่เปิดใช้ Vertex AI)
cd ~/memory_agent_starter
uv run python ~/memory_agent_starter/06_multimodal_agent/main.py
ดูขั้นตอนการยืนยันขั้นสุดท้าย
"จากรูปภาพ วิดีโอ และเสียงที่ฉันแชร์กับคุณก่อนหน้านี้..."
ตัวแทนจะตอบกลับดังนี้
"คุณควรไปเที่ยวที่กาเอตา คุณแสดงวิดีโอทะเลเมดิเตอร์เรเนียนและคลิปเสียงที่คุณบอกว่าชอบเมืองกาเอตา"
โดยเชื่อมโยงข้อมูลจากสื่อประเภทต่างๆ ในอดีตเข้าด้วยกัน
ประเด็นสำคัญ
กฎข้อที่ 6 ของความทรงจำ: ใช้ Vertex AI Memory Bank เพื่อประสบการณ์การใช้งานความทรงจำที่ดีที่สุด โดยจะรวมข้อความ รูปภาพ และวิดีโอไว้ในสมองที่ค้นหาได้เพียงหนึ่งเดียว
9. บทสรุป
คุณได้เดินทางจากปลาทองขี้ลืมไปสู่ช้างที่ใช้โมเดลหลายรูปแบบ
ที่คุณสร้าง | ความสามารถ |
Session Agent | ความจำระยะสั้นสำหรับการสนทนา |
Multi-Agent | ความทรงจำที่แชร์ของทีม |
Persistent Agent | ประวัติระยะยาว |
Stateful Agent | ความทรงจำแบบไดนามิกที่อัปเดตเองได้ |
Profile Agent | ความทรงจำเกี่ยวกับข้อมูลที่มีโครงสร้าง |
Agent แบบหลายโมดัล | ความทรงจำทางประสาทสัมผัสที่คล้ายมนุษย์ |
ความไว้วางใจสร้างขึ้นจากความทรงจำ การใช้รูปแบบเหล่านี้จะช่วยให้คุณสร้าง Agent ที่เคารพเวลาและประวัติของผู้ใช้ ซึ่งจะนำไปสู่การโต้ตอบที่ลึกซึ้งและมีประสิทธิภาพมากขึ้น
เริ่มสร้าง Agent ที่ปรับเปลี่ยนในแบบของคุณได้เลย