
이 Codelab 정보
1. 소개
이 Codelab에서는 고급 WorkManager 개념을 설명합니다. WorkManager로 백그라운드 작업 Codelab에서 다룬 기본 자료를 바탕으로 합니다.
WorkManager에 익숙해지는 데 사용할 수 있는 다른 리소스는 다음과 같습니다.
- WorkManager 가이드
- 블로그 시리즈: WorkManager 소개
- ADS 2019 WorkManager 강연: WorkManager: 고급 기능 활용하기
- WorkManager - MAD Skills 시리즈
빌드할 항목
이 Codelab에서는 사진과 이미지를 흐리게 처리하여 결과를 파일에 저장하는 앱인 Blur-O-Matic을 작업합니다. WorkManager로 백그라운드 작업 Codelab에서 작업한 샘플 앱과 비슷합니다(하나의 차이점은 이 샘플 앱에서는 흐리게 처리할 사진 갤러리에서 나만의 이미지를 선택할 수 있다는 점임). 여기에서는 코드에 다음 기능을 추가합니다.
- 맞춤 구성
- 작업이 실행되는 동안 Progress API를 사용하여 UI 업데이트
- 작업자 테스트
필요한 항목
이 Codelab을 실행하려면 최신 Android 스튜디오 안정화 버전이 필요합니다.
또한 LiveData, ViewModel, View Binding에 관해 잘 알고 있어야 합니다. 이러한 클래스를 처음 사용하는 경우 Android 수명 주기 인식 구성요소 Codelab(ViewModel 및 LiveData 전용) 또는 뷰를 사용한 Room Codelab(아키텍처 구성요소 소개)을 참고하세요.
언제든지 도움이 필요한 경우
이 Codelab을 사용하는 중에 언제든지 도움이 필요하거나 코드의 최종 상태를 확인하고 싶다면 하면 됩니다.
또는 원하는 경우 GitHub에서 완성된 WorkManager Codelab을 클론해도 됩니다.
$ git clone -b advanced https://github.com/googlecodelabs/android-workmanager
2. 설정
1단계 - 코드 다운로드
다음 링크를 클릭하여 이 Codelab을 따라 실행해 볼 수 있는 코드 버전을 다운로드합니다.
또는 원한다면 GitHub에서 Codelab을 클론할 수도 있습니다.
$ git clone -b advanced_start https://github.com/googlecodelabs/android-workmanager
2단계 - 앱 실행
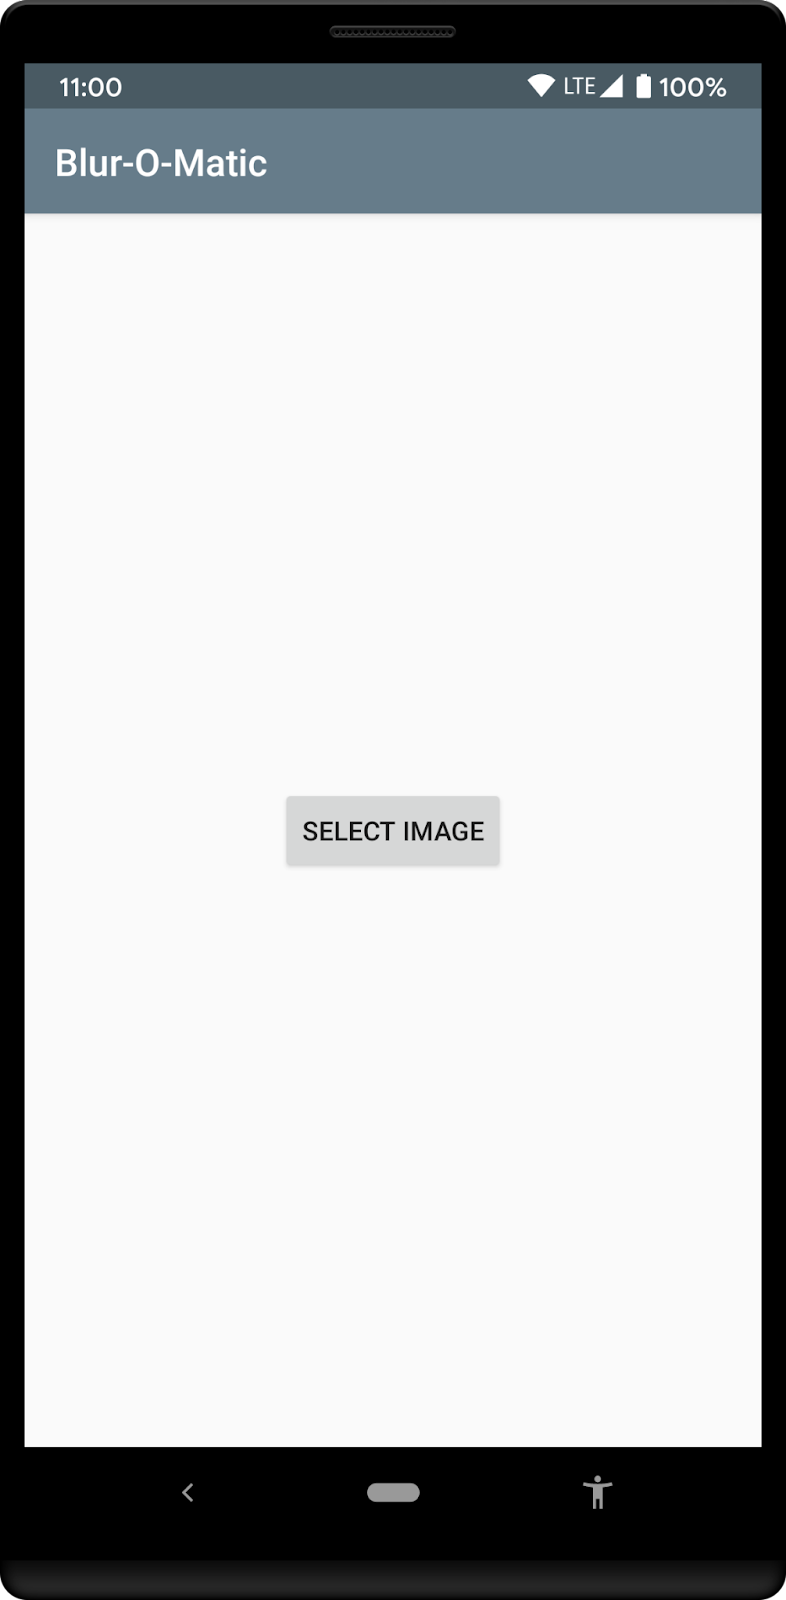
앱을 실행합니다. 다음과 같은 화면이 표시됩니다. 메시지가 표시되면 앱에 사진 액세스 권한을 부여해야 합니다.
|
|
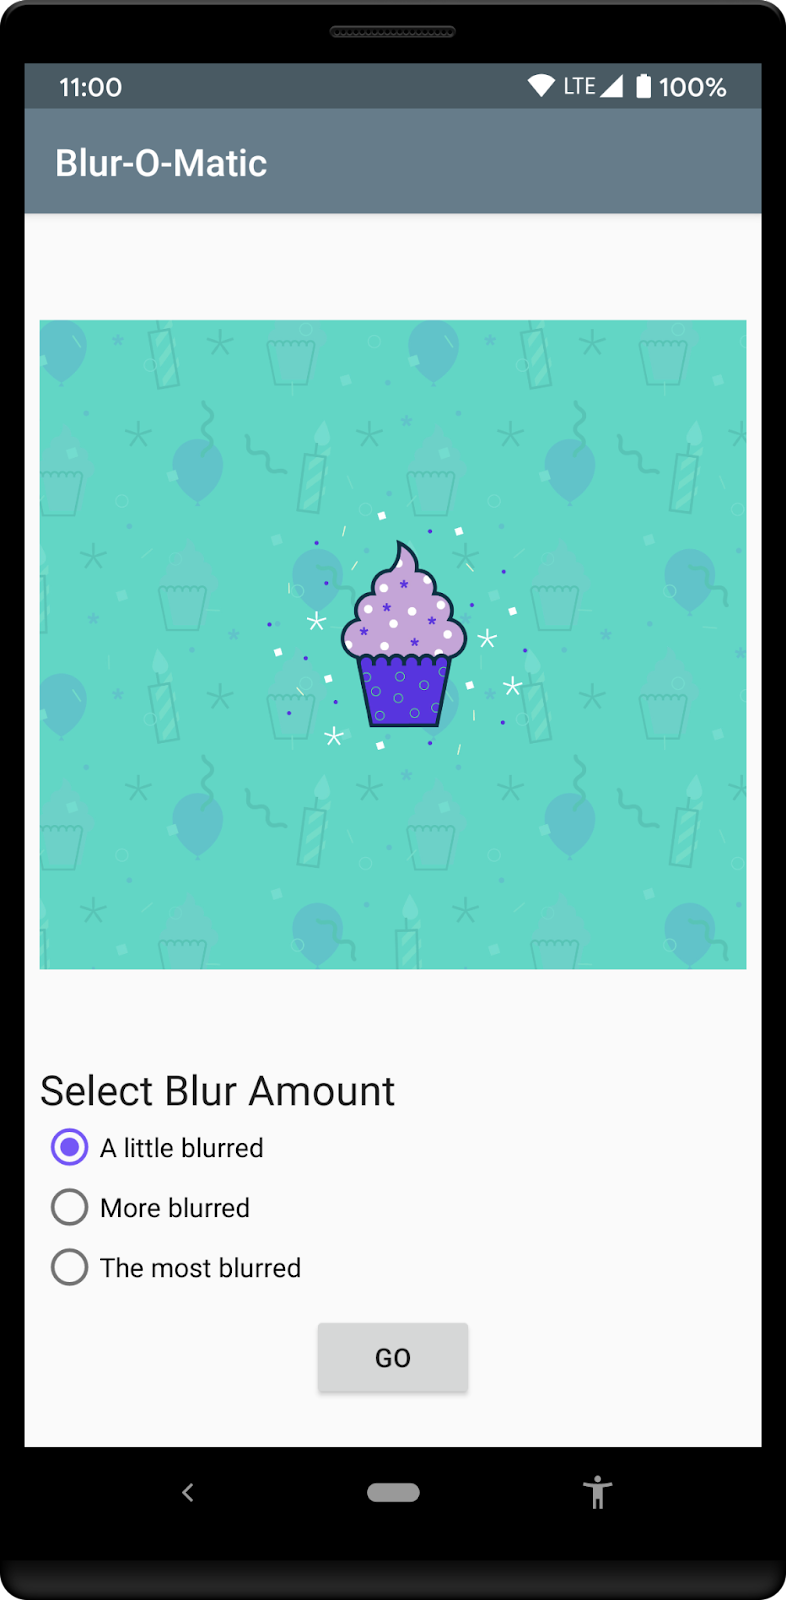
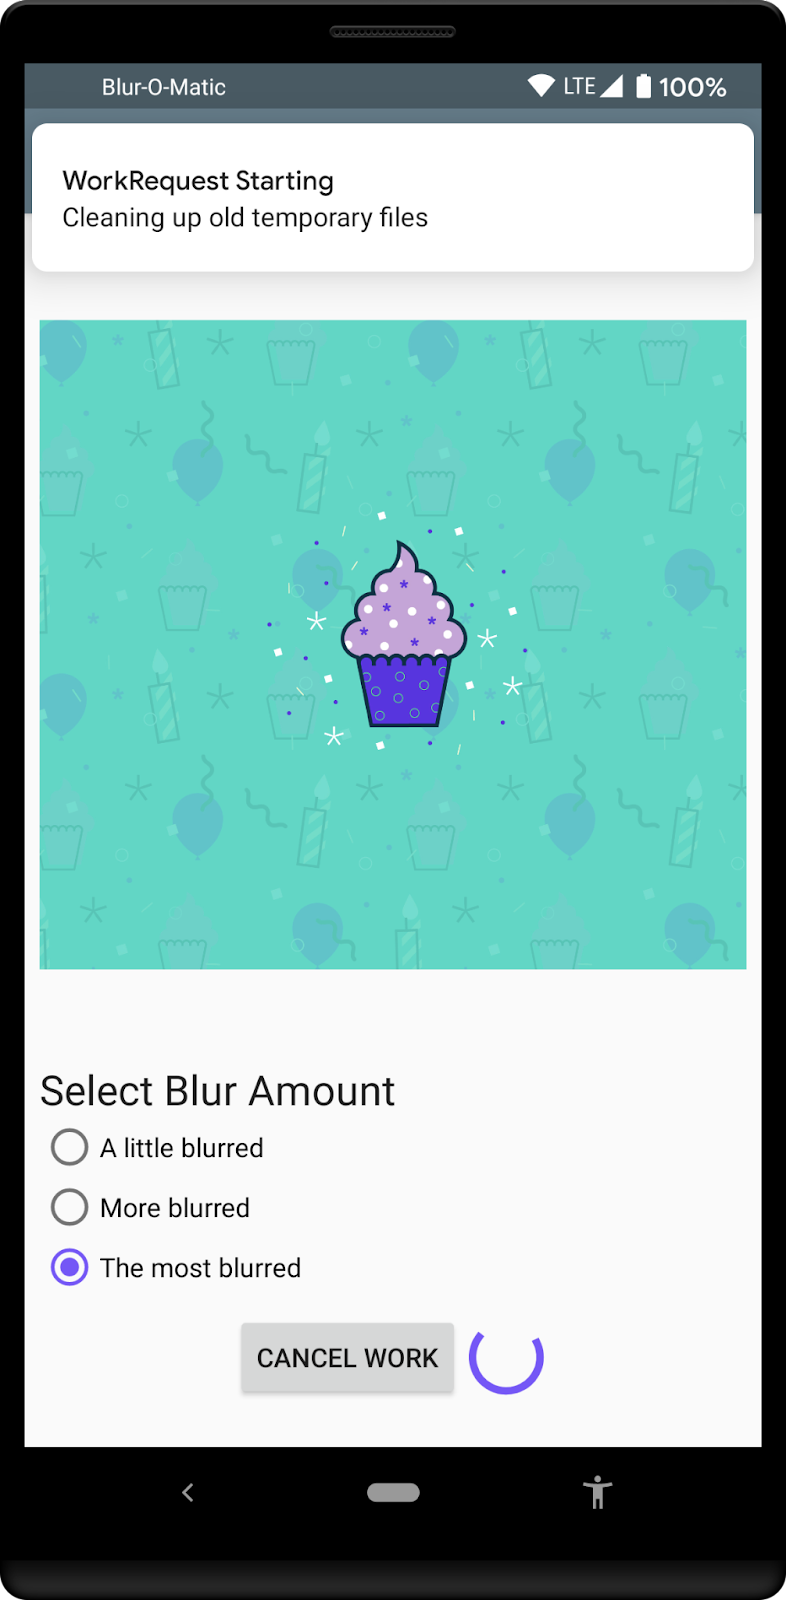
이미지를 선택하여 다음 화면으로 이동하면 이미지를 얼마나 흐리게 처리할지 선택할 수 있는 라디오 버튼이 표시됩니다. 적용 버튼을 누르면 이미지가 흐리게 처리되어 저장됩니다. 흐리게 처리하는 동안 앱에 표시되는 취소 버튼으로 작업을 종료할 수 있습니다.
시작 코드에는 다음이 포함됩니다.
WorkerUtils: 이 클래스에는 실제로 블러 처리를 하는 코드와 나중에Notifications를 표시하고 앱 속도를 저하하는 데 사용하는 몇 가지 편의 메서드가 있습니다.BlurApplication: 디버그 빌드를 위해 Timber 로깅 시스템을 초기화하는 간단한onCreate()메서드가 있는 애플리케이션 클래스입니다.BlurActivity: 이미지를 표시하고 흐림 수준을 선택하는 라디오 버튼이 포함된 활동입니다.BlurViewModel: 이 뷰 모델은BlurActivity를 표시하는 데 필요한 데이터를 모두 저장합니다. WorkManager를 사용하여 백그라운드 작업을 시작하는 클래스이기도 합니다.Workers/CleanupWorker: 이 작업자는 임시 파일이 있으면 항상 삭제합니다.Workers/BlurWorker: 이 작업자는 URI가 있는 입력 데이터로 전달된 이미지를 흐리게 처리하고 임시 파일의 URI를 반환합니다.Workers/SaveImageToFileWorker: 이 작업자는 임시 이미지의 URI를 입력으로 가져와서 최종 파일의 URI를 반환합니다.Constants: Codelab에서 사용할 상수가 포함된 정적 클래스입니다.SelectImageActivity: 개발자가 이미지를 선택할 수 있는 첫 번째 활동입니다.res/activity_blur.xml및res/activity_select.xml: 각 활동의 레이아웃 파일입니다.
BlurApplication, BlurActivity, BlurViewModel, BlurWorker 클래스에서 코드를 변경하게 됩니다.
3. 앱에 WorkManager 추가
WorkManager에는 아래의 Gradle 종속 항목이 필요합니다. 파일에는 이미 다음 항목이 포함되어 있습니다.
app/build.gradle
dependencies {
    implementation "androidx.work:work-runtime-ktx:$versions.work"
}
WorkManager 출시 페이지에서 최신 버전의 work-runtime을 가져와 최신 안정화 버전을 배치하거나 아래 항목을 사용해야 합니다.
build.gradle
versions.work = "2.7.1"
지금 동기화를 클릭하여 프로젝트를 변경된 Gradle 파일과 동기화해야 합니다.
4. WorkManager의 맞춤 구성 추가
이 단계에서 앱에 맞춤 구성을 추가하여 디버그 빌드의 WorkManager 로깅 수준을 수정합니다.
1단계 - 기본 초기화 사용 중지
맞춤 WorkManager 구성 및 초기화 문서에 설명된 대로 기본적으로 WorkManager 라이브러리에서 자동으로 병합되는 노드를 삭제하여 AndroidManifest.xml 파일에서 기본 초기화를 사용 중지해야 합니다.
이 노드를 삭제하려면 다음과 같이 새 제공자 노드를 AndroidManifest.xml에 추가하면 됩니다.
AndroidManifest.xml
<application

...

    <provider
        android:name="androidx.work.impl.WorkManagerInitializer"
        android:authorities="${applicationId}.workmanager-init"
        tools:node="remove" />
</application>
도구 네임스페이스도 매니페스트에 추가해야 합니다. 이러한 변경사항이 포함된 전체 파일은 다음과 같습니다.
AndroidManifest.xml
<?xml version="1.0" encoding="utf-8"?>
<!-- Copyright 2020 Google LLC.
   SPDX-License-Identifier: Apache-2.0 -->

<manifest package="com.example.background"
    xmlns:android="http://schemas.android.com/apk/res/android"
    xmlns:tools="http://schemas.android.com/tools">

    <uses-permission android:name="android.permission.INTERNET" />
    <uses-permission android:name="android.permission.READ_EXTERNAL_STORAGE" />
    <uses-permission android:name="android.permission.WRITE_EXTERNAL_STORAGE" />

    <application
        android:name=".BlurApplication"
        android:allowBackup="true"
        android:icon="@mipmap/ic_launcher"
        android:label="@string/app_name"
        android:roundIcon="@mipmap/ic_launcher_round"
        android:supportsRtl="true"
        android:theme="@style/AppTheme">

        <activity android:name=".SelectImageActivity">
            <intent-filter>
                <action android:name="android.intent.action.MAIN" />
                <category android:name="android.intent.category.LAUNCHER" />
            </intent-filter>
        </activity>

        <activity android:name=".BlurActivity" />

        <!-- ADD THE FOLLOWING NODE -->
        <provider
            android:name="androidx.work.impl.WorkManagerInitializer"
            android:authorities="${applicationId}.workmanager-init"
            tools:node="remove" />
    </application>
</manifest>
2단계 - Configuration.Provider를 Application 클래스에 추가
Application 클래스에서 WorkManager의 Configuration.Provider 인터페이스를 구현하여 주문형 초기화를 사용할 수 있습니다. 애플리케이션이 getInstance(context)를 사용하여 WorkManager의 인스턴스를 처음 가져올 때 WorkManager는 getWorkManagerConfiguration()에서 반환한 구성을 사용하여 초기화됩니다.
BlurApplication.kt
class BlurApplication : Application(), Configuration.Provider {

    override fun getWorkManagerConfiguration(): Configuration =

        Configuration.Builder()
                     .setMinimumLoggingLevel(android.util.Log.DEBUG)
                     .build()
...
}
이 변경사항이 적용되면 WorkManager는 로깅이 DEBUG로 설정된 상태로 실행됩니다.
다음과 같이 앱의 디버그 빌드에만 이런 방식으로 WorkManager를 설정하는 것이 더 나은 방법일 수 있습니다.
BlurApplication.kt
class BlurApplication() : Application(), Configuration.Provider {

    override fun getWorkManagerConfiguration(): Configuration {
        return if (BuildConfig.DEBUG) {
            Configuration.Builder()
                    .setMinimumLoggingLevel(android.util.Log.DEBUG)
                    .build()
        } else {
            Configuration.Builder()
                    .setMinimumLoggingLevel(android.util.Log.ERROR)
                    .build()
        }
    }

...
}
그러면 완성된 BlurApplication.kt는 다음과 같습니다.
BlurApplication.kt
/* Copyright 2020 Google LLC.
   SPDX-License-Identifier: Apache-2.0 */

package com.example.background

import android.app.Application
import androidx.work.Configuration
import timber.log.Timber
import timber.log.Timber.DebugTree

class BlurApplication() : Application(), Configuration.Provider {

    override fun getWorkManagerConfiguration(): Configuration {
        return if (BuildConfig.DEBUG) {
            Configuration.Builder()
                    .setMinimumLoggingLevel(android.util.Log.DEBUG)
                    .build()
        } else {
            Configuration.Builder()
                    .setMinimumLoggingLevel(android.util.Log.ERROR)
                    .build()
        }
    }

    override fun onCreate() {
        super.onCreate()
        if (BuildConfig.DEBUG) {
            Timber.plant(DebugTree())
        }
    }
}
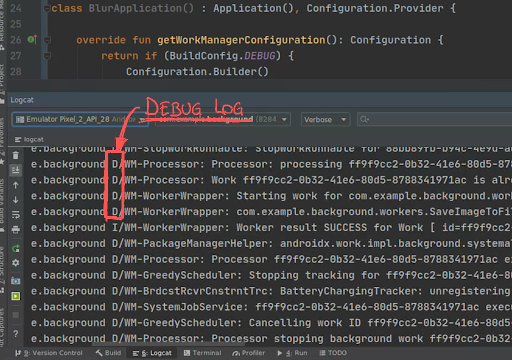
3단계 - 디버그 모드에서 앱 실행
이제 WorkManager는 디버그 빌드가 라이브러리에서 오는 모든 메시지를 기록하는 방식으로 구성됩니다.
앱을 실행하면 Android 스튜디오의 logcat 탭에서 로그를 확인할 수 있습니다.
4단계 - 무엇을 구성할 수 있나요?
전체 매개변수 목록은 Configuration.Builder의 WorkManager 참조 가이드를 확인하세요. 두 가지 추가 매개변수에 주의하세요.
WorkerFactoryJobId범위
WorkerFactory를 수정하면 다른 매개변수를 작업자의 생성자에 추가할 수 있습니다. 맞춤 WorkerFactory 구현 방법에 관한 자세한 내용은 WorkManager 맞춤설정 도움말을 참고하세요. 앱에서 WorkManager와 JobScheduler API를 사용하는 경우 두 API에서 동일한 JobId 범위를 사용하지 않도록 JobId 범위를 맞춤설정하는 것이 좋습니다.
WorkManager의 진행률 공유
WorkManager v2.3에서는 setProgressAsync()(또는 CoroutineWorker에서 사용되는 경우 setProgress())를 사용하여 작업자의 진행률 정보를 앱에 공유하는 기능을 추가했습니다. 이 정보는 WorkInfo를 통해 확인할 수 있고 UI에서 사용자에게 피드백을 제공하는 데 사용하기 위한 것입니다. 그런 다음 작업자가 최종 상태(SUCCEEDED, FAILED 또는 CANCELLED)에 도달하면 진행률 데이터가 취소됩니다. 진행률을 게시하고 수신 대기하는 방법에 관한 자세한 내용은 중간 작업자 진행률 관찰을 참고하세요.
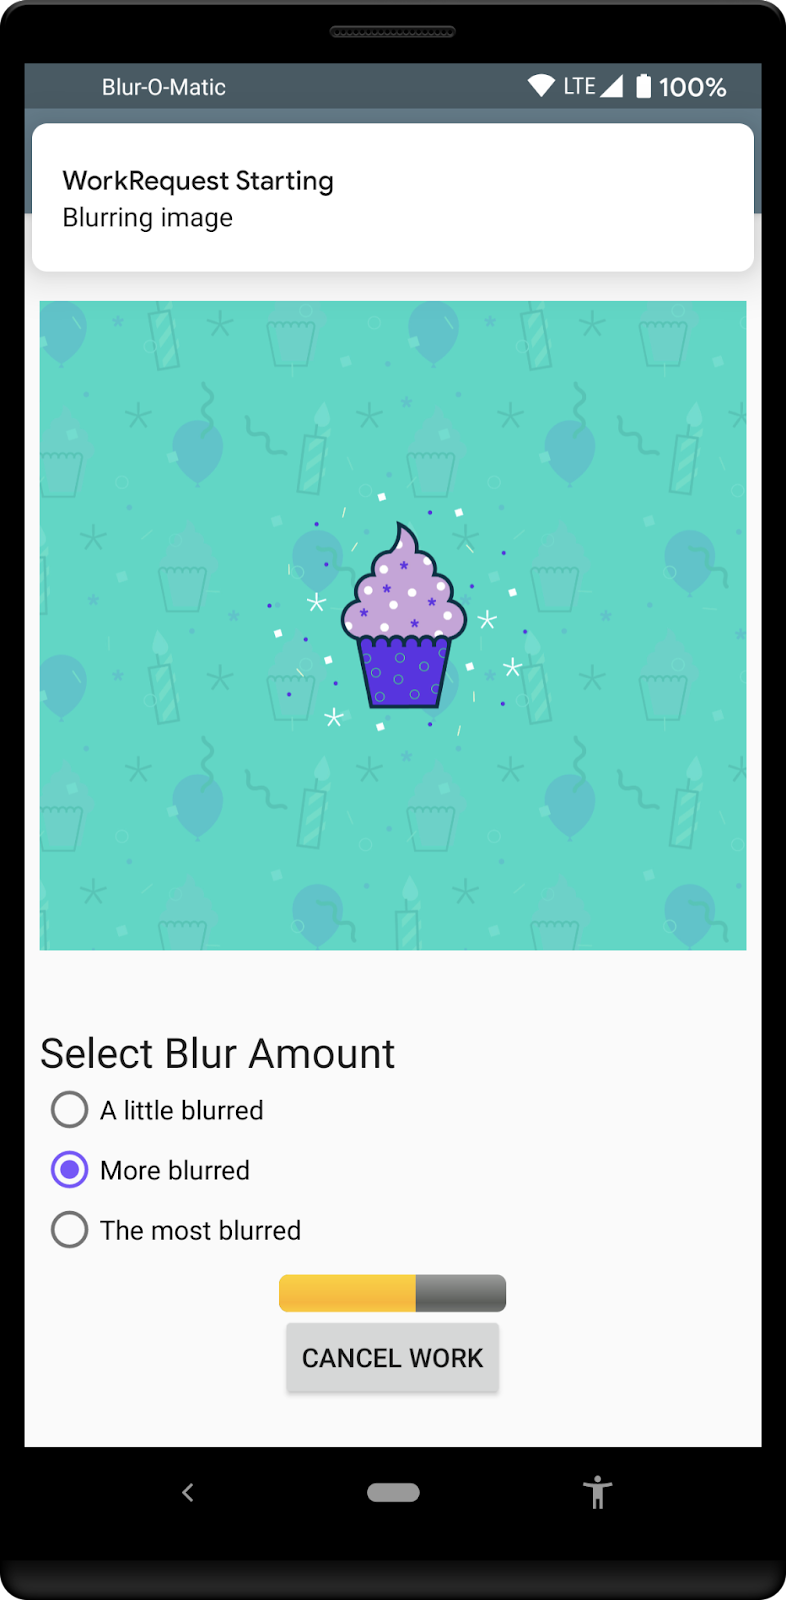
이제 UI에 진행률 표시줄을 추가하여 앱이 포그라운드에 있는 경우 사용자가 흐리게 처리 상태의 진행 상황을 확인할 수 있도록 합니다. 최종 결과는 다음과 같습니다.
1단계 - ProgressBar 수정
레이아웃에서 ProgressBar를 수정하려면 android:indeterminate="true" 매개변수를 삭제하고 style="@android:style/Widget.ProgressBar.Horizontal", 스타일을 추가하며 초깃값을 android:progress="0"으로 설정해야 합니다. LinearLayout 방향도 "vertical"로 설정해야 합니다.
app/src/main/res/layout/activity_blur.xml
<LinearLayout
    android:layout_width="wrap_content"
    android:layout_height="wrap_content"
    android:orientation="vertical">
    <ProgressBar
        android:id="@+id/progress_bar"
        style="@android:style/Widget.ProgressBar.Horizontal"
        android:layout_width="match_parent"
        android:layout_height="wrap_content"
        android:progress="0"
        android:visibility="gone"
        android:layout_gravity="center_horizontal"
        />

    <Button
        android:id="@+id/cancel_button"
        android:layout_width="wrap_content"
        android:layout_height="wrap_content"
        android:text="@string/cancel_work"
        android:visibility="gone"
        />
</LinearLayout>
필요한 다른 변경사항은 ProgressBar가 초기 위치에서 다시 시작되도록 하는 것입니다. BlurActivity.kt 파일의 showWorkFinished() 함수를 업데이트하면 됩니다.
app/src/main/java/com/example/background/BlurActivity.kt
/**
 * Shows and hides views for when the Activity is done processing an image
 */
private fun showWorkFinished() {
    with(binding) {
        progressBar.visibility = View.GONE
        cancelButton.visibility = View.GONE
        goButton.visibility = View.VISIBLE
        progressBar.progress = 0 // <-- ADD THIS LINE
    }
}
2단계 - ViewModel에서 진행률 정보 관찰
BlurViewModel 파일에는 체인이 완료되는 시기를 확인하는 관찰자가 이미 있습니다. BlurWorker에서 게시한 진행률을 관찰하는 새 관찰자를 추가합니다.
먼저 Constants.kt 파일의 끝에서 이를 추적하는 상수를 추가합니다.
app/src/main/java/com/example/background/Constants.kt
// Progress Data Key
const val PROGRESS = "PROGRESS"
const val TAG_PROGRESS = "TAG_PROGRESS"
다음 단계에서는 이 태그를 BlurViewModel.kt 파일에 있는 BlurWorker의 WorkRequest에 추가하여 WorkInfo를 검색할 수 있도록 합니다. 이 WorkInfo에서 작업자의 진행률 정보를 검색할 수 있습니다.
app/src/main/java/com/example/background/BlurViewModel.kt
// Add WorkRequests to blur the image the number of times requested
for (i in 0 until blurLevel) {
    val blurBuilder = OneTimeWorkRequestBuilder<BlurWorker>()

    // Input the Uri if this is the first blur operation
    // After the first blur operation the input will be the output of previous
    // blur operations.
    if (i == 0) {
        blurBuilder.setInputData(createInputDataForUri())
    }

    blurBuilder.addTag(TAG_PROGRESS) // <-- ADD THIS
    continuation = continuation.then(blurBuilder.build())
}
이 WorkRequest를 추적하는 BlurViewModel.kt 파일에 새 LiveData를 추가하고 init 블록에서 LiveData를 초기화합니다.
app/src/main/java/com/example/background/BlurViewModel.kt
class BlurViewModel(application: Application) : AndroidViewModel(application) {

    internal var imageUri: Uri? = null
    internal var outputUri: Uri? = null
    internal val outputWorkInfoItems: LiveData<List<WorkInfo>>
    internal val progressWorkInfoItems: LiveData<List<WorkInfo>> // <-- ADD THIS
    private val workManager: WorkManager = WorkManager.getInstance(application)

    init {
        // This transformation makes sure that whenever the current work Id changes the WorkStatus
        // the UI is listening to changes
        outputWorkInfoItems = workManager.getWorkInfosByTagLiveData(TAG_OUTPUT)
        progressWorkInfoItems = workManager.getWorkInfosByTagLiveData(TAG_PROGRESS) // <-- ADD THIS
    }

...
}
3단계 - 활동에서 LiveData 관찰
이제 BlurActivity에서 이 LiveData를 사용하여 게시된 진행률을 모두 관찰할 수 있습니다. 먼저 onCreate() 메서드의 끝에 새 LiveData 관찰자를 등록합니다.
app/src/main/java/com/example/background/BlurActivity.kt
// Show work status
viewModel.outputWorkInfoItems.observe(this, outputObserver())

// ADD THE FOLLOWING LINES
// Show work progress
viewModel.progressWorkInfoItems.observe(this, progressObserver())
이제 관찰자에서 수신한 WorkInfo를 확인하여 진행률 정보가 있는지 확인하고 적절하게 ProgressBar를 업데이트할 수 있습니다.
app/src/main/java/com/example/background/BlurActivity.kt
private fun progressObserver(): Observer<List<WorkInfo>> {
    return Observer { listOfWorkInfo ->
        if (listOfWorkInfo.isNullOrEmpty()) {
            return@Observer
        }

        listOfWorkInfo.forEach { workInfo ->
            if (WorkInfo.State.RUNNING == workInfo.state) {
                val progress = workInfo.progress.getInt(PROGRESS, 0)
                binding.progressBar.progress = progress
            }
        }

    }
}
4단계 - BlurWorker에서 진행률 게시
진행률 정보를 표시하는 데 필요한 모든 것이 이제 준비되었습니다. 이제 진행률 정보의 실제 게시를 BlurWorker에 추가할 차례입니다.
이 예에서는 doWork() 함수에서 긴 프로세스를 시뮬레이션하여 정의된 시간 동안 진행률 정보를 게시할 수 있도록 합니다.
여기서 변경사항은 단일 지연을 더 작은 지연 10개로 교체하여 각 반복에서 새로운 진행률을 설정하는 것입니다.
app/src/main/java/com/example/background/workers/BlurWorker.kt
override fun doWork(): Result {
    val appContext = applicationContext

    val resourceUri = inputData.getString(KEY_IMAGE_URI)

    makeStatusNotification("Blurring image", appContext)
    // sleep()
    (0..100 step 10).forEach {
        setProgressAsync(workDataOf(PROGRESS to it))
        sleep()
    }

...
}
원래 지연이 3초였으므로 10분의 1인 0.3초로 줄이는 것이 좋을 수 있습니다.
app/src/main/java/com/example/background/Constants.kt
// const val DELAY_TIME_MILLIS: Long = 3000
const val DELAY_TIME_MILLIS: Long = 300
5단계 - 실행
이 시점에서 애플리케이션을 실행하면 BlurWorker에서 수신하는 메시지로 채워진 ProgressBar가 표시됩니다.
5. WorkManager 테스트
테스트는 모든 애플리케이션의 중요한 구성요소이고 WorkManager와 같은 라이브러리를 도입할 때 코드를 쉽게 테스트하는 도구를 제공하는 것이 중요합니다.
WorkManager를 통해 작업자를 쉽게 테스트하는 데 사용할 수 있는 도우미도 만들었습니다. 작업자 테스트를 만드는 방법에 관한 자세한 내용은 테스트에 관한 WorkManager 문서를 참고하세요.
이 섹션의 Codelab에서는 일반적인 사용 사례를 보여 주는 몇 가지 작업자 클래스 테스트를 소개합니다.
먼저 간단하게 테스트를 설정하는 방법을 제공하려고 합니다. WorkManager를 설정하는 TestRule을 만들면 됩니다.
- 종속 항목을 추가합니다.
WorkManagerTestRule과TestUtils를 만듭니다.CleanupWorker테스트를 만듭니다.BlurWorker테스트를 만듭니다.
프로젝트에서 AndroidTest 폴더를 이미 만들었다고 가정하면 테스트에서 사용할 종속 항목을 추가해야 합니다.
app/build.gradle
androidTestImplementation "androidx.arch.core:core-testing:2.1.0"
androidTestImplementation "androidx.test.ext:junit:1.1.3"
androidTestImplementation "androidx.test:rules:1.4.0"
androidTestImplementation "androidx.test:runner:1.4.0"
androidTestImplementation "androidx.work:work-testing:$versions.work"
이제 테스트에서 사용할 수 있는 TestRule로 작업을 시작할 수 있습니다.
app/src/androidTest/java/com/example/background/workers/WorkManagerTestRule.kt
/* Copyright 2020 Google LLC.
   SPDX-License-Identifier: Apache-2.0 */

package com.example.background.workers

import android.content.Context
import android.util.Log
import androidx.test.platform.app.InstrumentationRegistry
import androidx.work.Configuration
import androidx.work.WorkManager
import androidx.work.testing.SynchronousExecutor
import androidx.work.testing.WorkManagerTestInitHelper
import org.junit.rules.TestWatcher
import org.junit.runner.Description

class WorkManagerTestRule : TestWatcher() {
    lateinit var targetContext: Context
    lateinit var testContext: Context
    lateinit var configuration: Configuration
    lateinit var workManager: WorkManager

    override fun starting(description: Description?) {
        targetContext = InstrumentationRegistry.getInstrumentation().targetContext
        testContext = InstrumentationRegistry.getInstrumentation().context
        configuration = Configuration.Builder()
                // Set log level to Log.DEBUG to make it easier to debug
                .setMinimumLoggingLevel(Log.DEBUG)
                // Use a SynchronousExecutor here to make it easier to write tests
                .setExecutor(SynchronousExecutor())
                .build()

        // Initialize WorkManager for instrumentation tests.
        WorkManagerTestInitHelper.initializeTestWorkManager(targetContext, configuration)
        workManager = WorkManager.getInstance(targetContext)
    }
}
테스트가 실행될 기기에 이 테스트 이미지가 필요하므로 테스트에서 사용할 도우미 함수를 만들 수 있습니다.
app/src/androidTest/java/com/example/background/workers/TestUtils.kt
/* Copyright 2020 Google LLC.
   SPDX-License-Identifier: Apache-2.0 */

package com.example.background.workers

import android.content.Context
import android.graphics.BitmapFactory
import android.net.Uri
import com.example.background.OUTPUT_PATH
import java.io.BufferedInputStream
import java.io.BufferedOutputStream
import java.io.File
import java.io.FileNotFoundException
import java.io.FileOutputStream
import java.util.UUID

/**
 * Copy a file from the asset folder in the testContext to the OUTPUT_PATH in the target context.
 * @param testCtx android test context
 * @param targetCtx target context
 * @param filename source asset file
 * @return Uri for temp file
 */
@Throws(Exception::class)
fun copyFileFromTestToTargetCtx(testCtx: Context, targetCtx: Context, filename: String): Uri {
    // Create test image
    val destinationFilename = String.format("blur-test-%s.png", UUID.randomUUID().toString())
    val outputDir = File(targetCtx.filesDir, OUTPUT_PATH)
    if (!outputDir.exists()) {
        outputDir.mkdirs()
    }
    val outputFile = File(outputDir, destinationFilename)

    val bis = BufferedInputStream(testCtx.assets.open(filename))
    val bos = BufferedOutputStream(FileOutputStream(outputFile))
    val buf = ByteArray(1024)
    bis.read(buf)
    do {
        bos.write(buf)
    } while (bis.read(buf) != -1)
    bis.close()
    bos.close()

    return Uri.fromFile(outputFile)
}

/**
 * Check if a file exists in the given context.
 * @param testCtx android test context
 * @param uri for the file
 * @return true if file exist, false if the file does not exist of the Uri is not valid
 */
fun uriFileExists(targetCtx: Context, uri: String?): Boolean {
    if (uri.isNullOrEmpty()) {
        return false
    }

    val resolver = targetCtx.contentResolver

    // Create a bitmap
    try {
        BitmapFactory.decodeStream(
                resolver.openInputStream(Uri.parse(uri)))
    } catch (e: FileNotFoundException) {
        return false
    }
    return true
}
이 작업을 마치면 테스트 작성을 시작할 수 있습니다.
먼저 CleanupWorker를 테스트하여 파일이 실제로 삭제되는지 확인합니다. 테스트에서 기기의 테스트 이미지를 복사하고 CleanupWorker를 실행한 후 테스트 이미지가 있는지 확인하면 됩니다.
app/src/androidTest/java/com/example/background/workers/CleanupWorkerTest.kt
/* Copyright 2020 Google LLC.
   SPDX-License-Identifier: Apache-2.0 */

package com.example.background.workers

import androidx.arch.core.executor.testing.InstantTaskExecutorRule
import androidx.work.OneTimeWorkRequestBuilder
import androidx.work.WorkInfo
import org.hamcrest.CoreMatchers.`is`
import org.junit.Assert.assertThat
import org.junit.Rule
import org.junit.Test

class CleanupWorkerTest {

    @get:Rule
    var instantTaskExecutorRule = InstantTaskExecutorRule()
    @get:Rule
    var wmRule = WorkManagerTestRule()

    @Test
    fun testCleanupWork() {
        val testUri = copyFileFromTestToTargetCtx(
                wmRule.testContext, wmRule.targetContext, "test_image.png")
        assertThat(uriFileExists(wmRule.targetContext, testUri.toString()), `is`(true))

        // Create request
        val request = OneTimeWorkRequestBuilder<CleanupWorker>().build()

        // Enqueue and wait for result. This also runs the Worker synchronously
        // because we are using a SynchronousExecutor.
        wmRule.workManager.enqueue(request).result.get()
        // Get WorkInfo
        val workInfo = wmRule.workManager.getWorkInfoById(request.id).get()

        // Assert
        assertThat(uriFileExists(wmRule.targetContext, testUri.toString()), `is`(false))
        assertThat(workInfo.state, `is`(WorkInfo.State.SUCCEEDED))
    }
}
이제 Android 스튜디오의 Run 메뉴에서 또는 테스트 클래스 왼쪽에 있는 녹색 직사각형을 사용하여 이 테스트를 실행할 수 있습니다.

프로젝트의 루트 폴더에서 ./gradlew cAT 명령어를 사용하여 명령줄에서 테스트를 실행할 수도 있습니다.
테스트가 올바르게 실행되는지 확인해야 합니다.
다음은 BlurWorker를 테스트할 차례입니다. 이 작업자는 처리할 이미지의 URI가 있는 입력 데이터를 예상하므로 몇 가지 테스트를 빌드할 수 있습니다. 하나는 입력 URI가 없으면 작업자가 실패하는지 확인하는 테스트고 다른 하나는 입력 이미지를 실제로 처리하는 테스트입니다.
app/src/androidTest/java/com/example/background/workers/BlurWorkerTest.kt
/* Copyright 2020 Google LLC.
   SPDX-License-Identifier: Apache-2.0 */

package com.example.background.workers

import androidx.arch.core.executor.testing.InstantTaskExecutorRule
import androidx.work.OneTimeWorkRequestBuilder
import androidx.work.WorkInfo
import androidx.work.workDataOf
import org.hamcrest.CoreMatchers.`is`
import org.junit.Assert.assertThat
import org.junit.Rule
import com.example.background.KEY_IMAGE_URI
import org.junit.Test

class BlurWorkerTest {

    @get:Rule
    var instantTaskExecutorRule = InstantTaskExecutorRule()
    @get:Rule
    var wmRule = WorkManagerTestRule()

    @Test
    fun testFailsIfNoInput() {
        // Define input data

        // Create request
        val request = OneTimeWorkRequestBuilder<BlurWorker>().build()

        // Enqueue and wait for result. This also runs the Worker synchronously
        // because we are using a SynchronousExecutor.
        wmRule.workManager.enqueue(request).result.get()
        // Get WorkInfo
        val workInfo = wmRule.workManager.getWorkInfoById(request.id).get()

        // Assert
        assertThat(workInfo.state, `is`(WorkInfo.State.FAILED))
    }

    @Test
    @Throws(Exception::class)
    fun testAppliesBlur() {
        // Define input data
        val inputDataUri = copyFileFromTestToTargetCtx(
                wmRule.testContext,
                wmRule.targetContext,
                "test_image.png")
        val inputData = workDataOf(KEY_IMAGE_URI to inputDataUri.toString())

        // Create request
        val request = OneTimeWorkRequestBuilder<BlurWorker>()
                .setInputData(inputData)
                .build()

        // Enqueue and wait for result. This also runs the Worker synchronously
        // because we are using a SynchronousExecutor.
        wmRule.workManager.enqueue(request).result.get()
        // Get WorkInfo
        val workInfo = wmRule.workManager.getWorkInfoById(request.id).get()
        val outputUri = workInfo.outputData.getString(KEY_IMAGE_URI)

        // Assert
        assertThat(uriFileExists(wmRule.targetContext, outputUri), `is`(true))
        assertThat(workInfo.state, `is`(WorkInfo.State.SUCCEEDED))
    }
}
이러한 테스트를 실행하면 둘 다 성공해야 합니다.
6. 축하합니다
축하합니다. Blur-O-Matic 앱을 완료했으며 그 과정에서 다음 항목을 알아봤습니다.
- 맞춤 구성 만드는 방법
- 작업자에서 진행률을 게시하는 방법
- UI에 작업 진행률을 표시하는 방법
- 작업자 테스트를 작성하는 방법
좋습니다. 코드의 최종 상태와 모든 변경사항을 보려면 다음을 확인하세요.
또는 원한다면 GitHub에서 WorkManager의 Codelab을 클론할 수 있습니다.
$ git clone -b advanced https://github.com/googlecodelabs/android-workmanager
WorkManager는 이 Codelab에서 다루는 것보다 훨씬 많은 것을 지원합니다. 자세한 내용은 WorkManager 문서를 참고하세요.