
About this codelab
1. Introduction
In this codelab you'll learn the importance of dependency injection (DI) to create a solid and extensible application that scales to large projects. We'll use Hilt as the DI tool to manage dependencies.
Dependency injection is a technique widely used in programming and well-suited to Android development. By following the principles of DI, you lay the groundwork for a good app architecture.
Implementing dependency injection provides you with the following advantages:
- Reusability of code
- Ease of refactoring
- Ease of testing
Hilt is an opinionated dependency injection library for Android that reduces the boilerplate of using manual DI in your project. Doing manual dependency injection requires constructing every class and its dependencies by hand and using containers to reuse and manage dependencies.
Hilt provides a standard way to do DI injection in your application by providing containers to every Android component in your project and managing the container's lifecycle automatically for you. This is done by leveraging the popular DI library: Dagger.
If you run into any issues (code bugs, grammatical errors, unclear wording, etc.) as you work through this codelab, please report the issue via the Report a mistake link in the lower left corner of the codelab.
Prerequisites
- You have experience with Kotlin syntax.
- You understand why dependency injection is important in your application.
What you'll learn
- How to use Hilt in your Android app.
- Relevant Hilt concepts to create a sustainable app.
- How to add multiple bindings to the same type with qualifiers.
- How to use
@EntryPointto access containers from classes that Hilt doesn't support. - How to use unit and instrumentation tests to test an application that uses Hilt.
What you'll need
- Android Studio Arctic Fox or higher.
2. Getting set up
Get the code
Get the codelab code from GitHub:
$ git clone https://github.com/android/codelab-android-hilt
Alternatively you can download the repository as a Zip file:
Open Android Studio
This codelab requires Android Studio Arctic Fox or higher. If you need to download Android Studio, you can do so here.
Running the sample app
In this codelab, you're going to add Hilt to an application that logs user interactions and uses Room to store data to a local database.
Follow these instructions to open the sample app in Android Studio:
- If you downloaded the zip archive, unzip the file locally.
- Open the project in Android Studio.
- Click the
 Run button, and either choose an emulator or connect your Android device.
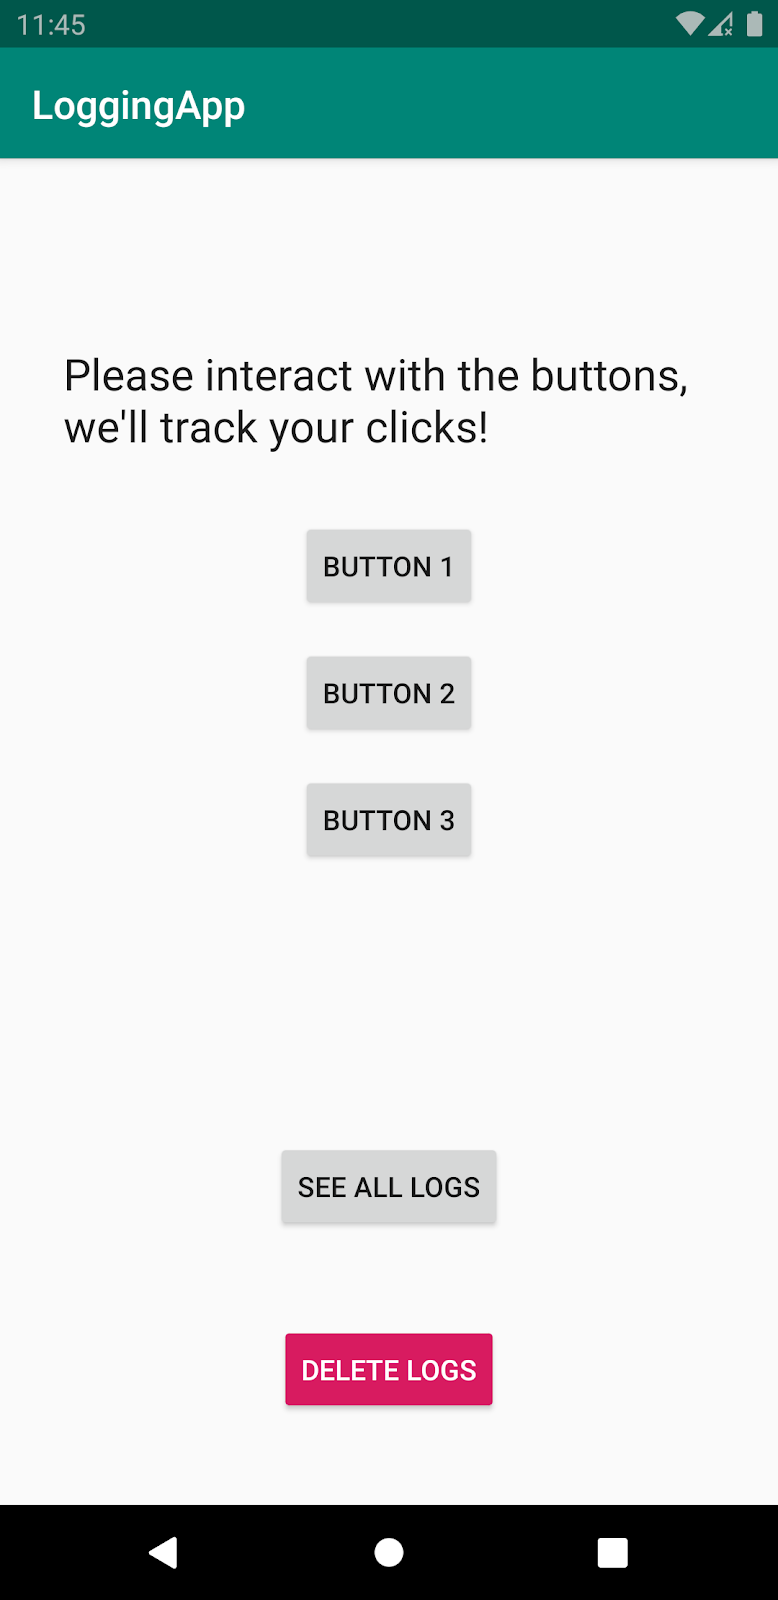
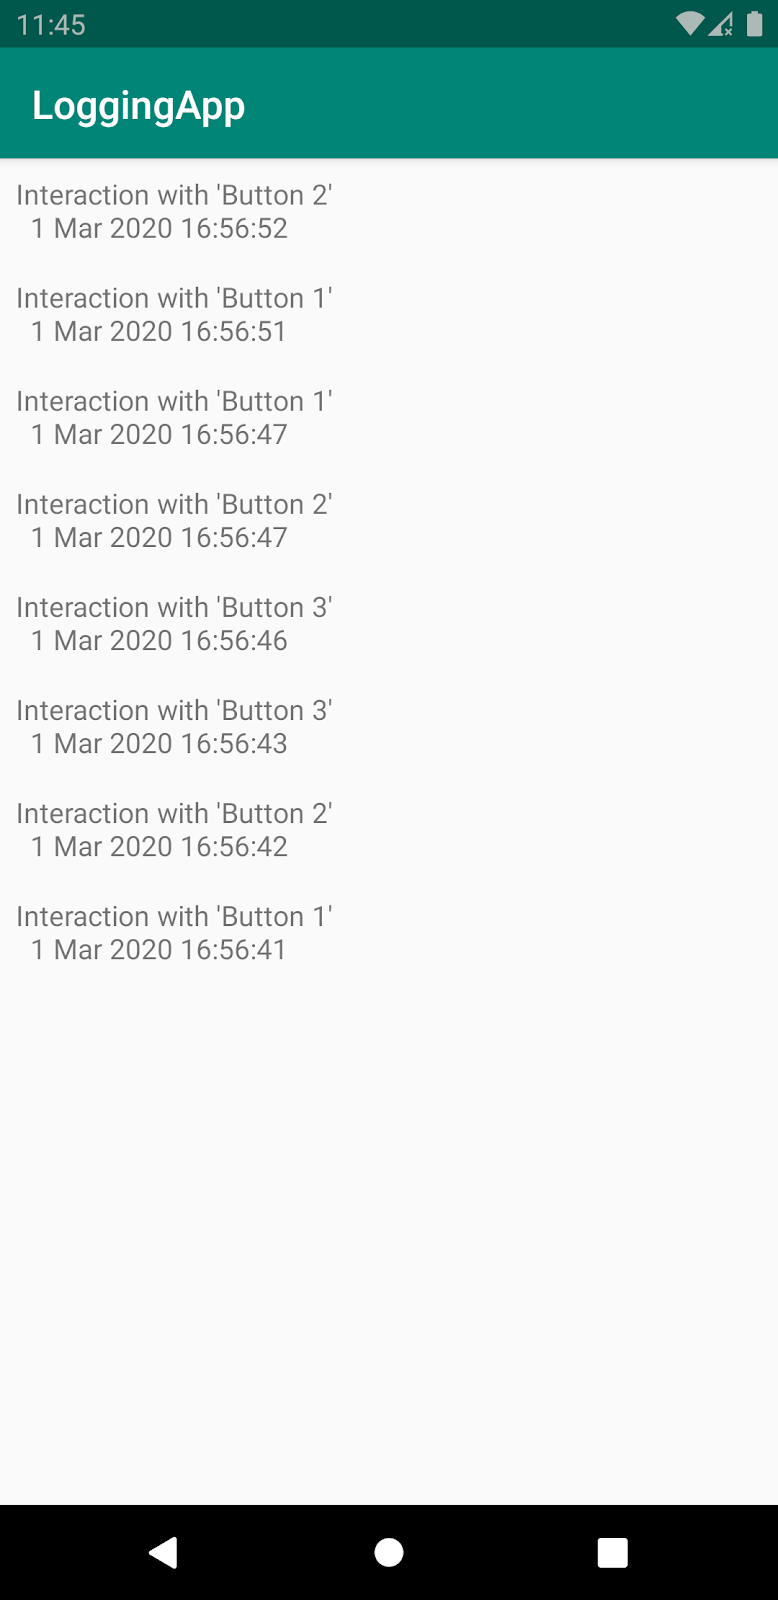
As you can see, a log is created and stored every time you interact with one of the numbered buttons. In the See All Logs screen, you'll see a list of all previous interactions. To remove the logs, tap the Delete Logs button.
Project setup
The project is built in multiple GitHub branches:
mainis the branch you checked out or downloaded. This is the codelab's starting point.solutioncontains the solution to this codelab.
We recommend that you start with the code in the main branch and follow the codelab step-by-step at your own pace.
During the codelab, you'll be presented with snippets of code that you'll need to add to the project. In some places, you'll also need to remove code that is explicitly mentioned in comments on the code snippets.
To get the solution branch using git, use this command:
$ git clone -b solution https://github.com/android/codelab-android-hilt
Or download the solution code from here:
Frequently asked questions
3. Adding Hilt to the project
Why Hilt?
If you take a look at the starting code, you can see an instance of the ServiceLocator class stored in the LogApplication class. The ServiceLocator creates and stores dependencies that are obtained on demand by the classes that need them. You can think of it as a container of dependencies that is attached to the app's lifecycle, which means it will be destroyed when the app process is destroyed.
As explained in the Android DI guidance, service locators start with relatively little boilerplate code, but also scale poorly. To develop an Android app at scale, you should use Hilt.
Hilt removes the unnecessary boilerplate involved in manual dependency injection or service locator patterns in an Android application by generating code you would've created manually (e.g. the code in the ServiceLocator class).
In the next steps, you will use Hilt to replace the ServiceLocator class. After that, you'll add new features to the project to explore more Hilt functionality.
Hilt in your project
Hilt is already configured in the main branch (code you downloaded). You don't have to include the following code in the project as it's already done for you. Nonetheless, let's see what's needed to use Hilt in an Android app.
Apart from the library dependencies, Hilt uses a Gradle plugin that is configured in the project. Open the root build.gradle file and see the following Hilt dependency in the classpath:
buildscript {
    ...
    ext.hilt_version = '2.40'
    dependencies {
        ...
        classpath "com.google.dagger:hilt-android-gradle-plugin:$hilt_version"
    }
}
Then, to use the gradle plugin in the app module, we specify it in the app/build.gradle file by adding the plugin to the top of the file, below the kotlin-kapt plugin:
plugins {
    ...
    id 'kotlin-kapt'
    id 'dagger.hilt.android.plugin'
}

android {
    ...
}
Lastly, Hilt dependencies are included in our project in the same app/build.gradle file:
...
dependencies {
    ...
    implementation "com.google.dagger:hilt-android:$hilt_version"
    kapt "com.google.dagger:hilt-android-compiler:$hilt_version"
}
All libraries, including Hilt, get downloaded when you build and sync the project. Let's start using Hilt!
4. Hilt in your Application class
Similarly to how the instance of ServiceLocator in the LogApplication class is used and initialized, to add a container that is attached to the app's lifecycle, we need to annotate the Application class with @HiltAndroidApp. Open LogApplication.kt and add the @HiltAndroidApp annotation to the Application class:
@HiltAndroidApp
class LogApplication : Application() {
    ...
}
@HiltAndroidApp triggers Hilt's code generation, including a base class for your application that can use dependency injection. The application container is the parent container for the app, which means that other containers can access the dependencies that it provides.
Now, our app is ready to use Hilt!
5. Field injection with Hilt
Instead of grabbing dependencies on demand from the ServiceLocator in our classes, we'll use Hilt to provide those dependencies for us. Let's start replacing calls to the ServiceLocator in our classes.
Open the ui/LogsFragment.kt file. LogsFragment populates its fields in onAttach(). Instead of populating instances of LoggerLocalDataSource and DateFormatter manually using the ServiceLocator, we can use Hilt to create and manage instances of those types.
To make LogsFragment use Hilt, we have to annotate it with @AndroidEntryPoint:
@AndroidEntryPoint
class LogsFragment : Fragment() {
    ...
}
Annotating Android classes with @AndroidEntryPoint creates a dependencies container that follows the Android class lifecycle.
With @AndroidEntryPoint, Hilt will create a dependencies container that is attached to LogsFragment's lifecycle and will be able to inject instances into LogsFragment. How can we reference fields that are injected by Hilt?
We can make Hilt inject instances of different types with the @Inject annotation on the fields we want to be injected (i.e. logger and dateFormatter):
@AndroidEntryPoint
class LogsFragment : Fragment() {

    @Inject lateinit var logger: LoggerLocalDataSource
    @Inject lateinit var dateFormatter: DateFormatter

    ...
}
This is called field injection.
As Hilt will be in charge of populating those fields for us, we don't need the populateFields() method anymore. Let's remove this method from the class:
@AndroidEntryPoint
class LogsFragment : Fragment() {

    // Remove following code from LogsFragment

    override fun onAttach(context: Context) {
        super.onAttach(context)

        populateFields(context)
    }

    private fun populateFields(context: Context) {
        logger = (context.applicationContext as LogApplication).serviceLocator.loggerLocalDataSource
        dateFormatter =
            (context.applicationContext as LogApplication).serviceLocator.provideDateFormatter()
    }

    ...
}
Under the hood, Hilt will populate those fields in the onAttach() lifecycle method with instances built in the dependencies container that Hilt automatically generated for LogsFragment..
To perform field injection, Hilt needs to know how to provide instances of those dependencies! In this case, we want Hilt to provide instances of LoggerLocalDataSource and DateFormatter. However, Hilt doesn't know how to provide instances of those classes yet.
Tell Hilt how to provide dependencies with @Inject
Open the ServiceLocator.kt file to see how ServiceLocator is implemented. You can see how calling provideDateFormatter() always returns a different instance of DateFormatter.
This is exactly the same behavior we want to achieve with Hilt. Fortunately, DateFormatter doesn't depend on other classes so we don't have to worry about transitive dependencies for now.
To tell Hilt how to provide instances of a type, add the @Inject annotation to the constructor of the class you want Hilt to inject.
Open the util/DateFormatter.kt file and annotate the DateFormatter class's constructor with @Inject. Remember that to annotate a constructor in Kotlin, you also need the constructor keyword:
class DateFormatter @Inject constructor() { ... }
With this, Hilt knows how to provide instances of DateFormatter. The same has to be done with LoggerLocalDataSource. Open the data/LoggerLocalDataSource.kt file and annotate its constructor with @Inject:
class LoggerLocalDataSource @Inject constructor(private val logDao: LogDao) {
    ...
}
If you open the ServiceLocator class again, you can see that we have a public LoggerLocalDataSource field. That means that the ServiceLocator will always return the same instance of LoggerLocalDataSource whenever it's called. This is called scoping an instance to a container. How can we do this in Hilt?
6. Scoping instances to containers
We can use annotations to scope instances to containers. As Hilt can produce different containers that have different lifecycles, there are different annotations that scope to those containers.
The annotation that scopes an instance to the application container is @Singleton. This annotation will make the application container always provide the same instance regardless of whether the type is used as a dependency of another type or if it needs to be field injected.
The same logic can be applied to all containers attached to Android classes. You can find the list of all scoping annotations in the Component scopes section in the documentation. For example, if you want an activity container to always provide the same instance of a type, you can annotate that type with @ActivityScoped.
As mentioned above, since we want the application container to always provide the same instance of LoggerLocalDataSource, we annotate its class with @Singleton:
@Singleton
class LoggerLocalDataSource @Inject constructor(private val logDao: LogDao) {
    ...
}
Now Hilt knows how to provide instances of LoggerLocalDataSource. However, this time the type has transitive dependencies! To provide an instance of LoggerLocalDataSource, Hilt also needs to know how to provide an instance of LogDao.
Unfortunately, because LogDao is an interface, we cannot annotate its constructor with @Inject because interfaces don't have constructors. How can we tell Hilt how to provide instances of this type?
7. Hilt modules
Modules are used to add bindings to Hilt, or in other words, to tell Hilt how to provide instances of different types. In Hilt modules, you can include bindings for types that cannot be constructor-injected such as interfaces or classes that are not contained in your project. An example of this is OkHttpClient - you need to use its builder to create an instance.
A Hilt module is a class annotated with @Module and @InstallIn. @Module tells Hilt that this is a module and @InstallIn tells Hilt the containers where the bindings are available by specifying a Hilt component. You can think of a Hilt component as a container. The full list of components can be found here.
For each Android class that can be injected by Hilt, there's an associated Hilt component. For example, the Application container is associated with SingletonComponent, and the Fragment container is associated with FragmentComponent.
Creating a module
Let's create a Hilt module where we can add bindings. Create a new package called di under the hilt package and create a new file called DatabaseModule.kt inside that package.
Since LoggerLocalDataSource is scoped to the application container, the LogDao binding needs to be available in the application container. We specify that requirement using the @InstallIn annotation by passing in the class of the Hilt component associated with it (i.e. SingletonComponent:class):
package com.example.android.hilt.di

import dagger.Module
import dagger.hilt.InstallIn
import dagger.hilt.components.SingletonComponent

@InstallIn(SingletonComponent::class)
@Module
object DatabaseModule {

}
In the ServiceLocator class implementation, the instance of LogDao is obtained by calling logsDatabase.logDao(). Therefore, to provide an instance of LogDao we have a transitive dependency on the AppDatabase class.
Providing instances with @Provides
We can annotate a function with @Provides in Hilt modules to tell Hilt how to provide types that cannot be constructor injected.
The function body of a function that is annotated with @Provides will be executed every time Hilt needs to provide an instance of that type. The return type of the @Provides-annotated function tells Hilt the binding type, the type that the function provides instances of.. The function parameters are the dependencies of that type.
In our case, we will include this function in the DatabaseModule class:
package com.example.android.hilt.di

import com.example.android.hilt.data.AppDatabase
import com.example.android.hilt.data.LogDao
import dagger.Module
import dagger.Provides
import dagger.hilt.InstallIn
import dagger.hilt.components.SingletonComponent

@InstallIn(SingletonComponent::class)
@Module
object DatabaseModule {

    @Provides
    fun provideLogDao(database: AppDatabase): LogDao {
        return database.logDao()
    }
}
The code above tells Hilt that database.logDao()needs to be executed when providing an instance of LogDao. Since we have AppDatabase as a transitive dependency, we also need to tell Hilt how to provide instances of that type.
Our project doesn't own the AppDatabase class either, because it is generated by Room. We can't constructor inject AppDatabase, but we can use an @Provides function to provide it, too. This is similar to how we build the database instance in the ServiceLocator class:
import android.content.Context
import androidx.room.Room
import com.example.android.hilt.data.AppDatabase
import com.example.android.hilt.data.LogDao
import dagger.Module
import dagger.Provides
import dagger.hilt.InstallIn
import dagger.hilt.android.qualifiers.ApplicationContext
import dagger.hilt.components.SingletonComponent
import javax.inject.Singleton

@InstallIn(SingletonComponent::class)
@Module
object DatabaseModule {

    @Provides
    fun provideLogDao(database: AppDatabase): LogDao {
        return database.logDao()
    }

    @Provides
    @Singleton
    fun provideDatabase(@ApplicationContext appContext: Context): AppDatabase {
        return Room.databaseBuilder(
            appContext,
            AppDatabase::class.java,
            "logging.db"
        ).build()
    }
}
Since we always want Hilt to provide the same database instance, we annotate the @Provides provideDatabase() method with @Singleton.
Each Hilt container comes with a set of default bindings that can be injected as dependencies into your custom bindings. This is the case with applicationContext. To access it, you need to annotate the field with @ApplicationContext.
Running the app
Now, Hilt has all the necessary information to inject the instances in LogsFragment. However, before running the app, Hilt needs to be aware of the Activity that hosts the Fragment in order to work. We'll need to use @AndroidEntryPoint.
Open the ui/MainActivity.kt file and annotate the MainActivity with @AndroidEntryPoint:
@AndroidEntryPoint
class MainActivity : AppCompatActivity() { ... }
Now, you can run the app and check that everything still works.
Let's continue refactoring the app to remove the ServiceLocator calls from the MainActivity.
8. Providing interfaces with @Binds
Currently, MainActivity gets an instance of the AppNavigator from the ServiceLocator by calling the provideNavigator(activity: FragmentActivity) function.
Because AppNavigator is an interface, we cannot use constructor injection. To tell Hilt what implementation to use for an interface, you can use the @Binds annotation on a function inside a Hilt module.
@Binds must annotate an abstract function (since it's abstract, it doesn't contain any code and the class needs to be abstract too). The return type of the abstract function is the interface we want to provide an implementation for (i.e. AppNavigator). The implementation is specified by adding a unique parameter with the interface implementation type (i.e. AppNavigatorImpl).
Can we add this function to the DatabaseModule class we created before, or do we need a new module? There are multiple reasons why we should create a new module:
- For better organization, a module's name should convey the type of information it provides. For example, it wouldn't make sense to include navigation bindings in a module named
DatabaseModule. - The
DatabaseModulemodule is installed in theSingletonComponent, so the bindings are available in the application container. Our new navigation information (i.e.AppNavigator) needs information specific to the activity becauseAppNavigatorImplhas anActivityas a dependency. Therefore, it must be installed in theActivitycontainer instead of theApplicationcontainer, since that's where information about theActivityis available. - Hilt Modules cannot contain both non-static and abstract binding methods, so you cannot place
@Bindsand@Providesannotations in the same class.
Create a new file called NavigationModule.kt in the di folder. There, let's create a new abstract class called NavigationModule annotated with @Module and @InstallIn(ActivityComponent::class) as explained above:
@InstallIn(ActivityComponent::class)
@Module
abstract class NavigationModule {

    @Binds
    abstract fun bindNavigator(impl: AppNavigatorImpl): AppNavigator
}
Inside the new module, we can add the binding for AppNavigator. It's an abstract function that returns the interface we're informing Hilt about (i.e. AppNavigator) and the parameter is the implementation of that interface (i.e. AppNavigatorImpl).
Now we have to tell Hilt how to provide instances of AppNavigatorImpl. Since this class can be constructor injected, we can just annotate its constructor with @Inject.
Open the navigator/AppNavigatorImpl.kt file and do that:
class AppNavigatorImpl @Inject constructor(
    private val activity: FragmentActivity
) : AppNavigator {
    ...
}
AppNavigatorImpl depends on a FragmentActivity. Because an AppNavigator instance is provided in the Activity container , FragmentActivity is already available as a predefined binding.
Using Hilt in the Activity
Now, Hilt has all the information to be able to inject an AppNavigator instance. Open the MainActivity.kt file and do the following:
- Annotate
navigatorfield with@Injectto get by Hilt, - Remove the
privatevisibility modifier, and - Remove the
navigatorinitialization code in theonCreatefunction.
The new code should look like this:
@AndroidEntryPoint
class MainActivity : AppCompatActivity() {

    @Inject lateinit var navigator: AppNavigator

    override fun onCreate(savedInstanceState: Bundle?) {
        super.onCreate(savedInstanceState)
        setContentView(R.layout.activity_main)

        if (savedInstanceState == null) {
            navigator.navigateTo(Screens.BUTTONS)
        }
    }

    ...
}
Running the app
You can run the app and see how it's working as expected.
Finishing the refactoring
The only class that is still using the ServiceLocator to grab dependencies is ButtonsFragment. Since Hilt already knows how to provide all the types that ButtonsFragment needs, we can just perform field injection in the class.
As we've learnt before, in order to make the class be field injected by Hilt, we have to:
- Annotate the
ButtonsFragmentwith@AndroidEntryPoint, - Remove private modifier from
loggerandnavigatorfields and annotate them with@Inject, - Remove fields initialization code (i.e.
onAttachandpopulateFieldsmethods).
Code for ButtonsFragment:
@AndroidEntryPoint
class ButtonsFragment : Fragment() {

    @Inject lateinit var logger: LoggerLocalDataSource
    @Inject lateinit var navigator: AppNavigator

    override fun onCreateView(
        inflater: LayoutInflater,
        container: ViewGroup?,
        savedInstanceState: Bundle?
    ): View? {
        return inflater.inflate(R.layout.fragment_buttons, container, false)
    }

    override fun onViewCreated(view: View, savedInstanceState: Bundle?) {
        ...
    }
}
Notice that the instance of LoggerLocalDataSource will be the same as the one we used in LogsFragment since the type is scoped to the application container. However, the instance of AppNavigator will be different from the instance in MainActivity as we haven't scoped it to its respective Activity container.
At this point, the ServiceLocator class no longer provides dependencies so we can remove it completely from the project. The only usage remains in the LogApplication class where we kept an instance of it. Let's clean that class as we don't need it anymore.
Open the LogApplication class and remove the ServiceLocator usage. The new code for the Application class is:
@HiltAndroidApp
class LogApplication : Application()
Now, feel free to remove the ServiceLocator class from the project altogether. As ServiceLocator is still used in tests, remove its usages from the AppTest class as well.
Basic content covered
What you just learnt should be enough to use Hilt as the Dependency Injection tool in your Android application.
From now on, we'll add new functionality to our app to learn how to use more advanced Hilt features in different situations.
9. Qualifiers
Now that we've removed the ServiceLocator class from our project and you learned the basics of Hilt, let's add new functionality to the app to explore other Hilt features.
In this section, you'll learn about:
- How to scope to the Activity container.
- What qualifiers are, what problems they solve, and how to use them.
To show this, we need a different behavior in our app. We'll swap the log storage from a database to an in-memory list with the intention of only recording the logs during an app session.
LoggerDataSource interface
Let's start abstracting the data source into an interface. Create a new file called LoggerDataSource.kt under the data folder with the following content:
package com.example.android.hilt.data

// Common interface for Logger data sources.
interface LoggerDataSource {
    fun addLog(msg: String)
    fun getAllLogs(callback: (List<Log>) -> Unit)
    fun removeLogs()
}
LoggerLocalDataSource is used in both Fragments: ButtonsFragment and LogsFragment. We need to refactor them to use an instance of LoggerDataSource instead.
Open LogsFragment and make the logger variable of type LoggerDataSource:
@AndroidEntryPoint
class LogsFragment : Fragment() {

    @Inject lateinit var logger: LoggerDataSource
    ...
}
Do the same in ButtonsFragment:
@AndroidEntryPoint
class ButtonsFragment : Fragment() {

    @Inject lateinit var logger: LoggerDataSource
    ...
}
Next, let's make the LoggerLocalDataSource implement this interface. Open the data/LoggerLocalDataSource.kt file and:
- Make it implement the
LoggerDataSourceinterface, and - Mark its methods with
override
@Singleton
class LoggerLocalDataSource @Inject constructor(
    private val logDao: LogDao
) : LoggerDataSource {
    ...
    override fun addLog(msg: String) { ... }
    override fun getAllLogs(callback: (List<Log>) -> Unit) { ... }
    override fun removeLogs() { ... }
}
Now, let's create another implementation of LoggerDataSource called LoggerInMemoryDataSource that keeps the logs in memory. Create a new file called LoggerInMemoryDataSource.kt under the data folder with the following content:
package com.example.android.hilt.data

import java.util.LinkedList

class LoggerInMemoryDataSource : LoggerDataSource {

    private val logs = LinkedList<Log>()

    override fun addLog(msg: String) {
        logs.addFirst(Log(msg, System.currentTimeMillis()))
    }

    override fun getAllLogs(callback: (List<Log>) -> Unit) {
        callback(logs)
    }

    override fun removeLogs() {
        logs.clear()
    }
}
Scoping to the Activity container
To be able to use LoggerInMemoryDataSource as an implementation detail, we need to tell Hilt how to provide instances of this type. As before, we annotate the class constructor with @Inject:
class LoggerInMemoryDataSource @Inject constructor(
) : LoggerDataSource { ... }
Since our application consists of only one Activity (also called a single-Activity application), we should have an instance of the LoggerInMemoryDataSource in the Activity container and reuse that instance across Fragments.
We can achieve the in-memory logging behavior by scoping LoggerInMemoryDataSource to the Activity container: every Activity created will have its own container, a different instance. On each container, the same instance of LoggerInMemoryDataSource will be provided when the logger is needed as a dependency or for field injection. Also, the same instance will be provided in containers below the Components hierarchy.
Following the scoping to Components documentation, to scope a type to the Activity container, we need to annotate the type with @ActivityScoped:
@ActivityScoped
class LoggerInMemoryDataSource @Inject constructor(
) : LoggerDataSource { ... }
At the moment, Hilt knows how to provide instances of LoggerInMemoryDataSource and LoggerLocalDataSource but what about LoggerDataSource? Hilt doesn't know which implementation to use when LoggerDataSource is requested.
As we know from previous sections, we can use the @Binds annotation in a module to tell Hilt which implementation to use. However, what if we need to provide both implementations in the same project? For example, using an LoggerInMemoryDataSource while the app is running and LoggerLocalDataSource in a Service.
Two implementations for the same interface
Let's create a new file in the di folder called LoggingModule.kt. Since the different implementations of LoggerDataSource are scoped to different containers, we cannot use the same module: LoggerInMemoryDataSource is scoped to the Activity container and LoggerLocalDataSource to the Application container.
Fortunately, we can define bindings for both modules in the same file we just created:
package com.example.android.hilt.di

import com.example.android.hilt.data.LoggerDataSource
import com.example.android.hilt.data.LoggerInMemoryDataSource
import com.example.android.hilt.data.LoggerLocalDataSource
import dagger.Binds
import dagger.Module
import dagger.hilt.InstallIn
import dagger.hilt.android.components.ActivityComponent
import dagger.hilt.android.scopes.ActivityScoped
import dagger.hilt.components.SingletonComponent
import javax.inject.Singleton

@InstallIn(SingletonComponent::class)
@Module
abstract class LoggingDatabaseModule {

    @Singleton
    @Binds
    abstract fun bindDatabaseLogger(impl: LoggerLocalDataSource): LoggerDataSource
}

@InstallIn(ActivityComponent::class)
@Module
abstract class LoggingInMemoryModule {

    @ActivityScoped
    @Binds
    abstract fun bindInMemoryLogger(impl: LoggerInMemoryDataSource): LoggerDataSource
}
@Binds methods must have the scoping annotations if the type is scoped, so that's why the functions above are annotated with @Singleton and @ActivityScoped. If @Binds or @Provides are used as a binding for a type, the scoping annotations in the type are not used anymore, so you can go ahead and remove them from the different implementation classes.
If you try to build the project now, you'll see a DuplicateBindings error!
error: [Dagger/DuplicateBindings] com.example.android.hilt.data.LoggerDataSource is bound multiple times
This is because the LoggerDataSource type is being injected in our Fragments but Hilt doesn't know which implementation to use because there are two bindings of the same type! How can Hilt know which one to use?
Using qualifiers
To tell Hilt how to provide different implementations (multiple bindings) of the same type, you can use qualifiers.
We need to define a qualifier per implementation since each qualifier will be used to identify a binding. When injecting the type in an Android class or having that type as a dependency of other classes, the qualifier annotation needs to be used to avoid ambiguity.
As a qualifier is just an annotation, we can define them in the LoggingModule.kt file where we added the modules:
package com.example.android.hilt.di

@Qualifier
annotation class InMemoryLogger

@Qualifier
annotation class DatabaseLogger
Now, these qualifiers must annotate the @Binds (or @Provides in case we need it) functions that provide each implementation. See the full code and notice the qualifiers usage in the @Binds methods:
package com.example.android.hilt.di

@Qualifier
annotation class InMemoryLogger

@Qualifier
annotation class DatabaseLogger

@InstallIn(SingletonComponent::class)
@Module
abstract class LoggingDatabaseModule {

    @DatabaseLogger
    @Singleton
    @Binds
    abstract fun bindDatabaseLogger(impl: LoggerLocalDataSource): LoggerDataSource
}

@InstallIn(ActivityComponent::class)
@Module
abstract class LoggingInMemoryModule {

    @InMemoryLogger
    @ActivityScoped
    @Binds
    abstract fun bindInMemoryLogger(impl: LoggerInMemoryDataSource): LoggerDataSource
}
Also, these qualifiers must be used at the injection point with the implementation we want to be injected. In this case, we're going to use the LoggerInMemoryDataSource implementation in our Fragments.
Open LogsFragment and use the @InMemoryLogger qualifier on the logger field to tell Hilt to inject an instance of LoggerInMemoryDataSource:
@AndroidEntryPoint
class LogsFragment : Fragment() {

    @InMemoryLogger
    @Inject lateinit var logger: LoggerDataSource
    ...
}
Do the same for ButtonsFragment:
@AndroidEntryPoint
class ButtonsFragment : Fragment() {

    @InMemoryLogger
    @Inject lateinit var logger: LoggerDataSource
    ...
}
If you want to change the database implementation you want to use, you just need to annotate the injected fields with @DatabaseLogger instead of @InMemoryLogger.
Running the app
We can run the app and confirm what we've done by interacting with the buttons and observing the appropriate logs appear on the "See all logs" screen.
Note that the logs are not saved to the database anymore. They don't persist between sessions, whenever you close and open the app again, the log screen is empty.
10. UI Testing
Now that the app is fully migrated to Hilt, we can also migrate the instrumentation test that we have in the project. The test that checks the functionality of the app is in the AppTest.kt file at the app/androidTest folder. Open it!
You will see that it doesn't compile because we removed the ServiceLocator class from our project. Remove the references to the ServiceLocator that we're not using anymore by removing the @After tearDown method from the class.
androidTest tests run on an emulator. The happyPath test confirms that the tap on "Button 1" has been logged to the database. As the app is using the in-memory database, after the test finishes, all logs will disappear.
UI Testing with Hilt
Hilt will be injecting dependencies in your UI test as it would happen in your production code.
Testing with Hilt requires no maintenance because Hilt automatically generates a new set of components for each test.
Adding the testing dependencies
Hilt uses an additional library with testing-specific annotations that makes testing your code easier named hilt-android-testing that must be added to the project. Additionally, as Hilt needs to generate code for classes in the androidTest folder, its annotation processor must also be able to run there. To enable this, you need to include two dependencies in the app/build.gradle file.
To add these dependencies, open app/build.gradle and add this configuration to the bottom of the dependencies section:
...
dependencies {

    // Hilt testing dependency
    androidTestImplementation "com.google.dagger:hilt-android-testing:$hilt_version"
    // Make Hilt generate code in the androidTest folder
    kaptAndroidTest "com.google.dagger:hilt-android-compiler:$hilt_version"
}
Custom TestRunner
Instrumented tests using Hilt need to be executed in an Application that supports Hilt. The library already comes with HiltTestApplication that we can use to run our UI tests. Specifying the Application to use in tests is done by creating a new test runner in the project.
At the same level the AppTest.kt file is under the androidTest folder, create a new file called CustomTestRunner. Our CustomTestRunner extends from AndroidJUnitRunner and is implemented as follows:
package com.example.android.hilt

import android.app.Application
import android.content.Context
import androidx.test.runner.AndroidJUnitRunner
import dagger.hilt.android.testing.HiltTestApplication

class CustomTestRunner : AndroidJUnitRunner() {

    override fun newApplication(cl: ClassLoader?, name: String?, context: Context?): Application {
        return super.newApplication(cl, HiltTestApplication::class.java.name, context)
    }
}
Next, we need to tell the project to use this test runner for instrumentation tests. That's specified in the testInstrumentationRunner attribute of the app/build.gradle file. Open the file, and replace the default testInstrumentationRunner content with this:
...
android {
    ...
    defaultConfig {
        ...
        testInstrumentationRunner "com.example.android.hilt.CustomTestRunner"
    }
    ...
}
...
Now we're ready to use Hilt in our UI tests!
Running a test that uses Hilt
Next, for an emulator test class to use Hilt, it needs to:
- Be annotated with
@HiltAndroidTestwhich is responsible for generating the Hilt components for each test - Use the
HiltAndroidRulethat manages the components' state and is used to perform injection on your test.
Let's include them in AppTest:
@RunWith(AndroidJUnit4::class)
@HiltAndroidTest
class AppTest {

    @get:Rule
    var hiltRule = HiltAndroidRule(this)

    ...
}
Now, if you run the test using the play button next to the class definition or the test method definition, an emulator will start if you have it configured and the test will pass.
To learn more about testing and features such as field injection or replacing bindings in tests, check out the documentation.
11. @EntryPoint annotation
In this section of the codelab, we'll learn how to use the @EntryPoint annotation which is used to inject dependencies in classes not supported by Hilt.
As we saw before, Hilt comes with support for the most common Android components. However, you might need to perform field injection in classes that either are not supported directly by Hilt or cannot use Hilt.
In those cases, you can use @EntryPoint. An entry point is the boundary place where you can get Hilt-provided objects from code that cannot use Hilt to inject its dependencies. It is the point where code first enters into containers managed by Hilt.
The use case
We want to be able to export our logs outside our application process. For that, we need to use a ContentProvider. We're only allowing consumers to query one specific log (given an id) or all the logs from the app using a ContentProvider. We'll be using the Room database to retrieve the data. Therefore, the LogDao class should expose methods that return the required information using a database Cursor. Open the LogDao.kt file and add the following methods to the interface.
@Dao
interface LogDao {
    ...

    @Query("SELECT * FROM logs ORDER BY id DESC")
    fun selectAllLogsCursor(): Cursor

    @Query("SELECT * FROM logs WHERE id = :id")
    fun selectLogById(id: Long): Cursor?
}
Next, we have to create a new ContentProvider class and override the query method to return a Cursor with the logs. Create a new file called LogsContentProvider.kt under a new contentprovider directory with the following content:
package com.example.android.hilt.contentprovider

import android.content.ContentProvider
import android.content.ContentUris
import android.content.ContentValues
import android.content.Context
import android.content.UriMatcher
import android.database.Cursor
import android.net.Uri
import com.example.android.hilt.data.LogDao
import dagger.hilt.EntryPoint
import dagger.hilt.InstallIn
import dagger.hilt.android.EntryPointAccessors
import dagger.hilt.components.SingletonComponent
import java.lang.UnsupportedOperationException

/** The authority of this content provider.  */
private const val LOGS_TABLE = "logs"

/** The authority of this content provider.  */
private const val AUTHORITY = "com.example.android.hilt.provider"

/** The match code for some items in the Logs table.  */
private const val CODE_LOGS_DIR = 1

/** The match code for an item in the Logs table.  */
private const val CODE_LOGS_ITEM = 2

/**
 * A ContentProvider that exposes the logs outside the application process.
 */
class LogsContentProvider: ContentProvider() {

    private val matcher: UriMatcher = UriMatcher(UriMatcher.NO_MATCH).apply {
        addURI(AUTHORITY, LOGS_TABLE, CODE_LOGS_DIR)
        addURI(AUTHORITY, "$LOGS_TABLE/*", CODE_LOGS_ITEM)
    }

    override fun onCreate(): Boolean {
        return true
    }

    /**
     * Queries all the logs or an individual log from the logs database.
     *
     * For the sake of this codelab, the logic has been simplified.
     */
    override fun query(
        uri: Uri,
        projection: Array<out String>?,
        selection: String?,
        selectionArgs: Array<out String>?,
        sortOrder: String?
    ): Cursor? {
        val code: Int = matcher.match(uri)
        return if (code == CODE_LOGS_DIR || code == CODE_LOGS_ITEM) {
            val appContext = context?.applicationContext ?: throw IllegalStateException()
            val logDao: LogDao = getLogDao(appContext)

            val cursor: Cursor? = if (code == CODE_LOGS_DIR) {
                logDao.selectAllLogsCursor()
            } else {
                logDao.selectLogById(ContentUris.parseId(uri))
            }
            cursor?.setNotificationUri(appContext.contentResolver, uri)
            cursor
        } else {
            throw IllegalArgumentException("Unknown URI: $uri")
        }
    }

    override fun insert(uri: Uri, values: ContentValues?): Uri? {
        throw UnsupportedOperationException("Only reading operations are allowed")
    }

    override fun update(
        uri: Uri,
        values: ContentValues?,
        selection: String?,
        selectionArgs: Array<out String>?
    ): Int {
        throw UnsupportedOperationException("Only reading operations are allowed")
    }

    override fun delete(uri: Uri, selection: String?, selectionArgs: Array<out String>?): Int {
        throw UnsupportedOperationException("Only reading operations are allowed")
    }

    override fun getType(uri: Uri): String? {
        throw UnsupportedOperationException("Only reading operations are allowed")
    }
}
You'll see that the getLogDao(appContext) call doesn't compile! We need to implement it by grabbing the LogDao dependency from the Hilt application container. However, Hilt doesn't support injecting to a ContentProvider out of the box as it does with Activity, for example, with @AndroidEntryPoint.
We need to create a new interface annotated with @EntryPoint to access it.
@EntryPoint in action
An entry point is an interface with an accessor method for each binding type we want (including its qualifier). Also, the interface must be annotated with @InstallIn to specify the component in which to install the entry point.
The best practice is adding the new entry point interface inside the class that uses it. Therefore, include the interface in LogsContentProvider.kt file:
class LogsContentProvider: ContentProvider() {

    @InstallIn(SingletonComponent::class)
    @EntryPoint
    interface LogsContentProviderEntryPoint {
        fun logDao(): LogDao
    }

    ...
}
Notice that the interface is annotated with the @EntryPoint and it's installed in the SingletonComponent since we want the dependency from an instance of the Application container. Inside the interface, we expose methods for the bindings we want to access, in our case, LogDao.
To access an entry point, use the appropriate static method from EntryPointAccessors. The parameter should be either the component instance or the @AndroidEntryPoint object that acts as the component holder. Make sure that the component you pass as a parameter and the EntryPointAccessors static method both match the Android class in the @InstallIn annotation on the @EntryPoint interface:
Now, we can implement the getLogDao method that is missing from the code above. Let's use the entry point interface we defined above in our LogsContentProviderEntryPoint class:
class LogsContentProvider: ContentProvider() {
    ...

    private fun getLogDao(appContext: Context): LogDao {
        val hiltEntryPoint = EntryPointAccessors.fromApplication(
            appContext,
            LogsContentProviderEntryPoint::class.java
        )
        return hiltEntryPoint.logDao()
    }
}
Notice how we pass the applicationContext to the static EntryPointAccessors.fromApplication method and the class of the interface that's annotated with @EntryPoint.
12. Congratulations!
You're now familiar with Hilt and you should be able to add it to your Android app. In this codelab you learned about:
- How to set up Hilt in your Application class using
@HiltAndroidApp. - How to add dependency containers to the different Android lifecycle components using
@AndroidEntryPoint. - How to use modules to tell Hilt how to provide certain types.
- How to use qualifiers to provide multiple bindings for certain types.
- How to test your app using Hilt.
- When
@EntryPointis useful and how to use it.