
1. סקירה כללית
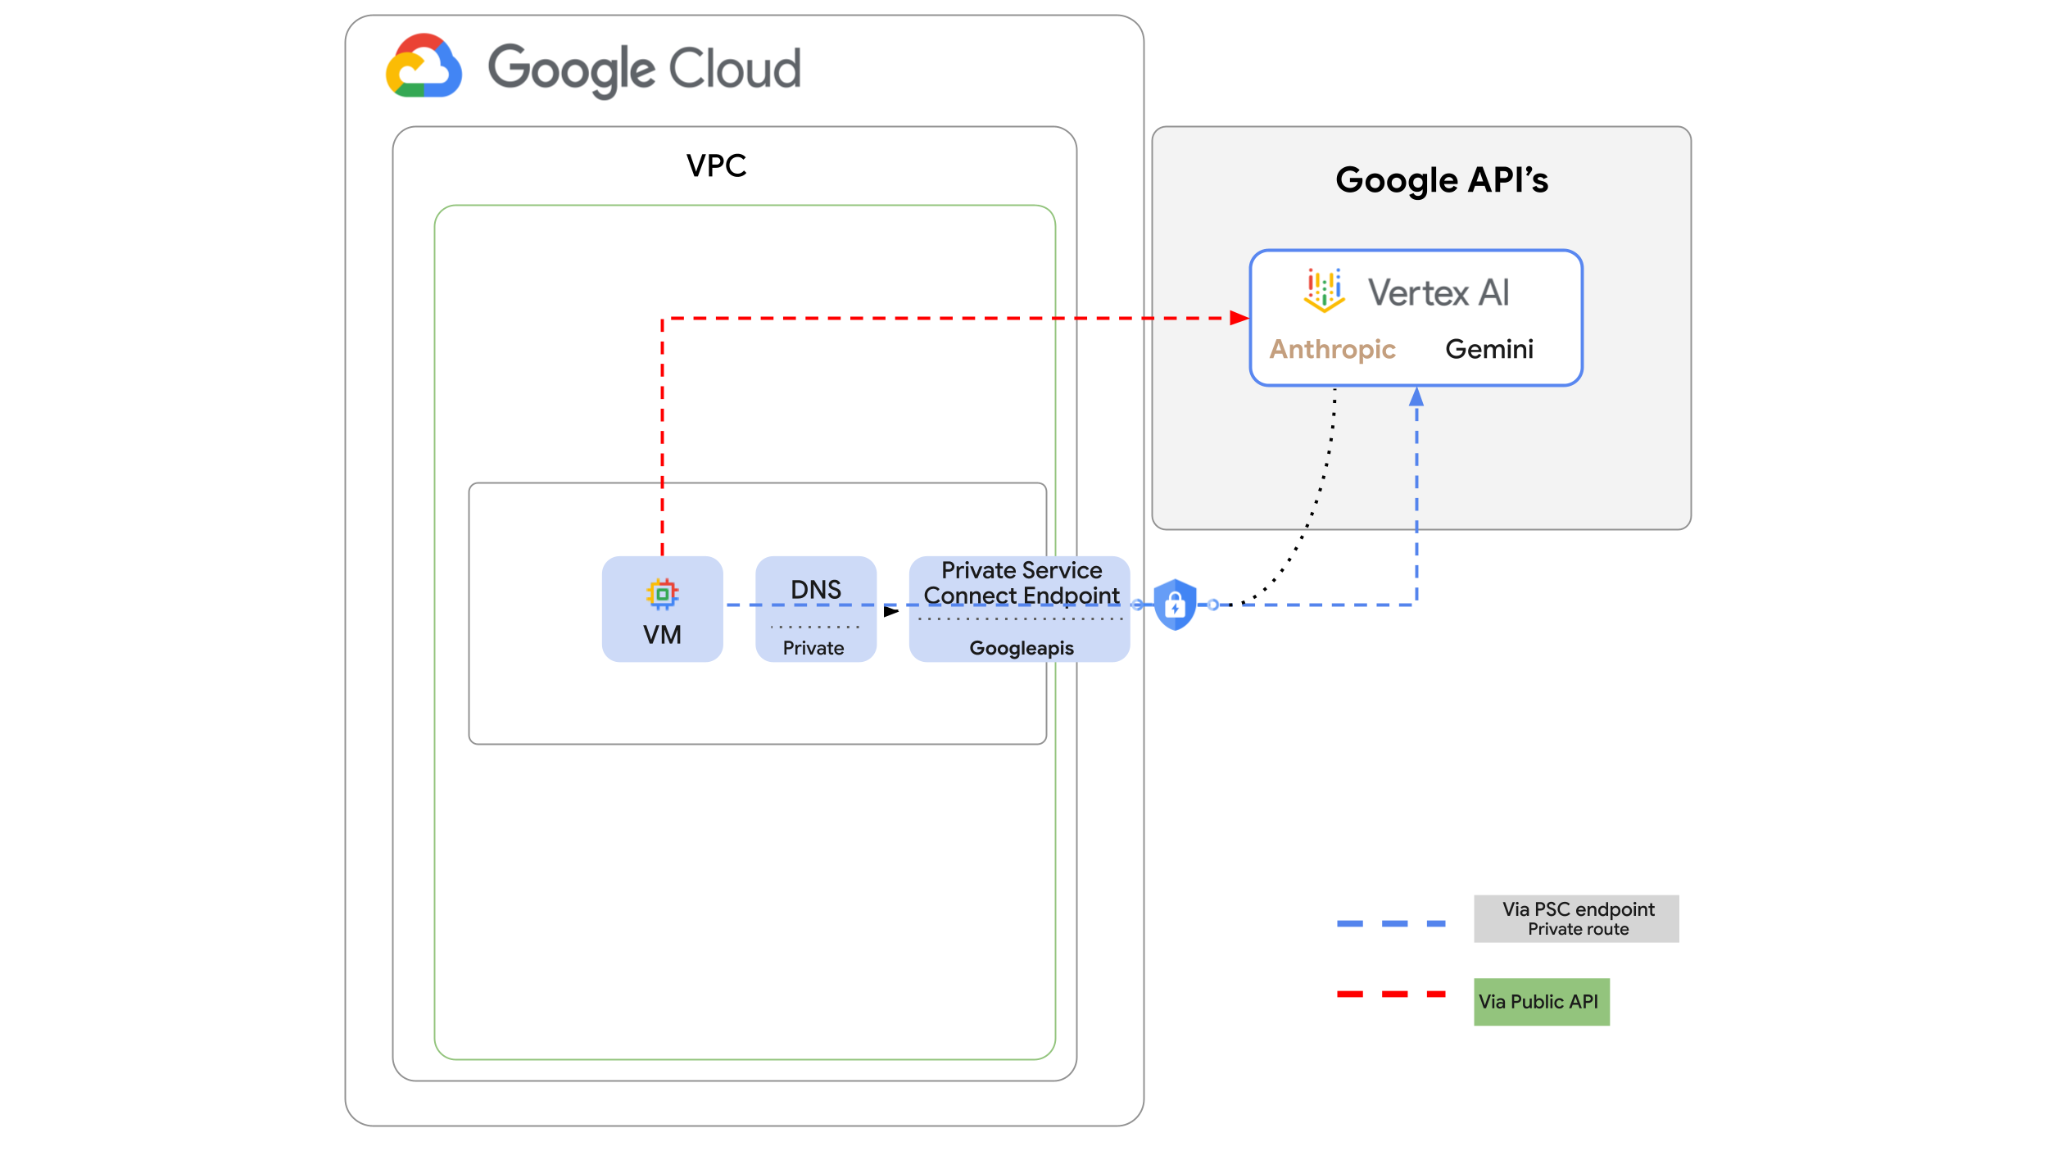
אפשר לגשת ל-Vertex AI API דרך האינטרנט, אבל יכול להיות שתרצו לגשת ל-Vertex AI API באופן פרטי בארגון שלכם, בלי לעבור דרך האינטרנט. במעבדה הזו תהיה לכם גישה ל-Anthropic Claude Opus 4.6 ול-Gemini 3.1Pro ב-Vertex באמצעות Python SDK שפועל במכונה וירטואלית דרך האינטרנט הציבורי.
לאחר מכן תיצרו נקודת קצה (endpoint) של Private Service Connect ל-Googleapis, ותשנו את זרימת התנועה כך שתשתמש בנקודת הקצה הפרטית כדי להתחבר ל-Vertex API.
דוגמת קוד Python תקבל את השאלות כקלט, תעביר אותן אל Claude Opus כדי ליצור תשובה, והפלט הזה יועבר אל Gemini 3 כדי ליצור סיכום טקסט וליצור תמונה.
בשיעור ה-Lab הזה תיצרו את התבנית הבאה.
איור 1.
2. מטרות
בשיעור ה-Lab הזה תלמדו איך לבצע את המשימה הבאה:
- הגדרת מכונה וירטואלית לשימוש ב-Python SDK
- הפעלת כרטיס מודל של Anthropic ב-Vertex AI
- חיבור אל Anthropic Claude Opus 4.6 ו-Gemini 3.1 Pro באמצעות סקריפט Python
- הגדרת נקודת קצה של PSC לחיבור אל Googleapis
- הגדרת רשומות DNS ידניות
- אימות נתיב הקישוריות אל Googleais
- הפעלת סקריפט Python כדי לשלוח שאילתות למודלים
הגדרת מעבדה
הגדרת סביבה בקצב אישי
- נכנסים ל-מסוף Google Cloud ויוצרים פרויקט חדש או משתמשים בפרויקט קיים. אם עדיין אין לכם חשבון Gmail או Google Workspace, אתם צריכים ליצור חשבון.


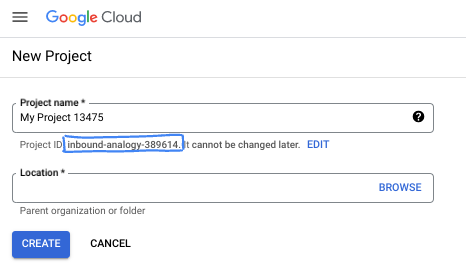
- שם הפרויקט הוא השם המוצג של הפרויקט הזה למשתתפים. זו מחרוזת תווים שלא נמצאת בשימוש ב-Google APIs. תמיד אפשר לעדכן את המיקום.
- מזהה הפרויקט הוא ייחודי לכל הפרויקטים ב-Google Cloud, והוא קבוע (אי אפשר לשנות אותו אחרי שהוא מוגדר). מסוף Cloud יוצר באופן אוטומטי מחרוזת ייחודית, ובדרך כלל לא צריך לדעת מה היא. ברוב ה-Codelabs, תצטרכו להפנות למזהה הפרויקט (בדרך כלל מסומן כ-
PROJECT_ID). אם אתם לא אוהבים את המזהה שנוצר, אתם יכולים ליצור מזהה אקראי אחר. אפשר גם לנסות שם משתמש משלכם ולבדוק אם הוא זמין. אי אפשר לשנות את ההגדרה הזו אחרי השלב הזה, והיא נשארת לאורך הפרויקט. - לידיעתכם, יש ערך שלישי, מספר פרויקט, שחלק מממשקי ה-API משתמשים בו. במאמרי העזרה מפורט מידע נוסף על שלושת הערכים האלה.
- בשלב הבא, תצטרכו להפעיל את החיוב במסוף Cloud כדי להשתמש במשאבי Cloud או בממשקי API של Cloud. השלמת ה-codelab הזה לא תעלה לכם הרבה, אם בכלל. כדי להשבית את המשאבים ולמנוע חיובים נוספים אחרי שתסיימו את המדריך הזה, תוכלו למחוק את המשאבים שיצרתם או למחוק את הפרויקט. משתמשים חדשים ב-Google Cloud זכאים לתוכנית תקופת ניסיון בחינם בשווי 300$.
מפעילים את Cloud Shell
אפשר להפעיל את Google Cloud מרחוק מהמחשב הנייד, אבל ב-Codelab הזה נשתמש ב-Google Cloud Shell, סביבת שורת פקודה שפועלת בענן.
ב-מסוף Google Cloud, לוחצים על סמל Cloud Shell בסרגל הכלים שבפינה הימנית העליונה:

יחלפו כמה רגעים עד שההקצאה והחיבור לסביבת העבודה יושלמו. בסיום התהליך, אמור להופיע משהו כזה:

המכונה הווירטואלית הזו כוללת את כל הכלים שדרושים למפתחים. יש בה ספריית בית בנפח מתמיד של 5GB והיא פועלת ב-Google Cloud, מה שמשפר מאוד את הביצועים והאימות ברשת. אפשר לבצע את כל העבודה ב-codelab הזה בדפדפן. לא צריך להתקין שום דבר.
3. הגדרת הסביבה
ניצור VPC בהתאמה אישית עם כללי חומת אש. אם כבר יש לכם VPC ופרויקט, אתם יכולים לדלג על החלק הזה.
פותחים את Cloud Shell בפינה השמאלית העליונה של המסוף. מגדירים את ההגדרות הבאות: 
- הפעלה של חלק מה-API שנשתמש בהם בשיעור ה-Lab הזה
gcloud services enable dns.googleapis.com
gcloud services enable aiplatform.googleapis.com
gcloud services enable servicedirectory.googleapis.com
- מגדירים כמה משתנים. המשתנים האלה הם מזהה הפרויקט ומזהה הרשת של ה-VPC המותאם אישית (תיצרו את ה-VPC בשלב 4).
projectid=$(gcloud config get-value project)
networkid=anthropic-net
echo $projectid
echo $networkid
- עכשיו יוצרים VPC מותאם אישית (anthropic-net), תת-רשת (vm1-subnet) וכללי חומת אש.
gcloud compute networks create $networkid \
--project=$projectid \
--subnet-mode=custom \
--mtu=1460 \
--bgp-routing-mode=global

gcloud compute networks subnets create vm-subnet \
--project=$projectid --range=10.0.88.0/24 \
--stack-type=IPV4_ONLY --network=$networkid \
--region=us-east1

gcloud compute firewall-rules create $networkid-allow-icmp --project=$projectid \
--network=$networkid \
--description="Allows ICMP connections from any source to any instance on the network." \
--direction=INGRESS \
--priority=65534 \
--source-ranges=0.0.0.0/0 \
--action=ALLOW \
--rules=icmp

gcloud compute firewall-rules create $networkid-allow-ssh \
--project=$projectid \
--network=$networkid \
--description="Allows TCP connections from any source to any instance on the network using port 22." \
--direction=INGRESS --priority=65534 \
--source-ranges=0.0.0.0/0 --action=ALLOW \
--rules=tcp:22

gcloud compute firewall-rules create $networkid-allow-web \
--project=$projectid \
--network=$networkid \
--description="Allows TCP connections on port 8080." \
--direction=INGRESS --priority=1000 \
--source-ranges=0.0.0.0/0 --action=ALLOW \
--rules=tcp:8080
4. הפעלת Anthropic ב-Vertex Model Garden
אנחנו צריכים להעניק גישה חיצונית לאינטרנט, אז ניצור שער Cloud NAT ונצרף אותו.
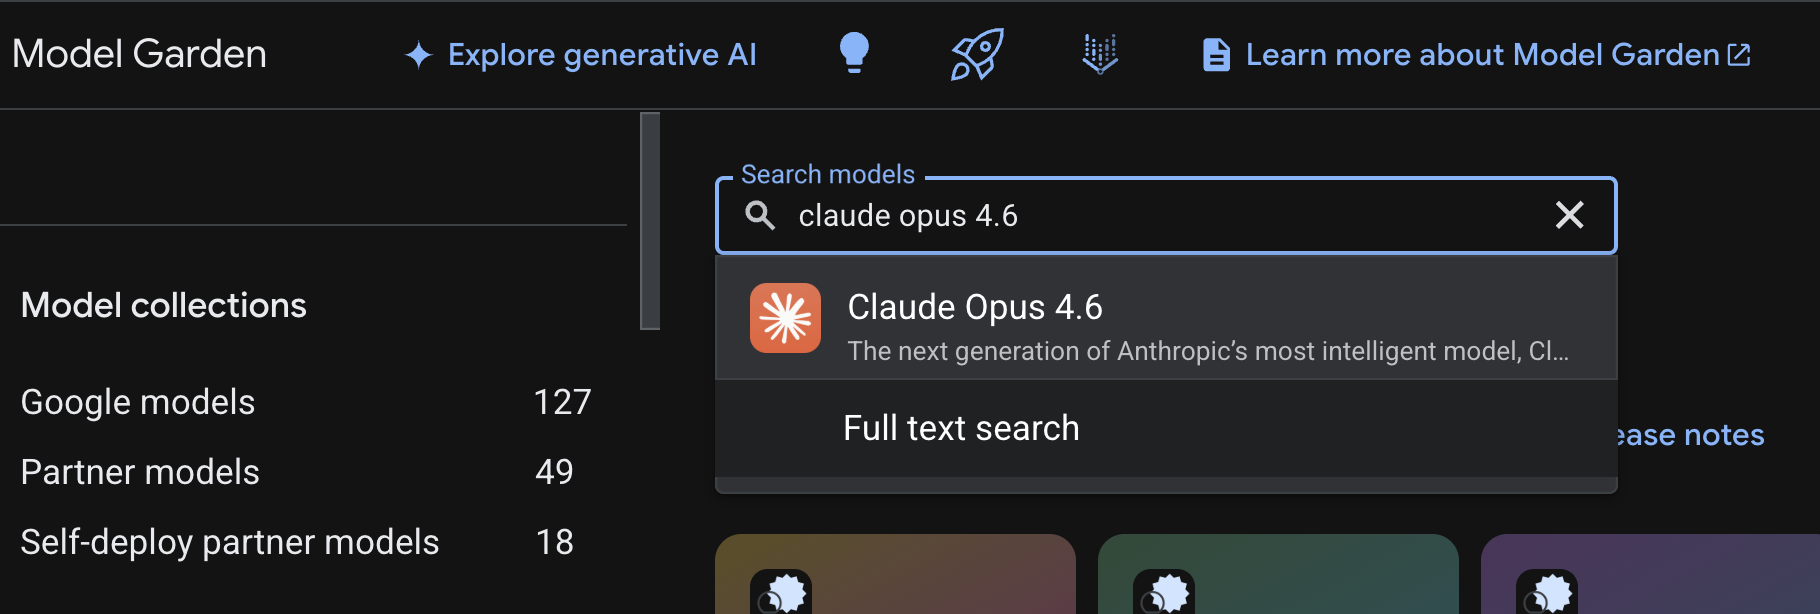
- עוברים אל מרכז הבקרה של Vertex AI ובוחרים באפשרות Model Garden.
- מחפשים את Anthropic ובוחרים באפשרות Claude Opus 4.6.
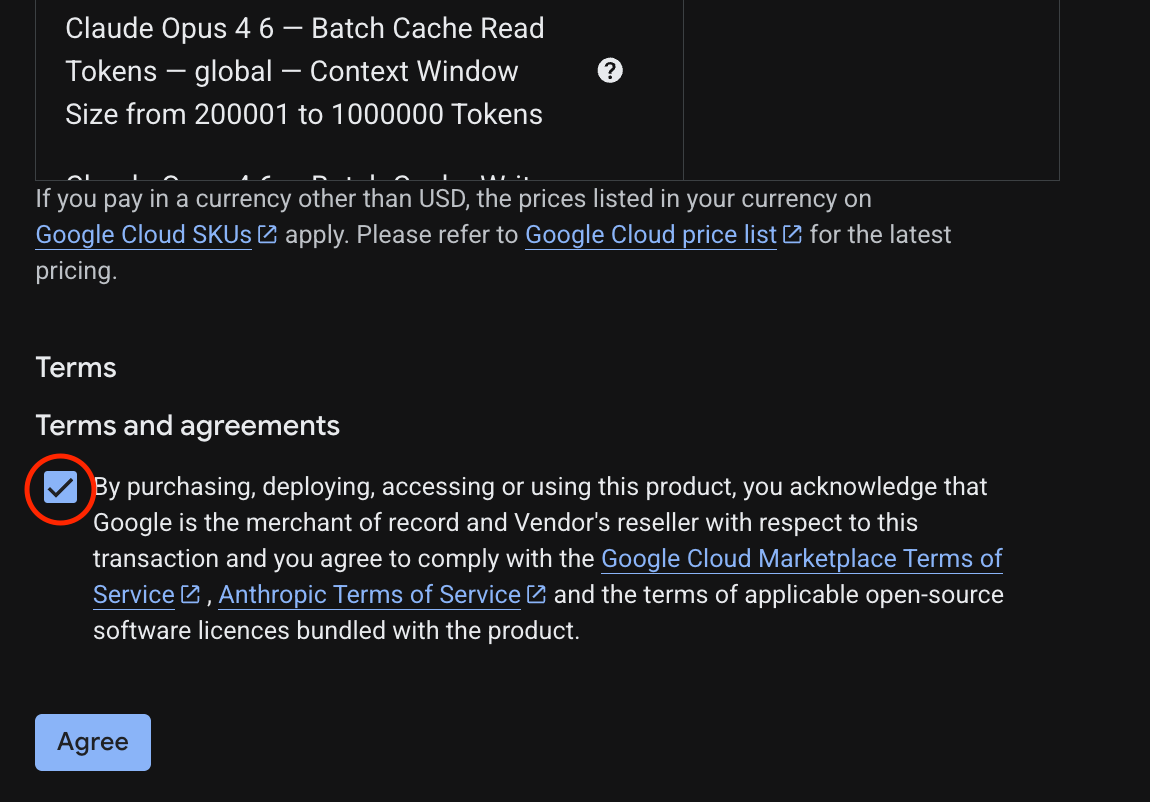
- לוחצים על הפעלה וממלאים את הפרטים הנדרשים בטופס. לאחר מכן לוחצים על הבא.
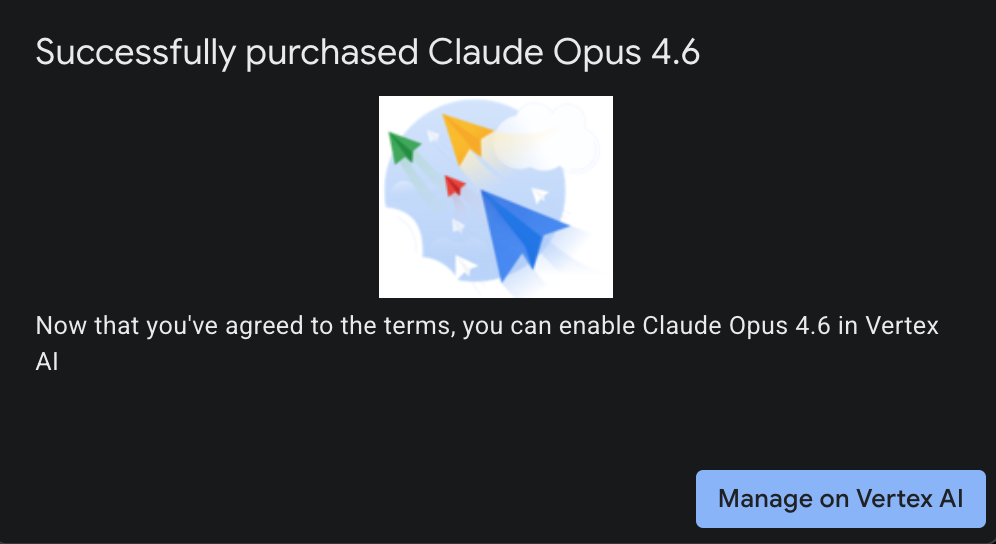
- בדף האחרון, בוחרים באפשרות הסכמה כדי להפעיל את Claude 4.6 Opus.
- יוצג דף ההצלחה.
5. יצירת שער NAT ומכונות וירטואליות
אנחנו צריכים להעניק גישה חיצונית לאינטרנט, אז ניצור שער Cloud NAT ונצרף אותו.
ב-Cloud Shell משתמשים בפקודות הבאות
- יצירת Cloud NAT ושער Cloud NAT
gcloud compute routers create anthro-out-nat \
    --network $networkid \
    --region us-east1

gcloud compute routers nats create anthro-out-nat-gw \
    --router-region us-east1 \
    --router anthro-out-nat \
    --nat-all-subnet-ip-ranges \
    --auto-allocate-nat-external-ips
עכשיו ניצור מכונה וירטואלית אחת כדי לגשת אל Anthropic ב-Vertex AI באמצעות Python SDK.
- באותו סשן של Cloud Shell, יוצרים את anthro-vm באמצעות הפקודה הבאה. (יש להמתין 3-4 דקות עד שהמכונה הווירטואלית תהיה פעילה בזמן שסקריפט לטעינה בזמן ההפעלה מותקן)
gcloud compute instances create anthro-vm \
--project=$projectid \
--zone=us-east1-b \
--network-interface=stack-type=IPV4_ONLY,subnet=vm-subnet,no-address,network=$networkid \
--metadata startup-script="#! /bin/bash
      apt-get update
      apt-get install python3 python3-dev python3-venv tcpdump dnsutils -y
      python3 -m venv /opt/py-anthro-env
      /opt/py-anthro-env/bin/pip install -U google-genai 'anthropic[vertex]' rich
      chmod -R 777 /opt/py-anthro-env"
אמורה להופיע מכונה וירטואלית שנוצרה ללא כתובות IP ציבוריות. עכשיו נגדיר את המכונה הווירטואלית
6. הגדרת מכונה וירטואלית ובדיקה
- ב-Google Cloud Shell, מתחברים ב-SSH למכונה הווירטואלית החדשה שנקראת anthro-vm. (יכול להיות שתצטרכו להמתין 3 דקות כדי לוודא שהמכונה הווירטואלית הוגדרה באופן מלא)
gcloud compute ssh anthro-vm \
    --project=$projectid \
    --zone=us-east1-b \
    --tunnel-through-iap \
    -- -L 8080:localhost:8080
- אחרי החיבור, נבצע בדיקה מהירה כדי לראות אם אפשר להתחבר אל Vertex Gemini API.
dig *-aiplatform.googleapis.com
- אמורה להופיע כותרת דומה (הכתובות יהיו שונות). שימו לב שהנתיב הוא דרך כתובות IP ציבוריות, כי ה-API הוא API ציבורי.
; <<>> DiG 9.18.39-0ubuntu0.24.04.2-Ubuntu <<>> *-aiplatform.googleapis.com
;; global options: +cmd
;; Got answer:
;; ->>HEADER<<- opcode: QUERY, status: NOERROR, id: 3728
;; flags: qr rd ra; QUERY: 1, ANSWER: 16, AUTHORITY: 0, ADDITIONAL: 1

;; OPT PSEUDOSECTION:
; EDNS: version: 0, flags:; udp: 512
;; QUESTION SECTION:
;*-aiplatform.googleapis.com.   IN      A

;; ANSWER SECTION:
*-aiplatform.googleapis.com. 300 IN     A       172.217.204.95
*-aiplatform.googleapis.com. 300 IN     A       172.217.203.95
*-aiplatform.googleapis.com. 300 IN     A       173.194.215.95
*-aiplatform.googleapis.com. 300 IN     A       142.250.98.95
*-aiplatform.googleapis.com. 300 IN     A       173.194.217.95
*-aiplatform.googleapis.com. 300 IN     A       142.251.107.95
*-aiplatform.googleapis.com. 300 IN     A       74.125.196.95
- עכשיו מפעילים את סביבת ה-venv:
source /opt/py-anthro-env/bin/activate
- עכשיו נאמת את זה כדי שנוכל לבצע בדיקות בהמשך. מריצים את הפקודה הבאה במכונת ה-VM ומקישים על y כשמופיעה בקשה.
gcloud auth application-default login
- אחר כך מעתיקים את כתובת ה-URL שמתחילה ב-https://, פותחים כרטיסייה חדשה בחלון הדפדפן של המעבדה ומדביקים את כתובת ה-URL. מאשרים את ההנחיות.
- כשמופיעה האפשרות הבאה, מעתיקים אותה, חוזרים לסשן של מכונת ה-VM anthro-vm ובשדה Enter authorization code: מדביקים את הקוד שהעתקתם ולוחצים על Enter כדי לבצע אימות.

- עכשיו נשתמש ב-Python ב-
env. הפעולה הזו יוצרת קובץ Pythonsuper-gen-ai.pyששואל את Claude Opus 4.6 את השאלה What are the key steps to building Agentic AI? (מהם השלבים העיקריים ליצירת AI אקטיבי?). לאחר מכן, הפלט מועבר ל-Gemini 3.1 Pro, שיוצר סיכום, ואז Gemini 3 Pro Image יוצר תמונה ושומר אותה במכונה הווירטואלית.
מעתיקים ומדביקים את הטקסט הבא.
cat << 'EOF' > super-gen-ai.py
import os
import subprocess
import google.auth
from google import genai
from google.genai import types
from anthropic import AnthropicVertex
from rich.console import Console
from rich.panel import Panel
from rich.spinner import SPINNERS
from rich.text import Text

# Custom Super Me Animation Spinner - Now with moving power-up!
SPINNERS["super_me"] = {
    "interval": 120,
    "frames": [
        "🧱🦖          🍄",
        "🧱 🦖        🍄 ",
        "🧱  🦖      🍄  ",
        "🧱   🦕    🍄   ",
        "🧱    🦖  🍄    ",
        "🧱     🦖🍄     ",
        "🧱      🌟      ",
        "🧱       🌟     ",
        "🧱        🌟    ",
        "🧱         🌟   ",
        "🧱        🌟    ",
        "🧱       🌟     ",
        "🧱      🌟      ",
        "🧱     🌟       ",
        "🧱    🌟        ",
        "🧱   🌟         ",
        "🧱  🌟          ",
        "🧱 🌟           ",
        "🧱🌟            "
    ]
}

console = Console()

def print_super_me_header():
    super_me_art = """
[bold red]   _____                       [/bold red][bold green]  __  __      _ [/bold green]
[bold red]  / ____|                      [/bold red][bold green] |  \/  |    | |[/bold green]
[bold red] | (___  _   _ _ __   ___ _ __ [/bold red][bold green] | \  / | ___| |[/bold green]
[bold red]  \___ \| | | | '_ \ / _ \ '__|[/bold red][bold green] | |\/| |/ _ \ |[/bold green]
[bold red]  ____) | |_| | |_) |  __/ |   [/bold red][bold green] | |  | |  __/_|[/bold green]
[bold red] |_____/ \__,_| .__/ \___|_|   [/bold red][bold green] |_|  |_|\___(_)[/bold green]
[bold red]              | |              [/bold red][bold green]                 [/bold green]
[bold red]              |_|              [/bold red][bold green]                 [/bold green]
    """
    console.print(super_me_art)
    console.rule("[bold gold1]⭐ LEVEL 1-1: Vertex AI Orchestrator ⭐[/bold gold1]")

def main():
    os.system('clear')  # Clears the terminal for a clean UI
    print_super_me_header()

    # Create the images directory
    os.makedirs("images", exist_ok=True)

    with console.status("[bold yellow]🪙  Collecting Coins (Authenticating)...[/bold yellow]", spinner="super_me"):
        try:
            creds, project_id = google.auth.default()
            LOCATION = "global"
        except Exception as e:
            console.print(f"[bold red]💥 GAME OVER! Authentication failed:[/bold red] {e}")
            return

    with console.status(f"[bold green]🍄 Powering up Clients for {project_id}...[/bold green]", spinner="super_me"):
        google_client = genai.Client(vertexai=True, location=LOCATION, project=project_id)
        claude_client = AnthropicVertex(region=LOCATION, project_id=project_id)

    console.print("\n[bold cyan]The Kingdom needs a strategy![/bold cyan]")

    # Auto-run prompt without user interaction
    question = "What are the key steps to building Agentic AI?"

    console.print(Panel(question, title="[bold green]Green Dino (Claude Opus) is entering the pipe...[/bold green]", border_style="green"))

    with console.status("[bold green]🟢 Green Dino is clearing the level...\n[/bold green]", spinner="super_me"):
        try:
            msg = claude_client.messages.create(
                model="claude-opus-4-6",
                max_tokens=2048,
                messages=[{"role": "user", "content": question}]
            )
            claude_text = msg.content[0].text
            console.print(f"[bold green]✓ Level Cleared! Green Dino generated {len(claude_text)} bytes of strategy.[/bold green]\n")
        except Exception as e:
            console.print(f"[bold red]💥 BOSS ATTACK (Claude API Error):[/bold red] {e}")
            return

    with console.status("[bold red]🔴 Red Hero (Gemini 3.1 Pro Preview) is summarizing the map...\n[/bold red]", spinner="super_me"):
        text_prompt = f"""
        I am providing you with a response generated by Claude.
        1. READ the text below.
        2. GENERATE a concise, bulleted executive summary.

        --- INPUT TEXT ---
        {claude_text}
        """

        try:
            text_response = google_client.models.generate_content(
                model="gemini-3.1-pro-preview",
                contents=text_prompt,
                config=types.GenerateContentConfig(temperature=0.7)
            )
            console.print("[bold red]✓ Super Me! Text Summary Complete.[/bold red]")
        except Exception as e:
            console.print(f"[bold red]💥 CHOMPER PLANT (Gemini Text Error):[/bold red] {e}")
            return

    with console.status("[bold blue]🔵 Mushroom Friend (Gemini 3 Pro Image) is painting the castle...\n[/bold blue]", spinner="super_me"):
        image_prompt = f"""
        CREATE a high-quality, futuristic illustration of autonomous AI agents for a tech blog header (16:9 aspect ratio).
        Base the image directly on the following text summary:

        {text_response.text}
        """

        try:
            image_response = google_client.models.generate_content(
                model="gemini-3-pro-image-preview",
                contents=image_prompt,
                config=types.GenerateContentConfig(
                    response_modalities=['TEXT', 'IMAGE'],
                    temperature=0.7
                )
            )
            console.print("[bold blue]✓ Masterpiece Complete![/bold blue]\n")
        except Exception as e:
            console.print(f"[bold red]💥 FALLING BLOCK (Gemini Image Error):[/bold red] {e}")
            return

    console.rule("[bold gold1]🚩 COURSE CLEAR! 🚩[/bold gold1]")

    if text_response.text:
        console.print(Panel(text_response.text.strip(),
                            title="[bold gold1]Gemini 3.1 Pro Summary[/bold gold1]",
                            border_style="gold1"))

    for part in image_response.parts:
        if image := part.as_image():
            # Save inside the images folder with the focus-specific name
            filename = "images/building-agentic.png"
            image.save(filename)
            console.print(f"\n[bold green]✓ REWARD SAVED:[/bold green] [underline]{os.path.abspath(filename)}[/underline]")

    console.rule("[bold red]Web Server Warp Pipe[/bold red]")
    with console.status("[bold yellow]Opening the warp pipe (HTTP server)...[/bold yellow]", spinner="super_me"):
        # Kill any existing server first so it doesn't crash on port binding
        os.system('pkill -f "http.server" > /dev/null 2>&1')

        # Start the server with the root directory set specifically to 'images'
        subprocess.Popen(
            ["python3", "-m", "http.server", "8080", "--directory", "images"],
            stdout=subprocess.DEVNULL,
            stderr=subprocess.DEVNULL
        )

    console.print("[bold green]✓ Warp Pipe is open in the background![/bold green]")
    console.print("[bold magenta]View your files here (Click Web Preview -> Preview on port 8080):[/bold magenta] [underline]http://localhost:8080/[/underline]\n")

if __name__ == "__main__":
    main()
EOF

python3 super-gen-ai.py
הסקריפט פועל בממשק מהנה ומפעיל שרת אינטרנט כדי שתוכלו לראות את פלט התמונה. כדי להריץ שוב את הסקריפט, מקלידים python3 super-gen-ai.py.
- כדי להשתמש באפשרות של תצוגה מקדימה באינטרנט ב-Cloud Shell, בוחרים באפשרות 'תצוגה מקדימה ביציאה 8080'

- בפעילות האינטרנט הפתוחה, בוחרים באפשרות building_agentic.png כדי לראות את התמונה שנוצרה. (תמונה לדוגמה שנוצרה על ידי AI מוצגת בהמשך)

- ב-Cloud Shell, כדי לצאת משרת האינטרנט, מריצים את הפקודה הבאה.
pkill -f "http.server"
- לאחר מכן מקלידים
exitכדי לחזור לדף הבית של Cloud Shell. אחרי שמסיימים, ממשיכים.
7. יצירת נקודת קצה של PSC ל-googleapis
כדי להפעיל קישוריות פרטית לנקודת קצה ל-API של Vertex, ניצור נקודת קצה של Private Service Connect ל-googleapis. כך נוכל להשתמש בכתובת IP פרטית שאנחנו מקצים כדי לנתב תעבורה אל googleapis שאנחנו צריכים, במקרה הזה Vertex Gemini.
- פותחים את Cloud Shell אם הוא לא פתוח. אנחנו ניצור כתובת IP לנקודת הקצה של PSC וניצור את נקודת הקצה של Private Service Connect. במקרה הזה נשתמש בכתובת 192.168.255.230.
projectid=$(gcloud config get-value project)
networkid=anthropic-net

gcloud compute addresses create anthro-ip \
    --global \
    --purpose=PRIVATE_SERVICE_CONNECT \
    --addresses=192.168.255.230 \
    --network=$networkid

gcloud compute forwarding-rules create pscanthrovertex \
    --global \
    --network=$networkid \
    --address=anthro-ip \
    --target-google-apis-bundle=all-apis
- אימות
gcloud compute addresses list --filter="name=( 'anthro-ip' ...)"

gcloud compute forwarding-rules describe pscanthrovertex --global
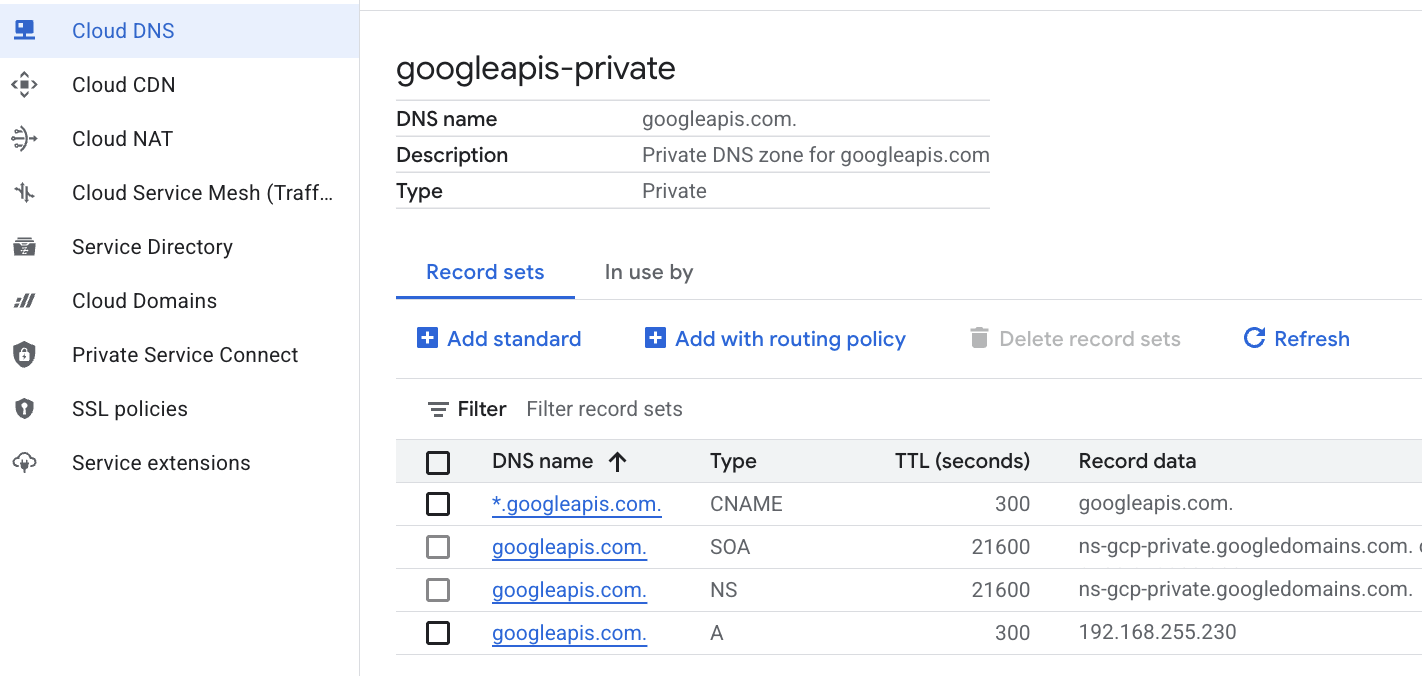
8. יצירת רשומת DNS ידנית ל-googleapis
אפשר ליצור רשומת DNS ידנית כדי להפנות לנקודת הקצה (endpoint) של PSC באמצעות שרת DNS פרטי. השינוי ישפיע על כל הרשתות שמשויכות אליו. עכשיו תיצרו את הפריטים הבאים
- תחום DNS פרטי עבור googleapis.com ומצרפים אותו לרשת anthropic-net.
- רשומת A שממפה את דומיין הבסיס לכתובת ה-IP של נקודת הקצה ב-Private Service Connect (192.168.255.230)
- רשומת CNAME עם תו כללי לחיפוש כדי להפנות אוטומטית את כל תת-הדומיינים (לדוגמה, aiplatform.googleapis.com) לרשומת A של דומיין השורש
- מריצים את הפקודות הבאות ב-Cloud Shell.
gcloud dns managed-zones create googleapis-private \
    --description="Private DNS zone for googleapis.com" \
    --dns-name="googleapis.com." \
    --visibility="private" \
    --networks="anthropic-net"

gcloud dns record-sets create "googleapis.com." \
    --zone="googleapis-private" \
    --type="A" \
    --ttl="300" \
    --rrdatas="192.168.255.230"

gcloud dns record-sets create "*.googleapis.com." \
    --zone="googleapis-private" \
    --type="CNAME" \
    --ttl="300" \
    --rrdatas="googleapis.com."
- מציגים את רשימת קבוצות הרשומות באזור כדי לוודא שרשומת ה-A ורשומת ה-CNAME נוצרו בצורה נכונה.
gcloud dns record-sets list --zone="googleapis-private"
- בתצוגת המסוף, זה אמור להיראות כך. ההגדרה אמורה לכלול רשומת A ורשומת CNAME, כמו בדוגמה הבאה
- לאחר מכן, אנחנו מאמתים את הקישוריות עם השינויים האלה ב-anthro-vm
9. אימות הקישוריות של נקודות קצה באמצעות כתובת IP
נתחבר ל-Gemini באמצעות נקודת הקצה הפרטית.
- ב-Google Cloud Shell, מתחברים באמצעות SSH למכונה הווירטואלית החדשה שנקראת anthro-vm.
gcloud compute ssh anthro-vm \
    --project=$projectid \
    --zone=us-east1-b \
    --tunnel-through-iap \
    -- -L 8080:localhost:8080
- במכונה הווירטואלית, בודקים את נתיב הקישוריות אל aiplatform-pscanthrovertex.p.googleapis.com באמצעות הפקודה
dig. כתובת ה-IP של נקודת הקצה של PSC אמורה להופיע192.168.255.230
dig aiplatform-pscanthrovertex.p.googleapis.com +noall +answer
נתחבר ל-Gemini באמצעות נקודת הקצה הפרטית.
- עכשיו נבצע
digכדי לבדוק אם אפשר להתחבר ל-Vertex Gemini API.
dig *-aiplatform.googleapis.com
- אמורה להופיע כתובת דומה (אבל לא זהה). שימו לב שהנתיב הוא דרך כתובות ה-IP של נקודת הקצה של PSC.
; <<>> DiG 9.18.41-1~deb12u1-Debian <<>> *-aiplatform.googleapis.com
;; global options: +cmd
;; Got answer:
;; ->>HEADER<<- opcode: QUERY, status: NOERROR, id: 33703
;; flags: qr rd ra; QUERY: 1, ANSWER: 2, AUTHORITY: 0, ADDITIONAL: 1

;; OPT PSEUDOSECTION:
; EDNS: version: 0, flags:; udp: 512
;; QUESTION SECTION:
;*-aiplatform.googleapis.com.   IN      A

;; ANSWER SECTION:
*-aiplatform.googleapis.com. 300 IN     CNAME   googleapis.com.
googleapis.com.         300     IN      A       192.168.255.230

;; Query time: 8 msec
;; SERVER: 169.254.169.254#53(169.254.169.254) (UDP)
;; WHEN: Sat Nov 29 15:19:15 UTC 2025
;; MSG SIZE  rcvd: 86
- משתמשים בפקודה
ping. אפשר לעשות בדיקה מהירה. הערה: כתובת ה-IP הזו היא נקודת קצה של PSC, והפינגים שלכם לא יצליחו.
ping -c 2 aiplatform.googleapis.com
- עכשיו מפעילים את סביבת ה-venv:
source /opt/py-anthro-env/bin/activate
- עכשיו נשתמש ב-Python ב-
env. נוצר קובץ Pythonstar-me.pyששולח ל-Claude Opus 4.6 את השאלה Give me a step by step recipe to make a roti for a beginner? (תיתן לי מתכון מפורט להכנת רוטי למתחילים?) אחר כך הוא לוקח את הפלט ומעביר אותו אל Gemini 3.1 pro שיוצר סיכום, ו-Gemini 3 pro image יוצר תמונה ושומר אותה במכונה הווירטואלית
cat << 'EOF' > star-me.py
import os
import subprocess
import google.auth
from google import genai
from google.genai import types
from anthropic import AnthropicVertex
from rich.console import Console
from rich.panel import Panel
from rich.spinner import SPINNERS
from rich.text import Text

# Custom Star Me Animation Spinner - Directional Flight!
SPINNERS["star_me"] = {
    "interval": 120,
    "frames": [
        "🌌 🚀              🛸 ",
        "🌌  🚀            🛸  ",
        "🌌   🚀          🛸   ",
        "🌌    🚀        🛸    ",
        "🌌     🚀      🛸     ",
        "🌌      🚀    🛸      ",
        "🌌       🚀  🛸       ",
        "🌌        🚀🛸        ",
        "🌌         💥         ",
        "🌌        ✨ ✨       ",
        "🌌       ✨   ✨      ",
        "🌌      ✨     ✨     ",
        "🌌     ✨       ✨    ",
        "🌌                    "
    ]
}

console = Console()

def print_star_me_header():
    star_me_art = """
[bold cyan]   _____ _______       _____    __  __ ______ [/bold cyan]
[bold cyan]  / ____|__   __|/\   |  __ \  |  \/  |  ____|[/bold cyan]
[bold cyan] | (___    | |  /  \  | |__) | | \  / | |__   [/bold cyan]
[bold cyan]  \___ \   | | / /\ \ |  _  /  | |\/| |  __|  [/bold cyan]
[bold cyan]  ____) |  | |/ ____ \| | \ \  | |  | | |____ [/bold cyan]
[bold cyan] |_____/   |_/_/    \_\_|  \_\ |_|  |_|______|[/bold cyan]
    """
    console.print(star_me_art)
    console.rule("[bold gold1]⭐ EPISODE I: The AI Awakening ⭐[/bold gold1]")

def main():
    os.system('clear')  # Clears the terminal for a clean UI
    print_star_me_header()

    # Create the images directory
    os.makedirs("images", exist_ok=True)

    with console.status("[bold yellow]🪙  Bypassing Security (Authenticating)...[/bold yellow]", spinner="star_me"):
        try:
            creds, project_id = google.auth.default()
            LOCATION = "global"
        except Exception as e:
            console.print(f"[bold red]💥 COMM LINK SEVERED! Authentication failed:[/bold red] {e}")
            return

    with console.status(f"[bold cyan]📡 Establishing secure connection for {project_id}...[/bold cyan]", spinner="star_me"):
        google_client = genai.Client(vertexai=True, location=LOCATION, project=project_id)
        claude_client = AnthropicVertex(region=LOCATION, project_id=project_id)

    console.print("\n[bold cyan]The Galaxy needs sustenance![/bold cyan]")

    # Auto-run prompt for the recipe
    question = "Give me a step by step recipe to make a roti for a beginner?"

    console.print(Panel(question, title="[bold green]Space Master (Claude Opus) is searching the archives...[/bold green]", border_style="green"))

    with console.status("[bold green]🟢 Space Master is compiling the ancient texts...\n[/bold green]", spinner="star_me"):
        try:
            msg = claude_client.messages.create(
                model="claude-opus-4-6",
                max_tokens=2048,
                messages=[{"role": "user", "content": question}]
            )
            claude_text = msg.content[0].text
            console.print(f"[bold green]✓ Archives Retrieved! Space Master generated a {len(claude_text)}-character Holocron.[/bold green]\n")
        except Exception as e:
            console.print(f"[bold red]💥 INTERFERENCE DETECTED (Claude API Error):[/bold red] {e}")
            return

    with console.status("[bold gold1]🟡 Protocol Bot (Gemini 3.1 Pro Preview) is translating the recipe...\n[/bold gold1]", spinner="star_me"):
        text_prompt = f"""
        I am providing you with a response generated by a Space Master.
        1. READ the text below.
        2. GENERATE a concise, bulleted executive summary.

        --- INPUT TEXT ---
        {claude_text}
        """

        try:
            text_response = google_client.models.generate_content(
                model="gemini-3.1-pro-preview",
                contents=text_prompt,
                config=types.GenerateContentConfig(temperature=0.7)
            )
            console.print("[bold gold1]✓ Translation Complete! The Protocol Bot has summarized the steps.[/bold gold1]")
        except Exception as e:
            console.print(f"[bold red]💥 SYSTEM FAILURE (Gemini Text Error):[/bold red] {e}")
            return

    with console.status("[bold blue]🔵 Astro Bot (Gemini 3 Pro Image) is projecting the hologram...\n[/bold blue]", spinner="star_me"):
        image_prompt = f"""
        CREATE a high-quality, beautiful illustration for a blog header (16:9 aspect ratio) of someone making roti, but with a subtle sci-fi, cinematic lighting aesthetic.
        Base the image directly on the following text summary:

        {text_response.text}
        """

        try:
            image_response = google_client.models.generate_content(
                model="gemini-3-pro-image-preview",
                contents=image_prompt,
                config=types.GenerateContentConfig(
                    response_modalities=['TEXT', 'IMAGE'],
                    temperature=0.7
                )
            )
            console.print("[bold blue]✓ Hologram Projection Ready![/bold blue]\n")
        except Exception as e:
            console.print(f"[bold red]💥 BAD COMPRESSOR (Gemini Image Error):[/bold red] {e}")
            return

    console.rule("[bold cyan]🚩 MISSION ACCOMPLISHED 🚩[/bold cyan]")

    if text_response.text:
        console.print(Panel(text_response.text.strip(),
                            title="[bold gold1]Protocol Bot Recipe Summary[/bold gold1]",
                            border_style="gold1"))

    for part in image_response.parts:
        if image := part.as_image():
            # Save inside the images folder with the focus-specific name
            filename = "images/cookingroti.png"
            image.save(filename)
            console.print(f"\n[bold green]✓ DATA SECURED:[/bold green] [underline]{os.path.abspath(filename)}[/underline]")

    console.rule("[bold cyan]Hyperlink Uplink[/bold cyan]")
    with console.status("[bold yellow]Opening the frequencies (HTTP server)...[/bold yellow]", spinner="star_me"):
        # Kill any existing server first so it doesn't crash on port binding
        os.system('pkill -f "http.server" > /dev/null 2>&1')

        # Start the server with the root directory set specifically to 'images'
        subprocess.Popen(
            ["python3", "-m", "http.server", "8080", "--directory", "images"],
            stdout=subprocess.DEVNULL,
            stderr=subprocess.DEVNULL
        )

    console.print("[bold green]✓ Transmitting on Port 8080![/bold green]")
    console.print("[bold magenta]View your files here (Click Web Preview -> Preview on port 8080):[/bold magenta] [underline]http://localhost:8080/[/underline]\n")

if __name__ == "__main__":
    main()
EOF

python3 star-me.py
הסקריפט פועל בממשק מהנה ומפעיל שרת אינטרנט כדי שתוכלו לראות את פלט התמונה. כדי להריץ שוב את הסקריפט, מקלידים python3 star-me.py
- עכשיו עוברים לאפשרות של תצוגה מקדימה באינטרנט ב-Cloud Shell, בוחרים באפשרות של תצוגה מקדימה ביציאה 8080
- בוחרים באפשרות cookingroti.png כדי לראות את התמונה שנוצרה. (דוגמה שנוצרה על ידי AI)

- כדי לצאת משרת האינטרנט ולחזור למכונה הווירטואלית ב-Cloud Shell, מריצים את הפקודה הבאה.
pkill -f "http.server"
- לאחר מכן מקלידים
exitכדי לחזור לדף הבית של Cloud Shell.
10. מזל טוב
מזל טוב! נהניתם והצלחתם להתחבר אל Anthropic Claude Opus 4.6 ו-Gemini 3.1 Pro ב-Vertex באמצעות כתובת API ציבורית וגם באופן פרטי באמצעות נקודת קצה (endpoint) של Private Service Connect ל-Googleapis. הפונקציונליות הזו יכולה להרחיב את הקישוריות הפרטית של ה-API לסביבה המקומית או לסביבת ענן אחרת שמחוברת באמצעות (Interconnect, Cross-Cloud Interconnect ו-VPC).
הסרת המשאבים
gcloud compute instances delete anthro-vm --zone=us-east1-b --quiet

gcloud compute routers nats delete anthro-out-nat-gw --router=anthro-out-nat --region=us-east1 --quiet

gcloud compute routers delete anthro-out-nat --region=us-east1 --quiet

gcloud compute firewall-rules delete anthropic-net-allow-icmp anthropic-net-allow-ssh anthropic-net-allow-web --quiet

gcloud compute forwarding-rules delete pscanthrovertex --global --quiet

gcloud dns record-sets delete googleapis.com. --zone googleapis-private --type A --quiet

gcloud dns record-sets delete *.googleapis.com --zone googleapis-private --type CNAME --quiet

gcloud dns managed-zones delete googleapis-private --quiet

gcloud compute addresses delete anthro-ip --global --quiet

gcloud compute networks subnets delete vm-subnet --region=us-east1 --quiet

gcloud compute networks delete anthropic-net --quiet
השלבים הבאים / מידע נוסף
מידע נוסף על רשתות ב-Vertex AI
Codelab: גישה לצ'אט ב-Gemini 3 Pro באמצעות Python SDK דרך נקודת קצה (endpoint) של Private Service Connect
Codelab: יצירה של סוכני AI באמצעות ADK:עקרונות היסוד
אל שיעור ה-Lab הבא
אתם יכולים להמשיך את יחידת ה-Quest ב-Google Cloud או לנסות את שיעורי ה-Lab הבאים של Google Cloud Skills Boost: