
1. खास जानकारी
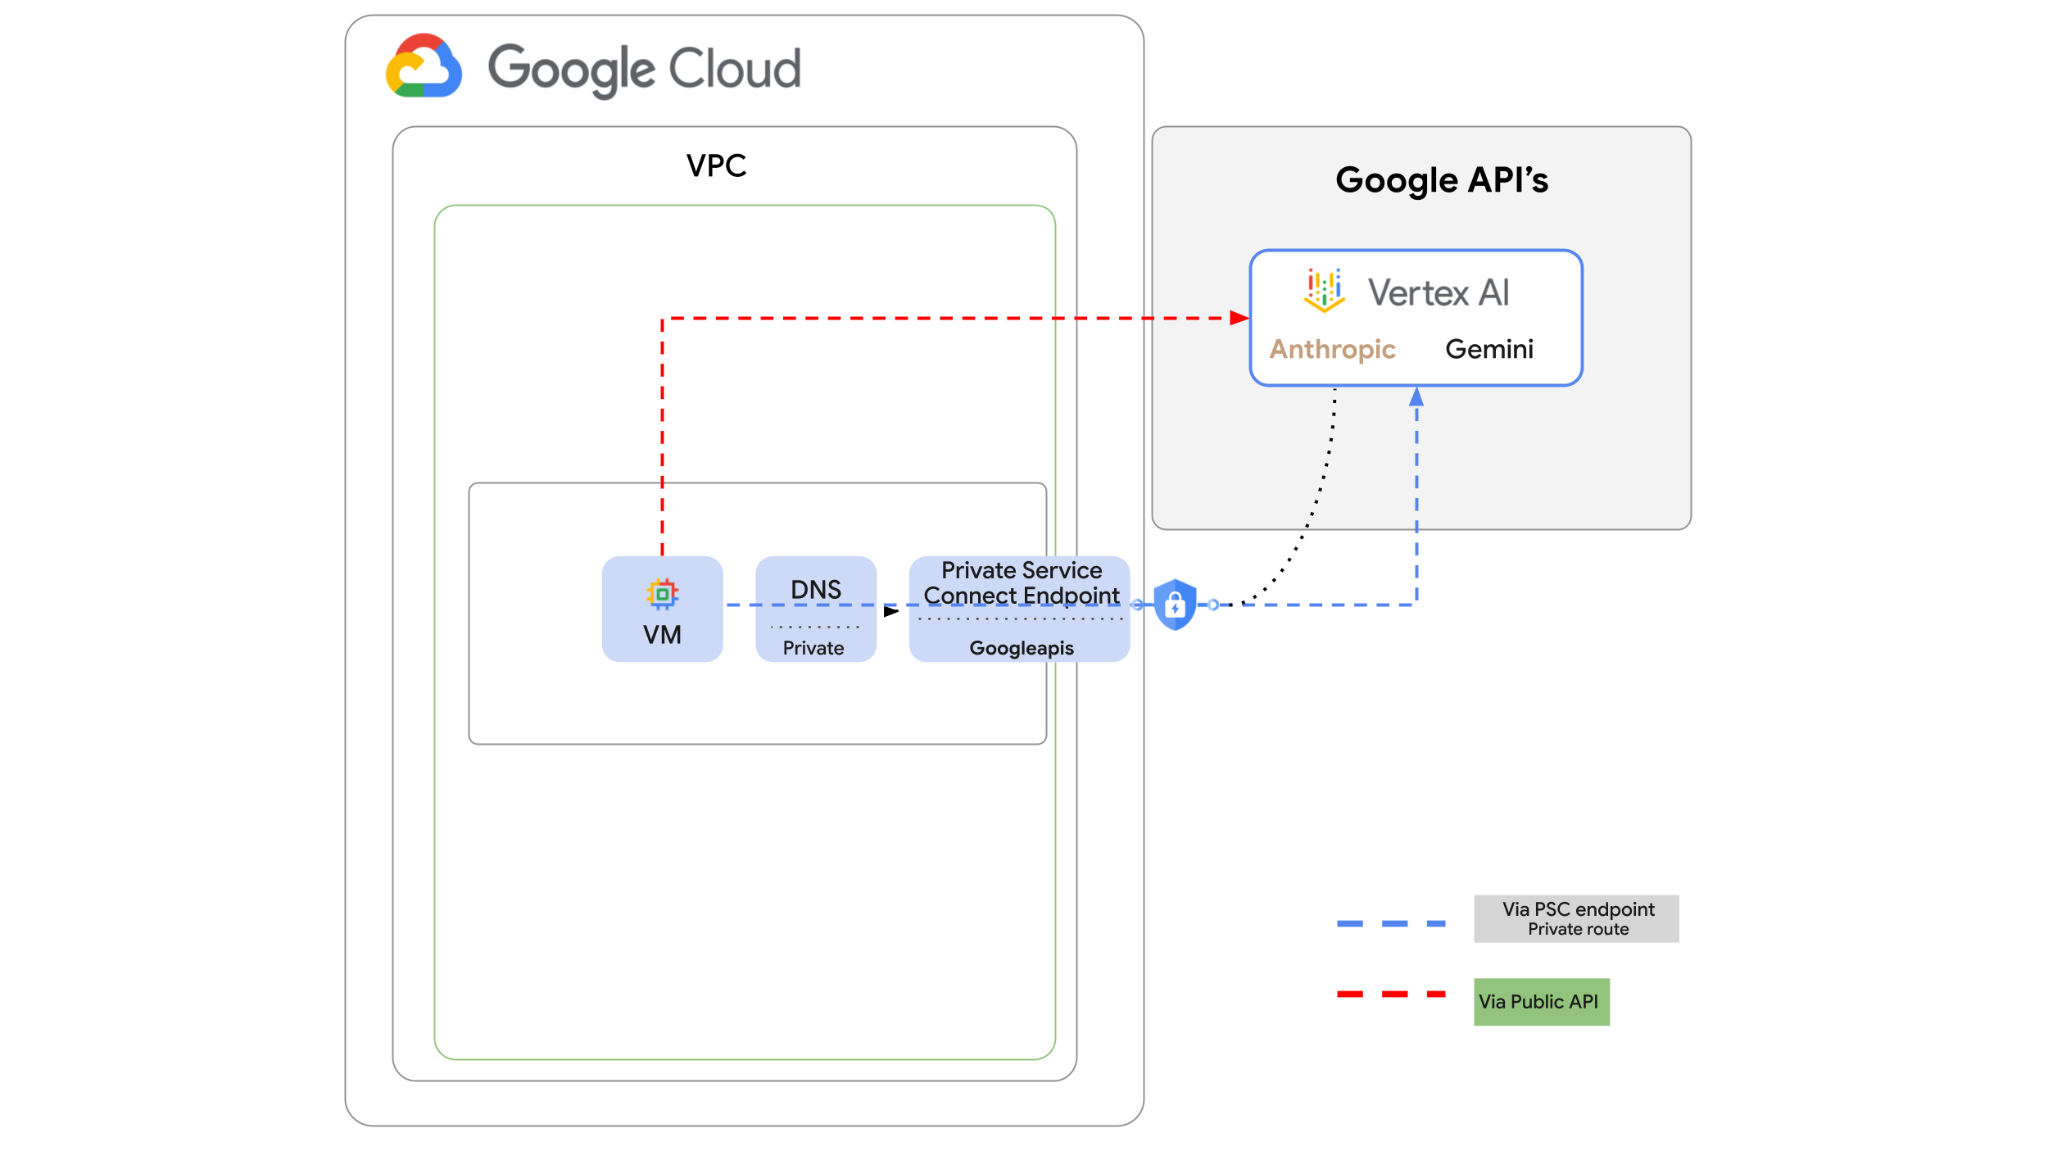
Vertex AI API को इंटरनेट पर ऐक्सेस किया जा सकता है. हालांकि, आपकी कंपनी में Vertex AI API को इंटरनेट पर ऐक्सेस किए बिना, निजी तौर पर ऐक्सेस किया जा सकता है. इस लैब में, सबसे पहले आपको सार्वजनिक इंटरनेट के ज़रिए वीएम इंस्टेंस पर चल रहे Python SDK की मदद से, Vertex पर Anthropic Claude Opus 4.6 और Gemini 3.1 Pro को ऐक्सेस करना होगा.
इसके बाद, Googleapis के लिए Private Service Connect एंडपॉइंट बनाया जाएगा. साथ ही, Vertex API से कनेक्ट करने के लिए, ट्रैफ़िक फ़्लो को बदलकर प्राइवेट एंडपॉइंट का इस्तेमाल किया जाएगा.
Python कोड का यह सैंपल, इनपुट के तौर पर मिले सवालों को लेगा. इसके बाद, Claude Opus को जवाब जनरेट करने के लिए पास करेगा. इस आउटपुट को Gemini 3 को पास किया जाएगा, ताकि वह टेक्स्ट की खास जानकारी बना सके और इमेज जनरेट कर सके.
इस लैब में, आपको यह पैटर्न बनाना है.
इमेज 1.
2. मकसद
इस लैब में, आपको यह काम करने का तरीका बताया जाएगा:
- Python SDK का इस्तेमाल करने के लिए, वीएम इंस्टेंस सेट अप करना
- Vertex AI में Anthropic मॉडल कार्ड की सुविधा चालू करना
- Python स्क्रिप्ट के ज़रिए, Anthropic Claude Opus 4.6 और Gemini 3.1 Pro से कनेक्ट करना
- Googleapis से कनेक्ट करने के लिए, पीएससी एंडपॉइंट कॉन्फ़िगर करना
- डीएनएस की मैन्युअल एंट्री कॉन्फ़िगर करना
- Googleais से कनेक्टिविटी के पाथ की पुष्टि करना
- मॉडल से क्वेरी करने के लिए, Python स्क्रिप्ट को एक्ज़ीक्यूट करना
लैब सेटअप करना
अपने हिसाब से एनवायरमेंट सेट अप करना
- Google Cloud Console में साइन इन करें और नया प्रोजेक्ट बनाएं या किसी मौजूदा प्रोजेक्ट का फिर से इस्तेमाल करें. अगर आपके पास पहले से कोई Gmail या Google Workspace खाता नहीं है, तो आपको एक खाता बनाना होगा.

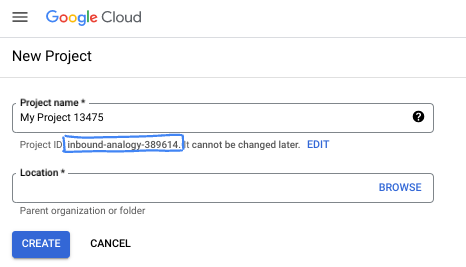
- प्रोजेक्ट का नाम, इस प्रोजेक्ट में हिस्सा लेने वाले लोगों के लिए डिसप्ले नेम होता है. यह एक वर्ण स्ट्रिंग है, जिसका इस्तेमाल Google API नहीं करते. इसे कभी भी अपडेट किया जा सकता है.
- प्रोजेक्ट आईडी, सभी Google Cloud प्रोजेक्ट के लिए यूनीक होता है. साथ ही, इसे बदला नहीं जा सकता. Cloud Console, यूनीक स्ट्रिंग को अपने-आप जनरेट करता है. आम तौर पर, आपको इससे कोई फ़र्क़ नहीं पड़ता कि यह क्या है. ज़्यादातर कोडलैब में, आपको अपने प्रोजेक्ट आईडी (आम तौर पर
PROJECT_IDके तौर पर पहचाना जाता है) का रेफ़रंस देना होगा. अगर आपको जनरेट किया गया आईडी पसंद नहीं है, तो कोई दूसरा रैंडम आईडी जनरेट किया जा सकता है. इसके अलावा, आपके पास अपना नाम आज़माने का विकल्प भी है. इससे आपको पता चलेगा कि वह नाम उपलब्ध है या नहीं. इस चरण के बाद, इसे बदला नहीं जा सकता. यह प्रोजेक्ट की अवधि तक बना रहता है. - आपकी जानकारी के लिए बता दें कि एक तीसरी वैल्यू भी होती है, जिसे प्रोजेक्ट नंबर कहते हैं. इसका इस्तेमाल कुछ एपीआई करते हैं. इन तीनों वैल्यू के बारे में ज़्यादा जानने के लिए, दस्तावेज़ देखें.
- इसके बाद, आपको Cloud Console में बिलिंग चालू करनी होगी, ताकि Cloud संसाधनों/एपीआई का इस्तेमाल किया जा सके. इस कोडलैब को पूरा करने में ज़्यादा समय नहीं लगेगा. इस ट्यूटोरियल के बाद बिलिंग से बचने के लिए, संसाधनों को बंद किया जा सकता है. इसके लिए, बनाए गए संसाधनों को मिटाएं या प्रोजेक्ट को मिटाएं. Google Cloud के नए उपयोगकर्ताओं को, 300 डॉलर का क्रेडिट मिलेगा. वे इसे मुफ़्त में आज़मा सकते हैं.
Cloud Shell शुरू करें
Google Cloud को अपने लैपटॉप से रिमोटली ऐक्सेस किया जा सकता है. हालांकि, इस कोडलैब में Google Cloud Shell का इस्तेमाल किया जाएगा. यह क्लाउड में चलने वाला कमांड लाइन एनवायरमेंट है.
Google Cloud Console में, सबसे ऊपर दाएं कोने में मौजूद टूलबार पर, Cloud Shell आइकॉन पर क्लिक करें:

इसे चालू करने और एनवायरमेंट से कनेक्ट करने में सिर्फ़ कुछ सेकंड लगेंगे. यह प्रोसेस पूरी होने के बाद, आपको कुछ ऐसा दिखेगा:

इस वर्चुअल मशीन में, डेवलपमेंट के लिए ज़रूरी सभी टूल पहले से मौजूद होते हैं. यह 5 जीबी की होम डायरेक्ट्री उपलब्ध कराता है. साथ ही, Google Cloud पर काम करता है. इससे नेटवर्क की परफ़ॉर्मेंस और पुष्टि करने की प्रोसेस बेहतर होती है. इस कोडलैब में मौजूद सभी टास्क, ब्राउज़र में किए जा सकते हैं. आपको कुछ भी इंस्टॉल करने की ज़रूरत नहीं है.
3. सेटअप एनवायरमेंट
हम फ़ायरवॉल के नियमों के साथ एक कस्टम वीपीसी बनाएंगे. अगर आपके पास पहले से ही वीपीसी और प्रोजेक्ट है, तो इस हिस्से को छोड़ा जा सकता है.
अपनी कंसोल स्क्रीन पर सबसे ऊपर दाईं ओर मौजूद Cloud Shell खोलें. इसके बाद, इसे इस तरह कॉन्फ़िगर करें: 
- इस लैब में इस्तेमाल की जाने वाली कुछ एपीआई चालू करें
gcloud services enable dns.googleapis.com
gcloud services enable aiplatform.googleapis.com
gcloud services enable servicedirectory.googleapis.com
- कुछ वैरिएबल सेट करें. ये वैरिएबल, कस्टम वीपीसी के प्रोजेक्ट आईडी और नेटवर्क आईडी होते हैं. आपको चौथे चरण में वीपीसी बनाना होगा.
projectid=$(gcloud config get-value project)
networkid=anthropic-net
echo $projectid
echo $networkid
- अब कस्टम वीपीसी (anthropic-net), सबनेट (vm1-subnet), और फ़ायरवॉल के नियम बनाएं
gcloud compute networks create $networkid \
--project=$projectid \
--subnet-mode=custom \
--mtu=1460 \
--bgp-routing-mode=global

gcloud compute networks subnets create vm-subnet \
--project=$projectid --range=10.0.88.0/24 \
--stack-type=IPV4_ONLY --network=$networkid \
--region=us-east1

gcloud compute firewall-rules create $networkid-allow-icmp --project=$projectid \
--network=$networkid \
--description="Allows ICMP connections from any source to any instance on the network." \
--direction=INGRESS \
--priority=65534 \
--source-ranges=0.0.0.0/0 \
--action=ALLOW \
--rules=icmp

gcloud compute firewall-rules create $networkid-allow-ssh \
--project=$projectid \
--network=$networkid \
--description="Allows TCP connections from any source to any instance on the network using port 22." \
--direction=INGRESS --priority=65534 \
--source-ranges=0.0.0.0/0 --action=ALLOW \
--rules=tcp:22

gcloud compute firewall-rules create $networkid-allow-web \
--project=$projectid \
--network=$networkid \
--description="Allows TCP connections on port 8080." \
--direction=INGRESS --priority=1000 \
--source-ranges=0.0.0.0/0 --action=ALLOW \
--rules=tcp:8080
4. Vertex Model Garden में Anthropic को चालू करना
हमें इंटरनेट के लिए आउटबाउंड बाहरी ऐक्सेस देना होगा. इसलिए, Cloud NAT गेटवे बनाते हैं और उसे अटैच करते हैं.
- Vertex AI डैशबोर्ड पर जाएं और Model Garden चुनें
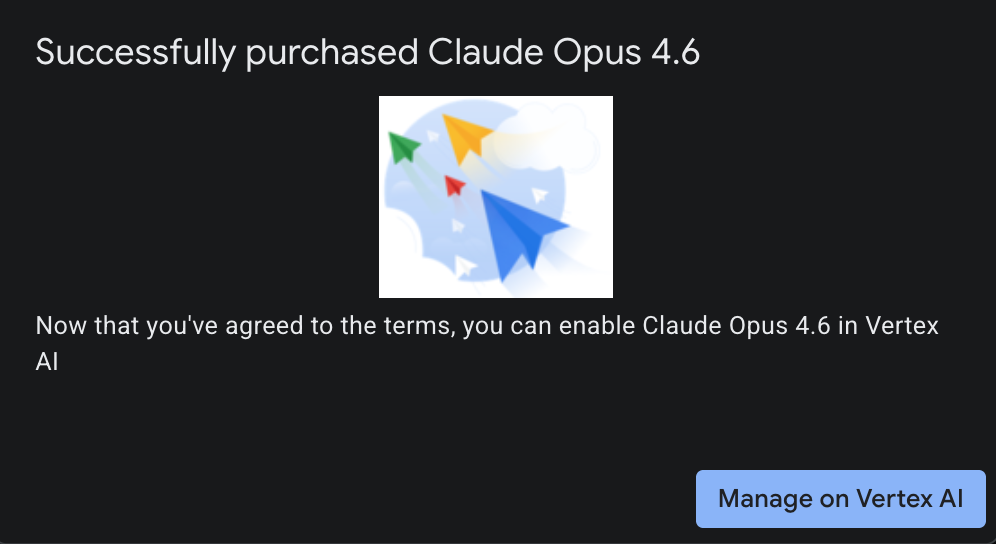
- Anthropic खोजें और Claude Opus 4.6 चुनें

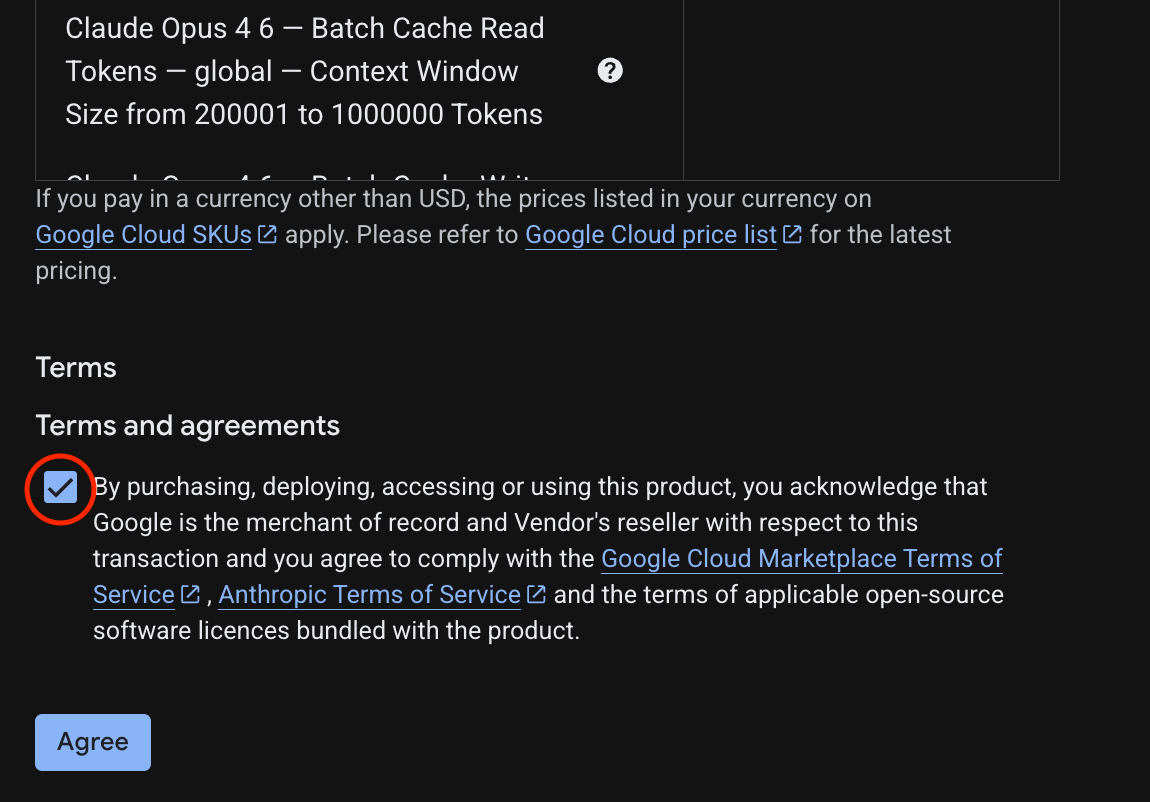
- चालू करें को चुनें. इसके बाद, आपको कुछ जानकारी भरनी होगी. फ़ॉर्म भरें और आगे बढ़ें को चुनें
- Claude 4.6 Opus को चालू करने के लिए, आखिरी पेज पर सहमत हूं को चुनें
- आपको 'हो गया' पेज दिखेगा.
5. NAT गेटवे और वीएम बनाना
हमें इंटरनेट के लिए आउटबाउंड बाहरी ऐक्सेस देना होगा. इसलिए, Cloud NAT गेटवे बनाते हैं और उसे अटैच करते हैं.
Cloud Shell में इन कमांड का इस्तेमाल करें
- Cloud NAT और Cloud NAT गेटवे बनाना
gcloud compute routers create anthro-out-nat \
    --network $networkid \
    --region us-east1

gcloud compute routers nats create anthro-out-nat-gw \
    --router-region us-east1 \
    --router anthro-out-nat \
    --nat-all-subnet-ip-ranges \
    --auto-allocate-nat-external-ips
अब Python SDK के ज़रिए, Vertex AI पर Anthropic को ऐक्सेस करने के लिए एक वीएम बनाते हैं.
- एक ही Cloud Shell सेशन में, नीचे दिए गए निर्देशों का इस्तेमाल करके anthro-vm बनाएं. (स्टार्टअप स्क्रिप्ट इंस्टॉल होने के दौरान, कृपया वीएम को चालू होने में तीन से चार मिनट दें)
gcloud compute instances create anthro-vm \
--project=$projectid \
--zone=us-east1-b \
--network-interface=stack-type=IPV4_ONLY,subnet=vm-subnet,no-address,network=$networkid \
--metadata startup-script="#! /bin/bash
      apt-get update
      apt-get install python3 python3-dev python3-venv tcpdump dnsutils -y
      python3 -m venv /opt/py-anthro-env
      /opt/py-anthro-env/bin/pip install -U google-genai 'anthropic[vertex]' rich
      chmod -R 777 /opt/py-anthro-env"
आपको बिना किसी सार्वजनिक आईपी पते के बनाई गई वीएम दिखनी चाहिए. अब हम वीएम को कॉन्फ़िगर करते हैं
6. वीएम को कॉन्फ़िगर करना और उसकी जांच करना
- Google Cloud Shell में, anthro-vm नाम की नई वीएम में एसएसएच करने की सुविधा मिलती है. (वीएम के पूरी तरह से सेट अप होने के लिए, आपको तीन मिनट इंतज़ार करना पड़ सकता है)
gcloud compute ssh anthro-vm \
    --project=$projectid \
    --zone=us-east1-b \
    --tunnel-through-iap \
    -- -L 8080:localhost:8080
- कनेक्ट होने के बाद, आइए एक छोटा सा टेस्ट करके देखें कि हम Vertex Gemini API से कनेक्ट हो सकते हैं या नहीं.
dig *-aiplatform.googleapis.com
- आपको कुछ ऐसा दिखेगा (पते अलग-अलग होंगे). ध्यान दें कि एपीआई एक सार्वजनिक एपीआई है. इसलिए, पाथ सार्वजनिक आईपी पतों के ज़रिए होता है.
; <<>> DiG 9.18.39-0ubuntu0.24.04.2-Ubuntu <<>> *-aiplatform.googleapis.com
;; global options: +cmd
;; Got answer:
;; ->>HEADER<<- opcode: QUERY, status: NOERROR, id: 3728
;; flags: qr rd ra; QUERY: 1, ANSWER: 16, AUTHORITY: 0, ADDITIONAL: 1

;; OPT PSEUDOSECTION:
; EDNS: version: 0, flags:; udp: 512
;; QUESTION SECTION:
;*-aiplatform.googleapis.com.   IN      A

;; ANSWER SECTION:
*-aiplatform.googleapis.com. 300 IN     A       172.217.204.95
*-aiplatform.googleapis.com. 300 IN     A       172.217.203.95
*-aiplatform.googleapis.com. 300 IN     A       173.194.215.95
*-aiplatform.googleapis.com. 300 IN     A       142.250.98.95
*-aiplatform.googleapis.com. 300 IN     A       173.194.217.95
*-aiplatform.googleapis.com. 300 IN     A       142.251.107.95
*-aiplatform.googleapis.com. 300 IN     A       74.125.196.95
- अब अपना venv एनवायरमेंट चालू करें:
source /opt/py-anthro-env/bin/activate
- अब इसकी पुष्टि करते हैं, ताकि बाद में कुछ टेस्टिंग की जा सके. वीएम में यहां दिया गया निर्देश चलाएं. जब कहा जाए, तब y दबाएं.
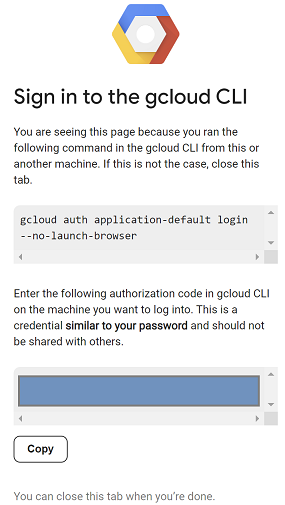
gcloud auth application-default login
- इसके बाद, https:// से शुरू होने वाले यूआरएल को कॉपी करें. अपने लैब ब्राउज़र विंडो में एक नया टैब खोलें और यूआरएल चिपकाएं. प्रॉम्प्ट स्वीकार करें.
- जब आपको यह दिखे, तो कॉपी करें को चुनें. इसके बाद, anthro-vm सेशन पर वापस जाएं. Enter authorization code: के लिए, कॉपी किया गया कोड चिपकाएं और पुष्टि करने के लिए Enter दबाएं.
- अब हम अपने
envमें Python का इस्तेमाल करेंगे. इससे एक Python फ़ाइलsuper-gen-ai.pyबनती है. इसमें Claude Opus 4.6 से पूछा जाता है कि "एजेंटिक एआई बनाने के मुख्य चरण क्या हैं?" इसके बाद, यह आउटपुट लेता है और इसे Gemini 3.1 Pro को भेजता है. यह मॉडल, खास जानकारी तैयार करता है. इसके बाद, Gemini 3 Pro इमेज एक इमेज जनरेट करता है और इसे वीएम पर सेव करता है.
यहां दिए गए टेक्स्ट को कॉपी करके चिपकाएं.
cat << 'EOF' > super-gen-ai.py
import os
import subprocess
import google.auth
from google import genai
from google.genai import types
from anthropic import AnthropicVertex
from rich.console import Console
from rich.panel import Panel
from rich.spinner import SPINNERS
from rich.text import Text

# Custom Super Me Animation Spinner - Now with moving power-up!
SPINNERS["super_me"] = {
    "interval": 120,
    "frames": [
        "🧱🦖          🍄",
        "🧱 🦖        🍄 ",
        "🧱  🦖      🍄  ",
        "🧱   🦕    🍄   ",
        "🧱    🦖  🍄    ",
        "🧱     🦖🍄     ",
        "🧱      🌟      ",
        "🧱       🌟     ",
        "🧱        🌟    ",
        "🧱         🌟   ",
        "🧱        🌟    ",
        "🧱       🌟     ",
        "🧱      🌟      ",
        "🧱     🌟       ",
        "🧱    🌟        ",
        "🧱   🌟         ",
        "🧱  🌟          ",
        "🧱 🌟           ",
        "🧱🌟            "
    ]
}

console = Console()

def print_super_me_header():
    super_me_art = """
[bold red]   _____                       [/bold red][bold green]  __  __      _ [/bold green]
[bold red]  / ____|                      [/bold red][bold green] |  \/  |    | |[/bold green]
[bold red] | (___  _   _ _ __   ___ _ __ [/bold red][bold green] | \  / | ___| |[/bold green]
[bold red]  \___ \| | | | '_ \ / _ \ '__|[/bold red][bold green] | |\/| |/ _ \ |[/bold green]
[bold red]  ____) | |_| | |_) |  __/ |   [/bold red][bold green] | |  | |  __/_|[/bold green]
[bold red] |_____/ \__,_| .__/ \___|_|   [/bold red][bold green] |_|  |_|\___(_)[/bold green]
[bold red]              | |              [/bold red][bold green]                 [/bold green]
[bold red]              |_|              [/bold red][bold green]                 [/bold green]
    """
    console.print(super_me_art)
    console.rule("[bold gold1]⭐ LEVEL 1-1: Vertex AI Orchestrator ⭐[/bold gold1]")

def main():
    os.system('clear')  # Clears the terminal for a clean UI
    print_super_me_header()

    # Create the images directory
    os.makedirs("images", exist_ok=True)

    with console.status("[bold yellow]🪙  Collecting Coins (Authenticating)...[/bold yellow]", spinner="super_me"):
        try:
            creds, project_id = google.auth.default()
            LOCATION = "global"
        except Exception as e:
            console.print(f"[bold red]💥 GAME OVER! Authentication failed:[/bold red] {e}")
            return

    with console.status(f"[bold green]🍄 Powering up Clients for {project_id}...[/bold green]", spinner="super_me"):
        google_client = genai.Client(vertexai=True, location=LOCATION, project=project_id)
        claude_client = AnthropicVertex(region=LOCATION, project_id=project_id)

    console.print("\n[bold cyan]The Kingdom needs a strategy![/bold cyan]")

    # Auto-run prompt without user interaction
    question = "What are the key steps to building Agentic AI?"

    console.print(Panel(question, title="[bold green]Green Dino (Claude Opus) is entering the pipe...[/bold green]", border_style="green"))

    with console.status("[bold green]🟢 Green Dino is clearing the level...\n[/bold green]", spinner="super_me"):
        try:
            msg = claude_client.messages.create(
                model="claude-opus-4-6",
                max_tokens=2048,
                messages=[{"role": "user", "content": question}]
            )
            claude_text = msg.content[0].text
            console.print(f"[bold green]✓ Level Cleared! Green Dino generated {len(claude_text)} bytes of strategy.[/bold green]\n")
        except Exception as e:
            console.print(f"[bold red]💥 BOSS ATTACK (Claude API Error):[/bold red] {e}")
            return

    with console.status("[bold red]🔴 Red Hero (Gemini 3.1 Pro Preview) is summarizing the map...\n[/bold red]", spinner="super_me"):
        text_prompt = f"""
        I am providing you with a response generated by Claude.
        1. READ the text below.
        2. GENERATE a concise, bulleted executive summary.

        --- INPUT TEXT ---
        {claude_text}
        """

        try:
            text_response = google_client.models.generate_content(
                model="gemini-3.1-pro-preview",
                contents=text_prompt,
                config=types.GenerateContentConfig(temperature=0.7)
            )
            console.print("[bold red]✓ Super Me! Text Summary Complete.[/bold red]")
        except Exception as e:
            console.print(f"[bold red]💥 CHOMPER PLANT (Gemini Text Error):[/bold red] {e}")
            return

    with console.status("[bold blue]🔵 Mushroom Friend (Gemini 3 Pro Image) is painting the castle...\n[/bold blue]", spinner="super_me"):
        image_prompt = f"""
        CREATE a high-quality, futuristic illustration of autonomous AI agents for a tech blog header (16:9 aspect ratio).
        Base the image directly on the following text summary:

        {text_response.text}
        """

        try:
            image_response = google_client.models.generate_content(
                model="gemini-3-pro-image-preview",
                contents=image_prompt,
                config=types.GenerateContentConfig(
                    response_modalities=['TEXT', 'IMAGE'],
                    temperature=0.7
                )
            )
            console.print("[bold blue]✓ Masterpiece Complete![/bold blue]\n")
        except Exception as e:
            console.print(f"[bold red]💥 FALLING BLOCK (Gemini Image Error):[/bold red] {e}")
            return

    console.rule("[bold gold1]🚩 COURSE CLEAR! 🚩[/bold gold1]")

    if text_response.text:
        console.print(Panel(text_response.text.strip(),
                            title="[bold gold1]Gemini 3.1 Pro Summary[/bold gold1]",
                            border_style="gold1"))

    for part in image_response.parts:
        if image := part.as_image():
            # Save inside the images folder with the focus-specific name
            filename = "images/building-agentic.png"
            image.save(filename)
            console.print(f"\n[bold green]✓ REWARD SAVED:[/bold green] [underline]{os.path.abspath(filename)}[/underline]")

    console.rule("[bold red]Web Server Warp Pipe[/bold red]")
    with console.status("[bold yellow]Opening the warp pipe (HTTP server)...[/bold yellow]", spinner="super_me"):
        # Kill any existing server first so it doesn't crash on port binding
        os.system('pkill -f "http.server" > /dev/null 2>&1')

        # Start the server with the root directory set specifically to 'images'
        subprocess.Popen(
            ["python3", "-m", "http.server", "8080", "--directory", "images"],
            stdout=subprocess.DEVNULL,
            stderr=subprocess.DEVNULL
        )

    console.print("[bold green]✓ Warp Pipe is open in the background![/bold green]")
    console.print("[bold magenta]View your files here (Click Web Preview -> Preview on port 8080):[/bold magenta] [underline]http://localhost:8080/[/underline]\n")

if __name__ == "__main__":
    main()
EOF

python3 super-gen-ai.py
यह स्क्रिप्ट, मज़ेदार इंटरफ़ेस में चलती है और एक वेब सर्वर लॉन्च करती है, ताकि आपको इमेज का आउटपुट दिख सके. स्क्रिप्ट को फिर से चलाने के लिए, python3 super-gen-ai.py टाइप करें.
- Cloud Shell में वेब प्रीव्यू के विकल्प के लिए, पोर्ट 8080 पर प्रीव्यू करें
 को चुनें
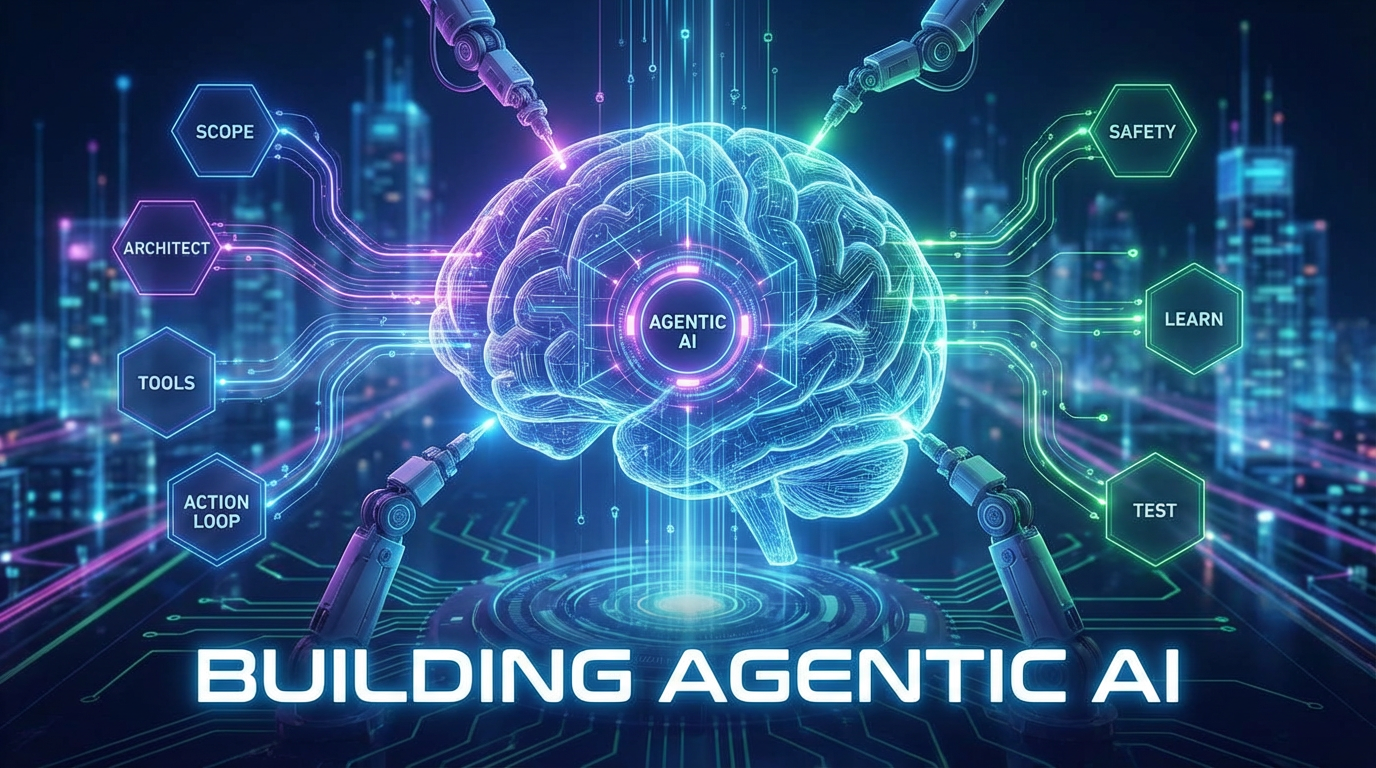
 - खुले हुए वेब सेशन में, जनरेट की गई इमेज देखने के लिए building_agentic.png को चुनें. (नीचे दी गई सैंपल इमेज, एआई से जनरेट की गई है)
- वेब सर्वर से बाहर निकलने के लिए, Cloud Shell में यह कमांड चलाएं.
pkill -f "http.server"
- Cloud Shell होम पर वापस जाने के लिए,
exitटाइप करें. यह प्रोसेस पूरी होने के बाद, आगे बढ़ते हैं.
7. googleapis के लिए पीएससी एंडपॉइंट बनाना
Vertex API एंडपॉइंट से निजी तौर पर कनेक्ट करने के लिए, हम googleapis के लिए Private Service Connect एंडपॉइंट बनाएंगे. इससे हमें एक निजी आईपी पते का इस्तेमाल करने की अनुमति मिलेगी. हम इस पते को, ज़रूरी googleapis पर ट्रैफ़िक को रूट करने के लिए असाइन करते हैं. इस मामले में, Vertex Gemini.
- अगर Cloud Shell पहले से खुला हुआ नहीं है, तो उसे खोलें. हम पीएससी एंडपॉइंट के लिए एक आईपी बनाएंगे और Private Service Connect एंडपॉइंट बनाएंगे. इस मामले में, हम 192.168.255.230 का इस्तेमाल करेंगे.
projectid=$(gcloud config get-value project)
networkid=anthropic-net

gcloud compute addresses create anthro-ip \
    --global \
    --purpose=PRIVATE_SERVICE_CONNECT \
    --addresses=192.168.255.230 \
    --network=$networkid

gcloud compute forwarding-rules create pscanthrovertex \
    --global \
    --network=$networkid \
    --address=anthro-ip \
    --target-google-apis-bundle=all-apis
- पुष्टि करें
gcloud compute addresses list --filter="name=( 'anthro-ip' ...)"

gcloud compute forwarding-rules describe pscanthrovertex --global
8. googleapis के लिए मैन्युअल डीएनएस एंट्री बनाना
निजी डीएनएस का इस्तेमाल करके, पीएससी एंडपॉइंट पर ले जाने के लिए, मैन्युअल डीएनएस एंट्री बनाई जा सकती है. इससे उन सभी नेटवर्क पर असर पड़ेगा जिन्हें आपने इस ग्रुप को असाइन किया है. अब आपको ये बनाने होंगे
- googleapis.com के लिए निजी डीएनएस ज़ोन बनाएं और उसे anthropic-net नेटवर्क से अटैच करें.
- रूट डोमेन को Private Service Connect एंडपॉइंट आईपी (192.168.255.230) पर मैप करने वाला A रिकॉर्ड
- सभी सबडोमेन (जैसे, aiplatform.googleapis.com) को रूट A रिकॉर्ड पर रीडायरेक्ट करने के लिए, वाइल्डकार्ड CNAME रिकॉर्ड
- Cloud Shell में ये कमांड चलाएं.
gcloud dns managed-zones create googleapis-private \
    --description="Private DNS zone for googleapis.com" \
    --dns-name="googleapis.com." \
    --visibility="private" \
    --networks="anthropic-net"

gcloud dns record-sets create "googleapis.com." \
    --zone="googleapis-private" \
    --type="A" \
    --ttl="300" \
    --rrdatas="192.168.255.230"

gcloud dns record-sets create "*.googleapis.com." \
    --zone="googleapis-private" \
    --type="CNAME" \
    --ttl="300" \
    --rrdatas="googleapis.com."
- ज़ोन में मौजूद रिकॉर्ड सेट की सूची बनाएं, ताकि यह पुष्टि की जा सके कि A रिकॉर्ड और CNAME सही तरीके से बनाए गए हैं.
gcloud dns record-sets list --zone="googleapis-private"
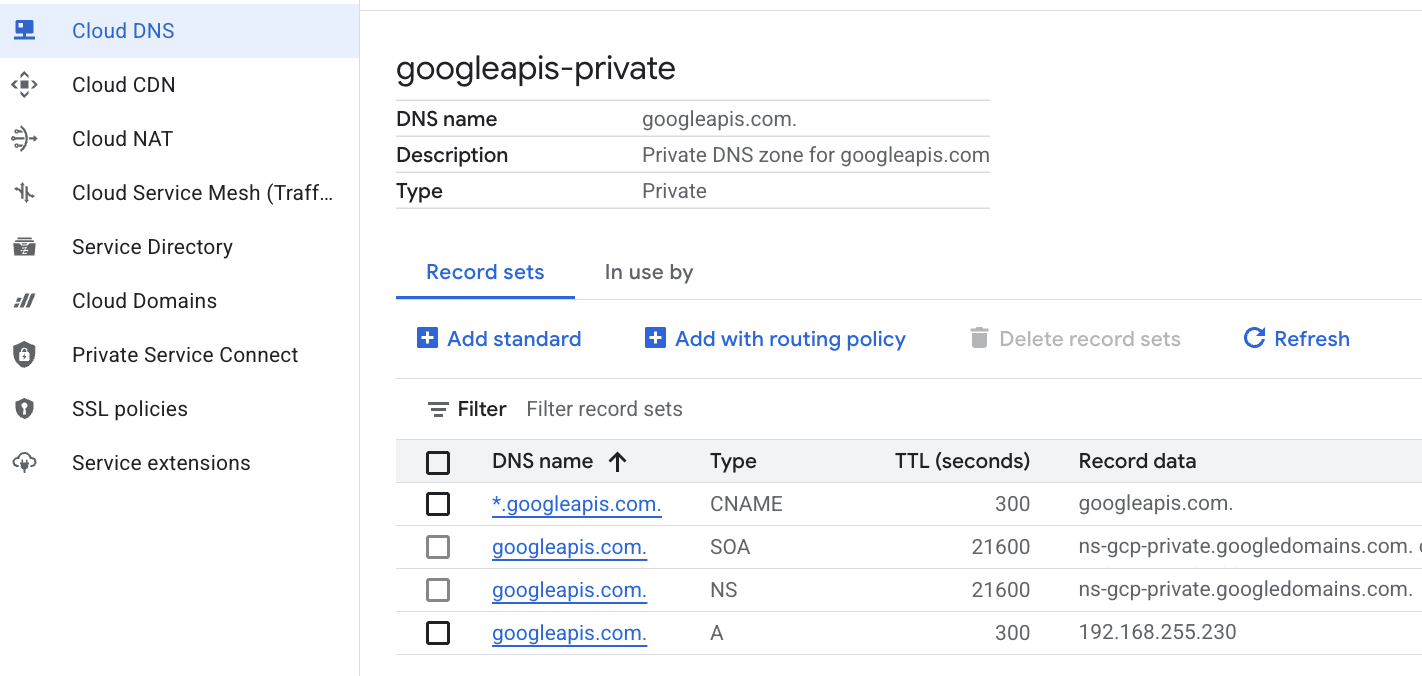
- कंसोल व्यू में यह इस तरह दिखना चाहिए. आपको A रिकॉर्ड और CNAME वाला सेटअप इस तरह दिखेगा
- इसके बाद, हम anthro-vm पर इन बदलावों के साथ कनेक्टिविटी की पुष्टि करते हैं
9. आईपी पते के ज़रिए एंडपॉइंट कनेक्टिविटी की पुष्टि करना
Gemini से कनेक्ट करने के लिए, प्राइवेट एंडपॉइंट का इस्तेमाल करते हैं.
- Google Cloud Shell में, anthro-vm नाम की नई वीएम में SSH करें.
gcloud compute ssh anthro-vm \
    --project=$projectid \
    --zone=us-east1-b \
    --tunnel-through-iap \
    -- -L 8080:localhost:8080
- अपनी वीएम में,
digकमांड का इस्तेमाल करके, aiplatform-pscanthrovertex.p.googleapis.com से कनेक्टिविटी का पाथ देखें. आपको पीएससी एंडपॉइंट का आईपी पता192.168.255.230दिखेगा
dig aiplatform-pscanthrovertex.p.googleapis.com +noall +answer
Gemini से कनेक्ट करने के लिए, प्राइवेट एंडपॉइंट का इस्तेमाल करते हैं.
- अब
digकरके देखते हैं कि हम Vertex Gemini API से कनेक्ट हो पाते हैं या नहीं.
dig *-aiplatform.googleapis.com
- आपको कुछ ऐसा दिखेगा (पता अलग होगा). ध्यान दें कि यह पाथ, पीएससी एंडपॉइंट के आईपी पतों से होकर जाता है.
; <<>> DiG 9.18.41-1~deb12u1-Debian <<>> *-aiplatform.googleapis.com
;; global options: +cmd
;; Got answer:
;; ->>HEADER<<- opcode: QUERY, status: NOERROR, id: 33703
;; flags: qr rd ra; QUERY: 1, ANSWER: 2, AUTHORITY: 0, ADDITIONAL: 1

;; OPT PSEUDOSECTION:
; EDNS: version: 0, flags:; udp: 512
;; QUESTION SECTION:
;*-aiplatform.googleapis.com.   IN      A

;; ANSWER SECTION:
*-aiplatform.googleapis.com. 300 IN     CNAME   googleapis.com.
googleapis.com.         300     IN      A       192.168.255.230

;; Query time: 8 msec
;; SERVER: 169.254.169.254#53(169.254.169.254) (UDP)
;; WHEN: Sat Nov 29 15:19:15 UTC 2025
;; MSG SIZE  rcvd: 86
pingकमांड का इस्तेमाल करके. हम एक छोटा सा टेस्ट कर सकते हैं. ध्यान दें: यह आईपी, पीएससी एंडपॉइंट है. इसलिए, आपके पिंग पूरे नहीं हो पाएंगे.
ping -c 2 aiplatform.googleapis.com
- अब अपना venv एनवायरमेंट चालू करें:
source /opt/py-anthro-env/bin/activate
- अब हम अपने
envमें Python का इस्तेमाल करेंगे. इससे एक Python फ़ाइलstar-me.pyबनती है, जो Claude Opus 4.6 से यह सवाल पूछती है: "मुझे रोटी बनाने की पूरी रेसिपी बताओ, ताकि शुरुआती दौर में रोटी बनाने वाले लोगों को मदद मिल सके?" इसके बाद, यह आउटपुट लेता है और इसे Gemini 3.1 Pro को भेजता है. यह एक खास जानकारी बनाता है. साथ ही, Gemini 3 Pro इमेज एक इमेज जनरेट करता है, जिसे VM पर सेव किया जाता है
cat << 'EOF' > star-me.py
import os
import subprocess
import google.auth
from google import genai
from google.genai import types
from anthropic import AnthropicVertex
from rich.console import Console
from rich.panel import Panel
from rich.spinner import SPINNERS
from rich.text import Text

# Custom Star Me Animation Spinner - Directional Flight!
SPINNERS["star_me"] = {
    "interval": 120,
    "frames": [
        "🌌 🚀              🛸 ",
        "🌌  🚀            🛸  ",
        "🌌   🚀          🛸   ",
        "🌌    🚀        🛸    ",
        "🌌     🚀      🛸     ",
        "🌌      🚀    🛸      ",
        "🌌       🚀  🛸       ",
        "🌌        🚀🛸        ",
        "🌌         💥         ",
        "🌌        ✨ ✨       ",
        "🌌       ✨   ✨      ",
        "🌌      ✨     ✨     ",
        "🌌     ✨       ✨    ",
        "🌌                    "
    ]
}

console = Console()

def print_star_me_header():
    star_me_art = """
[bold cyan]   _____ _______       _____    __  __ ______ [/bold cyan]
[bold cyan]  / ____|__   __|/\   |  __ \  |  \/  |  ____|[/bold cyan]
[bold cyan] | (___    | |  /  \  | |__) | | \  / | |__   [/bold cyan]
[bold cyan]  \___ \   | | / /\ \ |  _  /  | |\/| |  __|  [/bold cyan]
[bold cyan]  ____) |  | |/ ____ \| | \ \  | |  | | |____ [/bold cyan]
[bold cyan] |_____/   |_/_/    \_\_|  \_\ |_|  |_|______|[/bold cyan]
    """
    console.print(star_me_art)
    console.rule("[bold gold1]⭐ EPISODE I: The AI Awakening ⭐[/bold gold1]")

def main():
    os.system('clear')  # Clears the terminal for a clean UI
    print_star_me_header()

    # Create the images directory
    os.makedirs("images", exist_ok=True)

    with console.status("[bold yellow]🪙  Bypassing Security (Authenticating)...[/bold yellow]", spinner="star_me"):
        try:
            creds, project_id = google.auth.default()
            LOCATION = "global"
        except Exception as e:
            console.print(f"[bold red]💥 COMM LINK SEVERED! Authentication failed:[/bold red] {e}")
            return

    with console.status(f"[bold cyan]📡 Establishing secure connection for {project_id}...[/bold cyan]", spinner="star_me"):
        google_client = genai.Client(vertexai=True, location=LOCATION, project=project_id)
        claude_client = AnthropicVertex(region=LOCATION, project_id=project_id)

    console.print("\n[bold cyan]The Galaxy needs sustenance![/bold cyan]")

    # Auto-run prompt for the recipe
    question = "Give me a step by step recipe to make a roti for a beginner?"

    console.print(Panel(question, title="[bold green]Space Master (Claude Opus) is searching the archives...[/bold green]", border_style="green"))

    with console.status("[bold green]🟢 Space Master is compiling the ancient texts...\n[/bold green]", spinner="star_me"):
        try:
            msg = claude_client.messages.create(
                model="claude-opus-4-6",
                max_tokens=2048,
                messages=[{"role": "user", "content": question}]
            )
            claude_text = msg.content[0].text
            console.print(f"[bold green]✓ Archives Retrieved! Space Master generated a {len(claude_text)}-character Holocron.[/bold green]\n")
        except Exception as e:
            console.print(f"[bold red]💥 INTERFERENCE DETECTED (Claude API Error):[/bold red] {e}")
            return

    with console.status("[bold gold1]🟡 Protocol Bot (Gemini 3.1 Pro Preview) is translating the recipe...\n[/bold gold1]", spinner="star_me"):
        text_prompt = f"""
        I am providing you with a response generated by a Space Master.
        1. READ the text below.
        2. GENERATE a concise, bulleted executive summary.

        --- INPUT TEXT ---
        {claude_text}
        """

        try:
            text_response = google_client.models.generate_content(
                model="gemini-3.1-pro-preview",
                contents=text_prompt,
                config=types.GenerateContentConfig(temperature=0.7)
            )
            console.print("[bold gold1]✓ Translation Complete! The Protocol Bot has summarized the steps.[/bold gold1]")
        except Exception as e:
            console.print(f"[bold red]💥 SYSTEM FAILURE (Gemini Text Error):[/bold red] {e}")
            return

    with console.status("[bold blue]🔵 Astro Bot (Gemini 3 Pro Image) is projecting the hologram...\n[/bold blue]", spinner="star_me"):
        image_prompt = f"""
        CREATE a high-quality, beautiful illustration for a blog header (16:9 aspect ratio) of someone making roti, but with a subtle sci-fi, cinematic lighting aesthetic.
        Base the image directly on the following text summary:

        {text_response.text}
        """

        try:
            image_response = google_client.models.generate_content(
                model="gemini-3-pro-image-preview",
                contents=image_prompt,
                config=types.GenerateContentConfig(
                    response_modalities=['TEXT', 'IMAGE'],
                    temperature=0.7
                )
            )
            console.print("[bold blue]✓ Hologram Projection Ready![/bold blue]\n")
        except Exception as e:
            console.print(f"[bold red]💥 BAD COMPRESSOR (Gemini Image Error):[/bold red] {e}")
            return

    console.rule("[bold cyan]🚩 MISSION ACCOMPLISHED 🚩[/bold cyan]")

    if text_response.text:
        console.print(Panel(text_response.text.strip(),
                            title="[bold gold1]Protocol Bot Recipe Summary[/bold gold1]",
                            border_style="gold1"))

    for part in image_response.parts:
        if image := part.as_image():
            # Save inside the images folder with the focus-specific name
            filename = "images/cookingroti.png"
            image.save(filename)
            console.print(f"\n[bold green]✓ DATA SECURED:[/bold green] [underline]{os.path.abspath(filename)}[/underline]")

    console.rule("[bold cyan]Hyperlink Uplink[/bold cyan]")
    with console.status("[bold yellow]Opening the frequencies (HTTP server)...[/bold yellow]", spinner="star_me"):
        # Kill any existing server first so it doesn't crash on port binding
        os.system('pkill -f "http.server" > /dev/null 2>&1')

        # Start the server with the root directory set specifically to 'images'
        subprocess.Popen(
            ["python3", "-m", "http.server", "8080", "--directory", "images"],
            stdout=subprocess.DEVNULL,
            stderr=subprocess.DEVNULL
        )

    console.print("[bold green]✓ Transmitting on Port 8080![/bold green]")
    console.print("[bold magenta]View your files here (Click Web Preview -> Preview on port 8080):[/bold magenta] [underline]http://localhost:8080/[/underline]\n")

if __name__ == "__main__":
    main()
EOF

python3 star-me.py
यह स्क्रिप्ट, मज़ेदार इंटरफ़ेस में चलती है और एक वेब सर्वर लॉन्च करती है, ताकि आपको इमेज का आउटपुट दिख सके. स्क्रिप्ट को फिर से चलाने के लिए, python3 star-me.py टाइप करें
- अब Cloud Shell में वेब प्रीव्यू के विकल्प पर जाएं और पोर्ट 8080 पर प्रीव्यू चुनें
- जनरेट की गई इमेज देखने के लिए, cookingroti.png को चुनें. (यहां दिया गया उदाहरण, एआई ने जनरेट किया है)

- वेब सर्वर से बाहर निकलने और वीएम पर वापस जाने के लिए, Cloud Shell में यह कमांड चलाएं.
pkill -f "http.server"
- Cloud Shell होम पर वापस जाने के लिए,
exitटाइप करें.
10. बधाई हो
बधाई हो! आपने कुछ मज़ेदार काम किए और सार्वजनिक एपीआई पते और Googleapis के लिए Private Service Connect एंडपॉइंट का इस्तेमाल करके, Vertex पर Anthropic Claude Opus 4.6 और Gemini 3.1 Pro से कनेक्ट किया. इस सुविधा की मदद से, प्राइवेट एपीआई कनेक्टिविटी को अपने ऑन-प्रेम/अन्य क्लाउड एनवायरमेंट में बढ़ाया जा सकता है. ये एनवायरमेंट, इंटरकनेक्ट, क्रॉस-क्लाउड इंटरकनेक्ट, और वीपीसी के ज़रिए कनेक्ट किए जाते हैं.
व्यवस्थित करें
gcloud compute instances delete anthro-vm --zone=us-east1-b --quiet

gcloud compute routers nats delete anthro-out-nat-gw --router=anthro-out-nat --region=us-east1 --quiet

gcloud compute routers delete anthro-out-nat --region=us-east1 --quiet

gcloud compute firewall-rules delete anthropic-net-allow-icmp anthropic-net-allow-ssh anthropic-net-allow-web --quiet

gcloud compute forwarding-rules delete pscanthrovertex --global --quiet

gcloud dns record-sets delete googleapis.com. --zone googleapis-private --type A --quiet

gcloud dns record-sets delete *.googleapis.com --zone googleapis-private --type CNAME --quiet

gcloud dns managed-zones delete googleapis-private --quiet

gcloud compute addresses delete anthro-ip --global --quiet

gcloud compute networks subnets delete vm-subnet --region=us-east1 --quiet

gcloud compute networks delete anthropic-net --quiet
अगले चरण / ज़्यादा जानें
Vertex AI नेटवर्किंग के बारे में ज़्यादा जानें
Codelab: ADK की मदद से एआई एजेंट बनाना:बुनियादी बातें
अगली लैब पर जाएं
Google Cloud के साथ अपनी क्वेस्ट जारी रखें. साथ ही, Google Cloud Skills Boost के इन अन्य कोडलैब को देखें: