
1. 概要
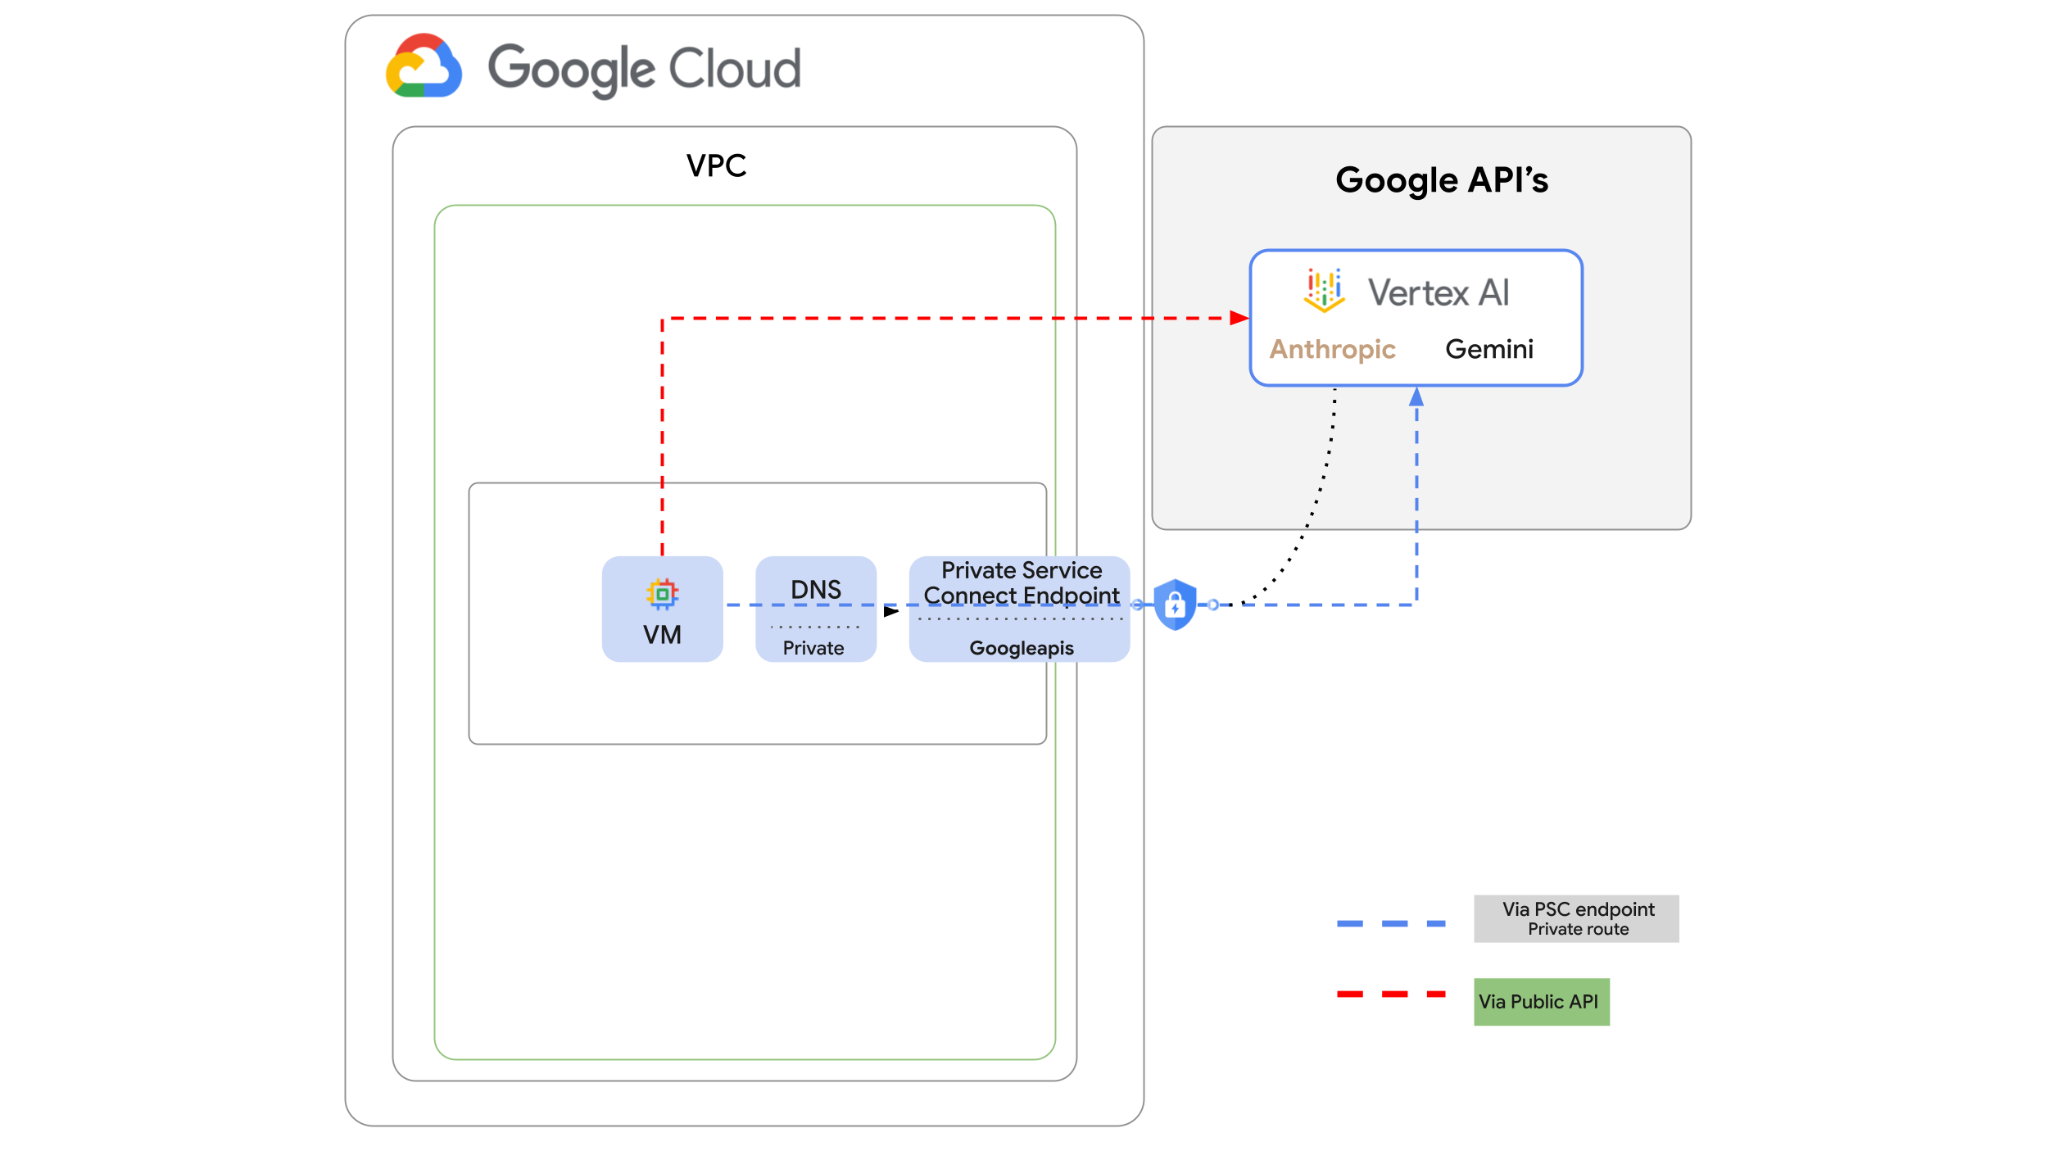
Vertex AI API には インターネット経由でアクセスできますが、企業によっては、インターネット経由ではなく、Vertex AI API にプライベート アクセスしたい場合があります。このラボでは、まずパブリック インターネット経由で VM インスタンスで実行されている Python SDK を使用して、Vertex 上の Anthropic Claude Opus 4.6 と Gemini 3.1 Pro にアクセスします。
次に、Googleapis への Private Service Connect エンドポイントを作成し、トラフィック フローを変更して、プライベート エンドポイントを使用して Vertex API に接続します。
Python コードサンプルは、入力された質問を受け取り、Claude Opus に渡して回答を生成 します。その出力は Gemini 3 に渡され、テキストの要約を作成して画像を生成します。
このラボでは、次のパターンを作成します。
図 1.
2. 目標
このラボでは、次のタスクの実行方法について学びます。
- Python SDK を使用するように VM インスタンスを設定する
- Vertex AI で Anthropic モデルカードを有効にする
- Python スクリプトを使用して Anthropic Claude Opus 4.6 と Gemini 3.1 Pro に接続する
- Googleapis に接続するように PSC エンドポイントを構成する
- 手動で DNS エントリを構成する
- Googleais への接続パスを確認する
- Python スクリプトを実行してモデルをクエリする
ラボの設定
セルフペース型の環境設定
- Google Cloud Console にログインして、プロジェクトを新規作成するか、既存のプロジェクトを再利用します。Gmail アカウントも Google Workspace アカウントもまだお持ちでない場合は、アカウントを作成してください。

- プロジェクト名 は、このプロジェクトの参加者に表示される名称です。Google API では使用されない文字列です。いつでも更新できます。
- プロジェクト ID は、すべての Google Cloud プロジェクトにおいて一意でなければならず、不変です(設定後は変更できません)。Cloud コンソールでは一意の文字列が自動生成されます。通常は、この内容を意識する必要はありません。ほとんどの Codelab では、プロジェクト ID(通常は
PROJECT_IDと識別されます)を参照する必要があります。生成された ID が好みではない場合は、ランダムに別の ID を生成できます。または、ご自身で試して、利用可能かどうかを確認することもできます。このステップ以降は変更できず、プロジェクトを通して同じ ID になります。 - なお、3 つ目の値として、一部の API が使用するプロジェクト番号があります。これら 3 つの値について詳しくは、こちらのドキュメントをご覧ください。
- 次に、Cloud のリソースや API を使用するために、Cloud コンソールで課金を有効にする必要があります。この Codelab の操作をすべて行って、費用が生じたとしても、少額です。このチュートリアルの終了後に請求が発生しないようにリソースをシャットダウンするには、作成したリソースを削除するか、プロジェクトを削除します。Google Cloud の新規ユーザーは、300 米ドル分の無料トライアル プログラムをご利用いただけます。
Cloud Shell を起動する
Google Cloud はノートパソコンからリモートで操作できますが、この Codelab では、Google Cloud Shell(Cloud 上で動作するコマンドライン環境)を使用します。
Google Cloud コンソール で、右上のツールバーにある Cloud Shell アイコンをクリックします。

プロビジョニングと環境への接続にはそれほど時間はかかりません。完了すると、次のように表示されます。

この仮想マシンには、必要な開発ツールがすべて用意されています。永続的なホーム ディレクトリが 5 GB 用意されており、Google Cloud で稼働します。そのため、ネットワークのパフォーマンスと認証機能が大幅に向上しています。この Codelab での作業はすべて、ブラウザ内から実行できます。インストールは不要です。
3. 環境を設定する
ファイアウォール ルールを使用してカスタム VPC を作成します。VPC とプロジェクトがすでに存在する場合は、この部分をスキップできます。
コンソールの右上の上部にある Cloud Shell を開きます。次のように構成します。 
- このラボで使用する API の一部を有効にします。
gcloud services enable dns.googleapis.com
gcloud services enable aiplatform.googleapis.com
gcloud services enable servicedirectory.googleapis.com
- 変数を設定します。これらの変数は、カスタム VPC のプロジェクト ID とネットワーク ID です(VPC はステップ 4 で作成します)。
projectid=$(gcloud config get-value project)
networkid=anthropic-net
echo $projectid
echo $networkid
- カスタム VPC(anthropic-net)、サブネット(vm1-subnet)、ファイアウォール ルールを作成します。
gcloud compute networks create $networkid \
--project=$projectid \
--subnet-mode=custom \
--mtu=1460 \
--bgp-routing-mode=global

gcloud compute networks subnets create vm-subnet \
--project=$projectid --range=10.0.88.0/24 \
--stack-type=IPV4_ONLY --network=$networkid \
--region=us-east1

gcloud compute firewall-rules create $networkid-allow-icmp --project=$projectid \
--network=$networkid \
--description="Allows ICMP connections from any source to any instance on the network." \
--direction=INGRESS \
--priority=65534 \
--source-ranges=0.0.0.0/0 \
--action=ALLOW \
--rules=icmp

gcloud compute firewall-rules create $networkid-allow-ssh \
--project=$projectid \
--network=$networkid \
--description="Allows TCP connections from any source to any instance on the network using port 22." \
--direction=INGRESS --priority=65534 \
--source-ranges=0.0.0.0/0 --action=ALLOW \
--rules=tcp:22

gcloud compute firewall-rules create $networkid-allow-web \
--project=$projectid \
--network=$networkid \
--description="Allows TCP connections on port 8080." \
--direction=INGRESS --priority=1000 \
--source-ranges=0.0.0.0/0 --action=ALLOW \
--rules=tcp:8080
4. Vertex Model Garden で Anthropic を有効にする
インターネットへの送信外部アクセスを許可する必要があるため、Cloud NAT ゲートウェイを作成して接続します。
- Vertex AI ダッシュボード に移動し、[Model Garden] を選択します。
- [Anthropic] を検索し、[Claude Opus 4.6] を選択します。
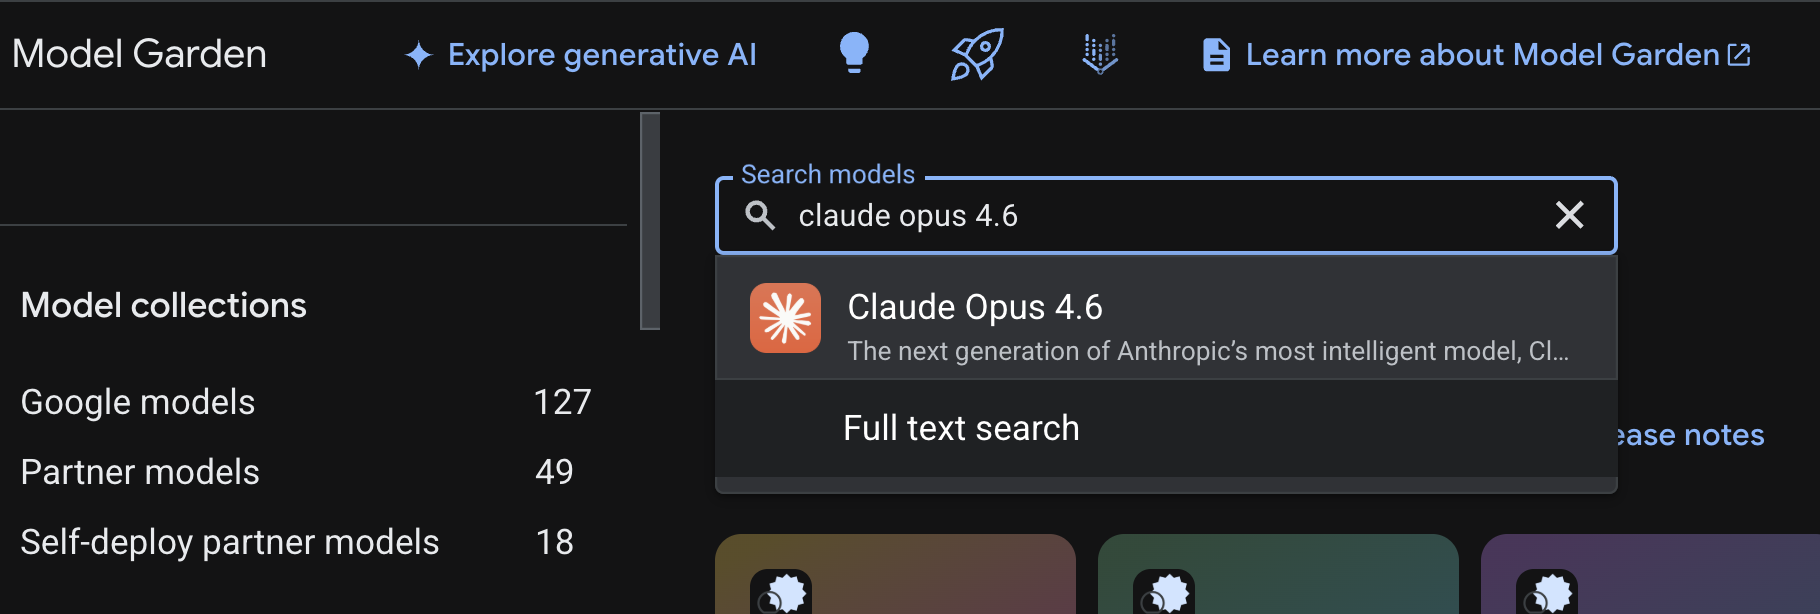
- [有効にする] を選択します。いくつかの情報を入力する必要があります。フォームに記入して [次へ] を選択します。
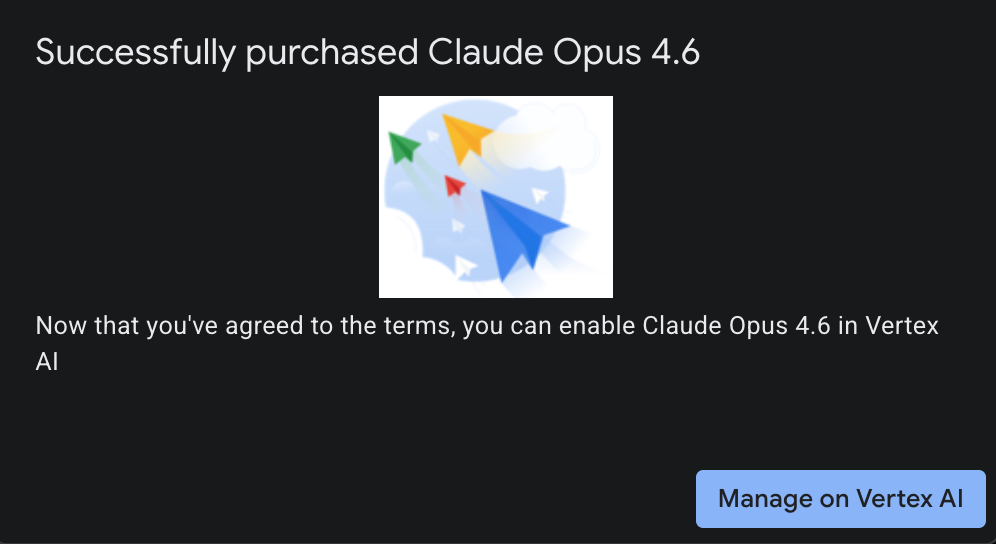
- 最後のページで [同意する] を選択して Claude 4.6 Opus を有効にします。

- 成功ページが表示されます。
5. NAT ゲートウェイと VM を作成する
インターネットへの送信外部アクセスを許可する必要があるため、Cloud NAT ゲートウェイを作成して接続します。
Cloud Shell で次のコマンドを使用します。
- Cloud NAT と Cloud NAT ゲートウェイを作成します。
gcloud compute routers create anthro-out-nat \
    --network $networkid \
    --region us-east1

gcloud compute routers nats create anthro-out-nat-gw \
    --router-region us-east1 \
    --router anthro-out-nat \
    --nat-all-subnet-ip-ranges \
    --auto-allocate-nat-external-ips
次に、Python SDK を使用して Vertex AI の Anthropic にアクセスするための VM を作成します。
- 同じ Cloud Shell セッションで、次のコマンドを使用して anthro-vm を作成します。 (起動スクリプトのインストール中に VM がアクティブになるまで 3 ~ 4 分かかります)
gcloud compute instances create anthro-vm \
--project=$projectid \
--zone=us-east1-b \
--network-interface=stack-type=IPV4_ONLY,subnet=vm-subnet,no-address,network=$networkid \
--metadata startup-script="#! /bin/bash
      apt-get update
      apt-get install python3 python3-dev python3-venv tcpdump dnsutils -y
      python3 -m venv /opt/py-anthro-env
      /opt/py-anthro-env/bin/pip install -U google-genai 'anthropic[vertex]' rich
      chmod -R 777 /opt/py-anthro-env"
パブリック IP アドレスのない VM が作成されます。次に、VM を構成します。
6. VM を構成してテストする
- Google Cloud Shell で、anthro-vm という新しい VM に SSH 接続します。(VM が完全に設定されるまで 3 分ほどかかることがあります)
gcloud compute ssh anthro-vm \
    --project=$projectid \
    --zone=us-east1-b \
    --tunnel-through-iap \
    -- -L 8080:localhost:8080
- 接続したら、Vertex Gemini API に接続できるかどうかを簡単にテストします。
dig *-aiplatform.googleapis.com
- 次のように表示されます(アドレスは異なります )。API は公開 API であるため、パスはパブリック IP アドレス経由になります。
; <<>> DiG 9.18.39-0ubuntu0.24.04.2-Ubuntu <<>> *-aiplatform.googleapis.com
;; global options: +cmd
;; Got answer:
;; ->>HEADER<<- opcode: QUERY, status: NOERROR, id: 3728
;; flags: qr rd ra; QUERY: 1, ANSWER: 16, AUTHORITY: 0, ADDITIONAL: 1

;; OPT PSEUDOSECTION:
; EDNS: version: 0, flags:; udp: 512
;; QUESTION SECTION:
;*-aiplatform.googleapis.com.   IN      A

;; ANSWER SECTION:
*-aiplatform.googleapis.com. 300 IN     A       172.217.204.95
*-aiplatform.googleapis.com. 300 IN     A       172.217.203.95
*-aiplatform.googleapis.com. 300 IN     A       173.194.215.95
*-aiplatform.googleapis.com. 300 IN     A       142.250.98.95
*-aiplatform.googleapis.com. 300 IN     A       173.194.217.95
*-aiplatform.googleapis.com. 300 IN     A       142.251.107.95
*-aiplatform.googleapis.com. 300 IN     A       74.125.196.95
- venv 環境を有効にします。
source /opt/py-anthro-env/bin/activate
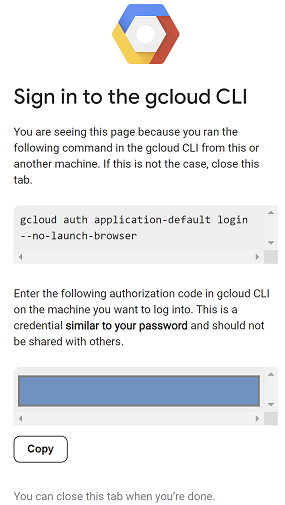
- 次に、後でテストを行うために認証します。VM で次のコマンドを実行し、プロンプトが表示されたら y を押します。
gcloud auth application-default login
- 次に、https:// で始まる URL をコピーし、ラボブラウザ ウィンドウで新しいタブを開いて URL を貼り付けます。プロンプトを受け入れます。
- 次のように表示されたら、[コピー] を選択し、VM anthro-vm セッションに戻ります。[Enter authorization code:] にコピーした認証コードを貼り付けて Enter キーを押して認証します。
envで Python を使用します。これにより、Python ファイルsuper-gen-ai.pyが作成され、Claude Opus 4.6 に「エージェント型 AI を構築するための主な手順は何ですか?」と質問します。次に、出力を受け取って Gemini 3.1 Pro に渡し、要約を作成します。その後、Gemini 3 Pro Image が画像を生成し、VM に保存します。
以下のコマンドをコピーして貼り付けます。
cat << 'EOF' > super-gen-ai.py
import os
import subprocess
import google.auth
from google import genai
from google.genai import types
from anthropic import AnthropicVertex
from rich.console import Console
from rich.panel import Panel
from rich.spinner import SPINNERS
from rich.text import Text

# Custom Super Me Animation Spinner - Now with moving power-up!
SPINNERS["super_me"] = {
    "interval": 120,
    "frames": [
        "🧱🦖          🍄",
        "🧱 🦖        🍄 ",
        "🧱  🦖      🍄  ",
        "🧱   🦕    🍄   ",
        "🧱    🦖  🍄    ",
        "🧱     🦖🍄     ",
        "🧱      🌟      ",
        "🧱       🌟     ",
        "🧱        🌟    ",
        "🧱         🌟   ",
        "🧱        🌟    ",
        "🧱       🌟     ",
        "🧱      🌟      ",
        "🧱     🌟       ",
        "🧱    🌟        ",
        "🧱   🌟         ",
        "🧱  🌟          ",
        "🧱 🌟           ",
        "🧱🌟            "
    ]
}

console = Console()

def print_super_me_header():
    super_me_art = """
[bold red]   _____                       [/bold red][bold green]  __  __      _ [/bold green]
[bold red]  / ____|                      [/bold red][bold green] |  \/  |    | |[/bold green]
[bold red] | (___  _   _ _ __   ___ _ __ [/bold red][bold green] | \  / | ___| |[/bold green]
[bold red]  \___ \| | | | '_ \ / _ \ '__|[/bold red][bold green] | |\/| |/ _ \ |[/bold green]
[bold red]  ____) | |_| | |_) |  __/ |   [/bold red][bold green] | |  | |  __/_|[/bold green]
[bold red] |_____/ \__,_| .__/ \___|_|   [/bold red][bold green] |_|  |_|\___(_)[/bold green]
[bold red]              | |              [/bold red][bold green]                 [/bold green]
[bold red]              |_|              [/bold red][bold green]                 [/bold green]
    """
    console.print(super_me_art)
    console.rule("[bold gold1]⭐ LEVEL 1-1: Vertex AI Orchestrator ⭐[/bold gold1]")

def main():
    os.system('clear')  # Clears the terminal for a clean UI
    print_super_me_header()

    # Create the images directory
    os.makedirs("images", exist_ok=True)

    with console.status("[bold yellow]🪙  Collecting Coins (Authenticating)...[/bold yellow]", spinner="super_me"):
        try:
            creds, project_id = google.auth.default()
            LOCATION = "global"
        except Exception as e:
            console.print(f"[bold red]💥 GAME OVER! Authentication failed:[/bold red] {e}")
            return

    with console.status(f"[bold green]🍄 Powering up Clients for {project_id}...[/bold green]", spinner="super_me"):
        google_client = genai.Client(vertexai=True, location=LOCATION, project=project_id)
        claude_client = AnthropicVertex(region=LOCATION, project_id=project_id)

    console.print("\n[bold cyan]The Kingdom needs a strategy![/bold cyan]")

    # Auto-run prompt without user interaction
    question = "What are the key steps to building Agentic AI?"

    console.print(Panel(question, title="[bold green]Green Dino (Claude Opus) is entering the pipe...[/bold green]", border_style="green"))

    with console.status("[bold green]🟢 Green Dino is clearing the level...\n[/bold green]", spinner="super_me"):
        try:
            msg = claude_client.messages.create(
                model="claude-opus-4-6",
                max_tokens=2048,
                messages=[{"role": "user", "content": question}]
            )
            claude_text = msg.content[0].text
            console.print(f"[bold green]✓ Level Cleared! Green Dino generated {len(claude_text)} bytes of strategy.[/bold green]\n")
        except Exception as e:
            console.print(f"[bold red]💥 BOSS ATTACK (Claude API Error):[/bold red] {e}")
            return

    with console.status("[bold red]🔴 Red Hero (Gemini 3.1 Pro Preview) is summarizing the map...\n[/bold red]", spinner="super_me"):
        text_prompt = f"""
        I am providing you with a response generated by Claude.
        1. READ the text below.
        2. GENERATE a concise, bulleted executive summary.

        --- INPUT TEXT ---
        {claude_text}
        """

        try:
            text_response = google_client.models.generate_content(
                model="gemini-3.1-pro-preview",
                contents=text_prompt,
                config=types.GenerateContentConfig(temperature=0.7)
            )
            console.print("[bold red]✓ Super Me! Text Summary Complete.[/bold red]")
        except Exception as e:
            console.print(f"[bold red]💥 CHOMPER PLANT (Gemini Text Error):[/bold red] {e}")
            return

    with console.status("[bold blue]🔵 Mushroom Friend (Gemini 3 Pro Image) is painting the castle...\n[/bold blue]", spinner="super_me"):
        image_prompt = f"""
        CREATE a high-quality, futuristic illustration of autonomous AI agents for a tech blog header (16:9 aspect ratio).
        Base the image directly on the following text summary:

        {text_response.text}
        """

        try:
            image_response = google_client.models.generate_content(
                model="gemini-3-pro-image-preview",
                contents=image_prompt,
                config=types.GenerateContentConfig(
                    response_modalities=['TEXT', 'IMAGE'],
                    temperature=0.7
                )
            )
            console.print("[bold blue]✓ Masterpiece Complete![/bold blue]\n")
        except Exception as e:
            console.print(f"[bold red]💥 FALLING BLOCK (Gemini Image Error):[/bold red] {e}")
            return

    console.rule("[bold gold1]🚩 COURSE CLEAR! 🚩[/bold gold1]")

    if text_response.text:
        console.print(Panel(text_response.text.strip(),
                            title="[bold gold1]Gemini 3.1 Pro Summary[/bold gold1]",
                            border_style="gold1"))

    for part in image_response.parts:
        if image := part.as_image():
            # Save inside the images folder with the focus-specific name
            filename = "images/building-agentic.png"
            image.save(filename)
            console.print(f"\n[bold green]✓ REWARD SAVED:[/bold green] [underline]{os.path.abspath(filename)}[/underline]")

    console.rule("[bold red]Web Server Warp Pipe[/bold red]")
    with console.status("[bold yellow]Opening the warp pipe (HTTP server)...[/bold yellow]", spinner="super_me"):
        # Kill any existing server first so it doesn't crash on port binding
        os.system('pkill -f "http.server" > /dev/null 2>&1')

        # Start the server with the root directory set specifically to 'images'
        subprocess.Popen(
            ["python3", "-m", "http.server", "8080", "--directory", "images"],
            stdout=subprocess.DEVNULL,
            stderr=subprocess.DEVNULL
        )

    console.print("[bold green]✓ Warp Pipe is open in the background![/bold green]")
    console.print("[bold magenta]View your files here (Click Web Preview -> Preview on port 8080):[/bold magenta] [underline]http://localhost:8080/[/underline]\n")

if __name__ == "__main__":
    main()
EOF

python3 super-gen-ai.py
スクリプトは楽しいインターフェースで実行され、ウェブサーバーが起動するため、画像の出力を確認できます。スクリプトを再度実行するには、「python3 super-gen-ai.py」と入力します。
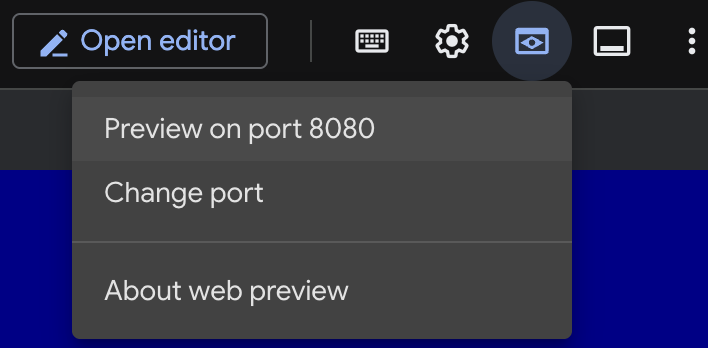
- Cloud Shell の [ウェブでプレビュー] オプションで、[ポート 8080 でプレビュー] を選択します。
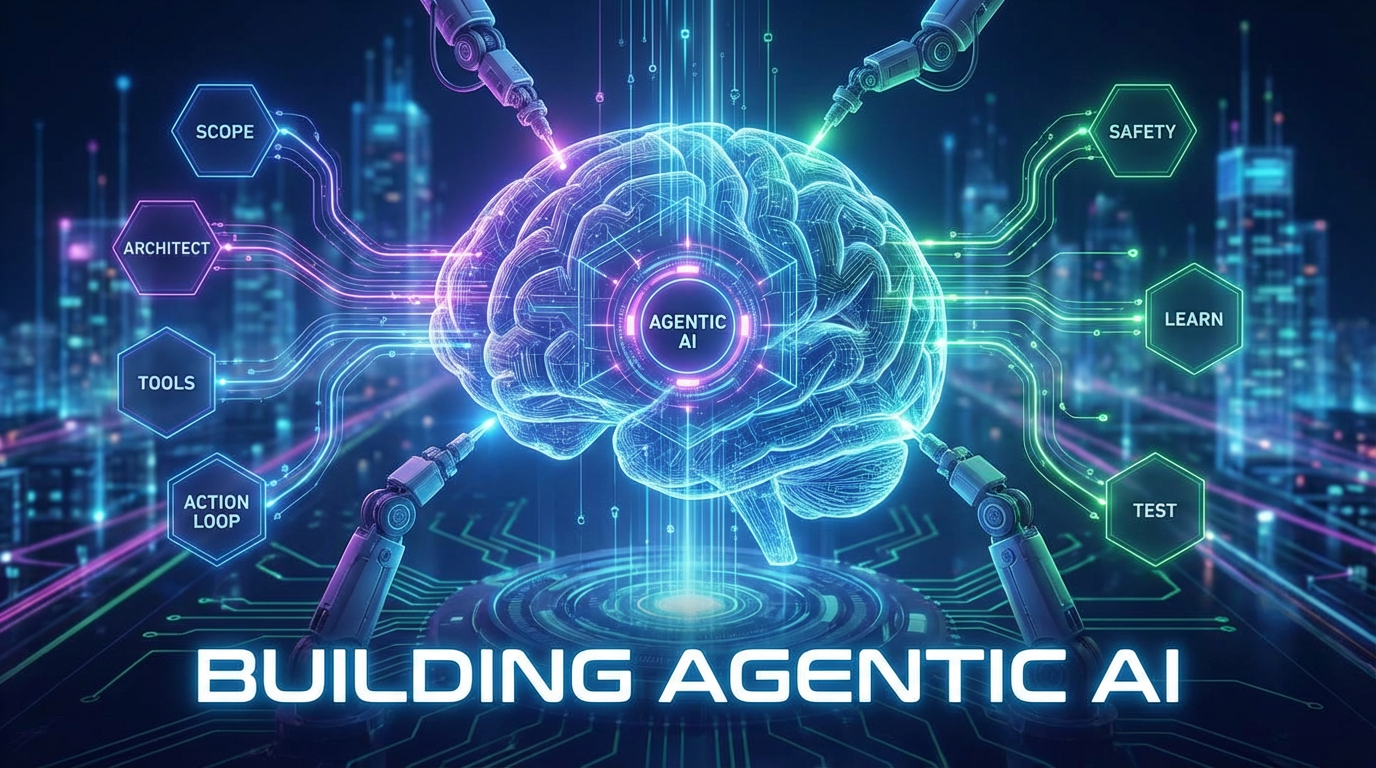
- 開いたウェブ セッションで [building_agentic.png] を選択して、生成された画像を表示します。(AI によって生成されたサンプル画像)
- Cloud Shell でウェブサーバーを終了するには、次のコマンドを実行します。
pkill -f "http.server"
- 次に、「
exit」と入力して Cloud Shell のホームに戻ります。完了したら、続行します。
7. googleapis への PSC エンドポイントを作成する
Vertex API エンドポイントへのプライベート接続を有効にするには、googleapis 用の Private Service Connect エンドポイントを作成します。これにより、割り当てたプライベート IP アドレスを使用して、必要な googleapis(この場合は Vertex Gemini)にトラフィックをルーティングできます。
- Cloud Shell が開いていない場合は開きます。PSC エンドポイントの IP を作成し、Private Service Connect エンドポイントを作成します。この例では 192.168.255.230 を使用します。
projectid=$(gcloud config get-value project)
networkid=anthropic-net

gcloud compute addresses create anthro-ip \
    --global \
    --purpose=PRIVATE_SERVICE_CONNECT \
    --addresses=192.168.255.230 \
    --network=$networkid

gcloud compute forwarding-rules create pscanthrovertex \
    --global \
    --network=$networkid \
    --address=anthro-ip \
    --target-google-apis-bundle=all-apis
- 確認
gcloud compute addresses list --filter="name=( 'anthro-ip' ...)"

gcloud compute forwarding-rules describe pscanthrovertex --global
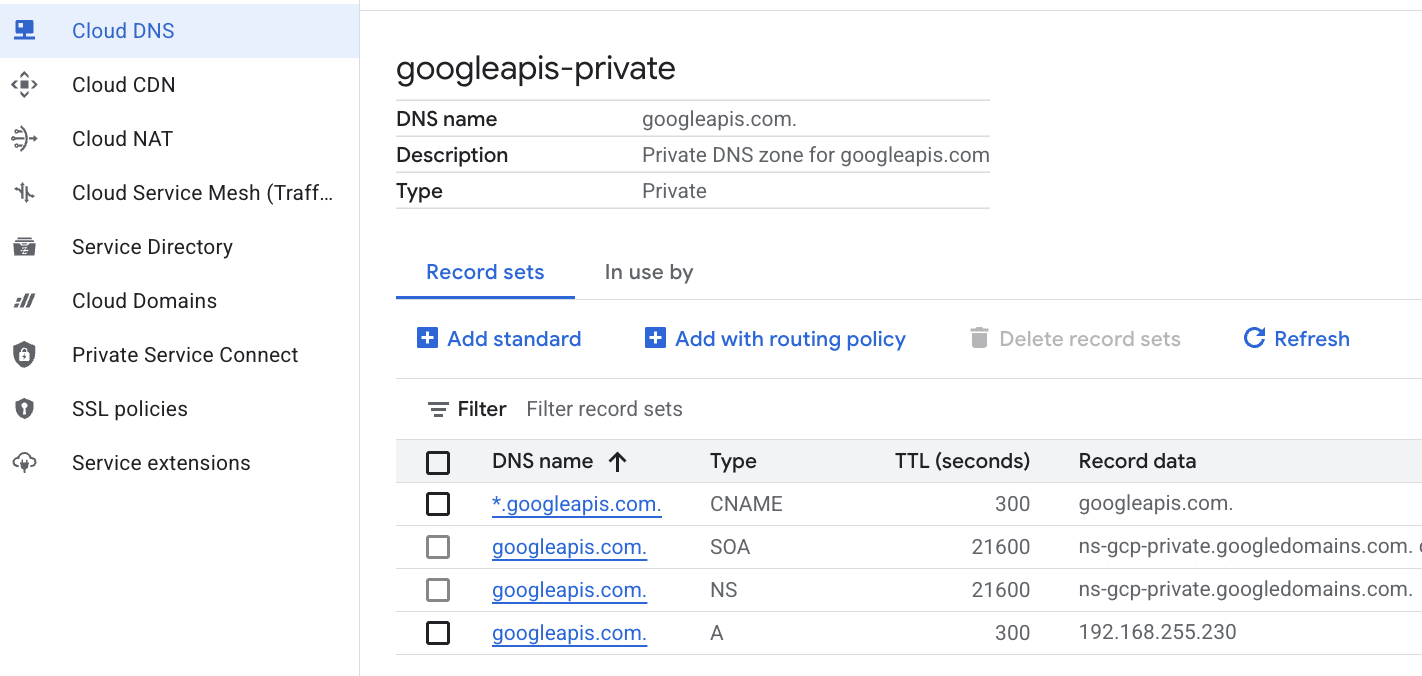
8. googleapis への手動 DNS エントリを作成する
限定公開 DNS を使用して、PSC エンドポイントを参照する手動 DNS エントリを作成できます。これは、割り当てたすべてのネットワークに影響します。次のものを作成します。
- googleapis.com のプライベート DNS ゾーン を作成し、anthropic-net ネットワークに接続します。
- ルートドメインを Private Service Connect エンドポイント IP(192.168.255.230)にマッピングする A レコード
- すべてのサブドメイン(aiplatform.googleapis.com など)をルート A レコードにリダイレクトするワイルドカード CNAME レコード
- Cloud Shell で次のコマンドを実行します。
gcloud dns managed-zones create googleapis-private \
    --description="Private DNS zone for googleapis.com" \
    --dns-name="googleapis.com." \
    --visibility="private" \
    --networks="anthropic-net"

gcloud dns record-sets create "googleapis.com." \
    --zone="googleapis-private" \
    --type="A" \
    --ttl="300" \
    --rrdatas="192.168.255.230"

gcloud dns record-sets create "*.googleapis.com." \
    --zone="googleapis-private" \
    --type="CNAME" \
    --ttl="300" \
    --rrdatas="googleapis.com."
- ゾーン内のレコードセットを一覧表示して、A レコードと CNAME が正しく作成されていることを確認します。
gcloud dns record-sets list --zone="googleapis-private"
- コンソール ビューでは、次のように表示されます。次のように、A レコードと CNAME が設定されていることを確認します。
- 次に、anthro-vm でこれらの変更による接続を確認します。
9. IP アドレスを使用してエンドポイントの接続を確認する
プライベート エンドポイントを使用して Gemini に接続します。
- Google Cloud Shell で、anthro-vm という新しい VM に SSH 接続します。
gcloud compute ssh anthro-vm \
    --project=$projectid \
    --zone=us-east1-b \
    --tunnel-through-iap \
    -- -L 8080:localhost:8080
- VM で、
digコマンドを使用して、aiplatform-pscanthrovertex.p.googleapis.com への接続パスを確認します。PSC エンドポイントの IP192.168.255.230が表示されます。
dig aiplatform-pscanthrovertex.p.googleapis.com +noall +answer
プライベート エンドポイントを使用して Gemini に接続します。
digを実行して、Vertex Gemini API に接続できるかどうかを確認します。
dig *-aiplatform.googleapis.com
- 次のように表示されます(アドレスは異なります)。パスは PSC エンドポイントの IP アドレス経由になります。
; <<>> DiG 9.18.41-1~deb12u1-Debian <<>> *-aiplatform.googleapis.com
;; global options: +cmd
;; Got answer:
;; ->>HEADER<<- opcode: QUERY, status: NOERROR, id: 33703
;; flags: qr rd ra; QUERY: 1, ANSWER: 2, AUTHORITY: 0, ADDITIONAL: 1

;; OPT PSEUDOSECTION:
; EDNS: version: 0, flags:; udp: 512
;; QUESTION SECTION:
;*-aiplatform.googleapis.com.   IN      A

;; ANSWER SECTION:
*-aiplatform.googleapis.com. 300 IN     CNAME   googleapis.com.
googleapis.com.         300     IN      A       192.168.255.230

;; Query time: 8 msec
;; SERVER: 169.254.169.254#53(169.254.169.254) (UDP)
;; WHEN: Sat Nov 29 15:19:15 UTC 2025
;; MSG SIZE  rcvd: 86
pingコマンドを使用します。簡単なテストを行うことができます。注: この IP は PSC エンドポイントであり、ping は失敗します。
ping -c 2 aiplatform.googleapis.com
- venv 環境を有効にします。
source /opt/py-anthro-env/bin/activate
envで Python を使用します。これにより、Claude Opus 4.6 に「初心者向けのロティのレシピを教えてください。」と質問する Python ファイルstar-me.pyが作成されます。次に、出力を受け取って Gemini 3.1 Pro に渡し、要約を作成します。Gemini 3 Pro Image が画像を生成し、VM に保存します。
cat << 'EOF' > star-me.py
import os
import subprocess
import google.auth
from google import genai
from google.genai import types
from anthropic import AnthropicVertex
from rich.console import Console
from rich.panel import Panel
from rich.spinner import SPINNERS
from rich.text import Text

# Custom Star Me Animation Spinner - Directional Flight!
SPINNERS["star_me"] = {
    "interval": 120,
    "frames": [
        "🌌 🚀              🛸 ",
        "🌌  🚀            🛸  ",
        "🌌   🚀          🛸   ",
        "🌌    🚀        🛸    ",
        "🌌     🚀      🛸     ",
        "🌌      🚀    🛸      ",
        "🌌       🚀  🛸       ",
        "🌌        🚀🛸        ",
        "🌌         💥         ",
        "🌌        ✨ ✨       ",
        "🌌       ✨   ✨      ",
        "🌌      ✨     ✨     ",
        "🌌     ✨       ✨    ",
        "🌌                    "
    ]
}

console = Console()

def print_star_me_header():
    star_me_art = """
[bold cyan]   _____ _______       _____    __  __ ______ [/bold cyan]
[bold cyan]  / ____|__   __|/\   |  __ \  |  \/  |  ____|[/bold cyan]
[bold cyan] | (___    | |  /  \  | |__) | | \  / | |__   [/bold cyan]
[bold cyan]  \___ \   | | / /\ \ |  _  /  | |\/| |  __|  [/bold cyan]
[bold cyan]  ____) |  | |/ ____ \| | \ \  | |  | | |____ [/bold cyan]
[bold cyan] |_____/   |_/_/    \_\_|  \_\ |_|  |_|______|[/bold cyan]
    """
    console.print(star_me_art)
    console.rule("[bold gold1]⭐ EPISODE I: The AI Awakening ⭐[/bold gold1]")

def main():
    os.system('clear')  # Clears the terminal for a clean UI
    print_star_me_header()

    # Create the images directory
    os.makedirs("images", exist_ok=True)

    with console.status("[bold yellow]🪙  Bypassing Security (Authenticating)...[/bold yellow]", spinner="star_me"):
        try:
            creds, project_id = google.auth.default()
            LOCATION = "global"
        except Exception as e:
            console.print(f"[bold red]💥 COMM LINK SEVERED! Authentication failed:[/bold red] {e}")
            return

    with console.status(f"[bold cyan]📡 Establishing secure connection for {project_id}...[/bold cyan]", spinner="star_me"):
        google_client = genai.Client(vertexai=True, location=LOCATION, project=project_id)
        claude_client = AnthropicVertex(region=LOCATION, project_id=project_id)

    console.print("\n[bold cyan]The Galaxy needs sustenance![/bold cyan]")

    # Auto-run prompt for the recipe
    question = "Give me a step by step recipe to make a roti for a beginner?"

    console.print(Panel(question, title="[bold green]Space Master (Claude Opus) is searching the archives...[/bold green]", border_style="green"))

    with console.status("[bold green]🟢 Space Master is compiling the ancient texts...\n[/bold green]", spinner="star_me"):
        try:
            msg = claude_client.messages.create(
                model="claude-opus-4-6",
                max_tokens=2048,
                messages=[{"role": "user", "content": question}]
            )
            claude_text = msg.content[0].text
            console.print(f"[bold green]✓ Archives Retrieved! Space Master generated a {len(claude_text)}-character Holocron.[/bold green]\n")
        except Exception as e:
            console.print(f"[bold red]💥 INTERFERENCE DETECTED (Claude API Error):[/bold red] {e}")
            return

    with console.status("[bold gold1]🟡 Protocol Bot (Gemini 3.1 Pro Preview) is translating the recipe...\n[/bold gold1]", spinner="star_me"):
        text_prompt = f"""
        I am providing you with a response generated by a Space Master.
        1. READ the text below.
        2. GENERATE a concise, bulleted executive summary.

        --- INPUT TEXT ---
        {claude_text}
        """

        try:
            text_response = google_client.models.generate_content(
                model="gemini-3.1-pro-preview",
                contents=text_prompt,
                config=types.GenerateContentConfig(temperature=0.7)
            )
            console.print("[bold gold1]✓ Translation Complete! The Protocol Bot has summarized the steps.[/bold gold1]")
        except Exception as e:
            console.print(f"[bold red]💥 SYSTEM FAILURE (Gemini Text Error):[/bold red] {e}")
            return

    with console.status("[bold blue]🔵 Astro Bot (Gemini 3 Pro Image) is projecting the hologram...\n[/bold blue]", spinner="star_me"):
        image_prompt = f"""
        CREATE a high-quality, beautiful illustration for a blog header (16:9 aspect ratio) of someone making roti, but with a subtle sci-fi, cinematic lighting aesthetic.
        Base the image directly on the following text summary:

        {text_response.text}
        """

        try:
            image_response = google_client.models.generate_content(
                model="gemini-3-pro-image-preview",
                contents=image_prompt,
                config=types.GenerateContentConfig(
                    response_modalities=['TEXT', 'IMAGE'],
                    temperature=0.7
                )
            )
            console.print("[bold blue]✓ Hologram Projection Ready![/bold blue]\n")
        except Exception as e:
            console.print(f"[bold red]💥 BAD COMPRESSOR (Gemini Image Error):[/bold red] {e}")
            return

    console.rule("[bold cyan]🚩 MISSION ACCOMPLISHED 🚩[/bold cyan]")

    if text_response.text:
        console.print(Panel(text_response.text.strip(),
                            title="[bold gold1]Protocol Bot Recipe Summary[/bold gold1]",
                            border_style="gold1"))

    for part in image_response.parts:
        if image := part.as_image():
            # Save inside the images folder with the focus-specific name
            filename = "images/cookingroti.png"
            image.save(filename)
            console.print(f"\n[bold green]✓ DATA SECURED:[/bold green] [underline]{os.path.abspath(filename)}[/underline]")

    console.rule("[bold cyan]Hyperlink Uplink[/bold cyan]")
    with console.status("[bold yellow]Opening the frequencies (HTTP server)...[/bold yellow]", spinner="star_me"):
        # Kill any existing server first so it doesn't crash on port binding
        os.system('pkill -f "http.server" > /dev/null 2>&1')

        # Start the server with the root directory set specifically to 'images'
        subprocess.Popen(
            ["python3", "-m", "http.server", "8080", "--directory", "images"],
            stdout=subprocess.DEVNULL,
            stderr=subprocess.DEVNULL
        )

    console.print("[bold green]✓ Transmitting on Port 8080![/bold green]")
    console.print("[bold magenta]View your files here (Click Web Preview -> Preview on port 8080):[/bold magenta] [underline]http://localhost:8080/[/underline]\n")

if __name__ == "__main__":
    main()
EOF

python3 star-me.py
スクリプトは楽しいインターフェースで実行され、ウェブサーバーが起動するため、画像の出力を確認できます。スクリプトを再度実行するには、「python3 star-me.py」と入力します。
- Cloud Shell の [ウェブでプレビュー] オプションに移動し、[ポート 8080 でプレビュー] を選択します。
- [cookingroti.png] を選択して、生成された画像を表示します。(AI によって生成されたサンプル)

- Cloud Shell でウェブサーバーを終了して VM に戻るには、次のコマンドを実行します。
pkill -f "http.server"
- 次に、「
exit」と入力して Cloud Shell のホームに戻ります。
10. 完了
お疲れさまでした。Vertex 上の Anthropic Claude Opus 4.6 と Gemini 3.1 Pro に、公開 API アドレスと Googleapis 用の Private Service Connect エンドポイントを使用してプライベートに接続できました。この機能により、非公開 API 接続をオンプレミス環境や他のクラウド環境(Interconnect、Cross-Cloud Interconnect、VPC 経由で接続)に拡張できます。
クリーンアップ
gcloud compute instances delete anthro-vm --zone=us-east1-b --quiet

gcloud compute routers nats delete anthro-out-nat-gw --router=anthro-out-nat --region=us-east1 --quiet

gcloud compute routers delete anthro-out-nat --region=us-east1 --quiet

gcloud compute firewall-rules delete anthropic-net-allow-icmp anthropic-net-allow-ssh anthropic-net-allow-web --quiet

gcloud compute forwarding-rules delete pscanthrovertex --global --quiet

gcloud dns record-sets delete googleapis.com. --zone googleapis-private --type A --quiet

gcloud dns record-sets delete *.googleapis.com --zone googleapis-private --type CNAME --quiet

gcloud dns managed-zones delete googleapis-private --quiet

gcloud compute addresses delete anthro-ip --global --quiet

gcloud compute networks subnets delete vm-subnet --region=us-east1 --quiet

gcloud compute networks delete anthropic-net --quiet
次のステップと詳細情報
Vertex AI ネットワーキングの詳細をご覧ください。
Codelab: Private Service Connect エンドポイント経由で Python SDK を使用して Gemini 3 Pro チャットにアクセスする
Codelab: ADK を使用した AI エージェントの構築:基礎
次のラボを受講する
Google Cloud のクエストを続け、その他の Google Cloud Skills Boost ラボをご確認ください。