
1. 개요
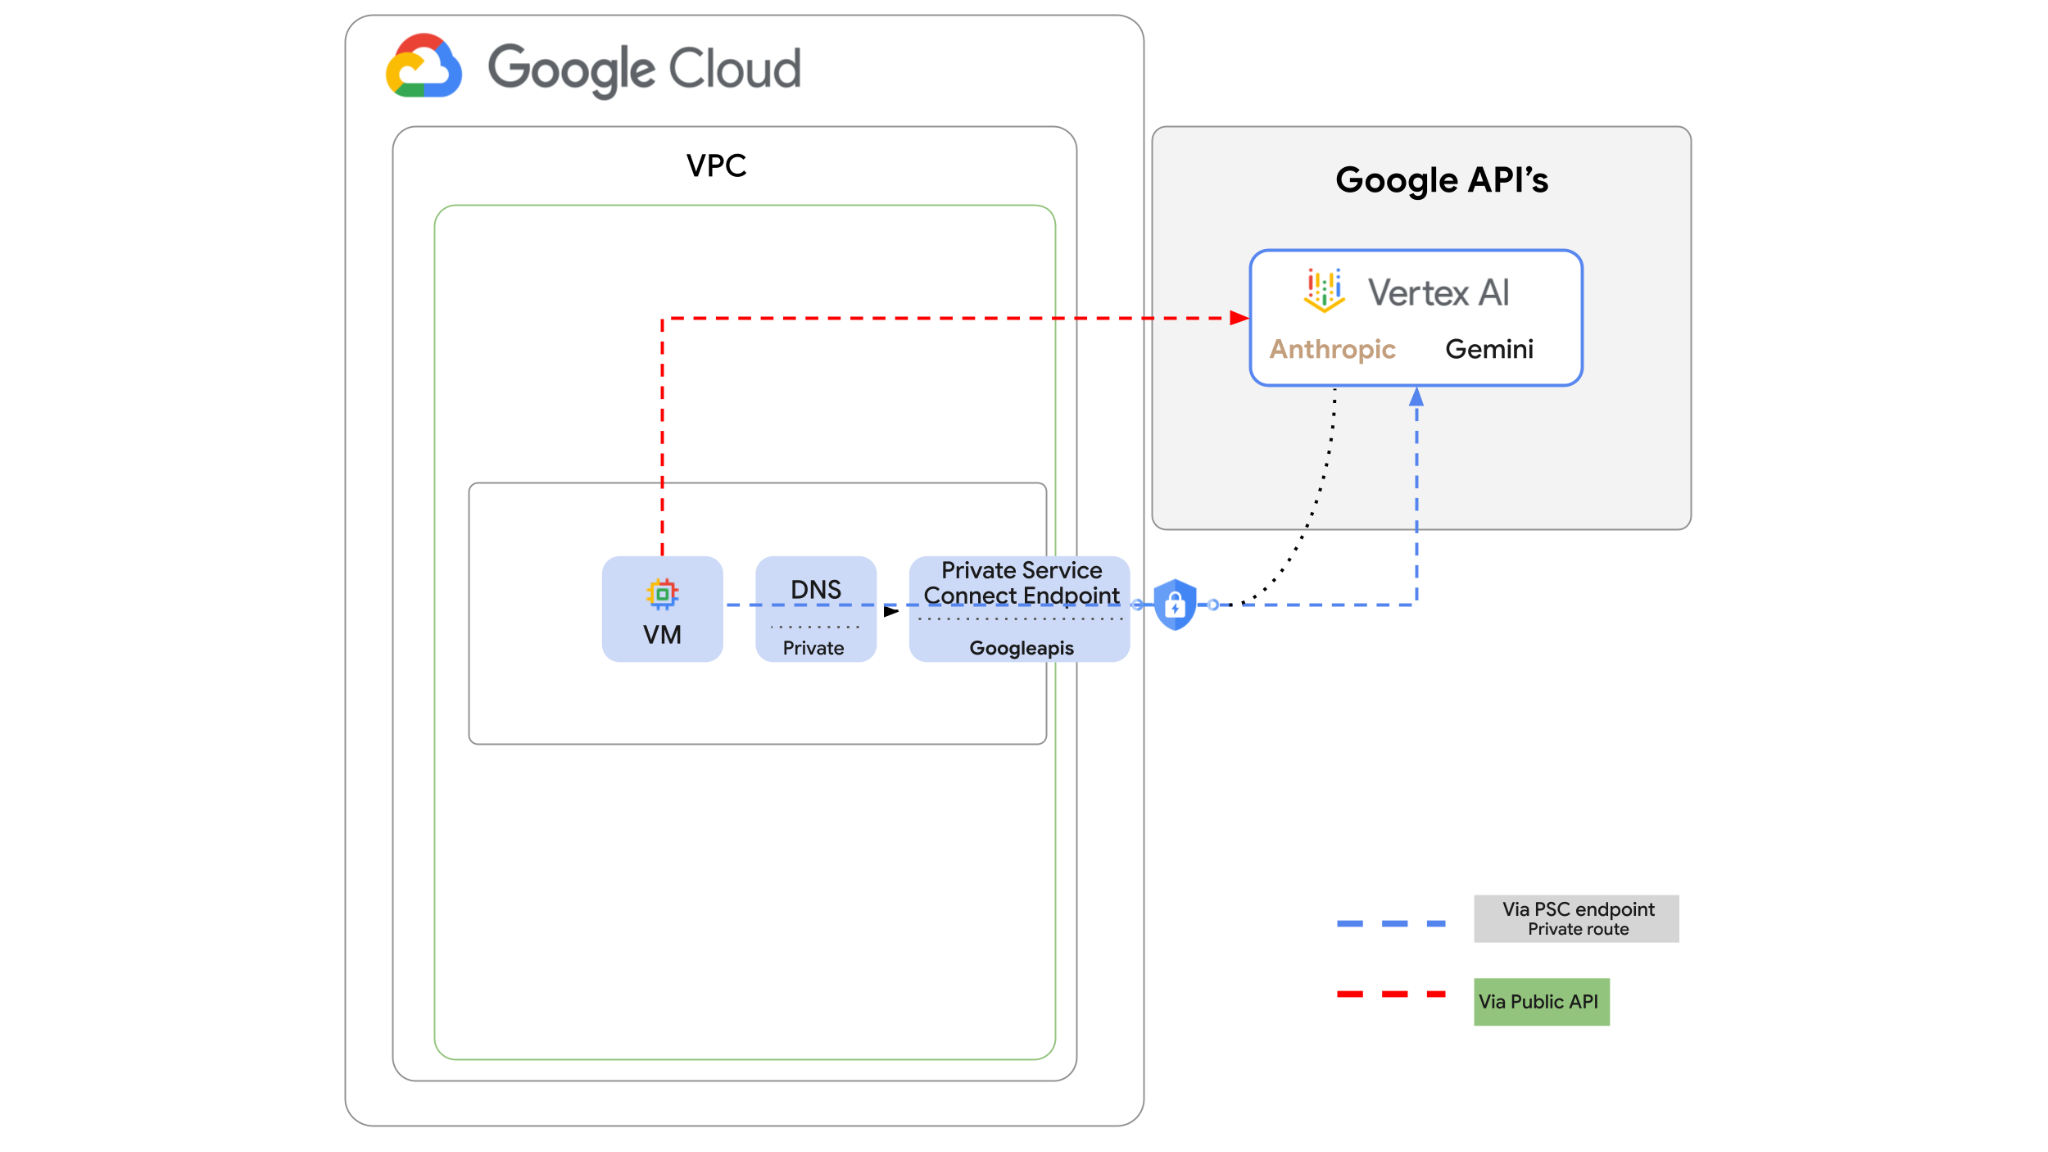
Vertex AI API는 인터넷을 통해 액세스할 수 있지만, 엔터프라이즈에서는 인터넷을 거치지 않고 비공개로 Vertex AI API에 액세스하는 것이 좋습니다. 이 실습에서는 먼저 공개 인터넷을 통해 VM 인스턴스에서 실행되는 Python SDK를 통해 Vertex에서 Anthropic Claude Opus 4.6 및 Gemini 3.1Pro에 액세스합니다.
그런 다음 Googleapis에 대한 Private Service Connect 엔드포인트를 만들고 트래픽 흐름을 변경하여 비공개 엔드포인트를 사용하여 Vertex API에 연결합니다.
Python 코드 샘플은 입력 질문을 가져와 Claude Opus에 전달하여 답변을 생성하고, 이 출력은 Gemini 3에 전달되어 텍스트 요약을 만들고 이미지를 생성합니다.
이 실습에서는 다음 패턴을 만듭니다.
그림 1.
2. 목표
이 실습에서는 다음 작업을 수행하는 방법을 알아봅니다.
- Python SDK를 사용하도록 VM 인스턴스 설정
- Vertex AI에서 Anthropic 모델 카드 사용 설정
- Python 스크립트를 통해 Anthropic Claude Opus 4.6 및 Gemini 3.1 Pro에 연결
- Googleapis에 연결하도록 PSC 엔드포인트 구성
- 수동 DNS 항목 구성
- Googleais 연결 경로 확인
- Python 스크립트를 실행하여 모델을 쿼리합니다.
실습 설정
자습형 환경 설정
- Google Cloud Console에 로그인하여 새 프로젝트를 만들거나 기존 프로젝트를 재사용합니다. 아직 Gmail이나 Google Workspace 계정이 없는 경우 계정을 만들어야 합니다.

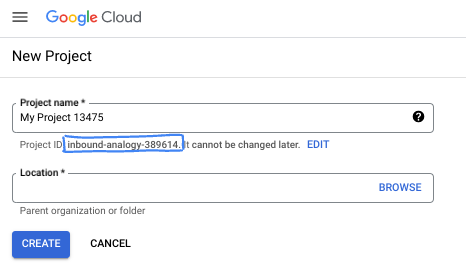
- 프로젝트 이름은 이 프로젝트 참가자의 표시 이름입니다. 이는 Google API에서 사용하지 않는 문자열이며 언제든지 업데이트할 수 있습니다.
- 프로젝트 ID는 모든 Google Cloud 프로젝트에서 고유하며, 변경할 수 없습니다(설정된 후에는 변경할 수 없음). Cloud 콘솔은 고유한 문자열을 자동으로 생성합니다. 일반적으로는 신경 쓰지 않아도 됩니다. 대부분의 Codelab에서는 프로젝트 ID (일반적으로
PROJECT_ID로 식별됨)를 참조해야 합니다. 생성된 ID가 마음에 들지 않으면 다른 임의 ID를 생성할 수 있습니다. 또는 직접 시도해 보고 사용 가능한지 확인할 수도 있습니다. 이 단계 이후에는 변경할 수 없으며 프로젝트 기간 동안 유지됩니다. - 참고로 세 번째 값은 일부 API에서 사용하는 프로젝트 번호입니다. 이 세 가지 값에 대한 자세한 내용은 문서를 참고하세요.
- 다음으로 Cloud 리소스/API를 사용하려면 Cloud 콘솔에서 결제를 사용 설정해야 합니다. 이 Codelab 실행에는 많은 비용이 들지 않습니다. 이 튜토리얼이 끝난 후에 요금이 청구되지 않도록 리소스를 종료하려면 만든 리소스 또는 프로젝트를 삭제하면 됩니다. Google Cloud 신규 사용자는 300달러(USD) 상당의 무료 체험판 프로그램에 참여할 수 있습니다.
Cloud Shell 시작
Google Cloud를 노트북에서 원격으로 실행할 수 있지만, 이 Codelab에서는 Cloud에서 실행되는 명령줄 환경인 Google Cloud Shell을 사용합니다.
Google Cloud Console의 오른쪽 상단 툴바에 있는 Cloud Shell 아이콘을 클릭합니다.

환경을 프로비저닝하고 연결하는 데 몇 분 정도 소요됩니다. 완료되면 다음과 같이 표시됩니다.

가상 머신에는 필요한 개발 도구가 모두 들어있습니다. 영구적인 5GB 홈 디렉터리를 제공하고 Google Cloud에서 실행되므로 네트워크 성능과 인증이 크게 개선됩니다. 이 Codelab의 모든 작업은 브라우저 내에서 수행할 수 있습니다. 아무것도 설치할 필요가 없습니다.
3. 환경 설정
방화벽 규칙이 있는 커스텀 VPC를 만듭니다. VPC와 프로젝트가 이미 있는 경우 이 부분을 건너뛰어도 됩니다.
콘솔 상단 오른쪽에 있는 Cloud Shell을 엽니다. 다음과 같이 구성합니다. 
- 이 실습에서 사용할 API 일부를 사용 설정합니다.
gcloud services enable dns.googleapis.com
gcloud services enable aiplatform.googleapis.com
gcloud services enable servicedirectory.googleapis.com
- 몇 가지 변수를 설정합니다. 이러한 변수는 커스텀 VPC의 프로젝트 ID와 네트워크 ID입니다 (4단계에서 VPC를 만듭니다).
projectid=$(gcloud config get-value project)
networkid=anthropic-net
echo $projectid
echo $networkid
- 이제 커스텀 VPC (anthropic-net), 서브넷 (vm1-subnet), 방화벽 규칙을 만듭니다.
gcloud compute networks create $networkid \
--project=$projectid \
--subnet-mode=custom \
--mtu=1460 \
--bgp-routing-mode=global

gcloud compute networks subnets create vm-subnet \
--project=$projectid --range=10.0.88.0/24 \
--stack-type=IPV4_ONLY --network=$networkid \
--region=us-east1

gcloud compute firewall-rules create $networkid-allow-icmp --project=$projectid \
--network=$networkid \
--description="Allows ICMP connections from any source to any instance on the network." \
--direction=INGRESS \
--priority=65534 \
--source-ranges=0.0.0.0/0 \
--action=ALLOW \
--rules=icmp

gcloud compute firewall-rules create $networkid-allow-ssh \
--project=$projectid \
--network=$networkid \
--description="Allows TCP connections from any source to any instance on the network using port 22." \
--direction=INGRESS --priority=65534 \
--source-ranges=0.0.0.0/0 --action=ALLOW \
--rules=tcp:22

gcloud compute firewall-rules create $networkid-allow-web \
--project=$projectid \
--network=$networkid \
--description="Allows TCP connections on port 8080." \
--direction=INGRESS --priority=1000 \
--source-ranges=0.0.0.0/0 --action=ALLOW \
--rules=tcp:8080
4. Vertex Model Garden에서 Anthropic 사용 설정
인터넷에 대한 아웃바운드 외부 액세스를 부여해야 하므로 Cloud NAT 게이트웨이를 만들어 연결하겠습니다.
- Vertex AI 대시보드로 이동하여 Model Garden을 선택합니다.
- Anthropic을 검색하고 Claude Opus 4.6을 선택합니다.

- 사용 설정을 선택하면 일부 정보를 입력해야 합니다. 양식을 작성하고 다음을 선택합니다.
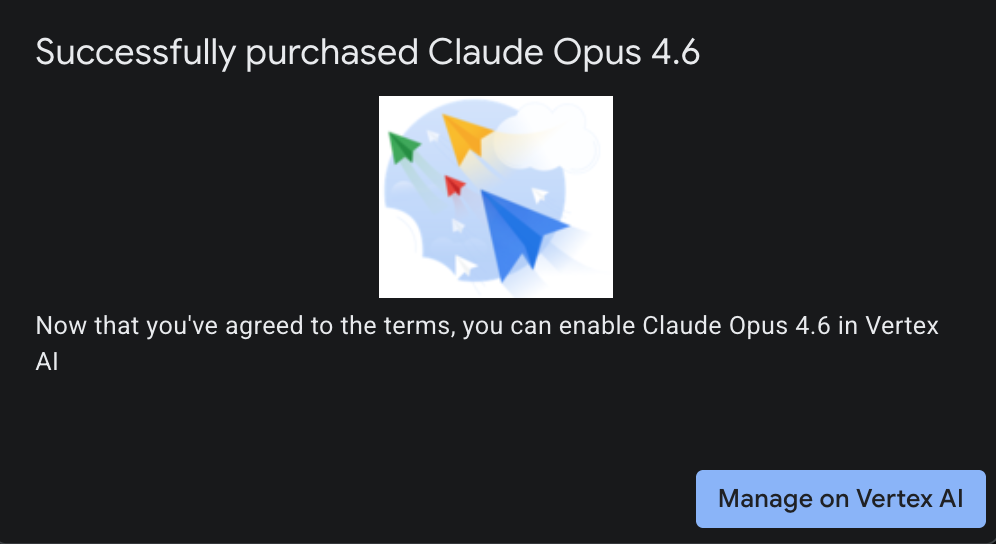
- 마지막 페이지에서 동의를 선택하여 Claude 4.6 Opus를 사용 설정합니다.
- 성공 페이지가 표시됩니다.
5. NAT 게이트웨이 및 VM 만들기
인터넷에 대한 아웃바운드 외부 액세스를 부여해야 하므로 Cloud NAT 게이트웨이를 만들어 연결하겠습니다.
Cloud Shell에서 다음 명령어를 사용합니다.
- Cloud NAT 및 Cloud NAT 게이트웨이 만들기
gcloud compute routers create anthro-out-nat \
    --network $networkid \
    --region us-east1

gcloud compute routers nats create anthro-out-nat-gw \
    --router-region us-east1 \
    --router anthro-out-nat \
    --nat-all-subnet-ip-ranges \
    --auto-allocate-nat-external-ips
이제 Python SDK를 통해 Vertex AI의 Anthropic에 액세스할 VM을 하나 만들어 보겠습니다.
- 동일한 Cloud Shell 세션에서 다음을 사용하여 anthro-vm을 만듭니다. (시작 스크립트가 설치되는 동안 VM이 활성화되는 데 3~4분이 걸릴 수 있습니다.)
gcloud compute instances create anthro-vm \
--project=$projectid \
--zone=us-east1-b \
--network-interface=stack-type=IPV4_ONLY,subnet=vm-subnet,no-address,network=$networkid \
--metadata startup-script="#! /bin/bash
      apt-get update
      apt-get install python3 python3-dev python3-venv tcpdump dnsutils -y
      python3 -m venv /opt/py-anthro-env
      /opt/py-anthro-env/bin/pip install -U google-genai 'anthropic[vertex]' rich
      chmod -R 777 /opt/py-anthro-env"
공개 IP 주소가 없는 VM이 생성됩니다. 이제 VM의
6. VM 구성 및 테스트
- Google Cloud Shell에서 anthro-vm이라는 새 VM에 SSH로 연결합니다. (VM이 완전히 설정될 때까지 3분 정도 기다려야 할 수 있습니다.)
gcloud compute ssh anthro-vm \
    --project=$projectid \
    --zone=us-east1-b \
    --tunnel-through-iap \
    -- -L 8080:localhost:8080
- 연결되면 Vertex Gemini API에 연결할 수 있는지 간단히 테스트해 보겠습니다.
dig *-aiplatform.googleapis.com
- 다음과 비슷한 내용이 표시됩니다 (주소는 다름). API가 공개 API이므로 경로는 공개 IP 주소를 통해 이루어집니다.
; <<>> DiG 9.18.39-0ubuntu0.24.04.2-Ubuntu <<>> *-aiplatform.googleapis.com
;; global options: +cmd
;; Got answer:
;; ->>HEADER<<- opcode: QUERY, status: NOERROR, id: 3728
;; flags: qr rd ra; QUERY: 1, ANSWER: 16, AUTHORITY: 0, ADDITIONAL: 1

;; OPT PSEUDOSECTION:
; EDNS: version: 0, flags:; udp: 512
;; QUESTION SECTION:
;*-aiplatform.googleapis.com.   IN      A

;; ANSWER SECTION:
*-aiplatform.googleapis.com. 300 IN     A       172.217.204.95
*-aiplatform.googleapis.com. 300 IN     A       172.217.203.95
*-aiplatform.googleapis.com. 300 IN     A       173.194.215.95
*-aiplatform.googleapis.com. 300 IN     A       142.250.98.95
*-aiplatform.googleapis.com. 300 IN     A       173.194.217.95
*-aiplatform.googleapis.com. 300 IN     A       142.251.107.95
*-aiplatform.googleapis.com. 300 IN     A       74.125.196.95
- 이제 venv 환경을 활성화합니다.
source /opt/py-anthro-env/bin/activate
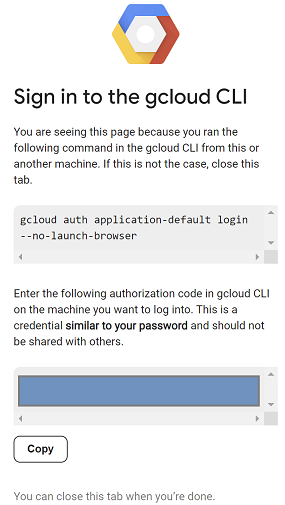
- 이제 나중에 테스트를 할 수 있도록 인증하겠습니다. VM에서 다음 명령어를 실행하고 메시지가 표시되면 y를 누릅니다.
gcloud auth application-default login
- 다음으로 https://로 시작하는 URL을 복사하고 실습 브라우저 창에서 새 탭을 열어 URL을 붙여넣습니다. 프롬프트를 수락합니다.
- 다음이 표시되면 복사를 선택하고 VM anthro-vm 세션으로 다시 전환한 후 승인 코드 입력:에 복사한 코드를 붙여넣고 Enter 키를 눌러 인증합니다.
- 이제
env에서 Python을 사용해 보겠습니다. 이렇게 하면 Claude Opus 4.6에 '에이전트형 AI를 구축하는 주요 단계는 무엇인가요?'라고 묻는 Python 파일super-gen-ai.py이 생성됩니다. 그런 다음 출력을 가져와 Gemini 3.1 Pro에 전달합니다. 그러면 요약이 생성되고 Gemini 3 Pro Image가 이미지를 생성하여 VM에 저장합니다.
다음을 복사하여 붙여넣습니다.
cat << 'EOF' > super-gen-ai.py
import os
import subprocess
import google.auth
from google import genai
from google.genai import types
from anthropic import AnthropicVertex
from rich.console import Console
from rich.panel import Panel
from rich.spinner import SPINNERS
from rich.text import Text

# Custom Super Me Animation Spinner - Now with moving power-up!
SPINNERS["super_me"] = {
    "interval": 120,
    "frames": [
        "🧱🦖          🍄",
        "🧱 🦖        🍄 ",
        "🧱  🦖      🍄  ",
        "🧱   🦕    🍄   ",
        "🧱    🦖  🍄    ",
        "🧱     🦖🍄     ",
        "🧱      🌟      ",
        "🧱       🌟     ",
        "🧱        🌟    ",
        "🧱         🌟   ",
        "🧱        🌟    ",
        "🧱       🌟     ",
        "🧱      🌟      ",
        "🧱     🌟       ",
        "🧱    🌟        ",
        "🧱   🌟         ",
        "🧱  🌟          ",
        "🧱 🌟           ",
        "🧱🌟            "
    ]
}

console = Console()

def print_super_me_header():
    super_me_art = """
[bold red]   _____                       [/bold red][bold green]  __  __      _ [/bold green]
[bold red]  / ____|                      [/bold red][bold green] |  \/  |    | |[/bold green]
[bold red] | (___  _   _ _ __   ___ _ __ [/bold red][bold green] | \  / | ___| |[/bold green]
[bold red]  \___ \| | | | '_ \ / _ \ '__|[/bold red][bold green] | |\/| |/ _ \ |[/bold green]
[bold red]  ____) | |_| | |_) |  __/ |   [/bold red][bold green] | |  | |  __/_|[/bold green]
[bold red] |_____/ \__,_| .__/ \___|_|   [/bold red][bold green] |_|  |_|\___(_)[/bold green]
[bold red]              | |              [/bold red][bold green]                 [/bold green]
[bold red]              |_|              [/bold red][bold green]                 [/bold green]
    """
    console.print(super_me_art)
    console.rule("[bold gold1]⭐ LEVEL 1-1: Vertex AI Orchestrator ⭐[/bold gold1]")

def main():
    os.system('clear')  # Clears the terminal for a clean UI
    print_super_me_header()

    # Create the images directory
    os.makedirs("images", exist_ok=True)

    with console.status("[bold yellow]🪙  Collecting Coins (Authenticating)...[/bold yellow]", spinner="super_me"):
        try:
            creds, project_id = google.auth.default()
            LOCATION = "global"
        except Exception as e:
            console.print(f"[bold red]💥 GAME OVER! Authentication failed:[/bold red] {e}")
            return

    with console.status(f"[bold green]🍄 Powering up Clients for {project_id}...[/bold green]", spinner="super_me"):
        google_client = genai.Client(vertexai=True, location=LOCATION, project=project_id)
        claude_client = AnthropicVertex(region=LOCATION, project_id=project_id)

    console.print("\n[bold cyan]The Kingdom needs a strategy![/bold cyan]")

    # Auto-run prompt without user interaction
    question = "What are the key steps to building Agentic AI?"

    console.print(Panel(question, title="[bold green]Green Dino (Claude Opus) is entering the pipe...[/bold green]", border_style="green"))

    with console.status("[bold green]🟢 Green Dino is clearing the level...\n[/bold green]", spinner="super_me"):
        try:
            msg = claude_client.messages.create(
                model="claude-opus-4-6",
                max_tokens=2048,
                messages=[{"role": "user", "content": question}]
            )
            claude_text = msg.content[0].text
            console.print(f"[bold green]✓ Level Cleared! Green Dino generated {len(claude_text)} bytes of strategy.[/bold green]\n")
        except Exception as e:
            console.print(f"[bold red]💥 BOSS ATTACK (Claude API Error):[/bold red] {e}")
            return

    with console.status("[bold red]🔴 Red Hero (Gemini 3.1 Pro Preview) is summarizing the map...\n[/bold red]", spinner="super_me"):
        text_prompt = f"""
        I am providing you with a response generated by Claude.
        1. READ the text below.
        2. GENERATE a concise, bulleted executive summary.

        --- INPUT TEXT ---
        {claude_text}
        """

        try:
            text_response = google_client.models.generate_content(
                model="gemini-3.1-pro-preview",
                contents=text_prompt,
                config=types.GenerateContentConfig(temperature=0.7)
            )
            console.print("[bold red]✓ Super Me! Text Summary Complete.[/bold red]")
        except Exception as e:
            console.print(f"[bold red]💥 CHOMPER PLANT (Gemini Text Error):[/bold red] {e}")
            return

    with console.status("[bold blue]🔵 Mushroom Friend (Gemini 3 Pro Image) is painting the castle...\n[/bold blue]", spinner="super_me"):
        image_prompt = f"""
        CREATE a high-quality, futuristic illustration of autonomous AI agents for a tech blog header (16:9 aspect ratio).
        Base the image directly on the following text summary:

        {text_response.text}
        """

        try:
            image_response = google_client.models.generate_content(
                model="gemini-3-pro-image-preview",
                contents=image_prompt,
                config=types.GenerateContentConfig(
                    response_modalities=['TEXT', 'IMAGE'],
                    temperature=0.7
                )
            )
            console.print("[bold blue]✓ Masterpiece Complete![/bold blue]\n")
        except Exception as e:
            console.print(f"[bold red]💥 FALLING BLOCK (Gemini Image Error):[/bold red] {e}")
            return

    console.rule("[bold gold1]🚩 COURSE CLEAR! 🚩[/bold gold1]")

    if text_response.text:
        console.print(Panel(text_response.text.strip(),
                            title="[bold gold1]Gemini 3.1 Pro Summary[/bold gold1]",
                            border_style="gold1"))

    for part in image_response.parts:
        if image := part.as_image():
            # Save inside the images folder with the focus-specific name
            filename = "images/building-agentic.png"
            image.save(filename)
            console.print(f"\n[bold green]✓ REWARD SAVED:[/bold green] [underline]{os.path.abspath(filename)}[/underline]")

    console.rule("[bold red]Web Server Warp Pipe[/bold red]")
    with console.status("[bold yellow]Opening the warp pipe (HTTP server)...[/bold yellow]", spinner="super_me"):
        # Kill any existing server first so it doesn't crash on port binding
        os.system('pkill -f "http.server" > /dev/null 2>&1')

        # Start the server with the root directory set specifically to 'images'
        subprocess.Popen(
            ["python3", "-m", "http.server", "8080", "--directory", "images"],
            stdout=subprocess.DEVNULL,
            stderr=subprocess.DEVNULL
        )

    console.print("[bold green]✓ Warp Pipe is open in the background![/bold green]")
    console.print("[bold magenta]View your files here (Click Web Preview -> Preview on port 8080):[/bold magenta] [underline]http://localhost:8080/[/underline]\n")

if __name__ == "__main__":
    main()
EOF

python3 super-gen-ai.py
스크립트는 재미있는 인터페이스에서 실행되며 이미지 출력을 볼 수 있도록 웹 서버를 실행합니다. 스크립트를 다시 실행하려면 python3 super-gen-ai.py.을 입력합니다.
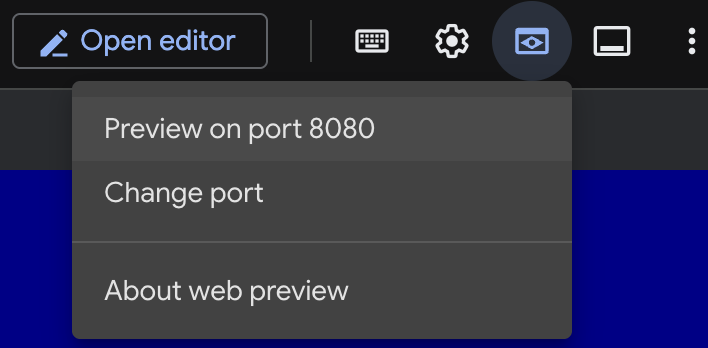
- Cloud Shell의 웹 미리보기 옵션에서 포트 8080에서 미리보기를 선택합니다.
- 열린 웹 세션에서 building_agentic.png를 선택하여 생성된 이미지를 확인합니다. (아래 샘플 이미지는 AI로 생성됨)

- Cloud Shell에서 웹 서버를 종료하려면 다음을 실행합니다.
pkill -f "http.server"
- 다음에
exit를 입력하여 Cloud Shell 홈으로 돌아갑니다. 완료되면 계속 진행합니다.
7. googleapis에 대한 PSC 엔드포인트 만들기
Vertex API 엔드포인트에 대한 비공개 연결을 사용 설정하기 위해 googleapis용 Private Service Connect 엔드포인트를 만듭니다. 이렇게 하면 이 경우 Vertex Gemini와 같이 필요한 googleapis로 트래픽을 라우팅하기 위해 할당된 비공개 IP 주소를 사용할 수 있습니다.
- 아직 열려 있지 않으면 Cloud Shell을 엽니다. PSC 엔드포인트의 IP를 만들고 Private Service Connect 엔드포인트를 만듭니다. 이 경우 192.168.255.230을 사용합니다.
projectid=$(gcloud config get-value project)
networkid=anthropic-net

gcloud compute addresses create anthro-ip \
    --global \
    --purpose=PRIVATE_SERVICE_CONNECT \
    --addresses=192.168.255.230 \
    --network=$networkid

gcloud compute forwarding-rules create pscanthrovertex \
    --global \
    --network=$networkid \
    --address=anthro-ip \
    --target-google-apis-bundle=all-apis
- 확인
gcloud compute addresses list --filter="name=( 'anthro-ip' ...)"

gcloud compute forwarding-rules describe pscanthrovertex --global
8. googleapis에 수동 DNS 항목 만들기
비공개 DNS를 사용하여 PSC 엔드포인트를 가리키는 수동 DNS 항목을 만들 수 있습니다. 이렇게 하면 할당된 모든 네트워크에 영향을 미칩니다. 이제 다음을 만듭니다.
- googleapis.com의 비공개 DNS 영역을 만들고 이를 anthropic-net 네트워크에 연결합니다.
- 루트 도메인을 Private Service Connect 엔드포인트 IP (192.168.255.230)에 매핑하는 A 레코드
- 모든 하위 도메인 (예: aiplatform.googleapis.com)을 루트 A 레코드로 리디렉션하는 와일드 카드 CNAME 레코드
- Cloud Shell에서 다음 명령어를 실행합니다.
gcloud dns managed-zones create googleapis-private \
    --description="Private DNS zone for googleapis.com" \
    --dns-name="googleapis.com." \
    --visibility="private" \
    --networks="anthropic-net"

gcloud dns record-sets create "googleapis.com." \
    --zone="googleapis-private" \
    --type="A" \
    --ttl="300" \
    --rrdatas="192.168.255.230"

gcloud dns record-sets create "*.googleapis.com." \
    --zone="googleapis-private" \
    --type="CNAME" \
    --ttl="300" \
    --rrdatas="googleapis.com."
- 영역의 레코드 세트를 나열하여 A 레코드와 CNAME이 올바르게 생성되었는지 확인합니다.
gcloud dns record-sets list --zone="googleapis-private"
- 콘솔 뷰에서는 다음과 같이 표시됩니다. A 레코드와 CNAME이 다음과 같이 설정되어야 합니다(
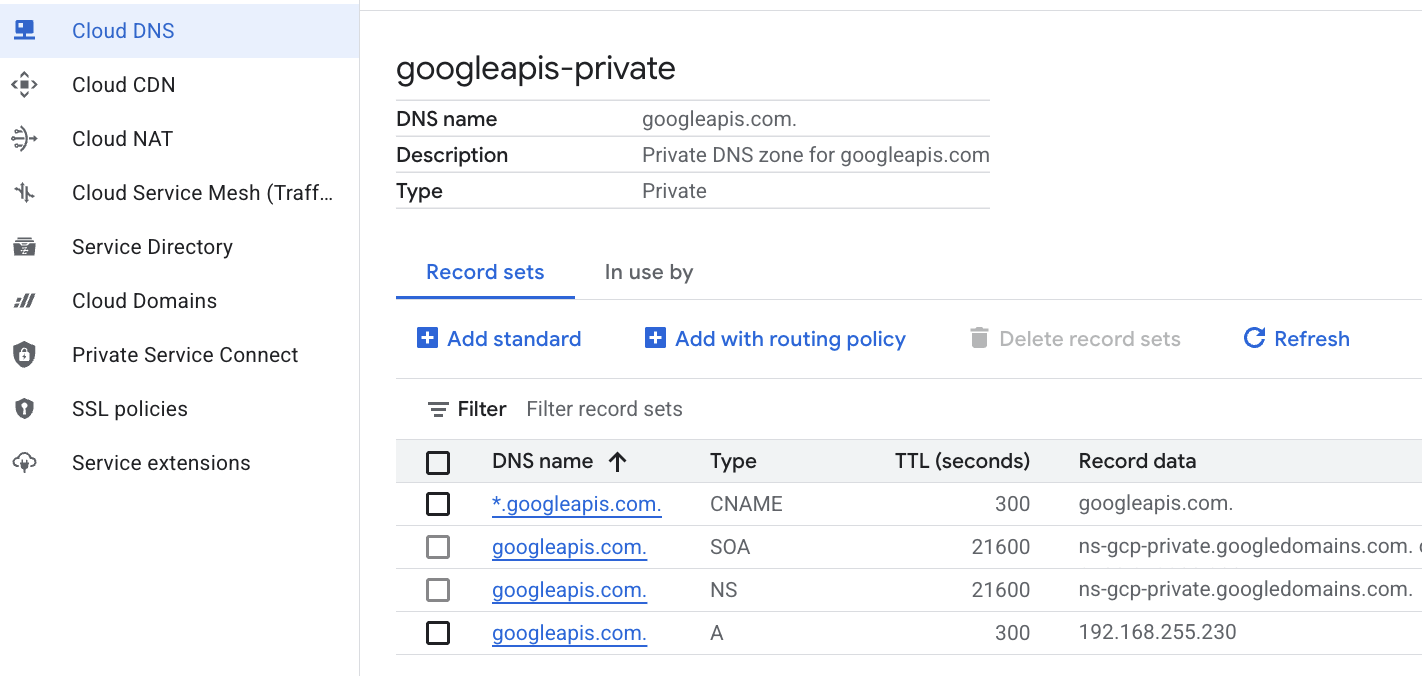 참고).
참고). - 다음으로 anthro-vm에서 이러한 변경사항을 적용하여 연결을 확인합니다.
9. IP 주소를 통해 엔드포인트 연결 확인
비공개 엔드포인트를 사용하여 Gemini에 연결해 보겠습니다.
- Google Cloud Shell에서 anthro-vm이라는 새 VM에 SSH로 연결합니다.
gcloud compute ssh anthro-vm \
    --project=$projectid \
    --zone=us-east1-b \
    --tunnel-through-iap \
    -- -L 8080:localhost:8080
- VM에서
dig명령어를 사용하여 aiplatform-pscanthrovertex.p.googleapis.com의 연결 경로를 확인합니다. PSC 엔드포인트의 IP192.168.255.230가 표시됩니다.
dig aiplatform-pscanthrovertex.p.googleapis.com +noall +answer
비공개 엔드포인트를 사용하여 Gemini에 연결해 보겠습니다.
- 이제
dig를 실행하여 Vertex Gemini API에 연결할 수 있는지 확인해 보겠습니다.
dig *-aiplatform.googleapis.com
- 주소는 다르지만 다음과 비슷한 내용이 표시됩니다. 경로는 PSC 엔드포인트 IP 주소를 통해 이루어집니다.
; <<>> DiG 9.18.41-1~deb12u1-Debian <<>> *-aiplatform.googleapis.com
;; global options: +cmd
;; Got answer:
;; ->>HEADER<<- opcode: QUERY, status: NOERROR, id: 33703
;; flags: qr rd ra; QUERY: 1, ANSWER: 2, AUTHORITY: 0, ADDITIONAL: 1

;; OPT PSEUDOSECTION:
; EDNS: version: 0, flags:; udp: 512
;; QUESTION SECTION:
;*-aiplatform.googleapis.com.   IN      A

;; ANSWER SECTION:
*-aiplatform.googleapis.com. 300 IN     CNAME   googleapis.com.
googleapis.com.         300     IN      A       192.168.255.230

;; Query time: 8 msec
;; SERVER: 169.254.169.254#53(169.254.169.254) (UDP)
;; WHEN: Sat Nov 29 15:19:15 UTC 2025
;; MSG SIZE  rcvd: 86
ping명령어 사용 간단한 테스트를 진행할 수 있습니다. 참고: 이 IP는 PSC 엔드포인트이며 핑이 실패합니다.
ping -c 2 aiplatform.googleapis.com
- 이제 venv 환경을 활성화합니다.
source /opt/py-anthro-env/bin/activate
- 이제
env에서 Python을 사용해 보겠습니다. 이렇게 하면 Claude Opus 4.6에 '초보자를 위한 로티 레시피를 단계별로 알려 줘'라고 묻는 Python 파일star-me.py가 생성됩니다. 그런 다음 출력을 가져와 Gemini 3.1 Pro에 전달합니다. 그러면 요약이 생성되고 Gemini 3 Pro Image가 이미지를 생성하여 VM에 저장합니다.
cat << 'EOF' > star-me.py
import os
import subprocess
import google.auth
from google import genai
from google.genai import types
from anthropic import AnthropicVertex
from rich.console import Console
from rich.panel import Panel
from rich.spinner import SPINNERS
from rich.text import Text

# Custom Star Me Animation Spinner - Directional Flight!
SPINNERS["star_me"] = {
    "interval": 120,
    "frames": [
        "🌌 🚀              🛸 ",
        "🌌  🚀            🛸  ",
        "🌌   🚀          🛸   ",
        "🌌    🚀        🛸    ",
        "🌌     🚀      🛸     ",
        "🌌      🚀    🛸      ",
        "🌌       🚀  🛸       ",
        "🌌        🚀🛸        ",
        "🌌         💥         ",
        "🌌        ✨ ✨       ",
        "🌌       ✨   ✨      ",
        "🌌      ✨     ✨     ",
        "🌌     ✨       ✨    ",
        "🌌                    "
    ]
}

console = Console()

def print_star_me_header():
    star_me_art = """
[bold cyan]   _____ _______       _____    __  __ ______ [/bold cyan]
[bold cyan]  / ____|__   __|/\   |  __ \  |  \/  |  ____|[/bold cyan]
[bold cyan] | (___    | |  /  \  | |__) | | \  / | |__   [/bold cyan]
[bold cyan]  \___ \   | | / /\ \ |  _  /  | |\/| |  __|  [/bold cyan]
[bold cyan]  ____) |  | |/ ____ \| | \ \  | |  | | |____ [/bold cyan]
[bold cyan] |_____/   |_/_/    \_\_|  \_\ |_|  |_|______|[/bold cyan]
    """
    console.print(star_me_art)
    console.rule("[bold gold1]⭐ EPISODE I: The AI Awakening ⭐[/bold gold1]")

def main():
    os.system('clear')  # Clears the terminal for a clean UI
    print_star_me_header()

    # Create the images directory
    os.makedirs("images", exist_ok=True)

    with console.status("[bold yellow]🪙  Bypassing Security (Authenticating)...[/bold yellow]", spinner="star_me"):
        try:
            creds, project_id = google.auth.default()
            LOCATION = "global"
        except Exception as e:
            console.print(f"[bold red]💥 COMM LINK SEVERED! Authentication failed:[/bold red] {e}")
            return

    with console.status(f"[bold cyan]📡 Establishing secure connection for {project_id}...[/bold cyan]", spinner="star_me"):
        google_client = genai.Client(vertexai=True, location=LOCATION, project=project_id)
        claude_client = AnthropicVertex(region=LOCATION, project_id=project_id)

    console.print("\n[bold cyan]The Galaxy needs sustenance![/bold cyan]")

    # Auto-run prompt for the recipe
    question = "Give me a step by step recipe to make a roti for a beginner?"

    console.print(Panel(question, title="[bold green]Space Master (Claude Opus) is searching the archives...[/bold green]", border_style="green"))

    with console.status("[bold green]🟢 Space Master is compiling the ancient texts...\n[/bold green]", spinner="star_me"):
        try:
            msg = claude_client.messages.create(
                model="claude-opus-4-6",
                max_tokens=2048,
                messages=[{"role": "user", "content": question}]
            )
            claude_text = msg.content[0].text
            console.print(f"[bold green]✓ Archives Retrieved! Space Master generated a {len(claude_text)}-character Holocron.[/bold green]\n")
        except Exception as e:
            console.print(f"[bold red]💥 INTERFERENCE DETECTED (Claude API Error):[/bold red] {e}")
            return

    with console.status("[bold gold1]🟡 Protocol Bot (Gemini 3.1 Pro Preview) is translating the recipe...\n[/bold gold1]", spinner="star_me"):
        text_prompt = f"""
        I am providing you with a response generated by a Space Master.
        1. READ the text below.
        2. GENERATE a concise, bulleted executive summary.

        --- INPUT TEXT ---
        {claude_text}
        """

        try:
            text_response = google_client.models.generate_content(
                model="gemini-3.1-pro-preview",
                contents=text_prompt,
                config=types.GenerateContentConfig(temperature=0.7)
            )
            console.print("[bold gold1]✓ Translation Complete! The Protocol Bot has summarized the steps.[/bold gold1]")
        except Exception as e:
            console.print(f"[bold red]💥 SYSTEM FAILURE (Gemini Text Error):[/bold red] {e}")
            return

    with console.status("[bold blue]🔵 Astro Bot (Gemini 3 Pro Image) is projecting the hologram...\n[/bold blue]", spinner="star_me"):
        image_prompt = f"""
        CREATE a high-quality, beautiful illustration for a blog header (16:9 aspect ratio) of someone making roti, but with a subtle sci-fi, cinematic lighting aesthetic.
        Base the image directly on the following text summary:

        {text_response.text}
        """

        try:
            image_response = google_client.models.generate_content(
                model="gemini-3-pro-image-preview",
                contents=image_prompt,
                config=types.GenerateContentConfig(
                    response_modalities=['TEXT', 'IMAGE'],
                    temperature=0.7
                )
            )
            console.print("[bold blue]✓ Hologram Projection Ready![/bold blue]\n")
        except Exception as e:
            console.print(f"[bold red]💥 BAD COMPRESSOR (Gemini Image Error):[/bold red] {e}")
            return

    console.rule("[bold cyan]🚩 MISSION ACCOMPLISHED 🚩[/bold cyan]")

    if text_response.text:
        console.print(Panel(text_response.text.strip(),
                            title="[bold gold1]Protocol Bot Recipe Summary[/bold gold1]",
                            border_style="gold1"))

    for part in image_response.parts:
        if image := part.as_image():
            # Save inside the images folder with the focus-specific name
            filename = "images/cookingroti.png"
            image.save(filename)
            console.print(f"\n[bold green]✓ DATA SECURED:[/bold green] [underline]{os.path.abspath(filename)}[/underline]")

    console.rule("[bold cyan]Hyperlink Uplink[/bold cyan]")
    with console.status("[bold yellow]Opening the frequencies (HTTP server)...[/bold yellow]", spinner="star_me"):
        # Kill any existing server first so it doesn't crash on port binding
        os.system('pkill -f "http.server" > /dev/null 2>&1')

        # Start the server with the root directory set specifically to 'images'
        subprocess.Popen(
            ["python3", "-m", "http.server", "8080", "--directory", "images"],
            stdout=subprocess.DEVNULL,
            stderr=subprocess.DEVNULL
        )

    console.print("[bold green]✓ Transmitting on Port 8080![/bold green]")
    console.print("[bold magenta]View your files here (Click Web Preview -> Preview on port 8080):[/bold magenta] [underline]http://localhost:8080/[/underline]\n")

if __name__ == "__main__":
    main()
EOF

python3 star-me.py
스크립트는 재미있는 인터페이스에서 실행되며 이미지 출력을 볼 수 있도록 웹 서버를 실행합니다. 스크립트를 다시 실행하려면 python3 star-me.py를 입력하세요.
- 이제 Cloud Shell의 웹 미리보기 옵션으로 이동하여 포트 8080에서 미리보기를 선택합니다.
- cookingroti.png를 선택하여 생성된 이미지를 확인합니다. (아래 샘플은 AI로 생성됨)

- Cloud Shell에서 웹 서버를 종료하고 VM으로 돌아가려면 다음을 실행합니다.
pkill -f "http.server"
- 다음에
exit를 입력하여 Cloud Shell 홈으로 돌아갑니다.
10. 축하합니다
축하합니다. 재미있는 시간을 보내셨으며 공개 API 주소와 Googleapis용 Private Service Connect 엔드포인트를 비공개로 사용하여 Vertex에서 Anthropic Claude Opus 4.6 및 Gemini 3.1 Pro에 성공적으로 연결되었습니다. 이 기능을 사용하면 (Interconnect, Cross-Cloud Interconnect, VPC)를 통해 연결된 온프레미스/기타 클라우드 환경으로 비공개 API 연결을 확장할 수 있습니다.
삭제
gcloud compute instances delete anthro-vm --zone=us-east1-b --quiet

gcloud compute routers nats delete anthro-out-nat-gw --router=anthro-out-nat --region=us-east1 --quiet

gcloud compute routers delete anthro-out-nat --region=us-east1 --quiet

gcloud compute firewall-rules delete anthropic-net-allow-icmp anthropic-net-allow-ssh anthropic-net-allow-web --quiet

gcloud compute forwarding-rules delete pscanthrovertex --global --quiet

gcloud dns record-sets delete googleapis.com. --zone googleapis-private --type A --quiet

gcloud dns record-sets delete *.googleapis.com --zone googleapis-private --type CNAME --quiet

gcloud dns managed-zones delete googleapis-private --quiet

gcloud compute addresses delete anthro-ip --global --quiet

gcloud compute networks subnets delete vm-subnet --region=us-east1 --quiet

gcloud compute networks delete anthropic-net --quiet
다음 단계/더 학습하기
Vertex AI 네트워킹에 대해 자세히 알아보세요.
Codelab: Private Service Connect 엔드포인트를 통해 Python SDK를 사용하여 Gemini 3 Pro 채팅에 액세스하기
Codelab: ADK를 이용한 AI 에이전트 빌드:기초
다음 실습 참여하기
Google Cloud로 퀘스트를 계속 진행하고 다른 Google Cloud Skills Boost 실습을 확인하세요.